Create successful ePaper yourself
Turn your PDF publications into a flip-book with our unique Google optimized e-Paper software.
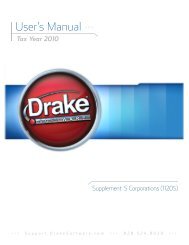
<strong>Drake</strong> <strong>Software</strong><br />
User’s <strong>Manual</strong><br />
Tax Year 2012<br />
Support.<strong>Drake</strong><strong>Software</strong>.com<br />
(828) 524-8020
<strong>Drake</strong> <strong>Software</strong> User’s <strong>Manual</strong><br />
Copyright<br />
The 2012 <strong>Drake</strong> <strong>Software</strong> <strong>Manual</strong>, <strong>Drake</strong> Tax <strong>Software</strong>, and any other related materials<br />
are copyrighted material. All rights are reserved by <strong>Drake</strong> Enterprises, LTD,<br />
including all ownership rights. This document, associated software, and related material<br />
are the property of <strong>Drake</strong> Enterprises, LTD.<br />
<strong>Drake</strong> Enterprises, LTD, hereby authorizes you to download, display, print, and reproduce<br />
the material in this document in an unaltered form only for your personal, noncommercial<br />
use or for non-commercial use within your organization. Copyright,<br />
trademark, and other proprietary notices may not be removed.<br />
© 2012 <strong>Drake</strong> Enterprises, LTD. All rights reserved.<br />
While every attempt has been made to produce an accurate and complete manual,<br />
there is no warranty, expressed or implied, to that effect. <strong>Drake</strong> Enterprises, LTD,<br />
assumes no liability for damages or claims resulting from the use of the information<br />
contained herein.<br />
Trademarks<br />
The <strong>Drake</strong> <strong>Software</strong> Logo and <strong>Drake</strong> Tax are registered trademarks of <strong>Drake</strong><br />
Enterprises, LTD.<br />
Other product names mentioned in this manual may be trademarks or registered<br />
trademarks of their respective companies.<br />
ii Tax Year 2012
<strong>Drake</strong> <strong>Software</strong> User’s <strong>Manual</strong><br />
Table of Contents<br />
Table of Contents<br />
Quick Reference........................................................................................ ix<br />
Contact Information . . . . . . . . . . . . . . . . . . . . . . . . . . . . . . . . . . . . . . . . . . . . . . . . . . . . . . . . . . . . . . . . . . . ix<br />
Shortcut Keys . . . . . . . . . . . . . . . . . . . . . . . . . . . . . . . . . . . . . . . . . . . . . . . . . . . . . . . . . . . . . . . . . . . . . . .xiii<br />
Accepted Forms and Schedules:. . . . . . . . . . . . . . . . . . . . . . . . . . . . . . . . . . . . . . . . . . . . . . . . . . . . . . . .xviii<br />
Introduction ................................................................................................ 1<br />
About Your <strong>Drake</strong> <strong>Software</strong> User’s <strong>Manual</strong> . . . . . . . . . . . . . . . . . . . . . . . . . . . . . . . . . . . . . . . . . . . . . . . . 1<br />
What’s New in <strong>Drake</strong> for 2012. . . . . . . . . . . . . . . . . . . . . . . . . . . . . . . . . . . . . . . . . . . . . . . . . . . . . . . . . . . 2<br />
Other Packages . . . . . . . . . . . . . . . . . . . . . . . . . . . . . . . . . . . . . . . . . . . . . . . . . . . . . . . . . . . . . . . . . . . . . . . 6<br />
IRS Changes and Requirements . . . . . . . . . . . . . . . . . . . . . . . . . . . . . . . . . . . . . . . . . . . . . . . . . . . . . . . . . . 8<br />
Contacting <strong>Drake</strong> Support . . . . . . . . . . . . . . . . . . . . . . . . . . . . . . . . . . . . . . . . . . . . . . . . . . . . . . . . . . . . . . 9<br />
Installation & Setup ................................................................................. 11<br />
System Requirements . . . . . . . . . . . . . . . . . . . . . . . . . . . . . . . . . . . . . . . . . . . . . . . . . . . . . . . . . . . . . . . . . 12<br />
Installing from CD . . . . . . . . . . . . . . . . . . . . . . . . . . . . . . . . . . . . . . . . . . . . . . . . . . . . . . . . . . . . . . . . . . . 12<br />
Running <strong>Drake</strong> on a Network. . . . . . . . . . . . . . . . . . . . . . . . . . . . . . . . . . . . . . . . . . . . . . . . . . . . . . . . . . . 15<br />
Single Workstations and Network Options . . . . . . . . . . . . . . . . . . . . . . . . . . . . . . . . . . . . . . . . . . . . . . . . 16<br />
<strong>Software</strong> Setup . . . . . . . . . . . . . . . . . . . . . . . . . . . . . . . . . . . . . . . . . . . . . . . . . . . . . . . . . . . . . . . . . . . . . . 18<br />
Making Changes on the Fly . . . . . . . . . . . . . . . . . . . . . . . . . . . . . . . . . . . . . . . . . . . . . . . . . . . . . . . . . . . . 52<br />
Basics ....................................................................................................... 61<br />
Logging In and Out. . . . . . . . . . . . . . . . . . . . . . . . . . . . . . . . . . . . . . . . . . . . . . . . . . . . . . . . . . . . . . . . . . . 61<br />
The Home Window. . . . . . . . . . . . . . . . . . . . . . . . . . . . . . . . . . . . . . . . . . . . . . . . . . . . . . . . . . . . . . . . . . . 61<br />
General Navigation. . . . . . . . . . . . . . . . . . . . . . . . . . . . . . . . . . . . . . . . . . . . . . . . . . . . . . . . . . . . . . . . . . . 63<br />
Creating and Opening Returns . . . . . . . . . . . . . . . . . . . . . . . . . . . . . . . . . . . . . . . . . . . . . . . . . . . . . . . . . . 65<br />
Data Entry. . . . . . . . . . . . . . . . . . . . . . . . . . . . . . . . . . . . . . . . . . . . . . . . . . . . . . . . . . . . . . . . . . . . . . . . . . 66<br />
State Returns. . . . . . . . . . . . . . . . . . . . . . . . . . . . . . . . . . . . . . . . . . . . . . . . . . . . . . . . . . . . . . . . . . . . . . . . 75<br />
Practice Returns and Test Returns . . . . . . . . . . . . . . . . . . . . . . . . . . . . . . . . . . . . . . . . . . . . . . . . . . . . . . . 76<br />
Preseason Preparation............................................................................ 77<br />
Prior-Year Updates . . . . . . . . . . . . . . . . . . . . . . . . . . . . . . . . . . . . . . . . . . . . . . . . . . . . . . . . . . . . . . . . . . . 77<br />
Organizers and Proformas . . . . . . . . . . . . . . . . . . . . . . . . . . . . . . . . . . . . . . . . . . . . . . . . . . . . . . . . . . . . . 80<br />
Scheduler . . . . . . . . . . . . . . . . . . . . . . . . . . . . . . . . . . . . . . . . . . . . . . . . . . . . . . . . . . . . . . . . . . . . . . . . . . 85<br />
e-Filing Preparation . . . . . . . . . . . . . . . . . . . . . . . . . . . . . . . . . . . . . . . . . . . . . . . . . . . . . . . . . . . . . . . . . . 96<br />
Return Preparation .................................................................................. 97<br />
Taxpayer Demographics. . . . . . . . . . . . . . . . . . . . . . . . . . . . . . . . . . . . . . . . . . . . . . . . . . . . . . . . . . . . . . . 97<br />
Required Fields. . . . . . . . . . . . . . . . . . . . . . . . . . . . . . . . . . . . . . . . . . . . . . . . . . . . . . . . . . . . . . . . . . . . . . 99<br />
Foreign Addresses . . . . . . . . . . . . . . . . . . . . . . . . . . . . . . . . . . . . . . . . . . . . . . . . . . . . . . . . . . . . . . . . . . . 99<br />
Exemptions . . . . . . . . . . . . . . . . . . . . . . . . . . . . . . . . . . . . . . . . . . . . . . . . . . . . . . . . . . . . . . . . . . . . . . . . . 99<br />
Personal Service Income (W-2, 1099-MISC). . . . . . . . . . . . . . . . . . . . . . . . . . . . . . . . . . . . . . . . . . . . . . 101<br />
Passive and Investment Income (1099-DIV, etc.) . . . . . . . . . . . . . . . . . . . . . . . . . . . . . . . . . . . . . . . . . . 105<br />
Taxable Refunds . . . . . . . . . . . . . . . . . . . . . . . . . . . . . . . . . . . . . . . . . . . . . . . . . . . . . . . . . . . . . . . . . . . . 109<br />
Tax Year 2012<br />
iii
Table of Contents<br />
<strong>Drake</strong> <strong>Software</strong> User’s <strong>Manual</strong><br />
Alimony . . . . . . . . . . . . . . . . . . . . . . . . . . . . . . . . . . . . . . . . . . . . . . . . . . . . . . . . . . . . . . . . . . . . . . . . . . 109<br />
Self-Employment Income (Schedule C). . . . . . . . . . . . . . . . . . . . . . . . . . . . . . . . . . . . . . . . . . . . . . . . . . 109<br />
Sales of Assets . . . . . . . . . . . . . . . . . . . . . . . . . . . . . . . . . . . . . . . . . . . . . . . . . . . . . . . . . . . . . . . . . . . . . 111<br />
Retirement Income . . . . . . . . . . . . . . . . . . . . . . . . . . . . . . . . . . . . . . . . . . . . . . . . . . . . . . . . . . . . . . . . . . 118<br />
Supplemental Income . . . . . . . . . . . . . . . . . . . . . . . . . . . . . . . . . . . . . . . . . . . . . . . . . . . . . . . . . . . . . . . . 121<br />
Farm Income. . . . . . . . . . . . . . . . . . . . . . . . . . . . . . . . . . . . . . . . . . . . . . . . . . . . . . . . . . . . . . . . . . . . . . . 130<br />
Unemployment Compensation . . . . . . . . . . . . . . . . . . . . . . . . . . . . . . . . . . . . . . . . . . . . . . . . . . . . . . . . . 131<br />
Social Security and Railroad Benefits . . . . . . . . . . . . . . . . . . . . . . . . . . . . . . . . . . . . . . . . . . . . . . . . . . . 132<br />
Other Income . . . . . . . . . . . . . . . . . . . . . . . . . . . . . . . . . . . . . . . . . . . . . . . . . . . . . . . . . . . . . . . . . . . . . . 132<br />
Educator Expenses . . . . . . . . . . . . . . . . . . . . . . . . . . . . . . . . . . . . . . . . . . . . . . . . . . . . . . . . . . . . . . . . . . 134<br />
Employee Business Expenses. . . . . . . . . . . . . . . . . . . . . . . . . . . . . . . . . . . . . . . . . . . . . . . . . . . . . . . . . . 134<br />
Health Savings Account (HSA) Deduction . . . . . . . . . . . . . . . . . . . . . . . . . . . . . . . . . . . . . . . . . . . . . . . 135<br />
Moving Expenses . . . . . . . . . . . . . . . . . . . . . . . . . . . . . . . . . . . . . . . . . . . . . . . . . . . . . . . . . . . . . . . . . . . 135<br />
Self-Employment Adjustments. . . . . . . . . . . . . . . . . . . . . . . . . . . . . . . . . . . . . . . . . . . . . . . . . . . . . . . . . 136<br />
Penalties . . . . . . . . . . . . . . . . . . . . . . . . . . . . . . . . . . . . . . . . . . . . . . . . . . . . . . . . . . . . . . . . . . . . . . . . . . 138<br />
Alimony Paid . . . . . . . . . . . . . . . . . . . . . . . . . . . . . . . . . . . . . . . . . . . . . . . . . . . . . . . . . . . . . . . . . . . . . . 138<br />
IRA Adjustments . . . . . . . . . . . . . . . . . . . . . . . . . . . . . . . . . . . . . . . . . . . . . . . . . . . . . . . . . . . . . . . . . . . 138<br />
Student Loan Interest Deduction . . . . . . . . . . . . . . . . . . . . . . . . . . . . . . . . . . . . . . . . . . . . . . . . . . . . . . . 138<br />
Education Expenses . . . . . . . . . . . . . . . . . . . . . . . . . . . . . . . . . . . . . . . . . . . . . . . . . . . . . . . . . . . . . . . . . 138<br />
Domestic Production Activities Deduction . . . . . . . . . . . . . . . . . . . . . . . . . . . . . . . . . . . . . . . . . . . . . . . 139<br />
Other Adjustments . . . . . . . . . . . . . . . . . . . . . . . . . . . . . . . . . . . . . . . . . . . . . . . . . . . . . . . . . . . . . . . . . . 139<br />
Standard and Itemized Deductions . . . . . . . . . . . . . . . . . . . . . . . . . . . . . . . . . . . . . . . . . . . . . . . . . . . . . . 140<br />
Alternative Minimum Tax . . . . . . . . . . . . . . . . . . . . . . . . . . . . . . . . . . . . . . . . . . . . . . . . . . . . . . . . . . . . 141<br />
Foreign Tax Credit . . . . . . . . . . . . . . . . . . . . . . . . . . . . . . . . . . . . . . . . . . . . . . . . . . . . . . . . . . . . . . . . . . 142<br />
Child and Dependent Care Expenses Credit. . . . . . . . . . . . . . . . . . . . . . . . . . . . . . . . . . . . . . . . . . . . . . . 142<br />
Elderly/Disabled Credit . . . . . . . . . . . . . . . . . . . . . . . . . . . . . . . . . . . . . . . . . . . . . . . . . . . . . . . . . . . . . . 143<br />
Home Energy Credits . . . . . . . . . . . . . . . . . . . . . . . . . . . . . . . . . . . . . . . . . . . . . . . . . . . . . . . . . . . . . . . . 143<br />
General Business Credits . . . . . . . . . . . . . . . . . . . . . . . . . . . . . . . . . . . . . . . . . . . . . . . . . . . . . . . . . . . . . 144<br />
Passive Activity Credits . . . . . . . . . . . . . . . . . . . . . . . . . . . . . . . . . . . . . . . . . . . . . . . . . . . . . . . . . . . . . . 144<br />
Child Tax Credit . . . . . . . . . . . . . . . . . . . . . . . . . . . . . . . . . . . . . . . . . . . . . . . . . . . . . . . . . . . . . . . . . . . . 146<br />
Retirement Savings Contributions Credit. . . . . . . . . . . . . . . . . . . . . . . . . . . . . . . . . . . . . . . . . . . . . . . . . 146<br />
Other Credits. . . . . . . . . . . . . . . . . . . . . . . . . . . . . . . . . . . . . . . . . . . . . . . . . . . . . . . . . . . . . . . . . . . . . . . 146<br />
Additional Tax on Qualified Plans, etc. . . . . . . . . . . . . . . . . . . . . . . . . . . . . . . . . . . . . . . . . . . . . . . . . . . 147<br />
Household Employment Taxes. . . . . . . . . . . . . . . . . . . . . . . . . . . . . . . . . . . . . . . . . . . . . . . . . . . . . . . . . 148<br />
Other Taxes. . . . . . . . . . . . . . . . . . . . . . . . . . . . . . . . . . . . . . . . . . . . . . . . . . . . . . . . . . . . . . . . . . . . . . . . 149<br />
Estimated Taxes . . . . . . . . . . . . . . . . . . . . . . . . . . . . . . . . . . . . . . . . . . . . . . . . . . . . . . . . . . . . . . . . . . . . 150<br />
Earned Income Credit (EIC). . . . . . . . . . . . . . . . . . . . . . . . . . . . . . . . . . . . . . . . . . . . . . . . . . . . . . . . . . . 154<br />
Additional Child Tax Credit and Combat Pay . . . . . . . . . . . . . . . . . . . . . . . . . . . . . . . . . . . . . . . . . . . . . 157<br />
Other Payments. . . . . . . . . . . . . . . . . . . . . . . . . . . . . . . . . . . . . . . . . . . . . . . . . . . . . . . . . . . . . . . . . . . . . 157<br />
First-Time Homebuyer Credit . . . . . . . . . . . . . . . . . . . . . . . . . . . . . . . . . . . . . . . . . . . . . . . . . . . . . . . . . 158<br />
Direct Deposit. . . . . . . . . . . . . . . . . . . . . . . . . . . . . . . . . . . . . . . . . . . . . . . . . . . . . . . . . . . . . . . . . . . . . . 158<br />
Electronic Payment Options . . . . . . . . . . . . . . . . . . . . . . . . . . . . . . . . . . . . . . . . . . . . . . . . . . . . . . . . . . . 160<br />
Third-Party Designee . . . . . . . . . . . . . . . . . . . . . . . . . . . . . . . . . . . . . . . . . . . . . . . . . . . . . . . . . . . . . . . . 162<br />
Signing the Return . . . . . . . . . . . . . . . . . . . . . . . . . . . . . . . . . . . . . . . . . . . . . . . . . . . . . . . . . . . . . . . . . . 163<br />
Depreciation . . . . . . . . . . . . . . . . . . . . . . . . . . . . . . . . . . . . . . . . . . . . . . . . . . . . . . . . . . . . . . . . . . . . . . . 165<br />
Auto Expenses . . . . . . . . . . . . . . . . . . . . . . . . . . . . . . . . . . . . . . . . . . . . . . . . . . . . . . . . . . . . . . . . . . . . . 171<br />
Office in Home . . . . . . . . . . . . . . . . . . . . . . . . . . . . . . . . . . . . . . . . . . . . . . . . . . . . . . . . . . . . . . . . . . . . . 172<br />
Net Operating Losses . . . . . . . . . . . . . . . . . . . . . . . . . . . . . . . . . . . . . . . . . . . . . . . . . . . . . . . . . . . . . . . . 173<br />
Election Options . . . . . . . . . . . . . . . . . . . . . . . . . . . . . . . . . . . . . . . . . . . . . . . . . . . . . . . . . . . . . . . . . . . . 175<br />
Special Returns . . . . . . . . . . . . . . . . . . . . . . . . . . . . . . . . . . . . . . . . . . . . . . . . . . . . . . . . . . . . . . . . . . . . . 175<br />
iv Tax Year 2012
<strong>Drake</strong> <strong>Software</strong> User’s <strong>Manual</strong><br />
Table of Contents<br />
Requests, Claims, and Other Forms . . . . . . . . . . . . . . . . . . . . . . . . . . . . . . . . . . . . . . . . . . . . . . . . . . . . . 178<br />
Features for Late-Filed Returns . . . . . . . . . . . . . . . . . . . . . . . . . . . . . . . . . . . . . . . . . . . . . . . . . . . . . . . . 181<br />
Other Special Features in Data Entry . . . . . . . . . . . . . . . . . . . . . . . . . . . . . . . . . . . . . . . . . . . . . . . . . . . . 183<br />
Binary Attachments . . . . . . . . . . . . . . . . . . . . . . . . . . . . . . . . . . . . . . . . . . . . . . . . . . . . . . . . . . . . . . . . . 184<br />
Return Results ....................................................................................... 193<br />
Calculating a Return . . . . . . . . . . . . . . . . . . . . . . . . . . . . . . . . . . . . . . . . . . . . . . . . . . . . . . . . . . . . . . . . . 193<br />
Calculation Results . . . . . . . . . . . . . . . . . . . . . . . . . . . . . . . . . . . . . . . . . . . . . . . . . . . . . . . . . . . . . . . . . . 194<br />
Viewing and Printing a Return . . . . . . . . . . . . . . . . . . . . . . . . . . . . . . . . . . . . . . . . . . . . . . . . . . . . . . . . . 196<br />
E-Mailing from View/Print. . . . . . . . . . . . . . . . . . . . . . . . . . . . . . . . . . . . . . . . . . . . . . . . . . . . . . . . . . . . 202<br />
Setting Up View/Print Options. . . . . . . . . . . . . . . . . . . . . . . . . . . . . . . . . . . . . . . . . . . . . . . . . . . . . . . . . 205<br />
Archive Manager . . . . . . . . . . . . . . . . . . . . . . . . . . . . . . . . . . . . . . . . . . . . . . . . . . . . . . . . . . . . . . . . . . . 207<br />
Banking................................................................................................... 209<br />
Tax Preparer Requirements . . . . . . . . . . . . . . . . . . . . . . . . . . . . . . . . . . . . . . . . . . . . . . . . . . . . . . . . . . . 209<br />
Taxpayer Requirements . . . . . . . . . . . . . . . . . . . . . . . . . . . . . . . . . . . . . . . . . . . . . . . . . . . . . . . . . . . . . . 212<br />
Franchise/Network Requirements . . . . . . . . . . . . . . . . . . . . . . . . . . . . . . . . . . . . . . . . . . . . . . . . . . . . . . 213<br />
Bank Products. . . . . . . . . . . . . . . . . . . . . . . . . . . . . . . . . . . . . . . . . . . . . . . . . . . . . . . . . . . . . . . . . . . . . . 213<br />
Distribution Methods . . . . . . . . . . . . . . . . . . . . . . . . . . . . . . . . . . . . . . . . . . . . . . . . . . . . . . . . . . . . . . . . 213<br />
E1 Visa ® Prepaid Card Program . . . . . . . . . . . . . . . . . . . . . . . . . . . . . . . . . . . . . . . . . . . . . . . . . . . . . . . 214<br />
Preparing to Offer Bank Products. . . . . . . . . . . . . . . . . . . . . . . . . . . . . . . . . . . . . . . . . . . . . . . . . . . . . . . 216<br />
Using Bank Screens in Data Entry . . . . . . . . . . . . . . . . . . . . . . . . . . . . . . . . . . . . . . . . . . . . . . . . . . . . . . 220<br />
Bank Product Transmission . . . . . . . . . . . . . . . . . . . . . . . . . . . . . . . . . . . . . . . . . . . . . . . . . . . . . . . . . . . 221<br />
Processing the Check . . . . . . . . . . . . . . . . . . . . . . . . . . . . . . . . . . . . . . . . . . . . . . . . . . . . . . . . . . . . . . . . 221<br />
Troubleshooting Check Printing. . . . . . . . . . . . . . . . . . . . . . . . . . . . . . . . . . . . . . . . . . . . . . . . . . . . . . . . 224<br />
e-File........................................................................................................ 227<br />
Preparing to e-File . . . . . . . . . . . . . . . . . . . . . . . . . . . . . . . . . . . . . . . . . . . . . . . . . . . . . . . . . . . . . . . . . . 228<br />
E-filing a Return . . . . . . . . . . . . . . . . . . . . . . . . . . . . . . . . . . . . . . . . . . . . . . . . . . . . . . . . . . . . . . . . . . . . 229<br />
EF Override Options in Data Entry . . . . . . . . . . . . . . . . . . . . . . . . . . . . . . . . . . . . . . . . . . . . . . . . . . . . . 236<br />
EF Database . . . . . . . . . . . . . . . . . . . . . . . . . . . . . . . . . . . . . . . . . . . . . . . . . . . . . . . . . . . . . . . . . . . . . . . 239<br />
Online EF Database . . . . . . . . . . . . . . . . . . . . . . . . . . . . . . . . . . . . . . . . . . . . . . . . . . . . . . . . . . . . . . . . . 241<br />
Copying EF Data . . . . . . . . . . . . . . . . . . . . . . . . . . . . . . . . . . . . . . . . . . . . . . . . . . . . . . . . . . . . . . . . . . . 247<br />
About State e-Filing . . . . . . . . . . . . . . . . . . . . . . . . . . . . . . . . . . . . . . . . . . . . . . . . . . . . . . . . . . . . . . . . . 248<br />
Client Status Manager ........................................................................... 249<br />
Accessing the CSM. . . . . . . . . . . . . . . . . . . . . . . . . . . . . . . . . . . . . . . . . . . . . . . . . . . . . . . . . . . . . . . . . . 249<br />
About Client Statuses . . . . . . . . . . . . . . . . . . . . . . . . . . . . . . . . . . . . . . . . . . . . . . . . . . . . . . . . . . . . . . . . 249<br />
Setting Statuses. . . . . . . . . . . . . . . . . . . . . . . . . . . . . . . . . . . . . . . . . . . . . . . . . . . . . . . . . . . . . . . . . . . . . 251<br />
Adding a Client to the CSM . . . . . . . . . . . . . . . . . . . . . . . . . . . . . . . . . . . . . . . . . . . . . . . . . . . . . . . . . . . 252<br />
Opening a Return from the CSM . . . . . . . . . . . . . . . . . . . . . . . . . . . . . . . . . . . . . . . . . . . . . . . . . . . . . . . 252<br />
Customizing the Display. . . . . . . . . . . . . . . . . . . . . . . . . . . . . . . . . . . . . . . . . . . . . . . . . . . . . . . . . . . . . . 252<br />
Searching, Updating, and Filtering, and Viewing . . . . . . . . . . . . . . . . . . . . . . . . . . . . . . . . . . . . . . . . . . 253<br />
CSM Reports . . . . . . . . . . . . . . . . . . . . . . . . . . . . . . . . . . . . . . . . . . . . . . . . . . . . . . . . . . . . . . . . . . . . . . 255<br />
Exporting CSM Data . . . . . . . . . . . . . . . . . . . . . . . . . . . . . . . . . . . . . . . . . . . . . . . . . . . . . . . . . . . . . . . . 256<br />
Admin-only Features . . . . . . . . . . . . . . . . . . . . . . . . . . . . . . . . . . . . . . . . . . . . . . . . . . . . . . . . . . . . . . . . 256<br />
Resources and Support ........................................................................ 257<br />
<strong>Drake</strong> <strong>Software</strong> <strong>Manual</strong> . . . . . . . . . . . . . . . . . . . . . . . . . . . . . . . . . . . . . . . . . . . . . . . . . . . . . . . . . . . . . . 257<br />
Tax Year 2012<br />
v
Table of Contents<br />
<strong>Drake</strong> <strong>Software</strong> User’s <strong>Manual</strong><br />
Online Support . . . . . . . . . . . . . . . . . . . . . . . . . . . . . . . . . . . . . . . . . . . . . . . . . . . . . . . . . . . . . . . . . . . . . 258<br />
Other Resources at <strong>Drake</strong> Support . . . . . . . . . . . . . . . . . . . . . . . . . . . . . . . . . . . . . . . . . . . . . . . . . . . . . . 269<br />
<strong>Software</strong> Support In <strong>Drake</strong>’s Tax <strong>Software</strong> . . . . . . . . . . . . . . . . . . . . . . . . . . . . . . . . . . . . . . . . . . . . . . . 273<br />
Interactive Support . . . . . . . . . . . . . . . . . . . . . . . . . . . . . . . . . . . . . . . . . . . . . . . . . . . . . . . . . . . . . . . . . . 276<br />
Fax Cover Letter for Support . . . . . . . . . . . . . . . . . . . . . . . . . . . . . . . . . . . . . . . . . . . . . . . . . . . . . . . . . . 285<br />
Tools ....................................................................................................... 287<br />
Update Manager . . . . . . . . . . . . . . . . . . . . . . . . . . . . . . . . . . . . . . . . . . . . . . . . . . . . . . . . . . . . . . . . . . . . 287<br />
Download Fonts . . . . . . . . . . . . . . . . . . . . . . . . . . . . . . . . . . . . . . . . . . . . . . . . . . . . . . . . . . . . . . . . . . . . 290<br />
Blank Forms . . . . . . . . . . . . . . . . . . . . . . . . . . . . . . . . . . . . . . . . . . . . . . . . . . . . . . . . . . . . . . . . . . . . . . . 290<br />
Repair Index Files. . . . . . . . . . . . . . . . . . . . . . . . . . . . . . . . . . . . . . . . . . . . . . . . . . . . . . . . . . . . . . . . . . . 291<br />
File Maintenance . . . . . . . . . . . . . . . . . . . . . . . . . . . . . . . . . . . . . . . . . . . . . . . . . . . . . . . . . . . . . . . . . . . 292<br />
Letters . . . . . . . . . . . . . . . . . . . . . . . . . . . . . . . . . . . . . . . . . . . . . . . . . . . . . . . . . . . . . . . . . . . . . . . . . . . . 301<br />
Amortization. . . . . . . . . . . . . . . . . . . . . . . . . . . . . . . . . . . . . . . . . . . . . . . . . . . . . . . . . . . . . . . . . . . . . . . 306<br />
EIN Database . . . . . . . . . . . . . . . . . . . . . . . . . . . . . . . . . . . . . . . . . . . . . . . . . . . . . . . . . . . . . . . . . . . . . . 307<br />
Install State Programs. . . . . . . . . . . . . . . . . . . . . . . . . . . . . . . . . . . . . . . . . . . . . . . . . . . . . . . . . . . . . . . . 308<br />
Scheduler . . . . . . . . . . . . . . . . . . . . . . . . . . . . . . . . . . . . . . . . . . . . . . . . . . . . . . . . . . . . . . . . . . . . . . . . . 308<br />
Forms-Based Data Entry. . . . . . . . . . . . . . . . . . . . . . . . . . . . . . . . . . . . . . . . . . . . . . . . . . . . . . . . . . . . . . 309<br />
Quick Estimator . . . . . . . . . . . . . . . . . . . . . . . . . . . . . . . . . . . . . . . . . . . . . . . . . . . . . . . . . . . . . . . . . . . . 310<br />
Reports ................................................................................................... 313<br />
Report Manager . . . . . . . . . . . . . . . . . . . . . . . . . . . . . . . . . . . . . . . . . . . . . . . . . . . . . . . . . . . . . . . . . . . . 313<br />
Setting Up a Report . . . . . . . . . . . . . . . . . . . . . . . . . . . . . . . . . . . . . . . . . . . . . . . . . . . . . . . . . . . . . . . . . 315<br />
Filter Manager . . . . . . . . . . . . . . . . . . . . . . . . . . . . . . . . . . . . . . . . . . . . . . . . . . . . . . . . . . . . . . . . . . . . . 319<br />
Report Viewer. . . . . . . . . . . . . . . . . . . . . . . . . . . . . . . . . . . . . . . . . . . . . . . . . . . . . . . . . . . . . . . . . . . . . . 323<br />
Depreciation List . . . . . . . . . . . . . . . . . . . . . . . . . . . . . . . . . . . . . . . . . . . . . . . . . . . . . . . . . . . . . . . . . . . 323<br />
Fixed Asset Manager . . . . . . . . . . . . . . . . . . . . . . . . . . . . . . . . . . . . . . . . . . . . . . . . . . . . . . . . . . . . . . . . 324<br />
Client Status Manager (CSM) Reports. . . . . . . . . . . . . . . . . . . . . . . . . . . . . . . . . . . . . . . . . . . . . . . . . . . 326<br />
Hash Totals . . . . . . . . . . . . . . . . . . . . . . . . . . . . . . . . . . . . . . . . . . . . . . . . . . . . . . . . . . . . . . . . . . . . . . . . 326<br />
Suite Products........................................................................................ 329<br />
Changes to Suite Products in 2012 . . . . . . . . . . . . . . . . . . . . . . . . . . . . . . . . . . . . . . . . . . . . . . . . . . . . . . 330<br />
<strong>Drake</strong>’s Document Manager. . . . . . . . . . . . . . . . . . . . . . . . . . . . . . . . . . . . . . . . . . . . . . . . . . . . . . . . . . . 331<br />
Setting up Your Document Manager . . . . . . . . . . . . . . . . . . . . . . . . . . . . . . . . . . . . . . . . . . . . . . . . . . . . 332<br />
Working With Document Manager Files . . . . . . . . . . . . . . . . . . . . . . . . . . . . . . . . . . . . . . . . . . . . . . . . . 348<br />
Tax Planner. . . . . . . . . . . . . . . . . . . . . . . . . . . . . . . . . . . . . . . . . . . . . . . . . . . . . . . . . . . . . . . . . . . . . . . . 353<br />
Client Write-Up . . . . . . . . . . . . . . . . . . . . . . . . . . . . . . . . . . . . . . . . . . . . . . . . . . . . . . . . . . . . . . . . . . . . 356<br />
Additional Products . . . . . . . . . . . . . . . . . . . . . . . . . . . . . . . . . . . . . . . . . . . . . . . . . . . . . . . . . . . . . . . . . 357<br />
SecureFilePro . . . . . . . . . . . . . . . . . . . . . . . . . . . . . . . . . . . . . . . . . . . . . . . . . . . . . . . . . . . . . . . . . . . . . . 362<br />
New Features in Other Packages ......................................................... 367<br />
Individual Entity Packages . . . . . . . . . . . . . . . . . . . . . . . . . . . . . . . . . . . . . . . . . . . . . . . . . . . . . . . . . . . . 367<br />
Fiduciary Package (1041). . . . . . . . . . . . . . . . . . . . . . . . . . . . . . . . . . . . . . . . . . . . . . . . . . . . . . . . . . . . . 371<br />
Estate Package (706). . . . . . . . . . . . . . . . . . . . . . . . . . . . . . . . . . . . . . . . . . . . . . . . . . . . . . . . . . . . . . . . . 371<br />
Appendix A: Preseason Checklist.........................................................A-1<br />
Appendix B: E-filing Overview...............................................................B-1<br />
vi Tax Year 2012
<strong>Drake</strong> <strong>Software</strong> User’s <strong>Manual</strong><br />
Appendix C: Keywords...........................................................................C-1<br />
Appendix D: Acronyms & Abbreviations..............................................D-1<br />
Appendix E: State E-filing Mandates ....................................................E-1<br />
Appendix F: Addenda Pages for 2012 ..................................................F-1<br />
Index....................................................................................................... xxix<br />
Tax Year 2012<br />
vii
<strong>Drake</strong> <strong>Software</strong> User’s <strong>Manual</strong><br />
This page intentionally left blank.<br />
viii Tax Year 2012
Quick Reference<br />
Contact Information<br />
Following is contact information for the Internal Revenue Service, <strong>Drake</strong> Support,<br />
and <strong>Drake</strong>’s banking partners, followed by tables of shortcut keys and their uses that<br />
can help with data entry. Also included is a list of the forms that are eligible for e-file.<br />
IRS Phone Numbers and Websites<br />
Website<br />
www.irs.gov<br />
Individual return assistance (800) 829-1040<br />
Business return assistance (800) 829-4933<br />
Exempt organizations, Retirement Plan<br />
Administrators, Government Entities<br />
People with hearing impairments<br />
(877) 829-5500<br />
(800) 829-4059 (TDD)<br />
e-File application and help (866) 255-0654<br />
Help Desk (U.S./Canada) (800) 876-1715<br />
Help Desk (International) (319) 464-3291<br />
Refund hotline (800) 829-1954<br />
Order forms and publications (800) 829-3676<br />
Social Security Administration (800) 772-1213<br />
Taxpayer Advocate Service (877) 777-4778<br />
Suspected identity-theft victims (800) 908-4490<br />
Tax Year 2012<br />
ix
Contact Information<br />
<strong>Drake</strong> <strong>Software</strong> User’s <strong>Manual</strong><br />
Register for EFINs<br />
Information on PTINs<br />
www.irs.gov > For Tax Pros > Getting<br />
Started > Become an Authorized e-file<br />
Provider<br />
(877) 613-7846 or <br />
www.irs.gov > For Tax Pros > Getting<br />
Started > Apply for a PTIN<br />
NOTE<br />
To call, write, or visit the local taxpayer advocate office for your state,<br />
refer to Publication 1546 on the IRS website (www.irs.gov).<br />
To report an individual or company that is not complying with the tax laws, phone,<br />
mail, or visit your local IRS walk-in office.<br />
Phone: From within the U.S. (800) 829-0433<br />
International callers (215) 516-2000<br />
Mail:<br />
Send written correspondence to the IRS Service Center where the return was<br />
filed, or complete Form 3949-A and mail it to:<br />
<strong>Drake</strong> Banking Department<br />
Bank Partners<br />
Internal Revenue Service<br />
Fresno, CA 93888<br />
Contact Information for <strong>Drake</strong> <strong>Software</strong>’s Banking Department:<br />
• Mail <strong>Drake</strong> <strong>Software</strong><br />
ATTN: RAL Department<br />
235 E. Palmer St.<br />
Franklin, NC 28734<br />
• Phone (828) 524-8020<br />
• Fax (828) 349-5745<br />
• e-Mail RALS@<strong>Drake</strong><strong>Software</strong>.com<br />
Contact Information for Advent Financial:<br />
• Mail Advent Financial<br />
2114 Central Street<br />
Suite 600<br />
Kansas City, MO 64108<br />
• Phone (866) 655-2340<br />
• Fax (608) 229-9990<br />
• e-Mail support@adventtax.com<br />
• e-Mail documents documents@adventtax.com<br />
x Tax Year 2012
<strong>Drake</strong> <strong>Software</strong> User’s <strong>Manual</strong><br />
Contact Information<br />
• Website www.adventtax.com<br />
• Check printing direct.adventtax.com.<br />
Contact Information for Cardholder Customer Service:<br />
• Mail Get It Prepaid MasterCard (R)<br />
P.O. Box 413944<br />
Kansas City, MO 64141<br />
• Phone (877) 833-4818<br />
Contact Information for E1 Card:<br />
• Phone (866) 331-8756<br />
• Website www.e1card.com<br />
Contact Information for EPS Financial (E-Collect):<br />
• Mail EPS Financial, LLC<br />
PO Box 1484<br />
Easton, PA 18044<br />
• Tax office support (484) 546-2241<br />
• Taxpayer support (877) 503-0788 or (484) 546-2242<br />
• Spanish support (484) 546-2243<br />
• Tax office website www.epsfinancial.net<br />
• Taxpayer website www.myecollect.com<br />
Contact Information for Republic Bank<br />
• Mail Republic Bank<br />
P.O. Box 2348<br />
Louisville, KY 40201<br />
• Tax office support (866) 491-1040<br />
• Taxpayer support (866) 581-1040<br />
• Check verification (866) 631-1040 or www.republicverify.com<br />
• Website www.republicrefund.com<br />
Contact Information for River City Bank:<br />
• Mail River City Bank<br />
P.O. Box 389<br />
Irvington, KY 40146<br />
• Phone (888) 820-7848<br />
• Fax (800) 896-9793<br />
Tax Year 2012<br />
xi
Contact Information<br />
<strong>Drake</strong> <strong>Software</strong> User’s <strong>Manual</strong><br />
• Website www.rcbral.com<br />
Contacting <strong>Drake</strong> Support<br />
Contact Information for Tax Products Group:<br />
• Mail University Bank<br />
P.O. Box 261639<br />
San Diego, CA 92196<br />
• Enrollment (877) 901-5646<br />
• Tax office support (800) 779-7228<br />
• Taxpayer customer service (800) 901-6663<br />
• 24-hour automated support (800) 455-7228<br />
• 24-hour fax support (858) 430-2795<br />
• Risk Analysis Group (800) 814-0401<br />
• Website www.cisc.sbtpg.com<br />
E-mail Support — Support@<strong>Drake</strong><strong>Software</strong>.com — Recommended for simpler<br />
<strong>Drake</strong> <strong>Software</strong> questions.<br />
Telephone Support — (828) 524-8020 — Recommended for more complicated<br />
<strong>Drake</strong> <strong>Software</strong> questions.<br />
Fax Support — (828) 349-5718 — We reply to faxes with faxes, not phone calls<br />
Client Write-Up Telephone Support — (828) 349-5547<br />
<strong>Drake</strong> Support Hours<br />
December 3, 2012 – April 20, 2013<br />
Monday – Friday: 8 a.m. – 10 p.m. EST<br />
Saturday: 8 a.m. – 6 p.m. EST<br />
April 22 – December 2, 2013<br />
Monday – Friday: 8 a.m. – 9 p.m. EST<br />
Saturday: 9 a.m. – 5 p.m. EST<br />
Other <strong>Drake</strong><br />
Support<br />
e-Mail<br />
Addresses<br />
Following are department e-mail addresses at <strong>Drake</strong> <strong>Software</strong>:<br />
Department<br />
Contact<br />
Accounting<br />
Accounting@<strong>Drake</strong><strong>Software</strong>.com<br />
Education<br />
e-Filing<br />
Support (General)<br />
Support (State-specific)<br />
Conversions<br />
Client Write-Up<br />
Education@<strong>Drake</strong><strong>Software</strong>.com<br />
EF@<strong>Drake</strong><strong>Software</strong>.com<br />
Support@<strong>Drake</strong><strong>Software</strong>.com<br />
XXstate@<strong>Drake</strong><strong>Software</strong>.com<br />
(Replace XX with state abbreviation)<br />
Support.<strong>Drake</strong><strong>Software</strong>.com<br />
Client_wu@<strong>Drake</strong><strong>Software</strong>.com<br />
xii Tax Year 2012
<strong>Drake</strong> <strong>Software</strong> User’s <strong>Manual</strong><br />
Shortcut Keys<br />
Shortcut Keys<br />
For more on the many helpful resources provided by <strong>Drake</strong> <strong>Software</strong>, see Chapter 10,<br />
“Resources and Support.”<br />
Save data-entry time with the following shortcut keys:<br />
Table Q-1: Home Window Shortcut Keys<br />
Desired Action<br />
Keyboard Keys<br />
Open Returns<br />
Calculate returns<br />
Print returns<br />
View returns<br />
CTRL + O<br />
CTRL + C<br />
CTRL + P<br />
CTRL + V<br />
Open recent client files Enter 1-9<br />
Open Quick Estimator<br />
Open Client Status Manager<br />
Open EF Return Selector<br />
Transmit/Receive<br />
Open <strong>Drake</strong> <strong>Software</strong> Help<br />
Exit the program<br />
CTRL + Q<br />
CTRL + L<br />
CTRL + S<br />
CTRL + T<br />
CTRL + F1<br />
ESC<br />
Table Q-2: Navigating Through Data Entry Screens<br />
Desired Action<br />
Move cursor forward one field<br />
Keyboard Keys<br />
TAB, ENTER, or DOWN ARROW <br />
Move cursor back one field SHIFT + TAB, CTRL + UP ARROW ,<br />
or SHIFT + ENTER<br />
Move cursor with a field<br />
Delete character behind the cursor<br />
Delete character in front of the cursor<br />
Move to last field on the screen<br />
Move to first field on the screen<br />
Bring up additional data entry screens (W2,<br />
1099, etc.)<br />
Return to previous screen or exit<br />
Go to the first position in a data entry field<br />
Go to the last position in a data entry field<br />
LEFT ARROW or RIGHT ARROW <br />
BACKSPACE<br />
DELETE<br />
CTRL + END<br />
CTRL + HOME<br />
PAGE DOWN<br />
ESC<br />
HOME<br />
END<br />
Tax Year 2012<br />
xiii
Shortcut Keys<br />
<strong>Drake</strong> <strong>Software</strong> User’s <strong>Manual</strong><br />
Table Q-2: Navigating Through Data Entry Screens<br />
Desired Action<br />
Navigate up and down a data entry screen<br />
Access View mode<br />
Access Print mode<br />
Access data entry from View or Print mode<br />
Access an action menu<br />
CTRL + UP ARROW or <br />
CTRL + DOWN ARROW <br />
CTRL + V<br />
CTRL + P<br />
CTRL + E<br />
Keyboard Keys<br />
Right-click in field<br />
Right-click in gray area<br />
Table Q-3: Data Entry Shortcut Keys<br />
Desired Action<br />
For field help during data entry or to verify a Social<br />
Security Number<br />
Insert today’s date in any date field<br />
Calculate a return<br />
View a return<br />
Print a return<br />
Return to data entry from view or print mode<br />
Split MFJ return to MFS return<br />
Open a Detailed Worksheet; Access Form 4562<br />
from the Depreciation field<br />
View preparer notes<br />
Enter the Preparer note pad (PAD screen)<br />
Increase Declaration Control Number (DCN)<br />
Toggle heads-down and standard data entry<br />
Delete a data entry screen<br />
Carry data to an amended screen<br />
Reset the screen<br />
Exit screen without saving changes<br />
Open Help<br />
Flag a field for review<br />
Clear a flagged field<br />
Clear all flagged fields<br />
Open <strong>Drake</strong> Document Manager<br />
Keyboard Keys<br />
F1, or SHIFT+?<br />
ALT+ D<br />
CTRL+ C<br />
CTRL+ V<br />
CTRL+ P<br />
CTRL+ E<br />
CTRL+ S<br />
Double-click, CTRL+ W, or<br />
Right-click > Add Worksheet<br />
CTRL+ R<br />
CTRL+ SHIFT+ N<br />
CTRL+ M<br />
CTRL+ N<br />
CTRL+ D<br />
CTRL+ X<br />
CTRL+ U<br />
SHIFT+ ESC<br />
Within data entry: CTRL+?<br />
From Home window: CTRL+ F1<br />
F2<br />
F4<br />
CTRL+ SHIFT+ SPACEBAR<br />
F6<br />
xiv Tax Year 2012
<strong>Drake</strong> <strong>Software</strong> User’s <strong>Manual</strong><br />
Shortcut Keys<br />
Table Q-3: Data Entry Shortcut Keys<br />
Desired Action<br />
Keyboard Keys<br />
Open <strong>Drake</strong> Tax Planner<br />
Open the Set Client Status menu<br />
Go to EF database<br />
Activate the calculator<br />
E-mail a client data file<br />
Exit data entry<br />
View / Open Forms-based data entry<br />
Opens Macros<br />
F7<br />
F8<br />
F9<br />
F10<br />
F11<br />
ESC<br />
CTRL+ G<br />
CTRL+ SHIFT+ M<br />
Table Q-4: Client Status Manager Shortcut Keys<br />
Desired Action<br />
Open CSM from the Home window<br />
Open selected client in CSM<br />
Search for a client record<br />
Customize the display<br />
Refresh the display<br />
Filter the client list<br />
View information for the currently selected return<br />
Generate reports<br />
Export to Excel<br />
Help<br />
Exit CSM<br />
Keyboard Keys<br />
CTRL + L<br />
CTRL + O<br />
CTRL + F<br />
CTRL + D<br />
F5<br />
CTRL + L<br />
CTRL + Q<br />
CTRL + R<br />
CTRL + E<br />
F1<br />
ESC<br />
Table Q-5: Frequently Used Codes<br />
Field Code Application<br />
TS or<br />
TSJ<br />
T<br />
S<br />
J<br />
Assigns data to primary taxpayer. The program default is T if<br />
field is left blank.<br />
Assigns data to spouse.<br />
Assigns data to both taxpayer and spouse.<br />
F 0 (zero) Excludes data from federal return.<br />
ST<br />
State<br />
code<br />
For state returns, enter appropriate two-letter state code. If field<br />
is left blank, program uses resident state.<br />
ST 0 (zero) Exclude data from any state return.<br />
Tax Year 2012<br />
xv
Shortcut Keys<br />
<strong>Drake</strong> <strong>Software</strong> User’s <strong>Manual</strong><br />
Table Q-5: Frequently Used Codes<br />
Field Code Application<br />
PY<br />
For multi-state returns, use PY as resident state code on<br />
screen 1. Do not use PY on any other screen.<br />
C City code For city returns, enter appropriate code to indicate source of<br />
income.<br />
Multiple 1-999 For Form 4562 (depreciation), indicate appropriate schedule<br />
for depreciated item in the For field. Indicate where information<br />
should be carried when there are multiple schedules.<br />
Table Q-6: Search EF Database<br />
Key Function Instructions<br />
F1 General information View basic EF information about taxpayer: taxpayer information,<br />
federal and state acknowledgement codes,<br />
acknowledgement dates, transaction date, filing status,<br />
refund amount, or balance due.<br />
F2 Bank information Access detailed loan information, direct deposit information,<br />
Declaration Control Number, etc.<br />
F3<br />
Fees/miscellaneous<br />
information<br />
Access miscellaneous information, including Earned<br />
Income Credit and AGI, MISC field data, firm and preparer<br />
numbers, and tentative fee distribution details.<br />
F4 Reject code lookup Access the reject code lookup feature, which allows you<br />
to search for federal and state reject code descriptions,<br />
loan status codes, and bank decline reasons.<br />
F5 Return to data entry Opens return data entry for the client.<br />
F10 Online Database View your online database from data entry or from your<br />
EF Database.<br />
Table Q-7: e-Mail Shortcut Keys<br />
Desired Action<br />
E-mail a client data file from data entry<br />
Check mail / Send and Receive<br />
Open a message<br />
Edit address book<br />
Create a new mail message<br />
Print a message<br />
Reply to a message<br />
Forward a message<br />
Delete a message<br />
Keyboard Keys<br />
F11<br />
CTRL + M<br />
CTRL + O<br />
CTRL + E<br />
CTRL + N<br />
CTRL + P<br />
CTRL + R<br />
CTRL + F<br />
CTRL + D<br />
xvi Tax Year 2012
<strong>Drake</strong> <strong>Software</strong> User’s <strong>Manual</strong><br />
Shortcut Keys<br />
Table Q-7: e-Mail Shortcut Keys<br />
Desired Action<br />
Send a message in the New Message window<br />
Open address book list in New Message window<br />
Attach a file to a message<br />
Check mailbox status<br />
Keyboard Keys<br />
ALT + S<br />
ALT + T<br />
ALT + A<br />
CTRL + S<br />
Table Q-8: Calculator Functions<br />
Desired Action Operator Instructions<br />
Access the calculator<br />
in a numeric field<br />
F10<br />
With the cursor in the desired field during return<br />
data entry, press F10.<br />
Clear a number Num Lock Press NUM LOCK key or click the C button on the<br />
calculator.<br />
Insert calculation<br />
total in data-entry<br />
field<br />
F1 or<br />
F1-Insert<br />
Result<br />
With desired total in calculator’s summary field,<br />
press F1 key or click F1-Insert Result on calculator<br />
window. Calculator is closed and calculation<br />
total is transferred to data-entry field.<br />
To exit the calculator ESC To deactivate calculator without inserting data in<br />
a field, press ESC or click ESC-Quit on calculator<br />
window.<br />
Addition + Enter number to be added and press PLUS key<br />
or click plus sign (+) on calculator window.<br />
Subtraction — Enter number to be subtracted and press MINUS<br />
key or click minus sign (–) on calculator window.<br />
Multiplication * Enter first number of equation and press<br />
SHIFT+8 or click * on the calculator window.<br />
Enter second number. Press ENTER or click<br />
equal sign (=) on the calculator window.<br />
Division / Enter the number to divide and press SLASH (/)<br />
key or click / on the calculator window. Enter the<br />
number to divide by. Press ENTER or click equal<br />
sign (=) on calculator window.<br />
Table Q-9: Print Mode Shortcut Keys<br />
Desired Action<br />
Keyboard Keys<br />
Toggle in/out of Classic mode<br />
Return to data entry<br />
Print selected form<br />
Quick-print select form<br />
Help<br />
CTRL + S<br />
CTRL + E<br />
CTRL + P<br />
CTRL + Q<br />
F1<br />
Tax Year 2012<br />
xvii
Accepted Forms and Schedules:<br />
<strong>Drake</strong> <strong>Software</strong> User’s <strong>Manual</strong><br />
Accepted Forms and Schedules:<br />
1040<br />
The following chart identifies forms and schedule accepted for the 2012 tax year and<br />
the maximum number that can be e-filed with a 1040 return:<br />
Form or<br />
Schedule<br />
Maximum<br />
Number<br />
Form or<br />
Schedule<br />
Maximum<br />
Number<br />
Form or<br />
Schedule<br />
Maximum<br />
Number<br />
1040 1 4970 1 8859 1<br />
1040A 1 4972 1 per taxpayer 8862 1<br />
1040EZ 1 5329 1 per taxpayer 8863 1<br />
Schedule A 1 5405 pg 2 2 8864 1<br />
Schedule B 1 5695 1 8866 1<br />
Schedule C 8 5884 1 8867 1<br />
Schedule C-EZ 1 per taxpayer 6198 10 8873 10<br />
Schedule D 1 6251 1 8874 1<br />
Schedule E Unlimited 6252 25 8880 1<br />
Sch E, pg 2 1 6478 1 8881 1<br />
Schedule EIC 1 6765 1 8882 1<br />
Schedule F 5 6781 1 8885 2<br />
Schedule H 1 per taxpayer 8082 Unlimited 8888 1<br />
Schedule J 1 8275 2 8889 2<br />
Schedule R 1 8275R 2 8896 1<br />
Schedule SE 1 per taxpayer 8283 Unlimited 8903 1<br />
970 2 8379 1 8907 1<br />
982 1 8396 1 8908 1<br />
1098-C 10 8582 1 8909 1<br />
1099-R 20 8582CR 1 8910 1<br />
1116 20 8586 1 8911 1<br />
1310 2 8594 1 8912 10<br />
2106 1 per taxpayer 8606 1 per taxpayer 8917 1<br />
2106-EZ 1 per taxpayer 8609A 10 8919 2<br />
2120 4 8611 5 8930 1<br />
2210 1 8615 1 8936 1<br />
2210-F 1 8801 1 8938 1<br />
xviii Tax Year 2012
<strong>Drake</strong> <strong>Software</strong> User’s <strong>Manual</strong><br />
Accepted Forms and Schedules:<br />
Form or<br />
Schedule<br />
Maximum<br />
Number<br />
Form or<br />
Schedule<br />
Maximum<br />
Number<br />
Form or<br />
Schedule<br />
Maximum<br />
Number<br />
2441 1 8812 1 8941 2<br />
2555 1 per taxpayer 8814 Unlimited 9465 1<br />
2555EZ 1 per taxpayer 8815 1 Pub 517, worksheet<br />
1-4<br />
2<br />
3468 1 8820 1 56 1<br />
3800 1 8824 5 2350 1<br />
3903 2 8826 1 4868 1<br />
4136 1 8826 1 9465 1<br />
4137 1 per taxpayer 8829 32 (4 per Sch C) W-2 50<br />
4255 1 8834 1 W-2G Unlimited<br />
4562 Unlimited 8835 1 W-2GU 10<br />
4684 5 8844 1 2439 4<br />
4797 1 8845 1<br />
4835 4 8846 1<br />
4952 1 8853 1<br />
1120<br />
The following chart identifies forms and schedules that can be e-filed with an 1120<br />
return for the 2012 tax year:<br />
Form<br />
Number<br />
Form Name<br />
Form<br />
Number<br />
Form Name<br />
851 Affiliations Schedule 8832 Entity Classification Election<br />
982 Reduction of Tax Attribute -<br />
Discharge<br />
8834 Qualified Electric Vehicle<br />
Credit<br />
1118 Foreign Tax Credit 8835 Renewable Electricity Credit<br />
1120 U S Corporate Income Tax<br />
Return<br />
1120-X Amended U.S. Corporation<br />
Income Tax Return<br />
1122 Authorization and Consent<br />
of Subsidiary<br />
2220 Underpayment of Estimated<br />
Tax<br />
8844 Empowerment Zone Credit<br />
8845 Indian Employment Credit<br />
8846 Credit for Employer SS &<br />
Medicare Taxes<br />
8847 Credit for Contributions<br />
Selected Community Development<br />
Corps.<br />
Tax Year 2012<br />
xix
Accepted Forms and Schedules:<br />
<strong>Drake</strong> <strong>Software</strong> User’s <strong>Manual</strong><br />
Form<br />
Number<br />
Form Name<br />
Form<br />
Number<br />
Form Name<br />
2439 Notice to Shareholders<br />
Undistributed Long-Term<br />
Cap Gain<br />
3115 Application for Change in<br />
Accounting Method<br />
8866 Interest Computation Under<br />
the Look-Back Method<br />
8873 Extraterritorial Income Exclusion<br />
3468 Investment Credit 8874 New Markets<br />
3800 General Business Credit 8881 Credit for Small Employer<br />
Pension Plan Startup Costs<br />
4136 Fuels Credit 8882 Credit for Employer-Provided<br />
Childcare<br />
4255 Recapture of Investment<br />
Credit<br />
4562 Depreciation and Amortization<br />
8883 Asset Allocation Statement<br />
Under Sec 338<br />
8896 Low Sulfur Diesel Fuel Production<br />
Credit<br />
4626 Alternative Minimum Tax 8900 Qualified Railroad Track<br />
Maintenance Credit<br />
4684 Casualties & Thefts 8903 Domestic Production Activities<br />
4797 Sale of Business Property 8906 Distilled Spirits Credit<br />
5471 Info Return of Persons with<br />
Respect to Certain Foreign<br />
Corps<br />
5472 25% Foreign-Owned U.S.<br />
Corporation<br />
8907 Nonconventional Source<br />
Fuel Credit<br />
8908 Energy Efficient Home Credit<br />
5884 Work Opportunity Credit 8910 Alternative Motor Vehicle<br />
Credit<br />
6252 Installment Sale Income 8911 Alternative Fuel Vehicle<br />
Refueling Property Credit<br />
6478 Credit for Alcohol Used as<br />
Fuel<br />
6781 Gains & Losses from Section<br />
1256<br />
8912 Clean Renewable Energy<br />
Bond Credit<br />
8916 Reconciliation of Sch M-3<br />
Taxable Income<br />
7004 Request for Extension 8916A Supplemental Attachment to<br />
Schedule M-3<br />
8050 Direct Deposit of a Corporate<br />
Refund<br />
8082 Notice of Inconsistent<br />
Treatment<br />
8283 Noncash Charitable Contributions<br />
8925 Report of Employer-Owned<br />
Life Insurance Contracts<br />
8941 Credit for Small Employer<br />
Health Insurance Premiums<br />
8949 Sales and Other Dispositions<br />
of Capital Assets<br />
xx Tax Year 2012
<strong>Drake</strong> <strong>Software</strong> User’s <strong>Manual</strong><br />
Accepted Forms and Schedules:<br />
Form<br />
Number<br />
Form Name<br />
Form<br />
Number<br />
Form Name<br />
8586 Low-Income Housing credit B Additional Information for<br />
Schedule M-3 Filers<br />
8594 Asset Acquisition statement D Capital Gains & Losses<br />
8609A<br />
Annual Stmt for Low-<br />
Income Housing Credit<br />
G<br />
Certain Persons Owning the<br />
Corporation's Stock<br />
8611 Recapture of Low-Income<br />
Housing Credit<br />
M-3 Net Income (Loss) Reconciliation<br />
8697 Interest Computation Under<br />
the Look-Back<br />
N<br />
Foreign Operations of U.S.<br />
Corporations<br />
8820 Orphan Drug Credit O Controlled Group Information<br />
8824 Like-Kind Exchange PH U S Personal Holding<br />
8827 Credit for Prior Year Minimum<br />
Tax<br />
1120S<br />
The following chart identifies forms and schedules that can be e-filed with an 1120<br />
return for the 2012 tax year:<br />
Form<br />
Number<br />
Form Name<br />
Form<br />
Number<br />
Form Name<br />
1120S<br />
U S Corporate Income Tax<br />
Return<br />
8825 Like-Kind Exchange<br />
982 Reduction of Tax Attribute -<br />
Discharge<br />
2220 Underpayment of Estimated<br />
Tax by Corporation<br />
2439 Undistributed Long-Term<br />
Capital Gains<br />
2553 Election by a Small Business<br />
Corporation - (Must<br />
be sent as PDF)<br />
3115 Application for Change in<br />
Accounting Method<br />
8827 Credit for Prior Year Minimum<br />
Tax<br />
8832 Entity Classification Election<br />
8834 Qualified Electric Vehicle<br />
Credit<br />
8835 Renewable Electricity<br />
Credit<br />
8838 Consent to Extend Time to<br />
Assess Tax<br />
3468 Investment Credit 8844 Empowerment Zone Credit<br />
3800 Other Business Credits 8846 Credit for Employer SS &<br />
Medicare Taxes<br />
4136 Fuels Credit 8847 Credit for Contributions to<br />
Selected Community<br />
Development Corps.<br />
Tax Year 2012<br />
xxi
Accepted Forms and Schedules:<br />
<strong>Drake</strong> <strong>Software</strong> User’s <strong>Manual</strong><br />
Form<br />
Number<br />
Form Name<br />
Form<br />
Number<br />
Form Name<br />
4255 Recapture of Investment<br />
Credit<br />
4562 Depreciation and Amortization<br />
8866 Interest Computation<br />
Under the Look-Back<br />
Method<br />
8873 Extraterritorial Income<br />
Exclusion<br />
4684 Casualties & Thefts 8874 New Markets Credit<br />
4797 Sale of Business Property 8881 Credit for Small Employer<br />
Pension Plan Startup<br />
Costs<br />
5884 Work Opportunity Credit 8882 Credit for Employer-Provided<br />
Childcare<br />
6252 Installment Sale Income 8883 Asset Allocation Statement<br />
Under Sec 338<br />
6478 Credit for Alcohol Used as<br />
Fuel<br />
6765 Credit for Increasing<br />
Research Activities<br />
6781 Gains & Losses from Section<br />
1256<br />
8903 Domestic Production Activities<br />
Deduction<br />
8907 Nonconventional Source<br />
Fuel Credit<br />
8908 Energy-Efficient Home<br />
Credit<br />
7004 Request for Extension 8910 Alternative Motor Vehicle<br />
Credit<br />
8050 Direct Deposit of a Corporate<br />
Refund<br />
8082 Notice of Inconsistent<br />
Treatment<br />
8911 Alternative Fuel Vehicle<br />
Refueling Property Credit<br />
8912 Clean Renewable Energy<br />
Bond and Gulf Bond Credit<br />
8283 Noncash Charitable Contributions<br />
8916A<br />
Supplemental Attachment<br />
to Schedule M-3<br />
8586 Low-Income Housing<br />
credit<br />
8594 Asset Acquisition statement<br />
8609-A Annual Stmt for Low-<br />
Income Housing Credit<br />
8925 Report of Employer-<br />
Owned Life Insurance<br />
Contracts<br />
8941 Credit for Small Employer<br />
Health Insurance Premiums<br />
8949 Sales and other Dispositions<br />
of Capital Assets<br />
8611 Recapture of Low-Income<br />
Housing Credit<br />
D<br />
Capital Gains & Losses<br />
8697 Interest Computation<br />
Under the Look-Back<br />
K-1 Shareholders Share of<br />
Income/Expense Items<br />
8820 Orphan Drug Credit M-3 Net Income (Loss) Reconciliation<br />
xxii Tax Year 2012
<strong>Drake</strong> <strong>Software</strong> User’s <strong>Manual</strong><br />
Accepted Forms and Schedules:<br />
Form<br />
Number<br />
Form Name<br />
Form<br />
Number<br />
Form Name<br />
8824 Like-Kind Exchange N Foreign Operations of U.S.<br />
Corporations<br />
1065<br />
The following chart identifies forms and schedules that can be e-filed with a 1065<br />
return for the 2012 tax year:<br />
Form<br />
Number<br />
Form Name<br />
Form<br />
Number<br />
Form Name<br />
982 Reduction of Tax Attribute -<br />
Discharge<br />
8844 Empowerment Zone Credit<br />
1065 Partnership Return 8846 Credit for Employer SS &<br />
Medicare Taxes<br />
3115 Application for Change in<br />
Accounting Method<br />
8847 Credit for Contributions<br />
Selected Community Development<br />
Corps.<br />
3468 Investment Credit 8864 Biodiesel and Renewable<br />
Diesel Fuels<br />
4255 Recapture of Investment<br />
Credit<br />
8866 Interest Computation Under<br />
the Look-Back Method<br />
4562 Depreciation & Amortization 8873 Extraterritorial Income Exclusion<br />
4684 Casualties & Thefts 8874 New Markets<br />
4797 Sale of Business Property 8881 Credit for Small Employer<br />
Pension Plan Startup Costs<br />
5884 Work Opportunity Credit 8882 Credit for Employer-Provided<br />
Childcare<br />
6252 Installment Sale Income 8883 Asset Allocation Statement<br />
6478 Credit for Alcohol Used as<br />
Fuel<br />
6765 Credit for Increasing<br />
Research Activities<br />
6781 Gains & Losses from Section<br />
1256<br />
8896 Low Sulfur Diesel Fuel Production<br />
Credit<br />
8907 Nonconventional Source<br />
Fuel Credit<br />
8908 Energy Efficient Home Credit<br />
7004 Request for Extension 8910 Alternative Motor Vehicle<br />
Credit<br />
8082 Notice of Inconsistent<br />
Treatment<br />
8911 Alternative Fuel Vehicle<br />
Refueling Property Credit<br />
Tax Year 2012<br />
xxiii
Accepted Forms and Schedules:<br />
<strong>Drake</strong> <strong>Software</strong> User’s <strong>Manual</strong><br />
Form<br />
Number<br />
Form Name<br />
Form<br />
Number<br />
Form Name<br />
8283 Noncash Charitable Contributions<br />
8308 Report of a Sale or<br />
Exchange<br />
8912 Clean Renewable Energy<br />
Bond Credit and Gulf Bond<br />
Credit<br />
8925 Report of Employer-Owned<br />
Life Insurance Contracts<br />
8586 Low-Income Housing Credit 8941 Credit for Small Employer<br />
Health Insurance Premiums<br />
8594 Asset Acquisition statement 8949 Sales and other Dispositions<br />
of Capital Assets<br />
8611 Recapture of Low Income<br />
Housing Credit<br />
8697 Look-Back Method for<br />
Completed Long-term Contracts<br />
8906-A Annual Statement for Low<br />
Income Housing Credit<br />
8916-A Supplemental Attachment to<br />
Schedule M-3<br />
8820 Orphan Drug Credit C Schedule C Additional Information<br />
for Schedule M-3<br />
8824 Like-Kind Exchange D 1065 Capital Gains/Losses<br />
8825 Real Estate Income F 1040 Profit/Loss from Farming<br />
8826 Disabled Access Credit K-1 1065 Partner's Share<br />
8832 Entity Classification Election<br />
K-1<br />
STM099<br />
K-1 statement record<br />
8834 Qualified Electric Vehicle<br />
Credit<br />
M-3 Net Income (Loss) Reconciliation<br />
for Certain Partnerships<br />
(1 per return)<br />
8835 Renewable Electricity<br />
Credit<br />
STMnnn<br />
Statement record other than<br />
K-1<br />
1041<br />
The following chart identifies forms and schedules that can be e-filed with a 1041<br />
return for the 2012 tax year:<br />
Form<br />
Number<br />
Form Name<br />
Form<br />
Number<br />
Form Name<br />
1041 U.S. Income Tax Return<br />
for Estates and Trusts<br />
6478 Credit for Alcohol use as<br />
Fuel<br />
C (Form<br />
1040)<br />
Profit or Loss From Business<br />
6765 Credit for Increasing<br />
Research Activities<br />
C-EZ (Form<br />
1040)<br />
Net Profit From Business 6781 Gains & Losses from Section<br />
1256 Contracts and Straddles<br />
xxiv Tax Year 2012
<strong>Drake</strong> <strong>Software</strong> User’s <strong>Manual</strong><br />
Accepted Forms and Schedules:<br />
Form<br />
Number<br />
Form Name<br />
Form<br />
Number<br />
Form Name<br />
D (Form<br />
1041)<br />
Capital Gains and Losses 8082 Notice of Inconsistent Treatment<br />
or Administrative<br />
Adjustment Request<br />
E (Form<br />
1040)<br />
F (Form<br />
1040)<br />
H (Form<br />
1040)<br />
Supplemental Income &<br />
Loss<br />
Profit or Loss From Farming<br />
Household Employment<br />
Taxes<br />
8275 Disclosure Statement<br />
8275-R Regulatory Disclosure Statement<br />
8582 Passive Activity Loss Limitation<br />
I (Form 1041) Alternative Minimum Tax –<br />
Estates and Trusts<br />
8582 Passive Activity Loss Limitations<br />
J (Form 1041)<br />
Trust Allocation of an<br />
Accumulation Distribution<br />
8582-CR<br />
Passive Activity Credit Limitations<br />
K-1 (Form<br />
1041)<br />
Beneficiary’s Share of<br />
Income, Deduction, Credits<br />
8586 Low-Income Housing Credit<br />
1116 Foreign Tax Credit 8609-A Annual Statement for Low-<br />
Income Housing Credit<br />
2210 Underpayment of Estimated<br />
Tax by Individuals,<br />
Estates and Trusts<br />
2439 Notice to Shareholder of<br />
Undistributed Long-Term<br />
Capital Gains<br />
8801 Credit for Prior Year Minimum<br />
Tax Individuals, Estates<br />
and Trusts<br />
8820 Orphan Drug Credit<br />
3468 Investment Credit 8824 Like Kind Exchanges<br />
3800 General Business Credit 8829 Expenses for Business Use<br />
of Your Home<br />
4136 Credit for Federal Tax Paid<br />
on Fuels<br />
4255 Recapture of Investment<br />
Credit<br />
4562 Depreciation & Amortization<br />
8864 Biodiesel Fuels Credit<br />
8874 New Markets Credit<br />
8881 Credit for Small Employer<br />
Pension Plan Startup Costs<br />
4684 Casualties and Theft 8882 Credit for Employer-Provided<br />
Childcare Facilities and Services<br />
4797 Sale of Business Property 8886 Reportable Transaction Disclosure<br />
Statement<br />
4952 Investment Interest<br />
Expense Deduction<br />
8896 Low Sulfur Diesel Fuel Production<br />
Credit<br />
Tax Year 2012<br />
xxv
Accepted Forms and Schedules:<br />
<strong>Drake</strong> <strong>Software</strong> User’s <strong>Manual</strong><br />
Form<br />
Number<br />
Form Name<br />
Form<br />
Number<br />
Form Name<br />
4970 Tax on Accumulation Distribution<br />
of Trusts<br />
8941 Credit for Small Employer<br />
Health Insurance Premiums<br />
4972 Tax on Lump-Sum Distributions<br />
5884 Work Opportunity Credit,<br />
and related Instructions<br />
6198 At-Risk Limitation<br />
6252 Installment Sale Income<br />
PMT<br />
STMbnn<br />
Payment Record Electronic<br />
Funds Withdrawal (Direct<br />
Debit) Payment<br />
Statement Records for forms<br />
and/or schedules other<br />
990<br />
The following chart identifies forms and schedules that can be e-filed with a 990<br />
return for the 2012 tax year:<br />
Form<br />
Number<br />
Form Name<br />
Form<br />
Number<br />
Form Name<br />
990 Exempt Organization Business<br />
Return<br />
F<br />
Statement of Activities Outside<br />
the United States<br />
990-EZ<br />
Short Form Return of Tax<br />
Exempt Organization<br />
G<br />
Supplemental Information<br />
Regarding Fundraising or<br />
Gaming Activities<br />
990-N Exempt Organization Postcard<br />
E-Filing<br />
H<br />
Hospitals<br />
990-PF<br />
Organization Exempt from<br />
Income Tax Private Foundation<br />
I<br />
Grants and Other Assistance<br />
to Organizations, Governments<br />
and Individuals in<br />
the U.S.<br />
3115 Application for Change in<br />
Accounting Method<br />
4562 Depreciation and Amortization<br />
8868 Application for Extension<br />
for Exempt Org<br />
J<br />
K<br />
L<br />
Compensation Information<br />
Supplemental Information on<br />
Tax Exempt Bonds<br />
Transactions with Interested<br />
Persons<br />
A<br />
Organization Exempt from<br />
Income Tax Sch A<br />
M<br />
Non-Cash Contributions<br />
B<br />
Organization Exempt from<br />
Income Tax Sch B<br />
N<br />
C<br />
Political Campaign and<br />
Lobbying Activities<br />
O<br />
Supplemental Information to<br />
Form 990<br />
xxvi Tax Year 2012
<strong>Drake</strong> <strong>Software</strong> User’s <strong>Manual</strong><br />
Accepted Forms and Schedules:<br />
Form<br />
Number<br />
Form Name<br />
Form<br />
Number<br />
Form Name<br />
D<br />
Supplemental Financial<br />
Statements<br />
R<br />
Related Organizations and<br />
Unrelated Partnerships<br />
E<br />
Schools<br />
Tax Year 2012<br />
xxvii
Accepted Forms and Schedules:<br />
<strong>Drake</strong> <strong>Software</strong> User’s <strong>Manual</strong><br />
This page intentionally left blank.<br />
xxviii Tax Year 2012
1 Introduction<br />
Thank you for choosing <strong>Drake</strong> <strong>Software</strong>. The <strong>Drake</strong> Team has been hard at work in<br />
2012 to help ensure that your firm has a successful, rewarding filing season in 2013.<br />
We appreciate the time you’re taking to familiarize yourself with the <strong>Drake</strong> <strong>Software</strong><br />
User’s <strong>Manual</strong> for the 2012 tax year. Please read the following introduction that<br />
includes information on how to use your manual and describes the software’s new features<br />
for tax year 2012.<br />
About Your <strong>Drake</strong> <strong>Software</strong> User’s <strong>Manual</strong><br />
The electronic <strong>Drake</strong> <strong>Software</strong> User’s <strong>Manual</strong> has been developed for <strong>Drake</strong> clients to<br />
provide clear, up-to-date, easy-to-find instructions and guidelines for using the software.<br />
Use this manual in conjunction with other <strong>Drake</strong> resources such as the online<br />
and onscreen help features, tutorials, training, and phone support. Be sure to take<br />
advantage of our extensive index and the “search” feature, both of which will help you<br />
locate information more efficiently in the 2012 manual.<br />
This manual is also available as a paper manual that can be ordered from the <strong>Drake</strong><br />
Support site (Support.<strong>Drake</strong><strong>Software</strong>.com > Training Tools > <strong>Manual</strong>s).<br />
To keep your manual updated, <strong>Drake</strong> <strong>Software</strong> publishes addenda pages as the tax season<br />
progresses. Check Appendix F, Addenda Pages, regularly with each CD shipment<br />
and throughout tax season so you’ll know which pages in the manual have been<br />
updated. Addenda pages are shipped with each software CD and are available on the<br />
<strong>Drake</strong> Support site.<br />
NEW FOR<br />
2012<br />
See the new “Quick Reference” section where you’ll find contact information<br />
for the Internal Revenue Service, <strong>Drake</strong> Support, and <strong>Drake</strong>’s<br />
banking partners, tables of shortcut keys and their uses, and a list of<br />
the forms that are eligible for e-file with <strong>Drake</strong> <strong>Software</strong>.<br />
Tax Year 2012 1
What’s New in <strong>Drake</strong> for 2012<br />
<strong>Drake</strong> <strong>Software</strong> User’s <strong>Manual</strong><br />
What’s New in <strong>Drake</strong> for 2012<br />
<strong>Drake</strong> Passwords<br />
Each year, <strong>Drake</strong> strives to offer the most efficient and comprehensive tax software in<br />
the industry while staying current with the latest technology. Listed here are short<br />
descriptions of some of the more significant changes to the 1040 program, and to the<br />
software in general, for tax year 2012. (Information on what’s new in business and<br />
other packages is also detailed in Chapter 14, “New Features in Other Packages.”)<br />
<strong>Drake</strong> passwords have been reformatted for greater security. Beginning with <strong>Drake</strong>12,<br />
the <strong>Drake</strong> password will consist of eight to 15 characters (numerals and case-sensitive<br />
letters). No special characters will be allowed and at least one character has to be a<br />
numeral.<br />
Passwords are assigned by <strong>Drake</strong> and included in your software packing slip or download<br />
e-mail. <strong>Drake</strong> recommends you change this password at your earliest convenience<br />
by going to Support.<strong>Drake</strong><strong>Software</strong>.com > My Account > Edit Account. The<br />
new password must meet the criteria listed above. Anytime you change your password,<br />
it is critical that you update the password entered in ERO Setup in <strong>Drake</strong>.<br />
<strong>Drake</strong> E-Mail<br />
Because of the new password system, it’s no longer possible to e-mail returns using<br />
prior-year <strong>Drake</strong> programs. To e-mail returns from prior tax years, open the e-mail<br />
program in <strong>Drake</strong>12, click Add or Attach, and use the Prior Year function. For<br />
details, see “E-Mail Program” on page 275.<br />
Program Enhancements<br />
Changes and enhancements to the program include:<br />
Printing<br />
Updates<br />
<strong>Drake</strong> has made changes to its print engine as a part of an ongoing effort to create<br />
nearly exact replicas of tax forms on the many different makes and models of printers<br />
that are used in tax offices today. Some of these changes are necessitated by the emergence<br />
of stricter requirements enforced by some government tax agencies for paper<br />
processing.<br />
<strong>Drake</strong> has provided a way for you to print a test page in the preferred Printer Command<br />
Language (PCL) mode to see if your printer is compliant with these software<br />
changes. See “Testing Your Printer” on page 49.<br />
PDF Attachments<br />
Binary, or PDF, files can now be attached to e-filed 1040 returns in <strong>Drake</strong> <strong>Software</strong>.<br />
These attachments are generally signature or third-party documents such as a copy of<br />
a signed lease, or a signed appraisal statement, possibly a divorce decree or bankruptcy<br />
papers. In some instances, the IRS requires that a document be attached to an e-<br />
filed return; in other instances, a document can be attached voluntarily to support or<br />
explain an entry in the return. In either case, a PDF must be available to be attached to<br />
the return in order to be e-filed with the return.<br />
The link to the PDF Attachments screen is on the right side of the Data Entry Menu.<br />
or enter PDF in the selector field.<br />
2 Tax Year 2012
<strong>Drake</strong> <strong>Software</strong> User’s <strong>Manual</strong> What’s New in <strong>Drake</strong> for 2012<br />
For more on attaching PDF documents to 1040 returns, go to item II of the FAQ<br />
screen of the 1040 package, or see “Binary Attachments” on page 184 of this manual.<br />
Setup > ERO<br />
Setup > Data<br />
Locations<br />
Redesigned Setup > ERO to make setup easier and less confusing, added a method of<br />
editing your serial number, and added a new Use Firm #1 Info button to import the<br />
information for the first firm listed in Setup > Firm(s) directly into the General<br />
Information section of the Electronic Filing Setup window. For details, see “ERO<br />
Setup” on page 21.<br />
<strong>Drake</strong> has redesigned its setup configurations for both stand-alone computers and networks,<br />
making the process easier and clearer. The software now inspects your system<br />
and makes the best choice for you, lessening the chance you’ll make an incorrect<br />
choice or that you’ll set up a network incorrectly.<br />
For more information see “Single Workstations and Network Options” on page 16.<br />
Tax Planner<br />
<strong>Drake</strong> has made extensive changes to the Tax Planner. As always, this tool allows you<br />
to show clients how such events as the birth of a child, a marriage, a divorce, a new<br />
house, or a new job will affect their finances and tax liability and help them make<br />
financial decisions.<br />
The best new feature of the Tax Planner is its use of the same <strong>Drake</strong> Data Entry<br />
Menu and data-entry screens you’re familiar with to set up the various scenarios, so<br />
there nothing new to learn.<br />
For more information, see Chapter 13, “Suite Products.”<br />
Document<br />
Manager<br />
The Document Manager was enhanced this year so it would more fully integrate with<br />
the tax software. Save your tax source documents (such as scanned or imported Forms<br />
W-2, 8879, and 1099s, Social Security cards and other forms of ID,) to the Document<br />
Manager’s “Working Cabinet” or “Archive Cabinet.”<br />
For details see Chapter 13, “Suite Products.”<br />
Organizers<br />
If you use organizers to collect your clients’ tax information, <strong>Drake</strong>’s enhanced organizers<br />
can help make the process of getting the organizers to and back from the clients<br />
easier.<br />
You can now download the organizers directly to your SecureFilePro TM portal. Secure-<br />
FilePro TM alerts your clients the organizer is ready for download, and lets you know<br />
when the clients access the documents through the portal. The clients can then print<br />
the organizers, complete them and mail them to you, or can scan them and upload<br />
them back to SecureFilePro TM , where you can download the organizers and start entering<br />
the data into <strong>Drake</strong>.<br />
You can also send organizers directly to the <strong>Drake</strong> Document Manager, to your regular<br />
printer, and to SecureFilePro TM at the same time. If you send multiple organizers to the<br />
Document Manager or to SecureFilePro TM portals, the program places the organizers<br />
in the correct Document Manager folders and correct portals.<br />
For more on organizers, see “Printing Organizers and Proformas for Clients” on<br />
page 82. For more on SecureFilePro, see Chapter 13, “Suite Products.”<br />
Tax Year 2012 3
What’s New in <strong>Drake</strong> for 2012<br />
<strong>Drake</strong> <strong>Software</strong> User’s <strong>Manual</strong><br />
SecureFile-<br />
Pro Changes have been made to SecureFileProTM :<br />
• E-mail customization will allow clients to:<br />
– Change certain text within the automatic e-mails<br />
– Add/remove a logo<br />
– Customize instructional paragraph for new and existing clients<br />
– Add additional paragraphs, and add footer information to e-mails<br />
• File expiration settings will allow our clients to set a date to expire all files. To<br />
help keep their portal size managed automatically.<br />
• Move/Copy feature has been added so clients can move/copy to a new target location.<br />
There have been behind the scenes changes to make PDF file sizes smaller. This will<br />
help with storage sizes in SecureFilePro and lag time in create, copy, and move of<br />
PDF files.<br />
For more on SecureFilePro, see Chapter 13, “Suite Products.”<br />
GruntWorx<br />
We’ve streamlined the process of uploading and downloading documents to and from<br />
GruntWorx, making it easier to select and upload documents from one or many clients.<br />
From one window, you choose the clients, choose the documents, scan new documents,<br />
and transmit to GruntWorx. We’ve also made it easier to access GruntWorx,<br />
allowing you to begin the process from the Data Entry Menu.<br />
For more on using GruntWorx, see Chapter 13, “Suite Products.”<br />
Online<br />
Resources<br />
Resources included on the <strong>Drake</strong> CD (software manuals, practice returns, shipment<br />
letters, informational brochures, and IRS publications) are now available through the<br />
software. From the Home window in <strong>Drake</strong>, go to Help > Online Resources. (Internet<br />
access is required.)<br />
Upgrading from PPR<br />
Data Entry/Calculation<br />
Screen Changes<br />
Pay Per Return customers who purchase 85 returns during the 2012 tax season are<br />
now switched automatically from the PPR package to the unlimited package without<br />
having to call <strong>Drake</strong> Support. PPR customers who purchase fewer than 85 returns can<br />
still update to the full package after the tax season ends.<br />
This year’s changes and enhancements include new data-entry and calculation features,<br />
screen changes, and improved letter functionality, EF messages, and notes.<br />
Some of the screen changes and enhancements you’ll see this year in <strong>Drake</strong>:<br />
Required<br />
Fields<br />
Fields that require completion before a return is eligible for e-file are highlighted in<br />
blue. (Figure 1-1 on page 5) You can change the colors at Setup > Colors. and turn off<br />
the warnings at Setup > Options > Data Entry tab.<br />
4 Tax Year 2012
<strong>Drake</strong> <strong>Software</strong> User’s <strong>Manual</strong> What’s New in <strong>Drake</strong> for 2012<br />
Figure 1-1: Required fields in blue<br />
Foreign<br />
Addresses<br />
8863<br />
Changes<br />
Increased support for foreign addresses with new Foreign Address Only fields on<br />
multiple screens in all packages. These fields are locked to keep incorrect data from<br />
being entered and must be clicked once to unlock them. For more information, see<br />
“Required Fields” on page 99.<br />
The IRS is increasing the amount of information it wants on Form 8863 concerning<br />
students and schools from taxpayers claiming education credits. <strong>Drake</strong> has redesigned<br />
screen 8863 to conform to the new Form 8863, removing the Education Expense<br />
Information from the Dependents screen (screen 2) and moving it to the 8863 screen.<br />
Added to screen 8863 are fields for the student’s name and SSN, and fields for the<br />
school’s name, address, and EIN.<br />
For more information, see “Education Expenses” on page 138.<br />
Other Data<br />
Entry<br />
Changes<br />
• Added FOR and MFC fields to screen 6478 (Credit for Alcohol Used as Fuel)<br />
so that the income from line 7 of Form 6478 can flow to the appropriate schedule.<br />
• Added questions to the 8867 screen to meet new IRS requirements for the Paid<br />
Preparer’s Earned Income Credit Checklist.<br />
• Redesigned the 2441 screen to make it easier to read and to complete.<br />
• A new “Record” feature allows you to build new macros with fewer key strokes.<br />
(See “Macros Setup” on page 38.)<br />
• Assets placed in service in 2012 — 50% bonus depreciation<br />
• Assets placed in service after 2012 — 50% bonus depreciation<br />
Highlights of Federal Tax Law Changes<br />
The passage of the American Taxpayer Relief Act of 2012 that included the AMT<br />
patch and the so-called “extenders” means that few things have changed for preparers<br />
of 2012 returns.<br />
Among the key provisions of ATRA:<br />
• AMT permanently adjusted for<br />
inflation<br />
• Educator expense deduction<br />
renewed<br />
• Sales tax deduction renewed • Work Opportunity Tax Credit<br />
renewed<br />
Tax Year 2012 5
Other Packages<br />
<strong>Drake</strong> <strong>Software</strong> User’s <strong>Manual</strong><br />
• Tuition and fees deduction<br />
renewed<br />
• Increased and expanded 179<br />
deductions<br />
• Bonus depreciation is 50% for<br />
2012 and 2013<br />
• Credit for Energy Efficient Appliances<br />
renewed<br />
Among the changes to the 1040 package:<br />
• Adoption Credit — Unlike last tax season, the adoption credit is a non-refundable<br />
credit. The maximum 2012 adoption tax credit is still $12,650 for all qualifying<br />
adoption expenses.<br />
• Conversion to Electric Motor — The credit for converting gasoline-powered<br />
automobiles to electric/hybrid has expired.<br />
Merchant Card and Other Third-Party Income Reporting<br />
Other Packages<br />
Last year, the IRS introduced Form 1099-K for merchant card and other third-party<br />
income reporting, and added lines to Schedules C, E, and F of the 1040 return and to<br />
the “Income” section of the business returns for reporting this income. <strong>Drake</strong> incorporated<br />
data-entry fields on screens C, E, and F (for Schedules C, E, and F) of the 1040<br />
package and to the Income (INC) screens of the business packages in anticipation that<br />
these fields would be used; however, because the IRS required that a zero (0) be<br />
entered in these fields for tax year 2011, the fields were inactive (grayed-out) in<br />
<strong>Drake</strong>.<br />
This year, the IRS reversed itself and removed those lines from Schedules C, E, and F<br />
of the 1040 and from the “Income” section of the business returns, and <strong>Drake</strong> removed<br />
those “Merchant Card and third-party payments from Form 1099-K” lines from<br />
screens C, E, and F in the 1040 package and from the INC screens of the business<br />
packages.<br />
No special reporting of this income is necessary.<br />
Chapter 14, “New Features in Other Packages,” lists additions, enhancements, and<br />
other changes to <strong>Drake</strong>’s 1120, 1120S, 1065, 990, 1041, and 706 packages.<br />
8949 in Business Packages<br />
Significant changes have been made to the way capital assets are to be reported in the<br />
Corporation (1120), S Corporation (1120S), and Partnership (1065) packages. In the<br />
past, capital gains and losses from stocks, bonds, mutual funds, and other investments,<br />
were listed on Schedule D, Capital Gains and Losses. Now they are to be listed on the<br />
new Form 8949, Sales and Other Dispositions of Capital Assets, and summarized on<br />
Schedule D. Information for these forms is entered on screens 8949, D, and D2. These<br />
screens are available under the Assets-Sales-Recapture tab of the Data Entry Menu.<br />
6 Tax Year 2012
<strong>Drake</strong> <strong>Software</strong> User’s <strong>Manual</strong><br />
Other Packages<br />
8825 Rental Property Attachment<br />
Qualified Real Property<br />
1041 Changes<br />
Changes to 706 Package<br />
<strong>Manual</strong> Supplements<br />
The IRS is requiring preparers to provide taxpayers with more detail about income<br />
from rental property, so <strong>Drake</strong> now generates the “K-1 Rental Real Estate Activity”<br />
attachment (listed as “K1_8825” in View mode) explaining the “Net rental real estate<br />
income (loss)” as it appears on line 2 of each shareholder’s or partner’s Schedule K-1.<br />
This attachment is generated automatically whenever Form 8825 is generated.<br />
See “8825 Rental Property Attachment” on page 368 for details.<br />
The provision of the Small Business Jobs Act of 2010—under which taxpayers could<br />
expense up to $250,000 of the cost of qualifying real property (QRP) placed in service<br />
during tax years 2010 and 2011, rather than recovering that cost through depreciation<br />
deductions—was set to expire at the end of 2012, but through the American Taxpayer<br />
Relief Act of 2012 been extended for the 2012 and 2013 tax years.<br />
For 2012, <strong>Drake</strong> provides better support of multiple grantor statements (last year it<br />
required some extra data entry if there was more than one) and allows preparers more<br />
flexibility to allocate deductions to a particular income type than in prior years.<br />
The IRS has created a page at www.irs.gov/form1041 for information about Form<br />
1041 and its instructions. Information concerning developments affecting Form 1041<br />
filers (such as legislation enacted after the 2012 form is released) will be posted to that<br />
page.<br />
Changes to the 706 package include:<br />
• The Deceased Spouse Unused Exclusion (DSUE) screen, to allow taxpayers to<br />
opt out of electing to transfer any DSUE amount to a surviving spouse.<br />
• The Protective Claim for Refund (PC) screen to allow taxpayers to preserve their<br />
right to a refund of estate taxes paid for assets or liabilities that are the subject of<br />
unresolved controversy at the time of filing the return.<br />
• The Recapitulation Overrides screen.<br />
For more information, see “Estate Package (706)” on page 371.<br />
In early 2013, <strong>Drake</strong> will publish supplements to this manual. These supplements provide<br />
basic procedures for using <strong>Drake</strong>’s 1120, 1120S, 1065, 990, 1041, and 706 packages.<br />
They will be available through the software (from the Home window, go to<br />
Help > Online Resources) or from the <strong>Drake</strong> Support website at Support.<strong>Drake</strong><strong>Software</strong>.com.<br />
Tax Year 2012 7
IRS Changes and Requirements<br />
<strong>Drake</strong> <strong>Software</strong> User’s <strong>Manual</strong><br />
IRS Changes and Requirements<br />
Preparer Regulations<br />
The following pages cover just a few of the IRS changes and requirements for tax year<br />
2012. For a complete list, see the IRS website (www.irs.gov).<br />
The IRS now requires all tax return preparers to obtain or renew their PTIN annually<br />
and pay a $64.25 annual fee. The PTIN renewal period begins each year in mid-October<br />
and all PTINs expire on December 31. Sign up for a PTIN online through the IRS<br />
website (www.irs.gov). Click the For Tax Pros tab and follow the links in the Getting<br />
Started section.<br />
RTRP Test<br />
Preparation<br />
Tax return preparers with a PTIN have until the end of 2013 to take and pass the Registered<br />
Tax Return Preparer (RTRP) Competency Test. Preparers are also required to<br />
earn 15 hours of CPE each year, beginning in 2012.<br />
e-File Mandates<br />
<strong>Drake</strong> <strong>Software</strong> offers two online, self-paced courses to assist you in preparing for the<br />
test and to earn up to 12 CPE credits.<br />
The RTRP Test Study Course covers the seven domain areas specified by the IRS as<br />
the content of the test and includes:<br />
• Study Guides, Examples, Quizzes, and a Practice Test<br />
• Flexible online format and custom feedback and tracking<br />
• Access to the course that does not expire. Re-take the course as many times as<br />
needed to pass the exam.<br />
• 10 hours of continuing education on federal tax law that applies towards the<br />
annual RTRP requirement.<br />
The cost of the course is $149, but <strong>Drake</strong> <strong>Software</strong> customers receive a discounted<br />
price of $99.<br />
The RTRP Test Overview and Tips Course provides both an overview of the RTRP<br />
test and tips for success. The course costs $19, includes two hours of continuing education,<br />
and reviews the test specifications, offers tips on how study and prepare, what<br />
to expect on test day, and how to handle test anxiety.<br />
For more information or to sign up for the courses, go to Support.<strong>Drake</strong><strong>Software</strong>.com,<br />
and from the blue menu on the left, select Training Tools > <strong>Drake</strong> ETC > RTRP<br />
Study. (For information on setting up an account in <strong>Drake</strong>’s ETC, see “<strong>Drake</strong>’s e-<br />
Training Center (ETC)” on page 261.)<br />
Go to www.irs.gov/For-Tax-Pros to learn more about PTIN renewal, the RTRP test,<br />
and new CE requirements.<br />
The current e-file mandate, phased in over the past two years, now requires tax preparers<br />
who anticipate preparing 11 or more federal individual or trust tax returns during<br />
the year to e-file their returns. This mandate went into effect January, 1, 2012.<br />
8 Tax Year 2012
<strong>Drake</strong> <strong>Software</strong> User’s <strong>Manual</strong><br />
Contacting <strong>Drake</strong> Support<br />
You must be an authorized e-file provider to use IRS e-file. To apply to become an e-<br />
file provider, go to the IRS website (www.irs.gov), click the Tax Professionals tab,<br />
and follow the links to set up an e-service account.<br />
For the newest state e-file mandates, see Chapter 1, “Appendix E: State E-filing Mandates.”<br />
Contacting <strong>Drake</strong> Support<br />
In addition to the manual, on-screen Help, and online resources, <strong>Drake</strong> <strong>Software</strong><br />
offers unparalleled telephone and e-mail support. See “Contacting <strong>Drake</strong> Support” in<br />
the “Quick Reference” on page ix for more information on contacting <strong>Drake</strong> Support.<br />
NOTE<br />
The filing deadline for 1040 is Monday, April 15, 2013. Note that<br />
<strong>Drake</strong>’s tax-season support hours are effective through April 20.<br />
For more on the many helpful resources provided by <strong>Drake</strong> <strong>Software</strong>, see Chapter 10,<br />
“Resources and Support.”<br />
IMPORTANT<br />
State and federal tax rules and regulations can change at any<br />
time. Read the <strong>Drake</strong> shipment letters and broadcast e-mails<br />
throughout the season to stay up to date on the latest changes to<br />
the software and in the state and federal tax laws.<br />
Tax Year 2012 9
Contacting <strong>Drake</strong> Support<br />
<strong>Drake</strong> <strong>Software</strong> User’s <strong>Manual</strong><br />
This page intentionally left blank.<br />
10 Tax Year 2012
2 Installation & Setup<br />
Read this section before installing your 2012 <strong>Drake</strong> program. Setup procedures for<br />
stand-alone and network systems have been simplified, requiring different selections<br />
this year. (See “Single Workstations and Network Options” on page 16.)<br />
The initial shipment of the software, sent in early December, includes:<br />
• <strong>Drake</strong> <strong>Software</strong> CD with all federal packages (1040, 1120, 1120S, 1065, 1041,<br />
990, 706, and 709)<br />
• 2012 year-end update of <strong>Drake</strong>’s Client Write-Up (CWU) accounting, payroll,<br />
and accounts payable program. (The 2013 version is released in January.)<br />
• Document Manager<br />
• Shipment letter<br />
• e-Filing software for sending test returns to <strong>Drake</strong><br />
• Practice returns (See “New for 2012” note below) and e-filing and banking practice<br />
files (PDF)<br />
• <strong>Drake</strong> <strong>Software</strong> User’s <strong>Manual</strong>: Tax Year 2012 (PDF)<br />
• Various informational fliers<br />
<strong>Software</strong> for state programs, e-filing, banking, the Tax Planner, city tax rates, and<br />
forms-based entry are included in a subsequent shipment in January. Federal and state<br />
programs are updated with each software release thereafter..<br />
NEW FOR<br />
2012<br />
Solutions to the practice returns are now kept online so that we can<br />
make adjustments when changes to the software affect the solutions.<br />
From the Home window menu bar in <strong>Drake</strong> go to Help > Online<br />
Resources. (Internet access is required.) The practice returns and<br />
solutions are kept in the “Practice” folder. You can also find the practice<br />
returns and the solutions at <strong>Drake</strong>ETC.com (<strong>Drake</strong> Resources > Practice<br />
Returns) and at Support.<strong>Drake</strong><strong>Software</strong>.com (Training Tools ><br />
Practice Returns> Returns).<br />
Tax Year 2012 11
System Requirements<br />
<strong>Drake</strong> <strong>Software</strong> User’s <strong>Manual</strong><br />
IMPORTANT<br />
Your serial number and <strong>Drake</strong> customer account number are<br />
required for installing the software and subsequent updates. If<br />
you installed <strong>Drake</strong> <strong>Software</strong> from a CD, the number was<br />
included on your packing slip with the CD shipment.<br />
System Requirements<br />
To run <strong>Drake</strong> <strong>Software</strong>, your computer operating system must be Windows 2000 or<br />
later and must meet or exceed the following system requirements:<br />
• Windows 2000/NT/XP/ME/Vista/7 (Windows NT users must have Service Pack<br />
4.0 or higher, available from www.microsoft.com.)<br />
• Windows 2000 & XP: 300 MHz processor or higher, 128 MB of RAM.<br />
• Windows Vista & Windows 7: 800 MHz processor or higher, 512 MB of RAM,<br />
Support for Super VGA graphics.<br />
• All Windows Operating Systems: CD Drive, 100 MB of available hard drive<br />
space, plus 7 MB for each state program, Internet Explorer 6.0 or newer, Internet<br />
access, HP-compatible laser printer (strongly recommended), TWAIN–compliant<br />
scanner. Internet service is required for immediate updates.<br />
NOTE<br />
If using Windows Vista or later, you may need to upgrade your Adobe<br />
Acrobat Reader to version 8.0 or later. Version 9.0 may be required if<br />
using the 64-bit version of Windows 7.<br />
To take full advantage of the software’s features, you must have:<br />
• A Hewlett-Packard (HP)–compatible laser printer<br />
• High-speed Internet access<br />
• A backup media source (such as a USB drive, memory stick, floppy disk, etc.)<br />
• A document-feed scanner (<strong>Drake</strong> supports all TWAIN–compliant flat-bed and<br />
document-feed scanners for use with the Document Manager.)<br />
NOTE<br />
If you do not have Windows XP or 7 and want to back up your data on<br />
CD, you must use your CD burner software—not the <strong>Drake</strong> backup<br />
tool—to perform the backup.<br />
Installing from CD<br />
Using Windows<br />
Vista? A system<br />
administrator or<br />
user with OS<br />
access must install<br />
your tax software.<br />
Before installing your software, close all open programs on your computer. Table 2-1<br />
on page 13 outlines the installation process for the first and subsequent CD shipments.<br />
12 Tax Year 2012
<strong>Drake</strong> <strong>Software</strong> User’s <strong>Manual</strong><br />
Installing from CD<br />
Note that the Document Manager is installed by default. If you don’t want to install<br />
the Document Manager, clear the applicable check box in Step 4.<br />
Table 2-1: CD Installation<br />
Step First CD Shipment Subsequent CDs<br />
1 Insert the 2012 <strong>Drake</strong> CD into the drive.<br />
Wait for the <strong>Drake</strong> 2012 <strong>Software</strong> Programs<br />
window to be opened.<br />
Insert the 2012 <strong>Drake</strong> CD into the drive.<br />
Wait for the <strong>Drake</strong> 2012 <strong>Software</strong> Programs<br />
window to be opened.<br />
2 Click Install <strong>Drake</strong> 2012 Tax <strong>Software</strong>. Click Install <strong>Drake</strong> 2012 Tax <strong>Software</strong>.<br />
3 Accept the <strong>Drake</strong> <strong>Software</strong> 2012<br />
License Agreement. Click Next.<br />
4 Note that Install 2012 <strong>Drake</strong> Tax <strong>Software</strong><br />
and Install <strong>Drake</strong> Document<br />
Manager are marked by default. (States<br />
are not available on this shipment.) Click<br />
Next.<br />
5 Select a drive or select New to install to<br />
a new location. (Optional: Select Install<br />
test returns if you are going to test e-filing<br />
capabilities.)* Click Next.<br />
6 Enter your account number and the<br />
serial number located on your software<br />
packing slip. Click Next.<br />
7 If you chose New in step 5, select an<br />
installation drive and click Next.<br />
8 If you chose to install the Document<br />
Manager in Step 4, select the drive on<br />
which to install it and click Next.<br />
9 Click Install and wait for the Installation<br />
Complete window to be displayed.<br />
Installation could take several minutes.<br />
Accept the <strong>Drake</strong> <strong>Software</strong> 2012<br />
License Agreement. Click Next.<br />
(Optional: Select Install State Tax Programs.)<br />
Click Next.<br />
Select a drive, or select New to install<br />
to a new location. Click Next.<br />
Enter your account number and the<br />
serial number located on your software<br />
packing slip. Click Next.<br />
Select an installation drive from the list<br />
of available drives. Click Next.<br />
Select states to install from the States<br />
on CD listing. Click Next.<br />
Click Install and wait for the Installation<br />
Complete window to be displayed.<br />
Installation could take several minutes.<br />
Downloading the <strong>Software</strong><br />
If a previous version of <strong>Drake</strong> is detected on your system, the Update Admin Preparer<br />
and Setup Information window is displayed after installation. If you do not<br />
want to update now, click Skip; otherwise, click Next. Click Finish and Exit to close<br />
the <strong>Drake</strong> 2012 <strong>Software</strong> Programs window.<br />
* Test returns are installed automatically if you are installing to a new location. If a<br />
drive letter is not displayed in Step 5, the software has determined that there is not<br />
enough space on the drive.<br />
If you choose to download the software from the <strong>Drake</strong> Support site rather than<br />
installing it from the CD, follow these steps:<br />
1. Go to Support.<strong>Drake</strong><strong>Software</strong>.com.<br />
Tax Year 2012 13
Installing from CD<br />
<strong>Drake</strong> <strong>Software</strong> User’s <strong>Manual</strong><br />
2. Enter your EFIN and <strong>Drake</strong> password.<br />
3. From the Resources Overview page, click Download Center (or from the blue<br />
sidebar menu, select Resources > Download Center).<br />
4. From the <strong>Drake</strong> <strong>Software</strong> list on the left side of the Download Center page,<br />
select <strong>Drake</strong> <strong>Software</strong> 2012.<br />
5. Read and agree to the License Agreement.<br />
6. Scroll to the bottom of the window and click the <strong>Drake</strong> <strong>Software</strong> 2012 link.<br />
7. When the File Download - Security Warning window is opened, select Save to<br />
save the software to your computer or server.<br />
8. When the download is complete, double-click the <strong>Drake</strong>12_Federal.exe icon,<br />
and then click Run and Yes to begin the installation process.<br />
9. Follow the steps to install the software to the drive of your choice. You will need<br />
your account number and the serial number from your packing slip.<br />
To download state programs, open <strong>Drake</strong> <strong>Software</strong>, go to Tools > Install State Programs,<br />
and choose the option to install states from the Internet.<br />
Initial Login<br />
To open and log in to <strong>Drake</strong> for the first time:<br />
1. Double-click the <strong>Drake</strong> <strong>Software</strong> 2012 icon on your desktop.<br />
2. In the Preparer ID field of the Login window (see Figure 2-1), type ADMIN (not<br />
case-sensitive).<br />
3. In the Password field, type your serial number (printed on your packing slip).<br />
4. Click Login.<br />
Setup Assistant<br />
Figure 2-1: Logging in as ADMIN<br />
The Setup Assistant is opened automatically the first time you log in to <strong>Drake</strong>.<br />
The Setup Assistant is opened automatically the first time you log in to <strong>Drake</strong>.<br />
Designed to guide you through the software setup screens, the Setup Assistant appears<br />
each time the program is opened until all required setup items are completed. A green<br />
check mark (see Figure 2-2 on page 15) indicates that a setup item is complete. A red<br />
“X” indicates or a question mark indicate an incomplete setup item.<br />
14 Tax Year 2012
<strong>Drake</strong> <strong>Software</strong> User’s <strong>Manual</strong><br />
Running <strong>Drake</strong> on a Network<br />
Figure 2-2: A green check mark indicates a completed setup item, a red X indicates an<br />
incomplete setup item, and a question mark indicates a partially complete setup item.<br />
You are not required to use the Setup Assistant. To keep it from opening at program<br />
startup, select Do not show Setup Assistant at program startup. (See Figure 2-2.)<br />
Go to Help > Setup Assistant to return to the Setup Assistant at any time.<br />
Running <strong>Drake</strong> on a Network<br />
Your network’s designated server should meet the following minimum specifications:<br />
NOTE<br />
The following specification are minimum requirements. For best results,<br />
<strong>Drake</strong> recommends upgrading your system above these requirements.<br />
For Windows XP:<br />
• 300 MHz processor<br />
• 128 MB RAM<br />
For Windows Vista and Windows 7:<br />
• 800 MHz processor or higher<br />
• 512 MB of RAM<br />
• Support for Super VGA graphics<br />
For all Windows operating systems:<br />
• 200 MB of available hard drive space, plus 7 MB for each state program<br />
• Internet Explorer 7 or higher<br />
• CD drive<br />
• Internet access (required for regular updates)<br />
An HP-compatible laser printer and a TWAIN-compliant scanner are also recommended.<br />
Tax Year 2012 15
Single Workstations and Network Options<br />
<strong>Drake</strong> <strong>Software</strong> User’s <strong>Manual</strong><br />
As computers are added to the network, RAM and processing speed of the server and<br />
the workstations should be upgraded to improve performance.<br />
NOTE<br />
Your office’s network must be properly configured for <strong>Drake</strong> to run correctly.<br />
<strong>Drake</strong> cannot provide technical support for the network itself.<br />
Consult an IT professional for network setup and support.<br />
Single Workstations and Network Options<br />
New for 2012: Setting up <strong>Drake</strong> on stand-alone computers or on networks is easier<br />
and clearer. The software automatically sets up the location and data paths for you on<br />
the Data Locations dialog box (Figure 2-3).<br />
The location where you install <strong>Drake</strong> (see step 5 in Table 2-1 on page 13 or step 7 in<br />
“Downloading the <strong>Software</strong>” on page 13) will be the default location for all current<br />
and prior-year client files and returns, and the default location for such configuration<br />
settings as firm and preparer setup, reports, macros, letters, pricing files, preparer<br />
notes, and schedules. Unless you have files stored in different locations, or you have a<br />
unique network setup, it shouldn’t be necessary to make any changes to your data<br />
locations.<br />
Administrators have the option of changing these data locations to conform to a particular<br />
network setup.<br />
Figure 2-3: Network information is entered at Setup > Data Locations<br />
Networks<br />
Install <strong>Drake</strong> to your network’s server or to all workstations of a “peer-to-peer” network.<br />
Table 2-2 shows a comparison of the two network options:<br />
Table 2-2: Comparison of Network Option<br />
Server Only<br />
(Preferred Setup)<br />
For firms with a robust network setup<br />
All Workstations<br />
(“Peer-to-Peer” Setups)<br />
For firms without resources to use a single server<br />
16 Tax Year 2012
<strong>Drake</strong> <strong>Software</strong> User’s <strong>Manual</strong><br />
Single Workstations and Network Options<br />
Table 2-2: Comparison of Network Option<br />
Server Only<br />
(Preferred Setup)<br />
Simplified setup and updates<br />
No need to “stagger” DCN counter<br />
All Workstations<br />
(“Peer-to-Peer” Setups)<br />
Updates must be installed to each computer<br />
Could be necessary to “stagger” DCN counter<br />
Server<br />
Networks<br />
Once your network has been mapped and <strong>Drake</strong> is installed on a server, complete the<br />
following steps at each workstation:<br />
1. Click Start > Run. (Windows 7 users: Click the Office button.) (The Windows<br />
Start and Office buttons are located at the lower-left corner of your screen.)<br />
2. Type F:\DRAKE12\NWCLIENT\NWCLIENT.EXE (substituting your server drive<br />
letter for “F”).<br />
3. Click OK. (Windows 7 users: Press ENTER.)<br />
4. Click OK. The server-only system is now in place.<br />
Once this process has been completed at each workstation that will be using <strong>Drake</strong>,<br />
you will be able to access the <strong>Drake</strong> program from any of these workstations.<br />
By default, all workstation use the configurations (for letters, pricing, firms, preparers,<br />
etc.), as set up on the server. To use configurations set up elsewhere (for instance, on<br />
each individual workstation):<br />
1. From the Home window in <strong>Drake</strong>, go to Setup > Data Locations.<br />
2. In the Network Setup section of the Data Locations dialog box (Figure 2-3 on<br />
page 16), choose the drive where you’ve made the configuration settings from the<br />
Share settings (letters, pricing...) drop list.<br />
3. Click OK.<br />
By default, all prior-year files are stored on the server. To access prior-year files stored<br />
elsewhere:<br />
1. From the Home window in <strong>Drake</strong>, go to Setup > Data Locations.<br />
2. In the Location of client folders section of the Data Locations dialog box<br />
(Figure 2-3 on page 16), enter the location where you wish to store and access<br />
prior-year files in the Location for 2011 client files drop list.<br />
3. Click OK.<br />
Other<br />
Network<br />
Configurations<br />
Some network setups—such as “peer-to-peer” networks—don’t work off an actual<br />
server. Each station runs <strong>Drake</strong> independently but one computer—a designated<br />
“server”— is used for transmitting returns. For such setups, follow the instructions in<br />
“Installing from CD” on page 12 to install <strong>Drake</strong> onto each workstation.<br />
Once <strong>Drake</strong> is installed on all your workstations and your network has been mapped,<br />
one of your workstations should be designated as the “server,” and the other workstations<br />
should linked to the “server” in the following manner:<br />
Tax Year 2012 17
<strong>Software</strong> Setup<br />
<strong>Drake</strong> <strong>Software</strong> User’s <strong>Manual</strong><br />
1. From the Home window in <strong>Drake</strong>, go to Setup > Data Locations to open the<br />
Data Locations dialog box. (See Figure 2-3 on page 16.)<br />
2. In the Network Setup section, select the drive of the workstation designated as<br />
the “server” from the Tax returns are stored here drop list.<br />
3. Click OK.<br />
By default, all workstation using <strong>Drake</strong> on a “peer-to-peer” network use the configuration<br />
files as set up on the individual workstations. To share the same configuration<br />
files as the “server” or some other workstation:<br />
1. From the Home window in <strong>Drake</strong>, go to Setup > Data Locations.<br />
2. In the Network Setup section of the Data Locations dialog box (Figure 2-3 on<br />
page 16), choose the drive letter where you’ve stored the configuration settings<br />
from the Share settings... drop list.<br />
3. Click OK.<br />
By default, all prior-year files are stored on the individual workstations. If your workstations<br />
should share the prior-year files:<br />
1. From the Home window in <strong>Drake</strong>, go to Setup > Data Locations.<br />
2. In the Location of client folders section of the Data Locations dialog box, enter<br />
the drive letter of the “server” workstation in the Location for 2011 client files<br />
drop list.<br />
3. Click OK.<br />
IMPORTANT<br />
All computers on the network must have access to the “server’s”<br />
drive – the drive on which the tax returns are stored and from<br />
which the returns will be e-filed. Map to the “server’s” drive—not<br />
to the <strong>Drake</strong>12 folder.<br />
All drives properly mapped and with <strong>Drake</strong> <strong>Software</strong> installed will<br />
appear in the Tax returns are stored here drop list and the<br />
Share settings... drop list. If the drive of the “server” does not<br />
appear in these lists, consult an IT professional. <strong>Drake</strong> cannot<br />
provide technical support for the network itself.<br />
CAUTION<br />
Do not change the Data Locations settings during tax season! If a<br />
change is necessary, contact <strong>Drake</strong> Support.<br />
<strong>Software</strong> Setup<br />
Perform setup procedures before attempting to prepare or e-file returns. Some setup<br />
procedures are required; others are optional.<br />
Table 2-3: Setup Procedures: Required and Optional<br />
Required Setup Procedure<br />
Optional Setup Procedures<br />
Firm(s) (See “Firm Setup” on page 20.) Options (See “Options Setup” on page 27.)<br />
18 Tax Year 2012
<strong>Drake</strong> <strong>Software</strong> User’s <strong>Manual</strong><br />
<strong>Software</strong> Setup<br />
Table 2-3: Setup Procedures: Required and Optional<br />
Required Setup Procedure<br />
Optional Setup Procedures<br />
ERO (See “ERO Setup” on page 21.) Pricing (See “Pricing Setup” on page 37.)<br />
Preparer(s) (See “Preparer Setup” on page 22.) Macros (See “Macros Setup” on page 38.)<br />
Data Locations (See “Single Workstations and<br />
Network Options” on page 16.)<br />
Pay Per Return (PPR clients only; see PPR<br />
manual on CD, from the Home window of the<br />
software at Help > Online Resources, or from<br />
the <strong>Drake</strong> Support website.)<br />
Letters (See “Letters Setup” on page 43.)<br />
Colors (See “Color Setup” on page 46.)<br />
Printing (See “Printing Setup” on page 47.)<br />
If you used <strong>Drake</strong> last year, you can bring forward most required program settings<br />
from your 2011 program. See “Updating Settings” on page 79 for details.<br />
Logging in as an Administrative User<br />
Log in as ADMIN to enter setup information. The administrator can access the following<br />
features not available to non-administrative users:<br />
• Preparer setup security features in Setup > Preparer(s)<br />
• Additional features in Setup > Firm(s)<br />
• Network options (Setup > Data Locations)<br />
• The Administrative Options tab of Setup > Options<br />
• Additional tracking information on the ADMN screen in data entry<br />
Setting an<br />
ADMIN<br />
Password<br />
An ADMIN password is not required. If your firm chooses to have an ADMIN password,<br />
keep a record of the password. <strong>Drake</strong> cannot retrieve lost or forgotten login<br />
passwords.<br />
To set a password for the ADMIN account (optional):<br />
Shortcut: Doubleclick<br />
the ADM row<br />
to edit it.<br />
1. From the <strong>Drake</strong> Home window, select Setup > Preparer(s).<br />
2. Click the Administrator (ADM) row, and then click Edit Preparer.<br />
3. Enter a password in the Password field under Login Information. A password<br />
can be up to eight characters (alphabetic and/or numeric) and is not case-sensitive.<br />
4. Re-enter the password in the Password (Repeated) field.<br />
5. Click Save, and then click Exit.<br />
NOTE<br />
If no PTIN has been entered, you will be asked if you want to exit the<br />
window without entering a PTIN. Click Yes, or click No and enter a<br />
PTIN before saving and exiting. (A PTIN is required for e-filing.)<br />
Tax Year 2012 19
<strong>Software</strong> Setup<br />
<strong>Drake</strong> <strong>Software</strong> User’s <strong>Manual</strong><br />
Firm Setup<br />
Firm setup must be completed before preparing and e-filing returns. If data is inaccurate<br />
or missing, tax returns might be e-filed with incorrect information.<br />
NOTE<br />
To ensure that all information needed for e-filing is entered for a firm,<br />
firms with incomplete information are highlighted in red in the Setup ><br />
Firm(s) grid. Fields required for e-filing are marked by red text.<br />
With the click of a button, you can now import the information from your<br />
firm’s bank application into the <strong>Drake</strong> program. (See “Banking Information,”<br />
below.)<br />
Adding a<br />
Firm<br />
To add a firm in Firm Setup:<br />
1. From the <strong>Drake</strong> Home window, go to Setup > Firm(s).<br />
2. Click Add to activate the bottom half of the Firm Setup window.<br />
3. Enter your firm’s general and banking information. Fields needed for e-filing are<br />
indicated by red text.<br />
• General Information — Enter contact and identification information, including<br />
firm name, address, phone and fax numbers, contact name, e-mail address,<br />
Employer Identification Number (EIN), and Electronic Filer’s Identification<br />
Number (EFIN). If the firm is not located in the U.S., enter the province or<br />
state, the country, and the postal code.<br />
– A DCN serial number is assigned to each return based on the firm’s<br />
EFIN and DCN. If two returns have the same DCN, the IRS rejects one of<br />
the returns. To avoid duplications, DCNs are automatically advanced for<br />
each return calculated.<br />
NOTE<br />
Offices that use multiple computers that are not networked must “stagger”<br />
DCNs to avoid duplication. DCNs should be staggered before creating<br />
any 2012 returns. For instructions on staggering DCNs, see<br />
“Staggering DCNs” on page 234.<br />
– Non-paid-prep — If the firm is not a paid preparer, enter a non-paid code<br />
here. Acceptable codes are VI (VITA), VT (VITA–T), TE (TCE–X), IP<br />
(IRS–PREPARED), AND IR (IRS–REVIEWED).<br />
• Banking Information — Choose a bank and include add-on fees.<br />
– If you’ve completed your online <strong>Drake</strong> bank application through the<br />
Enterprise Office Manager (EOM), click Retrieve to import your banking<br />
information directly from the bank application. (For information on the<br />
EOM, see “Banking Application” on page 216.)<br />
– Select a bank and enter the applicable add-on fee and the name of the person<br />
or entity that will receive the add-on fee. (This name will appear on<br />
the client’s “Bank Information Sheet,” generated with the return.) For<br />
more on available options, see Table 7-4 on page 218. For more on individual<br />
bank selections, see Chapter 7, “Banking.”<br />
20 Tax Year 2012
<strong>Drake</strong> <strong>Software</strong> User’s <strong>Manual</strong><br />
<strong>Software</strong> Setup<br />
4. Click Save. The program assigns a number for each firm entered in Firm Setup.<br />
NOTES<br />
To view a report of the revenue you’ve earned from the additional (addon)<br />
fees for e-filing, log in to Support.<strong>Drake</strong><strong>Software</strong>.com and go to My<br />
Account > Bank Application. Log in to the EOM with your EFIN and<br />
<strong>Drake</strong> password, then, from the blue sidebar menu, click Reporting.<br />
These fees are listed when the returns are funded, not as the returns<br />
are transmitted.<br />
Editing Firm<br />
Information<br />
Shortcut: Doubleclick<br />
a firm’s row to<br />
edit firm data.<br />
Deleting a<br />
Firm<br />
To edit a firm’s information:<br />
1. From the <strong>Drake</strong> Home window, go to Setup > Firm(s).<br />
2. Select the firm to edit and click Edit Firm to activate the bottom half of the Firm<br />
Setup window.<br />
3. Edit the firm information. (See “Adding a Firm” on page 20 for information on<br />
individual fields.)<br />
4. Click Save, and then click Exit to close the Firm Setup window.<br />
To delete a firm from Firm Setup:<br />
1. From the <strong>Drake</strong> Home window, go to Setup > Firm(s).<br />
2. Select the firm to delete and click Delete.<br />
3. Click Yes, and then click Exit to close the Firm Setup window.<br />
Printing a<br />
List of Firms<br />
ERO Setup<br />
To print a list of firms entered in the program:<br />
1. From the <strong>Drake</strong> Home window, go to Setup > Firm(s).<br />
2. Click Print. The Report Viewer displays the report on the screen.<br />
3. Click Print to open the Print ‘<strong>Drake</strong> Report’ dialog box.<br />
4. Change any print options necessary, and then click Print again.<br />
5. Click Exit, and then click Exit again to close the Firm Setup window.<br />
An Electronic Return Originator (ERO) must complete ERO Setup in order to e-file<br />
returns, use the <strong>Drake</strong> e-mail program, download software updates, and access the<br />
online e-filing database. Required fields for e-filers are marked in the program by red<br />
text.<br />
To set up your firm as an ERO in <strong>Drake</strong>:<br />
1. From the <strong>Drake</strong> Home window, go to Setup > ERO to open the Electronic Filing<br />
Setup dialog box.<br />
2. In the General Information section, enter the account number, EFIN, <strong>Drake</strong><br />
password, name, address, ZIP code, and EIN of the ERO. Fields required for e-filers<br />
are marked by red text. (See Figure 2-4 on page 22.)<br />
Tax Year 2012 21
<strong>Software</strong> Setup<br />
<strong>Drake</strong> <strong>Software</strong> User’s <strong>Manual</strong><br />
Figure 2-4: Setup > ERO<br />
NEW FOR<br />
2012<br />
Click the Use Firm #1 Info button (Figure 2-4 on page 22) to import the<br />
information for the first firm listed in Setup > Firm(s) directly into the<br />
General Information section of the Electronic Filing Setup window.<br />
In the event you must edit your serial number, mark the Serial Number<br />
check box and enter the changes.<br />
Preparer Setup<br />
3. Under Connection Settings, make a new choice if you wish to change from the<br />
default setting (Always use my existing Internet connection) which works for<br />
most computers. Contact <strong>Drake</strong> Support if you have trouble connecting to <strong>Drake</strong>.)<br />
4. If your firm is a franchise or network, complete the Franchise/Network Information<br />
fields. (See “Franchise/Network Requirements” on page 213.)<br />
5. If applicable, enter in the Disclosure or Use of Tax Information field the name<br />
of the franchise or network to which tax information must be disclosed in order to<br />
apply for bank products. (The field facilitates compliance with IRS Regulation<br />
7216; see “Taxpayer Requirements” on page 212.)<br />
6. Click OK.<br />
Preparer Setup fields and preparer security must be completed before a preparer can<br />
begin preparing and e-filing returns. All preparers must be entered in Preparer Setup.<br />
Data entry operators can also be entered. Each time a name is added to Preparer Setup,<br />
a number is assigned to that name.<br />
TIP<br />
Include data entry operators in Preparer Setup to (1) track data entry<br />
information and (2) easily set up Front Office preparers in the Scheduler.<br />
(See “Scheduler” on page 85.)<br />
22 Tax Year 2012
<strong>Drake</strong> <strong>Software</strong> User’s <strong>Manual</strong><br />
<strong>Software</strong> Setup<br />
Adding a<br />
Preparer<br />
To apply for a<br />
PTIN, go online at<br />
www.irs.gov /For-<br />
Tax-Pros and click<br />
Apply for PTIN.<br />
Information entered here determines what preparer information appears on the tax<br />
returns. To add a new preparer in <strong>Drake</strong>:<br />
1. From the <strong>Drake</strong> Home window, go to Setup > Preparer(s).<br />
2. Click Add to activate the bottom half of the Preparer Setup window.<br />
3. Enter General Information. Fields required for e-filers are indicated by red text.<br />
Note that a PTIN is required by the IRS.<br />
4. Enter Login Information. Note that a login name is needed for e-filing and use of<br />
a password is optional.<br />
5. If applicable, click Registration to enter your state registration ID (California,<br />
Maryland, New York, Oregon, and Virginia only). Click OK to save.<br />
6. Indicate Return Signature Options.<br />
• PIN Signature — Enter the preparer’s five-digit PIN Signature.<br />
• Use PIN for:<br />
– 8879 PIN Signature — Select to activate the 8879 PIN signature.<br />
– Alternative Electronic Signature — Select to automatically populate<br />
any field requiring electronic signature with the preparer’s name.<br />
IMPORTANT<br />
The alternative electronic signature is printed on the “Preparer’s<br />
signature” at the bottom of returns that have not been e-filed and<br />
on returns where the preparer and ERO are different (for example,<br />
if an override field on screen 1 is used). To have the alternative<br />
electronic signature printed on a return that has been e-filed,<br />
you must re-enter this number in the PIN for preparer’s alternative<br />
e-signature field on the PRNT screen for that return.<br />
7. If applicable, enter the firm’s Republic Bank Identification Number (RBIN).<br />
8. Enter Power of Attorney information (necessary for Form 2848, Power of Attorney<br />
and Declaration of Representative).<br />
– Preparer Designation — Select the designation under which the preparer<br />
is authorized to practice before the IRS.<br />
– CAF Number — Enter the preparer’s Central Authorization File (CAF)<br />
number assigned by the IRS.<br />
– Jurisdiction — Enter the jurisdiction in which the preparer is authorized<br />
to practice before the IRS. If the preparer is an IRS Enrolled Agent (EA),<br />
enter the EA number here.<br />
9. Enter W-7 Acceptance Agent information for the preparer, if applicable.<br />
You are now ready to set up preparer security. If you click Save at this point, you will<br />
be reminded that security rights need to be set before the preparer can access any features<br />
in the program. If you select to close Preparer Setup now, be aware that you’ll<br />
have to return at some point to set the preparer’s security rights.<br />
To proceed, go to Step 4 in the following section, “Setting Up Preparer Security.”<br />
Tax Year 2012 23
<strong>Software</strong> Setup<br />
<strong>Drake</strong> <strong>Software</strong> User’s <strong>Manual</strong><br />
Setting Up<br />
Preparer<br />
Security<br />
This feature establishes security settings for an individual preparer. To assign the same<br />
security level to many preparers, the Group Security feature may be a better option.<br />
See “Setting Up Group Security” on page 25.<br />
NOTE<br />
Only administrative users can set security rights. Settings must be<br />
established before a preparer can begin working in the software.<br />
To customize security settings for a preparer:<br />
1. From the <strong>Drake</strong> Home window, go to Setup > Preparer(s).<br />
2. Select a preparer and click Edit Preparer.<br />
3. Select Security > Custom Security.<br />
4. In the Preparer Security Setup window, select a menu, and then select the items<br />
to which the preparer should be allowed access. Items left blank will be inaccessible<br />
to the preparer. (See Figure 2-5 on page 24.)<br />
Figure 2-5: Security setup<br />
5. Click Save. When prompted, click OK. Click Exit to close Preparer Setup.<br />
Other options available under the Security button are shown in Table 2-4.<br />
Table 2-4: Preparer Security Options<br />
Security Option<br />
Set Security to Allow No Options<br />
Set Security to Allow All Options<br />
Set Security Equal to Existing Preparer<br />
Add Preparer to Security Group<br />
Front Office (Scheduling Only)<br />
Administrator (Full ADMIN Rights)<br />
Description<br />
Employee cannot access any part of the program.<br />
Employee can access all parts of the program,<br />
except for administrative-only features.<br />
Employee is given security settings to match those<br />
of another preparer on the list.<br />
Add preparer to a pre-established security group.<br />
(See “Setting Up Group Security,” following.)<br />
Employee can access the Scheduler only.<br />
Employee can access all parts of the program,<br />
including administrative-only features.<br />
24 Tax Year 2012
<strong>Drake</strong> <strong>Software</strong> User’s <strong>Manual</strong><br />
<strong>Software</strong> Setup<br />
To remove security rights from all preparers (other than administrative users), go to<br />
Setup > Preparers and click Remove Rights. To remove rights for an individual<br />
employee, set that person’s security to Allow No Options.<br />
Setting Up<br />
Group<br />
Security<br />
Only an administrative user can apply security settings to a group of preparers. You<br />
can create as many security groups as needed, but a preparer can belong to only one<br />
security group at a time.<br />
NOTE<br />
You cannot assign a preparer to more than one security group. If you<br />
try to do this, the preparer is removed from his or her current group and<br />
added to the new one.<br />
To apply group security:<br />
1. From the <strong>Drake</strong> Home window, go to Setup > Preparers.<br />
2. Click Group Security to open the Group Security dialog box. Three security<br />
levels, listed below and shown in Figure 2-6, are available by default. If preparer<br />
data is brought forward from last year and there are preparers with any of these<br />
security levels, they are automatically added to the appropriate group.<br />
• Admin — Users with administrative rights; group cannot be deleted.<br />
• Front Office — Front Office rights for non-preparers (Scheduler access only)<br />
• Full — Users with full access to everything except administrative features<br />
3. Choose one of the following options:<br />
• To add a group, click Add Group. Under Security Group General Information<br />
(Figure 2-6), enter a Group ID and a Group Description.<br />
• To add preparers to an existing group, double-click the group row near the top<br />
of the Group Security dialog box.<br />
Figure 2-6: Security Group General Information section of Group Security dialog box<br />
4. Under Security Settings, click to mark the boxes representing the features to<br />
which the group should have access. (Accessible features cannot be edited for the<br />
Full or Admin groups.) Click Check All to mark all boxes shown in all menu categories.<br />
Tax Year 2012 25
<strong>Software</strong> Setup<br />
<strong>Drake</strong> <strong>Software</strong> User’s <strong>Manual</strong><br />
5. Under the Assign Preparers tab, select the preparers to be assigned to the group.<br />
(To select a preparer, double-click a name or click the name and click Select.<br />
Selected preparers are listed in the Preparers in Security Group column.)<br />
6. Click Save.<br />
NOTE<br />
You do not have to assign preparers when creating a group. Assign<br />
preparers at any time by returning to the Group Security dialog box.<br />
To edit group settings or members, select a group name and click Edit Group. To<br />
delete a group, select a group name and click Delete Group. Note that a group must<br />
be empty (must contain no preparers) in order to be deleted.<br />
Group<br />
Security<br />
Reports<br />
The Group Security feature allows you to view and print two reports related to group<br />
security settings:<br />
• Group Security report — Lists group security settings for each group. Groups<br />
are listed in order of creation, with default groups first.<br />
• Group Preparers report — List all groups and their assigned preparers.<br />
Reports are shown in the Report Viewer, which allows options for printing and<br />
exporting the reports. To access reports, click Print in the Group Security toolbar.<br />
The program displays the “Group Security” report first. To access the “Group Preparers”<br />
report, click Exit in the Report Viewer toolbar. Once the “Group Preparers”<br />
report is open, click Exit again to return to the Group Security dialog box.<br />
Other<br />
Features<br />
Other features available under Setup > Preparer(s) include the ability to create a preparer’s<br />
daily schedule, the ability to print a list of preparers, and the ability to run a<br />
search on preparers. To access these features, use the following procedures.<br />
To create a preparer’s daily schedule:<br />
1. From the <strong>Drake</strong> Home window, go to Setup > Preparer(s).<br />
2. Select a preparer and click Edit Preparer.<br />
3. Click Schedule.<br />
4. Select day and “in” and “out” times.<br />
5. Click Apply, and then click Save to save the schedule.<br />
See “Scheduler” on page 85 for more information on using the <strong>Drake</strong> Scheduler.<br />
To print a list of preparers entered into the program:<br />
1. From the <strong>Drake</strong> Home window, go to Setup > Preparer(s).<br />
2. Click Print. The Report Viewer displays the current preparer listing.<br />
3. Click Print, and then click Print again.<br />
4. Click Exit to close the Report Viewer. Click Exit again to close the Preparer<br />
Setup dialog box.<br />
See “Report Viewer” on page 323 for more on using the <strong>Drake</strong> Report Viewer.<br />
26 Tax Year 2012
<strong>Drake</strong> <strong>Software</strong> User’s <strong>Manual</strong><br />
<strong>Software</strong> Setup<br />
To search for preparers entered into the program:<br />
1. From the <strong>Drake</strong> Home window, go to Setup > Preparer(s).<br />
2. Click Search.<br />
3. Enter preparer information in the Find Preparer Record box. As you type, the<br />
software locates (and highlights) the record.<br />
4. Click Close. Click Exit to close the Preparer Setup dialog box.<br />
Pay Per Return Setup (PPR Clients Only)<br />
Data Locations Setup<br />
For information on setting up PPR, see <strong>Drake</strong> <strong>Software</strong> User’s <strong>Manual</strong> Supplement:<br />
Pay Per Return (PPR), available on your <strong>Drake</strong> CD, through the software (from the<br />
Home window in <strong>Drake</strong>, go to Help > Online Resources) and on the <strong>Drake</strong> Support<br />
site at http://Support.<strong>Drake</strong><strong>Software</strong>.com (Training Tools > <strong>Manual</strong>s).<br />
Data location settings (formerly Directories/Paths settings), which manage the locations<br />
for data access and storage, is now configured when you install the program. To<br />
change your settings (ADMIN only), select Setup > Data Locations from the Home<br />
window. For more information, see “Single Workstations and Network Options” on<br />
page 16.<br />
CAUTION<br />
Directory and path settings should not be changed during tax season.Changing<br />
a drive letter during tax season can cause problems in<br />
file storage and e-file processing. For details on setting network configurations,<br />
see “Single Workstations and Network Options” on<br />
page 16. For assistance, contact your office IT professional or <strong>Drake</strong><br />
Support.<br />
Options Setup<br />
Options Setup is<br />
not required for<br />
completing or e-<br />
filing tax returns.<br />
The tax software is shipped with the most common preferences set as the defaults. Use<br />
Options Setup (accessible by clicking Setup > Options from the Home window) to<br />
view or change the defaults for the various options available. Options are categorized<br />
into tabs, as shown in Figure 2-7. (Only administrative users have the Administrative<br />
Options tab.)<br />
Figure 2-7: Tabs in Options Setup<br />
Tax Year 2012 27
<strong>Software</strong> Setup<br />
<strong>Drake</strong> <strong>Software</strong> User’s <strong>Manual</strong><br />
Table 2-5 through Table 2-12 describe the options available on each tab in Options<br />
Setup.<br />
Data Entry<br />
Options<br />
Options under the Data Entry tab are described in Table 2-5.<br />
Table 2-5: Options Setup: Data Entry<br />
Option<br />
Maximize data entry screens where<br />
possible for easier viewing<br />
Size data entry screens to show most<br />
fields without scrolling<br />
Disable sizing of data entry screens<br />
Tab to ZIP code field (skip city/state<br />
and use ZIP code database)<br />
Show notes/reminders to preparer<br />
when opening a return<br />
Verify SSN when creating new return<br />
Enable Windows standard keystrokes<br />
Autofill preparer and firm number on<br />
new returns<br />
Magnify data entry<br />
Activate W-2 wage and federal withholding<br />
verification fields<br />
Do not restrict minimum font size in<br />
800x600<br />
Use grid data entry format on available<br />
screens<br />
Language Options (1040 package<br />
only)<br />
Letter case for data entry<br />
Override field indicator<br />
Adjustment field indicator<br />
Display warning for missing required<br />
fields<br />
Description<br />
Increase the size of the <strong>Drake</strong> screen to fill your monitor. Effective at all<br />
monitor resolutions.<br />
Decrease the size of large <strong>Drake</strong> screens so they fit on your monitor.<br />
Effective only when monitor resolution is set to 1024x768 or smaller.<br />
Keep preparer from resizing screens. Effective usually for monitor resolution<br />
set to 800 x 600 or smaller.<br />
Press the TAB key while entering an address in data entry to bypass the<br />
City and State fields and go directly to the ZIP field. City and State fields<br />
are completed automatically based on the ZIP code entered.<br />
Show all notes and reminders from the NOTE and PAD screens every time<br />
you open a client file that contains notes or reminders.<br />
Require double entry of SSN or EIN, helping eliminate erroneous entries.<br />
CTRL+X = cut; CTRL+C = copy; CTRL+V = paste; <br />
SHIFT+CTRL+X = autofill amended screen;<br />
SHIFT+CTRL+C = calculate return; SHIFT+CTRL+V = view return<br />
Automatically enter the firm number and preparer number where required<br />
on data entry screens.<br />
Enlarge the active field for easier reading.<br />
To ensure accuracy of data entry, require wage and withholding amounts<br />
be entered twice on the W2 screen.<br />
This is a sizing option for computers using an 800x600 resolution. If this<br />
option is selected, the program will not attempt a font substitution to retain<br />
readability. Text on screens will shrink to fit as needed.<br />
Allows you to type information into a spreadsheet environment, which can<br />
result in faster data entry. This feature is available for the Dependents,<br />
INT, DIV, 8949, D, and 4562 screens.<br />
Choose between English and Spanish for menus, data entry screens, fieldspecific<br />
help text, and error codes.<br />
Choose between all uppercase letters and mixed case.<br />
Format override fields in data entry; see “Override & Adjustment Fields” on<br />
page 72.<br />
Format adjustment fields in data entry; see “Override & Adjustment Fields”<br />
on page 72.<br />
Choose to receive a warning: whenever a required field is empty; once per<br />
data-entry session; not at all.<br />
28 Tax Year 2012
<strong>Drake</strong> <strong>Software</strong> User’s <strong>Manual</strong><br />
<strong>Software</strong> Setup<br />
Calc &<br />
View/Print<br />
Options<br />
Options under the Calculation & View/Print tab are described in Table 2-6.<br />
Table 2-6: Options Setup: Calculation & View/Print<br />
Option<br />
Autocalculate tax return when exiting data<br />
entry<br />
Display client fee on Calculation screen<br />
Print only one overflow statement per page<br />
Go directly to form when accessing View<br />
or data entry mode<br />
Audible notification of calculation error<br />
messages<br />
Layout for depreciation schedule<br />
Pause option for calculation<br />
Number of days to store print files<br />
Print sort options for Interest/Dividends<br />
Description<br />
Returns are automatically calculated every time you exit the return.<br />
Allows the fees charged for return preparation to appear on the Calculation<br />
Results window.<br />
Each overflow statement is printed on a separate piece of paper.<br />
Go from a data entry screen to the corresponding form in View mode<br />
when you go to View mode. When the Data Entry button is clicked in<br />
View mode, the program returns to the data entry screen.<br />
When calculating a return, the program produces a “beep” to indicate<br />
an error message.<br />
Select Portrait to produce the depreciation schedule vertically using<br />
8.5 x 11 paper; select Landscape to produce it horizontally.<br />
Choose the circumstances under which the Calculation Results window<br />
appears, allowing a review of calculation results before proceeding<br />
to View mode.<br />
Select to store print files from 1 to 9 days, or to have them removed<br />
once the return is selected for e-filing. If a return is needed after the<br />
print file is removed, recalculate the return to re-create the print file.<br />
Choose how items entered on the INT and DIV screens are sorted<br />
when printed on Schedule B: alphabetically, numerically, or not at all.<br />
Form &<br />
Schedule<br />
Options under the Form & Schedule Options tab are described in Table 2-7.<br />
Table 2-7: Options Setup: Form & Schedule<br />
Option<br />
Print Schedule A only when required<br />
Print Schedule B only when required<br />
Print Form 4562 only when required<br />
Print Form 6251 only when required<br />
Next year depreciation schedule<br />
W-2/1099-R forms<br />
Description<br />
Produce Schedule A only when taxpayer qualifies to itemize.<br />
Produce Schedule B only when taxpayer has enough interest income<br />
to require filing Schedule B.<br />
Produce Form 4562, Depreciation and Amortization, only when the tax<br />
return requires it.<br />
Produce Form 6251, Alternative Minimum Tax, only when the tax<br />
return requires it.<br />
Select this option to produce a depreciation schedule for next year in<br />
addition to the one for this year.<br />
Produce and display in View mode all W-2 forms with the return.<br />
Tax Year 2012 29
<strong>Software</strong> Setup<br />
<strong>Drake</strong> <strong>Software</strong> User’s <strong>Manual</strong><br />
Table 2-7: Options Setup: Form & Schedule<br />
Print two W-2/1099-Rs per page<br />
Carryover worksheet<br />
Option<br />
Description<br />
If return has more than one W-2 or 1099-R form, print two per page.<br />
Produce any carryover worksheets associated with the return.<br />
Print page 2 of Schedule K-1 ... Produce page 2 of Schedule K-1 for Forms 1120S, 1065, and 1041.<br />
Form 8879 bank account options Select bank account printing options on Form 8879.<br />
1040A/EZ suppress<br />
Form 1045 page 2 (NOL)<br />
Select to Turn On ___ list if greater than...<br />
Automatically suppress Form 1040A or 1040EZ.<br />
Automatically produce Form 1045, page 2, if the return has NOL.<br />
Produce lists of these items (W-2, W-2G, 1099-M, 1099-R, dividends,<br />
interest, K-1) when the selected number in the drop list is exceeded.<br />
NOTE<br />
Many of these settings can be adjusted on a per-return basis. See<br />
“Making Changes on the Fly” on page 52.<br />
Optional<br />
Documents<br />
Options under the Optional Documents tab are described in Table 2-8.<br />
Table 2-8: Options Setup: Optional Documents<br />
Option<br />
Folder coversheet<br />
Prior year(s) comparison form<br />
Return summary<br />
Bill summary<br />
Federal filing instructions<br />
State filing instructions<br />
Labels<br />
Envelope Sheet (address drop<br />
lists)<br />
Estimated payment coversheet<br />
Description<br />
This option generates a folder cover sheet containing the taxpayers’ names and<br />
the name, address, and phone number of the preparer’s firm.<br />
Select this option to produce a comparison sheet containing data from the current<br />
and prior-year returns.<br />
Select this option to produce a return summary with every return prepared.<br />
Select this option to produce a summary of the taxpayer’s bill with each return.<br />
Displays detailed federal filing information, including the date to file, form to be<br />
filed, address to file, and payment amount. The instructions are listed as<br />
FILEINST.PG in View mode. Activated by default. Clear the check box to disable,<br />
or use the PRNT screen to activate or disable on a single return.<br />
Displays detailed state filing information, including the date to file, form to be<br />
filed, address to file, and payment amount. The instructions are listed as<br />
“STINST.PG” (“ST” refers to the state abbreviation; for example, OHINST.PG<br />
for Ohio instructions). Activated by default. Clear the check box to disable, or<br />
use the PRNT screen to activate or disable on a single return.<br />
Select this option to print a sheet of “mail to” addresses on Avery 5160 labels<br />
Choose the size of the envelope on which to print the addresses of the taxpayer,<br />
the IRS Service Center, the state tax department, the city tax office, and<br />
for Forms K-1.<br />
Select this option to print estimated coversheet payment addresses to envelope<br />
Nelco ENV500 dimensions for 1040 and 1041 returns with quarterly taxes.<br />
30 Tax Year 2012
<strong>Drake</strong> <strong>Software</strong> User’s <strong>Manual</strong><br />
<strong>Software</strong> Setup<br />
Table 2-8: Options Setup: Optional Documents<br />
Option<br />
NELCO hyperlink<br />
Letter Options (all packages)<br />
Include privacy letter with returns<br />
Include engagement letter with<br />
returns<br />
Include customized supplemental<br />
letter with returns<br />
Include K-1 letter with returns<br />
Referral Coupons (3 per sheet)<br />
Description<br />
Click this link to go to the NELCO website to order such <strong>Drake</strong>-compatible products<br />
as envelopes, IRS forms, and checks.<br />
Select the result letter templates to be used for each package.<br />
Select this option to print the privacy disclosure letter with every return.<br />
Select this option to print engagement letters for all packages when the return is<br />
calculated. At the end of the letter template are spaces for client and preparer<br />
signatures. Engagement letters can also be produced prior to completion of the<br />
return using Tools > Letters > Letters.<br />
Print a customized letter that can be used for various purposes.<br />
(See Table 2-14 on page 43.)<br />
Print the cover letter for individual K-1s (1065, 1120S, and 1041 packages).<br />
Enter the number of sheets per return or the coupon amount.<br />
NOTE<br />
To override the default letter for an individual client, see “Overriding<br />
Letters Setup” on page 58.<br />
Optional<br />
Items on<br />
Return<br />
Options under the Optional Items on Return tab are described in Table 2-9.<br />
Table 2-9: Options Setup: Optional Items on Return<br />
Date on return<br />
Option<br />
Print dates for taxpayer and spouse<br />
signatures (excludes 1040)<br />
Description<br />
The default is the current date. To change this date, enter the required date<br />
on the PRNT screen. If desired, select to print dates for taxpayer and spouse<br />
signatures (excluding 1040).<br />
Select this option to print the signature dates for taxpayer and spouse signatures<br />
on the return (excluding 1040).<br />
Taxpayer phone number Select this option to print the taxpayer’s phone number entered on screen 1.<br />
Third party designee<br />
Rounding amounts<br />
Interest and Penalty Calculation<br />
Select the preparer number of the preparer designated as the third-party designee<br />
to be printed on the main form of the return.<br />
Select Dollar or Penny rounding. Dollar rounding is required for e-filing.<br />
Penny rounding prints penny amounts on all forms.<br />
Calculate penalties and interest on returns filed after the due date based on<br />
interest rates entered. For more information, see “Penalty and Interest Calculation”<br />
on page 181.<br />
Tax Year 2012 31
<strong>Software</strong> Setup<br />
<strong>Drake</strong> <strong>Software</strong> User’s <strong>Manual</strong><br />
Billing Options under the Billing options tab are described in Table 2-10.<br />
Table 2-10: Options Setup: Billing<br />
Option<br />
Print taxpayer’s SSN on the bill<br />
Show preparer fees withheld from<br />
bank product<br />
Print taxpayer’s phone number on<br />
the bill<br />
Print taxpayer’s e-mail address<br />
on the bill<br />
Sales Tax<br />
Billing statement format<br />
Description<br />
Select this option to print the taxpayer's SSN on the bill.<br />
Select this option to print on the bill the preparer fees withheld from the bank<br />
product amount.<br />
Select this option to have the taxpayer’s phone number (entered on screen 1)<br />
printed on the bill.<br />
Select this option to have the taxpayer’s e-mail address (entered on screen 1)<br />
printed on the bill.<br />
Enter the sales tax rate to add to each bill. Number must be greater than 1. For<br />
example, 4.5 would represent a sales tax rate of 4.5%.<br />
Select among seven formatting options, including:<br />
- Billing by time (preparing bill based on time spent preparing return multiplied<br />
by preparer's hourly rate as defined in Setup > Preparers)<br />
- Billing by form (preparing bill based on forms necessary to complete return by<br />
price entered in Setup > Pricing); program prepares a bill summary along with<br />
the option selected here unless the Bill Summary option is cleared at Setup ><br />
Options, Optional Documents tab.<br />
Header on bill<br />
Custom Paragraph<br />
States<br />
E-filing<br />
Select among options for the header to be printed on the bill.<br />
Choose to have a custom paragraph printed on the bill. Select a location, and<br />
then write the paragraph in the supplied text box.<br />
To select options for state returns, select the States tab, and then select a state abbreviation<br />
from the drop list. When the options are displayed, select to activate or disable<br />
them as desired and click OK. Available options depend on the chosen state. For more<br />
on specific states, see the FAQ screen for each state program.<br />
Options under the EF tab are described in Table 2-11. Some can be adjusted for an<br />
individual return from the EF screen in data entry.<br />
Table 2-11: Options Setup: EF<br />
Option<br />
Auto-generate taxpayer(s) PIN<br />
Require ‘Ready for EF’ indicator on<br />
EF screen<br />
Lock client data file after EF acceptance<br />
Print 9325 when eligible for EF<br />
Description<br />
Have the software assign a randomly generated PIN. (1040 only)<br />
Requires that the Ready for EF indicator on the EF screen be marked<br />
before a return can be selected for e-filing.<br />
Locks the client's data file once it has been e-filed. Opening a locked file<br />
requires you to acknowledge a warning screen before you can edit the<br />
return. You can also access a locked file at Tools > File Maintenance ><br />
Unlock Client Files.<br />
Prints Form 9325, Acknowledgment and General Information for Taxpayers<br />
Who File Returns Electronically, for every eligible return.<br />
32 Tax Year 2012
<strong>Drake</strong> <strong>Software</strong> User’s <strong>Manual</strong><br />
<strong>Software</strong> Setup<br />
Table 2-11: Options Setup: EF<br />
Suppress federal EF<br />
Print EF status page<br />
Alert preparer when bank product is<br />
not included<br />
Activate imperfect return election in<br />
data entry<br />
Allow selection for EF from the ‘Calculation<br />
Results’ screen<br />
Enable prompting before automatic<br />
transmission of ‘Check Print<br />
Records’<br />
E-mail 9325 Notice to Taxpayer<br />
(automatic from <strong>Drake</strong> Processing<br />
Center)<br />
Default ERO<br />
Check for e-mail during EF transmit/<br />
receive<br />
Combine EF steps (Select, Transmit,<br />
Post Acks)<br />
Transmit return data to <strong>Drake</strong> for<br />
multi-office web reports<br />
State EF<br />
Option<br />
EF Selection Report Options<br />
Prevents e-filing of the federal return.<br />
Description<br />
Generates the EF Status page for any return that is eligible for e-file.<br />
Alert the preparer via an EF message that a return does not include a bank<br />
product (To override, see “Overriding Bank-Product Alert” on page 238.)<br />
Activates Imperfect Return Election check box on EF screen in data entry.<br />
Allows preparer to send the currently active return directly from the Calculations<br />
Results window to the e-filing queue. (The return is then transmitted<br />
automatically the next time you e-file returns.)<br />
Allows program to notify you before it transmits the Check Print Records.<br />
Form 9325, Acknowledgment and General Information for Taxpayers Who<br />
File Returns Electronically, is automatically e-mailed to taxpayer when<br />
return is accepted. (E-mail address must be present on screen 1.)<br />
Choose a preparer number, Paid Preparer, or None to indicate the ERO<br />
name that should appear on return documents. This choice can be overridden<br />
on screen 1 and the PREP screen in data entry.<br />
The program checks for e-mail received every time you transmit returns or<br />
pick up acknowledgments.<br />
Combines all e-filing steps. Click OK or press ESC on selected returns to e-<br />
file, pick up any new acknowledgments, and process the acknowledgments<br />
in one step.<br />
Sends Client Status Manager (CSM) data sent automatically to the Multi-<br />
Office Manager (MOM) during the EF process.<br />
Suppress e-filing of all state returns, or select states to suppress while other<br />
state returns remain eligible.<br />
Customize EF selection reports by specifying which columns (such as SSN/<br />
EIN, client name, refund/balance due, etc.) should be included in the EF<br />
selection report.<br />
Admin.<br />
Options<br />
To access the Administrative Options tab, a user must have administrative rights.<br />
Options under the Administrative Options tab are described in Table 2-12.<br />
Table 2-12: Options Setup: Administrative Options<br />
Option<br />
Use customized data entry selection<br />
menu<br />
Description<br />
Mark the check box, click the top Customize box, and then select the package<br />
and package type to customize. Click Load Menu. When the data entry<br />
screen is opened, click (uncheck) items to disable them in the Data Entry<br />
Menu. Click Save. The selected (unchecked) items will not be visible or<br />
accessible to any user other than those with administrative rights. (See<br />
“Locking Screens” on page 34.)<br />
Tax Year 2012 33
<strong>Software</strong> Setup<br />
<strong>Drake</strong> <strong>Software</strong> User’s <strong>Manual</strong><br />
Table 2-12: Options Setup: Administrative Options<br />
Option<br />
Customize user-defined data entry<br />
fields<br />
Use customized flagged fields on all<br />
returns<br />
Description<br />
Create option lists for the Miscellaneous Codes fields on screen 1 and the<br />
Adjustments and Payments fields on the BILL screen. For step-by-step<br />
instructions on this feature, see “Customized Drop Lists” on page 35.<br />
Select this box, click Flag, and select a package type. When the Data Entry<br />
Menu is opened, click the desired screen and click each field to flag. Click a<br />
field a second time to clear it. Press ESC to save your changes.<br />
Note: This option is available for federal packages only.<br />
Apply current-year Admin flag settings<br />
when updating from prior year<br />
Print due diligence documents<br />
Require applicable due diligence<br />
screens to be completed<br />
Enable logged in preparer’s Personal<br />
Client Manager<br />
Display program update availability<br />
to:<br />
Bank Products - State laws regarding<br />
fees: Charge ALL taxpayers the<br />
same fees<br />
<strong>Drake</strong> PDF Printer Password<br />
Options<br />
Return Status Notification Programs<br />
Flags set globally in 2011 are set globally after updating data from Last<br />
Year Data > Update from 2011 to 2012.<br />
Print due diligence documents generated from the EIC1, EIC2, EIC3, and<br />
EIC4 screens.<br />
Require that applicable fields on the EIC1, EIC2, EIC3, EIC4 screens be<br />
completed before the return can be e-filed.<br />
Display the Personal Client Manager on the <strong>Drake</strong> Home window for the<br />
logged-in preparer (check box is marked by default).<br />
Select which preparer groups can view update availability. Selections are<br />
Administrators (users with administrative rights) and All preparers.<br />
Select this box to charge all clients the same supplementary fees (software,<br />
franchise/network, and additional fees), regardless of whether a bank product<br />
is included. For more information, click the Program Help link.<br />
Choose to automatically password-protect any generated PDF documents.<br />
Passwords can be assigned to PDF documents that are sent using the<br />
<strong>Drake</strong> e-mail program. The default password format is the first four characters<br />
of the client’s name plus the last five digits of the client’s ID. The<br />
Default password drop list includes other format options. These settings<br />
can be overridden during printing from the Print Selection dialog box.<br />
New for 2012: Use this option to receive return status notification through<br />
TaxPoint or ABCvoice. Select to generate 7216 consent forms for the customer<br />
to sign. Select to require contact information (phone number and/or<br />
e-mail address on screen 1, or on the ABCV screen (for ABCvoice) or on<br />
the CALL screen (for TaxPoint).<br />
Locking<br />
Screens<br />
An administrative user can “lock” selected screens, making them inaccessible to other<br />
users.<br />
1. Go to Setup > Options, Administrative Options.<br />
2. Select Use Customized data entry selection menu.<br />
3. Click Customize.<br />
After loading a selected menu, click a screen’s check box to lock the screen or to make<br />
it visible or hidden. (Default is “visible.”) Examples are shown in Figure 2-8 and<br />
described below the figure.<br />
34 Tax Year 2012
<strong>Drake</strong> <strong>Software</strong> User’s <strong>Manual</strong><br />
<strong>Software</strong> Setup<br />
Figure 2-8: Locked, Visible, and Hidden screens<br />
• Locked — Menu items with a shaded check mark are not visible or accessible.<br />
• Visible — Menu items with a black check mark are both visible and accessible.<br />
• Hidden — Menu items with no check mark are not visible but can be accessed<br />
using the selector field.<br />
4. Click Save to save any changes or Cancel to close the menu with no changes<br />
saved.<br />
Selections made here do not apply for users with administrative rights.<br />
Customized<br />
Drop Lists<br />
Your firm can create drop lists for the Miscellaneous Codes on screen 1 and the<br />
Adjustment and Payment description fields on the BILL screen. Once you have created<br />
a drop list, it appears in the selected field. In Figure 2-9, a drop list has been created<br />
for Miscellaneous Code 1 and Code 2 on screen 1. As shown in the example,<br />
Code 2 has the user-defined referral codes BUSREF (business reference) and WOM-<br />
REF (word-of-mouth reference).<br />
Figure 2-9: Screen 1 drop lists and user-defined miscellaneous codes<br />
The instructions below explain how to create the drop list like the one in Figure 2-9.<br />
To create a drop list:<br />
1. From the Home window, select Setup > Options and click the Administrative<br />
Options tab.<br />
2. Click the second Customize button (Figure 2-10).<br />
Figure 2-10: Click Customize to customize user-defined data entry fields.<br />
3. In the Customizable Dropdowns in Data Entry dialog box, double-click a field<br />
to customize, or select a field and click Edit. The Edit Entries dialog box is<br />
opened.<br />
Tax Year 2012 35
<strong>Software</strong> Setup<br />
<strong>Drake</strong> <strong>Software</strong> User’s <strong>Manual</strong><br />
4. In the fields of the Add Entry section (Figure 2-11 on page 36), enter a Code<br />
(eight or fewer characters) and a Description (25 or fewer characters).<br />
Figure 2-11: Enter code and description in the Add Entry fields.<br />
5. Click Add.<br />
6. Repeat the previous two steps for additional drop list items. When added, items<br />
are displayed in the Entry List on the left side of the dialog box (Figure 2-12).<br />
Figure 2-12: Entry list of Edit Entries dialog box<br />
7. Click Save Changes to close the Edit Entries dialog box.<br />
Click Exit to return to the Administrative Options tab. The drop list is now available<br />
in data entry.<br />
The Edit Entries dialog box also offers the following options:<br />
• Changing the order of a listed item — Use the Move Up, Move Down, Sort<br />
Ascending, and Sort Descending buttons to change the order of items in the drop<br />
list. (See Figure 2-12.)<br />
• Removing a listed item — Select an item and click Remove. (See Figure 2-12.)<br />
• Editing a listed item — Double-click an item. The Selected Entry box (see<br />
Figure 2-11) is activated with the item properties. Make changes and click Save.<br />
NOTE<br />
You can also create drop lists for the Adjustments and Payments field<br />
of the BILL screen.<br />
When viewing a customized drop list in data entry, click F1 to see the<br />
item descriptions.<br />
36 Tax Year 2012
<strong>Drake</strong> <strong>Software</strong> User’s <strong>Manual</strong><br />
<strong>Software</strong> Setup<br />
Pricing Setup<br />
Use Pricing Setup to enter prices and allow <strong>Drake</strong> to calculate charges and generate<br />
them on the client’s bill. Prices can be defined for each form and, on some forms, for<br />
each item. You can also enter minimum and maximum charges for a completed return.<br />
NOTE<br />
Bank-product fees are established in Setup > Firm(s).<br />
To set up pricing:<br />
1. From the Home window, go to Setup > Pricing.<br />
2. Select a package from the Form box of the Pricing Setup window. All forms for<br />
that package are displayed in the grid below. View items by category by clicking<br />
the tabs at the top of the grid (Figure 2-13).<br />
Figure 2-13: Tabs allow you to view categories of documents that can be priced.<br />
Use the scroll bar<br />
or arrow keys to<br />
find forms. Doubleclick<br />
a form to<br />
select it quickly.<br />
3. Select a form in the grid and press ENTER (or double-click the form).<br />
4. (Optional) Edit the Form Description. This description is printed on the client<br />
bill if Include on Bill is selected. Do not edit the form name.<br />
5. Enter pricing information in the Per Item and Per Form fields.<br />
• When a Per Item entry is not applicable for a form, the field is unavailable.<br />
• If Per Item pricing is allowed, the price entered will apply to all instances of<br />
the selected form that are printed for a return. (To view all items for which<br />
per-item pricing is allowed, click the Per Item Charges tab; see Figure 2-13.)<br />
6. Click Update, and then click Save.<br />
Repeat these steps for each form, or set pricing for only the most commonly used<br />
forms. You can price other forms from within the individual returns that require them.<br />
(For more information, see “Overriding the Bill Amount” on page 56.)<br />
Fee Options<br />
The program includes options to add a custom fee and a financial product assistance<br />
fee. Both fees are included in the “Forms” section of the bill.<br />
• Custom fee — The custom fee is charged on all client returns. Use item 0387 in<br />
the Pricing Setup window to assign a fee name, description, and amount.<br />
• Financial product assistance fee — Use this option (item 0212 in Pricing Setup)<br />
to add a charge to all returns that include a bank product. This fee is not included<br />
on the bill if any of the following are true:<br />
Tax Year 2012 37
<strong>Software</strong> Setup<br />
<strong>Drake</strong> <strong>Software</strong> User’s <strong>Manual</strong><br />
– The firm state is Arkansas, Maryland, Maine, or New York (See Program<br />
Help link in Setup > Options, Administrative Options tab.)<br />
– In Setup > Options, Administrative Options tab, the option to charge all<br />
taxpayers the same fees is marked<br />
– In Setup > Pricing, the Include on Bill box is not marked for this fee<br />
Minimum &<br />
Maximum<br />
Fees<br />
Use the scroll bar<br />
or arrow keys to<br />
find forms.<br />
To set minimum and maximum fees to be charged for a return:<br />
1. From the Home window, go to Setup > Pricing and select a package from the<br />
Form box. All forms for that package are displayed in the grid below.<br />
2. Scroll down to Forms 0255 and 0256 (the minimum and maximum fee settings).<br />
3. Double-click a row and enter the fee. Repeat for the other form, if desired.<br />
4. Click Update, and then click Save.<br />
NOTE<br />
If incorrect charges are generated on bills, check the minimum and<br />
maximum fees to see if the settings are affecting the totals.<br />
Macros Setup<br />
Macros are a series of commands and functions that allow a combination of keys to<br />
accomplish tasks. Also called shortcut keys, some macros are already available in the<br />
program; for example, CTRL+V opens View mode. You can edit existing macros or<br />
create new ones to meet your office’s needs.<br />
You can also use macros for data that is used often by your office. For example, if<br />
many of your local clients use Small Town Bank, you can arrange for the program to<br />
enter “Small Town Bank” every time you press a particular shortcut key combination.<br />
NEW FOR<br />
2012<br />
The Setup Macros screen has changed slightly, making it easier to<br />
enter longer macros, and a new Record feature allows you to create<br />
new macros more quickly.<br />
Using<br />
Macros<br />
Creating<br />
New Macros<br />
To view a list of<br />
macros in data<br />
entry, press<br />
CTRL+SHIFT+M.<br />
To insert macro data, place the cursor in the field and press the applicable shortcut key<br />
(macro) combination. To view available macros, press CTRL+SHIFT+M from within a<br />
field to open the Data Entry - Macros window. To insert macro data from the list,<br />
select a macro and click Execute (or double-click the row). The Data Entry - Macros<br />
window is closed automatically.<br />
To set up your own macros in <strong>Drake</strong>:<br />
1. From the <strong>Drake</strong> Home window, go to Setup > Macros. The Setup Macros dialog<br />
box shows the shortcut keys (Hot Key column) and their associated tasks (Data<br />
column).<br />
2. Double-click a line to open the Edit Macro window and enter a new macro or edit<br />
an existing macro.<br />
38 Tax Year 2012
<strong>Drake</strong> <strong>Software</strong> User’s <strong>Manual</strong><br />
<strong>Software</strong> Setup<br />
3. In the Edit Macro pane, construct a simple formula or words and operators that<br />
will enter the data you choose. Symbols for non-character shortcuts are listed in<br />
Table 2-13.<br />
4. Click Save.<br />
For instance, if you wanted to create and use an address macro for 1234 Peachtree<br />
Street, Atlanta, GA 30331, Fulton County, using keys ATL+L for your macro:<br />
1. From the <strong>Drake</strong> Home window, go to Setup > Macros.<br />
2. In the Setup Macros window, double click an empty Data line line.<br />
3. In the Edit Macro window, enter 1234 Peachtree Street>><br />
Atlanta>Ga>30331>Fulton>>GA<br />
4. Click Save.<br />
5. Go to screen 1 in <strong>Drake</strong>.<br />
6. Click in the Street address field and press ALT+L.<br />
The macro enters 1234 Peachtree Street for the Street address line,<br />
jumps the Apt # field and enters Atlanta in the City field, enters GA in the State<br />
field, enters 30331 in the ZIP code, enters Fulton in the County field, then<br />
jumps ahead two fields and enters GA in the Resident State field.<br />
TIP<br />
If a single macro is to allow data entry in multiple fields, use heads-down mode<br />
and right angle brackets (>) to jump to a field.<br />
Example: The macro EF>#25>X>#~ would open the EF screen (EF>), toggle<br />
heads-down data entry mode to ON (#), enter field 25 (25>), select the box to<br />
Suppress Federal/State EF and all Bank Products (X), toggle heads-down<br />
mode to OFF (#), and save the data and escape the EF screen (~).<br />
“Recording”<br />
Macros<br />
New for 2012: Click the Record button on the Edit Macro window and you can use<br />
key strokes to enter certain macro operators. For instance, click Record and:<br />
• The ENTER key or the TAB key inserts the “field forward” (>) operator.<br />
• SHIFT+ENTER or SHIFT+TAB inserts the “field back” () symbol is inserted in front of the selected data in a macro, the<br />
program jumps ahead one field from the active field before inserting the data. If inserted after the<br />
selected data, the program inserts the data first, and then moves the cursor forward a field.<br />
Tax Year 2012 39
<strong>Software</strong> Setup<br />
<strong>Drake</strong> <strong>Software</strong> User’s <strong>Manual</strong><br />
Table 2-13: Macro Symbols<br />
Symbol<br />
Action<br />
~ Escape. If the (~) symbol is inserted after the selected data in a macro, the program inserts the<br />
selected data, saves the data, and exits the screen.<br />
[D]<br />
Insert date. If [D] is part of a macro, the program enters the current date into the active field.<br />
# Launch heads-down data entry mode. If the (#) symbol is inserted after the selected data in a macro,<br />
the program enters the data then activates heads-down data entry. To have heads-down closed from<br />
the macro, add a second (#) symbol. (See “Heads-Down Data Entry” on page 75.)<br />
* Bypass the Existing Forms List when performing the task set by a macro. Enter an asterisk (*) only<br />
once in any macro, and place it at the beginning of the macro. (When you open a screen that has multiple<br />
records, an Existing Forms List is displayed, and you have the choice of selecting an existing<br />
record or creating a new one. To bypass the New Record option and open the first record listed, enter<br />
the (*) symbol in front of the macro. For example, *C opens the first Schedule C record. To open the<br />
second record, enter a 2 inside brackets ([2]), thus the macro *C[2] opens the second C screen,<br />
*C[3] opens the third, etc.)<br />
[New]<br />
[Home]<br />
[End]<br />
[FF:#]<br />
[FB:#]<br />
Perform the assigned task on a new record. For example, *C[New] opens a new C screen. The asterisk<br />
(*) bypasses the Existing Forms list. It must be present for the [New] function to work properly.<br />
Return to first field on a screen. If [Home] is inserted into a macro, the cursor moves to the first field<br />
on the screen.<br />
Move to last field on a screen. If [End] is inserted into a macro, the cursor moves to the last field on<br />
the screen.<br />
Cursor jumps ahead a prescribed number of fields. For instance, [FF:5] jumps the cursor ahead five<br />
fields. This macro is not compatible with macros that use, or are initiated in, heads-down mode.<br />
Cursor jumps back a prescribed number of fields. For instance, [FB:5] would jump the cursor back<br />
five fields.<br />
[FJ:#] Cursor jumps to the prescribed field number. For instance, [FJ:25] would jump the cursor to field #<br />
25. (Obtain field numbers by viewing the screen in heads-down mode. This macro is not compatible<br />
with macros that use or are initiated in heads-down mode.<br />
+ Prevents a macro from clearing a flagged field.<br />
[PAGEDOWN]<br />
[PAGEUP]<br />
[NEXTTAB]<br />
[PREVTAB]<br />
Move to the next screen in a list. For instance, in a return with several W2s screens, Dependent<br />
screens, or 4562 detail screens, press the macro to move from one screen to the next.<br />
Move to the previous screen in a list. For instance, in a return with several W2s screens, Dependent<br />
screens, or 4562 detail screens, press the macro to move from one screen to the next.<br />
Move from one linked screen to the next linked screen. For instance, for clients who receive a K-1 from<br />
a partnership, press the macro and go from the 1065 K1 13-20 screen to the Basis Worksheet<br />
screen.<br />
Move from a linked screen to the previous one. For instance, for clients who receive a K-1 from a partnership,<br />
press the macro and go from the Basis Worksheet screen to the 1065 K1 1-12 screen.<br />
Introduction to Letters in <strong>Drake</strong><br />
The letters program generates various types of client letters, from engagement letters<br />
to the return’s cover letter. In some cases, letter content is automatically based on data<br />
from the tax return. For example, if a return with a federal balance due has been e-<br />
40 Tax Year 2012
<strong>Drake</strong> <strong>Software</strong> User’s <strong>Manual</strong><br />
<strong>Software</strong> Setup<br />
filed and the client has opted to mail a check to the IRS, the accompanying result letter<br />
will state the balance due amount, provide the e-filing information, and give instructions<br />
for mailing the check.<br />
Because so much of the letters program is automatic, you may not have to edit the letter<br />
templates at all. If you do need to make changes, <strong>Drake</strong> has provided numerous<br />
options for doing so.<br />
Before making changes, please continue reading this introduction to ensure that you<br />
understand how the templates and the Client Communications Editor are structured.<br />
NOTE<br />
To view a list of Rich Text Format (RTF) keyboard shortcuts for letters,<br />
from the menu bar at the top of the Home window, select Help > <strong>Drake</strong><br />
<strong>Software</strong> Help (or press CTRL+F1). In the Contents tab, double-click<br />
Setup, double-click Letters, then select RTF Guide.<br />
Parts of a<br />
Letter<br />
A letter in the Client Communications Editor (accessed from Setup > Letters) contains<br />
three categories of letter elements: keywords, text, and conditional paragraphs.<br />
Figure 2-14: A letter template consists of keywords, text, and conditional paragraphs.<br />
Keywords appear as red text within angle brackets. A keyword is a description of the<br />
type of text to be generated and added to the letter. For example, the keyword “Current<br />
Date” is at the top of each letter. When a letter is generated, the “Current Date” keyword<br />
is replaced with the current date. (For more on keywords, see Appendix C.)<br />
Text (in black text) is displayed exactly as it will be printed in the output of the letter.<br />
Conditional paragraphs, like keywords, contain angle brackets. Each “paragraph”<br />
actually consists of a starting tag, the conditional text, and an tag.<br />
Note that both the starting and ending tags end with the word “Paragraph.”<br />
The enclosed conditional text is printed only if a particular situation applies in that letter.<br />
For example, the conditional paragraph in Figure 2-15 on page 42 is generated<br />
only if the taxpayer, who has a balance due, is paper-filing and has selected not to pay<br />
by direct debit.<br />
Tax Year 2012 41
<strong>Software</strong> Setup<br />
<strong>Drake</strong> <strong>Software</strong> User’s <strong>Manual</strong><br />
Figure 2-15: Conditional paragraph<br />
Paragraph<br />
Nesting<br />
Many conditional paragraphs are nested within larger ones. Different nesting levels<br />
are indicated by different colors. In Figure 2-16, the Federal No Dir Debit (Paper)<br />
Paragraph from Figure 2-15 is nested inside the Federal Balance Due Paragraph.<br />
The green and purple text show where each paragraph begins and ends.<br />
Figure 2-16: Nested Conditional Paragraph<br />
In this example, the Federal No Dir Debit (Paper) Paragraph is generated only if<br />
the Federal Balance Due Paragraph is generated, and only if applicable for a return.<br />
Client<br />
Communications<br />
Editor<br />
The Client Communications Editor, accessed from Setup > Letters, is where you can<br />
read, edit, re-write, print, and save the letters contained in the program. You can also<br />
add your company letterhead and logo to the letters. The right pane of the Editor displays<br />
the letter template. The left pane displays, in tree view, the applicable paragraphs<br />
and keywords by category (Figure 2-17). Click [+] to expand a category, or<br />
click [-] to contract it. Hover your pointer over a keyword to view its description.<br />
Figure 2-17: Category tree (left pane of Client Communications Editor)<br />
While the result letters are designed with keywords inserted to handle most situations,<br />
additional keywords are available if you want to further customize the letter.<br />
42 Tax Year 2012
<strong>Drake</strong> <strong>Software</strong> User’s <strong>Manual</strong><br />
<strong>Software</strong> Setup<br />
Available<br />
Letters<br />
Table 2-14 lists all available letter templates. All letters can be modified using the Client<br />
Communications Editor. Templates with an asterisk (*) indicate letters that can be<br />
generated, individually or in batches, separately from the tax return. (See “Letters” on<br />
page 301.)<br />
Table 2-14: Letter Templates Available in 2012<br />
Letter Template<br />
Result Letter<br />
Result - Template<br />
Extension Letter<br />
Amended Letter<br />
Estimate Payment<br />
Reminder*<br />
Scheduled Appointment<br />
Reminder*<br />
Referral Coupon<br />
Preseason Letter*<br />
Post-season Letter*<br />
Customized Supplemental<br />
Letter<br />
Engagement Letter*<br />
E-file Status Letter*<br />
Privacy Policy<br />
Description<br />
Provides return results for the filed returns; gives info on bank products, estimates,<br />
due dates, mailing instructions, etc., as applicable.<br />
Contains the same keywords and paragraph tags as the Result Letter, but no prewritten<br />
letter template is provided.<br />
Explains that an application for extension has been filed.<br />
Similar to the result letter, but for an amended return.<br />
Provides details for making a 2013 estimate payment; individual (1040) package<br />
only.<br />
Informs prior-year clients of this year’s appointment date and gives instructions for<br />
preparing for the appointment; individual (1040) package only.<br />
Offers client a discount for referring another client; individual (1040) package only.<br />
Reminder to 2011 clients that tax season is coming up; all applicable packages.<br />
Letter thanking 2012 clients for their business; available for all applicable packages.<br />
Fully customizable template that can be used to create a customer survey, package<br />
or product offering sheet, generic letter, client coupon, etc.<br />
Standard engagement letter for tax services.<br />
Provides 2012 clients with an acknowledgment summary of their e-filed returns;<br />
available for all applicable packages.<br />
Generic privacy policy for clients.<br />
K-1 Cover Letter Cover letter for a shareholder, partner, or fiduciary receiving a Schedule K-1; S corp,<br />
partnership, and fiduciary packages only.<br />
K-1 Amended Letter Cover letter for a shareholder, partner, or fiduciary receiving a Schedule K-1 that has<br />
been amended; S corp, partnership, and fiduciary packages only.<br />
Grantor Trust Statement<br />
Cover letter for grantor trust statement; fiduciary package only.<br />
Letters Setup<br />
Use the Client Communications Editor (Setup > Letters) to edit letter templates, set<br />
up the letterhead for letters and client bills, and preview letters.<br />
NOTE<br />
Use the Letter Outline tab to find individual letter paragraphs quickly.<br />
Tax Year 2012 43
<strong>Software</strong> Setup<br />
<strong>Drake</strong> <strong>Software</strong> User’s <strong>Manual</strong><br />
Editing a<br />
Letter<br />
Template<br />
The Client<br />
Communications<br />
Editor opens to the<br />
last letter template<br />
viewed.<br />
CTRL+X deletes a<br />
selected item.<br />
To edit a letter:<br />
1. In the Client Communications Editor, click Open and select a package and letter<br />
to edit. The pane on the right displays the selected template.<br />
• To edit the letter contents, add, edit, or delete text as you would in a program<br />
like Microsoft Word. From the toolbar, specify font properties, typeface (bold,<br />
italic, underlined), and alignment; and copy, cut, and paste.<br />
• To add a keyword or conditional paragraph to the letter, place your cursor<br />
where you want the new item to go, and then locate and double-click a keyword<br />
or paragraph from the pane on the left. To delete a keyword or conditional<br />
paragraph, select it in the letter template and press DELETE.<br />
2. Click Save.<br />
NOTE<br />
The Client Communications Editor does not allow you to save any letter<br />
in which text within angle brackets (in other words, the names of<br />
keywords or conditional paragraphs) has been changed.<br />
Setting Up<br />
Letterhead<br />
You can also use<br />
the Client Communications<br />
Editor to<br />
set up letterhead<br />
for bills.<br />
Changing<br />
Letter<br />
Margins<br />
Arrange to have your firm’s information and logo generated on client bills and letters.<br />
To set up your letterhead:<br />
1. In the Client Communications Editor, go to Setup > Letterhead and Margins.<br />
2. Select options from the Letter/Bill Indicators section.<br />
3. Designate Coordinates. In the right column, number settings indicate the position<br />
of the firm information and logo. Settings for the default graphic are:<br />
• Left-most column for logo — 8<br />
• Top-most row for logo — 3<br />
• Left-most column for firm info — 25<br />
• Top-most row for firm Info — 4<br />
4. Enter the path to the graphic in the Path/Filename for Bitmap Logo text box (or<br />
use the Browse button). The full path and filename are required. To use the simple<br />
default graphic, enter C:\<strong>Drake</strong>12\CF\LOGO.BMP. (“C” indicates the<br />
drive letter to which the <strong>Drake</strong> program is installed. Change if necessary.) Leave<br />
blank for no logo.<br />
5. Click OK.<br />
The left margin of a letter can be changed to suit your printing needs. To change the<br />
left margin of the default letter:<br />
1. In the Client Communications Editor, select Setup > Letterhead and Margins.<br />
2. Enter a number under the Left Margin Adjustment box (Figure 2-18 on<br />
page 45).<br />
44 Tax Year 2012
<strong>Drake</strong> <strong>Software</strong> User’s <strong>Manual</strong><br />
<strong>Software</strong> Setup<br />
Figure 2-18: Left Margin Adjustment feature<br />
Values are in inches. An entry of 1, for example, adjusts the margin one inch to the<br />
right, and an entry of 1.5 adjusts it an inch and a half. Values can also be entered in<br />
increments of one-tenth of an inch. For example, an entry of .1 adjusts the margin<br />
one-tenth of an inch to the right (see example in Figure 2-18).<br />
3. Click OK.<br />
The appearance of the margin in the letter template will not change; however, when a<br />
letter is generated with a return, you’ll be able to see the margin change both in View<br />
mode and on the printed letter.<br />
NOTE<br />
An entry of “0” applies the default margins. <strong>Drake</strong> does not accept negative<br />
numbers or numbers with two decimal values (such as 1.25).<br />
Naming a<br />
Template<br />
Press CTRL+N to<br />
quickly access the<br />
Rename Letter<br />
dialog box.<br />
Restoring a<br />
Template<br />
Each template has a default name (see Table 2-14 on page 43). To assign a new name:<br />
1. From the Client Communications Editor, click Open and select a letter template.<br />
2. Click Setup > Rename Letter.<br />
3. Enter a new name in the Rename Letter dialog box and click OK.<br />
The new name is displayed in the Client Communications Editor title bar.<br />
To restore a template to its original (default) format, open the template and select<br />
Setup > Restore Original Letter.<br />
Tax Year 2012 45
<strong>Software</strong> Setup<br />
<strong>Drake</strong> <strong>Software</strong> User’s <strong>Manual</strong><br />
Viewing<br />
Letters for<br />
Sample<br />
Return<br />
The preview feature allows you to open View mode and view a sample letter for one<br />
of 10 return types:<br />
• An e-filed return with refund<br />
• An e-filed return with balance due<br />
• A paper-filed return with refund<br />
• A paper-filed return with balance due<br />
• An e-filed return with an extension<br />
• An e-filed return with an extension and balance due<br />
• A paper-filed return with a refund and an extension<br />
• A paper-filed return with a balance due and an extension<br />
• A paper-filed amended return with a refund<br />
• A paper-filed amended return with a balance due<br />
To access the preview feature, click the Preview button in the toolbar of the Client<br />
Communications Editor.<br />
Bringing<br />
Forward a<br />
Template<br />
To replace a current-year template with a prior-year one:<br />
1. From the Client Communications Editor, click Open and select the template to<br />
replace.<br />
2. Go to Setup > Update Prior Year Letter and click OK.<br />
3. Select the drive of the <strong>Drake</strong> program that contains the prior-year letter.<br />
4. Select a prior-year letter.<br />
5. Click Continue.<br />
6. When prompted, click Yes.<br />
Be sure to read through the replacement letter to ensure that the information is current.<br />
Color Setup<br />
Use the Color Setup feature to tailor <strong>Drake</strong> screens to meet your firm’s preferences.<br />
TIP<br />
If you used <strong>Drake</strong> last year, consider customizing colors to make your<br />
2012 program look different from your 2011 program. If you must open<br />
the 2011 program during tax season, customized colors will help you<br />
avoid entering data into the old program by mistake.<br />
Program<br />
Colors<br />
Use Define<br />
Custom Colors to<br />
create a new color.<br />
To customize program colors:<br />
1. From the <strong>Drake</strong> Home window, go to Setup > Colors.<br />
2. Under Program Colors, choose one of the following options:<br />
• Use Windows System Colors — Program screens inherit the color scheme<br />
used by the operating system.<br />
• Use Custom Created Colors — The Program text color and Program<br />
background color boxes to the right become available. Click a box to view<br />
the Windows color palette and choose a color.<br />
46 Tax Year 2012
<strong>Drake</strong> <strong>Software</strong> User’s <strong>Manual</strong><br />
<strong>Software</strong> Setup<br />
3. Click OK.<br />
Data Entry<br />
Colors<br />
To change the color of a specific area in data entry:<br />
1. From the <strong>Drake</strong> Home window, go to Setup > Colors.<br />
2. Click a color box in the Data Entry Colors box to open a Windows color palette.<br />
3. Select a color and click OK.<br />
4. Once all color selections are made, click OK.<br />
5. To restore the original color settings in Setup > Colors, click Restore, and then<br />
click OK.<br />
Printing Setup<br />
Use the Printer Setup to:<br />
• Establish the printer to be used with <strong>Drake</strong><br />
• Install a “Print to PDF” option that allows you to create PDF files<br />
• See if your printer is HP PCL-5e compliant<br />
NOTE<br />
TIP<br />
Your Windows default printer is designated as the <strong>Drake</strong> default printer<br />
when <strong>Drake</strong> is installed. You do not have to add or set up a printer in<br />
<strong>Drake</strong> if the printer is already set up in Windows. Printer settings are<br />
carried forward automatically each year.<br />
Watermarks can be added on the fly via the Print Selection dialog box<br />
(the box that is displayed when you click Print in <strong>Drake</strong>). You can opt to<br />
print a custom watermark that you specify (see “Watermark Text” in<br />
Table 2-15 on page 48) or to print “Client Set” or “Preparer Set” as a<br />
watermark.<br />
Editing<br />
Printer<br />
Settings<br />
To edit settings for the printer used for printing tax returns:<br />
1. From the <strong>Drake</strong> Home window, go to Setup > Printing > Printer Setup.<br />
2. Enter setup changes as needed. Details on each tab are provided in Table 2-15 on<br />
page 48.<br />
3. Click Save.<br />
Tax Year 2012 47
<strong>Software</strong> Setup<br />
<strong>Drake</strong> <strong>Software</strong> User’s <strong>Manual</strong><br />
Table 2-15: Printing Setup<br />
Tab Field Description<br />
(F5) General Setup<br />
— displays the current<br />
default printer for Tax<br />
Forms, Reports, Labels,<br />
and Checks, and the default<br />
for the Letterhead source<br />
tray (which allows you to<br />
print letters from a tray other<br />
than the one used for tax<br />
returns).<br />
Tray<br />
Default is “Main Paper Source.” Change the default if you have<br />
a multiple-tray printer and will not be printing from the main tray.<br />
# Copies Number of copies to print (not available for labels or checks).<br />
Duplex<br />
Staple<br />
Show dialog<br />
Directs printer to print duplex. Only forms that are approved for<br />
duplex will be printed as duplex.<br />
If the printer supports stapling after each print job, select this<br />
option to turn stapling on.<br />
Causes the Print dialog box to be opened before each print job.<br />
(F6) ‘Sets’ Setup<br />
— displays the current<br />
default printer and the different<br />
types of sets that can be<br />
printed; see “Printing Printer<br />
Sets” on page 201.<br />
(F7) Options<br />
— used to set up advanced<br />
printing options not related to<br />
a specific printer.<br />
Tray<br />
Duplex<br />
Duplex all<br />
Staple<br />
Print set<br />
Watermark<br />
text<br />
PCL soft font<br />
option<br />
Classic print<br />
mode<br />
Default is “Main Paper Source.” Change the default if you have<br />
a multiple-tray printer and will not be printing from the main tray.<br />
Directs printer to print duplex. Only forms that are approved for<br />
duplex will be printed as duplex.<br />
Directs printer to duplex-print all forms (approved or not). (Not<br />
available for sets to be mailed to the IRS or a state.)<br />
If the printer supports stapling after each print job, select this<br />
option to turn stapling on.<br />
Indicates which sets should be available for printing after a<br />
return is calculated.<br />
Watermarks to be displayed on the Client and Preparer copies,<br />
respectively. Defaults are “Client Copy” and “Preparer Copy.”<br />
Many printers require soft fonts to be downloaded before tax<br />
forms can be printed. Select the desired downloading option.<br />
For preparers who prefer Basic View (See “Viewing a Return<br />
(Enhanced Mode)” on page 197), <strong>Drake</strong>’s “Classic Print” mode<br />
will be displayed when in Print mode.<br />
48 Tax Year 2012
<strong>Drake</strong> <strong>Software</strong> User’s <strong>Manual</strong><br />
<strong>Software</strong> Setup<br />
Table 2-15: Printing Setup<br />
Tab Field Description<br />
(F8) Edit Printer Settings<br />
— used to edit print settings<br />
for a selected printer.<br />
Select printer<br />
Printer type<br />
DPI override<br />
Adjust margin<br />
Check adjustment<br />
- vertical<br />
Print Method<br />
Test Printer<br />
Main paper<br />
source<br />
Alternate<br />
paper source<br />
Opt. large<br />
paper source<br />
<strong>Manual</strong> feed<br />
Select the printer. For printers other than <strong>Drake</strong> PDF Printer,<br />
the fields listed below are activated. (If you select <strong>Drake</strong> PDF<br />
Printer, you’ll be given the option to launch Adobe after printing<br />
to the <strong>Drake</strong> PDF Printer.)<br />
Select the printer type from the drop list.<br />
Change the dots per inch (DPI) setting.<br />
Select this option if printed forms are running off the lower edge<br />
of the paper.<br />
Use this field if text is being printed too high or low on checks.<br />
Enter whole numbers to adjust the printed text 1/4-inch at a<br />
time. Enter 1 to move the type 1/4 inch; 2 to move 1/2 inch,<br />
etc. Positive numbers move the placement down; negative<br />
numbers move the placement up.<br />
PCL (Printer Control Language) is supported by most HP laserjet<br />
printers. If your printer supports PCL, the remaining fields on<br />
the screen will be filled automatically. The Alternate Print<br />
Method (GDI) will produce a good print quality but may be<br />
slower under some conditions.)<br />
Click the Test Printer button to see if your printer is HP PCL-5e<br />
compliant. (See “Testing Your Printer” following)<br />
Select the tray that is to be the main paper source for the<br />
selected printer.<br />
Select the paper source to be used when the main paper<br />
source is not available.<br />
Select the tray to be used as the optional large paper source.<br />
Select the tray to be used for manual feed.<br />
Testing Your<br />
Printer<br />
While there has been a huge shift towards e-filing, there are still times when returns<br />
must be paper-filed. In an effort to process those paper returns “electronically,” government<br />
agencies scan these returns, allowing them to more efficiently and accurately<br />
move the paper returns into the electronic processing system.<br />
<strong>Drake</strong> has made changes to its print engine as a part of an ongoing effort to create<br />
nearly exact replicas of tax forms on the many different makes and models of printers<br />
that are used in tax offices today. Some of these changes are necessitated by the emergence<br />
of stricter requirements enforced by some government tax agencies for paper<br />
processing.<br />
<strong>Drake</strong> has provided a way for you to print a test page in the preferred Printer Command<br />
Language (PCL) mode to see if your printer is compliant with these software<br />
changes.<br />
To test your printer, take the following steps:<br />
Tax Year 2012 49
<strong>Software</strong> Setup<br />
<strong>Drake</strong> <strong>Software</strong> User’s <strong>Manual</strong><br />
1. From the Home window of <strong>Drake</strong>, go to Setup > Printing > Printer Setup.<br />
2. Click the [F8] Edit Printer Settings tab to open the Printer Setup dialog box.<br />
3. Select your printer from the Select printer drop list. This activates the fields<br />
below.<br />
4. On the right-center of the Printer Setup dialog box, click Help Me Choose to<br />
open the Printer Test Assistant dialog box.<br />
5. From “Step 2” of the Printer Test Assistant dialog box, click Send Printer Test<br />
Page to the Selected Printer (item #1 in Figure 2-19).<br />
Figure 2-19: Click Send Printer Test Page... (item #1) to test a printer for PCL compliance<br />
6. Compare the text of the printed page to the Sample Arial Font of the dialog box<br />
(item #2 of Figure 2-19).<br />
7. Click the appropriate button (item #3 of Figure 2-19):<br />
• Yes, it matches exactly — Your printer is PCL-5e compliant and meets Arial<br />
font requirements. The software selects the PCL method automatically.<br />
• No, it does not match — Your printer doesn’t appear to support Arial font<br />
and will use the Alternate Print Method (GDI) to produce acceptable results.<br />
(GDI will produce good print quality but may be slower under some conditions.)<br />
<strong>Drake</strong> recommends you call your printer manufacturer to determine if<br />
Arial font can be added.<br />
• Nothing printed — Some printers that are not PCL-5e compliant will not<br />
accept the test print. These printers will use the Alternate Print Method (GDI)<br />
to produce acceptable results.<br />
8. Select another printer from the Step 1: Select a printer drop list and follow the<br />
same steps to test.<br />
9. When finished, click Exit to close the Printer Test Assistant.<br />
10.Click Update to save any printer changes. Click Save to exit Printer Setup.<br />
50 Tax Year 2012
<strong>Drake</strong> <strong>Software</strong> User’s <strong>Manual</strong><br />
<strong>Software</strong> Setup<br />
Printing Sets<br />
The Printing Sets feature allows you to print multiple sets of returns for different purposes.<br />
To define printing sets:<br />
1. From the <strong>Drake</strong> Home window, go to Setup > Printing > Printer Setup.<br />
2. Click the Sets button to open the Copies Per Set dialog box.<br />
3. Select a category from Form Categories. Your selection determines which forms<br />
are displayed in the grid below.<br />
4. Double-click a form in the list. The default information for that form fills the text<br />
boxes above.<br />
5. In the boxes under each set name, enter the number of copies of the form to be<br />
printed with each set. For example, to include three Schedule Cs with the Client<br />
set, enter 3 under Client.<br />
Figure 2-20: Example: Three copies of Schedule C for client<br />
6. Click Update.<br />
7. Click Save, and then click OK.<br />
Repeat this procedure for other forms as needed.<br />
Changing<br />
Print Sets “On<br />
the Fly”<br />
You can make Sets changes on the fly (in other words, without going to Printer Setup),<br />
but this will modify settings globally—not just for the active return. If you change<br />
your Sets settings on the fly, you change the settings for all returns.<br />
To change or add print settings on the fly, complete the following steps while in<br />
Enhanced View mode for a return:<br />
1. Select a form from the directory tree.<br />
2. Select Setup > Form Properties from the toolbar.<br />
3. In the Number of Copies section, edit settings and click Save.<br />
NOTES<br />
Pricing can also be changed using this option; see “Pricing for a Single<br />
Return” on page 57.<br />
If using Basic View, access this feature by right-clicking a form in Basic<br />
View and selecting Properties.<br />
Setting a Print<br />
Order<br />
Use this option to view or change the order in which forms are printed.<br />
1. From the <strong>Drake</strong> Home window, go to Setup > Printing > Printer Setup.<br />
2. Click Set Form Order (at the bottom of the Printer Setup dialog box) to open<br />
the Sort Form Order window.<br />
3. Select a package series and choose a set type. Forms are listed with their order<br />
number in parentheses to the left. Normal (Default) is the established IRS order.<br />
Tax Year 2012 51
Making Changes on the Fly<br />
<strong>Drake</strong> <strong>Software</strong> User’s <strong>Manual</strong><br />
4. To change the sequence in which the forms are printed, click and drag form names<br />
until the forms are listed in the desired order.<br />
5. Click Save.<br />
NOTE<br />
To back up the print order and restore it to another machine, choose to<br />
back up the setup files from Tools > File Maintenance > Backup.<br />
Document<br />
Manager<br />
Setup<br />
For details on how to set up and use the Document Manager, see Chapter 13, “Suite<br />
Products.”<br />
Making Changes on the Fly<br />
When you make changes “on the fly,” you override program calculations and defaults<br />
(set by either the program or by the preparer in Setup) for the open return. The rest of<br />
this chapter focuses on actions you can take while in data entry to “override” these<br />
global settings in an individual (1040) return. Comparable options for other packages<br />
(such as the business packages) are provided in the manual supplements for those<br />
packages, available at http://Support.<strong>Drake</strong><strong>Software</strong>.com.<br />
Suppressing/Forcing Documents<br />
The PRNT screen allows you to indicate which forms should and should not be generated<br />
for a return, regardless of program calculations and established defaults.<br />
Suppressing<br />
Items from<br />
Being<br />
Generated<br />
Table 2-16 lists items that can be suppressed using the PRNT screen.<br />
Table 2-16: Items That Can Be Suppressed from the PRNT Screen<br />
Item<br />
Description<br />
1040EZ<br />
1040A and EZ<br />
State short<br />
form<br />
Prevents Form 1040EZ from being prepared; program prepares either<br />
Form 1040 or 1040A instead.<br />
Prevents Forms 1040A and 1040EZ from being prepared; program prepares<br />
Form 1040 instead.<br />
Forces state return to be printed on the state long form.<br />
8801 Suppresses printing of Form 8801, Credit for Prior Year Minimum Tax -<br />
Individuals, Estates, and Trusts, if the form is not required. (This form is<br />
generated by default on certain returns that have a credit carryforward.)<br />
WK_PAL<br />
WK_6251B<br />
WK179LMT<br />
Prevents Passive Activity Deduction Worksheet from being prepared. This<br />
worksheet shows how much (if any) the taxpayer is taking in passive activity<br />
loss deductions this year and how much is being carried over.<br />
Suppresses exemption worksheet for Form 6251, Alternative Minimum Tax.<br />
Prevents section 179 Business Income Limit Worksheet from being prepared.<br />
This worksheet shows the amount (if any) of section 179 deductions<br />
taken this year and how much is being carried over.<br />
52 Tax Year 2012
<strong>Drake</strong> <strong>Software</strong> User’s <strong>Manual</strong><br />
Making Changes on the Fly<br />
Table 2-16: Items That Can Be Suppressed from the PRNT Screen<br />
Item<br />
Proforma/<br />
organizer<br />
Description<br />
Prevents proforma/organizer for next year from being generated. See<br />
“Organizers and Proformas” on page 80.<br />
NOTES<br />
The option to print or suppress the 1040A and 1040EZ for all returns (if<br />
applicable) is set at Setup > Options, Form & Schedule Options.<br />
In the 1120S, 1065, and 1041 packages, if the option to print K-1 letters<br />
is selected at Setup > Options, you can go to the PRNT screen to suppress<br />
the printing of K-1 letters.<br />
Forcing<br />
Items to Be<br />
Generated<br />
Table 2-17 lists PRNT screen items that can be “forced,” even if the program calculations<br />
and established defaults would otherwise not generate them.<br />
Table 2-17: Items That Can Be Forced from the PRNT Screen<br />
Item<br />
Schedule A<br />
Schedule B<br />
Form 4562<br />
Form 6198<br />
Form 6251<br />
Form 8582<br />
Summary<br />
Compare<br />
Schedule A, Itemized Deductions<br />
Description<br />
Schedule B, Interest and Dividend Income<br />
Form 4562, Depreciation and Amortization<br />
Form 6198, At-Risk Limitations<br />
Form 6251, Alternative Minimum Tax for Individuals<br />
Form 8582, Passive Activity Loss Limitations<br />
Individual Diagnostic Summary; appears as SUMMARY under Miscellaneous<br />
tab in View mode.<br />
Tax return comparison; compares current-year return with returns<br />
from the two prior years and appears as COMPARE under Miscellaneous<br />
tab in View mode. (See “Comparing Data” on page 186 for<br />
more on creating a tax return comparison in <strong>Drake</strong>.)<br />
WK_SSB Social Security Benefits Worksheet provided by IRS for Forms 1040<br />
and 1040A; allows taxpayer to see if any benefits are taxable.<br />
Next-Year<br />
Depreciation List<br />
Worksheet showing the depreciation to be carried forward to 2013.<br />
Overriding Other Setup Options<br />
Envelope<br />
Coversheets<br />
When a return is generated, <strong>Drake</strong> prints envelope coversheets, if selected, for mailing<br />
with copies of the return to the taxpayer and tax authorities. Default settings for envelope<br />
coversheets are set in Setup > Options, Optional Documents tab. Use the<br />
PRNT screen to override coversheet options for a single return.<br />
Tax Year 2012 53
Making Changes on the Fly<br />
<strong>Drake</strong> <strong>Software</strong> User’s <strong>Manual</strong><br />
Filing<br />
Instructions<br />
Due<br />
Diligence<br />
Documents<br />
Dates on the<br />
Return<br />
When a return is generated, <strong>Drake</strong> prints federal and state filing instructions. Default<br />
settings are established from Setup > Options, Optional Documents tab. Use the<br />
PRNT screen to override the default and force or suppress the filing instructions.<br />
EIC due diligence information is entered on screens EIC1, EIC2, EIC3, and EIC4.<br />
The PRNT screen includes options to print EIC due-diligence documents with a<br />
selected return. (These options are set globally from the Administrative Options tab<br />
in Setup > Options.)<br />
A default due date for filing is printed on returns and all letters and filing instructions<br />
generated with a return. Use the PRNT screen to override this default date. These<br />
changes cannot be set globally from Setup.<br />
Override the default date by entering an alternate due date in the Date to print on<br />
returns or Due date to print on letter and filing instructions fields in the Print<br />
Overrides section of the PRNT screen.<br />
Return<br />
Indicators<br />
By default, the program displays certain indicators (such as “Hurricane Katrina”) on<br />
applicable returns. Use the PRNT screen to force certain indicators to be displayed.<br />
NOTE<br />
If a return qualifies for special treatment due to a disaster, the<br />
required literal should be entered in the Disaster designation field.<br />
An entry here will be printed at the top of the main federal form and<br />
will be included in the transmission file for e-filed returns.<br />
Billing<br />
Format<br />
The following global setup options are set from Setup > Options, Billing tab, and can<br />
be changed on the fly by using the BILL screen in data entry:<br />
Table 2-18: Billing Options That Can Be Changed on the Fly<br />
Option Choices<br />
Billing Statement Format<br />
Custom Paragraph<br />
Total only; Forms and total; Forms, prices, and<br />
total; Bill by time; Charge per form<br />
None; Top of bill; Bottom of bill<br />
For more on the BILL screen, see “Overriding the Bill Amount” on page 56.<br />
NOTE<br />
Write the custom paragraph for the bill in the Custom Paragraph field<br />
at Setup > Options, Billing tab.<br />
54 Tax Year 2012
<strong>Drake</strong> <strong>Software</strong> User’s <strong>Manual</strong><br />
Making Changes on the Fly<br />
Penalty &<br />
Interest<br />
Calculations<br />
The following global setup options are for penalty and interest calculations on latefiled<br />
returns. These are set from Setup > Options, Optional Items on Return tab,<br />
and can be changed from within a return from the LATE screen on the Taxes tab:<br />
Table 2-19: Penalty & Interest Options That Can Be Changed on the Fly<br />
Global Setting Available Overrides<br />
Calculation of penalty<br />
and interest on all returns<br />
Interest rates<br />
If the global option is selected, it can be suppressed for a single<br />
return. If the global option is not selected, it can be forced for a<br />
single return.<br />
Penalty and interest amounts can be entered manually for a single<br />
return to override program calculations based on updated or<br />
manually entered interest rates in Setup > Options.<br />
For more on the setting up the global option in Options Setup and on using the LATE<br />
screen, see “Features for Late-Filed Returns” on page 181.<br />
Listing a Different Firm, Preparer, or ERO on a Return<br />
By default, the program prints the information shown in Table 2-20 on the return.<br />
Table 2-20: Firm, Preparer, and ERO Data That Can Be Changed on the Fly<br />
Information<br />
Firm<br />
Preparer<br />
ERO<br />
Description<br />
Firm associated with Preparer #1 in Setup > Preparer(s)<br />
Preparer #1 (as entered in Setup > Preparer(s))<br />
ERO selected in Setup > Options, EF tab (default is “Paid Preparer”)<br />
To override any of these defaults for a return, go to screen 1 of the return and select a<br />
firm, preparer number or name, or ERO under Return Options (Figure 2-21).<br />
Figure 2-21: Setup override fields on screen 1<br />
Be aware of the following information when determining what information is to<br />
appear on the return:<br />
• Because both the firm and ERO information is determined by the return’s preparer,<br />
a selection in the Preparer # drop list will cause both the firm and ERO<br />
information to be overridden with the corresponding information associated with<br />
the selected preparer.<br />
Tax Year 2012 55
Making Changes on the Fly<br />
<strong>Drake</strong> <strong>Software</strong> User’s <strong>Manual</strong><br />
• If, for Preparer # or Firm #, you select NONE/Self-Prepared Return (No Paid<br />
Preparer), nothing will be printed on the applicable lines on the return. For ERO,<br />
the program uses the information entered on the EF tab in Setup > Options.<br />
• Data entered on the PREP (Preparer Information) screen overrides the default<br />
data and the corresponding Return Options selections on screen 1. ERO information<br />
is not affected by PREP screen entries. For more on the PREP screen, see<br />
“Overriding Other Preparer Information,” following.<br />
• The Data Entry # field (shown in Figure 2-21 on page 55) is for tracking purposes<br />
only.<br />
• A firm or preparer must be entered in Setup > Firm(s) or Setup > Preparer(s) in<br />
order to show up as an option in the override drop lists on screen 1.<br />
Overriding<br />
Other<br />
Preparer<br />
Information<br />
The PREP screen in data entry allows you to override the following data for a return:<br />
• Third-party designee (See “Third-Party Designee” on page 162.)<br />
• Federal preparer information (if the preparer is not set up in Preparer Setup)<br />
• State preparer information (if the preparer is not set up in Preparer Setup)<br />
If you make an entry in the Federal Preparer Information section of the PREP<br />
screen, the program requires that full override information for both the preparer and<br />
the firm also be entered in this section.<br />
The PREP screen also includes an option not to print the preparer’s information on<br />
the letter, bill, or summary.<br />
NOTE<br />
You can now enter state preparer registration information for California,<br />
Maryland, Minnesota, New York, Oregon, and Virginia on the PREP<br />
screen. You can also enter a firm’s foreign address information in both<br />
the federal and state preparer information sections.<br />
Overriding the Bill Amount<br />
Standard rates must be established in Pricing Setup, but you can change the billing<br />
amount for a return, either by overriding the total or by adjusting individual amounts.<br />
Overriding<br />
the Total<br />
Adjusting<br />
Individual<br />
Amounts<br />
To override the total amount on a client’s bill, go to screen 1 and enter the desired<br />
amount in the Fee Override field (located in the Return Options box).<br />
Use the BILL screen to adjust individual amounts on a client’s bill. The following<br />
items are added to or subtracted from the bill using the BILL screen:<br />
• Write-in Adjustments, such as for coupons and other discounts, and adjust<br />
amounts charged for these adjustments<br />
• Balance due from prior years<br />
• Scenario Planner fees<br />
• Percentage increases and discounts<br />
• Sales tax percentage<br />
• Prior Payments<br />
56 Tax Year 2012
<strong>Drake</strong> <strong>Software</strong> User’s <strong>Manual</strong><br />
Making Changes on the Fly<br />
NOTE<br />
To create user-defined drop lists for the write-in Adjustments and Payments<br />
screens, see “Customized Drop Lists” on page 35.<br />
You can also indicate the following adjustments from the BILL screen:<br />
• To exclude a charge for the Filing Status Optimization Report. (See “About the<br />
MFJ/MFS Report” on page 74.)<br />
• To adjust the bill as needed for a self-prepared or firm-prepared e-filed return<br />
The BILL screen also allows you to override the date printed on the bill and add a<br />
short note (separate from the custom paragraph) to the bottom of the bill.<br />
Pricing for a<br />
Single<br />
Return<br />
To override Pricing Setup and establish prices for a single return:<br />
1. In data entry, click View to access View mode for the return.<br />
2. Right-click a form in the left column and select Setup > Form Properties. The<br />
Properties dialog box is displayed (Figure 2-22).<br />
Figure 2-22: Pricing on the fly section of the Properties dialog box<br />
3. Edit the description of the form (if desired) and edit the price listed per form or per<br />
item.<br />
4. Choose to Apply to this return or Apply to all returns. Applying to all returns<br />
changes the pricing file globally (in other words, for all returns).<br />
5. Change number of copies if desired, and then click Save.<br />
You must calculate the return before you can view your changes on the bill.<br />
Tax Year 2012 57
Making Changes on the Fly<br />
<strong>Drake</strong> <strong>Software</strong> User’s <strong>Manual</strong><br />
Overriding Letters Setup<br />
Letters options and defaults can be set from both Setup > Options, Optional Documents<br />
tab and Setup > Letters. Use the LTR screen, accessible from the Other<br />
Forms tab, to override global options on a per-return basis.<br />
The LTR screen allows you to make the following changes to the letters in a return:<br />
• Have a result letter other than the default printed with the return.<br />
• Enter a personalized letter greeting.<br />
• Add a custom paragraph.<br />
In addition, it provides the following options:<br />
• Force-print a letter for a paper-filed return or extension application, even if the<br />
return/application is eligible for e-file.<br />
• Force-print a letter for an e-filed return or extension application, even if the return/<br />
application is ineligible for e-file.<br />
• Force (or suppress) a customized supplemental letter, engagement letter, or privacy<br />
policy letter.<br />
Default<br />
Result Letter<br />
The result letter is the standard letter that is printed with a return. It tells the client that<br />
the return has been prepared from the information provided, states the amount of the<br />
refund or balance due, and provides instructions for mailing the return (if paper-filing).<br />
The program uses Result Letter #1 as the default.<br />
To change the default letter for a return, go to the LTR screen and select a new letter<br />
from the Letter # drop list. In addition to other result letter templates, you can have<br />
the program generate a result letter in Spanish (Figure 2-23), an extension letter, or an<br />
amended return letter instead of the program default letter.<br />
Figure 2-23: Selecting the Spanish letter as the default letter for a return (LTR screen)<br />
NOTE<br />
To change the default letter for all returns, go to the Optional Documents<br />
tab in Setup > Options and select a template from the<br />
applicable package in the Result Letter section of the dialog box.<br />
58 Tax Year 2012
<strong>Drake</strong> <strong>Software</strong> User’s <strong>Manual</strong><br />
Making Changes on the Fly<br />
Customized<br />
Greeting<br />
The default greeting for all letters is set in Letters Setup. To override the greeting for a<br />
return, go to the LTR screen and enter a new greeting in the Personalized letter<br />
greeting text box.<br />
NOTE<br />
To begin the greeting for the letter with one return with “Dear,” enter the<br />
greeting, along with the name, in the Personalized letter greeting<br />
field. To have all letters for a package type begin with “Dear” (or<br />
another greeting of your choice), make the change in the actual template<br />
in Setup > Letters.<br />
Adding a<br />
Custom<br />
Paragraph<br />
To add a custom paragraph to a letter, write the paragraph in the Custom Paragraph<br />
field of the LTR screen. By default, the paragraph is printed at the bottom of the letter.<br />
To have a custom paragraph appear somewhere else within the letter:<br />
1. From the <strong>Drake</strong> Home window, go to Setup > Letters.<br />
2. Click Open and select the package and letter to be generated for the client.<br />
3. Place the cursor on the line where you want the custom paragraph to appear.<br />
4. Click the plus [+] sign next to Miscellaneous in the tree directory (left column of<br />
window).<br />
5. Double-click the keyword. The keyword<br />
appears in the letter template.<br />
6. Click Save.<br />
When the return is generated, the letter displays the custom paragraph as directed.<br />
E-filing or<br />
Paper-filing?<br />
If a return has an EF message when calculated, the return is considered ineligible for<br />
e-file and the program generates a result letter for a paper-filed return. If the return is<br />
considered eligible for e-file, a letter for an e-filed return is generated. You can override<br />
these defaults for the federal and state tax returns and extension applications.<br />
To override the defaults, go to the LTR screen and select EF or Paper for the selected<br />
returns (Figure 2-24). To indicate one or more state returns, select state abbreviations<br />
from the drop lists provided. In the Figure 2-24 example, the letter will be worded as if<br />
both the federal and Arizona returns are going to be e-filed—even if the return is not<br />
eligible for e-file.<br />
Figure 2-24: Select EF to force a letter to be printed as if the return is eligible for e-file.<br />
Tax Year 2012 59
Making Changes on the Fly<br />
<strong>Drake</strong> <strong>Software</strong> User’s <strong>Manual</strong><br />
Printing<br />
Additional<br />
Letters<br />
From Setup > Options, Optional Documents tab, you can select to have the customized<br />
supplemental letter, engagement letter, and privacy policy letter printed with all<br />
returns. To override the established defaults for a single return, go to the return’s LTR<br />
screen and select Yes or No for the desired letter types. In Figure 2-24 on page 59, the<br />
user has selected not to have the engagement letter printed for the client.<br />
NOTE<br />
In the 1120S, 1065, and 1041 packages, you can print K-1 letters for a<br />
return by entering the signing information on the LTR screen. This is<br />
necessary only if the global option to print K-1 letters is not selected in<br />
Options Setup.<br />
Overriding EF Setup<br />
The EF screen in data entry allows you to suppress federal and state e-filing on a perreturn<br />
basis. (The program default in Setup > Options, EF tab is that all eligible<br />
forms will be e-filed.) For more information on the EF screen, see “EF Override<br />
Options in Data Entry” on page 236.<br />
60 Tax Year 2012
3 Basics<br />
Logging In and Out<br />
To open the 2012 program, double-click the <strong>Drake</strong> 2012 icon on your desktop. The<br />
Login window displays the Preparer Login box (Figure 3-1), system and drive information,<br />
and the current date.<br />
Log in using the Preparer Login box on the <strong>Drake</strong> Login window (Figure 3-1). Enter<br />
a Preparer ID and Password (if one has been designated) and click Login to open the<br />
<strong>Drake</strong> Home window (see Figure 3-2 on page 62).<br />
Figure 3-1: Preparer Login box on <strong>Drake</strong> login window<br />
IMPORTANT<br />
The Home Window<br />
If logging in for the first time after installation, enter ADMIN (not<br />
case-sensitive) for Preparer ID. For Password, enter the serial<br />
number from your packing slip.<br />
To log out without closing the program, click File > Logout Preparer from the Home<br />
window. To close the program, click Exit, then Yes.<br />
The <strong>Drake</strong> Home window (Figure 3-2 on page 62) has the following features:<br />
Tax Year 2012 61
The Home Window<br />
<strong>Drake</strong> <strong>Software</strong> User’s <strong>Manual</strong><br />
• Menu bar and toolbar — (items 1 and 2 in Figure 3-2) These tools allow you to<br />
accomplish tasks in the program.<br />
• Recent Returns — (item 3 in Figure 3-2) Lists the last nine returns opened in the<br />
program.<br />
• Appointments — (item 4 in Figure 3-2) Shows the preparer’s schedule and provides<br />
a link to turn appointment reminders on and off.<br />
• Notifications — (item 5 in Figure 3-2) Lists e-mail messages that must be downloaded,<br />
updates that must be installed, and acknowledgments that must be processed;<br />
lets you know if your program is up to date.<br />
NEW FOR<br />
2012<br />
Information on pending and completed GruntWorx jobs will also appear<br />
in the Notifications.<br />
• Status bar — (item 6 in Figure 3-2) Provides system information.<br />
• Personal Client Manager (PCM) — (item 7 in Figure 3-2) personalized version<br />
of the Client Status Manager; see “Personal Client Manager” on page 63 for more<br />
information.<br />
• Enable Privacy — Hides the recent return list, the PCM, and the preparer notes.<br />
(Click Disable Privacy to view the list again.)<br />
• Preparer Notes — (item 8 in Figure 3-2) Use this section to write brief notes,<br />
reminders, to-do lists, etc. Notes are visible only to the preparer who wrote them.<br />
(In other words, one preparer’s notes will not show up on another preparer’s<br />
Home window.) Notes remain in this section until they are deleted.<br />
Figure 3-2: <strong>Drake</strong> Home window<br />
62 Tax Year 2012
<strong>Drake</strong> <strong>Software</strong> User’s <strong>Manual</strong><br />
General Navigation<br />
Personal Client Manager<br />
The Personal Client Manager (PCM) allows a logged-in preparer to manage client<br />
returns more easily by providing a personalized version of the Client Status Manager<br />
(CSM). Client records can be sorted by name, return type, status, date the return was<br />
started or completed, date of last change, transmission date, acknowledgment code or<br />
date, and phone number. To sort records, click a column header.<br />
NOTE<br />
The PCM operates much the same as the CSM. For specific instructions<br />
on using these tools, see Chapter 9, “Client Status Manager.”<br />
Activating<br />
the PCM<br />
To activate the PCM for logged-in preparers, an administrative user must go to Setup<br />
> Options, Administrative Options tab and select the Enable logged in preparer’s<br />
Personal Client Manager box (located under Main Dialog Options).<br />
General Navigation<br />
You can use both the mouse and the keyboard for navigating within the software.<br />
• Left button (mouse) — Move the pointer over an item and click the left mouse<br />
button to select that item. When this manual instructs you to “click” or “doubleclick”<br />
an item on the screen, use the left button on the mouse.<br />
• Right button (mouse) — While in data entry, right-click the mouse anywhere on<br />
the screen to display a menu of common program functions. Right-click a specific<br />
field to view the return in View mode, use macros, undo an entry, reset the field,<br />
cut, copy, paste, delete, add worksheets, use the calculator, view help for that<br />
field, or flag the field for later review.<br />
• Shortcut keys (keyboard) — Use shortcut keys to accomplish tasks without<br />
using the mouse. Press ALT to display the underlined shortcut key and press the<br />
desired shortcut key. For example, from the Home window, you can press ALT, F,<br />
O (F for File, O for Open) to open the Open/Create a New Return dialog box, or<br />
ALT, L, O (L for Last Year Data, O for Open) to open the Organizer Client<br />
Selection dialog box. (Figure 3-3)<br />
Figure 3-3: Underlined shortcut keys in menu bar of Home window<br />
• Key combinations — Use key combinations as another way to accomplish tasks<br />
without using the mouse. They are written as two or more key names connected<br />
by a plus (+) sign. Press and hold down one key, and then press a second key. Key<br />
combinations are shown to the right of each menu item (Figure 3-4 on page 64).<br />
Tax Year 2012 63
General Navigation<br />
<strong>Drake</strong> <strong>Software</strong> User’s <strong>Manual</strong><br />
Screen Hyperlinks<br />
Figure 3-4: Key combinations<br />
Hyperlinks in data entry allow easier, more concise data entry. Hyperlinks are available<br />
in all packages and fall into two categories: links and screen tabs.<br />
Links<br />
Use links to move quickly from one screen to a related screen without having to return<br />
to the Data Entry Menu. The example in Figure 3-5 shows that Foreign Employer<br />
Compensation screen, the INT screen, the DIV screen, and the 1099-G screen can be<br />
directly accessed from the Income screen (screen 3).<br />
Figure 3-5: Links from the Income screen<br />
Federal-to-state links serve as shortcuts to related state screens. For example, the state<br />
links on screen 2441 (Child & Dependent Care Expenses) are to those state screens<br />
for child and dependent care expenses. State links are located in a State Information<br />
section at the upper-right corner of a screen (Figure 3-6).<br />
Figure 3-6: Example of a State Information section for federal-to-state links<br />
64 Tax Year 2012
<strong>Drake</strong> <strong>Software</strong> User’s <strong>Manual</strong><br />
Creating and Opening Returns<br />
Screen Tabs<br />
Screen tabs allow you to organize multiple instances of the same form and their associated<br />
worksheets. For instance, in <strong>Drake</strong>’s 1040 package, the K1P, K1S, and K1F<br />
screens contain tabs to associate the K-1 screens (Schedule K-1 requires two screens<br />
in <strong>Drake</strong>), the two sections of the basis worksheet, and two 6198 at-rink limit worksheets<br />
with a particular K-1 issued to the taxpayer. For a new K-1, press PAGE DOWN.<br />
Creating and Opening Returns<br />
Creating a Return<br />
Figure 3-7: Tabs on the K1P screen for an individual (1040) return<br />
When you enter an ID number (SSN or EIN), the software searches both current- and<br />
prior-year files. If it finds a client record in the prior-year files only, you are given the<br />
opportunity to update the record from the previous year into this year’s program. (See<br />
“Updating Client Files” on page 78 to perform an update.)<br />
To create a return in <strong>Drake</strong>:<br />
1. From the Home window, click Open/Create (or ALT, F, O).<br />
2. In the Open/Create a New Return box, enter the client’s ID number.<br />
3. Click OK.<br />
4. Click Yes when asked if you want to create a new return.<br />
5. In the New Return dialog box, select the return type.<br />
6. Enter the client’s name.<br />
7. Click OK. Data entry screen 1 for the new return is displayed.<br />
NOTE<br />
You may be required to verify the ID number for a new return. Verification<br />
is required for all Pay Per Return (PPR) clients.<br />
Opening a Return<br />
Recently accessed<br />
returns can be<br />
selected from the<br />
Recent Returns<br />
list in the Home<br />
window.<br />
To open an existing return in <strong>Drake</strong>:<br />
1. From the Home window, click Open/Create. The Open/Create a New Return<br />
dialog box is displayed (Figure 3-8 on page 66).<br />
2. Perform one of the following tasks:<br />
Tax Year 2012 65
Data Entry<br />
<strong>Drake</strong> <strong>Software</strong> User’s <strong>Manual</strong><br />
• Enter the ID number of the return (item 1 in Figure 3-8).<br />
• Select one of the last nine returns opened (item 2 in Figure 3-8). Click a row<br />
to select a return.<br />
• Select a return type (item 3 in Figure 3-8). Returns are displayed in the grid to<br />
the left. Click a row to select a return.<br />
Figure 3-8: Open/Create a New Return dialog box<br />
3. Click OK. The Data Entry Menu is opened for the selected return.<br />
Data Entry<br />
Data Entry Menu<br />
Returns are prepared in data entry mode. Access data entry screens from the Data<br />
Entry Menu. (See Figure 3-9 on page 67.) When in data entry, press ESC to save your<br />
data, exit the open screen, and return to the Data Entry Menu. Pressing ESC from the<br />
Data Entry Menu returns you to the Home window (Figure 3-2 on page 62). Also in<br />
data entry, you can use the TAB key, the UP ARROW and DOWN ARROW keys, and the<br />
PAGE UP and PAGE DOWN keys to move from field to field, or from screen to screen.<br />
The Data Entry Menu (Figure 3-9 on page 67) is displayed when you open a return.<br />
It consists of a toolbar, tabs, screen codes and names, the selector field, and the status<br />
bar.<br />
66 Tax Year 2012
<strong>Drake</strong> <strong>Software</strong> User’s <strong>Manual</strong><br />
Data Entry<br />
Working in a Tax Return<br />
Figure 3-9: Data Entry Menu<br />
Prepare tax returns in <strong>Drake</strong> by entering pertinent information on specific data entry<br />
screens. Entries are used to calculate the federal, state, and city tax returns.<br />
To open a screen, use one of the following methods:<br />
• Keyboard — From any tab, type a form code in the selector field. Press ENTER.<br />
• Mouse — Select a Data Entry Menu tab and click the screen name.<br />
Managing<br />
Screens<br />
Use the following methods to exit, save, reset, and delete screens in <strong>Drake</strong>:<br />
• Press ESC to save your changes and exit a screen.<br />
• Press SHIFT+ESC to exit a screen without saving your changes.<br />
• Press CTRL+U to reset a screen to the last save.<br />
• Press CTRL+D to delete a screen. If multiple occurrences of a screen exist (for<br />
example, if a return has two 1099s), an Existing Forms List is opened. Select the<br />
screens to delete, and then click Delete. (See “Existing Forms List” on page 68.)<br />
You can also use the right-click menu to take these actions.<br />
Navigating<br />
Fields<br />
A blinking cursor and yellow shading indicate an active field. Click a field to activate<br />
it. Following are keyboard-only methods of moving from field to field:<br />
• Press TAB to move the cursor forward one field.<br />
Tax Year 2012 67
Data Entry<br />
<strong>Drake</strong> <strong>Software</strong> User’s <strong>Manual</strong><br />
• Press SHIFT+TAB to move the cursor back one field.<br />
• Press CTRL+ or CTRL+ to move the cursor up or down one field, respectively.<br />
Grid Data<br />
Entry<br />
Grid data entry allows faster data entry for the Dependents, INT, DIV, and 4562<br />
screens. In grid data entry mode, click a field to activate it, and then type data directly<br />
into the field.<br />
Figure 3-10: Entering data directly with grid data entry<br />
To access grid data entry from full-screen mode, press F3. Press F3 again (or click<br />
Item Detail) to return to full-screen mode. To delete a row in grid data entry, select a<br />
row number and click Delete (or press CTRL+D). At the prompt, click Yes.<br />
Existing<br />
Forms List<br />
The Existing Forms List is displayed if more than one instance of a screen has been<br />
saved in a return.<br />
Figure 3-11: Existing Forms List<br />
To open a screen from the list, double-click a row (or select it and click Open). To<br />
open a new, blank screen, select New Record.<br />
NOTE<br />
Grid data entry replaces an Existing Forms List if grid data is the<br />
established default in Options Setup. Disable the default from Setup ><br />
Options > Data Entry tab.<br />
Multiple<br />
Instances of<br />
a Form<br />
Many clients require multiple instances of such forms as Form W-2. In most cases,<br />
press PAGE DOWN to open a new screen and enter data for a second form.<br />
Some forms have more than one “page” or screen. If you are in a multiple-screen<br />
form, use the links provided to go to the next page. If no links are provided, press<br />
PAGE DOWN to move to the second “page” of the screen. Press CTRL+PAGE DOWN to<br />
open a new instance of the form.<br />
Each time a new screen is produced, <strong>Drake</strong> indicates the record number on the status<br />
bar of the screen. The number of records is also shown on the Data Entry Menu<br />
(Figure 3-12 on page 69).<br />
68 Tax Year 2012
<strong>Drake</strong> <strong>Software</strong> User’s <strong>Manual</strong><br />
Data Entry<br />
Figure 3-12: Multiple instances of a screen are shown in status bar and Data Entry Menu.<br />
Detail<br />
Worksheet<br />
Use detail worksheets to enter up to 30 items for a numeric field. Totals are calculated<br />
automatically.<br />
To use a detail worksheet:<br />
1. Select the numeric field to which the worksheet will apply.<br />
Double-click the field, press CTRL+W, or right-click and select Add Worksheet to<br />
open a Detail Worksheet.<br />
Figure 3-13: Detail worksheet with data entered<br />
o<br />
2. Enter or edit the worksheet Title.<br />
3. Enter a Description and Amount for each item. Do not skip lines. As needed, use<br />
F1, F2, F3, and F4 to sort items in the list. (See Figure 3-13.)<br />
4. Press ESC. <strong>Drake</strong> saves your work and displays the total in data entry. Note that<br />
the field is shaded to indicate a worksheet is present. (Default color is red; see<br />
Figure 3-14.)<br />
Figure 3-14: Shaded worksheet field<br />
Tax Year 2012 69
Data Entry<br />
<strong>Drake</strong> <strong>Software</strong> User’s <strong>Manual</strong><br />
NOTES<br />
Detail worksheets are produced as overflow statements but are not e-<br />
filed with the return.<br />
To print a description on a statement without a corresponding dollar<br />
amount, enter a slash ( / ) in front of the description.<br />
If you press CTRL+W (or double-click) in a Depreciation field, the program<br />
opens the associated 4562 (Depreciation) screen with the For<br />
and Multi-Form Code boxes completed. (See “Associating One<br />
Screen with Another” on page 73.)<br />
Field Flags<br />
Use field flags to set certain fields apart for review. Flagged fields are shaded (default<br />
is green) and must be manually verified (cleared) prior to e-filing.<br />
To flag a field, click the field to activate it, and then press F2. You can also do this by<br />
right-clicking in the field and selecting Flag For Review. The field is displayed with a<br />
shaded background (Figure 3-15).<br />
Figure 3-15: Flagged fields are shaded. (Default is green.)<br />
When a return with flagged fields is calculated, an EF message is generated. It must be<br />
removed (in other words, all flagged fields must be cleared) before the return can be e-<br />
filed.<br />
To clear a flagged field, place the cursor in the field and press F4. To clear all flagged<br />
fields on an open screen, press CTRL+SHIFT+SPACE. To clear all flagged fields in the<br />
open return, go to the Data Entry Menu and press CTRL+SHIFT+SPACE.<br />
Global Flags<br />
A user with administrative rights can designate certain fields to be flagged in all<br />
returns. When flags are set globally, they apply to all returns. Global flags can be for<br />
screens, or for new returns.<br />
• Screens — The presence of an unverified flag produces an EF message only if the<br />
screen exists for the return. For example, if the Employer ID # field on screen C<br />
is flagged, an EF message for the unverified field is produced only if a Schedule C<br />
is present on the return and the Employer ID # field has not been verified. If there<br />
is no Schedule C, no verification is required.<br />
• New Returns — When a field is flagged for all new returns, an unverified flag<br />
produces an EF message whether or not the screen has been opened for the return.<br />
In the above example, an EF message would be created even if no Schedule C was<br />
present in the new return. In effect, this type of global flagging would force the<br />
data entry operator to open screen C, even if only to clear the flag.<br />
70 Tax Year 2012
<strong>Drake</strong> <strong>Software</strong> User’s <strong>Manual</strong><br />
Data Entry<br />
To prevent flagged fields from being overlooked, all new-return flags cause the corresponding<br />
screen and tab names to appear as the color of the field flag (Figure 3-16;<br />
default color is green). Once the field has been verified, the highlighted tab and screen<br />
names go back to their original colors.<br />
Figure 3-16: Screen C under the Income tab has a flagged field.<br />
Flagging<br />
Fields<br />
Globally<br />
To flag one or more fields in all returns:<br />
1. From the Home window, select Setup > Options, Administrative Options.<br />
2. Select Use Customized Flagged Fields on all Returns.<br />
3. Click Flag to open a dialog box with buttons for all <strong>Drake</strong> packages (Figure 3-17).<br />
Figure 3-17: Flag Fields for Review dialog box<br />
4. Click a package button. The Flag Fields for Review window for that package is<br />
opened. Note that this window resembles the Data Entry Menu.<br />
5. Select a screen to open it.<br />
6. Choose one of the following options:<br />
• Flag a field for a screen — Click the fields to flag. The field is flagged with<br />
the word “Screen.”<br />
• Flag a field for all new returns — Right-click a field and select Flag For<br />
Review When Return is Created. The field is flagged with the word<br />
“Return,” as shown in the example in Figure 3-18 on page 72.<br />
Tax Year 2012 71
Data Entry<br />
<strong>Drake</strong> <strong>Software</strong> User’s <strong>Manual</strong><br />
Figure 3-18: Field has been flagged for all new returns.<br />
NOTE Click a field a second time to remove the flag.<br />
7. Return to Setup > Options. (Press ESC to exit each window, press ESC again to<br />
exit the Flag Fields for Review window, and then click Exit.)<br />
8. Click OK.<br />
Override &<br />
Adjustment<br />
Fields<br />
By default, fields that allow overrides are preceded by an equal sign (=) and display<br />
red text. Data entered in these fields replaces, or overrides, program calculations.<br />
Figure 3-19: Direct entry, override, and adjustment fields<br />
Fields that allow adjustments are preceded by a plus/minus sign (+/-) and display blue<br />
text by default. Data in these fields adjust program calculations by the amount entered.<br />
A positive number increases the calculated amount; a negative number decreases it.<br />
ZIP Code<br />
Database<br />
EIN<br />
Database<br />
Bank Name<br />
Database<br />
Common<br />
Screen<br />
Fields<br />
When a ZIP code is entered on a screen, the city and state fields are filled by default<br />
from the program’s ZIP code database. There is no need to enter the city and state.<br />
When new employer data is entered on a screen, the program stores the EIN, business<br />
name, and business address in the EIN database. The next time the EIN is entered on a<br />
W2, 1099, or 2441 screen, the business name and address automatically appear in the<br />
required fields.<br />
The program retains the names of all financial institutions when they are entered for<br />
the first time in data entry. The next time the first few letters of a saved name are<br />
entered, the program “auto-completes” the entry. To add, edit, or delete entries from<br />
the bank name database, place the cursor in a bank name field and press<br />
CTRL+SHIFT+E and follow the instructions that are displayed.<br />
Many screens in <strong>Drake</strong> have fields labeled TS, F, ST, and City. These fields, shown in<br />
Figure 3-20 on page 73, are used to apply the data on the screen to the taxpayer or the<br />
spouse (or both), on federal, state, or city returns.<br />
72 Tax Year 2012
<strong>Drake</strong> <strong>Software</strong> User’s <strong>Manual</strong><br />
Data Entry<br />
Figure 3-20: Screen code examples for Schedule C<br />
• TS (or TSJ) — Select T if a screen applies to the primary taxpayer, S if it applies<br />
to the spouse, or J if it applies to each spouse equally. (Default is T.)<br />
• F — All data on a screen is automatically carried to the federal return as applicable.<br />
Select zero (0) from the F drop list to prevent a screen’s data from being carried<br />
to the federal return.<br />
• ST — Code indicates whether the screen data should be used in calculating a specific<br />
state return. If this field is blank, the software uses the resident state by<br />
default. The data is not carried to any state or city if a zero (0) is selected here.<br />
• City — Code indicates the source of the income on city returns.<br />
Press F1 in a screen field to view all acceptable codes for that field.<br />
Associating<br />
One Screen<br />
with Another<br />
<strong>Drake</strong> allows you to associate one screen with another, such as when an asset on one<br />
screen should be associated with a Schedule C. For example, to associate an asset<br />
screen to a C screen, complete the For field and the Multi-form Code field (if applicable)<br />
at the top of the asset screen. For the For drop list, select the form to be associated<br />
with the open screen, as shown in Figure 3-21.<br />
Figure 3-21: In this example, the 4562 screen is to be associated with the<br />
second Schedule C created in the return.<br />
If a return has multiple instances of the selected form, enter the instance of the form in<br />
the Multi-form code field. For example, if there are two Schedule Cs and you want to<br />
associate an asset with the second Schedule C created in the return, you would enter a<br />
multi-form code of “2.” (See Figure 3-21.)<br />
NOTE<br />
For Schedule E rental properties, each property (in other words, each<br />
screen) has a separate multi-form code. The MFC number for a<br />
Schedule E should refer to the property, not the instance of the<br />
Schedule E. (Up to three properties are printed on a Schedule E.)<br />
Splitting a<br />
Joint Return<br />
When you split a joint return in <strong>Drake</strong>, the program calculates three returns: one for<br />
married filing jointly (MFJ), and two for married filing separately (MFS).<br />
Before splitting a joint return, ensure that data on all screens clearly applies to either<br />
the taxpayer (T) or spouse (S), and make sure Ready for EF is not marked on the EF<br />
screen. If this box is marked, all three returns will be marked eligible for e-file. (See<br />
“EF Override Options in Data Entry” on page 236.)<br />
Tax Year 2012 73
Data Entry<br />
<strong>Drake</strong> <strong>Software</strong> User’s <strong>Manual</strong><br />
To split a joint return:<br />
1. Open the return.<br />
2. Choose one of the following options:<br />
• To compare returns for two individuals who lived together for the entire year,<br />
click the Split button or press CTRL+S.<br />
• To compare returns for two individuals who did not live together for the entire<br />
year, click the down arrow next to the Split button and select a category of<br />
MFS filing status.<br />
NOTE<br />
At this point, if there is a Schedule A on the return and you have not<br />
specified on screen A whether to force itemized or standard deduction,<br />
you are prompted to select Itemize, Standard, or Optimize before proceeding.<br />
If you select Optimize, the program will determine which is the<br />
better treatment of the Schedule A deductions.<br />
Results are displayed in the Return Selector (Figure 3-22). The MFJ/MFS<br />
Report button allows you to view a Filing Status Optimization Report for a<br />
selected return. (See “About the MFJ/MFS Report” following.)<br />
Figure 3-22: Results for split return<br />
3. Select files, and then click MFJ/MFS Report, Print, or Save, as applicable.<br />
4. Click Exit.<br />
About the<br />
MFJ/MFS<br />
Report<br />
To view the MFJ/MFS report, click the MFJ/MFS Report button. (See Figure 3-22.)<br />
The report is displayed with the MFS_COMP (and OH_COMP, for Ohio returns)<br />
reports visible in tree mode. Select a report for viewing or printing. The report appears<br />
in the pane to the right of the tree view. For more information on View mode, see<br />
“Viewing a Return (Enhanced Mode)” on page 197.<br />
NOTE<br />
Currently, the state report feature is available for Ohio returns only.<br />
74 Tax Year 2012
<strong>Drake</strong> <strong>Software</strong> User’s <strong>Manual</strong><br />
State Returns<br />
The program saves the MFS data shown in the reports only if you save the split<br />
returns. If you are not planning to save the MFS versions of the returns but want to<br />
show the reports to your client later, print the reports now for your client’s records.<br />
If the MFS versions are saved, both the completed MFS_COMP and OH_COMP<br />
reports can be viewed after calculating the return. If they are not saved, only the<br />
“Joint” column will be completed on these reports.<br />
NOTE<br />
Billing for this report is done through Setup > Pricing (use item 350).<br />
For more on setting up pricing in <strong>Drake</strong>, see “Pricing Setup” on<br />
page 37. To suppress the charge for an individual return, use the BILL<br />
screen. (See “Overriding the Bill Amount” on page 56.)<br />
Screen<br />
Captures<br />
Screen captures can be taken in data entry and sent to the clipboard, a printer, or a file.<br />
To capture a data entry screen:<br />
1. Right-click any open screen (not within a field or text box).<br />
2. Select Screen Shot. The program offers three choices for screen captures:<br />
• To File — Save the screen as a bitmap (.bmp) file to a location you select.<br />
• To Printer — Open the Print dialog box and print an image of the screen.<br />
• To Clipboard — Copy an image of the screen to your clipboard in order to<br />
paste it into another program, such as Microsoft Outlook.<br />
3. Save, print, or copy the image as directed, according to your selection.<br />
Calculator<br />
Macros<br />
A calculator feature is available in every numeric field in data entry. To access it, press<br />
F10 from within a field. Once results are calculated, press F1 to insert those results<br />
into the field. When the calculator is active, the NUM-LOCK status is activated.<br />
NUM-LOCK is disabled when the calculator is closed.<br />
Macros are shortcuts that allow you to enter frequently used data entry items with<br />
minimal keystrokes. This feature is described in detail in the “Macros Setup” on<br />
page 38.<br />
Heads-Down Data Entry<br />
State Returns<br />
Heads-down data entry provides an efficient method of data entry when working from<br />
a proforma interview sheet. Information on this method is provided in the “Headsdown<br />
Data Entry” section of Chapter 4, “Preseason Preparation.”<br />
When a return is prepared, <strong>Drake</strong> automatically generates state returns based on data<br />
entered for the federal return. Calculation is based on the state entered on screen 1 for<br />
Tax Year 2012 75
Practice Returns and Test Returns<br />
<strong>Drake</strong> <strong>Software</strong> User’s <strong>Manual</strong><br />
resident state and on the state codes indicated on other forms (W-2, Schedule C, 1099,<br />
Schedule B, etc.).<br />
Click the States tab in data entry to view a list of states. Click any state from the list or<br />
enter the two-letter state code in the selector field to access the Data Entry Menu for<br />
that state. It is not necessary to return to the States tab to enter a new state code.<br />
Access city screens by entering a city code into the selector field. Another option is to<br />
open a state menu, and then click the Cities tab (if available). Cities are listed with<br />
their two-letter codes.<br />
Practice Returns and Test Returns<br />
Practice returns, test returns, and EF test returns are available on the <strong>Drake</strong> Support<br />
site and on the software CD:<br />
• Practice returns help new <strong>Drake</strong> <strong>Software</strong> clients become more familiar with how<br />
data is entered in <strong>Drake</strong>. Practice preparing returns by completing data entry<br />
based on the practice scenarios provided. Practice returns can be found on the<br />
installation CD, through the software (from the <strong>Drake</strong> Home window, go to Help<br />
> Online Resources) and at Support.<strong>Drake</strong><strong>Software</strong>.com > Training Tools ><br />
Practice Returns.<br />
• Test returns can be installed with <strong>Drake</strong> <strong>Software</strong>. The SSNs for these returns run<br />
from 400-00-1031 through 400-00-1040 and consist of various forms and schedules<br />
to show how different tax scenarios are prepared in <strong>Drake</strong>. You can also use<br />
the test returns to test e-filing before tax season begins by transmitting a test<br />
return.<br />
• EF-Banking practice returns also allow you to practice e-filing returns in <strong>Drake</strong><br />
<strong>Software</strong>. The returns will be either accepted or rejected. Correct the rejected<br />
returns and resend them to receive acknowledgements. Practice printing checks<br />
for the returns with a bank product. The SSNs for the test returns run from 500-<br />
00-1001 through 500-00-1008. EF practice returns can be found on the installation<br />
CD, through the software (from the <strong>Drake</strong> Home window, go to Help ><br />
Online Resources) and at Support.<strong>Drake</strong><strong>Software</strong>.com > Training Tools > Practice<br />
Returns.<br />
For more information on how practice returns can help you, see “Practice Returns” on<br />
page 266.<br />
76 Tax Year 2012
4 Preseason Preparation<br />
Prior-Year Updates<br />
This chapter provides instructions for bringing forward information from last year,<br />
printing proformas or organizers for clients, mailing preseason materials, and setting<br />
up schedules. See Appendix A, Preseason Checklist, for a convenient list of tasks to<br />
consider as you prepare for tax season.<br />
If your firm used <strong>Drake</strong> last year, you can save time by updating prior-year returns,<br />
settings, letters, and EIN data. Before updating, you should (1) back up your files, and<br />
(2) ensure that your program’s 2011 data path points to your firm’s 2011 data files.<br />
By default, <strong>Drake</strong> accesses the previous year’s client files from the workstation’s local<br />
drive. If your prior-year files are stored elsewhere, enter the location at the bottom of<br />
the Network Setup window:<br />
1. Log in to the program as a user with administrative rights.<br />
2. From the Home window, select Setup > Data Locations.<br />
3. Look at the Location of 2011 client files field (Figure 4-1).<br />
Figure 4-1: Ensure that the Path for 2011 Data field is correct.<br />
4. If the correct path is not displayed, enter the correct path and click OK.<br />
NEW FOR<br />
2012<br />
For more on <strong>Drake</strong>’s updated Data Locations setup, see “Single Workstations<br />
and Network Options” on page 16.<br />
Tax Year 2012 77
Prior-Year Updates<br />
<strong>Drake</strong> <strong>Software</strong> User’s <strong>Manual</strong><br />
Updating Client Files<br />
By default, the following information is brought forward from the prior year:<br />
• names and addresses • depreciation • ages<br />
• filing statuses • occupations • dependent names<br />
• business names • installment sales • ID numbers<br />
You have the option of selecting other data to bring forward when you update client<br />
files, as explained in the following sections.<br />
NOTE<br />
To ensure that files are updated according to your clients’ needs,<br />
update returns individually as you meet with your clients. <strong>Drake</strong> does<br />
not recommend updating all returns in a package at once.<br />
Update<br />
Returns<br />
Individually<br />
To update an individual return:<br />
1. Open the return in <strong>Drake</strong> 2012. An Individual Update Options dialog box lists<br />
all options for updating (Figure 4-2).<br />
Figure 4-2: Individual Update Options box<br />
2. (optional) Select additional items to update. (Click Select All to choose all items.)<br />
3. Click Update 1040.<br />
Once updated, the return is shown in the Data Entry Menu.<br />
78 Tax Year 2012
<strong>Drake</strong> <strong>Software</strong> User’s <strong>Manual</strong><br />
Prior-Year Updates<br />
Update<br />
Returns<br />
Globally<br />
To update all returns in a package (not recommended):<br />
1. From the Home window, select Last Year Data > Update 2011 to 2012.<br />
2. Click Next.<br />
3. Select filters (optional), and then click Continue. The Update Options dialog<br />
box is displayed.<br />
4. (optional) Select additional items to bring forward. (See Figure 4-2 on page 78.)<br />
5. Click Update 1040. All returns are updated according to selections in the Update<br />
Options box.<br />
CAUTION<br />
Once returns have been updated, the updates cannot be reversed. To<br />
avoid oversights, update each return individually.<br />
Once the program has updated the returns, it displays a report listing the updated<br />
returns. Click Exit to close the Report Viewer.<br />
Building the EIN/Name Index<br />
Updating Settings<br />
Each time an employer is entered on a screen for a Form W-2, W-2G, 1099-R, 1099-G,<br />
8283, or 2441, that employer’s name, EIN, and corresponding information is automatically<br />
added to the EIN database.<br />
To update the EIN/name database from 2011:<br />
1. In the 2012 version of the program, select Last Year Data > Build EIN/Name<br />
from 2011.<br />
2. From the Build EIN Database and Name Index dialog box, select the indexes to<br />
update and click Continue.<br />
3. Wait for the program to finish scanning the files. (This update takes about one<br />
minute for every 2,000 client files.)<br />
4. Click Exit.<br />
Apply your firm’s 2011software settings to the 2012 program to save preseason preparation<br />
time. Once the settings are brought forward for the year, they can be individually<br />
adjusted.<br />
CAUTION<br />
Selecting a previously updated item can cause a loss of current-year<br />
data.<br />
To update settings from 2011:<br />
1. In the 2012 version of the program, go to Last Year Data > Update Settings<br />
2011 to 2012. The Update Settings dialog box is displayed. (Figure 4-3 on<br />
page 80.)<br />
Tax Year 2012 79
Organizers and Proformas<br />
<strong>Drake</strong> <strong>Software</strong> User’s <strong>Manual</strong><br />
Figure 4-3: Update Settings dialog box<br />
2. Select the drive that stores the 2011 data to bring forward.<br />
3. Select the setting categories to bring forward. All items, except for previously<br />
updated items, are selected by default.<br />
NOTES<br />
Click the plus sign in front of an item to expand it and view or select subitems.<br />
If you select an item with sub-items, all sub-items are selected by<br />
default.<br />
If updating Pricing setup, you will be prompted to enter a percentage<br />
increase to apply per item, per form, or both, and the option to round to<br />
the nearest dollar.<br />
4. Click Continue, and then Confirm the selections to start the update process.<br />
5. Click Exit when the status for each item is displayed as Completed.<br />
Organizers and Proformas<br />
Available for the 1040 package, organizers help clients prepare for their tax appointments.<br />
Many organizer sheets feature two-column layouts, with one column containing<br />
prior-year data and the other intended for current-year data (Figure 4-4 on<br />
page 81).<br />
NEW FOR<br />
2012<br />
Organizers can now be sent directly to the <strong>Drake</strong> Document Manager<br />
or to your SecureFilePro TM portal. For details, see “Printing Organizers<br />
and Proformas for Clients” on page 82. For more on the Document<br />
Manager and SecureFilePro TM , see Chapter 13, “Suite Products.”<br />
80 Tax Year 2012
<strong>Drake</strong> <strong>Software</strong> User’s <strong>Manual</strong><br />
Organizers and Proformas<br />
Figure 4-4: Sample of Wages and Salaries page from an organizer<br />
Available for individual and business packages, proformas have numbered fields corresponding<br />
to the fields on <strong>Drake</strong> data-entry screens (Figure 4-5). Proformas are<br />
designed to be internal documents and can be used during the interview process.<br />
Figure 4-5: Sample of W-2 page from a proforma<br />
Blank proformas and organizers can be viewed and printed from Tools > Blank<br />
Forms. See “Printing Organizers and Proformas for Clients” on page 82 for information<br />
on printing for selected clients.<br />
Entering Information from Proformas<br />
Use proformas during the interview process, or have a data entry operator enter tax<br />
information from proformas following the interview.<br />
Each sheet in a proforma has special codes printed on the left side of the page. For<br />
example, the red circle in Figure 4-5 shows that the proforma code for the W2 screen<br />
is “2-6.” As an alternative to the screen code of W2, the data entry operator or tax preparer<br />
can use the screen’s proforma code (2-6).<br />
To access a screen by entering its proforma code:<br />
1. From the Data Entry Menu, press CTRL+I to change the selector field.<br />
Tax Year 2012 81
Organizers and Proformas<br />
<strong>Drake</strong> <strong>Software</strong> User’s <strong>Manual</strong><br />
2. Enter the proforma code numbers, one in each text box. The Figure 4-6 example<br />
shows that a “2” and a “6” would be entered to access the W2 screen.<br />
Figure 4-6: Example: Type 2 and 6 to access the W2 screen.<br />
3. Press ENTER. The applicable screen is displayed for data entry.<br />
Heads-down<br />
Data Entry<br />
Combine the proforma codes and heads-down mode to move efficiently to the proper<br />
areas of a screen for data entry.<br />
To work in heads-down mode:<br />
1. Open a screen in data entry.<br />
2. Press CTRL+N. Numbers appear beside each field, as shown in Figure 4-7.<br />
Figure 4-7: Numbered fields in heads-down mode<br />
3. In the Heads Down Mode box at the top of the screen, enter a field number in the<br />
first text box and press ENTER.<br />
4. Enter data for the field in the second text box and press ENTER. The data is placed<br />
in the proper field and the system returns you to the first text box.<br />
5. Repeat for all other fields, pressing ENTER after the data for each field is entered.<br />
To return to the Data Entry Menu, press ESC.<br />
TIP<br />
Use CTRL+N to toggle between heads-down and data-entry modes.<br />
Printing Organizers and Proformas for Clients<br />
To print organizers or proformas for selected clients:<br />
1. From the Home window, click Last Year Data and select either Organizers or<br />
Proformas.<br />
2. Do one of the following tasks:<br />
• Enter the client’s SSN or EIN and press Add Client. Repeat for additional clients,<br />
and then click Next and wait for the program to scan the client files.<br />
82 Tax Year 2012
<strong>Drake</strong> <strong>Software</strong> User’s <strong>Manual</strong><br />
Organizers and Proformas<br />
See “Filter<br />
Manager” on<br />
page 319 for more<br />
on using filters.<br />
• Click Next and select filtering and sorting options as desired. Click Next<br />
again and modify filtering criteria from the Basic Search Conditions dialog<br />
box. Click Continue and wait for the program to scan the client files.<br />
3. When the Proforma/Organizer Options dialog box is opened, select the desired<br />
options (red circle on left in Figure 4-8).<br />
Figure 4-8: Organizers Options dialog box; includes Process button<br />
NOTE<br />
To have a certain preparer’s name appear on the preseason, engagement,<br />
and privacy policy letters, select a name from the Preparer Override<br />
drop list.<br />
4. Click Process (Figure 4-8) to open the Print Organizers/Proformas dialog box<br />
(Figure 4-9).<br />
Figure 4-9: Select print options from the Print Organizers/Proformas dialog box.<br />
5. Select options from the Print Options section (red circle in Figure 4-9). You can<br />
choose send the proformas or organizers to the printer, to the <strong>Drake</strong> Document<br />
Tax Year 2012 83
Organizers and Proformas<br />
<strong>Drake</strong> <strong>Software</strong> User’s <strong>Manual</strong><br />
Manager, or to the SecureFilePro TM portal. (For information on how to use the<br />
<strong>Drake</strong> Document Manager and SecureFilePro, see Chapter 13, “Suite Products.”)<br />
NEW FOR<br />
2012<br />
When sending organizers from multiple taxpayers to the Document<br />
Manager or SecureFilePro TM portal, <strong>Drake</strong> automatically sends the<br />
organizers or proformas to the correct client file or SecureFilePro TM <br />
portal.<br />
6. (Optional) Click Form Options to go to the Form Options dialog box and<br />
change the forms to be included in the organizer or the proforma. When finished,<br />
click Ok.<br />
7. (Optional) To view one of the organizers or proformas in View mode, click View.<br />
From View mode, you can print or e-mail the individual organizer or proforma.<br />
Click Exit to return to the Print Organizers/Proformas dialog box.<br />
8. Click Print.<br />
9. In the Print Selections dialog box, choose a printer and any other options desired.<br />
10.Click Print, and then click Print again. (If printing a PDF document, click Save.)<br />
NOTES<br />
If printing proformas for multiple return types, additional Proforma<br />
Options dialog boxes appear. Select additional options and click Process<br />
(1040, 1120, 1120S, 1065, etc.) to proceed.<br />
Preseason letters can also be printed in batches, apart from proformas<br />
and organizers. See “Letters” on page 301.<br />
Print Options for Organizers<br />
As noted above, you can choose send the proformas or organizers to a printer, to the<br />
Document Manager, or to the SecureFilePro TM portal. By sending it directly to your<br />
SecureFilePro TM portal, you save yourself several steps in getting an organizer into the<br />
hands of your client. Plus, SecureFilePro TM sends your client an e-mail, alerting him or<br />
her that the organizer is ready for download, and then sends you an e-mail when your<br />
client accesses your SecureFilePro TM portal.<br />
When the client completes the organizer, he or she can either mail it back, handdeliver<br />
it, or scan it and upload it to the portal. SecureFilePro TM will alert you by e-<br />
mail when the uploaded organizer is ready for you to download.<br />
For more on SecureFilePro TM , see “SecureFilePro” on page 362.<br />
NOTE<br />
You can also print organizers and proformas from the Scheduler. From<br />
the Appointment Detail toolbar in the Scheduler, click Proforma or<br />
Organizer and follow Step 3 through Step 10 in the procedure listed<br />
under “Printing Organizers and Proformas for Clients” on page 82. See<br />
“Scheduler,” following.<br />
84 Tax Year 2012
<strong>Drake</strong> <strong>Software</strong> User’s <strong>Manual</strong><br />
Scheduler<br />
Scheduler<br />
Scheduler Modes<br />
The <strong>Drake</strong> Scheduler is used to set up appointments for preparers. You can set up<br />
schedules for individual preparers or for groups of preparers, generate batch appointments,<br />
and set up daily schedules for an entire office. There are tools for customizing<br />
schedules, and printing and exporting schedules.<br />
Following are directions for setting up, accessing, and using the Scheduler.<br />
The Scheduler offers two levels of access: preparer mode and front office mode.<br />
Preparer<br />
Mode<br />
Front Office<br />
Mode<br />
Using preparer mode, a preparer has full access to his or her calendars. Preparers can<br />
make appointments, manage schedules, and share calendars with other preparers. Preparer<br />
mode is the default setting for Scheduler users and has three calendar types: Calendar<br />
for (current date), Weekly Calendar, and Preparer Calendars.<br />
Designed for the receptionist and others who manage appointments but do not prepare<br />
tax returns, front office mode allows the user to set up viewing options and manage<br />
appointments. Front office mode is the default setting for users with administrative<br />
rights, but it must be assigned manually to other personnel.<br />
To assign front office mode to an employee:<br />
1. Log in to <strong>Drake</strong> as an administrative user and go to Setup > Preparer(s).<br />
2. Select a preparer and click Edit Preparer.<br />
3. Click Security > Front Office (Scheduling Only).<br />
4. Click Save.<br />
IMPORTANT<br />
Preparer logins and front office mode assignments must be established<br />
in <strong>Drake</strong> before the Scheduler can be used effectively.<br />
Accessing the Scheduler<br />
From the Home window, select Tools > Scheduler, or click the Scheduler icon. The<br />
Appointment Scheduler has four main sections (see Figure 4-10 on page 86):<br />
• A toolbar across the top<br />
• A calendar overview in the left column<br />
• Tabs for selecting calendar types (not available for ADMIN login)<br />
• The schedule grid, which shows scheduled appointments for each calendar type<br />
Figure 4-10 on page 86 shows the Appointment Scheduler window in preparer<br />
mode.<br />
Tax Year 2012 85
Scheduler<br />
<strong>Drake</strong> <strong>Software</strong> User’s <strong>Manual</strong><br />
Figure 4-10: The Appointment Scheduler features a toolbar (#1); a calendar overview (#2);<br />
calendar tabs (#3); and a scheduled appointment list (#4).<br />
If the user is logged in as an administrative user, the Batch Appts button is displayed<br />
in the toolbar. (See “Batch Appointment Generator” on page 92.)<br />
Setting Up Scheduler Options<br />
Use the Scheduler Setup feature to establish the logged-in preparer’s default settings<br />
for appointment durations, automatically filled data, and calendar views. Only the<br />
logged-in preparer’s calendar and view are affected by any changes.<br />
86 Tax Year 2012
<strong>Drake</strong> <strong>Software</strong> User’s <strong>Manual</strong><br />
Scheduler<br />
Click the Setup icon in the Scheduler toolbar. The Scheduler Setup consists of two<br />
tabs: a General tab for default settings and a Calendars tab for setting viewing<br />
options for calendars. Options are described in Table 4-1.<br />
Table 4-1: Scheduler Setup Options<br />
Tab Setup Option Description<br />
General Appointment duration Set the default appointment time displayed in the<br />
Appointment Detail dialog box. (See “Scheduling<br />
Appointments” on page 90.) Values are set in fiveminute<br />
increments.<br />
Scheduler times<br />
Appointment reminders<br />
Open Setup Schedule<br />
for<br />
ZIP code autofill for city<br />
and state information<br />
Private appointment<br />
Customer name autofill<br />
Email Notification Settings<br />
Set time intervals (15, 30, or 60 minutes) to be displayed<br />
on the calendar grid rows of the Appointment<br />
Scheduler (see Figure 4-10 on page 86).<br />
Activate the appointment reminder; establish how far<br />
in advance to receive a reminder of an upcoming<br />
appointment. You can also select this option on the<br />
fly when setting up a preparer’s appointment.<br />
Set up a preparer’s general daily schedule (in/out<br />
times).<br />
Activate the ZIP code autofill feature, which automatically<br />
displays a client’s city and state information<br />
once the ZIP code has been entered.<br />
Mark all future appointments as “private.” Private<br />
appointment details are not visible to other preparers<br />
or to users with administrative rights. You can also<br />
select this option on the fly when setting up a preparer’s<br />
appointment.<br />
Establish how client names are displayed in the calendar<br />
view.<br />
Enter the words you want to appear in Subject line of<br />
your e-mail notifications.<br />
Calendars Preparers in View From Preparers not in my view list, select which<br />
preparer schedules you want visible by default. Click<br />
the arrow to move the name to the Preparers in my<br />
view list on the right.<br />
Calendar view start<br />
time<br />
Default calendar (tab<br />
displayed at login)<br />
Colors<br />
Select the time to be displayed when the calendar is<br />
opened.<br />
Select which calendar type will be displayed at login.<br />
(This choice not available to users with administrative<br />
rights.)<br />
Select screen colors for the calendar.<br />
Establishing<br />
Daily<br />
Schedules<br />
The Scheduler allows you to view, at a glance, the planned daily schedules of selected<br />
preparers, including the times they are scheduled to be in the office.<br />
To establish a preparer’s daily schedule in the Scheduler:<br />
Tax Year 2012 87
Scheduler<br />
<strong>Drake</strong> <strong>Software</strong> User’s <strong>Manual</strong><br />
1. Click Setup. The Scheduler Setup dialog box is displayed.<br />
2. Select a preparer from the Open setup schedule for drop list. The Setup Schedule<br />
dialog box (Figure 4-11) is opened for the selected preparer.<br />
Figure 4-11: Setup Scheduler dialog box for a preparer<br />
3. Under the Standard Schedule tab, mark one or more boxes to select days preparer<br />
is in the office (item #1 in Figure 4-11). This activates the In and Out drop<br />
lists (item #2 in Figure 4-11).<br />
4. Select the “in” and “out” times for the selected days (time preparer arrives at the<br />
office, goes to and returns from lunch, leaves for the day, etc.).<br />
5. Click Apply (item #3 in Figure 4-11).<br />
The preparer’s “in” and “out” times appear in the Standard Schedule grid. (item #4 of<br />
Figure 4-11.)<br />
6. Click Save.<br />
NOTES<br />
Use the Detail Schedule tab to indicate where the schedule changes<br />
for a certain time — for example, if a preparer is going to be out several<br />
hours on a particular morning to meet a client.<br />
In the preparer’s Appointment Scheduler window, the rows indicating<br />
the preparer’s “out” times will be shaded a different color from the rows<br />
indicating the preparer’s “in” times<br />
Calendar<br />
Settings<br />
Calendar viewing options are shown in the Calendar Settings section of the Calendars<br />
tab of the Scheduler Setup dialog box (Figure 4-12 on page 89).<br />
88 Tax Year 2012
<strong>Drake</strong> <strong>Software</strong> User’s <strong>Manual</strong><br />
Scheduler<br />
Figure 4-12: Calendar Settings section (under Calendars tab)<br />
These features are described with the Scheduler Setup features in Table 4-1 on<br />
page 87. For more information, click the Help icon in the Scheduler.<br />
Calendar<br />
Colors<br />
To change the default colors displayed in the Scheduler calendar:<br />
1. In the Scheduler Setup dialog box, select the Calendars tab. Default colors are<br />
displayed under Colors.<br />
Figure 4-13: Colors section under Calendar tab in Scheduler Setup.<br />
2. Click a color to open the Color dialog box for that color.<br />
3. Select a new color.<br />
4. Click OK. When you change a color, note that the Use custom created colors<br />
button is marked automatically.<br />
To reset the Scheduler to use the default colors, click Use application default colors.<br />
Printing and Exporting Preparer Schedules<br />
<strong>Drake</strong> allows you to print or export (to an Excel file) preparer schedules for a specified<br />
time range for a specific date or week. Schedules are printed or exported for all<br />
preparers.<br />
NOTE<br />
To print or export a schedule for a specified preparer, see “Creating<br />
Appointment Reports” on page 95.<br />
Printing<br />
The Print feature prints the appointments for the selected date (shown under the Current<br />
Calendar Date). From the Appointment Scheduler toolbar, click Print, select<br />
the starting and ending times, and click OK. Results are displayed in the Report<br />
Viewer, from which you can print or export the data.<br />
NOTE<br />
If the Weekly Calendar tab is selected, the Report Viewer displays all<br />
appointments for the week of the current date.<br />
Exporting<br />
The Export feature sends the data for the selected tab to an Excel spreadsheet. To<br />
export schedule data directly from the Appointment Scheduler, click Export, select<br />
Tax Year 2012 89
Scheduler<br />
<strong>Drake</strong> <strong>Software</strong> User’s <strong>Manual</strong><br />
Scheduling Appointments<br />
the starting and ending times, and click OK. Results are displayed as a printable<br />
spreadsheet.<br />
Appointments can be scheduled for an individual preparer or a group of preparers.<br />
NOTE<br />
Preparer schedules and appointments are carried forward each year.<br />
Go to Last Year Data > Update Settings 2011 to 2012 and select<br />
Preparer Schedules.<br />
For an<br />
Individual<br />
To schedule an appointment for a preparer:<br />
1. From the Appointment Scheduler toolbar, click New Appt, or double-click an<br />
appointment time in the schedule grid. The Appointment Detail dialog box is<br />
displayed. (If you accessed the dialog box by double-clicking a time in the schedule<br />
grid, it is opened to that date and time (Figure 4-14)).<br />
Figure 4-14: Appointment Detail dialog box.<br />
2. Select the appointment Date, Time, and Duration.<br />
3. Complete the applicable client-information fields.<br />
If a client record already exists in <strong>Drake</strong>, enter the SSN/EIN and press TAB. Click Yes<br />
at the prompt and the program automatically completes the Client type, Appointment<br />
type, Name, Address, Phone, and Email fields. If you replace data in an autofilled<br />
field in the Scheduler, this information is not overwritten in the client record in<br />
90 Tax Year 2012
<strong>Drake</strong> <strong>Software</strong> User’s <strong>Manual</strong><br />
Scheduler<br />
<strong>Drake</strong>. You can also use the Lookup feature to access data for a client. For more on<br />
this feature, see “Finding a Client Record” on page 93.<br />
NOTES<br />
To access the Appointment Detail dialog box from the Data Entry<br />
Menu within a return, right-click anywhere on the screen and select<br />
Add Appointment from the right-click menu. Click Yes on the Autofill<br />
prompt to complete contact information fields of the Appointment<br />
Detail dialog box.<br />
4. Assign the appointment to a preparer by selecting a name under Preparers. (More<br />
than one preparer can be selected.) To clear a selection, click the name a second<br />
time.<br />
5. (optional) Override selections made in Scheduler Setup by selecting (or clearing)<br />
the Add Reminder, Private Appointment, or Recurring Appointment boxes at<br />
the bottom of the Appointment Detail dialog box.<br />
• If Add Reminder is marked, the preparer will receive automatic alerts<br />
regarding the appointment when logged in.<br />
• If an appointment is marked “private,” the assigned preparer will be the only<br />
one allowed access to that appointment data.<br />
• If an appointment is marked “recurring,” you must provide information about<br />
the frequency (Daily, Weekly, or Monthly) and the end date of the recurring<br />
appointment. (The dialog box will expand to offer options.)<br />
6. Click Save. The appointment will now be displayed on the schedule grid.<br />
NOTES<br />
For a recurring appointment, you can edit a single occurrence or the<br />
series. You can also make a group meeting recurring.<br />
To e-mail an appointment reminder to the client, click the E-mail Notification<br />
button. An e-mail address must be displayed in the E-mail field<br />
in order for this feature to work.<br />
An appointment on a preparer’s calendar can be changed by dragging<br />
and dropping it to another section of the calendar grid. (Recurring<br />
appointments must be changed on the Appointment Detail dialog<br />
box.)<br />
For a Group<br />
of Preparers<br />
To schedule multiple preparers to meet with a client, follow the instructions provided<br />
in “For an Individual” on page 90. Instead of selecting only one preparer in Step 4,<br />
however, you can select up to 50. (Figure 4-15) There is no need to double-click a<br />
name or to press SHIFT or CTRL while selecting.<br />
Figure 4-15: Multiple preparers selected for a group meeting.<br />
Tax Year 2012 91
Scheduler<br />
<strong>Drake</strong> <strong>Software</strong> User’s <strong>Manual</strong><br />
To clear a selection, click the preparer’s name a second time.<br />
IMPORTANT<br />
In order to save the appointment, a client name must be entered.<br />
Batch<br />
Appointment<br />
Generator<br />
The batch appointment generator reviews client and recurring appointments from the<br />
previous tax year and creates new appointments in the current year’s Scheduler. You<br />
can set workday and holiday information that will roll forward (or backward) to an<br />
available appointment date.<br />
NOTE<br />
This feature is available for users with administrative rights. Appointments<br />
marked “private” (see “For an Individual” on page 90) are<br />
excluded from the batch process.<br />
To set up appointments using the batch appointment generator:<br />
1. From the Appointment Scheduler toolbar, click Batch Appts and select Generate<br />
batch appointments. The Batch Appointment Generator dialog box is displayed.<br />
2. If necessary, select a location from the Use last year’s appointments found on<br />
drive drop list.<br />
3. Enter (or select from the calendar) a Begin date and an End date.<br />
4. Select the days that should be available for appointments for this year.<br />
5. Under Dates Not Available for Appointments, click Add to add any holidays or<br />
other days on which appointments should not be scheduled.<br />
Figure 4-16: Example of dates entered that are not available for appointments<br />
To edit or delete an entered date, select the date and click Edit or Delete.<br />
6. Select your preference for Appointment Date Criteria. Your preference applies<br />
when a rolled-forward appointment falls on a weekday or holiday. You can also<br />
select to keep the day of the week (for example, if a client wants a Monday<br />
appointment each year) or the date (for example, if a client wants to meet on the<br />
first day of a month).<br />
7. Click OK to begin the batch appointment process.<br />
The program creates appointments as defined by your specifications and preferences.<br />
Next, it displays the “Scheduler - Batch Created Appointments” report, which displays<br />
the following information:<br />
• Summary of appointments that could not be generated (explanations provided)<br />
• Number of appointments that had conflicts<br />
92 Tax Year 2012
<strong>Drake</strong> <strong>Software</strong> User’s <strong>Manual</strong><br />
Scheduler<br />
• Number of new appointments generated successfully<br />
In addition, the report shows (1) which appointments had conflicts, along with the<br />
new times scheduled; and (2) the new times scheduled for all other appointments.<br />
NOTE<br />
To undo batch-generated appointments, go to the Appointment<br />
Scheduler, select Batch Appts > Undo Batch-generated Appointments,<br />
and click Yes. The batch-generated appointments will be<br />
removed from the current year’s schedule.<br />
Entering<br />
Overlapping<br />
Appts.<br />
If an appointment conflicts with another, you are asked if you want to save it anyway.<br />
If Yes, the calendar displays a Multiple Appts note, as shown in Figure 4-17.<br />
Figure 4-17: Notification of multiple appointments<br />
To view the multiple appointments scheduled, double-click the Multiple Appts row.<br />
Appointments are shown in the Open Appointment grid. To view appointment<br />
details, double-click an appointment.<br />
Finding Next<br />
Available<br />
Appointment<br />
To locate the next available appointment time in the Scheduler:<br />
1. From the Appointment Detail dialog box, click Find Next Appt.<br />
2. From the Find Next Appointment dialog box, choose a preparer from the Preparer<br />
drop list, or select Any Preparer.<br />
3. Select starting and ending dates. The program searches all times within your date<br />
range.<br />
4. (optional) Specify a day of the week and set a range of times to search. If you<br />
select a specific day of the week, that day must fall within the entered date range.<br />
5. Click Find. Any available appointment times for the preparer are displayed.<br />
6. Choose a date, time, and preparer and click Select to return to the Appointment<br />
Detail dialog box with that date and time entered and preparer selected.<br />
NOTE<br />
Preparers with no set schedules are excluded from the search.<br />
To find a scheduled appointment, see “Find Scheduled Appointment” on page 94.<br />
Finding a<br />
Client<br />
Record<br />
The Lookup feature allows you to find a client’s record and insert the client information<br />
into an Appointment Detail dialog box.<br />
Tax Year 2012 93
Scheduler<br />
<strong>Drake</strong> <strong>Software</strong> User’s <strong>Manual</strong><br />
To locate a client record:<br />
1. From the Appointment Detail dialog box, click Lookup.<br />
2. Select the location from which to search from the Select clients... drop list.<br />
3. Select a client name from the displayed list. Clients are listed in alphabetical order<br />
by last name or entity name.<br />
4. Click OK. The list is closed and several fields are filled with client data. (Content<br />
is determined by what was entered on screen 1 in data entry.)<br />
Changing<br />
Appointment<br />
Details<br />
Deleting an<br />
Appointment<br />
To change the details of an appointment that has already been entered into the Scheduler,<br />
double-click the time slot of the appointment in the Appointment Scheduler.<br />
When the Appointment Detail dialog box for the selected appointment is opened,<br />
make any changes necessary. Click Save.<br />
To delete an appointment from the Scheduler:<br />
1. Double-click the appointment time slot in the Appointment Scheduler.<br />
2. Click Delete in the Appointment Detail toolbar.<br />
3. Click Yes to confirm the deletion.<br />
4. Click OK to return to the Appointment Scheduler.<br />
Searching Appointments<br />
Find<br />
Scheduled<br />
Appointment<br />
Find scheduled appointments by searching keywords from the Appointment Details<br />
information for all clients. To search for a client’s appointment in the Scheduler:<br />
1. Open the Scheduler and click Search Appts to open the Scheduler Search.<br />
2. Enter one or more keywords in the Enter Search Terms field. The program will<br />
search all Appointment Detail information for these keywords.<br />
3. Select a date from the Start at this Date drop list. The program searches for all<br />
appointments scheduled for that date and after.<br />
4. Click Search. Results are displayed in the Scheduler Search window, as shown<br />
in the example in Figure 4-18.<br />
Figure 4-18: Scheduler search results<br />
94 Tax Year 2012
<strong>Drake</strong> <strong>Software</strong> User’s <strong>Manual</strong><br />
Scheduler<br />
Double-click an appointment row to view appointment details.<br />
Creating Appointment Reports<br />
The Scheduler works with the Reports feature in <strong>Drake</strong> to provide reports based on<br />
appointment data. To generate a Scheduler report:<br />
1. Open the Scheduler and click Reports. The Report Manager is opened.<br />
2. Expand the Schedule Reports and Client Contact menus to show the four types<br />
of reports that can be generated. These are listed in Table 4-2.<br />
Table 4-2: Scheduler Report Types<br />
Scheduler Report<br />
Call List for all Preparers<br />
New Client Appointments<br />
Preparer Appointments<br />
Preparer Call List<br />
Description<br />
Lists the appointments scheduled for all preparers; data<br />
types include appointment time and date, client name,<br />
client SSN, duration of appointment, client phone, cell<br />
phone, new client indicator, preparer’s name, and client’s<br />
e-mail address.<br />
Lists new clients entered for a selected preparer; data<br />
types include appointment time, start time, client name,<br />
client SSN, and client phone numbers.<br />
Lists the appointments for all preparers. Data types<br />
include preparer name, appointment date, state time,<br />
appointment time, client name and SSN, duration of<br />
appointment, client phone numbers, and new client indicator.<br />
Lists the appointments for a preparer; select a preparer<br />
name from the drop list. Data types include preparer<br />
name, appointment date, start time, client name, SSN,<br />
and client phone numbers.<br />
3. Click a report type to select it.<br />
4. Click View Report. You will be asked if you want to create the report again using<br />
current data; click Yes to do so.<br />
5. Make any desired changes to the Basic Search Conditions dialog box (in the<br />
“Call List for all Preparers” and “New Client Appointment” reports only).<br />
6. Select the parameters to the report from the Comparison drop list (in the “Preparer<br />
Appointments” report only).<br />
7. Set the report’s date range by typing start and end dates in the Value fields (in the<br />
“New Client Appointments” report only).<br />
8. Click Continue. The report is displayed in the Report Viewer. (For more information<br />
on reports, see Chapter 12, “Reports.”)<br />
Tax Year 2012 95
e-Filing Preparation<br />
<strong>Drake</strong> <strong>Software</strong> User’s <strong>Manual</strong><br />
Once you are in the Report Viewer, you can print or export the report output.<br />
NOTE<br />
The New Client List report does not pull data from other areas of<br />
<strong>Drake</strong>; it pulls data only from the Scheduler itself. To designate a client<br />
as a new client, select New from the Client Type drop list (in the middle<br />
of the Appointment Detail dialog box).<br />
e-Filing Preparation<br />
For details regarding preseason tasks for e-filing, see Chapter 8, “e-File.”<br />
96 Tax Year 2012
5 Return Preparation<br />
This chapter focuses on using <strong>Drake</strong> to produce Form 1040 and the supplemental<br />
forms, schedules, and other documents that might be part of a tax return. It is not<br />
intended as a tax course but, rather, as a primer for using <strong>Drake</strong> <strong>Software</strong> to prepare a<br />
1040 return. It assumes a fundamental knowledge of tax law and a basic understanding<br />
of <strong>Drake</strong> data entry. If you are not familiar with <strong>Drake</strong> data entry, read Chapter 3,<br />
“Basics,” before attempting to prepare a tax return in <strong>Drake</strong>.<br />
Screens 1 through 5 of the program provide fields for entering data directly onto the<br />
1040. Because many lines on the form require calculations from other forms and<br />
schedules, some of the fields in screens 3, 4, and 5 are treated as overrides or adjustments<br />
to program calculations from elsewhere in the program.<br />
Taxpayer Demographics<br />
Screen code: 1<br />
Selecting a Filing Status<br />
Use screen 1 (Name and Address), accessible from the General tab, to enter data for<br />
the top section of a Form 1040, including the taxpayer’s name, mailing address, and<br />
filing status. Screen 1 also has fields to indicate contact information and other relevant<br />
details of the return.<br />
Select a filing status from the Filing Status drop list at the top of screen 1. Press F1 in<br />
the Filing Status field to view explanations for the available codes.<br />
Entering Taxpayer Information<br />
The taxpayer’s name is entered when you create the return. Other important taxpayer<br />
data, such as date of birth, occupation, and contact information (phone numbers and e-<br />
mail address) for the taxpayer (and spouse, if applicable) is entered on screen 1. Note<br />
that not all fields in the Spouse column are activated if the filing status is something<br />
other than “Married Filing Jointly;” fields that are activated should be completed.<br />
Tax Year 2012 97
Taxpayer Demographics<br />
<strong>Drake</strong> <strong>Software</strong> User’s <strong>Manual</strong><br />
e-File specifications require that no more than 35 characters of a taxpayer’s name be<br />
transmitted on a tax return. In <strong>Drake</strong>, names of more than 35 characters (taxpayer and<br />
spouse named combined) are automatically shortened, and a note is generated. If, after<br />
the name is shortened, it is still too long, you will be directed in an EF message to<br />
shorten the name manually on screen 1. Press F1 in the taxpayer’s First name field on<br />
screen 1 for further instructions.<br />
Below the E-mail/text msg field, indicate if a taxpayer is a dependent of another, is a<br />
full-time student, wants to donate to the Presidential Campaign Fund, or is blind.<br />
NOTES<br />
If the taxpayer was a victim of identity theft, enter his or her IRS–<br />
assigned PIN in the Identity Protection PIN field on the MISC screen.<br />
Entering Residency Information<br />
The Mailing Address section of screen 1 includes fields for both domestic and foreign<br />
addresses.<br />
NOTE<br />
To indicate a stateside military address, mark the Stateside military<br />
address box on screen 1. Enter combat and special processing code<br />
information on the MISC screen (accessible by clicking the Combat<br />
Zone link on screen 1).<br />
State and<br />
Local Data<br />
If the resident state differs from the state in the mailing address, select the appropriate<br />
state code from the first drop list in the Resident state, City, School district line near<br />
the bottom of screen 1. If the taxpayer is a part-year (PY) resident of the state in the<br />
mailing address, select PY from the Resident state drop list. To suppress a state<br />
return from being calculated, select 0 from the Resident state drop list The second<br />
drop list (for the resident city) is activated if a city return is required. School districts<br />
are available in the third drop list of the Resident state, City, School district line<br />
when needed.<br />
TIP<br />
Press CTRL+SHIFT+S in the Resident city or School dist to search for<br />
options for those fields.<br />
Indicating a Deceased Taxpayer<br />
If the primary taxpayer is deceased:<br />
1. Enter the date of death in the taxpayer’s Date of death field on screen 1.<br />
2. In the In care of field (just above the Mailing Address section), enter the name of<br />
someone (surviving spouse, child, legal representative, etc.) to whom all taxrelated<br />
information should be addressed. (For MFJ returns, the name of the surviving<br />
spouse should be entered.)<br />
NOTE<br />
If there is a name in the In care of field, all correspondence generated<br />
by the program (letters, bills, etc.) will be addressed to that person.<br />
98 Tax Year 2012
<strong>Drake</strong> <strong>Software</strong> User’s <strong>Manual</strong><br />
Required Fields<br />
Required Fields<br />
New for 2012: Fields that require completion before a return is eligible for e-file are<br />
highlighted in blue (Figure 5-1).<br />
Foreign Addresses<br />
Exemptions<br />
Screen code: 2<br />
Figure 5-1: Required fields and foreign address fields<br />
Reminders appear when you try to escape from a screen on which required fields have<br />
not been completed. You can set up the software to remind you every time you leave a<br />
required field blank, to remind you only once per data-entry session, or not at all.<br />
From the Home window, go to Setup > Options > Data Entry tab.<br />
From the Home window, go to Setup > Colors to change the color of the required<br />
fields.<br />
New for 2012: Fields for adding foreign address information have been included on<br />
many <strong>Drake</strong> data-entry screens. These fields are locked to keep incorrect address data<br />
from being entered in these fields. (Figure 5-1) Click the field to unlock foreign<br />
address fields throughout the return. Close the return and re-open it to re-engage the<br />
lock for unused screens.<br />
To use the foreign address fields, enter in the first field the name of the foreign province<br />
or state, as appropriate. Select the appropriate foreign country from the drop list,<br />
and then enter the postal code, if appropriate.<br />
Use screen 2 (Dependents), accessible from the General tab, to complete the<br />
“Exemptions” section of Form 1040. Use a separate screen for each dependent, pressing<br />
PAGE DOWN to open each new screen. Data is saved automatically upon exiting a<br />
screen. The number of active Dependents screens is shown on the Data Entry Menu.<br />
(Figure 5-2 on page 100).<br />
Tax Year 2012 99
Exemptions<br />
<strong>Drake</strong> <strong>Software</strong> User’s <strong>Manual</strong><br />
Figure 5-2: Number of Dependents screens that contain data<br />
Enter the required data, including the dependent’s full date of birth, at the top of screen<br />
2. A dependent’s age is displayed once a birth date is entered (Figure 5-3).<br />
Figure 5-3: Calculated age is displayed once birth date is entered.<br />
TIP<br />
Figure 5-3 shows the default screen 2. Grid data entry can also be<br />
used for entering dependent information. To switch to grid data entry<br />
mode, press F3. See “Grid Data Entry” on page 68 for more information.<br />
Entering Dependent Last Names<br />
By default, the primary taxpayer’s last name is used for all dependents. Complete the<br />
Last Name field on screen 2 only if the dependent’s last is different.<br />
Selecting “Months in Home”<br />
By default, the program calculates the return as if a dependent lived with the taxpayer<br />
for the entire year. Complete the Months in Home field on screen 2 only if a dependent<br />
did not live with the taxpayer for all 12 months.<br />
If “00” is selected for the months in the home for a son or daughter, the dependent is<br />
classified as one who did not live with the taxpayer due to divorce or separation. If<br />
“00” is selected for another type of dependent (parent, grandchild, etc.) the program<br />
applies the “Other Dependent” classification, regardless of the relationship. To override<br />
these classifications, select the applicable boxes in the Additional Information<br />
section at the bottom the screen. (See “Additional Dependent Information” on<br />
page 101)<br />
100 Tax Year 2012
<strong>Drake</strong> <strong>Software</strong> User’s <strong>Manual</strong><br />
Personal Service Income (W-2, 1099-MISC)<br />
Claiming a Dependent (for Split Returns)<br />
T = Taxpayer<br />
S = Spouse<br />
J = Joint<br />
If taxpayers are married and want to split the return to see if filing separately would be<br />
more beneficial than filing jointly, use the TSJ drop list on screen 2 to assign the<br />
dependent information to the correct person. (See Figure 5-4 in the following section.)<br />
A TSJ code should also be selected if the state has an MFS (Married Filing Separate)<br />
combined option. The program default is T (Belongs to the Primary Taxpayer).<br />
Entering State Data for a Dependent<br />
Select a state from the State drop list (Figure 5-4) to specify which state should<br />
receive the dependent data. This selection helps ensure that dependent credit information<br />
flows to the correct state return. This information is necessary in some situations<br />
(for example, if the parents of the dependent are MFS and reside in different states).<br />
Figure 5-4: Fields for TSJ, State and State codes<br />
Enter a state code (disabled, adopted, etc.) as applicable. To view all state codes, click<br />
inside the State codes field and press F1. Double-click a displayed code to select it.<br />
Additional Dependent Information<br />
Screen 2 contains fields for other dependent-related data. Information on the belowlisted<br />
fields is provided elsewhere in this document.<br />
• Childcare Expense Information — See “Child and Dependent Care Expenses<br />
Credit” on page 142.<br />
• EIC Information (and related due diligence questions) — See “Earned Income<br />
Credit (EIC)” on page 154.<br />
It could be necessary to override or further clarify dependent information entered on<br />
screen 2—for example, if a child is over 18 and disabled or is not a U.S. citizen. Use<br />
the Additional Information section of screen 2 for this kind of data.<br />
NEW FOR<br />
2012<br />
<strong>Drake</strong> has redesigned both the Dependents screen and screen 8863 to<br />
conform to new requirements for Form 8863, Education Credits. The<br />
Education Expense Information has been removed from the Dependents<br />
screen and moved to the redesigned 8863 screen. See “Education<br />
Expenses” on page 138.<br />
Personal Service Income (W-2, 1099-MISC)<br />
Use the W2 and 99M screens, both accessible from the General tab, to enter personal<br />
service income data from a taxpayer’s W-2 and 1099-MISC forms, respectively.<br />
Tax Year 2012 101
Personal Service Income (W-2, 1099-MISC)<br />
<strong>Drake</strong> <strong>Software</strong> User’s <strong>Manual</strong><br />
W-2<br />
Screen code: W2<br />
The W2 screen is designed to reflect the IRS Form W-2, Wage and Tax Statement.<br />
Data entered here must match the client’s W-2 form. The following fields can be completed<br />
automatically by the program:<br />
• Names and Addresses — If the employer’s EIN is in your <strong>Drake</strong> database, the<br />
employer’s information is filled automatically once you enter the EIN. The<br />
employee information is filled automatically once T or S is selected at the top of<br />
the screen. Nothing needs to be typed into these fields unless the information differs<br />
from what was previously entered in the program.<br />
• Wages and Withholding — When wages are entered in box 1, boxes 3–6 are<br />
filled automatically. These amounts should match those on the taxpayer’s W-2.<br />
NOTES<br />
If, after contacting (or attempting to contact) the employer, you suspect<br />
fraud, immediately contact the nearest IRS Criminal Investigation office<br />
or call the IRS’s tax fraud hotline at (800) 829-0433.<br />
Links<br />
W-2<br />
Verification<br />
Links are provided from the W2 screen to screens 2441 (for entering Child and<br />
Dependent Care Expenses), screen 8880 (for entering data to calculate the Qualified<br />
Retirement Savings Contributions credit), and screen SEHI (for entering data to calculate<br />
the Self-Employed Health Insurance deduction).<br />
Verification fields (activated from Setup > Options > Data Entry) help ensure that<br />
wage and withholding amounts are correct by requiring re-entry of federal and state<br />
wage and withholding amounts at the bottom of screen W2 (Figure 5-5).<br />
Figure 5-5: Verification fields for federal and state wages and withholdings<br />
An EF message is generated if a verification amount does not match the corresponding<br />
amount entered. Amounts must be corrected before the return can be e-filed.<br />
Foreign<br />
Employers<br />
New for 2012: To indicate a foreign employer on screen W2, enter the city in the<br />
“city” field of the employer address, and in the Foreign ONLY section, enter the<br />
province or state, select a country from the Country drop list, and enter any relevant<br />
Postal Code. See example in Figure 5-6 on page 103.<br />
102 Tax Year 2012
<strong>Drake</strong> <strong>Software</strong> User’s <strong>Manual</strong><br />
Personal Service Income (W-2, 1099-MISC)<br />
Figure 5-6: Entering foreign employer information on W2 screen<br />
Screen code: FEC<br />
If no W-2 was issued by the foreign employer, use the Foreign Employer Compensation<br />
screen, accessible from the Income tab, to enter employee, employer, and income<br />
information.<br />
NOTE<br />
For information on the foreign income exclusion (Form 2555), see<br />
“Excluding Foreign Income” on page 134.<br />
Statutory<br />
Employees<br />
Because all statutory employees must file Schedule C for expenses related to W-2<br />
income, Schedule C is created for a statutory employee.<br />
To indicate a statutory employee and generate Schedule C:<br />
1. Open a W2 screen for the employee, and select Stat employee (line 13).<br />
2. From the Special tax treatment list (Figure 5-7), elect the associated Schedule C.<br />
Figure 5-7: W-2 in this example is associated with the second (#2) Schedule C entered<br />
The earnings amount from screen W2 flows to Schedule C, line 1c.<br />
Corrected or<br />
Altered W-2<br />
Do Not<br />
Update<br />
ITIN on<br />
Screen 1<br />
Near the bottom of the W2 screen are check boxes to indicate that a W-2 was altered,<br />
handwritten (non-standard), or corrected. Select the applicable box to indicate that a<br />
W-2 has been changed.<br />
New for 2012: The Do not update check box will affect the 2013 tax return. If you<br />
select this box, next year when you update your tax returns (Last Year Data ><br />
Update Clients 2012 to 2013) W-2 info from this year’s return will not be carried into<br />
2013’s W2 screen.<br />
If a taxpayer has an ITIN for screen 1, the taxpayer’s TIN from Form W-2 must be<br />
entered in the field at the bottom of screen W2. The program does not automatically<br />
Tax Year 2012 103
Personal Service Income (W-2, 1099-MISC)<br />
<strong>Drake</strong> <strong>Software</strong> User’s <strong>Manual</strong><br />
Substitute<br />
W-2, 1099-R<br />
use the ITIN entered on screen 1, and a return with an ITIN cannot be e-filed unless<br />
this field on screen W2 is completed.<br />
Form 4852 serves as a substitute for Form W-2, Form W-2c, or Form 1099-R when a<br />
taxpayer either did not receive one of these forms or an employer issued an incorrect<br />
one. Form 4852 is not generally filed before April 15.<br />
Screen code: 4852 Use the 4852 screen, accessible from the Other Forms tab, to fill out Form 4852.<br />
NOTE<br />
The generated Form 4852 uses data entered on the corresponding W2<br />
or 1099 screen (for Form 1099-R).<br />
W-2 Import If your client is an employee of a company that uses W-2 eXpress®, that client’s W-2<br />
can be downloaded directly into <strong>Drake</strong>. See the <strong>Drake</strong> Support site (My Account ><br />
W-2 Block Purchase) for information on purchasing W-2 downloads and a list of<br />
companies that supply employee W-2s using this service.<br />
To import W-2 information:<br />
1. From the Data Entry Menu of the client’s return, click Import > W2 Import.<br />
2. In the W2 Download dialog box, select Taxpayer or Spouse as applicable. The<br />
name and SSN of the selection is displayed below the Taxpayer/Spouse drop list.<br />
Figure 5-8: Name and SSN appear in W-2 Download dialog box<br />
3. Enter the client’s PIN (supplied by the employer).<br />
NOTE<br />
In some cases, the employer will provide the format for a PIN (for<br />
instance, if the company uses the last four digits of the employee’s<br />
SSN), but will not provide the PIN itself.<br />
4. Click Download, and then click Yes to continue.<br />
5. When the “W2 Download Complete” message is displayed, click OK. The W2<br />
screen for the taxpayer now contains the downloaded information.<br />
104 Tax Year 2012
<strong>Drake</strong> <strong>Software</strong> User’s <strong>Manual</strong><br />
Passive and Investment Income (1099-DIV, etc.)<br />
NOTE<br />
Purchase W-2 downloads in sets of 15 ($25 per set). Each instance of a<br />
downloaded W-2 counts as one against your total (even if the same W-<br />
2 is downloaded twice). If, however, the client has W-2s from multiple<br />
employers and all W-2s are downloaded in the same session, it counts<br />
as only one download. If the W-2s are downloaded in separate<br />
sessions, each session counts as one against your total.<br />
2D Barcode<br />
Scanning<br />
For W-2 forms with a 2D barcodes, W-2 and K-1 data can be scanned into <strong>Drake</strong><br />
(1040 package only). Open the program to the client’s Data Entry Menu (not the W2<br />
or K1 screen) to scan the barcode; the scanned information appears on the applicable<br />
screen. For example, if a W-2 is scanned, a W2 screen is opened that contains the data<br />
from the W-2. Guidelines for scanning are provided below.<br />
• When scanning the information, the program opens a new screen containing the<br />
information. It does not overwrite previously entered data on a W2 or K1 screen.<br />
• The IRS issues guidelines for the 2D barcode. If the software producing the barcode<br />
follows these guidelines, the correct information will be entered on the<br />
<strong>Drake</strong> screen. If not, you will need to verify that the scanned data was correctly<br />
transferred to the screen.<br />
• For Form W-2, the 2D barcode picks up only what is on the W-2. In the case of<br />
multiple city withholding (which is on a separate schedule that does not fit on the<br />
W-2), the extra information must be typed in after the barcode is scanned.<br />
• Most barcode scanners can be used, but <strong>Drake</strong> recommends the Honeywell/Metrologic<br />
MS1690 Focus.<br />
1099-MISC<br />
Screen code: 99M<br />
Use the 99M screen to enter data from Form 1099-MISC. Select from the TS drop list<br />
at the top of the 99M screen to whom (taxpayer or spouse) this 1099 information<br />
belongs. To associate the 99M information with a specific line or form within the<br />
return, make a selection from the For drop list. If associating it with one of multiple<br />
forms, enter a Multi-form code. (See “Associating One Screen with Another” on<br />
page 73.)<br />
Passive and Investment Income (1099-DIV, etc.)<br />
Interest and Dividends<br />
This section covers interest and dividend income from both domestic and foreign<br />
sources. To enter rental income data in <strong>Drake</strong>, see “Supplemental Income” on<br />
page 121. To enter foreign earned income, see “Foreign Earned Income” on page 134.<br />
The INT and DIV screens in <strong>Drake</strong> reflect the 1099-INT and 1099-DIV forms,<br />
respectively. Data from the INT and DIV screens is carried primarily to Schedule B,<br />
Interest and Dividends, and, when applicable, to Form 1116, Foreign Tax Credit.<br />
Tax Year 2012 105
Passive and Investment Income (1099-DIV, etc.)<br />
<strong>Drake</strong> <strong>Software</strong> User’s <strong>Manual</strong><br />
Income Less<br />
than $1,500<br />
In general, no Schedule B is required if interest and dividend income does not exceed<br />
$1,500; amounts can be entered instead directly on screen 3 (Income) (Figure 5-9).<br />
Figure 5-9: Interest and dividend fields on screen 3<br />
The Income screen amounts are calculated and the results flow directly into Form<br />
1040. Any interest or dividend income entered on the INT or DIV screens is combined<br />
with the screen 3 amounts when the return is calculated. Do not duplicate<br />
entries.<br />
Schedule B, Interest and Ordinary Dividends<br />
Schedule B is required if taxable interest or ordinary dividends exceed $1,500. Use the<br />
INT and DIV screens to report interest and dividend income that exceeds this amount.<br />
Amounts are generated for Schedule B and flow into Form 1040.<br />
Reporting<br />
Portions of<br />
Dividends<br />
Certain portions of ordinary dividends (domestic dividends not taxable by a state and<br />
ordinary dividends that are U.S. Government dividends) can be expressed on the DIV<br />
screen as either amounts or percentages (Figure 5-10).<br />
Figure 5-10: Enter portions of ordinary (line 1a) dividends<br />
as amounts or as percentages of the total.<br />
Schedule B,<br />
Part III<br />
Some taxpayers with bank or other financial accounts in foreign countries must file<br />
Schedule B, regardless of the income amount. This data, along with other Schedule B<br />
data, is entered in the Schedule B Part III section of the INT screen, (Figure 5-11 on<br />
page 107).<br />
NOTE<br />
This section has a field for indicating whether or not the taxpayer is<br />
required to file Form TD F 90.22.1, Report of Foreign Bank and Financial<br />
Accounts. If the Schedule B Part III section is being completed, a<br />
selection from this drop list is required.<br />
106 Tax Year 2012
<strong>Drake</strong> <strong>Software</strong> User’s <strong>Manual</strong><br />
Passive and Investment Income (1099-DIV, etc.)<br />
Figure 5-11: Schedule B Part III fields on the INT screen<br />
NOTES<br />
The ...foreign financial account and ...foreign trust items must be<br />
answered. Both are Yes/No questions. If either is left blank, a NOTE is<br />
generated, alerting you to this fact.<br />
If you do not have to file Form TD F 90-22-1, do not make a selection<br />
from the ...foreign country drop list<br />
NEW FOR<br />
2012<br />
For taxpayers with interest in more than one foreign account, or distributions<br />
from more than one foreign trust, you can now press PAGE<br />
DOWN and open a new screen for each country.<br />
Statespecific<br />
Information<br />
The State-specific information section has a drop list to designate Maine, Massachusetts,<br />
Oklahoma, or Tennessee for bank interest; a field for state identification numbers<br />
for Michigan, Minnesota, New Hampshire, and Rhode Island returns; a field for<br />
entering the amount of state tax withheld; and choices for Illinois returns (Figure 5-<br />
12).<br />
Figure 5-12: State-specific fields on INT screen<br />
In the IA taxable interest income field on the INT screen, enter the amount of taxable<br />
interest income from Iowa. (Figure 5-12) The DIV screen differs slightly; enter<br />
the amount of taxable IA dividends.<br />
1099-OID<br />
Enter interest from Form 1099-OID, Original Issue Discount, on either screen 3 (if<br />
less than $1,500) or the INT screen (if $1,500 or more).<br />
Foreign Interest and Dividends<br />
Use the INT and DIV screens to report interest and dividend income from foreign<br />
accounts and trusts. As applicable, this data flows to Form 1116, Foreign Tax Credit.<br />
The following Form 1116 capabilities are included on the INT and DIV screens:<br />
• A section for foreign tax credit information<br />
Tax Year 2012 107
Passive and Investment Income (1099-DIV, etc.)<br />
<strong>Drake</strong> <strong>Software</strong> User’s <strong>Manual</strong><br />
• Ability to associate information from an INT or DIV screen to an 1116 screen<br />
• Ability to suppress Form 1116 if it is not required for the return<br />
• Ability to open the 1116 screen in the program via a Form 1116 link<br />
Foreign Tax<br />
Credit Data<br />
The INT and DIV screens include a section for Form 1116/FTC information.<br />
Figure 5-13 shows this section as it appears on the DIV screen.<br />
Figure 5-13: Form 1116 section of DIV screen<br />
If data is entered in this section of the DIV or INT screen, Form 1116 is generated<br />
automatically. Data entered here does not have to be re-entered on the 1116 screen. In<br />
fact, if amounts are entered on both screens, the program combines the two amounts<br />
and prints the total on the return.<br />
Associating<br />
Data with the<br />
1116 Screen<br />
Because the INT/DIV screens include the most commonly used Form 1116 fields, and<br />
because Form 1116 is generated if these fields contain data, it may not be necessary to<br />
enter anything onto screen 1116. If, however, a return has a less-common foreign<br />
income factor, such as a carryover, you must enter that data on screen 1116.<br />
You can associate the DIV and INT screens with an 1116 screen so that the generated<br />
Form 1116 incorporates the applicable data from all applicable screens. To associate<br />
the Foreign Tax Credit information in a DIV or INT screen to an 1116 screen:<br />
Screen code: 1116<br />
1. Complete the Form 1116/FTC Information section of the DIV or INT screen.<br />
(See Figure 5-13.)<br />
2. Enter a number into the FTC field of this section. (See Figure 5-13.)<br />
3. Open the 1116 screen to be associated with the DIV or INT screen.<br />
4. Type the FTC number (from Step 2) into the FTC field (Figure 5-14).<br />
Figure 5-14: FTC field at top of 1116 screen<br />
The program uses this “FTC number” to associate the 1116 screen with the other<br />
screens and calculate the correct information for Form 1116.<br />
Suppressing<br />
Form 1116<br />
By default, Form 1116 is generated with the return if any data is entered into the Form<br />
1116/FTC Information fields. If these fields include data but a Form 1116 is not<br />
108 Tax Year 2012
<strong>Drake</strong> <strong>Software</strong> User’s <strong>Manual</strong><br />
Taxable Refunds<br />
Taxable Refunds<br />
Screen code: 99G<br />
Screen code: 3<br />
required and you don’t want one generated, select 1116 NOT required. (See Figure 5-<br />
13 on page 108 to view the check box as it appears on the DIV screen.)<br />
For more on Form 1116 in <strong>Drake</strong>, see “General Business Credits” on page 144.<br />
Enter state and local taxable refunds for the current year on the 99G screen (Form<br />
1099-G, Certain Government Payments). Taxable refund amounts are calculated and<br />
carried to the “Taxable refunds” line of Form 1040. Because the amount shown on this<br />
line can be affected by limitations computed from the <strong>Drake</strong> worksheets, the program<br />
allows you to adjust it.<br />
To adjust the taxable refund amount shown on the 1040, go to screen 3 and enter the<br />
amount of prior-year state or local refund the taxpayer received in the current year. Be<br />
aware that no calculations are done on the amount entered on screen 3. Use the 99G<br />
screen if you want the system to compute the taxable amount.<br />
NOTES<br />
A flagged Taxable refund field indicates that the displayed amount was<br />
carried forward from a prior-year return. To clear the field, press F4 (if<br />
the amount is correct) or enter a new amount.<br />
Screen 99G is also called the Unemployment Compensation screen.<br />
Alimony<br />
If the taxpayer received alimony, enter the amount on screen 3 in the Alimony<br />
received field. Enter paid alimony information on screen 4.<br />
Self-Employment Income (Schedule C)<br />
Screen code: C<br />
Screen C, Self-Employed Income, covers Schedule C, Profit or Loss from Business<br />
(Sole Proprietorship). Access screen C from the Income tab. Several screens in <strong>Drake</strong><br />
(such as the 99M, AUTO, and 4562 screens) can be associated with a Schedule C<br />
using the For and Multi-form Code boxes of those screens. (See “Associating One<br />
Screen with Another” on page 73.)<br />
NOTE<br />
Enter data for Schedule C, Part IV, Information on Your Vehicle, on the<br />
AUTO screen.<br />
Program Defaults for Screen C<br />
The program’s default accounting method (item F) is cash. Select Accrual or Other,<br />
as applicable, for accounting methods other than cash. If Other, include a description.<br />
The program’s default position for activity type (item G) is that the activity is not a<br />
passive activity (option D). For more information on activity-type options, see “Activity<br />
Type Codes,” following.<br />
Tax Year 2012 109
Self-Employment Income (Schedule C)<br />
<strong>Drake</strong> <strong>Software</strong> User’s <strong>Manual</strong><br />
Activity Type Codes<br />
The program’s default position for investments (item 32b) is that all investments are at<br />
risk. If this is not true for your client, select Some investment is NOT at risk. (Note<br />
that item 32b includes a link to screen 6198 for entering data to compute deductible<br />
losses for Form 6198, At-Risk Limitations.)<br />
The program’s default inventory valuation method (item 33) is cost. If the valuation<br />
method is not cost, select the correct method under Part III - Cost of Goods Sold.<br />
Screen C offers two options for activity type (item G) and shows where on Form 8582,<br />
Passive Activity Loss Limitations, the calculation flows, if applicable:<br />
• Option B: Other passive activity (Form 8582, line 3, All Other Passive Activities)<br />
• Option D: Not a passive activity (Default; does not flow to Form 8582)<br />
The program default is option D, Not a passive activity. Select D or leave this field<br />
blank if this is not a passive activity. Select option B to indicate a passive activity.<br />
NOTE This drop list does not contain an option A or an option C.<br />
Business Codes<br />
Press<br />
CTRL+SHIFT+S to<br />
search codes.<br />
To locate a specific business code, place the cursor in the Business Code box (field B)<br />
and press CTRL+SHIFT+S. Enter a search term and click Go. All codes that include the<br />
search term are displayed as shown in the example in Figure 5-15.<br />
Tax Treatment Codes<br />
Figure 5-15: Example of a business-code search on screen C<br />
Double-click the desired code or select one and click OK or press ENTER.<br />
Screen C contains a Special tax treatment code drop list (Figure 5-16 on page 111).<br />
110 Tax Year 2012
<strong>Drake</strong> <strong>Software</strong> User’s <strong>Manual</strong><br />
Sales of Assets<br />
Depreciation<br />
Loss on Schedule C<br />
Figure 5-16: Special tax treatment code drop list on screen C<br />
Use the Depreciation Detail (4562) screen to enter depreciable assets for Schedule C.<br />
Note that on screen C, the Depreciation field is an adjustment field, and that an<br />
amount entered there adjusts the calculated amount from the 4562 screen that flows to<br />
the “Depreciation and section 179 expense deduction” field of Schedule C.<br />
For more on entering depreciation in <strong>Drake</strong>, see “Depreciation” on page 165.<br />
If Schedule C shows a loss and all investment is not at risk, the program produces<br />
Form 6198, At-Risk Limitations. If part of a loss may be disallowed, enter the<br />
required data on screen 6198. If the taxpayer does not materially participate, the loss<br />
could be limited by Form 8582, Passive Activity Loss Limitations. This is computed<br />
automatically.<br />
e-Filing Schedules C and C-EZ<br />
Sales of Assets<br />
Only one Schedule C-EZ can be e-filed per return, but up to eight Schedule C forms<br />
can be e-filed per taxpayer. If necessary to allow e-filing, keep the short form (EZ)<br />
from being generated by selecting the Suppress EZ path box on screen C.<br />
Screens for entering gains, losses, and sales of assets are listed in Table 5-1. These<br />
screens can all be accessed from the Income tab of the Data Entry Menu.<br />
Table 5-1: Screens for Entering Gains and Losses<br />
Screen<br />
Screen or Form Name<br />
8949 Form 8949, Sales and Other Dispositions of Capital Assets (This screen also<br />
covers Schedule D and Form 1099-B and can be accessed from the selector<br />
field by using the 8949, D, or 99B codes.)<br />
D2<br />
Loss Carryovers and Other Entries (not an IRS form)<br />
2439 Form 2439, Notice to Shareholder of Undistributed Long-Term Capital Gains<br />
4255 Form 4255, Recapture of Investment Credit<br />
4684 Form 4684, Casualties and Thefts<br />
Tax Year 2012 111
Sales of Assets<br />
<strong>Drake</strong> <strong>Software</strong> User’s <strong>Manual</strong><br />
Table 5-1: Screens for Entering Gains and Losses<br />
Screen<br />
Screen or Form Name<br />
4797 Form 4797, Sales of Business Property<br />
6252 Form 6252, Installment Sale Income<br />
6781 Form 6781, Gains and Losses From Section 1256 Contracts and Straddles<br />
8824 Form 8824, Like-Kind Exchanges<br />
HOME<br />
99C<br />
Worksheet for Sale of Residence (not an IRS form)<br />
Form 1099-C, Cancellation of Debt<br />
Capital Asset Reporting<br />
Screen codes<br />
8949, D2<br />
When forms require identical data (such as when amounts from the 4684 and 6252<br />
screens must be carried to Form 4797), <strong>Drake</strong> prints the data on the appropriate forms.<br />
Capital gains and losses from stocks, bonds, mutual funds, and other investments are<br />
to be listed on the Form 8949, Sales and Other Dispositions of Capital Assets, and<br />
summarized on Schedule D. Information for these forms is entered on screens 8949<br />
and D2. These screens are available under the Income tab of the Data Entry Menu.<br />
NOTE<br />
Form 1099-B, Proceeds From Broker and Barter Exchange Transactions,<br />
reports individual transaction information and contains cost basis<br />
fields for brokers who are required to supply such information. Enter<br />
1099-B data on screen 8949.<br />
Form 8949,<br />
Schedule D,<br />
Form 1099-B<br />
Screen 8949 has fields for Form 8949, Schedule D, and Form 1099-B data. Following<br />
are some guidelines for data entry on this screen, first for 1099-B information, and<br />
then for 8949–specific information.<br />
• Date of Sale or Exchange — If a single date does not apply, type Bankrupt,<br />
Worthlss, or Expired, as applicable. Select S or L from the Type of gain<br />
or loss drop list to have it treated as short-term or long-term. (If Expired is<br />
entered, the return must be paper-filed.)<br />
• Date of Acquisition — Enter the date acquired as an eight-digit number using<br />
MMDDYYYY format. This date is used to determine whether the sale is shortterm<br />
or long-term. Enter VARIOUS, INHERIT, or INH2010, as applicable. (Only<br />
“Various,” “Inherit,” and “Inh2010” are acceptable for e-filing.) Select S or L<br />
from the Type of gain or loss drop list to have it treated as short-term or longterm.<br />
• Type of gain or loss — Select from the drop list to describe the gain or loss as<br />
long term or short term.<br />
• Stock or other symbol — Enter the stock or other symbol for the security sold.<br />
• Quantity sold — Enter the quantity of securities sold.<br />
• Proceeds from sale... — Enter the sale amount. If only the gain amount is available,<br />
enter the gain amount and leave the Cost or other basis field blank.<br />
112 Tax Year 2012
<strong>Drake</strong> <strong>Software</strong> User’s <strong>Manual</strong><br />
Sales of Assets<br />
• Cost or other basis — Enter the cost or basis. If only the loss amount is available,<br />
enter the loss amount and leave the Proceeds from sale... field blank.<br />
• Federal tax withheld — Enter the amount of federal tax withheld from the proceeds<br />
of a sale.<br />
• Wash sale loss disallowed — Enter amount of wash sale loss that is disallowed.<br />
• Description — Enter description of capital gain or loss item using stock ticker<br />
symbols or abbreviations. In the past, <strong>Drake</strong> supported 32 characters but only the<br />
first 15 were transmitted with an e-filed return. By default, the first 15 characters<br />
were displayed in black text on the screen; additional characters were displayed in<br />
red. With Modernize e-File (MeF) all characters are now transmitted and all characters<br />
are displayed in black text on the screen.<br />
• Basis not reported... — If the asset being entered is not being taken from a Form<br />
1099-B, indicate why by selecting an option from the drop list.<br />
• Adjustments — Up to three adjustments per screen are permitted. For each<br />
adjustment, select the applicable code from the drop list and enter the amount of<br />
adjustment (and AMT adjustment, if applicable) to the gain or loss.<br />
• AMT — Several AMT–related fields are included on screen 8949:<br />
– The Capital Gains and Losses worksheet (D_AMT) will use the same number<br />
as the regular Schedule D unless entries are made in the AMT Adjustment to<br />
gain or loss and AMT Cost Basis fields on screen 8949.<br />
– If the U.S. Real Property sold by a nonresident box is marked, the program<br />
might have to do a special calculation for line 30 of Form 6251 (AMT —<br />
Individuals); see Form 6251 instructions for more information.<br />
– Amount of gain or loss subject... — Enter amount of gain or loss subject to<br />
28% rate.<br />
• State Use Only — Check with your state for required codes.<br />
Screen D2,<br />
Carryovers &<br />
Other<br />
Entries<br />
Screen D2 has fields for short-term gains/losses from other sources, long-term gains/<br />
losses from other sources, loss carryovers from the prior year, capital gain tax computation,<br />
and federal withholding. If <strong>Drake</strong> was used for the taxpayer last year, the gains/<br />
losses and carryover fields are updated automatically.<br />
Schedule D Imports<br />
If amounts to be entered on screen D2 differ due to AMT, enter them under the AMT<br />
if Different column. For information on override fields, press F1 in a selected field.<br />
Use the Schedule D Import tool to import capital gain and loss transaction data from<br />
an Excel or other worksheet into <strong>Drake</strong>.<br />
Create a<br />
Worksheet<br />
Before you can use this feature, you must have a worksheet containing the transaction<br />
data. This worksheet should be saved as a Microsoft Excel, TAB, or CSV file, with<br />
each column labeled (in order) for a field on screen 8949. Suggested labels are shown<br />
in Table 5-2 on page 114.<br />
Columns must be in the same order as the fields on screen 8949. When looking at<br />
Table 5-2, which shows the field/column order, note that the column names do not<br />
have to match the field names exactly.<br />
Tax Year 2012 113
Sales of Assets<br />
<strong>Drake</strong> <strong>Software</strong> User’s <strong>Manual</strong><br />
Table 5-2: Spreadsheet Columns for Schedule D Import<br />
Spreadsheet<br />
Column<br />
Associated Field on Screen 8949<br />
A<br />
B<br />
C<br />
D<br />
E<br />
F<br />
G<br />
H<br />
I<br />
J<br />
K<br />
L<br />
M<br />
N<br />
O<br />
P<br />
Q<br />
R<br />
S<br />
T<br />
TSJ<br />
F<br />
State<br />
City<br />
Date of Sale or Exchange<br />
Date of Acquisition<br />
Type of gain or loss<br />
Stock or other symbol<br />
Quantity Sold<br />
Proceeds from sale of stocks, bonds, or other capital assets<br />
Loss not allowed based on amount in box 2 (Note: To have a check mark appear<br />
in this field, enter any character into the spreadsheet column.)<br />
Cost or other basis<br />
Federal tax withheld<br />
Wash sale loss disallowed<br />
Description<br />
State<br />
State ID<br />
State tax withholding<br />
Basis not reported/Form 1099-B not received<br />
Form 8949 Adjustment #1 Code<br />
U Adjustment #1<br />
V<br />
W<br />
Adjustment #1 AMT<br />
Form 8949 Adjustment #2 Code<br />
X Adjustment #2<br />
Y<br />
Z<br />
Adjustment #2 AMT<br />
Form 8949 Adjustment #3 Code<br />
AA Adjustment #3<br />
AB<br />
Adjustment #3 AMT<br />
AC Amount for 28%<br />
AD<br />
All 28% rate (Note: To have a check mark appear in this field, enter any character<br />
into the spreadsheet column.)<br />
114 Tax Year 2012
<strong>Drake</strong> <strong>Software</strong> User’s <strong>Manual</strong><br />
Sales of Assets<br />
Table 5-2: Spreadsheet Columns for Schedule D Import<br />
Spreadsheet<br />
Column<br />
Associated Field on Screen 8949<br />
AE<br />
AF<br />
AG<br />
AH<br />
AJ<br />
AMT Cost Basis<br />
US Real Property (Note: To have a check mark appear in this field, enter any character<br />
into the spreadsheet column.)<br />
State Use Code<br />
State adjustment<br />
State Cost or Basis<br />
Importing<br />
Saved Data<br />
To import the information:<br />
1. Open the client’s file to the Data Entry Menu and click Import > Schedule D<br />
Import/GruntWorx Trades from the toolbar. The Schedule D Import/Grunt-<br />
Worx Trades instructions are displayed.<br />
2. Click Next to open the Step 1 dialog box.<br />
3. Click Browse (to the right of the 1. Import File Name field) to locate the file to<br />
be imported.<br />
4. Once you have selected the file to be imported, click Open. The data path and file<br />
name will be displayed, with the transactions shown in the Schedule D Transaction<br />
Information grid below it.<br />
5. From the Start import at field, select the line at which to start the import. For<br />
example, if the Item 1 row in the transaction list is column header information,<br />
choose to begin import at line 2.<br />
6. Click Next.<br />
7. After verifying that the information is correct, click Import.<br />
Sales of Assets<br />
To enter non-recaptured losses, use the Part IV, Recapture Amounts when business<br />
use drops... section of screen 4797. For sold property listed on Form 4797, depreciation<br />
sometimes must be recaptured as ordinary income. (For more on depreciating<br />
sold assets in <strong>Drake</strong>, see “Depreciating Sold Assets” on page 170.)<br />
1099-S<br />
Transactions<br />
Enter data from Form 1099-S, Proceeds from Real Estate Transactions, on the 4797<br />
screen. Mark the 1099-S transaction box, located near the top of screen 4797.<br />
Installment Sales<br />
The steps for entering an installment sale vary depending on the use of the 4562<br />
screen. If the 4562 screen is not used, (1) complete the 4797 screen for the sold asset,<br />
(2) indicate with a “Y” on this screen that the sale is also reported on Form 6252, and<br />
(3) follow the procedure below, starting with Step 3.<br />
To enter an installment sale using the 4562 screen:<br />
Tax Year 2012 115
Sales of Assets<br />
<strong>Drake</strong> <strong>Software</strong> User’s <strong>Manual</strong><br />
Screen code: 4562<br />
Screen code: 4797<br />
Screen code: 6252<br />
1. For the sold asset, open screen 4562 and complete the Date sold field in the If<br />
sold section on the right side of the screen. This causes the program to stop calculating<br />
depreciation.<br />
2. Select as Property type “IN” (for §1245 property) or “IS” (for §1250 property).<br />
3. View the return, checking to see if there is an amount on Form 4797, line 31. If<br />
line 31 contains an amount, proceed to Step 4 below. If it doesn’t, proceed to<br />
Step 5.<br />
4. Enter the amount from Form 4797, line 31, on screen 6252, line 12 (Depreciation<br />
to recapture).<br />
5. Complete screen 6252 by entering all other installment sale information. Listed<br />
below are specific instructions and explanations for completing the separate parts<br />
of screen 6252.<br />
• Lines 1-15 (Part I of Form 6252) — Complete these lines for the year of sale<br />
only. Lines 1-15 must also be completed in subsequent years in order to have<br />
the gross profit percentage carry through to subsequent years.<br />
TIP<br />
As an alternative, and only if the current year is not the year of sale,<br />
you can enter the Gross Profit Percentage on the 6252 screen. Use a<br />
whole number, not the decimal equivalent. For example, enter 62% as<br />
62, not as .62.<br />
Like-Kind Exchanges<br />
• Line 19 and Receipt category section (Part II of Form 6252) — Complete<br />
line 19 (use a whole number, not a decimal equivalent) and the Receipt category<br />
fields for the year of sale and for any year in which a payment or debt<br />
must be treated as a payment on installment options.<br />
• Part III (Related Party Sale Income) — Complete Part III if (a) the sale<br />
was made to a related party, and (b) the income is not from the final payment<br />
in the current tax year.<br />
• Unrecaptured Section 1250 Gain — If unrecaptured §1250 gain is present,<br />
enter the gain amount in the Unrecaptured Section 1250 Gain field (to the<br />
right of line 19). The taxable amount is calculated on the WK_1250 worksheet<br />
and is carried to Schedule D, line 19 based on these calculations.<br />
6. View the return. See line 31 of Form 4797 for the recapture amount (if any).<br />
If an asset has been traded and requires continued depreciation and there is an increase<br />
in basis that must be depreciated, you can link like-kind exchange information to the<br />
appropriate depreciation details.<br />
To enter an asset as a like-kind exchange:<br />
Screen code: 4562<br />
Screen code: 8824<br />
1. Open the 4562 (Depreciation Detail) screen for the asset that the taxpayer traded<br />
(or gave up).<br />
2. Make an on-screen notation to indicate that the asset was traded (for example,<br />
type an A before the description in the Description field).<br />
3. Open the 8824 (Like-Kind Exchanges) screen and complete the fields for the<br />
like-kind exchange.<br />
116 Tax Year 2012
<strong>Drake</strong> <strong>Software</strong> User’s <strong>Manual</strong><br />
Sales of Assets<br />
Screen code: 4562<br />
4. Calculate the return. In View mode, view Form 8824 and note the amount calculated<br />
for the “Basis of like-kind property received” line. (Generally, this amount<br />
becomes the adjusted basis of the new asset, unless an additional amount was<br />
incurred in obtaining it.)<br />
5. Open the 4562 screen for the new asset. In the Description field, make a notation<br />
to indicate that the asset was traded (such as an A before the description).<br />
(As an example, if a Ford 150 is traded for a Chevy Blazer, the descriptions on the<br />
4562 screens might be “A-Ford F150” and “A-Chevy Blazer.” This notation<br />
makes the traded assets easier to identify.)<br />
6. Enter any increase in basis as the beginning cost.<br />
The depreciation on the old asset continues over the remaining life, and depreciation<br />
for the new asset starts, using the 8824 basis for the correct number of years.<br />
Basis of Primary Residence<br />
Screen code:<br />
HOME<br />
Use the HOME screen to accomplish the following tasks:<br />
• Report the sale of a primary residence<br />
• Enter data to determine the taxpayer’s basis in the primary residence and calculate<br />
the tax implications of the transaction<br />
• Allow the program to reduce the maximum exclusion if the taxpayer is eligible for<br />
part, but not all, of the gain exclusion<br />
• Apply the appropriate treatment for the gain (loss) on the transaction<br />
• Indicate that a surviving spouse is taking the MFJ exclusion for gain on the sale<br />
• Enter data to calculate the amount of recapture in a year of sale if the First-Time<br />
Homebuyer Credit (Form 5405) was taken on the home<br />
• Enter data for Form 5405, Part III (Disposition or Change in Use of Main Home<br />
for Which the Credit Was Claimed) and Part IV (Repayment of Credit Claimed<br />
for 2008 or 2009)<br />
Related<br />
Worksheets<br />
A Primary Residence Calculations worksheet (WK_2119) is generated with the return<br />
when the HOME screen is used. It consists of up to three pages:<br />
• Worksheet 1: Adjusted Basis of Home Sold<br />
• Worksheet 2: Gain (or Loss), Exclusion, and Taxable Gain on Sale of Home<br />
• Worksheet 3: Reduced Maximum Exclusion<br />
These pages are for informational purposes only to allow the basis in the home to be<br />
tracked. If no date of sale is entered, only Worksheet 1 contains data when generated<br />
with the return.<br />
Updating<br />
from the<br />
Prior Year<br />
Data entered in the Date home was purchased, Basis of Home, and Form 5405<br />
fields are included in the <strong>Drake</strong> update routine. These fields are updated as long as<br />
there is not a date in the Date home was sold field. Once the home is sold, there is no<br />
need to continue tracking the basis.<br />
Tax Year 2012 117
Retirement Income<br />
<strong>Drake</strong> <strong>Software</strong> User’s <strong>Manual</strong><br />
Schedule D<br />
Section 121<br />
Calculation<br />
Conversion<br />
to Business<br />
Use<br />
Exclusion<br />
for Surviving<br />
Spouse<br />
First-Time<br />
Homebuyer<br />
Credit<br />
The home sale flows to Schedule D only if the gain on the sale exceeds the exclusion<br />
amount. If Schedule D is generated, both the gain on the home and the Section 121<br />
exclusion (if applicable) appears on Schedule D. The WK_2119 is still generated, but<br />
Schedule D is added to report the taxable gain on the sale.<br />
The software calculates the section 121 exclusion using the number of days during the<br />
last five years that the taxpayer used the home and the number of days the home was<br />
owned during the past five years. Enter this information in the Calculate Section 121<br />
Exclusion section of the HOME screen.<br />
If a home was lived in and then converted entirely to rental or business use and subsequently<br />
sold, the transaction must be shown on Form 4797. Mark the Carry taxable<br />
gain to 4797 box (in the Miscellaneous section) to have the applicable HOME screen<br />
information flow to the 4797.<br />
For two years after the death of a taxpayer, a spouse is permitted to take the MFJ<br />
exclusion for gain on the sale of a principal residence, assuming the normal requirements<br />
for the exclusion are met. To indicate that the surviving spouse is taking the<br />
exclusion, mark the Recently widowed taxpayer eligible for MFJ exclusion box in<br />
the Miscellaneous section of the HOME screen.<br />
If the First-Time Homebuyer Credit was taken for the residence in 2008 or 2009 and<br />
there has been a disposition or change in the use of the residence or the credit is now<br />
being repaid, complete the applicable fields in the Form 5405 Repayment Information<br />
section of the HOME screen.<br />
Retirement Income<br />
Use the 1099, 8606, and ROTH screens to enter most retirement income data. Screens<br />
3 and 4 include fields for entering retirement data directly into the generated 1040.<br />
Amounts entered in these fields are combined with any corresponding calculations<br />
from the 1099, 8606, and ROTH screens.<br />
1099-R<br />
Use the 1099 screen to enter data, including distribution amounts, from Form 1099-R.<br />
The 1099 screen consists of two screens: 1099-R and Special Tax Treatments. The<br />
Special Tax Treatments screen has fields for the Simplified General Rule Worksheet,<br />
qualified charitable distributions, HSA funding distributions, and public safety officers.<br />
To access the Special Tax Treatments screen from the 1099 screen, click the<br />
Special Tax Treatments tab at the top of the screen.<br />
Items Not<br />
Reported on<br />
1099-R<br />
Use screen 3 for IRA and pension distribution amounts that were not reported on a<br />
1099-R. Enter total and taxable portions of these amounts (Figure 5-17 on page 119).<br />
118 Tax Year 2012
<strong>Drake</strong> <strong>Software</strong> User’s <strong>Manual</strong><br />
Retirement Income<br />
Figure 5-17: Adjustment fields for IRA and pension distributions (screen 3)<br />
These amounts are calculated with the corresponding amounts from the 1099 and<br />
8606 screens and carried to the “IRA distributions” and “Pensions and annuities” lines<br />
of Form 1040. Do not duplicate entries made on the 1099 or 8606 screens.<br />
NOTES<br />
Mark the applicable check box on this screen to have the program calculate<br />
the penalty early distribution of the taxable portion of IRA distributions<br />
(line 15b) or pensions (line 16b) entered.<br />
If the taxpayer did not receive a 1099-R for a pension, annuity, or IRA<br />
distribution, the return cannot be e-filed.<br />
Substitute<br />
1099-R<br />
Rollover of<br />
Pensions/<br />
Annuities<br />
To file a substitute 1099-R (Form 4852), refer to “Substitute W-2, 1099-R” on<br />
page 104.<br />
If a 1099-R distribution should be excluded from income because it was rolled over<br />
into another qualified plan, indicate this using the Exclude from income drop list on<br />
the 1099 screen (under the Rollover Information heading; see Figure 5-18).<br />
501(c)(18) Contributions<br />
IRA Contributions<br />
Figure 5-18: Selections for rolled-over 1099-R distribution<br />
Select S if the distribution was rolled over into the same type of account. Select X if it<br />
was rolled over into another plan. If S is selected, the word “ROLLOVER” is displayed<br />
on “Pensions and annuities” line of Form 1040.<br />
Enter contributions to a 501(c)(18) pension plan on screen 4, but do not include<br />
amounts that have been assigned Code H (“elective deferrals to a section<br />
501(c)(18)(D) tax-exempt organization plan”) in box 12 of the W-2. Those amounts<br />
are carried automatically from the W2 screen to Form 1040.<br />
For traditional IRA contributions, use the 8606 screen, which addresses Part I of<br />
Form 8606, Nondeductible IRAs. For Roth IRA contributions, use the ROTH screen,<br />
which addresses Parts II and III of Form 8606.<br />
Tax Year 2012 119
Retirement Income<br />
<strong>Drake</strong> <strong>Software</strong> User’s <strong>Manual</strong><br />
Deductible IRA contributions are calculated from the 8606 screen and displayed on<br />
the “IRA deduction” line of Form 1040. If an amount is entered into the Deductible<br />
IRA field on screen 4, it is combined with the amount from the 8606 screen.<br />
If a taxpayer is covered by a pension plan, use the 8606 screen instead of screen 4. If<br />
the program determines that the contribution amount exceeds the maximum allowed,<br />
it generates a NOTES page with the return.<br />
TIP<br />
If Form 8606 is not required but you want to generate it anyway, go to<br />
the 8606 screen and select Print Form 8606 even if not needed.<br />
Converting<br />
to a Roth IRA<br />
To report the transfer of an amount from a traditional IRA to a Roth IRA, enter the<br />
amount on the ROTH screen (Figure 5-19).<br />
IRA Penalty Computations<br />
Figure 5-19: ROTH screen field for amount to be transferred to a Roth IRA<br />
This amount is carried to the appropriate line of Form 8606.<br />
IRA penalties are calculated using data entered on the 5329 screen (Form 5329, Additional<br />
Taxes on Qualified Plans (Including IRAs) and Other Tax-Favored Accounts).<br />
Carrying<br />
1099-R Data<br />
to Form 5329<br />
It might not be necessary to enter data directly onto the 5329 screen. If a distribution<br />
code of “1” (Early (premature) distribution, no known exception) has been entered as<br />
Dist. code (box 7) of the 1099 screen, you can force the distribution amount from a<br />
1099-R to flow to Form 5329 and have the taxable amount of the distribution subject<br />
to the 10% penalty. To do so, go to the desired 1099 screen and select the applicable<br />
box under Additional Information for this Distribution (Figure 5-20).<br />
Figure 5-20: Select box to carry 1099-R data to Form 5329<br />
120 Tax Year 2012
<strong>Drake</strong> <strong>Software</strong> User’s <strong>Manual</strong><br />
Supplemental Income<br />
To access the 5329 screen directly from the 1099 screen, click the Form 5329 link<br />
shown in Figure 5-20 on page 120.<br />
Exception<br />
Numbers<br />
On the 5329 screen, exception numbers 01 and 06 (Part I, line 2) apply only to distributions<br />
from qualified employee plans—not to those from IRAs, annuities, or modified<br />
endowment contracts. To view full descriptions of each exception number, click<br />
inside the Exception number field and press F1.<br />
Supplemental Income<br />
Links for Schedule E and K-1 screens are located in the Schedules E and K-1 section<br />
of the Income tab.<br />
Figure 5-21: Screens for entering Schedule E data<br />
Schedule E<br />
Screen code: E<br />
Use screen E to complete page 1 of Schedule E (Part I: Income or Loss From Rental<br />
Real Estate and Royalties). Page 2 of Schedule E (Parts II through V) is calculated<br />
from K-1 schedules. The corresponding screens in <strong>Drake</strong> (E2, E3, and E4) primarily<br />
contain override fields; data entered here overrides amounts that would otherwise<br />
flow from the K-1.<br />
IMPORTANT<br />
Use screens E2, E3, and E4 only if transcribing the information<br />
from a previously calculated Schedule E.<br />
Form 1099<br />
Reporting<br />
Screen E includes check boxes for indicating (1) if any Forms 1099 were required to<br />
be filed, and (2) whether the required Forms 1099 were filed.<br />
Figure 5-22: 1099 check boxes on screen E<br />
NOTE<br />
If more than one Schedule E is required, questions A and B (above)<br />
should be answered only on the first screen E.<br />
Tax Year 2012 121
Supplemental Income<br />
<strong>Drake</strong> <strong>Software</strong> User’s <strong>Manual</strong><br />
General<br />
Property<br />
Information<br />
Information entered in the Property description for reporting field at the top of the<br />
screen (shown in Figure 5-22 on page 121) appears in the headings of all generated<br />
worksheets associated with the activity.<br />
The following general-information fields are also located at the top of screen E:<br />
• Activity type — If option D (“Not a passive activity”) is selected and EIC is<br />
involved, the program prints “NPA” on the appropriate line of Schedule E. For<br />
more on selecting activity types, see “Activity Types” on page 124.<br />
• Address and Type of Property — Enter the property address in the fields provided,<br />
and select the property type from the options below those fields. If Other,<br />
type a brief (20 characters or fewer) description of the property type.<br />
• Some investment is NOT at risk — Mark this box if portions of the real-estate<br />
investment are not at risk. To enter data for computing deductible profit or loss<br />
from at-risk activities, click the Form 6198 link to open the 6198 screen (for<br />
Form 6198, At-Risk Limitations). When you exit the 6198 screen, the program<br />
returns you to screen E.<br />
• Property was 100% disposed of in 2012 — Mark this box if the property was<br />
sold or otherwise disposed of in the current tax year.<br />
• Property is an SMLLC — Mark this box if the property is a Single Member<br />
Limited Liability Company (state use only).<br />
NOTE<br />
If the property was 100% disposed of and a 4562 screen has been<br />
completed, the software automatically determines if the disposal was at<br />
an overall loss or gain and prepares Form 8582, Passive Activity Loss<br />
Limitations, and its worksheets accordingly.<br />
Property<br />
Usage<br />
Item 2 of screen E contains fields for indicating how much of a property was used for<br />
fair rental and personal purposes, and a check box to indicate that a taxpayer owned a<br />
property as a member of a qualified joint venture that is reporting rental income not<br />
subject to self-employment tax.<br />
Other property-usage fields are:<br />
Figure 5-23: Item 2 of screen E<br />
• If multi-dwelling unit... — If the taxpayer lives in one unit of a multi-dwelling<br />
property while renting out the others, enter the percentage occupied by the taxpayer.<br />
An entry here causes the software to take indirect expenses into account<br />
when calculating the return (see “Direct and Indirect Expenses” on page 123).<br />
• To use Tax Court... — Mark the applicable check box (see Figure 5-23), and<br />
enter the number of days owned in the text box next to it. (If the text box is left<br />
blank, the program uses 365 as the default.)<br />
122 Tax Year 2012
<strong>Drake</strong> <strong>Software</strong> User’s <strong>Manual</strong><br />
Supplemental Income<br />
• This is your main home, or second home — Select this box if the property is the<br />
taxpayer’s main or second home. If personal use is indicated and this box is<br />
marked, mortgage interest is carried to Schedule A.<br />
NOTES<br />
The program uses the percentages entered when calculating the business<br />
percentage of expenses and taking deductions. The remaining<br />
percentage of taxes entered is carried to Schedule A.<br />
A taxpayer with more than 10% use of a rental can take expenses up to<br />
the amount gained, regardless of percent use. With 50% use, for example,<br />
the system does not calculate 50% of expenses; it instead calculates<br />
the gain and takes expenses up to that gain.<br />
If the If multi-dwelling unit... box is marked, a worksheet is produced<br />
for each property that lists expense types and divides expense amounts<br />
into personal, rental, and total amounts.<br />
Direct and<br />
Indirect<br />
Expenses<br />
The program can take both direct and indirect expenses into account when calculating<br />
a return for a taxpayer who occupies one unit of a multi-dwelling property while renting<br />
out the others.<br />
NOTE<br />
Direct expenses are those that affect only the rental units. Indirect<br />
expenses are those that affect both the rental units and the taxpayer’s<br />
dwelling. Indirect expenses can also be personal expenses.<br />
Enter expense amounts using the columns on screen E (Figure 5-24).<br />
Figure 5-24: Columns for Direct Expenses and Indirect Expenses<br />
IMPORTANT<br />
If the If multi-dwelling unit... box is not marked, the program<br />
ignores any figures entered in the Indirect Expenses column.<br />
Sale of<br />
Property<br />
PMI<br />
If a property was sold and Schedule E must be associated with data from a 4797<br />
screen (Form 4797, Sales of Assets), use a passive activity number (PAN) code to tie<br />
them together. To do so, enter a number in the PAN box on screen E, and then enter<br />
the same number in the PAN box of the applicable 4797 screen.<br />
To indicate that insurance includes Private Mortgage Insurance (PMI), mark the check<br />
box under item 9 on screen E. The program will display “PMI” on line 9 of the printed<br />
Schedule E (Figure 5-25 on page 124).<br />
Tax Year 2012 123
Supplemental Income<br />
<strong>Drake</strong> <strong>Software</strong> User’s <strong>Manual</strong><br />
Figure 5-25: If the PMI box on line 9 of screen E is marked,<br />
the program displays a “PMI” indicator on the Schedule E.<br />
Operating<br />
Expenses<br />
Carryover<br />
Rental of<br />
Personal<br />
Property<br />
Screen E includes a field for entering the carryover of operating expenses. This field is<br />
located in the lower-right quadrant of the screen. An entry in this field flows to the<br />
Rental Limitation on Deductions worksheet (WK_E____).<br />
Enter income from “casual” rental on personal property on screen 3. Enter expenses<br />
(if any) on screen 4, in the Expenses from casual rental of personal property field<br />
under line 36. Do not use screen E. If you do have a Schedule E with the return, enter<br />
this “casual” rental income on screen E and not on screen 3.<br />
Schedule K-1<br />
Screen codes: K1,<br />
K1F, K1S<br />
Screens for Schedule K-1 are accessible from the Income tab. The program contains<br />
three types of K1 screens: K1P for partnership income; K1S for S corporation<br />
income; and K1F for fiduciary income. Enter information directly into a K1 screen, or<br />
export K-1 information from a pass-through entity into an individual return.<br />
NOTE<br />
The K1P and K1S screens include 6198 At Risk tabs for tracking partner<br />
or shareholder basis for at-risk activities. For more information on<br />
using these tabs, see “Tracking At-Risk Basis” on page 129.<br />
Accessing<br />
K-1 Data<br />
Fields<br />
Two screens are used to complete the lines on a Schedule K-1 (see Figure 5-26). From<br />
the Data Entry Menu, the first page of the selected K1 screen is displayed.<br />
Figure 5-26: In this example, the program is opened to the first “page” of the K1P screen.<br />
In Figure 5-26, you would click 1065 K1 13-20 to complete lines 13 through 20.<br />
Activity<br />
Types<br />
The K1P, K1F, K1S, E, and 4835 screens feature an Activity Type drop list for designating<br />
an activity as passive or nonpassive. A selection from this list controls what<br />
124 Tax Year 2012
<strong>Drake</strong> <strong>Software</strong> User’s <strong>Manual</strong><br />
Supplemental Income<br />
income data, if any, goes to Form 8582, Passive Activity Loss Limitations. Available<br />
activity types are described in Table 5-3.<br />
Table 5-3: Activity Type Selections, for K1P, K1F, K1s, E, and 4835 screens<br />
Activity Type<br />
A - Active rental real estate<br />
B - Other passive activity<br />
C - Real estate professional<br />
D - Not a passive activity<br />
Description<br />
Activity is a rental real estate activity with active participation.<br />
Calculation flows to the “Rental Real Estate Activities With<br />
Active Participation” section in Part I of Form 8582 and to the<br />
WKS 1 worksheet. (This is the default for screen 4835.)<br />
Activity is a passive activity but is not a rental real estate<br />
activity. Calculation flows to the “All Other Passive Activities”<br />
section in Part I of Form 8582 and to the WKS 3 worksheet.<br />
Activity is that of a real estate professional and does not flow<br />
to Form 8582.<br />
Activity is not a passive activity. Because it is nonpassive,<br />
the calculations from this screen do not flow to Form 8582.<br />
(Option available on screens K1 and E only.)<br />
If A or B is selected, the activity is considered a currently passive activity because “A”<br />
is rental real estate and “B” is other passive activity.<br />
NOTE<br />
If the General partner box is marked on the K1P screen, self-employment<br />
income is automatically reduced by any amount entered in the<br />
Section 179 deduction field. The unreimbursed partnership expense<br />
flows to a separate line on Part II of Schedule E.<br />
State K-1<br />
Amounts<br />
(If Different)<br />
In cases where the state K-1 amounts differ from federal K-1 amounts (such as when a<br />
state does not take the federal limits on depreciation), indicate the difference in the<br />
software so the correct K-1 amounts will flow to the correct federal and state forms.<br />
By default, the program uses the federal K-1 amounts for both federal and state calculations.<br />
If the state K-1 amounts differ from the federal, enter the state amounts in the<br />
State column fields of a K1 screen (Figure 5-27).<br />
Figure 5-27: Some of the Federal and State K-1 columns from screen K1S<br />
Multiple<br />
States<br />
In some cases, an entity will issue Schedule K-1 forms for multiple states, requiring<br />
the preparer to enter two or more amounts for the same state K-1 items.<br />
To enter federal and state K-1 information where multiple state K-1s are issued:<br />
Tax Year 2012 125
Supplemental Income<br />
<strong>Drake</strong> <strong>Software</strong> User’s <strong>Manual</strong><br />
1. Enter all information for federal and the first state on the K1 screen. (Enter data in<br />
the State column only if the state amount differs from the federal).<br />
2. From the first “page” of the screen, press PAGE DOWN to start a new screen.<br />
3. In the F text box at the top of the screen, type 0 (zero) to exclude the information<br />
on this screen from the federal return. (See Figure 5-28.)<br />
4. Select a state from the ST drop list. In Figure 5-28 below, North Carolina has been<br />
selected.<br />
Figure 5-28: Enter “0” in the F text box and select a state from the ST drop list.<br />
5. Complete all applicable fields. Basic information, such as ID number and name,<br />
must be re-entered. Because the program does not use the entries on this screen<br />
for federal purposes, it is not necessary to enter the federal amounts; however, all<br />
applicable state amounts are required, even if they are identical to the federal<br />
amounts entered on the previous screen.<br />
6. Click the linked tab at the top of the screen for the next “page” (see Figure 5-26 on<br />
page 124) and continue entering state amounts.<br />
7. (if applicable) Complete the For State Use Only fields on the second “page.”<br />
To enter data for another state, repeat Step 2 through Step 7 above.<br />
K-1 Exports K-1 data can be exported from an 1120S, 1065, or 1041 return in <strong>Drake</strong> to an individual<br />
return in <strong>Drake</strong>. To export K-1 data, you must first have the following items:<br />
• An 1120S, 1065, or 1041 return, completed in <strong>Drake</strong><br />
• An individual return in <strong>Drake</strong> for the shareholder, partner, or beneficiary listed in<br />
the 1120S, 1065, or 1041 return<br />
To export K-1 data into an individual return:<br />
1. Open the 1120S, 1065, or 1041 return that contains the data to be exported.<br />
2. Click View to calculate the return and open View mode.<br />
3. Click the K1 Export button in the View mode toolbar. The Export K1s screen<br />
lists all taxpayer SSNs for exporting. All rows are selected by default.<br />
4. (optional) Click a row to clear it if you do not wish to export K-1 data to all individuals<br />
listed.<br />
126 Tax Year 2012
<strong>Drake</strong> <strong>Software</strong> User’s <strong>Manual</strong><br />
Supplemental Income<br />
5. Click Export. When the Export complete dialog box is displayed, click OK. The<br />
transferred data is highlighted in the K1 screen of each personal return that<br />
received the data.<br />
IMPORTANT<br />
Once the export is complete, any state K-1 amounts, if different<br />
from the federal, must be entered manually. See “State K-1<br />
Amounts (If Different)” on page 125).<br />
Tracking<br />
Adjusted<br />
Basis<br />
<strong>Drake</strong> takes current-year basis limitations into account when calculating K-1 amounts<br />
and tracks the adjusted basis for a K-1 from a pass-through entity (partnership or S<br />
corp). The program also limits any losses based on the basis calculation and carries<br />
forward to subsequent years the adjusted basis and any disallowed losses.<br />
When a return with adjusted basis data is calculated, the amounts entered on the K1P<br />
and K1S screens undergo the basis limitation calculation. The limited amounts are<br />
then used in at-risk and passive loss limitation calculations, if applicable. Because<br />
amounts flow from both the K1 and Basis Worksheet screens to determine the<br />
amount of basis the taxpayer has for deducting losses from the K-1, it is necessary to<br />
enter all basis data on the Basis Worksheet screens. These are accessed from either<br />
the K1P or K1S screen. (Tabs are shown in Figure 5-26 on page 124.)<br />
NOTE<br />
If you calculate a return with K-1 information but have not entered anything<br />
on the Basis Worksheet screens, the program generates a note<br />
advising you to do so.<br />
How the<br />
Calculation is<br />
Applied<br />
Adjusted<br />
Basis<br />
Once it is able to calculate the adjusted basis, the program takes steps based on calculation<br />
results:<br />
• Adjusted Basis More than Zero — If the adjusted basis is greater than zero<br />
based on current- and prior-year entries, amounts flow to the return and the software<br />
tracks and updates the adjusted basis amounts going forward.<br />
• Adjusted Basis Zero or Less — If the adjusted basis is zero or less based on current-<br />
and prior-year entries, amounts flow to page 2 of the printed Adjusted Basis<br />
Worksheet (see “Printed Worksheets” on page 129) to determine how much loss is<br />
allowed in the current year. Disallowed amounts are stored and updated to the<br />
next year.<br />
The first Basis Worksheet screen contains fields that are necessary to properly calculate<br />
adjusted basis for the 1040 return. Figure 5-29 on page 128 shows the adjusted<br />
basis fields for a partnership.<br />
Tax Year 2012 127
Supplemental Income<br />
<strong>Drake</strong> <strong>Software</strong> User’s <strong>Manual</strong><br />
Figure 5-29: Partner Basis fields on Basis Worksheet screen<br />
The fields in the Partner Basis (or Stock Basis for an S corporation) and Debt Basis<br />
sections for the current year must be completed manually.<br />
NOTE<br />
Data flows directly from the two K1 screens into the Current-year<br />
losses and deductions column (shown in Figure 5-30 on page 129).<br />
Data entry for this column begins on the first Basis Worksheet screen<br />
and continues to the Basis Worksheet continued screen.<br />
Calculating<br />
Loss<br />
Allocation<br />
Loss allocation percentage is calculated by:<br />
a. Taking the total losses and deductions allowed<br />
b. Dividing them by the total losses and deductions to figure the loss allocation<br />
percentage<br />
c. Multiplying the loss allocation percentage by each category of loss applicable<br />
to the return<br />
Once these calculations are complete:<br />
• The product flows to column (D), Allowed Losses and Deductions in Current<br />
Year, of the Adjusted Basis Worksheet.<br />
• The difference between the total losses and deductions and the allowed losses and<br />
deductions flows to column (E), Disallowed Losses and Deductions in Current<br />
Year, of the Adjusted Basis Worksheet.<br />
NOTE<br />
The Shareholder’s Adjusted Basis Worksheet (WK_ISBAS) and the<br />
Partner’s Adjusted Basis Worksheet (WK_IPBAS) are generated when<br />
the return is calculated.<br />
Prior-Year<br />
Unallowed<br />
Losses<br />
Enter prior-year unallowed losses in the Prior-year carryover losses and deductions<br />
column, which spans the Basis Worksheet screen (see Figure 5-30 on page 129) and<br />
Basis Worksheet continued screens. The program automatically updates prior-year<br />
unallowed losses entered in the 2011 program.<br />
128 Tax Year 2012
<strong>Drake</strong> <strong>Software</strong> User’s <strong>Manual</strong><br />
Supplemental Income<br />
Figure 5-30: Some of the fields for shareholder’s prior-year unallowed losses<br />
(Basis Worksheet screen)<br />
Printed<br />
Worksheets<br />
Basis worksheets are generated when the return is calculated. A worksheet actually<br />
consists of two pages: page 1 shows the adjusted basis calculations; page 2 shows the<br />
losses and deductions calculations.<br />
TIP<br />
You can force page 2 to be printed, even if it does not contain data. To<br />
do so, mark the Force page 2... box at the bottom of the Basis Worksheet<br />
continued screen in data entry.<br />
Updating to<br />
Next Year<br />
Tracking At-<br />
Risk Basis<br />
The following basis information will be updated to the next year’s software:<br />
• Adjusted basis amount at the end of the year<br />
• Amounts in the “Disallowed Losses” column of the printed Adjusted Basis Worksheet,<br />
page 2<br />
At-Risk Limit Worksheets can help track shareholder and partner basis for at-risk<br />
activities. Worksheets (WK_IPRSK for partnerships and WK_ISRSK for shareholders)<br />
are produced for each Schedule K-1 for both regular tax and AMT. Use the 6198<br />
At-Risk tabs on K1P and K1S screens to enter data for these worksheets. (Tabs are<br />
shown in Figure 5-26 on page 124.)<br />
The top half of the 6198 At Risk tab has the following groups of fields:<br />
• Part I, Profit (Loss) from the Activity — If the basis worksheet was used, the<br />
amount entered there for “Gain from Section 179 asset disposition” will flow to<br />
line 2b of Form 6198. If that worksheet was not used, then this field on the 6198<br />
At-Risk tab must be used. (If data is entered in both places, then the amount on<br />
the 6198 At-Risk tab will be used.)<br />
• Part II/III Simplified/Detailed Computations — If the Part III Detailed Computation<br />
fields (located in the following section on the screen) are used, then the<br />
program uses Part III to calculate the amount at risk for these fields. If amounts<br />
are entered in this section only, then Part II is used.<br />
Tax Year 2012 129
Farm Income<br />
<strong>Drake</strong> <strong>Software</strong> User’s <strong>Manual</strong><br />
• Part III Detailed Computation — Use this section to complete lines 15, 16, and<br />
18 of Form 6198. If data is entered here, the program uses Part III to calculate the<br />
amount at risk for these fields.<br />
The lower portion of the screen has fields for entering prior-year carryover and current-year<br />
losses and deductions. Use these fields for the following types of amounts:<br />
• Prior-year losses that were not deductible due to the at-risk limitations<br />
• Current-year amounts to override either (a) the equivalent fields on other K1<br />
screens or (b) the at-risk calculation<br />
NOTE<br />
Most of the entries on the 6198 At-Risk tabs are used for calculating<br />
Form 6198, line 4, “Other deductions and losses...”<br />
At-Risk Limit<br />
Worksheets<br />
When applicable, the program produces At-Risk Limit Worksheets with the calculated<br />
return. In View mode, the worksheets are listed as WK_IPRSK (for partnerships) and<br />
WK_ISRSK (for shareholders). Two copies of the worksheet are printed for each<br />
Schedule K-1: one for regular tax and one for the alternative minimum tax (AMT).<br />
Use the scroll bar in View mode to see both copies.<br />
NOTE<br />
To force the software to print the At-Risk Limit Worksheets even when<br />
they are not needed, mark the check box at the bottom of the 6198 At<br />
Risk continued tab.<br />
Farm Income<br />
Entry fields for the following farm-related forms are located under the Income tab:<br />
Screen codes:<br />
F, J, 4835<br />
• Schedule F, Profit or Loss From Farming (can also be used with a 1065 return)<br />
• Schedule J, Income Averaging for Farmers and Fishermen<br />
• Form 4835, Farm Rental Income and Expenses<br />
NOTES<br />
Enter crop insurance and disaster payments for Schedule F and Form<br />
4835 on the Crop Insurance and Disaster Payments (CIDP) screen.<br />
The Auto Expense Worksheet (AUTO) screen can be applied to the F<br />
and 4835 screens. See “Auto Expenses” on page 171.<br />
Schedule F, Profit or Loss From Farming<br />
Screen code: F<br />
Screen F<br />
Defaults<br />
Use screen F, accessible from the Income tab, to enter data for Schedule F, Profit or<br />
Loss From Farming.<br />
The program’s default accounting method (item C) is cash. Select Accrual if the taxpayer’s<br />
accounting method is not cash.<br />
The default position for material participation (item E) is that the taxpayer “materially<br />
participated” in the current year. If the taxpayer did not materially participate,<br />
select Did NOT materially participate option.<br />
130 Tax Year 2012
<strong>Drake</strong> <strong>Software</strong> User’s <strong>Manual</strong><br />
Unemployment Compensation<br />
The default position for investments (in Part II, Expenses) is that all investments are at<br />
risk. If this is not true for your client, select Some investment is NOT at risk.<br />
1099-PATR<br />
Enter the distribution amount from Form 1099-PATR, Taxable Distributions Received<br />
from Cooperatives, in the Co-op total distributions field on screen F.<br />
Form 4835, Farm Rental Income and Expenses<br />
Screen code: 4835<br />
Farm Asset Depreciation<br />
Use screen 4835 to enter data for Form 4835, Farm Rental Income and Expenses.<br />
Note that this form is for individual (1040) returns only; estates and trusts must file<br />
Schedule E, Part I, to report rental income and expenses from crop and livestock<br />
shares.<br />
Use screen 4562 (Depreciation Detail) to create depreciation schedules for Schedule<br />
F and Form 4835. From the For drop list on screen 4562, select either F or 4835, as<br />
applicable. For more on entering depreciation data, see “Depreciation” on page 165.<br />
Unemployment Compensation<br />
Unemployment compensation amounts should be entered, as applicable, in the fields<br />
described in Table 5-4.<br />
Table 5-4: Entering Unemployment Compensation in <strong>Drake</strong><br />
Unemployment<br />
Compensation<br />
Information from 1099-G<br />
Any prior-year amounts, repaid;<br />
to claim repayments<br />
(See Pub. 17 for guidance)<br />
Prior-year supplemental<br />
(employer-provided) amounts,<br />
repaid<br />
Screen: 99G<br />
Fields: As applicable<br />
Where to Enter in <strong>Drake</strong><br />
Screen: A<br />
Field: Other not subject to 2% limit; (choose Claim<br />
Repayment)<br />
Screen: 4<br />
Field: Repaid sub-pay previously reported (Enter the<br />
repaid amount.)<br />
Current year, total Screen: 3<br />
Field: Unemployment compensation (adjustment field;<br />
added to 99G amount)<br />
Current year, repaid Screen: 3<br />
Field: Portion of above unemployment repaid in 2012<br />
Note that the Unemployment compensation field on screen 3 is an adjustment field.<br />
Any amount entered in this field is added to the amounts from the 99G screen and carried<br />
to the “Unemployment compensation” line of Form 1040. Do not duplicate the<br />
99G entries on screen 3.<br />
Tax Year 2012 131
Social Security and Railroad Benefits<br />
<strong>Drake</strong> <strong>Software</strong> User’s <strong>Manual</strong><br />
Social Security and Railroad Benefits<br />
Screen code: SSA<br />
Use the SSA screen to enter data from Form SSA-1099. If this form was not distributed,<br />
use screen 3 to enter the following Social Security (or equivalent) benefit<br />
amounts (see Figure 5-31):<br />
• Social Security benefits that apply for the current year<br />
• Lump-sum benefits from prior years (total received and taxable portion)<br />
• Railroad Tier 1 benefits for the current year<br />
Figure 5-31: Screen 3 fields for Social Security benefit amounts<br />
These figures are combined with any Social Security or equivalent benefit amounts<br />
from the SSA screen, calculated, and displayed on the “Social security benefits” line<br />
of Form 1040.<br />
NEW FOR<br />
2012<br />
To treat Medicare premiums as self-employed health insurance, mark<br />
the Treat Medicare premiums... box on the SSA screen to have the<br />
Medicare premiums flow to the Self-Employed Health Insurance<br />
Deduction Worksheet (WK_SEHID) instead of Schedule A.<br />
Screen code: RRB<br />
To enter data from the federal RRB-1099R form, use the RRB screen. This screen<br />
reflects the federal form.<br />
NOTE<br />
Railroad Retirement Board payments should be reported on the SSA<br />
screen.<br />
Other Income<br />
Taxable Distributions<br />
The Other income fields on screen 3 are available for reporting taxable income not<br />
reported elsewhere on the return. Amounts entered here are produced on line 21 of<br />
Form 1040, and descriptions are listed in a statement.<br />
Several screens are available in <strong>Drake</strong> for entering other types of income, as described<br />
in the following sections.<br />
1099-Q If the amount on Form 1099-Q, Payments From Qualified Education Programs,<br />
exceeds the amount of education expenses, compute the taxable amount of the distributions<br />
and enter it on screen 5329 (Part II, line 5) and on screen 3, line 21.<br />
132 Tax Year 2012
<strong>Drake</strong> <strong>Software</strong> User’s <strong>Manual</strong><br />
Other Income<br />
Medical &<br />
Health<br />
Savings<br />
Accounts<br />
Enter distributions from Medical Savings Accounts (MSAs) on the 8853 screen (Form<br />
8853, Archer MSAs and Long-Term Care Insurance Contracts). Enter distributions<br />
from Health Savings Accounts (HSAs) on the 8889 screen (Form 8889, Health Savings<br />
Accounts (HSAs)). Taxable amounts from these screens flow to Form 1040.<br />
IMPORTANT<br />
Lines 1 (coverage indication) and 2 (HSA contributions for the<br />
year) of the 8889 screen are required if Form 8889 is to be e-filed<br />
with the return.<br />
Gambling Income & Loss<br />
Screen code: W2G<br />
Cancellation of Debt<br />
Screen code: 99C<br />
Use the W2G screen, accessible from the General tab, to enter gambling income and<br />
loss information from Form W2-G. Data from the W2G screen is carried to line 21<br />
(and line 22, if applicable) of Form 1040.<br />
NOTE<br />
The W2G screen has check boxes for Lottery Winnings and Electronic<br />
Games of Skill. Not all states tax the gambling winnings from<br />
lotteries and electronic games. Select boxes as applicable, but first<br />
press F1 in a field to access further information on each item.<br />
Other gambling winnings can be entered in the Gambling winnings field near the<br />
bottom of screen 3.<br />
Use the 99C screen, accessible from the Income tab, to enter data from Form 1099-C,<br />
Cancellation of Debt. From the For drop list at the top of the 99C screen, select 1040<br />
to indicate a non-business debt. Select one of the other available choices, as applicable,<br />
to indicate a business debt. The selections, along with the line on the tax return<br />
where the cancelled debt amount flows, are shown in Table 5-5.<br />
Table 5-5: Cancellation of Debt<br />
“For”<br />
Field Item<br />
Where Flows on Tax Return<br />
1040 Form 1040, “Other income” line<br />
C<br />
E<br />
F<br />
Schedule C, “Other income” line<br />
Schedule E, “Payments not reported” line<br />
Schedule F, “Other income not reported...” line<br />
4835 Form 4835, “Other income” line<br />
982 Form 982, “Total amount of discharged indebtedness<br />
excluded from gross income” line<br />
Tax Year 2012 133
Educator Expenses<br />
<strong>Drake</strong> <strong>Software</strong> User’s <strong>Manual</strong><br />
Foreign Earned Income<br />
Enter foreign earned income amounts on the applicable income screen (W2, C, FEC,<br />
etc.; see “Foreign Employers” on page 102). Foreign earned income is calculated into<br />
the “total income” line of Form 1040.<br />
Excluding<br />
Foreign<br />
Income<br />
If the taxpayer qualifies for the foreign earned income exclusion, use the 2555 screen<br />
(accessible from the Other Forms tab) to complete Form 2555, Foreign Earned<br />
Income. The income amount from this screen flows to the 1040 as a negative number;<br />
in other words, it is subtracted (excluded) from the total income shown Form 1040.<br />
NOTES<br />
Foreign income must be included in total income (via a W-2, Schedule<br />
C, etc.,) before it is excluded from total income using Form 2555.<br />
The 2555 screen consists of five screens or “pages,” accessible by<br />
clicking the links at the top of the screen. To create a new, second 2555<br />
screen, press PAGE DOWN.<br />
Educator Expenses<br />
Screen code: 4 Enter educator expenses in the Educator expenses field on screen 4.<br />
Employee Business Expenses<br />
Screen code: 2106 Use the 2106 screen, accessible from the General tab, to enter data for Form 2106,<br />
Employee Business Expenses.<br />
NOTE<br />
The 2106 screen expense flows to the Job Expenses and Certain<br />
Miscellaneous Deductions section of Schedule A. It does not flow<br />
directly to Form 1040.<br />
Meals and Entertainment<br />
Department of Transportation (DOT) workers are allowed to claim 80% (rather than<br />
the standard 50%) of the costs of meals as a business expense. To calculate the<br />
allowed amount properly, enter the total expense in the Meals/entertainment field of<br />
the 2106 screen and enter the amount attributable to DOT hours of service rules for<br />
meals in the DOT meals subject to 80% limit field (Figure 5-32).<br />
Figure 5-32: On the 2106 screen, use both the Meals/entertainment and<br />
DOT meals subject to 80% limit fields as appropriate.<br />
134 Tax Year 2012
<strong>Drake</strong> <strong>Software</strong> User’s <strong>Manual</strong><br />
Health Savings Account (HSA) Deduction<br />
Multiple 2106 Forms<br />
Clergy Expenses<br />
If 2106 screens are established for both taxpayer and spouse, the primary taxpayer’s<br />
2106 screen must be entered first (because the taxpayer is listed first on the return), or<br />
the return will receive a reject code after it is transmitted.<br />
If the taxpayer is a member of the clergy, mark the Pastor check box, located near the<br />
bottom of the right-hand column of the 2106 screen. The program carries the<br />
employee business expenses to the clergy worksheets (WK_CLGY1, WK_CLGY2)<br />
when the return is generated. See “Ministerial Income Allocation” on page 140 for<br />
more on data entry for clergy.<br />
Directing Data Entry to Form 2106<br />
To associate the data from a 2106 screen to that of another screen (such as the 4562<br />
screen for depreciation), select 2106 from the For drop list at the top of the other<br />
screen. Use the Multi-form code field as needed. (See “Associating One Screen with<br />
Another” on page 73 for more on multi-form codes.) See Screen Help on the 2106<br />
screen for more assistance in directing data entry to Form 2106.<br />
NOTE<br />
Be sure that either T (for taxpayer) or S (for spouse) is selected, as<br />
applicable, on the 2106 screen.<br />
Health Savings Account (HSA) Deduction<br />
Screen codes:<br />
8889, HSA<br />
Qualified HSA Distribution<br />
Form 1099-H<br />
Moving Expenses<br />
Screen code: 3903<br />
Use the 8889 screen, accessible from the Adjustments tab, to enter HSA data for<br />
Form 8889, Health Savings Accounts. Fields 1 (coverage indications) and 2 (HSA<br />
contributions for the year) of this screen are required in order to e-file Form 8889.<br />
An amount in the Qualified HSA distribution field of the 8889 screen flows to the<br />
“Other Taxes” section of Form 1040 and is marked with a notation of “HDHP.”<br />
Payment amounts from Form 1099-H, Health Coverage Tax Credit (HCTC) Advance<br />
Payments, can be entered on the 8889 screen.<br />
Use the 3903 screen, accessible from the Adjustments tab, to enter data for Form<br />
3903, Moving Expenses.<br />
Tax Year 2012 135
Self-Employment Adjustments<br />
<strong>Drake</strong> <strong>Software</strong> User’s <strong>Manual</strong><br />
Form 3903 Qualification<br />
Multiple Moves<br />
If the mileage is less than 50, and the Mileage test does not apply to this move box is<br />
marked on screen 3903, Form 3903 will not be generated. As the preparer, you must<br />
determine if the taxpayer qualifies for the moving-expense deduction. See IRS Pub.<br />
521 for details.<br />
If there are multiple qualifying moves within a single year, use a separate 3903 screen<br />
for each move. Press PAGE DOWN for additional screens.<br />
Self-Employment Adjustments<br />
Table 5-6 lists screens in <strong>Drake</strong> for entering adjustments to self-employment income.<br />
Table 5-6: Self-Employment Adjustment Screens<br />
Screen<br />
Purpose<br />
SE (Self-Employment Adjustment)<br />
SEHI (SE Health Insurance)<br />
Schedule SE<br />
Self-Employed Health Insurance Deduction<br />
4 (Adjustments) Adjustments to SE SEP, SIMPLE, and Qualified Plans<br />
Screen codes:<br />
SE, SEHI<br />
The SE and SEHI screens are located under the Adjustments tab. Screen 4 is located<br />
under the General tab.<br />
Self-Employment Tax (Schedule SE)<br />
Schedule SE is required if net earnings from self-employment exceed $400 ($108.28<br />
for church employees). If these conditions are not met, the program does not produce<br />
Schedule SE with the return. To force Schedule SE to be printed, select the applicable<br />
Force Schedule SE box on the SE screen.<br />
Data from Schedules C and F, along with any self-employment income from partnerships,<br />
flow to Schedule SE of the return. All other self-employment income should be<br />
entered directly on the SE screen.<br />
Short or<br />
Long SE<br />
Depending upon the employment terms, the taxpayer must complete a short (Schedule<br />
SE, page 1) or long (Schedule SE, page 2) Schedule SE. <strong>Drake</strong> determines the form<br />
required and processes it accordingly. To force the long form, select an applicable<br />
Force Schedule SE box in the middle of the SE screen. (Figure 5-33 on page 137.)<br />
136 Tax Year 2012
<strong>Drake</strong> <strong>Software</strong> User’s <strong>Manual</strong><br />
Self-Employment Adjustments<br />
Figure 5-33: Override SE printing for taxpayer (left box) or spouse (right box).<br />
NEW FOR<br />
2012<br />
A new section, Statement for Partner Expenses... at the bottom of<br />
the SE screen is for entering certain items that are deducted from selfemployed<br />
income that don’t normally flow to the “Schedule SE - Partner’s<br />
Allowable Expense” statement. Enter these deductions in the<br />
fields at the bottom of the SE screen to have them appear on the statement.<br />
Church<br />
Income<br />
Code church income as C or P on screen W2. (Select the correct code from the Special<br />
tax treatment drop list at the top of the screen.) Any income entered in the<br />
Wages of church employee... field of the SE screen will be added to the W-2 amount.<br />
(For more information on entering data for clergy, see “Clergy Expenses” on page 135<br />
and “Ministerial Income Allocation” on page 140.)<br />
SE Health Insurance Deduction<br />
Enter insurance deductions for a self-employed taxpayer in one of four places:<br />
• Screen C or screen F, Family Health Coverage field<br />
• SEHI screen, line 1 (An entry here overrides system calculations from screen C<br />
or F; an entry might be required on line 4 to effect correct system calculations.)<br />
• Screen 4, Self-employed health insurance deduction field (An entry here overrides<br />
system calculations from the screens listed above.)<br />
Be aware that the SEHI and screen 4 fields are overrides. Do not duplicate entries.<br />
SEHID<br />
Worksheet<br />
The top half of the SEHI screen incorporates the Self-Employed Health Insurance<br />
Deduction Worksheet (WK_SEHID in <strong>Drake</strong>) from the 1040 instructions.<br />
If entering an override on screen 4, type the deduction allowed—not the total premium<br />
paid. To have the software calculate the WK_SEHID, leave the screen 4 field blank<br />
and enter the total insurance premium paid on the C or F screen as applicable.<br />
NOTE<br />
Self-employed health insurance deduction information is entered on the<br />
same screen as self-employed pension (SEP) information. This screen<br />
can be accessed using either the SEHI or SEP screen code.<br />
Self-Employment Pensions<br />
Screen code: SEP<br />
SEP screen data flows to the WK_SEP worksheet for Self-Employed Rate and<br />
Deduction. To have the program calculate the maximum SEP contribution, enter the<br />
plan contribution rate as a decimal number on the SEP screen.<br />
Tax Year 2012 137
Penalties<br />
<strong>Drake</strong> <strong>Software</strong> User’s <strong>Manual</strong><br />
Adjustments to SEP, SIMPLE, and Qualified Plans<br />
Penalties<br />
Early Withdrawal Penalty<br />
IRA Withdrawal Penalty<br />
Screen code: 5329<br />
Self-employed health insurance deduction information entered on the SEHI or SEP<br />
screen will be adjusted by any entries made in the SEP and/or SIMPLE and<br />
KEOGH contribution fields on screen 4.<br />
This section of the manual covers penalties on withdrawals. Penalties on estimated<br />
taxes are covered in “Estimated Tax Penalty” on page 154.<br />
If the taxpayer is subject to the penalty for early withdrawal of savings, enter the penalty<br />
amount on screen 4. Do not duplicate entries in this field on the INT screen; the<br />
1099-INT form asks for the interest or principal that was forfeited due to early withdrawal,<br />
while screen 4 asks for the actual amount of the penalty.<br />
Use the 5329 screen to calculate what penalties apply regarding IRA withdrawals.<br />
NOTE<br />
Exception numbers 01 and 06 (Part I, line 2) apply only to distributions<br />
from qualified employee plans—not to those from IRAs, annuities, or<br />
modified endowment contracts.<br />
Alimony Paid<br />
IRA Adjustments<br />
See also “IRA Penalty Computations” on page 120.<br />
Enter details about alimony paid in the Alimony fields on screen 4.<br />
To enter IRA adjustments, see “Retirement Income” on page 118.<br />
Student Loan Interest Deduction<br />
Education Expenses<br />
Screen codes:<br />
8917, 8863<br />
Enter student loan interest deduction amounts (Form 1098-E, Student Loan Interest<br />
Statement) into the Student loan interest deduction field on screen 4.<br />
Entry fields for Forms 8863 (Education Credits) and 8917 (Tuition and Fees Deduction)<br />
are located on the same screen. The 8863/8917 screen should be used to enter<br />
information about the student and the educational institution the student attended.<br />
In the past, screen 8863 was used if the taxpayer or spouse was a student; if a dependent<br />
was a student, the education expenses were entered on the Dependents screen<br />
138 Tax Year 2012
<strong>Drake</strong> <strong>Software</strong> User’s <strong>Manual</strong><br />
Domestic Production Activities Deduction<br />
(screen 2). Now, regardless of whether the student is the taxpayer, the spouse, or the<br />
dependent, all education expenses are entered on the 8863 screen.<br />
NOTES<br />
If a dependent does not qualify for an education credit, the software<br />
does not apply this information when calculating the federal return.<br />
Student and<br />
School Info<br />
Form 1098-T<br />
Enter the SSN and the name of the student and the qualifying expenses in the top section<br />
of the 8863 screen. If more than one 8863 screen must be used (for families with<br />
more than one student), enter the information on lines 23-26 and the qualifying<br />
expenses only on the first screen. In the lower section of the 8863 screen, enter the<br />
information about the schools the student attended.<br />
If the amounts of qualifying expenses came from a Form 1098-T, Tuition Payments<br />
Statement, supplied by the educational institution, enter the amount of qualifying<br />
expenses, then mark the proper check boxes in the lower section of screen 8863. For<br />
an amount received from any taxable scholarship that was not reported on a Form W-<br />
2, enter the amounts on screen 3.<br />
Domestic Production Activities Deduction<br />
Screen code: 8903<br />
Use the 8903 screen, accessible from the Adjustments tab, for Form 8903, Domestic<br />
Production Activities Deduction.<br />
Entering Data from Multiple 8903 Forms<br />
Other Adjustments<br />
Only one Form 8903 can be attached to a taxpayer’s e-filed return. To e-file data from<br />
multiple 8903 forms on a return, calculate the total for each of the 8903 items and<br />
enter the combined totals onto the 8903 screen.<br />
Other adjustment-related screens in <strong>Drake</strong> are listed in Table 5-7. These screens are all<br />
available from the Adjustments tab.<br />
Table 5-7: Other Adjustment Screens Available from Adjustments Tab<br />
Screen Form or Worksheet Notes<br />
CLGY Ministerial Income Allocation See “Ministerial Income Allocation,” following.<br />
8082 Form 8082, Notice of Inconsistent<br />
Treatment or Administrative<br />
Adjustment Request<br />
MFS Community Property Allocation Use for MFS in a community property state<br />
8873 Form 8873, Extraterritorial<br />
Income Exclusion<br />
Tax Year 2012 139
Standard and Itemized Deductions<br />
<strong>Drake</strong> <strong>Software</strong> User’s <strong>Manual</strong><br />
Ministerial Income Allocation<br />
Use the CLGY screen for taxpayers with housing allowance in the form of a parsonage<br />
or rental, or a parsonage allowance from the church (generally reported on the W-<br />
2, box 14). The CLGY screen allows the following items to be calculated:<br />
• Percentage of tax-free income to be applied to Schedule C expenses marked with<br />
business code 813000<br />
• Percentage of tax-free income to be applied to Form 2106 expenses (The Pastor -<br />
Carry 2106 amount to CLGY worksheet check box must be marked on screen<br />
2106.)<br />
• Appropriate self-employment income to flow to the Schedule SE<br />
Rental/<br />
Parsonage<br />
Allowance<br />
Parsonage<br />
If the church provides a rental or parsonage allowance (but no parsonage), enter the<br />
Parsonage or rental allowance and the Actual expenses for parsonage. If a separate<br />
utility allowance is provided, enter the amount of the allowance in the Utility allowance<br />
field and the actual utility expenses in the Actual expenses for utilities field.<br />
Finally, enter the Fair Rental Value of the housing used.<br />
If a parsonage is provided, enter its Fair Rental Value. If a separate utility allowance<br />
is provided, enter the amount of the allowance in the Utility allowance field and the<br />
actual utility expenses in the Actual expenses for utilities field.<br />
Standard and Itemized Deductions<br />
Based on its calculations, the program determines whether to apply the standard<br />
deduction or to generate Schedule A, Itemized Deductions for a taxpayer. If your client<br />
is itemizing deductions, enter descriptions and amounts on one of the following<br />
screens, as applicable:<br />
Screen codes:<br />
A, 4952, 8283<br />
• Screen A (for Schedule A, Itemized Deductions)<br />
• 4952 screen (for Form 4952, Investment Interest Expense Deduction)<br />
• 8283 screen (for Form 8283, Noncash Charitable Contributions)<br />
Access screen A from the General tab. Access screens 4952 and 8283 from the Additional<br />
Itemized Deductions section of the Adjustments tab.<br />
NOTE<br />
The program includes self-employment losses when calculating the<br />
standard deduction. To override this default per the Briggs court case,<br />
go to the MISC screen and select Standard deduction by Briggs<br />
case method, located in the Dependent filer special situation box.<br />
Schedule A<br />
Screen code: A<br />
Generating<br />
Schedule A<br />
Use screen A to enter data for Schedule A, Itemized Deductions.<br />
If screen A has been completed for a return, the software determines which is more<br />
advantageous for the taxpayer—itemizing, or taking the standard deduction. To select<br />
one or the other, mark the applicable Force box at the top of screen A (Figure 5-34 on<br />
page 141).<br />
140 Tax Year 2012
<strong>Drake</strong> <strong>Software</strong> User’s <strong>Manual</strong><br />
Alternative Minimum Tax<br />
Figure 5-34: Boxes at the top of screen A<br />
If screen A has been completed for a return, Schedule A will be generated—even if<br />
the standard deduction is being taken. You can set up the option to have the software<br />
generate Schedule A only when it is required. To do so, go to Setup > Options ><br />
Form & Schedule Options tab and select Print Schedule A only when required.<br />
Mortgage<br />
Interest Paid<br />
Use the Interest You Paid section of screen A to enter mortgage interest not reported<br />
on Form 1098, Mortgage Interest Statement. For mortgage interest that is reported on<br />
Form 1098, use the 1098 screen.<br />
IMPORTANT<br />
If using the 1098 screen to report interest from Form 1098, do not<br />
enter an amount in the Home mortgage interest and points<br />
reported on Form 1098 field on screen A.<br />
Form 1098-C<br />
Enter amounts from Form 1098-C, Contribution of Motor Vehicles, Boats, & Airplanes,<br />
on either screen A (if less than $500) or screen 8283 (if more than $500).<br />
Additional Itemized Deductions<br />
Screen codes:<br />
4952, 8283<br />
Use the 4952 screen to enter data for Form 4952, Investment Interest Expense Deduction.<br />
Use the 8283 screen to enter data for Form 8283, Noncash Charitable Contributions.<br />
Calculations from the 8283 screen flow to the “Gifts by cash or check” line of<br />
Schedule A. There is also a direct entry field for this line on screen A. Do not enter<br />
duplicate amounts.<br />
NOTE<br />
When a Donee ID number is entered on the 8283 screen, the program<br />
automatically stores the number in the EIN database.<br />
Alternative Minimum Tax<br />
Screen code: 6251<br />
Forcing Form 6251<br />
Use the 6251 screen, accessible from the Taxes tab, to enter information for Form<br />
6251, Alternative Minimum Tax.<br />
Although Form 6251 amounts are computed on all returns, the form itself is generated<br />
with a return only when required. You can force this form to be generated for a single<br />
return, or you can force it to be generated with all returns.<br />
For a Single<br />
Return<br />
For All<br />
Returns<br />
To force Form 6251 for a single return, go to the PRNT screen of the return and select<br />
the Print 6251 box in the Items to Print section of the screen.<br />
To have the program print Form 6251 for all returns, go to Setup > Options > Form<br />
& Schedule Options and clear the Print Form 6251 only when required check box.<br />
Tax Year 2012 141
Foreign Tax Credit<br />
<strong>Drake</strong> <strong>Software</strong> User’s <strong>Manual</strong><br />
Foreign Tax Credit<br />
If the amount of foreign tax credit (FTC) is less than $300 ($600 for MFJ) and no<br />
Form 1116 is required, you can enter this amount directly into the Foreign Tax Credit<br />
field on screen 5. (See Figure 5-35.)<br />
Figure 5-35: Use screen 5 to enter FTC if totals are less than $300 ($600 for MFJ).<br />
For greater amounts, use the FTC sections of the INT and DIV screens to enter data<br />
regarding foreign interests and dividends, respectively, or use the 1116 screen.<br />
FTC Code<br />
If an 1116 screen is to be linked with an INT or DIV screen (for foreign interest or<br />
dividends), enter a number into the FTC box of the 1116 screen. Enter this same number<br />
on the INT or DIV screen. For more on entering foreign interests and dividends,<br />
see “Foreign Interest and Dividends” on page 107.<br />
Required Statements<br />
A statement may be required with Form 1116. Use the SCH screen to attach a required<br />
statement. On the SCH screen, select the applicable 1116 item from the Type of<br />
Attachment/statement number and title drop list<br />
If the return receives reject code 0973 on Form 1116, a statement must be entered as<br />
statement number 98, 99, or 100 on the SCH screen. This statement must indicate how<br />
the foreign currency was converted into U.S. dollars. For information on adding<br />
unformatted statements in <strong>Drake</strong>, see “Unformatted Schedules” on page 189.<br />
Child and Dependent Care Expenses Credit<br />
Screen code: 2441<br />
Where to Enter Data<br />
No Income for Spouse<br />
Use the 2441 screen, accessible from the General tab, for Form 2441, Child and<br />
Dependent Care Expenses.<br />
Enter data on both the 2441 screen and on screen 2 for each dependent for whom<br />
expenses were incurred.<br />
To qualify for the childcare credit, parents must have earned income, be full-time students,<br />
or be disabled. If a spouse does not have income but is disabled or a student,<br />
then enter $250 (one child) or $500 (two or more children) for each month the spouse<br />
142 Tax Year 2012
<strong>Drake</strong> <strong>Software</strong> User’s <strong>Manual</strong><br />
Elderly/Disabled Credit<br />
was a student or disabled. This information is entered on the 2441 screen in the<br />
Earned income for 2441 purposes ONLY field (Figure 5-36).<br />
Figure 5-36: Earned income fields on 2441 screen<br />
An entry in these fields affects Form 2441 amounts only and must be at least as great<br />
as the childcare expenses.<br />
Employer-Provided Dependent Care Benefits<br />
Ineligible Filing Statuses<br />
Carryover from Prior Year<br />
Elderly/Disabled Credit<br />
Screen code: R<br />
Dependent care benefits provided by the employer (box 10 on the W2 screen) adjust<br />
the credit by the amount provided. Any amounts above the allowed credit appears on<br />
the “Wages, salaries, tips, etc.” line of Form 1040 with the notation “DCB.”<br />
A taxpayer with a filing status of 3 (Married Filing Separately), 8 (MFS – Claiming<br />
spouse’s exemption did not live with spouse one day of the year), or A (Claiming nonresident<br />
alien (NRA) spouse’s exemption) on screen 1 is not eligible for the child and<br />
dependent care credit.<br />
For a carryover of dependent care credit from the prior year, enter the amounts and<br />
create a statement listing the circumstances and amounts. Use statement number 108<br />
on the SCH screen. For more information on adding an unformatted statement in<br />
<strong>Drake</strong>, see “Unformatted Schedules” on page 189.<br />
Use screen R, accessible from the first Credits tab, for Schedule R, Credit for the Elderly<br />
or the Disabled.<br />
TIP<br />
If the credit does not show up in the calculated return, make sure the<br />
taxpayer’s AGI is not too high to qualify for the credit.<br />
Home Energy Credits<br />
Screen code: 5695<br />
Use the 5695 screen, accessible from the first Credits tab, for Form 5695, Residential<br />
Energy Credits. To learn more about the federal tax credits for energy efficiency and<br />
the products that qualify, visit the U.S. Department of Energy’s website. A link to this<br />
site is available on the 5695 screen.<br />
Tax Year 2012 143
General Business Credits<br />
<strong>Drake</strong> <strong>Software</strong> User’s <strong>Manual</strong><br />
General Business Credits<br />
Use screen 3800 to fill out Form 3800, General Business Credit. This screen consists<br />
mostly of override fields for passive activity credits (see “Passive Activity Credits,”<br />
following); data should be entered in the override fields only to override the program’s<br />
calculated amounts from Form 3800, Part III, General Business Credits or Eligible<br />
Small Business Credits.<br />
The GBC screen is used for reporting the following types of information:<br />
• Data for current-year credits reported on forms <strong>Drake</strong> does not support (To enter<br />
data for a credit programmed into <strong>Drake</strong>, use the credit’s screen. For example, use<br />
the 8820 screen for Form 8820, Orphan Drug Credit.)<br />
• GBC and ESBC carryforwards and carrybacks<br />
Passive Activity Credits<br />
The Passive Activity Credit Carryover (PACR) screen allows you to enter passive<br />
activity credit amounts in a central location in the software, rather than on individual<br />
credit screens, thus streamlining data entry and increasing the number of passive<br />
credit carryforward amounts that can be updated from year to year.<br />
Entering Credit Carryforward Amounts<br />
Screen code:<br />
PACR<br />
NOTE<br />
Part III was added to the form to reflect all the general business credits<br />
reported on Form 3800 and to identify the type of credit being reported:<br />
General Business Credits (GBC) or Eligible Small Business Credits<br />
(ESBC).<br />
To enter credit carryforward amounts:<br />
1. Open the PACR screen (Figure 5-37), accessible from the first Credits tab.<br />
Figure 5-37: PACR screen<br />
144 Tax Year 2012
<strong>Drake</strong> <strong>Software</strong> User’s <strong>Manual</strong><br />
Passive Activity Credits<br />
2. After making TSJ and ST selections as applicable, select a screen from the For<br />
list to indicate the screen with which the credit carryforward should be associated.<br />
NOTE<br />
If the return has multiple screens for the form selected in the For<br />
drop list, use the multi-form code (MFC) text box. (See “Associating<br />
One Screen with Another” on page 73.)<br />
3. Select a credit form from the Form drop list.<br />
4. Enter the carryforward amount for the selected credit.<br />
When the return is calculated, the carryforward amounts flow to lines 3b and 4b (and<br />
1b, if applicable) of Form 8582-CR and to the corresponding worksheets, and the<br />
allowed credit amounts flow to Part III of Form 3800.<br />
NOTE<br />
Amounts on lines 3a and 4a (credits from Worksheets 3 and 4) flow<br />
from the screen (K1P, K1S, etc.) associated with the PACR screen.<br />
Worksheets<br />
3 and 4<br />
When a carryforward amount is linked from the PACR screen to another screen, the<br />
program produces one of two worksheets for the following lines of Form 8582-CR:<br />
• Lines 3a and 3b (for low-income housing credits for property placed in service<br />
after 1989)<br />
• Lines 4a and 4b (for all other passive activity credits)<br />
NOTE<br />
In View mode, these worksheets are WK_CR3 and WK_CR4.<br />
Each worksheet shows the name of the activity (partnership, S corporation, etc.), the<br />
associated form, the current- and prior-year credits, and the total credits. Figure 5-38<br />
shows an example from Worksheet 3 for lines 3a and 3b.<br />
Figure 5-38: <strong>Drake</strong> displays the name of the entity (such as partnership or S corporation)<br />
with which the credit is associated in data entry.<br />
Form 8582-CR, Passive Activity Credit Limitations<br />
Form 8582-CR is calculated using the credit carryforward amounts from the PACR<br />
screen rather than from individual credit screens. Use screen CR in <strong>Drake</strong> to access<br />
other fields for Form 8582-CR, Passive Activity Credit Limitations.<br />
Tax Year 2012 145
Child Tax Credit<br />
<strong>Drake</strong> <strong>Software</strong> User’s <strong>Manual</strong><br />
Child Tax Credit<br />
The Child Tax Credit is calculated automatically in the program. See “Additional<br />
Child Tax Credit and Combat Pay” on page 157.<br />
Retirement Savings Contributions Credit<br />
Screen code: 8880<br />
Use the 8880 screen, accessible from the second Credits tab, for Form 8880, Credit<br />
for Qualified Retirement Savings Contributions.<br />
NOTE<br />
When this credit can apply, Form 8880 is generated automatically, and<br />
a note is produced stating that retirement plan contributions have been<br />
carried to Form 8880. The note also provides instructions for preventing<br />
Form 8880 from being generated.<br />
Other Credits<br />
Table 5-8 lists all credit forms not mentioned previously for which <strong>Drake</strong> provides<br />
screens. If you need a form for which no screen is available, most forms can be found<br />
at Tools > Blank Forms.<br />
Table 5-8: Other Credits Calculated in <strong>Drake</strong><br />
Screen<br />
Form and Credit<br />
4136 Form 4136, Credit for Federal Tax Paid on Fuels<br />
3468 Form 3468, Investment Credit<br />
5884 Form 5884, Work Opportunity Credit<br />
6478 Form 6478, Credit for Alcohol Used as Fuel<br />
6765 Form 6765, Credit for Increasing Research Activities<br />
8396 Form 8396, Mortgage Interest Credit<br />
8609 Form 8609, Low-Income Housing Credit Allocation and Certification<br />
8801 Form 8801, Credit for Prior Year Minimum Tax - Individuals, Estates, and Trusts<br />
8820 Form 8820, Orphan Drug Credit<br />
8826 Form 8826, Disabled Access Credit<br />
8834 Form 8834, Qualified Electric Vehicle Credit<br />
8835 Form 8835, Renewable Electricity, Refined Coal, and Indian Coal Production<br />
Credit<br />
8839 Form 8839, Qualified Adoption Expenses<br />
8844 Form 8844, Empowerment Zone and Renewal Community Employment Credit<br />
8845 Form 8845, Indian Employment Credit<br />
8846 Form 8846, Credit for Employer Social Security and Medicare Taxes Paid on<br />
Certain Employee Tips<br />
146 Tax Year 2012
<strong>Drake</strong> <strong>Software</strong> User’s <strong>Manual</strong><br />
Additional Tax on Qualified Plans, etc.<br />
Table 5-8: Other Credits Calculated in <strong>Drake</strong><br />
Screen<br />
Form and Credit<br />
8859 Form 8859, D.C. First-Time Homebuyer Credit (This credit expired in 2009. The<br />
8859 screen in <strong>Drake</strong> contains TSJ and carryforward fields only.)<br />
8864 Form 8864, Bio-diesel and Renewable Diesel Fuels Credit<br />
8874 Form 8874, New Markets Credit<br />
8881 Form 8881, Credit for Small Employer Pension Plan Startup Costs<br />
8882 Form 8882, Credit for Employer-Provided Childcare Facilities and Services<br />
8885 Form 8885, Health Coverage Tax Credit<br />
8896 Form 8896, Low Sulfur Diesel Fuel Production Credit<br />
8907 Form 8907, Nonconventional Source Fuel Credit<br />
8908 Form 8908, Energy Efficient Home Credit<br />
8909 Form 8909, Energy Efficient Appliance Credit<br />
8910 Form 8910, Alternative Motor Vehicle Credit<br />
8911 Form 8911, Alternative Fuel Vehicle Refueling Property Credit<br />
8912 Form 8912, Credit for Clean Renewable Energy and Gulf Tax Credit Bonds<br />
8936 Form 8936, Qualified Plug-in Electric Drive Motor Vehicle Credit<br />
8941 Form 8941, Small Employer Health Insurance Credit<br />
Unreported Social Security and Medicare Tax<br />
In <strong>Drake</strong>, use the 4137/8919 screen for Form 4137, Social Security and Medicare Tax<br />
on Unreported Tip Income, and Form 8919, Uncollected Social Security and Medicare<br />
Tax on Wages.<br />
Additional Tax on Qualified Plans, etc.<br />
<strong>Drake</strong>’s tax software automatically calculates the taxable income from Qualified<br />
Tuition Program (QTP) and Coverdell Education Savings Account (ESA) distributions.<br />
The calculated amount flows to the following places in the tax return:<br />
• Form 1040, line 21 (Other income)<br />
• Form 5329 (Additional Taxes on Qualified Plans (including IRAs) and Other Tax-<br />
Favored Accounts), line 5 (Distributions included in income from Coverdell<br />
ESAs and QTPs)<br />
Enter qualified education expenses and contributions to and distributions from a QTP<br />
or ESA in the QTP/ESA Taxable Distributions section of screen 5329 (Figure 5-39<br />
on page 148).<br />
Tax Year 2012 147
Household Employment Taxes<br />
<strong>Drake</strong> <strong>Software</strong> User’s <strong>Manual</strong><br />
Figure 5-39: QTP/ESA Taxable Distributions section of screen 5329<br />
The program uses information entered in these fields to calculate the taxable portion<br />
of distributions and to generate the calculated amounts on the return. Table 5-9 shows<br />
which fields are required in order to ensure correct calculations.<br />
Table 5-9: Required Information for Accurate Calculation of Distribution Income<br />
To Calculate Income from an ESA<br />
Distribution<br />
To Calculate Income from a QTP<br />
Distribution<br />
Adjusted qualified education expenses - 2012 Adjusted qualified education expenses - 2012<br />
Gross distribution from Coverdell ESA<br />
Basis in Coverdell ESA as of 12/31/2011<br />
Education account type<br />
Gross distribution from QTP<br />
Portion of QTP distribution that is earnings<br />
Education account type<br />
2012 contributions for this ESA<br />
Value of Coverdell ESA on last day of 2012<br />
(entered at top of screen 5329)<br />
Along with the automatic calculation, the program produces the worksheet<br />
QTP_ESA, which shows how the taxable amount was calculated.<br />
NOTE<br />
The penalty is calculated and includes any amount that is income from<br />
a Coverdell ESA or QTP.<br />
Household Employment Taxes<br />
Screen code: H<br />
Use screen H, under the Taxes tab, for Schedule H, Household Employment Taxes.<br />
148 Tax Year 2012
<strong>Drake</strong> <strong>Software</strong> User’s <strong>Manual</strong><br />
Other Taxes<br />
Other Taxes<br />
Screens for the following other forms are available under the Taxes tab in <strong>Drake</strong>:<br />
Table 5-10: Other Tax Forms That Can Be Calculated in <strong>Drake</strong><br />
Screen/<br />
Form<br />
Form and Tax<br />
4137 Form 4137, Tax on Tips<br />
4970 Form 4970, Tax on Accumulation Distribution of Trusts<br />
4972 Form 4972, Tax on Lump Sum Distributions<br />
8611 Form 8611, Recapture of Low-Income Housing Credit<br />
8615* Form 8615, “Kiddie Tax” *<br />
8814 Form 8814, Parents’ Election to Report Child’s Income<br />
8828 Form 8828, Recapture of Federal Mortgage Subsidy<br />
*If both parents are deceased, go to the MISC screen and select Both parents<br />
deceased in the Dependent filer special situation section.<br />
NOTE<br />
To enter the amount of COBRA premium assistance received in 2012,<br />
go to screen 5 and enter the amount in the COBRA premium assistance<br />
received in 2012 line of item 60.<br />
Exporting Data for Kiddie Tax<br />
The 8615 Export feature allows exporting of parent data to a child’s Form 8615. This<br />
process consists of two main steps: (1) exporting the data from the parents’ return, and<br />
(2) importing the data into the dependent’s return.<br />
Exporting<br />
Parent<br />
Information<br />
To export a taxpayer’s information into a Form 8615 for the dependent:<br />
1. Go to View mode for the taxpayer’s (parent’s) return.<br />
2. From the toolbar, click the 8615 Export button. The Export 8615 dialog box lists<br />
the dependent names, SSNs, and export statuses for the return (Figure 5-40).<br />
Figure 5-40: Dependents entered on return<br />
Tax Year 2012 149
Estimated Taxes<br />
<strong>Drake</strong> <strong>Software</strong> User’s <strong>Manual</strong><br />
3. Mark the applicable boxes. If a row is selected, the parent’s data is exported to that<br />
dependent’s tax return in <strong>Drake</strong>.<br />
4. Click Export.<br />
5. Click OK.<br />
Click Exit to close the Export 8615 dialog box. The parent information is now ready<br />
to be imported into the dependent’s return.<br />
Importing<br />
Parent<br />
Information<br />
After the 8615 data has been exported from the parent’s return, you will be prompted<br />
to import the data the next time you open (or when you create) the dependent return.<br />
To import parent data into a dependent return:<br />
1. From the Home window, click Open/New.<br />
2. Enter or select the dependent’s SSN and click OK. You are asked if you want to<br />
import the return data.<br />
3. Click Yes. The return is opened to the General tab of the Data Entry Menu.<br />
When you open the 8615 screen, you will see that the parent information has been<br />
entered into all of the applicable fields, as shown in the Figure 5-41 example.<br />
Estimated Taxes<br />
Figure 5-41: Parent information has been imported into dependent’s 8615 screen.<br />
This section focuses on the following information in <strong>Drake</strong>:<br />
• Estimated taxes paid in 2012<br />
• Estimated payments for 2013<br />
• Estimated tax adjustments<br />
• Applying 2012 overpayment to 2013<br />
• Underpayment of estimated tax<br />
• Estimated tax penalty<br />
Estimated Taxes Paid in 2012<br />
Use the ES screen to enter, by quarter, the 2011 overpayment and the estimated taxes<br />
paid in 2012. The program applies the standard estimate payment dates. If any of these<br />
dates are different, enter the correct date in the applicable override field.<br />
150 Tax Year 2012
<strong>Drake</strong> <strong>Software</strong> User’s <strong>Manual</strong><br />
Estimated Taxes<br />
Estimated Payments for 2013<br />
Figure 5-42: Entering estimated taxes paid in 2012<br />
Estimated payments for 2013 are shown on the payment vouchers in View mode.<br />
NOTES<br />
Make estimated tax payments by debit card or credit card using the<br />
<strong>Drake</strong> e-Payment Center at www.1040paytax.com.<br />
E-mail reminders can also be set up for the taxpayer on this website.<br />
Printing<br />
Estimate<br />
Vouchers<br />
<strong>Drake</strong> calculates the balance due and generates this year’s payment vouchers (Form<br />
1040-V), but it does not generate estimate vouchers for next year’s payments by<br />
default. To have the program print estimate vouchers, you must indicate this manually.<br />
You can do this in one of two ways:<br />
• Select an estimate (ES) code on the ES screen (shown at left)<br />
• Select an ES code at the bottom of screen 1 (Figure 5-43)<br />
Figure 5-43: Estimated Tax (ES) code overrides on screen 1<br />
Note in Figure 5-43 that the screen 1 fields are overrides. If selections are made on<br />
both screens, the program disregards the ES screen selection and uses screen 1.<br />
Estimate<br />
(ES) Codes<br />
ES codes are shown in Table 5-11.<br />
Table 5-11: Estimate Codes in <strong>Drake</strong><br />
B<br />
P<br />
ES<br />
Code<br />
Description<br />
Does not generate estimate vouchers (in screen 1 drop list only)<br />
Generates estimate vouchers with no dollar amounts<br />
X Generates estimate vouchers with payments rounded to nearest $5<br />
Tax Year 2012 151
Estimated Taxes<br />
<strong>Drake</strong> <strong>Software</strong> User’s <strong>Manual</strong><br />
Table 5-11: Estimate Codes in <strong>Drake</strong><br />
ES<br />
Code<br />
Description<br />
T Generates estimate vouchers with payments rounded to nearest $10<br />
F Generates estimate vouchers with payments rounded to nearest $25<br />
H Generates estimate vouchers with payments rounded to nearest $100<br />
All vouchers include the taxpayer’s SSN, name, and address.<br />
Overriding<br />
Voucher<br />
Amounts<br />
The program divides the estimate amounts equally among the four vouchers. To have<br />
different payment amounts displayed on the vouchers, you must enter the amounts<br />
manually in the Estimate Amt fields of the ES screen (shown in Figure 5-44).<br />
NOTE<br />
Use the ETA screen to enter estimate adjustments (rather than<br />
overrides); see “Estimated Tax Adjustments,” following.<br />
Estimated Tax Adjustments<br />
Screen code: ETA<br />
Use the Estimated Tax Adjustments screen if the taxpayer expects a significant<br />
change in income the following year. If entries are made on this screen, the program<br />
generates an estimated tax worksheet (WK_ES) that shows the calculated estimates.<br />
See the ETA screen help for more information.<br />
Applying 2012 Overpayment to 2013<br />
To apply part of a 2012 overpayment to the 2013 estimate, enter the total overpayment<br />
to apply to all estimates (item 1 in Figure 5-44) on the ES screen. The program applies<br />
the overpayment according to the overpayment (OP) code selected (item 2 in<br />
Figure 5-44; see “OP Codes,” following). To override the OP code selection, enter<br />
amounts to be applied into the Overpayment fields for each voucher (item # 3 in<br />
Figure 5-44).<br />
Figure 5-44: Entering overpayment amounts<br />
152 Tax Year 2012
<strong>Drake</strong> <strong>Software</strong> User’s <strong>Manual</strong><br />
Estimated Taxes<br />
OP Codes<br />
If applying an overpayment to the 2013 estimated tax, it is necessary to indicate how<br />
that overpayment should be applied on the estimate vouchers. Do this by selecting an<br />
overpayment code on either the ES screen or screen 1 (see Figure 5-43 on page 151).<br />
NOTE<br />
If a code is selected on both the ES screen and screen 1, the program<br />
uses the override code from screen 1.<br />
Overpayment codes are described in Table 5-12. Code descriptions can also be viewed<br />
clicking in an overpayment code field and pressing F1.<br />
Table 5-12: Overpayment Codes in <strong>Drake</strong><br />
OP<br />
Code<br />
(blank)<br />
A<br />
R<br />
E<br />
O<br />
Description<br />
Does not apply overpayment to 2013; refund entirely<br />
Applies the overpayment to the vouchers in order until it is completely applied<br />
Applies overpayment to first voucher and refunds the remainder<br />
Makes the estimate equal to the overpayment<br />
Applies the overpayment to the 2013 estimate but does not print any vouchers<br />
4 Applies the overpayment to all four vouchers equally<br />
Underpayment of Estimated Tax<br />
By default, the software calculates the estimated tax penalty and generates Form 2210<br />
if there is an underpayment and the form is required. If Form 2210 is required, mark<br />
the reason for the requirement in the upper-left corner of the 2210 screen.<br />
This default setting can be can be changed for a single return in the 2210 Options section<br />
of screen 1 (Figure 5-45).<br />
Figure 5-45: 2210 Options section of screen 1<br />
Tax Year 2012 153
Earned Income Credit (EIC)<br />
<strong>Drake</strong> <strong>Software</strong> User’s <strong>Manual</strong><br />
2210 Codes To print or suppress Form 2210 (or Form 2210F) for a return, select one of the following<br />
from the 2210 Code drop list:<br />
Table 5-13: 2210 Codes in <strong>Drake</strong><br />
2210<br />
Code<br />
X<br />
P<br />
F<br />
G<br />
N<br />
Program Action<br />
Calculates the estimated penalty; produces Form 2210 if necessary.<br />
Calculates the estimated penalty; produces Form 2210 even if not required.<br />
Calculates the estimated penalty; produces Form 2210F if necessary.<br />
Calculates the estimated penalty; produces Form 2210F even if not required.<br />
Does not calculate the estimated penalty. (If this option is chosen, no form for<br />
underpayment of estimated tax is generated with the return.)<br />
Prior-Year<br />
Tax<br />
If a return is updated from the previous year, the program displays the prior-year tax<br />
by default in the Fed tax and State tax fields of screen 1 (Figure 5-45 on page 153).<br />
To override an amount shown, enter a new amount. Based on this amount, program<br />
calculations determine whether the taxpayer should receive the underpayment penalty.<br />
Estimated Tax Penalty<br />
The program automatically calculates an estimated tax penalty and displays the calculation<br />
on the “Estimated tax penalty” line of Form 1040. To override the system calculation,<br />
use the Estimated tax penalty field at the bottom of screen 5.<br />
NOTE<br />
For information on calculating interest and penalty amounts for future<br />
years, see “Penalty and Interest Calculation” on page 181.<br />
Earned Income Credit (EIC)<br />
The IRS requires that certain questions be addressed on a tax return for a taxpayer to<br />
receive EIC. These questions are located in the following locations within <strong>Drake</strong>:<br />
• EIC Information section of screen 2 (must be completed for each qualifying<br />
dependent)<br />
• EIC screen for Form 8867, Paid Preparer’s EIC Checklist (must be completed for<br />
the taxpayer claiming EIC)<br />
The EIC Due Diligence screens also provide supplemental questions to help ensure a<br />
comprehensive interview with each taxpayer. While the IRS does not require answers<br />
to these supplemental questions to be submitted with the return, these screens provide<br />
a means for collecting valuable supporting documentation in case of a due diligence<br />
audit.<br />
154 Tax Year 2012
<strong>Drake</strong> <strong>Software</strong> User’s <strong>Manual</strong><br />
Earned Income Credit (EIC)<br />
EIC Information for Dependent<br />
If the taxpayer has EIC with qualifying dependents, the EIC Information section of<br />
screen 2 must be completed for each qualifying dependent. If item 13a is answered<br />
No, items 13b and 13c can be left blank, as shown in the Figure 5-46 example.<br />
EIC Preparer Checklist<br />
Figure 5-46: One example of a completed EIC Information section (screen 2)<br />
If a child is not eligible for EIC, this ineligibility must be specified by selecting the<br />
Not eligible for EIC box above item 10 (Figure 5-46). Questions 10, 11, and 13 can<br />
be left blank if this box is selected.<br />
IRS due diligence rules require that all paid preparers complete an EIC Checklist<br />
(Form 8867) for each prepared return claiming EIC. Form 8867 has four parts:<br />
• Part I: All Taxpayers<br />
• Part II: Taxpayers With a Child<br />
• Part III: Taxpayers Without a Qualifying Child<br />
• Part IV: Due Diligence Requirements<br />
In <strong>Drake</strong>, Part II of this checklist is addressed on screen 2. Fields for Parts I, III, and<br />
IV are located on the 8867 screen.<br />
Screen codes:<br />
EIC, 8867<br />
NOTE<br />
The 8867 screen allows preparers to electronically track data related to<br />
IRS due diligence requirements for Form 8867. In the event of a due diligence<br />
audit, it provides an electronic record corresponding to the<br />
printed Form 8867.<br />
To complete Form 8867 for a return, go to the 8867 screen, accessible from the General<br />
tab, and mark all required boxes.<br />
EIC Due Diligence Screens<br />
Screen codes:<br />
EIC1, EIC2, EIC3,<br />
EIC4<br />
Because a thorough interview is necessary to ensure that all information is gathered<br />
about income, deductions, credits, etc., a comprehensive interview process should be<br />
part of a tax preparer’s office operating procedures. This same logic extends to EIC<br />
due diligence requirements. Since individual tax scenarios change from year to year,<br />
Tax Year 2012 155
Earned Income Credit (EIC)<br />
<strong>Drake</strong> <strong>Software</strong> User’s <strong>Manual</strong><br />
all clients—including returning clients—should be interviewed in order to obtain a<br />
clear picture for the current-year tax return.<br />
The EIC Due Diligence screens can be used as a tool for retaining the inquiries made<br />
of taxpayers to ensure that they meet EIC eligibility requirements. Described in<br />
Table 5-14, these screens contain interview questions and fields that must be completed<br />
(if required by a selection made at Setup > Options > Administrative Options<br />
tab) regarding EIC.<br />
Table 5-14: EIC Due Diligence Screens<br />
Screen<br />
Code<br />
Screen Name<br />
Description<br />
EIC1 EIC Due Diligence - Qualifying Child Screen contains questions pertaining to the age, relationship,<br />
and residency tests for up to three qualifying children.<br />
EIC2 EIC Due Diligence - Income Screen contains questions concerning the taxpayer’s<br />
reported earned income (including income earned from a<br />
legitimate business).<br />
EIC3 EIC Due Diligence - Head of Household Screen contains questions pertaining to the tests for marriage,<br />
qualifying person, and cost of keeping up a home for<br />
Head of Household filing status.<br />
EIC4 EIC Due Diligence - Additional Notes Screen contains space to record data about other inquiries<br />
made in verifying the taxpayer’s information.<br />
These screens are supplemental to the required EIC Preparer Checklist (8867 screen).<br />
At Setup > Options >Administrative Options tab, you can select the option to<br />
require that the screens be filled out. You can also select to print these due diligence<br />
documents. See “Options Setup” on page 27.<br />
See Screen Help, FAQs, and online help for further information and links to IRS documents<br />
and other resources relating to EIC.<br />
NOTE<br />
EIC due diligence requirements must be customized for each client<br />
based on the taxpayer’s scenario. The complexity of the law surrounding<br />
EIC prevents due diligence requirements from being standardized,<br />
so a tax preparer must have a thorough understanding of EIC law in<br />
order to comply with these requirements. <strong>Software</strong> can help provide<br />
guidance on fulfilling these requirements, but it cannot replace the<br />
knowledge a preparer applies to each taxpayer’s situation.<br />
EIC and Combat Pay<br />
Screen code: 8812<br />
You can override the amount of combat pay from the W-2 that is included in the EIC<br />
calculation. You can also select to include combat pay in the calculation of EIC.<br />
To modify how combat pay is calculated for EIC, open the return and click Add’l<br />
Child Tax Credit/Combat Pay under the first Credits tab. Enter a Combat pay<br />
156 Tax Year 2012
<strong>Drake</strong> <strong>Software</strong> User’s <strong>Manual</strong><br />
Additional Child Tax Credit and Combat Pay<br />
amount to override the W-2 amount. To force combat pay to be included in calculating<br />
EIC, select Include combat pay in EIC calculation.<br />
NOTE<br />
Combat pay entered on the W2 screen, Box 12, with a code of “Q”<br />
(“nontaxable combat pay”) is automatically accounted for in the program<br />
calculation. If you enter a combat pay amount on the 8812<br />
screen, this amount overrides the W2 amount.<br />
Blocking EIC Calculations<br />
In some cases, a taxpayer may not be eligible for EIC, even though the information on<br />
the tax return indicates otherwise. To block the program from calculating EIC, type NO<br />
into the EIC Blocker on the EIC screen.<br />
Additional Child Tax Credit and Combat Pay<br />
Other Payments<br />
The 8812 screen contains override fields for the following items:<br />
• Combat pay that is applicable to Additional Child Tax Credit and EIC<br />
• Total earned income for Form 8812, Additional Child Tax Credit<br />
The program automatically calculates the amount for earned income. If Form 8812<br />
applies, the program makes the calculations and generates the form. Use the Additional<br />
Child Tax Credit section on the 8812 screen only if you must override the calculation<br />
for total earned income. See “EIC and Combat Pay” on page 156.<br />
Use the following screens to enter other payments from credits.<br />
Table 5-15: Other Payments from Credits<br />
Screen<br />
Name of Form<br />
2439 Form 2439, Notice to Shareholder of Undistributed Long-Term Capital Gains<br />
4136 Form 4136, Credit for Federal Tax Paid on Fuels<br />
8801 Form 8801, Credit for Prior Year Minimum Tax - Individuals, Estates, and Trusts<br />
8885 Form 8885, Health Coverage Tax Credit<br />
With the exception of the Form 4136 amount, these amounts flow to the “Credits from<br />
Form:” line of Form 1040. The amount from Form 4136 flows to the “Credit for federal<br />
tax on fuels” line.<br />
NOTE<br />
Use the Other payments field on screen 5 to force an amount to flow to<br />
the “Credits from Form:” line of Form 1040. Be aware that no documentation<br />
justifying the forced amount is included with the return when<br />
using this field.<br />
Tax Year 2012 157
First-Time Homebuyer Credit<br />
<strong>Drake</strong> <strong>Software</strong> User’s <strong>Manual</strong><br />
First-Time Homebuyer Credit<br />
Screen code:<br />
HOME<br />
Taxpayers who bought a home in 2008 and took advantage of the first-time homebuyers<br />
credit must repay the amount in 15 equal installments, beginning with the 2010<br />
return. If you have prepared the client’s tax returns using <strong>Drake</strong> <strong>Software</strong>, the Home<br />
screen keeps track of the amount repaid every year.<br />
Direct Deposit<br />
If you didn’t prepare this taxpayer’s return previously using <strong>Drake</strong>, go to the Home<br />
screen, and in the Form 5405 Repayment Information section on the right side of<br />
the screen, enter the required information. If the taxpayer no longer used the house as<br />
his or her main home, enter the Date home ceased to be main home if not sold field.<br />
For more information, click Screen Help for the Home screen (or select Screen Help<br />
from the right-click menu.)<br />
Screen codes: DD,<br />
8888<br />
Use the DD screen, accessible from the General tab, to indicate that a refund is to be<br />
deposited directly into the taxpayer’s account.<br />
NOTES<br />
The DD screen contains fields for completing IRS Form 8888, Direct<br />
Deposit of Refund to More Than One Account.<br />
This section refers to refunds that are not in the form of bank products.<br />
Enter account information for bank products on the applicable bank<br />
screen. See “Additional Disbursement Methods” on page 220.<br />
Required Information<br />
The name of the financial institution, the bank’s routing number (RTN), the client’s<br />
account number, and the type of account (checking or savings) are required. The<br />
RTN, Account number, and Type of account information must be entered twice<br />
(Figure 5-47) or an EF message is generated and the return cannot be e-filed.<br />
Figure 5-47: Repeat account information for RTN, account number, and type of account<br />
Direct Deposit of Federal Refund<br />
If a single account is entered on the DD screen, the information flows to the “Refund”<br />
section of Form 1040. If multiple accounts are entered, the program produces Form<br />
8888. You can enter up to three accounts.<br />
Form 8888<br />
Conditions<br />
The following conditions must apply for the taxpayer to file Form 8888:<br />
• The taxpayer cannot choose to get any part of the refund as a check.<br />
• The account indicated for the refund deposit is a checking, savings, or other<br />
account such as an IRA, MSA, etc.<br />
158 Tax Year 2012
<strong>Drake</strong> <strong>Software</strong> User’s <strong>Manual</strong><br />
Direct Deposit<br />
• The account is in the taxpayer’s name.<br />
Multiple accounts are not allowed if filing Form 8279, Injured Spouse Allocation.<br />
NOTE<br />
A taxpayer cannot request a refund deposit to an account that is in the<br />
name of someone else (such as the tax preparer).<br />
Multiple<br />
Accounts<br />
By default, the program directs the federal refund to the first account entered on the<br />
DD screen. If depositing funds into multiple accounts, complete the Federal selection<br />
field to indicate whether the first account entered should be used for the federal refund<br />
(Figure 5-48). The default selection is Yes.<br />
Figure 5-48: Select No if federal refund is not to go to the account listed.<br />
To indicate that a refund should be distributed into multiple accounts, enter the portions<br />
for each account in the appropriate Federal deposit amount fields on the DD<br />
screen (Figure 5-49). An amount entered here overrides the calculated refund amount.<br />
Figure 5-49: An amount entered in the Federal deposit amount field<br />
overrides the calculated refund amount.<br />
NOTE<br />
Because not all states support multi-account direct deposit, the State<br />
deposit amount field (Figure 5-49) is inactive by default.<br />
Series I<br />
Savings<br />
Bonds<br />
To indicate that a taxpayer wishes to make a Series I Savings Bond purchase from the<br />
tax refund, press PAGE DOWN from the DD screen and fill out the BOND screen. If<br />
the taxpayer wishes to receive the remainder of the refund disbursed as a paper check,<br />
mark the applicable box on the BOND screen.<br />
Direct Deposit of State or City Refund<br />
To have a state or city refund deposited into an account, select the state abbreviation<br />
from the State/city selection field for the account. If this field is left blank, no state<br />
refund will be deposited into the account.<br />
Figure 5-50: State/City selection drop list<br />
Tax Year 2012 159
Electronic Payment Options<br />
<strong>Drake</strong> <strong>Software</strong> User’s <strong>Manual</strong><br />
Multiple<br />
State<br />
Refunds<br />
GA, ME, OH<br />
Refunds<br />
Foreign<br />
Accounts<br />
If the taxpayer receives refunds for more than one state or city return and wants to<br />
deposit refunds into separate accounts, indicate this on the DD screen by choosing a<br />
code from the State/city selection drop list for each account (Figure 5-50 on<br />
page 159). To have the refunds from all eligible state returns deposited into one<br />
account, select A from the State/city selection drop list.<br />
Georgia, Maine, and Ohio have unique requirements for direct deposit. Note the section<br />
near at the bottom of the DD screen if e-filing a return for one of these states.<br />
(State purposes only) To indicate that an account entered is a foreign account, mark<br />
the applicable box in the Foreign Account section at the bottom of the DD screen.<br />
Electronic Payment Options<br />
Electronic payments can be made by credit card, debit card, or electronic funds withdrawal<br />
(“direct debit”).<br />
Pay Balance Due with Credit or Debit Card<br />
<strong>Drake</strong> offers two options for paying a balance due with a credit or debit card (Master-<br />
Card ® , Visa ® , American Express ® , or Discover ® ):<br />
• Integrated File and Pay (IFP) — The preparer enters the taxpayer’s credit card<br />
information and has the payment authorized prior to e-filing the return. Once the<br />
e-filed return is accepted by the IRS, the debit or credit card is charged.<br />
• <strong>Drake</strong> e-Payment Center — Taxpayers can use the <strong>Drake</strong> e-Payment Center,<br />
located at www.1040paytax.com, to pay a balance due by debit or credit card after<br />
the return has been filed.<br />
Using the<br />
EPAY Screen<br />
Use the EPAY screen (accessible from the Miscellaneous tab) to pay a balance due<br />
with IFP. Use this screen after the return is completed but before e-filing it.<br />
IMPORTANT<br />
In order to use IFP, the taxpayer’s first and last name, SSN, full<br />
address, phone number including area code, and e-mail address<br />
must be entered on screen 1.<br />
A return must be e-filed and accepted within 21 days of card<br />
authorization in order to complete the payment transaction. If a<br />
return is not accepted (or is rejected) within 21 days, the authorization<br />
is, in effect, cancelled. Reauthorization would be required.<br />
Screen codes:<br />
EPAY or IFP<br />
On the EPAY screen, indicate the form being e-filed (1040 or 4868 extension), recalculate<br />
the return, then return to the EPAY screen and click the Authorize Credit<br />
Card button. You will be directed to a website where you can enter the taxpayer’s<br />
credit card information and authorize a hold on the card.<br />
To have the client letter refer to the payment method used, enter the credit card type<br />
and the last four digits of the credit card number in Optional Letter Information sec-<br />
160 Tax Year 2012
<strong>Drake</strong> <strong>Software</strong> User’s <strong>Manual</strong><br />
Electronic Payment Options<br />
tion of the EPAY screen. The client letter will then reference the amount that will be<br />
charged to the credit card, and the card’s last four digits.<br />
NOTE<br />
A website, www.integratedfileandpay.com/status, is available for checking<br />
payment statuses. See the EPAY screen help for more details.<br />
Electronic Funds Withdrawal (Direct Debit)<br />
Screen code: PMT<br />
Use the PMT screen, accessible from the General tab, to indicate that the balance due<br />
funds are to be electronically withdrawn (direct-debited) from the taxpayer’s account.<br />
Program<br />
Defaults and<br />
Overrides<br />
Required<br />
Information<br />
By default, the program indicates that the entire balance due (the “Amount You Owe”<br />
section of Form 1040) is to be electronically withdrawn on the return due date, unless<br />
otherwise indicated using the override fields for each account entered. (See Federal<br />
override fields in Figure 5-51.) If the return is e-filed on or before April 15, the<br />
requested payment date cannot be later than April 15. If the return is transmitted after<br />
April 15, the requested payment date cannot be later than the current date.<br />
A Withdrawal selection (item 1 in Figure 5-51) is required if the program is to direct<br />
tax authorities to electronically withdraw funds from the taxpayer’s account.<br />
Figure 5-51: Required fields on PMT screen: withdrawal selection (1);<br />
account information (2); specified return (3)<br />
The name of the financial institution, the bank’s routing number (RTN), the client’s<br />
account number, and the type of account (checking or savings) are required. As with<br />
the DD screen, the RTN, Account number, and Type of account must be entered<br />
twice (item 2 in Figure 5-51).<br />
Finally, the PMT screen must indicate the return to which the payment data applies<br />
(item 3 in Figure 5-51). Mark the box of the applicable return type.<br />
Withdrawal<br />
from Multiple<br />
Accounts<br />
Neither state nor federal balances can be paid by direct debit of funds from more than<br />
one account. To have a state balance due electronically withdrawn from an account<br />
other than the account indicated for federal, complete the fields in the Account #2 sec-<br />
Tax Year 2012 161
Third-Party Designee<br />
<strong>Drake</strong> <strong>Software</strong> User’s <strong>Manual</strong><br />
tion of the PMT screen. (To have a balance due from another state withdrawn from a<br />
third account, complete Account #3.)<br />
Direct Debit<br />
of Estimates<br />
To indicate direct debit of estimate payments only, select Estimates Only from the<br />
Federal selection drop list. By default, the estimate payment amounts and dates (see<br />
Figure 5-51 on page 161) are calculated from the information entered on the ES<br />
screen or in the override fields in screen 1. Use the fields on the PMT screen to override<br />
that data.<br />
Third-Party Designee<br />
For All Returns (Default)<br />
To set up a preparer as a third-party designee, the preparer’s PIN must first be entered<br />
in Preparer Setup. A default third-party designee can be set up for all returns. You can<br />
override the default for a single return as needed.<br />
To set up the third-party designee for all returns, go to Setup > Options > Optional<br />
Items on Return tab and make a selection from the Third party designee drop list.<br />
Options are shown in Table 5-16, along with descriptions of how the options affect the<br />
“Third Party Designee” section on page 2 of Form 1040.<br />
Table 5-16: Setup Options for Third-Party Designee<br />
Selection “Third Party Designee” Section of Form 1040<br />
None<br />
Preparer (1-9)*<br />
Return Preparer*<br />
ERO*<br />
Blank; “No” box is marked. (This default can be overridden from the<br />
PREP screen; see “For a Single Return (Override),” below.)<br />
Designated preparer (for preparer numbers, see list in Preparer Setup);<br />
“Yes” box is marked.<br />
Preparer who prepared the return; “Yes” box is marked.<br />
Preparer indicated at Setup > Options > EF tab as Default ERO; “Yes”<br />
box is marked.<br />
*If a preparer or ERO is selected, a PIN must be entered for that preparer; otherwise,<br />
no preparer name shows up as the third-party designee on Form 1040.<br />
For a Single Return (Override)<br />
Screen code:<br />
PREP<br />
Use the PREP screen to override the setup options for third-party designee for a single<br />
return. Enter the designee’s name, phone, and PIN in the fields provided. (E-mail<br />
address is optional.)<br />
162 Tax Year 2012
<strong>Drake</strong> <strong>Software</strong> User’s <strong>Manual</strong><br />
Signing the Return<br />
No Third-Party Designee<br />
Figure 5-52: Third-party designee fields on PREP screen<br />
For more on how to use the PREP screen to override preparer information, see “Overriding<br />
Other Preparer Information” on page 56.<br />
To indicate that no one other than the taxpayer is allowed to discuss the return with the<br />
IRS, go to the PREP screen and select No from the drop list in the Third Party Designee<br />
section. (See Figure 5-52.)<br />
NOTES<br />
If no third-party designee is indicated in Setup > Options, the “No” box<br />
is marked on the third-party designee line of Form 1040.<br />
If you select Yes on the PREP screen, the PREP screen entries override<br />
any third-party information in Setup. If you select Yes but leave the<br />
other fields blank, the third-party section of Form 1040 will be blank.<br />
Signing the Return<br />
Form 8879<br />
An e-filed tax return must contain electronic signatures of both the taxpayer and the<br />
ERO in order to be accepted. Electronic signatures are produced using PINs.<br />
Form 8879, an electronic signature document used to authorize e-filing, allows taxpayers<br />
to select a PIN signature (or have the software choose a random number for<br />
them). It also authorizes the ERO to enter the taxpayers’ PIN signatures authorizing<br />
electronic withdrawal of funds for tax payments.<br />
NOTE<br />
The signed Form 8879 does not have to be mailed to the IRS. It must<br />
instead be retained by the ERO for three years. See Form 8879 instructions<br />
for more information.<br />
Screen codes:<br />
8879, PIN<br />
Use the PIN screen, accessible from the General tab, to complete Form 8879. The<br />
generated return uses both the taxpayer’s PIN and the ERO’s Practitioner PIN.<br />
IMPORTANT<br />
The PIN entered must match either the PIN of the Default ERO<br />
(selected at Setup > Options > EF tab) or the PIN of the preparer<br />
specified in the Preparer # override field on screen 1.<br />
Signature<br />
Date<br />
A PIN signature date is required at the top of the PIN screen. If no date is entered, an<br />
EF message is generated and the return cannot be e-filed.<br />
Tax Year 2012 163
Signing the Return<br />
<strong>Drake</strong> <strong>Software</strong> User’s <strong>Manual</strong><br />
Obtaining<br />
Client PIN<br />
Signatures<br />
Ideally, the client signs Form 8879 in your office. If the client is not available to sign,<br />
you can e-mail Form 8879 as a PDF file to the client and have the client sign the form<br />
and return it to you.<br />
The taxpayer can select his or her own PIN (any five-digit number except 00000). On<br />
the PIN screen, have your client enter his or her PIN, and then indicate either Taxpayer<br />
entered or Spouse entered. If the client is not available and you enter the PIN<br />
signatures, leave the check boxes blank.<br />
NOTE<br />
The taxpayer can elect to use the PIN generated by the software. To<br />
turn off the option to generate PINs, go to Setup > Options > EF tab<br />
and clear the check mark from Auto-generate taxpayer(s) PIN (1040<br />
Only) option.<br />
Direct Debit<br />
Consent<br />
If there will be a direct debit from the client’s bank account to make a tax payment,<br />
selecting Direct Debit Consent on the PIN screen indicates that the taxpayer authorizes<br />
funds to be electronically withdrawn from his or her account.<br />
PIN Signatures for Forms Other than the 1040<br />
By default, Form 8879 is printed with Form 1040. If an electronic signature form is to<br />
be printed with any of the following other forms, indicate this by selecting the applicable<br />
box in the Select Form section of the PIN screen:<br />
• Form 4868, Application for Automatic Extension of Time to File U.S. Individual<br />
Income Tax Return (with payment)<br />
• Form 2350, Application for Extension of Time to File U.S. Income Tax Return<br />
• Form 9465, Installment Agreement Request<br />
• Form 56, Notice Concerning Fiduciary Relationship<br />
Note that the electronic signature form is required with Form 4868 only if making a<br />
payment. For Forms 4868 and 2350, the program produces Form 8878, IRS e-file Signature<br />
Authorization for Form 4868 or Form 2350.<br />
NOTE<br />
Prior-year AGI amounts are required to e-file Forms 2350, 9465, and<br />
56. Enter this data in the Prior year AGI section of the PIN screen.<br />
Special Conditions<br />
Power of<br />
Attorney<br />
If the return is being signed by someone with Power of Attorney for the taxpayer, indicate<br />
this information on the MISC screen and complete the Power of Attorney section<br />
(mark the check box and enter the name of the person signing). Because Form 2848 is<br />
not e-filable, a transmittal (Form 8453) is produced with the paper-document indicator<br />
marked for Form 2848.<br />
IMPORTANT<br />
Form 2848 itself is not printed automatically; it must be completed<br />
on the 2848 screen in order to be generated with the return. Form<br />
2848 must then be printed and mailed or faxed to the IRS.<br />
164 Tax Year 2012
<strong>Drake</strong> <strong>Software</strong> User’s <strong>Manual</strong><br />
Depreciation<br />
Taxpayer<br />
Signing for<br />
Spouse<br />
If the taxpayer is signing the return for the spouse, mark the box in the Signing for<br />
Spouse section of the MISC screen and provide an explanation using the SCH screen,<br />
code 013. (See “Unformatted Schedules” on page 189.)<br />
Depreciation<br />
Form 4562, Depreciation and Amortization, is used to claim deductions for depreciation<br />
and amortization, to elect to expense certain property under section 179, and to<br />
indicate automobile and other listed property use for business/investment purposes.<br />
Where the Information Flows<br />
Data entered on the 4562 screen flows to the applicable sections of Form 4562. The<br />
information is also used to calculate data for other related forms and schedules.<br />
Form 4562<br />
Depreciation<br />
Schedules<br />
Because the data entered into the 4562 screen flows to Form 4562, you should not<br />
have to use screens 6, 7, 8, and 9 (4562 Parts 1 through 5c) unless entering a pre-prepared<br />
return with no supporting documentation. Data also flows, as applicable, from<br />
the 4562 screen to Form 4797 (Sales of Business Assets) and Form 3468 (Investment<br />
Tax Credit).<br />
Screen 4562 is used to create depreciation or amortization schedules for Schedules A,<br />
C, E, and F; for Forms 2106, 4835, and 8829; and for tax returns of partners in a partnership<br />
and shareholders in an S corporation.<br />
Depreciation data is also used for the Auto Expense Worksheets for Schedules C, E,<br />
and F, and Form 4835. To create an auto worksheet, see “Auto Expenses” on<br />
page 171. To associate a depreciable asset with another screen in <strong>Drake</strong>, see “Associating<br />
One Screen with Another” on page 73.<br />
TIP<br />
Click the Form 4562 link or press CTRL+W inside the Depreciation<br />
field of a supporting schedule’s screen (such as Schedule E) to access<br />
the associated 4562 screen (or to begin a new 4562 screen).<br />
Entering Depreciable Assets<br />
Screen code: 4562<br />
Use the 4562 screen, accessible from the Income tab, to enter depreciation data. Enter<br />
each asset on a separate 4562 screen. (To open a new screen, press PAGE DOWN.)<br />
TIP<br />
Grid data entry can be used for the 4562 screen. Press F3 to switch to<br />
and from grid data. See “Grid Data Entry” on page 68.<br />
Tax Year 2012 165
Depreciation<br />
<strong>Drake</strong> <strong>Software</strong> User’s <strong>Manual</strong><br />
Required<br />
Fields<br />
Required fields on the 4562 screen are described in Table 5-17.<br />
Table 5-17: Required Fields on 4562 screen<br />
Field<br />
Description<br />
For<br />
Description<br />
Date Acquired<br />
Cost/Basis<br />
Method<br />
Life<br />
Used for associating an asset with a form or schedule; see “Associating<br />
One Screen with Another” on page 73.<br />
Description of asset. This field supports 42 characters. Per IRS regulations,<br />
only the first 24 characters are transmitted in e-filed returns. Additional<br />
characters are displayed in red on the screen.<br />
Date the asset was placed in service<br />
Depreciable basis of the asset (press F1 for further details)<br />
Depreciation method<br />
Class life; press F1 for a recovery-period listing.<br />
NOTE<br />
If EXP (section 179) is selected as the depreciation method, the useful<br />
life/recovery period entered in the Life field is used to calculate depreciation<br />
adjustments for Form 6251 (AMT). See “Section 179 Expensing,”<br />
following, for more on section 179.<br />
Business %<br />
Use<br />
The default business percent use is 100%. Enter a number in this field only if business<br />
percent use for the asset is not 100%.<br />
If business use dropped to 50% or less, complete the Business % use field and select<br />
the Recapture box under Other Information. The program recaptures any excess<br />
section 179 or depreciation and carries it to Form 4797 Part IV and to the “Other<br />
income” line on the form being associated with the 4562 screen.<br />
IMPORTANT<br />
EXP cannot be the selected method if the Recapture box is<br />
marked. The Method field must contain an acceptable IRS<br />
method for the recapture to be calculated correctly.<br />
Listed<br />
Property<br />
Type<br />
Prior<br />
Depreciation<br />
A selection in the Listed Prop Type field is required for an asset that could be used<br />
for personal, entertainment, recreation, or amusement purposes. An entry here lists the<br />
asset as “Listed property” on Form 4562. Depreciation limitations could apply.<br />
The amount in the Prior depreciation field is carried from the previous year (if the<br />
information is available). Otherwise, enter this information directly.<br />
Section 179 Expensing<br />
<strong>Drake</strong> calculates the amount up to the established current-year limit for all properties<br />
expensed under the section 179 deduction. If section 179 (EXP in the Method drop<br />
list) is selected as the depreciation method on more than one 4562 screen, the program<br />
expenses the initially entered items first, regardless of which schedule lists the asset.<br />
166 Tax Year 2012
<strong>Drake</strong> <strong>Software</strong> User’s <strong>Manual</strong><br />
Depreciation<br />
The limitation occurs when the total of the expensed assets reaches the established<br />
limit for the current year (again regardless of schedule).<br />
To conform with IRS mandates, <strong>Drake</strong> reports section 179 expense on the first Form<br />
4562 generated with the return. If multiple activities have section 179 expensing, a<br />
section 179 summary is produced on the first Form 4562. (All additional 4562 forms<br />
produced have only the “Section 179 expense deduction” lines completed.)<br />
NOTE<br />
Section 179 expense cannot be claimed on assets related to a passive<br />
activity.<br />
Indicating<br />
Sec. 179<br />
Expensing<br />
Indicate section 179 expensing on the 4562 screen. In most cases, you do not have to<br />
use screen 6, which contains override fields for Form 4562, Part I, Election to Expense<br />
(Section 179). If screen 6 contains a section 179 expense override, clear that field and<br />
enter the amount on the 4562 screen. The entry appears on Form 4562.<br />
To expense the entire amount of an asset under section 179, select EXP as the depreciation<br />
method. To expense only a portion of the tangible property under section 179,<br />
enter all information as if depreciating the full amount, then enter the amount to<br />
expense in the 179 expense elected this year field (Figure 5-53). An amount in this<br />
field overrides system calculations.<br />
Figure 5-53: On the 4562 screen, select EXP (1) to expense entire amount under section 179.<br />
Use the 179 Expense fields (2) if expensing only a portion of the amount.<br />
If the amount must be carried to a listed property, make an entry in the Listed Prop<br />
Type field in the upper-right section of the 4562 screen. (See “Listed Property Type”<br />
on page 166.)<br />
IMPORTANT<br />
For returns being prepared in <strong>Drake</strong> for the first time, the prior<br />
section 179 expense must be entered manually for the<br />
depreciation to be calculated correctly. In the future, the 179<br />
expense allowed in prior years field (see Figure 5-53 on<br />
page 167) will be updated based on system calculations.<br />
Tax Year 2012 167
Depreciation<br />
<strong>Drake</strong> <strong>Software</strong> User’s <strong>Manual</strong><br />
Indicating<br />
Prior-Year<br />
Sec. 179<br />
Expensing<br />
If you enter an amount in the first “179 expense elected in prior years,” (Figure 5-54)<br />
you must also enter an amount in the “179 expense allowed in prior years” field. If<br />
your taxpayer was allowed the whole amount elected, the entry in the fields should be<br />
the same; if the taxpayer was not allowed all the 179 expense elected, enter the<br />
amount elected on the “179 expense allowed in prior years” field.<br />
Figure 5-54: Prior-year 179 expenses “elected” and “allowed”<br />
If the taxpayer expenses assets using section 179, the program produces a WK_I179L<br />
worksheet, “Section 179 Business Income Limit,” with the return.<br />
NOTE<br />
For the 2012 tax year:<br />
• Assets placed in service in 2012 — 50% bonus depreciation<br />
• Assets placed in service after 2012 — 50% bonus depreciation<br />
Investment Credit Codes<br />
If an investment credit code is required, select the code from the Investment credit<br />
code drop list on the 4562 screen.<br />
Asset & Department Numbers<br />
The Asset number, Department number, and Asset Category fields on the 4562<br />
screen are for tracking purposes in the Fixed Asset Manager (see “Fixed Asset Manager”<br />
on page 324) and can be used in reports.<br />
NOTE<br />
Select asset categories from the Asset Category drop list in order to<br />
group items by asset category in the Fixed Asset Manager.<br />
168 Tax Year 2012
<strong>Drake</strong> <strong>Software</strong> User’s <strong>Manual</strong><br />
Depreciation<br />
Land Cost<br />
Use the Land cost field to enter cost/basis of the land. An amount entered here should<br />
not be included in the cost/basis of the asset. For example, if the purchase price<br />
including the land was $100,000 and the cost of the land was $10,000, you would<br />
enter $10,000 for Land cost field and $90,000 for Cost/Basis at the top of the screen.<br />
Depreciating Home Used for Business<br />
Amortization<br />
If a 4562 screen is to be associated with a Form 8829, Business Use of Home, select<br />
8829 from the For drop list at the top of the screen. If the home was the taxpayer’s<br />
main home, mark Main home for Form 8829 (in the Other Information section on<br />
the left side of the 4562 screen).<br />
Enter amortization codes in the Amortization code section field on the 4562 screen<br />
under Amortization Information. To allow the extra $5,000 deduction in the first<br />
year of amortization, select Elect additional first-year deduction.<br />
State-specific Depreciation Information<br />
All States<br />
FL, KY, and<br />
PA<br />
For state-specific depreciation information, complete the applicable fields under<br />
State-Specific Information section (near the bottom of the left column), ensuring that<br />
all state rules and guidelines are followed. Note that State basis (if different) is an<br />
override field. The default basis is the Cost/Basis from the top of the 4562 screen.<br />
State-specific fields for Florida, Kentucky, and Pennsylvania returns are located on<br />
screen 4562.<br />
• Occurrence of Schedule field: Choose the occurrence of the state form or schedule<br />
to which the asset relates (default is “1”). For PA entries, this field applies only<br />
when the asset is sold.<br />
• Schedule form data flow list: Select the state form or schedule to which the asset<br />
data should flow. For PA, this field applies only when the asset is sold.<br />
• Removal Method field (FL only): Press F1 to view valid entries. If left blank and<br />
a 2012 Date sold is entered, the program uses the default “02 - FL Sold.”<br />
Placed in Service (Overrides)<br />
The 4562 screen has the following placed-in-service override fields:<br />
• Force convention — MQ (mid-quarter) or HY (half-year). If MQ is selected, the<br />
program calculates which quarter to use.<br />
• Do not use MACRS % tables — Options include Qualified Indian Reservation<br />
Property.<br />
Tax Year 2012 169
Depreciation<br />
<strong>Drake</strong> <strong>Software</strong> User’s <strong>Manual</strong><br />
Stopping Depreciation on an Asset<br />
Depreciating Sold Assets<br />
To stop depreciation on an asset that was not sold, enter the asset’s remaining basis in<br />
the Salvage Value field (fourth item on the left side of the 4562 screen). The asset will<br />
be updated to next year. No additional depreciation will be taken since the accumulated<br />
depreciation equals the depreciable basis.<br />
To indicate the sale of an asset for depreciation purposes, complete the applicable<br />
fields in the If sold section of the 4562 screen. (See Figure 5-55.)<br />
Group Sales<br />
To enter group sales in <strong>Drake</strong>:<br />
1. Open a 4562 screen for the first asset of the group sale.<br />
2. Complete the applicable fields for the asset, including Date sold and Property<br />
type fields, and all fields under Group Sale Information (Figure 5-55).<br />
Figure 5-55: Screen 4562 fields to complete for the first asset of a group sale<br />
3. Open a 4562 screen for the next asset in the group sale.<br />
4. Complete the applicable fields for the asset. In the If sold section, only the Date<br />
sold, Property type, and Group sale number fields are required.<br />
5. Repeat steps 3 and 4 for all assets in the group sale.<br />
NOTE<br />
Complete the Date sold, Property type, and Group sale number<br />
fields for all assets in a group sale. The Group sales price and Group<br />
expense of sale are required for only the first asset listed.<br />
The sales price and the expenses will be pro-rated among the assets based on the cost/<br />
basis of the assets and will flow to Form 4797, Sales of Assets.<br />
Form 4797,<br />
Sales of<br />
Assets<br />
If data is entered for Date sold and Property type, the asset data flows to Form 4797,<br />
Sales of Assets. If only the Date sold field contains data, nothing flows to Form 4797.<br />
For a Section 1250 property, an entry in the Form 4797, line 26d depreciation field<br />
flows to that line of Form 4797. An entry in the Form 4797, other Part III depreciation<br />
field flows to the appropriate line of Form 4797, depending on the property type.<br />
170 Tax Year 2012
<strong>Drake</strong> <strong>Software</strong> User’s <strong>Manual</strong><br />
Auto Expenses<br />
Installment<br />
Sales<br />
Unlike Form 4797, Form 6252, Installment Sales, is not generated automatically if the<br />
If sold fields are completed. For information on entering installment sales, see<br />
“Installment Sales” on page 115.<br />
Depreciation Elections<br />
Two screens are used for indicating depreciation elections. Use screen 10, Additional<br />
Depreciation Elections, to elect out of 50% bonus depreciation for some or all of the<br />
assets placed in service in 2012. You can access this screen for an asset by clicking the<br />
Additional Depreciation Elections link on screen 4562 for that asset. Use the ELEC<br />
screen for other Form 4562 elections (listed under the Form 4562 heading on that<br />
screen). For more on the ELEC screen, see “Election Options” on page 175.<br />
Federally Declared Disaster<br />
Auto Expenses<br />
Screen code:<br />
AUTO<br />
If the Disaster assistance property box in the Federal declared disaster area is<br />
marked, the property will qualify for additional Section 179 deduction and also for<br />
50% bonus depreciation. A selection here will increase the section 179 limits on Form<br />
4562, lines 1 and 3 accordingly.<br />
Marking the GO Zone Extension property check box will not change any 2012 calculations<br />
in <strong>Drake</strong>. The box remains on the screen to alert the preparer if the asset is<br />
sold and anything must be recaptured due to additional GO Zone deductions in a prior<br />
year. All federal GO Zone provisions have expired.<br />
The Auto Expense Worksheet (AUTO screen), accessible from the Adjustments tab,<br />
is used for calculating automobile expenses related to certain types of income. The<br />
program calculates the mileage rate automatically.<br />
NOTE<br />
Enter data for Schedule C, Part IV, Information on Your Vehicle, on the<br />
AUTO screen (click the AUTO link on screen C). Use the For and MFC<br />
fields to associate the AUTO screen with the correct C screen.<br />
Applying Auto Expenses to a Form<br />
AUTO screens can be applied to Schedules C, E, and F, and Form 4835. Use a separate<br />
AUTO screen for each vehicle. A WK_AUTO worksheet is generated for each<br />
AUTO screen created.<br />
Tax Year 2012 171
Office in Home<br />
<strong>Drake</strong> <strong>Software</strong> User’s <strong>Manual</strong><br />
Business Mileage<br />
Prior-Years Mileage<br />
To apply an AUTO screen to a specific form, select the form type from the For menu.<br />
Use the multi-form code (MFC) box as necessary; see “Associating One Screen with<br />
Another” on page 73 for more on using the For and Multi-form code boxes in <strong>Drake</strong>.<br />
The 2012 standard business mileage deduction rate for the 2012 tax year was 55.5<br />
cents per mile. Use the applicable field on the AUTO screen to enter business miles<br />
driven in 2012.<br />
The Prior Years Mileage fields allow you to keep a running total of the mileage covered<br />
by the vehicle since being placed in service. The total amount is used to calculate<br />
the cumulative business percentage for the life of the vehicle. It is also used to calculate<br />
the business cost and sales price when the vehicle is sold.<br />
Prior-year mileage data is updated each year when you update your system.<br />
IMPORTANT<br />
The business mileage fields must be completed to compute business<br />
use percentage for depreciation (Form 4562).<br />
Office in Home<br />
Screen code: 8829<br />
Enter information for Form 8829, Expenses for Business Use of Your Home, on the<br />
8829 screen, accessible from the Adjustments tab.<br />
Applying 8829 Data to a Form<br />
The 8829 screen can be applied to Schedules C and F, Form 2106, and Schedule K-1<br />
for Partnership. Select the form type from the For menu at the top of the 8829 screen.<br />
Use the Multi-form code box as needed (default is “1”). (See “Associating One<br />
Screen with Another” on page 73.)<br />
Special<br />
Conditions:<br />
Form 2106<br />
The multi-form code information must be modified slightly if the 8829 screen is being<br />
associated with a Form 2106 (Employee Business Expenses) and the spouse has a<br />
2106 form. The program numbers all primary taxpayer 2106 forms before numbering<br />
the spouse 2106 forms, as shown in Table 5-18.<br />
Table 5-18: Screen 8829 Multi-form Codes for Form 2106<br />
If the 2106 is for ...<br />
Enter this<br />
code:<br />
Primary taxpayer 1<br />
Primary taxpayer (and it is the primary taxpayer’s second 2106) 2<br />
Spouse (and the primary taxpayer does not have a 2106) 1<br />
Spouse (and the primary taxpayer does have a 2106) 2<br />
172 Tax Year 2012
<strong>Drake</strong> <strong>Software</strong> User’s <strong>Manual</strong><br />
Net Operating Losses<br />
Table 5-18: Screen 8829 Multi-form Codes for Form 2106<br />
If the 2106 is for ...<br />
Enter this<br />
code:<br />
Spouse (and the taxpayer has two 2106 forms) 3<br />
Depreciation of Home<br />
Generally, home depreciation data should be entered under Part III of the 8829 screen.<br />
If the home was placed into service during the current tax year, however, leave Part III<br />
blank, start a 4562 screen for the home, and enter the data shown in Table 5-19:<br />
Table 5-19: Screen 4562 Fields to Complete for First-Year 8829<br />
Screen<br />
8829 Information or Text to be Entered<br />
For Select 8829.<br />
Multi-form code Enter the instance of Form 8829 to be associated with this 4562<br />
screen. (See “Associating One Screen with Another” on page 73.)<br />
Description<br />
Date Acquired<br />
Cost/Basis<br />
Enter a description of the asset.<br />
Enter the date the home was placed in service.<br />
Enter the smaller amount — the cost/basis or the fair market value.<br />
(This amount would normally be entered in Part III of the 8829<br />
screen.) Do not include the cost of the land.<br />
Business % Use Leave this field blank; default is 100%.<br />
Method<br />
(Federal column)<br />
Life<br />
(Federal column)<br />
Land cost<br />
Main Home for 8829<br />
Select SL - Straight Line.<br />
Enter the number 39.<br />
Enter the cost of the land only. This amount should not be included<br />
in Cost/Basis above. (This amount would normally be entered in<br />
Part III of the 8829 screen.)<br />
Select this box if the asset was the main home. This information is<br />
posted to the bottom of Form 8829 when the return is generated.<br />
Net Operating Losses<br />
This section explains how to enter carrybacks and carryforwards of net operating<br />
losses (NOLs) in <strong>Drake</strong>.<br />
Carrybacks from Future Years<br />
Screen code: 3<br />
Enter NOL carryback amounts from future years on screen 3 in the NOL field<br />
(Figure 5-56 on page 174). This field can also be used to amend the current-year<br />
amount or to adjust carryback amounts calculated from the LOSS screen.<br />
Tax Year 2012 173
Net Operating Losses<br />
<strong>Drake</strong> <strong>Software</strong> User’s <strong>Manual</strong><br />
Figure 5-56: NOL carryback field on screen 3<br />
An amount entered here flows to the “Other income” line of Form 1040. Click the<br />
LOSS link as needed to access the LOSS screen.<br />
Carryforwards from Prior Years<br />
Screen code:<br />
LOSS<br />
Use the LOSS screen to enter NOL carryforward amounts from prior years. Enter<br />
amounts for each year using the Amount available from carryforward, Used prior<br />
to 2012, and Used in 2012 columns on this screen.<br />
NOTES<br />
Never add a LOSS screen for a current-year NOL. The program carries<br />
forward any current-year NOL and displays the carryforward on the<br />
WK_CARRY worksheet. The results of your data entry are reflected on<br />
the WK_NOL worksheet.<br />
To have the program calculate whether there is a NOL for the current<br />
year, go to the NOL screen and select Calculate 1045 page 2 ONLY.<br />
(See “NOL Carryovers on Form 1045,” following.)<br />
NOL Carryovers on Form 1045<br />
Screen code: NOL<br />
Form 1045, Application for Tentative Refund, includes Schedule A (NOL) and Schedule<br />
B (NOL Carryover). Use the NOL screen, accessible from the Other Forms tab,<br />
to enter amounts for these schedules into <strong>Drake</strong>.<br />
NOTES<br />
The Schedule A fields are override fields. Entries override system calculations<br />
for Schedule A.<br />
To calculate only page 2 of Form 1045, select Calculate 1045 page 2<br />
ONLY at the top of the NOL screen.<br />
NOL<br />
Carryforward<br />
Only<br />
Figuring<br />
AMT NOL<br />
To indicate that the taxpayer elects to carry a NOL forward and not back, go to the<br />
NOL screen and select Election to carry forward ONLY. When the return is generated,<br />
it includes an ELECTIONS statement, stating that the taxpayer is electing under<br />
Section 172(b)(3) to relinquish the entire carryback period.<br />
Use the right-hand column of the NOL screen to enter data for figuring Alternative<br />
Minimum Tax NOL. When the return is generated, the AMT_NOL worksheet shows<br />
the current year AMT NOL.<br />
174 Tax Year 2012
<strong>Drake</strong> <strong>Software</strong> User’s <strong>Manual</strong><br />
Election Options<br />
Election Options<br />
Special Returns<br />
The ELEC screen has check boxes to indicate “elections” from the IRS code. If any<br />
boxes on this screen are marked, a note listing the elections is generated with the<br />
return. To attach an additional statement detailing an election, go to the SCH screen<br />
and select E – Election Explanation for the type of schedule. Both the list of elections<br />
and any designated election explanations are visible as ELECTION pages in<br />
View mode. (For more on unformatted schedules, see “Unformatted Schedules” on<br />
page 189.)<br />
This section explains how to complete the following return types in <strong>Drake</strong>:<br />
• Form 1040X, Amended U.S. Individual Income Tax Return<br />
• Extension Applications:<br />
– Form 4868, Application for Automatic Extension of Time To File U.S. Individual<br />
Income Tax Return<br />
– Form 2350, Application for Extension of Time To File U.S. Income Tax<br />
Return For U.S. Citizens and Resident Aliens Abroad Who Expect To Qualify<br />
for Special Tax Treatment<br />
• Form 1040NR, U.S. Nonresident Alien Income Tax Return<br />
• Form 709, United States Gift (and Generation-Skipping Transfer) Tax Return<br />
NOTE<br />
Amended returns cannot be e-filed. An electronic signature is required<br />
for all other returns and applications for extensions. See “Signing the<br />
Return” on page 163 for more on electronic signatures.<br />
Amended Returns<br />
A return must be established in <strong>Drake</strong> before the amended version can be created. If<br />
the original return was created using a different program, you must create the return in<br />
<strong>Drake</strong> and enter basic taxpayer information (filing status, address, etc.) before amending<br />
the return.<br />
NOTE<br />
Make sure you have a backup copy of a return before you change any<br />
data. You can create both a PDF copy and a backup client file in the<br />
Document Manager if you archive the return. (See “Archive Manager”<br />
on page 207.)<br />
To create an amended return in <strong>Drake</strong>:<br />
Screen code: X<br />
1. Open the return to be amended.<br />
2. From the Other Forms tab, click X, 1040X Amended Return.<br />
3. To have the program autofill the 1040X screen with data from the original return,<br />
click Yes. To leave the fields blank, click No.<br />
4. Enter all applicable data in the 1040X screen.<br />
5. Revise any other sections of the original return as needed.<br />
Tax Year 2012 175
Special Returns<br />
<strong>Drake</strong> <strong>Software</strong> User’s <strong>Manual</strong><br />
The 1040X screen contains the following sections:<br />
• Amounts as on ORIGINAL return — These amounts can be autofilled by the<br />
program. A manual entry in any of these fields overrides program calculations for<br />
the original return.<br />
• Part I - Exemptions — These numbers can be autofilled by the program. A manual<br />
entry in any of these fields overrides program calculations for the original<br />
return.<br />
• Amounts and information for the AMENDED return — These fields must be<br />
completed manually as applicable.<br />
• Part II - Presidential Election Campaign — If the taxpayer or spouse did not<br />
want $3 to go to the Presidential Election Campaign Fund but does now, mark the<br />
appropriate box.<br />
• Part III - Explanation of Changes — Type an explanation of the changes in this<br />
text box.<br />
Any additional changes in income will be incorporated into the amended return.<br />
Extensions<br />
To apply for an extension using <strong>Drake</strong>:<br />
1. Open the return for which an extension application is being filed.<br />
Screen code: EXT 2. From the Other Forms tab, click EXT, Extension Forms 4868 & 2350.<br />
3. Make the applicable selection from the 4868 drop list (if filing Form 4868) or the<br />
2350 drop list (if filing Form 2350). Selections are described in Table 5-20.<br />
Table 5-20: Extension Forms Screen Selections for Forms 4868 and 2350<br />
Code<br />
Description<br />
X<br />
A<br />
B<br />
P<br />
Produces Form 4868 or Form 2350, whichever is selected.<br />
Produces Form 2350. Firm information (rather than taxpayer information) is<br />
printed on the return label section.<br />
Produces Form 2350. Taxpayer’s name and address are printed at the bottom<br />
of the form.<br />
Produces Form 2350. Taxpayer’s name, preparer’s name, and firm address are<br />
printed at the bottom.<br />
4. Enter all applicable information.<br />
For further instructions, see the Screen Help for the EXT screen.<br />
e-Filing an<br />
Extension<br />
If e-filing an extension application, complete the EXT screen, and then select the<br />
applicable form number on the EF screen (accessible from the General tab). For more<br />
information on the EF screen, see “EF Override Options in Data Entry” on page 236.<br />
176 Tax Year 2012
<strong>Drake</strong> <strong>Software</strong> User’s <strong>Manual</strong><br />
Special Returns<br />
ETD<br />
Messages<br />
Payments<br />
When e-filing a 1040 extension, it is necessary to clear all of the errors shown on the<br />
ETD_MSG page. Because you are not sending the actual return, it is not necessary to<br />
address other EF messages. Only the ETD_MSG page needs to be addressed.<br />
Use the EXT screen to indicate the amount being paid with the extension. If a voucher<br />
is needed, mark the Produce 1040-V for extension box, and use the Amount to print<br />
on 1040-V override field if the amount differs from the automatically calculated<br />
amount.<br />
Mark the Taxpayer is paying the entire amount of tax due box (see Figure 5-57) if<br />
the entire amount of tax is being paid with the extension.<br />
Figure 5-57: Payment-related fields on the EXT screen<br />
Filing the<br />
Return<br />
Before filing the actual return, go to the EXT screen and mark the box labeled Taxpayer<br />
has paper-filed the extension and is now ready to file a regular return.<br />
Nonresident Alien Returns<br />
Screen code: NR<br />
Use the NR screen, accessible from the Taxes tab, to enter data for Form 1040NR,<br />
U.S. Nonresident Alien Income Tax Return. The 1040NR in <strong>Drake</strong> consists of three<br />
screens. Press PAGE UP or PAGE DOWN to move from screen to screen.<br />
NOTE<br />
Data from Form 1042-S, Foreign Person’s U.S. Source Income Subject<br />
to Withholding, should be entered on either the 2555 screen, the NR<br />
screen, or in the Other income field on screen 3.<br />
Gift Tax Returns<br />
Screen code: 709<br />
Form 709, U.S. Gift Tax Return, consists of several parts and schedules, all located on<br />
the 709 menu, accessible from the Taxes tab. (See Figure 5-58 on page 178.)<br />
Tax Year 2012 177
Requests, Claims, and Other Forms<br />
<strong>Drake</strong> <strong>Software</strong> User’s <strong>Manual</strong><br />
Figure 5-58: Menu for Form 709, Gift Tax<br />
Click an item to open it, or type its code into the selector field and press ENTER.<br />
NOTE<br />
Forms 709 and 8892 cannot be e-filed. They must be paper-filed.<br />
Pricing for<br />
Form 709<br />
Attached<br />
Statements<br />
709 Election<br />
Options<br />
Extension<br />
Request for<br />
Form 709<br />
To set up pricing for Form 709, go to the Home window and select Setup > Pricing.<br />
By default, the pricing list is for individual (1040 package) forms. From the State/<br />
City drop list, select GF - Gift Tax (709) to display a list of the gift tax forms. Double-click<br />
a form name to adjust the pricing.<br />
If Form 709 requires an attachment (for example, if an election option requires the<br />
amounts in question to be identified), use the ATT screen on the 709 menu.<br />
The ELEC screen (Election Options for 709) provides a series of check boxes for<br />
electing certain optional ways of treating some income and exclusion amounts.<br />
Form 4868 covers extension requests for both a 1040 and a 709 return. No separate<br />
extension request is required. For more information, see “Extensions” on page 176.<br />
To request an extension for Form 709 only, complete Form 8892. This form is not<br />
available in <strong>Drake</strong> but can be accessed from the IRS website. See IRS instructions for<br />
more on submitting a 709 extension request to the IRS.<br />
Requests, Claims, and Other Forms<br />
The screens described in this section are all available from the Other Forms tab of the<br />
Data Entry Menu. Most forms listed here are e-filable unless otherwise specified,<br />
and most can be obtained in <strong>Drake</strong> from Tools > Blank Forms.<br />
178 Tax Year 2012
<strong>Drake</strong> <strong>Software</strong> User’s <strong>Manual</strong><br />
Requests, Claims, and Other Forms<br />
Applications and Requests<br />
Table 5-21 lists additional screens for application and request forms.<br />
Table 5-21: Application and Request Forms Available from Other Forms Tab in <strong>Drake</strong><br />
Screen Form Notes<br />
970 Form 970, Application to Use LIFO Inventory<br />
Method<br />
Use the SCH screen for required attachments;<br />
select the appropriate code on that screen.<br />
1045 Form 1045, Application for Tentative Refund Press PAGE DOWN to access the NOL screen. This<br />
form is not e-filable. See “Net Operating Losses” on<br />
page 173 for more on the NOL screen.<br />
4506 Form 4506, Request for Copy of Tax Return To request a transcript of a tax return, use Form<br />
4506-T (available in <strong>Drake</strong> at Tools > Blank<br />
Forms) or call (800) 829-1040.<br />
8857 Form 8857, Request for Innocent Spouse Relief If question 3 on this screen is answered “Yes,” do<br />
not file Form 8857. File Form 8379 instead. For<br />
question 23, use the SCH screen, code 209, to<br />
submit information about assets.<br />
9465 Form 9465, Installment Agreement Request Form 9465 is e-filable if the taxpayer uses direct<br />
debit to pay. Otherwise, this form must be paperfiled.<br />
If e-filing, a PIN is required; indicate Form<br />
9465 and enter prior-year AGI on the PIN screen.<br />
W7<br />
Form W-7, Application for IRS Individual Taxpayer<br />
Identification Number (ITIN)<br />
This form is not e-filable.<br />
Statements and Claims<br />
Table 5-22 lists additional screens for statement and claim forms.<br />
Table 5-22: Statement and Claim Forms Available from Other Forms Tab in <strong>Drake</strong><br />
Screen Form Notes<br />
2120;<br />
8332<br />
Form 2120, Multiple Support Declaration<br />
Form 8332, Release of Claim to Exemption for<br />
Child of Divorced or Separated Parents<br />
The rules for multiple support agreements still<br />
apply to claiming an exemption for a qualifying relative,<br />
but they no longer apply to claiming an exemption<br />
for a qualifying child. For the definitions of<br />
“qualifying relative” and “qualifying child,” see your<br />
tax return instruction booklet.<br />
1310 Form 1310, Statement of Person Claiming<br />
Refund Due a Deceased Taxpayer<br />
2848 Form 2848, Power of Attorney and Declaration<br />
of Representative<br />
8275 Form 8275, Disclosure Statement<br />
Form 8275-R, Regulation Disclosure Statement<br />
If anything other than box C is selected in Part I of<br />
the screen, or if box 2a is selected in Part II, the<br />
return cannot be e-filed.<br />
This form is not e-filable.<br />
To print Form 8275-R, select 8275-R at the top of<br />
the screen.<br />
8379 Form 8379, Injured Spouse Allocation By filing Form 8379, the injured spouse may be<br />
able to get back his or her share of the joint refund.<br />
Tax Year 2012 179
Requests, Claims, and Other Forms<br />
<strong>Drake</strong> <strong>Software</strong> User’s <strong>Manual</strong><br />
Table 5-22: Statement and Claim Forms Available from Other Forms Tab in <strong>Drake</strong><br />
Screen Form Notes<br />
8594 Form 8594, Asset Acquisition Statement Under<br />
Section 1060<br />
8862 Form 8862, Information to Claim Earned Income<br />
Credit After Disallowance<br />
If this form is being amended, state the reasons for<br />
the change in the field provided.<br />
To enter data for additional qualifying children,<br />
press PAGE DOWN to start a new screen 8862.<br />
NOTE<br />
To claim tax forgiveness for death in a combat zone or as a result of a<br />
terrorist or military action, go to the MISC screen and select the applicable<br />
code for Combat Zone/Terrorist/Military Action Tax Forgiveness.<br />
Press F1 in that field for more information.<br />
Other Forms<br />
Table 5-23 lists screens for other forms available under the Other Forms tab.<br />
Table 5-23: Other Forms Available from Other Forms Tab in <strong>Drake</strong><br />
Screen Form Notes<br />
W4<br />
Form W-4, Employee’s Withholding Allowance Certificate<br />
56 Form 56, Notice Concerning Fiduciary Relationship PIN and prior-year AGI required; enter this<br />
data, and indicate Form 56, on the PIN screen.<br />
982 Form 982, Reduction of Tax Attributes Due to Discharge<br />
of Indebtedness<br />
8815 Form 8815, Exclusion of Interest from Series EE and<br />
I U.S. Savings Bonds Issued After 1989<br />
8822 Form 8822, Change of Address This form is not e-filable.<br />
8866 Form 8866, Interest Computation Under the Look-<br />
Back Method ...<br />
9022 Form 90-22.1, Report of Foreign Accounts See “Report of Foreign Accounts,” following.<br />
Report of<br />
Foreign<br />
Accounts<br />
Use screen 9022 to complete Form T%D 90-22.1, Report on Foreign Bank and Financial<br />
Accounts. The 9022 screen consists of four sections:<br />
• Filer Information — Complete once for each filer reporting a foreign account.<br />
Use a separate 9022 screen for each account. If necessary, select either T or S at<br />
the top of the screen to indicate which filer should report the account (default is<br />
T). Once a filer’s data is entered on a 9022 screen, this section can be left blank in<br />
subsequent 9022 screens for that filer.<br />
• For Parts II, III, IV, V — Complete this section for each 9022 screen used.<br />
Choose one of the boxes at the top of this section to indicate the nature of the<br />
account. Options are shown in Figure 5-59 on page 181.<br />
180 Tax Year 2012
<strong>Drake</strong> <strong>Software</strong> User’s <strong>Manual</strong><br />
Features for Late-Filed Returns<br />
Figure 5-59: Select one box to indicate the nature of the account<br />
• For Part III only — This section must be completed only if Owned Jointly (III)<br />
was selected. (See Figure 5-59.)<br />
• For Part IV, V only — This section must be completed only if item IV or V was<br />
selected. (See Figure 5-59.)<br />
The program generates only those pages of the form that are applicable. For example,<br />
if Owned Jointly (III) is selected, only pages 1 and 3 of the form are printed, since<br />
page 2 covers only accounts that are owned separately (selection II in Figure 5-59),<br />
and page 3 covers only jointly owned accounts. (Page 1 contains taxpayer data.).<br />
NOTE<br />
Section 4 applies to either “signature but no financial interest” (IV) or<br />
“consolidated report” (V). If IV is selected and a First name is entered<br />
on line 36, the nine-digit Account owner ID number from line 35 will<br />
be printed as an SSN. If V is selected, or if IV is selected and line 36 is<br />
blank, the Account owner ID number will be printed as an EIN.<br />
Features for Late-Filed Returns<br />
<strong>Drake</strong> calculates the late-filing penalty, late payment of tax penalty, and interest on<br />
late-filed 1040 returns. You can manually enter interest rates as needed and override<br />
certain components (such as interest owed) that affect system calculations of penalty<br />
and interest.<br />
Penalty and Interest Calculation<br />
You can set up the program to calculate penalties and interest for all late-filed returns,<br />
or you can have penalties and interest calculated on a per-return (“on-the-fly”) basis.<br />
Global<br />
Option<br />
To have the program calculate penalties and interest for all late-filing clients based on<br />
the filing dates:<br />
1. From the Home window, go to Setup > Options > Optional Items on Return.<br />
2. Ensure that the Automatically calculate... box is marked (Figure 5-60 on<br />
page 182).<br />
Tax Year 2012 181
Features for Late-Filed Returns<br />
<strong>Drake</strong> <strong>Software</strong> User’s <strong>Manual</strong><br />
Figure 5-60: Interest and Penalty Calculation section<br />
(Setup > Options > Optional Items on Return)<br />
3. Click OK. The program will now calculate penalties and interest on all late<br />
returns calculated.<br />
“On the Fly”<br />
Option<br />
The per-return option can be used if the global option shown in Figure 5-60 is not<br />
selected. To have the program calculate penalties and interest for a single return:<br />
1. Open the client’s file in <strong>Drake</strong> and go to the LATE screen (accessible from the<br />
Taxes tab).<br />
2. Mark the Calculate penalties and interest on this return box (Figure 5-61).<br />
3. Complete the Date return was filed text box (Figure 5-61). If this field is blank,<br />
the program uses the Date balance paid entry from the 2210 screen by default.<br />
Figure 5-61: The LATE screen (accessible from the Taxes tab)<br />
Other LATE<br />
Screen<br />
Features<br />
You can also use the LATE screen to override these additional default settings:<br />
• Including calculated amounts elsewhere — By default, the calculated amounts<br />
are incorporated into the payment voucher, filing instructions, and client result letter<br />
for the return. To override this default, go to the LATE screen and mark the Do<br />
not carry P&I box (Figure 5-61).<br />
• Suppressing calculation “on the fly” — If the option to calculate penalties and<br />
interest for all late returns is selected in Setup > Options > Optional Items on<br />
Return tab, and you want to suppress the calculation for a single return, mark the<br />
Suppress calculation... box at the top of the LATE screen (Figure 5-61) for that<br />
return.<br />
• Due date of return — An entry here overrides the default of April 15 of the year<br />
the return is due. (An override would be necessary for a special circumstance,<br />
182 Tax Year 2012
<strong>Drake</strong> <strong>Software</strong> User’s <strong>Manual</strong><br />
Other Special Features in Data Entry<br />
such as for returns affected by disasters or other IRS–extended due date occurrences.)<br />
• Date balance paid if different — An entry overrides the calculated balance due.<br />
Interest Rates<br />
If the global option is selected at Setup > Options > Optional Items on Return tab,<br />
the program bases its penalty-and-interest calculations on the interest rate for the quarter.<br />
You can override program calculations by manually entering penalty or interest<br />
amounts on the LATE screen. You can also manually enter interest rates at Setup ><br />
Options > Optional Items on Return tab.<br />
<strong>Manual</strong>ly<br />
Entering<br />
Rates<br />
<strong>Drake</strong> automatically updates quarterly interest rates for the current and following year<br />
as they are announced by the IRS. For tax year 2012, for example, interest rates will<br />
be updated for 2012 and 2013. After 2013, quarterly rates must be manually entered in<br />
the 2012 program for late returns for tax year 2012.<br />
To enter quarterly rates manually:<br />
1. From the Home window, select Setup > Options > Optional Items on Return.<br />
2. Enter the available rates for each applicable quarter (shown in Figure 5-60 on<br />
page 182). Percentages should be entered using four digits, with the last two digits<br />
coming after the decimal (for example, you would enter 1.5% as 01.50).<br />
3. Click OK to exit the screen and save the settings.<br />
NOTES<br />
If the Automatically calculate... box is marked, the program applies<br />
the rates to all late-filed returns. If it is not marked, the program applies<br />
the rates only if the LATE screen is used for a return.<br />
If an interest rate is entered for a quarter that has received (or will<br />
receive) an automatic update, the entry overrides the updated rate.<br />
Updated rates are not visible in Setup > Options > Optional Items on<br />
Return tab; all rates appear as 00.00 unless a new rate is entered.<br />
Overriding<br />
Program<br />
Calculations<br />
The LATE screen has the following fields for overriding penalty and interest amounts<br />
that would otherwise be calculated by the program:<br />
• Failure to file penalty — Enter the penalty amount for failing to file on time.<br />
• Failure to pay penalty — Enter the penalty amount for failing to pay.<br />
• Interest — Enter the amount of interest incurred.<br />
Other Special Features in Data Entry<br />
Special features are available to help tax preparers transmit certain documents with<br />
returns, and compare and review information more effectively, include all required<br />
details on a return, and track a return’s progress.<br />
Tax Year 2012 183
Binary Attachments<br />
<strong>Drake</strong> <strong>Software</strong> User’s <strong>Manual</strong><br />
Binary Attachments<br />
Binary, or PDF, files can be attached to certain tax forms. These attachments are generally<br />
signature or third-party documents such as a copy of a divorce decree, bankruptcy<br />
papers, signed lease, or a signed appraisal statement, transmitted with the<br />
return to support or explain an entry in the return. In either case, a PDF must be available<br />
to be attached to the return in order to be e-filed with the return.<br />
Attach files through the PDF Attachments screen, accessible from the Electronic<br />
Filing section on the General tab of the Data Entry Menu.<br />
The PDF Attachment Process<br />
Three main steps are involved in the PDF attachment process in <strong>Drake</strong>:<br />
1. Creating a PDF file to be attached<br />
2. Informing the program that a PDF file will be sent with the return<br />
3. Attaching the PDF file for e-filing<br />
These steps are described in the following sections.<br />
Creating a<br />
PDF File<br />
To create a PDF file:<br />
1. Scan the document to be attached to the return as a PDF.<br />
TIP<br />
It’s a good idea to use the Document Manager scanning feature for this<br />
step.<br />
2. Save the document to your client’s Document Manager, to your computer’s desktop,<br />
or anywhere you can readily find it.<br />
NOTE<br />
Many types of documents (for instance, documents created in Microsoft<br />
Word) can be printed or “saved” as PDF files if you have a PDF printer<br />
(such as Adobe Reader) installed.<br />
Adding PDF<br />
Files<br />
To indicate in the software that a PDF file will be sent with the return:<br />
1. Go to the PDF Attachments screen in data entry.<br />
2. Fill out the columns on the screen. See Table 5-24 for examples.<br />
Table 5-24: PDF Attachment Window Columns<br />
Column Description Examples<br />
Reference Source<br />
Description<br />
Name or number of regulation,<br />
publication, or form instruction that<br />
makes attachments necessary<br />
Description of form or document to<br />
be attached<br />
- IRS Pub xxx-1.4<br />
- Form Instructions for 8332<br />
- Divorce decree<br />
- Bonus depreciation worksheet<br />
184 Tax Year 2012
<strong>Drake</strong> <strong>Software</strong> User’s <strong>Manual</strong><br />
Binary Attachments<br />
Table 5-24: PDF Attachment Window Columns<br />
Column Description Examples<br />
File name<br />
Distinctive, easily recognizable file<br />
name, followed by “.pdf”<br />
- JohnsonDivorce.pdf<br />
- SmithInsolvency.pdf<br />
3. Exit the PDF screen.<br />
Because you’ve indicated that a PDF file is attached, the program generates an EF<br />
message regarding the attachment when the return is calculated.<br />
Attaching<br />
Documents<br />
to the Return<br />
To attach a PDF file to a return:<br />
1. From the return, click View. If anything was entered on the PDF screen (see<br />
“Adding PDF Files” on page 184), there will be three PDF–related items in the<br />
View/Print window:<br />
• A MESSAGES alert (see item 1 in Figure 5-62)<br />
• An EF_PDF~ worksheet that lists all items entered on the PDF screen and any<br />
required attachments determined by the program (see item 2 in Figure 5-62)<br />
• An Attach PDF button on the toolbar (item 3 in Figure 5-62)<br />
Figure 5-62: Attaching PDF documents to a return<br />
2. Click MESSAGES file to view EF messages, which provide information on how<br />
to attach the required documents to the return.<br />
3. Click the Attach PDF button in the toolbar at the top of the window. The EF PDF<br />
Attachments window displays the information entered on the PDF Attachments<br />
window in data entry. A red X means the document has not yet been attached; a<br />
green check mark indicates an attached document.<br />
Tax Year 2012 185
Binary Attachments<br />
<strong>Drake</strong> <strong>Software</strong> User’s <strong>Manual</strong><br />
Comparing Data<br />
Figure 5-63: A green check mark indicates the PDF document has been attached;<br />
a red “X” indicates the PDF document has not been attached<br />
4. Click the row of a document to attach.<br />
5. Click Browse.<br />
6. Browse to the proper folder (where you saved the PDF document), select the PDF<br />
file to attach, and click Open (or double-click the file name).<br />
Repeat for all documents with a red X. When all documents have been attached to a<br />
completed return, recalculate the return to make sure all EF messages have been<br />
cleared. If so, the return is ready to be e-filed.<br />
In <strong>Drake</strong>, you can compare data between two versions of the same tax return. You can<br />
also produce a tax return comparison worksheet that shows data for a client’s returns<br />
for the current year and the two prior years.<br />
Crosschecking<br />
<strong>Drake</strong><br />
Calculations<br />
The Checking Information screen allows you to cross-check <strong>Drake</strong> calculations with<br />
amounts from a previously prepared return. Any discrepancies between the <strong>Drake</strong><br />
return and the previously prepared return are shown in an EF message (Figure 5-64 on<br />
page 187).<br />
To compare a <strong>Drake</strong> return with a previously prepared return:<br />
Screen code: CHK<br />
1. Open the return to be compared, and go to the CHK screen.<br />
2. Enter the information from the previously prepared return regarding income,<br />
taxes, credits, deductions, banking, etc.<br />
3. Exit the CHK screen and calculate the return.<br />
4. In View mode, view the EF message page (Figure 5-64 on page 187), which<br />
shows where discrepancies occurred.<br />
186 Tax Year 2012
<strong>Drake</strong> <strong>Software</strong> User’s <strong>Manual</strong><br />
Binary Attachments<br />
Figure 5-64: EF message showing that CHK screen amounts do not match those in <strong>Drake</strong><br />
NOTE<br />
If pre-prepared data entry was used, the CHK screen already contains<br />
data.<br />
Comparing<br />
Tax Returns<br />
Screen code:<br />
COMP<br />
The Tax Return Comparison screen is used for comparing a current-year tax return<br />
with data from the two prior tax years. The screen itself has parallel columns of data<br />
entry fields—one column for the prior year, and one for the year before that.<br />
If a return was updated from the prior year, the COMP screen already contains data. If<br />
not, the screen must be completed manually for an accurate comparison. When a<br />
return is generated, the COMPARE worksheet displays the data comparisons.<br />
Miscellaneous Codes<br />
The Miscellaneous Codes fields on screen 1 are for use in tracking returns and creating<br />
customized reports. For example, you might decide to use Misc Code 1 to track<br />
the different ways that clients learned of your service. For each return, you might enter<br />
“Ad,” “Flyer,” “Referral,” etc. (whichever is applicable) into the Code 1 field.<br />
Later, when designing a report of all clients in the Report Manager, you would select<br />
Misc Code 1 as one of the columns. The report displays the information from the<br />
Misc Code 1 field on screen 1 for each client, and you would be able to see, at a<br />
glance, which clients were referred, which responded to an advertisement or flyer, etc.<br />
NOTE<br />
To create customized drop lists for miscellaneous code fields, see “Customized<br />
Drop Lists” on page 35.<br />
Notes about the Return<br />
Screen code:<br />
NOTE<br />
Use the NOTE screen to ensure that specific reminders (in the forms of notes and EF<br />
messages) appear for specific returns. By default, all notes from the NOTE screen are<br />
printed on the NOTES page generated with the return.<br />
Entering a<br />
Note<br />
To include a note with a return, go to the NOTE screen and enter all relevant information<br />
in the fields provided at the top of the screen (item #1 in Figure 5-65 on<br />
page 188). The screen includes fields for names, dates, and any screen or form to<br />
which the note refers.<br />
Tax Year 2012 187
Binary Attachments<br />
<strong>Drake</strong> <strong>Software</strong> User’s <strong>Manual</strong><br />
Figure 5-65: NOTE screen fields<br />
The maximum number of characters for the Note field is 120. Up to four notes can be<br />
entered on a single NOTE screen. For additional screens, press PAGE DOWN.<br />
NOTE<br />
In the Date Completed field, enter the date that the note should be discontinued.<br />
The note will no longer appear when the return is opened<br />
but will still appear in NOTES in View mode.<br />
Delaying<br />
E-filing<br />
In <strong>Drake</strong>, the presence of an EF message prevents a return from being e-filed. A return<br />
cannot be e-filed until all EF messages are eliminated.<br />
The NOTE screen can be used to delay the e-filing of a prepared return, even if the<br />
return is eligible for e-file. To have a note delay e-filing, select Hold EF (see Figure 5-<br />
65) for the note, and the note shows up as an EF message. When you are ready to e-<br />
file the return, return to the NOTE screen and clear the Hold EF box.<br />
Notes to be<br />
Updated<br />
Notes in the top section of the NOTE screen apply for the current year only. The Miscellaneous<br />
Notes (item #2 in Figure 5-65) at the bottom of the NOTE screen are<br />
updated each year when the return is updated. The Miscellaneous Notes also appear<br />
when the return is opened to data entry. (See TIP, following.)<br />
TIP<br />
To have notes appear when a return is opened, go to Setup > Options<br />
> Data Entry tab and select Show notes/reminders to preparer<br />
when opening a return.<br />
Preparer Notepad<br />
Screen code: PAD<br />
The Preparer Notepad (PAD) screen, accessible from the General tab, offers an area<br />
for keeping more extensive notes and other pertinent return information. The contents<br />
of this screen are brought forward each year when the return is updated, and appear<br />
188 Tax Year 2012
<strong>Drake</strong> <strong>Software</strong> User’s <strong>Manual</strong><br />
Binary Attachments<br />
Unformatted Schedules<br />
Screen code: SCH<br />
when the return is opened to data entry (provided that option is selected at Setup ><br />
Options > Data Entry tab. See TIP, above.).<br />
You can also access the PAD screen in the following ways:<br />
• By pressing CTRL+SHIFT+N<br />
• By right-clicking anywhere on a screen and selecting Preparer Notepad.<br />
Press PAGE DOWN for additional PAD screens.<br />
The SCH screen, accessible from the Miscellaneous tab and via links from certain<br />
screens, is available for adding statements and explanations not supported elsewhere<br />
in the return. Not all unformatted schedules can be e-filed. Amounts entered on SCH<br />
screens do not flow to any other form or schedule.<br />
For required attachments, select the attachment information (title and statement number)<br />
from the Type of attachment/statement number and title drop list on the SCH<br />
screen. For optional attachments, use the Title and Statement number fields below<br />
the explanation pane and make a selection from the Type of attachment/statement<br />
number and title drop list based on the information in Table 5-25.<br />
Optional<br />
Attachments<br />
If an attachment is optional, select the applicable category from the Type of attachment/statement<br />
number and title drop list. Categories are described in Table 5-25.<br />
Table 5-25: Attachment Types and How They Appear in View mode<br />
Type<br />
X<br />
E<br />
R<br />
Description<br />
Preparer’s EFT note; use for including voluntary information that is<br />
related to the tax return but (unlike a statement) is not required<br />
Explanation for certain IRS code elections where no official IRS<br />
form is designed for that purpose<br />
Explanation for certain regulatory elections where no official IRS<br />
form is designed for that purpose<br />
View/<br />
Print<br />
EF_NOTE<br />
ELECTION<br />
REG_NOTE<br />
(blank) Statement to be added to the return STATMENT<br />
Note that a title is required for each unformatted statement to be attached to the return,<br />
and that each statement should have a unique number. Statement numbers can be a<br />
maximum of three characters. Note that some statements are generated automatically,<br />
with the number already assigned. Verify this by reviewing the calculated return.<br />
The program numbers required statements in the order in which you create them and<br />
provides a reference where applicable on the printed return (Figure 5-66 on page 190).<br />
Tax Year 2012 189
Binary Attachments<br />
<strong>Drake</strong> <strong>Software</strong> User’s <strong>Manual</strong><br />
Return Tracking<br />
Screen codes:<br />
ADMN, ESUM<br />
Figure 5-66: The attached explanation (see item c) is Statement #1.<br />
Even if you have not created a required statement yet, the program prints a reference<br />
to the statement. For example, in Figure 5-66, the “Statement #1” label is triggered by<br />
marking Other for item c of Part III (on screen C)—not by creating the statement on<br />
the SCH screen. View a created statement by clicking the “STATMENT” label in<br />
View mode.<br />
Use the Administrative Tracking (ADMN) and EF Summary (ESUM) screens to<br />
track the progress of each return. The ADMN screen shows, at a glance, who did the<br />
work, who reviewed it, and how much time was spent on the return. It also shows<br />
bank product information. The ESUM screen provides an e-file summary of the<br />
return. You can also review e-filing and bank product information.<br />
Use the ADMN screen to track the data shown in Table 5-26:<br />
Table 5-26: ADMN and ESUM Screen Information<br />
Type of Information<br />
Fee and Payments (ADMN)<br />
First came in, interview (ADMN)<br />
Preparer Contribution (ADMN)<br />
Reviewer Contribution (ADMN)<br />
Approved, Copy/assemble, Client contact, Client<br />
pickup, Date promised. Date completed<br />
(ADMN)<br />
Prior-year bank product data (ADMN)<br />
Data entry stats for the return (admin. users<br />
only) (ADMN)<br />
Description<br />
Amounts are updated from prior year.<br />
Used in timed billing. (optional feature)<br />
Used to track which preparers made contributions<br />
to the return. (preparer entry)<br />
Used to track which preparers reviewed<br />
the return. (preparer entry)<br />
Used to track the various stages of return<br />
completion. (preparer entry)<br />
Dates and amounts are retained from<br />
prior year; fields are completed automatically.<br />
These fields are completed automatically<br />
190 Tax Year 2012
<strong>Drake</strong> <strong>Software</strong> User’s <strong>Manual</strong><br />
Binary Attachments<br />
Table 5-26: ADMN and ESUM Screen Information<br />
Type of Information<br />
EF transmission data (admin. users only)<br />
(ESUM)<br />
Non-traditional return types (admin. users only)<br />
(ESUM)<br />
Current-year bank product data (ADMN)<br />
Bank code (admin. users only) (ADMN)<br />
Description<br />
These fields are completed automatically<br />
These fields are completed automatically<br />
(PA and NY only)<br />
Number and amount of check are completed<br />
automatically; preparer must enter<br />
the date the check is picked up.<br />
This field is completed automatically.<br />
Note that some ADMN screen fields are automatically filled with data from elsewhere,<br />
while other fields require direct entries. Note also that some fields are “adminonly”<br />
and are not visible to users who do not have administrative rights.<br />
NOTE<br />
Some data from these screens can be incorporated into Report Manager<br />
and Client Status Manager (CSM) reports.<br />
ADMN<br />
Screen<br />
Reports<br />
Two reports can now be generated directly from the ADMN screen:<br />
• Return Preparation Data — Consists of data entered by preparers in the Return<br />
Preparation Data section of the ADMN screen<br />
• ADMIN ONLY Return Data — Consists of information generated by the software<br />
and displayed in the ADMIN ONLY side of the ADMN screen. (The<br />
ADMIN ONLY fields can be viewed only by users with administrative rights.)<br />
Sales Tax Worksheet<br />
Screen code:<br />
STAX<br />
To generate a report, go to the ADMN screen and mark the applicable check box:<br />
• The Generate Return Preparation Data Report box is located in the Return<br />
Preparation Data section of the ADMN screen.<br />
• The Generate ADMIN ONLY Return Data Report box in the ADMIN ONLY<br />
section of the ADMN screen.<br />
ADMN screen reports are generated when the return is calculated and appear as<br />
“TRAC” and “TRACADM” with the federal forms in View mode.<br />
The software uses data entered into the State & Local General Sales Tax Deduction<br />
Worksheet (the STAX screen, accessible from the General tab) to determine which<br />
tax is better to take: the state sales tax or the income tax. Lines 1 and 4 of this screen<br />
are calculated by the software, but you can enter overrides as necessary. As applicable,<br />
lines 2, 3, and 7 should be completed in order to calculate the maximum deduction.<br />
Tax Year 2012 191
Binary Attachments<br />
<strong>Drake</strong> <strong>Software</strong> User’s <strong>Manual</strong><br />
More information on the STAX screen is available by clicking F1 in the individual<br />
fields.<br />
NOTE<br />
The STAX screen includes a link to an IRS website where you can find<br />
information and guidance for understanding sales tax deduction, and a<br />
sale tax deduction calculator. From the STAX screen, click Sales Tax<br />
Calculator.<br />
192 Tax Year 2012
6 Return Results<br />
Calculating a Return<br />
This chapter covers calculating, viewing, and printing returns. A return must be calculated<br />
before it can be viewed, printed, or e-filed. Calculate returns as often as needed.<br />
To calculate a return from data entry, click Calculate. By default, results are displayed<br />
in the Calculation Results window. (See Figure 6-2 on page 194.)<br />
To calculate one or more returns from the Home window (without using data entry):<br />
1. Click Calculate. The Batch Calculation dialog box (Figure 6-1) displays the last<br />
nine returns calculated. Each return is indicated by a function (“F”) key.<br />
Figure 6-1: Batch Calculation dialog box<br />
Tax Year 2012 193
Calculation Results<br />
<strong>Drake</strong> <strong>Software</strong> User’s <strong>Manual</strong><br />
Calculation Results<br />
2. Using one of the following methods, indicate the returns to calculate:<br />
• Press the function key of a return to calculate. The return’s identification<br />
number (SSN/EIN) appears in the field to the left of the list.<br />
• Type the SSN/EIN of a return into the top field and press ENTER.<br />
3. Repeat the previous step until all returns are indicated.<br />
4. Click OK. The program calculates the returns.<br />
When you calculate a return from data entry, the Calculation Results window<br />
(Figure 6-2) is displayed by default. You can also choose to display the Calculation<br />
Results window when you View a return or calculate a return outside of data entry<br />
(for instance, from the Calculate button of the Home window of <strong>Drake</strong>.<br />
NOTE<br />
The “pause” option in Setup > Options > Calculation & View/Print<br />
tab, must be selected for the calculation results to be displayed when<br />
you click View or calculate outside of the return. For more information,<br />
see Table 2-6 on page 29.<br />
Calculation Summary<br />
The Summary tab, shown in Figure 6-2, has four main sections: the calculation summary;<br />
EF Messages; Return Notes; and Fee Type and Amount.<br />
Figure 6-2: Calculation Results window<br />
194 Tax Year 2012
<strong>Drake</strong> <strong>Software</strong> User’s <strong>Manual</strong><br />
Calculation Results<br />
The Summary shows total income, taxable income, total tax, refund amount, balance<br />
due, payment method, and e-filing eligibility. If the return is eligible for e-file, a green<br />
check mark is displayed. If a portion of the return is ineligible for e-file, a red X is displayed<br />
and a message appears in EF Messages (Figure 6-3).<br />
Figure 6-3: Return in this example is ineligible for e-file.<br />
EF<br />
Messages<br />
The EF Messages section lists e-file message codes and descriptions by package. EF<br />
messages pinpoint the reason a return is ineligible for e-file. Identified issues must be<br />
corrected for a return to be eligible for e-file.<br />
• Accessing full messages — Some messages do not fit in the Description row. To<br />
view a full message, right-click a row and select View Full Text Of EF Message.<br />
• Accessing message links — If an EF message is blue, double-clicking it opens<br />
the data entry screen that contains the error. If applicable, the field that caused the<br />
EF message is activated.<br />
NOTE<br />
If you double-click an EF message in black text, a window with the full<br />
EF message is displayed. Only messages in blue text link to screens<br />
within the return.<br />
EF messages appear as red MESSAGES in View mode. For more information on<br />
viewing and eliminating EF messages, see “E-filing a Return” on page 229.<br />
Return Notes<br />
Fee Type,<br />
Amount<br />
The Return Notes section (see Figure 6-2 on page 194) displays informational notes<br />
about the return. These notes provide details about the return, but they do not require<br />
that changes be made, and they do not prevent e-filing. They appear as NOTES in<br />
View mode.<br />
The Fee Type and Amount columns (see Figure 6-2 on page 194) list the preparation<br />
fees, and when bank products are present, the bank fees and the net amount of any<br />
refund check (or the total of all fees charged if the return has a balance due). (To have<br />
the fee type and amount displayed here, the Display client fee on Calculation screen<br />
option must be selected from Setup > Options, Calculation & View/Print tab.) Fee<br />
breakdowns appear on the bank product information page in View mode when bank<br />
products are present.<br />
Tax Year 2012 195
Viewing and Printing a Return<br />
<strong>Drake</strong> <strong>Software</strong> User’s <strong>Manual</strong><br />
Calculation Details<br />
The Details tab displays return amounts in an easy-to-read format (Figure 6-4).<br />
Figure 6-4: Calculation Details tab<br />
Click Print (at the bottom of the Details window) to print the details displayed.<br />
Viewing and Printing a Return<br />
View or print a return from either the Home window (without opening a return), or<br />
from within a return. To view or print from the Home window or from the Data<br />
Entry Menu, click View or Print. To view or print a return from a data entry screen,<br />
press CTRL+V (to view) or CTRL+P (to print), or right-click the screen and select<br />
View Return or Print Return. If results are first displayed in Calculation Results,<br />
click Continue to proceed.<br />
To view or print one or more returns from the Home window:<br />
Shortcut: Press<br />
Ctrl+V or Ctrl+P.<br />
1. Click the View or Print icon, or select File > View (or File > Print) from the<br />
menu bar. The Return Selector lists all recently calculated returns available for<br />
viewing or printing.<br />
2. Click the boxes to the left to select one or more returns.<br />
3. Click View (or Print). If the Calculation Results window is displayed at this<br />
point (it depends upon your set options), click Continue.<br />
Returns can be viewed in either Enhanced mode or Basic mode; these modes are<br />
described in detail in the following sections. In Enhanced mode, expand the tree view<br />
as needed and click the name of a form to view it. In Basic mode, view a form by double-clicking<br />
the label in the cascade of forms.<br />
196 Tax Year 2012
<strong>Drake</strong> <strong>Software</strong> User’s <strong>Manual</strong><br />
Viewing and Printing a Return<br />
Viewing a Return (Enhanced Mode)<br />
Enhanced mode, the default view/print mode, consists of five main components:<br />
• A toolbar has icons for performing actions regarding the return. (See item 1 in<br />
Figure 6-5; see also Table 6-1.)<br />
• A viewing tool allows zooming and scrolling. (See item 2 in Figure 6-5.)<br />
• Category tabs group documents within a return; select a tab to view all documents<br />
within a category. (See item 3 in Figure 6-5.)<br />
• A tree view showing all documents in a return can be expanded or collapsed. (See<br />
item 4 in Figure 6-5.)<br />
• A viewing panel displays the selected document. (See item 5 in Figure 6-5.)<br />
Figure 6-5: Enhanced Mode<br />
These five components are described in the following sections.<br />
NOTE<br />
“Basic” mode (the View and Print screens used prior to 2008) is available<br />
for those who prefer it; see Table 6-1.<br />
Toolbar The Enhanced mode toolbar consists of the buttons described in Table 6-1.<br />
Table 6-1: Enhanced mode Toolbar<br />
Button<br />
Description<br />
Leave View mode and return to data entry.<br />
Tax Year 2012 197
Viewing and Printing a Return<br />
<strong>Drake</strong> <strong>Software</strong> User’s <strong>Manual</strong><br />
Table 6-1: Enhanced mode Toolbar<br />
Button<br />
Description<br />
Send selected forms to printer; send selected forms to <strong>Drake</strong> PDF printer<br />
(includes option to password-protect PDF file); e-mail selected forms; “quick<br />
print” only the form open in the viewer.<br />
Set up form properties, color, and order. Access other setup options available in<br />
the program.<br />
Access archiving features, including the Document Manager<br />
E-mail the return to a selected recipient.<br />
Update the viewed return to reflect any changes made by another preparer<br />
working in the open return.<br />
Switch to the cascade view (the exclusive <strong>Drake</strong> view before 2008).<br />
Export parent information into child’s Form 8615 (“Kiddie Tax”); this button is visible<br />
only for Individual (1040) returns with qualifying dependents. (See “Exporting<br />
Data for Kiddie Tax” on page 149.)<br />
Open the K-1 Export tool. This button is visible only for certain business returns.<br />
Access <strong>Drake</strong> online help.<br />
Exit View mode.<br />
Viewing Tool<br />
Use the arrows and zoom icon (Figure 6-6) when viewing in Enhanced mode.<br />
Figure 6-6: Click arrows to move through the return; click zoom icon to zoom in or out.<br />
Category<br />
Tabs<br />
Labeled tabs allow you to view sections of the return according to selected categories.<br />
For example, if you click the EF tab, only the documents directly related to e-filing<br />
are displayed in the tree view.<br />
198 Tax Year 2012
<strong>Drake</strong> <strong>Software</strong> User’s <strong>Manual</strong><br />
Viewing and Printing a Return<br />
Figure 6-7: If the EF tab is selected, only<br />
the EF–specific documents are shown in tree view.<br />
Category tabs and descriptions are provided in Table 6-2.<br />
Table 6-2: Category Tabs and Descriptions<br />
Tab<br />
All Forms<br />
Items Shown in Tree View<br />
Every form generated during production of the return<br />
Sets Forms as distributed into the printer sets selected in Setup > Printing ><br />
Printer Setup<br />
EF<br />
Federal<br />
Worksheets<br />
Miscellaneous<br />
Notes/Messages<br />
State<br />
Gift tax<br />
All forms for e-filing, in addition to any EF messages<br />
All forms for filing the federal tax return<br />
All worksheets produced with the return<br />
Such items as W-2 forms, letters, overflow statements, depreciation<br />
lists, bill summary, direct deposit summary, notes, etc.<br />
Notes and EF messages only<br />
All forms for filing the state tax return<br />
Form 709 documents, if applicable<br />
Tree View<br />
Directory<br />
Viewing<br />
Panel<br />
A tree view directory of all forms, worksheets, and other documents in a return allows<br />
you to view, at a glance, the components of a return. Expand or collapse the tree as<br />
necessary for your viewing needs.<br />
The viewing panel (item #5 in Figure 6-5 on page 197) provides a preview of a<br />
selected document within the return. To preview a document, click the document<br />
name in the tree view.<br />
Printing a Return<br />
You can print selected forms, selected sets of forms, or individual forms in a return.<br />
The instructions in this section refer to Enhanced mode. If you are using Basic mode,<br />
see the F1-Help resource in the program for printing instructions.<br />
TIP<br />
As explained in the procedure that follows, you can opt to open Adobe<br />
when the PDF is created. This option prevents your having to go to the<br />
Document Manager to locate the new PDF for viewing.<br />
Tax Year 2012 199
Viewing and Printing a Return<br />
<strong>Drake</strong> <strong>Software</strong> User’s <strong>Manual</strong><br />
Printing<br />
Forms in a<br />
Return<br />
To print tax return forms and other documents:<br />
1. Open Enhanced mode for a return. The All Forms tab is shown by default.<br />
2. Collapse or expand the tree view as needed, and select the forms to be printed by<br />
marking the check box to the left of each form. (See item #4 in Figure 6-5 on<br />
page 197.) To print all forms in a set, select all of the boxes in the tree view under<br />
All Forms.<br />
NOTE<br />
If the main box of a set is selected, all sub-boxes are automatically<br />
selected.<br />
Shortcut: Press<br />
CTRL+P for the<br />
Print Selection<br />
option.<br />
Printing to<br />
<strong>Drake</strong> PDF<br />
3. Click Print to open the Print Selection dialog box. (If you click the arrow next to<br />
the Print icon, select Print Selected Forms.)<br />
4. (optional) Select any printing options shown in the Print dialog box.<br />
5. Click Print again. All of the selected items are printed using the printer selected<br />
from the Printer dialog box.<br />
To print tax return forms and other documents as PDF documents:<br />
1. Open Enhanced mode for a return. The All Forms tab is shown by default.<br />
2. Select the forms to be printed. To print all forms in a set, select all of the boxes in<br />
the tree view under All Forms.<br />
3. Click the arrow next to the print icon and select Print Selected Forms to PDF<br />
Document. The Print Selection dialog box is displayed with the <strong>Drake</strong> PDF<br />
Printer selected.<br />
Figure 6-8: Print Selection dialog box for <strong>Drake</strong> PDF Printer<br />
4. (optional) The program is set up to password-protect the PDF document. By<br />
default, the software uses the first four letters of the client’s last name and the last<br />
five numbers of the taxpayer’s SSN/EIN as the password. (An administrative user<br />
can change this default in Setup > Options, Administrative Options tab.) To<br />
print the PDF document without having to enter the password, clear the check<br />
mark from the Password Protect box.<br />
200 Tax Year 2012
<strong>Drake</strong> <strong>Software</strong> User’s <strong>Manual</strong><br />
Viewing and Printing a Return<br />
5. (optional) To have the program open Adobe once the PDF document is created,<br />
click Settings and mark Launch Adobe after creating a ‘<strong>Drake</strong> PDF.’<br />
6. Select any other options, as desired, from the Print Selection dialog box.<br />
NOTES<br />
Among the options in the Print dialog box is the DDM/Portal Options<br />
for sending a PDF copy of the printed forms to the SecureFilePro TM portal.<br />
For more, see Chapter 13, “Suite Products.”<br />
If you are using a PDF printer besides the <strong>Drake</strong> PDF Printer, you also<br />
will have the option storing the PDF document in the Document Manager.<br />
7. Click Print to open the Save As dialog box.<br />
8. If necessary, assign a filename and select a location for the document (the default<br />
location is the current-year folder in the Document Manager).<br />
9. Click Save.<br />
If you password-protected the PDF document, the password will be required for anyone,<br />
inside or outside of <strong>Drake</strong>, who tries to open the file.<br />
Printing<br />
Printer Sets<br />
Default printer sets are established in Printer Setup (see “Printing Sets” on page 51)<br />
but you can override the defaults from Enhanced mode.<br />
To print specific sets of a return from Enhanced mode:<br />
1. Select the Sets tab. All sets in the return are shown in the tree view (Figure 6-9).<br />
Figure 6-9: Example of a return that has five printer sets<br />
2. Select the sets to print.<br />
3. Click Print to open the Print Sets dialog box. (If you click the arrow next to the<br />
Print icon, select Print Selected Forms.)<br />
4. (optional) Select any printing options shown in the Print Sets dialog box.<br />
5. To change the number of forms to be printed, click Sets Setup to open the Copies<br />
Per Set dialog box. (A change here changes the number globally (for all returns).<br />
For more information see “Printing Sets” on page 51.) Click Save.<br />
6. Click Print again. All of the selected items are printed.<br />
Quick-<br />
Printing a<br />
Single Form<br />
Enhanced mode allows you to print the document currently in view. Printing a single<br />
form in this manner is referred to as quick printing.<br />
To quick-print a single form from Enhanced mode:<br />
1. Click a form or document name to display it in the viewer pane. In the example in<br />
Figure 6-10 on page 202, the 1040 form is selected for viewing.<br />
Tax Year 2012 201
E-Mailing from View/Print<br />
<strong>Drake</strong> <strong>Software</strong> User’s <strong>Manual</strong><br />
Figure 6-10: Click the form to view.<br />
Shortcut: Click<br />
CTRL+Q to print<br />
the form in view.<br />
2. Click the arrow next to the Print icon, and then click the Quick Print selection<br />
(or press CTRL+Q).<br />
Figure 6-11: Click the arrow next to the Print icon to see print options.<br />
3. (optional) Select any printing options shown in the Print Selection dialog box.<br />
4. Click Print again.<br />
E-Mailing from View/Print<br />
Setting Up Preferences<br />
You can e-mail tax returns directly from both Basic and Enhanced modes. Before e-<br />
mailing returns this way, set up View/Print e-mail preferences.<br />
Use E-mail Setup in View/Print to indicate the e-mail method you want to use and<br />
specify default settings.<br />
IMPORTANT<br />
Even though you must open a specific return to indicate your settings,<br />
those settings will apply for all e-mailed returns.<br />
The steps below are optional; you may not need to make any changes if you are happy<br />
with the program defaults. To set up your e-mail program for sending returns:<br />
1. Go to View mode of any return.<br />
202 Tax Year 2012
<strong>Drake</strong> <strong>Software</strong> User’s <strong>Manual</strong><br />
E-Mailing from View/Print<br />
2. Click the arrow on the Email button and select Email Setup.<br />
3. In the Email Setup dialog box, select your preferred e-mail program (the e-mail<br />
program you normally use or the <strong>Drake</strong> program) from the Select Email Method<br />
drop list. (This default will be applied whenever you click the Email button, not<br />
when you click the arrow next to the Email button.)<br />
4. To include a default Cc or Bcc address (one to which all e-mailed returns will be<br />
sent), type the address in the applicable field under Email Default Settings. If<br />
entering multiple addresses, use a semicolon (;) as a separator between addresses.<br />
CAUTION<br />
It is not recommended that you enter a default To address. If an<br />
address is entered in the To field, every return e-mailed through View<br />
mode will be sent to that address.<br />
5. Make any changes to the default message.<br />
6. Click Save.<br />
Your default settings will be applied for all e-mailed returns.<br />
Sending a Return to a Client<br />
To send a return to a client from Enhanced mode:<br />
1. Open the return.<br />
2. Click View or Print to access View mode.<br />
3. Select the forms to be included in the e-mail. (In Enhanced mode, select forms<br />
from the Forms tree; in Basic Print mode, click a form and choose Select Form<br />
from the right-click menu.)<br />
4. Click Email to use the default e-mail method, or click the arrow next to the Email<br />
button to choose a method. The Password Protect dialog box is opened, showing<br />
the password (Figure 6-12); see “About Passwords” on page 204, for more information<br />
on passwords.<br />
Figure 6-12: Password Protect PDF Attachment dialog box<br />
5. Click OK. The e-mail message is opened in the desired e-mail program, with the<br />
selected return documents attached. The client and spouse e-mail addresses are<br />
automatically shown in the To field if the addresses were entered on screen 1.<br />
(Any address you added in Email > Setup will also be in the To field; see “Setting<br />
Up Preferences” on page 202).<br />
Tax Year 2012 203
E-Mailing from View/Print<br />
<strong>Drake</strong> <strong>Software</strong> User’s <strong>Manual</strong><br />
6. If no further changes to the message are needed, click Send.<br />
About<br />
Passwords<br />
A client must know his or her return’s password in order to open the return.<br />
The default format for passwords is the first four letters of the client’s last name (or<br />
the first four letters of the entity’s name) followed by the last five numbers of the SSN<br />
for individual returns or the last five numbers of the EIN for entity returns. (See<br />
Figure 6-12 on page 203 for an example.) An administrative user can change the password<br />
format at Setup > Options, Administrative Options tab.)<br />
<strong>Drake</strong> cannot recover a lost password. If you opt to replace a password with a new<br />
one in the Password Protect dialog box, be sure to write down the new password and<br />
keep it in a secure location in case you forget it.<br />
Sending Client Files to <strong>Drake</strong> Support<br />
When you send an e-mail to <strong>Drake</strong> Support from View mode, the program automatically<br />
sends both the print file and the data file. (These files allow the Customer Support<br />
Representative to open the return in data entry.) When working in Enhanced<br />
mode, you have the option of including PDF attachments with the e-mail.<br />
To send files to <strong>Drake</strong> Support from Enhanced mode:<br />
1. Go to View mode of the return.<br />
2. (optional) Select any forms to be included as PDF documents in the e-mail.<br />
3. Click the arrow on the Email button and select Email to <strong>Drake</strong> Support. If you<br />
selected any forms in Step 2, the Password Protect dialog box is opened; click<br />
OK if not changing the password. The Compose Message window is opened,<br />
showing the attached files in the Attachments list (Figure 6-13).<br />
Figure 6-13: Attachments shown in Attachments list of the Compose Message dialog box.<br />
4. Click the To button (shown in Figure 6-13) and double-click an e-mail address<br />
from the <strong>Drake</strong> <strong>Software</strong> Support Address Book. Click OK.<br />
5. Click Send.<br />
NOTE<br />
You have the option of attaching additional files. See “Attaching Files”<br />
on page 277.<br />
204 Tax Year 2012
<strong>Drake</strong> <strong>Software</strong> User’s <strong>Manual</strong><br />
Setting Up View/Print Options<br />
IMPORTANT<br />
If you changed the password for e-mailing a PDF document,<br />
<strong>Drake</strong> Support will need that password in order to open the file.<br />
Setting Up View/Print Options<br />
Setting Form Properties<br />
Setting Form Colors<br />
In addition to setting up options for form properties, colors, and printing order, you<br />
can access other utilities within <strong>Drake</strong> using the Setup feature.<br />
The Form Properties setup function allows you to change the form description, pricing<br />
information, and numbers of copies to print for a form within a return. To access<br />
this feature in Enhanced mode, select a document and click Setup > Form Properties.<br />
Colors can be customized in both Basic and Enhanced modes.<br />
Enhanced<br />
Mode<br />
The Form Color, Background Color, and Text (Data) Color can each be changed in<br />
Enhanced mode. <strong>Drake</strong> default colors for these three items, as shown in Figure 6-14,<br />
are black, white, and red, respectively.<br />
Figure 6-14: Customizable colors in Enhanced mode<br />
To change colors in Enhanced mode, select Setup > Form Colors. In the View Mode<br />
Color Selection dialog box, click a color. After selecting a basic or custom color from<br />
the color palette, click OK. To revert to the <strong>Drake</strong> default colors, click Reset in the<br />
View Mode Color Selection dialog box.<br />
Basic Mode<br />
Because Basic mode uses the multicolor cascade of forms, it offers more opportunity<br />
for color configuration on the screen. In addition to changing the form, background,<br />
and text (data) colors, you can customize the following items in Basic mode:<br />
• View Mode (View mode only)<br />
• Print Mode (Print mode only)<br />
• EF message page<br />
• Notes page<br />
Tax Year 2012 205
Setting Up View/Print Options<br />
<strong>Drake</strong> <strong>Software</strong> User’s <strong>Manual</strong><br />
To change the colors shown in the cascade of forms in Basic mode:<br />
1. Select Setup > Color Configuration. The View/Print Mode Color Configuration<br />
dialog box displays the default colors for Basic mode.<br />
2. Click a color box and select a new color from the Color palette. You can also<br />
click Define Custom Colors to create any desired color.<br />
3. Click OK. The corresponding color box changes to the color you selected.<br />
To restore the default color palette, click Restore Colors.<br />
NOTE<br />
If the form, background, or text (data) colors are changed in one mode,<br />
the changes apply in both Enhanced and Basic modes.<br />
Setting Form Order<br />
To change the order in which the documents of a return are printed:<br />
1. In Enhanced mode, elect Setup > Form Order to open the Sort Form Order dialog<br />
box (Figure 6-15).<br />
Figure 6-15: Sort Form Order dialog box<br />
2. Select a printing set. (Default is Normal.)<br />
3. Click and drag the form names to put them in the desired order. The document at<br />
the top of the list, if it has been generated with the return, will be printed first.<br />
4. Click Save.<br />
To restore the default settings, click Reset in the Sort Form Order dialog box.<br />
Setting Up Drag/Drop Ordering<br />
Drag-and-drop ordering is available in Enhanced mode. This feature allows you to<br />
“drag” a form in the directory tree to another area of the tree and “drop” it into the new<br />
location. To “drag” a form, press and hold the mouse button on the form to be moved,<br />
206 Tax Year 2012
<strong>Drake</strong> <strong>Software</strong> User’s <strong>Manual</strong><br />
Archive Manager<br />
Other Setup Options<br />
Archive Manager<br />
Creating an Archive<br />
and then move the form up or down the tree. To “drop” the form into the new location,<br />
release the mouse button. To activate drag-and-drop ordering while in Enhanced<br />
mode, select Setup > Allow Drag/Drop Ordering.<br />
The following programs and setup options are also available in both Basic and<br />
Enhanced modes:<br />
• Pricing setup (See “Pricing Setup” on page 37.)<br />
• Printing setup (See “Printing Setup” on page 47.)<br />
• Printing sets setup (See “Printing Setup” on page 47.<br />
Use the Archive Manager to archive returns and to review, restore, or delete the<br />
archived returns. This means you can save various versions of a return, such as the<br />
amended return and the original return prior to amending. The Archive Manager is<br />
accessible from both Basic and Enhanced modes.<br />
To create an archive of an open return:<br />
1. From View mode, select Archive > Archive Client Return (or select Archive ><br />
Archive Manager and click the Archive icon in the Archive Manager toolbar).<br />
2. In the Archive Client Return dialog box, enter a description of the archived file<br />
(Figure 6-16), and click OK.<br />
Figure 6-16: Archive Client Return dialog box<br />
3. After the program has created the archive, click OK again. The program adds the<br />
archived return to the Archive Manager list.<br />
NOTE<br />
The archived return is also saved to the client’s file in <strong>Drake</strong> and to the<br />
client’s Document Manager. Reach the Document Manager from View<br />
mode by going to Archive > Document Manager.<br />
Tax Year 2012 207
Archive Manager<br />
<strong>Drake</strong> <strong>Software</strong> User’s <strong>Manual</strong><br />
Restoring an Archived Return<br />
When you restore an archive, you replace the open version of a return with an<br />
archived version. <strong>Drake</strong> recommends that you preserve the existing client data before<br />
restoring an older version of a return. A built-in prompt will suggest that you archive<br />
the latest version of a return before restoring an older version.<br />
To restore an archive:<br />
1. From View mode of the return, select Archive > Archive Manager.<br />
2. Click the row of the archive to restore.<br />
3. Click Restore. A program prompt suggests that you create a new archive of the<br />
current version of the return before restoring the older version.<br />
• To create a new archive, click Yes. The Archive Client Return dialog box is<br />
opened so you can name and save the new archive.<br />
• To proceed without creating a new archive, click No. A final warning is displayed;<br />
click OK to proceed.<br />
4. When the archive has been created, click OK.<br />
Deleting an Return from the Archive Manager<br />
To delete an archive of a return from the Archive Manager:<br />
1. From View mode of the return, select Archive > Archive Manager.<br />
2. Click the row of the archive to delete.<br />
3. Click Delete. You are prompted to confirm the deletion.<br />
4. Click Yes to delete the file from the archive.<br />
Once deleted, the previously archived file cannot be recovered.<br />
208 Tax Year 2012
7 Banking<br />
For tax year 2012, <strong>Drake</strong> is working in conjunction with the banks listed in Table 7-1<br />
to provide taxpayers access to bank products.<br />
Table 7-1: <strong>Drake</strong> Banking Partners<br />
Bank Phone Website<br />
Advent Financial (866) 655-2340 http://adventtax.com<br />
EPS Financial (877) 801-4411 http://epsfinancial.net<br />
Republic Bank & Trust (866) 491-1040 http://republicrefund.com<br />
River City Bank (888) 820-7848 http://rcbral.com<br />
Tax Products Group (800) 779-7228 http://cisc.sbtpg.com<br />
This chapter covers requirements for you and your clients, processes for setting up<br />
your software for offering various banking options, and data entry for these products.<br />
It also explains what these products are and provides valuable information you will<br />
want to review in addition to the information already provided by <strong>Drake</strong> and your<br />
banking partner.<br />
Tax Preparer Requirements<br />
IRS Regulation 7216 provides guidance to tax preparers regarding the use and disclosure<br />
of their clients’ tax information to parties outside of the tax preparer’s firm. The<br />
Consent to Use of Tax Information must be signed and dated by the taxpayer (and<br />
spouse, if married filing jointly) before the return is prepared. The Consent to Disclosure<br />
of Tax Information must be signed and dated by the taxpayers before the return is<br />
e-filed and the information submitted to a third party.<br />
Tax Year 2012 209
Tax Preparer Requirements<br />
<strong>Drake</strong> <strong>Software</strong> User’s <strong>Manual</strong><br />
<strong>Drake</strong> offers several options for making these forms available to your clients, including<br />
printing forms in batches and having clients provide their signatures electronically.<br />
These methods are described in the following sections.<br />
Consent to Use of Tax Return Information<br />
The Consent to Use of Tax Return Information explains the IRS Regulation 7216<br />
requirement to the taxpayer. It must be signed before the return is prepared.<br />
• Paper Forms — To generate paper forms, log in to the <strong>Drake</strong> Support site (Support.<strong>Drake</strong><strong>Software</strong>.com),<br />
and from the blue sidebar menu, go to Resources ><br />
7216 Sample Letters. Click to open the generic Consent to Use of Tax Return<br />
Information or any of the bank consent forms, in English or Spanish. Print or<br />
save to your computer desktop. Be sure to enter your firm’s name at the top of the<br />
page. Clients must sign and date this form manually. Forms are also available in<br />
the software at Tools > Blank Forms.<br />
Screen code: USE • Electronic Signatures — To obtain electronic consent, the taxpayer (and spouse,<br />
if married filing jointly) must enter their names and the date onto the USE screen.<br />
(See Figure 7-1.)<br />
Figure 7-1: Names and the date as entered by clients on the USE screen<br />
Once the appropriate fields on the applicable screen are completed, the Consent to<br />
Use of Tax Return Information will be generated with the return.<br />
Consent to Disclosure of Tax Return Information<br />
The Consent to Disclosure of Tax Return Information contains banking-option information<br />
and explains the IRS Regulation 7216 requirement to the taxpayer. It must be<br />
signed before the return is e-filed.<br />
• Paper Forms — Paper forms can be accessed by several means:<br />
– The software generates the disclosure form as part of the return. The wording<br />
of the form reflects the banking option your firm has selected. This form can<br />
be signed with other signature documents prior to e-filing.<br />
– Log in to the <strong>Drake</strong> Support site (Support.<strong>Drake</strong><strong>Software</strong>.com), and from the<br />
blue menu bar, go to Resources > 7216 Sample Letters. Click to open the<br />
generic Consent to Disclosure of Tax Return Information or any of the<br />
bank consent forms, in English or Spanish. Print or save to your computer<br />
desktop. Be sure to choose the correct form for your firm’s selected bank.<br />
Enter your firm’s name at the top of the form before printing it.<br />
210 Tax Year 2012
<strong>Drake</strong> <strong>Software</strong> User’s <strong>Manual</strong><br />
Tax Preparer Requirements<br />
Screen code:<br />
DISC<br />
– Consent to Disclose forms are also available in the software at Tools > Blank<br />
Forms.<br />
• Electronic Signatures — To obtain electronic consent, the taxpayer (and spouse,<br />
if married filing jointly) must enter his or her name and the date onto the DISC<br />
screen in <strong>Drake</strong>. Once the required fields on the applicable screen are completed,<br />
the Consent to Disclosure of Tax Return Information will be generated with the<br />
return.<br />
NOTE<br />
If using ABCvoice, go to the ABCV screen in data entry to indicate<br />
whether the taxpayer has signed the Consent to Disclosure of Tax<br />
Return Information.<br />
Consent to Disclosure: Franchises/Networks<br />
The Consent to Disclosure of Tax Return Information to franchises or networks (formerly,<br />
service bureaus) is required for all returns (not just bank-product returns) prepared<br />
by firms that are part of a franchise or network. The form is similar to the<br />
disclosure form for banks described previously and must be signed before the return is<br />
e-filed.<br />
• Paper Forms — Log in to the <strong>Drake</strong> Support site (Support.<strong>Drake</strong><strong>Software</strong>.com),<br />
and from the blue menu bar, go to Resources > 7216 Sample Letters. Click Consent<br />
to Use of Tax Return Information in English or Spanish. Enter the firm and<br />
franchise or network name or print the documents and enter the names manually.<br />
The taxpayer (and spouse, if applicable) must sign and date the form prior to e-filing.<br />
Next, in the software, go to screen CONS (accessible from the Miscellaneous tab)<br />
and select the first box in the Paper Consent section (Figure 7-2).<br />
Figure 7-2: Check boxes on CONS screen for disclosure to franchise/networks<br />
Screen code:<br />
CONS<br />
• Electronic Signatures — To obtain electronic consent, the taxpayer (and spouse,<br />
if married filing jointly) must enter their names and the date onto the CONS<br />
Tax Year 2012 211
Taxpayer Requirements<br />
<strong>Drake</strong> <strong>Software</strong> User’s <strong>Manual</strong><br />
screen. The Consent to Disclosure of Tax Return Information is generated with the<br />
return and includes the name of the franchise or network from Setup > ERO.<br />
IMPORTANT<br />
If your firm uses a franchise or network, the CONS screen must<br />
be used—even if the client refuses to sign the form. If the client<br />
declines to give consent, select the second box in the Paper Consent<br />
section of the CONS screen. (See Figure 7-2 on page 211.)<br />
A franchise or network EFIN must be entered in Setup > ERO in<br />
order to produce the correct letter from the CONS screen and<br />
ensure that consent can be obtained for every return. See “ERO<br />
Setup” on page 21.<br />
Taxpayer Requirements<br />
Application Forms<br />
For a taxpayer to be eligible for one of the banking options offered, the return must be<br />
eligible for e-file. In most cases, the taxpayer must be 18 or older. If married filing<br />
jointly, both taxpayers must be 18 or older. Check with your banking partner for statespecific<br />
age requirements.<br />
Both preparer and client must complete all parts of the appropriate application form.<br />
Form names vary by bank. If a bank is selected in Setup > Firm(s) and a bank product<br />
is indicated in the return’s bank screen, the appropriate application is included in the<br />
forms produced with the return.<br />
Blank application forms for Advent, EPS, River City, and Tax Products Group are<br />
available at Tools > Blank Forms. (Select the Federal tab, and then choose the<br />
desired bank application.) Note that applications are multiple pages, as shown in<br />
Table 7-2.<br />
Table 7-2: Application Forms for Banking Options Available in <strong>Drake</strong><br />
Bank<br />
Application Form<br />
Advent<br />
EPS<br />
River City<br />
Tax Products Group<br />
AD_APPL.PG through AD_APPL.PG4 (6 pages)<br />
EPS_APP.PG through EPS_APP.PG8 (8 pages)<br />
RCB_APPL.PG through RCB_APPL.PG5 (1 page)<br />
TPG_APPL.PG through TPG_APPL.PG5 (6 pages)<br />
Banks typically have specific minimum and maximum refund requirements. For more<br />
information, consult the bank application.<br />
NOTE<br />
Do not confuse the applications listed above with the bank application<br />
that an ERO must fill out online for <strong>Drake</strong>. For more on the <strong>Drake</strong> bank<br />
application, see “Preparing to Offer Bank Products” on page 216.<br />
212 Tax Year 2012
<strong>Drake</strong> <strong>Software</strong> User’s <strong>Manual</strong><br />
Franchise/Network Requirements<br />
Franchise/Network Requirements<br />
Bank Products<br />
If your firm collects tax returns for e-filing from outside companies or individuals, it<br />
might be considered part of franchise or network (formerly, a service bureau). Franchises<br />
and networks can be required to provide additional information when applying<br />
for banking services.<br />
A preparer or firm can be considered a franchise or network if:<br />
• The preparer accepts returns from other businesses that the preparer does not own<br />
• A preparer issues Form 1099 for contract labor at other locations<br />
• A preparer contracts with another to provide e-filing and banking options<br />
• A preparer issues W-2s to a non-employee who performs functions as a preparer<br />
Your firm is not a franchise or network if it issues W-2s to employees who are under<br />
direct control of the firm and collect returns at the other locations.<br />
Bank products allow taxpayers a way to pay their preparation fees from their refund<br />
rather than having to pay their fees up front. They also give taxpayers without bank<br />
accounts an alternate way to receive their refund proceeds.<br />
To provide any bank product, the bank sets up a temporary account for direct deposit<br />
of the taxpayer’s refund. Once the IRS deposits the refund into the temporary account,<br />
the bank deducts applicable fees and issues the remaining funds to the taxpayer.<br />
NOTES<br />
The taxpayer must understand that a bank product is not a loan. The<br />
disbursement reflects the actual deposited refund amount, with the<br />
bank, transmitter, and preparer fees deducted.<br />
Banks provide certain products for state refunds. Check with your bank<br />
for a list of eligible states.<br />
Distribution Methods<br />
Bank Product Costs<br />
Bank products include refund checks printed in your office, refunds directly deposited<br />
in your clients’ bank account, and refund deposited onto prepaid debit cards. All of<br />
<strong>Drake</strong>’s banking partners offer variations of these products. Show your client all bank<br />
documents, explain all costs, and check client ID to verify identity before offering<br />
banking services.<br />
Fees are charged for each method of bank product disbursement. Notify your client<br />
that the following fees can be subtracted from the refund amount:<br />
• Tax preparation fees<br />
• Additional fees (formerly “Add-on transmission fees”)<br />
• Bank fees<br />
Tax Year 2012 213
E1 Visa ® Prepaid Card Program<br />
<strong>Drake</strong> <strong>Software</strong> User’s <strong>Manual</strong><br />
• <strong>Software</strong> fee<br />
• Franchise/network fee<br />
For specific details regarding each bank product, go to the <strong>Drake</strong> Support site<br />
(Support.<strong>Drake</strong><strong>Software</strong>.com) and select Partner Programs > Bank Partners.<br />
NOTE<br />
A bank-product option cannot be added once the IRS has acknowledged<br />
the return.<br />
Direct Deposit<br />
Most bank products include a direct-deposit option. If a taxpayer has a checking or<br />
savings account, funds can be deposited directly into the taxpayer’s account, bypassing<br />
a trip back to the tax office to pick up a paper check.<br />
Cashier’s Check<br />
The most frequently used method of bank-product delivery is a cashier’s check printed<br />
in the tax preparer’s office. (See “Printing Checks for Bank Products” on page 222.)<br />
Debit Card<br />
<strong>Drake</strong>’s bank partners provide the option of delivering bank products via debit card.<br />
These are listed on Table 7-3:<br />
Table 7-3: Bank Partners’ Debit Cards<br />
Bank<br />
Card Name<br />
Advent Get It! Prepaid MasterCard ®<br />
EPS Financial<br />
E1 Visa ® Prepaid Card<br />
Republic Money Clip Prepaid Visa ®<br />
River City<br />
Futura Refund Access Card<br />
Tax Product Group Diamond Plus Prepaid Visa ®<br />
The steps to select a debit card for your clients are similar on most bank screens in<br />
<strong>Drake</strong>, but the ECOL screen, used to sign up for the E1 Visa ® Prepaid Card (“E1<br />
Card”), also contains an E1 activation procedure. The E1 Card is described in the following<br />
section.<br />
E1 Visa ® Prepaid Card Program<br />
If you’re offering the E1 Card, you provide your client with the card at the time of tax<br />
preparation. Once funds have been released, your client can receive notification by <br />
e-mail or text message. The refund amount must be larger than the sum of the preparer<br />
214 Tax Year 2012
<strong>Drake</strong> <strong>Software</strong> User’s <strong>Manual</strong><br />
E1 Visa ® Prepaid Card Program<br />
fees, franchise/network fees, and any <strong>Drake</strong> fees. A minimum first-time load amount<br />
of $10 applies.<br />
This card can be used year-round, and clients can reload it at any time using one of the<br />
following methods:<br />
• By direct deposit of their payroll<br />
• By direct deposit of government benefits<br />
• Through an approved E1 Card reload network partner<br />
As with e-Collect, the E1 Card is available to certain taxpayers who are 18 or older.<br />
For more information on qualifying for the E1 Card, visit epsfinancial.net. Information<br />
on entering the required information for the E1 Card is provided in “The ECOL<br />
Screen,” following.<br />
IMPORTANT<br />
The E1 Visa ® Prepaid Card is issued by The Bancorp Bank pursuant to a license<br />
from U.S.A. Inc. It can be used wherever debit cards are accepted. The Bancorp<br />
Bank; Member FDIC.<br />
Obtaining Your Card: The USA PATRIOT Act is a federal law that requires all<br />
financial institutions to obtain, verify, and record information that identifies each<br />
person who opens a Card Account. What this means for you: When you open a<br />
Card Account, we will ask for your name, address, date of birth, and other information<br />
that will allow us to reasonably identify you. We may also ask to see your<br />
driver's license or other identifying documents at any time.<br />
The ECOL Screen<br />
Use the ECOL screen to apply for the E1 Visa ® Prepaid Card or any of the e-Collect<br />
bank products.<br />
7216<br />
Signature<br />
Security<br />
Information<br />
Deposit<br />
Notification<br />
All 7216 forms must be signed by the taxpayer (and spouse, if applicable) before<br />
applying for the E1 Card or any e-Collect bank product. If the paper option has been<br />
used to obtain the taxpayer signatures, mark the box provided on the ECOL screen.<br />
To have the required forms signed electronically, click the links provided on the<br />
screen.<br />
The Security Information section of this screen contains questions intended for the<br />
preparer’s clients to answer. The taxpayer will have to able to answer these same questions<br />
if he or she wants to log in to the EPS Financial website (espfinancial.net) and<br />
set up an online account.<br />
The purpose of the Step 5: Disbursement Method section is to establish how your<br />
client should be notified when funds have been loaded onto the E1 Card. From the<br />
first drop list of this section, select the notification method for contacting the taxpayer.<br />
If you select SMS (text messaging), you’ll also need to select the cell phone carrier<br />
from the Cell phone carrier drop list. (Be aware that charge may apply when using<br />
Tax Year 2012 215
Preparing to Offer Bank Products<br />
<strong>Drake</strong> <strong>Software</strong> User’s <strong>Manual</strong><br />
the SMS method.) The program uses the e-mail address and cell phone number provided<br />
on screen 1.<br />
IMPORTANT<br />
An entry for e-mail or cell phone is necessary for a client to be<br />
notified when funds are loaded. If no e-mail address or cell phone<br />
number can be found, the taxpayer will not be notified automatically<br />
when funds are loaded.<br />
E1 Payment<br />
Reference<br />
Number<br />
(PRN)<br />
As Step 5 of the process, enter the 12-digit PRN as shown in the window of the E1<br />
Card envelope. Re-enter it for verification purposes.<br />
Apply for E1 Card<br />
As the final step in the E1 Card application process, click the Activate Card button.<br />
The data retrieved allows <strong>Drake</strong> to know whether the card has been approved.<br />
If the application is declined or rejected, an explanation is displayed in the text box at<br />
the bottom of the ECOL screen. After reviewing the explanation, make any required<br />
modifications to the application and click Activate Card again to reapply.<br />
e-Collect<br />
Options<br />
If you’re using EPS Financial as your bank and the taxpayer opts for a check or direct<br />
deposit (not the EI Card), take these steps to get approval from EPS:<br />
1. Open the ECOL screen.<br />
2. In Step 5, select either Check or Direct Deposit.<br />
3. Enter the taxpayer’s banking information. Note that the RTN, Account number,<br />
and Type of account must be entered twice for verification<br />
Preparing to Offer Bank Products<br />
Banking Application<br />
To offer bank products, you must set up your system with both <strong>Drake</strong> and the bank of<br />
your choice. Your firm must also submit an online bank application through <strong>Drake</strong><br />
each year. This application is separate from the application discussed in “Application<br />
Forms” on page 212.<br />
To offer a banking option through <strong>Drake</strong>, you must submit a banking application<br />
annually. <strong>Drake</strong> transmits the application to your selected bank for review. Bank information<br />
is managed using the Enterprise Office Manager (EOM).<br />
IMPORTANT<br />
Multi-offices must sign in with the Master EFIN and complete the<br />
required settings before the sub-offices can log in and access the<br />
EOM information.<br />
216 Tax Year 2012
<strong>Drake</strong> <strong>Software</strong> User’s <strong>Manual</strong><br />
Preparing to Offer Bank Products<br />
TIP<br />
Click Help on the EOM website to view the EOM tutorial or download<br />
the EOM manual. These resources provide information on managing<br />
your accounts, applications, sub-offices, fee overrides, and other<br />
options available through the EOM.<br />
Applying for<br />
a Bank<br />
In the procedure that follows, note that completing bank applications for single-office<br />
sites is slightly different from the procedure for multi-office sites.<br />
To access and complete a banking application:<br />
1. Access the EOM website in one of two ways:<br />
• On the <strong>Drake</strong> Support website (Support.<strong>Drake</strong><strong>Software</strong>.com), select My<br />
Account > Bank Application.<br />
• Go directly to the EOM website (eom.1040.com).<br />
2. Enter your EFIN and <strong>Drake</strong> password and click Sign In.<br />
NOTE<br />
If you are a single-office site and this is your first visit, select Account<br />
Information from the menu, complete the Company Information<br />
fields, and click Save before proceeding. It’s a good idea to review this<br />
information each time you log in to the EOM.<br />
3. (multi-office sites only) Follow the instructions on the “Recommended First<br />
Steps” page that is displayed, clicking one of the gray boxes to complete each<br />
step. When finished, mark the I’ve completed all relevant steps check box and<br />
click Continue. (This page is not displayed for single-office sites.)<br />
4. Select Bank Application from the menu of the EOM home page. A Bank Application<br />
drop list appears.<br />
5. Select a bank from the drop list. The application for that bank is displayed.<br />
6. Complete the application. (If you’re unable to complete the application in a single<br />
sitting, or if you want to come back and review the application later before submitting<br />
it, you can click Save and Finish Later.)<br />
7. Click Submit Completed Application. Once you have submitted the application,<br />
<strong>Drake</strong> forwards it to the appropriate bank.<br />
NOTES<br />
To import your banking information directly from your <strong>Drake</strong> bank application,<br />
see “Firm Setup” on page 12.<br />
If offering e-Collect or the E1 Card program, go to epsfinancial.net to<br />
access and download additional information. Program participants must<br />
complete compliance training through the EPS website.<br />
Republic Bank also requires compliance training through its website<br />
(republicrefund.com).<br />
Checking<br />
Application<br />
Status<br />
To check the status of your application, log in to the EOM website and select Bank<br />
Application from the menu. The Application Status appears in the box at the top of<br />
the page.<br />
CAUTION<br />
Making changes to an application and resubmitting it can change its<br />
status.<br />
Tax Year 2012 217
Preparing to Offer Bank Products<br />
<strong>Drake</strong> <strong>Software</strong> User’s <strong>Manual</strong><br />
Banking Options<br />
Application statuses are listed below.<br />
• A = Accepted<br />
• B = Accepted, post-acceptance changes rejected<br />
• C = Accepted, post-acceptance changes pending<br />
• D = Declined (Call the selected bank to resolve any issues.)<br />
• E = Accepted, awaiting bank account information<br />
• G = Approved pending state registration<br />
• I = Incomplete<br />
• N = Needs compliance training<br />
• P = Pending<br />
• R = Rejected (available for correction and resubmission)<br />
• S = Suspended; contact the bank<br />
• W = Withdrawn<br />
Most status updates are available within hours of submitting the application. Once<br />
your application has been approved, contact the bank to order check stock and complete<br />
any additional agreements.<br />
Once you have chosen your banking solution, activate your selection in <strong>Drake</strong> data<br />
entry so the correct screens are accessible from the General tab.<br />
Setting Up<br />
Banking<br />
Options<br />
1. From the Home window, select Setup > Firm(s).<br />
2. Double-click the firm (or select a row and click Edit Firm).<br />
3. Under Banking Information, select your chosen banking option and enter additional<br />
information as necessary. Options are described in Table 7-4.Click Save.<br />
Table 7-4: Options under Banking Information in Setup > Firm(s)<br />
Item in Setup<br />
Retrieve banking information<br />
Additional Fee (Add-on)<br />
Add-On Fee Recipient<br />
Description<br />
Import banking information from your completed bank<br />
application in the EOM into Firm Setup.<br />
These fees are deducted from the taxpayer’s refund<br />
and held for you by <strong>Drake</strong> in a separate bank<br />
account. The balance of this account will be distributed<br />
directly back to you on a monthly basis during<br />
tax season, and in mid-November for after-season<br />
balances.<br />
Use this field to have a name other than your firm’s<br />
name printed on the Bank Information Sheet line<br />
labeled “Additional Fee withheld on behalf of”<br />
218 Tax Year 2012
<strong>Drake</strong> <strong>Software</strong> User’s <strong>Manual</strong><br />
Preparing to Offer Bank Products<br />
Table 7-4: Options under Banking Information in Setup > Firm(s)<br />
Item in Setup<br />
Waive add-on fee (e-Collect only)<br />
e-Collect Basic (e-Collect only)<br />
e-Collect Basic Plus (e-Collect<br />
only)<br />
e-Collect Deluxe (e-Collect only)<br />
e-Collect Elite (e-Collect only)<br />
Description<br />
Mark this box to waive the add-on fees for customers<br />
choosing the E1 card as their disbursement method.<br />
For information on waving fees in restricted states, go<br />
to Setup > Options > Administrative Options tab<br />
and click Program Help.<br />
Mark this box if offering direct deposit disbursement<br />
only)<br />
Mark this box if offering E1 card and direct deposit<br />
disbursements<br />
Mark this box if offering paper check and direct<br />
deposit disbursements<br />
Mark this box if offering the E1 Card, paper check,<br />
and direct deposit disbursements<br />
NOTE<br />
Check with your bank for limitations on fees before setting up a new<br />
firm. Once an amount is set and a bank application has been created,<br />
the amount should never be changed. The banks closely monitor the<br />
amounts charged for application fees.<br />
Viewing in<br />
Data Entry<br />
Once a banking option is selected and saved, you can access it from data entry. In the<br />
Electronic Filing and Banking section of the General tab, click the bank’s name<br />
(Figure 7-3).<br />
Taxpayer Application<br />
Check and Card Stock<br />
Figure 7-3: Electronic Filing and Banking section of General tab in data entry<br />
Complete an application/agreement for every taxpayer applying for one of the banking<br />
options available (see “Taxpayer Requirements” on page 212). Some banks<br />
require original applications to be mailed on a weekly basis. Consult your bank for<br />
requirements.<br />
Obtain all check and card stock from your bank. All stock must be verified and<br />
secured upon receipt. Read and retain all information included with the checks or<br />
cards.<br />
Tax Year 2012 219
Using Bank Screens in Data Entry<br />
<strong>Drake</strong> <strong>Software</strong> User’s <strong>Manual</strong><br />
Using Bank Screens in Data Entry<br />
Select Product<br />
Identification<br />
The <strong>Drake</strong> program has a separate screen for each of <strong>Drake</strong>’s banking partners. While<br />
the bank screens have certain fields in common, each bank screen is unique. Become<br />
familiar with the screen for the bank you are using. Use the available help resources to<br />
ensure that all required information is entered for each taxpayer with bank products.<br />
Described here are the fields that are found on most bank screens in <strong>Drake</strong>, and vary<br />
from bank to bank.<br />
If a bank offers multiple products, the screen for that bank includes a product selection<br />
section in the upper-left corner. Click a product box to select it. If adding a state bank<br />
product, select the state.<br />
Each screen has one or more sections for entering and verifying the taxpayer’s identification.<br />
The address fields are overrides; if an address is entered on screen 1, you do<br />
not have to enter it again on the bank screen. Some fields require the taxpayer and<br />
spouse to produce one or more forms of ID (driver’s license, passport, etc.), and the<br />
preparer to enter information from these IDs on the screen. Identification information<br />
is required and must be entered before the return can be transmitted and bank product<br />
accepted.<br />
NOTES<br />
If the taxpayer’s address differs from the one entered on screen 1, or if<br />
the screen 1 address is a P.O. box, enter a physical address on the<br />
bank screen to help avoid delays in processing the application.<br />
(To scan copies of the IDs into the <strong>Drake</strong> Document Manager, see<br />
“Working With Files in the DDM” on page 309.)<br />
Prep Fee Override Field<br />
Tax preparation fees are calculated from fees established in Setup > Pricing and can<br />
be overridden from both screen 1 and the BILL screen. Use the Tax preparation fees<br />
override field on your bank screen to override the fee amount that is to be withheld<br />
from the bank product. (Figure 7-4)<br />
Figure 7-4: Overriding the Tax preparation fees from the bank screen.<br />
Additional Disbursement Methods<br />
Each <strong>Drake</strong> bank partner offers more than one disbursement method or product offering,<br />
and those selections are reflected on the various bank screens. If a taxpayer<br />
wishes to have the proceeds of the bank product deposited into an account rather than<br />
distributed as a check or card, enter the banking information in the proper section of<br />
220 Tax Year 2012
<strong>Drake</strong> <strong>Software</strong> User’s <strong>Manual</strong><br />
Bank Product Transmission<br />
Application Signing Date<br />
the bank screen. Note that the RTN, Account number, and Type of account must be<br />
entered twice for verification.<br />
Most bank screens include a field to indicate when the bank application was signed.<br />
By default, the current date is used in this field. Enter a different date if necessary;<br />
otherwise, leave this field blank.<br />
Bank Product Transmission<br />
Processing the Check<br />
Testing Check Print<br />
Several transmissions occur when you e-file the tax return with bank information<br />
using <strong>Drake</strong>:<br />
• <strong>Drake</strong> transmits the tax return to the IRS and the appropriate bank.<br />
• The IRS sends an acknowledgment (“ack”) to <strong>Drake</strong>. If the return has been<br />
accepted, <strong>Drake</strong> transmits the bank information to the bank.<br />
• The bank sends an acknowledgment back to <strong>Drake</strong>.<br />
The bank also posts a “Fees to ACH” (Automated Clearing House) acknowledgment<br />
when applicable to inform preparers that their fees have been distributed to their direct<br />
deposit account. It is normally posted on the Thursday of the following week, if the<br />
return is sent by noon Thursday.<br />
Your system picks up any new bank acks whenever you initiate a connection (transmit<br />
or receive from EF > Transmit/Receive) with <strong>Drake</strong>.<br />
The following process is necessary for firms that print checks in-house. (If your firm<br />
does not print the checks, post the bank-acceptance acks to the EF database so your<br />
database will always reflect the most current client status.)<br />
Before printing checks, you might want to run a test-print to ensure that checks will be<br />
printed correctly. One test check for each bank is loaded into <strong>Drake</strong>; when you testprint<br />
a check, the program uses the test check matching the bank that is set up for<br />
“Firm 1” in Setup > Firm(s).<br />
To print the test check:<br />
1. Ensure that paper for printing has been loaded into the printer. (<strong>Drake</strong> recommends<br />
using a blank sheet of paper.)<br />
2. From the Home window, select EF > Check Print. If no checks are ready, a message<br />
prompts you to reprint any previous checks. Click Yes.<br />
3. At the bottom of the Reprint Checks dialog box, click Test.<br />
4. Click Print in the Print dialog box.<br />
Tax Year 2012 221
Processing the Check<br />
<strong>Drake</strong> <strong>Software</strong> User’s <strong>Manual</strong><br />
Printing Checks for Bank Products<br />
Before you print checks:<br />
• Be aware that you cannot print checks until the appropriate IRS and bank<br />
acknowledgments are received.<br />
• Make sure the computer for EF transmissions has the correct date.<br />
• Make sure the check number on the computer matches the check number on the<br />
next available physical check.<br />
CAUTION<br />
Do not transmit from more than one computer unless the program is<br />
on a dedicated server. Transmitting and receiving from more than one<br />
computer can affect your ability to print checks correctly.<br />
To print a check for a bank product:<br />
1. From the Home window, select EF > Check Print to open the Bank Product<br />
Selection box.<br />
2. Choose to print checks or to print the Truth In Lending Agreement (TILA) disclosures<br />
for non-check bank products (such as debit cards and direct deposit).<br />
3. Click Continue. The Selection window for checks (or TILA) shows the items<br />
available for printing.<br />
4. Select the items to be printed or use Select All or Unselect All.<br />
5. Click Continue. The Check Print Options dialog box displays the client’s name,<br />
ID number, check amount, and check number.<br />
6. Choose from the available options, listed in Table 7-5.<br />
Table 7-5: Check Printing Options<br />
Option<br />
Print this check on #___<br />
Delete this Client’s check<br />
Skip this Client’s check for now<br />
Print ALL selected checks starting<br />
on #___<br />
Description<br />
Prints the check on the displayed check number.<br />
Deletes the check from the system. The check<br />
will not be displayed for printing again.<br />
Excludes the check from the current print job.<br />
Prints all previously selected checks starting at<br />
the displayed check number.<br />
IMPORTANT<br />
The first time you print checks, you must set up a check range.<br />
Click Setup Checks to choose a bank and set up the check<br />
range. You can also use Setup Checks to change the check<br />
number if necessary.<br />
7. Click Continue, and then click Print.<br />
222 Tax Year 2012
<strong>Drake</strong> <strong>Software</strong> User’s <strong>Manual</strong><br />
Processing the Check<br />
Immediately after the checks are printed, your system should initiate the process to<br />
transmit the check register to <strong>Drake</strong>. When the bank receives the check register, preparer<br />
fees are usually deposited on the next business day<br />
IMPORTANT<br />
The check register must be transmitted to <strong>Drake</strong> before you can<br />
receive fees from the bank. <strong>Drake</strong> recommends running EF ><br />
Transmit/Receive after printing large batches of checks.<br />
Reprinting Checks<br />
To reprint a check:<br />
1. From the Home window, select EF > Check Print.<br />
• If no new checks are ready for printing, you are prompted to reprint checks.<br />
Click Yes to open the Reprint Checks dialog box.<br />
• If new checks are ready, the Select Checks dialog box is displayed. Click<br />
Exit, and then click Yes to open the Reprint Checks dialog box.<br />
2. Type an SSN and press ENTER. The Reprint Checks dialog box displays any previous<br />
taxpayer and check information.<br />
3. Click Print. The program automatically voids the prior check number.<br />
NOTE<br />
You must write “VOID” on the face of the check that is no longer valid.<br />
Follow your bank’s guidelines for disposition of voided checks.<br />
Check Register<br />
Resetting Check Numbers<br />
To access a detailed register of checks printed by your office:<br />
1. From the Home window, select EF > Check Register.<br />
2. In the Check Register dialog box, select the Starting Date, Ending Date, and<br />
EFIN/Firm Name.<br />
3. Click Continue. The Report Viewer displays the check number, date, amount,<br />
EFIN, sequence number, client ID, and client name for all checks within the<br />
parameters.<br />
4. (optional) Print or export the register as needed. (See “Report Viewer” on<br />
page 293 for more on using these features in the Report Viewer.)<br />
5. Click Exit to close the Report Viewer.<br />
Occasionally, you might have to reset the check range. Follow the process outlined in<br />
“Printing Checks for Bank Products” on page 222. When you get to the Check Print<br />
Options dialog box, click Setup Checks to access the feature for resetting check<br />
range.<br />
Tax Year 2012 223
Troubleshooting Check Printing<br />
<strong>Drake</strong> <strong>Software</strong> User’s <strong>Manual</strong><br />
Lost or Stolen Checks<br />
If you do not physically possess a check that must be reissued (for example, if a check<br />
is lost, missing, or stolen), follow your bank’s procedures for a lost or stolen check.<br />
Do not reprint the check.<br />
Troubleshooting Check Printing<br />
Listed below are some common issues that preparers encounter when printing checks.<br />
Please read the following information before contacting <strong>Drake</strong> <strong>Software</strong> Support.<br />
Checks Aren’t Being Printed<br />
Text Won’t Line Up<br />
There are many reasons that a check is not being printed. Before contacting <strong>Drake</strong><br />
Support, review the following questions to ensure that the necessary conditions for<br />
printing checks have been met:<br />
• Is the correct printer selected? (Go to Setup > Printing > Printer Setup, and look<br />
in the Checks field of the (F5) General Setup tab. Select another printer from the<br />
drop list if necessary.)<br />
• Are you using the same computer from which the return was transmitted?<br />
• Have you received the bank acceptance acknowledgment for this taxpayer?<br />
• Has the correct SSN been entered (if reprinting)?<br />
If the text is not lining up correctly on the check, you may have to modify the adjustment<br />
settings for the printer. To adjust these settings:<br />
1. From the Home window, go to Setup > Printing > Printer Setup.<br />
2. Select the (F8) Edit Printer Settings tab.<br />
3. Select the printer being used to print the checks. Once a printer is selected, all<br />
other fields are activated.<br />
4. Enter a number in the Check Adjustment - Vertical field. Each whole number<br />
represents a fourth of a line. Enter a positive number (“1”) to move the check<br />
down a fourth of a line (text will show up higher on the check). Enter a negative<br />
number (“-1”) to move the check up a fourth of a line (text will show up lower on<br />
the check). Remember to click Update before closing the Edit Printer Settings<br />
window.<br />
If the text is showing up too far to the left or right, you may have to adjust the printer<br />
itself. Consult the user manual for your printer.<br />
Program Won’t Allow Reprinting<br />
If trying to reprint a check that was printed before the current date, you will get a<br />
Reprint Not Allowed message like the one shown in Figure 7-5.<br />
224 Tax Year 2012
<strong>Drake</strong> <strong>Software</strong> User’s <strong>Manual</strong><br />
Troubleshooting Check Printing<br />
Misfeeds and Paper Jams<br />
Post-Season Procedures<br />
Figure 7-5: Reprint Not Allowed<br />
If this happens, click OK, and then press F5. You will be asked if you have the prior<br />
check in hand. A prior check must be physically in your possession in order for you to<br />
reprint a check. If you have the check, select Yes.<br />
If the check has already cleared, there will be a date in the Clear Date field. You cannot<br />
reprint this check. Contact your bank for additional assistance.<br />
If a check is damaged and rendered unusable during printing, write “VOID” on the<br />
face of the check and reprint using a new check. (See “Reprinting Checks” on<br />
page 223.) If you accidentally print a check on something other than the check stock<br />
(such as a blank sheet of paper), print the check again, then guarantee that the original<br />
check cannot be cashed.<br />
If the check is still usable, you can reload and reprint it. In the Check Print Options<br />
dialog box, the check number displayed should match the number on the next check to<br />
be printed. If it doesn’t, see “Resetting Check Numbers” on page 223.<br />
Required post-season procedures vary from bank to bank. Refer to your bank’s operating<br />
procedures to determine the proper method of storing or returning taxpayer bank<br />
applications and the proper handling of excess check stock.<br />
If your office is closing for any extended period between April and October, notify<br />
<strong>Drake</strong> and your bank so the bank can print any late checks, if the service is available.<br />
Tax Year 2012 225
Troubleshooting Check Printing<br />
<strong>Drake</strong> <strong>Software</strong> User’s <strong>Manual</strong><br />
This page intentionally left blank.<br />
226 Tax Year 2012
8 e-File<br />
This chapter provides an overview of the e-filing process and outlines procedures for:<br />
• Setting up an e-filing account<br />
• Testing your e-filing system<br />
• e-Filing federal and state tax returns<br />
• Reading acknowledgment codes<br />
• Using the EF database and online EF database<br />
<strong>Drake</strong> tax software incorporates IRS regulations where feasible to ensure that returns<br />
are e-filed correctly; however, as a tax preparer, you should be well-versed in the IRS<br />
rules and processes. Before tax season begins, all tax preparers should:<br />
• Read relevant IRS publications — IRS Pubs 1345 and 1346 have information<br />
on the processes, laws, regulations, and specifications for e-filing tax returns.<br />
• Register for a PTIN — New preparer regulations require that all tax return<br />
preparers must register for a PTIN and pay a $64.25 annual fee. (See “Preparer<br />
Regulations” on page 8 for details.)<br />
• Obtain Circular 230 — All tax preparers must comply with the standards of conduct<br />
set by Treasury Department Circular 230. See “Contact the IRS” in Appendix<br />
A for details.<br />
• Know the applicable banking requirements — In addition to consulting your<br />
bank’s handbooks and brochures, see Chapter 7, “Banking.”)<br />
NOTE<br />
A detailed flow chart showing the e-filing process as it occurs for most<br />
tax preparers is included in Appendix B.<br />
Tax Year 2012 227
Preparing to e-File<br />
<strong>Drake</strong> <strong>Software</strong> User’s <strong>Manual</strong><br />
Preparing to e-File<br />
Applying for ERO Status<br />
In order to e-file tax returns, your firm or office must be an Electronic Return Originator<br />
(ERO), have an Electronic Filing Identification Number (EFIN), and be an authorized<br />
IRS e-Services provider. ERO and EFIN information must be entered in ERO<br />
Setup before a return can be transmitted.<br />
The IRS accepts ERO applications throughout the year. All new EROs must apply to<br />
the IRS to become an e-Services provider in order to receive an EFIN. If you are a<br />
new ERO and are not a CPA, EA, attorney, banking official, or officer of a publicly<br />
held company, you must also submit a fingerprint card.<br />
An established ERO must make changes to its e-file application only if the information<br />
in its original application has changed. Changes should be made online.<br />
IMPORTANT<br />
If you plan to e-file business returns this year after filing only 1040<br />
returns in the past, you must update your e-file application online,<br />
or your e-filed returns will be rejected by the IRS.<br />
To register as an e-Services provider online through the IRS website:<br />
1. Go to www.irs.gov<br />
2. Click the For Tax Pros tab.<br />
3. In the Getting Started section, click Become an Authorized e-file Provider.<br />
4. Follow the directions on your screen.<br />
Be aware that processing can take up to 45 days.<br />
To request federal e-file program fingerprint cards, contact <strong>Drake</strong>’s Education Department<br />
at education@<strong>Drake</strong><strong>Software</strong>.com, call <strong>Drake</strong> at (828) 524-8020, or contact the<br />
IRS e-Help Desk at (866) 255-0654.<br />
Once your application is processed, the IRS assigns you an EFIN. If your firm has<br />
applied for an EFIN but does not have one yet, <strong>Drake</strong> will assign you a temporary<br />
EFIN. Your temporary EFIN cannot be used to e-file returns, but it does allow you to<br />
transmit <strong>Drake</strong> test returns.<br />
When you receive your EFIN or make changes to the ERO status, forward a copy of<br />
the response letter from the IRS to accounting@<strong>Drake</strong><strong>Software</strong>.com so we can update<br />
your <strong>Drake</strong> customer account.<br />
228 Tax Year 2012
<strong>Drake</strong> <strong>Software</strong> User’s <strong>Manual</strong><br />
E-filing a Return<br />
Testing Transmission<br />
Once you have an EFIN, <strong>Drake</strong> strongly recommends that you run an initial transmission<br />
test to become familiar with the e-filing process and ensure that your system is<br />
working properly. Open a test return and calculate it before testing transmission.<br />
NOTE<br />
Your account number must be entered in ERO Setup in order to transmit<br />
returns. See “ERO Setup” on page 13.<br />
To test system transmission:<br />
Shortcut: CTRL+S<br />
1. From the Home window, select EF > Select Returns for EF.<br />
2. From the EF Return Selector, select the test returns to transmit.<br />
CAUTION<br />
Select only the returns in the 400-00 or 500-00 series provided in the<br />
software. All other returns are processed as actual (“live”) tax returns<br />
and can result in a charge of filing fraudulent returns.<br />
Shortcut: CTRL+T<br />
3. Click Continue. The Report Viewer displays the selected returns.<br />
4. Click Exit to close the Report Viewer.<br />
5. From the Home window, select EF > Transmit/Receive.<br />
6. Click Send/Receive in the Transmit/Receive dialog box that is opened.<br />
NEW FOR<br />
2012<br />
A green progress bar appears, assuring you that the transmission is<br />
proceeding normally during the transmittal of large files.<br />
7. When the process is complete, return to the Home window and select<br />
EF > Process Acks to view acknowledgments.<br />
An IRS acknowledgment of “T” indicates a successful test transmission.<br />
NOTE<br />
TIP<br />
Transmission unsuccessful? Go to Setup > ERO and add or correct<br />
your ERO information as needed and re-transmit. If transmission is still<br />
unsuccessful, make sure your Internet connection is working properly.<br />
You can save time—and mouse clicks—by combining the previous<br />
seven steps into one. From the Home window, go to Setup > Options,<br />
EF tab. In the Session Options section, select Combine EF Steps<br />
(Select, Transmit, Post Acks). You can still view the reports by going<br />
to Reports > Reports Viewer from the Home window.<br />
E-filing a Return<br />
The e-filing process can be said to consist of up to five main steps, starting with return<br />
calculation and ending with the processing of bank products.<br />
Tax Year 2012 229
E-filing a Return<br />
<strong>Drake</strong> <strong>Software</strong> User’s <strong>Manual</strong><br />
Step 1: Calculate the Return<br />
Calculate the return to determine if it is ready to be e-filed. (See “Calculating a<br />
Return” on page 179 for instructions on calculating returns in <strong>Drake</strong>.) <strong>Drake</strong> generates<br />
an EF status document and, if necessary, EF message pages, shown in the Figure 8-1<br />
directory tree and described in the following list:<br />
Figure 8-1: EF–related documents include EF messages and an EF status page<br />
• MESSAGES — EF messages are generated only if issues within the return cause<br />
it to be ineligible for e-file. Messages include error codes, descriptions of the<br />
issues, and identification of fields that must be verified.<br />
• EFSTATUS — The EF status page shows which federal and state returns will be<br />
transmitted and which returns have been suppressed and will not be transmitted. It<br />
also states whether any federal EF messages were generated.<br />
NOTE<br />
Error codes above 5000 are <strong>Drake</strong> error codes. All other codes are federal<br />
or state error codes.<br />
Eliminating<br />
EF<br />
Messages<br />
All EF messages must be eliminated before a return can be e-filed. To eliminate an EF<br />
message:<br />
1. Open the return and click View to calculate it and go to View mode.<br />
2. Under the All Forms or EF tab in the left column, click the MESSAGES page to<br />
view.<br />
• EF messages are displayed in red and are listed by error code.<br />
• Unverified fields are identified at the end of the EF message page.<br />
NOTE<br />
It’s easiest to view all EF messages from View mode, but individual<br />
issues can be viewed, and in some cases accessed, from the Calculation<br />
Results window. See “Calculation Results” on page 180.<br />
3. Return to data entry and correct the issues that are preventing e-filing.<br />
4. Re-calculate the return.<br />
Repeat the above steps until all federal and state EF messages are eliminated.<br />
230 Tax Year 2012
<strong>Drake</strong> <strong>Software</strong> User’s <strong>Manual</strong><br />
E-filing a Return<br />
Step 2: Prepare the Transmission File<br />
TIP<br />
To bypass this step, select the return directly from the Calculation<br />
Results screen. (See Figure 8-3 on page 232.)<br />
To prepare the transmission file:<br />
Shortcut: CTRL+S<br />
1. From the <strong>Drake</strong> Home window, select EF > Select Returns for EF. The EF<br />
Return Selector displays a list of recently calculated returns. Those eligible for e-<br />
file are indicated by a check box (Figure 8-2).<br />
Figure 8-2: Eligible returns are indicated by boxes<br />
2. Select the boxes of the returns to transmit. Use the Select All or Unselect All buttons<br />
as needed.<br />
TIP<br />
Click column headers to sort returns by column.<br />
3. (optional) Double-click a return to open an EF Transmission Detail box for the<br />
return. This box displays the client name, ID number, EF status, and federal and<br />
state forms to be filed and allows you to finalize the specific returns (1040, 4868,<br />
1120, etc.) to be transmitted. Click Save to retain any changes you make.<br />
4. Click Continue. The Report Viewer shows the EF Selection Report, which lists<br />
all returns that are awaiting transmission. See “Report Viewer” on page 293 for<br />
details on Report Viewer features.<br />
5. Click Exit to close the Report Viewer.<br />
The selected returns are now in the “send” queue and are ready for transmission.<br />
EF Select<br />
Button<br />
The EF Select button is available in all packages and is located at the bottom of the<br />
Calculation Results window. By default, the button is activated if the calculated<br />
return is eligible for e-file (Figure 8-3 on page 232).<br />
Tax Year 2012 231
E-filing a Return<br />
<strong>Drake</strong> <strong>Software</strong> User’s <strong>Manual</strong><br />
Figure 8-3: EF Select button at bottom of Calculation Results window<br />
By clicking EF Select, you can send federal and state returns directly to the e-file<br />
queue.<br />
NOTE<br />
The option to pause at the Calculations Results window must be<br />
selected in Setup > Options, Calculation & View Print tab. You also<br />
must go to Setup > Options, EF tab and select Allow selection for EF<br />
from the ‘Calculation Results’ screen.<br />
Troubleshooting<br />
Return<br />
Selection<br />
If a return is not in the EF Return Selector, consider these troubleshooting actions:<br />
• Recalculate the return.<br />
• Eliminate EF messages. Remember to check for both federal and state messages.<br />
• From the Home window, go to Setup > Options and select the EF tab to see if<br />
Require ‘Ready for EF’ Indicator on EF screen is selected. If it is, go to the EF<br />
screen in the return. In the Ready for EF box at the top, select X – Ready for EF.<br />
• Check to see if the return contains forms that are not e-filable.<br />
Step 3: Transmit Return<br />
CAUTION<br />
Never transmit from more than one computer unless the software is<br />
installed on a dedicated server. Calculating from more than one computer<br />
can lead to “duplicate DCN” rejections. This can affect the ability<br />
to print checks and can prevent IRS acks from showing up in your<br />
EF database.<br />
To transmit a return:<br />
Shortcut: Press<br />
CTRL+T to open<br />
the Transmit/<br />
Receive dialog<br />
box<br />
1. Ensure that the Internet connection is working properly and that the returns are<br />
selected for e-filing. (See “Step 2: Prepare the Transmission File” on page 231.)<br />
2. From the Home window, select EF > Transmit/Receive to open the Transmit/<br />
Receive dialog box, which displays the types of returns to be e-filed.<br />
3. (optional) To review and, if necessary, eliminate files from the “send” queue,<br />
select a file from the File for EF pane and click Review. The Transmit File Editor<br />
lists individual returns. To remove a return from the queue, select it and click<br />
Remove.<br />
4. Click Send/Receive. The Report Viewer displays the EF Transmission Record.<br />
5. Click Exit.<br />
NOTE<br />
The EF Transmission Record lists returns that are planned for<br />
transmission. Because transmittal can be interrupted or a return<br />
denied, this list is not suitable as a record of transmitted files.<br />
232 Tax Year 2012
<strong>Drake</strong> <strong>Software</strong> User’s <strong>Manual</strong><br />
E-filing a Return<br />
The program immediately logs in to <strong>Drake</strong> and performs the following tasks:<br />
• Checks for new acknowledgments<br />
• Transmits files to <strong>Drake</strong><br />
• Retrieves pending acknowledgments of the transmitted files (if available)<br />
• Checks for <strong>Drake</strong> e-mail (if this option is selected; see following note)<br />
• Logs out of <strong>Drake</strong><br />
Transmission notes appear in the Communications box of the Transmit/Receive<br />
window as transmission progresses. When transmission is complete, all returns transmitted<br />
through <strong>Drake</strong> are forwarded to the correct IRS processing center.<br />
6. Click Exit to close the Transmit/Receive box.<br />
TIP<br />
To have the system check for <strong>Drake</strong> e-mail during transmission, go to<br />
Setup > Options, EF tab and select Check for e-mail during EF<br />
transmit/receive.<br />
Receiving<br />
“Acks Only”<br />
To check for acknowledgments without transmitting any files to <strong>Drake</strong>, go to<br />
EF > Transmit/Receive and click Acks Only. The program checks for federal and<br />
state acknowledgments, bank-product acknowledgments, and check authorizations.<br />
See “Step 4: Process Acknowledgments,” following, for more on acknowledgments.<br />
Step 4: Process Acknowledgments<br />
When <strong>Drake</strong> receives a transmission, it immediately returns a one-letter acknowledgment,<br />
or “ack.” When the IRS Submission Processing Center receives the return, it<br />
sends an ack to <strong>Drake</strong>, which you can “pick up” by logging in to <strong>Drake</strong>.<br />
Ack<br />
Processing<br />
Ack Codes<br />
To process acks, go to the Home window and select EF > Process Acks. The Process<br />
Acknowledgments box displays progress. This data is copied to the EF database for<br />
later access. (See “EF Database” on page 239.) If no new acknowledgments are found,<br />
<strong>Drake</strong> asks if you want to review old ones. After you read the acknowledgment file, an<br />
Acknowledgment Report shows the acknowledgment code and batch ID.<br />
<strong>Drake</strong> codes are shown in Table 8-1. Re-send any return that receives a “B” ack.<br />
Table 8-1: <strong>Drake</strong> Acknowledgment Codes<br />
Code<br />
P<br />
T<br />
B<br />
Description<br />
Tax return transmitted successfully to <strong>Drake</strong>. Return is being processed.<br />
TEST return transmitted successfully to <strong>Drake</strong>.<br />
Bad transmission<br />
NOTE<br />
A “B” ack received for a return sent in a batch with other returns means<br />
only that return received the “B” ack; the other returns in the transmission<br />
will still be processed if they each generated a “P” ack.<br />
Tax Year 2012 233
E-filing a Return<br />
<strong>Drake</strong> <strong>Software</strong> User’s <strong>Manual</strong><br />
IRS acknowledgment codes are shown in Table 8-2. IRS acknowledgments are usually<br />
processed within 24 hours.<br />
Table 8-2: IRS Acknowledgment Codes<br />
Code<br />
A<br />
R<br />
D<br />
Description<br />
Tax return has been accepted by the IRS.<br />
Tax return has been rejected by the IRS.<br />
Tax return is a duplicate of a previously filed return or DCN; rejected by IRS.<br />
E Imperfect return; see “Imperfect Returns” on page 236.<br />
Bank acknowledgments, listed in Table 8-3, are usually processed within hours of IRS<br />
acknowledgments, depending on volume.<br />
Table 8-3: Bank Acknowledgment Codes<br />
Code<br />
Bank Product Accepted<br />
Bank Product Declined<br />
Check Print<br />
Prep Fees Deposited<br />
Description<br />
Bank product application has been approved.<br />
Bank product application has been declined.<br />
Checks are available for printing.<br />
Preparer fees have been deposited.<br />
State acknowledgment codes are not listed here, as codes and processing times vary.<br />
Troubleshooting<br />
Acks<br />
Described below are some troubleshooting steps for commonly received acks.<br />
• B — A “B” ack can occur for several reasons. The reason (for instance, if program<br />
updates are missing) is included with the acknowledgment. If you receive a “B”<br />
ack, correct the described problem, recalculate the return, and re-transmit.<br />
• R — An “R” ack indicates that the return has been rejected by the IRS. A reject<br />
code showing the reason for the rejection is provided. Look up reject codes in the<br />
EF database (see “Reject Code Lookup” on page 240), address the issue, and retransmit.<br />
Be sure to download and install the latest <strong>Drake</strong> updates (see “Update<br />
Manager” on page 261) and check your <strong>Drake</strong> e-mail for new tax developments.<br />
• D — A “D” ack occurs if a submitted return is a duplicate of a previously filed<br />
SSN or DCN. Check the EF database to see if the return has been transmitted<br />
more than once. If it was accepted previously, you do not have to re-transmit it.<br />
NOTE<br />
“D” acks can be caused by calculating on multiple computers from a<br />
peer-to-peer network (no dedicated server), or if DCNs are not sufficiently<br />
staggered. (See “Staggering DCNs,” following.)<br />
Staggering<br />
DCNs<br />
Each computer assigns a Declaration Control Number (DCN) to every calculated<br />
return. Each return created after the first return is assigned a DCN in sequential order,<br />
starting with 01001 (01001, 01002, 01003, etc.). If an office is not networked and uses<br />
234 Tax Year 2012
<strong>Drake</strong> <strong>Software</strong> User’s <strong>Manual</strong><br />
E-filing a Return<br />
multiple workstations for data entry, each workstation must adjust (“stagger”) its DCN<br />
counter.<br />
IMPORTANT<br />
Stagger the starting DCNs before creating 2012 returns.<br />
To stagger the DCNs, complete the following steps on each workstation:<br />
1. From the Home window, go to Setup > Firm(s).<br />
2. Double-click the firm, or select it and click Edit Firm. The bottom half of Firm<br />
Setup becomes active.<br />
3. Change the DCN serial number (Figure 8-4). <strong>Drake</strong> suggests choosing starting<br />
DCNs that are at least 2,000 numbers apart.<br />
Figure 8-4: DCN Serial Number field in Firm Setup<br />
4. Click Save to save changes, or click Cancel to exit without saving changes.<br />
Depending on the amount chosen to stagger the numbers, each workstation now produces<br />
DCNs based on a different starting number. For example, if you chose to stagger<br />
by 2,000 with the first computer starting at 01000, the second computer would start at<br />
03000, the third at 05000, and so on. In this case, each computer can process 2,000<br />
returns before duplicating a DCN.<br />
CAUTION<br />
Be careful if changing DCNs after tax season begins and returns<br />
have already been transmitted. If DCN staggering is done improperly,<br />
returns might be processed with duplicate DCNs, causing e-file<br />
rejections.<br />
Changing a<br />
DCN<br />
When a return receives an IRS rejection because the same DCN was assigned to more<br />
than one taxpayer, the DCN must be changed before you can re-transmit the return.<br />
To change the DCN of a tax return:<br />
1. In data entry for the return, press CTRL+M and wait while the program assigns a<br />
new DCN.<br />
2. Click View to go to View mode, where you can check Form 8879 to verify that the<br />
DCN has been changed.<br />
Tax Year 2012 235
EF Override Options in Data Entry<br />
<strong>Drake</strong> <strong>Software</strong> User’s <strong>Manual</strong><br />
Figure 8-5: DCN on Form 8879 in View mode<br />
Once the DCN has been changed, the return can be re-transmitted.<br />
Imperfect<br />
Returns<br />
Two common error codes (listed below) for IRS rejection of 1040 returns relate to<br />
“name” and “SSN” mismatches on either Form 1040 or Schedule EIC:<br />
• Error Code 0501 — A dependent’s SSN or name on Schedule EIC does not<br />
match the SSN or name in the IRS master file.<br />
• Error Code 0504 — A dependent’s SSN or name on Form 1040 does not match<br />
the SSN or name on the IRS master file.<br />
The IRS will accept such returns with these error codes (as “imperfect” returns), but<br />
you must set up the program for e-filing them.<br />
To set up your program:<br />
1. From the Home window, go to Setup > Options, EF tab.<br />
2. Select Activate imperfect return election in data entry.<br />
To e-file an imperfect return:<br />
1. Open the return and go to the EF screen in data entry.<br />
2. Under Additional Options, select Imperfect return election.<br />
3. Calculate the return.<br />
When you view the return, <strong>Drake</strong> displays a NOTES page indicating the return is<br />
imperfect. When you e-file the return, the IRS will accept it (provided there are no<br />
other, unrelated issues), but with an “E” ack. Processing of an imperfect return can<br />
take up to six weeks.<br />
NOTES<br />
Because IRS acceptance is not guaranteed for an imperfect return, no<br />
bank products can be e-filed with the return.<br />
Any refund amount could be adjusted as the return goes through<br />
exception processing if an exemption claimed is deemed invalid.<br />
EF Override Options in Data Entry<br />
By default, the program designates all eligible federal and state forms for e-file. Use<br />
the EF screen to override program defaults on a per-return basis.<br />
236 Tax Year 2012
<strong>Drake</strong> <strong>Software</strong> User’s <strong>Manual</strong><br />
EF Override Options in Data Entry<br />
Marking “Ready for EF”<br />
Suppressing e-File<br />
At the top of the EF screen is a Ready for EF drop list. If the option is selected in<br />
Setup, you must select Ready for EF before the return is put into the “send” queue for<br />
e-file—even if it is otherwise ready to go. Because you must manually indicate that<br />
each return is ready to be e-filed, selecting this option can help prevent accidental e-<br />
filing of returns. To choose this option, go to Setup > Options, EF tab and select<br />
Require ‘Ready for EF’ indicator on EF screen.<br />
To suppress a return that is otherwise eligible for e-file:<br />
1. Open the return and go to the EF screen, accessible from the General tab.<br />
2. Select one of the following check boxes, as appropriate:<br />
• Do NOT send Federal (suppresses e-file of federal return; see Figure 8-6)<br />
• Do NOT send any states (suppresses e-file of all state returns)<br />
• Suppress federal/state EF and all bank products (suppresses e-file of both<br />
the federal and state returns, plus any bank products)<br />
The selected returns are not e-filed until the check boxes are cleared.<br />
e-Filing Special Returns and Forms<br />
The EF screen includes the options to e-file the following forms only (without e-filing<br />
any other forms):<br />
• Extensions (Forms 4868 and 2350)<br />
• Form 9465, Installment Agreement Request<br />
• Form 56, Notice Concerning Fiduciary Relationship<br />
To e-file one of these types of forms:<br />
1. Open the return and go to the EF screen, accessible from the General tab.<br />
2. Under Federal E-file Override (Figure 8-6), select the forms to e-file.<br />
Figure 8-6: Federal E-file Override options; in this example, Form 56 will be e-filed.<br />
Be aware that, if the 9465 screen is completed, Form 9465 will be transmitted with the<br />
1040, but if the 9465 only box is marked on the EF screen, only Form 9465 will be<br />
transmitted; the 1040 will not be transmitted. Similarly, by selecting the check boxes<br />
Tax Year 2012 237
EF Override Options in Data Entry<br />
<strong>Drake</strong> <strong>Software</strong> User’s <strong>Manual</strong><br />
for 4868, 2350, or 56, you are indicating that the program should transmit only the<br />
form you’ve selected; no other forms will be transmitted.<br />
IMPORTANT<br />
Leaving the 1040 box blank does not prevent the 1040 from being<br />
transmitted if it is otherwise ready to be e-filed. It will not be transmitted,<br />
however, if you’ve marked one of the other check boxes in<br />
the Federal EF Override section of the EF screen.<br />
If you’re filing an extension, the applicable box (4868 or 2350)<br />
must be selected on the EF screen in order for the program to<br />
transmit it.<br />
Suppressing State Returns<br />
By default, all eligible returns are transmitted—unless you indicate otherwise on the<br />
EF screen. To suppress one state or city return while e-filing others, select the states or<br />
cities you want to e-file from the Select the states/cities to e-file drop lists. The<br />
selected states will be e-filed, but no other state returns will be transmitted, even if<br />
those other returns are eligible.<br />
NOTE<br />
If nothing is selected from the Select the states/cities to e-file drop<br />
lists, or no check mark is placed in the Do NOT send any states check<br />
box, the program sends all eligible state returns.<br />
Overriding Bank-Product Alert<br />
Under the EF tab of Setup > Options is an option to alert the preparer via an EF message<br />
if no bank screen (for a bank product) has been completed for a return. There are<br />
two ways to eliminate this EF message: complete a bank screen for the return, or, if<br />
the taxpayer is ineligible for a bank product, go to the EF screen and mark the Return<br />
not eligible for a bank product check box, located under Additional Options.<br />
Paper-Filing Forms and Supporting Documentation (Form 8453)<br />
A return can be e-filed even if it contains certain forms that must be paper-filed. The<br />
IRS requires that Form 8453, U.S. Individual Income Tax Transmittal for an IRS e-file<br />
Return, be e-filed in lieu of these required paper documents, and that these required<br />
documents be mailed. Form 8453 must indicate which forms are being mailed separately.<br />
To produce Form 8453 for the paper documents to be mailed:<br />
1. Open the return and go to the EF screen, accessible from the General tab.<br />
2. Select the appropriate forms in the Form 8453 Paper Document Indicators box<br />
(Figure 8-7 on page 239).<br />
238 Tax Year 2012
<strong>Drake</strong> <strong>Software</strong> User’s <strong>Manual</strong><br />
EF Database<br />
Figure 8-7: Form 8453 section of EF screen<br />
When the return is generated, Form 8453 shows which forms are to be mailed.<br />
NOTES<br />
To mark the Power of Attorney as a PDI on Form 8453, go to the MISC<br />
screen and complete the Power of Attorney section (mark the check<br />
box and enter the name of the person functioning under the power of<br />
attorney).<br />
For more information on Form 8453, go to Screen Help for the EF<br />
screen.<br />
EF Database<br />
The EF database is a searchable database that displays information about all returns<br />
your office has e-filed for the current tax year.<br />
To search the EF database:<br />
1. From the Home window, click EF > Search EF Database.<br />
2. Enter an SSN, EIN, or name in the SSN/EIN/Name To Search For field of the<br />
Search EF Database window (Figure 8-8). To browse all records, leave this field<br />
blank.<br />
Database Content<br />
Figure 8-8: Search EF Database window<br />
3. Click Go. To scroll through the records for that taxpayer, use the arrows at the bottom<br />
of the screen or press PAGE UP or PAGE DOWN on your keyboard.<br />
To close the EF database, click Exit.<br />
The EF database stores data about the return and the associated bank products, fees,<br />
and reject codes. Different types of data are stored under tabs. (See Figure 8-8.)<br />
General<br />
Information<br />
The F1-General Information tab displays basic taxpayer information along with:<br />
Tax Year 2012 239
EF Database<br />
<strong>Drake</strong> <strong>Software</strong> User’s <strong>Manual</strong><br />
• IRS acknowledgments — Federal code and date, transmission date, filing status,<br />
and refund amount or balance due are displayed in the left column. This data is<br />
from the federal “accepted” record; otherwise, the most recent transmission record<br />
for the client file is displayed.<br />
NOTE<br />
The Where is my refund? hyperlink connects you with the IRS<br />
“Refund Status” Web page.<br />
• State acknowledgments — The State column displays the state code and date,<br />
filing status, and refund amount or balance due. This data is from the federal<br />
“accepted” record; otherwise, the most recent transmission record for the client<br />
file is displayed.<br />
• Reject Codes — On the right side of the window are fields for the reject code,<br />
form ID, form number, and sequence number. Double-click a reject code to jump<br />
to the F4 Reject Code Lookup tab. (See “Reject Code Lookup,” following.)<br />
Bank/Direct<br />
Deposit Info<br />
Fees/<br />
Misc Info<br />
Reject Code<br />
Lookup<br />
The F2 - Bank/Direct Deposit tab contains detailed data about any bank products.<br />
• Bank product information is located on the left side of the window.<br />
• Direct-deposit information is located on the right side of the window. This information<br />
includes amounts paid to the bank, amounts paid to the preparer, and the<br />
dates of the payments.<br />
• Account information be found at the bottom of the window. Account type and<br />
number are displayed for each type of direct deposit.<br />
The F3 - Fees/Miscellaneous Info tab contains general return information about the<br />
taxpayer, the firm, and fees distribution.<br />
The F4 - Reject Code Lookup tab is a search tool for accessing and understanding<br />
IRS reject codes. To look up an IRS reject code for a federal return:<br />
1. Select a federal return type (1040, 1120/1120S, 1065, or 1041; see Figure 8-9).<br />
2. Enter the reject code in the Reject Code field.<br />
3. Click Go. The IRS explanation of the code is displayed in the lower box<br />
(Figure 8-9).<br />
Figure 8-9: Looking up 1040 reject code on Reject Code Lookup tab<br />
240 Tax Year 2012
<strong>Drake</strong> <strong>Software</strong> User’s <strong>Manual</strong><br />
Online EF Database<br />
Leaving the EF Database<br />
4. (optional) Click Print to print the code explanation.<br />
To search for a state reject code for an individual return, select 1040, and then select<br />
the state from the Category drop list before entering the reject code.<br />
To view bank product status, select Bank Codes (wording varies by bank). Explanations<br />
are displayed in the lower box.<br />
To view Bank Decline Reasons, select that option, and then choose a bank from the<br />
drop list. Explanations are displayed in the lower box. (Not all bank have codes<br />
listed.)<br />
Take one of the following actions to close the EF database or access another application<br />
from within it.<br />
• To close the EF database and return to the <strong>Drake</strong> Home window, click Exit.<br />
• To open the Online EF Database (an Internet connection is required), click F10 -<br />
Online DB (or press F10). The EF database in <strong>Drake</strong> remains open.<br />
• To close the EF database and access data entry for a selected return, click F5 -<br />
Data Entry (or press F5).<br />
IMPORTANT<br />
Peer-to-peer networks only: For non-transmitting workstations to<br />
view the EF database, you must select the drive letter of the<br />
transmitting machine from the Select a network drive for <strong>Drake</strong><br />
2012 drop list on the Setup > Directories and Paths window.<br />
See “Directories and Paths Setup” on page 18.<br />
Online EF Database<br />
The online EF database displays real-time data on e-filed returns. You can run reports<br />
on returns bank products, and checks; search for e-filing information for a single SSN<br />
or EIN; access the Multi-Office Manager (MOM); view CSM data for one or multiple<br />
offices; and check the status of each IRS Service Center.<br />
To access your online EF database from within the software:<br />
1. From the Home window, click Support. (If you are already in the EF database,<br />
click F10 - Online DB.)<br />
2. Enter your EFIN and password and click Log In.<br />
3. Go to My Account > EF Database.<br />
By default, the database displays information for the current tax year. To view another<br />
tax year, select the year from the Tax Year drop list under the blue sidebar menu on<br />
the left side of the page.<br />
Tax Year 2012 241
Online EF Database<br />
<strong>Drake</strong> <strong>Software</strong> User’s <strong>Manual</strong><br />
Below the tax year drop list is the SSN/Last Name Search field. To find information<br />
on a specific return, enter the SSN or last name in this field and click the blue arrow.<br />
TIP<br />
Any available checks and outstanding acknowledgments appear on the<br />
opening window of the online EF database every time you open it.<br />
Most of the options in the blue sidebar menu of the online EF database screen are for<br />
viewing and running reports. You can also access these options by scrolling down the<br />
screen and clicking the blue headings. Reports available are listed in Table 8-4.<br />
Table 8-4: Reports Options Available from Online EF Database<br />
Category<br />
Returns<br />
Bank Products<br />
Checks<br />
Fees<br />
Summary<br />
Description<br />
Filtered by: type, status, date, with and without bank products, EFIN<br />
Filtered by: type, status, date, EFIN<br />
Filtered by: Disbursement, status, date, EFIN<br />
Filtered by: status, date, EFIN, preparer (and as summary)<br />
Filtered by type (EF, preparer, Zip code, returns, returns by Ack date)<br />
and by date<br />
Tools 94x reports (for Client Write-Up users; see “94x Reports” on page 244);<br />
manage suppressed returns; download ABCvoice Files, generate client<br />
contact information lists<br />
Options<br />
MOM (Multi-<br />
Office Manager)<br />
Configure report security, manage check suppression, manage saved<br />
reports<br />
Multiple office reports; see “Multi-Office Manager (MOM)” on page 245.<br />
To select a report category, click one of the report categories from the blue sidebar<br />
menu (item #1 in Figure 8-10 on page 243) or scroll down the Overview page and<br />
click a blue heading (item #2 in Figure 8-10 on page 243):<br />
242 Tax Year 2012
<strong>Drake</strong> <strong>Software</strong> User’s <strong>Manual</strong><br />
Online EF Database<br />
Figure 8-10: Two methods of selecting “Returns” from the<br />
Online EF database report categories<br />
Viewing a<br />
Report<br />
To view a report:<br />
1. Click a category option to select a report category (Figure 8-10).<br />
2. Enter a Return Type, Return Status, Date Range, Disbursement Method, or<br />
Report Options. These criteria vary by report type. The report pulls information<br />
from only those returns with records that fall within the date range and based on<br />
the criteria selected.<br />
3. (optional; for multiple-EFIN offices only) Select Restrict to and choose an EFIN<br />
to filter the report by returns for a particular EFIN.<br />
4. Click Run Report.<br />
Click Download and Print, respectively, to export a report in spreadsheet format<br />
(suitable for Microsoft Excel) or to print the report.<br />
Saving<br />
Report<br />
Criteria<br />
To save a set of report criteria for future use:<br />
1. Click a category to select a report category (Figure 8-10).<br />
2. Enter the report criteria.<br />
3. Click Save Report.<br />
4. Type a report name in the Save Report As field.<br />
5. Click OK.<br />
In the future, when you want to view reports that meet those criteria, select the report<br />
name from the Saved Reports drop list.<br />
Deleting<br />
Reports<br />
When you are ready to delete a saved report, select Options from the blue sidebar<br />
menu and click Manage Saved Reports. Reports are displayed in columns on the<br />
Saved Report page. Select a report and click Delete. Sort reports by clicking column<br />
headers.<br />
Tax Year 2012 243
Online EF Database<br />
<strong>Drake</strong> <strong>Software</strong> User’s <strong>Manual</strong><br />
Using the Database for Multiple EFINs<br />
If your company has multiple EFINs, you can provide different levels of access to the<br />
online EF database for different EFINs.<br />
NOTE<br />
Hierarchies are built and maintained through the Enterprise Office Manager<br />
(EOM). Access the EOM through the <strong>Drake</strong> Support webpage<br />
(Support.<strong>Drake</strong><strong>Software</strong>.com) by selecting My Account > Bank Application<br />
from the toolbar. An EOM manual and video tutorial are available;<br />
on the opening window of the EOM website, click Help.<br />
Setting Security Levels<br />
Security settings allow you to password-protect reports in the online EF database. To<br />
define security settings:<br />
1. Log in to the online EF database. (See “Online EF Database” on page 241.)<br />
2. Click Options.<br />
3. Click Configure Report Security.<br />
4. Enter an e-mail address and password and click Add/Update Security Password.<br />
• From the Tab Security section, click False or True for a whole report category.<br />
(False leaves the report unprotected; True requires the password for<br />
access.)<br />
• From the Report Security section, click False or True as desired for a specific<br />
saved report.<br />
To exit the report security screen, choose another report option from the blue sidebar<br />
menu.<br />
Tools<br />
94x Reports<br />
Four functions are available from the Tools option: Run 94x Report; Manage Suppressed<br />
Returns; Download ABC Voice; and Generate Contact List.<br />
If you use <strong>Drake</strong>’s Client Write Up to e-file 940, 941, and 944 reports and returns, the<br />
online EF database allows you to run reports on those clients. To run a report:<br />
1. From the online EF database sidebar menu, click Tools > 94x Report.<br />
2. Choose the Return Type and Date Range.<br />
3. Select a Status. The available statuses are:<br />
• A — Include only returns with “A” (accepted) acks<br />
• P — Include only returns with “P” (pending) acks<br />
• R — Include only returns with “R” (rejected) acks<br />
• S — This status not active for these reports<br />
4. Click Run Report.<br />
244 Tax Year 2012
<strong>Drake</strong> <strong>Software</strong> User’s <strong>Manual</strong><br />
Online EF Database<br />
Manage<br />
Suppressed<br />
Returns<br />
When running Returns reports, you are offered the option of hiding rejected returns.<br />
(See Figure 8-11)<br />
Figure 8-11: Click hide to delete rejected returns from a Returns report<br />
To return the rejected returns to the report, go to Tools > Manage Suppressed<br />
Returns and click Show. (See Figure 8-12)<br />
Figure 8-12: Click Show to restore hidden returns to a Returns report<br />
ABCvoice<br />
Files<br />
Also in Tools, the option to Download ABC Voice applies to preparers using the<br />
ABCvoice File tool. For more information, call Versicom at (937) 438-3700.<br />
NOTE<br />
If using ABCvoice, go to the ABCV screen to indicate whether the taxpayer<br />
has signed the Consent to Disclosure of Tax Return Information.<br />
Generate<br />
Contact Lists<br />
To build lists containing contact information for your clients:<br />
1. From the online EF database toolbar, click Tools.<br />
2. Click Generate Contact List.<br />
3. Enter report criteria by selecting or clearing the check boxes.<br />
4. To further restrict the results, enter start and end dates to search.<br />
5. Click Run Report.<br />
6. (optional) To export the report into a spreadsheet, click Download. You are asked<br />
whether you want to open or save the file. Click Open or Save as desired. If you<br />
click Open, you will have another opportunity to save the report from within<br />
Excel.<br />
Multi-Office Manager (MOM)<br />
The Multi-Office Manager (MOM) is the online version of the Client Status Manager<br />
(CSM). (See Chapter 9, “Client Status Manager.”) Designed for the multi-office environment,<br />
MOM allows you to track workflow of multiple offices, providing a snapshot<br />
of your entire business. Reports and statistics on demographics, return status,<br />
return type, bank, payments, fees, and billing information are available.<br />
Tax Year 2012 245
Online EF Database<br />
<strong>Drake</strong> <strong>Software</strong> User’s <strong>Manual</strong><br />
Transferring<br />
Data to MOM<br />
For CSM data to be transferred to MOM, the software must be configured to send<br />
CSM data to <strong>Drake</strong> during the e-filing process. Each Level-1 and Level-2 EFIN office<br />
in a multi-office environment must complete the following steps:<br />
1. From the Home window of <strong>Drake</strong> <strong>Software</strong>, go to Setup > Options, EF tab.<br />
2. Under Session Options, select Transmit return data to <strong>Drake</strong> for multi-office<br />
web reports.<br />
3. Click OK.<br />
Any changes made in CSM will be transmitted to MOM during e-file transmissions.<br />
Running a<br />
MOM Report<br />
To run a MOM report:<br />
1. In the online EF database sidebar menu, click MOM to view filters. (Figure 8-13).<br />
Figure 8-13: Multi-Office Manager (MOM) filters<br />
2. Select an option from each filter and click Run Report.<br />
The report displays all of the data columns available in the CSM. Scroll down or<br />
across the report screen to view all the available data.<br />
If a report contains more than a specified number of rows (default is 25), it is paginated.<br />
Page numbers appear in the upper- and lower-left corners. The number of rows<br />
displayed per page can be changed via the Rows Per Page drop list above the report.<br />
• To print the report, click Print. Only the data on the report is printed.<br />
• To sort data based on the column selected, click a column header.<br />
• To view e-filing details for a particular return, click the record’s ID number.<br />
• To export the report into a spreadsheet, click the Download. You are asked<br />
whether you want to open or save the file. Click Open or Save as desired. If you<br />
click Open, you will have another opportunity to save it from within Excel.<br />
All data for the given report criteria is saved—not just the data shown on the current<br />
page. Once the report is exported and saved as a worksheet, access it from either Excel<br />
or Access.<br />
246 Tax Year 2012
<strong>Drake</strong> <strong>Software</strong> User’s <strong>Manual</strong><br />
Copying EF Data<br />
Copying EF Data<br />
Firms with multiple computers but no network might have to copy data from computer<br />
to computer using a disc, USB flash drive, or other memory storage device.<br />
IMPORTANT<br />
For firms that use a network, copying EF data from one computer<br />
to another is not recommended.<br />
Copying to Another Location<br />
To copy EF data from a computer to a memory storage device:<br />
1. From the Home window of the software, select EF > Copy EF Returns to Disk<br />
and select the returns to copy. Click Select All or Unselect All as needed.<br />
TIP<br />
Click column headers to sort in ascending or descending order.<br />
2. Click Continue.<br />
3. Select the output drive from the Select Drive drop list.<br />
4. Click Copy Files (Figure 8-14).<br />
5. Click OK after files are copied.<br />
Copying From a Storage Device<br />
Figure 8-14: Copying files to CD<br />
To copy EF information from a data storage device to a computer:<br />
1. From the Home window of the software, select EF > Copy EF Returns from<br />
Disk.<br />
2. In the Copy EF Return from Disk dialog box, select the drive to copy files from.<br />
3. Click Copy Files.<br />
4. Click OK to copy each file. Click Exit to close.<br />
Tax Year 2012 247
About State e-Filing<br />
<strong>Drake</strong> <strong>Software</strong> User’s <strong>Manual</strong><br />
About State e-Filing<br />
Most states accept e-filed returns and some require it—or have regulations that determine<br />
at what point a tax professional can or must begin to e-file. (Mandates don’t<br />
apply to taxpayers who e-file their own returns.) Some states with mandates have their<br />
own application process for EROs and tax preparers who offer bank products. These<br />
processes and the rules and regulations pertaining to e-file vary from state to state.<br />
The state FAQ screens in data entry includes links to state e-file information. Information<br />
on individual state requirements is available at Support.<strong>Drake</strong><strong>Software</strong>.com and<br />
in Appendix E: State e-File Mandates.<br />
248 Tax Year 2012
9 Client Status Manager<br />
Use the Client Status Manager (CSM) for tracking workflow within an office. The<br />
CSM can show you, with just a glance, the status of all returns in their various stages<br />
of completion: when a return was begun, when it was completed, who worked on it,<br />
and the current filing status and payment status, to name of few of many available statuses.<br />
The CSM can display various other types of data, including client name, ID number,<br />
and client name, and phone number, return type, balance due, preparer name, client<br />
status, bank deposits, client payments, and the starting and completion dates for each<br />
return. The CSM can be used for searching, viewing, organizing, and printing data.<br />
NOTE<br />
The logged-in preparer can see his or her CSM data upon login using<br />
the Personal Client Manager (PCM). Much of this chapter applies to the<br />
PCM and the CSM; see notes throughout these pages.<br />
Accessing the CSM<br />
About Client Statuses<br />
Choose one of the following methods to open the CSM:<br />
• From the <strong>Drake</strong> Home window, click the CSM icon in the toolbar.<br />
• From the <strong>Drake</strong> Home window, select Reports > Client Status Manager.<br />
• Press CTRL+L on your keyboard.<br />
You cannot access the CSM from data entry, but you can change the client’s status. To<br />
do so, click the CSM icon in the Data Entry Menu toolbar and select a new status.<br />
The CSM categorizes clients by status. A client status is the stage of a return in the<br />
return-preparation cycle. The CSM’s predefined client statuses can be set automati-<br />
Tax Year 2012 249
About Client Statuses<br />
<strong>Drake</strong> <strong>Software</strong> User’s <strong>Manual</strong><br />
cally as the return progresses through the cycle (Figure 9-1), or manually as needed.<br />
You can also define new statuses.<br />
Predefined Statuses<br />
Figure 9-1: Some statuses are set automatically as the return is processed.<br />
Table 9-1 displays the predefined statuses in the CSM. Note that some are set automatically<br />
while others must be set manually.<br />
Table 9-1: Predefined Statuses in the CSM<br />
Set Automatically<br />
Set <strong>Manual</strong>ly<br />
New Client EF Pending Printed Complete On Hold Signed<br />
In Progress EF Accepted Under Extension Under Review Delivered<br />
Set statuses manually as appropriate. Note that the program never automatically<br />
assigns a return a status of Complete.<br />
NOTE<br />
When a status changes in the CSM, it also changes in the PCM.<br />
Custom Statuses<br />
Define as many as ten custom statuses. Custom statuses must be set and changed manually.<br />
We recommend creating custom statuses before tax season begins.<br />
To define a custom status in the CSM:<br />
1. Click Customize. The Customize Display dialog box is opened.<br />
2. Under the Status Settings tab, select a status description to rename (Figure 9-2 on<br />
page 251). Five of the custom statuses have suggested descriptions that can be<br />
changed.<br />
250 Tax Year 2012
<strong>Drake</strong> <strong>Software</strong> User’s <strong>Manual</strong><br />
Setting Statuses<br />
Figure 9-2: Creating custom statuses<br />
3. Click Edit.<br />
4. Enter a status description in the Status Description text box (Figure 9-2) and<br />
click OK.<br />
To restore all original statuses, click Reset.<br />
NOTE<br />
When a custom status is changed or created in the CSM, it is also<br />
changed or created in the PCM.<br />
Setting Statuses<br />
Set return statuses at any time during the return-preparation cycle. A status can be set<br />
from within the CSM or from data entry. For consistent and valid CSM status reports,<br />
set statuses for each stage of a return.<br />
TIP<br />
You can ensure that the CSM Status column is always correct. From<br />
the <strong>Drake</strong> Home window, go to Setup > Options. Under the<br />
Calculation & View/Print tab, select Auto-calculate tax return when<br />
exiting data entry. When the return is calculated upon exit, the Status<br />
column will be automatically updated.<br />
Setting a Status from the CSM<br />
To set the status of a return from within the CSM:<br />
1. Right-click a return record in the Client Status Manager list.<br />
2. Select Set Client Status. A status list is displayed.<br />
3. Select a return status from the list.<br />
The status is updated in the Status column.<br />
Tax Year 2012 251
Adding a Client to the CSM<br />
<strong>Drake</strong> <strong>Software</strong> User’s <strong>Manual</strong><br />
Setting a Status from Data Entry<br />
To set the status of a return from within data entry, click the CSM button from the<br />
Data Entry Menu toolbar to display a status list, and then select a return status from<br />
the list. The status is automatically updated in the CSM.<br />
Adding a Client to the CSM<br />
If your client has a data file in <strong>Drake</strong>, he or she will have a record in the CSM. New<br />
client records can be added to the CSM in two ways:<br />
• From the Home window, click Last Year Data > Update 2011 to 2012 and<br />
update the return. The client’s record goes into the 2012 version of the CSM.<br />
• Create the return using the File > Open menu from the <strong>Drake</strong> Home window.<br />
Opening a Return from the CSM<br />
Returns can be opened or created from the CSM.<br />
Shortcut: Press<br />
CTRL+O to open a<br />
return in data<br />
entry.<br />
To open a return from within the CSM, highlight a client record from the list and click<br />
Open (or double-click the record to open in Client Quick View, and then click Open.<br />
See “Quick View” on page 238.) The return is opened to the General tab in data entry.<br />
When you exit the return, you are brought back to the CSM.<br />
To create a return from within the CSM:<br />
Shortcut: Press<br />
CTRL+N to open<br />
the Open Client<br />
File dialog box.<br />
1. Click the arrow next to the Open button and select New Client.<br />
2. Enter the SSN or EIN for the return in the Open Client File dialog box.<br />
3. Press Open, and then click Yes.<br />
When prompted, you can begin entering data for the new return.<br />
Customizing the Display<br />
Because custom views are saved and displayed according to the logged-in preparer,<br />
each preparer can set his or her own display.<br />
Shortcut: Press<br />
CTRL+D to open<br />
the Customize<br />
Display dialog<br />
box.<br />
NOTE<br />
Changing the custom view in the CSM does not change the custom<br />
view in the PCM. To change the PCM’s custom view, right-click within<br />
the PCM window and select Customize Display from the right-click<br />
menu. This action opens the Customize Display dialog box. This dialog<br />
box is also used for the CSM, as described in the following steps.<br />
To customize the CSM display:<br />
1. Click Customize. In the Column Layout tab of the Customize Display dialog<br />
box, Available Columns are listed in the left pane, and Columns in Current<br />
View are listed in the right. (Figure 9-3 on page 253.)<br />
252 Tax Year 2012
<strong>Drake</strong> <strong>Software</strong> User’s <strong>Manual</strong><br />
Searching, Updating, and Filtering, and Viewing<br />
Figure 9-3: Column Layout tab<br />
• To add a column, select an item in the left pane and click Select to move it to<br />
the right pane. To add all items, click Select All.<br />
• To remove a column, select an item in the right pane and click Remove to<br />
move it to the left pane. To remove all items, click Remove All.<br />
• To change the column order, drag items up or down the list in the right pane.<br />
• To reset columns to the default view, click Reset.<br />
2. Click OK to save your changes.<br />
Other Ways to Customize the Display<br />
Other ways to customize the column display are listed below:<br />
• Sort — Click a column header to sort records in ascending or descending order.<br />
• Adjust widths — Drag the edge of a column to the desired width.<br />
• Size to fit — Double-click a column header’s right border.<br />
• Change column order — Click and hold a column header, drag it left or right,<br />
and release to reposition the column. (This new order is saved upon exit and is<br />
automatically updated in the Customize Display dialog box (Figure 9-3)).<br />
Searching, Updating, and Filtering, and Viewing<br />
Searching the CSM<br />
The following tools will help you find and use data stored within the CSM.<br />
To find a return in the CSM, click Search, or press CTRL+F to open the Find Client<br />
Record text box. As you type the client name or ID, the CSM searches for and highlights<br />
the matching record. Click Close to exit.<br />
Tax Year 2012 253
Searching, Updating, and Filtering, and Viewing<br />
<strong>Drake</strong> <strong>Software</strong> User’s <strong>Manual</strong><br />
Updating the CSM<br />
To incorporate the latest return updates when the CSM is open, either click the<br />
Refresh button or press F5 on your keyboard.<br />
NOTE<br />
CSM data is updated automatically through different components of the<br />
application. Processes affecting CSM data include data entry changes,<br />
return printing, e-filing, and check-printing functions.<br />
Filtering Data in the CSM<br />
Filters allow you to control which records are shown in the CSM. To select filters:<br />
1. From the Home window, click CSM.<br />
Shortcut: Press<br />
CTRL+L to view the<br />
filter list.<br />
2. Click Filters. The filter list is divided into four sections, as shown in Figure 9-4.<br />
Figure 9-4: CSM filter list<br />
3. Select filters. You can select one filter from each of the first three lists, and any or<br />
all of the filters in the bottom list. A selected filter is indicated by a check mark.<br />
The CSM displays the files that fall within the selected filters.<br />
NOTES<br />
In the Status column, a red File Not Found message indicates a<br />
deleted return. Records of deleted return files stay in the CSM for tracking<br />
purposes.<br />
Filters are also available in the PCM; select Filter Client List from the<br />
PCM’s right-click menu.<br />
254 Tax Year 2012
<strong>Drake</strong> <strong>Software</strong> User’s <strong>Manual</strong><br />
CSM Reports<br />
Quick View<br />
The Client Quick View window summarizes the CSM data for a selected record. To<br />
open this window for a client in the CSM, select a client row and click Quick View or<br />
double-click the line. Displayed is client information, preparer and firm information,<br />
e-file information and acknowledgements, significant dates and actions regarding the<br />
return, and the amount of the refund or balance due.<br />
From the Client Quick View window, click Print to print the data or click Open to<br />
open the return in data entry. Click Exit to close the Client Quick View window.<br />
NOTE<br />
To access Quick View from the PCM, select a record and choose Quick<br />
View from the PCM’s right click menu (or press CTRL+Q).<br />
CSM Reports<br />
Seven predefined status and financial reports (Table 9-2) are available in the CSM.<br />
Table 9-2: CSM reports<br />
Report Title<br />
CSM Data<br />
Cash Receipts<br />
Cash Receipts -<br />
Bank Deposits<br />
Cash Receipts -<br />
Client Payments<br />
Completed Returns<br />
Problem Returns -<br />
‘Old’ Returns<br />
Problem Returns -<br />
‘Missing’ Files<br />
Description<br />
Report is based solely on the data in the CSM current view.<br />
Report lists cash amounts from bank deposits (resulting from bank<br />
products) and client payments from the BILL screen in data entry.<br />
Report lists cash amounts received from bank deposits only. The<br />
data in this report is pulled from the EF database.<br />
Report lists amounts entered on the BILL screen in data entry.<br />
Report lists SSN/EINs and client names of returns with a Complete<br />
status. The program pulls the date completed from the ADMN<br />
screen, which is automatically set when you select a status of Complete.<br />
(An administrative user can manually set the completion date<br />
by completing the Date complete field on the ADMN screen.)<br />
Report lists returns that have taken longer than a specified number of<br />
days to complete.<br />
For this report, the CSM scans client files for File Deleted and File<br />
Not Found statuses.<br />
Generating a CSM Report<br />
Many reports rely on data entry for accuracy. To take full advantage of the CSM’s<br />
reporting features, you must use the data entry screens mentioned in Table 9-2.<br />
To generate a report from the CSM:<br />
Tax Year 2012 255
Exporting CSM Data<br />
<strong>Drake</strong> <strong>Software</strong> User’s <strong>Manual</strong><br />
1. Select Reports.<br />
2. Select a report from the Select Report drop list in the CSM Reports dialog box<br />
and enter the requested data.<br />
3. Click Report. The report data is displayed in the Report Viewer.<br />
You can print the report, export it into another program, or customize the display. For<br />
information on using the Report Viewer, see “Report Viewer” on page 323.<br />
NOTE<br />
To access the CSM Reports dialog box from the Home window, select<br />
Reports > Report Manager. Next, under Other Report Options, double-click<br />
Client Status Manager Reports.<br />
Exporting CSM Data<br />
Admin-only Features<br />
To export CSM data into Notepad or CSV format (suitable for Microsoft Excel and<br />
Microsoft Access), click Export in the CSM toolbar. A worksheet of the data is<br />
opened automatically.<br />
Users with administrative rights can delete records from the CSM display, restore<br />
CSM data, and remove duplicate entries.<br />
Deleting a Record from the CSM Display<br />
When a record is deleted from the CSM display, it is no longer visible in the CSM. It<br />
still exists in the software, however. To delete a record from the CSM display, rightclick<br />
the record and select Delete CSM Record (This Client). To view a deleted<br />
record, click Filters > Display Deleted CSM Records.<br />
NOTE<br />
To delete a client file from <strong>Drake</strong>, see “Deleting Files from the Program”<br />
on page 297. A record cannot be deleted from within the PCM.<br />
Restoring Data<br />
Removing Duplicates<br />
When restoring data, the CSM scans a client file, calculates the return, searches the EF<br />
database, and updates the data. To restore data from the CSM, right-click a record and<br />
select Restore CSM Data (This Client). Click OK.<br />
To remove a duplicate entry in the CSM, right-click a record and select Remove<br />
Duplicate Entries (Entire Database).<br />
NOTE<br />
Duplicate CSM (and PCM) entries must be removed from within the<br />
CSM; they cannot be removed from within the PCM.<br />
256 Tax Year 2012
10 Resources and Support<br />
<strong>Drake</strong> <strong>Software</strong> <strong>Manual</strong><br />
<strong>Drake</strong> <strong>Software</strong> offers a wide range of support resources. In addition to our unparalleled<br />
telephone support, <strong>Drake</strong> has a variety of online and software help resources to<br />
give you 24-hour access to the latest information.<br />
Help resources are available to assist you in making the most of your tax preparation<br />
software and using it successfully. We do not, however, provide tax law advice. Support<br />
is provided as an aid to tax return completion only. Preparers are responsible for<br />
knowing tax preparation and for the accuracy of returns filed with the IRS and state<br />
tax authorities.<br />
Your <strong>Drake</strong> <strong>Software</strong> User’s <strong>Manual</strong>: Tax Year 2012 is an electronic document with a<br />
comprehensive index to help you quickly find the information you want. You can save<br />
the manual to your desktop or print your own copy. It is available from three locations:<br />
• <strong>Drake</strong> Home window — Select Help > Online Resources.<br />
• <strong>Software</strong> CD — The latest version of the manual is shipped with each CD.<br />
• Support website — Support.<strong>Drake</strong><strong>Software</strong>.com > Training Tools > <strong>Manual</strong>s.<br />
To purchase a printed copy of the manual ($25 plus tax and shipping), go to Support.<strong>Drake</strong><strong>Software</strong>.com<br />
(Training Tools > <strong>Manual</strong>s).<br />
IMPORTANT<br />
If you use a printed copy, be aware that it must be updated manually<br />
throughout tax season. (Addenda pages are included on each<br />
<strong>Drake</strong> CD.) Because <strong>Drake</strong> continually updates the online manual<br />
throughout the season, your best bet for always having the most<br />
current version is to use the online manual.<br />
Tax Year 2012 257
Online Support<br />
<strong>Drake</strong> <strong>Software</strong> User’s <strong>Manual</strong><br />
Online Support<br />
Knowledge Base<br />
<strong>Drake</strong>’s Support website (Support.<strong>Drake</strong><strong>Software</strong>.com) offers a wealth of resources<br />
that are available 24 hours a day. In addition to current tax information, it provides the<br />
online support options discussed here. A reliable Internet connection is necessary to<br />
take full advantage of <strong>Drake</strong>’s online resources.<br />
The Knowledge Base (KB) is a searchable database of articles submitted by clients,<br />
programmers, the IRS, and state revenue departments covering most of the topics that<br />
generate support questions. There are more than 1,800 articles covering such topics as<br />
<strong>Drake</strong>’s tax and Client Write-Up software, changes in state and federal tax laws, taxreturn<br />
troubleshooting, bank products, tax-law research, and other topics related to<br />
your tax practice.<br />
To access the KB, go to the <strong>Drake</strong> Support site and select Resources > Knowledge<br />
Bases. From the list displayed, click the KB you want to view:<br />
• <strong>Drake</strong> <strong>Software</strong> Support — Articles covering both <strong>Drake</strong> <strong>Software</strong> and Client<br />
Write-Up)<br />
• Client Write-Up — Article covering just CWU and CWU update notes<br />
When you open a KB, the Search tab for that KB is displayed (Figure 10-1).<br />
Figure 10-1: KB tabs (item 1); search fields (item 2); and suggested articles (item 3)<br />
258 Tax Year 2012
<strong>Drake</strong> <strong>Software</strong> User’s <strong>Manual</strong><br />
Online Support<br />
NEW FOR<br />
2012<br />
<strong>Drake</strong> has added a GruntWorx Knowledge Base to the list of available<br />
Knowledge Bases. New articles are being added. To search the Grunt-<br />
Worx KB, from the Search for articles section, select GruntWorx KB<br />
from the Search within drop list. See item #2 in Figure 10-1 on<br />
page 258. For more on GruntWorx, see Chapter 13, “Suite Products.”<br />
Begin your queries by viewing the Latest Articles (those most recently published or<br />
changed), Hot Topics (those most viewed in the past month), and Top 10 Frequently<br />
Asked Questions. (See item 3 in Figure 10-1 on page 258.) Next, search for specific<br />
articles, questions, or terms using the five tabs listed in Table 10-1.<br />
Table 10-1: KB Tabs (See item 1 in Figure 10-1)<br />
Search<br />
Browse<br />
FAQ<br />
Tab<br />
Solution Finder<br />
Glossary<br />
How to Search<br />
the KB<br />
Category List<br />
Description<br />
Search for articles using word searches. Enter search criteria under<br />
Search for articles. (See item 2 in Figure 10-1 on page 258; see also<br />
“Searching the KB,” following.)<br />
Open folders containing all articles on a selected subject. Choose from<br />
more than two dozen folders of tax software topics and 18 folders of Client<br />
Write Up topics.<br />
View articles we believe to be most pertinent. These change frequently, so<br />
check back often.<br />
Helps you diagnose, identify, and resolve data-path problems.<br />
View a list of relevant tax and <strong>Drake</strong> <strong>Software</strong> terms.<br />
View detailed instructions on how to use the KB search features to quickly<br />
find relevant articles.<br />
View all categories of topics in the <strong>Drake</strong> and CWU Knowledge Bases.<br />
Searching<br />
the KB<br />
To search for a topic or article in the KB:<br />
1. Under the Search tab (Figure 10-1 on page 258), enter a keyword in the Search<br />
field.<br />
2. (optional) Direct your search by selecting options from the Search Using and<br />
Search Within drop lists. Search Using options are described in Table 10-2.<br />
Table 10-2: Options in KB Search Using Drop List (See item 2 in Figure 10-1.)<br />
Search Option<br />
All Words<br />
Any Word<br />
Boolean<br />
Exact Phrase<br />
Description<br />
Searches for articles containing all search terms entered.<br />
Searches for articles containing any one of the search terms.<br />
Allows connector words to be used in conjunction with keywords<br />
to aid in searching. Use and, not, and or.<br />
Searches for articles containing the exact phrase entered.<br />
Tax Year 2012 259
Online Support<br />
<strong>Drake</strong> <strong>Software</strong> User’s <strong>Manual</strong><br />
Table 10-2: Options in KB Search Using Drop List (See item 2 in Figure 10-1.)<br />
Search Option<br />
Natural Language<br />
Description<br />
Allows you to enter a sentence in the Search field. The KB pulls<br />
out matches to any words in the sentence.<br />
3. Select Click to Search. Related articles appear in order of relevance, with the<br />
most relevant first. From the Sort by drop list, articles can also be sorted by the<br />
date the articles were modified, by the article rating, or by the article titles. Click a<br />
title to open the article. If only one article meets the search criteria, the KB opens<br />
that article. Matches to your keywords are highlighted.<br />
Be sure to click the How to Search the KB tab for additional instructions on setting<br />
up article searches.<br />
Search Within<br />
Use the new Search Within feature (Figure 10-2) to narrow a search to specific article<br />
categories within specific databases and find pertinent articles more quickly. For<br />
example, to get information on reporting depreciation for a federal 1040 return in<br />
<strong>Drake</strong>’s tax software, you might take the following steps:<br />
1. Type depreciation into the Search text box. (Figure 10-2)<br />
Figure 10-2: Narrow your search with Search Within<br />
2. From the Search using drop list, make a selection. (See Table 10-2 on page 259<br />
for the list of selections.)<br />
3. From the Select within drop list, select <strong>Drake</strong> <strong>Software</strong> KB.<br />
4. From the new drop list that appears below, select Federal Returns.<br />
5. From the new drop list that appears, select 1040 Individual.<br />
6. Select the Click to Search button at the top of the screen. (See Figure 10-2)<br />
Browsing<br />
the KB<br />
The Browse tab lists all available topics as folders, with all articles on each topic<br />
stored within the folders. Select Client Write-Up or <strong>Drake</strong> <strong>Software</strong>, click a folder<br />
to see a list of articles, and click an article to open it (Figure 10-3 on page 261).<br />
260 Tax Year 2012
<strong>Drake</strong> <strong>Software</strong> User’s <strong>Manual</strong><br />
Online Support<br />
Figure 10-3: Some folders and articles within the Browse tab<br />
Navigation<br />
Icons<br />
Related<br />
Articles<br />
Attachments<br />
Feedback<br />
From within each KB article, you can use the icons at the upper-right corner of the<br />
window to return to the previous article, print or e-mail the article, save the article to a<br />
browser’s “Favorites” folder, save it to another location, or copy it for pasting into<br />
another application (such as a Word document).<br />
A Related Articles link at the lower-left corner of an article window takes you to a list<br />
of other articles related to the one you queried.<br />
Some articles have an Attachments link that takes you to a list of attached documents<br />
that you can download and view. The attached documents provide additional detail<br />
beyond that provided in the text of the article.<br />
<strong>Drake</strong> encourages you to respond to any article you read in the KB. Your suggestions<br />
are used to improve the KB’s content for other clients. In the lower-left corner of an<br />
article window, click Feedback to open the feedback window. Enter your feedback<br />
and click Submit.<br />
<strong>Drake</strong>’s e-Training Center (ETC)<br />
<strong>Drake</strong> ETC is a convenient resource for training your office staff and earning continuing<br />
professional education (CPE) credits through the use of tutorials, practice returns,<br />
videos, webinars, and interactive tax courses. ETC also provides tracking tools and<br />
interactive testing so individuals and group administrators can monitor their personal<br />
and collective progress. To access <strong>Drake</strong> ETC, go to the <strong>Drake</strong> Support site and select<br />
Training Tools > <strong>Drake</strong> ETC, or go to <strong>Drake</strong>ETC.com.<br />
The new ETC Welcome page includes news and information on what’s happening in<br />
<strong>Drake</strong> ETC (Figure 10-4 on page 262).<br />
IMPORTANT<br />
For information on the IRS’s continuing education upload system,<br />
and how <strong>Drake</strong> reports CE credits for Registered Tax Return Preparers<br />
(RTRPs) and Enrolled Agents (EAs), click the Important!<br />
link available on ETC Home page, the Administration setup<br />
page, or when editing a student account.<br />
Tax Year 2012 261
Online Support<br />
<strong>Drake</strong> <strong>Software</strong> User’s <strong>Manual</strong><br />
Figure 10-4: The new ETC Welcome page<br />
Creating an<br />
ETC Admin<br />
Account<br />
Before you can log in to ETC, your office must have an ETC administrator (Admin)<br />
account. Once the account is established, you can create student accounts and begin<br />
tracking student progress. With their own user names and passwords, students can log<br />
in to ETC on their own.<br />
Admin accounts are created using the Need to sign up? section (Figure 10-5).<br />
Figure 10-5: Need to sign up? section of ETC Welcome page<br />
To create an Admin account:<br />
1. In the Need to sign up? section, <strong>Drake</strong> customers select Yes and click Submit.<br />
2. Enter your EFIN and <strong>Drake</strong> password (from your packing slip) and click Submit.<br />
3. In the Welcome window, complete all applicable fields.<br />
4. To earn CPE credit for completing ETC courses, select Yes from the CPE Credits<br />
drop list.<br />
5. Preparers registered in California, Oregon, Texas, or Pennsylvania should mark<br />
their respective boxes in order to receive CPE credits in those states.<br />
6. Enrolled Agents and Registered Tax Return Preparers should mark those boxes.<br />
7. Enter your PTIN.<br />
8. Click Save Information. When the system has saved your data, click Next.<br />
262 Tax Year 2012
<strong>Drake</strong> <strong>Software</strong> User’s <strong>Manual</strong><br />
Online Support<br />
Creating an<br />
ETC Student<br />
Account<br />
To create a student account, log in to ETC (See “Logging In,” following), click the<br />
Administration link, and click Add New Student. After completing all applicable<br />
fields (see steps 4-7 in the “Admin account” setup above), click Save Information.<br />
NOTE<br />
When creating a <strong>Drake</strong> ETC student account, each student must enter<br />
a unique e-mail address, even if all students are part of the same<br />
administrative account.<br />
Logging In<br />
To log in to ETC:<br />
1. Go to the <strong>Drake</strong> Support site and select Training Tools > <strong>Drake</strong> ETC, or go to<br />
<strong>Drake</strong>ETC.com.<br />
2. In the Returning Users section, enter a Username and Password (Figure 10-6).<br />
3. Click Sign In.<br />
Figure 10-6: Logging in as a returning user<br />
Once you’re logged in, the ETC Home page is opened. On the left side of this page is<br />
a blue sidebar menu (Figure 10-7).<br />
Figure 10-7: Sidebar menu for all ETC selections<br />
The sidebar menu lists the available resources within ETC, as described in Table 10-3.<br />
Table 10-3: <strong>Drake</strong> ETC Resources<br />
Item<br />
<strong>Drake</strong> Resources ><br />
Tax Courses<br />
Description<br />
Interactive tax courses explore IRS tax law and terminology and how they apply to<br />
<strong>Drake</strong> data entry. CPE credits are available. Current courses include 1040, 1065,<br />
1120, and 1120S.<br />
Tax Year 2012 263
Online Support<br />
<strong>Drake</strong> <strong>Software</strong> User’s <strong>Manual</strong><br />
Table 10-3: <strong>Drake</strong> ETC Resources<br />
Item<br />
<strong>Drake</strong> Resources > <br />
Tutorials<br />
<strong>Drake</strong> Resources ><br />
Practice Returns<br />
<strong>Drake</strong> Resources ><br />
Videos and<br />
Recorded Webinars<br />
Webinars > Available<br />
Webinars<br />
RTRP Study<br />
Report Card<br />
Administration<br />
Instructional slide shows teach the basics of <strong>Drake</strong> <strong>Software</strong>. Topics include tax<br />
and CWU subjects. Many topics are available in Spanish.<br />
Hands-on data entry and e-file training.<br />
Description<br />
Recorded webinars cover such subjects as <strong>Drake</strong> setup and tools, data entry, and<br />
e-filing. Some topics from previous years include <strong>Drake</strong> installation, required setup,<br />
data entry, View/Print, e-filing, letters and bills, bank products, and split, extension,<br />
and amended returns. Past-years’ videos for Client Write-Up include such subjects<br />
such as spreadsheet importation and end-of-year e-filing.administration.<br />
Covers such topics as: <strong>Drake</strong> 101, “Kiddie” tax, federal tax law update, IRAs, filing<br />
statuses, EITC due diligence, and continuing education requirements. More webinars<br />
are added each month. Panelists are available to answer your questions. CPE<br />
credits are available (no test required). Also keeps track of webinars you’re<br />
attended through Webinars > My Webinars.<br />
Study courses to help preparers pass the IRS’s Registered Tax Return Preparers<br />
competency test.<br />
Track students’ progress in the tutorials and in the tax courses, including dates of<br />
completion, quiz results, and CPE credits earned.<br />
Available only when logged in with an Admin account, this section allows you to<br />
create student accounts and view student report cards.<br />
When a course unit, tutorial, practice return, recorded webinar, or video has been<br />
viewed, a green check mark replaces the red “X” next to the completed item. (See<br />
Figure 10-8.)<br />
Tax Courses ETC offers basic return preparation courses for forms 1040, 1120, 1120S, and 1065.<br />
An intermediate 1040 course is also available. CPE credits are available for the successful<br />
completion of each course. There is a fee for printing the completion certificate.<br />
Check the <strong>Drake</strong> ETC website (<strong>Drake</strong>ETC.com) for details and pricing.<br />
For a list of available courses and units, from the sidebar menu, click Tax Courses.<br />
The Tax Courses page displays the units of the Basic Tax Course (Figure 10-8).<br />
Figure 10-8: Units of the Basic Tax Course<br />
264 Tax Year 2012
<strong>Drake</strong> <strong>Software</strong> User’s <strong>Manual</strong><br />
Online Support<br />
To view units for a different tax year or course, select an option from the Tax Year and<br />
Course drop lists.<br />
IMPORTANT<br />
Click System Requirements on the Tax Courses page to ensure<br />
that your system supports the tax course programs. Make sure<br />
your speaker volume is turned on in order to hear the audio.<br />
To open a unit:<br />
1. Click Launch Course for the selected unit. (See Figure 10-8 on page 264.) The<br />
unit is opened in a browser window.<br />
2. Use the navigation buttons in the upper-right corner to move through the course.<br />
Use the sound buttons at the bottom of the window to stop, pause, or replay audio.<br />
3. When you finish a unit, click Exit to return to the Tax Courses page.<br />
Completed units can be viewed again at any time. Once all course units are completed,<br />
the Launch Exam button will become available. Click it to begin the test. Submit<br />
your score upon completion of the test.<br />
CPE Credits<br />
To earn CPE credits for taking a tax course in <strong>Drake</strong> ETC, you must score 80% or<br />
higher on the course exam and submit a course evaluation. Review the CPE details<br />
(click the word “here” at the end of the first paragraph of directions) to determine<br />
CPE eligibility. The CPE eligibility is also available from the main Support page,<br />
under Training Tools > CPE.<br />
After completing all units of a course, click Launch Exam on the Tax Courses page<br />
for that course. After passing the exam with a score of 80% or higher, click Launch<br />
Evaluation. Once you have completed and submitted the evaluation, you will be able<br />
to print a CPE certificate.<br />
NOTES<br />
To reprint a CPE certificate, click Report Card in the <strong>Drake</strong> ETC sidebar<br />
menu. Scroll to the bottom of the Report Card window to the CPE<br />
Credits list, and click Print for the desired certificate.<br />
To access information on all the ways to earn CPE credits from <strong>Drake</strong><br />
without logging in to ETC, go to Support.<strong>Drake</strong><strong>Software</strong>.com and select<br />
Training Tools > CPE.<br />
Tutorials<br />
Tutorials teach the basics of <strong>Drake</strong> <strong>Software</strong> through text, sound, and animation. For a<br />
list of available tutorials in ETC, click <strong>Drake</strong> Resources > Tutorials from the blue<br />
sidebar menu. The Tutorials and Quizzes page displays a list of <strong>Drake</strong> tutorials,<br />
(Figure 10-9 on page 266), with green check marks indicating tutorials completed and<br />
red Xs indicating tutorials not yet begun.<br />
Tax Year 2012 265
Online Support<br />
<strong>Drake</strong> <strong>Software</strong> User’s <strong>Manual</strong><br />
Figure 10-9: Tutorial list<br />
Click Launch Tutorial for the desired tutorial. (Tutorials do not have to be completed<br />
in the order listed.)<br />
Each tutorial has its own quiz. Quizzes test the student’s knowledge of the subject and,<br />
if you’re an administrator, can help track student progress. To access a quiz, select<br />
Quizzes from the Subject drop list and click Launch Quiz for the desired quiz.<br />
NOTE<br />
Tutorials are added throughout the season, so check for new tutorials<br />
often. To view tutorials for <strong>Drake</strong> CWU, select Client Write-Up from the<br />
Subject drop list (shown in Figure 10-9).<br />
Practice<br />
Returns<br />
Practice returns have been designed to help your firm become familiar with the basics<br />
of data entry and e-filing in <strong>Drake</strong> <strong>Software</strong>. To access practice returns in ETC, click<br />
<strong>Drake</strong> Resources > Practice Returns. The Practice Returns page displays instructions<br />
and a list of available practice returns (Figure 10-10).<br />
Figure 10-10: List of practice returns on the Practice Returns page<br />
Click View Return to view the basic return scenario in a PDF file. Open <strong>Drake</strong>’s tax<br />
software and prepare the return according to the scenario. Once you’ve calculated the<br />
return, go back to the Practice Returns page and click View Solution to compare<br />
your return to the solution return.<br />
<strong>Drake</strong> ETC offers 10 basic and intermediate practice returns for the 1040 package and<br />
one practice return each for the 1120, 1120S, and 1065 packages. To practice e-filing<br />
and working with bank products, scroll to EF Banking and click View Return. Follow<br />
the instructions located in the PDF file.<br />
NOTE<br />
Tutorials and practice returns are also available outside of ETC. To see<br />
the tutorials, or to work on the practice returns without signing on to<br />
ETC, go to the Support website and click either Training Tools > Practice<br />
Returns or Training Tools > Tutorials. Practice returns are also<br />
available on your <strong>Drake</strong> CD and through the software (Help > Online<br />
Resources).<br />
266 Tax Year 2012
<strong>Drake</strong> <strong>Software</strong> User’s <strong>Manual</strong><br />
Online Support<br />
Recorded<br />
Webinars<br />
Some of our live webinars have been recorded and can be viewed at any time.<br />
Although these recorded webinars do not earn you CPE credits, they can help familiarize<br />
you with such topics are “Program Setup and Tools,” Data Entry,” and “e-Filing”<br />
for <strong>Drake</strong> tax software users and “Spreadsheet Importing” and “End of Year e-<br />
Filing” for Client Write-Up users.<br />
To view a recorded webinar:<br />
1. From the sidebar menu at the left of the <strong>Drake</strong> ETC window, select <strong>Drake</strong><br />
Resources > Videos and Recorded Webinars.<br />
2. Select from the Tax Year and Course drop lists.<br />
3. Click Launch Recorded Webinar.<br />
The first time you view a webinar, the WebEx Manager is automatically downloaded<br />
to your computer. For help with WebEx Manager, call WebEx Support at (866) 229-<br />
3239.<br />
NOTE<br />
<strong>Drake</strong> ETC also offers videos (CDs and DVDs) of our annual Update<br />
Schools. To order, from the sidebar menu of the main Support website,<br />
go to Resources > Supplemental Resources. (If you’re logged in to<br />
ETC, return to the main Support website by clicking Support Login in<br />
the upper-right corner of the window.)<br />
Webinars<br />
<strong>Drake</strong> ETC provides live webinars on various topics with new webinars added every<br />
month. The live webinars are presented with panelists available to answer viewers’<br />
questions during the event. CPE credits are available (no test required; see NOTES<br />
below). You or your account administrator can keep track of completed webinars and<br />
CPE credits earned through the ETC site.<br />
NOTES<br />
Review the CPE details provided with each <strong>Drake</strong> webinar to determine<br />
CPE eligibility. Our webinars cover various topics and are presented<br />
with panelists available to answer viewers’ questions during the event.<br />
Attendees must respond to several polls offered during the webinars,<br />
and complete a short evaluation after the webinar to qualify for CPE<br />
credits.<br />
A fee is required for most webinars.<br />
Please join webinars at least 10 minutes before the scheduled starting<br />
time. Speakers or headphones are required.<br />
Registration<br />
for Webinars<br />
To register for a webinar from <strong>Drake</strong>ETC:<br />
1. From the sidebar menu, go to Webinars > Available Webinars. (See “Logging<br />
In” on page 263 for details on logging in to <strong>Drake</strong>ETC.)<br />
2. From the list of Available Webinars, click Register on the right side of the window<br />
for the webinar you wish to attend. (See Figure 10-11 on page 268.)<br />
Tax Year 2012 267
Online Support<br />
<strong>Drake</strong> <strong>Software</strong> User’s <strong>Manual</strong><br />
Figure 10-11: Signing up for webinars on the ETC webpage<br />
3. Complete the information requested on the Webinar Registration window. Note<br />
that a unique e-mail address (one not already used by someone else) must be provided.<br />
4. Click the blue Register button.<br />
5. Complete the credit card information on the Webinar Payment window and click<br />
Submit.<br />
After your registration is processed, you will receive:<br />
• A confirmation e-mail message containing details of the upcoming webinar and a<br />
link you must click in order to join the webinar.<br />
• A calendar reminder you can save to your Microsoft Outlook e-mail account<br />
• Reminder e-mail one day before the event and one hour before the event.<br />
Attending<br />
Webinars<br />
CPE Credits<br />
To join the webinar, click the link provided in the confirmation e-mail and follow the<br />
included instructions, or from the sidebar menu of the <strong>Drake</strong> ETC website, go to<br />
Webinars > My Webinars and click Launch.<br />
To earn CPE credits, attendees must respond to a series of polls conducted during the<br />
webinar (attendees must respond to at least 75 percent of the polls to be eligible for the<br />
credits) and complete a short evaluation after the event.<br />
Webinar attendees will receive an e-mail notification when the CPE credits are made<br />
available (usually within 48 hours). After receiving the notification e-mail, follow<br />
these steps to complete the CPE process:<br />
1. From the sidebar menu, go to Webinars > My Webinars. A list of completed<br />
webinars is displayed.<br />
2. Click Evaluation on the line of the webinar you completed.<br />
3. Complete the short evaluation and click Submit.<br />
4. When the certificates are posted (24–48 hours after submission of the evaluation),<br />
return to My Webinars. On the line of the webinar completed, click Print CPE.<br />
More information on hardware and software requirements, registration, pricing,<br />
refunds, CPE details, and other webinar-related topics are available on the Available<br />
Webinars and My Webinars windows.<br />
268 Tax Year 2012
<strong>Drake</strong> <strong>Software</strong> User’s <strong>Manual</strong><br />
Other Resources at <strong>Drake</strong> Support<br />
RTRP Study<br />
Registers tax return preparers must take and pass a Registered Tax Return Preparer<br />
(RTRP) competency test, as mandated by the U.S. Congress. The test focuses on the<br />
ethical responsibilities of federal tax return preparers and on the preparer’s ability to<br />
complete Form 1040 and related schedules and forms.<br />
To help prepare you to take this test, <strong>Drake</strong> is offering two study courses: the RTRP<br />
Test Study Course, and the RTRP Test Overview and Tips. You earn CPE credits for<br />
taking either course, credits that apply toward your annual CPE requirements.<br />
For details on the two <strong>Drake</strong> courses, or to register for either course, from the sidebar<br />
menu of the <strong>Drake</strong>ETC window, click RTRP Study.<br />
Report Card<br />
Admin<br />
Click Report Card from an ETC sidebar menu to view training progress, test and<br />
quiz results, and CPE credits earned for a selected year. To reprint a CPE certificate,<br />
scroll down to the CPE Credits section and click Print for the desired certificate.<br />
The Administration page is available only for users logged in as Admin. To access<br />
this ETC page, click Administration. Displayed are a list of students, buttons for adding<br />
and searching student records, and a drop list for displaying Active Students,<br />
Inactive Students, or All Students. (Figure 10-12).<br />
Figure 10-12: Admin page displays list for student information<br />
Click to view a student’s Report Card, or click Edit to view and edit a student’s<br />
information. (Click Save to save it.)<br />
Logging Out<br />
To log out of <strong>Drake</strong> ETC, click Sign Out. You are returned to the ETC login page.<br />
IMPORTANT<br />
For information on the IRS’s continuing education upload system,<br />
and how <strong>Drake</strong> reports CE credits for Registered Tax Return Preparers<br />
(RTRPs) and Enrolled Agents (EAs), click the Important!<br />
link available on ETC Home page, the Administration setup<br />
page, or when editing a student account.<br />
Other Resources at <strong>Drake</strong> Support<br />
The <strong>Drake</strong> Support site offers a wealth of additional resources, such as information<br />
about webinars, trade shows, live training sessions, preparer regulations, state and federal<br />
tax laws, 1040.com e-mail and webpage account, update schools, GruntWorx,<br />
SecureFilePro TM , and CWU. You can also view helpful publications and download<br />
prior-year <strong>Drake</strong> programs, prior-year release notes, and software for converting data<br />
Tax Year 2012 269
Other Resources at <strong>Drake</strong> Support<br />
<strong>Drake</strong> <strong>Software</strong> User’s <strong>Manual</strong><br />
Federal/State Facts<br />
files from other tax software programs into <strong>Drake</strong>, and order marketing kits, checks,<br />
and printed forms.<br />
Some of these resources are available from the sidebar menu on the left side of the<br />
Support Web page and others by scrolling down the Resources Overview page.<br />
Here are just a few of the many resources available:<br />
The Federal/State Facts pages have federal data on and lists of forms eligible for e-<br />
file, and state data on e-filing, state tax forms, state payments and deposits, state due<br />
dates, penalties, and extensions. You can also access state shipment letters, form<br />
instructions, and update notes (Figure 10-13). As EF packages are approved, that<br />
information is added to the state pages. The pages also include links to the <strong>Drake</strong><br />
Forums (see “<strong>Drake</strong> Forums,” following) and state taxing authority websites.<br />
<strong>Drake</strong> Forums<br />
Figure 10-13: Link selections (item 1) on the CA page; link to the state taxing authority (#2)<br />
State pages offer a list of available topics (item 1 in Figure 10-13) from which to<br />
choose. Click the state taxing authority link (item 2 in Figure 10-13) to go to that<br />
state’s website.<br />
The online <strong>Drake</strong> Forums allow you to interact with other <strong>Drake</strong> clients. Participation<br />
in <strong>Drake</strong> Forums is strictly voluntary. To access <strong>Drake</strong> Forums from the <strong>Drake</strong> Support<br />
site, select Resources > Forums or from the sidebar menu on any of the state<br />
pages of the Federal/State Facts page.<br />
First-time users must register before participating; read the text on the Forums page<br />
regarding registration requirements, and then select Click here to Register. Follow<br />
the instructions provided on your screen.<br />
270 Tax Year 2012
<strong>Drake</strong> <strong>Software</strong> User’s <strong>Manual</strong><br />
Other Resources at <strong>Drake</strong> Support<br />
Once registered for the Forums, select Click here to Login on the Forums page.<br />
After logging in, click FAQ for further instructions. Click User CP to set up a user<br />
profile.<br />
NOTE<br />
The <strong>Drake</strong> <strong>Software</strong> Forums are strictly voluntary and should not be<br />
used as a substitute for obtaining help from <strong>Drake</strong> Support.<br />
<strong>Drake</strong><br />
<strong>Software</strong><br />
Downloads<br />
Secure-<br />
FilePro<br />
The Download Center is available from Resources > Download Center. The Download<br />
Center page displays the software packages and the education and training materials<br />
available for download. Click an item to download it.<br />
SecureFilePro provides secure client file exchange portals for your practice, so you<br />
and your clients can exchange confidential tax documents securely and conveniently.<br />
Send and receive client documents on your own secure site, anytime, from anywhere.<br />
All transmissions are secured with 256-bit SSL encryption, and files are encrypted at<br />
rest on the server. Clients can view and access only their own documents.<br />
Explanations and prices are on the window at Resources > SecureFilePro, as are<br />
links to sign up for a free trial or to purchase any of the regular SecureFilePro packages.<br />
Supplemental<br />
Resources<br />
Broadcast<br />
Center<br />
Prior-Year<br />
State<br />
Programs<br />
Release<br />
Notes<br />
Purchase <strong>Drake</strong>’s software manual, the Client Write-Up manual, Update School videos,<br />
or a subscription to The TaxBook WebLibrary. (See “Tax Book” on page 275 for<br />
more information.)<br />
Keep abreast of all the important tax and software information with <strong>Drake</strong> broadcasts.<br />
The broadcast e-mail messages that <strong>Drake</strong> sends out during the tax season are compiled<br />
and saved in the Broadcast Center. These broadcasts are grouped by categories;<br />
choose from the Select a category to display drop list.<br />
<strong>Drake</strong>’s prior-year software packages for state programs (1998–2009) are available for<br />
installation.<br />
• Tax years 2007 and after — Use Tools > Install State Programs in your <strong>Drake</strong><br />
program. Once state programs are installed, update them using Tools > Install<br />
Updates (for 2007 and 2008) or Tools > Update Manager (for 2009).<br />
• Tax years 2003–2006 — First download the state tax packages from the Download<br />
Center (From Resources > Download Center on the <strong>Drake</strong> Support site,<br />
select a year then any states you need), and then install the updates within <strong>Drake</strong><br />
<strong>Software</strong> (Tools > Install Updates).<br />
• Tax years 1998–2002 — Go to Resources > Prior Year States on the <strong>Drake</strong> Support<br />
site, click the appropriate year, select the state to download, and then follow<br />
the instructions on your screen.<br />
<strong>Software</strong> release notes from prior years are available on the <strong>Drake</strong> Support site.<br />
(Scroll down the Resources Overview page to Release Notes.) Select a year and<br />
update category to view the list of releases and release dates. Click a note link to view<br />
the release note.<br />
Tax Year 2012 271
Other Resources at <strong>Drake</strong> Support<br />
<strong>Drake</strong> <strong>Software</strong> User’s <strong>Manual</strong><br />
Conversions<br />
Publications<br />
Marketing<br />
Kits<br />
Partner<br />
Programs<br />
Business<br />
Planning<br />
Group<br />
To download software to convert data files from other tax programs into <strong>Drake</strong> format,<br />
go to the <strong>Drake</strong> Support site and select Resources > Conversions. Choose a tax<br />
year and a brand of software. Read the instructions (available for downloading and<br />
printing) before running the conversion.<br />
From the <strong>Drake</strong> Support site, select Training Tools > Publications to download some<br />
commonly accessed IRS publications. At the bottom of the publications list is a<br />
Search 1040.com for more publications link, which takes you to the 1040.com website.<br />
From this site, you can search for federal and state tax forms, instructions, and<br />
news; get tax tips; download tax tables; find federal tax estimators and financial calculators;<br />
and get information all professional tax preparers need.<br />
Advertise your business using the newspaper ads, posters, banners, and radio spots<br />
available at the <strong>Drake</strong> Support site. Select Training Tools > Marketing Kits to access<br />
and order these resources, visit links to other marketing resources, and pick up free<br />
marketing kits from the IRS.<br />
From the sidebar menu, click Partner Programs to access information on <strong>Drake</strong>’s<br />
partner companies that provide solutions for banking, forms and checks, budgeting,<br />
business planning, Internet services, and electronic tax payments.<br />
<strong>Drake</strong> clients have exclusive use of the Business Planning Group (BPG). This group<br />
consists of retirement specialists, advanced underwriters, and attorneys who can help<br />
your firm assist your clients in minimizing tax on Social Security benefits, estate tax<br />
planning and reduction, retirement planning, and business continuation and restructuring.<br />
When you work with BPG, it serves as an extension of your practice. Once you’ve<br />
identified a need for services (for example, noticing that your client is paying taxes on<br />
Social Security), you can begin the process of working with BPG. For you as a preparer,<br />
this process has three main steps:<br />
• Complete and submit questionnaire — You and your client submit a simple<br />
questionnaire to BPG for review. Based on that information, BPG’s professionals<br />
develop a plan and recommendations, which they will discuss at length with you,<br />
clarifying details, answering questions, and generally reviewing the facts to finalize<br />
a course of action for your client.<br />
• Present a plan to your client — Once the plan is approved, you present it to your<br />
client. If requested, BPG’s professionals can participate in the presentation, but<br />
this is not required.<br />
• Implement the plan — Although you and your client are responsible for implementing<br />
the plan, BPG is available throughout implementation and will continue<br />
to be available for follow-up.<br />
In addition to helping you guide your clients, BPG can be a significant revenue source<br />
for your business because you can charge consulting fees for both your work and the<br />
time BPG spends on each case (generally four to 10 times the number of hours as an<br />
accounting firm).<br />
For more information on how BPG works, and how you can work with its experts to<br />
benefit your clients, you can either:<br />
272 Tax Year 2012
<strong>Drake</strong> <strong>Software</strong> User’s <strong>Manual</strong><br />
<strong>Software</strong> Support In <strong>Drake</strong>’s Tax <strong>Software</strong><br />
• Call (828) 488-1950, extension 203<br />
• Go to <strong>Drake</strong><strong>Software</strong>.com, and from the blue sidebar menu bar, select Partner<br />
Program > Business Planning Group. When the Business Planning Group<br />
window is opened, from the right side of the window, click Business Planning<br />
Group.<br />
Blank Forms<br />
Beyond 415 TM<br />
Several blank banking and checking forms are available through <strong>Drake</strong> Support,<br />
including state-specific bank disclosures, cancellation requests, lost check affidavits,<br />
check registers, and voided check lists.<br />
Beyond 415, an automated system of managing such post-filing issues as IRS notices,<br />
letters, audits, account balances, and unpaid balances, is available through the <strong>Drake</strong>.<br />
The Beyond 415 technology is designed to help tax practitioners understand, handle,<br />
and settle IRS issues quickly. The system includes step-by-step instructions and provides<br />
images of the specific IRS letter for download. The system allows tax professionals<br />
to customize their responses to IRS issues, and automatically fills in applicable<br />
IRS forms, customized cover letters, worksheets, cover sheets, and document request<br />
forms, all in the IRS’s accepted formats.<br />
<strong>Drake</strong> customers can get a free trial and access to some of the features in Beyond 415.<br />
For more information, see the Beyond 415 website at https://www.beyond415.com, or<br />
from the <strong>Drake</strong> Support website, click Resources > Download Center, and on the<br />
right side of the Download Center window, in the Product Developments section,<br />
click Beyond 415 TM .<br />
<strong>Software</strong> Support In <strong>Drake</strong>’s Tax <strong>Software</strong><br />
Several support resources are available from within the <strong>Drake</strong> program itself. Access<br />
Frequently Asked Questions, searchable help, data entry help, and broadcast e-mails.<br />
Frequently Asked Questions (FAQs)<br />
Searchable Help<br />
An FAQ screen is included with each tax software package in <strong>Drake</strong> <strong>Software</strong>, accessible<br />
from any tab on the Data Entry Menu or by typing FAQ into the selector field<br />
and pressing ENTER. FAQ screen content varies by state and package.<br />
All <strong>Drake</strong> windows (except the data entry screens) have a clickable Help icon or button<br />
for accessing the <strong>Drake</strong> Help System—a searchable “<strong>Drake</strong> encyclopedia,”<br />
arranged in “books” and an index. The Help System answers many of the most commonly<br />
asked questions about the software.<br />
Tax Year 2012 273
<strong>Software</strong> Support In <strong>Drake</strong>’s Tax <strong>Software</strong><br />
<strong>Drake</strong> <strong>Software</strong> User’s <strong>Manual</strong><br />
When you access the Help System, it is opened for the window you are in. For example,<br />
if you are in pricing setup (Setup > Pricing) and click Help, you are shown the<br />
Help information for pricing setup. To print a topic, click the Print icon in the toolbar.<br />
NOTE<br />
If you encounter an error accessing the Help System, run<br />
X:\<strong>Drake</strong>12\Help\FixHelp.exe on each workstation. (Replace ‘X’ with<br />
the letter of the drive where <strong>Drake</strong> is installed.)<br />
Access Help System items by using the Contents, Index, and Search tabs.<br />
Figure 10-14: Contents, Index, and Search tabs<br />
Contents<br />
Index<br />
Search<br />
Arranged in a “Table of Contents” style, the Contents tab (Figure 10-14) lists all<br />
available Help topics. Topics are organized into “books,” which contain the Help files<br />
for a specific topic. Double-click a book to see a list of topics contained in that book.<br />
To see the Help screen for a topic, click the topic.<br />
The Index tab (Figure 10-14) allows you to access the Help index by keyword. As<br />
you type a keyword into the search field, the matching index term is displayed in the<br />
lower box. To see the Help screen for a matching term, double-click the topic or select<br />
the topic and click Display. Use the UP ARROW and DOWN ARROW on your keyboard<br />
to move from term to term.<br />
The Search tab (Figure 10-14) allows you to search the Help topics by keyword. Enter<br />
a search term and click List Topics (or press ENTER). From the topics displayed, double-click<br />
a topic to view (or single-click it and press ENTER). You can also use the UP<br />
ARROW and DOWN ARROW on your keyboard to move from topic to topic.<br />
Data Entry Help<br />
Two types of help are available in data entry: field help and screen help.<br />
Field-Level<br />
Help<br />
Field help provides information about a selected field. There are three ways to access<br />
field help:<br />
• Click inside a field and press F1<br />
• Select View Help from the right-click menu<br />
• Press SHIFT+?<br />
274 Tax Year 2012
<strong>Drake</strong> <strong>Software</strong> User’s <strong>Manual</strong><br />
<strong>Software</strong> Support In <strong>Drake</strong>’s Tax <strong>Software</strong><br />
The help for the selected field is displayed as shown in the example in Figure 10-15.<br />
Figure 10-15: Example of field help<br />
Each help window indicates whether the field is a direct entry, adjustment, or override<br />
field. To close a help window, click the X in the upper-right corner or press ESC.<br />
Screen Help<br />
Screen help provides information about an open screen in data entry. To access screen<br />
help, click the Screen Help button at the upper-right corner of the screen (Figure 10-<br />
16; this button may not be visible for all Windows 7 users), press CTRL+ALT+?, or<br />
select Screen Help from the right-click menu.<br />
Figure 10-16: Screen Help button for W2 screen<br />
In most cases, a window similar to the field help window displays the screen help.<br />
Some screen helps include links to form instructions and The TaxBook WebLibrary.<br />
(See “Tax Book” following.)<br />
Tax Book<br />
The TaxBook WebLibrary is an independent tool for advanced research by tax professionals.<br />
To subscribe to The TaxBook WebLibrary, go to the <strong>Drake</strong> Support website<br />
(Support.<strong>Drake</strong><strong>Software</strong>.com), and from the blue sidebar menu, select Resources ><br />
Supplemental Resources). A subscription to The TaxBook WebLibrary is $89 for the<br />
2012 tax year.<br />
Broadcast E-Mail<br />
Once your subscription is processed, you can go to the Home window of <strong>Drake</strong>, click<br />
the Tax Research button or select Help > Tax Research, and to go to the The Tax-<br />
Book WebLibrary website.<br />
Broadcast e-mail messages announce the latest developments in the industry, including<br />
banking news, IRS or state alerts, software issues, educational issues, and important<br />
information about new products or programs. These e-mail messages are sent<br />
during tax season to your 1040.com e-mail address (your EFIN@1040.com) and during<br />
the summer to the address you used when you registered with <strong>Drake</strong> for your<br />
account. Access these broadcast e-mail messages through <strong>Drake</strong> at Help > E-Mail.<br />
Tax Year 2012 275
Interactive Support<br />
<strong>Drake</strong> <strong>Software</strong> User’s <strong>Manual</strong><br />
Interactive Support<br />
E-Mail Program<br />
All broadcasts are also posted at the <strong>Drake</strong> Support site (Resources > Broadcast Center).<br />
<strong>Drake</strong> provides interactive support via e-mail, phone, and fax.<br />
The <strong>Drake</strong> e-mail program allows you to send and receive messages using a 1040.com<br />
e-mail address. Use this program to send questions to <strong>Drake</strong> Support or to e-mail your<br />
clients. You can also use it as your everyday e-mail program. To access <strong>Drake</strong> e-mail,<br />
open the tax software, and from the menu bar of the Home window, select Help > E-<br />
Mail. From data entry, click the Email icon.<br />
NOTE<br />
E-mail addresses for <strong>Drake</strong> Support are listed in “Contacting <strong>Drake</strong><br />
Support” on page xii of the Quick Reference chapter.<br />
E-Mail Setup<br />
Use the Setup menu to select a method of sending and receiving e-mail, change your<br />
reply-to address and display name, and suppress notification messages. To view the<br />
Setup menu, select Help > E-Mail from the menu bar of the Home window. From the<br />
Email - Inbox dialog box, go to the menu bar and select Setup > Options to open the<br />
Email - Options dialog box.<br />
Select from the options listed below, and click Save when finished.<br />
• Sending Method — Two methods are available: the default method, compatible<br />
with most Internet Service Providers (ISPs), and the alternate method, to use if<br />
the default method does not work for your office.<br />
• Alternate Reply-to Address — Select Use Alternate Reply-to Address to<br />
replace your 1040.com address. This address appears as the sender and reply-to<br />
address on e-mail messages you send.<br />
• Display Name — Enter the name you want displayed on your e-mail messages.<br />
(The program uses your Preparer Login name by default.)<br />
• Notification Message Options — Two options are available:<br />
– To keep the Report Complete window from opening when compiling a<br />
Report Generated Recipient List, select the Hide report results message<br />
for report generated recipient list.<br />
– To suppress the Open Attachment warning when you open a message that<br />
contains an attachment, select the Hide attachment open warning check<br />
box.<br />
NOTE<br />
Setup options are not available if you access the e-mail program from<br />
within data entry.<br />
276 Tax Year 2012
<strong>Drake</strong> <strong>Software</strong> User’s <strong>Manual</strong><br />
Interactive Support<br />
Checking for<br />
E-mail<br />
Once you have selected Help > E-mail from the Home window, you have three ways<br />
to check your <strong>Drake</strong> e-mail: select File > Check Mail from the menu bar, click Send/<br />
Receive, or press CTRL+M.<br />
NOTES<br />
To check only the status of your mailbox, click File > Check Mailbox<br />
Status or press CTRL+S.<br />
Messages are downloaded only once per EFIN. If multiple computers<br />
are using the same EFIN, consider designating one person to download<br />
<strong>Drake</strong> e-mail and forward it accordingly.<br />
Message<br />
Storage<br />
Downloaded messages appear in the Inbox; double-click a message to open it. Your<br />
mailbox includes a Sent Item box, a Drafts box, and a Trash box (Figure 10-17).<br />
Figure 10-17: Sent Items, Drafts, and Trash boxes<br />
Click a box to open it. Boxes are described below.<br />
• Sent Items — Messages appear here after they have been sent.<br />
• Drafts — If you attempt to close a message before sending it, you are prompted to<br />
save a draft of the message in your Drafts folder to be completed later. To accept,<br />
click Yes. To discard the message, click No.<br />
• Trash — Deleted messages are stored in Trash. To permanently delete a message,<br />
select it from Trash and click Delete. Messages deleted from Trash cannot be<br />
recovered.<br />
Basic E-Mail<br />
Tasks<br />
To compose a new message, click New. Enter an address in the To field, a subject in<br />
the Subject field (required), and a message in the text box at the bottom (optional).<br />
To reply to a message, click the message, and then click Reply (or, with the message<br />
open, click Reply). The original message is included in the reply message.<br />
To forward a message, click the message, and then click Forward (or, with the message<br />
open, click Forward).<br />
To send a message, click Send.<br />
To delete a message, click the message and click Delete (or, with the message open,<br />
click Delete). Deleted messages go to the Trash box.<br />
Attaching<br />
Files<br />
When contacting <strong>Drake</strong> Support with an issue, you might be asked to send, via e-mail,<br />
a client’s data file (a return), a file stored in your Document Manager file, <strong>Drake</strong> <strong>Software</strong><br />
program file, or other kind of file. Entire folders cannot be attached.<br />
Tax Year 2012 277
Interactive Support<br />
<strong>Drake</strong> <strong>Software</strong> User’s <strong>Manual</strong><br />
From Data<br />
Entry<br />
To e-mail a client data file directly from data entry:<br />
1. In <strong>Drake</strong>, open the return you want to transmit.<br />
2. Click Email. The Compose Message window shows the client’s data file attached<br />
to the message (Figure 10-18).<br />
Figure 10-18: Email - Compose Message window with data file attached<br />
3. Complete the To and Subject fields (required), and compose your message.<br />
4. Click Send. The e-mail with the client data file attachment is sent to the recipient.<br />
NOTE<br />
You can add other attachments to the e-mail using the Add button<br />
(or the Attach icon) in the Compose Message window. For more<br />
information, see “From the Home Window” following.<br />
From the<br />
Home Window<br />
To e-mail a client data file from the Home window:<br />
1. From the menu bar, select Help > E-Mail. The Inbox window is displayed.<br />
2. Click New to open a blank Compose Message window.<br />
3. Click Add to open the Email – Attachments dialog box (Figure 10-19 on<br />
page 279).<br />
4. In the SSN/EIN Search text box of the Client Data Files section, enter the SSN<br />
or EIN of the file to send (item #1 in Figure 10-19 on page 279).<br />
278 Tax Year 2012
<strong>Drake</strong> <strong>Software</strong> User’s <strong>Manual</strong><br />
Interactive Support<br />
Figure 10-19: Enter an SSN or EIN and click Attach to attach tax returns (item #1).<br />
Use Prior Year to attach prior-year returns (item #2).<br />
Use Document Manager Files to attach a PDF copy of a saved file (item #3).<br />
5. Click Attach (or press ENTER). The file appears in the Attachments pane to the<br />
right.<br />
6. Click Done. You are returned to the Compose Message window with the file<br />
attached. (See Figure 10-18 on page 278.)<br />
7. Complete the To and Subject fields and compose your message.<br />
8. Click Send. The message and attachment are sent to the recipient.<br />
NOTE<br />
Enter a partial SSN or EIN in the SSN/EIN Search text box and click<br />
Search for a list of returns beginning with those numbers. Double-click<br />
a return on the list to attach it to the e-mail.<br />
Attaching<br />
Prior-Year<br />
Returns<br />
New for 2012: Because of <strong>Drake</strong>’s more stringent password formatting, it is no longer<br />
possible to e-mail returns through past <strong>Drake</strong> programs. To attach returns from prior<br />
years through <strong>Drake</strong>12, follow these steps:<br />
1. From the menu bar, select Help > E-Mail. The Inbox window is displayed.<br />
2. Click New to open a blank Compose Message window.<br />
3. Click Add to open the Email – Attachments dialog box (item #2 in Figure 10-<br />
19).<br />
4. In the SSN/EIN Search text box of the Client Data Files section, enter the SSN<br />
or EIN of the file to send.<br />
5. Click Prior Year to open the Prior Year dialog box (Figure 10-20 on page 280)<br />
Tax Year 2012 279
Interactive Support<br />
<strong>Drake</strong> <strong>Software</strong> User’s <strong>Manual</strong><br />
Figure 10-20: Attaching prior-year returns<br />
6. Select the drive where your prior-year <strong>Drake</strong> files are kept.<br />
7. Select a tax year.<br />
8. Click a return (circled in Figure 10-20).<br />
9. Click Attach. The prior-year return appears in the Attachments pane to the right<br />
side of the Email - Attachments dialog box.<br />
Attaching<br />
Other Types<br />
of Files<br />
Other file types can be attached to an e-mail message from the Attachments dialog<br />
box in the <strong>Drake</strong> e-mail program. (See Step 3 of prior procedure and Figure 10-19 on<br />
page 279.)<br />
• To attach Document Manager files, enter an SSN or EIN in the Document<br />
Manager Files fields of the Email – Attachments dialog box. Click Search<br />
to open the Add Attachment - Document Manager window. Select a file<br />
and click Open. File is shown in the Attachments pane of the Email –<br />
Attachments dialog box. Click Done.<br />
• To attach a <strong>Drake</strong> program file, click Browse for <strong>Drake</strong> <strong>Software</strong> program<br />
files. Locate the file in the Attach File window, and then double-click it (or<br />
select the file and click Open). The file is shown in the Attachments pane of<br />
the Email – Attachments dialog box. Click Done.<br />
• To attach a file other than the types described above, click Browse for All<br />
other files. Locate the file in the Attach File window, and then double-click it<br />
(or select the file and click Open). The file is shown in the Attachments pane<br />
of the Email – Attachments dialog box. Click Done.<br />
Removing an<br />
Attached File<br />
Diagnostic<br />
Attachments<br />
Address<br />
Books<br />
To remove an attached file, select it in the Attachments list (see Figure 10-19 on<br />
page 279) and select Remove from the right-click menu.<br />
Use these only at the direction of <strong>Drake</strong> Support.<br />
You have several options for storing e-mail addresses in an address book. To access<br />
these options, click New to open the Compose Message window and click the To button<br />
on the tool bar (Figure 10-21 on page 281) or click the To button to the right of the<br />
Send button. Address books are shown the Address Book drop list.<br />
280 Tax Year 2012
<strong>Drake</strong> <strong>Software</strong> User’s <strong>Manual</strong><br />
Interactive Support<br />
Figure 10-21: Address Book drop list<br />
Support<br />
Address Book<br />
The <strong>Drake</strong> <strong>Software</strong> Support Address Book displays general, federal, and state support<br />
addresses at <strong>Drake</strong>. To insert an address into the To field of your message, double-click<br />
an e-mail address and click OK.<br />
NOTE<br />
Questions sent to Support via e-mail are generally answered with <br />
e-mail responses.<br />
Client<br />
Address Book<br />
Local Address<br />
Book<br />
If a client’s e-mail address is entered on screen 1 of the return (1040 package only), it<br />
can be accessed from the <strong>Drake</strong> <strong>Software</strong> Client Address Book. To fill this address<br />
book for the first time, you’ll need to repair the index files first (see “Repair Index<br />
Files” on page 291). Next, return to the e-mail program, click New, click To, and then<br />
select <strong>Drake</strong> <strong>Software</strong> Client Address Book. Double-click a line to add the client’s<br />
e-mail address to the To field for recipients of the e-mail message. When finished adding<br />
addresses, click OK.<br />
The Local Address Book can be filled with e-mail addresses of your choice. (Option<br />
not available when accessing the e-mail program from data entry.) To add an address:<br />
1. From the Email - Inbox window, click the Address Book button to open the Edit<br />
Address Book dialog box.<br />
2. Click Add to open the Email Address Book dialog box.<br />
3. Enter first name, last name, and e-mail address. Click Save.<br />
4. Click Done.<br />
Importing<br />
Addresses<br />
You can also import addresses from a spreadsheet into your Local Address Book.<br />
Your spreadsheet must have the proper headings before you can run the import.<br />
To create a file to be imported into the e-mail program:<br />
1. Using a spreadsheet program (such as Microsoft Excel), create three columns:<br />
Last Name, First Name, and E-mail Address (Figure 10-22 on page 282).<br />
Tax Year 2012 281
Interactive Support<br />
<strong>Drake</strong> <strong>Software</strong> User’s <strong>Manual</strong><br />
Figure 10-22: Row headings must be Last Name, First Name, and Email Address.<br />
2. Enter last names, first names, and e-mail addresses of all clients to be imported.<br />
3. Click File > Save As. (Window Vista or Windows 7 users click the Office button<br />
at the top-left corner and select Save As.)<br />
4. Choose a location to save the file.<br />
5. Assign a file name.<br />
6. From the Save as type drop list, select CSV (Comma delimited) (*.csv).<br />
7. Click Save.<br />
To import the file into your Local Address Book:<br />
1. From the Email - Inbox window, click the Address Book button to open the Edit<br />
Address Book dialog box.<br />
2. Click Import.<br />
3. From the Import Address Book File window, browse to the address book file and<br />
double-click it (or select it and click Open).<br />
4. Click OK.<br />
NOTE<br />
To delete an address from the Local Address Book, select it and click<br />
Delete.<br />
Report-<br />
Generated<br />
Recipient<br />
List<br />
The Report Generated Recipient List option allows you to run a customized report<br />
from your client, EF, and Scheduler data to generate a list of e-mail addresses. The<br />
keywords selected during the query are then used to create an e-mail message. Keywords<br />
inserted into the body of the message are replaced with the client’s information.<br />
NOTE<br />
You can access Scheduler data to send appointment reminders to<br />
groups of clients. To do so, select a Scheduler report in Step 3 of the<br />
following procedure.<br />
To create a report-generated recipient list:<br />
1. From the <strong>Drake</strong> Home window, click Help > E-Mail.<br />
2. Click New to open a blank Compose Message window.<br />
3. Do either of the following to open the Report Manager window:<br />
• Click To in the New Message window and click the Create Report Generated<br />
Recipient List link.<br />
282 Tax Year 2012
<strong>Drake</strong> <strong>Software</strong> User’s <strong>Manual</strong><br />
Interactive Support<br />
• Click the arrow next to the To icon and select Report Generated List.<br />
The Report Manager window is displayed.<br />
4. Select (or create) a report that includes only those clients who fit the criteria for<br />
the e-mail list. (For example, to include only those clients who have filed an<br />
extension application, you would create an “Extensions” report.)<br />
5. Click View Report. A message states the number of matching e-mail addresses<br />
found. Click OK to close the message window.<br />
Your recipient list has been generated. When you click Send, the e-mail message will<br />
go to all e-mail addresses in the list. To view the addresses, click the Edit button (see<br />
Figure 10-23). To remove a name from the address list, select it and click Remove.<br />
E-Mail<br />
Keywords<br />
Any keywords that were available to the report are now in the Keyword Selector<br />
pane of the Compose Message window (Figure 10-23.) You can double-click a keyword<br />
to add it to the body of the e-mail. In the Figure 10-23 example, the preparer has<br />
begun the letter with the greeting “Dear .”<br />
Figure 10-23: Selecting from available keywords for e-mail message<br />
Click your pointer anywhere within the body of the e-mail before double-clicking the<br />
keyword to have the keyword entered in that location. Once keywords are added, edit<br />
the e-mail message, add a subject line, and add any attachments before clicking Send.<br />
The message is sent to all selected recipients.<br />
NOTES<br />
Recipients will be unable to see other addresses in the recipient list;<br />
they will be unaware that others are receiving the same e-mail.<br />
To delete the recipient list, click Cancel Query at the bottom of the<br />
Compose Message dialog box.<br />
If you close the completed message before sending it, you will be<br />
prompted to save it in the Drafts folder. If you click Yes, the e-mail message<br />
is saved, along with the generated report list and keywords.<br />
Tax Year 2012 283
Interactive Support<br />
<strong>Drake</strong> <strong>Software</strong> User’s <strong>Manual</strong><br />
Alternative<br />
Reply<br />
Address<br />
The e-mail program uses your 1040.com e-mail address (your EFIN@1040.com; for<br />
example, 777777@1040.com). This address is used for both your sender and reply<br />
address. To change this address:<br />
1. From the <strong>Drake</strong> Home window, go to Help > E-Mail.<br />
2. From the menu bar within the e-mail program, select Setup > Options.<br />
3. Select Use alternative reply-to address.<br />
4. Enter an Alternate address. This address replaces your 1040.com address,<br />
appearing as the sender and reply addresses on e-mail messages you send.<br />
5. Enter a Display name if desired. (If none is entered here, the preparer’s login<br />
name will be used as a display name on all e-mails.) Click Save.<br />
Phone<br />
Fax<br />
Work one-on-one with a <strong>Drake</strong> customer service representative (CSR) to resolve software<br />
issues. CSRs are trained year-round on <strong>Drake</strong> <strong>Software</strong> topics such as connections,<br />
conversions, networking, and other customer-service needs. To reach any<br />
department, call (828) 524-8020 or fax (828) 349-5718. For additional phone numbers<br />
and contact information, see “Contacting <strong>Drake</strong> Support” on page xii of the Quick<br />
Reference chapter.<br />
Get answers to software questions using the fax cover letter provided on the following<br />
page. <strong>Drake</strong> replies to faxes with faxes, not phone calls.<br />
284 Tax Year 2012
<strong>Drake</strong> <strong>Software</strong> User’s <strong>Manual</strong><br />
Fax Cover Letter for Support<br />
Fax Cover Letter for Support<br />
Name:<br />
Company Name:<br />
EFIN:<br />
Phone number:<br />
Fax Number:<br />
To (department or individual):<br />
Computer Operating System (select one): Windows 2000 Windows Vista Windows NT<br />
Windows ME Windows XP Windows 7<br />
Are you working on a network? Windows 8 Yes No<br />
If this fax is concerning a prior-year <strong>Drake</strong><br />
program, what year?<br />
Program Year<br />
____________<br />
Give us a brief description of the situation:<br />
Tax Year 2012 285
Fax Cover Letter for Support<br />
<strong>Drake</strong> <strong>Software</strong> User’s <strong>Manual</strong><br />
This page intentionally left blank.<br />
286 Tax Year 2012
11 Tools<br />
Update Manager<br />
This chapter covers the various tools available on the Tools menu of the software and<br />
online at <strong>Drake</strong>Support.com.<br />
Regular updates to the program are critical to ensure that your software is performing<br />
efficiently. The program will alert you when updates to the program are available (see<br />
“Notification of Updates” on page 289), or you can use the Update Manager to obtain<br />
and install files manually or automatically. Updates include modifications to both the<br />
federal and state packages to reflect the most recent changes in the tax law.<br />
NOTES<br />
Program updates include updates to the Document Manager’s “Working<br />
Cabinet,” but not to the “Archive Cabinet.” (For details on backing<br />
up and restoring the Archive Cabinet, see “Backing Up, Restoring, and<br />
Updating the Archive Cabinet” on page 344).<br />
If the system finds updates are available, you will be alerted to update<br />
your software.<br />
Downloading and Installing Updates <strong>Manual</strong>ly<br />
To download and install updates manually:<br />
1. From the Home window, select Tools > Update Manager. The Update Manager<br />
dialog box is displayed (Figure 11-1 on page 288). Updates are shown in<br />
tabbed format, with tabs representing the program packages and one representing<br />
all state updates and one for the <strong>Drake</strong> Tax Planner. Click column headers to sort<br />
data in ascending or descending order.<br />
Tax Year 2012 287
Update Manager<br />
<strong>Drake</strong> <strong>Software</strong> User’s <strong>Manual</strong><br />
Figure 11-1: Update Manager dialog box<br />
2. Click Get Updates (item #1 in Figure 11-1) and wait while the program checks<br />
for updates.<br />
• If no updates are found, click Exit to return to the Update Manager dialog<br />
box.<br />
• If updates are found, you will be prompted to install them. Proceed to Step 3.<br />
3. Click Yes, and then click Yes again to close the software. The program contacts<br />
the server and displays a list of updates to be installed.<br />
4. Click Install.<br />
When installation is complete, click Exit to return to the <strong>Drake</strong> login window.<br />
Viewing<br />
Release<br />
Notes<br />
When updates are installed manually, the program creates an installation log showing<br />
the file name, release date, and number of the update. To view a release note, doubleclick<br />
the desired row in the Update Manager dialog box (item #3 in Figure 11-1).<br />
Notes are displayed in the Report Viewer, where you can print or export the notes as<br />
desired. (For more information on the Report Viewer, see “Report Viewer” on<br />
page 323.)<br />
Automatic Updates<br />
Program updates can be performed automatically based on the update options<br />
selected. With automatic updates, you can indicate what time of day you want the<br />
updates to occur. Automatic updates are not set by default; you must set up the software<br />
to receive updates automatically.<br />
To view or change your automatic-update settings:<br />
288 Tax Year 2012
<strong>Drake</strong> <strong>Software</strong> User’s <strong>Manual</strong><br />
Update Manager<br />
1. From the Home window, select Tools > Update Manager. The Update Manager<br />
dialog box is displayed (Figure 11-1 on page 288).<br />
2. Click Auto Update Settings (item #2 in Figure 11-1 on page 288). The Automatic<br />
Update Manager dialog box is displayed.<br />
3. Choose one of the following options:<br />
• Select On to turn on automatic updates. If you select this option, specify the<br />
hour, minute, and second each day that you want the program to check for<br />
updates. The Status section alerts you to the last time the program checked<br />
for updates and the last time it downloaded updates.<br />
• Select Off to turn automatic updates off.<br />
4. Exit the Automatic Update Manager dialog box by clicking either Hide (if you<br />
turned automatic updates on) or Exit (if you turned them off).<br />
If you clicked Hide, a message informs you that the Update Manager will be hidden<br />
from view but that automatic updates will continue to operate normally. Click OK to<br />
close the message and return to the Update Manager dialog box. If you clicked Exit,<br />
a message informs you that no update operation was set. Click Yes to return to the<br />
Update Manager dialog box.<br />
Notification<br />
of Updates<br />
When you log in to the program, you can see, in the Notifications section of the<br />
Home window, if program updates are available and ready for download—even if<br />
automatic updates are not activated. This feature can be accessed if all of the following<br />
conditions are met:<br />
• The program detects that the machine is connected to the Internet.<br />
• You have security rights to install patches. (See “Setting Up Preparer Security” on<br />
page 24.)<br />
• You have permission to see the message regarding the updates ready for download.<br />
(You must be an administrator or have the Display program update availability<br />
drop box at Setup > Options > Administrative Options tab set to All w/<br />
Update Rights. See Table 2-12 on page 33 for more information.)<br />
• Your system needs the updates.<br />
If no updates are needed, an “Up to Date” message is displayed in the Notification<br />
section of the Home window. When your system needs updates, you are informed that<br />
updates are available; click the Get Updates button to begin updating. (Figure 11-2)<br />
Figure 11-2: (L) System is up to date; (R) updates are needed.<br />
Tax Year 2012 289
Download Fonts<br />
<strong>Drake</strong> <strong>Software</strong> User’s <strong>Manual</strong><br />
NEW FOR<br />
2012<br />
For users of GruntWorx, notifications of GruntWorx jobs completed and<br />
ready for uploading will also appear in the Notifications sections. For<br />
more on GruntWorx, see Chapter 13, “Suite Products.”<br />
Download Fonts<br />
Special software-based fonts, or soft fonts, are required for printing tax forms.<br />
Because most laser printers do not come with these fonts installed, you might have to<br />
download them to the printer’s memory each time the printer is turned on. <strong>Drake</strong><br />
includes downloadable software fonts that work with HP–compatible laser printers<br />
and allow preparers to produce federal and state tax forms. By default, fonts are downloaded<br />
with each print job. If the printer is turned off, however, the fonts must be<br />
downloaded manually whenever the printer is turned back on.<br />
To manually download fonts:<br />
1. From the Home window, go to Tools > Download Fonts.<br />
2. Click Download to open the Download Soft Fonts dialog box.<br />
3. Choose a printer from the Printer drop list.<br />
4. Click Download. As downloading proceeds, the font download status is shown.<br />
5. Click Exit when the download is complete.<br />
NOTES<br />
When choosing a printer from the Printer drop list, be sure to select the<br />
printer that needs the fonts.<br />
To set up options for downloading fonts, go to Setup > Printing ><br />
Printer Setup. Under the (F7) Options tab, select an option from the<br />
PCL Soft Font Option drop list.<br />
Blank Forms<br />
All forms and worksheets supported by the program are available as blank forms in<br />
Tools > Blank Forms. If a state prohibits printing blank state forms, contact the state<br />
revenue office to obtain them.<br />
To view or print a blank form in <strong>Drake</strong>:<br />
1. From the Home window, go to Tools > Blank Forms. The Blank Forms window<br />
(Figure 11-3 on page 291) displays form categories, names, and descriptions for<br />
each package.<br />
290 Tax Year 2012
<strong>Drake</strong> <strong>Software</strong> User’s <strong>Manual</strong><br />
Repair Index Files<br />
Figure 11-3: Blank Forms window<br />
Click a column<br />
header to sort<br />
forms in ascending<br />
or descending<br />
order.<br />
2. Pick a form category (default is Federal) and tax package (default is Individual.)<br />
3. Scroll through the form list to locate a form.<br />
4. Select a form and click View or Print.<br />
NOTE<br />
IRS Rev Proc 96-48 requires the Paperwork Reduction Act Notice to be<br />
distributed with federal forms. When providing a blank copy of a federal<br />
form, you must include a copy of the notice. Access it from Tools ><br />
Blank Forms > Federal. Under Individual, select PAPERWRK.PG.<br />
Repair Index Files<br />
An index file is a comprehensive list of data on the client files in <strong>Drake</strong>. Keep index<br />
files current by repairing them regularly as part of your general file maintenance routine.<br />
Table 11-1 lists specific instances that could require repair of index files.<br />
Table 11-1: Situations that Might Require Repairing of Index Files<br />
Situation<br />
Files were restored using Tools > File Maintenance > Restore.<br />
A client record was deleted through Tools > File Maintenance > Delete<br />
Client Files.<br />
The EF > Search EF Database function does not seem to work properly.<br />
Records were added to the EIN database.<br />
The Client Status Manager (CSM) index was updated.<br />
What To<br />
Repair<br />
Name Index<br />
Name Index<br />
EF Index<br />
EIN Index<br />
CSM Index<br />
Tax Year 2012 291
File Maintenance<br />
<strong>Drake</strong> <strong>Software</strong> User’s <strong>Manual</strong><br />
To repair index files:<br />
Shortcut: Press<br />
CTRL+R to open<br />
the Repair Index<br />
Files window.<br />
1. From the Home window, go to Tools > Repair Index Files.<br />
2. Select the index files to repair. To repair all types of index files, click Repair All.<br />
3. Click Continue.<br />
4. Click OK. (If Name Index was selected, select a Name Index Option first.)<br />
5. When the file repair is completed, click Exit to return to the Home window.<br />
NOTE<br />
Repairing the name index takes about a minute for every 2,000 names.<br />
File Maintenance<br />
The File Maintenance menu provides access to the following functions:<br />
• Backing up and restoring files (including copying data and configuration files to<br />
other computers or for use as backups)<br />
• Importing, exporting, changing, deleting, unlocking, and password-protecting<br />
files<br />
Backing Up and Restoring Files<br />
Use the Backup and Restore tools to prevent loss of client data or to move client files<br />
to another machine. Files backed up to other locations can be used to restore lost data.<br />
If multiple machines are used for tax preparation in one office, files can be moved to<br />
other computers and uploaded to a single machine to create a master file.<br />
TIP<br />
Back up your files often and store them at an off-site location.<br />
Backup<br />
To back up your files from the hard drive:<br />
1. From the <strong>Drake</strong> Home window, select Tools > File Maintenance > Backup.<br />
2. Click Select a backup location and browse to the file-storage location.<br />
3. Click OK to return to the Backup window (Figure 11-4 on page 293).<br />
292 Tax Year 2012
<strong>Drake</strong> <strong>Software</strong> User’s <strong>Manual</strong><br />
File Maintenance<br />
Figure 11-4: Backup window<br />
4. Select the file or file types to back up by entering the SSN or EIN, or by selecting<br />
All File Types, Setup Files, System Files, or Client Files.<br />
5. If you marked a box, click Advanced. The Advanced Backup dialog box lists all<br />
files of the selected type. Filter or sort files as needed using the date and type filters<br />
on the right side of the Advanced Backup window.<br />
NOTE<br />
The files listed contain only the file types selected. For example, if the<br />
Client Files group is not selected, no client files (1040, 1120, 1120S,<br />
1065, 1041, or 990) are displayed.<br />
6. Click Backup. Files are backed up to a folder at the root of the selected drive or<br />
subdirectory. In the 2012 <strong>Drake</strong> program, the folder name always starts with<br />
DS2012 and is followed by the eight-digit date (MMDDYYYY format), a<br />
hyphen, and the number of the backup for the day. For example, the second<br />
backup file of January 28, 2013, would be titled DS201201282013-02.<br />
Restore<br />
Use the Restore tool to copy data files from a media storage device to a computer.<br />
Use this feature, along with the Backup tool, to transfer files from one computer to<br />
another or to restore lost files.<br />
To restore <strong>Drake</strong> files:<br />
1. From the Home window, select Tools > File Maintenance > Restore.<br />
2. Click the Location to restore files from button and browse to the desired location.<br />
Once you have made a selection, the Select folder to restore from drop list<br />
displays all of the subdirectories created during backup. Folder directories are displayed<br />
in the format described previously.<br />
3. Choose to Restore All Files in Folder or Restore Select Files in Folder.<br />
4. Click Restore. (This button is not activated until a restore location is entered.)<br />
Tax Year 2012 293
File Maintenance<br />
<strong>Drake</strong> <strong>Software</strong> User’s <strong>Manual</strong><br />
5. Click Exit when restoration is complete.<br />
IMPORTANT<br />
If you do not have Windows XP, Windows Vista, or Windows 7<br />
and want to back up your data on CD, you must use your CD<br />
burner software—not the <strong>Drake</strong> Backup tool—to perform the<br />
backup.<br />
Automated Backup<br />
Use the automated backup feature to have the program automatically back up client,<br />
setup, and system files at a specified time each day. Two types of backups are available:<br />
a full backup backs up all selected files, and an incremental backup backs up<br />
only those files that have changed since the last backup.<br />
To activate automatic backup:<br />
1. From the Home window, select Tools > File Maintenance > Backup.<br />
2. Click Automatic at the bottom of the Backup dialog box (shown in Figure 11-4<br />
on page 293.) The Automatic Backup Settings dialog box is displayed<br />
(Figure 11-5).<br />
Figure 11-5: Automatic Backup Settings dialog box<br />
3. Place a check mark in the Activate Automatic Backups box.<br />
4. In the Backup Operation box, choose a time, type, and location for your backup.<br />
• Time — Select a time from the Select time to perform automatic backup<br />
drop list.<br />
• Type — Select a type from the Select backup type drop list. Choose All<br />
Files for a full backup; choose Only changed files to back up only those files<br />
changed since the last backup.<br />
• Location — Click the backup location icon and browse to a desired location.<br />
5. In Select Files to Back Up, choose the files to be automatically backed up.<br />
• Client Files — Client files located in the <strong>Drake</strong>12\DT folder<br />
294 Tax Year 2012
<strong>Drake</strong> <strong>Software</strong> User’s <strong>Manual</strong><br />
File Maintenance<br />
• Setup Files — Pricing and setup information files<br />
• System Files — CSM, EF database, IRS, bank, and Scheduler files<br />
6. Click Save. Click Exit to close the Backup dialog box.<br />
NOTE<br />
The amount of free disk space is indicated in the lower-right section of<br />
the Automated Backup Settings dialog box. If an attempt at automatic<br />
backup is unsuccessful due to lack of disk space, the backup is<br />
stopped and you receive a message stating that disk space is insufficient.<br />
Once automatic backup is activated, the backup icon is added to the system tray at the<br />
bottom of your screen. You can click this icon to view the latest backup information.<br />
The automated backup program is also added to the Startup menu and will continue to<br />
be in operation after the machine is rebooted.<br />
Disabling<br />
Automated<br />
Backup<br />
There are two ways to turn off automatic backup:<br />
• Go to Tools > File Maintenance > Backup, click the Automatic button, and<br />
clear the Activate Automatic Backups check box.<br />
• Click the icon in the system tray, click Stop, and click OK.<br />
Changing a Client’s ID Number<br />
Changing a client’s SSN or EIN in the program requires more than simply making the<br />
change in data entry. To change a client’s SSN or EIN in the software:<br />
1. From the Home window, go to Tools > File Maintenance > Change SSNs on<br />
Return.<br />
2. In the Incorrect SSN/EIN box, enter the ID number that is currently in the system.<br />
3. In the Correct SSN/EIN box, enter the new ID number.<br />
4. Click Continue.<br />
5. Click Exit (or click Continue again to change another SSN or EIN).<br />
6. As directed in the program, repair the index files. (See “Repair Index Files” on<br />
page 291.)<br />
CAUTION<br />
PPR clients: If you change an SSN or EIN – even on a practice return<br />
– you will be charged for another return.<br />
Clearing <strong>Drake</strong> Update Files<br />
Use the Clear BBS Files feature in File Maintenance to delete <strong>Drake</strong> update files after<br />
they have been downloaded to the computer. To delete update files:<br />
1. From the Home window, select Tools > File Maintenance > Clear BBS Files.<br />
2. Click Continue.<br />
3. When the deletion process is complete, click Exit.<br />
Tax Year 2012 295
File Maintenance<br />
<strong>Drake</strong> <strong>Software</strong> User’s <strong>Manual</strong><br />
Exporting Data from <strong>Drake</strong><br />
The exporting tool allows you to transfer client data and the EF database files to either<br />
a text file or a CSV (spreadsheet format) file. You can then import that information<br />
into other programs, such as Microsoft Word, Excel, or Access.<br />
To export data files:<br />
1. From the Home window, go to Tools > File Maintenance > Export Client/EF<br />
Data. The Export Client/EF Data box provides several choices (Figure 11-6).<br />
Figure 11-6: Export Client/EF Data dialog box<br />
2. Select to either Export client data files or Export e-file data files.<br />
• If you choose Export client data files, the path to the location of the exported<br />
client data files is displayed. Change the default path as needed.<br />
• If you choose Export e-file data files, the path to the location of the exported<br />
e-file data files is displayed. Change the default path as needed.<br />
3. (optional) Click Export to CSV (Comma Separated Values) if you want to<br />
export the data to a spreadsheet.<br />
4. (optional) Click Include test returns if you want to include <strong>Drake</strong> test returns in<br />
the export.<br />
5. Click Continue.<br />
6. Click Exit when the export is complete.<br />
Password-Protecting Client Files<br />
The Password Protect tool protects files from unauthorized access. A protected file<br />
cannot be opened in data entry until it is unlocked with a password.<br />
To password-protect a file:<br />
1. From the Home window, go to Tools > File Maintenance > Password Protect<br />
Files.<br />
2. In the Password Protect Client Data Files dialog box (Figure 11-7 on page 297),<br />
enter the SSN or EIN of the client file to password-protect.<br />
296 Tax Year 2012
<strong>Drake</strong> <strong>Software</strong> User’s <strong>Manual</strong><br />
File Maintenance<br />
Unlocking Client Files<br />
Figure 11-7: Enter the SSN, and then enter the eight-character password twice.<br />
3. Enter an eight-character password in the Enter Password field. Passwords are<br />
case-sensitive and can consist of any combination of letters and numbers.<br />
4. Enter the password in the next field to confirm it.<br />
5. Click Continue.<br />
6. Click Yes to confirm that you want to password-protect the file.<br />
7. Click Exit.<br />
If a password has already been entered for an SSN or EIN, the Current Password<br />
field (Figure 11-7) is activated. Once you’ve entered the correct password, you can<br />
change or remove it using the bottom two text boxes on the screen.<br />
If files are automatically locked upon e-file acceptance, they can be viewed but not<br />
changed after e-filing. (The option to lock files automatically is available in Options<br />
Setup; see “E-filing” on page 32.)<br />
To unlock a client file that has been locked:<br />
1. From the Home window, go to Tools > File Maintenance > Unlock Client<br />
Files.<br />
2. Enter the SSN or EIN of the return.<br />
3. Click Continue. The file can now be modified in data entry.<br />
Deleting Files from the Program<br />
A client file is created when a return is prepared. A print file is a temporary file that is<br />
created when a return is calculated. Print files are used for e-filing and are automatically<br />
removed from the system after the designated number of days. (See Table 2-6 on<br />
page 29 to view or change the number of days to store print files.)<br />
Deleting<br />
Print Files<br />
To manually delete print files:<br />
Tax Year 2012 297
File Maintenance<br />
<strong>Drake</strong> <strong>Software</strong> User’s <strong>Manual</strong><br />
1. From the Home window, select Tools > File Maintenance > Delete Print Files<br />
and wait for the program to scan the day’s files. Print files are listed in the Return<br />
Selector.<br />
2. Select the file to delete. To delete all files, click Select All.<br />
3. Click Delete.<br />
4. Click Yes to continue.<br />
5. Click OK to return to the Home window.<br />
TIP<br />
Since print files appear on the EF transmission selection list, you may<br />
want to delete print files for returns that are not ready for e-file.<br />
Deleting<br />
Client Files<br />
To manually delete a client file from the database:<br />
1. From the Home window, select Tools > File Maintenance > Delete Client Files.<br />
2. Enter the SSN or EIN of the client file to delete.<br />
3. Click Continue.<br />
4. Click Yes to continue.<br />
5. Click OK.<br />
6. Click Exit to return to the Home window.<br />
NOTE<br />
If you are not accessing files on a network, the deleted files go to the<br />
recycle bin.<br />
Changing Return Types<br />
A return can be changed to another file type without your having to create a new file.<br />
When a return type is changed, the following information is transferred:<br />
• Name, address (including county), and telephone number<br />
• Fiscal year<br />
• All depreciation data, including screens 6, 7, 8, 9, and 10<br />
When a corporation return is converted to an S corporation return, the balance sheet<br />
and Schedule A information are also transferred.<br />
IMPORTANT<br />
Not all data is transferred. Before using Change File Type, back<br />
up the original file. (See “Backup” on page 292.)<br />
To change a return type:<br />
1. From the Home window, select Tools > File Maintenance > Change File Type.<br />
2. Enter the SSN or EIN of the file to convert, and click Continue.<br />
3. Select the new file type (Individual, Corporate, Sub-S Corp, Fiduciary, Partnership,<br />
Tax Exempt, Estate, or Heir) (See Figure 11-8 on page 299).<br />
4. Click Continue.<br />
298 Tax Year 2012
<strong>Drake</strong> <strong>Software</strong> User’s <strong>Manual</strong><br />
File Maintenance<br />
5. When the conversion is complete, click OK.<br />
Estate and<br />
Qualified<br />
Heir Returns<br />
You can use a single SSN for two return types when a taxpayer requires a Form 1040<br />
and one of the two return types listed below:<br />
• Form 706, U.S. Estate (and Generation-Skipping Transfer) Tax Return<br />
• Form 706-A, U.S. Additional Estate Tax Return<br />
An SSN must already be associated with a return in the software before it can be<br />
assigned to a second return type. To assign a single SSN to multiple returns:<br />
1. From the Home window, select Tools > File Maintenance > Change File Type<br />
to open the Convert Client Data File Type dialog box.<br />
2. In the Enter SSN/EIN to convert field, enter the SSN to be assigned to a new<br />
return type and click Continue.<br />
3. The available return types are displayed. In Figure 11-8, the selected return is a<br />
1040, so that option is disabled. Note that the 706 and 706-A options are in the<br />
right-hand column.<br />
Figure 11-8: Available return types are displayed.<br />
4. Click an option to select it, and then click Continue.<br />
5. When asked if you want to keep the original return in addition to the new return,<br />
click Yes.<br />
6. Click OK.<br />
The SSN is now applied to both the original return and the new return. In the future,<br />
when you enter the SSN to open a return, you will be asked which return you wish to<br />
open. When you use other features of the program where SSNs are entered, you will<br />
be prompted to indicate which return the program should use.<br />
Importing Data from QuickBooks<br />
Two main steps must be taken to import client data from QuickBooks into <strong>Drake</strong>: (1)<br />
preparing the QuickBooks file, and (2) performing the import. Always back up <strong>Drake</strong><br />
files (see “Backup” on page 292) and the QuickBooks files before importing client<br />
files.<br />
Tax Year 2012 299
File Maintenance<br />
<strong>Drake</strong> <strong>Software</strong> User’s <strong>Manual</strong><br />
Preparing a<br />
QuickBooks<br />
File<br />
Before you can import QuickBooks files into <strong>Drake</strong> <strong>Software</strong>, you must first place the<br />
QuickBooks files into an import file inside QuickBooks.<br />
To create the import file from inside QuickBooks:<br />
1. Select Report > Accountant & Taxes > Income Tax Summary.<br />
2. Click Print to open the Print dialog box.<br />
3. Select the option button to the left of FILE.<br />
4. Select ASCII text file.<br />
5. Press Print.<br />
6. Enter a file name of eight characters or fewer with no spaces.<br />
Importing<br />
QuickBooks<br />
Data<br />
To import data from a QuickBooks import file into <strong>Drake</strong> <strong>Software</strong>:<br />
1. From the Home window, select Tools > File Maintenance > QuickBooks<br />
Import.<br />
2. Click Next.<br />
3. In step 1, enter the name of the import file created from QuickBooks or click the<br />
button to the right of the text box and browse to the QuickBooks file. The file<br />
extension is .txt. <strong>Drake</strong> searches the local hard drive for the import file.<br />
4. In step 2, enter a Client ID Number (SSN or EIN) and click Next.<br />
Figure 11-9: Step 2. Enter SSN or EIN<br />
5. The program searches for a <strong>Drake</strong> file with the same EIN/SSN.<br />
• If no <strong>Drake</strong> file is found, you are prompted to choose a Business Type. Make<br />
your selection from the drop list (Figure 11-10 on page 301), and click Next.<br />
300 Tax Year 2012
<strong>Drake</strong> <strong>Software</strong> User’s <strong>Manual</strong><br />
Letters<br />
Figure 11-10: Step 3: Choose one of the business types listed.<br />
• If a <strong>Drake</strong> file is found, you’re asked to confirm the business type. Click Yes<br />
to proceed.<br />
6. Click Finish to import the QuickBooks file into the <strong>Drake</strong> file.<br />
After importing the QuickBooks files, enter Inventory amounts and details for Other<br />
Deductions and items requiring details on the return.<br />
NOTE<br />
If the QuickBooks file type does not match the one in <strong>Drake</strong>, you are<br />
prompted to convert the QuickBooks file while importing (for example, if<br />
there is an S corporation file to import into the <strong>Drake</strong> 1120 package).<br />
Letters<br />
The Letters tool allows you to print batches of certain client letters at a time. These letters,<br />
listed in Table 11-2, are those that do not typically accompany a tax return.<br />
Table 11-2: Letters Available from Tools > Letters > Letters<br />
Type of Letter<br />
Post-season letter<br />
Preseason letter<br />
Estimate payment reminder<br />
Appointment letter/<br />
email notifications<br />
EF status letter<br />
Engagement letter<br />
Suggested Purpose of Letter<br />
Thank clients for their business; remind them that you<br />
are available for additional tax-preparation assistance.<br />
Make contact with last year’s clients; encourage clients<br />
to use organizers.<br />
Remind current-year clients that estimate payments are<br />
due; provide instructions for sending payments.<br />
Send appointment reminder letters to selected clients<br />
via letter or e-mail.<br />
Provide acknowledgment status of e-filed return.<br />
Enter into contract with clients to prepare their tax<br />
return.<br />
Tax Year 2012 301
Letters<br />
<strong>Drake</strong> <strong>Software</strong> User’s <strong>Manual</strong><br />
You can also use the Letters tool to print batches of pre-addressed mailing labels,<br />
envelopes, and postcards.<br />
NOTES<br />
The information provided here applies to letters that can be printed in<br />
batches. For more information on the other types of letters available in<br />
<strong>Drake</strong>, see “Introduction to Letters in <strong>Drake</strong>” on page 40.<br />
If printing an engagement letter for a taxpayer who has not been<br />
entered into the system, you are prompted to provide the person’s<br />
name and address information and type of return. This action does not<br />
create a client file in <strong>Drake</strong>; the information is used for the engagement<br />
letter only.<br />
Printing Letters<br />
To print one or more letters:<br />
1. From the Home window, go to Tools > Letters > Letters.<br />
2. From the Client Letters dialog box, select a letter type (Figure 11-11).<br />
Mailing Labels<br />
Figure 11-11: Letter choices in Client Letters dialog box<br />
3. Click Next to open the Client Selection dialog box.<br />
4. Complete one of the following:<br />
• Print a letter for specific clients — Enter a client’s SSN/EIN and click Add<br />
Client. Repeat for additional clients. Click Next.<br />
• Print a batch of letters — Click Next to open Client Letters Filters Selection.<br />
Select filtering and sorting options. If a more complex filter is needed,<br />
click Edit Filters. (See “Filter Manager” on page 319.) Click Next for Basic<br />
Search Conditions. Click Continue to Scan Client Files.<br />
5. Click Print.<br />
You can print mailing labels to a label printer. To print mailing labels:<br />
1. Ensure that label sheets are loaded correctly into the printer.<br />
2. From the Home window, go to Tools > Letters > Mailing Labels.<br />
302 Tax Year 2012
<strong>Drake</strong> <strong>Software</strong> User’s <strong>Manual</strong><br />
Letters<br />
3. Select a label type from the Select Label list. Label selections are described in<br />
Table 11-3. Items with an asterisk (*) may require filtering of data before printing.<br />
Table 11-3: Label Selections Available in <strong>Drake</strong><br />
Label<br />
Client addresses*<br />
Single client address<br />
Birthday addresses<br />
Firm address<br />
EF service centers<br />
IRS ‘mail to’ address<br />
State ‘mail to’ address<br />
User defined<br />
Labels for folders*<br />
Prior year clients*<br />
Description<br />
Print a batch of client address labels.<br />
Print a label for a single client address.<br />
Print a batch of address labels for clients whose birthdays fall<br />
within a specified range.<br />
Print one or more address labels for a firm.<br />
Print address labels for e-filing service centers.<br />
Print labels for IRS mailing addresses.<br />
Print labels for state mailing addresses.<br />
Print user-defined mailing labels.<br />
Print labels for folders.<br />
Print address labels of prior-year client addresses.<br />
Recommended<br />
labels are three<br />
across and ten<br />
down (Avery 5160<br />
or 8160)<br />
4. Enter the requested information (if necessary), and then click Next.<br />
5. (If the Filter Selection dialog box is opened) Set desired filters and click Next.<br />
(See “Filter Manager” on page 319 for more on filtering.) Select any Basic<br />
Search Options and click Continue. (For more on search conditions, see “Search<br />
Conditions” on page 319.)<br />
6. Position the mailing labels as needed. Options are described below.<br />
• Print to a label printer — Select to print to a label printer.<br />
• Number of copies of this label (This option is available only when printing a<br />
single label.) — Number of labels to be printed. For example, if you enter a<br />
“5,” five labels will be printed.<br />
• Position of the first available label — Position of first label on the available<br />
sheet. If the first label is missing, you can enter “2” to have printing begin in<br />
the position of the second label.<br />
• Vertical adjustment — Enter a positive number. Each number refers to a<br />
row. If you enter “2,” printing will begin two rows into the label.<br />
• Horizontal adjustment — Enter a positive number. Each number refers to a<br />
column. If you enter “2,” printing will begin two columns into the label.<br />
• Name format — From the drop list, select the name format to use.<br />
7. Click Finish. The Client Labels dialog box is opened if you selected Print to a<br />
label maker in Step 6. If so, make the following selections:<br />
• Choose the clients from the list on the left whose labels will be printed. Click<br />
to highlight one name, press CTRL and then click names to choose multiple<br />
clients, or click Select All.<br />
• In the Other Selections section, choose to:<br />
Tax Year 2012 303
Letters<br />
<strong>Drake</strong> <strong>Software</strong> User’s <strong>Manual</strong><br />
– Print labels with IRS “Mail To” Addresses for individual and business<br />
returns with and without payments<br />
– Print labels with State “Mail To” Addresses for various individual and<br />
business returns<br />
– Print labels for mailings to IRS Service Centers<br />
– Build a Custom Label.<br />
• Options allows you to change the order of the clients’ names on the label, to<br />
hide the Label Preview (which appears when you choose one of the other<br />
options in the Other Selections section or when you choose Single client<br />
address in Step 2), and to use a custom printer dialog box.<br />
8. Click Print.<br />
NOTE<br />
The Mailing Labels tool can also be used to run reports. See<br />
Chapter 12, “Reports.”<br />
Printing a<br />
Client Label<br />
From Data<br />
Entry<br />
<strong>Drake</strong> provides a convenient way to print a mailing or folder label from data entry. To<br />
print a single label from data entry:<br />
1. Ensure that the label printer is installed properly per the manufacturer’s instructions<br />
and that the label sheet is properly loaded.<br />
2. In data entry, go to screen 1 of the return.<br />
3. Right-click on the screen (not a field) and select Client Labels > Name Format<br />
from the right-click menu.<br />
4. Select the name format (LastName, FirstName or FirstName LastName).<br />
5. Right click on the screen (not a field) again and select Client Labels.<br />
6. Choose from the following label types:<br />
• Mailing Label<br />
• Folder Label (SSN/EIN, Name or Name only)<br />
NOTE<br />
Unless you chose to hide the Preview Label Window in step 7 of the<br />
previous procedure (see “Mailing Labels” on page 302), you will see<br />
the Preview Label window. Click Continue.<br />
7. Select the label printer from the Print dialog box.<br />
8. Click OK to print the label.<br />
NOTE<br />
This option is designed for use with a dedicated label maker such as<br />
the DYMO LabelWriter 400 Label Printer. Data can be printed on any<br />
label size, but DYMO Label Writer labels, size 30252, are recommended<br />
because they work well for folder and mailing labels. Size<br />
30252 labels are included in the DYMO printer starter kit.<br />
304 Tax Year 2012
<strong>Drake</strong> <strong>Software</strong> User’s <strong>Manual</strong><br />
Letters<br />
TIP<br />
You can also choose to print individual address and folder labels for a<br />
client, or print labels for mailings to the IRS and state taxing authorities,<br />
and design custom labels from the Data Entry Menu. Right-click<br />
the menu and select Client Labels to open the Client Labels dialog<br />
box. See step 7 of “Mailing Labels” on page 302 for more information<br />
on the options.<br />
Envelopes<br />
To print addresses on envelopes:<br />
1. Ensure that envelopes are loaded properly into the printer.<br />
2. From the Home window, go to Tools > Letters > Envelopes.<br />
3. Select filtering and sorting options from the Envelopes Filter Selection box. If<br />
you need a more complex filter, click Edit Filters. (See “Filter Manager” on<br />
page 319.)<br />
4. Click Next.<br />
5. Modify the Basic Search Conditions as needed, and then click Continue. (For<br />
more on Basic Search Conditions, see “Search Conditions” on page 319.)<br />
6. In the Envelopes dialog box, update the envelope formatting as needed. Click<br />
Help for more on individual fields.<br />
7. Click Finish.<br />
8. Set printer options in the Print dialog box as needed, and then click Print.<br />
NOTE<br />
Not all printers are capable of printing envelopes. Verify that your<br />
printer has this capability before using this function in the program.<br />
Always test-print an envelope before printing an entire batch.<br />
Postcards<br />
To print addresses on postcards:<br />
1. Ensure that the postcards are loaded properly into the printer.<br />
2. From the Home window, go to Tools > Letters > Postcards.<br />
3. Select filtering and sorting options from the Postcard Filter Selection box. If a<br />
more complex filter is needed, click Edit Filters. (See “Filter Manager” on<br />
page 319.)<br />
4. Click Next.<br />
5. Modify the Basic Search Conditions as needed, and click Continue. (For more<br />
on basic search conditions, see “Search Conditions” on page 319.)<br />
6. From the Postcards dialog box, update the postcard formatting as needed. Click<br />
Help for more on individual fields.<br />
7. Click Finish<br />
8. Set printer options in the Print dialog box as needed, and then click Print.<br />
Tax Year 2012 305
Amortization<br />
<strong>Drake</strong> <strong>Software</strong> User’s <strong>Manual</strong><br />
Amortization<br />
The Amortization tool prepares loan repayment schedules for various loan scenarios.<br />
To prepare a loan repayment schedule:<br />
1. From the Home window, select Tools > Amortization.<br />
2. Enter a Schedule Title to be displayed at the top of the amortization schedule.<br />
3. Complete all other applicable fields. Fields are described in Table 11-4.<br />
4. Click Calculate. The program creates the amortization schedule.<br />
To print the schedule, click Print.<br />
To save it for later viewing (using Reports > Report Viewer), click Save.<br />
Table 11-4: Amortization Schedule Fields and Descriptions<br />
Amortization<br />
Schedule Field<br />
Loan Amount<br />
Amortization Periods<br />
Payments Per Year<br />
Annual Interest<br />
Payment Amount<br />
Payment Type<br />
Date of First Payment<br />
The original amount of the loan.<br />
Description<br />
The number of payments to be made over the life of the loan.<br />
(Example: If the loan is for two years and monthly payments are<br />
required, you would enter 24 (2 years = 24 months).<br />
The number of payments to be made each calendar year.<br />
The annual interest amount for the loan. This amount is calculated<br />
automatically. If the interest is unknown but the payment amount is<br />
known, leave this field blank.<br />
The amount of the payment. In most cases, this amount is calculated<br />
automatically based on the other information entered. If this<br />
field is left blank and the interest amount is entered in the Annual<br />
Interest field, the program displays the calculated payment here.<br />
The payment type. Select one of two types of payments: Fixed<br />
Payment or Fixed Principal. (The default is Fixed Payment.)<br />
Due date of the first payment. This entry is used to determine the<br />
dates for subsequent payments.<br />
To show only the payments from certain dates, enter those dates in the Filter Schedule<br />
Payments fields and click Apply.<br />
To clear the screen, click Reset.<br />
To get information on balloon payments, click the How do I make a balloon payment?<br />
link.<br />
To send the schedule to the printer, click Print. To save it for viewing through<br />
Reports > Report Viewer, click Save, designate a file name, and click Save.<br />
306 Tax Year 2012
<strong>Drake</strong> <strong>Software</strong> User’s <strong>Manual</strong><br />
EIN Database<br />
EIN Database<br />
The program stores all EINs and related data in the EIN database for later retrieval.<br />
Use the Edit EIN Database tool to add, edit, or delete an employer’s information.<br />
Adding or Editing Employer Information<br />
To add or edit an employer’s EIN database information:<br />
1. From the Home window, go to Tools > Edit EIN Database.<br />
2. (If editing) Enter or select the EIN to edit, or begin typing the name of the<br />
employer and select it when it appears in the list below.<br />
3. Click New (if adding) or Edit (if editing).<br />
4. Modify or complete the fields in the Edit EIN/Employer Listing dialog box.<br />
5. Click Save.<br />
Deleting Employer Information<br />
Printing a List of EINs<br />
To delete employer data from the EIN database:<br />
1. From the Home window, go to Tools > Edit EIN Database.<br />
2. Enter or select the EIN to delete, or begin typing the name of the employer and<br />
select it when it appears in the list below.<br />
3. Click Delete.<br />
4. Click Yes when prompted to confirm the deletion.<br />
5. Click Exit to close the EIN/Employer Database dialog box. (Depending on your<br />
changes, it might take several seconds to close as the database is updated.)<br />
To print a list of EINs from the EIN database:<br />
1. From the Home window, go to Tools > Edit EIN Database.<br />
2. Click Print. The Print EIN/Employer Listing dialog box displays sorting<br />
options.<br />
3. Select to sort the list by EIN, Company Name, City, State, or Zip Code.<br />
4. Click OK. A preview of the list is displayed in the Report Viewer.<br />
5. Click Print to open the Print ‘<strong>Drake</strong> Report’ dialog box.<br />
6. Click Print.<br />
NOTE<br />
Export EIN data to another program if desired. From the Report Viewer,<br />
click the arrow on the Export icon and select a format. If you click the<br />
Export icon (not the arrow), the program automatically exports the data<br />
into Excel.<br />
Tax Year 2012 307
Install State Programs<br />
<strong>Drake</strong> <strong>Software</strong> User’s <strong>Manual</strong><br />
Install State Programs<br />
Use Install State Programs to install or repair state program files. This can be done<br />
by accessing the Internet, the latest CD, or any drive location that has the needed program<br />
files. For networked offices sharing information, all users must close <strong>Drake</strong><br />
before installing state programs.<br />
To install state programs:<br />
1. From the Home window, select Tools > Install State Programs. The Install<br />
State Programs dialog box is displayed.<br />
2. Choose to install state programs from a drive or from the Internet. If a selected<br />
location has state files available, the files are displayed in the States Available...<br />
panel on left. (If the States Available panel stays empty, select another location.)<br />
Figure 11-12: Install state programs from computer, CD, or Internet.<br />
3. Choose the states to be installed and click Select (or Select All). States selected<br />
appear in the States Selected for Installation pane on the right.<br />
4. Click Install. The progress bar identifies the states being retrieved and installed.<br />
(Only installed states are updated.)<br />
5. To remove any states from the Installation pane, highlight the state in the Installation<br />
pane and click Unselect (or Unselect All.).<br />
6. To remove any state program from <strong>Drake</strong>, click Uninstall State(s), and from the<br />
Remove States dialog box, select the states currently installed, click Select (or<br />
Select All) and click Uninstall.<br />
TIP<br />
Check for updates (Tools > Update Manager) after installing state programs<br />
to ensure that you have the most up-to-date information.<br />
Repairing State Program Files<br />
Scheduler<br />
If the state program files on your computer or server are more recent than the state<br />
program files most recently installed, the current files will not be replaced. If you must<br />
overwrite the current state files, contact <strong>Drake</strong> Support or click the Help button of the<br />
Install State Programs dialog box for more information.<br />
The Scheduler tool is used for scheduling and maintaining client appointments. For<br />
information on using this tool, see “Scheduler” on page 85.<br />
308 Tax Year 2012
<strong>Drake</strong> <strong>Software</strong> User’s <strong>Manual</strong><br />
Forms-Based Data Entry<br />
Tax Rates for Ohio and Pennsylvania Cities<br />
Use the City Tax Rate Editor to edit and add tax rates, credits, and addresses to be<br />
used when creating city returns for the states of Ohio and Pennsylvania. Always verify<br />
tax rates as they are subject to change.<br />
To view and edit city tax details for these states:<br />
1. From the Home window, go to Tools > City Tax Rates and select a state. The<br />
City Tax Rate Editor for the selected state is displayed.<br />
2. Select a city or municipality from the drop list. The city’s details automatically fill<br />
the text boxes, which you can edit as needed.<br />
3. Click Update to save any changes.<br />
4. Click OK.<br />
About PA<br />
Cities<br />
The PA editor is designed for local city forms not including Philadelphia tax forms.<br />
The default address from the database is the “Zero Due” address listed on Pennsylvania’s<br />
Municipal Tax Information website. “Balance Due” and “Refund” addresses can<br />
be obtained from this site or from the paper form if provided by the municipality.<br />
To find a tax rate or other county or municipality tax information, click the Find Tax<br />
Rate and Address link.<br />
If penny rounding is required for a specific municipality a Pennsylvania return:<br />
1. In data entry, enter the desired amount, rounding to the penny (example: 810.33).<br />
2. Press CTRL+F.<br />
The CTRL+F action forces the program to allow penny-rounding for that field only and<br />
for that return only. Otherwise, the program automatically rounds all numbers entered.<br />
NOTE<br />
Penny-rounding can be set globally from Setup > Options > Optional<br />
Items on Return. Note that amounts on federal returns must be<br />
rounded to the nearest dollar in order to be eligible for e-file.<br />
Forms-Based Data Entry<br />
Forms-based data entry allows you to enter a previously prepared 1040 return into the<br />
tax software. To enter a forms-based return in <strong>Drake</strong>:<br />
1. From the Home window, go to File > Forms Based Data Entry.<br />
2. Enter or select the desired return.<br />
3. Click a link to open the screen for a particular line. Repeat for other lines.<br />
Tax Year 2012 309
Quick Estimator<br />
<strong>Drake</strong> <strong>Software</strong> User’s <strong>Manual</strong><br />
4. Once you’ve filled in all return data, click Exit to close the form.<br />
NOTES<br />
If “NONE” is selected for Preparer # on screen 1, the program applies<br />
the same designation for Firm #, and nothing is shown on the corresponding<br />
lines of the printed return unless corresponding entries are<br />
made on the PREP screen. In addition, the program will print as the<br />
ERO the preparer selected as the Default ERO (on the EF tab under<br />
Setup > Options).<br />
If the Preparer # field is left blank, the program will use the corresponding<br />
information from Setup > Preparer(s), respectively.<br />
Quick Estimator<br />
Note that the same toolbar from data entry is available in forms-based data entry.<br />
Use the Quick Estimator to quickly calculate results for an individual (1040) return.<br />
CAUTION<br />
Do not e-file or mail the return generated in the Quick Estimator to<br />
the IRS, or an amended return will be required.<br />
PPR clients: A return created in the Quick Estimator counts as one<br />
PPR return.<br />
To use the Quick Estimator:<br />
Shortcut: Press<br />
CTRL+Q to open<br />
Quick Estimator.<br />
1. From the Home window, select File > Quick Estimator.<br />
2. Enter or select an SSN. If an existing return is selected, the Quick Estimator will<br />
not override previous entries.<br />
3. Enter all applicable information for the return. Press F1 in an individual field for<br />
help on that field.<br />
4. Press ESC to save the data, exit the screen, and view the return. Depending upon<br />
your setup options, you may be able to click CTRL+C to calculate, or CTRL+V to<br />
calculate and view.<br />
Please note the following points when using the Quick Estimator:<br />
• Because the total of interest, dividends, and other income are entered in one field<br />
(Interest/dividends/Other income), the bank-product and preparer fees might<br />
not be accurately reflected on the bill. The income could be overestimated or<br />
underestimated.<br />
• The Quick Estimator produces only one return if calculating a Married Filing<br />
Separately return. A separate return must be generated for the other spouse.<br />
• Because the names of dependents are not entered in the Quick Estimator, the individual<br />
names are not shown on the return. The appropriate credit amounts are<br />
indicated if all applicable fields are completed in the Quick Estimator.<br />
• Select ERC if the taxpayer would want an Electronic Refund Check when the IRS<br />
deposits the refund.<br />
• A Preparation fees withheld from Bank Product entry overrides the Tax preparation<br />
fee field on the BANK screen.<br />
310 Tax Year 2012
<strong>Drake</strong> <strong>Software</strong> User’s <strong>Manual</strong><br />
Quick Estimator<br />
NOTE<br />
Remember, the Quick Estimator should be used only for estimating<br />
taxes. A full return should be prepared later. Data from the Quick<br />
Estimator flows to the full tax program and might need adjusting.<br />
Tax Year 2012 311
Quick Estimator<br />
<strong>Drake</strong> <strong>Software</strong> User’s <strong>Manual</strong><br />
This page intentionally left blank.<br />
312 Tax Year 2012
12 Reports<br />
Report Manager<br />
Report Categories<br />
The Reports function allows you to create printable reports based on data entered into<br />
the program via data entry, the CSM, or the Scheduler.<br />
Use the Report Manager to create a variety of pre-defined and customized printable<br />
reports. To access the Report Manager from the <strong>Drake</strong> Home window, select Reports<br />
> Report Manager.<br />
Five report categories are provided in the Report Manager:<br />
Table 12-1: Report Categories<br />
Report Category<br />
Client Reports<br />
EF/Bank Reports<br />
Scheduler Reports<br />
My Reports<br />
Other Report Options<br />
Description<br />
Criteria for these reports consist of client contact data, preparer<br />
and revenue data, return details, status and tracking data, and<br />
summary data.<br />
Criteria for these reports consist of data related to e-filing and<br />
banking, including bank-product status, tracking, check, and summary<br />
data; and EF status, tracking, and summary data.<br />
Reports are based on data entered in the Scheduler and include<br />
reports on new clients, preparer call lists, and appointments.<br />
Reports that you create, either by editing one of the pre-defined<br />
reports or by starting with a blank report, are automatically stored in<br />
My Reports.<br />
This category gives you access to the reporting capabilities of the<br />
CSM and the Fixed Asset Manager, and allows you to compile<br />
depreciation lists and hash totals.<br />
Tax Year 2012 313
Report Manager<br />
<strong>Drake</strong> <strong>Software</strong> User’s <strong>Manual</strong><br />
As shown in Figure 12-1, the Report Manager uses a standard tree format. Click [+] to<br />
expand a category list; click [–] to collapse the list and hide the reports in the category.<br />
Figure 12-1: Tree view of Report Manager<br />
Only those reports in My Reports can be deleted. To delete a report, select it and click<br />
Delete Report (or choose Delete Report from the right-click menu).<br />
NOTE<br />
<strong>Drake</strong> 2012 Help includes descriptions of all standard reports in the<br />
Report Manager. Click the link at the top of the Report Manager window<br />
to see the complete list. (You can also click Help on the Report<br />
Manager window, or, from the <strong>Drake</strong> Home window toolbar, click Help<br />
and search for “Report Descriptions.”)<br />
Sample Report Window<br />
Before generating a report, you can preview the report title and column headers to see<br />
how the report will fit on the printed page. The report preview is displayed in the<br />
Sample Report window at the bottom of the Report Manager. (See Figure 12-1.) Also<br />
included is a brief description (if available) of the selected report.<br />
To preview a report in the Report Manager, click the title of the report to preview. As<br />
shown in Figure 12-1, the report title and column headings are displayed. The display<br />
reflects changes as report details are updated.<br />
The Sample Report box also indicates a report layout of Portrait, Landscape, or<br />
Potentially too wide. A layout of Potentially too wide means that some data could be<br />
314 Tax Year 2012
<strong>Drake</strong> <strong>Software</strong> User’s <strong>Manual</strong><br />
Setting Up a Report<br />
Setting Up a Report<br />
cut off in the printed report due to the number of columns. A report that is Potentially<br />
too wide can still be exported as a .CVS file or to Excel, where it is possible to widen<br />
columns, change font size, or increase margins and be able to print reports that are<br />
potentially too wide to be printed directly from the <strong>Drake</strong> Report Manager.<br />
Regardless of width, the report can still be viewed in the Report Viewer using scroll<br />
bars.<br />
When planning reports for your office, consider beginning with one of <strong>Drake</strong>’s predefined<br />
reports, which may already include most of the information you want. You<br />
can create a new report if none of the predefined reports meet your needs. The steps<br />
for these procedures are similar, but it may be easier to learn how to create reports by<br />
working first from a pre-defined report.<br />
Several tasks, some of them optional, are involved in creating a report. These tasks are<br />
described in the following sections.<br />
Assigning a Title and Description<br />
The Report Title is displayed on the actual report; the Report Description is for<br />
informational purposes and is displayed in the Report Manager’s Sample Report box.<br />
To assign a new title and description to a report in the Report Manager:<br />
1. Select the report to use as a template.<br />
2. Click Edit Report. The Report Editor - Step 1 window is opened (Figure 12-2).<br />
Figure 12-2: Report Editor - Step 1 window for formatting reports<br />
Tax Year 2012 315
Setting Up a Report<br />
<strong>Drake</strong> <strong>Software</strong> User’s <strong>Manual</strong><br />
Assigning Columns<br />
3. Revise the Report title and Report description as needed. (The Report description<br />
text box is limited to 70 characters.) Note that the new data appears in the<br />
Sample Report box as you type.<br />
4. Click Save or proceed to “Assigning Columns,” following.<br />
The program stores the report with the new title under My Reports.<br />
The various columns that make up your report are represented by keywords. Select the<br />
columns and the order in which they are shown by choosing and ordering the keywords.<br />
Columns are established from the Report Editor - Step 1 window. Note that<br />
the columns currently appearing in the selected report are listed in the Selected report<br />
columns box on the right. (See Figure 12-2 on page 315.)<br />
To establish the columns shown in a report:<br />
1. From the Report Editor - Step 1 window, select a category from the Categories<br />
drop list. The available columns for that category are represented by the keywords<br />
in the Available columns field.<br />
TIP<br />
Place the mouse pointer over an Available columns keyword to display<br />
a tooltip description of the item.<br />
2. From the Available Columns list, double-click a keyword, or single-click it and<br />
choose Select. The keyword (column heading) moves to the Selected report columns<br />
field. Note that the new column heading appears in the Sample Report<br />
box.<br />
(To remove a column heading from the Selected report columns field, click it<br />
then click Unselect. Click Unselect All to remove all column headings.)<br />
3. Click Save or Next to proceed to “Assigning Filters,” following, to assign report<br />
filters.<br />
The program stores the modified report under My Reports.<br />
NOTE<br />
New reports overwrite existing reports of identical names in the Report<br />
View/Print Utility. To have multiple versions of one report, you must<br />
rename the newer report.<br />
Assigning Filters<br />
Filtering limits the information to be included in a report by screening out unwanted<br />
data. With the many filters available, and the ability to create filters and add conditions<br />
to each filter, you have a variety of output options for reports.<br />
Choose a filter from one of <strong>Drake</strong>’s many pre-defined filter choices. You can edit an<br />
existing filter to meet other selected criteria.<br />
Existing<br />
Filters<br />
To assign a filter to a report:<br />
316 Tax Year 2012
<strong>Drake</strong> <strong>Software</strong> User’s <strong>Manual</strong><br />
Setting Up a Report<br />
1. From the Report Editor - Step 1 window (see Figure 12-2 on page 315), click<br />
Next. The Report Editor - Step 2 window is opened (Figure 12-3).<br />
Figure 12-3: Report Editor - Step 2 window (top half)<br />
2. Select a pre-defined or custom filter from the Select a Report Filter drop list.<br />
Note the Filter Description displayed when a filter is selected. (Figure 12-3).<br />
3. Click Save.<br />
Customized<br />
Filters<br />
Use a pre-defined filter as a template for creating a customized filter. Be aware that<br />
changing a pre-defined filter affects every report in the program that uses that filter.<br />
We recommend making a custom filter (or copying a filter and giving it a unique<br />
name), and then editing it to your specifications.<br />
IMPORTANT<br />
Before a change is made to a filter, the program indicates which<br />
reports will be affected and offers the option of editing the existing<br />
filter or editing a copy of it. If you edit a copy, the original filter and<br />
associated reports remain unchanged; only the current report is<br />
affected.<br />
To customize a filter to assign to a report:<br />
1. After making changes in the Step 1 window (Figure 12-2 on page 315), click<br />
Next to open the Report Editor - Step 2 window (Figure 12-3).<br />
2. Select a filter from the Select a Report Filter drop list.<br />
3. Click Edit Filters to open the Filter Manager window (Figure 12-4 on<br />
page 318). The filter you selected is highlighted.<br />
Tax Year 2012 317
Setting Up a Report<br />
<strong>Drake</strong> <strong>Software</strong> User’s <strong>Manual</strong><br />
Figure 12-4: Filter Manager window<br />
4. Click Copy Filter. Name the filter and click OK. The new filter is highlighted.<br />
5. Modify the Basic Search Conditions and the Additional Search Conditions for<br />
your filter, as appropriate; there is a limit of 10 additional search conditions per<br />
filter. (See “Search Conditions” on page 319.)<br />
6. Click Save. The program returns to the Report Editor - Step 2 window.<br />
7. Click Save again to save the report. To close the Report Manager, click Exit.<br />
Selecting Additional Report Options<br />
Additional options for sorting data, calculating numeric data, using prior-year data,<br />
and assigning an output file name are available from the Report Editor - Step 2 window<br />
(Figure 12-3 on page 317).<br />
Sort/<br />
Summary<br />
Order<br />
Data<br />
Calculations<br />
Prior-Year<br />
Data<br />
Output File<br />
Name<br />
Under Additional Report Options, choose a keyword by which to sort reports. For<br />
example, to build a report on “Clients,” with results sorted by the last name, select<br />
Taxpayer Last Name from the drop list. This list includes all the keywords in the<br />
report, plus various others (depending on the report selected): Client type, DCNs of<br />
client tax returns, the start time and duration of scheduled meetings, the firm’s ID<br />
number, the preparer’s ID number, the taxpayers’ names, ID numbers, phones numbers,<br />
and ZIP code, the client type.<br />
Select the Summarize the Report Data box to have the program calculate and total<br />
each column. Not all reports benefit from summarizing. Edit your report and add such<br />
keywords as Count, Average, and Percentage to enhance the summary.<br />
The program queries current-year data by default. To have a report run prior-year data,<br />
select the Use Data from 2011 box. (This option is available only with Client<br />
Reports.)<br />
An output file name consisting of the first eight letters of the Report title (Step 3 in<br />
“Assigning a Title and Description” on page 315) is entered automatically in the<br />
Report output file name field. Changing this name is optional. A new name must be<br />
318 Tax Year 2012
<strong>Drake</strong> <strong>Software</strong> User’s <strong>Manual</strong><br />
Filter Manager<br />
Creating a New Report<br />
Deleting a Report<br />
Filter Manager<br />
Search Conditions<br />
fewer than nine characters. You will use this name to locate the report in the Report<br />
Viewer. (See “Report Viewer” on page 323.)<br />
To create a new report (not starting with a pre-defined report) in the Report Manager:<br />
1. Click the New Report button (at the bottom of the Report Manager window).<br />
2. Select one of the following report types:<br />
• E-Filing and Banking — For a report based on the EF database<br />
• Tax return data — For a report based on data entry information<br />
• Scheduler — For a report based on schedules set up in the Scheduler.<br />
3. Click OK to open the Report Editor - Step 1 window.<br />
4. Using the instructions in “Setting Up a Report” on page 315 as a guideline, enter<br />
the report formatting and filtering information, and then click Save.<br />
Only a report in My Reports can be deleted. To delete a report, from the Report<br />
Manager dialog box, select (single-click) the report to delete, click Delete Report,<br />
and then click Yes to confirm the deletion. If you have run the report, you are asked if<br />
you want to delete the report from the Report Viewer. Click Yes or No as applicable.<br />
The Filter Manager is used primarily in reports but is also used for letters, mailing<br />
labels, envelopes (see “Letters” on page 301), for Proformas and Organizers (see<br />
“Organizers and Proformas” on page 80) and the Fixed Asset Manager (see “Fixed<br />
Asset Manager” on page 324). Access the Filter Manager from a Filter Selection box,<br />
which is opened when you might have to narrow a selection of records. (See<br />
Figure 12-3 on page 317.) To access the Filter Manager from a Filter Selection box,<br />
click Edit Filters. (See “Customized Filters” on page 317.)<br />
Use the Filter Manager to set up search conditions. There are two levels of search conditions:<br />
Basic Search Conditions and Additional Search Conditions.<br />
Tax Year 2012 319
Filter Manager<br />
<strong>Drake</strong> <strong>Software</strong> User’s <strong>Manual</strong><br />
Figure 12-5: Basic and Additional Search Conditions boxes<br />
Basic Search<br />
Conditions<br />
Basic search conditions, described in Table 12-2, refer to the most common filtering<br />
criteria: Return Type(s), Return Result, Activity, and Preparer and Firm.<br />
Table 12-2: Basic Search Conditions: Categories<br />
Category<br />
Return Type(s)<br />
Return Result<br />
Activity<br />
Preparer and Firm<br />
Description<br />
Return types to include in the report. To include all return types,<br />
select All Return Types. Select Allow MFS 1040 Returns to<br />
include returns with a status of Married Filing Separate.<br />
Result types of the returns to include in the report. Example: If<br />
Balance Due is selected, only those returns with a balance due<br />
will be included. Select Any Result to include all results.<br />
Status of returns to include in the report. To include both active<br />
and inactive returns, select Any Status Type.<br />
Preparer and firm of returns to include in the report. To include<br />
only those returns handled by a specific preparer or firm in the<br />
report, select a preparer or firm name as applicable.<br />
To edit basic search conditions:<br />
1. Click Edit in the Basic Search Conditions for the Selected Filter box.<br />
CAUTION<br />
If you’re changing a filter that is used in other reports, the Filter<br />
Changes window is opened, describing these reports and informing<br />
you that changes to the filter will affect these reports. Click Edit to<br />
continue to edit the filter, or (recommended) click Copy to make a<br />
copy of the filter and change the copy so as not to affect other reports.<br />
2. When the Basic Search Conditions dialog box is opened, select items within the<br />
main categories.<br />
3. (optional) To include applicable test/sample returns (for example, <strong>Drake</strong> returns<br />
that begin with 400-00) in the report, select Allow Test/Sample Returns.<br />
320 Tax Year 2012
<strong>Drake</strong> <strong>Software</strong> User’s <strong>Manual</strong><br />
Filter Manager<br />
4. (optional) To allow a user to modify conditions when running a report, select Ask<br />
about the ‘Basic Search Conditions’ each time the Filter is used.<br />
5. Click OK to save the changes to the basic search conditions.<br />
Additional<br />
Search<br />
Conditions<br />
You can add as many as 10 additional search conditions. Use the Additional Search<br />
Conditions feature to further specify the types of data to include in the report.<br />
To add a new search condition in the Filter Manager:<br />
1. Click Add Condition. (See Figure 12-5 on page 320.)<br />
2. If you’re changing a filter that is used in other reports, the Filter Changes window<br />
is opened. (See “Caution” note on previous page.)<br />
3. In the Filter Condition Editor dialog box, select a Keyword Name.<br />
4. Select a Comparison option and a Value (if required) (Figure 12-6).<br />
Figure 12-6: Comparison (“is at least”) and Value (50000) selected for AGI keyword<br />
If a value is required, the Value field appears. A value can be alphabetic or<br />
numeric. For example, if AGI is selected with a comparison of is at least, the<br />
value must be numeric. (Do not use commas when entering numbers.) If Taxpayer’s<br />
Last Name is selected with a comparison of starts with, the value must<br />
be alphabetic.<br />
5. (optional) To allow a user to modify this condition when running a report, select<br />
Ask about this ‘Condition’ each time the Filter is used.<br />
6. Click OK. The new condition is displayed in the Filter Manager (Figure 12-7 on<br />
page 322).<br />
Tax Year 2012 321
Filter Manager<br />
<strong>Drake</strong> <strong>Software</strong> User’s <strong>Manual</strong><br />
Figure 12-7: New condition (“AGI is at least ‘50000’”) is displayed.<br />
7. (optional) Repeat the previous steps to add more conditions as needed.<br />
8. Select Match All Conditions (for narrower results) or Match Any Condition<br />
(for broader results) as applicable.<br />
9. Click Save.<br />
NOTE<br />
To edit a search condition, select the condition and click Edit Condition.<br />
Make changes and click OK. To delete a search condition, select<br />
the condition and click Delete. When prompted, click Yes.<br />
Available Filters List<br />
The Available Filters list in the Filter Manager (Figure 12-4 on page 318) can be<br />
modified as needed. Create new filters, edit existing ones, or rename filters.<br />
Creating a<br />
Filter<br />
Modifying a<br />
Filter<br />
To create a new filter in the Filter Manager:<br />
1. Click New Filter.<br />
2. Enter a unique filter name.<br />
3. Click OK.<br />
4. Modify the search conditions as needed. (See “Search Conditions” on page 319.)<br />
5. Click OK. The new filter is added to the Available Filters and can be edited.<br />
6. Click Save at the bottom of the Filter Manager window.<br />
To create a filter in the Filter Manager using an existing filter as a template:<br />
1. Select a filter to use as a template.<br />
2. Click Copy Filter.<br />
3. Enter a unique name for the new filter.<br />
4. Click OK.<br />
5. Modify the search conditions as needed. (See “Search Conditions” on page 319.)<br />
6. Click OK. The new filter is added to the Available Filters and can be edited.<br />
7. Click Save at the bottom of the Filter Manager window.<br />
322 Tax Year 2012
<strong>Drake</strong> <strong>Software</strong> User’s <strong>Manual</strong><br />
Report Viewer<br />
Renaming a<br />
Filter<br />
To rename a filter in the Filter Manager:<br />
1. Select a filter to use as a template.<br />
2. Click Rename Filter.<br />
3. Enter a new name for the filter.<br />
4. Click OK. The renamed filter shows in the Available Filters and can be edited.<br />
5. Click Save at the bottom of the Filter Manager window.<br />
Viewing a Report from the Report Manager<br />
Report Viewer<br />
To view a report from the Report Manager:<br />
1. Locate and select the report in the report tree.<br />
2. Click View Report. If a Basic Search Conditions box appears, make any desired<br />
changes and click Continue. If a previously saved version of the report is<br />
detected, you are prompted to:<br />
• Click Yes to re-create the report using the most current data.<br />
• Click No to open the previously saved report.<br />
If you clicked Yes, a Basic Search Condition box might appear. Make any<br />
desired changes and click Continue.<br />
3. Wait for the program to search the records for data matching the report criteria.<br />
The report is displayed in the Report Viewer.<br />
All reports in <strong>Drake</strong> are accessible through the Report Viewer. To access the Report<br />
Viewer, from the Home window select Reports > Report Viewer.<br />
To view a report, select the report to view and click View. From this point, you can<br />
print the report, export it, or change the font. You can also scroll through multiplepage<br />
reports by using the arrow keys at the top of the viewer. To perform a task, click<br />
the applicable icon.<br />
NOTE<br />
It’s best to save reports where they’re easily found. <strong>Drake</strong> has a suggested<br />
location: <strong>Drake</strong>12\Reports. Select a location by browsing from<br />
the Save CSV file window.<br />
Depreciation List<br />
The Depreciation List is a report that displays depreciation information for selected<br />
clients. There are two methods for creating depreciation lists in <strong>Drake</strong>: manually<br />
entering client SSN/EINs to be listed, and filtering the client database for clients that<br />
meet specified criteria.<br />
To create a depreciation list for one or more clients:<br />
Tax Year 2012 323
Fixed Asset Manager<br />
<strong>Drake</strong> <strong>Software</strong> User’s <strong>Manual</strong><br />
Fixed Asset Manager<br />
1. From the Home window, select Reports > Depreciation List. The Depreciation<br />
List Client Selection dialog box is displayed.<br />
2. Choose one of the following methods:<br />
a. Create a list — Enter the SSN/EIN and click Add Client. Repeat for additional<br />
clients until all the desired clients are entered, and click Next.<br />
b. Filter the client database — Click Next to open the Basic Search Conditions<br />
dialog box. Edit settings as desired (see “Search Conditions” on<br />
page 319), and then click Continue.<br />
3. Choose to Print the depreciation list or to Export to File.<br />
• Print — Send the list to the printer. In the Print dialog box, click Print.<br />
• Export to File — Depreciation lists exported to file are stored in<br />
<strong>Drake</strong>12\Reports as CSV files. Click OK.<br />
Use the Fixed Asset Manager (from the Home window, go to Reports > Fixed Asset<br />
Manager) to run reports based on client assets. Nine report types, shown in Table 12-<br />
3, are available.<br />
Table 12-3: Fixed Asset Manager Report Types<br />
Report Type Report Description Items on Report<br />
Depreciation Schedules<br />
Listings<br />
Section 179 Assets<br />
Dispositions<br />
Department Summary<br />
Depreciation list sorted by asset number<br />
(assigned asset number and department<br />
number separated by a decimal; example<br />
of asset number: 122.01)<br />
Depreciation list sorted by asset number<br />
(assigned asset number and department<br />
number separated by a decimal; example<br />
of asset number: 122.01)<br />
Asset list of items expensed during the<br />
current year<br />
Asset list of items disposed of within the<br />
current year<br />
Asset summary report sorted by department<br />
or schedule<br />
Asset Number, Description, Date in<br />
Service, Method and Recovery Period,<br />
Basis, Prior Depreciation (Prior and<br />
Current), Salvage Value, and Current<br />
Year Section 179 expense<br />
Asset Number, Description, Date in<br />
Service, Method & Recovery Period,<br />
Business Percentage, Cost, Federal<br />
Basis, Current Year Sec 179, Prior Year<br />
Depreciation, State Depreciation, Amt<br />
Depreciation, Book Depreciation, Tax<br />
Schedule, Code, Date Disposed<br />
Asset Number, Department Number,<br />
Description, and Date Placed in Service,<br />
Cost, Section 179 Expense, Prior<br />
Year Carryover, Current Year Sec 179<br />
deduction<br />
Asset Number, Descriptions, Date<br />
Acquired, Date Sold, Gross Sales<br />
Price, Depreciation Amount, Cost or<br />
Other Basis, Loss or Gain<br />
Department Number, Description, Cost,<br />
Federal Basis, Current Section 179<br />
expense, Federal Depreciation, State<br />
Depreciation, Alternate Depreciation,<br />
Book Depreciation<br />
324 Tax Year 2012
<strong>Drake</strong> <strong>Software</strong> User’s <strong>Manual</strong><br />
Fixed Asset Manager<br />
Table 12-3: Fixed Asset Manager Report Types<br />
Report Type Report Description Items on Report<br />
Year Summary<br />
Asset Category Summary<br />
Preference Report<br />
Auto Code Print<br />
Summary report of assets on a yearly<br />
basis, grouped by department. Each<br />
department has a summary line for each<br />
year up to 10 years prior. Also totals<br />
depreciation for 11 years and prior.<br />
Sorted by department then year.<br />
Summary report of asset categories (as<br />
set on 4562 screens).<br />
List of assets placed in service after<br />
1986<br />
Report based on the macro setup for<br />
each client selected. Reports can comprise<br />
any of the described reports and<br />
any valid options associated with them.<br />
See “Using Fixed Asset Manager Macros”<br />
on page 326.)<br />
Year Acquired, Cost, Prior Federal<br />
Depreciation, Current Federal Depreciation,<br />
Total Federal Depreciation, State<br />
Prior Depreciation, State Current<br />
Depreciation, and Total State Depreciation.<br />
Asset Category, Cost, Federal Basis,<br />
Current Section 179, Federal Depreciation,<br />
State Depreciation, Alternate<br />
Depreciation, Book Depreciation<br />
Asset Number, Description, Date in<br />
Service, Method & Recovery Period,<br />
Basis, Current Depreciation, Alternate<br />
Depreciation, Preference Amount.<br />
Running a Fixed Asset Manager Report<br />
To run a report using the Fixed Asset Manager:<br />
1. From the Home window, select Reports > Fixed Asset Manager. The Fixed<br />
Asset Manager dialog box has drop lists for report types, reporting options, and<br />
sorting options (Figure 12-8).<br />
Figure 12-8: Fixed Asset Manager dialog box<br />
2. Select a report type. (See Table 12-3 for available report types.)<br />
3. Select a tracking format. Options are:<br />
• Federal — Tracks federal depreciation methods<br />
• State — Tracks state depreciation methods<br />
• Alternative — Tracks alternative depreciation methods<br />
• Book — Tracks depreciation using book method<br />
Tax Year 2012 325
Client Status Manager (CSM) Reports<br />
<strong>Drake</strong> <strong>Software</strong> User’s <strong>Manual</strong><br />
4. Select a sorting option from the drop list on the right. Choose to print a Full<br />
Schedule, to sort By Department, to sort by Form/Schedule, or to sort by Asset<br />
Category. (Not all of these sorting options are available for every tracking format.)<br />
5. Click Run Report.<br />
6. In the Asset Manager Client Selection dialog box, create a report for one or<br />
more specific clients or create a filtered report based on all clients.<br />
• One or more clients — Enter SSN/EIN in the blank field and click Add Client.<br />
Repeat for all desired clients then click Next.<br />
• Filtered report — Click Next to open the Asset Manager Filter Selection<br />
dialog box. Select a filter or sort option then click Next to open the Basic<br />
Search Conditions dialog box. Edit settings as desired (see “Search Conditions”<br />
on page 319) and click Continue.<br />
7. Select an option for displaying the depreciation list.<br />
• Print — Send the list to the printer. When the Print dialog box is opened,<br />
choose and printer and click Print.<br />
• Export to File — Save the report as a .CSV file. To open the saved file, go to<br />
your <strong>Drake</strong>12\Reports folder. Click OK.<br />
Using Fixed Asset Manager Macros<br />
Use the Fixed Asset Manager macros to run a set of standard reports at one time.<br />
To set up a macro in the Fixed Asset Manager:<br />
1. From the Home window, select Reports > Fixed Asset Manager.<br />
2. Click Edit Macros to open the Fixed Asset Manager Macros dialog box. This<br />
box has three columns of drop lists: one for type of Report, one for Depreciation<br />
method, and one for Style.<br />
3. Select a report type, depreciation method, and style for each report to be printed<br />
under the macro.<br />
4. Click Save to save your changes and return to the Fixed Asset Manager dialog<br />
box (Figure 12-8 on page 325).<br />
To run the macro, select Auto Code Print as the report type (in the left-most drop list)<br />
and click Run Report.<br />
Client Status Manager (CSM) Reports<br />
Hash Totals<br />
For information on running CSM reports, see Chapter 9, “Client Status Manager.”<br />
The Hash Totals report displays the number of forms and schedules generated on a<br />
selected return. By consulting these totals, the data entry operator can be reasonably<br />
sure that the correct values have been entered into the fields.<br />
To generate a report of hash totals:<br />
326 Tax Year 2012
<strong>Drake</strong> <strong>Software</strong> User’s <strong>Manual</strong><br />
Hash Totals<br />
1. From the Home window, select Reports > Hash Totals.<br />
2. Enter the SSN or EIN of a return.<br />
3. Click Continue. The report is displayed in the Report Viewer.<br />
4. Click Exit to return to the Home window.<br />
Tax Year 2012 327
Hash Totals<br />
<strong>Drake</strong> <strong>Software</strong> User’s <strong>Manual</strong><br />
This page intentionally left blank.<br />
328 Tax Year 2012
13 Suite Products<br />
Take advantage of these <strong>Drake</strong> tools that can be integrated with the tax software to<br />
make your office run more efficiently. The <strong>Drake</strong> Document Manager (DDM) and<br />
Client Write-Up (CWU) programs can be installed from your <strong>Drake</strong> <strong>Software</strong> CD or<br />
from <strong>Drake</strong> Support website (Support.<strong>Drake</strong><strong>Software</strong>.com > Download Center.) The<br />
Tax Planner is installed with the software.<br />
NOTE<br />
These products are included with the full <strong>Drake</strong> program. Pay-Per-<br />
Return users must pay an additional fee for CWU.<br />
Two other products—GruntWorx and SecureFilePro TM —can, for an additional cost,<br />
also integrate with <strong>Drake</strong> products to make document mobility and usage a lot easier.<br />
Through GruntWorx, you can:<br />
• Organize multiple scanned, imported, or created documents into one PDF file<br />
• Extract data from certain forms and import that data directly to <strong>Drake</strong> data-entry<br />
screens<br />
• Import information from certain 1099s and stand-alone 1099-Bs from an Excel<br />
file directly into <strong>Drake</strong> through a process similar to <strong>Drake</strong>’s Schedule D Import<br />
function.<br />
NEW FOR<br />
2012<br />
Access GruntWorx from the Home window, from the Working Cabinet<br />
of the <strong>Drake</strong> Document Manager, or from a desktop shortcut. See<br />
“Shortcut to GruntWorx” on page 338 and “GruntWorx” on page 357 for<br />
details.<br />
Through SecureFilePro TM , you can upload organizers, proformas, and any other document<br />
to your online portal, from which your clients can download the documents and<br />
upload their own for you to access, saving you paperwork and postage.<br />
Tax Year 2012 329
Changes to Suite Products in 2012<br />
<strong>Drake</strong> <strong>Software</strong> User’s <strong>Manual</strong><br />
Changes to Suite Products in 2012<br />
<strong>Drake</strong> Document Manager<br />
<strong>Drake</strong> has made significant enhancements to both the Document Manager and the Tax<br />
Planner for tax season 2012. Read the following sections carefully to be able to take<br />
full advantage of the new versions of these two tools.<br />
This chapter focuses on the two Suite Products—Document Manager and Tax Planner—and<br />
on the two additional products—GruntWorx and SecureFilePro TM . For CWU<br />
instruction, the Client Write-Up <strong>Manual</strong> is available on the <strong>Drake</strong> CD, through the tax<br />
software (from the Home window, go to Help > Online Resources) and from Support.<strong>Drake</strong><strong>Software</strong>.com.<br />
Document Manager users have two storage options or “sources” to choose from: the<br />
“Archive Cabinet” and the “Working Cabinet.” The Archive Cabinet stores documents<br />
for all clients from multiple years in a central location outside of <strong>Drake</strong> <strong>Software</strong>;<br />
the Working Cabinet allows individual-year storage in the same location where<br />
the <strong>Drake</strong> program is located.<br />
Which DDM “source” you choose will depend on how you want to handle your document<br />
storage.<br />
Archive Cabinet files are stored outside of the tax software, are backed up and<br />
restored separately from the tax software, and any updates to the Archive Cabinet are<br />
downloaded separately from the tax software’s updates. All documents from all years<br />
for all clients are stored in the Archive Cabinet, in alphabetically arranged “cabinets,”<br />
“drawers,” and “folders.” If you choose the Archive Cabinet as your source, see “Setting<br />
up the Archive Cabinet” on page 339.<br />
Use the Working Cabinet as your source if you prefer more integration with the tax<br />
software. Working Cabinet source files are stored inside the tax software, saved documents<br />
are backed up or restored whenever the tax software is backed or restored, and<br />
all DDM updates are downloaded together with the tax software’s updates. You<br />
access Working Cabinet documents from within the <strong>Drake</strong> tax program for whichever<br />
year you are interested in: 2012 documents in the 2012 software, 2013 documents in<br />
the 2013 software, etc. If you choose the Working Cabinet as your source, see “Setting<br />
up the Working Cabinet” on page 332.<br />
IMPORTANT<br />
If you choose the Working Cabinet as your source, you can easily<br />
send your saved documents into the Archive Cabinet with just a<br />
few mouse clicks. See “Sending Files to Archive Cabinet” on<br />
page 336 for details.<br />
New Tax Planner<br />
The redesigned Tax Planner tool still helps you assist your clients in making financial<br />
decisions. Clients can see how events such as marriage, the birth of a child, a divorce,<br />
buying or selling a house, or taking a new job will affect their short- and long-term<br />
finances and tax liability.<br />
330 Tax Year 2012
<strong>Drake</strong> <strong>Software</strong> User’s <strong>Manual</strong><br />
<strong>Drake</strong>’s Document Manager<br />
The biggest change in the Tax Planner is that you now use the same <strong>Drake</strong> Data<br />
Entry Menu and data-entry screens you’re familiar with to set up the various scenarios.<br />
For more information, see “Tax Planner” on page 353.<br />
<strong>Drake</strong>’s Document Manager<br />
NOTE<br />
Instructions in this chapter will apply to both the Working Cabinet and<br />
the Archive Cabinet unless otherwise noted.<br />
Use the Document Manager to store and organize electronic documents such as PDF<br />
copies of tax returns, scanned Forms 8879 and 1099-B, and scanned copies of driver’s<br />
licenses, Social Security cards, and other forms of ID. Think of the Document Manager’s<br />
file structure as a virtual filing cabinet where files are saved within folders.<br />
Use the Document Manager to:<br />
• Store your clients’ documents — Scanned documents and copies of your clients’<br />
returns are stored in electronic “folders.”<br />
• Copy files to CD — Copy Document Manager files directly to a CD.<br />
• Password protect — Protect your clients’ documents with passwords.<br />
• Assemble documents sent to GruntWorx — See “GruntWorx” on page 357 for<br />
more information on this product.<br />
• Access SecureFilePro TM — See “SecureFilePro” on page 362 for more information<br />
of this product.<br />
Document Manager makes storing and moving documents easy:<br />
• When you create a new return in <strong>Drake</strong>, a corresponding folder is opened in the<br />
Document Manager.<br />
• When you archive a return in View mode of the tax software, a copy of the<br />
archived return is automatically saved in the Document Manager. (See “Archive<br />
Manager” on page 207 for details.)<br />
• You can click the Doc Mgr button in data entry to open the Document Manager<br />
directly to the client’s folder.<br />
• Files saved in the Document Manager can easily be attached to e-mail messages<br />
through the <strong>Drake</strong> e-mail program or e-filed with a return as a PDF attachment.<br />
Backing up, Restoring, Updating<br />
The Working Cabinet files are automatically backed up or restored whenever <strong>Drake</strong><br />
files are backed up or restored. (See “Backing Up and Restoring Files” on page 292.)<br />
Any updates needed for the Working Cabinet will be downloaded automatically wherever<br />
<strong>Drake</strong>’s tax software updates are downloaded.<br />
The Archive Cabinet files are backed up, restored, and updated through the Archive<br />
Cabinet toolbar. See “Backing Up, Restoring, and Updating the Archive Cabinet” on<br />
page 344 for more information.<br />
Tax Year 2012 331
Setting up Your Document Manager<br />
<strong>Drake</strong> <strong>Software</strong> User’s <strong>Manual</strong><br />
IMPORTANT<br />
Document Manager is not available to users of pre-Windows XP<br />
computer systems. Those users will have to update to Windows<br />
XP, Windows Server 2003, Windows Vista, Windows Server<br />
2008, or Windows 7.<br />
If you run Windows Server 2003, Windows Server 2008, Windows<br />
Vista, Windows XP, or Windows 7 but (1) have not kept up with<br />
regular Window updates and (2) have an older version of .NET<br />
Framework, you will automatically be directed to the Microsoft<br />
website, where you can download (at no charge) the newest version<br />
of .NET. If your system runs Microsoft’s .NET Framework<br />
v3.5 or later, a newer version is not necessary, and no further<br />
steps are needed.<br />
Setting up Your Document Manager<br />
For the sake of clarity, this part of the manual includes distinct sections for setting up<br />
the two sources of the Document Manager, and for using certain tools to add cabinets<br />
and drawers, and to back up, restore, and update the Archive Cabinet that aren’t relevant<br />
to the Working Cabinet. Users opting for the Working Cabinet, see “Setting up<br />
the Working Cabinet,” following. For information on using the Archive Cabinet, see<br />
“Shortcut to GruntWorx” on page 338.<br />
Setting up the Working Cabinet<br />
Everything in this section will pertain to the use of the Working Cabinet.<br />
File<br />
Structure<br />
The Document Manager stores documents in <strong>Drake</strong>’s tax software, but the documents<br />
in those folders are displayed alphabetically in a “tree” in the Working Cabinet window<br />
(Figure 13-1).<br />
Figure 13-1: Working Cabinet files are stored in alphabetically arranged client folders<br />
You can use the default Document Manager file structure or customize it as needed.<br />
332 Tax Year 2012
<strong>Drake</strong> <strong>Software</strong> User’s <strong>Manual</strong><br />
Setting up Your Document Manager<br />
To implement the Document Manager file structure:<br />
1. From the Home window of <strong>Drake</strong>, go to Setup > Printing > Document Manager<br />
to open the <strong>Drake</strong> Document Manager Integration Options dialog box.<br />
2. In the General Options section, select Use Working Cabinet.<br />
3. Select Allow <strong>Drake</strong> to set up Document Manager client folders (Recommended).<br />
If this box is not marked, you will have to specify the location where<br />
the Working Cabinet should store any scanned documents or returns printed<br />
through the PDF “printer.” (See “Printing to <strong>Drake</strong> PDF” on page 200.)<br />
4. (optional) In the Working Cabinet section is the option to add folders to the<br />
default Document Manager file structure. To do so:<br />
• Click Add.<br />
• Enter a custom folder name.<br />
• Click OK. The new folder will be inserted one level below the selected folder.<br />
• Mark the Apply this layout... check box if you want to insert the new folder<br />
into existing and new client files; otherwise, the new folder will be inserted<br />
only into new client files.<br />
• To change the name of the new folder, select the folder and click Edit. To<br />
delete the new folder, select the folder and click Remove.<br />
5. Click Save, and then click OK.<br />
TIP<br />
To avoid later restructuring, determine the type of file structure you<br />
want to use before you begin storing items in the Document Manager.<br />
Configuring<br />
Working<br />
Cabinet<br />
To set configurations for the Working Cabinet:<br />
1. Click the Doc Mgr icon from the toolbar of either the Home window or the Data<br />
Entry Menu.<br />
2. From the Working Cabinet menu bar, choose Setup > Options to open the<br />
Options dialog box (Figure 13-2). Options are listed in Table 13-1 on page 334.<br />
Figure 13-2: Document Manager Options dialog box<br />
Tax Year 2012 333
Setting up Your Document Manager<br />
<strong>Drake</strong> <strong>Software</strong> User’s <strong>Manual</strong><br />
Table 13-1: Working Cabinet Setup Options<br />
Option<br />
Use this scan device<br />
Turn off scanner interface<br />
Common Documents list<br />
Document Status list<br />
Description<br />
By default, the Document Manager chooses a scanner. To<br />
choose a different scanner, select it from the list.<br />
The software automatically uses the default scanner’s settings.<br />
To change those settings, click this box, and when the<br />
scanner control box is opened, make changes to the color,<br />
dpi, size or shape options.<br />
Click Show/Hide to edit names assigned to commonly<br />
scanned document types. For more information, see “Setting<br />
Up Common Documents” (following this table).<br />
Click Show/Hide to see the status of documents in the Document<br />
Manager. You can add statuses here, then apply<br />
them to the document. For details, see “Setting Document<br />
Status” on page 350.<br />
Setting Up<br />
Common<br />
Documents<br />
The “Common Documents” feature is available to help your office save time while<br />
maintaining its naming convention. Customizable default descriptions allow you to<br />
eliminate the step of typing a description by selecting pre-established descriptions.<br />
To set up default descriptions in the Working Cabinet:<br />
1. From the Working Cabinet menu bar, click Setup > Options. The Options dialog<br />
box is opened (Figure 13-3).<br />
Figure 13-3: Options for commonly scanned documents<br />
2. Click the Common Documents Show/Hide button. The common document names<br />
are shown in a small window of the dialog box.<br />
3. In the example in Figure 13-3, the user has added “Military ID” to the list.<br />
4. Add or edit names as desired.<br />
5. To save changes, click Save.<br />
334 Tax Year 2012
<strong>Drake</strong> <strong>Software</strong> User’s <strong>Manual</strong><br />
Setting up Your Document Manager<br />
Working Cabinet Window<br />
Whenever you scan a document into the Document Manager, you have the option of<br />
selecting one of the descriptions entered as a common document. (See “Scanning a<br />
File” on page 348.)<br />
The Document Manager Working Cabinet window consists of the folder “tree” on<br />
the left side, a list of files contained within the selected folder on the right, and a menu<br />
bar and toolbar at the top (Figure 13-4).<br />
Figure 13-4: Part of the Document Manager interface<br />
Folders are listed alphabetically, on the left side of the window (Figure 13-4), based<br />
on the individual clients’ last names or the business clients’ first names. Subfolders<br />
are stored within each client’s folder. Click [+] to expand a portion of the tree; click<br />
[–] to collapse it. Or with a folder selected, press the [+] or [–] keys on the numbers<br />
pad of your keyboard.<br />
Navigating<br />
Click to open a folder to view a list of its files. In the document pane the Document<br />
Manager displays document names, types, dates modified, descriptions, and status.<br />
Click column headers to sort by columns.<br />
Like other <strong>Drake</strong> windows, the Document Manager has a menu bar and a toolbar. If a<br />
shortcut key (such as F1 for help) exists for a menu item, it is listed to the right of the<br />
menu item. You can also access toolbar selections from the menu bar. Each toolbar<br />
button activates a different function.<br />
Searching<br />
To find a particular folder in the Document Manager, enter part of the name in the<br />
Find text box and click Find. The file location is highlighted in the tree (Figure 13-5<br />
on page 336).<br />
Tax Year 2012 335
Setting up Your Document Manager<br />
<strong>Drake</strong> <strong>Software</strong> User’s <strong>Manual</strong><br />
Figure 13-5: Click Find to locate files that match a search term.<br />
To find the next instance of the search term, click Find again. Repeat as needed until<br />
you find the folder you are looking for.<br />
NEW FOR<br />
2012<br />
Click Hide (Figure 13-5) to hide all folders except the one you were<br />
searching for. Click Show to restore the complete list. Click Refresh to<br />
refresh the screen.<br />
Adding<br />
Individual<br />
Subfolders<br />
More subfolders can be added to the <strong>Drake</strong>-integrated file structure. To create additional<br />
subfolders to the Working Cabinet for individual client folders:<br />
1. Highlight the folder in the “tree” that will contain the new subfolder.<br />
2. Click New Folder.<br />
3. Enter a folder name in the New Folder dialog box.<br />
4. Click OK. The new subfolder appears in the left pane.<br />
Repeat these steps as needed to create more subfolders.<br />
Delete subfolders by selecting them, right-clicking, and then selecting Delete Sub-<br />
Folder from the menu.<br />
TIP<br />
To add a subfolder to every client’s file, see “File Structure” on<br />
page 332.<br />
Sending Files to Archive Cabinet<br />
To send the documents saved during the 2012 tax season from the Working Cabinet to<br />
the Archive Cabinet, take the following steps:<br />
1. From the Working Cabinet toolbar, select Archive to open the DDM Cabinet<br />
Utility window.<br />
2. Select the boxes to the left of the client folders you wish to archive (or click Select<br />
All).<br />
3. Click OK.<br />
336 Tax Year 2012
<strong>Drake</strong> <strong>Software</strong> User’s <strong>Manual</strong><br />
Setting up Your Document Manager<br />
4. When the process is complete, click Close.<br />
NOTE<br />
If you open the DDM from within a return, only that client’s file will be<br />
offered for transfer to the Archive Cabinet.<br />
Other Tasks Other tasks that can be performed in the Document Manager are listed in Table 13-2.<br />
With the exception of the GruntWorx button, the following buttons are available on<br />
both the Working Cabinet and Archive Cabinet toolbars. Other buttons and their functions<br />
are explained in the section “Working With Document Manager Files” on<br />
page 348.<br />
Table 13-2: Other Working Cabinet Tasks<br />
Task<br />
Description<br />
(Working Cabinet only): Open GruntWorx. See “GruntWorx” on page 357 for<br />
details.<br />
Click the File button and select Open, Rename, or Delete in order to open,<br />
rename, or delete a file, respectively.<br />
Select a file in the Document Manager document list, and click Copy. Choose<br />
to copy to the clipboard, copy to a location, or copy to a CD. If copying to the<br />
clipboard, use the Document Manager’s Paste button to paste the document<br />
into another folder. If copying to a location, choose a location for storing the<br />
copied file, and then click Save. If copying to a CD, follow the instructions provided<br />
on your screen.<br />
Use the Cut and Paste buttons to move documents from one folder to another.<br />
To copy a folder to another document, use the Copy button.<br />
Use the Cut and Paste buttons to move documents from one folder to another.<br />
To copy a folder to another document, use the Copy button.<br />
Access your SecureFilePro TM portal and options to Upload or Download files<br />
to the portal. See “SecureFilePro” on page 362 for details.<br />
Select a file in the DDM document list (or select multiple files using the SHIFT or<br />
CTRL keys), and click E-mail. Your default e-mail program is opened with the<br />
document added as an attachment.<br />
Activate “drag-and-drop” navigation, which allows cabinets, drawers, folders,<br />
and files to be “dragged” and “dropped” within the Document Manager. Rightclick<br />
an item and drag the selected item to the new location. Click Drag On or<br />
Drag Off to turn this feature off and on<br />
Tax Year 2012 337
Setting up Your Document Manager<br />
<strong>Drake</strong> <strong>Software</strong> User’s <strong>Manual</strong><br />
Table 13-2: Other Working Cabinet Tasks<br />
Task<br />
Description<br />
Access Help.<br />
Exit the DDM.<br />
Restricting Access to the Working Cabinet<br />
To restrict access to the Working Cabinet for individual preparers:<br />
1. From the Home window of <strong>Drake</strong>, go to Setup > Preparer(s) to open the Preparer<br />
Setup window.<br />
2. Double-click a preparer’s name, click the Security button, and select Custom<br />
Security from the menu to open the Preparer Security Setup window.<br />
3. From the menu bar, select Tools.<br />
4. Remove the check mark from the Document Manager check box.<br />
5. Click Save, OK, and Save.<br />
To restrict access to the Working Cabinet for groups of preparers:<br />
1. From the Home window of <strong>Drake</strong>, go to Setup > Preparer(s) to open the Preparer<br />
Setup window.<br />
2. Click the Group Security button.<br />
3. From the list at the top of the window, double-click to choose security group to<br />
edit.<br />
4. From the menu bar, select Tools.<br />
5. Remove the check mark from the Document Manager check box.<br />
6. Click Save.<br />
NOTE<br />
Individual restrictions are not available for security groups ADMIN and<br />
FULL. The FRONT OFFICE security group and any security groups<br />
you’ve added can be restricted. For details on setting up security<br />
groups,“Setting Up Group Security” on page 25.<br />
Shortcut to<br />
GruntWorx<br />
If you have office personnel who regular work with GruntWorx but who do not have<br />
access to <strong>Drake</strong> <strong>Software</strong>, you can create a desktop shortcut to GruntWorx. To do so:<br />
1. Browse to the drive where <strong>Drake</strong> is installed and double-click “<strong>Drake</strong>12.”<br />
2. Double-click the folder named “DDM.”<br />
3. Right-click the file named “GruntWorx.exe.”<br />
4. From the right-click menu, select Send To > Desktop (create shortcut).<br />
338 Tax Year 2012
<strong>Drake</strong> <strong>Software</strong> User’s <strong>Manual</strong><br />
Setting up Your Document Manager<br />
For more information on using GruntWorx, see “GruntWorx” on page 357.<br />
Setting up the Archive Cabinet<br />
Everything in this section will pertain to the use of the Archive Cabinet.<br />
The Archive Cabinet is source to use for storing forms and documents accumulated<br />
over years for all your clients. The files are saved in “folders,” “drawers,” and “cabinets”<br />
to help make search and retrieval easy and fast. And because the files are stored<br />
outside of <strong>Drake</strong>, the Archive Cabinet can also be used as a stand-alone document<br />
manager.<br />
Integrating<br />
with <strong>Drake</strong><br />
To integrate the Archive Cabinet with <strong>Drake</strong> <strong>Software</strong>, take the following steps:<br />
1. From the Home window of <strong>Drake</strong> <strong>Software</strong>, go to Setup > Printing > Document<br />
Manager to open the <strong>Drake</strong> Document Manager Integration Options dialog<br />
box (Figure 13-6).<br />
2. In the General Options section, select Use Archive Cabinet.<br />
3. Also in the General Options section, mark the Allow <strong>Drake</strong> to set up Document<br />
Manager client folders check box (item #1 in Figure 13-6) to use the default file<br />
structure for the Archive Cabinet.<br />
4. (Optional) Change the default location for saving documents in the DDM Location<br />
field (item #2 in Figure 13-6) if you desire. Click Search to chose a new<br />
location.<br />
Figure 13-6: Integrating the Archive Cabinet with the Working Cabinet<br />
Optional<br />
Password<br />
Protection<br />
Establish, change, or remove a password required to open the Archive Cabinet. Setting<br />
up and requiring a password is optional. (You can also use password protection<br />
for each individual file. See “Document Security” on page 351 for details.)<br />
To require a password to open the Archive Cabinet:<br />
1. From the Home window of <strong>Drake</strong>, go to Setup > Printing > Document Manager<br />
to open the <strong>Drake</strong> Document Manager Integration Options dialog box.<br />
2. In the Archive Cabinet section, enter a password in the top text box of the Add<br />
Password for DDM Startup text box (Figure 13-7 on page 340). Passwords are<br />
case-sensitive.<br />
3. Re-enter the password in the Confirm Password text box to confirm it.<br />
4. Click Save.<br />
Tax Year 2012 339
Setting up Your Document Manager<br />
<strong>Drake</strong> <strong>Software</strong> User’s <strong>Manual</strong><br />
Figure 13-7: Protecting Archive Cabinet with optional password<br />
With a password in place, users must enter the password in order to open the Document<br />
Manager’s Archive Cabinet.<br />
• To change a password, repeat the steps described previously. In the Add Password<br />
for DDM Startup text box and the Confirm Password text box (see<br />
Figure 13-7), enter the new password and click Save, then click OK.<br />
• To remove a password, delete the passwords from the Add Password for DDM<br />
Startup and Confirm Password text boxes (see Figure 13-7) and click Save, then<br />
click OK. (To delete, select a password and press DELETE.)<br />
NOTE<br />
For information on password-protecting individual files in the Archive<br />
Cabinet, see “Document Security” on page 351.<br />
Adding<br />
Folders<br />
You can use the default Document Manager file structure or customize it as needed.<br />
To implement the Document Manager file structure:<br />
1. From the Home window of <strong>Drake</strong>, go to Setup > Printing > Document Manager<br />
to open the <strong>Drake</strong> Document Manager Integration Options dialog box.<br />
2. Select Allow <strong>Drake</strong> to set up Document Manager client folders (Recommended).<br />
If this box is not marked, you will have to specify the location where<br />
the Archive Cabinet should store any scanned documents or returns printed<br />
through the PDF “printer.” (See “Printing to <strong>Drake</strong> PDF” on page 200.)<br />
3. (optional) In the Archive Cabinet section is the option of adding folders to the<br />
default Document Manager file structure. To do so:<br />
• Choose a folder level where you want the new folder placed.<br />
• Click Add.<br />
• Enter a custom folder name.<br />
• Click OK. The new folder will be inserted one level below the selected folder<br />
level.<br />
• Mark the Apply this layout... check box if you want to insert the new folder<br />
into existing and new client files; otherwise, the new folder will be inserted<br />
only into new client files.<br />
• To change the name of the new folder, select the folder and click Edit. To<br />
delete the new folder, select the folder and click Remove.<br />
4. Click Save, and then click OK.<br />
TIP<br />
To avoid later restructuring, determine the type of file structure you<br />
want to use before you begin storing items in the Document Manager.<br />
340 Tax Year 2012
<strong>Drake</strong> <strong>Software</strong> User’s <strong>Manual</strong><br />
Setting up Your Document Manager<br />
Configuring Archive Cabinet<br />
Because the Archive Cabinet operates outside of <strong>Drake</strong> <strong>Software</strong>, there are a few setting<br />
you’ll need to enter in order to use it.<br />
1. Click the Doc Mgr button from the toolbar of either the Home window or the<br />
Data Entry Menu.<br />
2. From the Archive Cabinet menu bar, go to Setup > Options to open the Document<br />
Manager Options dialog box.<br />
The options are explained in Table 13-3.<br />
Table 13-3: Setting up Archive Cabinet Options<br />
Option<br />
Document Manager Data Path<br />
Use this scan device<br />
Turn off scanner interface<br />
Common Documents list<br />
Document Status list<br />
Secure customer folder<br />
names...<br />
Account #, EFIN, Password<br />
Description<br />
To store data in a location other than the default location,<br />
enter the data path here or click Browse to map<br />
to a new location.<br />
By default, the Document Manager chooses a scanner.<br />
To choose a different scanner, select it from the<br />
list.<br />
The software automatically uses the default scanner’s<br />
settings. To change those settings, click this box, and<br />
when the scanner control box is opened, make<br />
changes to the color, dpi, size or shape options.<br />
Click Show/Hide to edit names assigned to commonly<br />
scanned document types. For more information, see<br />
“Setting Up Common Documents” on page 334.<br />
Click Show/Hide to see the status of documents in the<br />
Working Cabinet. You can add statuses here, then<br />
apply them to the document. (Right-click the document<br />
and select Status from the menu.) The status appears<br />
on the right side of the document pane of the dialog<br />
box. See “Setting Document Status” on page 350.<br />
Client files used to be stored in the Document Manager<br />
based on the client’s nine-digit ID number (SSN<br />
or EIN). These files are now stored based on the client’s<br />
last name and the last four digits of the ID. (For<br />
instance, documents for William Carter, SSN<br />
400006665, are now stored in a folder named, “Carter<br />
6665.”) Older files in your Document Manager might<br />
still be stored using the nine-digit tag. To truncate all<br />
IDs to match the new system, click Secure IDs.<br />
Enter your <strong>Drake</strong> account number, your EFIN, and<br />
your <strong>Drake</strong> password.<br />
Technical<br />
Requirements<br />
The Archive Cabinet takes up very little disk space, but more space may be required<br />
for storing office files. The storage drive for an average-sized office needs approximately<br />
1GB of space for each year. Most new computers have at least a 20GB hard<br />
drive, so if you own a new computer, storage should not be an issue.<br />
Tax Year 2012 341
Setting up Your Document Manager<br />
<strong>Drake</strong> <strong>Software</strong> User’s <strong>Manual</strong><br />
Archive<br />
Cabinet File<br />
Structure<br />
The Archive Cabinet stores files in a file structure consisting of virtual “cabinets,”<br />
“drawers,” and “folders,” and displays them alphabetically in a “tree” (Figure 13-8).<br />
Figure 13-8: Each “cabinet” contains “drawers,” which contain client “folders”<br />
If you’re building your own file structure, map it out by hand before creating it in the<br />
Archive Cabinet. More cabinets, drawers, and folders can be added to a <strong>Drake</strong>-integrated<br />
file structure.<br />
NOTE<br />
Be aware that while long file names can be used, this naming convention<br />
might not function properly on older systems that limit file names to<br />
eight or fewer characters.<br />
Customizing<br />
File Structure<br />
You can use the default Archive Cabinet’s file structure or customize it as needed with<br />
new cabinets, drawers, folders, and subfolders.<br />
To add to individual subfolders to the Archive Cabinet’s document file structure:<br />
1. Open the Archive Cabinet by clicking the Doc Mgr button from the Home window<br />
of <strong>Drake</strong> or from the Data Entry Menu within a return.<br />
2. From the Archive Cabinet menu bar, go to Setup > Custom Folders to open the<br />
Setup Custom Folders dialog box.<br />
3. Click one of the blue folders in the window to indicate where you want a new<br />
folder to appear. Click Add.<br />
4. Enter a name for the new folder and click OK. The new folder will be inserted one<br />
level below the existing folder. Add subfolders to any existing folder in the same<br />
manner.<br />
• Mark the Add custom folders to each client now... check box if you want to<br />
insert the new folder or subfolder into all existing and new client files; otherwise,<br />
the new subfolder will be inserted only into new client files.<br />
NOTE<br />
If you mark the Add custom folders to each client now... check box<br />
and click Save, the custom folder is automatically added to all clients. If<br />
later you decide to edit or delete the custom folder, you will have to edit<br />
or delete the folder one client at a time.<br />
342 Tax Year 2012
<strong>Drake</strong> <strong>Software</strong> User’s <strong>Manual</strong><br />
Setting up Your Document Manager<br />
• To change the name of the new folder, select the folder and click Edit. To<br />
delete the new folder, select the folder and click Remove.<br />
• Click Save (You will have to collapse the client’s folder or close the Archive<br />
Cabinet and reopen it for the new file structure to take effect.)<br />
NOTES<br />
Be aware that while long file names can be used, this naming convention<br />
might not function properly on older systems that limit file names to<br />
eight or fewer characters.<br />
To avoid later restructuring, determine the type of file structure you<br />
want to use before you begin storing items in the Document Manager.<br />
Adding<br />
Clients<br />
To add new clients to the existing file structure without going through <strong>Drake</strong>, follow<br />
these steps:<br />
1. Open the Archive Cabinet by clicking the Doc Mgr button from the Home window<br />
of <strong>Drake</strong> or from the Data Entry Menu within a return.<br />
2. Click the Add Client button from the Archive Cabinet toolbar to open the Add<br />
Client dialog box.<br />
3. Enter the name of the new client in the First name and Last name fields for individual<br />
clients or the name of a business or estate in the Business/Estate name<br />
field.<br />
4. Enter the last four digits of the client’s SSN (or EIN) in the Last 4 digits of ID<br />
number field.<br />
5. Click Add.<br />
NOTE<br />
Adding a client to the Archive Cabinet does not add the client to <strong>Drake</strong><br />
<strong>Software</strong> or to the Working Cabinet.<br />
Adding<br />
Cabinets<br />
Cabinets are the top level of the filing structure. The <strong>Drake</strong> filing system creates a Clients<br />
cabinet, but you can separate clients by return types and have an Individual and<br />
a Business cabinet instead. Regardless of the structure you choose, cabinets are<br />
required for storing drawers and folders.<br />
To create a cabinet in the Archive Cabinet, follow these steps. (You must be on the<br />
Cabinet level to add a cabinet.)<br />
1. Open the Archive Cabinet by clicking the Doc Mgr button from the Home window<br />
of <strong>Drake</strong> or from the Data Entry Menu within a return<br />
2. Click New Cabinet.<br />
3. Enter a name in the New Cabinet dialog box.<br />
4. Click OK. The new cabinet appears in the left pane.<br />
Repeat these steps as needed to create more cabinets.<br />
NOTE<br />
File cabinets cannot be stored inside other file cabinets. Each cabinet is<br />
for Level-1 storage. Drawers are for Level-2 storage, and folders are for<br />
Level-3 storage.<br />
Tax Year 2012 343
Setting up Your Document Manager<br />
<strong>Drake</strong> <strong>Software</strong> User’s <strong>Manual</strong><br />
Adding<br />
Drawers<br />
Add drawers to cabinets for file storage. The <strong>Drake</strong> filing system lists these drawers<br />
by the first character of the name on the return. To add a drawer to a cabinet:<br />
1. Open the Archive Cabinet by clicking the Doc Mgr button from the Home window<br />
of <strong>Drake</strong> or from the Data Entry Menu within a return<br />
2. Highlight the cabinet you want to add a drawer to.<br />
3. Click New Drawer.<br />
4. Enter a drawer name in the New Drawer dialog box.<br />
5. Click OK. The new drawer appears in the left pane.<br />
Repeat these steps as needed to create more drawers.<br />
Adding<br />
Folders<br />
Documents are stored in folders, listed in alphabetical order by the clients’ last names<br />
(individual returns) or first names (business returns). When you create a return in the<br />
tax software, <strong>Drake</strong> automatically creates the client folder with subfolders labeled Tax<br />
and subfolders for tax year 2012.<br />
To create additional folders:<br />
1. Highlight the drawer or folder that will contain the new folder.<br />
2. Click New Folder.<br />
3. Enter a folder name in the New Folder dialog box.<br />
4. Click OK. The new folder appears in the left pane.<br />
Repeat these steps as needed to create more folders.<br />
Backing Up, Restoring, and Updating the Archive Cabinet<br />
The backup/restore feature is used to copy files to a local, networked, CD/DVD, or<br />
USB drive. You can back up and restore the entire Archive Cabinet structure or a specific<br />
cabinet, drawer, or folder.<br />
To back up individual documents:<br />
1. Select a document from the document pane of the Archive Cabinet.<br />
2. Click the arrow beside the Copy button.<br />
3. Choose to copy to the clipboard, copy to a location, or copy to a CD. If copying to<br />
the clipboard, use the Working Cabinet’s Paste button to paste the document into<br />
another folder. If copying to a location, choose a location for storing the copied<br />
file, and then click Save. If copying to a CD, follow the instructions provided on<br />
your screen.<br />
Backing Up<br />
Contents<br />
To back up cabinets, drawers, folders, or the entire contents of the Archive Cabinet:<br />
1. Open the Archive Cabinet.<br />
2. Select a specific cabinet, drawer, or folder to back up.<br />
3. Click the Backup button on the Archive Cabinet toolbar. The Backup dialog<br />
box is displayed (Figure 13-9 on page 345). Note that the Selected Folder is<br />
marked as the default cabinet, drawer, or folder to back up.<br />
344 Tax Year 2012
<strong>Drake</strong> <strong>Software</strong> User’s <strong>Manual</strong><br />
Setting up Your Document Manager<br />
Figure 13-9: Backup dialog box for Archive Cabinet<br />
4. (optional) If you do not want to use the default location to store your backup, click<br />
the Location button in the upper-left corner and specify a new location.<br />
5. (optional) If you do not want to use the default Backup Name, enter a new name.<br />
The default name uses the cabinet, drawer, or folder name and the current date. If<br />
more than one backup of the same selection is done on the same day, the system<br />
incorporates a sequential identifier by default.<br />
6. Click Start to begin the backup process.<br />
NOTE<br />
To back up the entire Archive Cabinet, select Entire DDM in the<br />
Backup dialog box before clicking Start.<br />
Because a backup may take several minutes, you can minimize the dialog box and<br />
continue working. You will be notified when the process is complete, at which point<br />
you should click Close to return to the Archive Cabinet.<br />
TIP<br />
Use the Copy function or the Backup tool to back up and restore files<br />
from one computer to another or to store data off-site as part of a disaster<br />
recovery plan.<br />
Estimated<br />
Backup Size &<br />
Free Space<br />
Restoring<br />
Contents<br />
As shown in Figure 13-9, the Backup dialog box provides Estimated Backup Size<br />
and Free Space information for the selected location. If there is not enough free space,<br />
you will be prompted to select another location. The Free Space information is not<br />
available if backing up to a CD/DVD drive, so you need to determine the amount of<br />
free space by manually checking the available space on the disk.<br />
To restore backed-up contents to the Archive Cabinet:<br />
1. Click the Backup button on the Archive Cabinet toolbar. The Backup dialog<br />
box is displayed. (See Figure 13-9)<br />
2. Click the Restore tab.<br />
3. If necessary, click the Location button to browse to the location of the files you<br />
want to restore.<br />
4. From the Select a Backup to Restore drop list, click a file to restore.<br />
Tax Year 2012 345
Setting up Your Document Manager<br />
<strong>Drake</strong> <strong>Software</strong> User’s <strong>Manual</strong><br />
5. Click Start to begin the restore process.<br />
NOTE<br />
If you see a “No Backups were found at...” message, you may have<br />
selected an incorrect location to fill the Select a Backup to Restore<br />
drop list. Check your information and try again.<br />
You will be notified when the process is complete, at which point you should click<br />
Close to return to the Archive Cabinet.<br />
Updating the<br />
Archive<br />
Cabinet<br />
The DDM Update Manager allows you to check for, download, and install DDM<br />
updates in a few simple steps.<br />
To get and install Archive Cabinet updates:<br />
1. From the Archive Cabinet menu bar, select File > Update Manager. The DDM-<br />
Update Manager dialog box is displayed.<br />
2. Click Update to initiate the connection to <strong>Drake</strong> and check for needed updates.<br />
3. Once the program has located any available updates, click Get Updates.<br />
4. When updates have been downloaded, click Install.<br />
The Archive Cabinet is closed while updates are downloaded. It is reopened once the<br />
download is complete.<br />
NOTE<br />
If an error or unexpected occurrence keeps you from installing found<br />
updates, contact <strong>Drake</strong> Support at (828) 524-8020 for assistance.<br />
To have your computer automatically update the Archive Cabinet:<br />
1. From the Archive Cabinet menu bar, select File > Update Manager. The DDM-<br />
Update Manager dialog box is displayed.<br />
2. Click Automatic to open the Automatic Update dialog box.<br />
3. Enter a time for the Document Manager to automatically search for Archive Cabinet<br />
updates and install them.<br />
4. To stop the Document Manager from searching for Archive Cabinet updates<br />
whenever Windows is restarted, mark the check box on the bottom of the Automatic<br />
Update dialog box.<br />
5. If you wish to update the Archive Cabinet as you set up an automatic update time,<br />
click Update Now.<br />
6. Click Hide.<br />
The Automatic Update manager is minimized and hidden in the task tray of the task<br />
bar at the bottom of your computer screen. To stop the Update Manager from automatically<br />
searching for and installing updates, click task tray to restore the Automatic<br />
Update manager. At the prompt, click Yes.<br />
346 Tax Year 2012
<strong>Drake</strong> <strong>Software</strong> User’s <strong>Manual</strong><br />
Setting up Your Document Manager<br />
Archive Cabinet Window<br />
The Archive Cabinet window displays the file structure “tree” on the left side, a list of<br />
files contained within the selected folder on the right, and a menu bar and toolbar at<br />
the top. (Figure 13-10.)<br />
Figure 13-10: Parts of the Archive Cabinet interface<br />
“Folders” are organized in “drawers” of “cabinets” in standard tree format. Click [+]<br />
to expand a portion of the tree; click [–] to collapse it. Or with a folder selected, press<br />
the [+] or [–] keys on the numbers pad of your keyboard.<br />
Navigating<br />
Click to open a cabinet, a drawer, then a folder to view a list of its files. In the document<br />
pane the Archive Cabinet displays document names, types, dates modified,<br />
descriptions, and status. Click column headers to sort by columns.<br />
Like other <strong>Drake</strong> windows, the Archive Cabinet has a menu bar and a toolbar. If a<br />
shortcut key (such as F2) exists for a menu item, it is listed to the right of the menu<br />
item. You can also access toolbar selections from the menu bar. Each toolbar button<br />
activates a different function, and different buttons are available at different levels of<br />
the Archive Cabinet. For example, from the Cabinet level, you can add only drawers<br />
and cabinets, so only these buttons are available; from the Drawer level, you can add<br />
new folders; from the Folder level, you can add folders, back up and restore, create<br />
files, import files, scan, copy, rename, delete, drag, send e-mail, and link to other files.<br />
Searching<br />
To find a cabinet, drawer, or folder in the Archive Cabinet, enter part of the name in<br />
the Find text box and click Find. The file location is highlighted in the tree<br />
(Figure 13-10).<br />
Archive Cabinet Toolbar<br />
Most of the features located on the Archive Cabinet toolbar function the same as in the<br />
Working Cabinet. For details, see Table 13-2 on page 337 and “Working With Document<br />
Manager Files,” following.<br />
Tax Year 2012 347
Working With Document Manager Files<br />
<strong>Drake</strong> <strong>Software</strong> User’s <strong>Manual</strong><br />
Working With Document Manager Files<br />
Once the Document Manager (Working Cabinet or Archive Cabinet) folders and any<br />
subfolders are established, you can begin adding files. The Document Manager supports<br />
many file types and allows you to import or scan files into the Document Manager<br />
or link to a file outside of the Document Manager. Once added to a folder, files<br />
are listed in the right pane of the Document Manager window (Figure 13-10 on<br />
page 347).<br />
NOTE<br />
Files can be added to the Document Manager from the toolbar or<br />
through the menu bar (Documents).<br />
Printing<br />
Returns<br />
Importing a<br />
File<br />
When you print a completed tax form or tax return in <strong>Drake</strong>, you have the option of<br />
also saving an electronic copy of the form or return in the Document Manager, and<br />
sending it to the SecureFilePro TM portal. For details, see “Printing to <strong>Drake</strong> PDF” on<br />
page 200.<br />
You can import a PDF copy or scanned image from another application or program<br />
located elsewhere in your computer or network into the client’s Document Manager<br />
folder. To import a file into the Document Manager:<br />
1. Select the folder where the document will be stored.<br />
2. From the toolbar, click Import to open the Import File dialog box.<br />
3. Browse to and select the desired document.<br />
4. Click Open. The Document Manager copies the document into the selected<br />
folder.<br />
Scanning a<br />
File<br />
Scan documents into the Document Manager using a flat-bed or document-feed scanner.<br />
A flat-bed scanner scans one page at a time, creating a separate PDF for each<br />
page. A document-feed scanner scans multiple pages and makes one document of<br />
many pages.<br />
NOTE<br />
Document-feeder scanners are recommended. See “Compatible Scanners”<br />
on page 349 for scanners that have been reviewed and found to<br />
be compatible with the 2012 Document Manager release.<br />
When you scan a document using the Document Manager, the program automatically<br />
locates and uses your system’s default scanner. A Scanner Cannot be Located message<br />
implies that the scanner is not TWAIN compliant or has been improperly<br />
installed.<br />
To scan a document into the Document Manager:<br />
1. Select the folder where the file will be stored.<br />
2. From the toolbar, click Scan, and select Use Scanner Bed or Use Document<br />
Feeder.<br />
3. From the Scan Input dialog box, select a file type (Figure 13-11 on page 349).<br />
348 Tax Year 2012
<strong>Drake</strong> <strong>Software</strong> User’s <strong>Manual</strong><br />
Working With Document Manager Files<br />
Figure 13-11: Scan input dialog boxes for Document Manager<br />
4. Enter a name for the scanned document or choose a default name from the drop<br />
list by clicking the arrow at the right end of the name input field. In the Figure 13-<br />
11 example, “Social Security Card” has been selected.<br />
5. Click Scan.<br />
TIP<br />
To ease search and retrieval of Document Manager files, use a<br />
consistent naming convention. The Common Documents feature can<br />
help you to do this. See “Setting Up Common Documents” on<br />
page 334.<br />
Compatible<br />
Scanners<br />
<strong>Drake</strong> has reviewed the following scanners and found them compatible with the Document<br />
Manager 2012 release. This list does not represent product endorsement or<br />
preference by our company.<br />
• Fujitsu fi-6130 • HP Scanjet 5000<br />
• Fujitsu fi-6140 • HP Scanjet 7000<br />
More details on these scanners are provided in <strong>Drake</strong>’s online help. Many TWAIN–<br />
compliant scanners will work with the Document Manager. Always review scanner<br />
specifications before purchasing a scanner.<br />
Linking a<br />
File<br />
Create a link between a Document Manager file and a document outside the Document<br />
Manager. The Document Manager maintains the link to the external document<br />
so that if the document is updated, the link remains and you do not have to replace the<br />
document in the Document Manager.<br />
To create a link to a file in the Document Manager:<br />
1. Select a folder in which to store the link.<br />
2. Click the Link File button from the Document Manager toolbar.<br />
3. Browse to and select the document to be linked and click Open. The link is indicated<br />
in the Type column of the Document Manager (Figure 13-12 on page 350).<br />
Tax Year 2012 349
Working With Document Manager Files<br />
<strong>Drake</strong> <strong>Software</strong> User’s <strong>Manual</strong><br />
Figure 13-12: Link is indicated in Type column of Document Manager.<br />
Double-click the line in the document pane to open and review the linked file.<br />
Using the<br />
Audit Log<br />
Each time an action occurs to a file, the Document Manager makes note of it in an<br />
audit log. An action includes importing, linking, exporting, copying, moving, opening,<br />
and renaming. The audit log records the action, the date the action was taken, and<br />
the user who performed the action. It also shows the document name and path and has<br />
a field for entering a document description.<br />
To access the Document Manager Audit Log, select a file from the Document Manager<br />
document list and choose Properties from the right-click menu (or click F9).<br />
If desired, enter a description of the document in the Audit Log’s Description field.<br />
Setting<br />
Document<br />
Status<br />
You can choose a status for any document in your filing system. The status will be<br />
listed in the Status column in the Document Manager window.<br />
To change the status of a document:<br />
1. Select a document from the document list and choose Properties from the rightclick<br />
menu (or click a document and press F9.) The Audit Log is displayed.<br />
2. From the Status drop list, choose Final, Review, or Draft (Figure 13-13).<br />
3. Click OK.<br />
Figure 13-13: Choosing a document<br />
Adding<br />
Statuses<br />
To add new statuses:<br />
1. From the Document Manager menu bar, click Setup > Options. The Options<br />
dialog box is opened (Figure 13-14 on page 351).<br />
350 Tax Year 2012
<strong>Drake</strong> <strong>Software</strong> User’s <strong>Manual</strong><br />
Working With Document Manager Files<br />
Figure 13-14: Options for commonly scanned documents<br />
2. Click the Document Status Show/Hide button. The list of document statuses is<br />
shown in a small window of the dialog box.<br />
3. In the example in Figure 13-14, the user has added “Pending Approval” to the list.<br />
4. Add or edit names as desired.<br />
5. To save changes, click Save.<br />
.txt, .doc, .xls<br />
Your computer must have Word and Excel installed in order to use the Document<br />
Manager to create new text (.txt), Word (.doc), and Excel (.xls) files. To create a new<br />
text, Word, or Excel file:<br />
1. From the Document Manager toolbar, click File.<br />
2. In the menu that is displayed, select New Text File, New Word Document, or<br />
New Excel Spreadsheet.<br />
3. Enter a name for the new document or spreadsheet.<br />
4. Click OK.<br />
The applicable program is opened when you click a selection. You can open, rename,<br />
or delete folders from the File button.<br />
Document<br />
Security<br />
When a DDM document is password-protected, a password must be entered before the<br />
document can be accessed. (This is separate from the optional password you can use<br />
to restrict entry into the Document Manager’s Archive Cabinet. See “Optional Password<br />
Protection” on page 339 for more information.) The use of a password is<br />
optional.<br />
IMPORTANT<br />
If you choose to password protect documents, be sure to write the<br />
password down and save it to a secure location. <strong>Drake</strong> cannot<br />
retrieve Document Manager passwords.<br />
To assign a password to a document: from the Document Manager menu bar, select<br />
Documents > Password Protection (or right-click a file and select Password Protection).<br />
In the Password Protection window, enter the password twice and click<br />
Save.<br />
To open a password-protected document: double-click the file (or select the file and<br />
click Open). Enter the password and click OK.<br />
Tax Year 2012 351
Working With Document Manager Files<br />
<strong>Drake</strong> <strong>Software</strong> User’s <strong>Manual</strong><br />
To remove a password: right-click the file, select Password Protection, and in the<br />
Password Protection window, enter the password in the Enter OLD Password field<br />
and click Save. (Leave both NEW Password fields blank.)<br />
To change a password: right-click the file, select Password Protection, and in the<br />
Password Protection window, enter the old password in the Enter OLD Password<br />
field. Enter a new password twice. Click Save.<br />
NOTE<br />
Document Manager passwords have an eight-character limit and are<br />
case-sensitive.<br />
Sharing<br />
Documents<br />
To share documents in a client’s folder, from the Document Manager menu bar, select<br />
Documents > Share Document. From the menu, choose any of the functions:<br />
• Copy to Location<br />
– Select a document in the document pane to share.<br />
– From the menu bar, go to Documents > Share Document > Copy to<br />
Location.<br />
– From the drop list at the top of the Select Location to Copy Files To window,<br />
browse to the location where you wish to save the file.<br />
– Click Save.<br />
NOTE<br />
You can also select a document, then click the arrow next to the Copy<br />
button on the toolbar, and choose Copy to Location.<br />
• Attach to Email<br />
– Select a document in the document pane to e-mail.<br />
– From the menu bar, go to Documents > Share Document > Attach to<br />
Email.<br />
– In the Untitled - Message window, enter the addressee, subject, and any<br />
text to e-mail body.<br />
– Click Send.<br />
NOTE<br />
You can also select a document and then click the E-mail button from<br />
the toolbar.<br />
• Upload to Portal<br />
– Select a document in the document pane to upload to SecureFilePro.<br />
– From the menu bar, go to Documents > Share Document > Upload to<br />
Portal.<br />
– In the Portal Login window, enter the Portal username and Portal<br />
password.<br />
352 Tax Year 2012
<strong>Drake</strong> <strong>Software</strong> User’s <strong>Manual</strong><br />
Tax Planner<br />
– Click OK. (For details on using SecureFilePro TM , see “SecureFilePro” on<br />
page 362.)<br />
NOTE<br />
You can also select a document and then click the Portal button from<br />
the toolbar.<br />
Tax Planner<br />
Opening the Tax Planner<br />
The <strong>Drake</strong> Tax Planner helps you assist your clients in planning for the future. By<br />
comparing the client’s current tax situation to different scenarios that could occur—<br />
such as marriage, the birth of a child, buying or selling a house, change in income—<br />
clients can see how these changes can affect their finances and tax liability. Because<br />
the different scenarios are set up using the same <strong>Drake</strong> Data Entry Menu and dataentry<br />
screens you’re already familiar with, building your different scenarios is quick<br />
and easy.<br />
The Tax Planner is installed when you install <strong>Drake</strong>.<br />
Open the Tax Planner from data entry:<br />
1. Open a client’s return.<br />
2. Click the Tax Planner icon from the Data Entry Menu toolbar.<br />
Tax Planner Window<br />
The Tax Planner window is opened, displaying a toolbar, the original return, and any<br />
planners (or “scenarios”) you create (Figure 13-15).<br />
Figure 13-15: Tax Planner toolbar and scenario pane<br />
The items on the toolbar are explained in Table 13-4.<br />
Table 13-4: Toolbar of the Tax Planner<br />
Tool button<br />
New<br />
Function<br />
Click New to begin new scenarios for different tax years, or to<br />
plan a new scenario based on a previous scenario<br />
Tax Year 2012 353
Tax Planner<br />
<strong>Drake</strong> <strong>Software</strong> User’s <strong>Manual</strong><br />
Table 13-4: Toolbar of the Tax Planner<br />
Tool button<br />
Open<br />
Remove<br />
Compare<br />
Help<br />
Exit<br />
Function<br />
Click Open to open data-entry screens to set up various scenarios,<br />
or to open the client’s original return<br />
Select a scenario from the scenario pane and click Remove to<br />
delete the scenario.<br />
Click Compare, select up to three scenarios, and click Compare<br />
again to compare the chosen scenarios to the client’s current<br />
tax situation based on the original return.<br />
Click Help to get explanations and direction for using the planner<br />
Click Exit to close the planner and return to <strong>Drake</strong> data entry.<br />
Working in the Tax Planner<br />
The first step in working with the Tax Planner is to create various scenarios. After<br />
you’ve created the scenarios, you make changes to the scenarios (such as in marital<br />
status, number of dependents, amount of income, etc.), then compare them to taxpayer’s<br />
original return to see what effect the projected changes would make to the taxpayer’s<br />
current financial and tax situation.<br />
Creating<br />
Scenarios<br />
To begin creating scenarios to compare to the original return, follow these steps:<br />
1. Open a client’s return in <strong>Drake</strong>.<br />
2. Click the Tax Planner button on the Data Entry Menu toolbar to open the Tax<br />
Planner dialog box.<br />
3. Click New from the Tax Planner toolbar and choose a tax year (Figure 13-16).<br />
4. In the Tax Planner Creation window, enter a name for the scenario and click<br />
OK. Create as many scenarios as you wish.<br />
Figure 13-16: Click New, choose a tax year, and then name the scenario<br />
354 Tax Year 2012
<strong>Drake</strong> <strong>Software</strong> User’s <strong>Manual</strong><br />
Tax Planner<br />
Varying<br />
Scenarios<br />
You can make different versions of a scenario. For instance, you might make a scenario<br />
in which the taxpayer has a child. You could make another version of that same<br />
scenario in which the taxpayer has two children, or has a child and buys a house or has<br />
a change in income.<br />
To make various versions of already-created scenarios:<br />
1. Select a scenario from the scenario pane.<br />
2. Click the New button, and from the drop list, click Selected Scenario.<br />
3. Enter a name for the new scenarios and click OK. This makes a copy of the original<br />
scenario that you can adjust. See “Setting up Scenarios,” following.<br />
Setting up<br />
Scenarios<br />
After you’ve created as many scenarios as you like, it’s time to set up the scenarios by<br />
changing, adding, or removing data from screens likely to have an impact on the customer’s<br />
tax situation. For example, for the birth of a child, you would most likely fill<br />
out or add to screen 2 (Dependents) in <strong>Drake</strong>, maybe screen 2441 (Child Care<br />
Credit), and possibly screen A (Itemized Deductions).<br />
To set up a scenario, follow these steps:<br />
1. From the Tax Planner window, click a scenario then click Open.<br />
NOTE<br />
A reminder that you are in a Tax Planner scenario and not the original<br />
return appears in the lower-right corner of the Data Entry Menu.<br />
2. From the Data Entry Menu, choose the screens you want to add or change.<br />
3. When you’re finished setting up the scenario, calculate the scenario (click Calculate<br />
from the toolbar).<br />
4. Close the Calculation Results window.<br />
5. Click the Tax Planner button to return to the Tax Planner window.<br />
NOTE<br />
If you are in a scenario and want to go to the original return, click Tax<br />
Planner, select Original Return from the Tax Planner window, and<br />
click Open.<br />
Comparing<br />
Scenarios<br />
When you have finished creating and setting up different scenarios and you want to<br />
compare them to the taxpayer’s original return, follow these steps:<br />
1. Click Compare from the Tax Planner toolbar.<br />
2. In the Scenario Comparison Selector, choose up to three scenarios to be compared<br />
to the original return.<br />
3. Click Compare to open the Tax Scenario Planning Comparison worksheet in<br />
View mode (Figure 13-17 on page 356). Print the worksheet, e-mail it, or send it<br />
to the Document Manager from View mode.<br />
Tax Year 2012 355
Client Write-Up<br />
<strong>Drake</strong> <strong>Software</strong> User’s <strong>Manual</strong><br />
Figure 13-17: Comparing scenarios to original return<br />
NOTE<br />
For 2013 scenarios, the calculations are adjusted based on the 2013<br />
inflation indexed numbers.<br />
Client Write-Up<br />
Client Write-Up (CWU) is free to <strong>Drake</strong> clients (Pay Per Return clients must pay an<br />
extra fee for CWU) and is shipped on every release of <strong>Drake</strong> <strong>Software</strong>. You can use<br />
CWU to prepare and print both live and after-the-fact payroll, and such forms as W-2,<br />
1099, 940, 941, 943, 944, 941SS, and 944SS. A number of reports, including multicolumn<br />
profit and loss reports, pre-posted reports, comparative or single-column balance<br />
sheets, and payroll reports are also available. Templates are included to allow<br />
easy creation of a Chart of Accounts, and there is an export function to carry this<br />
information into <strong>Drake</strong> <strong>Software</strong>.<br />
Install CWU from your <strong>Drake</strong> <strong>Software</strong> CD or from the <strong>Drake</strong> Support website. (Support.<strong>Drake</strong><strong>Software</strong>.com.<br />
From the blue sidebar menu, go to Resources > Download<br />
Center.) A manual is also available on the CD, through the software (from the Home<br />
window in <strong>Drake</strong>, go to Help > Online Resources), or for download from the <strong>Drake</strong><br />
Support site. (Go to Training Tools > <strong>Manual</strong>s. Scroll down to the Client Write-Up<br />
<strong>Manual</strong>s section and select a year.)<br />
356 Tax Year 2012
<strong>Drake</strong> <strong>Software</strong> User’s <strong>Manual</strong><br />
Additional Products<br />
Additional Products<br />
GruntWorx and SecureFilePro are separate programs designed to integrate with <strong>Drake</strong><br />
<strong>Software</strong> to make storing, accessing, and manipulating large numbers of documents<br />
easier.<br />
GruntWorx<br />
Use GruntWorx to organize your clients’ supporting documents in a single bookmarked<br />
PDF file. You can also import data from certain federal forms directly into<br />
<strong>Drake</strong>’s tax software.<br />
NEW FOR<br />
2012<br />
<strong>Drake</strong> has added a GruntWorx Knowledge Base to the list of available<br />
Knowledge Bases. New articles are being added. To search the Grunt-<br />
Worx KB, go to <strong>Drake</strong>.Support.com, select Resources > Knowledge<br />
Bases, select <strong>Drake</strong> <strong>Software</strong> Support Knowledge Base, and from<br />
the Search within drop list of the Search for articles section, select<br />
GruntWorx KB.<br />
GruntWorx offers three products to handle these tasks: Organize, Populate, and<br />
Trades.<br />
• Organize — With Organize, you scan or import all documents from one client,<br />
send the documents to GruntWorx, and receive a PDF with those documents classified,<br />
organized, and bookmarked. For clients with multiple federal tax forms<br />
(such as W-2s, W-2-Gs, 1099s, K-1s), this feature can save time shuffling papers<br />
and organizing these documents yourself. You can also scan receipts, logs, and<br />
handwritten notes in the GruntWorx PDF file. IRS documents are saved in the<br />
PDF in the following order:<br />
– “Income” documents<br />
– “Adjustments” documents<br />
– “Deductions” documents<br />
– “Credits” documents<br />
– “Supporting” documents (not otherwise classified)<br />
– “Poor Quality/Handwritten Notes”<br />
• Populate — With Populate, the data contained in certain <strong>Drake</strong>-supported federal<br />
tax forms can be extracted from the forms and imported directly into <strong>Drake</strong> <strong>Software</strong>,<br />
saving you data entry time and expense. (From the Data Entry Menu tool-<br />
Tax Year 2012 357
Additional Products<br />
<strong>Drake</strong> <strong>Software</strong> User’s <strong>Manual</strong><br />
bar in <strong>Drake</strong> <strong>Software</strong>, click Import > GruntWorx Populate Job.) The forms<br />
available for this service include:<br />
W-2 1099-B 1099-SSN<br />
W-2G 1099-G 1120S K-1<br />
1099-MISC 1099-K 1165 K-1<br />
1099-INT 1099-R 1041 K-1<br />
1099-DIV 1099-RRB 1098<br />
NOTE<br />
Unreadable or handwritten data on a supported form will not be<br />
imported.<br />
GruntWorx Payment<br />
• Trades — With Trades, brokerage information from consolidated 1099s and<br />
stand-alone 1099-Bs can be extracted, put into an Excel file, and imported into<br />
<strong>Drake</strong> <strong>Software</strong> through a process similar to <strong>Drake</strong>’s Schedule D Import function.<br />
(From the Data Entry Menu toolbar in <strong>Drake</strong> <strong>Software</strong>, click Import > Schedule<br />
D Import/GruntWorx Trades.)<br />
Payment for GruntWorx is through the use of tokens. Each use of a GruntWorx product<br />
costs one token. For instance, it costs one token to organize a client’s documents<br />
using Organize, and it costs another token to add Populate for the same client. Adding<br />
Trades to import brokerage data costs one additional token for every 50 trades.<br />
To purchase tokens, go to Support.<strong>Drake</strong><strong>Software</strong>.com, (or click Support from the<br />
Home window of <strong>Drake</strong>’s tax software). From the blue sidebar menu on the Support<br />
page, select My Account > GruntWorx Integration. Scroll down to Token Pricing.<br />
The retail price is $5 per token (sold in multiples of 10 only) with the per-token price<br />
decreasing for larger purchases. (See Table 13-5 on page 359.)<br />
358 Tax Year 2012
<strong>Drake</strong> <strong>Software</strong> User’s <strong>Manual</strong><br />
Additional Products<br />
Table 13-5: GruntWorx Tokens and <strong>Drake</strong>’s Discounted Costs<br />
Tokens Retail Discount Cost Per Token<br />
10 $50 $50.00 $5<br />
50 $250 $200.00 $4<br />
100 $500 $350.00 $3.50<br />
150 $750 $487.50 $3.25<br />
250 $1,250 $750.00 $3<br />
500 $2,500 $1,250.00 $2.50<br />
NOTES<br />
Tokens expire December 31 of the year following the upcoming tax<br />
season. For example, tokens purchased January 2013 expire December<br />
31, 2014. Tokens purchased in different years are spent in a “first<br />
in, first out” order, meaning the older tokens are automatically used<br />
first.<br />
Master EFINs can purchase tokens for their sub-EFINs or allow the<br />
sub-EFINs to purchase their own tokens.<br />
GruntWorx Process<br />
IMPORTANT<br />
Add all the necessary documents before submitting a job to Grunt-<br />
Worx. You cannot amend, or submit an addition to, an already<br />
submitted file; instead, you would have to resubmit the entire file<br />
as a new job and pay the appropriate amount in tokens.<br />
Uploading<br />
Files<br />
You can upload documents from a single client or do “batch” uploads—submitting<br />
documents from several clients at once. Select documents from the various clients’<br />
files or Working Cabinet document pane, or scan new documents not previously<br />
saved.<br />
NOTE<br />
Document-feeder scanners are recommended for use with GruntWorx.<br />
For special pricing on Fujitsu scanners for Gruntworx customers, go to<br />
www.1st-in-scanners.com/gruntworx.<br />
Selecting<br />
Documents<br />
To select documents for uploading to GruntWorx, take the following steps:<br />
1. Open GruntWorx by clicking the icon on toolbar of the Home window, from the<br />
Working Cabinet toolbar, or from your desktop. (See “Shortcut to GruntWorx” on<br />
page 338.) The GruntWorx window is opened. (See Figure 13-18 on page 360.)<br />
2. At the top of the Submit Jobs tab, select a client from the Step 1–Job For drop<br />
list. (You can scroll down the drop list or begin typing an individual client’s last<br />
name or a business’s first name in the Job For field.)<br />
Tax Year 2012 359
Additional Products<br />
<strong>Drake</strong> <strong>Software</strong> User’s <strong>Manual</strong><br />
3. In the Step 2–Job Options section, select Populate and/or Trades. (Each job<br />
automatically includes the Organize option and costs one token. Populate and<br />
Trades each cost an additional token.)<br />
4. In the Step 3–Files to Submit with job section, click Add Files and browse to the<br />
location of the files you wish to upload. Select a document and click Open. Select<br />
as many documents as you wish.<br />
5. For documents not already saved to your computer, put the documents in your<br />
scanner and click Scan. (Select Duplex Scanning if your scanner offers that<br />
option.) The scanned document is also saved to the client’s “GruntWorx” folder.<br />
6. To remove a document from the Files to submit with job pane, select the document<br />
and click Remove.<br />
7. To have GruntWorx notify you when the jobs (Organize, Populate, or Trades) are<br />
complete, mark the Step 4 (Optional) check box and enter your e-mail address.<br />
8. When all documents have been selected, click the Step 5 Ready button.<br />
Figure 13-18: GruntWorx window for submitting jobs<br />
To upload documents for another client, repeat steps 2-8.<br />
NOTE<br />
If you opened GruntWorx from the Home window and wish to open<br />
your DDM, click the Load DDM button on the lower left corner of the<br />
Submit Jobs tab. (See Figure 13-18.)<br />
360 Tax Year 2012
<strong>Drake</strong> <strong>Software</strong> User’s <strong>Manual</strong><br />
Additional Products<br />
Submitting<br />
Jobs<br />
To submit jobs to GruntWorx:<br />
1. In the Step 6–Jobs in Queue list at the bottom of the Submit Jobs tab, place a<br />
check mark in the box to the left of the name of all client jobs to submit.<br />
2. Click Submit.<br />
Other items of note on the GruntWorx window:<br />
• The Click to read instructions link near the top of the window offers instructions<br />
on how to select and upload files.<br />
• The Which option to choose link in the Step 2–Job Options section offers help<br />
in selecting Populate or Trades.<br />
• The number of tokens you have purchased, used, have available, and that you’re<br />
spending on the current job are listed to the right side of the window in the Token<br />
Information section. Amounts are adjusted after each job and with each purchase<br />
of new tokens from Support.<strong>Drake</strong>Support.com.<br />
NOTE<br />
Only PDF documents may be uploaded.<br />
Job Status<br />
The amount of time it takes to upload documents can range from a few minutes to several<br />
hours, depending on the number of documents you’re uploading. To check on the<br />
progress of the upload, click the GruntWorx button, and from the GruntWorx window,<br />
select the Job Status tab. (Figure 13-19)<br />
Figure 13-19: Checking on status of uploaded job<br />
In the Status column of the GruntWorx Status dialog box, one of these statuses is<br />
listed:<br />
Tax Year 2012 361
SecureFilePro<br />
<strong>Drake</strong> <strong>Software</strong> User’s <strong>Manual</strong><br />
SecureFilePro<br />
• Failed — A transmission failure stopped the download.<br />
• Pending — The upload to GruntWorx is still in progress.<br />
• Completed — The upload to GruntWorx is complete but you have yet to download<br />
the completed job back to your computer.<br />
• Downloaded — The job has been downloaded to your computer and the job is<br />
complete.<br />
When the Status is Completed, select the job to download by marking the check box<br />
on the left of the client’s name, and click Download. (Circled in Figure 13-19 on<br />
page 361.) You can click the check box at the top of the ID column to select all listed<br />
jobs for download<br />
Click Refresh to update the window.<br />
Note that in the upper-right corner of the GruntWorx Status dialog box is a running<br />
tally of the number of tokens purchased, the number used, and the number remaining.<br />
Available to users of either the Working Cabinet or the Archive Cabinet, Secure-<br />
FilePro TM is an HTTPS file-sharing site that allows you to send and receive documents<br />
on your own secure web portal. Think of it as a document exchange site for you and<br />
your clients. You can upload to SecureFilePro TM any documents that you have saved,<br />
imported, scanned, and stored in your <strong>Drake</strong> files, and your clients can go to the<br />
SecureFilePro TM website to view or download those documents. Your clients can also<br />
upload files to the portal for you to retrieve.<br />
Other features of SecureFilePro TM include:<br />
• An activity report that shows, at a glance, who has accessed which accounts and<br />
what has been uploaded and downloaded from the site<br />
• Automatic alerts e-mailed to your clients when their documents (such as their tax<br />
returns) are available for viewing or downloading<br />
• Automatic alerts when you are reaching the limit of your file-storage capacity<br />
New for 2012: Folder Management<br />
Among the changes and enhancements made to SecureFilePro TM :<br />
• E-mail customization will allow clients to:<br />
– Change certain text within the automatic e-mails<br />
– Add/remove a logo<br />
– Customize instructional paragraph for new and existing clients<br />
– Add additional paragraphs, and add footer information to e-mails<br />
• Administrators and preparers can now add folders and upload files to “Documents<br />
to Preparers.”<br />
• Users with access can rename and delete added folders. The default folders still<br />
cannot be changed or deleted.<br />
362 Tax Year 2012
<strong>Drake</strong> <strong>Software</strong> User’s <strong>Manual</strong><br />
SecureFilePro<br />
• Site Branding: Logos can now be placed left or right of the Firm Name.<br />
• File expiration settings will allow our clients to set a date to expire all files.<br />
• Move/Copy feature has been added so clients can move or copy to a new target<br />
location.<br />
• There have been behind-the-scenes changes to make PDF file sizes smaller. This<br />
will help with storage in SecureFilePro and with decreasing lag time in creating,<br />
copying, and moving PDF files.<br />
• A download indicator was added. When a file has been downloaded, the date and<br />
time the download was completed will show in the file information.<br />
• Other changes:<br />
– Unlimited number of files is now allowed in these folders:<br />
– “Document to Clients”<br />
– “Documents to Preparers”<br />
– “Private” (administrator and preparers only)<br />
– “Public”<br />
SecureFilePro Sign-up and Costs<br />
Accessing SecureFilePro<br />
Sign up for SecureFilePro TM from the <strong>Drake</strong> Support website (Support.<strong>Drake</strong><strong>Software</strong>.com<br />
or click Support from the <strong>Drake</strong> <strong>Software</strong> Home window). From the blue<br />
menu box to the left side of the Support web page, select Resources > SecureFilePro.<br />
Follow the onscreen directions to set up an administrative account and to add employees<br />
and clients who will have access to the site.<br />
The cost of using SecureFilePro TM is determined by the number and size of the documents<br />
you upload and save there. Prices are as follows:<br />
• $9.95 monthly ($99.95 annually) for a 250-Mb portal<br />
• $19.95/$199.95 for a 1-Gb portal<br />
• $29.95/$299.95 for a 5-Gb portal<br />
Once your account has been set up and made accessible, you and your clients can<br />
access your clients’ information from the SecureFilePro TM website (www.securefilepro.com).<br />
You and your staff can also access SecureFilePro TM through the Document<br />
Manager by clicking the Portal button from the Document Manager toolbar.<br />
(Figure 13-20 on page 364).<br />
Tax Year 2012 363
SecureFilePro<br />
<strong>Drake</strong> <strong>Software</strong> User’s <strong>Manual</strong><br />
Figure 13-20: Click Portal to upload or download documents to and<br />
from the SecureFilePro TM portal.<br />
Uploading and Downloading Files<br />
IMPORTANT<br />
Before you can upload and download files using SecureFilePro TM ,<br />
you must set up both your portal and your system. To set up your<br />
portal, go to www.securefilepro.com (or from your Document<br />
Manager toolbar, click Portal, and from the Portal Login window,<br />
click Sign Up.) Follow the directions for setting up your folders<br />
and your clients’ folders, login and password options, and e-mail<br />
addresses.<br />
(Archive Cabinet only) To set up your system, from the Document<br />
Manager menu bar, go to Setup > Options, and at the bottom of<br />
the Document Manager Options dialog box, enter your <strong>Drake</strong><br />
account number, EFIN, and <strong>Drake</strong> password.<br />
Uploading<br />
Files<br />
Downloading<br />
Files<br />
To upload files from the Document Manager to SecureFilePro TM :<br />
1. Open the Document Manager. (Click the Doc Mgr icon from the Home window,<br />
any Data Entry Menu toolbar, or your desktop.)<br />
2. From the client tree, open a client’s folder.<br />
3. From the Document pane, select the files to be uploaded.<br />
4. Click the Portal button from the toolbar and select Upload.<br />
5. Enter the Portal username and Portal password you set up with Secure-<br />
FilePro.com. Click OK.<br />
6. When the Folder List For (client name) window is opened, select a folder to<br />
receive the uploaded file and click Upload.<br />
7. When the Portal Upload Result window is opened, click OK.<br />
To download files from a client:<br />
1. From the Document Manager toolbar, click Portal and select Download.<br />
2. Enter the Portal username and Portal password you set up with Secure-<br />
FilePro.com. Click OK.<br />
3. In the Folder List for (client name) window, select the item to be downloaded<br />
and click Download.<br />
364 Tax Year 2012
<strong>Drake</strong> <strong>Software</strong> User’s <strong>Manual</strong><br />
SecureFilePro<br />
The file is downloaded to that client’s Document Manager folder.<br />
Uploading<br />
Private Files<br />
A private file is one that SecureFilePro TM makes available to all preparers in your<br />
firm. To make a file available to all preparers in SecureFilePro TM :<br />
1. Open the Working Cabinet from the Home window of <strong>Drake</strong>.<br />
2. Select the General folder from the document tree on the left side of the window.<br />
3. Select a file from document pane.<br />
4. Select Portal > Private > Upload. The Private Folder List is displayed.<br />
5. Select a folder from this list to receive the uploaded document.<br />
6. Click Upload.<br />
Uploading<br />
Public Files<br />
A public file is one that SecureFilePro TM makes available to all clients. To make a file<br />
available to all clients in SecureFilePro TM :<br />
1. Open the Working Cabinet from the Home window of <strong>Drake</strong>.<br />
2. Select the General folder from the document tree on the left side of the window.<br />
3. Select a file from document pane.<br />
4. Select Portal > Public > Upload. The Public Folder List is displayed.<br />
5. Select a folder from this list to receive the uploaded document.<br />
6. Click Upload. Click OK to verify you want to upload the document.<br />
7. When the Portal Upload Result dialog box is opened, click OK.<br />
NOTE<br />
CAUTION<br />
Only documents saved in the General folder in the Working Cabinet<br />
are eligible for upload or download as “Public” and “Private” files.<br />
Any document uploaded to the Public folder is available to all your<br />
clients. Be very careful about which documents you upload to this<br />
folder.<br />
Tax Year 2012 365
SecureFilePro<br />
<strong>Drake</strong> <strong>Software</strong> User’s <strong>Manual</strong><br />
This page intentionally left blank.<br />
366 Tax Year 2012
14 New Features in Other Packages<br />
This chapter lists some of the new features you’ll see in <strong>Drake</strong>’s corporation (1120), S<br />
corporation (1120S), partnership (1065), tax-exempt (990), fiduciary (1041) and<br />
estate (706) packages. Details for using these packages will appear in the supplemental<br />
manuals, to be published early in 2013.<br />
Individual Entity Packages<br />
The following enhancements have been made to one or more (but not all) of the entity<br />
packages:<br />
Changes in Reporting of Capital Assets<br />
Screen codes<br />
8949, D2, D<br />
Significant changes have been made to the way capital assets are to be reported in the<br />
Corporation (1120), S Corporation (1120S), and Partnership (1065) packages. In the<br />
past, capital gains and losses from stocks, bonds, mutual funds, and other investments,<br />
were listed on Schedule D, Capital Gains and Losses. Now they are to be listed on the<br />
new Form 8949, Sales and Other Dispositions of Capital Assets, and summarized on<br />
Schedule D. Information for these forms is entered on screens 8949, D, or D2. These<br />
screens are available under the Assets-Sales-Recapture tab of the Data Entry Menu.<br />
NOTE<br />
Form 1099-B, Proceeds From Broker and Barter Exchange Transactions,<br />
now reports individual transaction information and contains cost basis fields<br />
for brokers who are required to supply such information. Enter 1099-B data<br />
on screen 8949.<br />
Form 8949,<br />
Schedule D,<br />
Form 1099-B<br />
Screen 8949 has fields for Form 8949, Schedule D, and Form 1099-B data. Following<br />
are some guidelines for data entry on this screen, first for 1099-B information, and<br />
then for 8949–specific information.<br />
• Foreign Expropriation — Mark this box if the corporation sold foreign property.<br />
Foreign expropriation capital losses cannot be carried back, but are carried forward<br />
up to 10 years.<br />
Tax Year 2012 367
Individual Entity Packages<br />
<strong>Drake</strong> <strong>Software</strong> User’s <strong>Manual</strong><br />
• Date of Sale or Exchange — If a single date does not apply, type Bankrupt,<br />
Worthlss, or Expired, as applicable. Select S or L from the Type of gain<br />
or loss drop list to have it treated as short-term or long-term. (If Expired is<br />
entered, the return must be paper-filed.)<br />
• Date of Acquisition — Enter the date acquired as an eight-digit number using<br />
MMDDYYYY format. This date is used to determine whether the sale is shortterm<br />
or long-term. Enter VARIOUS, INHERIT, or INH2010, as applicable.<br />
(Only “Various,” “Inherit,” and “Inh2010” are acceptable for e-filing.Press<br />
CTRL+F to force the software to accept INH2010.) Select S or L from the Type<br />
of gain or loss drop list to have it treated as short-term or long-term.<br />
• Type of gain or loss — Select from the drop list to describe the gain or loss as<br />
long term or short term.<br />
• Stock or other symbol — Enter the stock or other symbol for the security sold.<br />
• Quantity sold — Enter the quantity of securities sold.<br />
• Proceeds from sale ... — Enter the sale amount. If only the gain amount is available,<br />
enter the gain amount and leave the Cost or other basis field blank.<br />
• Cost or other basis — Enter the cost or basis. If only the loss amount is available,<br />
enter the loss amount and leave the Proceeds from sale... field blank.<br />
• Federal tax withheld — Enter the amount of federal tax withheld from the proceeds<br />
of a sale.<br />
• Wash sale loss disallowed — Enter amount of wash sale loss that is disallowed.<br />
• Description — Enter description of capital gain or loss item using stock ticker<br />
symbols or abbreviations. In the past, <strong>Drake</strong> supported 32 characters but only the<br />
first 15 were transmitted with an e-filed return. By default, the first 15 characters<br />
were displayed in black text on the screen; additional characters were displayed in<br />
red. With Modernize e-File (MeF) all characters are now transmitted and all characters<br />
are displayed in black text on the screen.<br />
• Basis not reported ... — If the asset being entered is not being taken from a Form<br />
1099-B, indicate why by selecting an option from the drop list.<br />
• Adjustments — Up to three adjustments per screen are permitted. For each<br />
adjustment, select the applicable code from the drop list and enter the amount of<br />
adjustment (and AMT adjustment, if applicable) to the gain or loss.<br />
• AMT — Several AMT–related fields are included on screen 8949:<br />
– Form 4626 will use amount in the AMT Adjustment to gain or loss fields on<br />
screen 8949 (1120 package only).<br />
– Amount of gain or loss subject... — Enter amount of gain or loss subject to<br />
28% rate.<br />
• State Use Only — Check with your state for required codes.<br />
8825 Rental Property Attachment<br />
Because the IRS is requiring preparers to provide taxpayers with more detail about<br />
income from rental property, <strong>Drake</strong> now generates attachment K1_8825.LD explaining<br />
the “Net rental real estate income (loss)” as it appears on line 2 of each shareholder’s<br />
or partner’s Schedule K-1. (Figure 14-1 on page 369)<br />
368 Tax Year 2012
<strong>Drake</strong> <strong>Software</strong> User’s <strong>Manual</strong><br />
Individual Entity Packages<br />
Figure 14-1: Line 2, “Net rental real estate income (loss)” of Schedule K-1<br />
The amount on line 2 of Schedules K-1 is the shareholder’s or partner’s pro-rated<br />
share of the totals from line 21of Form 8825, Rental Real Estate Income and Expenses<br />
of a Partnership or an S Corporation. The resulting attachment, “K-1 Rental Real<br />
Estate Activity” (listed as “K1_8825” in View mode), includes the shareholder’s or<br />
partner’s name, ownership percentage, address of the property, the property “type” (as<br />
selected from the Type of Property drop list on screen 8825 in <strong>Drake</strong>; see Figure 14-<br />
2), and the total from line 17 of Form 8825 (the resulting net income or loss).<br />
Preparers should be aware:<br />
Figure 14-2: Selecting Land as property type on screen 8825<br />
• Attachment K1_8825 is generated automatically whenever Form 8825 is generated.<br />
• If the property type selected from the Type of Property drop list on screen 8825<br />
(Figure 14-2) is Land (type “5”) or Self-Rental (type “7”), this type of property is<br />
“recharacterized” by the IRS as “active” income if there is a net profit. (Net losses<br />
are subject to passive limitations.) The preparer must use this K-1 information<br />
when completing the individual shareholder’s or partner’s return.<br />
• Columns for “Line 19, 4797” and “Line 20s, Pass-thru” appear on the attachment,<br />
but only a total will be included for those columns. No other details will appear.<br />
• To explain details of the totals from the “Line 19” and “Line 20a” columns of the<br />
“K-1 Rental Real Estate Activity” attachment (lines 19 and 20a of Form 8825) to<br />
the shareholders or partners, open <strong>Drake</strong>, go to the K1 screen, click the Supplemental<br />
Info tab, and enter the information from the attachment. (Figure 14-3 on<br />
page 370)<br />
Tax Year 2012 369
Individual Entity Packages<br />
<strong>Drake</strong> <strong>Software</strong> User’s <strong>Manual</strong><br />
Figure 14-3: Supply details to shareholders or partners on Supplemental Info tab<br />
IMPORTANT<br />
The “K-1 Rental Real Estate Activity” attachment (K1_8825) is not<br />
transmitted when the return in e-filed. Preparers should present<br />
this attachment to each shareholder or partner who receives a<br />
Schedule K-1.<br />
Fields Added to “Name/Address” Information<br />
“Doing Business As” and “In care of” lines have been given separate data-entry fields<br />
in the business packages to allow this info to flow to state forms. (Figure 14-4)<br />
Bonus Depreciation<br />
For the 2012 tax year:<br />
Figure 14-4: “C/O” and “DBA” lines split in business packages<br />
• Assets placed in service in 2012 — 50% bonus depreciation<br />
• Assets placed in service in 2013 — 50% bonus depreciation<br />
Data Entry Field Enhancements<br />
On screens in the 1120, 1120S, and 1065 packages, where “Doing business as” and<br />
“In care of” fields were combined in the past, these are now separate lines to allow this<br />
information to flow through to certain state packages.<br />
370 Tax Year 2012
<strong>Drake</strong> <strong>Software</strong> User’s <strong>Manual</strong> Fiduciary Package (1041)<br />
Fiduciary Package (1041)<br />
Estate Package (706)<br />
For 2012, <strong>Drake</strong> provides better support of multiple grantor statements (last year it<br />
required some extra data entry if there was more than one) and allows preparers more<br />
flexibility to allocate deductions to a particular income type than in prior years.<br />
Because the IRS added a fourth page to Form 706 for the Deceased Spouse Unused<br />
Exclusion (DSUE), <strong>Drake</strong> has added a new DSUE screen.<br />
This new section allows taxpayers to opt out of electing to transfer any DSUE amount<br />
to a surviving spouse, and allows taxpayers to calculate the amount of DSUE that can<br />
be transferred in the event of an election, and to account for any DSUE amount<br />
received from each predeceased spouse.<br />
There is also a Schedule PC—Protective Claim for Refund—added to the Form 706<br />
and a corresponding new <strong>Drake</strong> screen (screen PC). Schedule PC can be used for taxpayers<br />
to preserve their right to a refund of estate taxes paid for assets or liabilities that<br />
are the subject of unresolved controversy at the time of filing the return.<br />
<strong>Drake</strong> has also added a new Recapitulation Overrides screen (screen 5).<br />
More details will appear in the estate (706) supplemental manual, to be published<br />
early in 2013.<br />
Tax Year 2012 371
Estate Package (706)<br />
<strong>Drake</strong> <strong>Software</strong> User’s <strong>Manual</strong><br />
This page intentionally left blank.<br />
372 Tax Year 2012
<strong>Drake</strong> <strong>Software</strong> User’s <strong>Manual</strong><br />
Appendix A: Preseason Checklist<br />
Efficient preseason planning can reduce or eliminate many problems for tax preparers. Take time now to<br />
prepare for the months ahead and ensure that your office is ready before the first client arrives. The needs<br />
of each office vary in the months before tax season, but your preparations might include the actions listed<br />
here. Several refer to the <strong>Drake</strong> Support site, which is located at Support.<strong>Drake</strong><strong>Software</strong>.com.<br />
Contact the IRS<br />
Register for PTIN — All tax return preparers must register for a Preparer Tax Identification Number<br />
(PTIN) and pay a $64.25 initial fee. Preparers who already have a PTIN must renew their<br />
PTINs and pay a $63 renewal fee. Attorneys, CPAs, and EAs are not exempt. Sign up for a PTIN<br />
online through the IRS website (www.irs.gov). Click the For Tax Pros tab and from the Getting<br />
Started section, click Apply for a PTIN. The IRS has a special toll-free telephone number, (877)<br />
613-PTIN (7846), that tax professionals can call for technical support related to the online registration<br />
system.<br />
Pass RTRP Competency Test — Paid tax return preparers with a PTIN have until the end of 2013<br />
to take and pass the Registered Tax Return Preparer (RTRP) Competency Test. To schedule a time<br />
for taking the exam, from the IRS website (www.irs.gov), go to the For Tax Pros tab and go to the<br />
Testing & Credentials section. You can also call 855-IRS-EXAM (3926).<br />
PTIN Test Study and Prep — <strong>Drake</strong> <strong>Software</strong> offers two online, self-paced courses to assist you<br />
in preparing for the required RTRP Test and earn some required CPE credits. The RTRP Test<br />
Study Course offers an interactive way to study for the RTRP exam by covering the seven domain<br />
areas specified by the IRS as the content of the test. <strong>Drake</strong> <strong>Software</strong> customers receive a discounted<br />
price of $99. This price includes 10 hours of continuing education on federal tax law that<br />
applies towards the annual RTRP requirement, plus: study guides, examples, quizzes, and a practice<br />
test. The RTRP Test Overview And Tips course provides an overview of the RTRP test and<br />
tips for success. Course costs $19 and includes two hours of continuing education and includes<br />
information on test specifications, ways to study and prepare, what to expect on test day, and tips<br />
on handling test anxiety.<br />
Get Required CPE Credits — PTIN holders are required to obtain 15 hours of continuing education<br />
annually, including two hours of ethics, three hours of federal tax-law updates, and 10 hours<br />
of federal tax-law topics. To view a <strong>Drake</strong> webinar on continuing education requirements, log in to<br />
<strong>Drake</strong>ETC.com and from the blue menu sidebar, select Webinars > Available Webinars, and<br />
from the list of webinars, select Continuing Education Requirements. (Click Details or Register.)<br />
Apply for Electronic Filer’s Identification Number (EFIN) — All new EROs must apply to the<br />
IRS to become an e-Services provider in order to receive an EFIN. If you are a new ERO and are<br />
not a CPA, EA, attorney, banking official, or officer of a publicly held company, you must also<br />
submit a fingerprint card. Register as an e-Services provider online through the IRS website<br />
(www.irs.gov). Click the For Tax Pros tab and from the Getting Started section, click Become an<br />
Authorized e-file Provider.<br />
Tax Year 2012 A-1
<strong>Drake</strong> <strong>Software</strong> User’s <strong>Manual</strong><br />
Obtain Circular 230 — Beginning January 1, 2011, all tax preparers must comply with the standards<br />
of conduct set by Treasury Department Circular 230 (revised October, 2010). Under these<br />
standards, current regulations that apply to attorneys, CPAs, EAs, and other specified tax professionals<br />
now apply to all tax preparers, including unenrolled preparers. This circular is available on<br />
the <strong>Drake</strong> CD and at www.irs.gov/pub/irs-pdf/pcir230.pdf<br />
Obtain Other IRS publications — Order from the IRS or print from www.irs.com.<br />
Contact the States<br />
Obtain state applications — Some states require e-file applications and many states now enforce<br />
e-file mandates. Contact those states early to apply. State data is available on the Federal/State<br />
Facts page at the <strong>Drake</strong> Support site.<br />
Check state requirements for bank products — Check with your state for special applications to<br />
offer bank products. Contact applicable states that could require different forms.<br />
Check for state e-filing mandates — Mandates vary from state to state; see Appendix E.<br />
Check state requirements for business returns — E-filing requirements vary.<br />
Contact <strong>Drake</strong><br />
Notify <strong>Drake</strong> of changes — Inform us of changes to your firm’s EFIN, phone number, address,<br />
contact person, e-mail address, etc. e-Mail accounting@drakesoftware.com, call (828) 349-5900,<br />
or make changes online at the <strong>Drake</strong> Support site.<br />
Prepare to Offer Banking Options<br />
Choose your bank — Complete a bank application at the <strong>Drake</strong> Support site.<br />
Decide which disbursement methods to use — For example, EPS Financial offers e-Collect<br />
Basic, Deluxe, and Elite. Also, the E1 Visa® Prepaid Card can be used in conjunction with banks<br />
other than EPS.<br />
Complete other required applications — Complete any application or contract that your chosen<br />
bank may require in addition to the bank application at the <strong>Drake</strong> Support site.<br />
Order check and/or card stock.<br />
Test-print check — After installing the software, test-print a check.<br />
Set bank fees and complete Firm Setup in the software.<br />
Review Equipment/Staff Needs<br />
Learn about tax law changes — Do online research; visit and study the IRS Web site and state<br />
tax departments sites.<br />
A-2 Tax Year 2012
<strong>Drake</strong> <strong>Software</strong> User’s <strong>Manual</strong><br />
Learn new phaseout limits — Be prepared to explain to your clients why they no longer receive<br />
benefits they’ve received in the past.<br />
Review or learn EIC rules — Prepare for EIC due diligence interviews.<br />
Review staffing needs — Set staff software security levels.<br />
Train your staff — Make sure everyone understands his or her duties and is familiar with the software.<br />
Train your staff through <strong>Drake</strong> ETC.<br />
Upgrade computers as needed — Ensure that your computers comply with system requirements.<br />
Test printers and modems to be used with <strong>Drake</strong> <strong>Software</strong>.<br />
Check phone cords and connections to be used during tax season.<br />
Check scanner — Review <strong>Drake</strong>-recommended scanners. If necessary, purchase a scanner to use<br />
with the <strong>Drake</strong> Document Manager. For a <strong>Drake</strong> recommendation, see “Compatible Scanners” on<br />
page 349.<br />
Purchase office supplies — These include folders, envelopes, paper, and toner.<br />
Install and Set Up <strong>Software</strong><br />
Review system requirements for installation — See “System Requirements” on page 12.<br />
Install the 2012 <strong>Drake</strong> <strong>Software</strong> CD — Refer to your shipment letter, or see “Installing from<br />
CD” on page 12.<br />
Customize program settings — Complete required and optional program settings. Check the<br />
packing slip to verify your EFIN. Enter your new password and account number at Setup > ERO.<br />
(Keep your packing slip, which contains your serial number and account number, in a safe place.)<br />
Perform database updates — Update the EIN Database from the prior year.<br />
Set up your office’s network — See “Running <strong>Drake</strong> on a Network” on page 15.<br />
Perform configuration updates — Update configurations for firm information, macros, etc.,<br />
from the prior year.<br />
Establish billing amounts — Save time later by setting your billable amounts now.<br />
Help Clients Prepare for Tax Season<br />
Prepare proformas and organizers for prior-year clients — Note that reports, organizers, proformas,<br />
and returns can be stored and e-mailed as PDF files.<br />
Prepare preseason letters and coupons to send with organizers.<br />
Tax Year 2012 A-3
<strong>Drake</strong> <strong>Software</strong> User’s <strong>Manual</strong><br />
Begin preseason scheduling — Get a jump-start on tax season. Schedule clients who are eager to<br />
file early.<br />
Order mailers from Nelco if necessary.<br />
Update and Configure Data<br />
Choose the backup media type that best suits your needs.<br />
Familiarize yourself with the Update Manager features — See “Update Manager” on<br />
page 287.<br />
Update and back up settings — Run the update routine (see “Prior-Year Updates” on page 77),<br />
and make a backup copy of the software setup (see “Backing Up and Restoring Files” on<br />
page 292).<br />
Take Advantage of <strong>Drake</strong> Resources<br />
e-Training Center (ETC) — For tax courses, tutorials, videos, and testing, go to <strong>Drake</strong><strong>Software</strong>.com/ETC.<br />
Tutorials — The 2012 tutorials can be accessed through the Help menu or from the <strong>Drake</strong> Support<br />
site (Training Tools > Tutorials).<br />
<strong>Drake</strong> User’s <strong>Manual</strong> — Familiarize yourself with this manual and use it as a resource for learning<br />
how to use the software and prepare individual returns.<br />
Business Planning Group — Learn more about the Business Planning Group, which can help you<br />
help your clients with tax reduction, business continuation and restructuring, and retirement planning.<br />
See “Business Planning Group” on page 271.<br />
Practice returns — Use our practice returns to learn program navigation and data entry.<br />
<strong>Drake</strong> Website — Add Support.<strong>Drake</strong><strong>Software</strong>.com and the <strong>Drake</strong> <strong>Software</strong> blog (blog.<strong>Drake</strong>-<br />
<strong>Software</strong>.com) to your “Favorites” list.<br />
<strong>Drake</strong> Knowledge Base — Practice using the Knowledge Base at the <strong>Drake</strong> Support site.<br />
<strong>Drake</strong> Forums — Sign up for the <strong>Drake</strong> Forums at the <strong>Drake</strong> Support site.<br />
Online EF database — Review and practice using the online EF database.<br />
Execute your marketing plan — Consider running radio spots, hanging posters or banners, and<br />
encouraging word-of-mouth marketing. <strong>Drake</strong> <strong>Software</strong> offers marketing ideas online. Go to the<br />
Support page (Support.<strong>Drake</strong><strong>Software</strong>.com) and from the blue menu bar, go to Resources > Marketing<br />
Kits, or go to <strong>Drake</strong><strong>Software</strong>.com/marketing.<br />
A-4 Tax Year 2012
<strong>Drake</strong> <strong>Software</strong> User’s <strong>Manual</strong><br />
Prepare for e-Filing<br />
Research and verify e-file requirements — Review any state e-file mandates. (See Appendix E.)<br />
Complete settings — Certain Preparer, Firm, and EF (e-filing) settings in <strong>Drake</strong> are required.<br />
Send test transmissions to <strong>Drake</strong>.<br />
Use Practice Returns — Access practice returns on the <strong>Drake</strong> Support site (Training Tools ><br />
Practice Returns).<br />
Tax Year 2012 A-5
<strong>Drake</strong> <strong>Software</strong> User’s <strong>Manual</strong><br />
This page intentionally left blank.<br />
A-6 Tax Year 2012
<strong>Drake</strong> <strong>Software</strong> User’s <strong>Manual</strong><br />
Appendix B: E-filing Overview<br />
The flow chart on the following page shows an overview of the e-filing process for<br />
most <strong>Drake</strong> preparers. Included are definitions of acknowledgment codes (“acks”).<br />
Tax Year 2012 B-1
PROCESS: E-FILING FEDERAL RETURNS<br />
Complete<br />
the tax<br />
return<br />
Address the<br />
identified issue<br />
Test<br />
transmission<br />
successful!<br />
IRS <strong>Drake</strong><br />
Tax Preparer<br />
Review return to<br />
ensure that it is<br />
ready to e-file<br />
Mark ready for EF<br />
<strong>Drake</strong> Acknowledgement<br />
Codes<br />
P = Processing! Wait for IRS ack.<br />
T = Test transmission successful.<br />
Ready to e-file!<br />
B = Bad transmission; rejected by<br />
<strong>Drake</strong>. Install updates and<br />
try again.<br />
A = Accepted by IRS!<br />
R = Rejected by IRS; see reject codes.<br />
Transmit return<br />
Receive<br />
transmitted<br />
return<br />
IRS Acknowledgement Codes<br />
Transmitting P, T, or B ack<br />
Transmit<br />
acknowledgment<br />
D = Duplicate; return is a duplicate of a previously filed return or DCN. Rejected by IRS.<br />
X = Problem with the transmission<br />
E = Imperfect return<br />
? = Ack file was not posted to your EF database. Run Repair Index in <strong>Drake</strong>.<br />
If P ack<br />
Transmit return<br />
to IRS<br />
Receive<br />
transmitted<br />
return<br />
If NOT accepted<br />
(B, R, D or X ack)<br />
Pick up & process<br />
acknowledgments<br />
Receive ack<br />
Transmit<br />
acknowledgment<br />
If<br />
ACCEPTED<br />
T ack<br />
A ack<br />
(or E ack)<br />
P ack<br />
<strong>Drake</strong><br />
transmission<br />
successful!<br />
Wait for<br />
IRS ack.<br />
E-filing process<br />
complete!
<strong>Drake</strong> <strong>Software</strong> User’s <strong>Manual</strong><br />
Appendix C: Keywords<br />
Report Keywords<br />
Keywords are used in the Reports and Letters programs in <strong>Drake</strong>.<br />
Report keywords appear as columns in reports (Figure C-1 on page C-1). Reports are<br />
generated from the Report Manager.<br />
Figure C-1: Report keywords appear as column headers in reports.<br />
To view report keywords, select Reports > Report Manager from the Home window<br />
and choose to either open a new report or edit an existing report. The Select Report<br />
Columns section of the Report Editor - Step 1 dialog box lists the available and<br />
selected keywords for each column category. Figure C-2 on page C-1 shows the keywords<br />
for the Return Results category.<br />
Figure C-2: Keywords are listed under available columns.<br />
To view a keyword description, hold the mouse pointer over a selected keyword<br />
(Figure C-3 on page C-2).<br />
Tax Year 2012 C-1
<strong>Drake</strong> <strong>Software</strong> User’s <strong>Manual</strong><br />
Letter Keywords<br />
Figure C-3: Place mouse pointer over a selected keyword to see the description.<br />
For instructions on creating and editing reports, see Chapter 12, “Reports.”<br />
Letter keywords appear as bracketed phrases within the letter templates of the Client<br />
Communications Editor (Figure C-4 on page C-2).<br />
Figure C-4: Keywords from letter template<br />
To view available letter keywords, select Setup > Letters from the Home window<br />
and select any template to view.<br />
The tree view of the Client Communications Editor lists the keyword categories. Click<br />
[+] to view specific keywords within a category. In the example in Figure C-5 on<br />
page C-2, the Preparer, Firm, and Revenue category has been expanded.<br />
Figure C-5: Prep, Firm and Revenue keywords<br />
C-2 Tax Year 2012
<strong>Drake</strong> <strong>Software</strong> User’s <strong>Manual</strong><br />
To view a keyword description, hold the mouse pointer over a selected keyword<br />
(Figure C-6 on page C-3).<br />
Figure C-6: Place mouse pointer over a selected keyword to see the description.<br />
Instructions for adding and editing report columns are provided in “Introduction to<br />
Letters in <strong>Drake</strong>” on page 40.<br />
“OtherTax” Keywords in Letters<br />
The result letters in the Client Communications Editor include keywords for other tax<br />
types for state and city returns, as shown in the example in Figure C-7 on page C-3.<br />
These “Other Tax” types generally refer to tax types other than income tax (franchise<br />
tax, composite tax, etc.) that are required by certain states and cities.<br />
Figure C-7: Examples of “OtherTax” paragraph keywords<br />
Tax Year 2012 C-3
<strong>Drake</strong> <strong>Software</strong> User’s <strong>Manual</strong><br />
Table C-1 lists the “Other Tax” types indicated by specific letter keywords for state<br />
and city returns in the <strong>Drake</strong> tax packages.<br />
Table C-1: Letter Keywords: Other Tax Types for State Packages<br />
State or City Package Tax Type Description<br />
Alabama S corporation OtherTax1 Composite<br />
OtherTax2<br />
Privilege Tax and Annual Report<br />
Partnership OtherTax1 Composite<br />
OtherTax2<br />
Privilege Tax and Annual Report<br />
Individual OtherTax2 Privilege Tax and Annual Report<br />
Fiduciary OtherTax2 Privilege Tax and Annual Report<br />
Corporation OtherTax2 Privilege Tax and Annual Report<br />
Arkansas Individual OtherTax1 LLC Franchise<br />
Corporation OtherTax1 LLC Franchise<br />
OtherTax2<br />
Franchise<br />
S Corporation OtherTax1 NR Composite<br />
OtherTax2<br />
Franchise<br />
Partnership OtherTax1 NR Composite<br />
OtherTax2<br />
Franchise<br />
Fiduciary OtherTax1 NR Composite<br />
OtherTax2<br />
Franchise<br />
Colorado Individual OtherTax1 Severance Tax<br />
Corporate OtherTax1 Severance Tax<br />
S Corporation OtherTax1 Severance Tax<br />
Partnership OtherTax1 Severance Tax<br />
Fiduciary OtherTax1 Severance Tax<br />
Connecticut Individual OtherTax1 Gift Tax<br />
OtherTax2<br />
Business Entity Tax<br />
S corporation OtherTax2 Business Entity Tax<br />
Partnership OtherTax2 Business Entity Tax<br />
Delaware S Corporation OtherTax1 Composite<br />
Partnership OtherTax1 Composite<br />
District of<br />
Columbia<br />
Partnership OtherTax1 Franchise<br />
Individual OtherTax1 Franchise<br />
Fiduciary OtherTax1 Franchise<br />
C-4 Tax Year 2012
<strong>Drake</strong> <strong>Software</strong> User’s <strong>Manual</strong><br />
Table C-1: Letter Keywords: Other Tax Types for State Packages<br />
State or City Package Tax Type Description<br />
Florida Individual OtherTax1 FL 405<br />
Corporation OtherTax1 FL 405<br />
S Corporation OtherTax1 FL 405<br />
Partnership OtherTax1 FL 405<br />
Fiduciary OtherTax1 FL 405<br />
Georgia S Corporation OtherTax1 Composite<br />
Partnership OtherTax1 Composite<br />
Kansas Individual OtherTax1 Franchise<br />
OtherTax2<br />
Homestead<br />
Corporation OtherTax1 Franchise<br />
OtherTax2<br />
Unitary<br />
S Corporation OtherTax1 Franchise<br />
OtherTax2<br />
Unitary<br />
Partnership OtherTax1 Franchise<br />
Fiduciary OtherTax1 Franchise<br />
Estate OtherTax2 Estate<br />
Massachusetts Corporation OtherTax1 Unitary<br />
OtherTax2<br />
Annual Report<br />
S corporation OtherTax1 Unitary<br />
OtherTax2<br />
Nonresident Composite<br />
Partnership OtherTax2 Nonresident Composite<br />
Fiduciary OtherTax2 Nonresident Composite<br />
Michigan Individual OtherTax1 Michigan Business Tax<br />
OtherTax2<br />
Homestead Property Tax Credit/Home<br />
Heating Credit<br />
Minnesota Individual OtherTax1 Property Tax Credit<br />
Tax Year 2012 C-5
<strong>Drake</strong> <strong>Software</strong> User’s <strong>Manual</strong><br />
Table C-1: Letter Keywords: Other Tax Types for State Packages<br />
State or City Package Tax Type Description<br />
Missouri Individual OtherTax1 Kansas City<br />
OtherTax2<br />
St. Louis<br />
Corporation OtherTax1 Kansas City<br />
OtherTax2<br />
St. Louis<br />
S Corporation OtherTax1 Kansas City<br />
OtherTax2<br />
St. Louis<br />
Partnership OtherTax1 Kansas City<br />
OtherTax2<br />
St. Louis<br />
Fiduciary OtherTax1 Kansas City<br />
OtherTax2<br />
St. Louis<br />
New Hampshire Individual OtherTax1 Business Tax<br />
OtherTax2<br />
Interest and Dividends<br />
Corporation OtherTax1 Business Tax<br />
S corporation OtherTax1 Business Tax<br />
Partnership OtherTax1 Business Tax<br />
OtherTax2<br />
Interest and Dividends<br />
Fiduciary OtherTax1 Business Tax<br />
OtherTax2<br />
Interest and Dividends<br />
New Jersey S corporation OtherTax1 Composite<br />
Partnership OtherTax1 NJ 1065<br />
OtherTax2<br />
Composite<br />
Fiduciary OtherTax1 Composite<br />
New York Individual OtherTax1 IT-204-LL<br />
OtherTax2<br />
MTA-6 (MCTMT)<br />
Corporation OtherTax1 CT3M/4M<br />
Partnership OtherTax1 IT-204-LL<br />
New York City Individual OtherTax1 NYC 1127 NYC Employment<br />
C-6 Tax Year 2012
<strong>Drake</strong> <strong>Software</strong> User’s <strong>Manual</strong><br />
Table C-1: Letter Keywords: Other Tax Types for State Packages<br />
State or City Package Tax Type Description<br />
Ohio Individual OtherTax1 School District<br />
OtherTax2<br />
Commercial Activity Tax<br />
Corporation OtherTax2 Commercial Activity Tax<br />
S Corporation OtherTax1 Composite<br />
OtherTax2<br />
Pass-through Entity & Trust Withholding<br />
Partnership OtherTax1 Composite<br />
OtherTax2<br />
Pass-through Entity & Trust Withholding<br />
Fiduciary OtherTax2 Commercial Activity Tax<br />
Pennsylvania Individual OtherTax1 Property Tax Rebate<br />
OtherTax2<br />
RCT-101 (SMLLCs)<br />
Partnership OtherTax1 20S65<br />
OtherTax2<br />
NR Composite<br />
S corporation OtherTax1 20S65<br />
OtherTax2<br />
NR Composite<br />
Philadelphia Individual OtherTax1 Business Profits Tax<br />
OtherTax2<br />
Net Profits Tax<br />
Corporation OtherTax1 Franchise<br />
S Corporation OtherTax1 Business Profits Tax<br />
Partnership OtherTax1 Business Profits Tax<br />
Fiduciary OtherTax1 Franchise<br />
Rhode Island S Corporation OtherTax1 Composite<br />
Partnership OtherTax1 Composite<br />
Fiduciary OtherTax1 Composite<br />
South Carolina S Corporation OtherTax1 Withholding Tax - Nonresident Income<br />
Tax Year 2012 C-7
<strong>Drake</strong> <strong>Software</strong> User’s <strong>Manual</strong><br />
Table C-1: Letter Keywords: Other Tax Types for State Packages<br />
State or City Package Tax Type Description<br />
Tennessee Individual OtherTax1 Franchise and Excise Tax<br />
OtherTax2<br />
Interest and Dividends<br />
Corporation OtherTax1 Franchise and Excise Tax<br />
S corporation OtherTax1 Franchise and Excise Tax<br />
Partnership OtherTax1 Franchise and Excise Tax<br />
OtherTax2<br />
Interest and Dividends<br />
Fiduciary OtherTax2 Interest and Dividends<br />
Estate OtherTax1 Estate Tax<br />
Texas S corporation OtherTax1 Franchise<br />
Partnership OtherTax1 Franchise<br />
Individual OtherTax1 Franchise<br />
Corporation OtherTax1 Franchise<br />
Fiduciary OtherTax1 Franchise<br />
Tax-Exempt OtherTax1 Franchise<br />
8 Tax Year 2012
<strong>Drake</strong> <strong>Software</strong> User’s <strong>Manual</strong><br />
Appendix D: Acronyms & Abbreviations<br />
This appendix lists and defines many of the acronyms and abbreviations you may<br />
encounter when using <strong>Drake</strong> tax software.<br />
“A” ack<br />
ack<br />
ACH<br />
ACRS<br />
AGI<br />
AMT<br />
ATIN<br />
“B” ack<br />
CAF<br />
CSM<br />
COGS<br />
CWU<br />
“D” ack<br />
DAN<br />
DCN<br />
DD<br />
DDM<br />
.doc<br />
.DTP<br />
Accepted transmission.<br />
Acknowledgment. A report generated by the IRS and by <strong>Drake</strong> to a transmitter that<br />
indicates receipt of transmissions.<br />
Automated Clearing House. A system that administers electronic funds transfers<br />
(EFTs) among participating financial institutions.<br />
Accelerated Cost Recovery System.<br />
Adjusted Gross Income<br />
Alternative Minimum Tax<br />
Adoption Taxpayer Identification Number. A tax processing number issued by the IRS<br />
as a temporary taxpayer identification number for a child in the domestic adoption<br />
process who is not yet eligible for a Social Security Number (SSN).<br />
Bad transmission<br />
Centralized Authorization File; number issued to a preparer by the IRS.<br />
Client Status Manager. a tool for tracking workflow within a preparer’s office.<br />
Cost of Goods Sold<br />
Client Write-Up<br />
Duplicate of previously filed return. Rejected.<br />
Depositor Account Number. The financial institution account to which a direct deposit<br />
refund is to be routed.<br />
Declaration Control Number. A unique 14-digit number assigned by the ERO (or, in<br />
the case of online filing, by the transmitter) to each e-filed tax return.<br />
Direct Deposit<br />
<strong>Drake</strong> Document Manager<br />
File extension for Microsoft Word files<br />
File extension for Scenario Planner files<br />
Tax Year 2012 D-1
<strong>Drake</strong> <strong>Software</strong> User’s <strong>Manual</strong><br />
EA<br />
“E” ack<br />
EF<br />
EFIN<br />
EFT<br />
EFTPS<br />
EFW<br />
EIC, EITC<br />
EIN<br />
ERC<br />
ERD<br />
ERO<br />
ETA<br />
ETC<br />
ETD<br />
ETIN<br />
F<br />
FMS<br />
HOH<br />
IRC<br />
IRS<br />
Enrolled Agent<br />
IRS acknowledgment for an imperfect return<br />
Electronic Filing<br />
Electronic Filer’s Identification Number<br />
Electronic Funds Transfer. The process through which direct deposit refunds are transmitted<br />
from the government to the taxpayer’s account at a financial institution.<br />
Electronic Federal Tax Payment System. A free service from the U.S. Treasury<br />
through which federal taxes may be paid via the Internet, by phone, or through a service<br />
provider.<br />
Electronic Funds Withdrawal. A payment method which allows taxpayers to authorize<br />
the U.S. Treasury to electronically withdrawal funds from their checking or savings<br />
accounts. Also known as “direct debit.”<br />
Earned Income Credit, Earned Income Tax Credit. A refundable individual income tax<br />
credit for certain persons who work.<br />
Employer Identification Number<br />
Electronic Refund Check (bank product)<br />
Electronic Refund Deposit (bank product)<br />
Electronic Return Originator. An authorized IRS e-file provider that originates the<br />
electronic submission of returns to the IRS.<br />
Electronic Tax Administration. The office within the IRS with management oversight<br />
of the IRS’ electronic commerce initiatives.<br />
Electronic Training Center. <strong>Drake</strong>’s online training center featuring tax courses, tutorials,<br />
and practice returns.<br />
Electronically Transmitted Documents<br />
Electronic Transmitter Identification Number. An ID number assigned by the IRS to a<br />
participant in the e-file program.<br />
Federal code; generally a drop list at the top of an applicable screen.<br />
Financial Management Service. The agency of the Department of the Treasury<br />
through which payments to and from the government, such as direct deposits of<br />
refunds, are processed.<br />
Head of Household<br />
Internal Revenue Code<br />
Internal Revenue Service<br />
D-2 Tax Year 2012
<strong>Drake</strong> <strong>Software</strong> User’s <strong>Manual</strong><br />
ITIN<br />
KB<br />
LLC<br />
MACRS<br />
MB<br />
MeF<br />
MFC<br />
MFJ<br />
MFS<br />
MOM<br />
NOL<br />
“P” ack<br />
PAN<br />
PCM<br />
PDF and .pdf<br />
PIN<br />
PRN<br />
PPR<br />
PTIN<br />
“R” ack<br />
RET<br />
RT<br />
RTN<br />
SMLLC<br />
Individual Taxpayer Identification Number. A tax processing number for certain nonresident<br />
and resident aliens who cannot obtain a Social Security Number (SSN).<br />
Knowledge Base. The <strong>Drake</strong> <strong>Software</strong> Knowledge Base is a comprehensive searchable<br />
database consisting of support solutions and articles of interest, providing support<br />
around the clock.<br />
Limited Liability Company<br />
Modified Accelerated Cost Recovery System<br />
Megabytes<br />
Modernized e-File<br />
Multi-form code; text box on certain screens that allows you to indicate the instance of<br />
a form with which the screen’s data should be associated<br />
Married, Filing Jointly<br />
Married, Filing Separately<br />
Multi-Office Manager<br />
Net Operating Loss<br />
Processing a successful transmission<br />
Passive Activity Number<br />
Personal Client Manager<br />
Portable Document Format<br />
Personal Identification Number<br />
Payment Reference Number<br />
Pay Per Return<br />
Preparer Tax Identification Number<br />
Reject transmission<br />
Refund Electronic Transfer (bank product)<br />
Refund Transfer (bank product)<br />
Routing Transit Number. A number assigned by the Federal Reserve to each financial<br />
institution.<br />
Single Member Limited Liability Corporation<br />
Tax Year 2012 D-3
<strong>Drake</strong> <strong>Software</strong> User’s <strong>Manual</strong><br />
SSN<br />
ST<br />
Sub-S<br />
“T” ack<br />
TS<br />
TSJ<br />
TILA<br />
.txt<br />
TY<br />
UNVER<br />
.xls<br />
Social Security Number<br />
State code; generally a drop list at the top of an applicable screen.<br />
S corporation<br />
Test transmission<br />
Taxpayer (or) Spouse<br />
Taxpayer (or) Spouse (or) Joint<br />
Truth in Lending Agreement<br />
File extension for text files<br />
Tax Year<br />
Unverified field. Fields flagged as UNVER must be verified before e-file is possible.<br />
File extension for Microsoft Excel files<br />
D-4 Tax Year 2012
<strong>Drake</strong> <strong>Software</strong> User’s <strong>Manual</strong><br />
Appendix E: State E-filing Mandates<br />
State e-filing mandates for tax year 2012, as collected from state tax-authority publications,<br />
are provided below.<br />
Alabama<br />
If an income tax return preparer prepares 50 or more acceptable, original individual<br />
income tax returns using tax preparation software in a calendar year, then for each<br />
subsequent calendar year thereafter, all acceptable individual income tax returns prepared<br />
by that income tax preparer must be filed using electronic technology. Regulation<br />
810-3-27-.09<br />
A taxpayer can elect to opt out of e-filing; you need only to file a signed paper original<br />
individual income tax return. That client’s paper return will be included in your total<br />
mandate count.<br />
If an income tax return preparer prepares 25 or more acceptable, original corporate or<br />
partnership income tax returns using tax preparation software in a calendar year, then<br />
for that calendar year and for each subsequent calendar year thereafter, all acceptable<br />
corporate and partnership income tax returns prepared by that income tax preparer<br />
must be filed using electronic technology.<br />
There is no opt-out provision for corporations or partnerships.<br />
California<br />
Connecticut<br />
Florida<br />
Illinois<br />
California law requires tax preparers who prepare more than 100 individual state<br />
income tax returns annually and prepare one or more using tax preparation software—<br />
including preparers residing or with an office out the state—to e-file all individual<br />
income tax returns. A $50-per-return penalty may be assessed for each return filed on<br />
paper that should have been e-filed unless the failure to e-file is due to reasonable<br />
cause and not willful neglect. Reasonable cause can include a taxpayer’s election not<br />
to e-file. No practitioner waivers are available.<br />
Connecticut agency regulations Section 12-690-1 require tax preparers who prepared<br />
50 or more CT income tax returns during any calendar year to e-file all CT income tax<br />
returns. Preparers may obtain a one-year waiver from the e-filing requirement by<br />
establishing that they cannot e-file a return without experiencing an “undue hardship.”<br />
Regs. Section 12-690-1<br />
A corporation in Florida must file and pay its income tax electronically if it paid<br />
$20,000 or more in tax during the State of Florida’s prior fiscal year (July 1–June 30).<br />
File Florida corporate income tax with the Florida Corporate Income/Franchise Tax<br />
Return (Form F-1120), and file through the IRS’s 1120 Federal/State Electronic Filing<br />
Program using approved software.<br />
Effective January 1, 2012, paid preparers who file more than ten (10) IL individual<br />
income tax returns must file those returns electronically.<br />
The majority of returns, more than 62%, are already e-filed. e-Filed returns are processed<br />
more quickly, resulting in fewer errors and faster refunds to taxpayers.<br />
Tax Year 2012 E-1
<strong>Drake</strong> <strong>Software</strong> User’s <strong>Manual</strong><br />
Opt-out Information: If a client refuses to allow you to e-file his or her return, you can<br />
remain in compliance with the mandate by having your client complete and sign Form<br />
IL-8948, Electronic Filing Opt-Out Declaration. Retain all Forms IL-8948 you receive<br />
from your clients in your files for three years. The department may request copies at<br />
any time.<br />
Form IL-8948 is available through <strong>Drake</strong> <strong>Software</strong>.<br />
Indiana<br />
Professional tax return preparers who files more than 50 personal income tax returns<br />
in a calendar year for resident or nonresident individuals must file personal income tax<br />
returns in an electronic format in the immediately following calendar year. If a tax preparer<br />
is part of a firm, the mandate applies to the firm as a whole. If an individual<br />
employed by the firm prepares more than 100 returns for clients other than the firm’s<br />
clients, that individual must also e-file the returns. Amended returns are not counted<br />
because they cannot be e-filed.<br />
A paid preparer’s client may refuse to allow his or her income-tax return to be e-filed.<br />
In order for the preparer to avoid being penalized for not e-filing the tax return, a completed<br />
Form IN-OPT must be signed by the client, and the paid preparer must keep this<br />
form on file for five years.<br />
Professional preparers are subject to a penalty of $50 for each return not filed in an<br />
electronic format, with a maximum penalty of $25,000 per calendar year.<br />
Kansas<br />
Kentucky<br />
Louisiana<br />
Preparers who file 51 or more returns a year are required to file at least 90 percent of<br />
their returns electronically. The requirement applies to any paid preparer who prepares<br />
51 or more Kansas individual income tax returns during any calendar year. The combined<br />
total of the returns prepared by all employees at all of the tax preparer's locations<br />
will be used to determine whether or not the tax preparer is subject to the e-filing<br />
requirement. The Secretary may waive the e-filing requirement if it is determined that<br />
complying with the requirement would cause an undue hardship.<br />
Tax preparers who file 11 or more individual income tax returns are required to e-file<br />
their client’s returns. There are some exceptions to the mandate. Form 8948-K (Preparer<br />
Explanation for Not Filing Electronically) is used to explain why a particular<br />
return is being filed by paper. The form should be attached to and mailed with the<br />
paper return.<br />
The e-filing mandate requires tax preparers filing more than 100 individual income<br />
tax returns to e-file at least 90 percent of the returns, as authorized by Louisiana<br />
Revised Statute 47:1520.<br />
Failure to comply with the e-filing requirements will result in the assessment of a penalty<br />
of $100 or five percent of the tax, whichever is greater. The e-filing requirement<br />
may be waived if complying with the requirement would cause undue hardship.<br />
Maine<br />
Tax return preparers must file by electronic data submission all original Maine tax<br />
returns for individual income tax that are eligible for electronic filing, except:<br />
• When for the previous calendar year, the tax return preparer prepared 10 or fewer<br />
original Maine tax returns for individual income tax that are eligible for e-filing<br />
E-2 Tax Year 2012
<strong>Drake</strong> <strong>Software</strong> User’s <strong>Manual</strong><br />
• When the taxpayer refuses to allow the return to be e-filed and the tax return preparer<br />
notes the refusal in the taxpayer’s records<br />
• When the tax return preparer has been granted a waiver from mandatory participation<br />
under section .05 (Rule 104).<br />
Maryland<br />
Massachusetts<br />
For any taxable year beginning after December 31, 2010, a preparer who has prepared<br />
more than 100 qualified returns in the prior taxable year is required to file the returns<br />
electronically. The Act authorizes the Comptroller to impose on a preparer a $50 penalty<br />
for each return that is not filed electronically in compliance with this Act, unless<br />
the preparer is able to show that the failure to comply is due to reasonable cause and<br />
not due to willful neglect. The total penalties assessed may not exceed $500 for all<br />
returns filed by the preparer in a taxable year. Waivers are available. Tax-General Article<br />
§10-824<br />
Paid preparers must, under certain conditions, e-file all corporate, S corporation, and<br />
partnership returns and corporate extensions.<br />
Additionally, the Commonwealth of Massachusetts requires personal income tax<br />
extensions with zero payment or with payments of $5,000 or more to be filed (and<br />
paid, if applicable) electronically.<br />
For tax years beginning on or after January 1, 2004, income tax return preparers who<br />
completed 200 or more original Massachusetts Forms 1 and 1-NR-PY, including those<br />
e-filed, during the previous calendar year are required to use electronic means to file<br />
all personal income tax returns unless the taxpayer specifically directs on the paper<br />
form that filing be on paper. The threshold is reduced to 100 returns for tax years<br />
beginning on or after January 1, 2005. The preparer must continue using electronic<br />
means to file returns in all subsequent years unless the preparer completed no more<br />
than 25 original individual income tax returns during the previous calendar year.<br />
(Note: Effective February 16, 2004, software-generated forms that are printed and<br />
mailed to the Department of Revenue must contain a 2-D barcode or the return will be<br />
sent back to the taxpayer unprocessed.)<br />
Michigan Tax preparers completing more than 10 personal income tax returns are required to e-<br />
file all eligible returns that are supported by their software.<br />
Minnesota<br />
Preparers are required to e-file all Minnesota individual income tax returns if they are<br />
in the business of preparing tax returns and reasonably expect to prepare more than 10<br />
MN income tax returns this year. This requirement also applies to preparers located in<br />
other states who expect to prepare more than 10 MN individual income tax returns for<br />
the current year. Do not include in the 10-return threshold returns prepared for businesses,<br />
property tax refund returns, amended income tax returns or returns filed with<br />
other states.<br />
State law (M.S. 289A.08, subd. 16) requires tax preparers who are required to e-file<br />
MN individual income tax returns to pay a $5 fee for each original Form M1 that is<br />
filed on paper that could have been e-filed. The fee will be waived only if the IRS or<br />
the department requires the federal or MN return to be filed on paper.<br />
Tax Year 2012 E-3
<strong>Drake</strong> <strong>Software</strong> User’s <strong>Manual</strong><br />
For purposes of this law, the business entity, as a whole, is the “preparer.” If the business<br />
employs individuals to prepare returns, the total number of returns prepared by<br />
all employees in the business count toward the 10-return threshold. Likewise, if the<br />
business operates from multiple locations, the total of returns prepared by all locations<br />
count toward the threshold.<br />
Nebraska<br />
New Jersey<br />
New Mexico<br />
New York<br />
Effective Jan. 1, 2010, any paid preparer who prepares and files more than 25 individual<br />
income tax returns annually must file the returns electronically.<br />
Practitioners who prepared 11 or more NJ resident income tax returns must file their<br />
clients’ returns via one of the state’s three e-filing services. An E-File Opt-Out<br />
Request Form, Form NJ- 1040-O, is available for taxpayers who choose not to have<br />
their returns e-filed by a tax practitioner.<br />
Mandatory e-file of PIT returns by preparers filing more than 25 returns; taxpayers<br />
can opt out in writing; penalty for noncompliance $5 per return.<br />
1. If a tax return preparer prepares 11 or more authorized tax documents for compensation,<br />
then all authorized tax documents prepared by that tax return preparer must<br />
be e-filed. There is no client opt-out provision. Tax preparers who do not comply<br />
with the e-file mandate may be subject to a $50 per document penalty.<br />
2. Individual taxpayers are required to e-file their NYS personal income tax returns<br />
if they meet the following conditions:<br />
– They use tax software to prepare their own return<br />
– Their tax software supports e-filing of their return<br />
– They have broadband access<br />
New York State law prohibits software companies from charging an additional e-filing<br />
fee. If individual taxpayers don't meet all three of these conditions, or if they prepare<br />
returns using paper and pencil, they are not required to e-file.<br />
The $25 penalty that applied when an individual was required to e-file but instead<br />
filed using paper has been removed.<br />
New York<br />
City<br />
New York City instituted a preparer mandate for the first time for tax year 2010. No<br />
change has been made to this mandate for tax year 2011. Preparers must e-file if they<br />
both:<br />
• Prepared more than 100 original New York City General Corporation Tax or<br />
Unincorporated Business Tax documents in calendar year 2011, including tax<br />
documents for prior periods<br />
• Used tax software to prepare one or more corporation tax documents in 2011.<br />
Tax preparers who meet the mandated criteria above cannot opt-out of the e-filing<br />
mandate. If a taxpayer wants to opt-out, he or she must apply for a hardship waiver<br />
available at:<br />
www.nyc.gov/html/dof/html/contact/contact_emailefilewaiver.shtml.<br />
Ohio<br />
A tax return preparer that prepares more than 11 original tax returns during any calendar<br />
year that begins on or after January 1, 2013, shall use electronic technology to file<br />
E-4 Tax Year 2012
<strong>Drake</strong> <strong>Software</strong> User’s <strong>Manual</strong><br />
with the tax commissioner all original tax returns prepared by the tax return preparer.<br />
This division does not apply to a tax return preparer in any calendar year that begins<br />
on or after January 1, 2013, if, during the previous calendar year, the tax return preparer<br />
prepared not more than 10 original tax returns.<br />
If a tax return preparer required by this section to submit original tax returns by electronic<br />
technology files an original tax return by some means other than by electronic<br />
technology, the tax commissioner shall impose a penalty of $50 for each return in<br />
excess of 11 that is not filed by electronic technology. Upon good cause shown by the<br />
tax return preparer, the tax commissioner may waive all or any portion of the penalty<br />
or may refund all or any portion of the penalty the tax return preparer has paid.<br />
A paid preparer may complete the IT EF opt-out form to request exclusion from the <br />
e-filing mandate. The requests will be reviewed and approved or denied on a case-bycase<br />
basis.<br />
The taxpayer waiver is provided for taxpayers who do not want their tax return to be<br />
e-filed. The taxpayer must attach the completed and signed IT Waiver to his or her<br />
Ohio Form IT 1040 or IT 1040EZ. The taxpayer must complete and sign the waiver<br />
each year.<br />
Oklahoma<br />
House Bill 3166 expands the mandate for those tax preparers who must e-file individual<br />
income tax returns from those who prepare more than 50 returns for the prior year<br />
to any “specified tax return preparer.” The term “specified tax return preparer” has the<br />
same meaning as provided in Section 6011 of the Internal Revenue Code.<br />
The provision which allowed a taxpayer to designate that they did not want their<br />
income tax return e-filed has been deleted. 68 O.S. § 2385.<br />
Oregon<br />
Pennsylvania<br />
House Bill 2071 extends the federal requirement to Oregon personal income tax<br />
returns. Paid preparers who meet the requirements of the federal e-file mandate must<br />
also e-file Oregon personal income tax returns. (The federal mandate: Preparers who<br />
anticipate preparing 11 or more federal individual or trust tax returns during the year<br />
must e-file their returns.) Form 8948 (Preparer Explanation for Not Filing Electronically)<br />
is used to explain why a particular return is being paper-filed.<br />
Individual Returns — For the tax year beginning on or after January 1, 2010, any PA-<br />
40 (2010) Pennsylvania Personal Income Tax Return prepared by a third-party preparer<br />
who submitted at least 50 PA-40 Pennsylvania Personal Income Tax returns or<br />
amended PA-40 Pennsylvania Personal Income Tax returns for any taxable year shall<br />
be e-filed in the manner prescribed by Departmental instructions.<br />
Corporation Returns — For tax years starting on or after January 1, 2011, paid thirdparty<br />
tax preparers who prepare at least 50 PA Corporate Tax Reports (RCT-101) are<br />
required to e-file their clients’ tax reports during calendar years starting on or after<br />
January 1, 2012. Once a third-party preparer is subject to the e-filing mandate, the<br />
third-party preparer will continue to be subject to the mandate regardless of how many<br />
PA corporate tax reports he or she prepares during the year. A paid tax preparer may<br />
be allowed to file a paper report when a taxpayer specifically directs the preparer to do<br />
so or if the preparer proves that e-filing would place undue hardship on the preparer<br />
by filing a written request for a waiver. Volunteer, unpaid preparers; people who pro-<br />
Tax Year 2012 E-5
<strong>Drake</strong> <strong>Software</strong> User’s <strong>Manual</strong><br />
vide only support such as typing; employees of a business who prepare tax reports for<br />
other employees and officers of the business; and fiduciaries who prepare reports for<br />
the trusts and estates they serve, are not subject to the mandatory e-filing requirement.<br />
(Pennsylvania Tax Update 157, 08/01/2011.)<br />
Rhode Island<br />
South<br />
Carolina<br />
Any paid preparer who filed more than 100 RI tax returns during the previous calendar<br />
year must e-file all eligible tax returns. A person employed by a paid preparer with<br />
multiple offices is required to e-file if the total of all tax returns filed from all offices is<br />
more than 100, regardless of whether a single office of the same preparer files fewer<br />
than 100 returns. If a paid preparer fails to abide by the e-file mandate, or otherwise<br />
causes clients’ RI tax returns to be filed falsely or improperly, the Tax Administrator<br />
may, after a hearing to show cause, preclude such preparer from preparing and filing<br />
RI tax returns with the Tax Division.Reg. (ELF09-01).<br />
Tax return preparers filing 100 or more returns of any package (individual, S corporation,<br />
partnership, etc.) must submit them electronically. The mandate is separate for<br />
each package. (For example, preparers e-filing 100 individual returns are not required<br />
to e-file 1120 returns unless the number of 1120 returns exceeds 99.) All returns<br />
should be e-filed if possible.<br />
“Tax return preparer” refers to the business entity and not to the individual location or<br />
individual completing the return.<br />
If compliance with this section is a substantial financial hardship, a tax return preparer<br />
may apply in writing to the S.C. Department of Revenue to be exempted from these<br />
requirements. The DoR may grant an exemption for no more than one year at a time.<br />
Utah<br />
Tax preparers that file more than 100 income tax returns in a calendar year is required<br />
to file all such returns using scan technology or by electronic means.<br />
If, however, the filing requirement will not apply if:<br />
• A schedule must be attached to the return that cannot be filed using scan technology<br />
or electronic means<br />
• The taxpayer requests in writing that the income tax preparer not file the return<br />
using scan technology or electronic means<br />
• The Utah Tax Commission waives the requirement that a return be filed by scan<br />
technology or electronic means.<br />
A tax preparer may obtain such a waiver from the commission by demonstrating that<br />
the use of scan technology or electronic means would result in an undue hardship. The<br />
filing requirement also does not apply to amended returns or returns for any taxable<br />
year that begins before the first day of the current taxable year.<br />
If a preparer or multiple preparers affiliated with the same establishment prepared 101<br />
or more returns in the prior calendar year, they must submit all UT individual tax<br />
returns electronically.<br />
Virginia<br />
Effective January 1, 2012, paid preparers who prepare 50 or more returns in a tax year<br />
must file all eligible returns electronically using e-File. If a return is not eligible for e-<br />
File, it may be filed on paper.<br />
E-6 Tax Year 2012
<strong>Drake</strong> <strong>Software</strong> User’s <strong>Manual</strong><br />
The Tax Commissioner has the authority to waive the requirements to e-file if that<br />
requirement would cause an undue hardship for the tax preparer. The tax preparer<br />
must request the waiver (Form 8454-P) in writing and clearly demonstrate the nature<br />
of the undue hardship. Hardship waiver requests will be responded to within 45 days<br />
of receipt.<br />
Taxpayers may elect not to have their returns e-filed. To opt out, the taxpayer must<br />
complete the Taxpayer Opt Out Form 8454T, which is to be retained by the tax preparer.<br />
In addition, the tax preparer will indicate on the taxpayer’s return that the taxpayer<br />
elected to opt out of the e-file requirement.<br />
Both Form 8454P and Form 8454T are available through <strong>Drake</strong> <strong>Software</strong>.<br />
West Virginia<br />
Income tax preparers who filed more than 25 personal income tax returns, and will be<br />
using tax preparation software to complete one or more of these returns, must e-file<br />
them for the current tax year. Tax preparers may opt-out of the e-file provision if the<br />
preparer has clients who prefer not to e-file.<br />
Starting in 2012, taxpayers who pay more than $10,000 in any tax for a single year<br />
must e-file all returns; however the Department, through procedural rule, decided to<br />
phase this requirement in over three years. The threshold will be $50,000 for the tax<br />
year beginning January 1, 2013 (look back to 2012), $25,000 for the tax year beginning<br />
January 1, 2014, and $10,000 for the tax year beginning January 1, 2015. W.V.<br />
Code of State Rules 110-10D-9.3.a. Under this procedural rule, the Commissioner has<br />
the authority to “carve out” certain tax types from the e-file requirement. Personal<br />
income tax is the tax that will likely be carved out of this requirement.<br />
Wisconsin<br />
Practitioners who filed 50 or more Wisconsin individual income tax returns in prior<br />
years are required to e-file returns. A practitioner can ask for a waiver from the e-filing<br />
requirement if the requirement causes an undue hardship. If a taxpayer wishes to<br />
file a paper tax return, the practitioner is not required to e-file that return. The taxpayer<br />
should write “no e-file” by his or her signature on the tax return.<br />
Combined Corporate returns must be e-filed. <strong>Drake</strong> <strong>Software</strong> does not support e-filing<br />
of Combined or Apportioned corporation returns. A waiver request can be e-mailed<br />
(DORWaiverRequest@revenue.wi.gov), faxed (608-267-1030) or mailed to the state<br />
at:<br />
Mandate Waiver Request<br />
Wisconsin Department of Revenue<br />
Mail Stop 5-77<br />
P.O. Box 8949<br />
Madison, WI 53708-8949<br />
The state DOR has mailed letters to corporations and partnerships that are required to<br />
e-file. The Wisconsin Administrative Code provides that the DOR may require any<br />
corporation franchise or income tax return or any partnership return to be e-filed.<br />
Tax Year 2012 7
<strong>Drake</strong> <strong>Software</strong> User’s <strong>Manual</strong><br />
This page intentionally left blank.<br />
8 Tax Year 2012
<strong>Drake</strong> <strong>Software</strong> User’s <strong>Manual</strong><br />
Appendix F: Addenda Pages for 2012<br />
The <strong>Drake</strong> <strong>Software</strong> User’s <strong>Manual</strong> is updated as changes are made to the software to<br />
reflect IRS changes and improve the user experience for tax preparers. The manual is<br />
provided in electronic version on your CD, online, and as a “hard copy,” which can be<br />
ordered from <strong>Drake</strong> <strong>Software</strong> for a fee. To access the online manual:<br />
• From the <strong>Drake</strong> Home window, select Help > Online Resources.<br />
• From the <strong>Drake</strong> Support site, select Training Tools > <strong>Manual</strong>s and click the link<br />
for the 2012 manual.<br />
Note to dial-up users: The PDF document is large and will take time to download. We<br />
suggest that you use the version on your latest CD rather than downloading the PDF.<br />
Addenda pages are provided throughout the season for those who use a printed version<br />
of the manual. These pages are provided on the CD and on the <strong>Drake</strong> Support<br />
site. This appendix is a guide to the addenda pages added to the <strong>Drake</strong> <strong>Software</strong> User’s<br />
<strong>Manual</strong>: Tax Year 2012 during filing season 2012. This appendix is updated regularly<br />
throughout tax season.<br />
NOTE<br />
To ensure that you always have the most up-to-date version of the<br />
manual, we recommend using the online manual, available from the<br />
<strong>Drake</strong> Home window, (go to Help > Online Resources), and on the<br />
<strong>Drake</strong> Support site. If you use a PDF of the manual copied to your<br />
desktop, we recommend periodically replacing your PDF copy with the<br />
updated online manual.<br />
While Table F-1 provides a record of the changes made to the manual throughout the<br />
season, the instructions are for printed-manual users only.<br />
Table F 1: Addenda Pages for 2012<br />
New<br />
Page<br />
Replaces<br />
Page<br />
Explanation<br />
5-10 5-10 Inserting information on American Taxpayer Relief Act of 2012 to “Introduction.” Print<br />
this addenda from the CD and replace pages 5-10 in your printed manual.<br />
15-60 15-60 Replacing Data Location information in “Installation and Setup.” Print this addenda from<br />
the CD and replace pages 15-60 in your printed manual.<br />
113-116 113-116 Replacing the Schedule D import directions and Table 5-2.<br />
167-168 167-168 Removing outdated information due to American Taxpayer Relief Act of 2012 in “Return<br />
Preparation.” Print this addenda from the CD and replace pages 167-168 in your<br />
printed manual.<br />
171-172 171-172 Removing outdated information due to American Taxpayer Relief Act of 2012 in “Return<br />
Preparation.” Print this addenda from the CD and replace pages 171-172 in your<br />
printed manual.<br />
Tax Year 2012 F-1
<strong>Drake</strong> <strong>Software</strong> User’s <strong>Manual</strong><br />
New<br />
Page<br />
Replaces<br />
Page<br />
Table F 1: Addenda Pages for 2012<br />
Explanation<br />
329-366 329-354 Chapter 13 was expanded by several pages to include new enhancements. Print this<br />
addenda from the CD and replace Chapter 13 in your printed manual.<br />
367-372 355-358 Chapter 14 page numbers were altered due to additions to Chapter 13. Print this<br />
addenda from the CD and replace Chapter 14 in your printed manual.<br />
F-2 Tax Year 2012
<strong>Drake</strong> <strong>Software</strong> User’s <strong>Manual</strong><br />
Index<br />
Index<br />
Symbols<br />
+/- (adjustment fields) 72<br />
= (override fields) 72<br />
A<br />
ABCvoice files 245<br />
accessing<br />
see also opening<br />
appointments 62<br />
recent returns 62<br />
state returns in data entry 75<br />
acknowledgments ("acks")<br />
"Fees to ACH" 221<br />
codes for 233–234<br />
e-filing overview Appendix B<br />
notification of 62<br />
processing 233<br />
activating<br />
automatic program updates 288<br />
error message beeps 29<br />
flags 70<br />
heads-down data entry 82<br />
imperfect return election 33<br />
macros 38<br />
prompting for check print transmission 33<br />
state return options 32<br />
W-2 verification option 28<br />
addenda pages Appendix F<br />
adding<br />
custom paragraphs 32, 59<br />
employer information 307<br />
firm information 20<br />
preparer information 23<br />
statements/explanations to a return 189<br />
student records (ETC) 269<br />
add-on fees 21<br />
address book (<strong>Drake</strong> e-mail) 280<br />
addresses<br />
change of 180<br />
foreign (for tax firm) 20<br />
in care of 98<br />
military 98<br />
taxpayer 98<br />
adjusted basis, tracking 127<br />
adjustment fields 28, 72<br />
ADMIN, logging in as 14<br />
administrative options setup 33<br />
administrative rights, assigning 24<br />
administrator login<br />
see also ADMIN, logging in as<br />
in CSM 256<br />
in ETC 262, 269<br />
passwords 19<br />
Scheduler options 86<br />
Advent Financial contact info x<br />
alimony 109, 138<br />
Alternative Minimum Tax (AMT)<br />
data entry of 141<br />
amended returns 175<br />
amortization<br />
codes 169<br />
schedules 306<br />
applications for bank products 212, 216<br />
appointment reminders 91<br />
appointments<br />
see also Scheduler<br />
calendars 88<br />
changing details of 94<br />
on the Home window 62<br />
overlapping 93<br />
private 91<br />
recurring 91<br />
rolling over from prior year 92<br />
scheduling 90<br />
searching 93<br />
Archer MSAs 133<br />
archiving returns 207–208<br />
ard xi<br />
assets<br />
depreciable 165<br />
group sales 170<br />
on Schedule C 111<br />
sales of 111<br />
section 179 expensing 167<br />
sold 170<br />
traded 116<br />
associating two screens in data entry 73<br />
attachments<br />
binary 184–186<br />
DDM files 331<br />
e-mail 278<br />
Form 709 178<br />
PDF, see PDF files<br />
unformatted schedules 189<br />
audit log (DDM) 350<br />
Tax Year 2012<br />
xxix
Index<br />
<strong>Drake</strong> <strong>Software</strong> User’s <strong>Manual</strong><br />
auto expenses 171–172<br />
automated backup of files 294<br />
automatic updates 288<br />
B<br />
backup and restore<br />
DDM files 344<br />
<strong>Drake</strong> files 292<br />
bank name database 72<br />
bank products<br />
see also banking<br />
see also checks<br />
applying for 212<br />
banking partners contact info x<br />
check register 223<br />
depositing funds 213<br />
direct deposit of 240<br />
distribution of 213<br />
eligibility for 212<br />
in data entry 220<br />
processing checks 221<br />
service bureau 213<br />
settings 33<br />
transmission of data 221<br />
withholding fees from 220<br />
Banking 209<br />
bank partners contact info x<br />
<strong>Drake</strong> Banking Dept. x<br />
bankruptcy 112, 368<br />
basis (in calculating K-1 amounts) 127<br />
batch<br />
calculations 193<br />
letter printing 301–302<br />
uploads (GruntWorx) 359<br />
batch appointment generator 92<br />
billing<br />
overriding setup options 54<br />
blank forms 290<br />
blindness 98<br />
bonds purchased with refund 159<br />
Briggs court case 140<br />
business<br />
see also business use<br />
cancellation of debt 133<br />
codes 110<br />
depreciating home used for 169<br />
expenses 134<br />
mileage 172<br />
use of home for 172<br />
business use<br />
converting home to 118<br />
percentage 166, 172<br />
C<br />
C corporations, changing from S corps 298<br />
calculating tax returns 193–196, 230<br />
calculations<br />
batch 193<br />
global options for 29<br />
pause option for 29<br />
calculator 75<br />
calendars (in Scheduler) 88<br />
cancellation<br />
of debt 133<br />
capital gains and losses<br />
see also Schedule D (Capital Gains and Losses)<br />
carryovers from prior years 113<br />
Cardholder Customer Service contact info xi<br />
carryback of net operating losses 173<br />
carryforward of net operating losses 174<br />
carryover worksheets 30<br />
cashier’s checks 214<br />
casualties and thefts 111<br />
CD shipments 12<br />
change of address 180<br />
changing<br />
client SSN or EIN 295<br />
return types (C-corp to S-corp, etc.) 298<br />
charitable distributions 118<br />
check register 223<br />
checks 219<br />
lost or stolen 224<br />
resetting check numbers 223<br />
test printing 221<br />
Child Tax Credit 146<br />
child-care expenses 142–143<br />
church income, see clergy<br />
city<br />
codes 73<br />
tax rates for Ohio and Pennsylvania 309<br />
clearing flags 70<br />
clergy<br />
expenses 135<br />
income allocation 140<br />
indicating on W-2 137<br />
self-employment tax 136<br />
Client Communications Editor 41<br />
client files, see files<br />
Client Status Manager 63, 249–256<br />
client statuses (in CSM) 249<br />
Client Write Up 356<br />
Client Write-Up Support xii<br />
COBRA assistance 149<br />
codes<br />
acknowledgment ("acks") 233–234<br />
activity type (Schedule C) 110<br />
xxx Tax Year 2012
<strong>Drake</strong> <strong>Software</strong> User’s <strong>Manual</strong><br />
Index<br />
business 110<br />
city 73<br />
error (in e-filing) 230<br />
ES (estimate) 151<br />
extension form 176<br />
filing status 97<br />
form 66<br />
FTC (foreign tax credit) 142<br />
investment credit 168<br />
miscellaneous 187<br />
multi-form (MFC) 73<br />
non-paid preparer 20<br />
OP (overpayment) 153<br />
proforma 81<br />
reject 240<br />
searching 110<br />
special processing 98<br />
ST (state) 73<br />
tax treatment 110<br />
TS/TSJ 73<br />
underpayment 154<br />
unformatted schedule 189<br />
colors<br />
in data entry 46<br />
in view/print mode (basic and enhanced) 205<br />
combat zone 98<br />
community property allocation 139<br />
comparing<br />
current to prior year 30<br />
network options 16<br />
two versions of a return 186<br />
configuring<br />
colors in basic mode 205<br />
DDM 333<br />
Consent to Use and Disclosure of Tax Return Information<br />
(IRS Reg. 7216) 22, 209–212<br />
contact lists 245<br />
conversions 272<br />
copying<br />
DDM files 337, 344<br />
EF data 247<br />
coversheets 30<br />
CPE credits 265<br />
creating<br />
see also opening<br />
amended returns 175<br />
appointment reports 95<br />
archived returns 207<br />
CSM reports 255<br />
EF reports 241<br />
ETC accounts 262<br />
filters 322<br />
key combinations 38<br />
macros 38<br />
miscellaneous codes 34, 35<br />
preparer schedules 87<br />
reports 315<br />
returns 65<br />
credit card (as electronic payment option) 160<br />
credits<br />
see also individual credit and form names<br />
child and dependent care 142<br />
child tax 146<br />
elderly/disabled 143<br />
foreign tax 142<br />
home energy 143<br />
homebuyer 117, 118, 158<br />
retirement savings contributions 146<br />
crop<br />
income for Form 1041 131<br />
insurance 141<br />
CSM, see Client Status Manager<br />
Ctrl+W (detail) worksheets 69–70<br />
custom paragraphs 32, 59<br />
customized supplemental letter 31<br />
customizing<br />
colors 46, 205<br />
CSM display 252<br />
data entry menu 33<br />
drop lists 35<br />
fields on BILL screen 34<br />
flagged fields 34<br />
greetings in letters 59<br />
letters 42<br />
miscellaneous code fields 34<br />
report filters 317<br />
security settings 24<br />
D<br />
data entry<br />
bank screens in 220<br />
basics of 66<br />
colors 47<br />
customizing 33<br />
EF override options in 236<br />
forms-based 309<br />
grid 68, 100, 165<br />
heads-down 82<br />
help resources within 274<br />
maximizing screens 28<br />
menu 66<br />
practice returns 266<br />
printing client labels from 304<br />
screen captures 75<br />
setting CSM statuses from 252<br />
setup options 28<br />
Spanish 28<br />
Tax Year 2012<br />
xxxi
Index<br />
<strong>Drake</strong> <strong>Software</strong> User’s <strong>Manual</strong><br />
special features in 183–192<br />
upper/mixed case 28<br />
date shown on return 31, 54<br />
DCNs (Document Control Numbers)<br />
assignment of 20<br />
changing 235<br />
staggering 234<br />
DDM 2 331–??<br />
DDM, see Document Manager<br />
debit card (as electronic payment option) 160<br />
debt cancellation 133<br />
deceased taxpayer 98<br />
deductions<br />
claiming for depreciation 165<br />
domestic production activities 139<br />
itemizing 140–141<br />
section 179 expensing 166<br />
self-employed health insurance 137<br />
tuition and fees 138<br />
deleted files in the CSM 254<br />
deleting<br />
see also editing<br />
appointments 94<br />
archived returns 208<br />
checks 222<br />
CSM records 256<br />
duplicate entries from the CSM 256<br />
e-mail messages 277<br />
employer data 307<br />
files from <strong>Drake</strong> 297<br />
firm information 21<br />
flags 70<br />
records from CSM display 256<br />
reports from "My Reports" 319<br />
reports from online EF database 243<br />
rows in grid data entry 68<br />
screens in <strong>Drake</strong> 67<br />
text from letter templates 44<br />
update files 295<br />
dependent of another 98<br />
dependents<br />
child-care expenses 142<br />
claiming (if married filing separately) 101<br />
EIC information for 155<br />
kiddie tax 149–150<br />
release of claim to exemption (Form 8332) 179<br />
state-related data 101<br />
depreciation<br />
see also depreciation schedules<br />
see also section 179 expensing<br />
elections 171<br />
in data entry 165–171<br />
of farm assets 131<br />
of home 169, 173<br />
of sold assets 170<br />
of traded assets 116<br />
reports and lists 323–326<br />
stopping depreciation on an asset 170<br />
depreciation schedules<br />
for 2009 29<br />
generated in <strong>Drake</strong> 165<br />
layout (portrait or landscape) 29<br />
detail (Ctrl+W) worksheets 69–70<br />
direct debit<br />
balance due 161<br />
consent (Form 8879) 164<br />
from multiple accounts 161<br />
of estimates 162<br />
direct deposit<br />
of bank products 214, 240<br />
of refunds 158–160<br />
to multiple accounts 159<br />
direct expenses (on Schedule E) 123<br />
directories and paths 27<br />
disabling grid data entry 68<br />
disaster<br />
payments (farm) 130<br />
special tax treatment due to 54<br />
disposal of property 122<br />
distributions, charitable 118<br />
distributions, HSA funding 118<br />
dividends and interest 105–108<br />
document control numbers, see DCNs<br />
Document Manager<br />
printer setup 52<br />
using 331–337<br />
dollar rounding 31<br />
domestic production activities deduction 139<br />
DOT hours of service rules, meals subject to 110<br />
downloading<br />
ABCvoice Files 245<br />
automatic updates 288<br />
conversion software 272<br />
<strong>Drake</strong> tax software 271<br />
e-mail messages 277<br />
fonts 290<br />
prior-year state programs 271<br />
program updates 287<br />
publications 272<br />
W-2 information 104<br />
drag/drop ordering 206<br />
<strong>Drake</strong> Document Manager, see Document Manager<br />
<strong>Drake</strong> PDF<br />
password-protection 200<br />
printing to 198<br />
<strong>Drake</strong> <strong>Software</strong><br />
Banking Department x<br />
CD installation process 12<br />
xxxii Tax Year 2012
<strong>Drake</strong> <strong>Software</strong> User’s <strong>Manual</strong><br />
Index<br />
contact information 284<br />
online forums 270<br />
partner programs 272<br />
shipment letters 9<br />
<strong>Drake</strong> Support 257–285<br />
due date to print on letter and instructions 54<br />
due diligence screens<br />
for EIC 155<br />
E<br />
E1 Card contact info xi<br />
EA, see enrolled agents<br />
Earned Income Credit (EIC)<br />
blocking EIC calculations 156<br />
due diligence 155<br />
in data entry 154–157<br />
interview questions 34<br />
preparer checklist 155<br />
editing<br />
see also adding and deleting<br />
firms 21<br />
letter templates 44<br />
printer settings 47–52<br />
education<br />
expenses 138<br />
student loan interest deduction 138<br />
educator expenses 134<br />
EF<br />
database 239–241<br />
messages 195<br />
online database 241<br />
status letter 301<br />
status page 33<br />
e-filing<br />
acknowledgments 233–234<br />
checking e-mail while 33<br />
combining steps for 33<br />
delaying 188<br />
eliminating EF messages 230<br />
extensions 176, 237<br />
imperfect returns 236<br />
installment agreement requests 179<br />
mandates 8<br />
see also state mandates<br />
marking "Ready for EF" 237<br />
messages 195<br />
online database 241<br />
override options 236<br />
overview Appendix B<br />
PDF documents 184–186<br />
PIN signature for 163<br />
process 227–248<br />
Schedules C and C-EZ 111<br />
suppressing 33<br />
test transmissions 229<br />
transmitting a return 232<br />
troubleshooting 232, 234<br />
EFINs<br />
setting up multiple 244<br />
EFSTATUS page 230<br />
EIN database<br />
about 72, 307<br />
editing 305<br />
updating from prior year 79<br />
EITC, see Earned Income Credit<br />
election options 175, 178<br />
electronic<br />
funds withdrawal, see direct debit<br />
games of skill 133<br />
payment options 160<br />
return originator, see ERO<br />
e-mail<br />
broadcast 275<br />
checking during EF transmission 33<br />
Form 9325 to taxpayer 33<br />
in View/Print 202<br />
notification of new 62<br />
program in <strong>Drake</strong> 276–284<br />
sending a client file (return) to <strong>Drake</strong> 277<br />
to <strong>Drake</strong> Support xii<br />
employee business expenses 134<br />
employer information in EIN database 307<br />
employers<br />
foreign 102<br />
who use Talx W-2 eXpress 104<br />
engagment letters 31<br />
enhanced view/print mode 197–202<br />
enrolled agents 23<br />
envelopes 30, 53, 305<br />
EPS Financial contact info xi<br />
ERO (Electronic Return Originator)<br />
overriding defaults 55<br />
setting the default 33<br />
setup 21–??, 228<br />
error messages, audible notification of 29<br />
estate returns 299, 371<br />
Estimated 150<br />
estimated payment coversheet 30<br />
estimated tax<br />
adjustments (ETA screen) 152<br />
applying overpayments to 152<br />
codes in <strong>Drake</strong> 151<br />
direct debit of 162<br />
paid in 2008 150<br />
payment reminders 301<br />
payments for 2009 151<br />
penalties 154<br />
Tax Year 2012<br />
xxxiii
Index<br />
<strong>Drake</strong> <strong>Software</strong> User’s <strong>Manual</strong><br />
underpayment of 153<br />
vouchers for 151<br />
estimating 1040 results (Quick Estimator) 310<br />
ETC, see e-Training Center<br />
e-Training Center (ETC) 261–269<br />
exempt notary income 110<br />
exemptions, see dependents<br />
existing forms list 68<br />
expenses, direct and indirect (on Schedule E) 123<br />
exporting<br />
see also importing<br />
check register 223<br />
client data 296<br />
CSM data 256<br />
Kiddie Tax data 149<br />
Schedule K-1 data 126<br />
extensions 176<br />
F<br />
F (federal) code 73<br />
FAQs 273<br />
farm income 130–131<br />
fax cover letter for support 285<br />
Fax number for Support xii<br />
federal/state facts 270<br />
fees<br />
add-on 21<br />
calculated 195<br />
charging for bank products 20<br />
in EF database 240<br />
minimum and maximum 38<br />
pricing setup 37<br />
reports 255<br />
reports of bank and preparer 242<br />
setting 235<br />
Tax Planner 56<br />
types of 195<br />
Fees to ACH (bank acknowledgment) 221<br />
fiduciary (1041) returns 60, 131<br />
field flags, see flags<br />
file maintenance 292–301<br />
files<br />
automated backup of 294<br />
backing up 292<br />
changing types 298<br />
client vs print 297<br />
deleting from <strong>Drake</strong> 297<br />
e-mailing client files to <strong>Drake</strong> 277<br />
exporting 296<br />
password protecting 296<br />
restoring 292<br />
structure of in DDM 336, 342, 344<br />
unlocking 297<br />
filing<br />
instructions 30<br />
late 181<br />
status selection 97<br />
filing instructions 54<br />
filters and filtering<br />
see also reports<br />
CSM data 254<br />
report data 316<br />
firm setup 20–21<br />
first-time homebuyer credit 117, 118, 158<br />
Fixed Asset Manager 324<br />
flags<br />
activating 70<br />
clearing 34<br />
customizing 34<br />
fonts for printing tax forms 48, 290<br />
foreign<br />
account reporting 180<br />
earned income 134<br />
employers 102<br />
interest and dividends 107<br />
mailing address (for tax firm) 20<br />
tax credit 142<br />
Form 56 (Notice Concerning Fiduciary Relationship) 164,<br />
180, 237<br />
Form 706 (U.S. Estate (and Generation-Skipping Transfer)<br />
Tax Return) 299<br />
Form 706-A (U.S. Additional Estate Tax Return) 299<br />
Form 709 (U.S. Gift (and Generation-Skipping Transfer)<br />
Tax Return) 177<br />
Form 90-22.1 (Report of Foreign Bank and Financial Accounts)<br />
180<br />
Form 940, see Client Write-Up<br />
Form 944, see Client Write-Up<br />
Form 944SS, see Client Write-Up<br />
Form 970 (Application to Use LIFO Inventory Method)<br />
179<br />
Form 982 (Reduction of Tax Attributes Due to Discharge<br />
of Indebtedness) 180<br />
Form 1040 (U.S. Individual Income Tax Return) 97–192<br />
Form 1040NR (U.S. Nonresident Alien Income Tax Return)<br />
177<br />
Form 1040X (Amended U.S. Individual Income Tax Return)<br />
175<br />
Form 1045 (Application for Tentative Refund) 174, 179<br />
Form 1098 (Mortgage Interest Statement) 141<br />
Form 1098-C (Contribution of Motor Vehicles, Boats, &<br />
Airplanes) 141<br />
Form 1098-E (Student Loan Interest Statement) 138<br />
Form 1098-T (Tuition Payments Statement) 139<br />
Form 1099-B (Proceeds From Broker and Barter Exchange<br />
Transactions) 111, 112, 367<br />
Form 1099-C (Cancellation of Debt) 133<br />
xxxiv Tax Year 2012
<strong>Drake</strong> <strong>Software</strong> User’s <strong>Manual</strong><br />
Index<br />
Form 1099-DIV (Dividends and Distributions) 105–108<br />
Form 1099-H (Health Coverage Tax Credit) 135<br />
Form 1099-INT (Interest Income) 106–108<br />
Form 1099-MISC (Miscellaneous Income) 105<br />
Form 1099-OID (Original Issue Discount) 107<br />
Form 1099-PATR (Taxable Distributions Received from<br />
Cooperatives) 131<br />
Form 1099-Q (Payments From Qualified Education Programs)<br />
132<br />
Form 1099-R (Distributions From Pensions, Annuities, Retirement<br />
or Profit-Sharing Plans, IRAs, Insurance<br />
Contracts, etc.) 118<br />
Form 1099-S (Proceeds from Real Estate Transactions)<br />
115<br />
Form 1116 (Foreign Tax Credit) 108, 142<br />
Form 1310 (Statement of Person Claiming Refund Due a<br />
Deceased Taxpayer) 179<br />
Form 2106 (Employee Business Expenses) 134<br />
Form 2120 (Multiple Support Declaration) 179<br />
Form 2210 (Underpayment of Estimated Tax) 153<br />
Form 2350 (Application for Extension of Time to File)<br />
164, 176<br />
Form 2439 (Notice to Shareholder of Undistributed Long-<br />
Term Capital Gains) 157<br />
Form 2441 (Child and Dependent Care Expenses) 142–<br />
143<br />
Form 2848 (Power of Attorney and Declaration of Representative)<br />
23, 179<br />
Form 3468 (Investment Credit) 146, 165<br />
Form 3903 (Moving Expenses) 135<br />
Form 4136 (Credit for Federal Tax Paid on Fuels) 146, 157<br />
Form 4137 (Social Security and Medicare Tax on Unreported<br />
Tip Income) 147, 149<br />
Form 4506 (Request for Copy of Tax Return) 179<br />
Form 4562 (Depreciation and Amortization) 29, 165–171<br />
Form 4797 (Sales of Business Property) 115, 165, 170<br />
Form 4835 (Farm Rental Income and Expenses) 131<br />
Form 4852 (Substitute for Form W-2 or Form 1099-R) 119<br />
Form 4868 (Application for Automatic Extension) 164,<br />
176<br />
Form 4952 (Investment Interest Expense Deduction) 140,<br />
141<br />
Form 4970 (Tax on Accumulation Distribution of Trusts)<br />
149<br />
Form 4972 (Tax on Lump Sum Distributions) 149<br />
Form 5405 (First-Time Homebuyer Credit) 117, 118<br />
Form 5695 (Residential Energy Credits) 143<br />
Form 5884 (Work Opportunity Credit) 146<br />
Form 6198 (At-Risk Limitations) 111, 122<br />
Form 6251 (Alternative Minimum Tax - Individual) 29,<br />
141<br />
Form 6252 (Installment Sale Income) 115, 171<br />
Form 6478 (Credit for Alcohol Used as Fuel) 146<br />
Form 6765 (Credit for Increasing Research Activities) 146<br />
Form 6781 (Gains and Losses From Section 1256 Contracts<br />
and Straddles) 112<br />
Form 8082 (Notice of Inconsistent Treatment or Administrative<br />
Adjustment Request) 139<br />
Form 8275 (Disclosure Statement) 179<br />
Form 8275-R (Regulation Disclosure Statement) 179<br />
Form 8283 (Noncash Charitable Contributions) 140, 141<br />
Form 8332 (Release of Claim to Exemption for Child of<br />
Divorced or Separated Parents) 179<br />
Form 8379 (Injured Spouse Allocation) 179<br />
Form 8396 (Mortgage Interest Credit) 146<br />
Form 8453 (U.S. Individual Income Tax Transmittal for an<br />
IRS e-file Return) 238<br />
Form 8582 (Passive Activity Loss Limitations) 111, 122,<br />
125<br />
Form 8582-CR (Passive Activity Credit Limitations) 145<br />
Form 8594 (Asset Acquisition Statement Under Section<br />
1060) 180<br />
Form 8609 (Low-Income Housing Credit Allocation and<br />
Certification) 146<br />
Form 8611 (Recapture of Low-Income Housing Credit)<br />
149<br />
Form 8615 ("Kiddie Tax") 149<br />
Form 8801 (Credit for Prior Year Minimum Tax - Individuals,<br />
Estates, and Trusts) 52, 146, 157<br />
Form 8812 (Additional Child Tax Credit) 157<br />
Form 8814 (Parents’ Election to Report Child’s Income)<br />
149<br />
Form 8815 (Exclusion of Interest from Series EE and I U.S.<br />
Savings Bonds Issued After 1989) 180<br />
Form 8820 (Orphan Drug Credit) 146<br />
Form 8822 (Change of Address) 180<br />
Form 8826 (Disabled Access Credit) 146<br />
Form 8828 (Recapture of Federal Mortgage Subsidy) 149<br />
Form 8829 (Expenses for Business Use of Your Home)<br />
172<br />
Form 8834 (Qualified Electric Vehicle Credit) 146<br />
Form 8835 (Renewable Electricity, Refined Coal, and Indian<br />
Coal Production Credit) 146<br />
Form 8839 (Qualified Adoption Expenses) 146<br />
Form 8844 (Empowerment Zone and Renewal Community<br />
Employment Credit) 146<br />
Form 8845 (Indian Employment Credit) 146<br />
Form 8846 (Credit for Employer Social Security and Medicare<br />
Taxes Paid on Certain Employee Tips) 146<br />
Form 8857 (Request for Innocent Spouse Relief) 179<br />
Form 8859 (D.C. First-Time Homebuyer Credit) 147<br />
Form 8862 (Information to Claim Earned Income Credit<br />
After Disallowance) 180<br />
Form 8863 (Education Credits) 138<br />
Form 8864 (Bio-diesel and Renewable Diesel Fuels Credit)<br />
147<br />
Form 8866 (Interest Computation Under the Look-Back<br />
Method ...) 180<br />
Tax Year 2012<br />
xxxv
Index<br />
<strong>Drake</strong> <strong>Software</strong> User’s <strong>Manual</strong><br />
Form 8867 (EIC Preparer Checklist) 155<br />
Form 8873 (Extraterritorial Income Exclusion) 139<br />
Form 8874 (New Markets Credit) 147<br />
Form 8879 (IRS e-file Signature Authorization) 163–164<br />
Form 8880 (Credit for Qualified Retirement Savings Contributions)<br />
146<br />
Form 8881 (Credit for Small Employer Pension Plan Startup<br />
Costs) 147<br />
Form 8882 (Credit for Employer-Provided Childcare Facilities<br />
and Services) 147<br />
Form 8885 (Health Coverage Tax Credit) 147, 157<br />
Form 8888 (Direct Deposit of Refund to More Than One<br />
Account) 158<br />
Form 8889 (Health Savings Accounts) 135<br />
Form 8896 (Low Sulfur Diesel Fuel Production Credit)<br />
147<br />
Form 8903 (Domestic Production Activities Deduction)<br />
139<br />
Form 8907 (Nonconventional Source Fuel Credit) 147<br />
Form 8908 (Energy Efficient Home Credit) 147<br />
Form 8909 (Energy Efficient Appliance Credit) 147<br />
Form 8910 (Alternative Motor Vehicle Credit) 147<br />
Form 8911 (Alternative Fuel Vehicle Refueling Property<br />
Credit) 147<br />
Form 8912 (Credit for Clean Renewable Energy and Gulf<br />
Tax Credit Bonds) 147<br />
Form 8917 (Tuition and Fees Deduction) 138<br />
Form 8919 (Uncollected Social Security and Medicare Tax<br />
on Wages) 147<br />
Form 9325 (Acknowledgment and General Information for<br />
Taxpayers Who File Returns Electronically) 32, 33<br />
Form 9465 (Installment Agreement Request) 164, 179,<br />
237<br />
Form SSA-1099 (Social Security Benefits Statement) 132<br />
Form W-2 (Wage and Tax Statement) 29, 102–105<br />
Form W-2G (Gambling Income and Loss) 133<br />
Form W-4 (Employee’s Withholding Allowance Certificate)<br />
180<br />
Form W-7 (Application for IRS Individual Taxpayer Identification<br />
Number (ITIN)) 179<br />
forms<br />
blank 290<br />
order of (in printing) 206<br />
properties of 205<br />
forms-based data entry 309<br />
forums 270<br />
frequently asked questions, see FAQs<br />
front office mode (in Scheduler) 85<br />
full-time student 98<br />
G<br />
gains, capital 112<br />
grid data entry 68<br />
group sales 170<br />
group security settings 25<br />
GruntWorx ??–362<br />
H<br />
heads-down data entry<br />
about 82<br />
macro for 40<br />
toggling to basic data-entry 82<br />
health insurance<br />
COBRA 149<br />
self-employed 137<br />
health savings accounts (HSAs) 133<br />
home (residence)<br />
conversion to business use 118<br />
credit for first-time buyers 158<br />
depreciation of 173<br />
energy credits 143<br />
months in 100<br />
office 172<br />
sale of 117<br />
using the HOME screen 117<br />
Home window in <strong>Drake</strong> 61<br />
HSA funding distributions 118<br />
I<br />
identity theft 98<br />
imperfect returns 33, 236<br />
importing<br />
see also exporting<br />
files into the DDM 348<br />
Kiddie Tax data 149<br />
QuickBooks data 299<br />
Schedule D data 112, 367<br />
income<br />
exempt notary 110<br />
index file repair 291<br />
indirect expenses (on Schedule E) 123<br />
installing<br />
<strong>Drake</strong> tax software 11–18<br />
updates 287<br />
Integrated File and Pay 160<br />
interest<br />
and dividends 105–108<br />
and penalty for late-filed returns 181<br />
rates, manually entering 183<br />
IRA<br />
adjustments 138<br />
contributions 119<br />
converting to Roth 120<br />
income not reported on 1099-R 118<br />
penalty computations 120<br />
xxxvi Tax Year 2012
<strong>Drake</strong> <strong>Software</strong> User’s <strong>Manual</strong><br />
Index<br />
IRS Regulation 7216 (Consent to Use and Disclosure of<br />
Tax Return Information) 22, 209–212<br />
itemized deductions 140<br />
K<br />
K-1, see Schedule K-1<br />
KB (Knowledge Base) 258<br />
key combinations 63, 67<br />
keyboard 63<br />
keywords Appendix C<br />
Kiddie Tax 149–150<br />
Knowledge Base (KB) 258<br />
L<br />
labels 302<br />
language, Spanish 28<br />
late-filed returns 181–183<br />
letterhead for bills and letters 44<br />
letters<br />
about 40–43<br />
available templates 43<br />
batch 301–304<br />
bringing forward from last year 46<br />
Client Communications Editor 41<br />
customized supplemental 31<br />
default templates 31<br />
due date to print on 54<br />
editing a template 44<br />
engagement 31<br />
envelopes 305<br />
estimate payment reminders 301<br />
K-1 (1120S, 1065, 1041 only) 31, 43, 53<br />
keywords Appendix C<br />
letterhead 44<br />
mailing labels 302<br />
margins (adjusting) 44<br />
overrides (LTR screen) 58<br />
overriding due date shown on 54<br />
printing 302<br />
privacy 31<br />
restoring 45<br />
setup 43<br />
viewing 46<br />
like-kind exchanges 116<br />
listed property types 166<br />
live payroll, see Client Write-Up<br />
logging in<br />
as ADMIN 14<br />
to <strong>Drake</strong> 14, 61<br />
to ETC 263<br />
to online EF database 241<br />
logging out of <strong>Drake</strong> 61<br />
long-term care insurance 133<br />
losses<br />
capital gains and 112<br />
net operating (NOLs) 173–174<br />
non-recaptured 115<br />
of assets (screens for entering) 111<br />
on Schedule C 111<br />
passive activity 124<br />
using the LOSS screen 174<br />
lost checks 224<br />
lottery winnings 133<br />
M<br />
macros<br />
see also shortcut keys<br />
in the Fixed Asset Manager 326<br />
setup 38<br />
symbols used in 39<br />
viewing from data entry 38<br />
mailing labels 302<br />
mandates 8<br />
mandates, e-filing 8<br />
margin adjustments (letters) 44<br />
marketing kits 272<br />
married filing separately, see MFS filing status<br />
maximizing screens 28<br />
maximum/minimum fees 38<br />
meals and entertainment 134<br />
meals subject to DOT rules 110<br />
medical savings accounts (MSAs) 133<br />
message pages (EF messages) 230<br />
MFS filing status<br />
claiming dependents 101<br />
ineligibility for child care credit 143<br />
splitting a joint return 73<br />
using Quick Estimator 310<br />
mileage<br />
and moving expenses 136<br />
prior-year 172<br />
rates 172<br />
military<br />
addresses 98<br />
and EIC 156<br />
processing codes 98<br />
-related tax forgiveness 180<br />
Military Spouses Residency Relief Act 110<br />
ministerial income allocation, see clergy<br />
MOM, see Multi-Office Manager<br />
months in home (dependents) 100<br />
mouse 63<br />
moving expenses 135<br />
MSG (state EF message) pages 232<br />
multi-form code (MFC) fields 73<br />
Tax Year 2012<br />
xxxvii
Index<br />
<strong>Drake</strong> <strong>Software</strong> User’s <strong>Manual</strong><br />
Multi-Office Manager (MOM) 33, 241, 245–246<br />
multiple EFINs 244<br />
multi-screen forms 68<br />
N<br />
net operating losses (NOLs) 173–174<br />
network<br />
options 16<br />
peer-to-peer 234<br />
new features this year<br />
other packages 367<br />
new features this year (1040 package) 2–7<br />
non-paid preparers 20<br />
non-passive activities 124<br />
non-profit contributions 119<br />
notary income, exempt 110<br />
NOTE screen 187<br />
notepad (PAD screen) 188<br />
notes<br />
pages (generated with return) 195<br />
release 271<br />
NWClient 17<br />
O<br />
office in home 172<br />
Ohio city tax rates 309<br />
online EF database 241–245<br />
opening<br />
see also accessing<br />
see also activating<br />
see also creating<br />
<strong>Drake</strong> tax software 14, 61<br />
password-protected files in the DDM 351<br />
returns from the CSM 252<br />
returns in <strong>Drake</strong> 65<br />
the DDM 331<br />
the EF return selector 231<br />
the Scheduler 85<br />
the Tax Planner 353<br />
optional<br />
documents with return 30<br />
items on return 31<br />
options setup 27–36<br />
order of forms 206<br />
Organize (GruntWorx function) 357<br />
organizers 80–84<br />
overflow statements 29<br />
overlapping appointments (in Scheduler) 93<br />
overpayments 152<br />
override fields 28, 72<br />
overriding<br />
bill amounts 56<br />
EF options 236<br />
letters setup 58<br />
setup options 53–60<br />
P<br />
PAD screen (preparer notepad) 188<br />
paper boy 110<br />
paper document indicators 238<br />
paper jams 225<br />
parsonage allowance 140<br />
see also clergy<br />
partner programs 272<br />
passive<br />
activities 124<br />
activity loss limitations 125<br />
activity numbers (PANs) 123<br />
income 105–142<br />
password protecting<br />
client files 296<br />
DDM files 351<br />
e-mails with PDFs 203<br />
online EF database reports 244<br />
pause option for calculations 29<br />
Pay Per Return (PPR) 27<br />
payment options, electronic 160<br />
payroll, see Client Write-Up<br />
PCM, see Personal Client Manager<br />
PDF documents, e-filing 184–186<br />
PDF files<br />
e-mailing forms as 164<br />
penalties<br />
estimated tax 154<br />
for early withdrawal of savings 138<br />
for late-filed returns 181<br />
IRA 120, 138<br />
Pennsylvania city tax rates 309<br />
penny rounding 31<br />
pensions, self-employment 137<br />
Personal Client Manager 34, 63<br />
PIN signatures<br />
auto-generating for taxpayer 32<br />
in data entry 163–164<br />
of preparer 23<br />
PMI (private mortgage insurance) 123<br />
Populate (GruntWorx function) 357<br />
Portal (SecureFileProTM) 362–??<br />
postcards 305<br />
power of attorney 23, 164<br />
PPR, see Pay Per Return<br />
practice returns 76, 266<br />
preparer<br />
checklist for EIC 155<br />
mode (in Scheduler) 85<br />
xxxviii Tax Year 2012
<strong>Drake</strong> <strong>Software</strong> User’s <strong>Manual</strong><br />
Index<br />
PIN signature 23<br />
schedules 89–96<br />
security settings 24<br />
setup 22–27<br />
tax identification number, see PTIN<br />
pre-prepared entry (also forms-based data entry) 309<br />
presidential campaign 98<br />
previously passive activities 124<br />
pricing<br />
for a single return 57<br />
maximum/minimum fees 38<br />
per item and per form 37<br />
setup 37<br />
printer setup 47–52<br />
printing<br />
see also viewing<br />
bill summary 30<br />
calculation details 196<br />
carryover worksheets 30<br />
checks 221, 222<br />
data entry screens 75<br />
date of signature 31<br />
depreciation schedules 29<br />
documents only when required 32<br />
due diligence info for homebuyer credit 34<br />
EF status page 33<br />
EIC due diligence documents 34<br />
estimate vouchers 151<br />
filing instructions 30<br />
forms in a certain order 206<br />
forms in a return 200<br />
forms only when required 29<br />
labels 304<br />
letters (batches) 302<br />
list of EINs 307<br />
list of firms 21<br />
list of preparers in a firm 26<br />
on the fly 52<br />
options 205–207<br />
organizers and proformas 82<br />
preparer fees withheld 32<br />
printer sets 201<br />
referral coupons 31<br />
return summary 30<br />
sets 51<br />
SSN on bill 32<br />
tax returns 196<br />
taxpayer phone number 31<br />
third-party designee 31<br />
using the PRNT screen 52<br />
privacy<br />
letter 31<br />
private<br />
appointments, setting up 91<br />
mortgage insurance (PMI) 123<br />
processing<br />
acknowledgments 233<br />
loan checks (for bank products) 221<br />
proformas 81–84<br />
property<br />
disposal of 122<br />
listed 166<br />
on Schedule E 121<br />
qualified Indian reservation 169<br />
rental of personal 124<br />
sale of 123<br />
section 179 expensing 167<br />
type and usage 122<br />
PTIN 8, 19, 23, 227<br />
public safety officers 118<br />
publications (IRS, <strong>Drake</strong>, etc.) 272<br />
purchasing<br />
GruntWorx 358<br />
SecureFileProTM 363<br />
W-2 downloads 104<br />
Q<br />
qualified charitable distributions 118<br />
Quick Estimator 310<br />
Quick Reference<br />
Accepted Forms xviii<br />
Contact Information ix<br />
Shortcut Keys xiii<br />
QuickBooks imports 299<br />
R<br />
railroad benefits 132<br />
Ready for EF indicator 32<br />
real estate 121, 125<br />
receiving "acks only" 233<br />
recurring appointments, setting up 91<br />
referral coupons 31<br />
refunds, direct deposit of 158–160<br />
Regulation 7216 (Consent to Use and Disclosure of Tax<br />
Return Information) 22, 209–212<br />
reject codes<br />
see also acknowledgments<br />
due to multiple 2106 forms 135<br />
foreign tax credit 142<br />
looking up 240<br />
troubleshooting acks 234<br />
release notes 271<br />
rental real estate with active participation 125<br />
rentals<br />
see also Schedule E (Supplemental Income and Loss)<br />
by clergy 140<br />
Tax Year 2012<br />
xxxix
Index<br />
<strong>Drake</strong> <strong>Software</strong> User’s <strong>Manual</strong><br />
converted from home use 118<br />
farm 130<br />
repairing index files 291<br />
report cards (ETC) 269<br />
reports<br />
appointment 95<br />
creating 315<br />
CSM 255<br />
deleting 319<br />
depreciation list 323<br />
filters 316–323<br />
hash totals 326<br />
in <strong>Drake</strong> 313–327<br />
keywords Appendix C<br />
Multi-Office Manager (MOM) 246<br />
reprinting checks 223<br />
Republic Bank contact info xi<br />
requirements<br />
e-filing, see e-filing<br />
EIC due diligence 155<br />
for bank product eligibility 212<br />
service bureau 213<br />
system (for running <strong>Drake</strong> software) 12<br />
resetting check stock 223<br />
restoring<br />
see also backup and restore files<br />
archived returns 208<br />
client files 292, 293<br />
color settings 47<br />
CSM data 256<br />
DDM files 345<br />
default color palette (basic view/print) 206<br />
letter templates 45<br />
print order settings 52<br />
statuses in the CSM 251<br />
retirement income 118–121<br />
return options 55<br />
returns<br />
amending 175<br />
archiving 207–208<br />
calculating 193–196, 230<br />
comparing data between 186<br />
creating 65<br />
e-filing process 227–248<br />
e-mailing to <strong>Drake</strong> 277<br />
entity packages (990, 1120, 1120S, 1065) 367<br />
estate (706) 299, 371<br />
extensions 176<br />
fiduciary (1041) 60, 131<br />
filing late 181<br />
gift (709) 177<br />
indicators on 54<br />
late-filed 181<br />
non-resident 177<br />
NOTES pages 195<br />
opening 65, 252<br />
Pay Per Return (PPR) 27<br />
practice 76, 266<br />
preparation of 97–192<br />
pre-prepared entry 309<br />
printing 196<br />
requesting copies from IRS 179<br />
splitting 73<br />
state 75, 238<br />
statuses of 249<br />
storing information in DDM 331–337<br />
tax-exempt organizations (990) 186<br />
tracking information on 190<br />
updating from prior year 77–80<br />
viewing and printing 196–202<br />
River City Bank contact info xi<br />
rollover of pensions/annuities 119<br />
Roth IRAs 120<br />
rounding amounts 31<br />
royalties 121<br />
S<br />
S corporations, changing from C corps 298<br />
sale of residence 117<br />
sales tax 191<br />
saving previously prepared returns 207<br />
scanners 12, 334, 341, 348, 349<br />
scanning<br />
2D barcode 105<br />
DDM files 348<br />
Schedule A (Itemized Deductions)<br />
and application for tentative refund 174<br />
depreciation schedules for 165<br />
entering data for 140–141<br />
printing 29, 53<br />
Schedule B (Interest and Ordinary Dividends)<br />
entering data for 105–107<br />
order of items listed on 29<br />
printing 29, 53<br />
Schedule C (Profit or Loss From Business)<br />
applying expenses to 171, 172<br />
depreciation schedules for 165<br />
e-filing 111<br />
entering data for 109–111<br />
for clergy 140<br />
for statutory employees 103<br />
foreign income on 134<br />
Schedule C-EZ (Net Profit From Business) 111<br />
Schedule D (Capital Gains and Losses)<br />
entering AMT cost/basis on 113<br />
entering data for 112, 367<br />
importing data from spreadsheet 113<br />
xl Tax Year 2012
<strong>Drake</strong> <strong>Software</strong> User’s <strong>Manual</strong><br />
Index<br />
sale of home 118<br />
Schedule E (Supplemental Income and Loss)<br />
activity types 122, 124<br />
applying expenses to 171<br />
depreciation schedules for 165<br />
entering data for 121–124<br />
using for farm income & expenses (Form 1041) 131<br />
Schedule F (Profit or Loss From Farming)<br />
applying expenses to 171, 172<br />
depreciation schedules for 165<br />
entering data for 130–131<br />
Schedule H (Household Employment Taxes) 148<br />
Schedule J (Income Averaging for Farmers and Fishermen)<br />
130<br />
Schedule K-1 (Share of Income, Deductions, Credits, etc.)<br />
accessing screens 124<br />
applying expenses to 172<br />
basis worksheets for 127<br />
entering data for 124–127<br />
exporting data from another return 126<br />
letters 31, 43, 53, 60<br />
printing page 2 30<br />
state amounts (if different from federal) 125<br />
Schedule R (Credit for the Elderly or the Disabled) 143<br />
Schedule SE (Self-Employment Tax) 136<br />
Scheduler 85–96<br />
establishing daily schedules 87<br />
new features this year 85<br />
reports 95, 313<br />
searching 94<br />
screen captures 75<br />
search conditions (in Filter Manager) 319–322<br />
searching<br />
appointments 94<br />
business codes 110<br />
city codes 98<br />
CSM 253<br />
DDM 335, 347<br />
<strong>Drake</strong> <strong>Software</strong> User’s <strong>Manual</strong> 1<br />
EF database 239<br />
federal and state publications 272<br />
Help feature in <strong>Drake</strong> 273<br />
Knowledge Base 259<br />
preparers 27<br />
reject codes 240, 241<br />
reports 319<br />
student records (ETC) 269<br />
section 179 expensing<br />
entering data for 166–168<br />
for general partner on K1P screen 125<br />
report of assets 324<br />
SecureFileProTM 363–??<br />
security<br />
group 25<br />
levels (online EF database) 244<br />
of client files 296<br />
preparer 23<br />
selecting a filing status 97<br />
self-employment<br />
see also Schedule C (Profit or Loss From Business)<br />
adjustments 136–138<br />
clergy, see clergy<br />
foreign income 134<br />
tax 136<br />
Series I Savings Bonds 159<br />
sets (printing) 201<br />
setup procedures 18–52<br />
Setup Wizard 14<br />
shipment letters 9<br />
Shortcut Keys xiii<br />
shortcut keys 63, 67<br />
Simplified General Rule Worksheet 118<br />
Single Member Limited Liability Company (SMLLC) 110<br />
Social Security benefits 132<br />
Social Security Numbers<br />
applying one number to two returns 299<br />
changing 295<br />
printing on bill 32<br />
verifying 28<br />
soft fonts 48, 290<br />
Spanish<br />
result letters 58<br />
screens 28<br />
special tax treatments 118<br />
splitting a return (MFJ to MFS) 73<br />
SSN, see Social Security Numbers<br />
ST (field) 73<br />
staggering DCNs 234<br />
state<br />
see also state programs<br />
see also state returns<br />
FAQ screens 248<br />
mandates Appendix E<br />
registration numbers 23<br />
state programs<br />
downloading prior-year 271<br />
setup options 32<br />
state returns<br />
accessing 75<br />
e-filing 248<br />
statutory employees 103<br />
stolen checks 224<br />
storing<br />
files in the DDM 336–??, 342–??, 344–349<br />
print files 29<br />
student<br />
full time 98<br />
loan interest deduction 138<br />
Tax Year 2012<br />
xli
Index<br />
<strong>Drake</strong> <strong>Software</strong> User’s <strong>Manual</strong><br />
supplemental income 121–127<br />
support, see <strong>Drake</strong> Support<br />
suppressing<br />
documents on the fly 52<br />
e-filing of a return (on the fly) 237<br />
e-filing of returns (globally) 33<br />
EIC calculations 157<br />
Form 1116 (Foreign Tax Credit) 109<br />
forms, options for 29<br />
system requirements 12<br />
T<br />
tax courses (ETC) 264<br />
Tax Planner 353–??<br />
Tax Products Group contact info xii<br />
tax returns, see returns<br />
taxable<br />
distributions 132<br />
refunds 109<br />
testing<br />
e-file transmission 229<br />
printing of checks 221<br />
third-party designee 162–163<br />
tokens (GruntWorx) 358<br />
tracking adjusted basis 127<br />
tracking return data (TRAC screen) 190<br />
Trades (GruntWorx function) 358<br />
troubleshooting<br />
acknowledgments (in e-filing) 234<br />
check printing 224<br />
e-file transmissions 232<br />
return selection (for e-filing) 232<br />
TS/TSJ (field) 73<br />
tutorials 265<br />
U<br />
unemployment<br />
COBRA 149<br />
compensation 131<br />
unemployment compensation 109<br />
unformatted schedules (SCH screen) 189<br />
unlocking client files 297<br />
Update Manager 287<br />
updates<br />
access to 34, 289<br />
automatic 288<br />
installing 287<br />
notification of available 62<br />
updating<br />
CSM 254<br />
from the prior year 77–80<br />
NOTE screens from year to year 188<br />
V<br />
verification fields, see flags<br />
verifying<br />
SSNs 28<br />
W-2 amounts 28, 102<br />
Veriscom (ABCvoice files) 245<br />
viewing<br />
see also printing<br />
bank decline reasons 241<br />
blank forms 290<br />
CSM filters 254<br />
deleted records 256<br />
earned revenue from add-on fees 21<br />
EF reports 243<br />
letter keywords Appendix C<br />
loan status codes 241<br />
processed acknowledgments 229<br />
report keywords Appendix C<br />
reports 323<br />
sample letters 46<br />
scheduled appointments 93<br />
tax returns 196<br />
W<br />
W-2 import 104<br />
watermarks 47, 48<br />
Windows operating system<br />
default printers 47<br />
enabling standard keystrokes 28<br />
using system colors 46<br />
Windows operating system requirements 12<br />
worksheets<br />
AUTO 171<br />
carryover 30<br />
detail (Ctrl+W) 69–70<br />
next-year depreciation listing 53<br />
sale of home (HOME screen) 117<br />
sales tax 191<br />
Z<br />
ZIP code<br />
auto-fill 28<br />
database 72<br />
xlii Tax Year 2012