

TM 9-2320-211-34-2-1 - JATONKAM35s HOME ON THE WEB
TM 9-2320-211-34-2-1 - JATONKAM35s HOME ON THE WEB
TM 9-2320-211-34-2-1 - JATONKAM35s HOME ON THE WEB

Create successful ePaper yourself
Turn your PDF publications into a flip-book with our unique Google optimized e-Paper software.
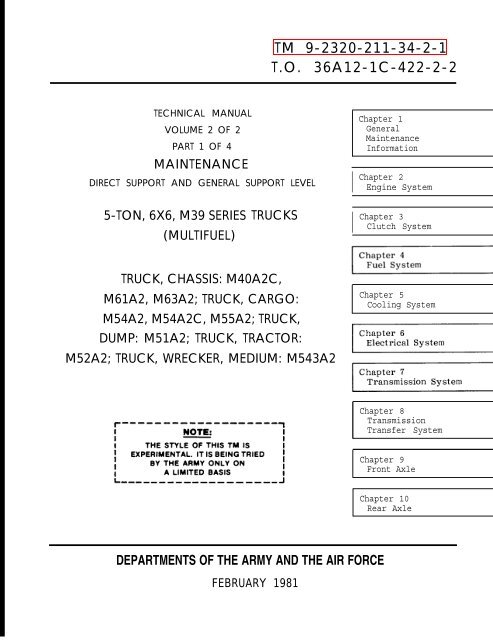
<strong>TM</strong> 9-<strong>2320</strong>-<strong>211</strong>-<strong>34</strong>-2-1<br />
T.O. 36A12-1C-422-2-2<br />
TECHNICAL MANUAL<br />
VOLUME 2 OF 2<br />
PART 1 OF 4<br />
MAINTENANCE<br />
DIRECT SUPPORT AND GENERAL SUPPORT LEVEL<br />
I<br />
Chapter 1<br />
General<br />
Maintenance<br />
Information<br />
Chapter 2<br />
Engine System<br />
5-T<strong>ON</strong>, 6X6, M39 SERIES<br />
(MULTIFUEL)<br />
TRUCKS<br />
I<br />
Chapter 3<br />
Clutch System<br />
TRUCK, CHASSIS: M40A2C,<br />
M61A2, M63A2; TRUCK, CARGO:<br />
M54A2, M54A2C, M55A2; TRUCK,<br />
DUMP: M51A2; TRUCK, TRACTOR:<br />
M52A2; TRUCK, WRECKER, MEDIUM: M543A2<br />
Chapter 5<br />
Cooling System<br />
Chapter 8<br />
Transmission<br />
Transfer System<br />
Chapter 9<br />
Front Axle<br />
Chapter 10<br />
Rear Axle<br />
DEPAR<strong>TM</strong>ENTS OF <strong>THE</strong> ARMY AND <strong>THE</strong> AIR FORCE<br />
FEBRUARY 1981
*<strong>TM</strong> 9-<strong>2320</strong>-<strong>211</strong>-<strong>34</strong>-2-1<br />
T.O. 36A12-1C-422-2-2<br />
TECHNICAL MANUAL<br />
NO. 9-<strong>2320</strong>-<strong>211</strong>-<strong>34</strong>-2-1<br />
TECHNICAL ORDER<br />
NO. 36A12-1C-422-2-2<br />
DEPAR<strong>TM</strong>ENTS OF <strong>THE</strong> ARMY<br />
AND<br />
<strong>THE</strong> AIR FORCE<br />
WASHINGT<strong>ON</strong>, DC, 25 February 1981<br />
TECHNICAL MANUAL<br />
VOLUME 2 OF 2<br />
PART 1 OF 4<br />
MAINTENANCE<br />
DIRECT SUPPORT AND GENERAL SUPPORT LEVEL<br />
5-T<strong>ON</strong>, 6X6, M39 SERIES TRUCKS<br />
(MULTIFUEL)<br />
Truck, Chassis<br />
Truck, Cargo<br />
Truck, Dump<br />
Truck, Tractor<br />
Truck, Wrecker,<br />
Medium<br />
Model<br />
NSN without Winch<br />
M40A2C <strong>2320</strong>-00-969-4114<br />
M61A2 <strong>2320</strong>-00-055-9264<br />
M63A2 <strong>2320</strong>-00-226-6251<br />
M54A2 <strong>2320</strong>-00-055-9266<br />
M54A2C <strong>2320</strong>-00-926-0874<br />
M55A2 <strong>2320</strong>-00-073-8476<br />
M51A2 <strong>2320</strong>-00-055-9262<br />
M52A2 <strong>2320</strong>-00-055-9260<br />
M543A2<br />
NSN with Winch<br />
<strong>2320</strong>-00-965-0321<br />
<strong>2320</strong>-00-285-3757<br />
<strong>2320</strong>-00-055-9265<br />
<strong>2320</strong>-00-926-0874<br />
<strong>2320</strong>-00-055-9259<br />
<strong>2320</strong>-00-055-9263<br />
<strong>2320</strong>-00-055-9261<br />
<strong>2320</strong>-00-055-9258<br />
Current as of 25 Jul 80.<br />
* This manual together with <strong>TM</strong> 9-<strong>2320</strong>-<strong>211</strong>-<strong>34</strong>-1, 25 February 1981; <strong>TM</strong> 9-<strong>2320</strong>-<strong>211</strong>-<strong>34</strong>-2-2, 25 February 1981;<br />
<strong>TM</strong> 9-<strong>2320</strong>-<strong>211</strong>-<strong>34</strong>-2-3, 25 February 1981 and <strong>TM</strong> 9-<strong>2320</strong>-<strong>211</strong>-<strong>34</strong>-2-4, 25 February 1981 supersedes so much of<br />
<strong>TM</strong> 9-<strong>2320</strong>-<strong>211</strong>-35, 13 September 1964 as pertains to multifuel vehicles including all changes.
<strong>TM</strong> 9-<strong>2320</strong>-<strong>211</strong>-<strong>34</strong>-2-1<br />
REPORTING OF ERRORS AND RECOMMENDING IMPROVEMENTS<br />
You can help improve this manual. If you find any mistakes or if you know of a way to improve<br />
the procedure, please let us know. Mail your letter, DA Form 2028 (Recommended Changes to<br />
Publications and Blank Forms), or DA Form 2028-2 located in the back of this manual direct to:<br />
Commander, US Army Tank-Automotive Command, ATTN: DRSTA-MB, Warren,<br />
Michigan 48090. A reply will be furnished to you.<br />
TABLE OF C<strong>ON</strong>TENTS<br />
CHAPTER 1. GENERAL MAINTENANCE INFORMATI<strong>ON</strong><br />
Scope . . . . . . . . . . . . . . . . . . . . . . . . . . . . . . . . . . . . . . . . .<br />
General Maintenance . . . . . . . . . . . . . . . . . . . . . . . . . . .<br />
Cleaning . . . . . . . . . . . . . . . . . . . . . . . . . . . . . . . . . . . . . .<br />
Painting . . . . . . . . . . . . . . . . . . . . . . . . . . . . . . . . . . . . . .<br />
Torque Values, . . . . . . . . . . . . . . . . . . . . . . . . . . . . . . . .<br />
Special Tools and Equipment . . . . . . . . . . . . . . . . . . .<br />
Safety Inspection and Testing of Lifting<br />
Devices . . . . . . . . . . . . . . . . . . . . . . . . . . . . . . . . . . . . . .<br />
Forms and Records . . . . . . . . . . . . . . . . . . . . . . . . . . . .<br />
Equipment Improvement Report and<br />
Maintenance Digest (EIRMD) and<br />
Equipment Improvement Report and<br />
Maintenance Summary (EIRMS) . . . . . . . . . . . . . . . .<br />
Reporting Improvement Recommendations . . . . . . .<br />
Metric System . . . . . . . . . . . . . . . . . . . . . . . . . . . . . . . . .<br />
Destruction to Prevent Enemy Use . . . . . . . . . . . . .<br />
Administrative Storage . . . . . . . . . . . . . . . . . . . . . . . .<br />
Tabulated Data . . . . . . . . . . . . . . . . . . . . . . . . . . . . . . .<br />
Description . . . . . . . . . . . . . . . . . . . . . . . . . . . . . . . . . . .<br />
General Shipping Instructions . . . . . . . . . . . . . . . . .<br />
Transportability Guidance . . . . . . . . . . . . . . . . . . . . .<br />
Maintenance Repair Parts . . . . . . . . . . . . . . . . . . . . . .<br />
CHAPTER 2. ENGINE SYSTEM GROUP MAINTENANCE<br />
Section I. Scope . . . . . . . . . . . . . . . . . . . . . . . . . . . . . . . . . . . . . . . . .<br />
Equipment Items Covered . . . . . . . . . . . . . . . . . . . .<br />
Equipment Items Not Covered . . . . . . . . . . . . . . . .<br />
Section II. Engine Assembly . . . . . . . . . . . . . . . . . . . . . . . . . . . . . .<br />
Front Engine Mount and Bracket<br />
Removal, Repair, and Replacement . . . . . . . . . .<br />
Preliminary Procedures . . . . . . . . . . . . . . . . . . . .<br />
Removal . . . . . . . . . . . . . . . . . . . . . . . . . . . . . . . . . .<br />
Cleaning . . . . . . . . . . . . . . . . . . . . . . . . . . . . . . . . . .<br />
Inspection and Repair . . . . . . . . . . . . . . .. . . . . . . . . . .<br />
Replacement . . . . . . . . . . . . . . . . . . . . . . . . . . . . . . .<br />
Rear Engine Mounts and Brackets<br />
Removal and Replacement . . . . . . . . . . . . . . . . . . .<br />
Removal . . . . . . . . . . . . . . . . . . . . . . . . . . . . . . . . . .<br />
Replacement . . . . . . . . . . . . . . . . . . . . . . . . . . . . . . .<br />
Paragraph<br />
1-1<br />
1-2<br />
1-3<br />
1-4<br />
1-5<br />
1-6<br />
1-7<br />
1-8<br />
1-9<br />
1-10<br />
1-11<br />
1-12<br />
1-13<br />
1-14<br />
1-15<br />
1-16<br />
1-17<br />
1-18<br />
2-1<br />
2-2<br />
2-3<br />
2-3a<br />
2- 3b<br />
2- 3c<br />
2- 3d<br />
2- 3e<br />
2-4<br />
2-4a<br />
2- 4b<br />
Page<br />
1-1<br />
1-1<br />
1-1<br />
1-2<br />
1-2<br />
1-2<br />
1-2<br />
1-2<br />
1-2<br />
1-7<br />
1-7<br />
1-7<br />
1-7<br />
1-7<br />
1-7<br />
1-7<br />
1-7<br />
1-7<br />
2-1<br />
2-1<br />
2-1<br />
2-1<br />
2-1<br />
2-1<br />
2-2<br />
2-5<br />
2-5<br />
2-6<br />
2-7<br />
2-7<br />
2-10<br />
ii
<strong>TM</strong> 9-<strong>2320</strong>-<strong>211</strong>-<strong>34</strong>-2-1<br />
TABLE OF C<strong>ON</strong>TENTS -C<strong>ON</strong>T<br />
Paragraph<br />
Page<br />
Engine Assembly Removal and<br />
Replacement . . . . . . . . . . . . . . . . . . . . . . . . . . . . . . .<br />
Preliminary Procedures . . . . . . . . . . . . . . . . . . . .<br />
Removal . . . . . . . . . . . . . . . . . . . . . . . . . . . . . . . . . . .<br />
Replacement . . . . . . . . . . . . . . . . . . . . . . . . . . . . . . .<br />
Section III. Crankcase, Block, and Cylinder Head . . . . . . . . . .<br />
Cylinder Head Removal, Repair, and<br />
Replacement . . . . . . . . . . . . . . . . . . . . . . . . . . . . . . . .<br />
Preliminary Procedures . . . . . . . . . . . . . . . . . . . .<br />
Removal . . . . . . . . . . . . . . . . . . . . . . . . . . . . . . . . . . .<br />
Repair . . . . . . . . . . . . . . . . . . . . . . . . . . . . . . . . . . .<br />
Replacement . . . . . . . . . . . . . . . . . . . . . . . . . . . . . .<br />
Section IV. Crankshaft . . . . . . . . . . . . . . . . . . . . . . . . . . . . . . . . . . .<br />
Crankshaft Front Seal Removal<br />
and Replacement . . . . . . . . . . . . . . . . . . . . . . . . . . .<br />
Preliminary Procedure . . . . . . . . . . . . . . . . . . . . .<br />
Removal . . . . . . . . . . . . . . . . . . . . . . . . . . . . . . . . . .<br />
Cleaning . . . . . . . . . . . . . . . . . . . . . . . . . . . . . . . . . .<br />
Replacement . . . . . . . . . . . . . . . . . . . . . . . . . . . . . . .<br />
Crankshaft Rear Oil Seal Removal and<br />
Replacement . . . . . . . . . . . . . . . . . . . . . . . . . . . . . . . .<br />
Preliminary Procedures . . . . . . . . . . . . . . . . . . . .<br />
Removal . . . . . . . . . . . . . . . . . . . . . . . . . . . . . . . . . .<br />
Cleaning, Inspection, and Repair . . . . . . . . . .<br />
Replacement . . . . . . . . . . . . . . . . . . . . . . . . . . . . . .<br />
Crankshaft Vibrating Damper Removal<br />
and Replacement . . . . . . . . . . . . . . . . . . . . . . . . . . .<br />
Preliminary Procedures . . . . . . . . . . . . . . . . . . . .<br />
Removal . . . . . . . . . . . . . . . . . . . . . . . . . . . . . . . . . .<br />
Cleaning . . . . . . . . . . . . . . . . . . . . . . . . . . . . . . . . . .<br />
Inspection and Repair . . . . . . . . . . . . . . . . . . . . .<br />
Replacement . . . . . . . . . . . . . . . . . . . . . . . . . . . . . .<br />
Section V. Flywheel . . . . . . . . . . . . . . . . . . . . . . . . . . . . . . . . . . . . . . .<br />
Flywheel Removal and Replacement . . . . . . . . . . .<br />
Preliminary Procedures . . . . . . . . . . . . . . . . . . . .<br />
Removal . . . . . . . . . . . . . . . . . . . . . . . . . . . . . . . . . .<br />
Cleaning . . . . . . . . . . . . . . . . . . . . . . . . . . . . . . . . . .<br />
Inspection and Repair . . . . . . . . . . . . . . . . . . . . .<br />
Replacement . . . . . . . . . . . . . . . . . . . . . . . . . . . . . . .<br />
Flywheel Ring Gear Removal and<br />
Replacement . . . . . . . . . . . . . . . . . . . . . . . . . . . . . . .<br />
Preliminary Procedures. . . . . . . . . . . . . . . . . . . .<br />
Removal . . . . . . . . . . . . . . . . . . . . . . . . . . . . . . . . . .<br />
Replacement . . . . . . . . . . . . . . . . . . . . . . . . . . . . . .<br />
Flywheel Housing Removal, Repair,<br />
and Replacement . . . . . . . . . . . . . . . . . . . . . . . . . . . .<br />
Preliminary Procedures . . . . . . . . . . . . . . . . . . . .<br />
Removal . . . . . . . . . . . . . . . . . . . . . . . . . . . . . . . . . .<br />
2-5<br />
2-5a<br />
2-5b<br />
2-5c<br />
2-6<br />
2-6a<br />
2-6b<br />
2- 6C<br />
2-6d<br />
2-7<br />
2-7a<br />
2-7b<br />
2-7c<br />
2-7d<br />
2-8<br />
2-8a<br />
2-8b<br />
2-8c<br />
2-8d<br />
2-9<br />
2-9a<br />
2-9b<br />
2-9c<br />
2-9d<br />
2-9e<br />
2-10<br />
2-10a<br />
2-10b<br />
2-10c<br />
2-10d<br />
2- 10e<br />
2-11<br />
2-11a<br />
2-11b<br />
2-11c<br />
2-12<br />
2-12a<br />
2-12b<br />
2-12<br />
2-12<br />
2-13<br />
2-21<br />
2-30<br />
2-30<br />
2-30<br />
2-31<br />
2-32<br />
2-32<br />
2-37<br />
2-37<br />
2-37<br />
2-38<br />
2-39<br />
2-40<br />
2-42<br />
2-42<br />
2-42<br />
2-43<br />
2-44<br />
2-46<br />
2-46<br />
2-47<br />
2-50<br />
2-51<br />
2-52<br />
2-57<br />
2-57<br />
2-57<br />
2-58<br />
2-60<br />
2-60<br />
2-61<br />
2-62<br />
2-62<br />
2-62<br />
2-64<br />
2-65<br />
2-65<br />
2-66<br />
iii
<strong>TM</strong> 9-<strong>2320</strong>-<strong>211</strong>-<strong>34</strong>-2-1<br />
TABLE OF C<strong>ON</strong>TENTS-C<strong>ON</strong>T<br />
Cleaning, Inspection, and Repair . . . . . . . . . . .<br />
Replacement . . . . . . . . . . . . . . . . . . . . . . . . . . . . . .<br />
Final Inspection . . . . . . . . . . . . . . . . . . . . . . . . . . .<br />
Pilot Bearing Removal and Replacement . . . . . . .<br />
Preliminary Procedures . . . . . . . . . . . . . . . . . . . .<br />
Removal . . . . . . . . . . . . . . . . . . . . . . . . . . . . . . . . . . .<br />
Replacement . . . . . . . . . . . . . . . . . . . . . . . . . . . . . . .<br />
Section VI. Valves, Camshaft, and Timing System . . . . . . . . . .<br />
Valve Rocker Arm Pushrods Removal,<br />
Repair, and Replacement . . . . . . . . . . . . . . . . . . .<br />
Preliminary Procedures . . . . . . . . . . . . . . . . . . . .<br />
Removal . . . . . . . . . . . . . . . . . . . . . . . . . . . . . . . . . .<br />
Inspection . . . . . . . . . . . . . . . . . . . . . . . . . . . . . . . . .<br />
Replacement . . . . . . . . . . . . . . . . . . . . . . . . . . . . . . .<br />
Rocker Arm Assembly Removal, Repair,<br />
Replacement and Adjustment . . . . . . . . . . . . . . . .<br />
Preliminary Procedures . . . . . . . . . . . . . . . . . . . .<br />
Removal . . . . . . . . . . . . . . . . . . . . . . . . . . . . . . . . . . .<br />
Cleaning, Inspection, and Repair . . . . . . . . . .<br />
Replacement . . . . . . . . . . . . . . . . . . . . . . . . . . . . . . .<br />
Adjustment . . . . . . . . . . . . . . . . . . . . . . . . . . . . . . . .<br />
Crankshaft Gear and Camshaft Gear<br />
Removal, Repair, and Replacement . . . . . . . . . .<br />
Preliminary Procedures . . . . . . . . . . . . . . . . . . . .<br />
Removal . . . . . . . . . . . . . . . . . . . . . . . . . . . . . . . . . .<br />
Cleaning, Inspection, and Repair . . . . . . . . . .<br />
Replacement . . . . . . . . . . . . . . . . . . . . . . . . . . . . . . .<br />
Camshaft and Bushing Type Bearings<br />
Removal and Replacement . . . . . . . . . . . . . . . . . . .<br />
Preliminary Procedures . . . . . . . . . . . . . . . . . . . .<br />
Removal . . . . . . . . . . . . . . . . . . . . . . . . . . . . . . . . . . .<br />
Cleaning . . . . . . . . . . . . . . . . . . . . . . . . . . . . . . . . . .<br />
Inspection . . . . . . . . . . . . . . . . . . . . . . . . . . . . . . . . .<br />
Repairs . . . . . . . . . . . . . . . . . . . . . . . . . . . . . . . . . . .<br />
Replacement . . . . . . . . . . . . . . . . . . . . . . . . . . . . . . .<br />
Tappet Chamber Cover Removal, Repair,<br />
and Replacement . . . . . . . . . . . . . . . . . . . . . . . . . . . .<br />
Preliminary Procedures . . . . . . . . . . . . . . . . . . . .<br />
Removal . . . . . . . . . . . . . . . . . . . . . . . . . . . . . . . . . . .<br />
Cleaning, Inspection, and Repair . . . . . . . . . .<br />
Replacement . . . . . . . . . . . . . . . . . . . . . . . . . . . . . . .<br />
Valve Tappets Removal, Repair, and<br />
Replacement . . . . . . . . . . . . . . . . . . . . . . . . . . . . . . . .<br />
Preliminary Procedures . . . . . . . . . . . . . . . . . . . .<br />
Removal . . . . . . . . . . . . . . . . . . . . . . . . . . . . . . . . . . .<br />
Cleaning . . . . . . . . . . . . . . . . . . . . . . . . . . . . . . . . . .<br />
Inspection and Repair . . . . . . . . . . . . . . . . . . . . .<br />
Replacement . . . . . . . . . . . . . . . . . . . . . . . . . . . . . . .<br />
Paragraph<br />
2- 12c<br />
2-12d<br />
2-12e<br />
2-13<br />
2-13a<br />
2-13b<br />
2- 13c<br />
2-14<br />
2-14a<br />
2-14b<br />
2-14c<br />
2-14d<br />
2-15<br />
2-15a<br />
2- 15b<br />
2- 15c<br />
2- 15d<br />
2-15e<br />
2-16<br />
2-16a<br />
2-16b<br />
2-16c<br />
2-16d<br />
2-17<br />
2-17a<br />
2-17b<br />
2-17c<br />
2-17d<br />
2-17e<br />
2-17f<br />
2-18<br />
2- 18a<br />
2-18b<br />
2-18c<br />
2-18d<br />
2-19<br />
2-19a<br />
2-19b<br />
2-19c<br />
2-19d<br />
2-19e<br />
Page<br />
2-67<br />
2-68<br />
2-71<br />
2-74<br />
2-74<br />
2-74<br />
2-75<br />
2-76<br />
2-76<br />
2-76<br />
2-77<br />
2-78<br />
2-79<br />
2-80<br />
2-80<br />
2-81<br />
2-82<br />
2-82<br />
2-83<br />
2-85<br />
2- 85<br />
2-86<br />
2-88<br />
2-90<br />
2-92<br />
2-92<br />
2-93<br />
2-95<br />
2-95<br />
2-95<br />
2-96<br />
2-99<br />
2-99<br />
2-99<br />
2-100<br />
2-101<br />
2-102<br />
2-102<br />
2-103<br />
2-104<br />
2-104<br />
2-105<br />
iv
<strong>TM</strong> 9-<strong>2320</strong>-<strong>211</strong>-<strong>34</strong>-2-1<br />
TABLE OF C<strong>ON</strong>TENTS-C<strong>ON</strong>T<br />
Section VII. Engine Lubricating System.. . . . . . . . . . . . . . . . . . . . .<br />
Engine Oil Pump Assembly Removal,<br />
Repair, and Replacement (Trucks<br />
with Engines LDS 465-1 and LDS 465-1A) . . . . .<br />
Preliminary Procedures . . . . . . . . . . . . . . . . . . . . .<br />
Removal . . . . . . . . . . . . . . . . . . . . . . . . . . . . . . . . . . . .<br />
Disassembly . . . . . . . . . . . . . . . . . . . . . . . . . . . . . . . .<br />
Cleaning . . . . . . . . . . . . . . . . . . . . . . . . . . . . . . . . . . .<br />
Inspection and Repair . . . . . . . . . . . . . . . . . . . . . .<br />
Adjustment and Testing . . . . . . . . . . . . . . . . . . . . .<br />
Assembly . . . . . . . . . . . . . . . . . . . . . . . . . . . . . . . . . .<br />
Replacement . . . . . . . . . . . . . . . . . . . . . . . . . . . . . . .<br />
Oil Pan Removal, Repair, and<br />
Replacement . . . . . . . . . . . . . . . . . . . . . . . . . . . . . . . .<br />
Preliminary Procedures . . . . . . . . . . . . . . . . . . . . .<br />
Removal . . . . . . . . . . . . . . . . . . . . . . . . . . . . . . . . . . .<br />
Cleaning . . . . . . . . . . . . . . . . . . . . . . . . . . . . . . . . . . .<br />
Inspection and Repair . . . . . . . . . . . . . . . . . . . . . .<br />
Replacement . . . . . . . . . . . . . . . . . . . . . . . . . . . . . . . .<br />
Oil Cooler Element and Housing Removal,<br />
Repair, and Replacement . . . . . . . . . . . . . . . . . . . . .<br />
Preliminary Procedures . . . . . . . . . . . . . . . . . . . . .<br />
Removal . . . . . . . . . . . . . . . . . . . . . . . . . . . . . . . . . . .<br />
Disassembly . . . . . . . . . . . . . . . . . . . . . . . . . . . . . . . .<br />
Cleaning . . . . . . . . . . . . . . . . . . . . . . . . . . . . . . . . . . .<br />
Inspection and Repair . . . . . . . . . . . . . . . . . . . . . .<br />
Assembly . . . . . . . . . . . . . . . . . . . . . . . . . . . . . . . . . .<br />
Replacement . . . . . . . . . . . . . . . . . . . . . . . . . . . . . . .<br />
Oil Pressure Regulator Removal and<br />
Replacement . . . . . . . . . . . . . . . . . . . . . . . . . . . . . . . .<br />
Preliminary Procedures . . . . . . . . . . . . . . . . . . . . .<br />
Removal . . . . . . . . . . . . . . . . . . . . . . . . . . . . . . . . . . .<br />
Cleaning and Inspection . . . . . . . . . . . . . . . . . . . .<br />
Replacement . . . . . . . . . . . . . . . . . . . . . . . . . . . . . . .<br />
Section VIII. Manifolds . . . . . . . . . . . . . . . . . . . . . . . . . . . . . . . . . . . . . .<br />
Intake and Exhaust Manifolds Removal,<br />
Repair, and Replacement . . . . . . . . . . . . . . . . . . . . .<br />
Preliminary Procedures . . . . . . . . . . . . . . . . . . . . .<br />
Removal . . . . . . . . . . . . . . . . . . . . . . . . . . . . . . . . . . .<br />
Disassembly . . . . . . . . . . . . . . . . . . . . . . . . . . . . . . . .<br />
Cleaning . . . . . . . . . . . . . . . . . . . . . . . . . . . . . . . . . . .<br />
Inspection and Repair . . . . . . . . . . . . . . . . . . . . . .<br />
Assembly . . . . . . . . . . . . . . . . . . . . . . . . . . . . . . . . . .<br />
Replacement . . . . . . . . . . . . . . . . . . . . . . . . . . . . . . .<br />
CHAPTER 3. CLUTCH SYSTEM GROUP MAINTENANCE<br />
Section I. Scope . . . . . . . . . . . . . . . . . . . . . . . . . . . . . . . . . . . . . . . . .<br />
Equipment Items Covered . . . . . . . . . . . . . . . . . . . . .<br />
Equipment Items Not Covered . . . . . . . . . . . . . . . . .<br />
Paragraph<br />
2-20<br />
2-20a<br />
2-20b<br />
2-20c<br />
2-20d<br />
2- 20e<br />
2-20f<br />
2-20g<br />
2-20h<br />
2-21<br />
2-21a<br />
2-21b<br />
2-21c<br />
2-21d<br />
2-21e<br />
2-22<br />
2-22a<br />
2-22b<br />
2-22c<br />
2-22d<br />
2- 22e<br />
2-22f<br />
2-22g<br />
2-23<br />
2-23a<br />
2-23b<br />
2-23c<br />
2-23d<br />
2-24<br />
2-24a<br />
2-24b<br />
2-24c<br />
2-24d<br />
2-24e<br />
2-24f<br />
2-24g<br />
3-1<br />
3-2<br />
Page<br />
2-106<br />
2-106<br />
2-106<br />
2-107<br />
2-109<br />
2-111<br />
2-111<br />
2-111<br />
2-111<br />
2-116<br />
2-119<br />
2-119<br />
2-119<br />
2-122<br />
2-122<br />
2-123<br />
2-126<br />
2-126<br />
2-127<br />
2-130<br />
2-131<br />
2-131<br />
2-133<br />
2-1<strong>34</strong><br />
2-137<br />
2-137<br />
2-138<br />
2-140<br />
2-141<br />
2-144<br />
2-144<br />
2-144<br />
2-145<br />
2-148<br />
2-151<br />
2-151<br />
2-152<br />
2-155<br />
3-1<br />
3-1<br />
3-1<br />
v
<strong>TM</strong> 9-<strong>2320</strong>-<strong>211</strong>-<strong>34</strong>-2-1<br />
TABLE OF C<strong>ON</strong>TENTS-C<strong>ON</strong>T<br />
Section II. Clutch Assembly . . . . . . . . . . .. . . . . . . . . . . . . . . . . . . . . . . .<br />
Clutch Assembly Removal and<br />
Replacement . . . . . . . . . . . . . . . . . . . . . . . . . . . . . . .<br />
Preliminary Procedures . . . . . . . . . . . . . . . . . . . .<br />
Removal . . . . . . . . . . . . . . . . . . . . . . . . . . . . . . . . . .<br />
Cleaning . . . . . . . . . . . . . . . . . . . . . . . . . . . . . . . . . .<br />
Inspection . . . . . . . . . . . . . . . . . . . . . . . . . . . . . . . .<br />
Adjustment of Clutch . . . . . . . . . . . . . . . . . . . . . .<br />
Replacement . . . . . . . . . . . . . . . . . . . . . . . . . . . . . . .<br />
CHAPTER 4. FUEL SYSTEM GROUP MAINTENANCE<br />
Section I. Scope . . . . . . . . . . . . . . . . . . . . . . . . . . . . . . . . . . . . . . . . .<br />
Equipment Items Covered . . . . . . . . . . . . . . . . . . . .<br />
Equipment Items Not Covered . . . . . . . . . . . . . . . .<br />
Section II. Fuel Injector . . . . . . . . . . . . . . . . . . . . . . . . . . . . . . . . . .<br />
Fuel Injector Nozzle and Holder Repair . . . . . . .<br />
Removal . . . . . . . . . . . . . . . . . . . . . . . . . . . . . . . . . .<br />
Cleaning, Inspection, and Repair . . . . . . . . . .<br />
Replacement . . . . . . . . . . . . . . . . . . . . . . . . . . . . . .<br />
Fuel Injector Pump Removal, Repair,<br />
and Replacement . . . . . . . . . . . . . . . . . . . . . . . . . . .<br />
Preliminary Procedures . . . . . . . . . . . . . . . . . . . .<br />
Removal . . . . . . . . . . . . . . . . . . . . . . . . . . . . . . . . . .<br />
Repair . . . . . . . . . . . . . . . . . . . . . . . . . . . . . . . . . . . .<br />
Replacement . . . . . . . . . . . . . . . . . . . . . . . . . . . . . .<br />
Fuel Injector Pump Timing... . . . . . . . . . . . . . . . .<br />
Preliminary Procedures . . . . . . . . . . . . . . . . . . . .<br />
Timing . . . . . . . . . . . . . . . . . . . . . . . . . . . . . . . . . . . .<br />
Fuel Injector Tubes Repair . . . . . . . . . . . . . . . . . .<br />
Removal . . . . . . . . . . . . . . . . . . . . . . . . . . . . . . . . . .<br />
Cleaning, Inspection, and Repair . . . . . . . . . .<br />
Replacement . . . . . . . . . . . . . . . . . . . . . . . . . . . . . .<br />
Section III. Turbocharger . . . . . . . . . . . . . . . . . . . . . . . . . . . . . . . . .<br />
Turbocharger Repair . . . . . . . . . . . . . . . . . . . . . . .<br />
Section IV. Fuel Tanks . . . . . . . . . . . . . . . . . . . . . . . . . . . . . . . . . . . .<br />
Fuel Tank Repair . . . . . . . . . . . . . . . . . . . . . . . . . . .<br />
Disassembly . . . . . . . . . . . . . . . . . . . . . . . . . . . . . .<br />
Cleaning . . . . . . . . . . . . . . . . . . . . . . . . . . . . . . . . .<br />
Inspection and Repair . . . . . . . . . . . . . . . . . . . . .<br />
Assembly . . . . . . . . . . . . . . . . . . . . . . . . . . . . . . . . .<br />
Section V. Cold Start System . . . . . . . . . . . . . . . . . . . . . . . . . . . . .<br />
Flame Heater (Side-Mounted,<br />
Uncovered and Side-Mounted,<br />
Covered) Repair . . . . . . . . . . . . . . . . . . . . . . . . . . .<br />
CHAPTER 5.<br />
Removal . . . .. . .<br />
Repair . . . . . . .<br />
Replacement .<br />
COOLING SYSTEM<br />
Section I. Scope . . . . . . . . . . . .<br />
Equipment Items<br />
Equipment Items<br />
. . . . . . . . . . . . . . . . . . . . . . . . . . . . .<br />
. . . . . . . . . . . . . . . . . . . . . . . . . . . . .<br />
. . . . . . . . . . . . . . . . . . . . . . . . . . . . .<br />
GROUP MAINTENANCE<br />
. . . . . . . . . . . . . . . . . . . . . . . . . . . . .<br />
Covered . . . . . . . . . . . . . . . . . . . .<br />
Not Covered . . . . . . . . . . . . . . . .<br />
Paragraph<br />
3-3<br />
3-3a<br />
3- 3b<br />
3- 3c<br />
3- 3d<br />
3- 3e<br />
3- 3f<br />
4-1<br />
4-2<br />
4-3<br />
4-3a<br />
4- 3b<br />
4- 3c<br />
4-4<br />
4-4a<br />
4- 4b<br />
4- 4c<br />
4- 4d<br />
4-5<br />
4-5a<br />
4-5b<br />
4-6<br />
4-6a<br />
4-6b<br />
4- 6C<br />
4-7<br />
4-8<br />
4-8a<br />
4-8b<br />
4-8c<br />
4-8d<br />
4-9<br />
4-9a<br />
4-9b<br />
4-9c<br />
5-1<br />
5-2<br />
Page<br />
3-1<br />
3-1<br />
3-1<br />
3-2<br />
3-3<br />
3-4<br />
3-7<br />
3-8<br />
4-1<br />
4-1<br />
4-1<br />
4-1<br />
4-1<br />
4-1<br />
4-1<br />
4-1<br />
4-1<br />
4-1<br />
4-2<br />
4-11<br />
4-11<br />
4-19<br />
4-19<br />
4-20<br />
4-26<br />
4-26<br />
4-26<br />
4-26<br />
4-26<br />
4-26<br />
4-26<br />
4-26<br />
4-27<br />
4-28<br />
4-29<br />
4-30<br />
4-31<br />
4-31<br />
4-31<br />
4-31<br />
4-31<br />
5-1<br />
5-1<br />
5-1<br />
vi
<strong>TM</strong> 9-<strong>2320</strong>-<strong>211</strong>-<strong>34</strong>-2-1<br />
TABLE OF C<strong>ON</strong>TENTS-C<strong>ON</strong>T<br />
Section II. Radiator . . . . . . . . . . . . . . . . . . . . . . . . . . . . . . . . . . . . .<br />
Engine Cooling Radiator Assembly<br />
Repair . . . . . . . . . . . . . . . . . . . . . . . . . . . . . . . . . . . . .<br />
Removal . . . . . . . . . . . . . . . . . . . . . . . . . . . . . . . . . . .<br />
Repair . . . . . . . . . . . . . . . . . . . . . . . . . . . . . . . . . . . . .<br />
Replacement . . . . . . . . . . . . . . . . . . . . . . . . . . . . . . .<br />
Section III. Water Pump . . . . . . . . . . . . . . . . . . . . . . . . . . . . . . . . . . .<br />
Water Pump Assembly Repair . . . . . . . . . . . . . . . . .<br />
Preliminary Procedures . . . . . . . . . . . . . . . . . . . . .<br />
Disassembly . . . . . . . . . . . . . . . . . . . . . . . . . . . . . . . .<br />
Cleaning . . . . . . . . . . . . . . . . . . . . . . . . . . . . . . . . . . .<br />
Inspection . . . . . . . . . . . . . . . . . . . . . . . . . . . . . . . .<br />
Repair . . . . . . . . . . . . . . . . . . . . . . . . . . . . . . . . . . . . .<br />
Assembly . . . . . . . . . . . . . . . . . . . . . . . . . . . . . . . . . .<br />
Section IV. Fan Assembly . . . . . . . . . . . . . . . . . . . . . . . . . . . . . . .<br />
Engine Cooling Fan Cleaning,<br />
Inspection, and Repair . . . . . . . . . . . . . . . . . . . . .<br />
Preliminary Procedures . . . . . . . . . . . . . . . . . . . .<br />
Cleaning, Inspection, and Repair . . . . . . . . . .<br />
CHAPTER 6. ELECTRICAL SYSTEM GROUP MAINTENANCE<br />
Section I. Scope . . . . . . . . . . . . . . . . . . . . . . . . . . . . . . . . . . . . . . .<br />
Equipment Items Covered . . . . . . . . . . . . . . . . . . . .<br />
Equipment Items Not Covered . . . . . . . . . . . . . . .<br />
Section II. Charging System . . . . . . . . . . . . . . . . . . . . . . . . . . . . .<br />
Engine Generator Repair . . . . . . . . . . . . . . . . . . . .<br />
Removal . . . . . . . . . . . . . . . . . . . . . . . . . . . . . . . . . . .<br />
Repair . . . . . . . . . . . . . . . . . . . . . . . . . . . . . . . . . . . .<br />
Replacement . . . . . . . . . . . . . . . . . . . . . . . . . . . . . . .<br />
Generator Mounting Bracket Removal,<br />
Repair, and Replacement . . . . . . . . . . . . . . . . . . . .<br />
Preliminary Procedures . . . . . . . . . . . . . . . . . . . .<br />
Removal . . . . . . . . . . . . . . . . . . . . . . . . . . . . . . . . . . .<br />
Cleaning . . . . . . . . . . . . . . . . . . . . . . . . . . . . . . . . . . .<br />
Inspection . . . . . . . . . . . . . . . . . . . . . . . . . . . . . . . . .<br />
Replacement . . . . . . . . . . . . . . . . . . . . . . . . . . . . . . . .<br />
Engine Generator Regulator Removal,<br />
Repair, and Replacement . . . . . . . . . . . . . . . . . . . .<br />
Removal . . . . . . . . . . . . . . . . . . . . . . . . . . . . . . . . . . .<br />
Repair . . . . . . . . . . . . . . . . . . . . . . . . . . . . . . . . . . . .<br />
Replacement . . . . . . . . . . . . . . . . . . . . . . . . . . . . . .<br />
Section III. Starting System . . . . . . . . . . . . . . . . . . . . . . . . . . . . . . .<br />
Starter Repair . . . . . . . . . . . . . . . . . . . . . . . . . . . . . .<br />
Removal . . . . . . . . . . . . . . . . . . . . . . . . . . . . . . . . . . .<br />
Repair . . . . . . . . . . . . . . . . . . . . . . . . . . . . . . . . . . .<br />
Replacement . . . . . . . . . . . . . . . . . . . . . . . . . . . . . . .<br />
Engine Starter Solenoid Removal and<br />
Replacement . . . . . . . . . . . . . . . . . . . . . . . . . . . . . . .<br />
Removal . . . . . . . . . . . . . . . . . . . . . . . . . . . . . . . . . . .<br />
Replacement . . . . . . . . . . . . . . . . . . . . . . . . . . . . . . .<br />
Paragraph<br />
5-3<br />
5-3a<br />
5-3b<br />
5-3c<br />
5-4<br />
5-4a<br />
5-4b<br />
5-4c<br />
5-4d<br />
5-4e<br />
5-4f<br />
5-5<br />
5-5a<br />
5- 5b<br />
6-1<br />
6-2<br />
6-3<br />
6-3a<br />
6-3b<br />
6- 3C<br />
6-4<br />
6-4a<br />
6- 4b<br />
6- 4C<br />
6-4d<br />
6-4e<br />
6-5<br />
6-5a<br />
6- 5b<br />
6- 5C<br />
6-6<br />
6-6a<br />
6-6b<br />
6- 6C<br />
6-7<br />
6-7a<br />
6- 7b<br />
Page<br />
5-1<br />
5-1<br />
5-1<br />
5-1<br />
5-1<br />
5-1<br />
5-1<br />
5-2<br />
5-2<br />
5-3<br />
5-4<br />
5-5<br />
5-6<br />
5-7<br />
5-7<br />
5-7<br />
5-8<br />
6-1<br />
6-1<br />
6-1<br />
6-1<br />
6-1<br />
6-1<br />
6-1<br />
6-1<br />
6-2<br />
6-2<br />
6-2<br />
6-3<br />
6-3<br />
6-3<br />
6-4<br />
6-4<br />
6-4<br />
6-4<br />
6-4<br />
6-4<br />
6-4<br />
6-4<br />
6-4<br />
6-5<br />
6-5<br />
6-7<br />
vii
<strong>TM</strong>9-<strong>2320</strong>-<strong>211</strong>-<strong>34</strong>-2-1<br />
TABLE OF C<strong>ON</strong>TENTS-C<strong>ON</strong>T<br />
Starter Relay Harness Removal<br />
and Replacement . . . . . . . . . . . . . . . . . . . . . . . . . . . .<br />
Preliminary Procedures . . . . . . . . . . . . . . . . . . . . .<br />
Removal . . . . . . . . . . . . . . . . . . . . . . . . . . . . . . . . . . . .<br />
Replacement . . . . . . . . . . . . . . . . . . . . . . . . . . . . . . .<br />
Section IV. Instrument Panel . . . . . . . . . . . . . . . . . . . . . . . . . . . . . . .<br />
Instrument Panel Repair . . . . . . . . . . . . . . . . . . . . . .<br />
Preliminary Procedure . . . . . . . . . . . . . . . . . . . . . .<br />
Cleaning . . . . . . . . . . . . . . . . . . . . . . . . . . . . . . . . . . .<br />
Inspection and Repair . . . . . . . . . . . . . . . . . . . . . .<br />
Accessory Wiring Circuit Breakers<br />
Removal and Replacement . . . . . . . . . . . . . . . . . . . .<br />
Preliminary Procedures . . . . . . . . . . . . . . . . . . . .<br />
Removal . . . . . . . . . . . . . . . . . . . . . . . . . . . . . . . . . . .<br />
Replacement . . . . . . . . . . . . . . . . . . . . . . . . . . . . . . .<br />
Section V. Lighting System . . . . . . . . . . . . . . . . . . . . . . . . . . . . . . .<br />
Floodlight Assembly Repair<br />
(Truck M543A2) . . . . . ..<br />
Preliminary Procedure<br />
Cleaning . . . . . . . . . . . . .<br />
Inspection and Repair<br />
Section VI. Horn Assembly . . . . . . . . . .<br />
Horn Assembly Repair . .<br />
Preliminary Procedure<br />
Disassembly . . . . . . . . . .<br />
Cleaning . . . . . . . . . . . . .<br />
Inspection and Repair<br />
Assembly . . . . . . . . . . . .<br />
. . . . . . . . . . . . . . . . . . . . . .<br />
. . . . . . . . . . . . . . . . . . . . . .<br />
. . . . . . . . . . . . . . . . . . . . . .<br />
. . . . . . . . . . . . . . . . . . . . . .<br />
. . . . . . . . . . . . . . . . . . . . . .<br />
. . . . . . . . . . . . . . . . . . . . . .<br />
. . . . . . . . . . . . . . . . . . . . . . .<br />
. . . . . . . . . . . . . . . . . . . . . .<br />
. . . . . . . . . . . . . . . . . . . . . .<br />
. . . . . . . . . . . . . . . . . . . . . .<br />
. . . . . . . . . . . . . . . . . . . . . .<br />
Horn Contact Brush Assembly<br />
Removal and Replacement . . . . . . . . . . . . . . . . . . . .<br />
Preliminary Procedures . . . . . . . . . . . . . . . . . . . . .<br />
Removal . . . . . . . . . . . . . . . . . . . . . . . . . . . . . . . . . . .<br />
Replacement . . . . . . . . . . . . . . . . . . . . . . . . . . . . . . . . .<br />
Section VII. Battery System . . . . . . . . . . . . . . . . . . . . . . . . . . . . . . . .<br />
Battery Repair . . . . . . . . . . . . . . . . . . . . . . . . . . . . . . .<br />
Removal . . . . . . . . . . . . . . . . . . . . . . . . . . . . . . . . . . .<br />
Repair . . . . . . . . . . . . . . . . . . . . . . . . . . . . . . . . . . . . .<br />
Replacement . . . . . . . . . . . . . . . . . . . . . . . . . . . . . . .<br />
Section VIII. Cab and Chassis Wiring Harnesses . . . . . . . . . . . . . .<br />
Wire Clamps Removal and Replacement . . . . . . . .<br />
Removal . . . . . . . . . . . . . . . . . . . . . . . . . . . . . . . . . . . .<br />
Replacement . . . . . . . . . . . . . . . . . . . . . . . . . . . . . . .<br />
Front Wiring Harness Removal and<br />
Replacement . . . . . . . . . . . . . . . . . . . . . . . . . . . . . . . .<br />
Preliminary Procedure . . . . . . . . . . . . . . . . . . . . . .<br />
Removal . . . . . . . . . . . . . . . . . . . . . . . . . . . . . . . . . . . .<br />
Replacement . . . . . . . . . . . . . . . . . . . . . . . . . . . . . . .<br />
Paragraph<br />
6-8<br />
6-8a<br />
6- 8b<br />
6- 8C<br />
6-9<br />
6-9a<br />
6- 9b<br />
6- 9c<br />
6-10<br />
6-10a<br />
6-10b<br />
6- 10c<br />
6-11<br />
6-11a<br />
6-11b<br />
6-11c<br />
6-12<br />
6-12a<br />
6-12b<br />
6-12c<br />
6- 12d<br />
6- 12e<br />
6-13<br />
6-13a<br />
6- 13b<br />
6- 13c<br />
6-14<br />
6-14a<br />
6- 14b<br />
6- 14c<br />
6-15<br />
6-15a<br />
6- 15b<br />
6-16<br />
6- 16a<br />
6-16b<br />
6- 16c<br />
Page<br />
6-9<br />
6-9<br />
6-10<br />
6-12<br />
6-14<br />
6-14<br />
6-14<br />
6-14<br />
6-14<br />
6-15<br />
6-15<br />
6-15<br />
6-16<br />
6-17<br />
6-17<br />
6-17<br />
6-17<br />
6-18<br />
6-19<br />
6-19<br />
6-19<br />
6-19<br />
6-20<br />
6-21<br />
6-22<br />
6-23<br />
6-23<br />
6-23<br />
6-25<br />
6-27<br />
6-27<br />
6-27<br />
6-27<br />
6-27<br />
6-28<br />
6-28<br />
6-28<br />
6-29<br />
6-30<br />
6-30<br />
6-30<br />
6-43<br />
viii
<strong>TM</strong> 9-<strong>2320</strong>-<strong>211</strong>-<strong>34</strong>-2-1<br />
TABLE OF C<strong>ON</strong>TENTS-C<strong>ON</strong>T<br />
Paragraph<br />
Page<br />
Trailer Connector Cable Harness<br />
Removal and Replacement . . . . . . . . . . . . . . . . . . . .<br />
Removal . . . . . . . . . . . . . . . . . . . . . . . . . . . . . . ....<br />
Inspection . . . . . . . . . . . . . . . . . . . . . . . . . . ..<br />
Replacement . . . . . . . . . . . . . . . . . . . . . . . . . . . . . . .<br />
Rear Wiring Harness Removal and<br />
Replacement . . . . . . . . . . . . . . . . . . . . . . . . . . . . . . . .<br />
Preliminary Procedure . . . . . . . . . . . . . . . . . . . . .<br />
Removal . . . . . . . . . . . . . . . . . . . . . . . . . . . . . . . . . . .<br />
Replacement . . . . . . . . . . . . . . . . . . . . . . . . . . . . . . .<br />
CHAPTER 7. TRANSMISSI<strong>ON</strong> SYSTEM GROUP MAINTENANCE<br />
Section I. Scope . . . . . . . . . . . . . . . . . . . . . . . . . . . . . . . . . . . . . . . . .<br />
Equipment Items Covered . . . . . . . . . . . . . . . . . . . . .<br />
Equipment Items Not Covered . . . . . . . . . . . . . . . . .<br />
Section II. Transmission Assembly . . . . . . . . . . . . . . . . . .. . . . . . .<br />
Transmission Assembly Removal,<br />
Repair, and Replacement . . . . . . . . . . . . . . . . . . . . .<br />
Preliminary Procedures . . . . . . . . . . . . . . . . . . . . .<br />
Removal . . . . . . . . . . . . . . . . . . . . . . . . . . . . . . . . . . .<br />
Disassembly of Transmission into<br />
Subassemblies . . . . . . . . . . . . . . . . . . . . . . . . . . . . .<br />
Disassembly of Transmission<br />
Subassemblies . . . . . . . . . . . . . . . . . . . . . . . . . . ..<br />
Cleaning . . . . . . . . . . . . . . . . . . . . . . . . . . . . . . . . . .<br />
Inspection and Repair . . . . . . . . . . . . . . . . . . . . .<br />
Assembly of Transmission Subassemblies . . . . .<br />
Assembly of Subassemblies into<br />
Transmission . . . . . . . . . . . . . . . . . . . . . . . . . . . . .<br />
Replacement . . . . . . . . . . . . . . . . . . . . . . . . . . . . . . .<br />
Transmission Power Test . . . . . . . . . . . . . . . . . . . . .<br />
Preliminary Procedure . . . . . . . . . . . . . . . . . . . . . .<br />
Test . . . . . . . . . . . . . . . . . . . . . . . . . . . . . . . . . . . . . .<br />
Transmission Input Shaft Seal Removal<br />
and Replacement . . . . . . . . . . . . . . . . . . . . . . . . . . . . .<br />
Preliminary Procedures . . . . . . . . . . . . . . . . . . . . .<br />
Removal . . . . . . . . . . . . . . . . . . . . . . . . . . . . . . . . . . .<br />
Replacement . . . . . . . . . . . . . . . . . . . . . . . . . . . . . .<br />
Transmission Output Shaft Seal<br />
Removal and Replacement . . . . . . . . . . . . . . . . . . . .<br />
Preliminary Procedure . . . . . . . . . . . . . . . . . . . . . .<br />
Removal . . . . . . . . . . . . . . . . . . . . . . . . . . . . . . . . . . .<br />
Replacement . . . . . . . . . . . . . . . . . . . . . . . . . . . . . . .<br />
Maintenance of Bearings . . . . . . . . . . . . . . . . . . . . . .<br />
Removal of Bearing from Shaft<br />
by Pressing . . . . . . . . . . . . . . . . . . . . . . . . . . . . . . .<br />
Removal of Bearing from Shaft<br />
by Pulling . . . . . . . . . . . . . . . . . . . . . . . . . . . . . . . . .<br />
Removal of Bearing from Housing<br />
by Pressing . . . . . . . . . . . . . . . . . . . . . . . . . . . . . . .<br />
6-17<br />
6-17a<br />
6-17b<br />
6-17c<br />
6-18<br />
6-18a<br />
6- 18b<br />
6- 18c<br />
7-1<br />
7-2<br />
7-3<br />
7-3a<br />
7- 3b<br />
7- 3c<br />
7- 3d<br />
7- 3e<br />
7- 3f<br />
7-3g<br />
7- 3h<br />
7- 3i<br />
7-4<br />
7-4a<br />
7- 4b<br />
7-5<br />
7-5a<br />
7- 5b<br />
7- 5c<br />
7-6<br />
7-6a<br />
7- 6b<br />
7- 6C<br />
7-7<br />
7-7a<br />
7-7b<br />
7-7c<br />
6-56<br />
6-56<br />
6-57<br />
6-57<br />
6-58<br />
6-58<br />
6-59<br />
6-60<br />
7-1<br />
7-1<br />
7-1<br />
7-1<br />
7-1<br />
7-2<br />
7-3<br />
7-6<br />
7-28<br />
7-46<br />
7-47<br />
7-64<br />
7-85<br />
7-105<br />
7-107<br />
7-107<br />
7-108<br />
7-109<br />
7-109<br />
7-110<br />
7-115<br />
7-120<br />
7-120<br />
7-121<br />
7-123<br />
7-125<br />
7-125<br />
7-126<br />
7-127<br />
ix
<strong>TM</strong> 9-<strong>2320</strong>-<strong>211</strong>-<strong>34</strong>-2-1<br />
TABLE OF C<strong>ON</strong>TENTS -C<strong>ON</strong>T<br />
Removal of Bearing from Housing<br />
by Pulling . . . . . . . . . . . . . . . . . . . . . . . . . . . . . . . . . . .<br />
Cleaning of Bearings . . . . . . . . . . . . . . . . . . . . . . . . .<br />
Inspection . . . . . . . . . . . . . . . . . . . . . . . . . . . . . . . . . . .<br />
Replacement of Bearing onto Shaft . . . . . . . . . . . .<br />
Replacement of Bearing into Housing . . . . . . . . . .<br />
CHAPTER 8. TRANSMISSI<strong>ON</strong> TRANSFER SYSTEM<br />
GROUP MAINTENANCE<br />
Section I. Scope . . . . . . . . . . . . . . . . . . . . . . . . . . . . . . . . . . . . . . . . . .<br />
Equipment Items Covered . . . . . . . . . . . . . . . . . . . . .<br />
Equipment Items Not Covered . . . . . . . . . . . . . . . . .<br />
Section II. Transmission Transfer Assemblv . . . . . . . . . . . . . . . .<br />
Transmission Transfer Removal and<br />
Replacement . . . . . . . . . . . . . . . . . . . . . . . . . . . . . . . . .<br />
Preliminary Procedures . . . . . . . . . . . . . . . . . . . . .<br />
Removal . . . . . . . . . . . . . . . . . . . . . . . . . . . . . . . . . . . .<br />
Replacement . . . . . . . . . . . . . . . . . . . . . . . . . . . . . . . .<br />
Transmission Transfer Assembly<br />
Repair . . . . . . . . . . . . . . . . . . . . . . . . . . . . . . . . . . . . . . .<br />
Mounting Transmission Transfer<br />
Assembly instant . . . . . . . . . . . . . . . . . . . . . . . . .<br />
Disassembly into Subassemblies . . . . . . . . . . . . .<br />
Disassembly of Subassemblies . . . . . . . . . . . . . .<br />
Cleaning . . . . . . . . . . . . . . . . . . . . . . . . . . . . . . . . . . .<br />
Inspection . . . . . . . . . . . . . . . . . . . . . . . . . . . . . . . . .<br />
Repair . . . . . . . . . . . . . . . . . . . . . . . . . . . . . . . . . . . . .<br />
Assembly of Subassemblies . . . . . . . . . . . . . . . . . .<br />
Replacement of Subassemblies . . . . . . . . . . . . . . .<br />
Transmission Transfer Assembly Rear<br />
Seal Removal and Replacement . . . . . . . . . . . . . . .<br />
Preliminary Procedure . . . . . . . . . . . . . . . . . . . . .<br />
Removal . . . . . . . . . . . . . . . . . . . . . . . . . . . . . . . . . . . .<br />
Replacement . . . . . . . . . . . . . . . . . . . . . . . . . . . . . . .<br />
Transmission Transfer Case Mounting<br />
Brackets Removal and Replacement . . . . . . . . . . .<br />
Preliminary Procedures . . . . . . . . . . . . . . . . . . . . .<br />
Removal . . . . . . . . . . . . . . . . . . . . . . . . . . . . . . . . . . .<br />
Cleaning and Inspection . . . . . . . . . . . . . . . . . . . .<br />
Replacement . . . . . . . . . . . . . . . . . . . . . . . . . . . . . . .<br />
Section III. Transmission Transfer Controls and Linkages . . . .<br />
Transmission Transfer Controls and<br />
Linkage Removal, Repair, and<br />
Replacement (Trucks Without Front<br />
Winch) . . . . . . . . . . . . . . . . . . . . . . . . . . . . . . . . . . . . . .<br />
Removal . . . . . . . . . . . . . . . . . . . . . . . . . . . . . . . . . . . .<br />
Disassembly . . . . . . . . . . . . . . . . . . . . . . . . . . . . . . . .<br />
Cleaning . . . . . . . . . . . . . . . . . . . . . . . . . . . . . . . . . . .<br />
Inspection and Repair . . . . . . . . . . . . . . . . . . . . . .<br />
Assembly . . . . . . . . . . . . . . . . . . . . . . . . . . . . . . . . . .<br />
Replacement . . . . . . . . . . . . . . . .. . . . . . . . . . .<br />
Paragraph<br />
7- 7d<br />
7- 7e<br />
7- 7f<br />
7- 7g<br />
7-7h<br />
8-1<br />
8-2<br />
8-3<br />
8-3a<br />
8-3b<br />
8- 3C<br />
8-4<br />
8-4a<br />
8- 4b<br />
8- 4C<br />
8- 4d<br />
8- 4e<br />
8-4f<br />
8-4g<br />
8-4h<br />
8-5<br />
8-5a<br />
8-5b<br />
8- 5C<br />
8-6<br />
8-6a<br />
8-6b<br />
8- 6C<br />
8-6d<br />
8-7<br />
8-7a<br />
8- 7b<br />
8-7c<br />
8-7d<br />
8-7e<br />
8-7f<br />
Page<br />
7-128<br />
7-129<br />
7-130<br />
7-131<br />
7-132<br />
8-1<br />
8-1<br />
8-1<br />
8-1<br />
8-1<br />
8-1<br />
8-2<br />
8-7<br />
8-13<br />
8-14<br />
8-16<br />
8-<strong>34</strong><br />
8-48<br />
8-48<br />
8-70<br />
8-72<br />
8-87<br />
8-94<br />
8-94<br />
8-94<br />
8-96<br />
8-98<br />
8-98<br />
8-98<br />
8-100<br />
8-101<br />
8-103<br />
8-103<br />
8-103<br />
8-107<br />
8-108<br />
8-108<br />
8-109<br />
8-110<br />
x
<strong>TM</strong> 9-<strong>2320</strong>-<strong>211</strong>-<strong>34</strong>-2-1<br />
TABLE OF C<strong>ON</strong>TENTS-C<strong>ON</strong>T<br />
Paragraph<br />
Page<br />
CHAPTER 9.<br />
Section I.<br />
Section II.<br />
Section III.<br />
Section IV.<br />
Transmission Transfer Controls and<br />
Linkage Removal, Repair, and<br />
Replacement (Trucks With Front<br />
Winch) . . . . . . . . . . . . . . . . . . . . . . . . . . . . . . . . . . . . . .<br />
Removal . . . . . . . . . . . . . . . . . . . . . . . . . . . . . . . . . . .<br />
Disassembly . . . . . . . . . . . . . . . . . . . . . . . . . . . . . . . .<br />
Cleaning . . . . . . . . . . . . . . . . . . . . . . . . . . . . . . . . . . .<br />
Inspection and Repair . . . . . . . . . . . . . . . . . . . . . .<br />
Assembly . . . . . . . . . . . . . . . . . . . . . . . . . . . . . . . . . .<br />
Replacement . . . . . . . . . . . . . . . . . . . . . . . . . . . . . . .<br />
FR<strong>ON</strong>T AXLE GROUP MAINTENANCE<br />
Scope . . . . . . . . . . . . . . . . . . . . . . . . . . . . . . . . . . . . . . . . . .<br />
Equipment Items Covered . . . . . . . . . . . . . . . . . . . . .<br />
Equipment Items Not Covered . . . . . . . . . . . . . . . . .<br />
Front Axle Assembly . . . . . . . . . . . . . . . . . . . . . . . . . . .<br />
Front Axle Assembly Removal, Repair,<br />
and Replacement . . . . . . . . . . . . . . . . . . . . . . . . . . . . .<br />
Preliminary Procedures . . . . . . . . . . . . . . . . . . . . .<br />
Removal . . . . . . . . . . . . . . . . . . . . . . . . . . . . . . . . . . . .<br />
Disassembly . . . . . . . . . . . . . . . . . . . . . . . . . . . . . . . .<br />
Cleaning . . . . . . . . . . . . . . . . . . . . . . . . . . . . . . . . . . .<br />
Inspection and Repair . . . . . . . . . . . . . . . . . . . . . .<br />
Assembly . . . . . . . . . . . . . . . . . . . . . . . . . . . . . . . . . .<br />
Tests and Adjustments . . . . . . . . . . . . . . . . . . . . . .<br />
Replacement . . . . . . . . . . . . . . . . . . . . . . . . . . . . . . .<br />
Differential Carrier Assembly . . . . . . . . . . . . . . . . . . .<br />
Differential Carrier Assembly Removal,<br />
Repair, and Replacement . . . . . . . . . . . . . . . . . . . . .<br />
Preliminary Procedures . . . . . . . . . . . . . . . . . . . . .<br />
Removal . . . . . . . . . . . . . . . . . . . . . . . . . . . . . . . . . . .<br />
Disassembly . . . . . . . . . . . . . . . . . . . . . . . . . . . . . . . .<br />
Cleaning . . . . . . . . . . . . . . . . . . . . . . . . . . . . . . . . . . .<br />
Inspection and Repair . . . . . . . . . . . . . . . . . . . . . .<br />
Assembly and Adjustment . . . . . . . . . . . . . . . . . . .<br />
Replacement . . . . . . . . . . . . . . . . . . . . . . . . . . . . . . .<br />
Steering Mechanism . . . . . . . . . . . . . . . . . . . . . . . . . . . . .<br />
Front Axle Shafts, Bearings, Seals,<br />
Knuckles, and Arms Removal, Repair,<br />
Replacement, and Tests and Adjustments . . . . .<br />
Preliminary Procedures . . . . . . . . . . . . . . . . . . . . .<br />
Removal . . . . . . . . . . . . . . . . . . . . . . . . . . . . . . . . . . . .<br />
Cleaning . . . . . . . . . . . . . . . . . . . . . . . . . . . . . . . . . . .<br />
Inspection and Repair . . . . . . . . . . . . . . . . . . . . . .<br />
Replacement . . . . . . . . . . . . . . . . . . . . . . . . . . . . . . .<br />
Tests and Adjustments . . . . . . . . . . . . . . . . . . . . .<br />
8-8<br />
8-8a<br />
8-8b<br />
8-8c<br />
8-8d<br />
8-8e<br />
8-8f<br />
9-1<br />
9-2<br />
9-3<br />
9-3a<br />
9- 3b<br />
9- 3C<br />
9- 3d<br />
9-3e<br />
9-3f<br />
9-3g<br />
9-3h<br />
9-4<br />
9-4a<br />
9-4b<br />
9-4c<br />
9-4d<br />
9-4e<br />
9-4f<br />
9-4g<br />
9-5<br />
9-5a<br />
9- 5b<br />
9- 5c<br />
9-5d<br />
9- 5e<br />
9-5f<br />
8-113<br />
8-113<br />
8-116<br />
8-117<br />
8-117<br />
8-118<br />
8-119<br />
9-1<br />
9-1<br />
9-1<br />
9-1<br />
9-1<br />
9-1<br />
9-2<br />
9-4<br />
9-6<br />
9-6<br />
9-8<br />
9-10<br />
9-11<br />
9-14<br />
9-14<br />
9-14<br />
9-15<br />
9-16<br />
9-31<br />
9-31<br />
9-42<br />
9-83<br />
9-85<br />
9-85<br />
9-85<br />
9-86<br />
9-92<br />
9-92<br />
9-94<br />
9-100<br />
xi
<strong>TM</strong> 9-<strong>2320</strong>-<strong>211</strong>-<strong>34</strong>-2-1<br />
TABLE OF C<strong>ON</strong>TENTS-C<strong>ON</strong>T<br />
Paragraph<br />
Page<br />
CHAPTER 10.<br />
Section I.<br />
Section II.<br />
REAR AXLE GROUP MAINTENANCE<br />
Scope . . . . . . . . . . . . . . . . . . . . . . . . . . . . . . . . . . . . . . . . .<br />
Equipment Items Covered . . . . . . . . . . . . . . . . . . .<br />
Equipment Items Not Covered . . . . . . . . . . . . . . . .<br />
Rear Axle Assemblies . . . . . . . . . . . . . . . . . . . . . . . . . .<br />
Forward-Rear and Rear-Rear<br />
Suspension Axle Assembly Removal<br />
and Replacement . . . . . . . . . . . . . . . ... . . . . . . . .<br />
Preliminary Procedures . . . . . . . . . . . . . ... .<br />
Removal . . . . . . . . . . . . . . . . . . . . . . . . . .... . . . . .<br />
Replacement . . . . . .... . . . . . . . . . . . . . . . . . . . .<br />
Forward-Rear and Rear-Rear Suspension<br />
Axle Assembly Repair . . . . . . . . . . . . . . . . . . . . . . .<br />
Preliminary Procedures . . ..... . . . . . . . . . .<br />
Disassembly . . . . . . . . . . . . . . . . . . . . . . . . . . . . . . .<br />
Cleaning . . . . . . . . . . . . . . . . . .... . . . ..... .<br />
Inspection and Repair . . . . . . . . . . . . . . . . . . . . .<br />
Assembly . . . . . . . . . . . . . . . . . . . . . . . ... . . .<br />
10-1<br />
10-2<br />
10-3<br />
10- 3a<br />
10-3b<br />
10-3c<br />
10-4<br />
10-4a<br />
10-4b<br />
10- 4c<br />
10- 4d<br />
10-4e<br />
10-1<br />
10-1<br />
10-1<br />
10-1<br />
10-1<br />
10-1<br />
10-2<br />
10-3<br />
10-5<br />
10-5<br />
10-6<br />
10-7<br />
10-8<br />
10-9<br />
Part 2 of 4<br />
CHAPTER 11.<br />
Section I.<br />
Section II.<br />
Section III.<br />
CHAPTER 12.<br />
Section I.<br />
Section II.<br />
CHAPTER 13.<br />
Section I.<br />
Section II.<br />
Section III.<br />
Section IV.<br />
Section V.<br />
CHAPTER 14.<br />
Section I.<br />
Section II.<br />
Section III.<br />
Section IV.<br />
CHAPTER 15.<br />
Section I.<br />
Section II.<br />
Section III.<br />
CHAPTER 16.<br />
Section I.<br />
Section II.<br />
BRAKE SYSTEM GROUP MAINTENANCE<br />
Scope . . . . . . . . . . . . . . . . . . . . . . . . . . . . . . . ... .<br />
Handbrake and Service Brake Systems. . . . . . . . . .<br />
Hydraulic Brake System . . . . . . . . . . . . . . . . . . . . . . . .<br />
WHEEL SYSTEM GROUP MAINTENANCE<br />
Scope . . . . . . . . . . . . . . . . . . . . . . . . . . . . . . . . . . . . . . . . .<br />
Tires . . . . . . . . . . . . . . . . . . . . . . . . . . . . . . . . . . . . . . . .<br />
STEERING SYSTEM GROUP MAINTENANCE<br />
Scope . . . . . . . . . . . . . . . . . . . . . . . . . . . . . . . . . ..... .<br />
Mechanical Steering Gear Assembly . . . . . . . . . . . . .<br />
Power Steering Gear Assembly . . . . . . . . . . . . . . . . .<br />
Steering Hydraulic System... . . . . . . . . . . . . . . . . . .<br />
Steering System Valves . . . . . . . . . . . . . . . . . . . . . . . .<br />
FRAME AND TOWING ATTACHMENTS GROUP<br />
MAINTENANCE<br />
Scope . . . . . . . . . . . . . . . . . . . . . . . . . . . . . . . . . . . . . . . . .<br />
Frame Assembly . . . . . . . . . . . . . . . . . . . . . . . . . . . . . .<br />
Pintles . . . . . . . . . . . . . . . . . . . . . . . . . . . . . . . . . . . . . . . .<br />
Fifth Wheel Assembly . . . . . . . . . . . . . . . . . . . . . . . . .<br />
SPRINGS AND TORQUE AND STABILIZER<br />
RODS GROUP MAINTENANCE<br />
Scope . . . . . . . . . . . . . . . . . . . . . . . . . . . . . . . . . . . . . . . . .<br />
Springs . . . . . . . . . . . . . . . . . . . . . . . . . . . . . . . . . . . . . .<br />
Torque and Stabilizer Rods . . . . . . . . . . . . . . . . . . . .<br />
BODY , CAB, AND HOOD GROUP<br />
MAINTENANCE<br />
Scope . . . . . . . . . . . . . . . . . . . . . . . . . . . . . . . ... . . . .<br />
Body, Cab, and Hood Components . . . . . . . . . . . . . .<br />
11-1<br />
11-1<br />
11-18<br />
12-1<br />
12-1<br />
13-1<br />
13-1<br />
13-9<br />
13-76<br />
13-94<br />
14-1<br />
14-1<br />
14-55<br />
14-59<br />
15-1<br />
15-1<br />
15-27<br />
16-1<br />
16-1<br />
xii
<strong>TM</strong> 9-<strong>2320</strong>-<strong>211</strong>-<strong>34</strong>-2-1<br />
TABLE OF C<strong>ON</strong>TENTS-C<strong>ON</strong>T<br />
Paragraph<br />
Page<br />
Section III. Fenders, Running Boards, and<br />
Windshield Assembly . . . . . . . . . . . . . . . . . . . . . . . . . .<br />
Section IV. Seats . . . . . . . . . . . . . . . . . . . . . . . . . . . . . . . . . . . . . . . . .<br />
Section V. Tool and Stowage Boxes . . . . . . . . . . . . . . . . . . . . . . .<br />
Section VI. Cargo Bodies . . . . . . . . . . . . . . . . . . . . . . . . . . . . . . . . . .<br />
Section VII. Special Purpose Bodies . . . . . . . . . . . . . . . . . . . . . . . .<br />
16-85<br />
16-156<br />
16-176<br />
16-194<br />
16-268<br />
Part 3 of 4<br />
CHAPTER 17. WINCH , HOIST, CRANE, AND POWER TAKEOFF<br />
ASSEMBLIES GROUP MAINTENANCE<br />
Section I. Scope . . . . . . . . . . . . . . . . . . . . . . . . . . . . . . . . . . . . . . . .<br />
Section II. Winch, Hoist, and Crane Assemblies . . . . . . . . . . .<br />
Section III. Power Takeoff and Swivel Valve Assemblies . . . .<br />
17-1<br />
17-1<br />
17-774<br />
Part 4 of 4<br />
CHAPTER 18. BODY ACCESSORY ITEMS GROUP<br />
MAINTENANCE<br />
Section I. Scope . . . . . . . . . . . . . . . . . . . . . . . . . . . . . . . . . . . . . . . .<br />
Section II. Canvas Accessory Items . . . . . . . . . . . . . . . . . . . . . .<br />
CHAPTER 19. MAINTENANCE OF MATERIAL USED IN<br />
C<strong>ON</strong>JUNCTI<strong>ON</strong> WITH MAJOR ITEMS<br />
Section I. Scope . . . . . . . . . . . . . . . . . . . . . . . . . . . . . . . . . . . . . . . .<br />
Section II. Winterization Kits . . . . . . . . . . . . . . . . . . . . . . . . . . . . .<br />
Section III. Special Purpose Kits . . . . . . . . . . . . . . . . . . . . . . . . . .<br />
18-1<br />
18-1<br />
19-1<br />
19-1<br />
19-169<br />
xiii
<strong>TM</strong> 9-<strong>2320</strong>-<strong>211</strong>-<strong>34</strong>-2-1<br />
Number<br />
1-1<br />
1-2<br />
2-1<br />
2-2<br />
7-1<br />
7-2<br />
7-3<br />
7-4<br />
7-5<br />
7-6<br />
7-7<br />
7-8<br />
7-9<br />
8-1<br />
8-2<br />
8-3<br />
8-4<br />
8-5<br />
8-6<br />
8-7<br />
8-8<br />
8-9<br />
8-10<br />
8-11<br />
8-12<br />
8-13<br />
9-1<br />
9-2<br />
9-3<br />
9-4<br />
9-5<br />
9-6<br />
13-1<br />
13-2<br />
13-3<br />
14-1<br />
17-1<br />
17-2<br />
17-3<br />
17-4<br />
LIST OF TABLES<br />
Title<br />
Standard Torque Specifications . . . . . . . . . . . . . . . . . . . . . . . . . . . . . .<br />
Special Tools and Equipment . . . . . . . . . . . . . . . . . . . . . . . . . . . . . . . . .<br />
Camshaft Gear and Crankshaft Gear Tolerances . . . . . . . . . . . . . . .<br />
Oil Cooler Housing Wear Limits . . . . . . . . . . . . . . . . . . . . . . . . . . . . . . .<br />
Transmission Reverse Idler Gear and First and<br />
Reverse Speed Gear Backlash Wear Limits . . . . . . . . . . . . . . . . . . . .<br />
Transmission Second Speed Gear Backlash Wear Limits . . . . . . . .<br />
Transmission Input Gear and Third and Fourth<br />
Speed Gear Backlash Wear Limits . . . . . . . . . . . . . . . . . . . . . . . . . . . .<br />
Transmission Input Gear to Shaft Wear Limits . . . . . . . . . . . . . . . . .<br />
Transmission Mainshaft Bearing to Shaft Wear Limits . . . . . . . . . .<br />
Transmission Countershaft Front and Rear Bearing<br />
to Shaft Wear Limits . . . . . . . . . . . . . . . . . . . . . . . . . . . . . . . . . . . . . . . . .<br />
Transmission Bearing to Case Wear Limits . . . . . . . . . . . . . . . . . . . .<br />
Transmission Third and Fourth Speed Gear Wear Limits . . . . . . .<br />
Transmission Second Gear to Mainshaft Wear Limits . . . . . . . . . . .<br />
Transmission Transfer Low Speed Gear Backlash<br />
Wear Limits . . . . . . . . . . . . . . . . . . . . . . . . . . . . . . . . . . . . . . . . . . . . . . . . .<br />
Transmission Transfer High Speed Gear Backlash<br />
Wear Limits . . . . . . . . . . . . . . . . . . . . . . . . . . . . . . . . . . . . . . . . . . . . . . . . .<br />
Transfer Case Wear Limits . . . . . . . . . . . . . . . . . . . . . . . . . . . . . . . . . . .<br />
Front Cover Wear Limits . . . . . . . . . . . . . . . . . . . . . . . . . . . . . . . . . . . . .<br />
Front Output Shaft Cover Wear Limits . . . . . . . . . . . . . . . . . . . . . . .<br />
Input Shaft High Speed Gear Assembly Wear Limits . . . . . . . . . . .<br />
Input Shaft Low Speed Gear Assembly Wear Limits . . . . . . . . . . . .<br />
Intermediate Shaft Wear Limits . . . . . . . . . . . . . . . . . . . . . . . . . . . . . . . .<br />
Front Output Shaft Wear Limits . . . . . . . . . . . . . . . . . . . . . . . . . . . . . . .<br />
Rear Output Shaft Wear Limits. . . . . . . . . . . . . . . . . . . . . . . . . . . . . . . .<br />
Outer Shifter Shaft Wear Limits . . . . . . . . . . . . . . . . . . . . . . . . . . . . . .<br />
High and Low Range Shifter Fork Shaft Wear Limits . . . . . . . . . . .<br />
High and Low Range Shifter Fork Wear Limits . . . . . . . . . . . . . . . . .<br />
Front Axle Steering Knuckle Pin Wear Limits . . . . . . . . . . . . . . . . . .<br />
Differential Case Half Wear Limits . . . . . . . . . . . . . . . . . . . . . . . . . . . . .<br />
Differential Spider Assembly Wear Limits. . . . . . . . . . . . . . . . . . . . . .<br />
Differential Hypoid Gear Assembly Wear Limits . . . . . . . . . . . . . . . .<br />
Differential Hypoid Drive Pinion Assembly Wear Limits . . . . . . . .<br />
Front Axle Assembly Wear Limits . . . . . . . . . . . . . . . . . . . . . . . . . . . .<br />
Pitman Arm Shaft Assembly Wear Limits . . . . . . . . . . . . . . . . . . . . . .<br />
Power Cylinder Wear Limits . . . . . . . . . . . . . . . . . . . . . . . . . . . . . . . . . .<br />
Hydraulic Control Valve Assembly Wear Limits . . . . . . . . . . . . . . . .<br />
Fifth Wheel Assembly Wear Limits . . . . . . . . . . . . . . . . . . . . . . . . . . . .<br />
Cable Drum Bushing and End Frame Bushing Wear Limits . . . . . .<br />
Drum Shaft and Gearcase Bushing Wear Limits . . . . . . . . . . . . . . . .<br />
Drum Shaft Bushing, End Frame Bushing, Sleeve and<br />
Drum Shaft Wear Limits . . . . . . . . . . . . . . . . . . . . . . . . . . . . . . . . . . . .<br />
Drive Worm Bearing, Drum Shaft Bushing, and Drive Worm<br />
Gear Wear Limits . . . . . . . . . . . . . . . . . . . . . . . . . . . . . . . . . . . . . . . . . .<br />
Page<br />
1-3<br />
1-4<br />
2-89<br />
2-132<br />
7-14<br />
7-15<br />
7-16<br />
7-49<br />
7-50<br />
7-51<br />
7-52<br />
7-53<br />
7-54<br />
8-29<br />
8-30<br />
8-49<br />
8-50<br />
8-51<br />
8-53<br />
8-54<br />
8-56<br />
8-58<br />
8-60<br />
8-62<br />
8-64<br />
8-65<br />
9-7<br />
9-33<br />
9-35<br />
9-37<br />
9-41<br />
9-93<br />
13-32<br />
13-<strong>34</strong><br />
13-36<br />
14-71<br />
17-71<br />
17-72<br />
17-148<br />
17-148<br />
xiv
<strong>TM</strong> 9-<strong>2320</strong>-<strong>211</strong>-<strong>34</strong>-2-1<br />
Number<br />
17-5<br />
17-6<br />
17-7<br />
17-8<br />
17-9<br />
17-10<br />
17-11<br />
LIST OF TABLES -C<strong>ON</strong>T<br />
Title<br />
Gearcase Bores and Gearcase Cover Bore Wear Limits . . . . . . . . .<br />
Control Valve Adapter Wear Limits . . . . . . . . . . . . . . ..... . . . . . . .<br />
Bearing Wear Limits . . . . . . . . . . . . . . . . . . . . . . . . . . . . . . . . . . . . . . . . .<br />
Bearing Journal Wear Limits . . . . . . . . . . . . . . . . . . . . . . . . . . ......<br />
Bearing Bore Wear Limits . . . . . . . . . . . . . . . . . . . . . . . . . . . . . . . . . . . .<br />
Spring Wear Limits . . . . . . . . . . . . . . . . . . . . . . . . . . . . . . . . . . .<br />
Detent Spring Wear Limits . . . . . . . . . . . . . . . . . . . . . . . . . . . . . . . . . .<br />
Page<br />
17-148<br />
17-242<br />
17-737<br />
17-738<br />
17-741<br />
17-742<br />
17-743<br />
xv/( xvi blank)
WARNING<br />
EXHAUST GASES CAN BE DEADLY<br />
Exposure to exhaust gases produces symptoms of headache, dizziness, loss of muscular<br />
control, apparent drowsiness, and coma. Permanent brain damage or death<br />
can result from severe exposure.<br />
Carbon monoxide occurs in the exhaust fumes of fuel burning heaters and internal<br />
combustion engines, and becomes dangerously concentrated under conditions of inadequate<br />
ventilation. The following precautions must be observed to insure the<br />
safety of personnel whenever fuel burning heater(s) or engine of any vehicle is<br />
operated for maintenance purposes or tactical use.<br />
Do not operate heater or engine of vehicle in an enclosed area unless it is adequately<br />
ventilated.<br />
Do not idle engine for long periods without maintaining adequate ventilation in personnel<br />
compartments.<br />
Do not drive any vehicle with inspection plates or cover plates removed unless necessary<br />
for maintenance purposes. .<br />
Be alert at all times during vehicle operation for exhaust odors and exposure<br />
symptoms. If either are present, immediately ventilate personnel compartments. If<br />
symptoms persist, remove affected personnel from vehicle and treat as follows:<br />
expose to fresh air; keep warm; do not permit physical exercise; if necessary,<br />
administer artificial respiration,<br />
If exposed, seek prompt medical attention for possible delayed onset of acute lung<br />
congestion. Administer oxygen if available.<br />
The best defense against exhaust gas poisoning is adequate ventilation.<br />
WARNING<br />
Serious or fatal injury to personnel may result<br />
if the following instructions are not complied with.<br />
Dry cleaning solvent is flammable. Do not use near an open flame. Keep a fire extinguisher<br />
nearby when solvent is used. Use only in well-ventilated places. Failure<br />
to do this may result in injury to personnel and damage to equipment.<br />
Eye shields must be worn when using compressed air. Eye injury can occur if eye<br />
shields are not used.<br />
Smoking, flames, sparks and glowing or hot objects are not allowed within 50 feet of<br />
work area during maintenance of fuel system components. Fuel can explode,<br />
causing injury to personnel and damage to equipment.<br />
Do not repair fuel tank unless tank has been cleaned and properly treated to get rid<br />
of all inflammable or explosive fumes. Merely draining tank does not make it safe for<br />
welding. An “empty” tank can be more dangerous than a full one. Before repairing,<br />
thoroughly steam clean tank or use other approved methods to completely take out<br />
all fumes.<br />
a
Do not dry bearings with compressed air.<br />
serious injury to personnel.<br />
Transfer input shaft assembly is heavy.<br />
injury.<br />
WARNING - Cont<br />
Spinning bearings may explode and cause<br />
Be careful when working on it to avoid<br />
When working on front axle assembly, weight of vehicle must be supported by floor<br />
jacks or motor vehicle trestles at all times. Do not attempt to support weight of<br />
truck on hydraulic jack.<br />
Do not use a wire brush or compressed air to clean clutch disk facings. There may<br />
be asbestos dust on the disk facings which can be dangerous to your health if you<br />
breathe it in.<br />
Use extreme care when handling heated ring gear to prevent being injured.<br />
b
<strong>TM</strong> 9-<strong>2320</strong>-<strong>211</strong>-<strong>34</strong>-2-1<br />
CHAPTER 1<br />
GENERAL MAINTENANCE INFORMATI<strong>ON</strong><br />
1-1. SCOPE. This manual contains the direct support and general support maintenance<br />
instructions for the trucks listed below. This manual includes procedures for<br />
disassembly, cleaning, inspection, repair, test, adjustment and overhaul as authorized<br />
by the maintenance allocation chart.<br />
Truck, Cargo:<br />
5 ton, 6 x 6, M54A2, M54A2C and M55A2<br />
Truck, Dump : 5 ton, 6 x 6, M51A2<br />
Truck, Tractor:<br />
5 ton, 6 x 6, M52A2<br />
Truck, Wrecker, Medium: 5 ton, 6 x 6, M543A2<br />
Information<br />
equipment,<br />
is provided on maintenance of trucks which is beyond the scope of tools,<br />
personnel, or supplies normally available to operator or using organization.<br />
1-2. GENERAL MAINTENANCE . The general maintenance and repair covered by<br />
other manuals and called out in this manual are as follows:<br />
<strong>TM</strong> 9-214 Inspection, Care and Maintenance of Antifriction Bearings.<br />
<strong>TM</strong> 9-237 Operator’s Manual: Welding Theory and Application (TO <strong>34</strong>W4-1-5).<br />
FM 43-3 General Repair for Canvas and Webbing.<br />
<strong>TM</strong> 9-247 Materials Used for Cleaning, Preserving, Abrading and Cementing<br />
Ordnance Materiel and Related Materials Including Chemicals.<br />
FM 43-2 Metal Body Repair and Related Operations.<br />
TB 750-254<br />
TB 43-0212<br />
<strong>TM</strong> 43-0139<br />
TB 43-0209<br />
Cooling Systems: Tactical Vehicles Changes 1, 2.<br />
Purging, Cleaning and Coating Interior Ferrous and Terne Sheet<br />
Vehicle Fuel Tanks.<br />
Painting Instructions for Field Use.<br />
Color, Marking and Camouflage Painting of Military Vehicles,<br />
Construction Equipment, and Materials Handling Equipment.<br />
TB 43-0213 (Rustproofing)<br />
<strong>TM</strong> 9-2300-422-20 Security of Tactical Wheeled Vehicles.<br />
WARNING<br />
Dry cleaning solvent is flammable. Do not use<br />
near an open flame. Keep a fire extinguisher<br />
nearby when solvent is used. Use only in well–<br />
ventilated places. Failure to do this may result<br />
in injury to personnel and damage to equipment.<br />
1-3. CLEANING. All parts must be cleaned before inspection and assembly and after<br />
repair. Clean inner and outer surfaces of metallic parts and all areas subject to oil<br />
or grease with dry cleaning solvent, type II (SD-2), FED. SPEC P-D-680. Clean out<br />
sludge and gum with a stiff brush. Use steam cleaning to take off accumulated grease<br />
and dirt after dry cleaning solvent has been applied. Dry with clean rags. To<br />
clean bearings refer to <strong>TM</strong> 9-214. The general cleaning covered by other manuals and<br />
references called out in this manual are as follows:<br />
1-1
<strong>TM</strong> 9-<strong>2320</strong>-<strong>211</strong>-<strong>34</strong>-2-1<br />
<strong>TM</strong> 9-247<br />
<strong>TM</strong> 9-214<br />
Materials Used for Cleaning, Preserving, Abrading and Cementing<br />
Ordnance Materiel and Related Materials Including Chemicals.<br />
Inspection, Care and Maintenance of Antifriction Bearings.<br />
1-4. PAINTING. Instructions for the preparation of the material for painting, how<br />
to paint and material to be used are in <strong>TM</strong> 43-0139. Instructions for camouflage painting<br />
are contained in TB 43-0209. Stenciling and marking must be done periodically<br />
due to weathering or repainting. Instructions for marking military trucks is called<br />
out in TB 746-93-1.<br />
1-5. TORQUE VALUES. Critical torque values for a particular component are given<br />
in the maintenance procedures. When torque values are not given, bolts, screws<br />
and nuts are to be tightened as given in table 1-1.<br />
1-6. SPECIAL TOOLS AND EQUIPMENT. Speical tools and equipment are provided<br />
to make it easier to do particular maintenance tasks and to keep the truck in good<br />
repair. Table 1-2 lists the special tools and equipment and gives a reference to<br />
the maintenance paragraph where they are used and what they are used for.<br />
1-7. SAFETY INSPECTI<strong>ON</strong> AND TESTING OF LIFTING DEVICES. Refer to<br />
TB 43-0142 for safety inspection and testing of lifting devices used in this manual.<br />
1-8. FORMS AND RECORDS. Maintenance forms, records, and reports which are to<br />
be used by maintenance personnel at all levels are listed in and prescribed by<br />
<strong>TM</strong> 38-750.<br />
1-9. EQUIPMENT IMPROVEMENT REPORT AND MAINTENANCE DIGEST (EIR MD)<br />
AND EQUIPMENT IMPROVEMENT REPORT AND MAINTENANCE SUMMARY (EIR MS).<br />
The quarterly Equipment Improvement Report and Maintenance Digest, TB 43-0001-39<br />
series, contains valuable field information on the equipment covered in this manual.<br />
The information in the TB 43-0001-39 series is compiled from some of the Equipment<br />
Improvement Reports that you prepared on the vehicles covered in this manual.<br />
Many of these articles result from comments, suggestions, and improvement recommendations<br />
that you submitted to the EIR program. The TB 43-0001-39 series<br />
contains information on equipment improvement, minor alterations, proposed Modifi–<br />
cation Work Orders (MWO’s), warranties (if applicable), actions taken on some of<br />
your DA Form 2028’s (Recommended Changes to Publications), and advance information<br />
on proposed changes that may affect this manual. In addition, the more<br />
maintenance significant articles, including minor alterations, field–fixes, etc., that<br />
have a more permanent and continuing need in the field are republished in the<br />
Equipment Improvement Report and Maintenance Summary (EIR MS) for TARCOM<br />
Equipment (<strong>TM</strong> 43-0143). Refer to both of these publications (TB 43-0001-39 series<br />
and <strong>TM</strong> 43–0143) periodically, especially the TB 43-0001-39 series, for the most<br />
current and authoritative information on your equipment. The information will help<br />
you in doing your job better and will help in keeping you advised of the latest<br />
changes to this manual. Also refer to DA Pam 310-4, Index of Technical Publications,<br />
and Appendix A, References, of this manual.<br />
1-2
<strong>TM</strong> 9-<strong>2320</strong>-<strong>211</strong>-<strong>34</strong>-2-1<br />
Table 1-1.<br />
Standard Torque Specifications<br />
1-3
<strong>TM</strong> 9-<strong>2320</strong>-<strong>211</strong>-<strong>34</strong>-2-1<br />
Table 1-2.<br />
Special Tools and Equipment<br />
Part National Reference<br />
Item No. Stock No. Paragraph Use<br />
ADAPTER , 7950090 5120-00-795-0090 8-4 Used with puller to<br />
PULLER:(Transfer<br />
take off front drive<br />
Case Front Drive<br />
rear bearing cone.<br />
Rear Bearing<br />
Cone)<br />
BRACKET, ANGLE 7010362 5<strong>34</strong>0-00-610-0919 8-4 Used to adapt left<br />
side of transfer to<br />
transfer stand.<br />
BRACKET, ANGLE 7010363 5<strong>34</strong>0-00-610-0920 8-4 Used to adapt right<br />
side of transfer to<br />
transfer stand.<br />
BURNISHER, 7950139 5120-00-795-0139 13-5 Used to burnish<br />
SLEEVE: (Steering<br />
steering knuckle<br />
Gear Housing<br />
sleeve.<br />
Bushing)<br />
FIXTURE : 8708898 5120-00-<strong>34</strong>1-4974 8-4 Used to transport<br />
(Transfer Case)<br />
transfer.<br />
GAGE , PINI<strong>ON</strong> 7950104 4910-00-795-0104 9-4 Used to check<br />
SETTING:<br />
adjustment on<br />
(Differential<br />
bevel pinion gear.<br />
Pinion Setting)<br />
HOISTING UNIT 8387771 4910-00-448-0254 7-3 Used to take out<br />
and put in<br />
transmission.<br />
PLUG 10899178 5120-00-870-6914 2-9 Used with puller<br />
5120-00-338-6721<br />
to take off crankshaft<br />
clamps and<br />
pulley assembly.<br />
1-4
<strong>TM</strong> 9-<strong>2320</strong>-<strong>211</strong>-<strong>34</strong>-2-1<br />
Table 1-2.<br />
Special Tools and Equipment - Cont<br />
Item<br />
Part<br />
No.<br />
National<br />
Stock No.<br />
Reference<br />
Paragraph<br />
Use<br />
PULLER KIT<br />
8708724<br />
5120-00-338-6721<br />
2-9<br />
7-6<br />
8-4<br />
9-4<br />
Used with plug<br />
5120-00–870–6914 to<br />
take off crankshaft<br />
clamps and pulley<br />
assembly<br />
Used to take off<br />
transmission companion<br />
flange,<br />
transfer companion<br />
flange, and differential<br />
carrier companion<br />
flange.<br />
REAMER , HAND:<br />
(Steering gear<br />
Housing Bushing)<br />
7950248<br />
5110–00-795-0248<br />
13-5<br />
Used to ream steering<br />
gear housing<br />
bushings.<br />
REMOVER: (Front<br />
Axle Spindle<br />
Inner Bushings)<br />
7950127<br />
5120-00-378-4301<br />
9-5<br />
Used to take off<br />
front axle inner<br />
bushings.<br />
REMOVER AND<br />
REPLACER ,<br />
BEARING CUP:<br />
(Differential<br />
Rear Gearing<br />
Cage Bearing<br />
Cap)<br />
7950159<br />
5120-00-795-0159<br />
8-4<br />
Used to take off and<br />
put on differential<br />
forward bearing gage<br />
bearing cap.<br />
REMOVER AND<br />
REPLACER ,<br />
BUSHING:<br />
(Steering Gear<br />
Housing Bushing)<br />
7950137<br />
5120-00-795-0137<br />
13-5<br />
Used to remove and<br />
replace steering gear<br />
housing bushings.<br />
REMOVER AND<br />
REPLACER, OIL<br />
SEAL: (Front<br />
Axle Oil Seal)<br />
7950129<br />
5120-00-795-0129<br />
9-5<br />
13-5<br />
Used to put on front<br />
axle oil seal.<br />
Used to put pitman<br />
arm shaft seal into<br />
steering gear housing<br />
1-5
<strong>TM</strong> 9-<strong>2320</strong>-<strong>211</strong>-<strong>34</strong>-2-1<br />
Table 1-2.<br />
Special Tools and Equipment - Cont<br />
Item<br />
Part<br />
No.<br />
National<br />
Stock No.<br />
Reference<br />
Paragraph<br />
Use<br />
REMOVER AND<br />
REPLACER:<br />
(Steering Knuckle<br />
Bushing)<br />
7950130<br />
5120-00–795-0130<br />
9-5<br />
Used to take off and<br />
put on steering<br />
knuckle bushing.<br />
REPLACER,<br />
FLANGE :<br />
7950147<br />
5120–00–795-0147<br />
7-3<br />
7-6<br />
8-4<br />
Used to put back<br />
transmission companion<br />
flange and transfer<br />
companion flange.<br />
REPLACER,<br />
GEAR: (Crankshaft<br />
gear)<br />
10899179<br />
5120-00-870-6920<br />
2-9<br />
Used to put<br />
on crankshaft<br />
gear.<br />
REPLACER, OIL<br />
SEAL: (Transfer<br />
Case Front<br />
Drive Gear<br />
Oil Seal)<br />
7950152<br />
5120-00–795-0152<br />
8-4<br />
Used to put on<br />
transfer case front<br />
drive gear oil seal.<br />
SCALE, DML<br />
INDICATING:<br />
(Differential<br />
Pinion Bearing<br />
Preload)<br />
7950157<br />
6670–00-<strong>34</strong>7-5922<br />
9-4<br />
Used to check preload<br />
of differential pinion<br />
bearing.<br />
SLING ASSEMBLY:<br />
(Engine and<br />
Transmission<br />
Sling)<br />
11595523<br />
4910-00-168-2388<br />
7-3<br />
Used to transport<br />
transmission.<br />
TOOL, HOLDING<br />
ST 384<br />
5120-00-104-1795<br />
11-7<br />
Used to hold air<br />
hydraulic cylinder<br />
air pak piston<br />
assembly.<br />
1-6
<strong>TM</strong> 9-<strong>2320</strong>-<strong>211</strong>-<strong>34</strong>-2-1<br />
1-10. REPORTING IMPROVEMENT RECOMMENDATI<strong>ON</strong>S. If your truck needs<br />
improvement, let us know. Send us an EIR. You, the user, are the only one who<br />
can tell us what you don’t like about your equipment. Let us know why you don’t<br />
like the design. Tell us why a procedure is hard to perform. Put it on an SF 368<br />
(Quality Deficiency Report). Mail it to us at: Commander, U.S. Army Tank<br />
Automotive Material Readiness Command, ATTN: DRSTA-MT, Warren, Michigan<br />
48090. We’ll send you a reply.<br />
1-11. METRIC SYSTEM. The equipment/system described herein is nonmetric and<br />
does not require metric common or special tools. Therefore, metric units are not<br />
supplied. Tactical instructions, for sake of clarity, will also remain nonmetric.<br />
1-12. DESTRUCTI<strong>ON</strong> TO PREVENT ENEMY USE. Follow procedures given in<br />
<strong>TM</strong> 750-244-6 for destruction of Army material to prevent enemy use.<br />
1-13. ADMINISTRATIVE STORAGE. See <strong>TM</strong> 740-90-1 for truck storage procedures.<br />
1-14. TABULATED DATA. <strong>TM</strong> 9-<strong>2320</strong>-<strong>211</strong>-20 has data for the trucks covered in<br />
this manual. Additional data can be found in paragraphs dealing with individual<br />
vehicles or components.<br />
1-15. DESCRIPTI<strong>ON</strong>. <strong>TM</strong> 9-<strong>2320</strong>-<strong>211</strong>-10 and <strong>TM</strong> 9-<strong>2320</strong>-<strong>211</strong>-20 have general<br />
descriptions of the 5 ton, 6 x 6 trucks.<br />
1-16. GENERAL SHIPPING INSTRUCTI<strong>ON</strong>S. When shipping 5 ton, 6 x 6 trucks, the<br />
officer in charge of preparing shipments will be responsible for the materiel being<br />
shipped in a serviceable condition. Also, the trucks must be properly processed for<br />
shipment, including the preparation of shipping documents.<br />
1-17. TRANSPORTABILITY GUIDANCE. Transportability guidance for logistic<br />
handling and movement of 5 ton, 6 x 6 trucks is contained in <strong>TM</strong> 55-<strong>2320</strong>-<strong>211</strong>-15-1.<br />
1-18. MAINTENANCE REPAIR PARTS. Repair parts for direct and general support<br />
maintenance are listed and illustrated in <strong>TM</strong> 9-<strong>2320</strong>-<strong>211</strong>-<strong>34</strong>P.<br />
1-7/(1-8blank)
<strong>TM</strong> 9-<strong>2320</strong>-<strong>211</strong>-<strong>34</strong>-2-1<br />
CHAPTER 2<br />
ENGINE SYSTEM GROUP MAINTENANCE<br />
Section I. SCOPE<br />
2-1. EQUIPMENT ITEMS COVERED. This chapter gives equipment maintenance pro<br />
cedures for the engine assembly, crankcase, block, and cylinder head, crankshaft,<br />
flywheel, valves, camshaft, and timing system, engine lubricating system and manifolds<br />
for which there are authorized corrective maintenance tasks at the direct and<br />
general support maintenance levels.<br />
2-2. EQUIPMENT ITEMS NOT COVERED. All equipment items for which corrective<br />
maintenance is authorized at the direct and general support maintenance levels are<br />
covered in this chapter.<br />
Section II.<br />
ENGINE ASSEMBLY<br />
2-3. FR<strong>ON</strong>T ENGINE MOUNT AND BRACKET REMOVAL, REPAIR, AND REPLACEMENT.<br />
TOOLS : No special tools required<br />
SUPPLIES : None<br />
PERS<strong>ON</strong>NEL: TW O<br />
EQUIPMENT C<strong>ON</strong>DITI<strong>ON</strong> : Truck parked, engine off, handbrake set.<br />
a. Preliminary Procedures.<br />
(1) Open hood. Refer to <strong>TM</strong> 9-<strong>2320</strong>-<strong>211</strong>-10.<br />
(2) Remove radiator. Refer to <strong>TM</strong> 9-<strong>2320</strong>-<strong>211</strong>-20.<br />
2-1
<strong>TM</strong> 9-<strong>2320</strong>-<strong>211</strong>-<strong>34</strong>-2-1<br />
b. Removal.<br />
FRAME 1<br />
1. Hook hoist chain (1) into truck engine lifting eye (2).<br />
2. Using hoist, lift engine to release pressure on motor mounts.<br />
GO TO FRAME 2<br />
2-2
<strong>TM</strong> 9-<strong>2320</strong>-<strong>211</strong>-<strong>34</strong>-2-1<br />
FRAME 2<br />
Soldier A 1. Working under engine, take out five capscrews (1).<br />
Soldier B 2. Take out two cotter pins (2) and take off two nuts (3).<br />
Soldier A 3. Take out two screws (4).<br />
Soldier B 4. Take out four insulators (5) . Slide mount (6) forward to clear<br />
bracket (7) and take it out.<br />
GO TO FRAME 3<br />
2-3
<strong>TM</strong> 9-<strong>2320</strong>-<strong>211</strong>-<strong>34</strong>-2-1<br />
FRAME 3<br />
1. Take out two bolts (1) and washers (2).<br />
2. Do step 1 again on other side of engine.<br />
3. Take out bracket (3).<br />
END OF TASK<br />
2-4
<strong>TM</strong> 9-<strong>2320</strong>-<strong>211</strong>-<strong>34</strong>-2-1<br />
c. Cleaning. There are no special cleaning procedures needed. Refer to cleaning<br />
procedures given in para 1–3.<br />
d. Inspection and Repair.<br />
1. Check that bracket (1) and mount (2) have no cracks. If parts are cracked ,<br />
get new ones in their place.<br />
2. Check that insulators (3) are not cracked and do not have holes. If insulators<br />
are damaged, get new ones in their place.<br />
END OF TASK<br />
2-5
<strong>TM</strong> 9-<strong>2320</strong>-<strong>211</strong>-<strong>34</strong>-2-1<br />
e. Replacement.<br />
Soldier A<br />
Soldier B<br />
Soldier A<br />
Soldier B<br />
1.<br />
2.<br />
3.<br />
4.<br />
5.<br />
6.<br />
7.<br />
8.<br />
END OF TASK<br />
Put bracket (1) in place.<br />
Put in two bolts (2) and washers (3).<br />
Do step 2 again on other side of engine.<br />
Put mount (4) in place. Put in four insulators (5).<br />
Working under truck, put in and hold two bolts (6).<br />
Put on two nuts (7) and tighten nuts to 210 to 230 pound-feet.<br />
Put in two cotter pins (8).<br />
Put in five cap screws (9). Tighten capscrews to 23 to 26<br />
pound-feet.<br />
9. Lower engine and unhook hoist from lifting eye.<br />
NOTE<br />
Follow-on Maintenance Action Required:<br />
1. Replace radiator. Refer to <strong>TM</strong> 9-<strong>2320</strong>-<strong>211</strong>-20.<br />
2. Fill cooling system. Refer to <strong>TM</strong> 9-<strong>2320</strong>-<strong>211</strong>-20.<br />
3. Close hood. Refer to <strong>TM</strong> 9-<strong>2320</strong>-<strong>211</strong>-10.<br />
2-6
<strong>TM</strong> 9-<strong>2320</strong>-<strong>211</strong>-<strong>34</strong>-2-1<br />
2-4. REAR ENGINE MOUNTS AND BRACKETS REMOVAL AND REPLACEMENT.<br />
TOOLS :<br />
SUPPLIES:<br />
PERS<strong>ON</strong>NEL:<br />
No special tools required<br />
None<br />
TWO<br />
EQUIPMENT C<strong>ON</strong>DITI<strong>ON</strong>:<br />
a. Removal.<br />
Truck parked, engine off, handbrake set, wheels<br />
chocked.<br />
1.<br />
2.<br />
3.<br />
GO<br />
Put wood blocks (1, 2, and 3) and hydraulic jack (4) under flywheel housing<br />
(5) as shown.<br />
Put wood block (6)<br />
Raise jack (4) until<br />
housing (5) .<br />
TO FRAME 2<br />
between hydraulic jack (4) and flywheel housing (5).<br />
wood block (6) is pressed firmly against flywheel<br />
2-7
<strong>TM</strong> 9-<strong>2320</strong>-<strong>211</strong>-<strong>34</strong>-2-1<br />
FRAME 2<br />
Soldier A 1.<br />
Soldier B 2.<br />
Soldier A 3.<br />
Soldiers 4.<br />
A and B<br />
Soldier A 5.<br />
GO TO FRAME 3<br />
Hold rear mounting bolt (1).<br />
Take off nut (2) and lockwasher (3).<br />
Take out bolt (1) and flat washer (4).<br />
Do steps 1, 2, and 3 again for other rear mount assembly.<br />
Jack up flywheel housing (5) three to four inches off rear<br />
mount (6).<br />
2-8
<strong>TM</strong> 9-<strong>2320</strong>-<strong>211</strong>-<strong>34</strong>-2-1<br />
FRAME 3<br />
Soldier A 1. Hold two mounting screws (1) .<br />
Soldier B 2.<br />
Take off two nuts (2), washers (3), and insulators (4). Throw<br />
away insulators.<br />
Soldier A 3. Take out two screws (1). Take off support bracket (5) and two<br />
insulators (6). Throw away insulators.<br />
Soldiers 4.<br />
A and B<br />
END OF TASK<br />
Do steps 1, 2, and 3 on right side of truck.<br />
5. Take off air line (7) and clamp (8) under nut (2) on right rear<br />
engine mount.<br />
2-9
<strong>TM</strong> 9-<strong>2320</strong>-<strong>211</strong>-<strong>34</strong>-2-1<br />
b. Replacement.<br />
Soldier A<br />
Soldier B<br />
Soldiers<br />
A and B<br />
1.<br />
2.<br />
3.<br />
4.<br />
5.<br />
6.<br />
7.<br />
GO TO FRAME 2<br />
Hold two upper insulators (1) on frame bracket (2). Put support --<br />
bracket (3) on insulators (1).<br />
Line up holes and put in two screws (4).<br />
Hold two screws (4).<br />
Put two lower insulators (5) and washers<br />
(6) on screws (4).<br />
Put on two nuts (7) and tighten them to 75 to 85 pound-feet.<br />
Do steps 1 through 5 again on other side of truck.<br />
Put on air line (8) and clamp (9) under nut (7) on right rear<br />
engine mount.<br />
2-10
<strong>TM</strong> 9-<strong>2320</strong>-<strong>211</strong>-<strong>34</strong>-2-1<br />
Soldier A 2.<br />
1. Let jack (1) down so that housing (2) rests on bracket (3). Take<br />
away jack (1) and wood blocks (4, 5, and 6).<br />
Put screw (7) with washer (8) through housing (2) and bracket<br />
(3) and hold it.<br />
Soldier B 3. Put on lockwasher (9) and nut (10). Tighten nut to 150<br />
pound-feet.<br />
Soldiers 4.<br />
A and B<br />
END OF TASK<br />
Do steps 1, 2, and 3 again on other side of truck.<br />
2-11
<strong>TM</strong> 9-<strong>2320</strong>-<strong>211</strong>-<strong>34</strong>-2-1<br />
2-5. ENGINE ASSEMBLY, REMOVAL, AND REPLACEMENT.<br />
TOOLS :<br />
SUPPLIES :<br />
PERS<strong>ON</strong>NEL: TW O<br />
No special tools required<br />
Cotter pins<br />
Tags<br />
EQUIPMENT C<strong>ON</strong>DITI<strong>ON</strong>:<br />
a. Preliminary Procedures.<br />
Truck parked, engine off, handbrake set.<br />
(1) Open hood and hood side panels. Refer to <strong>TM</strong> 9-<strong>2320</strong>-<strong>211</strong>-10.<br />
(2) Takeoff battery ground cable. Refer to <strong>TM</strong> 9-<strong>2320</strong>-<strong>211</strong>-20.<br />
(3) Take apart electrical harnesses in engine compartment. Refer to<br />
para 6-16.<br />
(4) Remove power takeoff linkage. Refer to Part 3, para 17-59.<br />
(5) Remove air cleaner hoses. Refer to <strong>TM</strong> 9-<strong>2320</strong>-<strong>211</strong>-20.<br />
(6) Remove engine exhaust. Refer to <strong>TM</strong> 9-<strong>2320</strong>-<strong>211</strong>-20.<br />
(7) Remove throttle accelerator linkage. Refer to <strong>TM</strong> 9-<strong>2320</strong>-<strong>211</strong>-20.<br />
(8) Remove clutch and brake control linkage and return springs. Refer<br />
to <strong>TM</strong> 9-<strong>2320</strong>-<strong>211</strong>-20.<br />
(9) Remove steering pump hoses. Refer to <strong>TM</strong> 9-<strong>2320</strong>-<strong>211</strong>-20.<br />
(10) Drain cooling system. Refer to <strong>TM</strong> 9-<strong>2320</strong>-<strong>211</strong>-20.<br />
(11) Remove radiator brush guard. Refer to <strong>TM</strong> 9-<strong>2320</strong>-<strong>211</strong>-20.<br />
(12) Remove radiator assembly. Refer to <strong>TM</strong> 9-<strong>2320</strong>-<strong>211</strong>-20.<br />
(13) Remove transmission assembly. Refer to para 7-3.<br />
(14) Remove mounting bolts and lay power steering reservoir on left<br />
fender. Refer to <strong>TM</strong> 9-<strong>2320</strong>-<strong>211</strong>-20.<br />
(15) Remove headlight brackets from fender. Refer to <strong>TM</strong> 9-<strong>2320</strong>-<strong>211</strong>-20.<br />
(16) Remove tachometer flexible shaft assembly. Refer to <strong>TM</strong> 9-<strong>2320</strong>-<strong>211</strong>-20.<br />
2-12
<strong>TM</strong> 9-<strong>2320</strong>-<strong>211</strong>-<strong>34</strong>-2-1<br />
b. Removal.<br />
FRAME 1<br />
Tag all wires so<br />
1. Take off nuts (1) holding<br />
2. Take off cables (2) from starter (3).<br />
3. Put nuts (1) back on starter (3).<br />
GO TO FRAME 2<br />
NOTE<br />
they can be put back in proper place.<br />
starter cables (2).<br />
2-13
<strong>TM</strong> 9-<strong>2320</strong>-<strong>211</strong>-<strong>34</strong>-2-1<br />
FRAME 2<br />
1. Loosen nut (1) from elbow (2).<br />
2. Slide nut (1) back on cable (3). Take off cable from generator (4).<br />
GO TO FRAME 3<br />
2-14
<strong>TM</strong> 9-<strong>2320</strong>-<strong>211</strong>-<strong>34</strong>-2-1<br />
FRAME 3<br />
NOTE<br />
Newer vehicles have a push, pull type connector.<br />
1. Twist connector (1) to left and pull it off.<br />
2. Take out oil pressure gage sending unit (2).<br />
GO TO FRAME 4<br />
2-15
<strong>TM</strong> 9-<strong>2320</strong>-<strong>211</strong>-<strong>34</strong>-2-1<br />
FRAME 4<br />
NOTE<br />
Newer vehicles have a push, pull type connector.<br />
1. Twist connector (1) to right and pull it off.<br />
2. Take out water temperature sending unit (2).<br />
GO TO FRAME 5<br />
2-16
<strong>TM</strong> 9-<strong>2320</strong>-<strong>211</strong>-<strong>34</strong>-2-1<br />
FRAME 5<br />
1. Unscrew nut (1).<br />
2. Takeout ground strap (2) from fire wall (3).<br />
3. Unscrew nut (4).<br />
4. Take out ground strap (5) from frame (6).<br />
5. Take off fuel line (7) at frame (6).<br />
GO TO FRAME 6<br />
2-17
<strong>TM</strong> 9-<strong>2320</strong>-<strong>211</strong>-<strong>34</strong>-2-1<br />
1.<br />
2.<br />
3.<br />
GO<br />
Take out cotter pin (1) from pin (2). Throw away cotter pin.<br />
Take off nut, washer, and screw (3).<br />
Take off cable (4).<br />
TO FRAME 7<br />
2-18
<strong>TM</strong> 9-<strong>2320</strong>-<strong>211</strong>-<strong>34</strong>-2-1<br />
FRAME 7<br />
1. Take off<br />
air supply line (1).<br />
2. Take off<br />
3. Take out<br />
GO TO FRAME 8<br />
NOTE<br />
Truck may have governor air line (2) at top of compressor<br />
or at side of compressor.<br />
governor air line (2).<br />
bolt (3). Take off clip (4).<br />
2-19
<strong>TM</strong> 9-<strong>2320</strong>-<strong>211</strong>-<strong>34</strong>-2-1<br />
FRAME 8<br />
Soldiers<br />
A and B<br />
Soldier A<br />
Soldier B<br />
Soldier A<br />
Soldiers<br />
A and B<br />
1.<br />
2.<br />
3.<br />
4.<br />
5.<br />
6.<br />
7.<br />
8.<br />
9.<br />
10.<br />
END OF T ASK<br />
Put on hoist and chain sling to front and rear lifting brackets<br />
(1 and 2).<br />
Take slack out of hoist and chain sling.<br />
Take off capscrews and lockwashers (3) from front mounting<br />
support (4).<br />
Hold bolt and flat washer (5) for soldier B.<br />
Take off nut and lockwasher (6) from rear mounting Plate (7).<br />
Take out bolt and flat washer (5).<br />
Do steps 4, 5, and 6 again on other side of engine (10).<br />
Take off fuel line (9) at injector pump (10).<br />
Raise engine (8) out of engine compartment with hoist and chain<br />
sling. Place engine on engine stand.<br />
Take off hoist and chain sling.<br />
2-20
<strong>TM</strong> 9-<strong>2320</strong>-<strong>211</strong>-<strong>34</strong>-2-1<br />
c. Replacement.<br />
FRAME 1<br />
Soldiers<br />
A and B<br />
Soldier A<br />
Soldier B<br />
Soldiers<br />
A and B<br />
Soldier A<br />
1.<br />
2.<br />
3.<br />
4.<br />
5.<br />
6.<br />
7.<br />
8.<br />
9.<br />
GO TO FRAME<br />
Put on hoist and chain sling to front and rear lifting brackets<br />
(1 and 2).<br />
Take slack out of chain sling.<br />
Raise engine (3) with hoist and chain sling high enough to clear<br />
engine compartment.<br />
Lower engine (3) into engine compartment.<br />
Line up holes in front mounting support (4) and put in capscrews<br />
and lockwashers (5).<br />
Line up holes in rear mounting plate (6) and put in bolt and flat<br />
washer (7).<br />
2<br />
Put on nut and lockwasher (8).<br />
Tighten nut to 150 pound-feet.<br />
Do steps 6 and 7 again on other side of engine (3).<br />
Put on fuel line (9) at injector pump (10).<br />
2-21
<strong>TM</strong> 9-<strong>2320</strong>-<strong>211</strong>-<strong>34</strong>-2-1<br />
FRAME 2<br />
1. Put clip (1) on<br />
2. Put clip (1) on<br />
line (2).<br />
air compressor (3) with bolt (4).<br />
NOTE<br />
Truck may have governor air line (5) at top of compressor<br />
or at side of compressor.<br />
3. Put on and tighten air line (5).<br />
4. Put on and tighten air line (6).<br />
GO TO FRAME 3<br />
2-22
<strong>TM</strong> 9-<strong>2320</strong>-<strong>211</strong>-<strong>34</strong>-2-1<br />
FRAME 3<br />
1. Take screw, washer, and nut (1) from fuel shutoff control wire (2). Mount<br />
wire to fuel shutoff valve (3). Put on, but not tighten screw, washer,<br />
and nut.<br />
2. Put cotter pin (4) in pin (5) on fuel shutoff valve (3).<br />
3. Set length of wire and tighten screw, washer, and nut (1).<br />
GO TO FRAME 4<br />
2-23
<strong>TM</strong> 9-<strong>2320</strong>-<strong>211</strong>-<strong>34</strong>-2-1<br />
FRAME 4<br />
1. Put ground strap (1) on frame (2). Put in bolt (3).<br />
2. Put ground strap (4) on firewall (5). Put in bolt (6).<br />
3. Put on fuel line (7) at frame (2).<br />
GO TO FRAME 5<br />
2-24
<strong>TM</strong> 9-<strong>2320</strong>-<strong>211</strong>-<strong>34</strong>-2-1<br />
FRAME 5<br />
1. Screw in water temperature sending unit (1).<br />
NOTE<br />
Newer vehicles have a push, pull type connector.<br />
2. Put in connector (2) and twist it to right to lock.<br />
GO TO FRAME 6<br />
2-25
<strong>TM</strong> 9-<strong>2320</strong>-<strong>211</strong>-<strong>34</strong>-2-1<br />
FRAME 6<br />
1. Screw in oil pressure gage sending unit (1).<br />
NOTE<br />
Newer vehicles have a push, pull type connector.<br />
2. Put in connector (2) and twist it to right to lock.<br />
GO TO FRAME 7<br />
2-26
<strong>TM</strong> 9-<strong>2320</strong>-<strong>211</strong>-<strong>34</strong>-2-1<br />
FRAME 7<br />
1. Slide nut (1) forward on cable (2).<br />
2. Join cable (2) to generator (3). Put nut (1) onto elbow (4).<br />
GO TO FRAME 8<br />
2-27
<strong>TM</strong> 9-<strong>2320</strong>-<strong>211</strong>-<strong>34</strong>-2-1<br />
FRAME 8<br />
1. Take off nuts (1) from terminal posts on starter (2).<br />
2. Put cables (3) on starter (2). Put on nuts (1).<br />
GO TO FRAME 9<br />
2-28
<strong>TM</strong> 9-<strong>2320</strong>-<strong>211</strong>-<strong>34</strong>-2-1<br />
FRAME 9<br />
1.<br />
2.<br />
3.<br />
4.<br />
5.<br />
6.<br />
7.<br />
8.<br />
9.<br />
10.<br />
11.<br />
12.<br />
13.<br />
14.<br />
15.<br />
16.<br />
END OF TASK<br />
NOTE<br />
Follow-on Maintenance Action Required:<br />
Replace tachometer flexible shaft assembly. Refer to<br />
<strong>TM</strong> 9-<strong>2320</strong>-<strong>211</strong>-20.<br />
Replace headlight brackets. Refer to <strong>TM</strong> 9-<strong>2320</strong>-<strong>211</strong>-20.<br />
Replace power steering reservoir. Refer to<br />
<strong>TM</strong> 9-<strong>2320</strong>-<strong>211</strong>-20.<br />
Replace transmission assembly. Refer to para 7-3.<br />
Replace radiator assembly. Refer to <strong>TM</strong> 9-<strong>2320</strong>-<strong>211</strong>-20.<br />
Replace radiator brush guard. Refer to<br />
<strong>TM</strong> 9-<strong>2320</strong>-<strong>211</strong>-20.<br />
Fill cooling system. Refer to <strong>TM</strong> 9-<strong>2320</strong>-<strong>211</strong>-20.<br />
Replace steering pump hoses. Refer to<br />
<strong>TM</strong> 9-<strong>2320</strong>-<strong>211</strong>-20.<br />
Replace clutch and brake control linkage and return<br />
springs. Refer to <strong>TM</strong> 9-<strong>2320</strong>-<strong>211</strong>-20.<br />
Replace throttle accelerator linkage. Refer to<br />
<strong>TM</strong> 9-<strong>2320</strong>-<strong>211</strong>-20.<br />
Replace engine exhaust. Refer to <strong>TM</strong> 9-<strong>2320</strong>-<strong>211</strong>-20.<br />
Replace air cleaner hoses. Refer to <strong>TM</strong> 9-<strong>2320</strong>-<strong>211</strong>-20.<br />
Replace power takeoff linkage. Refer to part 3, para 17-59.<br />
Join electrical harnesses in engine compartment. Refer<br />
to para 6-16.<br />
Reconnect battery ground cable. Refer to<br />
<strong>TM</strong> 9-<strong>2320</strong>-<strong>211</strong>-20.<br />
Close hood and hood side panels. Refer to<br />
<strong>TM</strong> 9-<strong>2320</strong>-<strong>211</strong>-10.<br />
2-29
<strong>TM</strong> 9-<strong>2320</strong>-<strong>211</strong>-<strong>34</strong>-2-1<br />
Section III. CRANKCASE, BLOCK, AND CYLINDER HEAD<br />
2-6. CYLINDER HEAD REMOVAL, REPAIR, AND REPLACEMENT.<br />
TOOLS:<br />
SUPPLIES:<br />
PERS<strong>ON</strong>NEL: One<br />
No special tools needed<br />
EQUIPMENT C<strong>ON</strong>DITI<strong>ON</strong>:<br />
Sealant, MIL-S-7916B<br />
Gasket and preformed packing set pn 5702677<br />
Gasket set, turbocharger to exhaust<br />
a. Preliminary Procedures.<br />
(1)<br />
(2)<br />
(3)<br />
(4)<br />
(5)<br />
(6)<br />
(7)<br />
(8)<br />
(9)<br />
(10)<br />
(11)<br />
(12)<br />
(13)<br />
(14)<br />
Truck parked, engine off, handbrake set.<br />
Open hood and engine side panels. Refer to <strong>TM</strong> 9-<strong>2320</strong>-<strong>211</strong>-10.<br />
Disconnect battery ground cable. Refer to <strong>TM</strong> 9-<strong>2320</strong>-<strong>211</strong>-20.<br />
Drain cooling system. Refer to <strong>TM</strong> 9-<strong>2320</strong>-<strong>211</strong>-20.<br />
Remove fuel injector tubes. Refer to <strong>TM</strong> 9-2815-210-<strong>34</strong>.<br />
Remove turbocharger assembly. Refer to <strong>TM</strong> 9-2815-210-<strong>34</strong>.<br />
Remove cylinder head water outlet manifold. Refer to <strong>TM</strong> 9-2815-210-<strong>34</strong>.<br />
Remove intake and exhaust manifolds. Refer to para 2-24.<br />
Remove engine breather tube. Refer to <strong>TM</strong> 9-<strong>2320</strong>-<strong>211</strong>-20.<br />
Remove manifold flame heater assembly. Refer to <strong>TM</strong> 9-<strong>2320</strong>-<strong>211</strong>-20.<br />
Remove valve covers and gaskets. Refer to <strong>TM</strong> 9-<strong>2320</strong>-<strong>211</strong>-20.<br />
Remove rocker arm assembly. Refer to para 2-15.<br />
Remove fuel injector assemblies. Refer to <strong>TM</strong> 9-2815-210-<strong>34</strong>.<br />
Remove engine lift and radiator support. Refer to <strong>TM</strong> 9-<strong>2320</strong>-<strong>211</strong>-20.<br />
Remove pushrods. Refer to para 2-14.<br />
2-30
<strong>TM</strong> 9-<strong>2320</strong>-<strong>211</strong>-<strong>34</strong>-2-1<br />
b. Removal.<br />
FRAME 1<br />
1.<br />
2.<br />
3.<br />
Take off<br />
Take off<br />
NOTE<br />
This procedure is the same for front and rear cylinder<br />
head removal.<br />
11 plain nuts (1) and flatwashers (2).<br />
NOTE<br />
Early model cylinder heads use 3/8-inch sleeve spacers<br />
under three head nuts at stud bases. Later model<br />
cylinder heads use 1/8-inch flatwashers under three<br />
head nuts at stud bases.<br />
three plain nuts (3) and three sleeve spacers (4) or washers.<br />
Take off cylinder head assembly (5). Take off cylinder head gasket and<br />
fire rings (6). Throw away gasket and fire rings.<br />
END OF TASK<br />
2-31
<strong>TM</strong> 9-<strong>2320</strong>-<strong>211</strong>-<strong>34</strong>-2-1<br />
c. Repair. Refer to <strong>TM</strong> 9-2815-210-<strong>34</strong> for repair of the cylinder head.<br />
d. Replacement.<br />
FRAME 1<br />
NOTE<br />
This procedure is the same for front and rear cylinder<br />
head replacement.<br />
1. Put a thin coat of sealant, MIL-S-7916B (1) as shown to both sides of<br />
cylinder head gasket (2) before putting it on cylinder head.<br />
GO TO FRAME 2<br />
2-32
<strong>TM</strong> 9-<strong>2320</strong>-<strong>211</strong>-<strong>34</strong>-2-1<br />
FRAME 2<br />
1. Put cylinder head gasket (1) and three fire rings (2) in place on engine<br />
block (3).<br />
2. Mount cylinder head (4) onto block (3).<br />
GO TO FRAME 3<br />
2-33
<strong>TM</strong> 9-<strong>2320</strong>-<strong>211</strong>-<strong>34</strong>-2-1<br />
FRAME 3<br />
NOTE<br />
Early model cylinder heads use 3/8-inch sleeve spacers<br />
under three head nuts at stud bases. Later model<br />
cylinder heads use 1/8-inch flatwashers under three<br />
headnuts at stud bases.<br />
1. Put on three plain nuts (1) with three sleeve spacers (2) or flatwashers.<br />
Do not tighten at this time.<br />
2. Put on 11 plain nuts (3) with flatwashers (4). Do not tighten at this time.<br />
GO TO FRAME 4<br />
2-<strong>34</strong>
<strong>TM</strong> 9-<strong>2320</strong>-<strong>211</strong>-<strong>34</strong>-2-1<br />
FRAME 4<br />
1. Tighten nuts 1 through 28 in the order shown, and as follows:<br />
a.<br />
b.<br />
c.<br />
d.<br />
e.<br />
Tighten nuts 1 through 14 to 40 pound-feet.<br />
Tighten nuts 1 through 14 to 80 pound-feet.<br />
Tighten nuts 1 through 14 to 110 pound-feet.<br />
Tighten nuts 1 through 14 to 130 pound-feet.<br />
NOTE<br />
Perform step le only when TD (thick deck) is stamped on<br />
crankcase.<br />
Tighten nuts 1 through 14 to 157 pound-feet.<br />
2. Do steps la through ld for remaining 14 nuts.<br />
GO TO FRAME 5<br />
2-35
<strong>TM</strong> 9-<strong>2320</strong>-<strong>211</strong>-<strong>34</strong>-2-1<br />
FRAME 5<br />
END OF TASK<br />
NOTE<br />
Follow-on Maintenance Action Required:<br />
1. Replace pushrods. Refer to para 2-14.<br />
2. Replace rocker arm assembly. Refer to para 2-15.<br />
3. Replace valve covers and gaskets. Refer to<br />
<strong>TM</strong> 9-<strong>2320</strong>-<strong>211</strong>-20.<br />
4. Replace cylinder head water outlet manifold. Refer to<br />
<strong>TM</strong> 9-2815-210-<strong>34</strong>.<br />
5. Replace intake and exhaust manifolds. Refer to para 2-24.<br />
6. Replace turbocharger assembly. Refer to <strong>TM</strong> 9-2815-210-<strong>34</strong>.<br />
7. Replace fuel injector tubes. Refer to para 4-6.<br />
8. Replace fuel injector assemblies. Refer to para 4-3.<br />
9. Replace breather tube. Refer to <strong>TM</strong> 9-<strong>2320</strong>-<strong>211</strong>-20.<br />
10. Replace manifold flame heater assembly. Refer to<br />
<strong>TM</strong> 9-<strong>2320</strong>-<strong>211</strong>-20.<br />
11. Replace engine lift and radiator support. Refer to<br />
<strong>TM</strong> 9-<strong>2320</strong>-<strong>211</strong>-20.<br />
12. Connect battery ground cable. Refer to <strong>TM</strong> 9-<strong>2320</strong>-<strong>211</strong>-20.<br />
13. Fill cooling system. Refer to <strong>TM</strong> 9-<strong>2320</strong>-<strong>211</strong>-20.<br />
14. Close hood and side panels. Refer to <strong>TM</strong> 9-<strong>2320</strong>-<strong>211</strong>-10.<br />
2-36
<strong>TM</strong> 9-<strong>2320</strong>-<strong>211</strong>-<strong>34</strong>-2-1<br />
Section IV. CRANKSHAFT<br />
2-7. CRANKSHAFT FR<strong>ON</strong>T SEAL REMOVAL AND REPLACEMENT.<br />
TOOLS: Oil seal replacer, pn 11642003<br />
Oil seal installation adapter, fabricated locally<br />
Puller, mechanical, pn 11642008<br />
SUPPLIES:<br />
PERS<strong>ON</strong>NEL:<br />
Seal, crankshaft oil front<br />
Lubricating oil, ICE, OE/HDO 30, MIL-L-2104<br />
Solvent, dry cleaning, type II (SD-2), Fed. Spec P-D-680<br />
One<br />
EQUIPMENT C<strong>ON</strong>DITI<strong>ON</strong>:<br />
Truck parked, engine off, handbrake set.<br />
a. Preliminary Procedure. Remove damper and pulley assembly. Refer to<br />
para 2-9.<br />
2-37
<strong>TM</strong> 9-<strong>2320</strong>-<strong>211</strong>-<strong>34</strong>-2-1<br />
b. Removal.<br />
FRAME 1<br />
1. Put mechanical puller (1) with center screw (2) in end of crankshaft (3).<br />
2. Turn screw (4) until legs of mechanical puller (1) hold oil seal (5).<br />
3. Turn screw (2) and takeout oil seal (5).<br />
END OF TASK<br />
2-38
<strong>TM</strong> 9-<strong>2320</strong>-<strong>211</strong>-<strong>34</strong>-2-1<br />
WARNING<br />
Dry cleaning solvent is flammable. Do not<br />
use near an open flame. Keep a fire<br />
extinguisher nearby when solvent is used.<br />
Use only in well-ventilated places. Failure<br />
to do this may result in injury to personnel<br />
and damage to equipment.<br />
c. Cleaning. Clean area around oil seal bore with solvent. Do not get solvent<br />
in engine. Let area air dry.<br />
2-39
<strong>TM</strong> 9-<strong>2320</strong>-<strong>211</strong>-<strong>34</strong>-2-1<br />
d. Replacement.<br />
FRAME 1<br />
1.<br />
2.<br />
3.<br />
4.<br />
5.<br />
6.<br />
7.<br />
8.<br />
Make an oil seal installation adapter.<br />
Put oil seal installation adapter (1) on oil seal replacer (2).<br />
NOTE<br />
See figure 2-1 for fabrication instructions<br />
The crankshaft front seal has a double lip which<br />
must be put in timing case cover with flanged<br />
edge away from cover mounting flange.<br />
Spread lubricating oil on new oil seal (3).<br />
Put new oil seal on oil seal replacer (2).<br />
Put oil seal replacer (2), oil seal (3) and adapter (1) on crankshaft (4).<br />
Put on screw (5) with washer (6).<br />
timing case cover (7).<br />
Turn screw until adapter (1) mates with<br />
Tighten screw (5), until oil seal (3) is seated flush in timing case cover (7).<br />
Take out screw (5) with washer (6), oil seal replacer (2) and oil seal installation<br />
adapter (1).<br />
END OF TASK<br />
NOTE<br />
Follow-on Maintenance Action Required:<br />
Replace damper and pulley assembly. Refer to para 2-9.<br />
2-40
<strong>TM</strong> 9-<strong>2320</strong>-<strong>211</strong>-<strong>34</strong>-2-1<br />
Figure 2-1. Oil Seal Installation Adapter, Fabrication Instructions<br />
2-41
<strong>TM</strong> 9-<strong>2320</strong>-<strong>211</strong>-<strong>34</strong>-2-1<br />
2-8. CRANKSHAFT REAR OIL SEAL REMOVAL<br />
TOOLS:<br />
SUPPLIES:<br />
PERS<strong>ON</strong>NEL: One<br />
No special tools required<br />
EQUIPMENT C<strong>ON</strong>DITI<strong>ON</strong>:<br />
Solvent, dry cleaning, type II<br />
Rear oil seal<br />
Rear oil seal housing gasket<br />
Crocus cloth<br />
a. Preliminary Procedures.<br />
AND REPLACEMENT.<br />
(SD-2), Fed. Spec P-D-680<br />
Truck parked, engine off, handbrake set.<br />
(1) Remove transmission. Refer to para 7-3.<br />
(2) Remove clutch. Refer to para 3-3.<br />
(3) Remove flywheel. Refer to para 2-10.<br />
b. Removal.<br />
FRAME 1<br />
1. Take out six capscrews (1) with lockwashers (2). Take off seal housing (3).<br />
2. Take oil seal housing gasket (4) off and throw away.<br />
END OF TASK<br />
2-42
<strong>TM</strong> 9-<strong>2320</strong>-<strong>211</strong>-<strong>34</strong>-2-1<br />
c. Cleaning, Inspection, and Repair.<br />
FRAME 1<br />
WARNING<br />
Dry cleaning solvent is flammable. Do not use near an<br />
open flame. Keep a fire extinguisher nearby when solvent<br />
is used. Use only in well-ventilated places.<br />
Failure to do this may result in injury to personnel and<br />
damage to equipment.<br />
1. Drive out old seal with punch through hoIe (1). Wash housing (2) in dry<br />
cleaning solvent.<br />
2. Check housing (2) for burrs and cracks. Replace if cracked. Polish burrs<br />
with crocus cloth.<br />
END OF TASK<br />
NOTE<br />
Check that housing (2) has 3 holes. If it has only 1, drill<br />
2 more as shown. All holes are 0.250 inches in diameter.<br />
2-43
<strong>TM</strong> 9-<strong>2320</strong>-<strong>211</strong>-<strong>34</strong>-2-1<br />
d. Replacement.<br />
FRAME 1<br />
1. Put seal housing (1) on arbor press (2), gasket surface down.<br />
2. Put new seal (3) on housing (1) as shown.<br />
3. Press seal (3) into housing (1) with arbor press.<br />
4. Put new gasket (4) on crankcase (5).<br />
5. Line up holes (6) with pins (7). Put seal housing assembly (1) into place.<br />
GO TO FRAME 2<br />
2-44
<strong>TM</strong> 9-<strong>2320</strong>-<strong>211</strong>-<strong>34</strong>-2-1<br />
FRAME 2<br />
1. Put in six capscrews (1) and washers (2).<br />
END OF TASK<br />
NOTE<br />
Follow-on Maintenance Action Required:<br />
1. Replace flywheel. Refer to para 2-10.<br />
2. Replace clutch. Refer to para 3-3.<br />
3. Replace transmission. Refer to para 7-3.<br />
2-45
<strong>TM</strong> 9-<strong>2320</strong>-<strong>211</strong>-<strong>34</strong>-2-1<br />
2-9. CRANKSHAFT VIBRATI<strong>ON</strong> DAMPER REMOVAL AND REPLACEMENT.<br />
TOOLS: Mechanical puller kit, pn 8708724<br />
Plug, pn 10899178<br />
Damper and pulley locator<br />
Gear replacer, pn 10899179<br />
SUPPLIES:<br />
PERS<strong>ON</strong>NEL:<br />
Lubrication oil, ICE, OE/HDO 30, MIL-L-2104<br />
Solvent, dry cleaning, type II (SD-2), Fed. Spec P-D-680<br />
One<br />
EQUIPMENT C<strong>ON</strong>DITI<strong>ON</strong>:<br />
a. Preliminary Procedures.<br />
Truck parked, engine off, handbrake set.<br />
(1) Open hood. Refer to <strong>TM</strong> 9-<strong>2320</strong>-<strong>211</strong>-10.<br />
(2) Drain coolant. Refer to <strong>TM</strong> 9-<strong>2320</strong>-<strong>211</strong>-20.<br />
(3) Remove radiator. Refer to <strong>TM</strong> 9-<strong>2320</strong>-<strong>211</strong>-20.<br />
(4) Remove engine drive belts. Refer to <strong>TM</strong> 9-<strong>2320</strong>-<strong>211</strong>-20.<br />
(5) Remove fan. Refer to <strong>TM</strong> 9-<strong>2320</strong>-<strong>211</strong>-20.<br />
(6) Remove front engine mounts. Refer to para 2-3.<br />
2-46
<strong>TM</strong> 9-<strong>2320</strong>-<strong>211</strong>-<strong>34</strong>-2-1<br />
b. Removal.<br />
FRAME 1<br />
1. Take off two capscrews (1) and two lockwashers (2).<br />
2. Take off lockplate (3).<br />
GO TO FRAME 2<br />
2-47
<strong>TM</strong> 9-<strong>2320</strong>-<strong>211</strong>-<strong>34</strong>-2-1<br />
FRAME 2<br />
NOTE<br />
Tighten retaining bolt (2) to 225 to 250 pound-feet.<br />
It may be required to stop the engine from turning<br />
when taking out bolt.<br />
1. Put in two 3/8-16 bolts (1) in pulley mounting holes. Put a bar over one<br />
bolt and under the other bolt and use as a lever to stop engine from turning.<br />
2. Take off retaining bolt (2) and retaining washer (3).<br />
3. Take off two 3/8-16 bolts (1).<br />
GO TO FRAME 3<br />
2-48
<strong>TM</strong> 9-<strong>2320</strong>-<strong>211</strong>-<strong>34</strong>-2-1<br />
FRAME 3<br />
1. Put in mechanical puller capscrews (1) in hub of pulley, as shown. Use thick<br />
washers (2) under heads of capscrews.<br />
2. Put in small end of puller adapter (3) in end of crankshaft and turn puller<br />
screw tight against adapter (3) to hold it in place.<br />
3. Take off crankshaft damper and pulley assembly (4) by turning mechanical<br />
puller screw (5) to the left.<br />
END OF TASK<br />
2-49
<strong>TM</strong> 9-<strong>2320</strong>-<strong>211</strong>-<strong>34</strong>-2-1<br />
WARNING<br />
Dry cleaning solvent is flammable. Do not use<br />
near an open flame. Keep a fire extinguisher<br />
nearby when solvent is used. Use only in wellventilated<br />
places. Failure to do this may result<br />
in injury to personnel and damage to equipment.<br />
c. Cleaning. Clean inner and outer surfaces of metallic parts and all area subject<br />
to oil, or grease with dry cleaning solvent.<br />
2-50
<strong>TM</strong> 9-<strong>2320</strong>-<strong>211</strong>-<strong>34</strong>-2-1<br />
d. Inspection and Repair.<br />
FRAME 1<br />
1.<br />
2.<br />
3.<br />
4.<br />
5.<br />
6.<br />
7.<br />
8.<br />
Take off keyway seal (1) from keyway (2) and hold for assembly.<br />
Check keyway (2) for burrs or damage.<br />
Check damper and pulley assembly (3) for burrs, damage or cracks. Get a<br />
new damper and pulley assembly (3) if either is cracked or damaged.<br />
Check rubber insert in damper and pulley assembly (3) for cracks, cuts or<br />
loose fit. If rubber insert has pulled apart from steel hub or rim , get a<br />
new damper and pulley assembly.<br />
Check alining marks for slippage.<br />
Fix minor damage.<br />
Take out minor burrs or raised metal from keyway (2), and damper and pulley<br />
assembly (3) hub and grooves with a fine mill file.<br />
Fix threads in damper and pulley assembly (3) screw holes with taps.<br />
END OF TASK<br />
2-51
<strong>TM</strong> 9-<strong>2320</strong>-<strong>211</strong>-<strong>34</strong>-2-1<br />
e. Replacement.<br />
FRAME 1<br />
1. Put keyway (1) on crankshaft (2).<br />
2. Make a damper and pulley locator (3). See figure 2-2 for fabrication<br />
instructions.<br />
3. Aline damper and pulley locator (3) with the key (2) in the crankshaft and<br />
hold with the pulley mounting bolt (4).<br />
GO TO FRAME 2<br />
2-52
<strong>TM</strong> 9-<strong>2320</strong>-<strong>211</strong>-<strong>34</strong>-2-1<br />
Figure 2-2.<br />
Crankshaft Damper and Pulley Locator, Fabrication Instructions<br />
2-53
<strong>TM</strong> 9-<strong>2320</strong>-<strong>211</strong>-<strong>34</strong>-2-1<br />
FRAME 2<br />
1.<br />
2.<br />
3.<br />
4.<br />
5.<br />
6.<br />
GO<br />
Spread lubricating oil around oil seal before putting damper and pulley<br />
assembly back.<br />
Preheat crankshaft damper and pulley assembly (1) at 200°F for 30 minutes.<br />
NOTE<br />
To insure proper seating of crankshaft damper and<br />
pulley assembly, the installation of the heated damper<br />
and pulley assembly, including installation and<br />
tightening of retaining screw, should be done as<br />
rapidly as possible before temperature of the pulley<br />
and crankshaft equalize.<br />
Start crankshaft damper and pulley assembly (1) on crankshaft alining<br />
pulley keyway with pulley locator. Heated pulley should slide on<br />
crankshaft and seat against deflector.<br />
If pulley (1) does not seat the right way, take out pulley mounting bolt,<br />
put crankshaft damper and pulley reflector in the end of crankshaft.<br />
Hold replacer bolt (2) while turning plain nut (3) to seat damper and<br />
pulley assembly (1).<br />
Take out damper and pulley replacer and pulley locator.<br />
TO FRAME 3<br />
2-54
<strong>TM</strong> 9-<strong>2320</strong>-<strong>211</strong>-<strong>34</strong>-2-1<br />
FRAME 3<br />
NOTE<br />
1.<br />
2.<br />
3.<br />
4.<br />
GO<br />
Tighten retaining bolt (1) to 225 to 250 pound-feet.<br />
It may be required to stop the engine from turning<br />
when taking out bolt.<br />
Put in two 3/8-16 bolts (2) in pulley mounting holes. Put a bar over one bolt<br />
and under the other bolt, and use as a lever to stop engine from turning.<br />
Put back retaining bolt (1) and retaining washer (3).<br />
Tighten bolt (1) 225 to 250 pound-feet.<br />
Take off two 3/16-16 bolts (2).<br />
TO FRAME 4<br />
2-55
<strong>TM</strong> 9-<strong>2320</strong>-<strong>211</strong>-<strong>34</strong>-2-1<br />
FRAME 4<br />
1.<br />
2.<br />
3.<br />
NOTE<br />
When screw holes in lockplate do not aline with threaded<br />
holes in pulley, the plate can be turned over and placed<br />
so the holes are alined.<br />
Put in keyway seat.<br />
Put back lockplate (1).<br />
Put in two capscrews (2) and two lockwashers (3).<br />
END OF TASK<br />
NOTE<br />
Follow-on Maintenance Action Required:<br />
1. Replace front engine mounts. Refer to para 2-3.<br />
2. Replace fan. Refer to <strong>TM</strong> 9-<strong>2320</strong>-<strong>211</strong>-20.<br />
3. Replace belts. Refer to <strong>TM</strong> 9-<strong>2320</strong>-<strong>211</strong>-20.<br />
4. Replace radiator. Refer to <strong>TM</strong> 9-<strong>2320</strong>-<strong>211</strong>-20.<br />
5. Replace coolant. Refer to <strong>TM</strong> 9-<strong>2320</strong>-<strong>211</strong>-20.<br />
6. Close hood. Refer to <strong>TM</strong> 9-<strong>2320</strong>-<strong>211</strong>-10<br />
2-56
<strong>TM</strong> 9-<strong>2320</strong>-<strong>211</strong>-<strong>34</strong>-2-1<br />
Section V. FLYWHEEL<br />
2-10. FLYWHEEL REMOVAL AND REPLACEMENT.<br />
TOOLS: Pilot bolt, fabricated locally<br />
SUPPLIES: None<br />
PERS<strong>ON</strong>NEL: One<br />
EQUIPMENT C<strong>ON</strong>DITI<strong>ON</strong>: Truck parked, engine off, handbrake set.<br />
a. Preliminary Procedures.<br />
(1) Remove transmission. Refer to para 7-3.<br />
(2) Remove clutch. Refer to para 3-3.<br />
2-57
<strong>TM</strong> 9-<strong>2320</strong>-<strong>211</strong>-<strong>34</strong>-2-1<br />
b. Removal.<br />
FRAME 1<br />
1. Scribe a mark (1) across rim of flywheel (2) and housing (3).<br />
2. Take out bolt (4). Screw in (5). See figure 2-3 for fabrication<br />
instructions.<br />
3. Take out five bolts (6).<br />
4. Pull flywheel (2) out of housing (3) over pilot bolt (5).<br />
5. Take out pilot bolt (5).<br />
END OF TASK<br />
2-58
<strong>TM</strong> 9-<strong>2320</strong>-<strong>211</strong>-<strong>34</strong>-2-1<br />
Figure 2-3. Pilot Bolt, Fabrication Instructions<br />
2-59
<strong>TM</strong> 9-<strong>2320</strong>-<strong>211</strong>-<strong>34</strong>-2-1<br />
c. Cleaning. There are no special cleaning procedures required. Refer to<br />
cleaning procedures given in para 1-3.<br />
d. Inspection and Repair.<br />
(1) Check that flywheel face is not grooved, scuffed, heat marked or warped.<br />
If flywheel face is damaged, get a new flywheel.<br />
(2) Check that ring gear is not worn, cracked, and that teeth are not broken.<br />
If gear is damaged, put on a new one. Refer to para 2-11.<br />
(3) Check that pilot bearing turns freely without binding. If pilot bearing is<br />
damaged, put in a new one. Refer to para 2-13.<br />
(4) Check that clutch mounting holes have no damaged threads. Retap<br />
damaged threads.<br />
2-60
<strong>TM</strong> 9-<strong>2320</strong>-<strong>211</strong>-<strong>34</strong>-2-1<br />
e. Replacement.<br />
FRAME 1<br />
1. Put in pilot bolt (1). Line up scribe mark (2) on flywheel (3) housing (4).<br />
Slide flywheel over pilot bolt.<br />
2. Put in and hand tighten five bolts (5). Take out pilot bolt (1). Put in and<br />
hand tighten bolt (6).<br />
3. Tighten bolts (5 and 6) to 80 to 90 pound-feet. Retighten bolts to 115 to<br />
120 pound-feet.<br />
END OF TASK<br />
NOTE<br />
Follow-on Maintenance Action Required:<br />
1. Replace clutch. Refer to para 3-3.<br />
2. Replace transmission. Refer to para 7-3.<br />
2-61
<strong>TM</strong> 9-<strong>2320</strong>-<strong>211</strong>-<strong>34</strong>-2-1<br />
2-11. FLYWHEEL RING GEAR REMOVAL AND REPLACEMENT.<br />
TOOLS: No<br />
SUPPLIES:<br />
PERS<strong>ON</strong>NEL:<br />
special tools required.<br />
Crayons, heat indicating, 400°<br />
Gear, spur, flywheel, FSN 3020-264-5559<br />
Gloves<br />
One<br />
EQUIPMENT C<strong>ON</strong>DITI<strong>ON</strong>:<br />
a. Preliminary Procedures.<br />
Truck parked, engine off, handbrake set.<br />
(1) Remove transmission. Refer to para 7-3.<br />
(2) Remove clutch. Refer to para 3-3.<br />
(3) Remove flywheel. Refer to para 2-10.<br />
b. Removal.<br />
FRAME 1<br />
1. Using a hacksaw, cut through ring gear (1) until hacksaw blade comes in<br />
contact with flywheel (2) surface.<br />
2. Put blade of chisel in hacksaw cut in ring gear (1).<br />
3. Using hammer on chisel, complete cutting of ring gear (1).<br />
GO TO FRAME 2<br />
2-62
<strong>TM</strong> 9-<strong>2320</strong>-<strong>211</strong>-<strong>34</strong>-2-1<br />
FRAME 2<br />
1. Using hammer and chisel, drive ring gear (1) off flywheel (2). Throw<br />
away ring gear.<br />
END OF TASK<br />
2-63
<strong>TM</strong> 9-<strong>2320</strong>-<strong>211</strong>-<strong>34</strong>-2-1<br />
c. Replacement.<br />
FRAME 1<br />
WARNING<br />
Use extreme care when handling<br />
prevent being injured.<br />
heated ring gear to<br />
1.<br />
2.<br />
CAUTI<strong>ON</strong><br />
Do not heat ring gear over 400°F; too much heat may<br />
destroy the original heat treatment.<br />
NOTE<br />
Heat indicating “crayons, ” which are placed on the<br />
ring gear, will melt when the right temperature is<br />
reached are available. Use of one of these “crayons”<br />
will insure against overheating the ring gear.<br />
Put two “crayons” on ring gear (1). Heat gear evenly to 400°F.<br />
Wearing protective gloves, place ring gear (1) on flywheel (2) with bevel<br />
on teeth nearest flywheel (2).<br />
END OF TASK<br />
NOTE<br />
Follow-on Maintenance Actions Required:<br />
1. Replace flywheel. Refer to para 2-10.<br />
2. Replace clutch. Refer to para 3-3.<br />
3. Replace transmission. Refer to para 7-3.<br />
2-64
<strong>TM</strong> 9-<strong>2320</strong>-<strong>211</strong>-<strong>34</strong>-2-1<br />
2-12. FLYWHEEL HOUSING REMOVAL, REPAIR, AND REPLACEMENT.<br />
TOOLS: No special tools required<br />
SUPPLIES:<br />
PERS<strong>ON</strong>NEL: One<br />
EQUIPMENT C<strong>ON</strong>DITI<strong>ON</strong>:<br />
Solvent, dry cleaning, type II (SD-2), Fed. Spec P-D-680<br />
Lint-free rags<br />
a. Preliminary Procedures.<br />
Truck parked, handbrake set, engine off.<br />
(1) Remove transmission. Refer to para 7-3.<br />
(2) Remove clutch. Refer to para 3-3.<br />
(3) Remove flywheel. Refer to para 2-10.<br />
(4) Disconnect batteries. Refer to <strong>TM</strong> 9-<strong>2320</strong>-<strong>211</strong>-20.<br />
(5) Remove starter. Refer to <strong>TM</strong> 9-<strong>2320</strong>-<strong>211</strong>-20.<br />
(6) Remove front axle propeller shaft. Refer to para 9-5.<br />
(7) Trucks with power takeoff, remove all propeller shafts. Refer to<br />
<strong>TM</strong> 9-<strong>2320</strong>-<strong>211</strong>-20.<br />
(8) Trucks with power takeoff, remove linkages. Refer to Part 3,<br />
para 17-59.<br />
2-65
<strong>TM</strong> 9-<strong>2320</strong>-<strong>211</strong>-<strong>34</strong>-2-1<br />
b. Removal.<br />
FRAME 1<br />
1.<br />
2.<br />
3.<br />
4.<br />
5.<br />
END<br />
Using suitable jack, support rear of engine.<br />
Take out two rear engine mounting bolts (1) and nuts (2), and four resilient<br />
mounts (3) from rear mounting brackets (4).<br />
Take out two nuts with washers<br />
Take out six nuts with washers<br />
Pull off flywheel housing (7).<br />
OF TASK<br />
(5).<br />
(6).<br />
2-66
<strong>TM</strong> 9-<strong>2320</strong>-<strong>211</strong>-<strong>34</strong>-2-1<br />
c. Cleaning, Inspection, and Repair.<br />
FRAME 1<br />
WARNING<br />
Dry cleaning solvent is flammable. Do not use near an<br />
open flame. Keep a fire extinguisher nearby when solvent<br />
is used. Use only in well-ventilated places. Failure<br />
to do this may result in injury to personnel and<br />
damage to equipment.<br />
1. Clean flywheel housing (1) with dry cleaning solvent. Dry with clean<br />
dry rags.<br />
2. Check that flywheel housing (1) has no cracks.<br />
3. Fix cracks by welding. Refer to <strong>TM</strong> 9-237. Get new housing if used one<br />
cannot be fixed.<br />
END OF TASK<br />
2-67
<strong>TM</strong> 9-<strong>2320</strong>-<strong>211</strong>-<strong>34</strong>-2-1<br />
d. Replacement.<br />
FRAME 1<br />
1. Put housing with new gasket (1) over studs (2).<br />
2. Put on six nuts with 1/16-inch thick washers (3).<br />
3. Put on two nuts (4) and 1/8-inch thick washers (5).<br />
4. Put in two rear engine mounting bolts (6), four resilient mounts (7), and two<br />
nuts (8).<br />
5. Take jack support from rear of engine and lower engine onto rear mounting<br />
brackets (9).<br />
6. Tighten rear mounting bolts (6) and nuts (8).<br />
GO TO FRAME 2<br />
2-68
<strong>TM</strong> 9-<strong>2320</strong>-<strong>211</strong>-<strong>34</strong>-2-1<br />
FRAME 2<br />
1. Tighten nuts in the sequence shown below.<br />
GO TO FRAME 3<br />
2-69
<strong>TM</strong> 9-<strong>2320</strong>-<strong>211</strong>-<strong>34</strong>-2-1<br />
FRAME 3<br />
1. Tighten nuts (1 through 6) again using torque wrench in the sequence and<br />
steps shown.<br />
2. Tighten nuts (7 and 8) to 45 pound-feet.<br />
END OF TASK<br />
2-70
<strong>TM</strong> 9-<strong>2320</strong>-<strong>211</strong>-<strong>34</strong>-2-1<br />
e. Final Inspection.<br />
(1) Flywheel housing face runout.<br />
FRAME 1<br />
1. Check flywheel housing face runout as follows:<br />
a. Mount dial indicator (1) on crankshaft flywheel flange (2).<br />
b. Indicator point (3) must rest on flywheel housing mounting face (4).<br />
c. Set indicator dial (5) on zero reading.<br />
d. Turn crankshaft 360° pushing toward front of engine.<br />
e. Check runout. Reading must not exceed 0.0008 inch total indicator<br />
reading (TIR).<br />
f. If reading is more than given limits, get new flywheel housing.<br />
END OF TASK<br />
2-71
<strong>TM</strong> 9-<strong>2320</strong>-<strong>211</strong>-<strong>34</strong>-2-1<br />
(2) Flywheel housing inside rim.<br />
FRAME 1<br />
1. Check flywheel housing inside rim for out-of-round condition as follows:<br />
a. Mount dial indicator (1) on crankshaft flywheel flange (2).<br />
b. Rest indicator point (3) on inside rim of flywheel housing (4).<br />
c. Set indicator dial (5) to zero reading.<br />
d. Turn crankshaft 360° and check out-of-round.<br />
e. Reading must not exceed 0.008 inch.<br />
f. If reading is more than given limits, get new flywheel housing.<br />
GO TO FRAME 2<br />
2-72
<strong>TM</strong> 9-<strong>2320</strong>-<strong>211</strong>-<strong>34</strong>-2-1<br />
FRAME 2<br />
NOTE<br />
1.<br />
2.<br />
3.<br />
4.<br />
5.<br />
6.<br />
7.<br />
8.<br />
END OF TASK<br />
Follow-on Maintenance Action Required:<br />
Replace flywheel. Refer to para 2-10.<br />
Replace clutch. Refer to para 3-3.<br />
Replace transmission. Refer to para 7-3.<br />
Replace front axle propeller shaft. Refer to para 9-5.<br />
Replace starter. Refer to <strong>TM</strong> 9-<strong>2320</strong>-<strong>211</strong>-20.<br />
Replace all propeller shafts on trucks with power takeoff.<br />
Refer to <strong>TM</strong> 9-<strong>2320</strong>-<strong>211</strong>-20.<br />
Replace all linkages on trucks with power takeoff.<br />
Refer to Part 3, para 17-59.<br />
Connect batteries. Refer to <strong>TM</strong> 9-<strong>2320</strong>-<strong>211</strong>-20.<br />
2-73
<strong>TM</strong> 9-<strong>2320</strong>-<strong>211</strong>-<strong>34</strong>-2-1<br />
2-13. PILOT BEARING REMOVAL AND REPLACEMENT.<br />
TOOLS : No special tools required<br />
SUPPLIES : Pilot bearing<br />
PERS<strong>ON</strong>NEL: One<br />
EQUIPMENT C<strong>ON</strong>DITI<strong>ON</strong> : Truck parked, engine off, handbrake set.<br />
a. Preliminary Procedures.<br />
(1) Remove transmission. Refer to para 7-3.<br />
(2) Remove clutch. Refer to para 3-3.<br />
(3) Remove flywheel. Refer to para 2-10.<br />
b. Removal.<br />
FRAME 1<br />
1. Pull bearing (1) off flywheel (2). Throw bearing away.<br />
END OF TASK<br />
2-74
<strong>TM</strong> 9-<strong>2320</strong>-<strong>211</strong>-<strong>34</strong>-2-1<br />
c. Replacement.<br />
FRAME 1<br />
1. Press new bearing (1) in flywheel (2).<br />
2. Check that bearing (1) turns with no binding.<br />
END OF TASK<br />
NOTE<br />
Follow-on Maintenance Action Required:<br />
1. Replace flywheel. Refer to para 2-10.<br />
2. Replace clutch. Refer to para 3-3.<br />
3. Replace transmission. Refer to para 7-3.<br />
2-75
<strong>TM</strong> 9-<strong>2320</strong>-<strong>211</strong>-<strong>34</strong>-2-1<br />
Section VI.<br />
VALVES, CAMSHAFT, AND TIMING SYSTEM<br />
2-14. VALVE ROCKER ARM PUSHRODS, REMOVAL, REPAIR, AND REPLACEMENT.<br />
TOOLS : No special tools required<br />
SUPPLIES: Tags<br />
PERS<strong>ON</strong>NEL: One<br />
EQUIPMENT C<strong>ON</strong>DITI<strong>ON</strong>: Truck parked, engine off, handbrake set.<br />
a. Preliminary Procedures.<br />
(1) Open engine cover. Refer to <strong>TM</strong> 9-<strong>2320</strong>-<strong>211</strong>-10.<br />
(2) Disconnect battery ground. Refer to <strong>TM</strong> 9-<strong>2320</strong>-<strong>211</strong>-20.<br />
(3) Remove cylinder head covers and gaskets. Refer to <strong>TM</strong> 9-2515-210-3.<br />
(4) Remove rocker arm assembly. Refer to para 2-15.<br />
2-76
<strong>TM</strong> 9-<strong>2320</strong>-<strong>211</strong>-<strong>34</strong>-2-1<br />
b. Removal.<br />
1. Take out<br />
CAUTI<strong>ON</strong><br />
When taking out the valve rocker arm pushrods, the<br />
tappet may be lifted from bore in engine block. The<br />
tappet covers must be removed to put in a new tappet.<br />
valve rocker arm pushrod (1) using a fast snapping pull.<br />
2. Make sure each valve rocker arm pushrod (1) is tagged to show which valve<br />
tappet it was taken from.<br />
END OF TASK<br />
2-77
<strong>TM</strong> 9-<strong>2320</strong>-<strong>211</strong>-<strong>34</strong>-2-1<br />
c. Inspection.<br />
NOTE<br />
This procedure is the same for all 12 pushrods.<br />
(1) Check pushrods for scratches and grooves. Check that socket ends<br />
are not loose.<br />
(2) Check that pushrods are straight, within limits given in <strong>TM</strong> 9-2815-210-<strong>34</strong>.<br />
(3) If pushrods do not pass inspection, get new ones.<br />
2-78
<strong>TM</strong> 9-<strong>2320</strong>-<strong>211</strong>-<strong>34</strong>-2-1<br />
d. Replacement.<br />
FRAME 1<br />
1.<br />
2.<br />
NOTE<br />
This procedure is the same for all 12 pushrods. Take off<br />
tag from each pushrod before putting it in its proper hole.<br />
Put pushrod (1) back into hole in cylinder head (2).<br />
Make sure pushrod (1) is seated properly.<br />
1.<br />
2.<br />
3.<br />
4.<br />
END OF TASK<br />
NOTE<br />
Follow-on Maintenance Action Required:<br />
Replace rocker arm assembly. Refer to para 2-15.<br />
Replace cylinder head covers and gaskets. Refer to<br />
<strong>TM</strong> 9-2815-210-<strong>34</strong>.<br />
Connect battery ground. Refer to <strong>TM</strong> 9-<strong>2320</strong>-<strong>211</strong>-20.<br />
Close engine cover. Refer to <strong>TM</strong> 9-<strong>2320</strong>-<strong>211</strong>-10.<br />
2-79
<strong>TM</strong> 9-<strong>2320</strong>-<strong>211</strong>-<strong>34</strong>-2-1<br />
2-15. ROCKER ARM ASSEMBLY, REMOVAL, REPAIR, REPLACEMENT, AND<br />
ADJUS<strong>TM</strong>ENT.<br />
TOOLS :<br />
SUPPLIES :<br />
PERS<strong>ON</strong>NEL: One<br />
No special tools required<br />
EQUIPMENT C<strong>ON</strong>DITI<strong>ON</strong> :<br />
Solvent, dry cleaning, type II (SD-2) Fed. Spec P-D-680<br />
Dry rags<br />
Container.<br />
a. Preliminary Procedures.<br />
Truck parked, engine off, handbrake set.<br />
(1) Open hood and side panels. Refer to <strong>TM</strong> 9-<strong>2320</strong>-<strong>211</strong>-10.<br />
(2) Drain engine oil. Refer to LO 9-<strong>2320</strong>-<strong>211</strong>-12.<br />
(3) Disconnect battery ground. Refer to <strong>TM</strong> 9-<strong>2320</strong>-<strong>211</strong>-20.<br />
(4) Remove cylinder head covers. Refer to <strong>TM</strong> 9-2815-210-<strong>34</strong>.<br />
2-80
<strong>TM</strong> 9-<strong>2320</strong>-<strong>211</strong>-<strong>34</strong>-2-1<br />
b. Removal.<br />
FRAME 1<br />
NOTE<br />
This procedure is the same for the front and rear<br />
valve rocker arm assemblies.<br />
1. Loosen six locknuts (1) and six adjusting screws (2). Do not take off locknuts<br />
at this time.<br />
2. Take out six screws (3) and lockwashers (4) holding three rocker arm shaft<br />
supports (5) to cylinder head (6).<br />
3. Take off rocker arm assembly (7).<br />
4. Take off six locknuts (1) and take out six screws (2).<br />
END OF TASK<br />
2-81
<strong>TM</strong> 9-<strong>2320</strong>-<strong>211</strong>-<strong>34</strong>-2-1<br />
c. Cleaning, Inspection, and Repair. Refer to <strong>TM</strong> 9-2815-210-<strong>34</strong> for procedures<br />
to clean, inspect, and repair rocker arm assembly.<br />
d. Replacement.<br />
1. Put in six rocker arm adjusting screws (1) from bottom of rocker arm (2).<br />
2. Put locknuts (3) on screws (1) and hand tighten.<br />
3. Put rocker arm assembly (4) on cylinder head (5).<br />
4. Put on six screws (6) and lockwashers (7) holding three rocker arm shaft<br />
supports (8) to cylinder head (5) .<br />
5. Tighten screws (6) to 28 pound-feet.<br />
END OF TASK<br />
2-82
<strong>TM</strong> 9-<strong>2320</strong>-<strong>211</strong>-<strong>34</strong>-2-1<br />
e. Adjustment.<br />
NOTE<br />
Intake valves are the front valves in each cylinder<br />
and exhaust valves are the rear ones.<br />
FRAME 1<br />
1. Looking at engine from fan end, turn crankshaft to right until cylinder<br />
number 1 intake valve (1) is fully open.<br />
2. Set clearance on cylinder number 2, 3, and 6 intake valves (2) to 0.010<br />
inch.<br />
3. Set clearance on cylinder number 1, 2, and 4 exhaust valves (3) to 0.025<br />
inch.<br />
GO TO FRAME 2<br />
2-83
<strong>TM</strong> 9-<strong>2320</strong>-<strong>211</strong>-<strong>34</strong>-2-1<br />
FRAME 2<br />
1. Turn crankshaft 1 full turn to right<br />
is fully open.<br />
2. Set clearance on cylinder number 1,<br />
3. Set clearance on cylinder number 3,<br />
END OF TASK<br />
until cylinder number 6 intake valve (1)<br />
4, and 5 intake valves (2) to 0.010 inch.<br />
5, and 6 exhaust valves (3) to 0.025 inch.<br />
NOTE<br />
Follow-on Maintenance Action Required:<br />
1. Replace cylinder head covers. Refer to <strong>TM</strong> 9-2815-210-<strong>34</strong>.<br />
2. Reconnect battery ground. Refer to <strong>TM</strong> 9-<strong>2320</strong>-<strong>211</strong>-20.<br />
3. Fill engine with oil. Refer to LO 9-<strong>2320</strong>-<strong>211</strong>-12.<br />
4. Close hood and side panels. Refer to <strong>TM</strong> 9-<strong>2320</strong>-<strong>211</strong>-10.<br />
2-84
<strong>TM</strong> 9-<strong>2320</strong>-<strong>211</strong>-<strong>34</strong>-2-1<br />
2-16. CRANKSHAFT GEAR AND CAMSHAFT GEAR REMOVAL, REPAIR, AND<br />
REPLACEMENT.<br />
TOOLS :<br />
SUPPLIES :<br />
PERS<strong>ON</strong>NEL: One<br />
No special tools required<br />
EQUIPMENT C<strong>ON</strong>DITI<strong>ON</strong> :<br />
Solvent, dry cleaning, type II (SD-2) Fed. Spec P-D-680<br />
Tempilstick mfr no. 14503D<br />
a. Preliminary Procedures.<br />
(1)<br />
(2)<br />
(3)<br />
(4)<br />
(5)<br />
(6)<br />
(7)<br />
(8)<br />
Truck parked, engine off, handbrake set.<br />
Open hood. Refer to <strong>TM</strong> 9-<strong>2320</strong>-<strong>211</strong>-10.<br />
Remove radiator. Refer to <strong>TM</strong> 9-<strong>2320</strong>-<strong>211</strong>-20.<br />
Remove front engine mount. Refer to <strong>TM</strong> 9-<strong>2320</strong>-<strong>211</strong>-20.<br />
Remove crankshaft damper and pulley assembly. Refer to para 2-9.<br />
Remove oil pan assembly. Refer to para 2-21.<br />
Remove water pump assembly. Refer to <strong>TM</strong> 9-<strong>2320</strong>-<strong>211</strong>-20.<br />
Remove timing gear cover assembly. Refer to <strong>TM</strong> 9-2815-210-<strong>34</strong>.<br />
Remove fuel pump drive gear. Refer to <strong>TM</strong> 9-2815-210-<strong>34</strong>.<br />
2-85
<strong>TM</strong> 9-<strong>2320</strong>-<strong>211</strong>-<strong>34</strong>-2-1<br />
b. Removal.<br />
FRAME 1<br />
1. Slide oil deflector (1) off crankshaft (2).<br />
2. Put wood wedge (3) between camshaft gear (4) and crankshaft gear (5).<br />
3. Unscrew nut (6). Do not take off yet. Take out wood block (3).<br />
4. Turn crankshaft to line up punch marks (7 and 8).<br />
5. Pull off crankshaft gear (5).<br />
GO TO FRAME 2<br />
2-86
<strong>TM</strong> 9-<strong>2320</strong>-<strong>211</strong>-<strong>34</strong>-2-1<br />
FRAME 2<br />
1. Take off camshaft gear retaining nut (1). Pull off camshaft gear (2).<br />
END OF TASK<br />
2-87
<strong>TM</strong> 9-<strong>2320</strong>-<strong>211</strong>-<strong>34</strong>-2-1<br />
c. Cleaning, Inspection, and Repair.<br />
WARNING<br />
Dry cleaning solvent is flammable. Do not use<br />
near an open flame. Keep a fire extinguisher<br />
nearby at all times when using solvent. Use<br />
only in well–ventilated places. Failure to do<br />
this may result in injury to personnel and damage<br />
to equipment.<br />
FRAME 1<br />
1.<br />
2.<br />
3.<br />
4.<br />
5.<br />
6.<br />
Clean both gears in dry cleaning solvent.<br />
Check gear teeth for burrs and pits. Polish small burrs and pits with<br />
crocus cloth. Get new gear, if damage will not rub out.<br />
Check keyways in gears for raised metal or burrs. Polish off with a fine mill<br />
file.<br />
Measure inside diameter of gear (1) and outside diameter of camshaft (2).<br />
Check with table 2-1.<br />
Measure inside diameter of gear (3) and outside diameter of crankshaft (4).<br />
Check with table 2-1.<br />
Check that plate (5) is not loose, cracked, or scored. Tighten if loose.<br />
Get new plate, if scored or cracked.<br />
END OF TASK<br />
2-88
<strong>TM</strong> 9-<strong>2320</strong>-<strong>211</strong>-<strong>34</strong>-2-1<br />
Table 2-1.<br />
Camshaft Gear and Crankshaft Gear Tolerances<br />
Index<br />
Number<br />
Item /Point of Measurement<br />
Size and Fit<br />
of New Parts<br />
(inches)<br />
Wear Limit<br />
(inches)<br />
1<br />
Camshaft gear inside diameter<br />
1.3744 to 1.3749<br />
None<br />
2<br />
Camshaft out side diameter<br />
1.3752 to 1.3758<br />
None<br />
3<br />
Crankshaft gear inside<br />
diameter<br />
2.2495 to 2.2500<br />
None<br />
4<br />
Crankshaft out side diameter<br />
2.2492 to 2.2498<br />
None<br />
5<br />
Camshaft end play<br />
0.002 to 0.015<br />
0.015<br />
6<br />
Gear backlash<br />
0.003 to 0.009<br />
None<br />
2-89
<strong>TM</strong> 9-<strong>2320</strong>-<strong>211</strong>-<strong>34</strong>-2-1<br />
d. Replacement.<br />
FRAME 1<br />
WARNING<br />
Wear heavy gloves when handling heated gears. Failure<br />
to do this may cause injury to personnel.<br />
1. Using templistick, heat crankshaft gear (1) and camshaft gear (2) to 250°F.<br />
2. Line up gear (1) with key (3) and push gear on. Oil pump gear teeth (4)<br />
must mesh. Timing mark (5) must face away from block.<br />
3. Line up camshaft gear (2) and camshaft key. Push gear (2) on. Match<br />
punchmarks (5 and 6).<br />
4. Put on nut (7).<br />
GO TO FRAME 2<br />
2-90
<strong>TM</strong> 9-<strong>2320</strong>-<strong>211</strong>-<strong>34</strong>-2-1<br />
FRAME 2<br />
1. Put in wood block (1). Tighten nut (2) to 325 to 350 pound-feet. Takeout<br />
wood block (1).<br />
2. Measure camshaft end play. If within limits in table 2-1, go to step 4. If<br />
not in limits, go to step 3.<br />
3. If end play is over limits, put in new thrust plate. If below limits, lap thrust<br />
plate until minimum is reached.<br />
4. Check<br />
5. Put on<br />
END OF TASK<br />
gear backlash with table 2-1.<br />
oil deflector plate (3).<br />
NOTE<br />
Follow-on Maintenance Action Required:<br />
Replace gears if backlash is over limits.<br />
1. Retime fuel injector pump. Refer to para 4-5.<br />
2. Install fuel pump drive gear. Refer to <strong>TM</strong> 9-2815-210-<strong>34</strong>.<br />
3. Replace timing gear cover assembly. Refer to<br />
<strong>TM</strong> 9-2815-210-<strong>34</strong>.<br />
4. Replace water pump assembly. Refer to <strong>TM</strong> 9-<strong>2320</strong>-<strong>211</strong>-20.<br />
5. Replace oil pan assembly. Refer to para 2-21.<br />
6. Replace crankshaft damper and pulley assembly. Refer<br />
to para 2-9.<br />
7. Replace front engine mount. Refer to <strong>TM</strong> 9-<strong>2320</strong>-<strong>211</strong>-20.<br />
8. Replace radiator. Refer to <strong>TM</strong> 9-<strong>2320</strong>-<strong>211</strong>-20.<br />
9. Close hood. Refer to <strong>TM</strong> 9-<strong>2320</strong>-<strong>211</strong>-10.<br />
2-91
<strong>TM</strong> 9-<strong>2320</strong>-<strong>211</strong>- <strong>34</strong>-2-1<br />
2-17. CAMSHAFT AND BUSHING TYPE BEARINGS REMOVAL AND REPLACEMENT.<br />
TOOLS :<br />
SUPPLIES :<br />
PERS<strong>ON</strong>NEL : TWO<br />
No special tools required<br />
EQUIPMENT C<strong>ON</strong>DITI<strong>ON</strong> :<br />
Anti-scuff lubricant, Lubrizol / 1060 or Texaco TLA111<br />
Rear bearing plug<br />
Sealer compound, type II, MIL-S-45180<br />
Thrust plate<br />
Solvent, dry cleaning, type II (SD-2), Fed. Spec. P-D-680<br />
a. Preliminary Procedures.<br />
Truck parked, engine off and cool, handbrake set.<br />
(1) Open engine and side panels. Refer to <strong>TM</strong> 9-<strong>2320</strong>-<strong>211</strong>-10.<br />
(2) Disconnect battery. Refer to <strong>TM</strong> 9-<strong>2320</strong>-<strong>211</strong>-20.<br />
(3) Drain cooling system. Refer to <strong>TM</strong> 9-<strong>2320</strong>-<strong>211</strong>-20.<br />
(4) Take off brushguard assembly. Refer to <strong>TM</strong> 9-<strong>2320</strong>-<strong>211</strong>-20.<br />
(5) Take off radiator and radiator hoses. Refer to <strong>TM</strong> 9-<strong>2320</strong>-<strong>211</strong>-20.<br />
(6) Take off oil filter cap. Refer to <strong>TM</strong> 9-<strong>2320</strong>-<strong>211</strong>-20.<br />
(7) Take off fan, power steering, water pump and alternator drive belts.<br />
Refer to <strong>TM</strong> 9-<strong>2320</strong>-<strong>211</strong>-20.<br />
(8) Take off<br />
(9) Take off<br />
<strong>TM</strong> 9-2815-210-<strong>34</strong>.<br />
(10) Take off<br />
(11) Take off<br />
(12) Take off<br />
para 2-9.<br />
(13) Take off tachometer drive adapter cable. Refer to <strong>TM</strong> 9-2815-210-<strong>34</strong>.<br />
(14) Take off<br />
(15) Take off<br />
<strong>TM</strong> 9-2815-210-<strong>34</strong>.<br />
(16) Take off<br />
(17) Take off<br />
(18) Take off<br />
(19) Take off<br />
(20) Take off<br />
to <strong>TM</strong> 9-2815-210-<strong>34</strong>.<br />
(21) Take off<br />
(22) Take off<br />
(23) Take off<br />
(24) Take off<br />
water pump and hoses. Refer to <strong>TM</strong> 9-<strong>2320</strong>-<strong>211</strong>-20.<br />
air compressor pulley and adjusting flange. Refer to<br />
tachometer drive sleeve. Refer to <strong>TM</strong> 9-2815-210-<strong>34</strong>.<br />
tachometer drive adapter. Refer to <strong>TM</strong> 9-2815-210-<strong>34</strong>.<br />
crankshaft vibration damper and pulley assembly. Refer to<br />
hydraulic pump. - Refer to <strong>TM</strong> 9-2815-210-<strong>34</strong>.<br />
timing gear, cover assembly and gasket. Refer to<br />
flame heater ignition unit. Refer to <strong>TM</strong> 9-2815-210-<strong>34</strong>.<br />
crankcase breather adapter tube. Refer to <strong>TM</strong> 9-<strong>2320</strong>-<strong>211</strong>-20.<br />
intake manifold and gaskets. Refer to para 2-24.<br />
exhaust manifold and gaskets. Refer to para 2-24.<br />
fuel return-to-fuel injector pump overflow valve tube. Refer<br />
turbocharger assembly. Refer to <strong>TM</strong> 9-2815-210-<strong>34</strong>.<br />
thermostat housing and gasket. Refer to <strong>TM</strong> 9-<strong>2320</strong>-<strong>211</strong>-20.<br />
crankcase breather adapter. Refer to <strong>TM</strong> 9-2815-210-<strong>34</strong>.<br />
cylinder head covers and gaskets. Refer to <strong>TM</strong> 9-2815–210–<strong>34</strong>.<br />
2-92
<strong>TM</strong> 9-<strong>2320</strong>-<strong>211</strong>-<strong>34</strong>-2-1<br />
(25) Take off cylinder head assemblies and gaskets. Refer to para 2-6.<br />
(26) Take out valve tappets. Refer to para 2-19.<br />
b. Removal.<br />
FRAME 1<br />
Soldier A 1.<br />
Soldier B 2.<br />
Soldier A 3.<br />
GO TO FRAME 2<br />
CAUTI<strong>ON</strong><br />
To stop damage to bushing type bearings, be very careful<br />
when pulling out camshaft assembly from engine<br />
block .<br />
Take out two screws (1) and lockwashers (2) from camshaft<br />
thrust plates (3).<br />
As soldier A pulls out camshaft (4), guide it carefully so that<br />
camshaft lobes (5) are not damaged.<br />
While soldier B turns camshaft assembly (4), pull straight out<br />
of engine block (6).<br />
2-93
<strong>TM</strong> 9-<strong>2320</strong>-<strong>211</strong>-<strong>34</strong>-2-1<br />
FRAME 2<br />
1. Take out camshaft rear bearing plug (1) from engine block (2) and throw<br />
away.<br />
END OF TASK<br />
2-94
<strong>TM</strong> 9-<strong>2320</strong>-<strong>211</strong>-<strong>34</strong>-2-1<br />
c.<br />
d.<br />
e.<br />
Cleaning.<br />
Inspection.<br />
NOTE<br />
Open up oil passages with a wire probe to break up sludge<br />
and gum deposits. There are no special cleaning procedures<br />
required. Refer to cleaning procedures given in para 1-3.<br />
(1) Use magnaflux equipment, if available, or a magnifying glass and a<br />
strong light to check camshaft assembly for wear to cam lobes and<br />
bearing surfaces.<br />
(2) Check for scuffing, scoring or scratches.<br />
(3) Check for stripped or damaged threads. Refer to <strong>TM</strong> 9-2815-210-<strong>34</strong>.<br />
(4) Check keyway for damage or oversize.<br />
(5) Measure diameter of camshaft journals.<br />
(6) Check that measurements are within wear limits. If not, replace with a<br />
new camshaft assembly. Refer to <strong>TM</strong> 9-2815-210-<strong>34</strong>.<br />
Repair.<br />
(1) Repairs to the camshaft assembly are limited to taking out minor<br />
scratches, burrs and nicks from camshaft lobes and bearing contact<br />
surfaces.<br />
WARNING<br />
Dry cleaning solvent is flammable. Do not<br />
use near an open flame. Keep a fire extinguisher<br />
nearby when solvent is used. Use only in wellventilated<br />
places. Failure to do this may result<br />
in injury to personnel and damage to equipment.<br />
(2) Use crocus cloth soaked in dry cleaning solvent and a fine mill file<br />
to take out nicks, scratches or burrs from camshaft assembly.<br />
2-95
<strong>TM</strong> 9-<strong>2320</strong>-<strong>211</strong>-<strong>34</strong>-2-1<br />
f. Replacement.<br />
Soldier A 1.<br />
Coat camshaft lobes (1) with anti-scuff lubricant.<br />
CAUTI<strong>ON</strong><br />
To stop damage to bushing type bearings, be very<br />
careful when putting cam shaft assembly into engine<br />
block .<br />
Soldier B 2. Guide camshaft assembly (2) carefully into engine block (3).<br />
Soldier A 3.<br />
GO TO FRAME 2<br />
Push and turn cam shaft assembly into engine block until<br />
it reaches rear bearing plug cutout.<br />
2-96
<strong>TM</strong> 9-<strong>2320</strong>-<strong>211</strong>-<strong>34</strong>-2-1<br />
CAUTI<strong>ON</strong><br />
Be careful not to bump camshaft as it could unseat rear<br />
bearing plug (1) and cause an oil leak.<br />
FRAME 2<br />
1. Coat edge of rear bearing plug with sealant.<br />
2. Put new camshaft rear bearing plug (1) into engine block (2) and tap center of<br />
plug to expand it.<br />
3. Aline new camshaft thrust plate (3) with engine block holes (4).<br />
4. Put in two screws (5) and two lockwashers (6).<br />
GO TO FRAME 3<br />
2-97
<strong>TM</strong> 9-<strong>2320</strong>-<strong>211</strong>-<strong>34</strong>-2-1<br />
FRAME 3<br />
NOTE<br />
END OF<br />
1.<br />
2.<br />
3.<br />
4.<br />
5.<br />
6.<br />
7.<br />
8.<br />
9.<br />
10.<br />
11.<br />
12.<br />
13.<br />
14.<br />
15.<br />
16.<br />
17.<br />
18.<br />
19.<br />
20.<br />
21.<br />
22.<br />
23.<br />
24.<br />
25.<br />
26.<br />
TASK<br />
Follow-on Maintenance Action Required:<br />
Put in valve tappets. Refer to para 2-19.<br />
Put on cylinder head assemblies and gaskets. Refer to<br />
para 2-6.<br />
Put on cylinder head covers and gaskets. Refer to<br />
<strong>TM</strong> 9-2815-210-<strong>34</strong>.<br />
Put on crankcase breather adapter. Refer to<br />
<strong>TM</strong> 9-2815-210-<strong>34</strong>.<br />
Put on thermostat housing and gasket. Refer to<br />
<strong>TM</strong> 9-<strong>2320</strong>-<strong>211</strong>-20.<br />
Put on turbocharger assembly. Refer to <strong>TM</strong> 9-2815-210-<strong>34</strong>.<br />
Put on fuel return-to-fuel injector pump overflow valve<br />
tube. Refer to <strong>TM</strong> 9-2815-210-<strong>34</strong>.<br />
Put on exhaust manifold and gaskets. Refer to para 2-24.<br />
Put on intake manifold and gaskets. Refer to para 2-24.<br />
Put on crankcase breather adapter tube. Refer to<br />
<strong>TM</strong> 9-<strong>2320</strong>-<strong>211</strong>-20.<br />
Put on flame heater ignition unit. Refer to<br />
<strong>TM</strong> 9-2815-210-<strong>34</strong>.<br />
Put on timing gear, cover assembly and gasket. Refer to<br />
<strong>TM</strong> 9-2815-210-<strong>34</strong>.<br />
Put on hydraulic pump. Refer to <strong>TM</strong> 9-2815-210-<strong>34</strong>.<br />
Put on tachometer drive adapter cable. Refer to<br />
<strong>TM</strong> 9-2815-210-<strong>34</strong>.<br />
Put on crankshaft vibration damper and pulley assembly.<br />
Refer to para 2-9.<br />
Put on tachometer drive adapter. Refer to<br />
<strong>TM</strong> 9-2815-210-<strong>34</strong>.<br />
Put on tachometer drive sleeve. Refer to <strong>TM</strong> 9-2815-210-<strong>34</strong>.<br />
Put on air compressor pulley and adjusting flange. Refer to<br />
<strong>TM</strong> 9-2815-210-<strong>34</strong>.<br />
Put on water pump and hoses. Refer to <strong>TM</strong> 9-<strong>2320</strong>-<strong>211</strong>-20.<br />
Put on fan, power steering, water pump and alternator<br />
drive belts. Refer to <strong>TM</strong> 9-<strong>2320</strong>-<strong>211</strong>-20.<br />
Put on oil filter cap. Refer to <strong>TM</strong> 9-<strong>2320</strong>-<strong>211</strong>-20.<br />
Put on radiator and radiator hoses. Refer to<br />
<strong>TM</strong> 9-<strong>2320</strong>-<strong>211</strong>-20.<br />
Put on brushguard assembly. Refer to <strong>TM</strong> 9-<strong>2320</strong>-<strong>211</strong>-20.<br />
Fill up cooling system with coolant. Refer to<br />
<strong>TM</strong> 9-<strong>2320</strong>-<strong>211</strong>-20.<br />
Connect battery. Refer to <strong>TM</strong> 9-<strong>2320</strong>-<strong>211</strong>-20.<br />
Close hood and side panels. Refer to <strong>TM</strong> 9-<strong>2320</strong>-<strong>211</strong>-10.<br />
2-98
<strong>TM</strong> 9-<strong>2320</strong>-<strong>211</strong>-<strong>34</strong>-2-1<br />
2-18. TAPPET CHAMBER COVER REMOVAL, REPAIR, AND REPLACEMENT.<br />
TOOLS :<br />
SUPPLIES :<br />
PERS<strong>ON</strong>NEL: One<br />
No special tools required<br />
EQUIPMENT C<strong>ON</strong>DITI<strong>ON</strong> :<br />
Solvent, dry cleaning, type II (SD-2), Fed. Spec P-D-680<br />
Tappet cover gasket<br />
a. Preliminary Procedures.<br />
Truck parked, engine off, handbrake set.<br />
(1) Open hood. Refer to <strong>TM</strong> 9-<strong>2320</strong>-<strong>211</strong>-10.<br />
(2) Open left side panel. Refer to <strong>TM</strong> 9-<strong>2320</strong>-<strong>211</strong>-10.<br />
(3) Remove fuel filters and bracket. Refer to <strong>TM</strong> 9-<strong>2320</strong>-<strong>211</strong>-20.<br />
b. Removal.<br />
1. Take out 11 capscrews (1) with washers (2).<br />
2. Pull off rear cover (3). Take off gasket (4) and throw away.<br />
3. The front cover (5) is part of the oil cooler and filter housing assembly.<br />
Refer to para 2-22 for oil cooler and filter housing assembly removal.<br />
END OF TASK<br />
2-99
<strong>TM</strong> 9-<strong>2320</strong>-<strong>211</strong>-<strong>34</strong>-2-1<br />
c. Cleaning, Inspection, and Repair.<br />
WARNING<br />
Dry cleaning solvent is flammable. Do not use<br />
near an open flame. Keep a fire extinguisher<br />
nearby when solvent is used. Use only in wellventilated<br />
places. Failure to do this may result<br />
in injury to personnel and damage to equipment.<br />
(1) Clean rear tappet cover with solvent. Dry using lint free cloth.<br />
(2) Check that gasket mating surface on cover is free of nicks, burrs,<br />
or scratches.<br />
(3) Repair gasket mating surface on cover using crocus cloth.<br />
(4) If cover is cracked or badly bent, get new cover.<br />
2-100
<strong>TM</strong> 9-<strong>2320</strong>-<strong>211</strong>-<strong>34</strong>-2-1<br />
d. Replacement.<br />
FRAME 1<br />
1. Put new cover gasket (1) and cover (2) on engine (3).<br />
2. Put in 11 capscrews (4) with washers (5).<br />
3. The front cover (6) is part of the oil cooler and filter housing assembly.<br />
Refer to para 2-22 for oil cooler and filter housing assembly replacement.<br />
END OF TASK<br />
1<br />
2<br />
3<br />
NOTE<br />
Follow-on Maintenance Action Required:<br />
Replace fuel filters and bracket. Refer to<br />
<strong>TM</strong> 9-<strong>2320</strong>-<strong>211</strong>-20.<br />
Close left side panel. Refer to <strong>TM</strong> 9-<strong>2320</strong>-<strong>211</strong>-10.<br />
Close hood. Refer to <strong>TM</strong> 9-<strong>2320</strong>-<strong>211</strong>-10.<br />
2-101
<strong>TM</strong> 9-<strong>2320</strong>-<strong>211</strong>-<strong>34</strong>-2-1<br />
2-19. VALVE TAPPETS REMOVAL, REPAIR, AND REPLACEMENT.<br />
TOOLS :<br />
SUPPLIES:<br />
PERS<strong>ON</strong>NEL: One<br />
No special tools required<br />
EQUIPMENT C<strong>ON</strong>DITI<strong>ON</strong> :<br />
Solvent, dry cleaning, type II (SD-2), Fed. Spec P-D-680<br />
Anti-scuff lubricant<br />
Crocus cloth<br />
a. Preliminary Procedures.<br />
Truck parked, engine off, handbrake set.<br />
(1) Open hood. Refer to <strong>TM</strong> 9-<strong>2320</strong>-<strong>211</strong>-10.<br />
(2) Disconnect battery ground. Refer to <strong>TM</strong> 9-<strong>2320</strong>-<strong>211</strong>-20.<br />
(3) Remove fuel injector tubes. Refer to <strong>TM</strong> 9-2815-210-<strong>34</strong>.<br />
(4) Remove cylinder head covers and gaskets. Refer to <strong>TM</strong> 9-2815-210-<strong>34</strong>.<br />
(5) Remove rocker arm assembly. Refer to para 2-15.<br />
(6) Remove pushrods. Refer to para 2-14.<br />
(7) Remove fuel filter. Refer to <strong>TM</strong> 9-<strong>2320</strong>-<strong>211</strong>-20.<br />
(8) Remove oil filter. Refer to <strong>TM</strong> 9-<strong>2320</strong>-<strong>211</strong>-20.<br />
(9) Remove oil cooler. Refer to para 2-22.<br />
(10) Remove valve tappet chamber cover. Refer to para 2-18.<br />
(11) Remove air compressor and mounting bracket. Refer to <strong>TM</strong> 9-<strong>2320</strong>-<strong>211</strong>-20.<br />
2-102
<strong>TM</strong> 9-<strong>2320</strong>-<strong>211</strong>-<strong>34</strong>-2-1<br />
b. Removal.<br />
FRAME 1<br />
CAUTI<strong>ON</strong><br />
Crankcase, camshaft, and tappets must stay as a matched<br />
set.<br />
1. Take out 12 valve tappets (1) from<br />
2. Make sure each valve tappet (1) is<br />
taken from.<br />
END OF TASK<br />
crankcase (2).<br />
tagged as to the camshaft lobe it was<br />
2-103
<strong>TM</strong> 9-<strong>2320</strong>-<strong>211</strong>-<strong>34</strong>-2-1<br />
WARNING<br />
Dry cleaning solvent is flammable. Do not<br />
use near an open flame. Keep a fire<br />
extinguisher nearby when solvent is used.<br />
Use only in well-ventilated places. Failure<br />
to do this may result in injury to personnel<br />
and damage to equipment.<br />
Eye shields must be worn when using compressed<br />
air. Eye injury can occur if eye<br />
shields are not used.<br />
c. Cleaning. Clean valve tappets with dry cleaning solvent and blow dry.<br />
d. Inspection and Repair. For procedures to inspect and repair valve tappets,<br />
refer to <strong>TM</strong> 9-2815-210-<strong>34</strong>.<br />
2-104
<strong>TM</strong> 9-<strong>2320</strong>-<strong>211</strong>-<strong>34</strong>-2-1<br />
e. Replacement.<br />
FRAME 1<br />
1.<br />
2.<br />
Put anti-scuff lubricant on all valve tappets.<br />
Put valve tappet (1) in crankcase (2), making<br />
that was taken out.<br />
END OF TASK<br />
NOTE<br />
Follow-on Maintenance Action Required:<br />
1. Replace air compressor and mounting bracket.<br />
<strong>TM</strong> 9-<strong>2320</strong>-<strong>211</strong>-20.<br />
Refer to<br />
2. Replace valve tappet chamber cover. Refer to para 2-18.<br />
3. Replace oil cooler. Refer to para 2-22.<br />
4. Replace oil filter. Refer to <strong>TM</strong> 9-<strong>2320</strong>-<strong>211</strong>-20.<br />
5. Replace fuel filter. Refer to <strong>TM</strong> 9-<strong>2320</strong>-<strong>211</strong>-20.<br />
6. Replace pushrods. Refer to paragraph 2-14.<br />
7. Replace rocker arm housings. Refer to para 2–15.<br />
8. Replace cylinder head covers and gaskets. Refer to<br />
<strong>TM</strong> 9-2815-210-<strong>34</strong>.<br />
9. Replace fuel injector tubes. Refer to <strong>TM</strong> 9-2815-210-<strong>34</strong>.<br />
10. Connect battery ground. Refer to <strong>TM</strong> 9-<strong>2320</strong>-<strong>211</strong>-20.<br />
11. Close hood. Refer to <strong>TM</strong> 9-<strong>2320</strong>-<strong>211</strong>-10.<br />
2-105
<strong>TM</strong> 9-<strong>2320</strong>-<strong>211</strong>-<strong>34</strong>-2-1<br />
Section VII.<br />
ENGINE LUBRICATING SYSTEM<br />
2-20. ENGINE OIL PUMP ASSEMBLY REMOVAL, REPAIR, AND REPLACEMENT<br />
(TRUCKS WITH ENGINES LDS 465-1 AND LDS 465-1A).<br />
TOOLS :<br />
SUPPLIES :<br />
PERS<strong>ON</strong>NEL: One<br />
No special tools required<br />
EQUIPMENT C<strong>ON</strong>DITI<strong>ON</strong> :<br />
Solvent, dry cleaning, type II (SD-2), Fed. Spec P-D-680<br />
Clean, dry rags<br />
Oil pump outlet tube preformed packing<br />
Nickel copper wire<br />
Oil pump pickup tube gasket<br />
Pressure oil pump outlet tube gasket<br />
Scavenger pump inlet tube gasket<br />
Scavenger pump outlet tube gasket<br />
a. Preliminary Procedures.<br />
Truck parked, engine off, handbrake set.<br />
(1) Drain engine oil. Refer to LO 9-<strong>2320</strong>-<strong>211</strong>-12.<br />
(2) Remove oil pan. Refer to para 2-21.<br />
2-106
<strong>TM</strong> 9-<strong>2320</strong>-<strong>211</strong>-<strong>34</strong>-2-1<br />
b. Removal.<br />
FRAME 1<br />
1. Cut and take out safety wire (1).<br />
2. Take out two bolts (2).<br />
3. Take out two capscrews with washers (3).<br />
4. Take out oil pump outlet tube assembly (4).<br />
5. Take out and throw away gasket (5).<br />
GO TO FRAME 2<br />
2-107
<strong>TM</strong> 9-<strong>2320</strong>-<strong>211</strong>-<strong>34</strong>-2-1<br />
FRAME 2<br />
1. Take out bolt with washer (1) from tube brace (2).<br />
2. Take out bolt with washer (3) from tube clamp (4).<br />
3. Take out three bolts (5) from oil pump assembly (6).<br />
4. Take out oil pump assembly (6).<br />
END OF TASK<br />
2-108
<strong>TM</strong> 9-<strong>2320</strong>-<strong>211</strong>-<strong>34</strong>-2-1<br />
c. Disassembly.<br />
1. Take preformed packing<br />
away preformed packing<br />
2. Takeoff flange (3).<br />
GO TO FRAME 2<br />
(1) off oil pump outlet tube assembly<br />
(1).<br />
(2). Throw<br />
2-109
<strong>TM</strong> 9-<strong>2320</strong>-<strong>211</strong>-<strong>34</strong>-2-1<br />
FRAME 2<br />
1.<br />
2.<br />
3.<br />
4.<br />
5.<br />
Take out three capscrews with washers (1) from four tube clamps (2).<br />
Take out tube brace (3).<br />
Take out two capscrews with washers (4) from pressure oil pump pickup<br />
tube assembly (5). Take out tube assembly.<br />
Take out two capscrews with washers (6) from oil pump inlet screen<br />
assembly (7). Take out screen assembly.<br />
Take out two capscrews with washers (8) from scavenger oil pump outlet<br />
tube assembly (9). Take out tube assembly.<br />
Take off and throw away three gaskets (10).<br />
END OF TASK<br />
2-110
<strong>TM</strong> 9-<strong>2320</strong>-<strong>211</strong>-<strong>34</strong>-2-1<br />
d. Cleaning. There are no special cleaning procedures required. Refer to<br />
cleaning procedures given in para 1-3.<br />
e. Inspection and Repair. Refer to <strong>TM</strong> 9-2815-210-<strong>34</strong> for inspection of the oil<br />
pump tube assemblies and the oil pump assembly.<br />
f. Adjustment and Testing. Refer to <strong>TM</strong> 9-2815-210-<strong>34</strong> for test and adjustment<br />
of the oil pump assembly.<br />
g. Assembly.<br />
FRAME 1<br />
1. Put flange (1) on oil pump outlet tube assembly (2).<br />
2. Put preformed packing (3) on tube assembly (2).<br />
GO TO FRAME 2<br />
2-111
<strong>TM</strong> 9-<strong>2320</strong>-<strong>211</strong>-<strong>34</strong>-2-1<br />
FRAME 2<br />
1. Put<br />
2. Put<br />
3. Put<br />
4. Put<br />
5. Put<br />
6. Put<br />
GO TO FRAME 3<br />
gasket (1) on oil pump inlet (2).<br />
scavenger oil pump inlet tube assembly (3) on gasket (1).<br />
in two 3 1 /2-inch long capscrews (4) with lockwashers (5).<br />
gasket (6) on oil pump outlet (7).<br />
scavenger oil pump outlet tube assembly (8) on gasket (6).<br />
in two 3 1/2-inch long cap screws (9) with lockwashers (10).<br />
2-112
<strong>TM</strong> 9-<strong>2320</strong>-<strong>211</strong>-<strong>34</strong>-2-1<br />
FRAME 3<br />
1. Put gasket (1) on oil pump inlet (2).<br />
2. Put pressure oil pump pickup tube assembly (3) on gasket (1). Put in two<br />
3/4-inch long capscrews (4) with lockwashers (5).<br />
GO TO FRAME 4<br />
2-113
<strong>TM</strong> 9-<strong>2320</strong>-<strong>211</strong>-<strong>34</strong>-2-1<br />
FRAME 4<br />
1. Put tube brace (1) on tube clamp (2).<br />
2. Put in 3/4-inch long cap screw (3). Put on nut (4S) with lockwasher (5).<br />
GO TO FRAME 5<br />
2-114
<strong>TM</strong> 9-<strong>2320</strong>-<strong>211</strong>-<strong>34</strong>-2-1<br />
FRAME 5<br />
1. Put 3/4-inch long capscrew (1) in tube clamp (2) and tube clamp (3).<br />
Put on nut (4) with lockwasher (5).<br />
2. Put 5/8-inch long capscrew (6) in tube clamp (7). Put on nut (8) with<br />
lockwasher ( 9).<br />
END OF TASK<br />
2-115
<strong>TM</strong> 9-<strong>2320</strong>-<strong>211</strong>-<strong>34</strong>-2-1<br />
h. Replacement.<br />
FRAME 1<br />
1. Put in oil pump assembly (1).<br />
2. Put three self-locking bolts (2) in oil pump housing (3). Tighten bolts to<br />
48 to 58 pound-feet.<br />
3. Put machine bolt (4) with lockwasher (5) in tube clamp (6).<br />
4. Put machine bolt (7) with lockwasher (8) in tube clamp (9).<br />
GO TO FRAME 2<br />
2-116
<strong>TM</strong> 9-<strong>2320</strong>-<strong>211</strong>-<strong>34</strong>-2-1<br />
FRAME 2<br />
1.<br />
2.<br />
3.<br />
4.<br />
5.<br />
GO<br />
Put end of oil pump outlet tube assembly (1) in oil pump outlet (2),<br />
seating preformed packing (3) on top of oil pump outlet (2).<br />
Put gasket (4) on crankcase oil inlet (5). Put oil pump outlet tube<br />
assembly (1) over gasket (4).<br />
Put 1-1/4-inch long machine bolt (6) in oil pump side of crankcase inlet end of<br />
tube assembly (1).<br />
Put 1-inch long machine bolt (7) in other side of crankcase end of tube<br />
assembly (1).<br />
Seat flange (8) on oil pump outlet (2).<br />
lockwashers (10).<br />
TO FRAME 3<br />
Put in two capscrews (9) with<br />
2-117
<strong>TM</strong> 9-<strong>2320</strong>-<strong>211</strong>-<strong>34</strong>-2-1<br />
FRAME 3<br />
1. Put one end of nickel copper wire (1) through hole in bolt (2).<br />
2. Put other end of nickel copper wire (1) through hole in bolt (3).<br />
3. Bend end of wire (1) back over head of bolt (2) and over head of bolt (3).<br />
END OF TASK<br />
NOTE<br />
Follow-on Maintenance Action Required:<br />
1. Replace oil pan. Refer to para 2-21.<br />
2. Refill crankcase with engine oil. Refer to<br />
LO 9-<strong>2320</strong>-<strong>211</strong>-12.<br />
2-118
<strong>TM</strong> 9-<strong>2320</strong>-<strong>211</strong>-<strong>34</strong>-2-1<br />
2-21. OIL PAN REMOVAL, REPAIR, AND REPLACEMENT.<br />
TOOLS :<br />
SUPPLIES :<br />
PERS<strong>ON</strong>NEL: One<br />
No special tools required<br />
EQUIPMENT C<strong>ON</strong>DITI<strong>ON</strong> :<br />
Solvent, dry cleaning, type II (SD-2), Fed. Spec P-D-680<br />
Gasket, oil pan 10889730<br />
Sealant, MIL-S-45180 or MIL-S-7916B<br />
a. Preliminary Procedures.<br />
Truck parked, engine off, handbrake set.<br />
(1) Open hood. Refer to <strong>TM</strong> 9-<strong>2320</strong>-<strong>211</strong>-10.<br />
(2) Drain oil. Refer to LO 9-<strong>2320</strong>-<strong>211</strong>-12.<br />
(3) Remove dipstick. Refer to <strong>TM</strong> 9-<strong>2320</strong>-<strong>211</strong>-10.<br />
(4) Disconnect battery gtound cable. Refer to <strong>TM</strong> 9-<strong>2320</strong>-<strong>211</strong>-20.<br />
(5) If vehicle has a front winch, remove front winch propeller shaft. Refer to<br />
<strong>TM</strong> 9-<strong>2320</strong>-<strong>211</strong>-20.<br />
b. Removal.<br />
(1) Models LD465-1, LD465-1C and LDT465-1C.<br />
FRAME 1<br />
1. Take out 30 capscrews with lockwashers (1).<br />
2. Take off oil pan with gasket (2). Throw gasket away.<br />
END OF TASK<br />
2-119
<strong>TM</strong> 9-<strong>2320</strong>-<strong>211</strong>-<strong>34</strong>-2-1<br />
(2) Model LDS465-1A.<br />
FRAME 1<br />
1. Take out cap screw with lockwasher (1) and move ground strap (2) out of way.<br />
2. Take out screw with lockwasher (3) and take off drain tube bracket (4).<br />
3. Take out 28 screws with lockwashers (5) and take off oil pan (6) with gasket<br />
(7). Throw gasket away.<br />
END OF TASK<br />
2-120
<strong>TM</strong> 9-<strong>2320</strong>-<strong>211</strong>-<strong>34</strong>-2-1<br />
(3) Model LDS465-2.<br />
FRAME 1<br />
1. Take out two capscrews with lockwashers (1) and take off throttle return<br />
spring bracket (2).<br />
2. Take out 28 capscrews with lockwashers (3) and take off oil pan with<br />
gasket (4). Throw gasket away.<br />
END OF TASK<br />
2-121
<strong>TM</strong> 9-<strong>2320</strong>-<strong>211</strong>-<strong>34</strong>-2-1<br />
WARNING<br />
Dry cleaning solvent is flammable. Do not use near<br />
an open flame. Keep a fire extinguisher nearby when<br />
solvent is used. Use only in well-ventilated places.<br />
Failure to do this may result in injury to personnel<br />
and damage to equipment.<br />
Eye shields must be worn when using compressed air.<br />
Eye injury can occur if eye shields are not used.<br />
NOTE<br />
Clean parts before inspection and after repairs.<br />
c. Cleaning. Clean oil pan inside and out with dry cleaning solvent, and<br />
clean oil pan gasket surface on engine bleak. Refer to <strong>TM</strong> 9-247<br />
d. Inspection and Repair.<br />
(1) Check<br />
(2) Check<br />
to FM 43-2.<br />
(3) Check<br />
a fine mill file.<br />
for cracks. Repair cracks by welding. Refer to <strong>TM</strong> 9-237.<br />
for dents.<br />
Knock out dents with a soft-face hammer. Refer<br />
gasket surface for nicks or burrs.<br />
Fix any nicks or burrs with<br />
2-122
<strong>TM</strong> 9-<strong>2320</strong>-<strong>211</strong>-<strong>34</strong>-2-1<br />
e. Replacement.<br />
(1) Models LD465-1, LD465-1C and LDT465-1C.<br />
1.<br />
2.<br />
Coat oil pan gasket (1) on both sides with sealant. Put oil pan gasket (1)<br />
on oil pan (2).<br />
Put oil pan (2) with gasket (1) in place on engine block (3) and put in 30<br />
capscrews (4) with 30 lockwashers (5).<br />
END OF TASK<br />
1.<br />
2.<br />
3.<br />
4.<br />
5.<br />
6.<br />
NOTE<br />
Follow-on Maintenance Action Required:<br />
If vehicle has a front winch, replace front winch<br />
propeller shaft. Refer to <strong>TM</strong> 9-<strong>2320</strong>-<strong>211</strong>-20.<br />
Connect battery ground cable. Refer to<br />
<strong>TM</strong> 9-<strong>2320</strong>-<strong>211</strong>-20.<br />
Replace dipstick. Refer to <strong>TM</strong> 9-<strong>2320</strong>-<strong>211</strong>-10.<br />
Fill crankcase with oil. Refer to LO 9-<strong>2320</strong>-<strong>211</strong>-12.<br />
Check for oil leaks. Refer to <strong>TM</strong> 9-<strong>2320</strong>-<strong>211</strong>-10.<br />
Close hood. Refer to <strong>TM</strong> 9-<strong>2320</strong>-<strong>211</strong>-10.<br />
2-123
<strong>TM</strong> 9-<strong>2320</strong>-<strong>211</strong>-<strong>34</strong>-2-1<br />
(2) Model LDS-465-1A.<br />
1.<br />
2.<br />
3.<br />
4.<br />
Coat oil pan gasket (1) on both sides with sealant. Put oil pan gasket (1)<br />
on oil pan (2).<br />
Put oil pan (2) with gasket (1) in place on engine block (3) and put in 28<br />
capscrews (4) with 28 lockwashers (5).<br />
Put ground strap (6) in place and put in cap screw and lockwasher (7).<br />
Aline drain tube bracket (8). Put in one screw and washer (9).<br />
END OF TASK<br />
NOTE<br />
Follow-on Maintenance Action Required:<br />
1. If vehicle has a front winch, replace front winch<br />
propeller shaft. Refer to <strong>TM</strong> 9-<strong>2320</strong>-<strong>211</strong>-20.<br />
2. Connect battery ground cable. Refer to<br />
<strong>TM</strong> 9-<strong>2320</strong>-<strong>211</strong>-20.<br />
3. Replace dipstick. Refer to <strong>TM</strong> 9-<strong>2320</strong>- <strong>211</strong>-10.,<br />
4. Fill crankcase with oil. Refer to LO 9-<strong>2320</strong>-<strong>211</strong>-12.<br />
5. Check for oil leaks. Refer to <strong>TM</strong> 9-<strong>2320</strong>-<strong>211</strong>-10.<br />
6. Close hood. Refer to <strong>TM</strong> 9-<strong>2320</strong>-<strong>211</strong>-10.<br />
2-124
<strong>TM</strong> 9-<strong>2320</strong>-<strong>211</strong>-<strong>34</strong>-2-1<br />
(3) Model LDS465-2.<br />
FRAME 1<br />
1.<br />
2.<br />
3.<br />
Coat oil pan gasket (1) on both sides with sealant. Put oil pan gasket (1)<br />
on oil pan (2).<br />
Put oil pan (2) with gasket (1) in place on engine block (3) and put in 28<br />
capscrews (4) with 28 lockwashers (5).<br />
Put throttle return spring bracket (6) in place and put in two capscrews<br />
with lockwashers (7).<br />
END OF TASK<br />
NOTE<br />
Follow-on Maintenance Action Required:<br />
1. If vehicle has a front winch, replace front winch<br />
propeller shaft. Refer to <strong>TM</strong> 9-<strong>2320</strong>-<strong>211</strong>-20.<br />
2. Connect battery ground cable. Refer to<br />
<strong>TM</strong> 9-<strong>2320</strong>-<strong>211</strong>-20.<br />
3. Replace dipstick. Refer to <strong>TM</strong> 9-<strong>2320</strong>-<strong>211</strong>-10.<br />
4. Fill crankcase with oil. Refer to LO 9-<strong>2320</strong>-<strong>211</strong>-12.<br />
5. Check for oil leaks. Refer to <strong>TM</strong> 9-<strong>2320</strong>-<strong>211</strong>-10.<br />
6. Close hood. Refer to <strong>TM</strong> 9-<strong>2320</strong>-<strong>211</strong>-10.<br />
2-125
<strong>TM</strong> 9-<strong>2320</strong>-<strong>211</strong>-<strong>34</strong>-2-1<br />
2-22. OIL COOLER ELEMENT AND HOUSING REMOVAL, REPAIR, AND<br />
REPLACEMENT.<br />
TOOLS:<br />
SUPPLIES:<br />
PERS<strong>ON</strong>NEL: One<br />
No special tools required.<br />
Solvent, dry cleaning, type II (SD-2) Fed. Spec P-D-680<br />
Oil cooler cover gasket<br />
Oil cooler preformed packings<br />
Crocus cloth<br />
Plunger plug gaskets<br />
EQUIPMENT C<strong>ON</strong>DITI<strong>ON</strong>: Truck parked, engine off, handbrake set.<br />
a. Preliminary Procedures.<br />
(1) Open hood. Refer to <strong>TM</strong> 9-<strong>2320</strong>-<strong>211</strong>-10.<br />
(2) Remove rear three fuel injector tubes. Refer to <strong>TM</strong> 9-2815-210-<strong>34</strong>.<br />
(3) Remove oil filters. Refer to <strong>TM</strong> 9-<strong>2320</strong>-<strong>211</strong>-20.<br />
(4) Drain engine cooling system. Refer to <strong>TM</strong> 9-<strong>2320</strong>-<strong>211</strong>-20.<br />
(5) Remove fuel filter housing. Refer to <strong>TM</strong> 9-<strong>2320</strong>-<strong>211</strong>-20.<br />
2-126
<strong>TM</strong> 9-<strong>2320</strong>-<strong>211</strong>-<strong>34</strong>-2-1<br />
b. Removal.<br />
(1) Oil cooler radiator and cover.<br />
1. Take off 12 nuts (1) and washers (2). Take off cover (3).<br />
GO TO FRAME 2<br />
2-127
<strong>TM</strong> 9-<strong>2320</strong>-<strong>211</strong>-<strong>34</strong>-2-1<br />
FRAME 2<br />
1. Take out and throw away cover gasket (1).<br />
2. Take off oil cooler core (2).<br />
3. Take out and throw away two preformed packings (3).<br />
4. Take out and throw away gasket (4).<br />
END OF TASK<br />
2-128
<strong>TM</strong> 9-<strong>2320</strong>-<strong>211</strong>-<strong>34</strong>-2-1<br />
(2) Oil cooler housing.<br />
1. Loosen two hose clamps (1). Slide hose (2) back on oil cooler water<br />
inlet tube (3).<br />
2. Take out machine bolt (4) and washer (5).<br />
3. Take out 16 machine bolts (6) and washers (7). Take off housing (8).<br />
4. Take off and throw away gasket (9).<br />
END OF TASK<br />
2-129
<strong>TM</strong> 9-<strong>2320</strong>-<strong>211</strong>-<strong>34</strong>-2-1<br />
c. Disassembly.<br />
FRAME 1<br />
1. Take out two plugs (1), two gaskets (2), two springs (3), and two plungers<br />
(4). Throw away gaskets (2).<br />
2. Take out plug (5).<br />
3. Take out three plugs (6).<br />
END OF TASK<br />
2-130
<strong>TM</strong> 9-<strong>2320</strong>-<strong>211</strong>-<strong>34</strong>-2-1<br />
WARNING<br />
Dry cleaning solvent is flammable. Do not use<br />
near an open flame. Keep a fire extinguisher<br />
nearby when solvent is used. Use only in wellventilated<br />
places. Failure to do this may result<br />
in injury to personnel and damage to equipment.<br />
d. Cleaning. Clean all parts with solvent. Dry using lint-free cloth.<br />
e. Inspection and Repair.<br />
FRAME 1<br />
1.<br />
2.<br />
3.<br />
4.<br />
5.<br />
Check that housing (1) and cover (2) have no cracks. If cracks are found,<br />
get a new part.<br />
Plug one opening (3) in cooler core (4). Put a 150 psi air source into the<br />
other opening.<br />
Put cooler core (4) under water. Check that cooler does not leak. If cooler<br />
leaks, get a new one.<br />
Check that gasket surface on cooler core (4) is smooth. Take off rough spots<br />
using crocus cloth.<br />
Check that plungers (5) have no scratches or burrs. Polish plungers with<br />
crocus cloth.<br />
GO TO FRAME 2<br />
2-131
<strong>TM</strong> 9-<strong>2320</strong>-<strong>211</strong>-<strong>34</strong>-2-1<br />
FRAME 2<br />
1. Measure<br />
2. Measure<br />
3. Measure<br />
4. Measure<br />
5. Measure<br />
6. Measure<br />
NOTE<br />
Readings must be within limits given in table 2-2. If<br />
readings are not within given limits, throw away part<br />
and get a new one.<br />
two plunger bores (1).<br />
outside diameters of two plungers (2).<br />
fit between two plunger bores (1) and two plungers (2).<br />
free length of two springs (3).<br />
squeezed length of two springs (3), using 7. 65-pound load.<br />
solid length of two springs (3).<br />
Table 2-2.<br />
Oil Cooler Housing Wear Limits<br />
Index<br />
Number<br />
Item /Point of Measurement<br />
Size and Fit<br />
of New Parts<br />
(inches)<br />
Wear Limit<br />
(inches)<br />
1<br />
Plunger bore inner diameter<br />
0.8030 to 0.8040<br />
0.8050<br />
2<br />
Valve plunger outer diameter<br />
0.8000 to 0.8010<br />
0.7990<br />
1 and 2<br />
Fit of plunger in bore<br />
0.0020 to 0.0040<br />
0.0060<br />
3<br />
Spring (free length)<br />
1.6200<br />
None<br />
3<br />
Spring width (7.65-pound load)<br />
1.3800<br />
None<br />
3<br />
Spring solid height<br />
0.9520 maximum<br />
None<br />
2-132
<strong>TM</strong> 9-<strong>2320</strong>-<strong>211</strong>-<strong>34</strong>-2-1<br />
f. Assembly.<br />
FRAME 1<br />
CAUTI<strong>ON</strong><br />
Do not overtighten plugs when putting in housing.<br />
Damage to threads of cast iron housing will result.<br />
1. Put in two plugs (1) and two springs (2). Place two new gaskets (3) on<br />
two plugs (4). Put in two plugs (4) with gaskets (3).<br />
2. Put in plug (5).<br />
3. Put in three plugs (6).<br />
END OF TASK<br />
2-133
<strong>TM</strong> 9-<strong>2320</strong>-<strong>211</strong>-<strong>34</strong>-2-1<br />
g. Replacement.<br />
(1) Oil cooler housing<br />
1. Place new gasket (1) on engine, lining up all bolt holes in the gasket with<br />
the threaded bolt holes in the engine.<br />
2. Place housing (2) over gasket (1), lining up holes for 16 bolts (3) with bolt<br />
holes in gasket (1) and bolt holes in engine.<br />
3. Put in 16 machine bolts (3) with washers (4). Put in one machine bolt (5)<br />
with washer (6).<br />
4. Slide water inlet hose (7) forward over flange (8). Tighten hose clamps (9).<br />
END OF TASK<br />
2-1<strong>34</strong>
<strong>TM</strong> 9-<strong>2320</strong>-<strong>211</strong>-<strong>34</strong>-2-1<br />
(2) Oil cooler radiator and cover.<br />
FRAME 1<br />
1. Put new gasket (1) on housing (2).<br />
2. Put two new preformed packings (3) in gasket (1).<br />
3. Put on oil cooler core (4).<br />
4. Put on new cover gasket (5).<br />
GO TO FRAME 2<br />
2-135
<strong>TM</strong> 9-<strong>2320</strong>-<strong>211</strong>-<strong>34</strong>-2<br />
1. Put cover (1) on housing (2). Put on 12 washers (3) and nuts (4).<br />
END OF TASK<br />
NOTE<br />
Follow-on Maintenance Action Required:<br />
1. Replace oil filters. Refer to <strong>TM</strong> 9-<strong>2320</strong>-<strong>211</strong>-20.<br />
2. Replace fuel injection tubes. Refer to <strong>TM</strong> 9-2815-210-<strong>34</strong>.<br />
3. Replace fuel filter housing. Refer to<br />
<strong>TM</strong> 9-<strong>2320</strong>-<strong>211</strong>-20.<br />
4. Refill engine cooling system. Refer to<br />
<strong>TM</strong> 9-<strong>2320</strong>-<strong>211</strong>-20.<br />
5. Start engine and check for leaks. Refer to<br />
<strong>TM</strong> 9-<strong>2320</strong>-<strong>211</strong>-10.<br />
6. Close hood. Refer to <strong>TM</strong> 9-<strong>2320</strong>-<strong>211</strong>-10.<br />
2-136
<strong>TM</strong> 9-<strong>2320</strong>-<strong>211</strong>-<strong>34</strong>-2-1<br />
2-23. OIL PRESSURE REGULATOR, REMOVAL, AND REPLACEMENT.<br />
TOOLS:<br />
SUPPLIES:<br />
PERS<strong>ON</strong>NEL: One<br />
No special tools required<br />
Solvent, dry cleaning, type II (SD-2), Fed. Spec P-D-680<br />
Clean, lint-free rags<br />
Gasket, oil pressure regulator housing to crankcase,<br />
NSN 2815-00-930-9229<br />
Oil pressure regulator housing assembly, NSN 2815-00-194-2454<br />
EQUIPMENT C<strong>ON</strong>DITI<strong>ON</strong>: Truck parked, engine off and cool, handbrake set.<br />
a. Preliminary Procedures.<br />
(1) Open hood and right side panel. Refer to <strong>TM</strong> 9-<strong>2320</strong>-<strong>211</strong>-10.<br />
(2) If working on engine LDS465-1A or LDT465-1C (with turbocharger),<br />
remove turbocharger air intake hose. Refer to <strong>TM</strong> 9–2815-210-<strong>34</strong>.<br />
2-137
<strong>TM</strong> 9-<strong>2320</strong>-<strong>211</strong>-<strong>34</strong>-2-1<br />
b. Removal.<br />
FRAME 1<br />
1.<br />
2.<br />
3.<br />
NOTE<br />
If working on engine LD465-1 or LD465-1C (without<br />
turbocharger), refer to view A and do step 1.<br />
If working on engine LDS465-1A or LDT465-1C (with<br />
turbocharger), refer to view B and do steps 2 and 3.<br />
Take out four capscrews with lockwashers (1). Move breather tube support<br />
bracket (2) off oil pressure regulator (3). Take off oil pressure<br />
regulator (3) from engine crankcase.<br />
Working under turbocharger (4), take out three capscrews with lockwashers<br />
(5, 6, and 7). Unscrew capscrew with lockwasher (8) from engine<br />
crankcase. Move cable clip (9) off oil pressure regulator (10).<br />
Take off oil pressure regulator (10) with capscrew and lockwasher (8).<br />
Take out capscrew with lockwasher (8) from oil pressure regulator (10).<br />
GO TO FRAME 2<br />
2-138
<strong>TM</strong> 9-<strong>2320</strong>-<strong>211</strong>-<strong>34</strong>-2-1<br />
FRAME 2<br />
1. Take off gasket (1) from engine crankcase (2). Throw away gasket.<br />
CAUTI<strong>ON</strong><br />
To prevent clogging of oil system and damage to engine,<br />
dust and other matter must not get into oil system openings.<br />
2. Cover oil pressure regulator gasket areas of engine crankcase.<br />
END OF TASK<br />
2-139
<strong>TM</strong> 9-<strong>2320</strong>-<strong>211</strong>-<strong>34</strong>-2-1<br />
c. Cleaning and Inspection.<br />
WARNING<br />
Dry cleaning solvent is flammable. Do not use<br />
near an open flame. Keep a fire extinguisher<br />
nearby when solvent is used. Use only in wellventilated<br />
places. Failure to do this may result<br />
in injury to personnel and damage to equipment.<br />
(1) Using dry cleaning solvent, clean oil pressure regulator and oil pressure<br />
regulator gasket area of engine crankcase. Wipe dry with clean, lint-free rags.<br />
(2) Check oil pressure regulator gasket area of engine crankcase for damage.<br />
Refer to <strong>TM</strong> 9-2815-210-<strong>34</strong>.<br />
2-140
<strong>TM</strong> 9-<strong>2320</strong>-<strong>211</strong>-<strong>34</strong>-2-1<br />
d. Replacement.<br />
FRAME 1<br />
1. Put new gasket (1) on engine crankcase (2).<br />
IF WORKING <strong>ON</strong> ENGINE LD465-1 OR LD465-1C (WITHOUT TURBOCHARGER),<br />
GO TO FRAME 2.<br />
IF WORKING <strong>ON</strong> ENGINE LDS465-1A OR LDT465-1C (WITH TURBOCHARGER),<br />
GO TO FRAME 3<br />
2-141
<strong>TM</strong> 9-<strong>2320</strong>-<strong>211</strong>-<strong>34</strong>-2-1<br />
FRAME 2<br />
1. put new oil pressure regulator (1) on gasket (2). Move breather tube<br />
support bracket (3) over screwhole (4).<br />
2. Put in and tighten four capscrews (5) with lockwashers (6).<br />
END OF TASK<br />
NOTE<br />
Follow-on Maintenance Action Required:<br />
Close right side panel and hood. Refer to<br />
<strong>TM</strong> 9-<strong>2320</strong>-<strong>211</strong>-10.<br />
2-142
<strong>TM</strong> 9-<strong>2320</strong>-<strong>211</strong>-<strong>34</strong>-2-1<br />
FRAME 3<br />
1.<br />
2.<br />
3.<br />
4.<br />
5.<br />
Put capscrew (1) with lockwasher (2) in screwhole (3) of oil pressure<br />
regulator (4).<br />
Put new oil pressure regulator (4) on gasket (5).<br />
Put hole in cable clamp (6) over screwhole (7) of oil pressure regulator (4).<br />
Put capscrews (1) with lockwashers (2) in three screwholes (7, 8, and 9) of<br />
oil pressure regulator (4).<br />
Tighten capscrew (10) and three capscrews in screwholes (7, 8, and 9).<br />
END OF TASK<br />
NOTE<br />
Follow-on Maintenance Action Required:<br />
1. Put on turbocharger air intake hose. Refer to<br />
<strong>TM</strong> 9-2815-210-<strong>34</strong>.<br />
2. Check for oil leak. Refer to <strong>TM</strong> 9-<strong>2320</strong>-<strong>211</strong>-10.<br />
3. Close right side panel and hood. Refer to<br />
<strong>TM</strong> 9-<strong>2320</strong>-<strong>211</strong>-10.<br />
2-143
<strong>TM</strong> 9-<strong>2320</strong>-<strong>211</strong>-<strong>34</strong>-2-1<br />
Section VIII. MANIFOLDS<br />
2-24. INTAKE AND EXHAUST MANIFOLDS REMOVAL, REPAIR, AND REPLACEMENT.<br />
TOOLS:<br />
SUPPLIES:<br />
PERS<strong>ON</strong>NEL: One<br />
No special tools required<br />
EQUIPMENT C<strong>ON</strong>DITI<strong>ON</strong>:<br />
Crocus cloth<br />
Manifold gasket (2)<br />
Water manifold gasket (6)<br />
Intake manifold elbow gasket<br />
a. Preliminary Procedures.<br />
Truck parked, engine off, handbrake set.<br />
(1) Disconnect battery ground cable. Refer to <strong>TM</strong> 9-<strong>2320</strong>-<strong>211</strong>-20.<br />
(2) Drain coolant system. Refer to <strong>TM</strong> 9-<strong>2320</strong>-<strong>211</strong>-20.<br />
(3) Remove thermostat housing. Refer to <strong>TM</strong> 9-<strong>2320</strong>-<strong>211</strong>-20.<br />
(4) Remove crankcase breather tube. Refer to <strong>TM</strong> 9-<strong>2320</strong>-<strong>211</strong>-20.<br />
(5) If engine has side mounted (solenoid controlled) flame heater system, do<br />
the following:<br />
(a) Remove flame heater ignition unit. Refer to <strong>TM</strong> 9-<strong>2320</strong>-<strong>211</strong>-20.<br />
(b) Remove intake manifold flame heater assembly. Refer to<br />
<strong>TM</strong> 9-<strong>2320</strong>-<strong>211</strong>-20.<br />
(c) Remove flame heater wiring harness. Refer to <strong>TM</strong> 9-<strong>2320</strong>-<strong>211</strong>-20.<br />
(6) If engine has top mounted-covered flame heater system, do the following:<br />
(a) Remove flame heater nozzle and check valve assembly. Refer to<br />
<strong>TM</strong> 9-<strong>2320</strong>-<strong>211</strong>-20.<br />
(b) Remove flame heater wiring harness. Refer to <strong>TM</strong> 9-<strong>2320</strong>-<strong>211</strong>-20.<br />
(c) Remove flame heater ignition unit and fuel pump. Refer to<br />
<strong>TM</strong> 9-<strong>2320</strong>-<strong>211</strong>-20.<br />
(d) Remove flame heater spark plug. Refer to <strong>TM</strong> 9-<strong>2320</strong>-<strong>211</strong>-20.<br />
(7) If engine has top mounted-uncovered flame heater system, do the<br />
following:<br />
(a) Remove flame heater nozzle and check valve assembly. Refer to<br />
<strong>TM</strong> 9-<strong>2320</strong>-<strong>211</strong>-20.<br />
(b) Remove flame heater fuel pump. Refer to <strong>TM</strong> 9-<strong>2320</strong>-<strong>211</strong>-20.<br />
(c) Remove flame heater fuel filter. Refer to <strong>TM</strong> 9-<strong>2320</strong>-<strong>211</strong>-20.<br />
(d) Remove flame heater wiring harness. Refer to <strong>TM</strong> 9-<strong>2320</strong>-<strong>211</strong>-20.<br />
(e) Remove flame heater ignition unit. Refer to <strong>TM</strong> 9-<strong>2320</strong>-<strong>211</strong>-20.<br />
(8) Remove turbocharger. Refer to <strong>TM</strong> 9-2815-210-<strong>34</strong>.<br />
2-144
<strong>TM</strong> 9-<strong>2320</strong>-<strong>211</strong>-<strong>34</strong>-2-1<br />
b. Removal.<br />
FRAME 1<br />
1. Take out oil gage rod (1).<br />
2. Loosen fitting (2) and take off turbocharger oil inlet tube (3).<br />
3. Take off six nuts (4) with washers (5).<br />
4. Take off oil level gage support bracket (6).<br />
5. Take off six nuts (7) with washers (8),<br />
GO TO FRAME 2<br />
2-145
<strong>TM</strong> 9-<strong>2320</strong>-<strong>211</strong>-<strong>34</strong>-2-1<br />
FRAME 2<br />
1. Take off 12 bolts (1) with washers (2).<br />
2. Take off six self-locking nuts (3) with washers (4).<br />
3. Take off 12 plain nuts (5) with washers (6).<br />
4. Pull intake and exhaust manifold (7) off engine as an assembly.<br />
GO TO FRAME 3<br />
2-146
<strong>TM</strong> 9-<strong>2320</strong>-<strong>211</strong>-<strong>34</strong>-2-1<br />
FRAME 3<br />
1. Take off and throw away two gaskets (1).<br />
2. Takeoff and throw away six gaskets (2).<br />
END OF TASK<br />
2-147
<strong>TM</strong> 9-<strong>2320</strong>-<strong>211</strong>-<strong>34</strong>-2-1<br />
c. Disassembly.<br />
(1) Exhaust manifold.<br />
FRAME 1<br />
1. Heat joint (1). Pull apart manifold sections (2 and 3).<br />
2. Heat joint (4). Pull apart manifold sections (3 and 5).<br />
3. Take out two seal rings (6) from manifold sections (2 and 5).<br />
END OF TASK<br />
2-148
<strong>TM</strong> 9-<strong>2320</strong>-<strong>211</strong>-<strong>34</strong>-2-1<br />
(2) Intake manifold.<br />
FRAME 1<br />
1. Loosen four clamp screws (1).<br />
2. Takeout rear water manifold (2).<br />
3. Take out front water manifold (3).<br />
4. Take off hoses (4 and 5).<br />
5. Take off four nuts (6) and washers (7).<br />
6. Pull intake manifold elbow (8) off intake manifold (9).<br />
GO TO FRAME 2<br />
2-149
<strong>TM</strong> 9-<strong>2320</strong>-<strong>211</strong>-<strong>34</strong>-2-1<br />
FRAME 2<br />
1. Take out and throw away gasket (1).<br />
2. Take out transmitter (2).<br />
3. Take out plugs (3, 4, and 5).<br />
END OF TASK<br />
2-150
<strong>TM</strong> 9-<strong>2320</strong>-<strong>211</strong>-<strong>34</strong>-2-1<br />
d. Cleaning. There are no special cleaning procedures needed. Refer to<br />
cleaning procedures in para 1-3.<br />
e. Inspection and Repair.<br />
FRAME 1<br />
1.<br />
2.<br />
3.<br />
4.<br />
5.<br />
Check that mounting flanges on manifolds (1, 2, and 3) and manifold elbow (4)<br />
are not scratched. Take off scratches with file or crocus cloth.<br />
Check that four elbow studs (5) and 30 manifold studs (6) are not bent or<br />
broken and that threads are not damaged. If studs are broken, drill them out<br />
and retap holes. Get new studs in place of damaged ones.<br />
Check that manifolds (1, 2, and 3) and manifold elbow (4) are not cracked.<br />
Weld cracks. Refer to <strong>TM</strong> 9-237. If more repair is needed, get a new part.<br />
Check that 12 threaded holes (7) are not damaged. Retap damaged holes.<br />
Check that two hoses (8) have no cracks, tears or dry rot. If hoses are<br />
damaged, get new ones.<br />
END OF TASK<br />
2-151
<strong>TM</strong> 9-<strong>2320</strong>-<strong>211</strong>-<strong>34</strong>-2-1<br />
f. Assembly.<br />
(1) Intake manifold.<br />
FRAME 1<br />
CAUTI<strong>ON</strong><br />
Do not overtighten plugs (1, 2, and 3) and transmitter (4).<br />
Manifold casting can be damaged and will leak.<br />
1. Put in plugs (1, 2, and 3).<br />
2. Put in transmitter (4).<br />
3. Put on gasket (5).<br />
GO TO FRAME 2<br />
2-152
<strong>TM</strong> 9-<strong>2320</strong>-<strong>211</strong>-<strong>34</strong>-2-1<br />
1. Put two hoses (1) and four clamps (2) on manifold (3). Put two water<br />
manifolds (4) in hoses.<br />
2. Tighten four clamps (2).<br />
3. Put elbow (5) on manifold (3).<br />
4. Hand tighten four nuts (6) and washers (7). Tighten nuts to 10 to 13<br />
pound-feet.<br />
END OF TASK<br />
2-153
<strong>TM</strong> 9-<strong>2320</strong>-<strong>211</strong>-<strong>34</strong>-2-1<br />
(2) Exhaust manifold.<br />
FRAME 1<br />
1.<br />
2.<br />
3.<br />
4.<br />
5.<br />
6.<br />
Put two seal rings (1) on rear and front manifold sections (2 and 3).<br />
Heat left joint (4).<br />
Squeeze seal ring (1) and push rear manifold section (2) into center<br />
(5) .<br />
Heat right joint (4).<br />
Squeeze seal ring (1) and push front manifold section<br />
(5).<br />
Check that manifold sections (2, 3, and 5) are alined<br />
END OF TASK<br />
(3) into center<br />
and that joints<br />
manifold section<br />
manifold section<br />
(4) are tight.<br />
2-154
<strong>TM</strong> 9-<strong>2320</strong>-<strong>211</strong>-<strong>34</strong>-2-1<br />
g. Replacement.<br />
FRAME 1<br />
1. Put on two gaskets (1). Put on six gaskets (2).<br />
NOTE<br />
Intake and exhaust manifolds (3) cannot be put back<br />
separately. They must be put on at the same time.<br />
2. Put intake, exhaust, and water manifolds (3) over studs in block. Hand<br />
tighten 12 plain nuts (4) with washers (5).<br />
3. Hand tighten six locknuts (6) with washers (7).<br />
4. Hand tighten 12 bolts (8) with washers (9). Tighten bolts to 15 to 20<br />
pound-feet.<br />
GO TO FRAME 2<br />
2-155
<strong>TM</strong> 9-<strong>2320</strong>-<strong>211</strong>-<strong>34</strong>-2-1<br />
FRAME 2<br />
1. Hand tighten six nuts (1) with washers (2).<br />
2. Put on oil level gage support bracket (3).<br />
3. Hand tighten six nuts (4) with washers (5).<br />
4. Tighten upper and lower nuts (1) to 12 to 15 pound-feet.<br />
5. Tighten upper and lower nuts (4) to <strong>34</strong> to 39 pound-feet.<br />
6. Put on tube (6) and screw on fitting (7). Put in oil gage rod (8).<br />
GO TO FRAME 3<br />
2-156
<strong>TM</strong> 9-<strong>2320</strong>-<strong>211</strong>-<strong>34</strong>-2-1<br />
END OF TASK<br />
NOTE<br />
Follow-on Maintenance Action Required:<br />
1. Replace turbocharger. Refer to <strong>TM</strong> 9-2815-210-<strong>34</strong>.<br />
2. If engine has top mounted-uncovered flame heater system,<br />
do the following:<br />
a. Replace heater nozzle and check valve assembly. Refer<br />
to <strong>TM</strong> 9-<strong>2320</strong>-<strong>211</strong>-20.<br />
b. Replace flame heater<br />
c. Replace flame heater<br />
<strong>TM</strong> 9-<strong>2320</strong>-<strong>211</strong>-20.<br />
d. Replace flame heater<br />
<strong>TM</strong> 9-<strong>2320</strong>-<strong>211</strong>-20.<br />
e. Replace flame heater<br />
<strong>TM</strong> 9-<strong>2320</strong>-<strong>211</strong>-20.<br />
pump. Refer to <strong>TM</strong> 9-<strong>2320</strong>-<strong>211</strong>-20.<br />
fuel filter. Refer to<br />
wiring harness.<br />
Refer to<br />
ignition unit. Refer to<br />
3. If engine has top mounted-covered flame heater system, do<br />
the following:<br />
a. Replace flame heater spark plug. Refer to<br />
<strong>TM</strong> 9-<strong>2320</strong>-<strong>211</strong>-20.<br />
b. Replace flame heater ignition unit and<br />
to <strong>TM</strong> 9-<strong>2320</strong>-<strong>211</strong>-20.<br />
c. Replace flame heater wiring harness.<br />
<strong>TM</strong> 9-<strong>2320</strong>-<strong>211</strong>-20.<br />
d. Replace flame heater nozzle and check<br />
Refer to <strong>TM</strong> 9-<strong>2320</strong>-<strong>211</strong>-20.<br />
fuel pump. Refer<br />
Refer to<br />
valve assembly.<br />
4. If engine has side mounted (solenoid controlled) flame heater<br />
system, do the following:<br />
a. Replace flame heater wiring harness, Refer to<br />
<strong>TM</strong> 9-<strong>2320</strong>-<strong>211</strong>-20.<br />
b. Replace intake manifold flame heater assembly. Refer to<br />
<strong>TM</strong> 9-<strong>2320</strong>-<strong>211</strong>-20.<br />
c. Replace flame heater ignition unit. Refer to<br />
<strong>TM</strong> 9-<strong>2320</strong>-<strong>211</strong>-20.<br />
5. Replace crankcase breather tube. Refer to <strong>TM</strong> 9-<strong>2320</strong>-<strong>211</strong>-20.<br />
6. Replace thermostat housing. Refer to <strong>TM</strong> 9-<strong>2320</strong>-<strong>211</strong>-20.<br />
7. Fill coolant system. Refer to <strong>TM</strong> 9-<strong>2320</strong>-<strong>211</strong>-20.<br />
8. Reconnect battery ground cable. Refer to <strong>TM</strong> 9-<strong>2320</strong>-<strong>211</strong>-20.<br />
2-157/(2-158 blank)
<strong>TM</strong> 9-<strong>2320</strong>-<strong>211</strong>-<strong>34</strong>-2-1<br />
CHAPTER 3<br />
CLUTCH SYSTEM GROUP MAINTENANCE<br />
Section I. SCOPE<br />
3-1. EQUIPMENT ITEMS COVERED. This chapter gives equipment maintenance procedures<br />
for the clutch assembly for which there are authorized corrective maintenance<br />
tasks at the direct and general support maintenance levels.<br />
3-2. EQUIPMENT ITEMS NOT COVERED. All equipment items for which corrective<br />
maintenance is authorized at the direct and general support maintenance levels are<br />
covered in this chapter.<br />
Section II. CLUTCH ASSEMBLY<br />
3-3. CLUTCH ASSEMBLY REMOVAL AND REPLACEMENT.<br />
TOOLS: NO<br />
SUPPLIES:<br />
PERS<strong>ON</strong>NEL:<br />
special tools required<br />
3/8-16 UNC x 2 1/4-inch capscrew (3)<br />
3/8 x l/4-inch flat washer (3)<br />
Solvent, dry cleaning, type II (SD-2), Fed. Spec P-D-680<br />
Clean soft lint-free cloth<br />
Penetrant kit<br />
Water<br />
Two<br />
EQUIPMENT C<strong>ON</strong>DITI<strong>ON</strong>:<br />
a. Preliminary Procedures.<br />
Truck parked, engine off, handbrake set.<br />
(1) Remove transmission-to-transfer case propeller shaft. Refer to<br />
<strong>TM</strong> 9-<strong>2320</strong>-<strong>211</strong>-20.<br />
(2) Remove front winch propeller shaft (all trucks with front winch) . Refer<br />
to <strong>TM</strong> 9-<strong>2320</strong>-<strong>211</strong>-20.<br />
(3) On truck M51A2, remove hoist pump propeller shaft. Refer to<br />
<strong>TM</strong> 9-<strong>2320</strong>-<strong>211</strong>-20.<br />
(4) Remove power takeoff linkage on all trucks with front winch. Refer to<br />
Part 3, para 17-59.<br />
(5) Remove cab floor tunnel and bell housing toeboard. Refer to<br />
<strong>TM</strong> 9-<strong>2320</strong>-<strong>211</strong>-20.<br />
(6) Remove shift lever. Refer to <strong>TM</strong> 9-<strong>2320</strong>-<strong>211</strong>-20.<br />
(7) Remove transmission declutch shift air lines, main air supply and vent<br />
lines. Refer to Hydraulic Lines and Fittings Removal and Replacement,<br />
<strong>TM</strong> 9-<strong>2320</strong>-<strong>211</strong>-20.<br />
(8) Remove clutch actuating link rod assembly. Refer to <strong>TM</strong> 9-<strong>2320</strong>-<strong>211</strong>-20.<br />
(9) On truck M543A2, remove outer auxiliary release clutch lever. Refer to<br />
<strong>TM</strong> 9-<strong>2320</strong>-<strong>211</strong>-20.<br />
(10) Remove front axle propeller shaft. Refer to para 9-5.<br />
(11) Remove transmission. Refer to para 7-3.<br />
3-1
<strong>TM</strong> 9-<strong>2320</strong>-<strong>211</strong>-<strong>34</strong>-2-1<br />
b. Removal.<br />
FRAME 1<br />
Soldier A<br />
1. Mark position of clutch (1) to flywheel (2).<br />
2. Put in three capscrews (3) and flat washers (4).<br />
3 Hold clutch cover (1) in place.<br />
CAUTI<strong>ON</strong><br />
Soldier B<br />
Soldiers<br />
A and B<br />
END OF TASK<br />
Take out 12 capscrews (5) by turning each screw one<br />
or two turns at a time to stop damage to clutch cover (1).<br />
4. Take out 12 capscrews (5) and lockwashers (6).<br />
5. Take out clutch cover (1) and clutch disk (7).<br />
6. If bearing (8) is damaged or worn, pull out bearing.<br />
3-2
<strong>TM</strong> 9-<strong>2320</strong>-<strong>211</strong>-<strong>34</strong>-2-1<br />
c. Cleaning.<br />
WARNING<br />
Dry cleaning solvent is flammable and will not<br />
be used near an open flame. A fire extinguisher<br />
will be kept nearby when the solvent is used.<br />
Use only in well-ventilated places. Failure to do<br />
this may result in injury to personnel and damage<br />
to equipment.<br />
(1) Clean clutch cover and flywheel with solvent. Make sure that capscrew<br />
holes are clean. Let parts dry and wipe parts with clean cloth.<br />
WARNING<br />
Do not use a wire brush or compressed air to<br />
clean clutch disk facings. There may be asbestos<br />
dust on the disk facings which can be dangerous<br />
to your health if you breathe it in.<br />
CAUTI<strong>ON</strong><br />
Never let dry cleaning solvent, grease or oil of<br />
of any kind touch facing of clutch disk.<br />
(2) Clean clutch disk facings using a brush and water.<br />
(3) Clean drive hub on clutch disk with a cloth soaked in solvent.<br />
3-3
<strong>TM</strong> 9-<strong>2320</strong>-<strong>211</strong>-<strong>34</strong>-2-1<br />
d. Inspection.<br />
FRAME 1<br />
1. Check that clutch disk (1) has no loose rivets, hub or lining distortion or<br />
damaged splines. If clutch disk is damaged, get a new one.<br />
2. Check that thickness of clutch disk (1) is at least 0.390 inch. Take<br />
measurement at several points. If clutch disk is worn more than given limit,<br />
get a new one.<br />
3. Check that bearing (2) is not damaged. Refer to para 7-7. If bearing is<br />
damaged, get a new one.<br />
4. Check that flywheel (3) is not damaged.<br />
GO TO FRAME 2<br />
3-4
<strong>TM</strong> 9-<strong>2320</strong>-<strong>211</strong>-<strong>34</strong>-2-1<br />
FRAME 2<br />
1.<br />
2.<br />
3.<br />
4.<br />
5.<br />
GO<br />
Check that 12 capscrews (1) have no stripped threads. If capscrews are<br />
damaged, get new ones.<br />
Check that clutch cover (2) is not broken, uneven, or damaged in any other<br />
way. If clutch is damaged, get a new one.<br />
Using penetrant kit, check that clutch cover (2) is not cracked. If clutch<br />
cover is cracked, get a new one.<br />
Check that springs (3) are not collapsed or broken. Get a new clutch cover<br />
(2) if springs are damaged.<br />
Check that three release levers (4) are not broken. Get a new clutch cover<br />
(2) if release levers are damaged.<br />
TO FRAME 3<br />
3-5
<strong>TM</strong> 9-<strong>2320</strong>-<strong>211</strong>-<strong>34</strong>-2-1<br />
FRAME 3<br />
1. Using straight bar and feeler gages, check that pressure plate (1) is not<br />
warped more than 0.010 inch. Get a new clutch cover (2) if pressure plate<br />
is warped.<br />
END OF TASK<br />
3-6
<strong>TM</strong> 9-<strong>2320</strong>-<strong>211</strong>-<strong>34</strong>-2-1<br />
e. Adjustment of Clutch.<br />
FRAME 7<br />
1.<br />
2.<br />
3.<br />
4.<br />
5.<br />
6.<br />
7.<br />
Measure distance<br />
cover plate (2).<br />
inches.<br />
Lay clutch cover<br />
from outer surface of pressure plate (1) to inner surface of<br />
Unscrew three capscrews (3) until distance is 1.274 to 1.276<br />
(4) face down on a flat surface.<br />
Measure distance from top of three release levers (5) to flat surface. If distance<br />
is not 2.163 to 2.193 inches, do steps 4 through 7.<br />
Loosen three jamnuts (6).<br />
If distance in step 3 was less than 2.163 inches, turn three adjusting screws<br />
(7) to the right. If distance was more than 2.193 inches, turn three adjusting<br />
screws to the left.<br />
When distance in step 3 is correct,<br />
jamnuts (6).<br />
hold adjusting screws (7) and tighten<br />
Turn each of three capscrews (3) one turn to the right.<br />
END OF TASK<br />
3-7
<strong>TM</strong> 9-<strong>2320</strong>-<strong>211</strong>-<strong>34</strong>-2-1<br />
f. Replacement.<br />
FRAME 1<br />
1. Put bearing (1) into bore of flywheel (2). Refer to para 7-7.<br />
GO TO FRAME 2<br />
3-8
<strong>TM</strong> 9-<strong>2320</strong>-<strong>211</strong>-<strong>34</strong>-2-1<br />
FRAME 2<br />
1. Put clutch disk (1) against flywheel (2) with long end of drive hub (3)<br />
away from flywheel.<br />
2. Using clutch alinement tool (4), aline splines of disk drive hub (3) with<br />
bearing in flywheel (2). Do not take off clutch alinement tool.<br />
GO TO FRAME 3<br />
3-9
<strong>TM</strong> 9-<strong>2320</strong>-<strong>211</strong>-<strong>34</strong>-2-1<br />
FRAME 3<br />
1. Put clutch cover (1) against flywheel (2) and aline marks.<br />
2. Put in and hand tighten 12 capscrews (3).<br />
3. Tighten 12 capscrews (3) to 23 to 27 pound-feet in tightening order shown.<br />
4. Take out three capscrews (4) and flat washers (5).<br />
5. Take out clutch alinement tool (6).<br />
GO TO FRAME 4<br />
3-10
<strong>TM</strong> 9-<strong>2320</strong>-<strong>211</strong>-<strong>34</strong>-2-1<br />
FRAME 4<br />
END OF TASK<br />
1.<br />
2.<br />
3.<br />
4.<br />
5.<br />
6.<br />
7.<br />
8.<br />
9.<br />
10.<br />
11.<br />
12.<br />
NOTE<br />
Follow-on Maintenance Action Required:<br />
Replace transmission. Refer to para 7-3.<br />
Replace and adjust clutch actuating link rod<br />
assembly. Refer to <strong>TM</strong> 9-<strong>2320</strong>-<strong>211</strong>-20.<br />
On truck M543A2, replace outer auxiliary release<br />
clutch lever. Refer to <strong>TM</strong> 9-<strong>2320</strong>-<strong>211</strong>-10.<br />
Replace transmission declutch lines and main air<br />
supply line and vent line. Refer to Hydraulic<br />
Lines and Fittings Removal and Replacement,<br />
<strong>TM</strong> 9-<strong>2320</strong>-<strong>211</strong>-20.<br />
Replace cab floor tunnel and bell housing toeboard.<br />
Refer to <strong>TM</strong> 9-<strong>2320</strong>-<strong>211</strong>-20.<br />
Replace shift lever. Refer to <strong>TM</strong> 9-<strong>2320</strong>-<strong>211</strong>-20.<br />
Replace power takeoff linkage on all trucks with<br />
front winch. Refer to Part 3, para 17-59.<br />
Replace hoist pump propeller shaft (M51A2 truck).<br />
Refer to <strong>TM</strong> 9-<strong>2320</strong>-<strong>211</strong>-20.<br />
Replace front winch propeller shaft (all trucks with<br />
front winch). Refer to <strong>TM</strong> 9-<strong>2320</strong>-<strong>211</strong>-20.<br />
Replace transmission-to-transfer case propeller<br />
shaft. Refer to <strong>TM</strong> 9-<strong>2320</strong>-<strong>211</strong>-20.<br />
Replace front axle propeller shaft. Refer to para 9-5.<br />
Check clutch assembly for proper operation. Refer<br />
to <strong>TM</strong> 9-<strong>2320</strong>-<strong>211</strong>-10.<br />
3-11/(3-12 blank)
<strong>TM</strong> 9-<strong>2320</strong>-<strong>211</strong>-<strong>34</strong>-2-1<br />
CHAPTER 4<br />
FUEL SYSTEM GROUP MAINTENANCE<br />
Section I. SCOPE<br />
4-1. EQUIPMENT ITEMS COVERED. This chapter gives equipment maintenance procedures<br />
for the fuel injector, turbocharger, fuel tanks, and cold start system for<br />
which there are authorized corrective maintenance tasks at the direct and general<br />
support maintenance levels.<br />
4-2. EQUIPMENT ITEMS NOT COVERED. All equipment items for which corrective<br />
maintenance is authorized at the direct and general support maintenance levels are<br />
covered in this chapter.<br />
Section II.<br />
FUEL INJECTOR<br />
4-3. FUEL INJECTOR NOZZLE AND HOLDER REPAIR.<br />
a. Removal. Refer to <strong>TM</strong> 9-2815-210-<strong>34</strong> to remove the fuel injector nozzle<br />
and holder.<br />
b. Cleaning, Inspection, and Repair. Refer to <strong>TM</strong> 9-2815-210-<strong>34</strong> for procedures<br />
to clean, inspect and repair the fuel injector nozzle and holder.<br />
c. Replacement. Refer to <strong>TM</strong> 9-2815-210-<strong>34</strong> to replace the fuel injector nozzle<br />
and holder.<br />
4-4. FUEL INJECTOR PUMP REMOVAL, REPAIR, AND REPLACEMENT.<br />
TOOLS:<br />
SUPPLIES:<br />
PERS<strong>ON</strong>NEL:<br />
Gear hub holding wrench<br />
Solvent, dry cleaning, type II (SD-2), Fed. Spec P-D-680<br />
3/8 x 1 1/4 capscrews (2)<br />
One<br />
EQUIPMENT C<strong>ON</strong>DITI<strong>ON</strong>:<br />
a. Preliminary Procedures.<br />
Truck parked, engine off, handbrake set.<br />
(1) Open hood and left side panel. Refer to <strong>TM</strong> 9-<strong>2320</strong>-<strong>211</strong>-10.<br />
(2) Remove radiator. Refer to <strong>TM</strong> 9-<strong>2320</strong>-<strong>211</strong>-20.<br />
(3) Remove power steering reservoir. Refer to <strong>TM</strong> 9-<strong>2320</strong>-<strong>211</strong>-20.<br />
(4) Remove left front fender. Refer to <strong>TM</strong> 9-<strong>2320</strong>-<strong>211</strong>-20.<br />
(5) Remove steering hydraulic pump. Refer to Part 2, para 13-7.<br />
4-1
<strong>TM</strong> 9-<strong>2320</strong>-<strong>211</strong>-<strong>34</strong>-2-1<br />
b. Removal.<br />
FRAME 1<br />
1. Unscrew six hose fittings (1). Takeoff lines (2).<br />
2. Unscrew line (3) from elbow (4). Take off line.<br />
3. Unscrew screw (5). Take out cable (6).<br />
4. Take out spring (7). Take out pin (8). Take off linkage (9).<br />
GO TO FRAME 2<br />
4-2
<strong>TM</strong> 9-<strong>2320</strong>-<strong>211</strong>-<strong>34</strong>-2-1<br />
FRAME 2<br />
1.<br />
2.<br />
3.<br />
4.<br />
Take out four capscrews (1) with washers and self-locking nuts (2).<br />
Take off eight clamp pads (3) and retainers (4).<br />
Take out two cap screws (5) with washers and self-locking nuts (6).<br />
Take off clamp (7).<br />
GO TO FRAME 3<br />
4-3
<strong>TM</strong> 9-<strong>2320</strong>-<strong>211</strong>-<strong>34</strong>-2-1<br />
FRAME 3<br />
1. Takeout two capscrews (1) with washers and self-locking nuts (2).<br />
2. Take off two clamps (3).<br />
3. Lift six dust caps (4) off injection pump (5).<br />
GO TO FRAME 4<br />
4-4
<strong>TM</strong> 9-<strong>2320</strong>-<strong>211</strong>-<strong>34</strong>-2-1<br />
FRAME 4<br />
1. Unscrew six tube fittings (1).<br />
2. Unscrew six tube fittings (2).<br />
3. Take off six tubes (3). Put caps on ends of tubes and in injection port holes.<br />
GO TO FRAME 5<br />
4-5
<strong>TM</strong> 9-<strong>2320</strong>-<strong>211</strong>-<strong>34</strong>-2-1<br />
FRAME 5<br />
1. Line up mark (1) with pointer (2).<br />
2. Take out three capscrews (3) with lockwashers (4). Take out retaining<br />
plate (5).<br />
3. Take out drive gear (6).<br />
GO TO FRAME 6<br />
4-6
<strong>TM</strong> 9-<strong>2320</strong>-<strong>211</strong>-<strong>34</strong>-2-1<br />
FRAME 6<br />
1. Take out two capscrews (1) and washers (2).<br />
2. Take out two capscrews (3) and washers (4). Take out bracket (5).<br />
GO TO FRAME 7<br />
4-7
<strong>TM</strong> 9-<strong>2320</strong>-<strong>211</strong>-<strong>34</strong>-2-1<br />
FRAME 7<br />
1. Take out three capscrews (1) and washers (2).<br />
2. Take out injection pump (3).<br />
GO TO FRAME 8<br />
4-8
<strong>TM</strong> 9-<strong>2320</strong>-<strong>211</strong>-<strong>34</strong>-2-1<br />
FRAME 8<br />
1. Put gear hub holding wrench (1) on hub (2). See figure 4-1 for fabrication<br />
data. Put in two capscrews (3).<br />
2. Take out nut (4) and lockwasher (5).<br />
3. Take off hub (2).<br />
4. Take out two capscrews (3). Take off gear hub holding wrench (1).<br />
END OF TASK<br />
4-9
<strong>TM</strong> 9-<strong>2320</strong>-<strong>211</strong>-<strong>34</strong>-2-1<br />
Figure 4-1. Gear Hub Holding Wrench, Fabrication Data<br />
4-10
<strong>TM</strong> 9-<strong>2320</strong>-<strong>211</strong>-<strong>34</strong>-2-1<br />
c. Repair. Refer<br />
d. Replacement.<br />
to <strong>TM</strong> 9-2815-210-<strong>34</strong>.<br />
FRAME 1<br />
1. Put hub (1) on shaft. Put on lockwasher (2) and nut (3).<br />
2. Put gear hub holding wrench (4) on hub (1). See figure 4-1 for fabrication<br />
data. Put in two capscrews (5).<br />
3. Tighten nut (3) to 66 to 71 pound-feet.<br />
4. Take out two capscrews (5) and holding wrench (4).<br />
GO TO FRAME 2<br />
4-11
<strong>TM</strong> 9-<strong>2320</strong>-<strong>211</strong>-<strong>34</strong>-2-1<br />
FRAME 2<br />
1. Set injector pump (1) in place. Put in three capscrews (2) with washers (3).<br />
NOTE<br />
Make sure hub and pointer stay alined.<br />
GO TO FRAME 3<br />
4-12
<strong>TM</strong> 9-<strong>2320</strong>-<strong>211</strong>-<strong>34</strong>-2-1<br />
FRAME 3<br />
1. Put bracket (1) on engine block (2) as shown. Put in two capscrews (3)<br />
and washers (4).<br />
2. Put in two capscrews (5) and washers (6).<br />
GO TO FRAME 4<br />
4-13
<strong>TM</strong> 9-<strong>2320</strong>-<strong>211</strong>-<strong>34</strong>-2-1<br />
FRAME 4<br />
1. Put gear (1) in place.<br />
NOTE<br />
Holes in gear are long enough to allow alinement.<br />
2. Make sure mark (2) and pointer (3) stay as shown.<br />
3. Put on plate (4). Put in capscrews (5) with washers (6).<br />
GO TO FRAME 5<br />
4-14
<strong>TM</strong> 9-<strong>2320</strong>-<strong>211</strong>-<strong>34</strong>-2-1<br />
FRAME 5<br />
1.<br />
2.<br />
3.<br />
4.<br />
Take off caps on tubes and injection pump port holes.<br />
Set six tubes (1) in place.<br />
Screw in fittings (2).<br />
Screw six fittings (3) into pump.<br />
GO TO FRAME 6<br />
4-15
<strong>TM</strong> 9-<strong>2320</strong>-<strong>211</strong>-<strong>34</strong>-2-1<br />
FRAME 6<br />
1. Put six dustcaps (1) on injection pump (2).<br />
2. Put on two clamps (3).<br />
3. Put in capscrews (4) with washers. Put on self-locking nuts (5).<br />
GO TO FRAME 7<br />
4-16
<strong>TM</strong> 9-<strong>2320</strong>-<strong>211</strong>-<strong>34</strong>-2-1<br />
FRAME 7<br />
1.<br />
2.<br />
3.<br />
4.<br />
Put on clamp (1). Put in capscrews (2) with washers and self-locking nuts (3).<br />
Put on eight clamp pads (4) and eight retainers (5).<br />
Put in four capscrews (6) with washers (7).<br />
Put on four locknuts (8).<br />
GO TO FRAME 8<br />
4-17
<strong>TM</strong> 9-<strong>2320</strong>-<strong>211</strong>-<strong>34</strong>-2-1<br />
FRAME 8<br />
1.<br />
2.<br />
3.<br />
4.<br />
5.<br />
Put on six hoses (1).<br />
Tighten six nuts (2).<br />
Put line (3) on elbow (4).<br />
Put on linkage (5). Put in pin (6). Put on spring (7).<br />
Put in cable (8). Tighten screw (9).<br />
END OF TASK<br />
1.<br />
2.<br />
3.<br />
4.<br />
5.<br />
NOTE<br />
Follow-on Maintenance Action Required:<br />
Replace steering hydraulic pump. Refer to<br />
Part 2, para 13-7.<br />
Replace left front fender. Refer to<br />
<strong>TM</strong> 9-<strong>2320</strong>-<strong>211</strong>-20.<br />
Replace power steering reservoir. Refer to<br />
<strong>TM</strong> 9-<strong>2320</strong>-<strong>211</strong>-20.<br />
Replace radiator. Refer to <strong>TM</strong> 9-<strong>2320</strong>-<strong>211</strong>-20.<br />
Close hood and left side panel. Refer to<br />
<strong>TM</strong> 9-<strong>2320</strong>-<strong>211</strong>-10.<br />
4-18
<strong>TM</strong> 9-<strong>2320</strong>-<strong>211</strong>-<strong>34</strong>-2-1<br />
4-5. FUEL INJECTOR PUMP TIMING.<br />
TOOLS:<br />
SUPPLIES:<br />
PERS<strong>ON</strong>NEL: One<br />
Inspection mirror<br />
EQUIPMENT C<strong>ON</strong>DITI<strong>ON</strong>:<br />
Timing cover gasket<br />
Timing window cover gasket<br />
a. Preliminary Procedures.<br />
Truck parked, engine off, handbrake set.<br />
(1) Open hood and left side panel. Refer to <strong>TM</strong> 9-<strong>2320</strong>-<strong>211</strong>-10.<br />
(2) Time engine. Refer to <strong>TM</strong> 9-<strong>2320</strong>-<strong>211</strong>-20.<br />
(3) Remove access cover under left fender. Refer to <strong>TM</strong> 9-<strong>2320</strong>-<strong>211</strong>-10.<br />
4-19
<strong>TM</strong> 9-<strong>2320</strong>-<strong>211</strong>-<strong>34</strong>-2-1<br />
b. Timing.<br />
FRAME 1<br />
1.<br />
2.<br />
3.<br />
4.<br />
Take out four capscrews and lockwashers (1).<br />
Take off cover (2). Take out and throw away gasket (3).<br />
Take out two screws and lockwashers (4).<br />
Take off cover (5). Take out and throw away gasket (6).<br />
GO TO FRAME 2<br />
4-20
<strong>TM</strong> 9-<strong>2320</strong>-<strong>211</strong>-<strong>34</strong>-2-1<br />
FRAME 2<br />
1. Check that timing mark on hub (1) is lined up with pointer (2).<br />
2. Using inspection mirror, check that marked tooth on plunger drive gear (3)<br />
can be seen when mark on hub (1) is lined up with pointer (2).<br />
3. If marked tooth on plunger drive gear (3) cannot be seen, take out power<br />
steering pump. Refer to Part 2, para 13-7.<br />
GO TO FRAME 3<br />
4-21
<strong>TM</strong> 9-<strong>2320</strong>-<strong>211</strong>-<strong>34</strong>-2-1<br />
FRAME 3<br />
1. Takeout three capscrews and lockwashers (1).<br />
2. Take off retaining plate (2).<br />
3. Take out drive gear (3).<br />
GO TO FRAME 4<br />
4-22
<strong>TM</strong> 9-<strong>2320</strong>-<strong>211</strong>-<strong>34</strong>-2-1<br />
FRAME 4<br />
1. Turn fuel injector pump shaft (1) until the marked tooth (2) can be seen<br />
in inspection mirror.<br />
2. Line up timing mark on hub (3) with pointer (4). Check that marked tooth<br />
(2) can still be seen. If not, repeat steps 1 and 2.<br />
3. Check that timing mark on crankshaft damper (5) is lined up with mark on<br />
timing pointer (6).<br />
GO TO FRAME 5<br />
4-23
<strong>TM</strong> 9-<strong>2320</strong>-<strong>211</strong>-<strong>34</strong>-2-1<br />
FRAME 5<br />
1. Put on drive gear (1).<br />
CAUTI<strong>ON</strong><br />
Be sure timing marks are maintained when putting on<br />
drive gear (1).<br />
2. Put on retaining plate (2).<br />
3. Put on three capscrews and lockwashers (3).<br />
GO TO FRAME 6<br />
4-24
<strong>TM</strong> 9-<strong>2320</strong>-<strong>211</strong>-<strong>34</strong>-2-1<br />
FRAME 6<br />
1.<br />
2.<br />
3.<br />
4.<br />
Put new gasket (1) on timing window (2).<br />
Put on timing window cover (3). Put in two capscrews (4) with two lockwashers<br />
(5).<br />
Put new gasket (6) on timing device housing (7).<br />
Put on timing device housing cover (8). Put in four capscrews (9) with<br />
lockwashers (10).<br />
END OF TASK<br />
NOTE<br />
Follow-on Maintenance Action Required:<br />
1. Replace power steering pump. Refer to Part<br />
2, para 13-7.<br />
2. Close hood and left side panel. Refer to<br />
<strong>TM</strong> 9-<strong>2320</strong>-<strong>211</strong>-10.<br />
3. Replace access cover under left fender. Refer<br />
to <strong>TM</strong> 9-<strong>2320</strong>-<strong>211</strong>-10.<br />
4-25
<strong>TM</strong> 9-<strong>2320</strong>-<strong>211</strong>-<strong>34</strong>-2-1<br />
4-6. FUEL INJECTOR TUBES REPAIR.<br />
a. Removal. Refer to <strong>TM</strong> 9-2815-210-<strong>34</strong> to remove the fuel injector tubes.<br />
b. Cleaning, Inspection, and Repair. Refer to <strong>TM</strong> 9-2815-210-<strong>34</strong> for procedures<br />
to clean, inspect, and repair the fuel injector tubes.<br />
c. Replacement. Refer to <strong>TM</strong> 9-2815-210-<strong>34</strong> to replace the fuel injector tubes.<br />
Section III. TURBOCHARGER<br />
4-7. TURBOCHARGER REPAIR. To repair trubocharger, refer to <strong>TM</strong> 9-2990-201-40 & P.<br />
Section IV. FUEL TANKS<br />
4-8. FUEL TANK REPAIR.<br />
TOOLS:<br />
SUPPLIES:<br />
PERS<strong>ON</strong>NEL: One<br />
No special tools required<br />
Filler cap gasket<br />
Intank pump gasket<br />
Sending unit gasket<br />
Vent cover gasket<br />
Solvent, dry cleaning, type II (SD-2), Fed. Spec P-D-680<br />
Compressed air source, 30 psi max<br />
EQUIPMENT C<strong>ON</strong>DITI<strong>ON</strong>: Fuel tank on workbench.<br />
4-26
<strong>TM</strong> 9-<strong>2320</strong>-<strong>211</strong>-<strong>34</strong>-2-1<br />
a. Disassembly.<br />
NOTE<br />
It is not necessary to take apart fuel tank unless<br />
inspection shows damage.<br />
Trucks M51A2, M52A2, and M543A2 have two<br />
fuel tanks, a main tank and an auxiliary tank.<br />
This task is the same for both tanks.<br />
FRAME 1<br />
1. Place container under drain plug (1) to catch any fuel in tank (2).<br />
2. Take out drain plug (1).<br />
3. Take off filler cap (3).<br />
4. Take out filler cap gasket (4).<br />
5. Take off filler sleeve (5).<br />
6. Take out five screws (6). Pull sending unit (7) from tank (2).<br />
7. Take out and throw away gasket (8).<br />
8. Take out 10 screws (9) on main tank (2) and 12 screws (9) on auxiliary tank<br />
(2).<br />
9. Take out electric fuel pump with gasket (10) on main tank (2) or vent cover<br />
with gasket (10) on auxiliary tank (2). Throw away gasket (10).<br />
END OF TASK<br />
4-27
<strong>TM</strong> 9-<strong>2320</strong>-<strong>211</strong>-<strong>34</strong>-2-1<br />
b. Cleaning.<br />
WARNING<br />
(1) Clean<br />
(2) Using<br />
(3) Steam<br />
Dry cleaning solvent is flammable. Do not use<br />
near an open flame. Keep a fire extinguisher<br />
nearby when solvent is used. Use only in well–<br />
ventilated places. Failure to do this may result<br />
in injury to personnel and damage to equipment.<br />
outside of tank with solvent.<br />
solvent, take off sediment on inside of tank.<br />
clean inside of tank to remove all fumes. Refer to TB 43-0212.<br />
4-28
<strong>TM</strong> 9-<strong>2320</strong>-<strong>211</strong>-<strong>34</strong>-2-1<br />
c. Inspection and Repair.<br />
FRAME 1<br />
1.<br />
Plug all openings in tank (1) except one.<br />
pressure into tank. Listen for air leaks.<br />
WARNING<br />
Put in air hose and put 6 psi of air<br />
2.<br />
3.<br />
4.<br />
5.<br />
Do not repair unless tank has been cleaned and properly<br />
treated to get rid of all inflammable or explosive fumes.<br />
Merely draining tank does not make it safe for welding.<br />
An “empty” tank can be more dangerous than a full one.<br />
Before repairing, thoroughly steam clean tank or use<br />
other approved method to completely take out all fumes.<br />
Weld small leaks. Refer to <strong>TM</strong> 9-237. If tank (1) has a large leak, get a new<br />
tank.<br />
Check that filler cap (2) and filler sleeve (3) are not cracked or dented. If<br />
cap or sleeve is damaged, get a new one.<br />
Check that filler cap gasket (4) is not worn or dried out. If gasket is worn<br />
or dried out, get a new one.<br />
Check that drain plug (5) has no damaged threads. If plug has damaged<br />
threads, get a new one.<br />
END OF TASK<br />
4-29
<strong>TM</strong> 9-<strong>2320</strong>-<strong>211</strong>-<strong>34</strong>-2-1<br />
d. Assembly.<br />
FRAME 1<br />
1.<br />
2.<br />
3.<br />
4.<br />
5.<br />
6.<br />
7.<br />
8.<br />
Put in electric fuel pump with gasket (1) for main tank (2) for vent cover<br />
with gasket (1) for auxiliary tank (2).<br />
Put in 10 screws (3) on main tank (2) and 12 screws (3) on auxiliary tank (2).<br />
Place sending unit (4) with gasket (5) in fuel tank (2).<br />
Put in five screws (6).<br />
Put filler sleeve (7) in fuel tank (2).<br />
Put gasket (8) in filler cap (9).<br />
Screw on filler cap (9).<br />
Put drain plug (10) in fuel tank (2).<br />
END OF TASK<br />
4-30
<strong>TM</strong> 9-<strong>2320</strong>-<strong>211</strong>-<strong>34</strong>-2-1<br />
Section V. COLD START SYSTEM<br />
4-9. FLAME HEATER (SIDE-MOUNTED, UNCOVERED AND SIDE-MOUNTED,<br />
COVERED) REPAIR.<br />
a. Removal. Refer to <strong>TM</strong> 9-<strong>2320</strong>-<strong>211</strong>-20.<br />
b. Repair. Refer to <strong>TM</strong> 9-2815-210-<strong>34</strong>.<br />
c. Replacement. Refer to <strong>TM</strong> 9-<strong>2320</strong>-<strong>211</strong>-20.<br />
4-31/(4-32 blank)
<strong>TM</strong> 9-<strong>2320</strong>-<strong>211</strong>-<strong>34</strong>-2-1<br />
CHAPTER 5<br />
COOLING SYSTEM GROUP MAINTENANCE<br />
Section I<br />
SCOPE<br />
5-1. EQUIPMENT ITEMS COVERED. This chapter gives equipment maintenance profan<br />
assembly for which there are autho-<br />
cedures for the radiator, water pump, and<br />
rized corrective maintenance tasks at the direct and general support maintenance<br />
levels.<br />
5-2. EQUIPMENT ITEMS NOT COVERED. All equipment items for which corrective<br />
maintenance is authorized at the direct and general support maintenance levels are<br />
covered in this chapter.<br />
Section II. RADIATOR<br />
5-3. ENGINE COOLING RADIATOR ASSEMBLY REPAIR.<br />
a. Removal. Remove engine cooling radiator assembly. Refer to <strong>TM</strong> 9-<strong>2320</strong>-<strong>211</strong>-20.<br />
b. Repair. Repair engine cooling radiator assembly. Refer to <strong>TM</strong> 750-25P.<br />
Replacement. Replace engine cooling radiator assembly. Refer to<br />
<strong>TM</strong> 9-<strong>2320</strong>-<strong>211</strong>-20.<br />
Section III. WATER PUMP<br />
5-4. WATER PUMP ASSEMBLY REPAIR.<br />
TOOLS:<br />
SUPPLIES:<br />
PERS<strong>ON</strong>NEL: One<br />
NOTE<br />
Engine model LDS 465-1 may have either an<br />
old type or new type of water pump housing<br />
assembly. Engine model LDS 465-1A has only<br />
the new type of water pump housing assembly.<br />
Since the old type of water pump housing<br />
assembly is no longer available, only the new<br />
type of water pump housing assembly may be<br />
put back. Both types are covered in this task.<br />
No special tools required<br />
EQUIPMENT C<strong>ON</strong>DITI<strong>ON</strong>:<br />
Water pump drive assembly gasket<br />
Solvent, dry cleaning, type II (SD-2), Fed. Spec P-D-680<br />
Rag<br />
Truck parked, engine off, handbrake set.<br />
5-1
<strong>TM</strong> 9-<strong>2320</strong>-<strong>211</strong>-<strong>34</strong>-2-1<br />
a. Preliminary Procedures.<br />
(1) Drain cooling system. Refer to <strong>TM</strong> 9-<strong>2320</strong>-<strong>211</strong>-20.<br />
(2) Remove water pump assembly. Refer to <strong>TM</strong> 9-<strong>2320</strong>-<strong>211</strong>-20.<br />
b. Disassemble.<br />
FRAME 1<br />
1. Takeoff six nuts (1) and lockwashers (2).<br />
2. Take off water pump drive assembly (3) and gasket (4). Throw away gasket.<br />
3. Takeout plug (5).<br />
END OF TASK<br />
5-2
<strong>TM</strong> 9-<strong>2320</strong>-<strong>211</strong>-<strong>34</strong>-2-1<br />
c. Cleaning.<br />
FRAME 1<br />
WARNING<br />
Dry cleaning solvent is flammable. Do not use<br />
near an open flame. Keep a fire extinguisher<br />
nearby when solvent is used. Use only in wellventilated<br />
places. Failure to do this may result<br />
in injury to personnel and damage to<br />
equipment.<br />
CAUTI<strong>ON</strong><br />
Be careful not to let solvent get on bearings inside<br />
of water pump drive assembly (1). Solvent<br />
can dissolve grease in bearings.<br />
1. Clean water pump drive assembly (1) using rag lightly dampened with solver<br />
2. Clean housing (2) with solvent.<br />
END OF TASK<br />
5-3
<strong>TM</strong> 9-<strong>2320</strong>-<strong>211</strong>-<strong>34</strong>-2-1<br />
d. Inspection.<br />
FRAME 1<br />
1. Check that water pump housing (1) has no cracks, nicks or stripped threads.<br />
Check that studs (2) on water pump housing have no stripped or worn threads.<br />
2. Check that water pump drive assembly (3) has no cracks, nicks, wear or signs<br />
of leakage.<br />
3. Turn water pump drive shaft (4), and check that it turns smoothly and evenly.<br />
END OF TASK<br />
5-4
<strong>TM</strong> 9-<strong>2320</strong>-<strong>211</strong>-<strong>34</strong>-2-1<br />
e. Repair.<br />
FRAME 1<br />
1. Throw away cracked or worn parts and get new parts in their place.<br />
2. Take out nicks in water pump housing (1) and water pump drive assembly (2)<br />
with fine mill file.<br />
3. Fix studs (3) with a thread chaser.<br />
4. If water pump drive assembly (2) shows signs of leakage, get a new water<br />
pump assembly.<br />
5. If water pump drive shaft (4) is loose or turns roughly, get a new water pump<br />
assembly.<br />
END OF TASK<br />
5-5
<strong>TM</strong> 9-<strong>2320</strong>-<strong>211</strong>-<strong>34</strong>-2-1<br />
f. Assembly.<br />
FRAME 1<br />
1.<br />
2.<br />
3.<br />
4.<br />
Put water pump drive assembly gasket (1) on water pump housing (2).<br />
Aline holes in water pump drive assembly (3) with studs of water pump<br />
housing (2) and put water pump drive assembly onto water pump housing.<br />
Put on six nuts (4) and lockwashers (5).<br />
Put in plug (6).<br />
NOTE<br />
Follow-on Maintenance Action Required:<br />
1. Replace water pump. Refer to <strong>TM</strong> 9-<strong>2320</strong>-<strong>211</strong>-20.<br />
2. Fill cooling system. Refer to <strong>TM</strong> 9-<strong>2320</strong>-<strong>211</strong>-20.<br />
END OF TASK<br />
5-6
<strong>TM</strong> 9-<strong>2320</strong>-<strong>211</strong>-<strong>34</strong>-2-1<br />
Section IV. FAN ASSEMBLY<br />
5-5. ENGINE COOLING FAN CLEANING, INSPECTI<strong>ON</strong>, AND REPAIR.<br />
TOOLS:<br />
SUPPLIES:<br />
PERS<strong>ON</strong>NEL: One<br />
No special tools required<br />
EQUIPMENT C<strong>ON</strong>DITI<strong>ON</strong>:<br />
Solvent, dry cleaning, type II (SD-2), Fed. Spec P-D-680<br />
Clean, dry rags<br />
a. Preliminary Procedures.<br />
Truck parked, engine off, handbrake set.<br />
(1) Open hood. Refer to <strong>TM</strong> 9-<strong>2320</strong>-<strong>211</strong>-10.<br />
(2) Remove fan. Refer to <strong>TM</strong> 9-<strong>2320</strong>-<strong>211</strong>-20.<br />
5-7
<strong>TM</strong> 9-<strong>2320</strong>-<strong>211</strong>-<strong>34</strong>-2-1<br />
b. Cleaning, Inspection, and Repair.<br />
WARNING<br />
Dry cleaning solvent is flammable. Do not use near an<br />
open flame. Keep a fire extinguisher nearby when solvent<br />
is used. Use only in well-ventilated places. Failure<br />
to do this may result in injury to personnel and damage<br />
to equipment.<br />
(1) Cleaning. Clean fan with dry cleaning solvent, type II (SD-2) Fed.<br />
Spec P-D-680. Wipe with clean, dry rag.<br />
(2) Inspection and repair.<br />
FRAME 1<br />
1. Check that rivets (1) are tight. Replace fan if rivets are loose.<br />
2. Check that blades (2) have no nicks. Repair nicks using a mill file.<br />
3. Check that fan blades (2) are not cracked. If fan blades are cracked, get<br />
new fan.<br />
4. Check that fan hub (3) is not cracked. If fan hub is cracked, get new fan.<br />
END OF TASK<br />
NOTE<br />
Follow-on Maintenance Action Required:<br />
1. Replace fan. Refer to <strong>TM</strong> 9-<strong>2320</strong>-<strong>211</strong>-20.<br />
2. Close hood. Refer to <strong>TM</strong> 9-<strong>2320</strong>-<strong>211</strong>-10.<br />
5-8
<strong>TM</strong> 9-<strong>2320</strong>-<strong>211</strong>-<strong>34</strong>-2-1<br />
CHAPTER 6<br />
ELECTRICAL SYSTEM GROUP MAINTENANCE<br />
Section I. SCOPE<br />
6-1. EQUIPMENT ITEMS COVERED. This chapter gives equipment maintenance procedures<br />
for the charging and starting systems, instrument panel, lighting system,<br />
horn assembly, battery system and cab and chassis wiring harnesses for which there<br />
are authorized corrective maintenance tasks at the direct and general support maintenance<br />
levels.<br />
6-2. EQUIPMENT ITEMS NOT COVERED. All equipment items for which corrective<br />
maintenance is authorized at the direct and general support maintenance levels are<br />
covered in this chapter.<br />
Section II. CHARGING SYSTEM<br />
6-3. ENGINE GENERATOR REPAIR.<br />
a. Removal. Remove engine generator. Refer to <strong>TM</strong> 9-<strong>2320</strong>-<strong>211</strong>-20.<br />
b. Repair. Repair engine generator. Refer to <strong>TM</strong> 9-2920-214-35 and<br />
<strong>TM</strong> 9-2920-247-<strong>34</strong>.<br />
c. Replacement. Replace engine generator. Refer to <strong>TM</strong> 9-<strong>2320</strong>-<strong>211</strong>-20.<br />
6-1
<strong>TM</strong> 9-<strong>2320</strong>-<strong>211</strong>-<strong>34</strong>-2-1<br />
6-4. GENERATOR MOUNTING BRACKET REMOVAL, REPAIR, AND REPLACEMENT.<br />
TOOLS: No special tools required<br />
SUPPLIES: None<br />
PERS<strong>ON</strong>NEL: One<br />
EQUIPMENT C<strong>ON</strong>DITI<strong>ON</strong>: Truck parked, engine off, handbrake set.<br />
a. Preliminary Procedures.<br />
(1) Open hood. Refer to <strong>TM</strong> 9-<strong>2320</strong>-<strong>211</strong>-10.<br />
(2) Disconnect battery ground cable. Refer to <strong>TM</strong> 9-<strong>2320</strong>-<strong>211</strong>-20.<br />
(3) Remove generator. Refer to <strong>TM</strong> 9-<strong>2320</strong>-<strong>211</strong>-20.<br />
b. Removal.<br />
FRAME 1<br />
1. Working through splash shield, take out three bolts (1) with six washers (2).<br />
2. Take off bracket (3).<br />
END OF TASK<br />
6-2
<strong>TM</strong> 9-<strong>2320</strong>-<strong>211</strong>-<strong>34</strong>-2-1<br />
c. Cleaning. There are no peculiar cleaning procedures needed. Refer to cleaning<br />
procedures in para 1-3.<br />
d. Inspection. Check that bracket is not cracked or bent. If bracket is damaged, get<br />
a new one.<br />
e. Replacement.<br />
FRAME 1<br />
1.<br />
2.<br />
3.<br />
4.<br />
Working through splash shield, hold bracket (1) against side of engine (2) as shown.<br />
Put in and hand tighten center bolt (3) with two washers (4).<br />
Put in and hand tighten two end bolts (5) with four washers (6).<br />
Tighten all three bolts (3 and 5).<br />
END OF TASK<br />
NOTE<br />
Follow-on Maintenance Action Required:<br />
1. Replace generator. Refer to <strong>TM</strong> 9-<strong>2320</strong>-<strong>211</strong>-20.<br />
2. Reconnect battery ground cable. Refer to<br />
<strong>TM</strong> 9-<strong>2320</strong>-<strong>211</strong>-20.<br />
3. Close hood. Refer to <strong>TM</strong> 9-<strong>2320</strong>-<strong>211</strong>-10.<br />
6-3
<strong>TM</strong> 9-<strong>2320</strong>-<strong>211</strong>-<strong>34</strong>-2-1<br />
6-5. ENGINE GENERATOR REGULATOR REMOVAL, REPAIR, AND REPLACEMENT.<br />
a. Removal. Refer to <strong>TM</strong> 9-<strong>2320</strong>-<strong>211</strong>-20.<br />
b. Repair.<br />
(1) Delco-Remy model 1118656 regulator. Replace with Delco Remy (19728)<br />
Part No. 1181106 ( 16764) regulator or Auto-Lite model part no. VBC-4003-UT regulator.<br />
(2) Delco-Remy model 1118606 regulator. Refer to <strong>TM</strong> 9-8627.<br />
(3) Auto-Lite model VBC-4003-UT regulator. Refer to <strong>TM</strong> 9-2920-210-<strong>34</strong>.<br />
c. Replacement. Refer to <strong>TM</strong> 9-<strong>2320</strong>-<strong>211</strong>-20.<br />
Section III.<br />
STARTING SYSTEM<br />
6-6. STARTER REPAIR.<br />
a. Removal. Remove starter. Refer to <strong>TM</strong> 9-<strong>2320</strong>-<strong>211</strong>-20.<br />
b. Repair. Rep air starter. Refer to <strong>TM</strong> 9-2920-242-<strong>34</strong>&P.<br />
c. Replacement. Replace starter. Refer to <strong>TM</strong> 9-<strong>2320</strong>-<strong>211</strong>-20.<br />
6-4
<strong>TM</strong> 9-<strong>2320</strong>-<strong>211</strong>-<strong>34</strong>-2-1<br />
6-7. ENGINE STARTER SOLENOID REMOVAL AND REPLACEMENT.<br />
TOOLS: No special tools required<br />
SUPPLIES: None<br />
PERS<strong>ON</strong>NEL: One<br />
EQUIPMENT C<strong>ON</strong>DITI<strong>ON</strong>: Starter assembly on<br />
a. Removal.<br />
FRAME 1<br />
1. Take off nut (1) and washer (2).<br />
2. Take off ground wire (3).<br />
3. Take off two nuts (4 and 5) and washers (6 and 7).<br />
4. Take off connector (8).<br />
GO TO FRAME 2<br />
6-5
<strong>TM</strong> 9-<strong>2320</strong>-<strong>211</strong>-<strong>34</strong>-2-1<br />
FRAME 2<br />
1. Take out two screws (1).<br />
2. Pull starter solenoid (2) away from starter case (3).<br />
3. Unscrew starter solenoid plunger (4) from linkage (5).<br />
4. Take off starter solenoid (2).<br />
END OF TASK<br />
6-6
<strong>TM</strong> 9-<strong>2320</strong>-<strong>211</strong>-<strong>34</strong>-2-1<br />
b. Replacement.<br />
FRAME 1<br />
1. Aline starter solenoid plunger (1) with linkage (2).<br />
2 . Finger tighten stater solenoid plunger (1) to linkage (2).<br />
3. Aline holes in starter solenoid (3) with holes in stader case (4).<br />
4. Put in two screws (5).<br />
GO TO FRAME 2<br />
6-7
<strong>TM</strong> 9-<strong>2320</strong>-<strong>211</strong>-<strong>34</strong>-2-1<br />
FRAME 2<br />
1. Put on ground wire (1), nut (2), and washer (3).<br />
2. Put connector (4) in place on starter solenoid (5) and starter assembly (6).<br />
3. Put on two washers (7 and 8) and nuts (9 and 10).<br />
END OF TASK<br />
6-8
<strong>TM</strong> 9-<strong>2320</strong>-<strong>211</strong>-<strong>34</strong>-2-1<br />
6-8. STARTER RELAY HARNESS REMOVAL AND REPLACEMENT.<br />
TOOLS:<br />
SUPPLIES:<br />
PERS<strong>ON</strong>NEL:<br />
No special tools required<br />
Tags<br />
Two<br />
EQUIPMENT C<strong>ON</strong>DITI<strong>ON</strong>:<br />
a. Preliminary Procedures.<br />
Truck parked, engine off, handbrake set.<br />
(1) Disconnect battery ground cable at frame. Refer to <strong>TM</strong> 9-<strong>2320</strong>-<strong>211</strong>-20.<br />
(2) Open hood. Refer to <strong>TM</strong> 9-<strong>2320</strong>-<strong>211</strong>-10.<br />
(3) Takeoff side access panels. Refer to <strong>TM</strong> 9-<strong>2320</strong>-<strong>211</strong>-10<br />
(4) Pullback thermal barrier in cab on left side of firewall (if installed).<br />
Refer to Part 4, para 19-20.<br />
6-9
<strong>TM</strong> 9-<strong>2320</strong>-<strong>211</strong>-<strong>34</strong>-2-1<br />
b. Removal.<br />
NOTE<br />
Tag leads before taking them off so that they<br />
can be put back in the right place.<br />
FRAME 1<br />
1. Working from under truck, take off nut (1) and screw (2). Take off<br />
wires (3) and (4).<br />
GO TO FRAME 2<br />
6-10
<strong>TM</strong> 9-<strong>2320</strong>-<strong>211</strong>-<strong>34</strong>-2-1<br />
FRAME 2<br />
Soldier A 1. Working in cab, hold screw (1).<br />
Soldier B 2.<br />
END OF TASK<br />
Working in rear of engine compartment, take off nut (2) and<br />
harness ground wire (3) from starter relay (4).<br />
3. Unplug common ground wire (5) from starter relay harness (6).<br />
4. Unscrew and take off quick disconnect (7) from starter relay (4).<br />
5. Take out starter relay harness (6).<br />
6-11
<strong>TM</strong> 9-<strong>2320</strong>-<strong>211</strong>-<strong>34</strong>-2-1<br />
c. Replacement.<br />
FRAME 1<br />
Soldier A 1.<br />
Plug quick disconnect (1) on starter relay harness (2) into starter<br />
relay (3). Tighten coupling (4).<br />
2. Plug common ground wire (5) into plug (6) from starter relay<br />
harness (2).<br />
Soldier B 3. Working in cab of truck, hold head of screw (7).<br />
Soldier A 4. Put ground wire (8) and nut (9) on screw (7).<br />
GO TO FRAME 2<br />
6-12
<strong>TM</strong> 9-<strong>2320</strong>-<strong>211</strong>-<strong>34</strong>-2-1<br />
FRAME 2<br />
1. Working under truck, put back wire (1) and nut (2) on starter stud (3).<br />
2. Put screw (4) through wire (5) and into starter terminal (6).<br />
END OF TASK<br />
NOTE<br />
Follow-on Maintenance Action Required:<br />
1. Replace thermal barrier in cab on left side<br />
of firewall (if taken off). Refer to Part 4,<br />
para 19-20.<br />
2. Replace side access panels. Refer to<br />
<strong>TM</strong> 9-<strong>2320</strong>-<strong>211</strong>-10.<br />
3. Reconnect battery ground cable at frame.<br />
Refer to <strong>TM</strong> 9-<strong>2320</strong>-<strong>211</strong>-20.<br />
4. Close hood. Refer to <strong>TM</strong> 9-<strong>2320</strong>-<strong>211</strong>-10.<br />
6-13
<strong>TM</strong> 9-<strong>2320</strong>-<strong>211</strong>-<strong>34</strong>-2-1<br />
Section IV.<br />
INSTRUMENT PANEL<br />
6-9. INSTRUMENT PANEL REPAIR.<br />
TOOLS :<br />
SUPPLIES :<br />
No special tools required<br />
None<br />
PERS<strong>ON</strong>NEL: Two<br />
EQUIPMENT C<strong>ON</strong>DITI<strong>ON</strong>:<br />
Truck parked, engine off, handbrake set.<br />
a. Preliminary Procedure. Remove instrument panel. Refer to <strong>TM</strong><br />
b. Cleaning. There are no special cleaning procedures required.<br />
cleaning procedures given in para 1–3.<br />
c. Inspection and Repair.<br />
(1) Inspect the instrument panel for dents, cracks, warping,<br />
holes, damaged instrument cut-out holes and burrs.<br />
9-<strong>2320</strong>-<strong>211</strong>-20.<br />
Refer to<br />
damaged screw<br />
(2) Repair the instrument panel by straightening out dents.<br />
smooth out burrs and screw holes that are damaged.<br />
(3) Repair cracks by welding. Refer to <strong>TM</strong> 9-237.<br />
NOTE<br />
Follow-on Maintenance Action Required:<br />
Replace instrument panel. Refer to <strong>TM</strong> 9-<strong>2320</strong>-<strong>211</strong>-20.<br />
Use a file to<br />
6-14
<strong>TM</strong> 9-<strong>2320</strong>-<strong>211</strong>-<strong>34</strong>-2-1<br />
6-10. ACCESSORY WIRING CIRCUIT BREAKERS REMOVAL AND REPLACEMENT.<br />
NOTE<br />
This task shows three circuit breakers on firewall.<br />
The M543A2 truck has one more circuit<br />
breaker on firewall. The task for the fourth<br />
circuit breaker is the same.<br />
TOOLS: No special tools required<br />
SUPPLIES: Tags<br />
PERS<strong>ON</strong>NEL: One<br />
EQUIPMENT C<strong>ON</strong>DITI<strong>ON</strong>: Truck parked, engine off, handbrake set.<br />
a. Preliminary Procedures.<br />
(1) Open hood. Refer to <strong>TM</strong> 9-<strong>2320</strong>-<strong>211</strong>-10.<br />
(2) Disconnect battery ground cable. Refer to <strong>TM</strong> 9-<strong>2320</strong>-<strong>211</strong>-20.<br />
b. Removal.<br />
FRAME 1<br />
NOTE<br />
Tag wires on circuit breakers so wires can be put back<br />
in the same places.<br />
1. Unplug two connectors (1) from circuit breaker (2).<br />
2. Take out two screws (3). Take off circuit breaker (2).<br />
3. Do steps 1 and 2 again for circuit breakers (4 and 5).<br />
END OF TASK<br />
6-15
<strong>TM</strong> 9-<strong>2320</strong>-<strong>211</strong>-<strong>34</strong>-2-1<br />
c. Replacement.<br />
FRAME 1<br />
1. Put circuit breaker (1) in place and aline holes<br />
two screws. Plug in two connectors (3).<br />
2. Do step 1 again for circuit breakers (4 and 5).<br />
END OF TASK<br />
NOTE<br />
Follow-on Maintenance Action Required:<br />
for two screws (2).<br />
1. Close Hood. Refer to <strong>TM</strong> 9-<strong>2320</strong>-<strong>211</strong>-10.<br />
2. Reconnect battery ground cable. Refer<br />
to <strong>TM</strong> 9-<strong>2320</strong>-<strong>211</strong>-20.<br />
Put in<br />
6-16
<strong>TM</strong> 9-<strong>2320</strong>-<strong>211</strong>-<strong>34</strong>-2-1<br />
Section V.<br />
LIGHTING SYSTEM<br />
6-11. FLOODLIGHT ASSEMBLY REPAIR (TRUCK M543A2).<br />
TOOLS:<br />
SUPPLIE:<br />
PERS<strong>ON</strong>NEL:<br />
No special tools required<br />
Solvent, dry cleaning, type II (SD-2) , Fed. Spec P-D-680<br />
Soapy water<br />
Lint free cloth<br />
Electrical contact cleaner, pn MS 230<br />
One<br />
EQUIPMENT C<strong>ON</strong>DITI<strong>ON</strong>: Truck parked, engine off, handbrake set.<br />
a.<br />
Preliminary Procedure. Remove floodlight assembly. Refer to<br />
<strong>TM</strong> 9-<strong>2320</strong>-<strong>211</strong>-20<br />
b. Cleaning.<br />
WARNING<br />
cloth.<br />
(1) Clean<br />
(2) Clean<br />
(3) Clean<br />
Dry cleaning solvent is flammable. Do not use<br />
near an open flame. Keep a fire extinguisher<br />
nearby when solvent is used. Use only in well–<br />
ventilated places. Failure to do this may result<br />
in injury to personnel and damage to equipment.<br />
metal parts with dry cleaning solvent. Thoroughly dry parts.<br />
light door with soap<br />
electrical parts with<br />
and water. Dry light door with clean lint-free<br />
electrical contact cleaner.<br />
6-17
<strong>TM</strong> 9-<strong>2320</strong>-<strong>211</strong>-<strong>34</strong>-2-1<br />
c. Inspection and Repair.<br />
FRAME 1<br />
1. Check that body (1) and light door (2) have no cracks or signs of leaks. If parts are<br />
damaged, get new ones in their place.<br />
2. Check that two cables (3), sockets (4), and connectors (5) are not damaged. If parts<br />
are damaged, get new ones in their place.<br />
3. Check that switch assembly (6) is not damaged. If switch assembly is damaged, get<br />
a new one.<br />
END OF TASK<br />
NOTE<br />
Follow-on Maintenance Action Required:<br />
Replace floodlight assembly. Refer to <strong>TM</strong> 9-<strong>2320</strong>-<strong>211</strong>-20.<br />
6-18
<strong>TM</strong> 9-<strong>2320</strong>-<strong>211</strong>-<strong>34</strong>-2-1<br />
Section VI.<br />
HORN ASSEMBLY<br />
6-12. HORN ASSEMBLY REPAIR.<br />
TOOLS:<br />
SUPPLIES:<br />
PERS<strong>ON</strong>NEL:<br />
No special tools required<br />
Solvent, dry cleaning, type II (SD-2) , Fed. Spec P-D-680.<br />
Rag<br />
One<br />
EQUIPMENT C<strong>ON</strong>DITI<strong>ON</strong>:<br />
Truck parked, engine off, handbrake set.<br />
a. Preliminary Procedure. Remove horn. Refer to <strong>TM</strong> 9–<strong>2320</strong>-<strong>211</strong>-20.<br />
b. Disassembly.<br />
FRAME 1<br />
1. Take off elbow (1).<br />
2. Take off solenoid (2) from horn assembly base (3).<br />
END OF TASK<br />
6-19
<strong>TM</strong> 9-<strong>2320</strong>-<strong>211</strong>-<strong>34</strong>-2-1<br />
WARNING<br />
Dry cleaning solvent is flammable. Do<br />
not use near an open flame. Keep a<br />
fire extinguisher nearby when solvent<br />
is used. Use only in well-ventilated<br />
places. Failure to do this may result<br />
in injury to personnel and damage to<br />
equipment.<br />
c. Cleaning. Clean outside of horn with cloth dipped in dry cleaning solvent.<br />
6-20
<strong>TM</strong> 9-<strong>2320</strong>-<strong>211</strong>-<strong>34</strong>-2-1<br />
d. Inspection and Repair.<br />
FRAME 1<br />
1. Check that horn assembly (1) is not damaged. Straighten projectors (2) if<br />
they are bent. If more repair is needed, get a new horn assembly.<br />
2. Check that solenoid (3) is not damaged. If solenoid is damaged, get a new<br />
one.<br />
3. Check that threads on elbow (4) are not stripped or damaged. If elbow is<br />
damaged, get a new one.<br />
END OF TASK<br />
6-21
<strong>TM</strong> 9-<strong>2320</strong>-<strong>211</strong>-<strong>34</strong>-2-1<br />
e. Assembly.<br />
1. Put solenoid (1) into horn assembly (2).<br />
2. Put on elbow (3).<br />
NOTE<br />
Follow-on Maintenance Action Required:<br />
Replace horn assembly. Refer to <strong>TM</strong> 9-<strong>2320</strong>-<strong>211</strong>-20.<br />
END OF TASK<br />
6-22
<strong>TM</strong> 9-<strong>2320</strong>-<strong>211</strong>-<strong>34</strong>-2-1<br />
6-13. HORN C<strong>ON</strong>TACT BRUSH ASSEMBLY REMOVAL AND REPLACEMENT.<br />
TOOLS:<br />
SUPPLIES:<br />
PERS<strong>ON</strong>NEL:<br />
No special tools required<br />
Cover gasket<br />
Brush holder gasket<br />
One<br />
EQUIPMENT C<strong>ON</strong>DITI<strong>ON</strong>:<br />
a. Preliminary Procedures.<br />
Truck parked, engine off, handbrake set.<br />
(1) Open hood. Refer to <strong>TM</strong> 9-<strong>2320</strong>-<strong>211</strong>-10.<br />
(2) Takeoff left side access panel. Refer to <strong>TM</strong> 9-<strong>2320</strong>-<strong>211</strong>-10.<br />
b. Removal.<br />
FRAME 1<br />
1.<br />
2.<br />
3.<br />
4.<br />
5.<br />
GO<br />
Takeout lead (1) from cover (2).<br />
Take out four screws (3) and washers (4).<br />
Lift up cover (2).<br />
Take out screw (5), washer (6), and electrical lead (7).<br />
Take off cover (2) and gasket (8). Throw away gasket.<br />
TO FRAME 2<br />
6-23
<strong>TM</strong> 9-<strong>2320</strong>-<strong>211</strong>-<strong>34</strong>-2-1<br />
FRAME 2<br />
1. Take out two screws (1), and two washers (2).<br />
2. Take out contact brush (3) and gasket (4). Throw away gasket.<br />
END OF TASK<br />
6-24
<strong>TM</strong> 9-<strong>2320</strong>-<strong>211</strong>-<strong>34</strong>-2-1<br />
c. Replacement.<br />
1. Place gasket (1) and contact brush (2) on steering column (3).<br />
2. Put washer (4) on each of two screws (5). Put in screws.<br />
GO TO FRAME 2<br />
6-25
<strong>TM</strong> 9-<strong>2320</strong>-<strong>211</strong>-<strong>34</strong>-2-1<br />
FRAME 2<br />
1. Put gasket (1) on steering wheel column (2).<br />
2. Put lead (3) on contact brush (4).<br />
3. Put in screw (5) and washer (6).<br />
4. Put cover (7) over gasket (1).<br />
5. Put in four screws (8) and washers (9).<br />
6. Plug in lead (10) to cover (7).<br />
END OF TASK<br />
NOTE<br />
Follow-on Maintenance Action Required:<br />
1. Put on left side access panel. Refer to<br />
<strong>TM</strong> 9-<strong>2320</strong>-<strong>211</strong>-10).<br />
2. Close hood. Refer to <strong>TM</strong> 9-<strong>2320</strong>-<strong>211</strong>-10.<br />
6-26
<strong>TM</strong> 9-<strong>2320</strong>-<strong>211</strong>-<strong>34</strong>-2-1<br />
Section VII.<br />
BATTERY SYSTEM<br />
6-14. BATTERY REPAIR.<br />
a. Removal. Remove battery. Refer to <strong>TM</strong> 9-<strong>2320</strong>-<strong>211</strong>-20.<br />
b. Repair. Repair battery. Refer to <strong>TM</strong> 9-6140-200-14.<br />
c. Replacement. Replace battery. Refer to <strong>TM</strong> 9-<strong>2320</strong>-<strong>211</strong>-20.<br />
6-27
<strong>TM</strong> 9-<strong>2320</strong>-<strong>211</strong>-<strong>34</strong>-2-1<br />
Section VIII.<br />
CAB AND CHASSIS WIRING HARNESSES<br />
6-15. WIRE CLAMPS REMOVAL AND REPLACEMENT.<br />
TOOLS: No special tools required<br />
SUPPLIES: Chalk, SS-C-266F<br />
PERS<strong>ON</strong>NEL: One<br />
EQUIPMENT C<strong>ON</strong>DITI<strong>ON</strong>: Truck parked, engine off, handbrake set.<br />
a. Removal.<br />
FRAME 1<br />
1. Follow wire to clamp. If clamp is screw type (1), using 7/16-inch wrench,<br />
take off nut (2) from screw (3). Take off clamp (1). Circle hole in chassis<br />
with chalk.<br />
2. If clamp is disposable plastic type (4) , cut off clamp and mark straight line<br />
with chalk on chassis.<br />
3. If clamp is wrap-around type (5) , unwrap and take out wire.<br />
END OF TASK<br />
6-28
<strong>TM</strong> 9-<strong>2320</strong>-<strong>211</strong>-<strong>34</strong>-2-1<br />
b. Replacement.<br />
FRAME 1<br />
1. If hole on chassis is circled with chalk, put on screw type clamp (1). Put in<br />
screw (2). Put on nut (3), using 7/16-inch wrench.<br />
2. If chassis has straight chalk line, put on disposable plastic clamp (4). Put<br />
clamp around wire. Put end of clamp (5) through loop (6) and pull end of clamp<br />
until clamp is tight.<br />
3. If clamp is wrap-around type (7), place wire in clamp and wrap metal strip<br />
around wire.<br />
END OF TASK<br />
6-29
<strong>TM</strong> 9-<strong>2320</strong>-<strong>211</strong>-<strong>34</strong>-2-1<br />
6-16. FR<strong>ON</strong>T WIRING HARNESS REMOVAL AND REPLACEMENT.<br />
TOOLS:<br />
SUPPLIES:<br />
No special tools required<br />
Tags<br />
Chalk<br />
PERS<strong>ON</strong>NEL: TW O<br />
EQUIPMENT C<strong>ON</strong>DITI<strong>ON</strong>:<br />
a. Preliminary Procedure.<br />
<strong>TM</strong>9-<strong>2320</strong>-<strong>211</strong>-20.<br />
b. Removal.<br />
Truck parked, engine off, handbrake set.<br />
Disconnect battery negative (-) lead. Refer to<br />
NOTE<br />
Tag both sides of a connector before taking it apart,<br />
so it can be put back the same way.<br />
Before taking out harness, mark routing along<br />
chassis and engine with chalk so that it can be<br />
put back the same way.<br />
FRAME 1<br />
1. Take off nut (1) from bolt (2).<br />
2. Take off two leads (3) from bolt (2).<br />
GO TO FRAME 2<br />
6-30
<strong>TM</strong> 9-<strong>2320</strong>-<strong>211</strong>-<strong>34</strong>-2-1<br />
FRAME 2<br />
1. Working behind instrument cluster, take off speedometer shaft (1) from<br />
speedometer (2).<br />
2. Take off tachometer shaft (3) from tachometer (4).<br />
GO TO FRAME 3<br />
6-31
<strong>TM</strong> 9-<strong>2320</strong>-<strong>211</strong>-<strong>34</strong>-2-1<br />
FRAME 3<br />
1. Loosen four quick disconnect mounting studs (1).<br />
2. Pull instrument cluster (2) away from instrument panel (3).<br />
3. Unplug connector (4) from turn signal control arm (5).<br />
GO TO FRAME 4<br />
6-32
<strong>TM</strong> 9-<strong>2320</strong>-<strong>211</strong>-<strong>34</strong>-2-1<br />
1. Unplug six leads (1) from instrument cluster (2).<br />
2. Unplug lead (3) from top of low air pressure switch (4).<br />
3. Unplug two leads (5) from FUEL TRANSFER SWITCH (6).<br />
4. Unplug lead (7) from FUEL TRANSFER SWITCH indicator light (8).<br />
GO TO FRAME 5<br />
6-33
<strong>TM</strong> 9-<strong>2320</strong>-<strong>211</strong>-<strong>34</strong>-2-1<br />
FRAME 5<br />
1. Tilt instrument panel (1) forward.<br />
2. Unplug lead (2) from STARTER switch (3).<br />
3. Unplug two leads (4) from manifold heater switch (5).<br />
4. Unscrew and unplug connector (6) from MASTER light switch (7).<br />
5. Unplug three harness leads (8) from IGNITI<strong>ON</strong> switch (9).<br />
GO TO FRAME 6<br />
6-<strong>34</strong>
<strong>TM</strong> 9-<strong>2320</strong>-<strong>211</strong>-<strong>34</strong>-2-1<br />
FRAME 6<br />
1. Unplug two leads (1) from fuel selector switch (2).<br />
2. Unplug two leads (3) from circuit breaker (4).<br />
GO TO FRAME 7<br />
6-35
<strong>TM</strong> 9-<strong>2320</strong>-<strong>211</strong>-<strong>34</strong>-2-1<br />
FRAME 7<br />
1. Take off three leads (1) from dimmer switch (2).<br />
GO TO FRAME 8<br />
6-36
<strong>TM</strong> 9-<strong>2320</strong>-<strong>211</strong>-<strong>34</strong>-2-1<br />
FRAME 8<br />
Soldier A 1. Loosen four quick disconnect screws (1).<br />
Soldier B 5.<br />
2. Loosen capscrew (2).<br />
3. Slide accessory panel (3) down.<br />
4. Unplug rear wiring harness connector (4) from front wiring harness<br />
connector (5).<br />
Hold four nuts (6) from turning.<br />
Soldier A 6. Take out four screws (7) from front wiring harness connector (5).<br />
GO TO FRAME 9<br />
7. Take out front wiring harness connector (5) from bracket (8).<br />
6-37
<strong>TM</strong> 9-<strong>2320</strong>-<strong>211</strong>-<strong>34</strong>-2-1<br />
FRAME 9<br />
1. Unplug three leads (1) from right parking and blackout marker light (2).<br />
2. Unplug two top leads (3) from right headlight (4).<br />
3. Unplug lead (5) from blackout driving light (6).<br />
4. Unplug two top leads (7) from left headlight (8).<br />
5. Unplug three leads (9) from left parking and blackout marker light (10).<br />
GO TO FRAME 10<br />
6-38
<strong>TM</strong> 9-<strong>2320</strong>-<strong>211</strong>-<strong>34</strong>-2-1<br />
FRAME 10<br />
1.<br />
2.<br />
3.<br />
4.<br />
5.<br />
GO<br />
Unplug connector (1) from regulator (2).<br />
Unplug connector (3) from flasher unit (4).<br />
Take out screw, washer, and nut (5) holding lead (6).<br />
Unplug six leads (7) from circuit breakers (8).<br />
Unplug lead (9) from horn relay (10).<br />
TO FRAME 11<br />
6-39
<strong>TM</strong> 9-<strong>2320</strong>-<strong>211</strong>-<strong>34</strong>-2-1<br />
FRAME 11<br />
NOTE<br />
If truck has starter relay (1) mounted on firewall,<br />
go to step 1. If truck does not have starter relay<br />
mounted on firewall, go to step 2.<br />
1. Unplug starter relay lead (2) from front harness lead (3).<br />
2. Take off nut and washer (4) from starter solenoid. Take off lead (5).<br />
GO TO FRAME 12<br />
6-40
<strong>TM</strong> 9-<strong>2320</strong>-<strong>211</strong>-<strong>34</strong>-2-1<br />
FRAME 12<br />
1.<br />
2.<br />
3.<br />
4.<br />
GO<br />
Unplug two leads (1) from horn (2).<br />
Unplug lead (3) from oil pressure sending unit (4).<br />
Unplug lead (5) from water temperature sending unit (6).<br />
Unplug lead (7) from manifold heater harness lead (8).<br />
TO FRAME 13<br />
6-41
<strong>TM</strong> 9-<strong>2320</strong>-<strong>211</strong>-<strong>34</strong>-2-1<br />
NOTE<br />
On trucks M543A2, brake lock and floodlight<br />
switches must be disconnected from under<br />
instrument panel. Emergency warning light<br />
must be disconnected. Truck M543A2 has two<br />
clamps with leads going through fire wall.<br />
FRAME 13<br />
Soldier A 1. Working in cab behind instrument panel, hold cap screws (1).<br />
Soldier B 2. Take off two nuts (2) and washers (3).<br />
3. Take off grommets (4).<br />
Soldier A 4. Take out capscrews (1) and washers (5).<br />
Soldiers 5. Take all clamps off wiring harness. Refer to para 6-15.<br />
A and B<br />
END OF TASK<br />
6. Take wiring harness out of truck.<br />
6-42
<strong>TM</strong> 9-<strong>2320</strong>-<strong>211</strong>-<strong>34</strong>-2-1<br />
c. Replacement.<br />
NOTE<br />
When putting in new harness, lay old and new<br />
harnesses side by side and tag wires on new<br />
harness to match old harness. If there is<br />
any questions about which wire in a group<br />
gets a particular tag, match the numbers on<br />
the small metal tags on the new harness with<br />
ones on old harness.<br />
Soldiers 1. Route harness (1) in engine compartment and through firewall as<br />
A and B noted.<br />
2. Put all clamps on wiring harness. Refer to para 6-15.<br />
GO TO FRAME 2<br />
6-43
<strong>TM</strong> 9-<strong>2320</strong>-<strong>211</strong>-<strong>34</strong>-2-1<br />
NOTE<br />
On trucks M543A2, brake lock and floodlight<br />
switches must be connected from under<br />
instrument panel. Emergency warning light<br />
must be connected. Route two clamps with<br />
leads through fire wall.<br />
FRAME 2<br />
Soldier A 1. Working in cab behind instrument panel, put two capscrews (1)<br />
with washers (2) through holes in firewall.<br />
Soldier B 2.<br />
GO TO FRAME 3<br />
Put two grommets (3), washers (4), and nuts (5) on<br />
capscrews (1).<br />
6-44
<strong>TM</strong> 9-<strong>2320</strong>-<strong>211</strong>-<strong>34</strong>-2-1<br />
FRAME 3<br />
1. Plug<br />
2. Plug<br />
3. Plug<br />
4. Plug<br />
GO TO FRAME 4<br />
NOTE<br />
After leads are plugged into connectors, take off tags.<br />
two harness leads (1) into horn (2).<br />
harness lead (3) into manifold heater lead (4).<br />
harness lead (5) into temperature sending unit (6).<br />
harness lead (7) into oil pressure sending unit (8).<br />
6-45
<strong>TM</strong> 9-<strong>2320</strong>-<strong>211</strong>-<strong>34</strong>-2-1<br />
FRAME 4<br />
NOTE<br />
If truck has starter relay (1) mounted on firewall,<br />
go to step 1. If truck does not have starter relay,<br />
go to step 2.<br />
1. Plug starter relay lead (2) into harness lead (3).<br />
2. Put on lead (4), washer (5), and nut (6).<br />
GO TO FRAME 5<br />
6-46
<strong>TM</strong> 9-<strong>2320</strong>-<strong>211</strong>-<strong>34</strong>-2-1<br />
FRAME 5<br />
1.<br />
2.<br />
3.<br />
4.<br />
5.<br />
GO<br />
Screw in connector (1) into regulator (2).<br />
Screw connector (3) into flasher unit (4).<br />
Plug six leads (5) into circuit breakers (6).<br />
Plug lead (7) into horn relay (8).<br />
Hook up ground lead (9) to flasher unit (4).<br />
TO FRAME 6<br />
6-47
<strong>TM</strong> 9-<strong>2320</strong>-<strong>211</strong>-<strong>34</strong>-2-1<br />
FRAME 6<br />
1. Plug three leads (1) into right parking and blackout marker light (2).<br />
2. Plug two leads (3) into top of right headlight (4).<br />
3. Plug lead (5) into blackout driving light (6).<br />
4. Plug two leads (7) into top of left headlight (8).<br />
5. Plug three leads (9) into left parking and blackout marker light (10).<br />
GO TO FRAME 7<br />
6-48
<strong>TM</strong> 9-<strong>2320</strong>-<strong>211</strong>-<strong>34</strong>-2-1<br />
FRAME 7<br />
1. Put front wiring harness connector (1) into bracket (2).<br />
2. Put in and tighten four screws (3).<br />
3. Screw in rear harness connector (4) into front harness connector (1).<br />
4. Slide accessory panel (5) up.<br />
5. Screw in four quick disconnect screws (6).<br />
6. Tighten capscrew (7).<br />
GO TO FRAME 8<br />
6-49
<strong>TM</strong> 9-<strong>2320</strong>-<strong>211</strong>-<strong>34</strong>-2-1<br />
FRAME 8<br />
1. Plug three leads (1) into dimmer switch (2).<br />
GO TO FRAME 9<br />
6-50
<strong>TM</strong> 9-<strong>2320</strong>-<strong>211</strong>-<strong>34</strong>-2-1<br />
FRAME 9<br />
1. Plug six leads (1) into instrument cluster (2).<br />
2. Plug lead (3) into top of low air pressure switch (4).<br />
3. Plug two leads (5) into FUEL TRANSFER SWITCH (6).<br />
4. Plug lead (7) into FUEL TRANSFER SWITCH indicator light (8).<br />
GO TO FRAME 10<br />
6-51
<strong>TM</strong> 9-<strong>2320</strong>-<strong>211</strong>-<strong>34</strong>-2-1<br />
FRAME 10<br />
1 .<br />
2 .<br />
3 .<br />
4 .<br />
5 .<br />
GO<br />
Plug two leads (1) into FUEL TRANSFER SWITCH (2).<br />
Plug three leads (3) into IGNITI<strong>ON</strong> switch (4).<br />
Plug two leads (5) into manifold heater switch (6).<br />
Plug lead (7) into STARTER switch (8).<br />
Screw in connector (9) into MASTER light switch (10).<br />
TO FRAME 11<br />
6-52
<strong>TM</strong> 9-<strong>2320</strong>-<strong>211</strong>-<strong>34</strong>-2-1<br />
FRAME 11<br />
1. Plug lead (1) into circuit breaker (2).<br />
GO TO FRAME 12<br />
6-53
<strong>TM</strong> 9-<strong>2320</strong>-<strong>211</strong>-<strong>34</strong>-2-1<br />
FRAME 12<br />
1. Put instrument cluster (1) back into instrument panel (2).<br />
2. Tighten four quick disconnect mounting screws (3).<br />
3. Screw connector (4) into turn signal control arm (5).<br />
4. Working behind instrument panel, screw speedometer shaft (6) into<br />
(7).<br />
5. Screw tachometer shaft (8) into tachometer (9).<br />
GO TO FRAME 13<br />
speedometer<br />
6-54
<strong>TM</strong> 9-<strong>2320</strong>-<strong>211</strong>-<strong>34</strong>-2-1<br />
FRAME 13<br />
1. Put lead (1) on bolt (2).<br />
2. Put nut (3) on bolt (2) and tighten.<br />
3. Take off all tags on wires.<br />
NOTE<br />
Follow-on Maintenance Action Required:<br />
Connect battery negative (-) cable. Refer to <strong>TM</strong> 9-<strong>2320</strong>-<strong>211</strong>-20.<br />
END OF TASK<br />
6-55
<strong>TM</strong> 9-<strong>2320</strong>-<strong>211</strong>-<strong>34</strong>-2-1<br />
6-17. TRAILER C<strong>ON</strong>NECTOR CABLE HARNESS REMOVAL AND REPLACEMENT.<br />
TOOLS: None<br />
SUPPLIES: None<br />
PERS<strong>ON</strong>NEL: One<br />
EQUIPMENT C<strong>ON</strong>DITI<strong>ON</strong>:<br />
a. Removal.<br />
Truck parked, engine off, handbrake set.<br />
1. Lift up tractor and trailer hinge covers (1) and pull out connectors (2).<br />
2. Unlock and close cable harness hinge covers (3). Take out cable<br />
harness (4).<br />
END OF TASK<br />
6-56
<strong>TM</strong> 9-<strong>2320</strong>-<strong>211</strong>-<strong>34</strong>-2-1<br />
b. Inspection. Look over trailer cable harness for cuts, breaks or folds.<br />
Check that cable harness cover is not worn. Open hinge covers on two ends of cable<br />
harness and check for dirt or corrosion. Check electrical pins to see if any are loose.<br />
If cable harness is damaged, refer to <strong>TM</strong> 9-<strong>2320</strong>-<strong>211</strong>-20.<br />
c. Replacement.<br />
FRAME 1<br />
1. Open and lock cable hinge cover (1) on both ends of cable harness (2).<br />
2. Push cable harness end (3) into receptacle (4) until lip (5) on hinge cover<br />
(6) snaps into slot (7).<br />
3. Do step 2 again for tractor end of cable harness (2).<br />
END OF TASK<br />
6-57
<strong>TM</strong> 9-<strong>2320</strong>-<strong>211</strong>-<strong>34</strong>-2-1<br />
6-18. REAR WIRING HARNESS REMOVAL AND REPLACEMENT.<br />
TOOLS:<br />
SUPPLIES:<br />
No special tools required<br />
Tags<br />
PERS<strong>ON</strong>NEL: One<br />
EQUIPMENT C<strong>ON</strong>DITI<strong>ON</strong>:<br />
Truck parked, engine off, handbrake set.<br />
a. Preliminary Procedure. Disconnect battery ground cable. Refer to<br />
<strong>TM</strong> 9-<strong>2320</strong>-<strong>211</strong>-20.<br />
6-58
<strong>TM</strong> 9-<strong>2320</strong>-<strong>211</strong>-<strong>34</strong>-2-1<br />
b. Removal.<br />
FRAME 1<br />
1.<br />
2.<br />
3.<br />
4.<br />
5.<br />
6.<br />
7.<br />
8.<br />
9.<br />
NOTE<br />
Refer to removal procedures given for each part<br />
in <strong>TM</strong> 9-<strong>2320</strong>-<strong>211</strong>–20, if needed, to work on<br />
connectors and electrical leads covered in this task.<br />
Tag all wires so that they are put back in the<br />
right places.<br />
Take off rear harness plug (1) from rear harness connector.<br />
Unplug two leads (2) from stoplight switch.<br />
Unplug two leads (3) from fuel tank.<br />
Unplug three leads (4) from left taillight.<br />
Take off trailer coupling receptacle (5).<br />
Unplug three leads (6) from right taillight.<br />
Unplug lead (7) from blackout stoplight.<br />
Take off all clamps. Refer to para 6-15.<br />
Take rear harness off truck frame.<br />
END OF TASK<br />
6-59
<strong>TM</strong> 9-<strong>2320</strong>-<strong>211</strong>-<strong>34</strong>-2-1<br />
c. Replacement.<br />
NOTE<br />
If new harness is being put on, put old harness<br />
next to new harness and put tags in the same<br />
places as on old harness.<br />
Refer to replacement procedures given for each<br />
part in <strong>TM</strong> 9-<strong>2320</strong>-<strong>211</strong>-20, if needed, to work on<br />
connectors and electrical leads covered in this<br />
task.<br />
1. Put rear harness back on truck as noted.<br />
2. Put back all clamps. Refer to para 6-15.<br />
3. Plug three leads (1) into right taillight.<br />
4. Plug lead (2) into blackout stoplight.<br />
5. Put on trailer coupling receptacle (3).<br />
6. Plug three leads (4) into left taillight.<br />
7. Plug two leads (5) into fuel tank.<br />
8. Plug two leads (6) into stoplight switch.<br />
9. Put rear harness plug (7) into rear harness receptacle.<br />
10. Remove all tags.<br />
NOTE<br />
Follow-on Maintenance Action Required:<br />
Reconnect battery ground cable. Refer to <strong>TM</strong> 9-<strong>2320</strong>-<strong>211</strong>-20.<br />
END OF TASK<br />
6-60
<strong>TM</strong> 9-<strong>2320</strong>-<strong>211</strong>-<strong>34</strong>-2-1<br />
CHAPTER 7<br />
TRANSMISSI<strong>ON</strong> SYSTEM GROUP MAINTENANCE<br />
Section I. SCOPE<br />
7-1. EQUIPMENT ITEMS COVERED. This chapter gives equipment maintenance procedures<br />
for the transmission assembly for which there are authorized corrective main–<br />
tenance tasks at the direct and general support maintenance levels. Since bearings<br />
in the transmission assembly must be maintained, the procedure for the maintenance<br />
of bearings is also included in this chapter.<br />
7-2. EQUIPMENT ITEMS NOT COVERED. All equipment items for which corrective<br />
maintenance is authorized at the direct and general support maintenance levels are<br />
covered in this chapter.<br />
Section II.<br />
TRANSMISSI<strong>ON</strong> ASSEMBLY<br />
7-3. TRANSMISSI<strong>ON</strong> ASSEMBLY REMOVAL, REPAIR, AND REPLACEMENT.<br />
TOOLS: Automotive maintenance hoisting unit, pn 8387771<br />
Transmission reverse idler shaft puller, pn 8708669<br />
Engine and transmission sling, pn 11595523<br />
Transmission flange yoke replacer, pn 7950147<br />
Soft-faced hammer<br />
Pry bar<br />
Lightweight hammer<br />
Punch<br />
SUPPLIES:<br />
PERS<strong>ON</strong>NEL: One<br />
EQUIPMENT C<strong>ON</strong>DITI<strong>ON</strong>:<br />
Eye shields<br />
Solvent, dry cleaning, type II (SD-2) , Fed. Spec P-D-680<br />
Main shaft front bearing cover seal<br />
Rear main shaft cap seal<br />
Transmission gasket set<br />
Countershaft nut, cotter pin (2)<br />
Main shaft cotter pin<br />
Whte lead pigment, Fed. Spec TT-W-261C<br />
Safety wire, MS-20995E<br />
Artillery and automotive grease, type GAA, MIL-G-10924<br />
Snap ring<br />
Hardening sealer, MIL-S-3927C<br />
Compressed air source, 30 psi max<br />
Truck parked, engine off, handbrake set.<br />
7-1
<strong>TM</strong> 9-<strong>2320</strong>-<strong>211</strong>-<strong>34</strong>-2-1<br />
a. Preliminary Procedures.<br />
(1) Drain transmission. Refer to LO 9-<strong>2320</strong>-<strong>211</strong>-12.<br />
(2) Remove transmission-to-transfer case propeller shaft. Refer to<br />
<strong>TM</strong> 9-<strong>2320</strong>-<strong>211</strong>-20.<br />
(3) Remove front winch propeller shaft (trucks with front winches). Refer<br />
to <strong>TM</strong> 9-<strong>2320</strong>-<strong>211</strong>-20.<br />
(4) Remove hoist pump propeller shaft (truck M51A2). Refer to<br />
<strong>TM</strong> 9-<strong>2320</strong>-<strong>211</strong>-20.<br />
(5) Remove power takeoff linkage (truck M51A2 and trucks with front winches).<br />
Refer to <strong>TM</strong> 9-<strong>2320</strong>-<strong>211</strong>-20.<br />
(6) Remove cab floor tunnel and clutch housing toe board. Refer to<br />
<strong>TM</strong> 9-<strong>2320</strong>-<strong>211</strong>-20.<br />
(7) Remove clutch actuating link rod assembly. Refer to <strong>TM</strong> 9-<strong>2320</strong>-<strong>211</strong>-20.<br />
(8) Remove outer auxiliary release clutch lever (truck M543A2). Refer to<br />
<strong>TM</strong> 9-<strong>2320</strong>-<strong>211</strong>-20.<br />
(9) Remove rotochamber (truck M543A2). Refer to Part 3, para 17-47<br />
(10) Remove transmission shift lever. Refer to <strong>TM</strong> 9-<strong>2320</strong>-<strong>211</strong>-20.<br />
(11) Remove transmission power takeoff (truck M51A2 and trucks with<br />
front winches). Refer to Part 3, para 17-60.<br />
7-2
<strong>TM</strong> 9-<strong>2320</strong>-<strong>211</strong>-<strong>34</strong>-2-1<br />
b. Removal.<br />
FRAME 1<br />
1. Unhook transmission vent line (1) at tee connection (2).<br />
GO TO FRAME 2<br />
7-3
<strong>TM</strong> 9-<strong>2320</strong>-<strong>211</strong>-<strong>34</strong>-2-1<br />
1. Loosen but do not takeoff top two nuts (1).<br />
2. Take off other 10 nuts (2) and washers (3).<br />
GO TO FRAME 3<br />
7-4
<strong>TM</strong> 9-<strong>2320</strong>-<strong>211</strong>-<strong>34</strong>-2-1<br />
FRAME 3<br />
1. Put chain (1) on transmission (2).<br />
2. Put hoist (3) over transmission (2) and hook chain (1) to hoist.<br />
3. Using hoist (3), take up slack in chain (1).<br />
CAUTI<strong>ON</strong><br />
Support weight of transmission (2) until it is all the way out<br />
of housing (5). Drive gear splines must be clear of driven<br />
member or clutch may be damaged.<br />
4. Take off two nuts and washers (4) on housing (5).<br />
5. Pull transmission (2) toward rear of truck until shaft is out of housing (5).<br />
6. Using hoist (3), lower transmission (2) onto low wheel dolly and push transmission<br />
out from under truck.<br />
END OF TASK<br />
7-5
<strong>TM</strong> 9-<strong>2320</strong>-<strong>211</strong>-<strong>34</strong>-2-1<br />
c. Disassembly of Transmission into Subassemblies.<br />
(1) Clutch release mechanism and housing.<br />
FRAME 1<br />
1.<br />
2.<br />
3.<br />
4.<br />
5.<br />
GO<br />
Take out four screws (1) and lockwashers (2).<br />
Take off two spring clips (3) and pads (4).<br />
Take out plug (5).<br />
Slide off sleeve (6) with clutch release bearing (7).<br />
Using bearing remover, take clutch release bearing (7) off sleeve (6). Refer to<br />
para 7-7.<br />
TO FRAME 2<br />
7-6
<strong>TM</strong> 9-<strong>2320</strong>-<strong>211</strong>-<strong>34</strong>-2-1<br />
FRAME 2<br />
1. Loosen locknut (1) while holding bolt ( 2). Slide off clutch release lever (3).<br />
2. Take out woodruff key (4).<br />
3. For truck M543A2:<br />
a. Loosen locknut (5) while holding bolt (6). Slide off clutch release lever<br />
(7).<br />
b. Take out woodruff key (8).<br />
GO TO FRAME 3<br />
7-7
<strong>TM</strong> 9-<strong>2320</strong>-<strong>211</strong>-<strong>34</strong>-2-1<br />
FRAME 3<br />
1. Take out two screws (1) and lockwashers (2).<br />
2. Slide clutch release shaft (3) abuut two inches to the right and take out two keys(4).<br />
3. Slide clutch release shaft (3) to the right far enough to slide off clutch release<br />
yoke (5).<br />
4. Slide clutch release shaft (3) out of clutch housing (6).<br />
NOTE<br />
Truck M543A2 has two oil seals (7), one on each side.<br />
5. Take out and throw away oil seal (7).<br />
GO TO FRAME 4<br />
7-8
<strong>TM</strong> 9-<strong>2320</strong>-<strong>211</strong>-<strong>34</strong>-2-1<br />
FRAME 4<br />
1. Take out seven screws (1) and lockwashers (2).<br />
2. Takeoff clutch housing (3) and gasket(4). Throwaway gasket.<br />
END OF TASK<br />
7-9
<strong>TM</strong> 9-<strong>2320</strong>-<strong>211</strong>-<strong>34</strong>-2-1<br />
(2) Shifter housing assembly.<br />
1. Take out eight screws (1) and lockwashers (2).<br />
2. Take off poppet valve assembly (3), two plates (4), and two preformed packings (5).<br />
Throw away preformed packings.<br />
3. Take off two transfer shift lines (6).<br />
GO TO FRAME 2<br />
7-10
<strong>TM</strong> 9-<strong>2320</strong>-<strong>211</strong>-<strong>34</strong>-2-1<br />
FRAME 2<br />
1. Put shifter lever (1) in place in shifter housing cover (2) and shift lever to neutral<br />
position.<br />
2. Take out 14 screws and lockwasher assemblies (3).<br />
3. Take shifter housing cover (2) off transmission case (4).<br />
4. Take out shifter lever (1).<br />
END OF TASK<br />
7-11
<strong>TM</strong> 9-<strong>2320</strong>-<strong>211</strong>-<strong>34</strong>-2-1<br />
(3) Covers.<br />
FRAME 1<br />
1. Take out six screws and lockwasher assemblies (l).<br />
2. Take off cover (2).<br />
3. Take off gasket (3) and throw it away.<br />
4. If transmission does not have power takeoff, do steps 1 through 3 again on other<br />
side of transmission.<br />
END OF TASK<br />
7-12
<strong>TM</strong> 9-<strong>2320</strong>-<strong>211</strong>-<strong>34</strong>-2-1<br />
(4) Backlash check.<br />
FRAME 1<br />
1.<br />
2.<br />
3.<br />
4.<br />
5.<br />
NOTE<br />
This frame tells how to check backlash for all gears. Do<br />
this frame when measuring backlash for each set of gears<br />
in frames 2 through 4.<br />
Mount dial indicator on housing and set stem against side of gear tooth (1)<br />
as shown.<br />
NOTE<br />
When measuring backlash, make sure gear (2) does not<br />
turn. If gear turns, backlash readings will be wrong.<br />
Turn gear (3) away from dial indicator until gear tooth (4) touches gear<br />
tooth (5) as shown in view A.<br />
Set dial indicator to read 0.<br />
Turn gear (3) towards dial indicator until gear tooth (6) touches other<br />
of gear tooth (5) as shown in view B.<br />
Check that dial indicator readings are within wear limits given for each<br />
of gears.<br />
GO TO FRAME 2<br />
side<br />
set<br />
VIEW A<br />
VIEW B<br />
TA 087357<br />
7-13
<strong>TM</strong> 9-<strong>2320</strong>-<strong>211</strong>-<strong>34</strong>-2-1<br />
1.<br />
2.<br />
3.<br />
4.<br />
NOTE<br />
Readings must be within limits given in table 7-1. If<br />
readings are not within given limits, throw away both<br />
gears and get new ones. Some gears on countershaft<br />
cannot be taken off. If these gears are damaged, throw<br />
away countershaft and get a new one.<br />
Measure backlash between reverse idler drive gear (1) and<br />
speed gear (2).<br />
Measure backlash between first and reverse speed gear (2)<br />
(3).<br />
Measure backlash between first and reverse speed gear (2)<br />
first speed drive gear (4) .<br />
Measure backlash between reverse idler drive gear (5) and<br />
verse idler gear ( 6).<br />
GO TO FRAME 3<br />
first and reverse<br />
and main shaft<br />
and countershaft<br />
countershaft re-<br />
Table 7-1.<br />
TA 087358<br />
Transmission Reverse Idler Gear and First and Reverse<br />
Speed Gear Backlash Wear Limits<br />
Index Number<br />
Item/Point of Measurement<br />
Size and Fit<br />
of New Parts<br />
(inches)<br />
Wear Limit<br />
(inches)<br />
1 and 2<br />
Reverse idler drive gear to first<br />
and reverse speed gear<br />
0.005 to 0.011<br />
None<br />
2 and 3<br />
First and reverse speed gear to<br />
main shaft<br />
0.004 to 0.007<br />
None<br />
2 and 4<br />
First and reverse speed gear to<br />
countershaft first speed drive gear<br />
0.008 to 0.011<br />
None<br />
5 and 6<br />
Reverse idler drive gear to countershaft<br />
reverse idler drive gear<br />
0.008 to 0.011<br />
None<br />
7-14
<strong>TM</strong> 9-<strong>2320</strong>-<strong>211</strong>-<strong>34</strong>-2-1<br />
FRAME 3<br />
NOTE<br />
Readings must be within limits given in table 7-2. If<br />
readings are not within given limits, throw away both gears<br />
and get new ones. Some gears on countershaft cannot<br />
be taken off. If these gears are damaged, throw away<br />
counter shaft and get a new one.<br />
1. Measure backlash between second speed<br />
gear (2).<br />
2. Measure backlash between second speed<br />
3. Measure backlash between synchronizer<br />
gear (4).<br />
gear (1) and countersha.ft second speed<br />
gear (1) and synchronizer (3).<br />
(3) and second and third speed clutch<br />
4. Measure backlash between second and third speed clutch gear (4) and main shaft (5).<br />
GO TO FRAME 4<br />
TA 087359<br />
Table 7-2.<br />
Transmission Second Speed Gear Backlash Wear Limits<br />
Index Number<br />
Item/Point of Measurement<br />
Size and Fit<br />
of New Parts<br />
(inches)<br />
Wear Limit<br />
(inches)<br />
1 and 2<br />
Second speed gear to countershaft<br />
second speed gear<br />
0.006 to 0.009<br />
None<br />
1 and 3<br />
Second speed gear to synchronizer<br />
0.004 to 0.009<br />
None<br />
3 and 4<br />
Synchronizer to second and<br />
third speed clutch gear<br />
0.004 to 0.007<br />
None<br />
4 and 5<br />
Second and third speed clutch<br />
gear to main shaft<br />
0.000 to 0.003<br />
None<br />
7-15
<strong>TM</strong> 9-<strong>2320</strong>-<strong>211</strong>-<strong>34</strong>-2-1<br />
FRAME 4<br />
1.<br />
2.<br />
3.<br />
4.<br />
5.<br />
6.<br />
NOTE<br />
Readings must be within limits given in table 7-3. If<br />
readings are not within given limits, throw away both<br />
gears and get new ones. Some gears on countershaft<br />
cannot be taken off. If these gears are damaged, throw<br />
away countershaft and get a new one.<br />
Measure backlash between<br />
gear (2).<br />
Measure backlash between<br />
Measure backlash between<br />
gear (5).<br />
Measure backlash between<br />
Measure backlash between<br />
Measure backlash between<br />
END OF TASK<br />
third speed gear (1) and countershaft third speed<br />
third speed gear (1) and synchronizer (3).<br />
fourth speed gear (4) and countershaft fourth<br />
fourth speed gear (4) and synchronizer (6).<br />
input gear (7) and synchronizer (6).<br />
input gear (7) and countershaft input gear (8).<br />
Table 7-3.<br />
TA 087360<br />
Transmission Input Gear and Third and Fourth<br />
Speed Gear Backlash Wear Limits<br />
Index Number<br />
Item/Point of Measurement<br />
Size and Fit<br />
of New Parts<br />
(inches)<br />
Wear Limits<br />
(inches)<br />
1 and 2<br />
Third speed gear to countershaft<br />
third speed gear<br />
0.006 to 0.009<br />
None<br />
1 and 3<br />
Third speed gear to synchronizer<br />
0.004 to 0.009<br />
None<br />
4 and 5<br />
Fourth speed gear to counter–<br />
shaft fourth gear<br />
0.006 to 0.009<br />
None<br />
4 and 6<br />
Fourth speed gear to synchronizer<br />
0.004 to 0.009<br />
None<br />
6 and 7<br />
Input gear to synchronizer<br />
0.004 to 0.009<br />
None<br />
7 and 8<br />
Input gear to countershaft input<br />
gear<br />
0.006 to 0.009<br />
None<br />
7-16
<strong>TM</strong> 9-<strong>2320</strong>-<strong>211</strong>-<strong>34</strong>-2-1<br />
(5) Transmission gears and shafts.<br />
FRAME 1<br />
1. Slide first and reverse speed gear (l) and second and third speed synchronizer (2)<br />
into mesh with countershaft gears. This will keep transmission gears and shafts<br />
from turning during this task.<br />
GO TO FRAME 2<br />
7-17
<strong>TM</strong> 9-<strong>2320</strong>-<strong>211</strong>-<strong>34</strong>-2-1<br />
FRAME 2<br />
1. Take out and throw away cotter pin (1).<br />
2. Take off slotted nut (2).<br />
3. Using mechanical puller, pull companion flange (3) off main shaft (4).<br />
GO TO FRAME 3<br />
7-18
<strong>TM</strong> 9-<strong>2320</strong>-<strong>211</strong>-<strong>34</strong>-2-1<br />
1. Take out four screws (1) and lockwashers (2).<br />
2. Using lightweight hammer, tap rear output shaft cover (3) lightly to free it from<br />
main shaft rear bearing outer race (4).<br />
3. Take off rear output shaft cover (3), cover gasket (5), and oil seal (6). Throw<br />
away gasket.<br />
4. Using hammer and punch, drive oil seal (6) out of rear output shaft cover (3).<br />
Throw away oil seal.<br />
GO TO FRAME 4<br />
7-19
<strong>TM</strong> 9-<strong>2320</strong>-<strong>211</strong>-<strong>34</strong>-2-1<br />
FRAME 4<br />
1. Take out four screws (1) and lockwashers (2).<br />
2. Using lightweight hammer, tap countershaft rear bearing cover (3) to unseat it<br />
from rear bearing (4). Lift off cover.<br />
3. Take off countershaft rear bearing cover gasket (5) and throw it away.<br />
4. Take out and throw away cotter pin (6).<br />
5. Take off slotted nut (7).<br />
GO TO FRAME 5<br />
7-20
<strong>TM</strong> 9-<strong>2320</strong>-<strong>211</strong>-<strong>34</strong>-2-1<br />
FRAME 5<br />
1. Take off six nuts (1) and lockwashers (2).<br />
2. Put two 3/8-16-UNC screws (3) evenly into threaded holes in input shaft cover (4)<br />
until cover is free.<br />
3. Take off input shaft cover (4) with seal (5) and gasket (6).<br />
4. Using hammer and punch, take out seal (5). Throw away seal<br />
5. Take out two screws (3).<br />
GO TO FRAME 6<br />
Throw away gasket.<br />
7-21
<strong>TM</strong> 9-<strong>2320</strong>-<strong>211</strong>-<strong>34</strong>-2-1<br />
FRAME 6<br />
1. Using soft-faced hammer, lightly tap end of input shaft (1) to unseat input<br />
shaft bearing assembly (2).<br />
NOTE<br />
As input shaft (1) is pulled out, 14 pilot roller bearings will<br />
fall into bottom of transmission case (3). They can be taken<br />
out of transmission case after it is taken apart.<br />
2. Pull out input shaft (1) with input shaft bearing assembly (2).<br />
GO TO FRAME 7<br />
7-22
<strong>TM</strong> 9-2326-<strong>211</strong>-<strong>34</strong>-2-1<br />
FRAME 7<br />
1. Slide off spacer washer(1).<br />
2. Takeoff rear bearing snapring (2) and throw it away.<br />
3. Using wrench and mechanical puller, pull main shaft rear bearing (3) off main<br />
shaft (4) and bore of transmission case (5).<br />
GO TO FRAME 8<br />
7-23
<strong>TM</strong> 9-<strong>2320</strong>-<strong>211</strong>-<strong>34</strong>-2-1<br />
FRAME 8<br />
1.<br />
2.<br />
3.<br />
4.<br />
5.<br />
6.<br />
Slide main shaft assembly (1) to rear of transmission case (2).<br />
Slide fourth and fifth speed gear synchronizer (3) off front end of main shaft<br />
assembly (1).<br />
Tie rope to front and rear end of main shaft assembly (1) as shown.<br />
Lift main shaft assembly (1) out of first and reverse speed gear (4) and out of<br />
transmission case (2).<br />
Take off rope sling.<br />
Take out first and reverse speed gear (4).<br />
GO TO FRAME 9<br />
7-24
<strong>TM</strong> 9-<strong>2320</strong>-<strong>211</strong>-<strong>34</strong>-2-1<br />
FRAME 9<br />
1. Using prybar, pull out reverse idler gear shaft (1).<br />
2. Lift reverse idler gear assembly (2) from transmission case (3).<br />
GO TO FRAME 10<br />
7-25
<strong>TM</strong> 9-<strong>2320</strong>-<strong>211</strong>-<strong>34</strong>-2-1<br />
1.<br />
2.<br />
GO<br />
Take off snapring (1).<br />
Using wrench and mechanical puller, pull countershaft rear bearing<br />
countershaft (3) and out of bore of transmission case (4).<br />
TO FRAME 11<br />
(2) off<br />
7-26
<strong>TM</strong> 9-<strong>2320</strong>-<strong>211</strong>-<strong>34</strong>-2-1<br />
FRAME 11<br />
1. Using hoist and rope sling, slide countershaft assembly (1) out of front bearing(2).<br />
Lift countershaft assembly out of transmission case (3) and onto workbench.<br />
2. Take off hoist and rope sling.<br />
3. Take out front bearing (2).<br />
END OF TASK<br />
7-27
<strong>TM</strong> 9-<strong>2320</strong>-<strong>211</strong>-<strong>34</strong>-2-1<br />
d. Disassembly of Transmission Subassemblies.<br />
(1) Shifter housing assembly.<br />
FRAME 1<br />
1. Take out retainer (1).<br />
2. Take out spring (2) and finger plunger (3) from shifter housing (4).<br />
GO TO FRAME 2<br />
7-28
<strong>TM</strong> 9-<strong>2320</strong>-<strong>211</strong>-<strong>34</strong>-2-1<br />
1. Takeout six screws (1) and lockwashers (2).<br />
2. Take off shifter housing cover assembly (3) and housing cover gasket (4). Throw<br />
away gasket.<br />
GO TO FRAME 3<br />
7-29
<strong>TM</strong> 9-<strong>2320</strong>-<strong>211</strong>-<strong>34</strong>-2-1<br />
1. Take nut (1) and lockwasher (2) off shoulder bolt (3).<br />
2. Take shoulder bolt (3) and shift lever finger (4) out of shifter housing cover<br />
assembly (5).<br />
3. Take shift lever finger (4) off shoulder bolt (3).<br />
4. Take shift lever finger plunger (6) out of shift lever finger (4).<br />
GO TO FRAME 4<br />
7-30
<strong>TM</strong> 9-<strong>2320</strong>-<strong>211</strong>-<strong>34</strong>-2-1<br />
FRAME 4<br />
1.<br />
2.<br />
3.<br />
4.<br />
GO<br />
Take off knob (1).<br />
Slide off grommet (2).<br />
Take out snapring (3).<br />
Slide off spring (4) and spring cup (5).<br />
TO FRAME 5<br />
7-31
<strong>TM</strong> 9-<strong>2320</strong>-<strong>211</strong>-<strong>34</strong>-2-1<br />
FRAME 5<br />
1.<br />
2.<br />
GO<br />
Using punch and lightweight hammer, drive out pivot pin (1) from shift lever<br />
retainer (2) and shift lever (3).<br />
Take apart shift lever retainer (2) and shift lever (3).<br />
TO FRAME 6<br />
7-32
<strong>TM</strong> 9-<strong>2320</strong>-<strong>211</strong>-<strong>34</strong>-2-1<br />
FRAME 6<br />
1. Turn shifter housing (1) on one side as shown.<br />
2. Take out three poppet ball compression springs (2) and three poppet balls<br />
(3). Place springs and balls in safe place so they will not get lost or damaged.<br />
GO TO FRAME 7<br />
7-33
<strong>TM</strong> 9-<strong>2320</strong>-<strong>211</strong>-<strong>34</strong>-2-1<br />
FRAME 7<br />
1. Turn shifter housing assembly (1) upside down on workbench.<br />
2. Take off safety wire (2) from five setscrews (3).<br />
3. Take out five setscrews (3).<br />
GO TO FRAME 8<br />
7-<strong>34</strong>
<strong>TM</strong> 9-<strong>2320</strong>-<strong>211</strong>-<strong>34</strong>-2-1<br />
FRAME 8<br />
1. Using punch and lightweight hammer, tap on fourth and fifth speed shifter shaft (1)<br />
to drive out expansion plug (2).<br />
NOTE<br />
Interlock pin (3) will fall into housing when shifter shaft (1)<br />
is taken out.<br />
2. Slide out fourth and fifth speed shifter shaft (l).<br />
3. Take out fourth and fifth speed shifter fork (4) and interlock pin (3).<br />
4. Take out second and third speed interlock pin (5).<br />
GO TO FRAME 9<br />
7-35
<strong>TM</strong> 9-<strong>2320</strong>-<strong>211</strong>-<strong>34</strong>-2-1<br />
FRAME 9<br />
1. Using punch and lightweight hammer, tap on second and third speed shifter shaft (1)<br />
to drive out expansion plug (2).<br />
2. Slide out second and third speed shifter shaft(l).<br />
3. Takeout second and third speed shifter fork (3) and bracket(4).<br />
GO TO FRAME 10<br />
7-36
<strong>TM</strong> 9-<strong>2320</strong>-<strong>211</strong>-<strong>34</strong>-2-1<br />
FRAME 10<br />
1. Using punch and lightweight hammer, tap first and reverse speed shifter shaft (1)<br />
to drive out expansion plug (2).<br />
2. Slide out first and reverse speed shifter shaft (1).<br />
3. Take out first and reverse speed shifter fork (3) and bracket (4).<br />
END OF TASK<br />
7-37
<strong>TM</strong> 9-<strong>2320</strong>-<strong>211</strong>-<strong>34</strong>-2-1<br />
(2) Transmission gears and shafts.<br />
FRAME 1<br />
1. Carefully clamp input shaft assembly (1) in soft-jawed vise.<br />
2. Take out snapring (2).<br />
3. Using mechanical puller wrench, take off bearing (3).<br />
4. Take input shaft assembly (1) out of vise.<br />
GO TO FRAME 2<br />
7-38
<strong>TM</strong> 9-<strong>2320</strong>-<strong>211</strong>-<strong>34</strong>-2-I<br />
FRAME 2<br />
1. Carefully clamp main shaft assembly (1) in soft-jawed vise.<br />
2. Take off snapring (2).<br />
3. Slide thrust washer (3) and fourth speed gear (4) off main shaft (1).<br />
GO TO FRAME 3<br />
7-39
<strong>TM</strong> 9-<strong>2320</strong>-<strong>211</strong>-<strong>34</strong>-2-1<br />
FRAME 3<br />
1.<br />
2.<br />
GO<br />
Using mechanical puller and wrench,<br />
gear sleeve (2) from main shaft (3).<br />
Slide off second and third speed gear synchronizer (4).<br />
TO FRAME 4<br />
pull third speed gear (1) and fourth speed<br />
7-40
<strong>TM</strong> 9-<strong>2320</strong>-<strong>211</strong>-<strong>34</strong>-2-1<br />
FRAME 4<br />
1. Takeout snapring (1).<br />
2 Slide off second and third speed clutch gear (2) and second speed gear (3).<br />
GO TO FRAME 5<br />
7-41
<strong>TM</strong> 9-<strong>2320</strong>-<strong>211</strong>-<strong>34</strong>-2-1<br />
FRAME 5<br />
1.<br />
2.<br />
3.<br />
4.<br />
5.<br />
Take out snapring (1).<br />
Press countershaft (2) out of countershaft driven gear (3). Take out woodruff<br />
key (4).<br />
Take off snapring (5).<br />
Press countershaft (2) out of countershaft fourth speed gear and countershaft<br />
third speed gear (6). Take out two woodruff keys (7) and take off<br />
spacer (8).<br />
Press countershaft (2) out of countershaft second speed gear (9). Take<br />
out woodruff key (10).<br />
GO TO FRAME 6<br />
7-42
<strong>TM</strong> 9-<strong>2320</strong>-<strong>211</strong>-<strong>34</strong>-2-1<br />
FRAME 6<br />
1. Slide two bearings (1) out of reverse idler gear (2).<br />
END OF TASK<br />
7-43
<strong>TM</strong> 9-<strong>2320</strong>-<strong>211</strong>-<strong>34</strong>-2-1<br />
(3) Clutch housing and transmission case.<br />
1. Take out six lockscrews (1).<br />
2. Take off inspection hole cover (2) and gasket(3). Throwaway gasket.<br />
3. Take out two grease cup assemblies(4).<br />
GO TO FRAME 2<br />
7-44
<strong>TM</strong> 9-<strong>2320</strong>-<strong>211</strong>-<strong>34</strong>-2-1<br />
FRAME 2<br />
1. Take out<br />
NOTE<br />
Do not take studs out unless they are damaged.<br />
filler hole plug (l).<br />
2. Take out drain hole plug (2).<br />
3. Take out five studs (3).<br />
END OF TASK<br />
7-45
<strong>TM</strong> 9-<strong>2320</strong>-<strong>211</strong>-<strong>34</strong>-2-1<br />
e. Cleaning.<br />
(1) Clean all bearings. Refer to para 7-7.<br />
WARNING<br />
Dry cleaning solvent is flammable. Do not use near an open<br />
flame. Keep fire extinguisher nearby when solvent is<br />
used. Use only in well-ventilated places. Failure to do this<br />
may result in injury to personnel and damage to equipment.<br />
(2) Clean all other parts with solvent.<br />
WARNING<br />
Eye shields must be worn when using compressed air.<br />
Eye injury can occur if eye shields are not used.<br />
(3) Make sure all oil passages are open. Open clogged passages with compressed<br />
air or by working a wire back and forth. Flush with solvent.<br />
7-46
<strong>TM</strong> 9-<strong>2320</strong>-<strong>211</strong>-<strong>34</strong>-2-1<br />
f. Inspection and Repair.<br />
FRAME 1<br />
1.<br />
2.<br />
3.<br />
GO<br />
Check that bearing bores in transmission case (l) are not cracked, burred or scored.<br />
Take off burrs with crocus cloth or honing stone. If bores are cracked or badly<br />
scored, get a new transmission case.<br />
Check that mounting surfaces and all other machined surfaces of transmission case<br />
(1) are not nicked, burred or scratched. Smooth surfaces with crocus cloth or<br />
honing stone. If more repair is needed, get a new transmission case.<br />
Check that tapped holes in transmission case (1) are not stripped or crossthreaded.<br />
Repair damaged threads with correct size tap.<br />
TO FRAME 2<br />
7-47
<strong>TM</strong> 9-<strong>2320</strong>-<strong>211</strong>-<strong>34</strong>-2-1<br />
FRAME 2<br />
I<br />
1. Check that input shaft bearing (1), 14 pilot roller bearings (2), main shaft<br />
rear bearing (3), countershaft rear bearing (4), countershaft front bearing<br />
(5), and two reverse idler gear bearings (6) are not damaged. Refer to<br />
para 7-7.<br />
GO TO FRAME 3<br />
NOTE :<br />
CHECK <strong>ON</strong>LY THOSE PARTS WHICH<br />
ARE CALLED OUT IN THIS FRAME.<br />
PARTS WITHOUT CALLOUTS ARE<br />
SHOWN <strong>ON</strong>LY FOR REFERENCE<br />
PURPOSES OR ARE CHECKED IN<br />
ANO<strong>THE</strong>R FRAME.<br />
7-48
<strong>TM</strong> 9-<strong>2320</strong>-<strong>211</strong>-<strong>34</strong>-2-1<br />
FRAME 3<br />
NOTE<br />
Readings must be within limits given in table 7-4. The<br />
letter L shows a loose fit and the letter T shows a<br />
tight fit. If readings are not within given limits, throw<br />
away part and get a new one.<br />
1. Measure fit of bearing (1) on input shaft (2).<br />
GO TO FRAME 4<br />
Table 7-4.<br />
Transmission Input Gear to Shaft Wear Limits<br />
Size and Fit<br />
Index Number Item/Point of Measurement of New Parts Wear Limit<br />
(inches)<br />
(inches)<br />
1 and 2<br />
Fit of input gear bearing on<br />
input shaft<br />
0.0001L to 0. 001T None<br />
7-49
<strong>TM</strong> 9-<strong>2320</strong>-<strong>211</strong>-<strong>34</strong>-2-1<br />
NOTE<br />
Readings must be within limits given in table 7-5. The<br />
letter L shows a loose fit and the letter T shows a tight<br />
fit. If readings are not within given limits, throw away<br />
part and get a new one.<br />
1. Measure fit of main shaft bearing (1) on shaft (2).<br />
GO TO FRAME 5<br />
NOTE<br />
CHECK <strong>ON</strong>LY THOSE PARTS WHICH ARE CALLED OUT<br />
PARTS WITHOUT CA LLOUTS ARE SHOWN <strong>ON</strong>LY FOR<br />
REFERENCE PURPOSES,<br />
TA 087394<br />
Table 7-5.<br />
Transmission Mainshaft Bearing to<br />
Shaft Wear Limits<br />
I<br />
Index Number Item /Point of Measurement<br />
I<br />
1 and 2 Fit of mainshaft bearing on<br />
shaft<br />
Size and Fit<br />
of New Parts<br />
(inches)<br />
0.0004L to 0.0007T<br />
Wear Limit<br />
(inches)<br />
None<br />
7-50
<strong>TM</strong> 9-<strong>2320</strong>-<strong>211</strong>-<strong>34</strong>-2-1<br />
FRAME 5<br />
NOTE<br />
Readings must be within limits given in table 7-6. The<br />
letter L shows a loose fit and the letter T shows a tight<br />
fit. If readings are not within given limits, throw away<br />
1. Measure<br />
part and get a new one.<br />
fit of countershaft rear bearing (1) on shaft (2).<br />
2. Measure fit of countershaft front bearing (3) on shaft (2).<br />
GO TO FRAME 6<br />
NOTE<br />
CHECK <strong>ON</strong>LY THOSE PARTS WHICH ARE CALLED OUT.<br />
PARTS WITHOUT CALLOUTS ARE SHOWN <strong>ON</strong>LY FOR<br />
REFERENCE PURPOSES.<br />
TA 087395<br />
Table 7-6.<br />
Transmission Countershaft Front and Rear Bearing<br />
to Shaft Wear Limits<br />
Size and Fit<br />
Index Number Item/Point of Measurement of New Parts Wear Limits<br />
(inches)<br />
(inches)<br />
1 and 2 Fit of countershaft rear 0.0002L to 0.0007T None<br />
bearing on shaft<br />
2 and 3 Fit of countershaft front 0.0005L to 0.0015L None<br />
bearing on shaft<br />
7-51
<strong>TM</strong> 9-<strong>2320</strong>-<strong>211</strong>-<strong>34</strong>-2-1<br />
FRAME 6<br />
NOTE<br />
1.<br />
2.<br />
3.<br />
GO<br />
Measure fit of<br />
Measure fit of<br />
Measure fit of<br />
TO FRAME 7<br />
Readings must be within limits given in table 7-7. The<br />
letter L shows a loose fit and the letter T shows a tight<br />
fit. If readings are not within given limits, throw away<br />
part and get a new one.<br />
input gear bearing (1) in transmission case (2).<br />
countershaft rear bearing (3) in transmission case (2).<br />
countershaft front bearing (4) in transmission case (2).<br />
Table 7-7.<br />
Transmission Bearing to Case Wear Limits<br />
Index Number<br />
Item/Point of Measurement<br />
Size and Fit<br />
of New Parts<br />
(inches)<br />
Wear Limits<br />
(inches)<br />
1 and 2<br />
2 and 3<br />
2 and 4<br />
Fit of input gear bearing<br />
in transmission case<br />
Fit of rear bearing in transmission<br />
case<br />
Fit of front bearing in transmission<br />
case<br />
0.000 to 0.002L<br />
0.0016 to 0.000T<br />
0.0018L to 0.000T<br />
None<br />
None<br />
None<br />
7-52
<strong>TM</strong> 9-<strong>2320</strong>-<strong>211</strong>-<strong>34</strong>-2-1<br />
FRAME 7<br />
NOTE<br />
Readings must be within limits given in table 7-8. The<br />
letter L shows a loose fit. If readings are not within<br />
1. Measure<br />
given limits, throw away part and get a new one.<br />
inside diameter of fourth speed gear (1).<br />
2. Measure outside diameter of fourth speed gear sleeve (2).<br />
3. Measure fit of fourth speed gear (1) and sleeve (2).<br />
4. Measure inside diameter of third speed gear (3).<br />
5. Measure outside diameter of main shaft (4).<br />
GO TO FRAME 8<br />
NOTE<br />
CHECK <strong>ON</strong>LY THOSE PARTS WHICH ARE CALLED OUT.<br />
PARTS WITHOUT CALLOUTS ARE SHOWN <strong>ON</strong>LY FOR<br />
REFERENCE PURPOSES.<br />
TA 087397<br />
Table 7-8.<br />
Transmission Third and Fourth Speed Gear Wear Limits<br />
Index Number<br />
Item/Point of Measurement<br />
Size and Fit<br />
of New Parts<br />
(inches)<br />
Wear Limit:<br />
(inches)<br />
1<br />
Fourth speed gear inside<br />
diameter<br />
2.7535 to 2.7540<br />
None<br />
2<br />
Gear sleeve outside diameter<br />
2.7490 to 2.7495<br />
None<br />
1 and 2<br />
Fit of fourth speed and sleeve<br />
0.004L to 0.005L<br />
None<br />
3<br />
Third speed gear inside<br />
diameter<br />
2.6250 to 2.6255<br />
None<br />
4<br />
Main shaft outside diameter<br />
2.6210 to 2.6215<br />
None<br />
3 and 4<br />
Fit of third speed gear and<br />
main shaft<br />
0.0035L to 0.0045L<br />
None<br />
7-53
<strong>TM</strong> 9-<strong>2320</strong>-<strong>211</strong>-<strong>34</strong>-2-1<br />
FRAME 8<br />
NOTE<br />
Readings must be within limits given in table 7-9. The<br />
letter L shows a loose fit. If readings are not within<br />
given limits, throw away part and get a new one.<br />
1. Measure inside diameter of second speed gear (1).<br />
2. Measure outside diameter of main shaft (2).<br />
3. Measure fit of second speed gear (1) on main shaft (2).<br />
GO TO FRAME 9<br />
Table 7-9.<br />
Transmission Second Gear to Main Shaft Wear Limits<br />
Index Number<br />
Item/Point of Measurement<br />
Size and Fit<br />
of New Parts<br />
(inches)<br />
Wear Limit<br />
(inches)<br />
1<br />
Second speed gear inside<br />
diameter<br />
2.8725 to 2.8730<br />
None<br />
2<br />
Main shaft outside diameter<br />
2.8725 to 2.8730<br />
None<br />
1 and 2<br />
Fit of second speed gear on<br />
main shaft<br />
0.0035L to 0.0045L<br />
None<br />
7-54
<strong>TM</strong> 9-<strong>2320</strong>-<strong>211</strong>-<strong>34</strong>-2-1<br />
FRAME 9<br />
1. Check that teeth on gears (1 through 4) are not twisted, nicked, burred,<br />
worn or broken. Take off raised metal with a honing stone. If more repair is<br />
needed, get a new gear.<br />
2. Check that synchronizers (5 and 6) have no nicks, scratches or wear. If<br />
damaged, get a new part.<br />
3. Check that splines in bores of synchronizers (5 and 6) are not damaged. If<br />
splines are damaged, get a new synchronizer.<br />
GO TO FRAME 10<br />
7-55
<strong>TM</strong> 9-<strong>2320</strong>-<strong>211</strong>-<strong>34</strong>-2-1<br />
FRAME 10<br />
1.<br />
GO<br />
Check that teeth on gears (1 through 5) are not twisted, nicked, burred,<br />
chipped, cracked, worn or broken. Take off raised metal with a honing<br />
stone. If more repair is needed, get a new gear.<br />
TO FRAME 11<br />
7-56
<strong>TM</strong> 9-<strong>2320</strong>-<strong>211</strong>-<strong>34</strong>-2-1<br />
FRAME 11<br />
1. Put a coat of clean engine lubricating oil on bearings (1 through 6).<br />
2. Turn bearings slowly. Ball bearings must turn freely and smoothly.<br />
3. Check that bearings (1 through 6) are not pitted, chipped, scored, rough or<br />
worn. If bearings are damaged, get new ones.<br />
GO TO FRAME 12<br />
7-57
<strong>TM</strong> 9-<strong>2320</strong>-<strong>211</strong>-<strong>34</strong>-2-1<br />
FRAME 12<br />
1. Check that shafts (1 through 4) are not cracked, pitted, scored, worn or broken.<br />
Check that splines are not twisted or worn.<br />
2. Check that shafts (1 through 4) have not been crossthreaded. If shaft is damaged,<br />
get a new one.<br />
GO TO FRAME 13<br />
7-58
<strong>TM</strong> 9-<strong>2320</strong>-<strong>211</strong>-<strong>34</strong>-2-1<br />
FRAME 13<br />
1. Check that snaprings (1 through 6) are not damaged. If snaprings are damaged,<br />
get new ones.<br />
2. Check that thickness of thrust washer (7) is between 0.151 and 0.153 inch.<br />
If washer is not within given limits, get a new one.<br />
GO TO FRAME 14<br />
7-59
<strong>TM</strong> 9-<strong>2320</strong>-<strong>211</strong>-<strong>34</strong>-2-1<br />
FRAME 14<br />
1. Check that mounting flange of shifter housing cover (1) is not cracked,<br />
nicked, burred or scratched. Smooth with crocus cloth or honing stone.<br />
If more repair is needed, get a new housing cover.<br />
2. Check that tapped holes in cover (1) are not stripped or crossthreaded.<br />
Chase damaged threads with right size tap.<br />
3. Check that spring (2) is not bent or broken. If spring is damaged, get<br />
a new one.<br />
4. Check that free length of spring (2) is 1 23/64 inches. Check that spring<br />
measures 31/32 inch under pressure of 21 to 25 pounds. If spring is not<br />
within given limits, get a new one.<br />
5. Check that shifter lever (3) is not bent or cracked. Straighten lever if<br />
bent. If lever is cracked or broken, get a new shifter lever.<br />
GO TO FRAME 15<br />
7-60
<strong>TM</strong> 9-<strong>2320</strong>-<strong>211</strong>-<strong>34</strong>-2-1<br />
1. Check that mounting flanges of shifter housing (1) are not nicked, burred<br />
or scratched. Smooth with crocus cloth or honing stone. If more repair<br />
is needed, get a new housing.<br />
2. Check that tapped holes in housing (1) are not stripped or crossthreaded.<br />
Chase damaged threads with correct size tap.<br />
3. Check that springs (2 and 3) are not broken or twisted. If springs are<br />
damaged, get new ones.<br />
4. Check that free length of spring (2) is 2 1/32 inches. Check that spring<br />
measures 1 5/8 inches under pressure of 56 to 64 pounds. If spring is<br />
not within given limits, get a new one.<br />
5. Check that three shafts (4) are not cracked or bent. If shafts are damaged<br />
get new ones.<br />
GO TO FRAME 16<br />
7-61
<strong>TM</strong> 9-<strong>2320</strong>-<strong>211</strong>-<strong>34</strong>-2-1<br />
FRAME 16<br />
1. Check that mounting flanges of clutch housing (1) are not nicked, burred<br />
or scratched. If flanges are damaged, get a new housing.<br />
2. Check that tapped holes in housing (1) are not stripped or crossthreaded.<br />
If threads are damaged, chase threads with right size tap.<br />
GO TO FRAME 17<br />
7-62
<strong>TM</strong> 9-<strong>2320</strong>-<strong>211</strong>-<strong>34</strong>-2-1<br />
FRAME 17<br />
1. Check that groove made by oil seal on companion flange (1) is not deeper than<br />
0.003 inch. If worn beyond given limit, get a new companion flange.<br />
END OF TASK<br />
7-63
<strong>TM</strong> 9-<strong>2320</strong>-<strong>211</strong>-<strong>34</strong>-2-1<br />
g. Assembly of Transmission Subassemblies.<br />
(1) Clutch housing and transmission case.<br />
FRAME 1<br />
NOTE<br />
Replace only damaged studs.<br />
1. Put five studs (1) into transmission case (2).<br />
2. Put in drain hole plug (3).<br />
3. Put in filler hole plug (4).<br />
GO TO FRAME 2<br />
7-64
<strong>TM</strong> 9-<strong>2320</strong>-<strong>211</strong>-<strong>34</strong>-2-1<br />
FRAME 2<br />
1. Put in two grease cup assemblies (1).<br />
2. Put inspection hole cover gasket (2) and inspection hole cover (3) in place.<br />
3. Put in six lockscrews (4).<br />
END OF TASK<br />
7-65
<strong>TM</strong> 9-<strong>2320</strong>-<strong>211</strong>-<strong>34</strong>-2-1<br />
(2) Transmission gears and shafts.<br />
FRAME 1<br />
1. Slide two bearings (1) into bore of reverse idler gear (2).<br />
2. Cover reverse idler gear (2) with a clean rag.<br />
GO TO FRAME 2<br />
7-66
<strong>TM</strong> 9-<strong>2320</strong>-<strong>211</strong>-<strong>34</strong>-2-1<br />
FRAME 2<br />
1. Put woodruff key (1) in keyway in countershaft (2).<br />
2. Coat counter shaft (2) and bore of countershaft second speed gear (3) with<br />
white lead pigment.<br />
3. Slide second speed gear (3) on countershaft (2) with long side of hub facing away<br />
from fixed gear (4). Aline keyway in second speed gear with woodruff key (1).<br />
4. Press second speed gear (3) flush against fixed gear (4).<br />
GO TO FRAME 3<br />
7-67
<strong>TM</strong> 9-<strong>2320</strong>-<strong>211</strong>-<strong>34</strong>-2-1<br />
FRAME 3<br />
1. Slide spacer (1) onto<br />
2. Put woodruff key (3)<br />
3. Coat countershaft (2)<br />
white lead pigment.<br />
countershaft (2).<br />
in keyway in countershaft (2).<br />
and bore of countershaft third speed gear (4) with<br />
4. Slide third speed gear (4) on countershaft (2) with long side of hub facing<br />
away from spacer (1). Aline keyway in gear with woodruff key (3).<br />
5. Press third speed gear (4) flush against spacer (1).<br />
GO TO FRAME 4<br />
7-68
<strong>TM</strong> 9-<strong>2320</strong>-<strong>211</strong>-<strong>34</strong>-2-1<br />
FRAME 4<br />
1. Put woodruff key (1) in keyway in countershaft (2).<br />
2. Coat countershaft (2) and bore of countershaft fourth speed gear (3) with<br />
white lead pigment.<br />
3. Slide fourth speed gear (3) on countershaft (2) with long side of hub facing<br />
away from third speed gear (4). Aline keyway in fourth speed gear with<br />
woodruff key (1).<br />
4. Press fourth speed gear (3) flush against third speed gear (4).<br />
5. Put snapring (5) in place.<br />
GO TO FRAME 5<br />
7-69
<strong>TM</strong> 9-<strong>2320</strong>-<strong>211</strong>-<strong>34</strong>-2-1<br />
1. Put woodruff key (1) in keyway in countershaft (2).<br />
2. Coat countershaft (2) and bore of countershaft drive gear (3) with white<br />
lead pigment.<br />
3. Slide drive gear (3) onto countershaft (2) with long side of hub facing<br />
toward fourth speed gear (4). Aline keyway in drive gear with woodruff<br />
key (1).<br />
4. Press drive gear (3) flush against shoulder of countershaft (2).<br />
5. Put snapring (5) in place. Make sure that snapring is seated in groove of<br />
countershaft (2).<br />
6. Cover countershaft assembly with a clean rag.<br />
GO TO FRAME 6<br />
7-70
<strong>TM</strong> 9-<strong>2320</strong>-<strong>211</strong>-<strong>34</strong>-2-1<br />
FRAME 6<br />
1.<br />
2.<br />
3.<br />
Slide second speed gear (1) onto main shaft (2) with synchronizer cone (3)<br />
toward front of main shaft.<br />
Slide on second and third speed clutch gear (4).<br />
Put snapring (5) in groove in main shaft (2).<br />
GO TO FRAME 7<br />
7-71
<strong>TM</strong> 9-<strong>2320</strong>-<strong>211</strong>-<strong>34</strong>-2-1<br />
FRAME 7<br />
1. Slide second and third speed gear synchronizer (1) onto main shaft (2) and into<br />
place over second and third speed clutch gear (3). Make sure front side of<br />
synchronizer faces away from second speed gear (4).<br />
2. Slide third speed gear (5) onto main shaft (2) with internal synchronizer cone<br />
facing toward rear of main shaft (2).<br />
GO TO FRAME 8<br />
7-72
<strong>TM</strong> 9-<strong>2320</strong>-<strong>211</strong>-<strong>34</strong>-2-1<br />
FRAME 8<br />
1. Coat bore of fourth speed gear sleeve (1) with white lead pigment.<br />
2. Put pin (2) in fourth speed gear sleeve (1).<br />
3. Press sleeve (1) into position on main shaft (3) with flange facing toward third<br />
speed gear (4).<br />
GO TO FRAME 9<br />
7-73
<strong>TM</strong> 9-<strong>2320</strong>-<strong>211</strong>-<strong>34</strong>-2-1<br />
FRAME 9<br />
1. Slide fourth speed gear (1) into position over fourth gear sleeve (2). Synchronizer<br />
internal cone (3) must face forward.<br />
2. Slide thrust washer (4) onto main shaft (5) flush against fourth gear sleeve (2).<br />
3. Put snapring (6) into place.<br />
4. Cover main shaft assembly with a clean cloth.<br />
END OF TASK<br />
7-74
<strong>TM</strong> 9-<strong>2320</strong>-<strong>211</strong>-<strong>34</strong>-2-1<br />
(3) Shifter housing assembly.<br />
FRAME 1<br />
1.<br />
2.<br />
3.<br />
4.<br />
5.<br />
Place shifter housing (1) upside down on workbench.<br />
Using lightweight hammer, tap first and reverse speed shifter shaft (2) partway<br />
through bore of shifter housing (1).<br />
Put first and reverse speed shifter shaft bracket (3) and shifter fork (4) on shifter<br />
shaft (2).<br />
Using lightweight hammer and punch, drive shifter shaft (2) into place in<br />
shifter housing (1).<br />
Tap expansion plug (5) into place.<br />
GO TO FRAME 2<br />
7-75
<strong>TM</strong> 9-<strong>2320</strong>-<strong>211</strong>-<strong>34</strong>-2-1<br />
FRAME 2<br />
1. Push interlock pin (1) into shifter shaft support (2) past hole (3).<br />
2. Tap second and third speed shifter shaft (4) half way through hole in<br />
shifter shaft housing (5).<br />
3. Put second and third speed shifter bracket (6) on end of shifter shaft (4).<br />
Tap shifter shaft through shifter shaft support hole (3).<br />
4. Put second and third speed shifter fork (7) on end of shifter shaft (4).<br />
GO TO FRAME 3<br />
7-76
<strong>TM</strong> 9-<strong>2320</strong>-<strong>211</strong>-<strong>34</strong>-2-1<br />
FRAME 3<br />
1.<br />
2.<br />
3.<br />
4.<br />
GO<br />
Tap shifter shaft (1) until edge of interlock detent notch (2) is even with shifter<br />
shaft support hole (3).<br />
Put interlock pin (4) in hole in shifter shaft interlock detent notch (2).<br />
Tap shifter shaft (1) into place through rear shifter shaft support (5).<br />
Tap expansion plug (6) into place in hole (7).<br />
TO FRAME 4<br />
7-77
<strong>TM</strong> 9-<strong>2320</strong>-<strong>211</strong>-<strong>34</strong>-2-1<br />
FRAME 4<br />
1. Put interlock pin (1) into shifter shaft support (2) past hole (3).<br />
2. Tap fourth and fifth speed shifter shaft (4) halfway through hole (5) in housing.<br />
3. Put fourth and fifth speed shifter fork (6) on end of shifter shaft (4).<br />
4. Tap shifter shaft (4) past shifter shaft support (2).<br />
5. Put on expansion plug (7).<br />
6. Put in five setscrews (8).<br />
7. Put safety wire (9) on five setscrews (8).<br />
GO TO FRAME 5<br />
7-78
<strong>TM</strong> 9-<strong>2320</strong>-<strong>211</strong>-<strong>34</strong>-2-1<br />
FRAME 5<br />
1. Turn shifter housing (1) on one side as shown.<br />
2. Put in three poppet balls (2) and poppet ball springs (3).<br />
GO TO FRAME 6<br />
7-79
<strong>TM</strong> 9-<strong>2320</strong>-<strong>211</strong>-<strong>34</strong>-2-1<br />
FRAME 6<br />
1. Join shift lever retainer (1) and shift lever (2) as shown.<br />
2. Using a light weight hammer, tap in pivot pin (3).<br />
GO TO FRAME 7<br />
7-80
<strong>TM</strong> 9-<strong>2320</strong>-<strong>211</strong>-<strong>34</strong>-2-1<br />
FRAME 7<br />
1. Slide spring cup (1) and spring (2) on shift lever (3).<br />
2. Put on snapring (4).<br />
3, Put on grommet (5).<br />
4. Put on knob (6).<br />
GO TO FRAME 8<br />
7-81
<strong>TM</strong> 9-<strong>2320</strong>-<strong>211</strong>-<strong>34</strong>-2-1<br />
FRAME 8<br />
1.<br />
2.<br />
3.<br />
GO<br />
Put shift lever finger plunger (1) on shift lever finger (2).<br />
Put shift lever finger (2) in shifter housing cover assembly<br />
Put on bolt (4), lockwasher (5), and nut (6).<br />
TO FRAME 9<br />
(3).<br />
7-82
<strong>TM</strong> 9-<strong>2320</strong>-<strong>211</strong>-<strong>34</strong>-2-1<br />
FRAME 9<br />
1. Put shifter housing cover assembly (1) and housing cover gasket (2) on shifter<br />
housing assembly (3).<br />
2. Put on six screws (4) and lockwashers (5).<br />
GO TO FRAME 10<br />
7-83
<strong>TM</strong> 9-<strong>2320</strong>-<strong>211</strong>-<strong>34</strong>-2-1<br />
FRAME 10<br />
1. Put finger plunger (1) and spring (2) into shifter housing (3).<br />
2. Put on retainer (4).<br />
END OF TASK<br />
7-84
<strong>TM</strong> 9-<strong>2320</strong>-<strong>211</strong>-<strong>34</strong>-2-1<br />
h. Assembly of Subassemblies into Transmission.<br />
(1) Gears and shafts.<br />
FRAME 1<br />
1. Press front bearing (1) into transmission case (2).<br />
2. Using hoist and rope sling, put countershaft assembly (3) into transmission case (2).<br />
3. Lower rear end of countershaft<br />
transmission case (2).<br />
4. Slide countershaft assembly (3)<br />
5. Take off hoist and rope sling.<br />
GO TO FRAME 2<br />
assembly (3) through rear bearing bore (4) of<br />
forward into front bearing (1).<br />
7-85
<strong>TM</strong> 9-<strong>2320</strong>-<strong>211</strong>-<strong>34</strong>-2-1<br />
FRAME 2<br />
1. Put snapring (1) in place on rear bearing (2).<br />
2. Using bearing replacer, put rear bearing (2) on countershaft (3) and into bore of<br />
transmission case (4).<br />
3. Put on slotted nut (5) against bearing (2).<br />
4. Check that countershaft (3) turns freely.<br />
GO TO FRAME 3<br />
7-86
<strong>TM</strong> 9-<strong>2320</strong>-<strong>211</strong>-<strong>34</strong>-2-1<br />
FRAME 3<br />
1. Put reverse idler gear (1) with two roller bearings (2) into transmission case (3).<br />
Larger gear must face towards front of transmission case and mesh with<br />
countershaft gears.<br />
2. Slide reverse idler gear shaft (4) through bore in rear of transmission case (3)<br />
with flat milled side towards countershaft rear bearing (5).<br />
GO TO FRAME 4<br />
7-87
<strong>TM</strong> 9-<strong>2320</strong>-<strong>211</strong>-<strong>34</strong>-2-1<br />
FRAME 4<br />
1.<br />
2.<br />
3.<br />
4.<br />
5.<br />
GO<br />
Put first and reverse gear (1) into transmission case (2) as shown.<br />
Using hoist and rope sling, lower main shaft assembly (3) into transmission<br />
case (2) through first and reverse gear (1) and bearing bore (4).<br />
Lower front end of main shaft assembly (3) to mate gears with gears on<br />
countershaft assembly (5).<br />
Take off hoist and rope sling.<br />
Put fourth and fifth speed gear synchronizer (6) onto front end of main shaft<br />
assembly (3) with small bronze end facing rear as shown.<br />
TO FRAME 5<br />
7-88
<strong>TM</strong> 9-<strong>2320</strong>-<strong>211</strong>-<strong>34</strong>-2-1<br />
FRAME 5<br />
1. Put snapring (1) in place on main shaft rear bearing (2).<br />
2. Slide main shaft rear bearing (2) with snapring (1) onto rear end of main<br />
shaft (3).<br />
3. Using bearing replacer, put main shaft rear bearing (2) onto main shaft<br />
(3) and into bore of transmission case (4).<br />
4. Slide spacer washers (5) onto main shaft (3).<br />
GO TO FRAME 6<br />
7-89
<strong>TM</strong> 9-<strong>2320</strong>-<strong>211</strong>-<strong>34</strong>-2-1<br />
FRAME 6<br />
1.<br />
2.<br />
3.<br />
4.<br />
Put hardening sealer on outside of oil seal (1). Pack inside lip of seal with<br />
small amount of grease.<br />
Drive oil seal (1) into place in rear output shaft cover (2). Lip of oil seal<br />
must face transmission case (3).<br />
Put rear output shaft cover gasket (4) and cover (2) with oil seal (1) in<br />
place on transmission case (3). Aline oil holes in transmission case, gasket,<br />
and cover.<br />
Put in and tighten four screws (5) and lockwashers (6) to 65 to 75 poundfeet.<br />
GO TO FRAME 7<br />
7-90
<strong>TM</strong> 9-<strong>2320</strong>-<strong>211</strong>-<strong>34</strong>-2-1<br />
FRAME 7<br />
CAUTI<strong>ON</strong><br />
Be careful not to damage gear teeth when tightening vise.<br />
1. Clamp input shaft (1) in soft-jawed vise as shown.<br />
2. Put bearing (2) on input shaft (1) with closed side of bearing facing<br />
gear (3).<br />
3. Put snapring (4) on input shaft (1).<br />
4. Put snapring (5) in place on bearing (2).<br />
GO TO FRAME 8<br />
7-91
<strong>TM</strong> 9-<strong>2320</strong>-<strong>211</strong>-<strong>34</strong>-2-1<br />
FRAME 8<br />
1. Pack grease into pocket of input shaft assembly (1).<br />
2. Put 14 pilot roller bearings (2) into pocket of input shaft (1).<br />
NOTE<br />
Synchronizer shift collar should be in neutral position when<br />
putting in input shaft assembly (1).<br />
3. Put input shaft (1) in transmission case (3) and onto main shaft (4). Mate gear on<br />
input shaft assembly with countershaft driver gear (5).<br />
4. Turn input shaft assembly (1) to seat pilot roller bearing (2).<br />
GO TO FRAME 9<br />
7-92
<strong>TM</strong> 9-<strong>2320</strong>-<strong>211</strong>-<strong>34</strong>-2-1<br />
FRAME 9<br />
1. Coat outside of oil seal (1) with hardening sealer. Pack inside of lip with<br />
a small amount of grease.<br />
2. Put oil seal (1) in place to input shaft cover (2). Lip of oil seal must face<br />
towards transmission case (3) .<br />
3. Put input shaft cover gasket (4) in place.<br />
4. Slide cover (2) with oil seal (1) onto input shaft (5). Using flange replacer,<br />
press cover into place.<br />
5. Put in and tighten six nuts (6) and lockwashers (7) to 25 to 30 pound-feet.<br />
GO TO FRAME 10<br />
7-93
<strong>TM</strong> 9-<strong>2320</strong>-<strong>211</strong>-<strong>34</strong>-2-1<br />
FRAME 10<br />
1. Slide first and reverse speed gear<br />
into mesh with countershaft gears.<br />
from turning.<br />
GO TO FRAME 11<br />
(1) and second and third speed synchronizer (2)<br />
This will keep transmission gears and shafts<br />
7-94
<strong>TM</strong> 9-<strong>2320</strong>-<strong>211</strong>-<strong>34</strong>-2-1<br />
FRAME 11<br />
1. Tighten slotted nut (1) to 400 to 500 pound-feet. If slot in nut does not<br />
aline with hole in countershaft (2), tighten nut until it does.<br />
2. Put in cotter pin (3).<br />
3. Put countershaft rear bearing cover gasket (4) and cover (5) in place.<br />
Tab of cover must lock against reverse idler gear shaft (6).<br />
4. Put in four screws (7) and lockwashers (8).<br />
GO TO FRAME 12<br />
7-95
<strong>TM</strong> 9-<strong>2320</strong>-<strong>211</strong>-<strong>34</strong>-2-1<br />
FRAME 12<br />
1. Using flange replacer and<br />
shaft (2).<br />
2. Put on and tighten slotted<br />
does not aline with hole in<br />
3. Put in cotter pin (4).<br />
GO TO FRAME 13<br />
wrench, press companion flange (1) onto main<br />
nut (3) to 500 to 550 pound-feet. If slot in nut<br />
main shaft (2), tighten nut until it does.<br />
7-96
<strong>TM</strong> 9-<strong>2320</strong>-<strong>211</strong>-<strong>34</strong>-2-1<br />
FRAME 13<br />
1. Slide first and reverse speed gear (1) and second and third speed synchronizer<br />
(2) out of mesh with countershaft gears.<br />
2. Check backlash between main shaft gears and countershaft gears. Refer to<br />
para 7-3c(4).<br />
END OF TASK<br />
7-97
<strong>TM</strong> 9-<strong>2320</strong>-<strong>211</strong>-<strong>34</strong>-2-1<br />
(2) Shifter housing assembly.<br />
FRAME 1<br />
1. Put shifter housing gasket (1) in place on transmission case (2).<br />
2. Aline shifter forks (3, 4, and 5) with collars on synchronizers (6 and 7) and gear(8).<br />
Set shifter housing assembly (9) in place.<br />
3. Put in 14 screw and lockwasher assemblies (10). Tighten screws to 35 to 40<br />
pound-feet.<br />
GO TO FRAME 2<br />
7-98
<strong>TM</strong> 9-<strong>2320</strong>-<strong>211</strong>-<strong>34</strong>-2-1<br />
FRAME 2<br />
1. Put two preformed packings (1) in place in poppet valve bores in shifter<br />
housing (2).<br />
2, Put two plates (3) on poppet valve assembly (4).<br />
3. Put poppet<br />
4. Put in and<br />
feet.<br />
5. Put on two<br />
END OF TASK<br />
valve assembly (4) in place in shifter housing (2).<br />
tighten four screws (5) and lockwashers (6) to 10 to 15 poundtransfer<br />
shift lines (7).<br />
7-99
<strong>TM</strong> 9-<strong>2320</strong>-<strong>211</strong>-<strong>34</strong>-2-1<br />
(3) Clutch release mechanism and housing.<br />
FRAME 1<br />
1. Put clutch housing gasket (1) and clutch housing (2) in place.<br />
2. Put in six screws (3) and lockwashers (4).<br />
GO TO FRAME 2<br />
7-100
<strong>TM</strong> 9-<strong>2320</strong>-<strong>211</strong>-<strong>34</strong>-2-1<br />
FRAME 2<br />
1.<br />
2.<br />
3.<br />
4.<br />
5.<br />
NOTE<br />
Truck M543A2 has two oil seals (1), one on each side.<br />
Put oil seal (1) in place in clutch housing (2).<br />
Starting from left side of clutch housing (2), slide clutch release shaft (3) about<br />
six inches into housing.<br />
Hold clutch release yoke (4) in place.<br />
release yoke.<br />
Slide clutch release shaft (3) through clutch<br />
Put two keys (5) into position in each bottom end of clutch release yoke (4) and slide<br />
clutch release shaft (3) into right shaft bore in clutch housing (2).<br />
Put in two screws (6) and lockwashers (7).<br />
GO TO FRAME 3<br />
7-101
<strong>TM</strong> 9-<strong>2320</strong>-<strong>211</strong>-<strong>34</strong>-2-1<br />
FRAME 3<br />
1. Put woodruff key (1) into keyway in clutch release shaft (2).<br />
2. Slide clutch release lever (3) into place.<br />
3. Tighten locknut (4) while holding bolt (5).<br />
4. For truck M543A2:<br />
a. Put woodruff key (6) into keyway in clutch release shaft (2).<br />
b. Slide clutch release lever (7) into place.<br />
c. Tighten locknut (8) while holding bolt (9).<br />
GO TO FRAME 4<br />
7-102
<strong>TM</strong> 9-<strong>2320</strong>-<strong>211</strong>-<strong>34</strong>-2-1<br />
FRAME 4<br />
1. Press clutch release bearing (1) on clutch release sleeve (2).<br />
2. Put in plug (3).<br />
3. Put a small amount of grease on main shaft bearing cover (4).<br />
4. Slide clutch release sleeve (2) with bearing (1) to main shaft bearing cover<br />
(4) and aline holes in clutch release yoke (5).<br />
5. Put two pads (6) and spring clips (7) in place on clutch release sleeve (2)<br />
and clutch release yoke (5).<br />
6. Put in four screws (8) with lockwashers (9).<br />
END OF TASK<br />
7-103
<strong>TM</strong> 9-<strong>2320</strong>-<strong>211</strong>-<strong>34</strong>-2-1<br />
(4) Covers.<br />
FRAME 1<br />
1. Put cover gasket (1) and cover (2) in place on left side of transmission case (3).<br />
2. Put in six screws and lockwasher assemblies (4).<br />
3. If transmission does not have power takeoff, do steps 1 and 2 again on right side.<br />
END OF TASK<br />
7-104
<strong>TM</strong> 9-<strong>2320</strong>-<strong>211</strong>-<strong>34</strong>-2-1<br />
i. Replacement.<br />
FRAME 1<br />
1.<br />
2.<br />
3.<br />
4.<br />
5.<br />
6.<br />
7.<br />
Put gasket (1) on engine flywheel housing studs (2).<br />
Using dolly, push transmission (3) under truck.<br />
Put chain (4) around transmission (3) and hook it to hoist (5). Take slack<br />
out of chain.<br />
Raise transmission (3) so input shaft (6) will slide straight into clutch (7).<br />
Mate splines of input shaft and clutch. If splines do not mate, put transmission<br />
(3) in fourth or fifth gear and turn output shaft (8) by hand to<br />
mate splines.<br />
Slide transmission (3) onto flywheel housing studs (2).<br />
Put on 12 nuts (9) and washers (10).<br />
Take off chain (4) and hoist (5).<br />
GO TO FRAME 2<br />
7-105
<strong>TM</strong> 9-<strong>2320</strong>-<strong>211</strong>-<strong>34</strong>-2-1<br />
FRAME 2<br />
1. Hook up transmission vent line (1) at tee connection (2).<br />
NOTE<br />
END OF TASK<br />
1.<br />
2.<br />
3.<br />
4.<br />
5.<br />
6.<br />
7.<br />
8.<br />
9.<br />
10.<br />
11.<br />
Follow-on Maintenance Action Required:<br />
Replace power takeoff (truck M51A2 and trucks<br />
with front winches). Refer to Part 3, para<br />
17-60.<br />
Replace transmission shift lever. Refer to<br />
<strong>TM</strong> 9-<strong>2320</strong>-<strong>211</strong>-20.<br />
Replace rotochamber (truck M543A 2). Refer<br />
to Part 3, para 17-47.<br />
Replace outer auxiliary release clutch lever<br />
(truck M543A2). Refer to <strong>TM</strong> 9-<strong>2320</strong>-<strong>211</strong>-20.<br />
Replace clutch actuating link rod assembly.<br />
Refer to <strong>TM</strong> 9-<strong>2320</strong>-<strong>211</strong>-20.<br />
Replace cab floor tunnel and clutch housing<br />
toe board. Refer to <strong>TM</strong> 9-<strong>2320</strong>-<strong>211</strong>-20.<br />
Replace power takeoff linkage (truck M51A2<br />
and trucks with front winches). Refer to<br />
<strong>TM</strong> 9-<strong>2320</strong>-<strong>211</strong>-20.<br />
Replace hoist pump propeller shaft (truck<br />
M51A2). Refer to <strong>TM</strong> 9-<strong>2320</strong>-<strong>211</strong>-20.<br />
Replace front winch propeller shaft (trucks<br />
with front winches). Refer to <strong>TM</strong> 9-<strong>2320</strong>-<strong>211</strong>-20.<br />
Replace transmission-to-transfer case propeller<br />
shaft. Refer to <strong>TM</strong> 9-<strong>2320</strong>-<strong>211</strong>-20.<br />
Fill transmission. Refer to LO 9-<strong>2320</strong>-<strong>211</strong>-12.<br />
7-106
<strong>TM</strong> 9-<strong>2320</strong>-<strong>211</strong>-<strong>34</strong>-2-1<br />
7-4. TRANSMISSI<strong>ON</strong> POWER TEST.<br />
TOOLS:<br />
SUPPLIES:<br />
No special tools required<br />
None<br />
PERS<strong>ON</strong>NEL: One<br />
EQUIPMENT C<strong>ON</strong>DITI<strong>ON</strong>: Truck parked, engine off, handbrake set.<br />
a. Preliminary Procedure. Check level of transmission oil and add if necessary.<br />
Refer to LO 9-<strong>2320</strong>-<strong>211</strong>-12.<br />
7-107
<strong>TM</strong> 9-<strong>2320</strong>-<strong>211</strong>-<strong>34</strong>-2-1<br />
b. Test.<br />
FRAME 1<br />
1. Start engine. Refer to <strong>TM</strong> 9-<strong>2320</strong>-<strong>211</strong>-10.<br />
2. Put handbrake (1) in down (brake off) position.<br />
3. Set truck in motion. Refer to <strong>TM</strong> 9-<strong>2320</strong>-<strong>211</strong>-10.<br />
4. Move gearshift lever (2) through all positions at different speeds. Listen<br />
for any unusual noises.<br />
NOTE<br />
Unusual noises might mean transmission gears<br />
are not fully in mesh or that there is more than.<br />
normal clearance between gear teeth.<br />
5. Make sure gearshift lever (2) does not go back to neutral position by itself.<br />
6. Stop truck and turn off engine. Refer to <strong>TM</strong> 9-<strong>2320</strong>-<strong>211</strong>-10.<br />
7. Put handbrake (1) in up (brake on) position.<br />
END OF TASK<br />
NOTE<br />
Follow-on Maintenance Action Required:<br />
1. Check outside of transmission case for leaks<br />
at gasket joints.<br />
2. If any unusual noises were heard, if gearshift<br />
lever went back to neutral position by itself or<br />
if fluid leaks are noted, repair transmission.<br />
Refer to para 7-3.<br />
7-108
<strong>TM</strong> 9-<strong>2320</strong>-<strong>211</strong>-<strong>34</strong>-2-1<br />
7-5. TRANSMISSI<strong>ON</strong> INPUT SHAFT SEAL REMOVAL AND REPLACEMENT.<br />
TOOLS:<br />
SUPPLIES:<br />
PERS<strong>ON</strong>NEL: One<br />
No special tools required<br />
Input shaft cover seal<br />
Input shaft cover gasket<br />
Clutch housing gasket<br />
Clutch housing seal (2)<br />
Hardening sealer, MIL-S-3927C<br />
Automotive and artillery grease, type GAA, MIL-G-10924<br />
Clean rags<br />
EQUIPMENT C<strong>ON</strong>DITI<strong>ON</strong>: Truck parked, engine off, handbrake set.<br />
a. Preliminary Procedures.<br />
(1) Drain transmission. Refer to LO 9-<strong>2320</strong>-<strong>211</strong>-12.<br />
(2) Remove transmission. Refer to para 7-3.<br />
7-109
<strong>TM</strong> 9-<strong>2320</strong>-<strong>211</strong>-<strong>34</strong>-2-1<br />
b. Removal.<br />
FRAME 1<br />
1. Take out four screws (1) and lockwashers (2).<br />
2. Take off two spring clips (3) and pads (4).<br />
3. Take out plug (5).<br />
4. Slide off sleeve (6) with clutch release bearing (7).<br />
GO TO FRAME 2<br />
7-110
<strong>TM</strong> 9-<strong>2320</strong>-<strong>211</strong>-<strong>34</strong>-2-1<br />
FRAME 2<br />
1. Take off locknut (1) while holding bolt (2). Take out bolt (2) and slide<br />
off clutch release lever (3).<br />
2. Take out woodruff key (4).<br />
NOTE<br />
For truck M543A2, do steps 3 and 4. For all other<br />
trucks, go to frame 3.<br />
3. Take off locknut (5) while holding bolt (6). Take out bolt (6) and slide<br />
off clutch release lever (7).<br />
4. Take out woodruff key (8).<br />
GO TO FRAME 3<br />
7-111
<strong>TM</strong> 9-<strong>2320</strong>-<strong>211</strong>-<strong>34</strong>-2-1<br />
FRAME 3<br />
1.<br />
2.<br />
3.<br />
4.<br />
Take out two screws (1) and lockwashers (2).<br />
Slide clutch release shaft (3) about two inches to the right and take out<br />
two keys (4).<br />
Slide clutch release shaft (3) to the right far enough to slide off clutch<br />
release yoke (5).<br />
Slide clutch release shaft (3) out of clutch housing (6).<br />
5.<br />
NOTE<br />
Transmission for truck M543A2 has two oil seals<br />
(7). Transmission for all other trucks has only<br />
one oil seal.<br />
Take out and throw away oil seal (7).<br />
GO TO FRAME 4<br />
7-112
<strong>TM</strong> 9-<strong>2320</strong>-<strong>211</strong>-<strong>34</strong>-2-1<br />
FRAME 4<br />
1. Take off seven nuts (1) and lockwashers (2).<br />
2. Take off clutch housing (3) and gasket (4). Throw away gasket.<br />
GO TO FRAME 5<br />
7-113
<strong>TM</strong> 9-<strong>2320</strong>-<strong>211</strong>-<strong>34</strong>-2-1<br />
FRAME 5<br />
1.<br />
2.<br />
3.<br />
4.<br />
5.<br />
6.<br />
Take off six nuts (1) and lockwashers (2).<br />
Put two 3/8-16-UNC screws (3) into threaded holes in input shaft cover<br />
(4). Do not tighten screws.<br />
NOTE<br />
When taking out input shaft cover (4), make sure<br />
input shaft (5) does not come out of transmission<br />
case (6) or bearings may fall into case.<br />
Screw in screws (3) evenly until input shaft cover (4) is free.<br />
Take off input shaft cover (4) with seal (7) and gasket (8). Throw<br />
away gasket.<br />
Take out seal (7). Throw away seal.<br />
Take out two screws (3).<br />
END OF TASK<br />
7-114
<strong>TM</strong> 9-<strong>2320</strong>-<strong>211</strong>-<strong>34</strong>-2-1<br />
c. Replacement.<br />
FRAME 1<br />
1. Coat outside of oil seal (1) with hardening sealer. Pack inside of lip with<br />
a small amount of grease.<br />
2. Put oil seal (1) in place in input shaft cover (2). Lip of oil seal must face<br />
towards transmission case (3).<br />
3. Put input shaft cover gasket (4) in place.<br />
4. Slide cover (2) with oil seal (1) onto input shaft (5).<br />
5. Put on and tighten seven nuts (6) and lockwashers (7) to 25 to 30 poundfeet.<br />
GO TO FRAME 2<br />
7-115
<strong>TM</strong> 9-<strong>2320</strong>-<strong>211</strong>-<strong>34</strong>-2-1<br />
FRAME 2<br />
1. Put clutch housing gasket (1) and clutch housing (2) in place.<br />
2. Put in seven nuts (3) and lockwashers (4).<br />
GO TO FRAME 3<br />
7-116
<strong>TM</strong> 9-<strong>2320</strong>-<strong>211</strong>-<strong>34</strong>-2-1<br />
FRAME 3<br />
NOTE<br />
Transmission for M543A2 truck has two oil seals<br />
(1). Transmission on all other trucks has only<br />
one oil seal.<br />
1. Put oil seal (1) in place in clutch housing (2).<br />
2. Start clutch release shaft (3) from left side of clutch housing (2). Slide<br />
clutch release shaft about six inches into housing.<br />
3. Hold clutch release yoke (4) in place. Slide clutch release shaft (3).<br />
through clutch release yoke.<br />
4. Put two keys (5) into position in each bottom end of clutch release yoke<br />
(4) and slide shaft into right shaft bore in clutch housing (2).<br />
5. Put in two screws (6) and lockwashers (7).<br />
GO TO FRAME 4<br />
7-117
<strong>TM</strong> 9-<strong>2320</strong>-<strong>211</strong>-<strong>34</strong>-2-1<br />
FRAME 4<br />
1. Put woodruff key (1) into keyway in clutch release shaft (2).<br />
2. Slide clutch release lever (3) into place.<br />
NOTE<br />
For M543A2 truck transmission, do steps 4 through<br />
6. For other truck transmission, go to frame 5.<br />
3. Put bolt (4) into release lever (3). Put on and tighten locknut (5).<br />
4. Put woodruff key (6) into keyway in clutch release shaft (2).<br />
5. Slide clutch release lever (7) into place.<br />
6. Put bolt (8) into release lever (7). Put in and tighten locknut (9).<br />
GO TO FRAME 5<br />
7-118
<strong>TM</strong> 9-<strong>2320</strong>-<strong>211</strong>-<strong>34</strong>-2-1<br />
FRAME 5<br />
1. Put plug (1) into sleeve (2).<br />
2. Put a small amount of grease into bore of sleeve (2).<br />
3. Slide sleeve (2) onto input shaft (3) and aline it with clutch release yoke<br />
(4).<br />
4. Put two pads (5) and spring clips (6) in place on sleeve (2) and clutch<br />
release yoke (4).<br />
5. Put in four screws (7) and lockwashers (8).<br />
6. With clean rag, wipe grease from clutch housing (9).<br />
END OF TASK<br />
NOTE<br />
Follow-on Maintenance Action Required:<br />
1. Replace transmission. Refer to para 7-3.<br />
2. Fill transmission. Refer to LO 9-<strong>2320</strong>-<strong>211</strong>-12.<br />
7-119
<strong>TM</strong> 9-<strong>2320</strong>-<strong>211</strong>-<strong>34</strong>-2-1<br />
7-6. TRANSMISSI<strong>ON</strong> OUTPUT SHAFT SEAL REMOVAL AND REPLACEMENT.<br />
TOOLS: Mechanical puller, pn 8708724<br />
Companion flange replacer, pn 7950147<br />
SUPPLIES:<br />
PERS<strong>ON</strong>NEL: One<br />
EQUIPMENT C<strong>ON</strong>DITI<strong>ON</strong>:<br />
Hardening sealer, MIL-S-3927C<br />
Artillery and automotive grease, type GAA, MIL-G-10924<br />
Rear output shaft seal<br />
Cotter pin<br />
Rear output shaft cover gasket<br />
Truck parked, engine off, handbrake set.<br />
a. Preliminary Procedure. Remove transmission-to-transfer propeller shaft.<br />
Refe to <strong>TM</strong> 9-<strong>2320</strong>-<strong>211</strong>-20.<br />
7-120
<strong>TM</strong> 9-<strong>2320</strong>-<strong>211</strong>-<strong>34</strong>-2-1<br />
b. Removal.<br />
FRAME 1<br />
1. Take out and throw away cotter pin (1).<br />
2. Takeoff slotted nut (2).<br />
3. Using mechanical puller, take off companion flange (3) from main shaft (4).<br />
GO TO FRAME 2<br />
7-121
<strong>TM</strong> 9-<strong>2320</strong>-<strong>211</strong>-<strong>34</strong>-2-1<br />
FRAME 2<br />
1. Take out four screws (1) and lockwashers (2).<br />
2. Using lightweight hammer, tap rear output shaft cover (3) lightly to free it from<br />
main shaft rear bearing outer race (4).<br />
3. Take off rear output shaft cover (3), cover gasket (5), and oil seal (6). Throw<br />
away gasket.<br />
4. Using hammer and punch, drive oil seal (6) out of rear output shaft cover (3). Throw<br />
away oil seal.<br />
END OF TASK<br />
7-122
<strong>TM</strong> 9-<strong>2320</strong>-<strong>211</strong>-<strong>34</strong>-2-1<br />
c. Replacement.<br />
FRAME 1<br />
1. Put hardening sealer on outside of oil seal (1). Pack inside lip of seal<br />
with small amount of grease.<br />
2. Using hammer and block of wood, drive oil seal (1) into place in rear output<br />
shaft cover (2). Lip of oil seal must face transmission case (3).<br />
3. Put rear output shaft cover gasket (4) and cover (2) with oil seal (1) in<br />
place on transmission case (3). Aline oil holes in transmission case, gasket,<br />
and cover.<br />
4. Put in and tighten four screws (5) and lockwashers (6) to 65 to 75 poundfeet.<br />
GO TO FRAME 2<br />
7-123
<strong>TM</strong> 9-<strong>2320</strong>-<strong>211</strong>-<strong>34</strong>-2-1<br />
FRAME 2<br />
1. Using flange replacer, press companion flange (1) onto main shaft (2).<br />
2. Put on and tighten slotted nut (3) to 500 to 550 pound-feet. If slot in<br />
nut does not aline with cotter pin hole in main shaft (2), tighten nut until<br />
it does.<br />
3. Put in and bend open ends of cotter pin (4).<br />
END OF TASK<br />
NOTE<br />
Follow-on Maintenance Action Required:<br />
1. Fill transmission. Refer to LO 9-<strong>2320</strong>-<strong>211</strong>-12.<br />
2. Replace transmission-to-transfer propeller<br />
shaft. Refer to <strong>TM</strong> 9-<strong>2320</strong>-<strong>211</strong>-20.<br />
7-124
<strong>TM</strong> 9-<strong>2320</strong>-<strong>211</strong>-<strong>34</strong>-2-1<br />
7-7. MAINTENANCE OF BEARINGS.<br />
TOOLS:<br />
SUPPLIES:<br />
PERS<strong>ON</strong>NEL: One<br />
NOTE<br />
Tasks are for general maintenance of bearings.<br />
Refer to <strong>TM</strong> 9-214 for more detailed<br />
information.<br />
No special tools required<br />
Solvent, dry cleaning, type II (SD-2), Fed. Spec P-D-680<br />
Anti-seize compound, white lead, TT-A-680-B-2<br />
Drop light<br />
a. Removal of Bearing from Shaft by Pressing.<br />
FRAME 1<br />
1. Hold shaft (1) with bearing (2) in arbor press (3).<br />
CAUTI<strong>ON</strong><br />
Do not place steel bars (4) against shaft (1). Steel<br />
bars can scratch and score shaft.<br />
2. Place two flat bars (4) between bearing (2) and base plate (5). Inner race<br />
(6) of bearing must rest firmly on steel bars.<br />
3. Hold shaft (1) so it does not fall and press shaft from bearing (2).<br />
END OF TASK<br />
7-125
<strong>TM</strong> 9-<strong>2320</strong>-<strong>211</strong>-<strong>34</strong>-2-1<br />
b. Removal of Bearing from Shaft by Pulling.<br />
FRAME 1<br />
1. Put puller plate (1) on shaft (2) with bearing (3) as shown. Close puller plate<br />
until inner race (4) of bearing (3) rests on puller plate but plate does not<br />
touch shaft (2).<br />
2. Tighten two nuts (5) to keep puller plate (1) from opening.<br />
3. Put puller wrench (6) on push-puller (7). Screw in and tighten two legs<br />
(8) into puller plate (1).<br />
4. Pull bearing (3) off shaft (2).<br />
END OF TASK<br />
7-126
<strong>TM</strong> 9-<strong>2320</strong>-<strong>211</strong>-<strong>34</strong>-2-1<br />
c. Removal of Bearing from Housing by Pressing.<br />
FRAME 1<br />
1. Hold housing (1) with bearing (2) in arbor press (3).<br />
2. Place two steel bars (4) on rim of housing (1) but not touching outer race (5)<br />
of bearing (2).<br />
3. Place steel bar (6) in notches in housing (1).<br />
4. Press bearing (2) out of housing (1).<br />
END OF TASK<br />
7-127
<strong>TM</strong> 9-<strong>2320</strong>-<strong>211</strong>-<strong>34</strong>-2-1<br />
d. Removal of Bearing from Housing By Pulling.<br />
FRAME 1<br />
1. Hold pulling attachment (1) in bearing (2). Tighten nut (3) to spread two<br />
legs (4).<br />
2. Join pulling attachment (1), reducing adapter (5).<br />
3. Pull bearing (2) from housing (6).<br />
END OF TASK<br />
7-128
<strong>TM</strong> 9-<strong>2320</strong>-<strong>211</strong>-<strong>34</strong>-2-1<br />
e. Cleaning of Bearings.<br />
FRAME 1<br />
WARNING<br />
Dry cleaning solvent is flammable. Do not use near an<br />
open flame.Keep a fire extinguisher nearby when solvent<br />
is used. Use only in well-ventilated places. Failure<br />
to do this may result in injury to personnel and damage<br />
to equipment.<br />
NOTE<br />
All old lubricant must be taken off bearing cones (1)<br />
during cleaning. Soak bearing cones as long as<br />
needed to take off all old lubricant.<br />
1. Soak bearing (1) in solvent.<br />
2. Rinse bearing cone (1) in clean solvent.<br />
3. Let bearing (1) dry.<br />
WARNING<br />
Do not dry bearing with compressed air. Spinning<br />
bearings may explode and cause serious injury to<br />
personnel.<br />
4. Using clean rags, wipe all old grease from inside bearing cup (2).<br />
END OF TASK<br />
7-129
<strong>TM</strong> 9-<strong>2320</strong>-<strong>211</strong>-<strong>34</strong>-2-1<br />
f. Inspection.<br />
FRAME 1<br />
1. Place drop light behind bearing assembly.<br />
2. Hold wheel bearing cone (1) and turn inner race (2) slowly.<br />
3. Check that bearing rollers (3) and wheel bearing cone (1) have no cracks,<br />
flaking, pitting or long or deep scratches.<br />
4. Check that wheel bearing cone (1) has not overheated. Wheel bearing cone<br />
will turn blue where it has overheated.<br />
5. Check that bearing cups (4) have no dents or small depressions.<br />
NOTE<br />
If bearing rollers (3) are damaged, throw away bearing<br />
cone (1) and get a new one.<br />
6. Check that bearing cups (4) and bearing rollers (3) are not splintered or<br />
chipped.<br />
7. Throw away damaged parts and get new ones.<br />
END OF TASK<br />
7-130
<strong>TM</strong> 9-<strong>2320</strong>-<strong>211</strong>-<strong>34</strong>-2-1<br />
g. Replacement of Bearing onto Shaft.<br />
FRAME 1<br />
WARNING<br />
Dry cleaning solvent is flammable. Do not use near an<br />
open flame. Keep a fire extinguisher nearby when solvent<br />
is used. Use only in well-ventilated places. Failure<br />
to do this may result in injury to personnel and damage<br />
to equipment.<br />
1. Using solvent, clean bearing seat on shaft (1).<br />
2. Coat bearing seat on shaft (1) with anti-seize compound.<br />
3. Hold shaft (1) in place in arbor press (2).<br />
4. Place bearing (3) squarely on top of shaft (1).<br />
5. Place sleeve (4) on inner race (5). Put steel drive plate (6) on sleeve (4).<br />
6. Press bearing (3) into place on shaft (1).<br />
END OF TASK<br />
7-131
<strong>TM</strong> 9-<strong>2320</strong>-<strong>211</strong>-<strong>34</strong>-2-1<br />
h. Replacement of Bearing into Housing.<br />
FRAME 1<br />
1.<br />
2.<br />
3.<br />
4.<br />
5.<br />
6.<br />
7.<br />
WARNING<br />
Dry cleaning solvent is flammable. Do not use near an<br />
open flame. Keep a fire extinguisher nearby when solvent<br />
is used. Use only in well-ventilated places. Failure to<br />
do this may result in injury to personnel and damage to<br />
equipment.<br />
Using solvent, clean bore of housing (1).<br />
Coat bore of housing (1) with anti-seize compound.<br />
Put housing (1) in place in arbor press (2).<br />
Place bearing (3) squarely on bore of housing (1).<br />
Put sleeve (4) on outer race (5) of bearing (3).<br />
Put steel drive plate (6) on top of sleeve (4).<br />
Using press arbor (7), push bearing (3) into housing (1).<br />
END OF TASK<br />
7-132
<strong>TM</strong> 9-<strong>2320</strong>-<strong>211</strong>-<strong>34</strong>-2-1<br />
CHAPTER 8<br />
TRANSMISSI<strong>ON</strong> TRANSFER SYSTEM GROUP MAINTENANCE<br />
Section I. SCOPE<br />
8-1. EQUIPMENT ITEMS COVERED. This chapter gives equipment maintenance<br />
procedures for the transmission transfer assembly and the transmission transfer<br />
controls and linkages for which there are authorized corrective maintenance tasks<br />
at the direct and general support maintenance levels.<br />
8-2. EQUIPMENT ITEMS NOT COVERED. All equipment items for which corrective<br />
maintenance is authorized at the direct and general support maintenance levels are<br />
covered in this chapter.<br />
Section II. TRANSMISSI<strong>ON</strong> TRANSFER ASSEMBLY<br />
8-3. TRANSMISSI<strong>ON</strong> TRANSFER REMOVAL AND REPLACEMENT.<br />
TOOLS:<br />
SUPPLIES:<br />
Transfer case fixture,<br />
None<br />
PERS<strong>ON</strong>NEL: One<br />
EQUIPMENT C<strong>ON</strong>DITI<strong>ON</strong>: Truck parked, engine off, handbrake set.<br />
a. Preliminary Procedures.<br />
(1) Remove outer right forward-rear wheel. Refer to <strong>TM</strong> 9-<strong>2320</strong>-<strong>211</strong>-10.<br />
(2) Remove inner right forward-rear wheel. Refer to <strong>TM</strong> 9-<strong>2320</strong>-<strong>211</strong>-10.<br />
(3) Vent air system pressure. Refer to <strong>TM</strong> 9-<strong>2320</strong>-<strong>211</strong>-20.<br />
(4) Remove transfer-to-forward-rear axle propeller shaft from transfer<br />
case. Refer to <strong>TM</strong> 9-<strong>2320</strong>-<strong>211</strong>-20.<br />
(5) Remove transfer-to-transmission propeller shaft from transfer case.<br />
Refer to <strong>TM</strong> 9-<strong>2320</strong>-<strong>211</strong>-20.<br />
(6) Remove transfer-to-front axle propeller shaft from transfer case.<br />
Refer to <strong>TM</strong> 9-<strong>2320</strong>-<strong>211</strong>-20.<br />
(7) For truck M543A2, remove power takeoff-to-power divider propeller<br />
shaft from power takeoff unit on transfer case. Refer to <strong>TM</strong> 9-<strong>2320</strong>-<strong>211</strong>-20.<br />
(8) Remove air hydraulic cylinder shield. Refer to <strong>TM</strong> 9-<strong>2320</strong>-<strong>211</strong>-20.<br />
8-1
<strong>TM</strong> 9-<strong>2320</strong>-<strong>211</strong>-<strong>34</strong>-2-1<br />
b. Removal.<br />
FRAME 1<br />
1. Unscrew coupling nut (1).<br />
2. Unscrew and take off hose (2).<br />
3. Unscrew coupling nut (3) and take off hose (2).<br />
GO TO FRAME 2<br />
8-2
<strong>TM</strong> 9-<strong>2320</strong>-<strong>211</strong>-<strong>34</strong>-2-1<br />
FRAME 2<br />
1. Take out cotter pin (1) and clevis pin (2).<br />
2. Take control rod yoke (3) away from transfer shifting fork pin (4).<br />
3. Unscrew coupling nut (5) and take off speedometer cable (6).<br />
4. Unscrew and take off actuating hose (7).<br />
GO TO FRAME 3<br />
8-3
<strong>TM</strong> 9-<strong>2320</strong>-<strong>211</strong>-<strong>34</strong>-2-1<br />
FRAME 3<br />
1. Take off<br />
2. Take off<br />
3. Take off<br />
4. Take off<br />
handbrake release spring (1).<br />
two nuts (2).<br />
two nuts (3) and take out two screws (4).<br />
clamp (5), spacer (6), and handbrake cable (7).<br />
IF WORKING <strong>ON</strong> TRUCK M543A2, GO TO FRAME 4.<br />
IF WORKING <strong>ON</strong> ALL O<strong>THE</strong>R TRUCKS, GO TO FRAME 5<br />
8-4
<strong>TM</strong> 9-<strong>2320</strong>-<strong>211</strong>-<strong>34</strong>-2-1<br />
FRAME 4<br />
1. Take out cotter pin (1) and take out clevis pin (2). Take off rod (3).<br />
GO TO FRAME 5<br />
8-5
<strong>TM</strong> 9-<strong>2320</strong>-<strong>211</strong>-<strong>34</strong>-2-1<br />
FRAME 5<br />
1.<br />
2.<br />
3.<br />
4.<br />
5.<br />
6.<br />
7.<br />
Place transfer fixture (1) and lift (2), under transfer assembly (3).<br />
Raise lift (2) until weight of transfer assembly (3) rests on transfer fixture (1).<br />
Tighten six screws (4) in transfer fixture (1) until they touch transfer assembly (3).<br />
Take out seven screws with washers (5), four from left mounting bracket (6) and<br />
three from right mounting bracket (7).<br />
Slowly lower lift (2).<br />
Turn lift (2) so that right side of transfer assembly (3) faces forward-rear axle (8).<br />
Working on right side of truck, pull lift (2) with transfer fixture (1) and transfer<br />
assembly (3) out from under truck.<br />
END OF TASK<br />
8-6
<strong>TM</strong> 9-<strong>2320</strong>-<strong>211</strong>-<strong>34</strong>-2-1<br />
c. Replacement.<br />
FRAME 1<br />
1.<br />
2.<br />
3.<br />
4.<br />
5.<br />
GO<br />
Using transfer fixture (1) and lift (2), slide transfer assembly (3) under<br />
right side of truck as shown.<br />
Turn transfer assembly (3) so that handbrake (4) faces forward-rear axle (5).<br />
Lift transfer assembly (3) into place.<br />
Put in seven screws and washers (6) and two mounting brackets (7), four<br />
into left mounting bracket and three into right mounting bracket.<br />
Lower lift (2) and take away lift (2) and transfer fixture (1).<br />
TO FRAME 2<br />
8-7
<strong>TM</strong> 9-<strong>2320</strong>-<strong>211</strong>-<strong>34</strong>-2-1<br />
FRAME 2<br />
1. Hold handbrake cable (1), spacer (2), and clamp (3) in place.<br />
2. Put in and hold two screws (4).<br />
3. Put on two nuts (5).<br />
4. Slide cable (1) into handbrake lever (6).<br />
5. Put on two nuts (7).<br />
6. Hook handbrake release spring (8) on lever (6).<br />
IF WORKING <strong>ON</strong> TRUCK M543A2, GO TO FRAME 3.<br />
IF WORKING <strong>ON</strong> ALL O<strong>THE</strong>R TRUCKS, GO TO FRAME 4<br />
8-8
<strong>TM</strong> 9-<strong>2320</strong>-<strong>211</strong>-<strong>34</strong>-2-1<br />
FRAME 3<br />
1. Hold yoke (1) in place on lever (2). Put in clevis pin (3). Put in cotter pin (4).<br />
GO TO FRAME 4<br />
8-9
<strong>TM</strong> 9-<strong>2320</strong>-<strong>211</strong>-<strong>34</strong>-2-1<br />
FRAME 4<br />
1. Put on actuating hose (1) at elbow (2).<br />
2. Hold speedometer cable (3) in pIace. Tighten coupling nut (4).<br />
GO TO FRAME 5<br />
8-10
<strong>TM</strong> 9-<strong>2320</strong>-<strong>211</strong>-<strong>34</strong>-2-1<br />
FRAME 5<br />
1. Put on transfer-to-air cylinder hose (1) at air cylinder (2). Screw on<br />
coupling nut (3).<br />
2. Put actuating hose (4) in place and screw on coupling nut (5).<br />
GO TO FRAME 6<br />
8-11
<strong>TM</strong> 9-<strong>2320</strong>-<strong>211</strong>-<strong>34</strong>-2-1<br />
FRAME 6<br />
1.<br />
2.<br />
Hold control yoke (1) on shifter shaft (2) and put in clevis pin (3).<br />
Put in cotter pin (4).<br />
END OF TASK<br />
1.<br />
2.<br />
3.<br />
4.<br />
5.<br />
6.<br />
7.<br />
8.<br />
9.<br />
10.<br />
11.<br />
NOTE<br />
Follow-on Maintenance Action Required:<br />
Replace transfer-to-front axle propeller shaft<br />
on transfer case. Refer to <strong>TM</strong> 9-<strong>2320</strong>-<strong>211</strong>-20.<br />
Replace transfer-to-transmission propeller shaft<br />
on transfer case. Refer to <strong>TM</strong> 9-<strong>2320</strong>-<strong>211</strong>-20.<br />
Replace transfer-to-forward-rear axle propeller<br />
on transfer case. Refer to <strong>TM</strong> 9-<strong>2320</strong>-<strong>211</strong>-20.<br />
Pressurize air system. Refer to <strong>TM</strong> <strong>2320</strong>-<strong>211</strong>-10.<br />
Replace inner right forward-rear wheel. Refer<br />
to <strong>TM</strong> 9-<strong>2320</strong>-<strong>211</strong>-10.<br />
Replace outer right forward-rear wheel. Refer<br />
to <strong>TM</strong> 9-<strong>2320</strong>-<strong>211</strong>-10.<br />
Adjust transfer shift linkage. Refer to<br />
<strong>TM</strong> 9-<strong>2320</strong>-<strong>211</strong>-20.<br />
Adjust handbrake. Refer to <strong>TM</strong> 9-<strong>2320</strong>-<strong>211</strong>-10.<br />
Check for proper operation of transfer. Refer<br />
to <strong>TM</strong> 9-<strong>2320</strong>-<strong>211</strong>-10.<br />
For truck M543A2, replace power takeoff-tohydraulic<br />
hoist pump propeller shaft on power<br />
takeoff unit on transfer case. Refer to<br />
<strong>TM</strong> 9-<strong>2320</strong>-<strong>211</strong>-20.<br />
Replace air hydraulic cylinder shield. Refer to<br />
<strong>TM</strong> 9-<strong>2320</strong>-<strong>211</strong>-20.<br />
8-12
<strong>TM</strong> 9-<strong>2320</strong>-<strong>211</strong>-<strong>34</strong>-2-1<br />
8-4. TRANSMISSI<strong>ON</strong> TRANSFER ASSEMBLY REPAIR.<br />
TOOLS: Transfer case fixture, pn 8708898<br />
Puller adapter, pn 7950090<br />
Yoke replacer, pn 7950147<br />
Mechanical puller kit, pn 8708724<br />
Oil seal replacer, pn 7950152<br />
Remover and replacer, pn 7950159<br />
Right side adapter bracket, pn 7010363<br />
Left side adapter bracket, pn 7010362<br />
Intermediate shaft bearing adjusting fixture, fabricated locally<br />
Rear output shaft bearing adjusting fixture, fabricated locally<br />
SUPPLIES:<br />
PERS<strong>ON</strong>NEL: Two<br />
EQUIPMENT C<strong>ON</strong>DITI<strong>ON</strong>:<br />
Solvent, dry cleaning, type II (SD-2), Fed. Spec P-D-680<br />
Multipurpose lubricant, GO 85/140, MIL-L-2105<br />
Lubricating oil, ICE, OE/HDO 10, MIL-L-2104<br />
Gear lubricating oil, GO 80/90, MIL-L-2105<br />
Gear lubricating oil, GO 85/140, MIL-L-2105<br />
Sealer compound, type II<br />
Clear lacquer<br />
White lead pigment<br />
Wood block, 1 x 1 x 2 inches (2)<br />
Safety wire<br />
Transfer transmission gasket set<br />
Rear output shaft cover and intermediate shaft bearing<br />
cover shim kit<br />
Rear output shaft seal<br />
Front input shaft seal<br />
Front output shaft seal<br />
Shift pin seal<br />
Shifting fork pin seal<br />
Transmission transfer assembly removed from truck.<br />
8-13
<strong>TM</strong> 9-<strong>2320</strong>-<strong>211</strong>-<strong>34</strong>-2-1<br />
a. Mounting Transmission Transfer Assembly in Stand.<br />
FRAME 1<br />
1. Hold right side adapter bracket (1) on right side of transfer assembly (2) and<br />
put in two screws with washers (3).<br />
2. Hold left side adapter bracket (4) on left side of transfer assembly (2) and put<br />
in two screws with washer (5).<br />
GO TO FRAME 2<br />
8-14
<strong>TM</strong> 9-<strong>2320</strong>-<strong>211</strong>-<strong>34</strong>-2-1<br />
FRAME 2<br />
1.<br />
2.<br />
3.<br />
NOTE<br />
Make sure that oil has been drained from transfer assembly (1).<br />
Using chain hoist, lift transfer assembly (1) to height for mounting in stand.<br />
Mount transfer assembly (1) in stand.<br />
Check that transfer (1) has no leaks around driveshafts (2), shifting fork<br />
pin (3), or sprag air cylinder (4).<br />
4.<br />
5.<br />
WARNING<br />
Dry cleaning solvent is flammable. Do not use near an<br />
open flame. Keep a fire extinguisher nearby when solvent<br />
is used. Use only in well-ventilated places. Failure<br />
to do this may result in injury to personnel and<br />
damage to equipment.<br />
Using solvent, clean outside of transfer assembly (1).<br />
Remove handbrake. Refer to <strong>TM</strong> 9-<strong>2320</strong>-<strong>211</strong>-20.<br />
END OF TASK<br />
8-15
<strong>TM</strong> 9-<strong>2320</strong>-<strong>211</strong>-<strong>34</strong>-2-1<br />
b. Disassembly into Subassemblies.<br />
(1) Transmission transfer power takeoff (truck M543A2).<br />
FRAME 1<br />
1. Take out capscrew (1) and flat washer (2).<br />
2. Loosen coupling nut (3) and take away driveshaft lube tube (4).<br />
GO TO FRAME 2<br />
8-16
<strong>TM</strong> 9-<strong>2320</strong>-<strong>211</strong>-<strong>34</strong>-2-1<br />
FRAME 2<br />
1. Take out four capscrews (1) and lockwashers (2).<br />
2. Take off two nuts (3) and flat washers (4).<br />
3. Take off transmission transfer power takeoff (5) and gasket (6). Throw<br />
away gasket.<br />
GO TO FRAME 3<br />
8-17
<strong>TM</strong> 9-<strong>2320</strong>-<strong>211</strong>-<strong>34</strong>-2-1<br />
FRAME 3<br />
1. Loosen coupling nut (1) and takeoff drive shaft lube tube (2) and nut (1).<br />
2. Takeout check valve assembly (3).<br />
END OF TASK<br />
8-18
<strong>TM</strong> 9-<strong>2320</strong>-<strong>211</strong>-<strong>34</strong>-2-1<br />
(2) Input shaft cover (all trucks except M543A2).<br />
FRAME 1<br />
1. Take out six screws (1) and washers (2).<br />
2. Take off input shaft cover (3) and gasket (4). Throw away gasket.<br />
END OF TASK<br />
8-19
<strong>TM</strong> 9-<strong>2320</strong>-<strong>211</strong>-<strong>34</strong>-2-1<br />
(3) Handbrake brake drum and flange assembly.<br />
FRAME 1<br />
1. Take out cotter pin (1).<br />
2. Put prybar through screw hole in companion flange (2) to keep handbrake<br />
brake drum and flange assembly (3) from turning.<br />
3. Take off nut (4) and washer (5).<br />
4. Using puller kit, take off handbrake brake drum and flange assembly (3).<br />
Hold assembly to keep it from falling as it is taken off.<br />
5. Take out prybar.<br />
END OF TASK<br />
8-20
<strong>TM</strong> 9-<strong>2320</strong>-<strong>211</strong>-<strong>34</strong>-2-1<br />
(4) Intermediate shaft bearing retainer cap and rear output shaft bearing<br />
retainer cap and seal.<br />
FRAME 1<br />
1.<br />
2.<br />
3.<br />
Take out six screws with washers (1). Tap off rear output shaft bearing<br />
retainer cap and seal assembly (2) and needed number of shims (3).<br />
Take out two screws with washers (4). Take off bracket (5).<br />
Take out two screws with washers (6). Take off bracket (7), intermediate<br />
shaft bearing retainer cap (8), and needed number of shims (9).<br />
GO TO FRAME 2<br />
8-21
<strong>TM</strong> 9-<strong>2320</strong>-<strong>211</strong>-<strong>34</strong>-2-1<br />
FRAME 2<br />
1. Bend tabs of retaining plate (1) away from two screws (2).<br />
2. Take out two screws (2).<br />
3. Take off retaining plate (1) and thrust washer (3).<br />
4. Take off collar (4).<br />
END OF TASK<br />
8-22
<strong>TM</strong> 9-<strong>2320</strong>-<strong>211</strong>-<strong>34</strong>-2-1<br />
(5) Input shaft companion flange and transfer case breather assembly.<br />
FRAME 1<br />
1. Take out cotter pin (1).<br />
2. Take off nut (2) and washer (3).<br />
3. Using mechanical puller kit, take off companion flange (4).<br />
4. Take out breather assembly (5).<br />
END OF TASK<br />
8-23
<strong>TM</strong> 9-<strong>2320</strong>-<strong>211</strong>-<strong>34</strong>-2-1<br />
(6) Front output shaft cover assembly.<br />
FRAME 1<br />
1. Take out 10 screws and washers (1).<br />
2. Screw two screws and washers (1) into two threaded puller mounting holes<br />
as shown. Tighten two screws until front output shaft cover (2) is raised.<br />
3. Using chain and hoist, lift off and set down front output shaft cover (2).<br />
Take off chain and move hoist away.<br />
4. Take off and throw away gasket (3).<br />
5. Take out two screws and washers (1).<br />
6. Take out speedometer union (4) and pin (5).<br />
END OF TASK<br />
8-24
<strong>TM</strong> 9-<strong>2320</strong>-<strong>211</strong>-<strong>34</strong>-2-1<br />
(7) Transfer housing front cover.<br />
FRAME 1<br />
1. Take out five screws with washers (1).<br />
2. Take off input shaft bearing retainer cap (2) and gasket (3). Throw away<br />
gasket.<br />
3. Bend tabs of retaining plate (4) away from two screws (5).<br />
4. Take out two screws (5).<br />
5. Take off retaining plate (4) and thrust washer (6).<br />
6. Take off gear (7).<br />
GO TO FRAME 2<br />
8-25
<strong>TM</strong> 9-<strong>2320</strong>-<strong>211</strong>-<strong>34</strong>-2-1<br />
FRAME 2<br />
1. Take off two nuts (1) and lockwashers (2).<br />
2. Take off lifting plate (3).<br />
3. Take off two nuts (4) and lockwashers (5). Take out two screws (6).<br />
4. Takeout screw (7) and lockwasher (8).<br />
GO TO FRAME 3<br />
8-26
<strong>TM</strong> 9-<strong>2320</strong>-<strong>211</strong>-<strong>34</strong>-2-1<br />
FRAME 3<br />
1. Take off 15 nuts (1) and lockwashers (2). Take out 15 screws (3).<br />
2. Screw three screws (3) into threaded holes in transfer case cover (4) and<br />
tighten until cover is free from transfer housing (5).<br />
3. Put chain hoist on cover (4).<br />
4. Tap input shaft (6) free.<br />
5. Using chain hoist and prybar, lift off transfer case cover (4) and put it<br />
on workbench. Take off and throw away gasket (7). Take off chain hoist.<br />
6. Take out three screws (3).<br />
END OF TASK<br />
8-27
<strong>TM</strong> 9-<strong>2320</strong>-<strong>211</strong>-<strong>34</strong>-2-1<br />
(8) Backlash check.<br />
FRAME 1<br />
1.<br />
2.<br />
3.<br />
4.<br />
5.<br />
NOTE<br />
This frame tells how to check backlash for all<br />
gears. Do this frame when measuring backlash<br />
for each set of gears in frames 2 and 3.<br />
Mount dial indicator on housing and set stem against side of gear tooth (1)<br />
as shown.<br />
NOTE<br />
When measuring backlash, make sure that gear<br />
(2) does not turn. If gear turns, backlash<br />
readings will be wrong.<br />
Turn gear (3) away from dial indicator until gear tooth (4) touches gear<br />
tooth (5) as shown in view A.<br />
Set dial indicator to read 0.<br />
Turn, gear (3) towards dial indicator until gear tooth (6) touches other side<br />
of gear tooth (5) as shown in view B.<br />
Check that dial indicator readings are within wear limits given for each set<br />
of gears.<br />
GO TO FRAME 2<br />
8-28
<strong>TM</strong> 9-<strong>2320</strong>-<strong>211</strong>-<strong>34</strong>-2-1<br />
FRAME 2<br />
1.<br />
2.<br />
3.<br />
4.<br />
NOTE<br />
Readings must be within limits given in table 8-1. If<br />
readings are not within given limits, throw away both<br />
gears and get new ones.<br />
Measure backlash between low speed gear (1) and low speed intermediate<br />
gear (2).<br />
Measure backlash between low speed gear (1) and synchronizer (3).<br />
Measure backlash between synchronizer (3) and high speed gear (4).<br />
Measure backlash between high speed gear (4) and high speed intermediate<br />
gear (5).<br />
GO TO FRAME 3<br />
Table 8-1. Transmission Transfer Low Speed Gear Backlash Wear Limits<br />
Index Number<br />
Item/Point Measurement<br />
Size and Fit<br />
of New Parts<br />
(inches)<br />
Wear Limit<br />
(inches)<br />
1 and 2<br />
1 and 3<br />
3 and 4<br />
4 and 5<br />
Low speed gear to low speed<br />
intermediate gear<br />
Low speed gear to synchronizer<br />
Synchronizer to high speed<br />
gear<br />
High speed gear to high speed<br />
intermediate gear<br />
0.005 to 0.010<br />
0.004 to 0.010<br />
0.004 to 0.010<br />
0.005 to 0.010<br />
None<br />
None<br />
None<br />
None<br />
8-29
<strong>TM</strong> 9-<strong>2320</strong>-<strong>211</strong>-<strong>34</strong>-2-1<br />
FRAME 3<br />
1.<br />
2.<br />
3.<br />
4.<br />
NOTE<br />
Readings must be within limits given in table 8-2. If<br />
readings are not within given limits, throw away both<br />
gears and get new ones.<br />
Measure backlash between high speed intermediate gear (1) and rear driven<br />
gear (2).<br />
Measure backlash between front output driven gear (3) and front intermediate<br />
drive gear (4).<br />
Measure backlash between front output driven gear (3) and sprag clutch<br />
shifter collar (5).<br />
Measure backlash between sprag clutch shifter collar (5) and sprag clutch<br />
outer race (6).<br />
END OF TASK<br />
Table 8-2. Transmission Transfer High Speed Gear Backlash Wear Limits<br />
Index Number<br />
Item /Point of Measurement<br />
Size and Fit<br />
of New Parts<br />
(inches)<br />
Wear Limit<br />
(inches)<br />
1 and 2<br />
3 and 4<br />
3 and 5<br />
5 and 6<br />
High speed intermediate gear<br />
to rear driven gear<br />
Front output driven gear to<br />
front intermediate drive gear<br />
Front output driven gear to<br />
sprag clutch shifter collar<br />
Sprag clutch shifter collar to<br />
sprag clutch outer race<br />
0.005 to 0.010<br />
0.005 to 0.010<br />
0.017<br />
0.017<br />
None<br />
None<br />
None<br />
None<br />
8-30
<strong>TM</strong> 9-<strong>2320</strong>-<strong>211</strong>-<strong>34</strong>-2-1<br />
(9) Shaft assemblies.<br />
FRAME 1<br />
1. Carefully lift out rear output shaft assembly (1).<br />
2. Carefully lift out intermediate shaft assembly (2).<br />
3. Take out four screws and washers (3).<br />
4. Take off cover plate (4) and gasket (5). Throw away gasket.<br />
GO TO FRAME 2<br />
8-31
<strong>TM</strong> 9-<strong>2320</strong>-<strong>211</strong>-<strong>34</strong>-2-1<br />
FRAME 2<br />
1. Take out spring retaining screw and washer (1).<br />
2. Take out spring (2).<br />
3. Using small magnet, take out plunger (3) and poppet ball (4).<br />
4. Take off safety wire (5).<br />
5. Take out setscrew (6).<br />
GO TO FRAME 3<br />
8-32
<strong>TM</strong> 9-<strong>2320</strong>-<strong>211</strong>-<strong>34</strong>-2-1<br />
FRAME 3<br />
1. Take out screw (1).<br />
2. Loosen screw (2).<br />
WARNING<br />
Input shaft assembly (3) is heavy. Be careful<br />
to avoid injury.<br />
3. Using two prybars and wood blocks as shown, lift input shaft assembly<br />
(3) free of transfer housing (4).<br />
4. Holding gear shifter shaft (5) and input shaft high speed gear (6), lift<br />
input shaft assembly (3) out of transfer housing (4). Set down shaft<br />
assembly.<br />
END OF TASK<br />
8-33
<strong>TM</strong> 9-<strong>2320</strong>-<strong>211</strong>-<strong>34</strong>-2-1<br />
c. Disassembly of Subassemblies.<br />
(1) Input shaft assembly.<br />
FRAME 1<br />
1. Take retaining ring (1) off input shaft (2).<br />
2. Using hammer and brass punch, take off bearing (3) and thrust washer (4).<br />
Refer to para 7-7.<br />
3. Press off low speed gear assembly (5). Take off bearing spacer (6).<br />
4. Using hammer and brass punch, take out bearing (7).<br />
5. Using hammer and brass punch, take bearing (8) out of gear (5).<br />
GO TO FRAME 2<br />
8-<strong>34</strong>
<strong>TM</strong> 9-<strong>2320</strong>-<strong>211</strong>-<strong>34</strong>-2-1<br />
FRAME 2<br />
1. Take synchromesh clutch (1) off input shaft (2).<br />
2. Take off spacing collar (3). Press off high speed gear assembly (4).<br />
3. Using hammer and brass punch, take off bearing (5) and spacer (6).<br />
4. Using hammer and brass punch, take bearing (7) out of gear (8).<br />
END OF TASK<br />
8-35
<strong>TM</strong> 9-<strong>2320</strong>-<strong>211</strong>-<strong>34</strong>-2-1<br />
(2) Intermediate shaft assembly.<br />
FRAME 1<br />
1. Press bearing cone (1) and high speed gear (2) off intermediate shaft (3).<br />
Refer to para 7-7.<br />
2. Take out woodruff key (4).<br />
GO TO FRAME 2<br />
8-36
<strong>TM</strong> 9-<strong>2320</strong>-<strong>211</strong>-<strong>34</strong>-2-1<br />
FRAME 2<br />
1. Press bearing cone (1) and low speed gear (2) off intermediate shaft (3).<br />
Refer to para 7-7.<br />
2. Take out woodruff key (4).<br />
END OF TASK<br />
8-37
<strong>TM</strong> 9-<strong>2320</strong>-<strong>211</strong>-<strong>34</strong>-2-1<br />
(3) Rear output shaft.<br />
FRAME 1<br />
1. Set rear output shaft (1) in hydraulic press as shown.<br />
2. Press off inner bearing cone (2). Take shaft out of press.<br />
3. Turn shaft over and put it back in press. Press off reverse shift gear<br />
(3) and outer bearing cone (4).<br />
4. Take shaft out of press. Take out woodruff key (5).<br />
END OF TASK<br />
8-38
<strong>TM</strong> 9-<strong>2320</strong>-<strong>211</strong>-<strong>34</strong>-2-1<br />
(4) Front output shaft cover assembly.<br />
FRAME 1<br />
1.<br />
2.<br />
3.<br />
4.<br />
5.<br />
6.<br />
Take out cotter pin (1).<br />
Take off nut and washer (2).<br />
Using puller, take off companion flange (3).<br />
Bend tabs of four lockwashers (4) away from screws (5).<br />
Take out four screws (5). Take off cylinder cover (6) and nut (7).<br />
Take off cylinder (8) and two gaskets (9), one from cover (6) and one from<br />
shifter shaft (10).<br />
GO TO FRAME 2<br />
8-39
<strong>TM</strong> 9-<strong>2320</strong>-<strong>211</strong>-<strong>34</strong>-2-1<br />
FRAME 2<br />
1. Using hammer and brass punch, take front output shaft (1) out of front<br />
output cover (2).<br />
2. Take shifting fork pin (3) off reverse shift gear (4).<br />
3. Aline teeth of reverse shift gear (4) and sprag clutch (5) and take off<br />
reverse shift gear.<br />
4. Take off collar (6).<br />
GO TO FRAME 3<br />
8-40
<strong>TM</strong> 9-<strong>2320</strong>-<strong>211</strong>-<strong>34</strong>-2-1<br />
FRAME 3<br />
1. Take front output shaft seal (1) out of front output shaft cover (2).<br />
2. Take out collar (3).<br />
3. Take out two retaining rings (4).<br />
4. Press out bearing (5). Refer to para 7-7.<br />
5. Take out air cylinder shifter shaft washer (6) and seal (7).<br />
END OF TASK<br />
8-41
<strong>TM</strong> 9-<strong>2320</strong>-<strong>211</strong>-<strong>34</strong>-2-1<br />
(5) Front output shaft assembly.<br />
FRAME 1<br />
1. Take off retaining ring (1).<br />
2. Lift race (2), two springs (3), front sprag assembly (4), and transfer<br />
case washer (5) off drive sprag race (6).<br />
3. Take off transfer case washer (5) and take out two springs (3) and front<br />
sprag assembly (4) from race (2).<br />
4. Lift race (7) with two springs (8) and rear sprag assembly (9) off drive<br />
sprag race (6).<br />
5. Take out two springs (8) and rear sprag assembly (9) from race (7).<br />
GO TO FRAME 2<br />
8-42
<strong>TM</strong> 9-<strong>2320</strong>-<strong>211</strong>-<strong>34</strong>-2-1<br />
FRAME 2<br />
Soldier A 2.<br />
1. Take off retaining ring (1).<br />
Set up front output shaft (2) in hydraulic press as shown.<br />
Soldier B 3. Working under hydraulic press, hold end of front output shaft<br />
(2) to keep it from falling when front output shaft is pressed<br />
out of transmission gear (3) and inner race (4). Tell soldier<br />
A when ready.<br />
Soldier A 4. Press out front output shaft (2).<br />
GO TO FRAME 3<br />
8-43
<strong>TM</strong> 9-<strong>2320</strong>-<strong>211</strong>-<strong>34</strong>-2-1<br />
FRAME 3<br />
1. Take out woodruff key (1) from front output shaft (2).<br />
END OF TASK<br />
8-44
<strong>TM</strong> 9-<strong>2320</strong>-<strong>211</strong>-<strong>34</strong>-2-1<br />
(6) High and low range output shifter forks.<br />
FRAME 1<br />
1. Take off safety wire (1).<br />
2. Take out setscrew (2).<br />
3. Take off safety wire (3).<br />
4. Take out setscrew (4).<br />
5. Take shifter output shaft (5) out of fork (6).<br />
6. Take shifter high and low range shaft (7) out of fork (8).<br />
END OF TASK<br />
8-45
<strong>TM</strong> 9-<strong>2320</strong>-<strong>211</strong>-<strong>34</strong>-2-1<br />
(7) Handbrake brake drum.<br />
FRAME 1<br />
1. Take out eight screws (1). Take apart brake drum (2), shield (3), and<br />
flange (4).<br />
END OF TASK<br />
8-46
<strong>TM</strong> 9-<strong>2320</strong>-<strong>211</strong>-<strong>34</strong>-2-1<br />
(8) Rear output bearing retainer cap and front cover.<br />
FRAME 1<br />
1.<br />
2.<br />
Press rear output shaft seal (1) out of rear output bearing retainer cap<br />
(2).<br />
Take shifter shaft seal (3) out of front cover (4).<br />
END OF TASK<br />
8-47
<strong>TM</strong> 9-<strong>2320</strong>-<strong>211</strong>-<strong>34</strong>-2-1<br />
d. Cleaning. There are no special cleaning procedures required. Refer<br />
to cleaning procedures given in para 1-3.<br />
e. Inspection.<br />
(1) Transfer case, front cover, and front output shaft cover.<br />
FRAME 1<br />
1. Check that transfer case housing (1), front cover (2), and front output<br />
shaft cover (3) are not cracked. Check that machined surfaces of housing,<br />
front cover, and front output shaft cover are not scratched or scored.<br />
2. Check that all bearing cups and seals in transfer case housing (1), front<br />
cover (2), and front output shaft cover (3) are not damaged.<br />
GO TO FRAME 2<br />
8-48
<strong>TM</strong> 9-<strong>2320</strong>-<strong>211</strong>-<strong>34</strong>-2-1<br />
FRAME 2<br />
NOTE<br />
Readings must be within limits given in table<br />
8-3. The letter L shows a loose fit and the<br />
letter T shows a tight fit. If readings are not<br />
within given limits, throw away part and get a<br />
new one.<br />
1. Measure diameter of transfer case bearing bore (1).<br />
2. Measure fit of bearing (2) in transfer case (1).<br />
GO TO FRAME 3<br />
Table 8-3. Transfer Case Wear Limits<br />
Index Number<br />
Item/Point of Measurement<br />
Size and Fit<br />
of New Parts<br />
(inches)<br />
Wear Limit<br />
(inches)<br />
1<br />
Diameter of transfer case<br />
bearing bore<br />
4.3305 to 4.3315<br />
4.3315<br />
1 and 2<br />
Fit of bearing case in<br />
transfer case<br />
0.0009T to 0.0006L<br />
0.0006L<br />
8-49
<strong>TM</strong> 9-<strong>2320</strong>-<strong>211</strong>-<strong>34</strong>-2-1<br />
FRAME 3<br />
NOTE<br />
Readings must be within limits given in table<br />
8-4. The letter L shows a loose fit and the<br />
letter T shows a tight fit. If readings are not<br />
within given limits, throw away part and get a<br />
new one.<br />
1. Measure diameter of front cover bore (1).<br />
2. Measure fit of bearing (2) in front cover bore (1).<br />
GO TO FRAME 4<br />
Table 8-4. Front Cover Wear Limits<br />
Index Number<br />
Item/Point of Measurement<br />
Size and Fit<br />
of New Parts<br />
(inches)<br />
Wear Limi<br />
(inches)<br />
1 Diameter of front cover<br />
bore<br />
1 and 2 Fit of bearing in front<br />
cover bore<br />
4.7242 to 4.7252<br />
0.0002T to 0.0014L<br />
4.7252<br />
0.0014L<br />
8-50
<strong>TM</strong> 9-<strong>2320</strong>-<strong>211</strong>-<strong>34</strong>-2-1<br />
FRAME 4<br />
NOTE<br />
Readings must be within limits given in table<br />
8-5. The letter L shows a loose fit and the<br />
letter T shows a tight fit. If reading is not<br />
within given limits, throw away part and get<br />
a new one.<br />
1. Measure inside diameter of front output shaft cover bore (1).<br />
2. Measure fit of bearing (2) in front output shaft cover bore (1).<br />
END OF TASK<br />
Table 8-5. Front Output Shaft Cover Wear Limits<br />
Index Number<br />
Item/Point of Measurement<br />
Size and Fit<br />
of New Parts<br />
(inches)<br />
Wear Limit<br />
(inches)<br />
1<br />
1 and 2<br />
Front output shaft cover<br />
bore diameter<br />
Fit of bearing in front<br />
output shaft cover bore<br />
3.9368 to 3.9376<br />
0.0002T to 0.0012L<br />
3.9376<br />
0.0012L<br />
8-51
<strong>TM</strong> 9-<strong>2320</strong>-<strong>211</strong>-<strong>34</strong>-2-1<br />
(2) Input shaft.<br />
FRAME 1<br />
1. Check that machined surface on shaft (1) is not scratched, scored or pitted<br />
If shaft is damaged, get a new one.<br />
2. Check that splines on shaft (1) are not bent or chipped. If splines are<br />
damaged, get a new shaft.<br />
3. Check that synchronizer (2) slides smoothly on shaft (1). Check that<br />
teeth on synchronizer are not cracked or broken. If synchronizer is damaged,<br />
get a new one.<br />
4. Check that five bearings (3) are not damaged. Refer to <strong>TM</strong> 9-214.<br />
5. Check that two bushings (4) are not worn, scored or burred. If bushings<br />
are damaged, get new ones.<br />
6. Check that teeth on two gears (5) are not cracked, chipped or broken. If<br />
teeth are damaged, get new gears.<br />
7. Check that two collars (6) and lockring (7) are not worn, cracked or<br />
bent. If parts are damaged, get new ones.<br />
GO TO FRAME 2<br />
8-52
<strong>TM</strong> 9-<strong>2320</strong>-<strong>211</strong>-<strong>34</strong>-2-1<br />
FRAME 2<br />
NOTE<br />
Readings must be within limits given in table 8-6. The<br />
letter L shows a loose fit and the letter T shows a tight<br />
fit. If readings are not within given limits, throw away<br />
1. Measure<br />
part and get a new one.<br />
outside diameter of input shaft (1).<br />
2. Measure fit of bearing (2) on input shaft (1).<br />
3. Measure inside diameter of gear bore (3).<br />
4. Measure fit of bearing (2) in gear bore (3).<br />
GO TO FRAME 3<br />
NOTE<br />
CHECK <strong>ON</strong>LY THOSE PARTS WHICH ARE CALLED OUT<br />
PARTS WITHOUT CALLOUTS ARE SHOWN <strong>ON</strong>LY FOR<br />
REFERENCE PURPOSES.<br />
Table 8-6.<br />
Input Shaft High Speed Gear Assembly Wear Limits<br />
Index Number<br />
Item /Point of Measurement<br />
Size and Fit<br />
of New Parts<br />
(inches)<br />
Wear Limit<br />
(inches)<br />
1 Input shaft outside diameter<br />
1 and 2 Fit of bearing on shaft<br />
2 and 3 Fit of bearing in gear<br />
3 Inside diameter of gear<br />
2.1651 to 2.1656<br />
0.0008T to 0.0003L<br />
0.0009T to 0.0007L<br />
3.9361 to 3.9371<br />
2.1651<br />
0.0003L<br />
0.00007L<br />
3.9371<br />
8-53
<strong>TM</strong> 9-<strong>2320</strong>-<strong>211</strong>-<strong>34</strong>-2-1<br />
FRAME 3<br />
NOTE<br />
Readings must be within limits given in table<br />
8-7. The letter L shows a loose fit and the<br />
letter T shows a tight fit. If readings are not<br />
within given limits, throw away part and get a<br />
new one.<br />
1. Measure outside diameter of shaft (1).<br />
2. Measure fit of two bearings (2) on shaft (1).<br />
3. Measure inside diameter of gear bore (3).<br />
4. Measure fit of bearings (2) in gear bore (3).<br />
END OF TASK<br />
NOTE<br />
CHECK <strong>ON</strong>LY THOSE PARTS WHICH ARE CALLED OUT.<br />
PARTS WITHOUT CALLOUTS ARE SHOWN <strong>ON</strong>LY FOR<br />
REFERENCE PURPOSES.<br />
Table 8-7.<br />
Input Shaft Low Speed Gear Assembly Wear Limits<br />
Size and Fit<br />
Index Number Item/Point of Measurement of New Parts<br />
(inches)<br />
1 Input shaft outer diameter 1.9684 to 1.9689<br />
1 and 2 Fit of bearing on shaft 0.0008T to 0.0003L<br />
3 Inside diameter of gear bore 3.9361 to 3.9371<br />
2 and 3 Fit of bearing in gear bore 0.0009T to 0.0007L<br />
Wear Limit<br />
(inches)<br />
None<br />
None<br />
None<br />
None<br />
8-54
<strong>TM</strong> 9-<strong>2320</strong>-<strong>211</strong>-<strong>34</strong>-2-1<br />
(3) Intermediate shaft.<br />
FRAME 1<br />
1. Check that machined surface on shaft (1) is not scratched, pitted or<br />
scored. If shaft is damaged, get a new one.<br />
2. Check that splines on shaft (1) are not bent or chipped. If splines are<br />
damaged, get a new shaft.<br />
3. Check that teeth in gears (2, 3, and 4) are not cracked or broken. If<br />
teeth are damaged, get new gears.<br />
4. Check that<br />
5. Check that<br />
6. Check that<br />
7. Check that<br />
8. Check that<br />
GO TO FRAME 2<br />
bearings (5 and 6) are not damaged. Refer to <strong>TM</strong> 9-214.<br />
keys (7) are not bent or cracked.<br />
keyways in shaft (1) are not worn.<br />
two plates (8) and washers (9) are not worn, cracked or bent.<br />
tapped holes (10) have no damaged threads.<br />
8-55
<strong>TM</strong> 9-<strong>2320</strong>-<strong>211</strong>-<strong>34</strong>-2-1<br />
FRAME 2<br />
1.<br />
2.<br />
END<br />
NOTE<br />
Readings must be within limits given in table<br />
8-8. The letter L shows a loose fit and the<br />
letter T shows a tight fit. If readings are<br />
not within given limits, throw away part and<br />
get a new one.<br />
Measure outside diameter of shaft (1).<br />
Measure fit of bearing (2) on shaft (1).<br />
OF TASK<br />
NOTE<br />
CHECK <strong>ON</strong>LY THOSE PARTS WHICH ARE CALL ED OUT.<br />
PARTS WITHOUT CALLOUTS ARE SHOWN <strong>ON</strong>LY FOR<br />
REFERENCE PURPOSES.<br />
Table 8-8.<br />
Intermediate Shaft Wear Limits<br />
Size and Fit<br />
Index Number Item/Point of Measurement of New Parts Wear Limit<br />
(inches)<br />
(inches)<br />
1 Outside diameter of shaft 2.2510 to 2.2515 2.2509<br />
1 and 2 Fit of bearings on shaft 0.0008T to 0.0003L 2.2509<br />
8-56
<strong>TM</strong> 9-<strong>2320</strong>-<strong>211</strong>-<strong>34</strong>-2-1<br />
(4)<br />
Front output shaft.<br />
FRAME 1<br />
1. Check that splines on shaft (1) are not broken, chipped or cracked. If<br />
splines are damaged, get a new shaft.<br />
2. Check that threads on end of shaft (1) are not burred or damaged. Retap<br />
damaged threads. If more repair is needed, get a new shaft.<br />
3. Check that keyway in shaft (1) is not worn or damaged.<br />
4. Check that teeth on gear (2) are not broken, chipped or cracked. If<br />
teeth are damaged, get a new gear.<br />
5. Check that teeth or spur gear (3) are not broken, chipped or cracked. If<br />
teeth are damaged, get a new spur gear.<br />
6. Check that two collars (4) are not bent, worn or cracked.<br />
GO TO FRAME 2<br />
NOTE :<br />
CHECK <strong>ON</strong>LY THOSE PARTS WHICH<br />
ARE CALLED OUT IN THIS FRAME.<br />
PARTS WITHOUT CAL LOUTS ARE<br />
SHOWN <strong>ON</strong>LY FOR REFERENCE<br />
PURPOSES OR ARE CHECKED IN<br />
ANO<strong>THE</strong>R FRAME.<br />
8-57
<strong>TM</strong> 9-<strong>2320</strong>-<strong>211</strong>-<strong>34</strong>-2-1<br />
FRAME 2<br />
1. Measure<br />
2. Measure<br />
3. Measure<br />
4. Measure<br />
5. Measure<br />
6. Measure<br />
END OF TASK<br />
NOTE<br />
Readings must be within limits given in table 8-9. If<br />
readings are not within given limits, throw away part<br />
and get a new one.<br />
width of grooves inside gear (1).<br />
outside diameter of spur gear assembly (2).<br />
inside diameter of bore in gear (3).<br />
front output shaft diameter (4).<br />
front output shaft diameter (5).<br />
front output shaft diameter (6).<br />
NOTE<br />
CHECK <strong>ON</strong>LY THOSE PARTS WHICH ARE CALLED OUT<br />
PARTS WITHOUT CALLOUTS ARE SHOWN <strong>ON</strong>LY FOR<br />
REFERENCE PURPOSES.<br />
Table 8-9.<br />
Front Output Shaft Wear Limits<br />
Index Number<br />
Item /Point of Measurement<br />
Size and Fit<br />
of New Parts<br />
(inches)<br />
Wear Limit<br />
(inches<br />
1 Groove width<br />
2 Spur gear assembly outside<br />
diameter<br />
3 Gear bore inside diameter<br />
4 Diameter of shaft<br />
5 Diameter of shaft<br />
6 Diameter of shaft<br />
0.607 to 0.612<br />
6.6974 to 6.70<strong>34</strong><br />
3.001 to 3.002<br />
2.9985 to 2.9990<br />
1.8103 to 1.8108<br />
2.1652 to 2.1657<br />
0.618<br />
6.6910<br />
3.001<br />
2.9980<br />
1.8100<br />
2.1652<br />
8-58
<strong>TM</strong> 9-<strong>2320</strong>-<strong>211</strong>-<strong>34</strong>-2-1<br />
(5) Rear output shaft.<br />
FRAME 1<br />
1.<br />
2.<br />
3.<br />
4.<br />
5.<br />
6.<br />
7.<br />
GO<br />
Check that machined surface on shaft (1) is not scratched, pitted or scored.<br />
If shaft is damaged, get a new one.<br />
Check that splines on shaft (1) are not bent or chipped. If splines are damaged,<br />
get a new shaft.<br />
Check that teeth on gear (2) are not chipped, cracked or broken. If teeth<br />
are damaged, get a new gear.<br />
Check that bearings (3 and 4) are not damaged. Refer to <strong>TM</strong> 9-214.<br />
Check that key (5) is not cracked or bent.<br />
Check that keyway in shaft (1) has a tight fit with key (5).<br />
Check that threads (6) are not damaged. Retap damaged threads. If more<br />
repair is needed, get a new shaft (1).<br />
TO FRAME 2<br />
8-59
<strong>TM</strong> 9-<strong>2320</strong>-<strong>211</strong>-<strong>34</strong>-2-1<br />
FRAME 2<br />
NOTE<br />
Readings must be within limits given<br />
readings are not within given limits,<br />
and get a new one.<br />
1. Measure shaft front out side diameter (1).<br />
2. Measure shaft rear outside diameter (2).<br />
3. Measure inside diameter bore (3).<br />
END OF TASK<br />
in table 8-10. If<br />
throw away part<br />
NOTE<br />
CHECK <strong>ON</strong>LY THOSE PARTS WHICH ARE CALLED OUT.<br />
PARTS WITHOUT CALLOUTS ARE SHOWN <strong>ON</strong>LY FOR<br />
REFERENCE PURPOSES.<br />
Table 8-10. Rear Output Shaft Wear Limits<br />
Index Number<br />
Item /Point of Measurement<br />
Size and Fit<br />
of New Parts<br />
(inches)<br />
Wear Limit<br />
(inches)<br />
1<br />
2<br />
3<br />
Shaft front outside diameter<br />
Shaft rear outside diameter<br />
Bore inside diameter<br />
2.8765 to 2.8770 2.8765<br />
2.0010 to 2.0015 2.0010<br />
1.8125 to 1.8130 1.8133<br />
8-60
<strong>TM</strong> 9-<strong>2320</strong>-<strong>211</strong>-<strong>34</strong>-2-1<br />
(6) Output shifter shaft.<br />
FRAME 1<br />
1. Check that shaft (1) is not cracked, scored, pitted or scratched.<br />
2. Check that fork (2) is not cracked, scored or bent.<br />
3. Check that threads (3) are not damaged.<br />
GO TO FRAME 2<br />
NOTE<br />
CHECK <strong>ON</strong>LY THOSE PARTS WHICH ARE CALLED OUT.<br />
PARTS WITHOUT CALLOUTS ARE SHOWN <strong>ON</strong>LY FOR<br />
REFERENCE PURPOSES OR ARE CHECKED IN ANO<strong>THE</strong>R<br />
FRAME.<br />
TA 102744<br />
8-61
<strong>TM</strong> 9-<strong>2320</strong>-<strong>211</strong>-<strong>34</strong>-2-1<br />
FRAME 2<br />
NOTE<br />
1.<br />
2.<br />
3.<br />
END<br />
Readings must be within limits given in table 8-11. If<br />
readings are not within given limits, throw away parts<br />
and get new ones.<br />
Measure outside diameter of shaft (1).<br />
Measure shift pad thickness (2).<br />
Measure shift pad distance (3).<br />
OF TASK<br />
Table 8-11.<br />
Outer Shifter Shaft Wear Limits<br />
Index Number<br />
1<br />
2<br />
3<br />
Item /Point of Measurement<br />
Shaft outside diameter<br />
Shift pad thickness<br />
Pad-to-pad distance<br />
0.8715 to 0.8745 0.8710<br />
0.562 to 0.572 0.562<br />
7.<strong>34</strong>4 to 7.375 7.385<br />
8-62
<strong>TM</strong> 9-<strong>2320</strong>-<strong>211</strong>-<strong>34</strong>-2-1<br />
(7) High and low range shifter fork.<br />
FRAME 1<br />
1. Check that ball (1) and plunger (2) have no scoring, uneven wear, pitting,<br />
or cracks. If ball or plunger is damaged, get a new one.<br />
2. Check that threads on screws (3 through 6) are not damaged.<br />
3. Check that shaft (7) is not cracked, scored, pitted or worn unevenly. If shaft<br />
is damaged, get a new one.<br />
4. Check that fork (8) has no cracks, scoring or uneven wear. If fork is damaged,<br />
get a new one.<br />
GO TO FRAME 2<br />
NOTE:<br />
CHECK <strong>ON</strong>LY THOSE PARTS WHICH<br />
ARE CALLED OUT IN THIS FRAME.<br />
PARTS WITHOUT CALLOUTS ARE<br />
SHOWN <strong>ON</strong>LY FOR REFERENCE<br />
PURPOSES OR ARE CHECKED IN<br />
ANO<strong>THE</strong>R FRAME.<br />
8-63
<strong>TM</strong> 9-<strong>2320</strong>-<strong>211</strong>-<strong>34</strong>-2-1<br />
FRAME 2<br />
NOTE<br />
Readings must be within limits given in table 8-12.<br />
The letter L shows a loose fit. If readings are not<br />
within given limits, throw away parts and get new<br />
ones.<br />
1. Measure outside diameter of shaft (1).<br />
2. Measure width of three grooves (2).<br />
3. Measure outside diameter of hole (3).<br />
4. Measure inside diameter of shifter bore in housing (4).<br />
5. Measure fit of shifter shaft (1) in shifter bore (4).<br />
GO TO FRAME 3<br />
NOTE<br />
CHECK <strong>ON</strong>LY THOSE PARTS WHICH ARE CALLED OUT.<br />
PARTS WITHOUT CALLOUTS ARE SHOWN <strong>ON</strong>LY FOR<br />
REFERENCE PURPOSES.<br />
Table 8-12.<br />
High and Low Range Shifter Fork Shaft Wear Limits<br />
Index Number<br />
Item /Point of Measurement<br />
Size and Fit<br />
of New Parts<br />
(inches)<br />
Wear Limit<br />
(inches)<br />
1<br />
Outside diameter of shaft<br />
2.9945 to 0.9955<br />
0.9945<br />
2<br />
Groove width (under<br />
0.4375-inch diameter ball)<br />
0.0005 to 0.015<br />
0.002<br />
3<br />
Hole diameter<br />
0.495 to 0.500<br />
0.503<br />
4<br />
Shifter bore in housing<br />
0.9995 to 1.0015<br />
1.0025<br />
1 and 4<br />
Shifter shaft in shifter<br />
bore<br />
0.0045 to 0.00070L<br />
0.010L<br />
8-64
<strong>TM</strong> 9-<strong>2320</strong>-<strong>211</strong>-<strong>34</strong>-2-1<br />
FRAME 3<br />
1. Measure<br />
2. Measure<br />
END OF TASK<br />
NOTE<br />
Readings must be within limits given in table 8-13. If<br />
readings are not within given limits, throw away parts<br />
and get new ones.<br />
width of two slots (1).<br />
width of fork (2) at slots (1).<br />
Table 8-13.<br />
High and Low Range Shifter Fork Wear Limits<br />
Index Number<br />
Item /Point of Measurement<br />
Size and Fit<br />
of New Parts<br />
(inches)<br />
Wear Limit<br />
(inches)<br />
1<br />
Slot width<br />
0.712 to 0.720<br />
0.725<br />
1 and 2<br />
Fork width at slots<br />
7.910 to 7.936<br />
7.945<br />
8-65
<strong>TM</strong> 9-<strong>2320</strong>-<strong>211</strong>-<strong>34</strong>-2-1<br />
(8) Sprag assembly.<br />
FRAME 1<br />
1.<br />
2.<br />
3.<br />
4.<br />
5.<br />
Check that two retaining rings (1) are not cracked, nicked or scored. If<br />
retaining rings are damaged, get new ones.<br />
Check that teeth on two races (2) are not nicked, broken, cracked or worn.<br />
If teeth are damaged, get new races.<br />
Check that four springs (3) have no kinks, bends or twists. If spring<br />
is damaged, get a new one.<br />
Check that transfer case washer (4) is not scored, chipped or cracked. If<br />
washer is damaged, get a new one.<br />
Check that sprag drive race (5) has no chipped retaining ring grooves,<br />
scoring or burrs. Take off burrs using a file. If more repair is needed,<br />
get a new sprag drive race.<br />
GO TO FRAME 2<br />
NOTE:<br />
CHECK <strong>ON</strong>LY THOSE PARTS WHICH<br />
ARE CALLED OUT IN THIS FRAME.<br />
PARTS WITHOUT CALLOUTS ARE<br />
SHOWN <strong>ON</strong>LY FOR REFERENCE<br />
PURPOSES.<br />
8-66
<strong>TM</strong> 9-<strong>2320</strong>-<strong>211</strong>-<strong>34</strong>-2-1<br />
FRAME 2<br />
1.<br />
2.<br />
NOTE<br />
When checking sprags, anvil and spindle ends of micrometer<br />
and flat back of sprag must all rest on a flat<br />
surface as shown in view A.<br />
Since wear on all sprags in any one sprag unit will be<br />
the same, it is only necessary to check five sprags in<br />
each assembly.<br />
Measure five sprags (1) as shown in view A. If three or more sprags are<br />
worn to 0.375 inch or smaller, put new sprags in sprag unit.<br />
Measure five sprags (2) as shown in view B. If three or more sprags are worn<br />
more than 1/16 inch on the polished edge, put new sprags in sprag unit.<br />
END OF TASK<br />
8-67
<strong>TM</strong> 9-<strong>2320</strong>-<strong>211</strong>-<strong>34</strong>-2-1<br />
(9) Shifter clutch collar.<br />
FRAME 1<br />
1.<br />
2.<br />
3.<br />
4.<br />
5.<br />
6.<br />
GO<br />
Grind two flats on 0.2727-inch diameter pins (1) so that there is 0.251 inch<br />
along flat area as shown in view A.<br />
Put pins (1) into gear segment as shown along line a-a.<br />
Measure distance (2) between pins (1). If measurement is more than 2.4757<br />
inches, get a new collar.<br />
Move pins (1) into gear segment along line b-b.<br />
Do step 3 again for line b-b.<br />
Measure thickness (3) of collar (4).<br />
get a new collar.<br />
TO FRAME 2<br />
If measurement is less than 0.677 inch,<br />
8-68
<strong>TM</strong> 9-<strong>2320</strong>-<strong>211</strong>-<strong>34</strong>-2-1<br />
FRAME 2<br />
1. Put shifter clutch collar (1) on two blocks (2) as shown. Lower side of<br />
collar must not touch surface.<br />
2. Add weights (3) to collar until collar (1) is free. Get a new collar if weight<br />
needed is below 145 pounds or above 175 pounds.<br />
END OF TASK<br />
8-69
<strong>TM</strong> 9-<strong>2320</strong>-<strong>211</strong>-<strong>34</strong>-2-1<br />
f. Repair.<br />
1. Take off small scratches or nicks from transfer case housing (1), front cover<br />
(2), and front output shaft cover (3) as needed.<br />
2. Weld<br />
3. Drill<br />
racks and small holes in housing and covers. Refer to <strong>TM</strong> 9-237,<br />
out any broken bolts or studs in tapped holes.<br />
4. Drill out stripped or out-of-round holes.<br />
or stud of new size in assembly.<br />
Retap to next larger size. Use bolt<br />
5. If bearing cup (4) is damaged, take it out of bore (5). Refer to para 7-7.<br />
Get a new bearing cup and mating bearing cone.<br />
6. Put new bearing cup (6) into bore (5). Refer to para 7-7.<br />
GO TO FRAME 2<br />
8-70
<strong>TM</strong> 9-<strong>2320</strong>-<strong>211</strong>-<strong>34</strong>-2-1<br />
FRAME 2<br />
1. If front input shaft oil seal (1) is damaged, take it out of input shaft bearing<br />
retainer cap (2). Throw away damaged oil seal.<br />
2. Coat new front drive gear oil seal (3) with multipurpose lubricant.<br />
3. Put new front input shaft oil seal (3) into input shaft bearing retainer cap (2).<br />
END OF TASK<br />
8-71
<strong>TM</strong> 9-<strong>2320</strong>-<strong>211</strong>-<strong>34</strong>-2-1<br />
g. Assembly of Subassemblies.<br />
NOTE<br />
Keep all parts clean and protected from dust and<br />
dirt. Coat all bearings and oil seals with multipurpose<br />
lubricant when putting them in.<br />
Coat all gears and shafts with<br />
oil . Coat shafts and bores of<br />
pigment.<br />
(1) Rear output bearing retainer cap<br />
engine lubricating<br />
gears with white lead<br />
and front cover.<br />
FRAME 1<br />
1. Press rear output shaft seal (1) into rear output shaft bearing retainer<br />
cap (2).<br />
2. Put shaft pin seal (3) in transfer case front cover (4).<br />
END OF TASK<br />
8-72
<strong>TM</strong> 9-<strong>2320</strong>-<strong>211</strong>-<strong>34</strong>-2-1<br />
FRAME 1<br />
I<br />
1. Aline holes in brake drum (1), shield (2), and companion flange (3).<br />
2. Push eight screws (4) through holes.<br />
END OF TASK<br />
8-73
<strong>TM</strong> 9-<strong>2320</strong>-<strong>211</strong>-<strong>34</strong>-2-1<br />
(3) High and Iow range and output shifter forks.<br />
FRAME 1<br />
1. Put shifter shaft (1) in shifter shaft fork (2).<br />
2. Put shifter shaft (3) in shifter shaft fork (4).<br />
3. Screw in, but do not tighten, setscrew (5) . put on safety wire (6).<br />
4. Put in setscrew (7). Tighten setscrew to 45 to 57 pound-feet.<br />
5. Put on safety wire (8).<br />
END OF TASK<br />
8-74
<strong>TM</strong> 9-<strong>2320</strong>-<strong>211</strong>-<strong>34</strong>-2-1<br />
(4) Front output shaft assembly.<br />
FRAME 1<br />
1. Put<br />
2. Set<br />
3. Put<br />
key<br />
woodruff key (1) into shaft (2).<br />
gear (3) on shaft (2).<br />
shaft (2) and gear (3) on hydraulic press.<br />
(1).<br />
4. Press race (4) against back of gear (3).<br />
GO TO FRAME 2<br />
Aline keyway in race (4) with<br />
8-75
<strong>TM</strong> 9-<strong>2320</strong>-<strong>211</strong>-<strong>34</strong>-2-1<br />
FRAME 2<br />
1. Put retaining ring (1) on back of race (2).<br />
2. Put race (3) over race (2) .<br />
3. Put two springs (4) and 41 sprags (5) into race (3).<br />
GO TO FRAME 3<br />
8-76
<strong>TM</strong> 9-<strong>2320</strong>-<strong>211</strong>-<strong>34</strong>-2-1<br />
FRAME 3<br />
1. Put race (1) face up on workbench.<br />
2. Put two springs (2) and 41 sprags (3) into race (1).<br />
3. Put transfer case washer (4) on top of race (1).<br />
4. Lift race (1) off workbench and place it on top of race (5) as shown.<br />
5. Put on retaining ring (6).<br />
END OF TASK<br />
I<br />
I<br />
I<br />
8-77
<strong>TM</strong> 9-<strong>2320</strong>-<strong>211</strong>-<strong>34</strong>-2-1<br />
(5) Front output shaft cover assembly.<br />
FRAME 1<br />
1. Put shifting fork pin seal (1) and washer (2) in front output shaft cover (3).<br />
2. Put in inner snapring (4).<br />
3. Press in bearing (5). Refer to para 7-7.<br />
4. Put in outer snapring (6).<br />
5. Press in front output shaft seal (7).<br />
GO TO FRAME 2<br />
8-78
<strong>TM</strong> 9-<strong>2320</strong>-<strong>211</strong>-<strong>34</strong>-2-1<br />
FRAME 2<br />
1. Aline teeth of sprag clutch (1) and drive gear (2) and put on reverse shift<br />
gear (3).<br />
2. Slide shifting fork pin (4) on reverse shift gear (3).<br />
3. Put collar spacer (5) in front output shaft cover (6) .<br />
4. Press shaft assembly (7) into front output shaft cover (6) .<br />
GO TO FRAME 3<br />
8-79
<strong>TM</strong> 9-<strong>2320</strong>-<strong>211</strong>-<strong>34</strong>-2-1<br />
FRAME 3<br />
1. Put collar (1) on front output shaft (2).<br />
2. Put companion flange (3) on front output shaft (2).<br />
3. Put on washer (4) and nut (5). Tighten nut to 300 to 400 pound-feet. Aline<br />
slots in nut with hole in shaft (2).<br />
4. Put in cotter pin (6).<br />
GO TO FRAME 4<br />
8-80
<strong>TM</strong> 9-<strong>2320</strong>-<strong>211</strong>-<strong>34</strong>-2-1<br />
FRAME 4<br />
1.<br />
2.<br />
3.<br />
4.<br />
END<br />
Put two gaskets (1) and air shift cylinder (2) on shifter shaft (3) .<br />
Put on nut (4).<br />
Hold air cylinder cover (5) in place and put on four washers (6) and screws<br />
(7). Tighten screws to 5 to 8.5 pound-feet.<br />
Bend tabs of washers (6) up against screws (7).<br />
OF TASK<br />
8-81
<strong>TM</strong> 9-<strong>2320</strong>-<strong>211</strong>-<strong>34</strong>-2-1<br />
(6) Rear output shaft.<br />
FRAME 1<br />
1. Put woodruff key (1) into rear output shaft (2).<br />
2. Press on gear (3).<br />
3. Press on bearing cone (4). Refer to para 7-7.<br />
4. Press on bearing cone (5). Refer to para 7-7.<br />
END OF TASK<br />
8-82
<strong>TM</strong> 9-<strong>2320</strong>-<strong>211</strong>-<strong>34</strong>-2-1<br />
(7) Intermediate shaft.<br />
FRAME 1<br />
1.<br />
2.<br />
3.<br />
GO<br />
Put woodruff key (1) into intermediate shaft (2).<br />
Press on gear (3).<br />
Press on bearing (4). Refer to para 7-7.<br />
TO FRAME 2<br />
8-83
<strong>TM</strong> 9-<strong>2320</strong>-<strong>211</strong>-<strong>34</strong>-2-1<br />
FRAME 2<br />
1. Put woodruff key (1) into intermediate shaft (2).<br />
2. Press on gear (3).<br />
3. Press on bearing (4). Refer to para 7-7.<br />
END OF TASK<br />
8-84
<strong>TM</strong> 9-<strong>2320</strong>-<strong>211</strong>-<strong>34</strong>-2-1<br />
(8) Input shaft.<br />
F R A M E 1<br />
1. Press gear bearing (1) on input shaft (2). Put on sleeve spacer (3).<br />
2. Press gear (4) on bearing (1).<br />
3. Press gear bearing (5) into gear (4).<br />
4. Slide on synchromesh clutch (6).<br />
GO TO FRAME 2<br />
8-85
<strong>TM</strong> 9-<strong>2320</strong>-<strong>211</strong>-<strong>34</strong>-2-1<br />
FRAME 2<br />
1. Press gear bearing (1) onto input shaft assembly (2) . Put on sleeve spacer<br />
(3).<br />
2. Press gear (4) onto gear bearing (1).<br />
3. Press gear bearing (5) into gear (4).<br />
4. Put on spacing collar (6).<br />
5. Press on bearing (7). Refer to para 7-7.<br />
6. Put on snapring (8).<br />
END OF TASK<br />
8-86
<strong>TM</strong> 9-<strong>2320</strong>-<strong>211</strong>-<strong>34</strong>-2-1<br />
h. Replacement of Subassemblies.<br />
(1) Shaft assemblies.<br />
FRAME 1<br />
1. Place shifter shaft fork (1) on synchromesh clutch of input shaft assembly<br />
(2).<br />
2. Put shaft assembly (2) in place in transfer case housing (3).<br />
3. Press shaft assembly (2) into transfer housing (3).<br />
4. Tighten stop screw (4) to 5 to 15 pound-feet.<br />
5. Put in screw (5).<br />
GO TO FRAME 2<br />
8-87
<strong>TM</strong> 9-<strong>2320</strong>-<strong>211</strong>-<strong>34</strong>-2-1<br />
FRAME 2<br />
1. Put in screw (1). Tighten screw to 115 to 120 pound-feet.<br />
2. Put on safety wire (2).<br />
3. Put poppet ball (3), plunger (4), and spring (5) in transfer case housing<br />
(6).<br />
4. Put in screw and washer (7). Tighten screw to 60 to 70 pound-feet.<br />
GO TO FRAME 3<br />
8-88
<strong>TM</strong> 9-<strong>2320</strong>-<strong>211</strong>-<strong>34</strong>-2-1<br />
FRAME 3<br />
1. Hold cover plate gasket (1) and cover plate (2) in place on transfer case<br />
housing (3).<br />
2. Put in four screws and washers (4). Tighten screws to 38 to 49 pound-feet.<br />
3. Put rear output shaft (5) and intermediate shaft (6) in place.<br />
4. Do backlash check. Refer to para 8-4b (8).<br />
5. If backlash check is not within given limits, disassemble transmission transfer<br />
and do wear limit inspection. Refer to para 8-4e.<br />
END OF TASK<br />
8-89
<strong>TM</strong> 9-<strong>2320</strong>-<strong>211</strong>-<strong>34</strong>-2-1<br />
(2) Transfer housing front cover.<br />
FRAME 1<br />
1. Put on front cover gasket (1).<br />
2. Put transfer case front cover (2) in place<br />
3. Put in and hold two screws (4).<br />
4. Put on two lockwashers (5) and nuts (6).<br />
feet.<br />
5. Put on lifting bracket (7).<br />
6. Put on two lockwashers (8) and nuts ( 9).<br />
feet.<br />
GO TO FRAME 2<br />
on housing (3). Aline holes.<br />
Tighten nuts to 48 to 61 pound-<br />
Tighten nuts to 48 to 61 pound-<br />
8-90
<strong>TM</strong> 9-<strong>2320</strong>-<strong>211</strong>-<strong>34</strong>-2-1<br />
FRAME 2<br />
1. Put in lockwashers (1) on screw (2). Tighten screw to 60 to 77 pound-feet.<br />
2. Put in 15 screws (3). Put on 15 lockwashers (4) and nuts (5). Tighten nuts<br />
alternately and evenly to 40 to 61 pound-feet.<br />
GO TO FRAME 3<br />
8-91
<strong>TM</strong> 9-<strong>2320</strong>-<strong>211</strong>-<strong>34</strong>-2-1<br />
FRAME 3<br />
1. Put intermediate front drive gear (1) in place.<br />
2. Hold thrust washer (2) and intermediate shaft bearing retainer plate (3) in<br />
place and put in two screws (4). Tighten screws to 60 to 77 pound-feet.<br />
3. Bend tabs of retainer plate (3) up against screws (4).<br />
4. Hold front input shaft gasket (5) and bearing retainer (6) and put in five<br />
washers (7) and screws (8). Tighten screws to 60 to 77 pound-feet.<br />
END OF TASK<br />
8-92
<strong>TM</strong> 9-<strong>2320</strong>-<strong>211</strong>-<strong>34</strong>-2-1<br />
(3) Front output shaft cover assembly.<br />
FRAME 1<br />
1. Put front output shaft cover gasket (1) and front output shaft cover assembly<br />
(2) in place on transfer case front cover (3).<br />
2. Put in 10 screws and washers (4). Tighten screws to 60 to 77 pound-feet.<br />
3. Put in speedometer pin (5). Put in union (6).<br />
END OF TASK<br />
8-93
<strong>TM</strong> 9-<strong>2320</strong>-<strong>211</strong>-<strong>34</strong>-2-1<br />
8-5. TRANSMISSI<strong>ON</strong> TRANSFER ASSEMBLY REAR SEAL REMOVAL AND REPLACE-<br />
MENT.<br />
TOOLS:<br />
SUPPLIES:<br />
No special tools<br />
None<br />
PERS<strong>ON</strong>NEL: One<br />
EQUIPMENT C<strong>ON</strong>DITI<strong>ON</strong>:<br />
a. Preliminary Procedures.<br />
required<br />
Truck parked, engine off, transmission in gear, handbrake<br />
set, wheels chocked.<br />
(1) Drain transfer. Refer to LO 9-<strong>2320</strong>-<strong>211</strong>-12.<br />
(2) Take off transfer-to-rear axle propeller shaft from transfer assembly.<br />
Refer to <strong>TM</strong> 9-<strong>2320</strong>-<strong>211</strong>-20.<br />
b. Removal.<br />
FRAME 1<br />
1. Take out cotter pin (1).<br />
2. Take off nut (2) and washer (3).<br />
3. Pull brake drum (4) off transfer (5).<br />
GO TO FRAME 2<br />
8-94
<strong>TM</strong> 9-<strong>2320</strong>-<strong>211</strong>-<strong>34</strong>-2-1<br />
FRAME 2<br />
CAUTI<strong>ON</strong><br />
Be careful not to damage shaft or housing when driving out<br />
seal (1).<br />
1. Using punch, drive oil seal (1) out of transfer housing (2).<br />
END OF TASK<br />
8-95
<strong>TM</strong> 9-<strong>2320</strong>-<strong>211</strong>-<strong>34</strong>-2-1<br />
c. Replacement.<br />
FRAME 1<br />
CAUTI<strong>ON</strong><br />
Be careful not to damage shaft or housing when putting<br />
in seal (1).<br />
1. Using hammer and brass bar, drive oil seal (1) into transfer housing (2).<br />
GO TO FRAME 2<br />
8-96
<strong>TM</strong> 9-<strong>2320</strong>-<strong>211</strong>-<strong>34</strong>-2-1<br />
F R A M E 2<br />
1. Press brake drum (1) over shaft (2).<br />
2. Put on washer (3) and nut (4). Tighten nut to 300 to 400 pound-feet.<br />
3. Put in cotter pin (5) .<br />
END OF TASK<br />
NOTE<br />
Follow-on Maintenance Action Required:<br />
1. Replace transfer-to-rear axle propeller shaft on<br />
transfer assembly. Refer to <strong>TM</strong> 9-<strong>2320</strong>-<strong>211</strong>-20.<br />
2. Fill transfer. Refer to LO 9-<strong>2320</strong>-<strong>211</strong>-12.<br />
8-97
<strong>TM</strong> 9-<strong>2320</strong>-<strong>211</strong>-<strong>34</strong>-2-1<br />
8-6. TRANSMISSI<strong>ON</strong> TRANSFER CASE MOUNTING BRACKETS REMOVAL AND<br />
REPLACEMENT .<br />
TOOLS:<br />
No special tools required<br />
SUPPLIES: 5/8-inch x 1 1/2-inch NC screws (9)<br />
5/8-inch NC nuts (9)<br />
5/8-inch lockwashers (9)<br />
Solvent, dry cleaning, type 11 (SD-2) , Fed. Spec P-D-680<br />
PERS<strong>ON</strong>NEL: One<br />
EQUIPMENT C<strong>ON</strong>DITI<strong>ON</strong> :<br />
Truck parked, engine off, wheels blocked.<br />
a. Preliminary Procedure. Remove transfer transmission from truck. Refer<br />
to para 8-3.<br />
b. Removal.<br />
FRAME 1<br />
1. Take out three screws (1) , three washers (2) , six insulators (3) , and three<br />
nuts (4) from mounting brackets (5) and supports (6) .<br />
GO TO FRAME 2<br />
8-98
<strong>TM</strong> 9-<strong>2320</strong>-<strong>211</strong>-<strong>34</strong>-2-1<br />
FRAME 2<br />
1. Take out rivets (1) holding support brackets (2) to frame. Take off support<br />
brackets (2).<br />
END OF TASK<br />
NOTE<br />
If support brackets (2) have been taken off before,<br />
take out screws, nuts and washers holding support<br />
brackets.<br />
8-99
<strong>TM</strong> 9-<strong>2320</strong>- <strong>211</strong>-<strong>34</strong>-2-1<br />
c. Cleaning and Inspection.<br />
WARNING<br />
Dry cleaning sol vent is flammable. Do not use<br />
near an open flame. Keep a fire extinguisher<br />
nearby when solvent is used. Use only in wellventilated<br />
places. Failure to do this may result<br />
in injury to personnel and damage to equipment.<br />
NOTE<br />
Clean all parts before inspection, after repair,<br />
and before assembly.<br />
(1) Clean inner and outer surfaces of metallic parts and all areas subject<br />
to oil or grease with dry cleaning solvent.<br />
(2) Remove sludge and gum deposits with a stiff brush.<br />
(3) Steam cleaning may be used to remove accumulated grease and dirt<br />
after dry cleaning solvent has been applied.<br />
(4) Dry with clean rags.<br />
(5) Rust must be taken off using a wire brush.<br />
(6) Refer to para 1-3 for additional cleaning steps.<br />
8-100
<strong>TM</strong> 9-<strong>2320</strong>-<strong>211</strong>-<strong>34</strong>-2-1<br />
d. Replacement.<br />
FRAME 1<br />
1. Put in and tighten nine screws (1) , washers (2) , and nuts (3) joining<br />
support brackets to frame.<br />
GO TO FRAME 2<br />
8-101
<strong>TM</strong> 9-<strong>2320</strong>-<strong>211</strong>-<strong>34</strong>-2-1<br />
FRAME 2<br />
1. Put in three screws (1), three washers (2), six insulators (3), and three<br />
nuts (4) joining mounting brackets (5) and support brackets (6).<br />
END OF TASK<br />
NOTE<br />
Follow-on Maintenance Action Required:<br />
Install transfer transmission into truck. Refer to para 8-3.<br />
8-102
<strong>TM</strong> 9-<strong>2320</strong>-<strong>211</strong>-<strong>34</strong>-2-1<br />
Section III.<br />
TRANSMISSI<strong>ON</strong> TRANSFER C<strong>ON</strong>TROLS AND LINKAGES<br />
8-7. TRANSMISSI<strong>ON</strong> C<strong>ON</strong>TROLS AND LINKAGE REMOVAL, REPAIR, AND RE-<br />
PLACEMENT (TRUCKS WITHOUT FR<strong>ON</strong>T WINCH).<br />
TOOLS:<br />
No special tools required<br />
SUPPLIES: Cotter pin (5)<br />
PERS<strong>ON</strong>NEL: One<br />
EQUIPMENT C<strong>ON</strong>DITI<strong>ON</strong> :<br />
Removal.<br />
Truck parked, engine off, handbrake set.<br />
FRAME 1<br />
1. Lift up companion seat (1).<br />
2. Take out 12 screws (2) and lockwashers (3) from front tunnel (4).<br />
3. Lift up and slide off front tunnel (4).<br />
4. Take out eight screws (5) and lockwashers (6) from toeboard (7). Take<br />
off toeboard.<br />
5. Take out six screws (8) and lockwashers (9). Lift up and slide off rear<br />
tunnel (10).<br />
GO TO FRAME 2<br />
8-103
<strong>TM</strong> 9-<strong>2320</strong>-<strong>211</strong>-<strong>34</strong>-2-1<br />
FRAME 2<br />
1. Take off nut (1).<br />
2. Take out screw (2) and retainer (3).<br />
3. Take out two cotter pins (4 and 5).<br />
4. Take off washer (6).<br />
5. Take out clevis pin (7).<br />
6. Slide shaft (8) to the right and take off hand lever (9).<br />
GO TO FRAME 3<br />
8-104
<strong>TM</strong> 9-<strong>2320</strong>-<strong>211</strong>-<strong>34</strong>-2-1<br />
FRAME 3<br />
1. Take off two nuts (1) and two screws (2).<br />
2. Take off bracket (3) and slide out shaft (4).<br />
GO TO FRAME 4<br />
8-105
<strong>TM</strong> 9-<strong>2320</strong>-<strong>211</strong>-<strong>34</strong>-2-1<br />
FRAME 4<br />
1. Take out cotter pin (1).<br />
2. Take out clevis pin (2).<br />
3. Take off two nuts (3) and two screws (4).<br />
4. Take off bracket and linkage assembly (5).<br />
END OF TASK<br />
8-106
<strong>TM</strong> 9-<strong>2320</strong>-<strong>211</strong>-<strong>34</strong>-2-1<br />
b. Disassembly.<br />
FRAME 1<br />
1. Take out two cotter pins (1).<br />
2. Take out two clevis pins (2) and control rods (3).<br />
3. Take out two bolts (4) and nuts (5).<br />
4. Take off two levers (6).<br />
5. Take out two keys (7).<br />
6. Take shaft (8) out of bracket (9).<br />
END OF TASK<br />
8-107
<strong>TM</strong> 9-<strong>2320</strong>-<strong>211</strong>-<strong>34</strong>-2-1<br />
c. Cleaning. There are no special cleaning procedures needed. Refer to<br />
cleaning procedures given in para 1-3.<br />
d. Inspection and Repair.<br />
FRAME 1<br />
NOTE<br />
Do not remove bushings unless they are damaged.<br />
1. Check that bushing (1) in hand lever (2) is not scored, chipped or damaged<br />
in any other way. If bushing is damaged, press it out and press in a new<br />
one.<br />
2. Check that two bushings (3) in mounting bracket (4) are not scored, chipped<br />
or damaged in any other way. If bushings are damaged, press them out and<br />
press in new ones.<br />
3. Check that all parts are not bent or cracked. Straighten bent parts. Refer<br />
to FM 43-2. Get new parts in place of cracked or damaged parts.<br />
END OF TASK<br />
8-108
<strong>TM</strong> 9-<strong>2320</strong>-<strong>211</strong>-<strong>34</strong>-2-1<br />
e. Assembly.<br />
FRAME 1<br />
1. Put two keys (1) in shaft (2) and put shaft in bracket ( 3).<br />
2. Put on two levers (4) and tighten two screws (5) .<br />
3. Put on two control rods (6).<br />
4. Put in two clevis pins (7) and cotter pins ( 8).<br />
END OF TASK<br />
8-109
<strong>TM</strong> 9-<strong>2320</strong>-<strong>211</strong>-<strong>34</strong>-2-1<br />
f. Replacement.<br />
FRAME 1<br />
1.<br />
2.<br />
3.<br />
4.<br />
GO<br />
Put in bracket and linkage assembly (1).<br />
Put on two screws (2) and nuts (3).<br />
Put in clevis pin (4).<br />
Put in cotter pin (5).<br />
TO FRAME 2<br />
8-110
<strong>TM</strong> 9-<strong>2320</strong>-<strong>211</strong>-<strong>34</strong>-2-1<br />
FRAME 2<br />
1. Put shaft (1) in bracket (2).<br />
2. Put in two screws and nuts (3).<br />
3. Put on hand lever (4).<br />
4. Put in clevis pin (5).<br />
5. Put on washer (6).<br />
6. Put in two cotter pins (7).<br />
7. Put in screw (8) and retainer (9).<br />
8. Put on nut (10).<br />
GO TO FRAME 3<br />
8-111
<strong>TM</strong> 9-<strong>2320</strong>-<strong>211</strong>-<strong>34</strong>-2-1<br />
FRAME 3<br />
1. Put toeboard (1) in place and aline holes. Put in 11 screws and lockwashers<br />
(2).<br />
2. Slide rear tunnel (3) down into place and aline holes.<br />
3. Put in six screws and lockwashers (4).<br />
4. Slide front tunnel (5) down over shift lever (6).<br />
5. Aline holes in front tunnel (5) with holes in cab floor, toeboard (1), and rear<br />
tunnel (3).<br />
6. Put in 12 screws and lockwashers (7).<br />
7. Put down companion seat (8).<br />
END OF TASK<br />
8-112
<strong>TM</strong> 9-<strong>2320</strong>-<strong>211</strong>-<strong>34</strong>-2-1<br />
8-8. TRANSMISSI<strong>ON</strong> TRANSFER C<strong>ON</strong>TROLS AND LINKAGE REMOVAL, REPAIR,<br />
AND REPLACEMENT (TRUCKS WITH FR<strong>ON</strong>T WINCH).<br />
TOOLS:<br />
No special tools required<br />
SUPPLIES: Cotter pin (2)<br />
PERS<strong>ON</strong>NEL:<br />
One<br />
EQUIPMENT C<strong>ON</strong>DITI<strong>ON</strong>:<br />
a. Removal.<br />
Truck parked, engine off, handbrake set.<br />
FRAME 1<br />
1. Lift up companion seat (1).<br />
2. Take out 13 screws (2) and lockwashers (3) from front tunnel (4).<br />
3. Lift up and slide off front tunnel (4).<br />
4. Take out eight screws (5) and lockwashers (6). Lift up and slide off rear<br />
tunnel (7).<br />
GO TO FRAME 2<br />
8-113
<strong>TM</strong> 9-<strong>2320</strong>-<strong>211</strong>-<strong>34</strong>-2-1<br />
FRAME 2<br />
1. Take off nut (1).<br />
2. Take out screw (2) and retainer (3).<br />
3. Take out two cotter pins (4 and 5).<br />
4. Take off washer (6).<br />
5. Take out clevis pin (7).<br />
6. Slide shaft (8) to the right and take off hand lever (9).<br />
GO TO FRAME 3<br />
8-114
<strong>TM</strong> 9-<strong>2320</strong>-<strong>211</strong>-<strong>34</strong>-2-1<br />
FRAME 3<br />
1. Take out cotter pin (1).<br />
2. Take out clevis pin (2).<br />
3. Take off four nuts (3) from screws (4). Take out two outside screws (4).<br />
4. Take off bracket and linkage assembly (5).<br />
END OF TASK<br />
8-115
<strong>TM</strong> 9-<strong>2320</strong>-<strong>211</strong>-<strong>34</strong>-2-1<br />
b. Disassembly.<br />
FRAME 1<br />
1. Take out two cotter pins (1).<br />
2. Take out two clevis pins (2) and control rods (3).<br />
3. Take out two bolts (4) and nuts (5).<br />
4. Take off two levers (6) and spacers (7).<br />
5. Take out two keys (8).<br />
6. Take shaft (9) out of bracket (10).<br />
END OF TASK<br />
8-116
<strong>TM</strong> 9-<strong>2320</strong>-<strong>211</strong>-<strong>34</strong>-2-1<br />
c. Cleaning. There are no special cleaning procedures needed. Refer to<br />
cleaning procedures given in para 1–3.<br />
d. Inspection and Repair.<br />
FRAME 1<br />
NOTE<br />
Do not remove bushings unless they are damaged.<br />
1. Check that bushing (1) in hand lever (2) is not scored, chipped or damaged<br />
in any way. If bushing is damaged, press it out and press in a new one.<br />
2. Check that two bushings (3) in mounting bracket (4) are not scored, chipped<br />
or damaged in any way. If bushings are damaged, press them out and press<br />
in new ones.<br />
3. Check that all parts are not bent or cracked. Straighten bent parts. Refer<br />
to FM 43-2. Get new parts in place of cracked or damaged parts.<br />
END OF TASK<br />
8-117
<strong>TM</strong> 9-<strong>2320</strong>-<strong>211</strong>-<strong>34</strong>-2-1<br />
e. Assembly.<br />
FRAME 1<br />
1. Put shaft (1) in bracket (2).<br />
2. Put two keys (3) in shaft (1).<br />
3. Put on two spacers (4).<br />
4. Put on two levers (5) and tighten two screws (6).<br />
5. Put on two control rods (7).<br />
6. Put in two clevis pins (8) and cotter pins (9).<br />
END OF TASK<br />
8-118
<strong>TM</strong> 9-<strong>2320</strong>-<strong>211</strong>-<strong>34</strong>-2-1<br />
f. Replacement.<br />
FRAME 1<br />
1. Put in bracket and linkage assembly (1).<br />
2. Put on four screws (2) and four nuts (3).<br />
3. Put in clevis pin (4).<br />
4. Put in cotter pin (5).<br />
GO TO FRAME 2<br />
8-119
<strong>TM</strong> 9-<strong>2320</strong>-<strong>211</strong>-<strong>34</strong>-2-1<br />
FRAME 2<br />
1.<br />
2.<br />
Hold hand lever (1) in place as shown.<br />
Push shaft (2) into hand lever (1).<br />
3.<br />
4.<br />
5.<br />
6.<br />
7.<br />
8.<br />
Put on<br />
Put in<br />
Put on<br />
Put in<br />
Put in<br />
Put on<br />
linkage (3).<br />
clevis pin (4).<br />
washer (5).<br />
two cotter pins (6).<br />
screw (7) and retainer (8).<br />
nut (9).<br />
GO TO FRAME 3<br />
8-120
<strong>TM</strong> 9-<strong>2320</strong>-<strong>211</strong>-<strong>34</strong>-2-1<br />
FRAME 3<br />
1. Slide rear tunnel (1) down into place and aline holes.<br />
2. Put in eight screws (2) and lockwashers (3).<br />
3. Slide front tunnel (4) down over shift lever (5).<br />
4. Aline holes in front tunnel (4) with holes in cab floor, and rear tunnel (1).<br />
5. Put in 13 screws (6) and lockwashers (7).<br />
6. Put down companion seat (8).<br />
END OF TASK<br />
8-121/(8-122 blank)
<strong>TM</strong> 9-<strong>2320</strong>-<strong>211</strong>-<strong>34</strong>-2-1<br />
CHAPTER 9<br />
FR<strong>ON</strong>T AXLE GROUP MAINTENANCE<br />
Section 1. SCOPE<br />
9-1. EQUIPMENT ITEMS COVERED. This chapter gives equipment maintenance procedures<br />
for the front axle and differential carrier assemblies and the steering mechanism<br />
for which there are authorized corrective maintenance tasks at the direct and<br />
general support maintenance levels.<br />
9-2. EQUIPMENT ITEMS NOT COVERED. All equipment items for which corrective<br />
maintenance is authorized at the direct and general support maintenance levels are<br />
covered in this chapter.<br />
Section II.<br />
FR<strong>ON</strong>T AXLE ASSEMBLY<br />
9-3. FR<strong>ON</strong>T AXLE ASSEMBLY REMOVAL, REPAIR, AND REPLACEMENT.<br />
TOOLS :<br />
No special tools required<br />
SUPPLIES : Filler plug gasket (2)<br />
PERS<strong>ON</strong>NEL :<br />
Two<br />
EQUIPMENT C<strong>ON</strong>DITI<strong>ON</strong> :<br />
a. Preliminary Procedures.<br />
Truck parked on level surface, engine off, handbrake<br />
set, rear wheels chocked.<br />
WARNING<br />
Weight of vehicle must be supported by floor<br />
jacks or motor vehicle trestles at all times.<br />
Do not attempt to support weight of truck<br />
on hydraulic jack.<br />
(1) Jack up truck and support chassis. Refer to <strong>TM</strong> 9-<strong>2320</strong>-<strong>211</strong>-20.<br />
(2) Remove front wheels and tires. Refer to <strong>TM</strong> 9-<strong>2320</strong>-<strong>211</strong>-10.<br />
(3) Put trestle under left and right front brake hub. Remove hydraulic jack<br />
from under differential housing. Refer to <strong>TM</strong> 9-<strong>2320</strong>-<strong>211</strong>-20.<br />
(4) Take off lower drag link from steering arm. Refer to <strong>TM</strong> 9-<strong>2320</strong>-<strong>211</strong>-20.<br />
(5) Drain lubrication from front axle. Refer to LO 9-<strong>2320</strong>-<strong>211</strong>-12.<br />
(6) Remove hydraulic lines on front axle. Refer to Hydraulic Lines<br />
Removal and Replacement, <strong>TM</strong> 9-<strong>2320</strong>-<strong>211</strong>-20.<br />
(7) Remove nut from lower end of<br />
off only. Refer to <strong>TM</strong> 9-<strong>2320</strong>-<strong>211</strong>-20.<br />
(8) Remove transfer-to-front axle<br />
front shock absorbers, and pull that end<br />
propeller shaft. Refer to <strong>TM</strong> 9-<strong>2320</strong>-<strong>211</strong>-20.<br />
9-1
<strong>TM</strong> 9-<strong>2320</strong>-<strong>211</strong>-<strong>34</strong>-2-1<br />
b. Removal.<br />
FRAME 1<br />
1. Take off four nuts (1) and washers (2) from two U-bolts (3).<br />
2. Take off clamp plate (4).<br />
3. Do steps 1 and 2 again for other side of axle housing (5).<br />
4. Put hydraulic jack (6) with axle fixture (7) under differential housing of<br />
axle (5).<br />
5. Raise jack (6) to clear two trestles (8) under wheel hubs. Take out trestles.<br />
GO TO FRAME 2<br />
9-2
<strong>TM</strong> 9-<strong>2320</strong>-<strong>211</strong>-<strong>34</strong>-2-1<br />
FRAME 1<br />
1. Lower hydraulic jack (1) with axle assembly (2).<br />
Soldiers 2. Pull hydraulic jack (1) with axle assembly (2) forward and out from<br />
A and B under truck.<br />
3. Take off two spring seats (3).<br />
4. Put chain sling (4) around axle assembly (2).<br />
5. Hook chain sling (4) onto hoist.<br />
6. Lift axle assembly (2) off hydraulic jack (1) and onto axle stand (5).<br />
7. Take off chain sling (4) and hoist.<br />
END OF TASK<br />
9-3
<strong>TM</strong> 9-<strong>2320</strong>-<strong>211</strong>-<strong>34</strong>-2-1<br />
c. Disassembly.<br />
FRAME 1<br />
1. Take off left and right front hub and drum assembly (1 and 2). Refer to<br />
<strong>TM</strong> 9-<strong>2320</strong>-<strong>211</strong>-20.<br />
2. Take off tie rod assembly (3). Refer to <strong>TM</strong> 9-<strong>2320</strong>-<strong>211</strong>-20.<br />
3. Takeoff front axle steering knuckle (4). Refer to para 9-5.<br />
4. Take off front differential (5). Refer to para 9-4.<br />
5. Take out air pressure valve (6).<br />
GO TO FRAME 2<br />
9-4
<strong>TM</strong> 9-<strong>2320</strong>-<strong>211</strong>-<strong>34</strong>-2-1<br />
FRAME 2<br />
1.<br />
NOTE<br />
Do not take out alinement pins (1) unless they are damaged.<br />
Refer to para 9-3e, for inspection procedures.<br />
Drill out two alinement pins (1).<br />
2.<br />
3.<br />
4.<br />
Take<br />
Take<br />
Take<br />
END OF TASK<br />
NOTE<br />
Do not take out studs (2) unless they are damaged.<br />
Refer to para 9-3e, for inspection procedures.<br />
out studs (2).<br />
out two pipe plugs (3).<br />
out plugs (4 and 5) with gaskets (6 and 7). Throw away gaskets.<br />
9-5
<strong>TM</strong> 9-<strong>2320</strong>-<strong>211</strong>-<strong>34</strong>-2-1<br />
d. Cleaning.<br />
WARNING<br />
Dry cleaning solvent is flammable. Do not use<br />
near an open flame. Keep a fire extinguisher<br />
nearby when solvent is used. Use only in wellventilated<br />
places. Failure to do this may result<br />
in injury to personnel and damage to equipment.<br />
(1) Clean all parts with dry cleaning solvent.<br />
(2) Let parts dry.<br />
e. Inspection and Repair.<br />
FRAME 1<br />
1. Check that axle housing (1) has no scratches or burrs on machined surfaces.<br />
If there are burrs or scratches, file them off with fine mill file.<br />
2. Check that threads on plugs (2 and 3) are not damaged. If plug has damaged<br />
threads, get a new one.<br />
3. Check that threads on 18 studs (4) are not damaged. If stud has damaged<br />
threads, get a new one.<br />
4. Check that two alinement pins (5) have no cracks or wear, If pins are<br />
damaged, get new ones.<br />
GO TO FRAME 2<br />
9-6
<strong>TM</strong> 9-<strong>2320</strong>-<strong>211</strong>-<strong>34</strong>-2-1<br />
FRAME 2<br />
1. Measure<br />
2. Measure<br />
END OF TASK<br />
NOTE<br />
Readings must be within limits given in table 9-1. If readings<br />
are not within given limits, throw away part and get<br />
a new one.<br />
inside diameter of steering knuckle bushing (1).<br />
outside diameter of steering knuckle pin (2).<br />
NOTE<br />
CHECK <strong>ON</strong>LY THOSE PARTS WHICH ARE CALLED OUT.<br />
PARTS WITHOUT CAL LOUTS ARE SHOWN <strong>ON</strong>LY FOR<br />
REFERENCE PURPOSES.<br />
Table 9-1.<br />
Front Axle Steering Knuckle Pin Wear Limits<br />
Size and Fit<br />
Index of New Parts Wear Limit<br />
Number Item /Point of Measurement (inches) (inches)<br />
1 Inside diameter of steering knuckle 1.500 to 1.501 None<br />
bushing<br />
2 Steering knuckle pin 1.498 to 1.4990 None<br />
1 and 2 Fit of steering knuckle pin bushing 0.001 to 0.0025 None<br />
9-7
<strong>TM</strong> 9-<strong>2320</strong>-<strong>211</strong>-<strong>34</strong>-2-1<br />
f. Assembly.<br />
FRAME 1<br />
1. Put in drain plug (1) with gasket (2).<br />
2. Put two pipe plugs (3) in axle housing (4).<br />
3. Put in alinement pins (5), if removed.<br />
4. Put in studs (6), if removed.<br />
GO TO FRAME 2<br />
9-8
<strong>TM</strong> 9-<strong>2320</strong>-<strong>211</strong>-<strong>34</strong>-2-1<br />
FRAME 2<br />
1. Put on front differential (1). Refer to para 9-4.<br />
2. Put on front axle steering knuckle (2). Refer to para 9-5.<br />
3. Put on left and right front hub and drum assemblies (3 and 4). Refer to<br />
<strong>TM</strong> 9-<strong>2320</strong>-<strong>211</strong>-20.<br />
4. Put on tie rod assembly (5). Refer to <strong>TM</strong> 9-<strong>2320</strong>-<strong>211</strong>-20.<br />
END OF TASK<br />
9-9
<strong>TM</strong> 9-<strong>2320</strong>-<strong>211</strong>-<strong>34</strong>-2-1<br />
g. Tests and Adjustments.<br />
FRAME 1<br />
1.<br />
2.<br />
3.<br />
4.<br />
5.<br />
6.<br />
7.<br />
CAUTI<strong>ON</strong><br />
Do not use more than 15 psi of air pressure.<br />
Put air pressure gage (1) in air pressure valve hole.<br />
Using adapter (2) and air line (3), hook up air supply to front axle (4).<br />
Using air pressure gage (1) and stop watch, check that no more than 5 psi of air<br />
leaks in 45 seconds.<br />
If more than 5 psi of air leaks out, tighten all screws and nuts again.<br />
Do steps 3 and 4 again until less than 5 psi of air leaks in 45 seconds.<br />
Take out air pressure gage (1) and put in air pressure valve (5).<br />
Take off air line (3) with adapter (2) and put in fill plug (6) with gasket (7).<br />
END OF TASK<br />
9-10
<strong>TM</strong> 9-<strong>2320</strong>-<strong>211</strong>-<strong>34</strong>-2-1<br />
h. Replacement.<br />
FRAME 1<br />
1. Put chain sling (1) around axle assembly (2).<br />
2. Hook chain sling (1) to hoist.<br />
3. Lift axle assembly (2) off axle stand (3) and onto hydraulic jack (4).<br />
4. Take off chain sling (1) and hoist.<br />
5. Put on two spring seats (5).<br />
Soldiers 6. Push hydraulic jack (4) with axle assembly (2) under truck. Put axle<br />
A and B assembly under U-bolts (6 and 7).<br />
GO TO FRAME 2<br />
9-11
<strong>TM</strong> 9-<strong>2320</strong>-<strong>211</strong>-<strong>34</strong>-2-1<br />
FRAME 2<br />
1. Raise hydraulic jack (1) until U-bolts (2) almost touch spring seats (3).<br />
2. Move hydraulic jack (1) so that leaf spring center bolt goes into alinement<br />
hole in spring seats (3). Raise jack until spring seats touch left springs (4).<br />
3. Place motor vehicle trestle (5) under each brake hub (6).<br />
4. Lower hydraulic jack (1) and pull it out from under truck.<br />
GO TO FRAME 3<br />
9-12
<strong>TM</strong> 9-<strong>2320</strong>-<strong>211</strong>-<strong>34</strong>-2-1<br />
FRAME 1<br />
NOTE<br />
END OF TASK<br />
1.<br />
2.<br />
3.<br />
4.<br />
5.<br />
6.<br />
7.<br />
8.<br />
9.<br />
10.<br />
Follow-on Maintenance Action Required:<br />
Replace transfer-to-front axle propeller shaft. Refer<br />
to <strong>TM</strong> 9-<strong>2320</strong>-<strong>211</strong>-20.<br />
Pull lever end of front shock absorbers forward<br />
and replace nut. Refer to <strong>TM</strong> 9-<strong>2320</strong>-<strong>211</strong>-20.<br />
Replace hydraulic lines on front axle. Refer to Hydraulic<br />
Lines and Fittings Removal and Replacement, <strong>TM</strong> 9-<strong>2320</strong>-<strong>211</strong>-20.<br />
Replace lower drag link on steering arm. Refer to<br />
<strong>TM</strong> 9-<strong>2320</strong>-<strong>211</strong>-20.<br />
Place hydraulic jack under differential. Raise front axle<br />
assembly and take out trestles from under left and right<br />
front brake hub. Refer to <strong>TM</strong> 9-<strong>2320</strong>-<strong>211</strong>-20.<br />
Replace front wheels and tires. Refer to <strong>TM</strong> 9-<strong>2320</strong>-<br />
<strong>211</strong>-10.<br />
Remove supports from truck chassis. Refer to <strong>TM</strong><br />
9-<strong>2320</strong>-<strong>211</strong>-20.<br />
Bleed brakes. Refer to <strong>TM</strong> 9-<strong>2320</strong>-<strong>211</strong>-20.<br />
Lubricate front axle and propeller shaft. Refer to<br />
Lubrication Order LO 9-<strong>2320</strong>-<strong>211</strong>-12.<br />
Do front wheels alinement. Refer to <strong>TM</strong> 9-<strong>2320</strong>-<strong>211</strong>-<br />
20.<br />
9-13
<strong>TM</strong> 9-<strong>2320</strong>-<strong>211</strong>-<strong>34</strong>-2-1<br />
Section III.<br />
DIFFERENTIAL CARRIER ASSEMBLY<br />
9-4. DIFFERENTIAL CARRIER ASSEMBLY REMOVAL, REPAIR, AND REPLACEMENT.<br />
TOOLS: Bearing preload tester, pn 1597-200<br />
Mechanical puller kit, pn 8708724<br />
Dial indicating scale, pn 8950157<br />
Dial indicator, pn 7950104<br />
Bearing remover and replacer, pn 7950159<br />
Honing stone, NSN 5<strong>34</strong>5-00-260-0759<br />
SUPPLIES: Solvent, dry cleaning, type II Safety wire<br />
(SD-2), Fed. Spec P-D-680<br />
Gasket and shim set<br />
Crocus cloth<br />
Pinion bevel spacers<br />
White load pigment, Fed.<br />
Sleeve spacers<br />
Spec TT-W-262C<br />
Pinion bearing spacer<br />
Prussian blue, MIL-P-30501<br />
Pinion drive spacer<br />
String<br />
PERS<strong>ON</strong>NEL:<br />
TWO<br />
EQUIPMENT C<strong>ON</strong>DITI<strong>ON</strong>:<br />
a. Preliminary Procedures.<br />
Truck parked, engine off, handbrake set.<br />
(1) For front axle differential, do the following:<br />
(a) Drain differential. Refer to LO 9-<strong>2320</strong>-<strong>211</strong>-12.<br />
(b) Remove axle shafts. Refer to para 9-5.<br />
(c) Remove propeller shaft. Refer to <strong>TM</strong> 9-<strong>2320</strong>-<strong>211</strong>-20.<br />
(d) Jack up truck and put safety jacks under frame rails behind front<br />
axle housing. Refer to <strong>TM</strong> 9-<strong>2320</strong>-<strong>211</strong>-20.<br />
para 13-5.<br />
(e) Remove wheels and tires. Refer to <strong>TM</strong> 9-<strong>2320</strong>-<strong>211</strong>-10.<br />
(f) Remove drag link. Refer to <strong>TM</strong> 9-<strong>2320</strong>-<strong>211</strong>-20.<br />
(g) Remove power steering cylinder assembly. Refer to Part 2,<br />
(h) Remove brake hydraulic lines. Refer to Hydraulic Lines and<br />
Fittings Removal and Replacement, <strong>TM</strong> 9-<strong>2320</strong>-<strong>211</strong>-20.<br />
(i) Remove front axle assembly. Refer to para 9-3.<br />
(2) For forward-rear axle or rear-rear axle differential, do the following:<br />
(a) Drain differential. Refer to LO 9-<strong>2320</strong>-<strong>211</strong>-12.<br />
(b) Remove axle shafts. Refer to <strong>TM</strong> 9-<strong>2320</strong>-<strong>211</strong>-20.<br />
(c) Remove propeller shafts. Refer to <strong>TM</strong> 9-<strong>2320</strong>-<strong>211</strong>-20.<br />
(d) Jack up truck and put safety jacks under rear spring seats. Refer<br />
to <strong>TM</strong> 9-<strong>2320</strong>-<strong>211</strong>-20.<br />
(e) Remove wheels and tires. Refer to <strong>TM</strong> 9-<strong>2320</strong>-<strong>211</strong>-10.<br />
(f) Remove torque rods. Refer to Part 2, para 15-7.<br />
(g) Remove brake hydraulic lines. Refer to Hydraulic Lines and<br />
Fittings Removal and Replacement, <strong>TM</strong> 9-<strong>2320</strong>-<strong>211</strong>-20.<br />
9-14<br />
(h) Remove axle housing. Refer to para 10-3.
<strong>TM</strong> 9-<strong>2320</strong>-<strong>211</strong>-<strong>34</strong>-2-1<br />
b. Removal.<br />
FRAME 1<br />
1. Takeout 18 nuts (1) and flat washers (2).<br />
2. Using hoist and chain sling, lift differential carrier<br />
housing (4).<br />
3. Take off and throw away gasket (5).<br />
END OF TASK<br />
assembly (3) out of axle<br />
9-15
<strong>TM</strong> 9-<strong>2320</strong>-<strong>211</strong>-<strong>34</strong>-2-1<br />
c. Disassembly.<br />
FRAME 1<br />
1. Mount differential carrier assembly (1) in holding device.<br />
2. Using center punch and hammer, mark positions of two caps (2) to bearing<br />
saddles (3). Caps must be put back in same positions.<br />
3. Take out two safety wires (4). Throw away safety wires.<br />
4. Take out two screws (5). Take off two adjusting nut locks (6).<br />
5. Take out four screws and flat washers (7).<br />
6. Tap on sides of two caps (2) to loosen them. Take off caps.<br />
GO TO FRAME 2<br />
9-16
<strong>TM</strong> 9-<strong>2320</strong>-<strong>211</strong>-<strong>34</strong>-2-1<br />
FRAME 2<br />
1.<br />
2.<br />
3.<br />
4.<br />
GO<br />
Lift off two adjusting nuts (1).<br />
Lift each side of differential case assembly (2) enough to pull out two<br />
bearing cups (3).<br />
Lift out differential case assembly (2).<br />
Take off two bearing cones (4). Refer to para 7-7.<br />
TO FRAME 3<br />
9-17
<strong>TM</strong> 9-<strong>2320</strong>-<strong>211</strong>-<strong>34</strong>-2-1<br />
FRAME 3<br />
1. Using center punch and hammer, mark positions of two<br />
halves (1) to helical drive gear (2). These parts must<br />
same positions.<br />
2. Take out safety wire (3). Throw away safety wire.<br />
3. Take out eight screws (4) and nuts (5).<br />
GO TO FRAME 4<br />
differential case<br />
be put back in the<br />
9-18
<strong>TM</strong> 9-<strong>2320</strong>-<strong>211</strong>-<strong>34</strong>-2-1<br />
FRAME 4<br />
1. Pull two differential case halves (1) off helical drive gear (2).<br />
2. Take off two thrust washers (3) and two side gears (4).<br />
3. Take off four thrust washers (5) and four spider gears (6) from spider (7).<br />
GO TO FRAME 5<br />
9-19
<strong>TM</strong> 9-<strong>2320</strong>-<strong>211</strong>-<strong>34</strong>-2-1<br />
FRAME 5<br />
1. Takeout and throw away two cotter pins (1).<br />
Soldiers 2. Take off two nuts (2).<br />
A and B<br />
3. Using puller, take off two companion flanges (3).<br />
4. Take<br />
5. Take<br />
(8).<br />
6. Take<br />
GO TO FRAME 6<br />
out six screws (4) and lockwashers (5).<br />
off rear bearing cover (6) with seal (7) and thrust washer<br />
Take out and throw away gasket (9).<br />
out and throw away seal (7) from rear bearing cover (6).<br />
9-20
<strong>TM</strong> 9-<strong>2320</strong>-<strong>211</strong>-<strong>34</strong>-2-1<br />
FRAME 6<br />
1. Take out eight screws (1) and flat washers (2).<br />
2. Take off front bearing cover assembly (3) and gasket (4). Throw away<br />
gasket.<br />
3. Take out and throw away seal (5) from front bearing cover (6).<br />
4. Take out and throw away gasket (7).<br />
GO TO FRAME 7<br />
9-21
<strong>TM</strong> 9-<strong>2320</strong>-<strong>211</strong>-<strong>34</strong>-2-1<br />
FRAME 7<br />
1. Tap on rear end of drive shaft assembly (1) to loosen it. Slide out drive<br />
shaft assembly with needed number of shims (2).<br />
2. Take shims (2) off drive shaft assembly (1) and tie them to front bearing cover<br />
(taken off in frame 6).<br />
3. Using bearing remover and replacer and hammer, take out bearing (3). Refer<br />
to para 7-7.<br />
GO TO FRAME 8<br />
9-22
<strong>TM</strong> 9-<strong>2320</strong>-<strong>211</strong>-<strong>34</strong>-2-1<br />
FRAME 8<br />
1. Clamp drive shaft (1) in vise.<br />
2. Take off bearing inner race (2). Refer to para 7-7.<br />
3. Bend open locktab on lockwasher (3).<br />
4. Take off outer nut (4).<br />
5. Take off lockwasher (3) and key washer (5).<br />
6. Take off inner nut (6).<br />
GO TO FRAME 9<br />
9-23
<strong>TM</strong> 9-<strong>2320</strong>-<strong>211</strong>-<strong>34</strong>-2-1<br />
FRAME 9<br />
1.<br />
2.<br />
3.<br />
4.<br />
5.<br />
6.<br />
Tap lightly on retainer assembly (1) to loosen outer bearing cone (2).<br />
Slide off outer bearing cone (2), retainer assembly (1), and collar (3).<br />
Place retainer assembly (1), flange side down, on two wooden blocks.<br />
Using bearing remover<br />
cup (4).<br />
Tap inner bearing cup<br />
Using bearing remover<br />
cup (5) .<br />
GO TO FRAME 10<br />
and replacer, and hammer, drive out outer bearing<br />
(5) away from shoulder (6) of retainer (1).<br />
and replacer and hammer, drive out inner bearing<br />
9-24
<strong>TM</strong> 9-<strong>2320</strong>-<strong>211</strong>-<strong>34</strong>-2-1<br />
FRAME 10<br />
1. Take drive shaft (1) out of vise.<br />
2. Press drive shaft (1) out of bevel pinion gear (2).<br />
3. Drive out key (3).<br />
4. Take inner bearing cone (4) off bevel pinion gear (2).<br />
GO TO FRAME 11<br />
9-25
<strong>TM</strong> 9-<strong>2320</strong>-<strong>211</strong>-<strong>34</strong>-2-1<br />
FRAME 11<br />
1. Takeout eight screws (1) and flat washers (2).<br />
2. Takeoff side cover (3) and gasket (4). Throw away gasket.<br />
3. Take off six nuts (5), lockwashers (6), and flat washers (7).<br />
4. Take off outer bearing cover (8) and needed number of shims (9). Tie shims<br />
to outer bearing cover.<br />
GO TO FRAME 12<br />
9-26
<strong>TM</strong> 9-<strong>2320</strong>-<strong>211</strong>-<strong>34</strong>-2-1<br />
FRAME 12<br />
1.<br />
2.<br />
3.<br />
4.<br />
5.<br />
6.<br />
7.<br />
Take out safety wire (1). Throw away safety wire.<br />
Take out three screws (2).<br />
Take off retaining plate (3).<br />
Put two puller screws into jacking holes in cap assembly (4) and evenly<br />
tighten screws until cap assembly is free. Take off cap assembly.<br />
Take out puller screws.<br />
Place cap (4) on arbor press table with flange down. Press out inner bearing<br />
cup (5) and inner bearing cone (6). Press out outer bearing cone (7) and<br />
outer bearing cup (8).<br />
Take off needed number of shims (9) and tie them to cap (4).<br />
GO TO FRAME 13<br />
9-27
<strong>TM</strong> 9-<strong>2320</strong>-<strong>211</strong>-<strong>34</strong>-2-1<br />
FRAME 13<br />
1. Take out 10 screws (1) and flat washers (2).<br />
2. Take off top cover (3) and gasket (4). Throw away gasket.<br />
3. Put differential carrier assembly (5) on arbor press with side cover hole (6)<br />
facing up.<br />
GO TO FRAME 14<br />
9-28
<strong>TM</strong> 9-<strong>2320</strong>-<strong>211</strong>-<strong>34</strong>-2-1<br />
FRAME 14<br />
1. Put two soft iron spacers (1) between hypoid drive gear (2) and housing (3)<br />
as shown.<br />
2. Using arbor press, press spur gear pinion (4) with key (5) out of hypoid<br />
drive gear (2).<br />
3. Take out key (5).<br />
4. Slide off spacing washer (6).<br />
5. Take out two soft iron spacers (1).<br />
GO TO FRAME 15<br />
9-29
<strong>TM</strong> 9-<strong>2320</strong>-<strong>211</strong>-<strong>34</strong>-2-1<br />
FRAME 15<br />
1.<br />
2.<br />
3.<br />
Pry off hypoid drive gear (1).<br />
Takeout bearing (2).<br />
Take out screw (3).<br />
CAUTI<strong>ON</strong><br />
4.<br />
5.<br />
6.<br />
Do not let sleeve (4) cock to one side when driving it<br />
out or housing (5) will be damaged. Avoid damage<br />
by driving sleeve a little at one notch and then at the<br />
other.<br />
Drive sleeve (4) away from shoulder of housing (5).<br />
Using bearing remover and replacer, take out sleeve (4).<br />
Using stud remover, unscrew and take out six studs (6).<br />
END OF TASK<br />
9-30
<strong>TM</strong> 9-<strong>2320</strong>-<strong>211</strong>-<strong>34</strong>-2-1<br />
d. Cleaning. There are no special cleaning procedures needed. Refer to<br />
cleaning procedures given in para 1-3.<br />
e. Inspection and Repair.<br />
FRAME 1<br />
1. Check that differential carrier housing (1) and two cap assemblies (2) are not<br />
cracked or distorted. If housing or cap assemblies are damaged, get a new<br />
differential carrier housing and two new cap assemblies.<br />
2. Check that adjusting nut threads on differential carrier housing (1), cap<br />
assemblies (2), and two adjusting nuts (3) are not stripped or crossthreaded.<br />
If adjusting nuts are damaged, get new one.<br />
3. Check that tapped holes in differential carrier housing (1) are not stripped or<br />
crossthreaded. Fix with correct size tap.<br />
GO TO FRAME 2<br />
NOTE: CHECK <strong>ON</strong>LY THOSE PARTS WHICH ARE CALLED OUT IN<br />
THIS FRAME. PARTS WITHOUT CALLOUTS ARE SHOWN<br />
<strong>ON</strong>LY FOR REFERENCE PURPOSES OR ARE CHECKED IN<br />
ANO<strong>THE</strong>R FRAME.<br />
9-31
<strong>TM</strong> 9-<strong>2320</strong>-<strong>211</strong>-<strong>34</strong>-2-1<br />
FRAME 2<br />
1.<br />
2.<br />
Check that two bearing cups (1) and two bearing cones (2) are not damaged.<br />
Refer to para 7-7. Replace if damaged.<br />
Mount each differential case half (3) in a lathe. Place dial indicator against<br />
flange that mounts to helical drive gear (4). Check that runout at flange of<br />
differential case half is not more than 0.002 inch.<br />
3.<br />
WARNING<br />
Dry cleaning solvent is flammable. Do not use near an<br />
open flame. Keep a fire extinguisher nearby when solvent<br />
is used. Use only in well-ventilated places.<br />
Failure to do this may result in injury to personnel and<br />
damage to equipment.<br />
If differential case half (3) runout is more than 0.002 inch, use lathe to cut<br />
away only enough metal to bring runout within limits. Rem-eve burrs with<br />
a honing stone. Clean with solvent.<br />
GO TO FRAME 3<br />
NOTE:<br />
CHECK <strong>ON</strong>LY THOSE PARTS WHICH ARE CALLED OUT.<br />
PARTS WITHOUT CALLOUTS ARE SHOWN <strong>ON</strong>LY FOR<br />
REFERENCE PURPOSES.<br />
9-32
<strong>TM</strong> 9-<strong>2320</strong>-<strong>211</strong>-<strong>34</strong>-2-1<br />
FRAME 3<br />
NOTE<br />
Readings must be within limits given in table 9-2.<br />
letter T indicates a tight fit. If readings are not<br />
given limits, throw away parts and get new ones.<br />
1. Measure fit of bearing cone (1) to case (2).<br />
GO TO FRAME 4<br />
The<br />
within<br />
NOTE:<br />
CHECK <strong>ON</strong>LY THOSE PARTS WHICH ARE CALLED OUT<br />
PARTS WITHOUT CALLOUTS ARE SHOWN <strong>ON</strong>LY FOR<br />
REFERENCE PURPOSES.<br />
Table 9-2.<br />
Differential Case Half Wear Limits<br />
Size and Fit<br />
of New Parts Wear Limit<br />
Index Number Item /Point of Measurement (inches) (inches)<br />
1 and 2 Bearing cone to case 0.0015T to 0.003T None<br />
9-33
<strong>TM</strong> 9-<strong>2320</strong>-<strong>211</strong>-<strong>34</strong>-2-1<br />
FRAME 4<br />
1. Check that teeth of helical drive gear (1), four spider gears (2), and two side<br />
gears (3) are not chipped, burred, cracked, scored or broken. Replace<br />
gear if damage cannot be repaired with a honing stone. If spider gear or side<br />
gear is damaged, replace all six spider and side gears.<br />
2. Check that<br />
other way.<br />
damaged.<br />
3. Check that<br />
bushings inside spider gears (2) are not pitted or damaged in any<br />
Replace all spider gears and side gears (3) if any bushing is<br />
spider (4) is not cracked.<br />
If spider is cracked, get a new one.<br />
4. Check that four thrust washers (5) and two thrust washers (6) are not scored<br />
or worn unevenly. Replace parts if they are damaged.<br />
GO TO FRAME 5<br />
NOTE:<br />
CHECK <strong>ON</strong>LY THOSE PARTS WHICH ARE CALLED OUT.<br />
PARTS WITHOUT CALLOUTS ARE SHOWN <strong>ON</strong>LY FOR<br />
REFERENCE PURPOSES.<br />
9-<strong>34</strong>
<strong>TM</strong> 9-<strong>2320</strong>-<strong>211</strong>-<strong>34</strong>-2-1<br />
FRAME 5<br />
NOTE<br />
Readings must be within limits given in table 9-3. If<br />
readings are not within given limits, throw away parts<br />
and get new ones.<br />
1. Measure outside diameter of differential spider (1).<br />
2. Measure inside diameter of spider bushing (2).<br />
3. Measure fit between differential spider (1) and spider bushing (2).<br />
GO TO FRAME 6<br />
NOTE:<br />
CHECK <strong>ON</strong>LY THOSE PARTS WHICH ARE CALLED OUT.<br />
PARTS WITHOUT CALLOUTS ARE SHOWN <strong>ON</strong>LY FOR<br />
REFERENCE PURPOSES.<br />
Table 9-3.<br />
Differential Spider Assembly Wear Limits<br />
Index Number<br />
Item /Point of Measurement<br />
Size and Fit<br />
of New Parts<br />
(inches)<br />
Wear Limit<br />
(inches)<br />
1<br />
Differential spider<br />
outside diameter<br />
1.123 to 1.122<br />
None<br />
2<br />
Spider bushing<br />
inside diameter<br />
1.127 to 1.129<br />
None<br />
1 and 2<br />
Spider to bushing<br />
0.009 to 0.007<br />
None<br />
9-35
<strong>TM</strong> 9-<strong>2320</strong>-<strong>211</strong>-<strong>34</strong>-2-1<br />
FRAME 6<br />
1. Check that bearing assemblies (1 and 2) and bearing (3) are not damaged.<br />
Refer to para 7-7.<br />
2. Check that teeth on spur gear pinion (4) are not broken. If teeth are<br />
damaged, get a new spur gear pinion.<br />
3. Check that hypoid drive gear (5) and sleeve (6) are not cracked. If parts<br />
are damaged, get new ones.<br />
GO TO FRAME 7<br />
9-36
<strong>TM</strong> 9-<strong>2320</strong>-<strong>211</strong>-<strong>34</strong>-2-1<br />
FRAME 7<br />
NOTE<br />
Readings must be within limits given in table 9-4. The<br />
letter L indicates a loose fit and the letter T indicates a<br />
tight fit. If readings are not within given limits, throw<br />
1. Measure<br />
away parts and get new ones.<br />
fit between inner bearing (1) and hypoid gear (2).<br />
2. Measure fit between bearing (3) and sleeve on hypoid gear (1).<br />
3. Measure fit between bearings (4 and 5) and gear (6).<br />
GO TO FRAME 8<br />
Table 9-4.<br />
Differential Hypoid Gear Assembly Wear Limits<br />
Index Number<br />
Item /Point of Measurement<br />
Size and Fit<br />
of New Parts<br />
(inches)<br />
Wear Limit<br />
(inches)<br />
1 and 2<br />
1 and 3<br />
4, 5, and 6<br />
Fit between inner bearing and<br />
hypoid gear<br />
Fit between bearing to sleeve<br />
on hypoid gear<br />
Fit between bearing and<br />
gear<br />
0.006T to 0.0011L None<br />
0.0020L to 0.0042L None<br />
0.000 to 0.0015T None<br />
9-37
<strong>TM</strong> 9-<strong>2320</strong>-<strong>211</strong>-<strong>34</strong>-2-1<br />
FRAME 8<br />
1. Check that teeth of spur gear pinion (1) and hypoid drive gear (2) are not<br />
chipped, cracked, scored or broken. Replace gear if damage cannot be<br />
repaired with a honing stone.<br />
2. Check that sleeve (3) is not scored, cracked or damaged in any other way.<br />
Replace sleeve if it is damaged.<br />
GO TO FRAME 9<br />
NOTE :<br />
CHECK <strong>ON</strong>LY THOSE PARTS WHICH ARE CALLED OUT.<br />
PARTS WITHOUT CALLOUTS ARE SHOWN <strong>ON</strong>LY FOR<br />
REFERENCE PURPOSES.<br />
9-38
<strong>TM</strong> 9-<strong>2320</strong>-<strong>211</strong>-<strong>34</strong>-2-1<br />
FRAME 9<br />
1. Check that outer bearing assembly (1), inner bearing assembly (2), and rear<br />
bearing assembly (3) are not damaged. Refer to para 7-7.<br />
2. Check that bevel pinion gear (4), drive shaft (5), and differential carrier<br />
housing (6) are not chipped, burred , cracked, scored or broken. Replace<br />
parts if damage cannot be repaired with a honing stone.<br />
GO TO FRAME 10<br />
9-39
<strong>TM</strong> 9-<strong>2320</strong>-<strong>211</strong>-<strong>34</strong>-2-1<br />
FRAME 10<br />
NOTE<br />
Readings must be within limits given in table 9-5. The<br />
letter L indicates a loose fit and the letter T indicates a<br />
tight fit. If readings are not within given limits, throw<br />
away both gears and get new ones.<br />
1. Measure fit between outer hypoid drive pinion bearing cone (1) and hypoid<br />
drive pinion (2).<br />
2. Measure fit between inner hypoid drive pinion bearing cone (3) and hypoid<br />
drive pinion (2).<br />
3. Measure fit of hypoid pinion shaft rear bearing (4) on hypoid drive pinion<br />
shaft (5).<br />
4. Measure fit of hypoid pinion shaft rear bearing (6) in carrier (7).<br />
END OF TASK<br />
NOTE :<br />
CHECK <strong>ON</strong>LY THOSE PARTS WHICH ARE CALLED OUT.<br />
PARTS WITHOUT CALLOUTS ARE SHOWN <strong>ON</strong>LY FOR<br />
REFERENCE PURPOSES.<br />
9-40
<strong>TM</strong> 9-<strong>2320</strong>-<strong>211</strong>-<strong>34</strong>-2-1<br />
Table 9-5.<br />
Differential Hypoid Drive Pinion Assembly Wear Limits<br />
Index Number<br />
Item<br />
Point of Measurement<br />
Size and Fit<br />
of New Parts<br />
(inches)<br />
Wear Limit<br />
(inches)<br />
1 and 2<br />
2 and 3<br />
4 and 5<br />
6 and 7<br />
Fit of outer hypoid drive pinion<br />
cone on pinion<br />
Fit of inner hypoid drive<br />
pinion cone on<br />
pinion<br />
Fit of hypoid shaft rear bearing<br />
on hypoid drive pinion<br />
shaft<br />
Fit of hypoid pinion shaft<br />
rear bearing in carrier<br />
0.0002L to 0.0022L None<br />
0.001T to 0.0025T None<br />
0.0006T to 0.0013T None<br />
0.0005L to 0.0007T None<br />
9-41
<strong>TM</strong> 9-<strong>2320</strong>-<strong>211</strong>-<strong>34</strong>-2-1<br />
f. Assembly and Adjustment.<br />
FRAME 1<br />
1. Take off<br />
NOTE<br />
Coat bearings, gears, and seals with<br />
assembly.<br />
shims which were tied to retainer (1)<br />
gear oil during<br />
in disassembly.<br />
2. Using remover and replacer, press outer bearing cup (2) and inner bearing<br />
cup (3) into retainer (1). Thick side of cups must be toward shoulder inside<br />
retainer.<br />
GO TO FRAME 2<br />
9-42
<strong>TM</strong> 9-<strong>2320</strong>-<strong>211</strong>-<strong>34</strong>-2-1<br />
FRAME 2<br />
1.<br />
2.<br />
3.<br />
4.<br />
5.<br />
6.<br />
GO<br />
Press inner bearing cone (1) on bevel pinion gear (2) with thick side of cone<br />
towards gear.<br />
Tap key (3) into keyway of drive shaft (4).<br />
Coat long spline end of drive shaft (4) with white lead pigment.<br />
Start gear (2) with cone (1) on drive shaft (4).<br />
key (3).<br />
Line up keyway in gear with<br />
Using arbor press, press on gear (2) with cone (1) until gear is firmly seated<br />
against shoulder of drive shaft (4).<br />
Clamp drive shaft (4) in vise.<br />
TO FRAME 3<br />
9-43
<strong>TM</strong> 9-<strong>2320</strong>-<strong>211</strong>-<strong>34</strong>-2-1<br />
FRAME 3<br />
NOTE<br />
1.<br />
2.<br />
GO<br />
Collar (1) is used to set preload on bevel pinion gear<br />
bearings. Use same collar taken out in disassembly<br />
the first time preload is checked.<br />
Put collar (1) on drive shaft (2). Put retainer assembly (3) in place on inner<br />
bearing cone (4) of drive shaft assembly (5) with flange side of retainer<br />
assembly facing out.<br />
Put on outer bearing cone (6).<br />
TO FRAME 4<br />
9-44
<strong>TM</strong> 9-<strong>2320</strong>-<strong>211</strong>-<strong>34</strong>-2-1<br />
FRAME 4<br />
1. Put on inner nut (1). Tighten inner nut to 500 pound-feet.<br />
2. Put keywasher (2) in place with hole over stud on inner nut (1). If hole does<br />
not go on stud, tighten nut untiI it does. Put on lockwasher (3) so that stud<br />
alines with keywasher holes.<br />
3. Put on outer nut (4). Tighten outer nut to 500 pound-feet.<br />
GO TO FRAME 5<br />
9-45
<strong>TM</strong> 9-<strong>2320</strong>-<strong>211</strong>-<strong>34</strong>-2-1<br />
FRAME 5<br />
1. Wrap a length of string (1) around retainer assembly (2) as shown. Join<br />
string to bearing preload scale (3).<br />
2. Using bearing preload scale (3), check preload. If new bearings were put in<br />
retainer assembly (2), preload must be 12 to 18 pound-inches. If original<br />
bearings were used, preload must be 4 to 8 pound-inches.<br />
3. Take off string (1) and bearing preload scale (3).<br />
IF PRELOAD IS NOT WITHIN LIMITS GIVEN, GO TO FRAME 6.<br />
IF PRELOAD IS WITHIN LIMITS GIVEN, GO TO FRAME 8<br />
9-46
<strong>TM</strong> 9-<strong>2320</strong>-<strong>211</strong>-<strong>34</strong>-2-1<br />
FRAME 6<br />
1. Take off outer nut (1).<br />
2. Take off lockwasher (2) and keywasher (3).<br />
3. Take off inner nut (4).<br />
4. Tap lightly on retainer assembly (5) to loosen outer bearing cone (6).<br />
5. Slide off outer bearing cone (6), collar (7), and retainer assembly (5).<br />
GO TO FRAME 7<br />
9-47
<strong>TM</strong> 9-<strong>2320</strong>-<strong>211</strong>-<strong>34</strong>-2-1<br />
FRAME 7<br />
1.<br />
2.<br />
3.<br />
GO<br />
Measure thickness of collar (1).<br />
NOTE<br />
Original collar (1) may be made thinner by rubbing<br />
it on crocus cloth laid on a face plate.<br />
If bevel pinion gear preload checked in frame 5 was more than limits given,<br />
use a thicker collar from bevel pinion gear spacer kit.<br />
If preload was less than limits given, use a thinner collar from bevel pinion<br />
gear spacer kit.<br />
TO FRAME 8<br />
9-48
<strong>TM</strong> 9-<strong>2320</strong>-<strong>211</strong>-<strong>34</strong>-2-1<br />
FRAME 8<br />
1.<br />
2.<br />
3.<br />
4.<br />
GO<br />
Bend locktab on washer (1) over outer locknut (2).<br />
Put on bearing inner race (3).<br />
Take drive shaft assembly (4) out of vise.<br />
Using remover and replacer, and hammer, put bearing (5) in place in housing<br />
(6).<br />
TO FRAME 9<br />
9-49
<strong>TM</strong> 9-<strong>2320</strong>-<strong>211</strong>-<strong>34</strong>-2-1<br />
1. Put arbor (1) and two disks (2)<br />
(3).<br />
2. Place gage holder (4) on master<br />
3. Loosen dial face screw (6).<br />
in place in spur gear pinion bore of housing<br />
block (5) as shown.<br />
4 Turn dial face (7) until 0 on dial face is in line with pointer.<br />
5. Tighten dial face screw (6).<br />
GO TO FRAME 10<br />
9-50
<strong>TM</strong> 9-<strong>2320</strong>-<strong>211</strong>-<strong>34</strong>-2-1<br />
NOTE<br />
Shims (1) are used to set bevel pinion gear tooth depth.<br />
Use same shims taken out in disassembly the first time<br />
gear tooth depth is checked.<br />
1. Put needed number of shims (1) in place on gear side of retainer assembly (2).<br />
2. Slide drive shaft assembly (3) with shims (1) into bore in differential carrier<br />
assembly (4). Line up bearing inner race (5) with bearing (6).<br />
3. Line up holes in shims (1), retainer assembly (2), and differential carrier<br />
assembly (3).<br />
4. Seat drive shaft assembly (3) with shims (1) against differential carrier<br />
assembly (4).<br />
5. Put in eight screws (7) with flat washers (8).<br />
GO TO FRAME 11<br />
9-51
<strong>TM</strong> 9-<strong>2320</strong>-<strong>211</strong>-<strong>34</strong>-2-1<br />
1. Hold differential hypoid drive pinion setting gage holder (1) firmly in place<br />
against bevel pinion gear (2).<br />
2. Turn bevel pinion gear (2) so button of dial indicator (3) rides across arbor<br />
(4). Note maximum dial indicator reading.<br />
3. Take out gage holder (1).<br />
4. Check measurement marked on tooth end of bevel pinion gear (2). It should<br />
be the same as reading noted in step 2.<br />
IF DIAL INDICATOR READING IS NOT <strong>THE</strong> SAME AS MARKING <strong>ON</strong> BEVEL PINI<strong>ON</strong><br />
GEAR, GO TO FRAME 12.<br />
IF READING IS <strong>THE</strong> SAME AS MARKING, GO TO FRAME 13<br />
9-52
<strong>TM</strong> 9-<strong>2320</strong>-<strong>211</strong>-<strong>34</strong>-2-1<br />
FRAME 12<br />
1. Take out eight screws (1) with washers (2).<br />
2. Tap on rear end of drive shaft assembly (3) to loosen it. Slide out drive<br />
shaft assembly with shims (4).<br />
3. Take off shims (4 .<br />
NOTE<br />
Use shims taken from carrier gasket and shim kit.<br />
4. If dial indicator reading made in frame 11 was more than marking on bevel<br />
pinion gear (5), add a shim or use thicker shim in its place. Shim used<br />
should be same size as difference between reading and marking.<br />
5. If dial indicator reading was less than marking on bevel pinion gear (5), take<br />
away a shim or use thinner shim in its place.<br />
GO BACK TO FRAME 10<br />
9-53
<strong>TM</strong> 9-<strong>2320</strong>-<strong>211</strong>-<strong>34</strong>-2-1<br />
FRAME 13<br />
1. Take out eight capscrews (1) with lockwashers (2).<br />
2. Tap on rear end of drive shaft assembly (3) to loosen it. Slide out drive shaft<br />
assembly with needed number of shims (4).<br />
assembly.<br />
Leave shims on drive shaft<br />
3. Take out arbor (5) and two disks (6).<br />
GO TO FRAME 14<br />
9-54
<strong>TM</strong> 9-<strong>2320</strong>-<strong>211</strong>-<strong>34</strong>-2-1<br />
1.<br />
2.<br />
3.<br />
4.<br />
GO<br />
Press bearing (1) onto hub of hypoid drive gear (2).<br />
Slide spacing washer (3) onto spur gear pinion (4).<br />
Tap key (5) into keyway of spur gear pinion (4).<br />
Coat keyed end of spur gear pinion (4) with white lead pigment.<br />
TO FRAME 15<br />
I<br />
9-55
<strong>TM</strong> 9-<strong>2320</strong>-<strong>211</strong>-<strong>34</strong>-2-1<br />
FRAME 15<br />
1. Place differential carrier assembly (1) on arbor press in position shown.<br />
2. Put sleeve (2) in differential carrier assembly (1) with notches in sleeve toward<br />
shoulder of bore (3). A line screw hole in sleeve with screw hole in carrier.<br />
3. Using arbor press and remover and replacer, seat sleeve (2) against shoulder<br />
of bore (3).<br />
4. Screw in and tighten setscrew (4).<br />
GO TO FRAME 16<br />
9-56
<strong>TM</strong> 9-<strong>2320</strong>-<strong>211</strong>-<strong>34</strong>-2-1<br />
FRAME 16<br />
1. Turn differential carrier assembly (1) over so bore (2) is on top.<br />
2. Put hypoid drive gear (3) with bearing (4) inside differential carrier assembly<br />
(1). Rest hub of hypoid drive gear on adapter (5).<br />
3. put spur gear pinion (6) through bore (2). Aline key (7) in spur gear pinion<br />
with keyway in hypoid drive gear (3).<br />
4. Press spur gear pinion (6) into bore of hypoid drive gear (3).<br />
5. Take out adapter (5).<br />
6. Turn differential carrier assembly (1) over so bore (2) is on bottom.<br />
GO TO FRAME 17<br />
9-57
<strong>TM</strong> 9-<strong>2320</strong>-<strong>211</strong>-<strong>34</strong>-2-1<br />
FRAME 17<br />
1. Press bearing (1) on hypoid drive gear (2) into sleeve (3).<br />
2. Put in six studs (4).<br />
GO TO FRAME 18<br />
9-58
<strong>TM</strong> 9-<strong>2320</strong>-<strong>211</strong>-<strong>34</strong>-2-1<br />
FRAME 18<br />
1. Take off shims which were tied to cap (1). Use same number of shims the<br />
first time cap is put in place.<br />
2. Using bearing replacer, put inner bearing cup (2) in cap (1). Thick side of<br />
cup must face out.<br />
3. Turn cap (1) over. Put in inner bearing cone (3) and outer bearing cone (4)<br />
with large diameters of cones together.<br />
4. Using bearing replacer, put in outer bearing cup (5).<br />
GO TO FRAME 19<br />
9-59
<strong>TM</strong> 9-<strong>2320</strong>-<strong>211</strong>-<strong>34</strong>-2-1<br />
FRAME 19<br />
1. Put needed number of shims (1) in place on differential carrier assembly (2).<br />
Line up oil holes in shims and differential carrier assembly.<br />
2. Place cap assembly (3) over end of spur gear pinion (4). Line up oil holes in<br />
cap assembly and differential carrier assembly (2).<br />
3. Lightly tap cap assembly (3) into place.<br />
4. Put retaining plate (5) in place.<br />
5. Put in three screws (6).<br />
GO TO FRAME 20<br />
9-60
<strong>TM</strong> 9-<strong>2320</strong>-<strong>211</strong>-<strong>34</strong>-2-1<br />
FRAME 20<br />
1. Take off needed number of shims (1) which were tied to outer bearing cover<br />
(2). Use same number of shims the first time outer bearing cover is put in<br />
place.<br />
2. Put needed number of shims (1) and outer bearing cover (2) in place on<br />
differential carrier assembly (3). Line up oil holes in shims, outer bearing<br />
cover (2), and differential carrier assembly.<br />
3. Put in six flat washers (4), lockwashers (5), and nuts (6).<br />
GO TO FRAME 21<br />
9-61
<strong>TM</strong> 9-<strong>2320</strong>-<strong>211</strong>-<strong>34</strong>-2-1<br />
1. Turn over differential carrier assembly (1).<br />
2. Wrap a length of string (2) around spur gear pinion (3) as shown. Join string<br />
to bearing preload scale (4).<br />
3. Using bearing preload scale (4), check preload. If new bearings were put in<br />
cap assembly (5), preload must be 12 to 18 pound–inches. If original bearings<br />
were used, preload must be 4 to 8 pound–inches.<br />
4. Turn over differential carrier assembly (1).<br />
IF PRELOAD IS NOT WITHIN LIMITS GIVEN, GO TO FRAME 22.<br />
IF PRELOAD IS WITHIN LIMITS GIVEN, GO TO FRAME 23<br />
9-62
<strong>TM</strong> 9-<strong>2320</strong>-<strong>211</strong>-<strong>34</strong>-2-1<br />
FRAME 22<br />
1. Take out six nuts (1), lockwashers (2), and flat washers (3).<br />
2. Take off outer bearing cover (4) and needed number of shims (5).<br />
3. Measure thickness of shims (5).<br />
4. If preload checked in frame 21 was more than limits given, use an extra shim<br />
from carrier gasket and shim kit or a thicker shim.<br />
5. If preload was less than limits given, use one less shim or a thinner shim.<br />
GO BACK TO FRAME 20<br />
9-63
<strong>TM</strong> 9-<strong>2320</strong>-<strong>211</strong>-<strong>34</strong>-2-1<br />
FRAME 23<br />
1.<br />
2.<br />
3.<br />
4.<br />
GO<br />
Slide drive shaft assembly (1) with needed number of shims (2) into bore in<br />
differential carrier assembly (3). Line up bearing inner race (4) with bearing<br />
(5)<br />
Line up holes in shims (2), retainer assembly (6), and differential carrier<br />
assembly (3).<br />
Seat drive shaft assembly (1) with shims (2) against differential carrier<br />
assembly (3).<br />
Put in eight capscrews (7) with washers (8).<br />
TO FRAME 24<br />
9-64
<strong>TM</strong> 9-<strong>2320</strong>-<strong>211</strong>-<strong>34</strong>-2-1<br />
FRAME 24<br />
1. Coat three teeth of bevel pinion gear (1) with prussian blue.<br />
2. Turn bevel pinion gear (1) and check pattern on hypoid drive gear (2).<br />
Pattern should be centered and cover about 80% of hypoid drive gear teeth<br />
as shown.<br />
IF PATTERN IS NOT CORRECT, GO TO FRAME 25.<br />
IF PATTERN IS CORRECT, GO TO FRAME 30<br />
9-65
<strong>TM</strong> 9-<strong>2320</strong>-<strong>211</strong>-<strong>34</strong>-2-1<br />
FRAME 25<br />
1. Take out eight capscrews (1) with washers (2).<br />
2. Tap on rear end of drive shaft assembly (3) to loosen it. Slide out drive<br />
shaft assembly with needed number of shims (4).<br />
3. Take off shims (4).<br />
4. Take off six nuts (5), lockwashers (6), and flat washers (7).<br />
5. Take off cover (8) and needed number of shims (9).<br />
GO TO FRAME 26<br />
9-66
<strong>TM</strong> 9-<strong>2320</strong>-<strong>211</strong>-<strong>34</strong>-2-1<br />
FRAME 26<br />
1. Take out three screws (l).<br />
2. Take off retaining plate (2).<br />
3. Screw three puller screws into jacking holes in cap assembly (3). Tighten<br />
puller screws until cap assembly is free. Take off cap assembly and shims<br />
(4).<br />
4. Take out puller screws.<br />
GO TO FRAME 27<br />
9-67
<strong>TM</strong> 9-<strong>2320</strong>-<strong>211</strong>-<strong>34</strong>-2-1<br />
FRAME 27<br />
1.<br />
2.<br />
3.<br />
4.<br />
Measure thickness of shims (1) and shims (2).<br />
If tooth pattern on hypoid drive gear (3) checked in frame 24 looked like<br />
pattern A or pattern B, do step 3. If tooth pattern looked like pattern C<br />
or pattern D, do step 4.<br />
NOTE<br />
Use shims from carrier gasket and shim kit.<br />
Take away one shim from shims (1) or use a thinner shim in place of another.<br />
Add one shim to shims (2) or use a thicker shim in its place.<br />
Add one shim to shims (1) or use a thicker shim in its place. Take away one<br />
shim from shims (2) or use a thinner shim in its place. -<br />
GO TO FRAME 28<br />
9-68
<strong>TM</strong> 9-<strong>2320</strong>-<strong>211</strong>-<strong>34</strong>-2-1<br />
1. Put needed number of shims (1) in place on differential carrier assembly (2).<br />
Line up oil holes in shims and differential carrier assembly.<br />
2. Place cap assembly (3) over end of spur gear pinion (4). Line up oil holes in<br />
cap assembly and differential carrier assembly (2) .<br />
3. Lightly tap cap assembly (3) into place.<br />
4. Put retaining plate (5) in place.<br />
5. Put in three screws (6).<br />
6. Put in safety wire (7) .<br />
GO TO FRAME 29<br />
9-69
<strong>TM</strong> 9-<strong>2320</strong>-<strong>211</strong>-<strong>34</strong>-2-1<br />
FRAME 29<br />
1. Put needed number of shims (1) and outer bearing cover (2) in place on<br />
differential carrier assembly (3). Line up oil holes in shims, outer bearing<br />
cover, and differential carrier assembly.<br />
2. Put in six flat washers (4), lockwashers (5), and nuts (6).<br />
GO BACK TO FRAME 24<br />
9-70
<strong>TM</strong> 9-<strong>2320</strong>-<strong>211</strong>-<strong>34</strong>-2-1<br />
FRAME 30<br />
1. Put gasket (1) in place in front bearing cover (2).<br />
2. Using replacer, put in seal (3).<br />
3. Put gasket (4) and front bearing cover assembly (5) in place. Make sure<br />
all screw holes line up.<br />
4. Put in eight screws (6) and lockwashers (7). Tighten screws to 78 to 88<br />
pound-feet.<br />
GO TO FRAME 31<br />
9-71
<strong>TM</strong> 9-<strong>2320</strong>-<strong>211</strong>-<strong>34</strong>-2-1<br />
FRAME 31<br />
1. Using replacer, put seal (1) into rear bearing cover (2).<br />
2. Put gasket (3) and rear bearing cover (2) with seal (1) in place.<br />
3. Put in six screws (4) and lockwashers (5). Tighten screws to 25 to 35<br />
pound-feet.<br />
GO TO FRAME 32<br />
9-72
<strong>TM</strong> 9-<strong>2320</strong>-<strong>211</strong>-<strong>34</strong>-2-1<br />
FRAME 32<br />
1. Put thrust washer (1) in place.<br />
CAUTI<strong>ON</strong><br />
Never drive companion flanges (2) onto drive shaft<br />
assembly (3) or drive shaft bearings will be damaged.<br />
2. Using differential case companion flange replacer, put two<br />
companion flanges (2) onto drive shaft assembly (3).<br />
3. Put on two nuts (4 and 5).<br />
Soldier A 4. Hold nut (4) as soldier B tightens nut (5).<br />
Soldier B 5.<br />
GO TO FRAME 33<br />
Tighten nut (5) to 800 pound-feet.<br />
6. Put in two cotter pins (6).<br />
9-73
<strong>TM</strong> 9-<strong>2320</strong>-<strong>211</strong>-<strong>34</strong>-2-1<br />
FRAME 33<br />
1. Put gasket (1) and side cover (2) in place.<br />
2. Put in eight screws (3) and flat washers (4).<br />
3. Put gasket (5) and top cover (6) in place.<br />
4. Put in 10 screws (7) and flat washers (8).<br />
GO TO FRAME <strong>34</strong><br />
9-74
<strong>TM</strong> 9-<strong>2320</strong>-<strong>211</strong>-<strong>34</strong>-2-1<br />
FRAME <strong>34</strong><br />
1.<br />
2.<br />
3.<br />
GO<br />
Press two bearing cones (1) onto two differential case halves (2).<br />
Mounting flange inside of helical drive gear (3) is off center. During disassembly,<br />
the positions of differential case halves (2) on helical drive gear<br />
were marked.<br />
Lay differential case half (2) that mounts towards outside of helical drive gear<br />
on bench with flange side up.<br />
TO FRAME 35<br />
9-75
<strong>TM</strong> 9-<strong>2320</strong>-<strong>211</strong>-<strong>34</strong>-2-1<br />
FRAME 35<br />
1. Put thrust washer (1) and side gear (2) in place in differential case half (3).<br />
2. Slide four spider gears (4) and four thrust washers (5) onto spider (6).<br />
3. Put spider (6) with thrust washers (5) and spider gears (4) in place.<br />
4. Put side gear (7) and thrust washer (8) in place. Make sure all gear<br />
teeth are in mesh.<br />
GO TO FRAME 36<br />
9-76
<strong>TM</strong> 9-<strong>2320</strong>-<strong>211</strong>-<strong>34</strong>-2-1<br />
FRAME 36<br />
1. Put helical drive gear (1) and differential case half (2) in place. Make sure<br />
marks on helical drive gear and differential case halves (2 and 3) line up.<br />
2. Push eight screws (4) up through screw holes in differential case halves<br />
(2 and 3) and helical drive gear (1). Put on eight nuts (5).<br />
3. Tighten nuts (5) to 115 pound-feet.<br />
4. Put safety wire (6) through holes in screws (4). Twist ends of safety wire<br />
together.<br />
GO TO FRAME 37<br />
9-77
<strong>TM</strong> 9-<strong>2320</strong>-<strong>211</strong>-<strong>34</strong>-2-1<br />
FRAME 37<br />
1. Lift differential case assembly (1) into place in differential carrier assembly<br />
(2) . Make sure helical drive gear (3) meshes with spur gear pinion (4).<br />
2. Lift differential case assembly (1) one side at a time. Put two bearing cups<br />
(5) over two bearing cones (6). Seat bearing cups in differential carrier<br />
assembly (2).<br />
GO TO FRAME 38<br />
9-78
<strong>TM</strong> 9-<strong>2320</strong>-<strong>211</strong>-<strong>34</strong>-2-1<br />
FRAME 38<br />
1. Put two caps (1) in place as marked.<br />
2. Put in and finger tighten four screws (2) and washers (3).<br />
3. Put in two adjusting nuts (4) partway.<br />
4. Tighten screws (2) just enough to firmly hold two bearing cups (5).<br />
5. Tighten adjusting nuts (4) a little at a time. Tighten nuts until both adjusting<br />
nuts are tight and screwed in the same distance.<br />
GO TO FRAME 39<br />
9-79
<strong>TM</strong> 9--<strong>2320</strong>-<strong>211</strong>-<strong>34</strong>-2-1<br />
1. Turn helical drive gear (1) several times to seat bearings.<br />
2. Place dial indicator (2) so plunger is against side face of helical drive gear<br />
(1).<br />
3. Push and pull on helical drive gear (1) and check reading on dial indicator (2).<br />
4. Tighten two adjusting nuts (3) a little at a time. Push and pull on helical<br />
drive gear (1) each time until reading on dial indicator is 0.000 inch.<br />
5. Turn helical drive gear (1). Using dial indicator (2), check that runout is<br />
0.008 inch or less.<br />
GO TO FRAME 40<br />
9-80
<strong>TM</strong> 9-<strong>2320</strong>-<strong>211</strong>-<strong>34</strong>-2-1<br />
FRAME 40<br />
1. Move dial indicator (1) so its plunger is against a tooth of helical drive<br />
gear (2).<br />
2. Hold spur gear pinion (3) to keep it from turning. Rock helical drive gear<br />
(2) back and forth. Reading on dial indicator (1) shouId be between 0.007<br />
and 0.014 inch.<br />
3. If reading in helical drive gear (2) was not within limits, put in new pinion<br />
drive gear and new differential drive gear and do steps 1 and 2 again.<br />
4. Take off dial indicator (1).<br />
GO TO FRAME 41<br />
9-81
<strong>TM</strong> 9-<strong>2320</strong>-<strong>211</strong>-<strong>34</strong>-2-1<br />
FRAME 41<br />
1. Tighten each of two adjusting nuts (1) one notch. If slots in adjusting nuts<br />
will not line up with two adjusting nut locks (2), loosen adjusting nuts enough<br />
to aline them.<br />
2. Tighten four screws (3) to 300 pound-feet.<br />
3. Put<br />
4. Put<br />
5. Put<br />
END OF<br />
two adjusting nut locks (2) in place.<br />
in and tighten two screws (4).<br />
safety wire on screws (3 and 4) as shown.<br />
TASK<br />
9-82
<strong>TM</strong> 9-<strong>2320</strong>-<strong>211</strong>-<strong>34</strong>-2-1<br />
g. Replacement.<br />
FRAME 1<br />
1. Put differential carrier<br />
2. Lift differential carrier<br />
3. Put on 18 nuts (4) and<br />
feet.<br />
GO TO FRAME 2<br />
gasket (1) in place on axle housing (2).<br />
assembly (3) into axle housing (2).<br />
lockwashers (5). Tighten hub to 140 to 155 pound-<br />
9-83
<strong>TM</strong> 9-<strong>2320</strong>-<strong>211</strong>-<strong>34</strong>-2-1<br />
END OF TASK<br />
NOTE<br />
Follow-on Maintenance Action Required:<br />
1. For front axle differential. do the followinq:<br />
a. Replace front axle assembly. Refer to para<br />
9-3.<br />
b. Replace and bleed brake hydraulic lines.<br />
Refer to Hydraulic Lines Removal and Replacement,<br />
<strong>TM</strong> 9-<strong>2320</strong>-<strong>211</strong>-20.<br />
c. Replace power steering cylinder assembly.<br />
Refer to Part 2, para 13-5.<br />
d. Replace drag link. Refer to <strong>TM</strong> 9-<strong>2320</strong>-<strong>211</strong>-20.<br />
e. Replace wheels and tires. Refer to<br />
<strong>TM</strong> 9-<strong>2320</strong>-<strong>211</strong>-10.<br />
f. Jack down truck and take out safety jacks.<br />
Refer to <strong>TM</strong> 9-<strong>2320</strong>-<strong>211</strong>-20.<br />
g. Replace propeller shaft. Refer to<br />
<strong>TM</strong> 9-<strong>2320</strong>-<strong>211</strong>-20.<br />
h. Replace axle shafts. Refer to para 9-5.<br />
i. Fill differential. Refer to LO 9-<strong>2320</strong>-<strong>211</strong>-12.<br />
2. For forward-rear axle or rear-rear axle differential,<br />
do the following:<br />
a. Replace axle housing. Refer to para 10-3.<br />
b. Replace and bleed brake hydraulic lines.<br />
Refer to Hydraulic Lines Removal and Replacement,<br />
<strong>TM</strong> 9-<strong>2320</strong>-<strong>211</strong>-20.<br />
c. Replace torque rods. Refer to Part 2, para 15-7.<br />
d. Replace wheels and tires. Refer to<br />
<strong>TM</strong> 9-<strong>2320</strong>-<strong>211</strong>-10.<br />
e. Jack down truck and take out safety jacks.<br />
Refer to <strong>TM</strong> 9-<strong>2320</strong>-<strong>211</strong>-20.<br />
f. Replace propeller shafts. Refer to<br />
<strong>TM</strong> 9-<strong>2320</strong>-<strong>211</strong>-20.<br />
g. Replace axle shafts. Refer to <strong>TM</strong> 9-<strong>2320</strong>-<strong>211</strong>-20.<br />
h. Fill differential. Refer to LO 9-<strong>2320</strong>-<strong>211</strong>-12.<br />
9-84
<strong>TM</strong> 9-<strong>2320</strong>-<strong>211</strong>-<strong>34</strong>-2-1<br />
Section IV.<br />
STEERING MECHANISM<br />
9-5. FR<strong>ON</strong>T AXLE SHAFTS, BEARINGS, SEALS, KNUCKLES, AND ARMS REMOVAL,<br />
REPAIR, REPLACEMENT, AND TESTS AND ADJUS<strong>TM</strong>ENTS.<br />
NOTE<br />
This task is the same for both sides of front<br />
axle assembly, except where noted.<br />
TOOLS: Bearing remover, pn 7950127<br />
Bearing remover and replacer, pn 7950130<br />
Bearing replacer, pn 7950129<br />
SUPPLIES: Axle shaft seal (2)<br />
Axle shaft seal assembly (2)<br />
Trunnion bearing spacer set<br />
PERS<strong>ON</strong>NEL:<br />
One<br />
EQUIPMENT C<strong>ON</strong>DITI<strong>ON</strong>:<br />
a. Preliminary Procedures.<br />
(1)<br />
front axle.<br />
(2)<br />
(3)<br />
(4)<br />
(5)<br />
(6)<br />
(7)<br />
(8)<br />
Truck parked, engine off, handbrake set.<br />
Jack up front of truck and put safety jacks under frame rails behind<br />
Refer to <strong>TM</strong> 9-<strong>2320</strong>-<strong>211</strong>-20.<br />
Remove front tires and wheels. Refer to <strong>TM</strong> 9-<strong>2320</strong>-<strong>211</strong>-20.<br />
Remove front hub and brake drum assembly. Refer to <strong>TM</strong> 9-<strong>2320</strong>-<strong>211</strong>-20.<br />
Remove tie rod assembly. Refer to <strong>TM</strong> 9-<strong>2320</strong>-<strong>211</strong>-20.<br />
Remove drag link. Refer to <strong>TM</strong> 9-<strong>2320</strong>-<strong>211</strong>-20.<br />
Remove front moisture seal and dust boots. Refer to <strong>TM</strong> 9-<strong>2320</strong>-<strong>211</strong>-20.<br />
Remove steering power cylinder. Refer to Part 2, para 13-5.<br />
Drain front axle. Refer to LO 9-<strong>2320</strong>-<strong>211</strong>-12.<br />
9-85
<strong>TM</strong> 9-<strong>2320</strong>-<strong>211</strong>-<strong>34</strong>-2-1<br />
b. Removal.<br />
1. Take off 10 nuts (1) and 10 lockwashers (2).<br />
2. Take off oil slinger (3).<br />
3. Take off backing plate (4) with brakeshoes.<br />
4. Take off spindle (5) to loosen it. Take off spindle. Take off washer (6).<br />
5. Take spindle bearing sleeve (7) out of spindle (5).<br />
GO TO FRAME 2<br />
9-86
<strong>TM</strong> 9-<strong>2320</strong>-<strong>211</strong>-<strong>34</strong>-2-1<br />
1. Pull out axle shaft (1).<br />
2. Take out axle shaft seal assembly (2) with axle shaft seal (3) and washer (4).<br />
3. Take axle shaft seal (3) off axle shaft seal assembly (2). Throw away seal.<br />
FOR LEFT SIDE OF AXLE, GO TO FRAME 3.<br />
FOR RIGHT SIDE OF AXLE, GO TO FRAME 4<br />
9-87
<strong>TM</strong> 9-<strong>2320</strong>-<strong>211</strong>-<strong>34</strong>-2-1<br />
FRAME 3<br />
1. Take off four nuts (1) and lockwashers (2).<br />
2. Tap steering arm (3) lightly.<br />
3. Take off steering arm (3) and four split dowels (4).<br />
4. Take out grease fitting (5).<br />
5. Pull out and throw away cotter pin (6).<br />
6. Take off nut (7).<br />
7. Take out ball and stud assembly (8).<br />
GO TO FRAME 5<br />
9-88
<strong>TM</strong> 9-<strong>2320</strong>-<strong>211</strong>-<strong>34</strong>-2-1<br />
FRAME 4<br />
1. Take off four nuts (1) and lockwashers (2).<br />
2. Tap sleeve plate (3) lightly.<br />
3. Take off sleeve plate (3) and four split dowels (4).<br />
4. Take out grease fitting (5).<br />
GO TO FRAME 5<br />
9-89
<strong>TM</strong> 9-<strong>2320</strong>-<strong>211</strong>-<strong>34</strong>-2-1<br />
FRAME 5<br />
1. Take out spacer (1).<br />
2.<br />
3.<br />
Take off sleeve (2) with bearing (3).<br />
Take bearing (3) out of sleeve (2).<br />
4.<br />
5.<br />
6.<br />
7.<br />
Take<br />
Take<br />
Take<br />
Take<br />
out grease fitting (4).<br />
out two screws (5) and lockwashers (6).<br />
off sleeve plate (7) and sleeve (8) with bearing (9).<br />
bearing (9) out of sleeve (8).<br />
GO TO FRAME 6<br />
9-90
<strong>TM</strong> 9-<strong>2320</strong>-<strong>211</strong>-<strong>34</strong>-2-1<br />
FRAME 6<br />
1. Takeoff steering knuckle (1).<br />
NOTE<br />
Do not take out studs unless they are damaged.<br />
2. Take out four studs (2) and ten studs (3).<br />
3. Knock welds off screw (4) and nut (5).<br />
4. Takeout screw (4) and takeoff nut (5).<br />
END OF TASK<br />
9-91
<strong>TM</strong> 9-<strong>2320</strong>-<strong>211</strong>-<strong>34</strong>-2-1<br />
c. Cleaning. There are no special cleaning procedures required. Refer to<br />
cleaning procedures given in para 1-3.<br />
d. Inspection and Repair.<br />
1.<br />
2.<br />
3.<br />
4.<br />
5.<br />
6.<br />
7.<br />
NOTE<br />
Readings must be within limits given in table 9-6.<br />
If readings are not within given limits, throw away<br />
part and get a new one.<br />
Check that bearings (1 and 2) are not pitted or scored. If bearings are damaged,<br />
get new ones in their place.<br />
Measure inside diameter of bearings (1 and 2).<br />
Measure outside diameter of two steering knuckle pins (3). If steering knuckle<br />
pins are worn more than wear limits get a new axle housing.<br />
Check that machined surfaces of axle shaft (4) are not scored or pitted. Check<br />
that splines on axle shaft are not twisted, chipped, cracked or broken. If axle<br />
shaft or splines are damaged, get a new axle shaft.<br />
Measure outside diameter of bearing journals on axle shaft (4).<br />
Measure inside diameter of bearing sleeve (5).<br />
Check that axle housing (6) has no cracks, scratches or burrs on machined<br />
surf aces. File off scratches or burrs with a fine mill file.<br />
END OF TASK<br />
9-92
<strong>TM</strong> 9-<strong>2320</strong>-<strong>211</strong>-<strong>34</strong>-2-1<br />
Table 9-6.<br />
Front Axle Assembly Wear Limits<br />
Index<br />
Wear Limit<br />
Number Item/Point of Measurement (inches)<br />
1 Bearing inside diameter 1.500 to 1.501<br />
2 Bearing inside diameter 1.500 to 1.501<br />
3 Steering knuckle pin outside diameter 1.4985 to 1.4990<br />
4 Bearing journal on axle shaft outside diameter 2.2<strong>34</strong> to 2.231<br />
5 Bearing sleeve inside diameter 2.249 to 2.251<br />
9-93
<strong>TM</strong> 9-<strong>2320</strong>-<strong>211</strong>-<strong>34</strong>-2-1<br />
e. Replacement.<br />
1. Put nut (1) on screw (2).<br />
2. Put in screw (2).<br />
3. Put in ten studs (3) and four studs (4).<br />
4. Put steering knuckle (5) in place on axle housing (6).<br />
GO TO FRAME 2<br />
9-94
<strong>TM</strong> 9-<strong>2320</strong>-<strong>211</strong>-<strong>34</strong>-2-1<br />
FRAME 2<br />
1. Put<br />
2. Put<br />
3. Put<br />
4. Put<br />
5. Put<br />
6. Put<br />
7. Put<br />
8. Put<br />
bearing (1) in sleeve (2).<br />
sleeve (2) in place.<br />
sleeve plate (3) in place.<br />
in two screws (4) and lockwashers (5).<br />
in grease fitting (6).<br />
bearing (7) in sleeve (8).<br />
sleeve (8) in place.<br />
spacer (9) in place.<br />
FOR LEFT SIDE OF FR<strong>ON</strong>T AXLE, GO TO FRAME 3.<br />
FOR RIGHT SIDE OF FR<strong>ON</strong>T AXLE, GO TO FRAME 4<br />
9-95
<strong>TM</strong> 9-<strong>2320</strong>-<strong>211</strong>-<strong>34</strong>-2-1<br />
1. Put ball and stud assembly (1) in place.<br />
2. Put on nut (2), alining holes for cotter pin (3).<br />
3. Put in cotter pin (3).<br />
4. Put in grease fitting (4).<br />
5. Put steering arm (5) and four split dowels (6) in place.<br />
6. Put on and torque four nuts (7) and lockwashers (8) to 155 to 200 pound-feet.<br />
GO TO FRAME 5<br />
9-96
<strong>TM</strong> 9-<strong>2320</strong>-<strong>211</strong>-<strong>34</strong>-2-1<br />
FRAME 4<br />
1. Put grease fitting (1) in sleeve plate (2).<br />
2. Put sleeve plate (2) and four split dowels (3) in place.<br />
3. Put on and tighten four nuts (4) and lockwashers (5) to 155 to 200 pound-feet.<br />
GO TO FRAME 5<br />
9-97
<strong>TM</strong> 9-2326-<strong>211</strong>-<strong>34</strong>-2-1<br />
FRAME 5<br />
1. Put axle shaft seal (l) on axle shaft seal assembly (2).<br />
2. Put washer (3) on axle shaft seals (1).<br />
3. Put washer (3), seal (1), and seal assembly (2) in tie housing(4).<br />
4. Put in axle shaft (5).<br />
GO TO FRAME 6<br />
9-98
<strong>TM</strong> 9-<strong>2320</strong>-<strong>211</strong>-<strong>34</strong>-2-1<br />
FRAME 6<br />
1. Using bearing replacer, put spindle bearing sleeve (1) in place in<br />
spindle (2).<br />
2. Put washer (3) in place on one shaft (4).<br />
3. Put spindle (2) on axle shaft (4) with oil drain slot (5) down.<br />
4. Put backing plate with brakeshoes (6) in place. Put oil slinger (7) in place.<br />
5. Put in 10 nuts (8) and 10 lockwashers (9).<br />
END OF TASK<br />
1.<br />
2.<br />
3.<br />
4.<br />
5.<br />
6.<br />
7.<br />
8.<br />
9.<br />
NOTE<br />
Follow-on Maintenance Action Required:<br />
Replace moisture seal and dust boot. Refer to<br />
<strong>TM</strong> 9-<strong>2320</strong>-<strong>211</strong>-20.<br />
Replace steering control power cylinder. Refer<br />
to Part 2, para 13-5.<br />
Replace drag link. Refer to <strong>TM</strong> 9-<strong>2320</strong>-<strong>211</strong>-20.<br />
Replace tie rod assembly. Refer to<br />
<strong>TM</strong> 9-<strong>2320</strong>-<strong>211</strong>-20.<br />
Replace hub and brake drum assembly. Refer to<br />
<strong>TM</strong> 9-<strong>2320</strong>-<strong>211</strong>-20.<br />
Replace front wheels and tires. Refer to<br />
<strong>TM</strong> 9-<strong>2320</strong>-<strong>211</strong>-10.<br />
Grease front axle assembly. Refer to<br />
LO 9-<strong>2320</strong>-<strong>211</strong>-12.<br />
Take out safety jacks and lower truck. Refer to<br />
<strong>TM</strong> 9-<strong>2320</strong>-<strong>211</strong>-20.<br />
Fill front axle. Refer to LO 9-<strong>2320</strong>-<strong>211</strong>-12.<br />
9-99
<strong>TM</strong> 9-<strong>2320</strong>-<strong>211</strong>-<strong>34</strong>-2-1<br />
f. Tests and Adjustments.<br />
(1) Steering knuckIe end play test and adjustment.<br />
FRAME 1<br />
1. Put dial indicator (1) on front axle housing (2) as shown.<br />
2. Jack front axle housing (2) off ground. Refer to <strong>TM</strong>9-<strong>2320</strong>-<strong>211</strong>-20.<br />
3. Check that reading on dial indicator (1) is between 0.005 inch and 0.013 inch.<br />
4. Take off dial indicator (1). If reading is correct, do step 5. If reading is not<br />
correct, go to frame 2.<br />
5. Jack down truck. Refer to <strong>TM</strong> 9-<strong>2320</strong>-<strong>211</strong>-10.<br />
GO TO FRAME 2<br />
9-100
<strong>TM</strong> 9-<strong>2320</strong>-<strong>211</strong>-<strong>34</strong>-2-1<br />
FRAME 2<br />
1. Take off four nuts (1) and lockwashers (2).<br />
2. Lift up steering arm (3).<br />
3. Take out spacer (4).<br />
4. If reading in frame 1 was less than limits given, use a thinner spacer from<br />
trunnion bearing spacer set. If reading was more than limits given, use a<br />
thicker spacer from trunnion bearing spacer set.<br />
GO TO FRAME 3<br />
9-101
<strong>TM</strong> 9-<strong>2320</strong>-<strong>211</strong>-<strong>34</strong>-2-1<br />
FRAME 3<br />
1. Put spacer (1) from trunnion bearing<br />
2. Push steering arm (2) into place.<br />
3. Put on and tighten four nuts (3) and<br />
4. Do frame 1 again.<br />
END OF TASK<br />
spacer set in place.<br />
lockwashers (4) to 155 to 200 pound-feet.<br />
9-102
<strong>TM</strong> 9-<strong>2320</strong>-<strong>211</strong>-<strong>34</strong>-2-1<br />
(2)<br />
Turning angle adjustment.<br />
FRAME 1<br />
1. Hold protractor (1) on centerline (2) of steering arm (3), axle housing (4),<br />
and spindle (5) as shown.<br />
2. Push steering arm (3) towards front of truck until centerline of spindle (5) is<br />
between 28° and 29° on protractor (1).<br />
3. Turn adjusting screw (6) out until it touches axle housing (4).<br />
4. Hold adjusting screw (6).<br />
5. Tighten nut (7) to 94 to 120 pound-feet.<br />
6. Spot weld bottom and top of nut (7).<br />
END OF TASK<br />
9-103
<strong>TM</strong> 9-<strong>2320</strong>-<strong>211</strong>-<strong>34</strong>-2-1<br />
(3) Wheel alinement. Refer to <strong>TM</strong> 9-<strong>2320</strong>-<strong>211</strong>-20.<br />
9-104
<strong>TM</strong> 9-<strong>2320</strong>-<strong>211</strong>-<strong>34</strong>-2-1<br />
REAR AXLE<br />
CHAPTER 10<br />
GROUP MAINTENANCE<br />
Section 1. SCOPE<br />
10-1. EQUIPMENT ITEMS COVERED . This chapter gives equipment maintenance procedures<br />
for the rear axle assemblies for which there are authorized corrective maintenance<br />
tasks at the direct and general support maintenance level.<br />
10-2. EQUIPMENT ITEMS NOT COVERED. All equipment items for which corrective<br />
maintenance is authorized at the direct and general support maintenance levels are<br />
covered in this chapter.<br />
Section II.<br />
REAR AXLE ASSEMBLIES<br />
10-3. FORWARD-REAR AND REAR-REAR SUSPENSI<strong>ON</strong> AXLE ASSEMBLY REMOVAL<br />
AND REPLACEMENT.<br />
TOOLS :<br />
SUPPLIES :<br />
PERS<strong>ON</strong>NEL: TW O<br />
NOTE<br />
This task is the same for forward-rear and rearrear<br />
suspension axle assemblies.<br />
No special tools required<br />
EQUIPMENT C<strong>ON</strong>DITI<strong>ON</strong> :<br />
Solvent, dry cleaning, type II (SD-2), Fed. Spec P-D-680<br />
a. Preliminary Procedures.<br />
Truck parked, engine off, handbrake set.<br />
(1) Jack up and support truck. Refer to <strong>TM</strong> 9-<strong>2320</strong>-<strong>211</strong>-20.<br />
(2) Remove rear outer and inner wheels. Refer to <strong>TM</strong> 9-<strong>2320</strong>-<strong>211</strong>-10.<br />
(3) Remove rear brake lines, hoses, and connectors. Refer to Hydraulic<br />
Lines and Fittings Removal and Replacement, <strong>TM</strong> 9-<strong>2320</strong>-<strong>211</strong>-20.<br />
(4) Remove forward-rear and rear-rear propeller shafts. Refer to<br />
<strong>TM</strong> 9-<strong>2320</strong>-<strong>211</strong>-20.<br />
(5) Drain axle housings. Refer to LO 9-<strong>2320</strong>-<strong>211</strong>-12.<br />
(6) Remove upper and lower torque rods and brackets. Refer to Part 2,<br />
para 15-7.<br />
10-1
<strong>TM</strong> 9-<strong>2320</strong>-<strong>211</strong>-<strong>34</strong>-2-1<br />
b. Removal.<br />
Soldiers 1. With hydraulic jack (1) in place as shown, lift axle housing (2) enough<br />
A and B to take weight off front end of rear springs (3).<br />
END OF TASK<br />
2. Slide axle housing (2) away from both rear springs (3).<br />
3. Lower hydraulic jack (1) and axle housing (2) and slide them out from<br />
under truck.<br />
4. Using hoist, lift axle housing (2) off hydraulic jack (1).<br />
10-2
<strong>TM</strong> 9-<strong>2320</strong>-<strong>211</strong>-<strong>34</strong>-2-1<br />
c. Replacement.<br />
FRAME 1<br />
Soldiers 1.<br />
A and B<br />
2.<br />
Soldier A 3.<br />
Soldier B 4.<br />
Soldiers 5.<br />
A and B<br />
6.<br />
GO TO FRAME 2<br />
Using hoist, lift axle housing (1) onto hydraulic jack (2). Take<br />
off hoist.<br />
Slide axle housing (1) and hydraulic jack (2) under truck.<br />
Guide axle housing (1) as soldier B lifts it up.<br />
Using hydraulic jack (2), raise axle housing (1) to height of both<br />
rear springs (3).<br />
Slide axle housing (1) on hydraulic jack (2) into place.<br />
Take out hydraulic jack (2).<br />
10-3
<strong>TM</strong> 9-<strong>2320</strong>-<strong>211</strong>-<strong>34</strong>-2-1<br />
FRAME 2<br />
END OF TASK<br />
NOTE<br />
Follow-on Maintenance Action Required:<br />
1. Replace upper and lower torque rods and brackets.<br />
Refer to Part 2, para 15-7.<br />
2. Replace rear-rear and forward-rear propeller<br />
shafts. Refer to <strong>TM</strong> 9-<strong>2320</strong>-<strong>211</strong>-20.<br />
3. Replace rear brake lines, hoses, and connectors.<br />
Refer to Hydraulic Lines and Fittings Removal<br />
and Replacement , <strong>TM</strong> 9-<strong>2320</strong>-<strong>211</strong>-20.<br />
4. Replace rear inner and outer wheels. Refer to<br />
<strong>TM</strong> 9-<strong>2320</strong>-<strong>211</strong>-10.<br />
5. Take out supports and jack down truck. Refer to<br />
<strong>TM</strong> 9-<strong>2320</strong>-<strong>211</strong>-20.<br />
6. Lubricate axle housing. Refer to LO 9-<strong>2320</strong>-<strong>211</strong>-12.<br />
7. Bleed and adjust brakes. Refer to <strong>TM</strong> 9-<strong>2320</strong>-<strong>211</strong>-20.<br />
10-4
<strong>TM</strong> 9-<strong>2320</strong>-<strong>211</strong>-<strong>34</strong>-2-1<br />
10-4. FORWARD-REAR AND REAR-REAR SUSPENSI<strong>ON</strong> AXLE ASSEMBLY REPAIR.<br />
TOOLS :<br />
SUPPLIES :<br />
PERS<strong>ON</strong>NEL: One<br />
No special tools required<br />
EQUIPMENT C<strong>ON</strong>DITI<strong>ON</strong>:<br />
Solvent, dry cleaning, type II (SD-2) , Fed. Spec P-D-680<br />
Rear axle housing plug gasket<br />
a. Preliminary Procedures.<br />
Truck parked, engine off, handbrake set.<br />
(1) Jack up truck and put safety jacks under each rear spring seat. Refer<br />
to <strong>TM</strong> 9-<strong>2320</strong>-<strong>211</strong>-20.<br />
(2) Remove rear wheels on axle assembly to be repaired. Refer to<br />
<strong>TM</strong> 9-<strong>2320</strong>-<strong>211</strong>-10.<br />
(3) Remove rear brake lines, hoses, and connectors. Refer to Hydraulic<br />
Lines and Fittings Removal and Replacement, <strong>TM</strong> 9-<strong>2320</strong>-<strong>211</strong>-20.<br />
(4) Remove rear propeller shafts. Refer to <strong>TM</strong> 9-<strong>2320</strong>-<strong>211</strong>-20.<br />
(5) Drain axle housings. Refer to LO 9-<strong>2320</strong>-<strong>211</strong>-12.<br />
(6) Remove upper and lower torque rods and brackets. Refer to<br />
Part 2, para 15-7.<br />
(7) Remove forward-rear or rear-rear suspension axle assembly to be<br />
repaired. Refer to para 10-3.<br />
(8) Remove rear axles. Refer to <strong>TM</strong> 9-<strong>2320</strong>-<strong>211</strong>-20.<br />
(9) Remove rear hub and drum assemblies. Refer to <strong>TM</strong> 9-<strong>2320</strong>-<strong>211</strong>-20.<br />
(10) Remove brakeshoe assemblies. Refer to <strong>TM</strong> 9-<strong>2320</strong>-<strong>211</strong>-20.<br />
(11) Remove wheel cylinders. Refer to <strong>TM</strong> 9-<strong>2320</strong>-<strong>211</strong>-20.<br />
(12) Remove differentials. Refer to para 9-4.<br />
10-5
<strong>TM</strong> 9-<strong>2320</strong>-<strong>211</strong>-<strong>34</strong>-2-1<br />
b. Disassembly.<br />
FRAME 1<br />
1. Takeout plug (1), plug (2), and gasket (3). Throwaway gasket.<br />
2. Takeout 18 studs (4).<br />
3. Take out relief valve (5).<br />
END OF TASK<br />
10-6
<strong>TM</strong> 9-<strong>2320</strong>-<strong>211</strong>-<strong>34</strong>-2-1<br />
WARNING<br />
Dry cleaning solvent is flammable. Do not use near<br />
an open flame. Keep a fire extinguisher nearby when<br />
solvent is used. Use only in well-ventilated places.<br />
Failure to do this may result in injury to personnel<br />
and damage to equipment.<br />
c. Cleaning. Clean all parts with solvent.<br />
10-7
<strong>TM</strong> 9-<strong>2320</strong>-<strong>211</strong>-<strong>34</strong>-2-1<br />
d. Inspection and Repair.<br />
FRAME 1<br />
CAUTI<strong>ON</strong><br />
1.<br />
2.<br />
If pins (1) are drilled out, be careful not to use a bit larger<br />
than pin. Damage to hole for pin in axle housing will result.<br />
Check that three pins (1) are not damaged.<br />
and put in new ones.<br />
If pins (1) are damaged, drill them out<br />
Check that plug (2), plug (3), 18 studs (4), and relief valve (5) are not damaged. If<br />
they are damaged, throw them away and get new ones.<br />
CAUTI<strong>ON</strong><br />
3.<br />
4.<br />
If rivets (6) are damaged and must be drilled out, be careful<br />
not to use a bit larger than rivet hole in backing plate (7).<br />
Damage to holes in backing plate will result.<br />
Check that rivets (6) in backing plate (7) are not loose or cracked. Drill out loose<br />
or cracked rivets and put in new ones.<br />
Check that axle housing (8) has no scratches or burrs on machined surfaces. Fix<br />
burrs or scratches with a fine mill file.<br />
END OF TASK<br />
10-8
<strong>TM</strong> 9-<strong>2320</strong>-<strong>211</strong>-<strong>34</strong>-2-1<br />
e. Assembly.<br />
FRAME 1<br />
1. Screw in and tighten relief valve (1).<br />
2. Put in 18 studs (2).<br />
3. Put gasket (3) in place.<br />
4. Screw in and tighten plugs (4 and 5).<br />
GO TO FRAME 2<br />
10-9
<strong>TM</strong> 9-<strong>2320</strong>-<strong>211</strong>-<strong>34</strong>-2-1<br />
FRAME 2<br />
END OF TASK<br />
1.<br />
2.<br />
3.<br />
4.<br />
5.<br />
6.<br />
7.<br />
8.<br />
9.<br />
10.<br />
11.<br />
12.<br />
NOTE<br />
Follow-on Maintenance Action Required:<br />
Replace differentials. Refer to para 9-4.<br />
Replace wheel cylinders. Refer to<br />
<strong>TM</strong> 9-<strong>2320</strong>-<strong>211</strong>-20.<br />
Replace brakeshoe assemblies. Refer to<br />
<strong>TM</strong> 9-<strong>2320</strong>-<strong>211</strong>-20.<br />
Replace rear hub and drum assemblies. Refer<br />
to <strong>TM</strong> 9-<strong>2320</strong>-<strong>211</strong>-20.<br />
Replace rear axles. Refer to <strong>TM</strong> 9-<strong>2320</strong>-<strong>211</strong>-20.<br />
Replace forward-rear or rear-rear suspension<br />
axle assembly after repairs. Refer to para 10–3.<br />
Replace upper and lower torque rods and brackets.<br />
Refer to Part 2, para 15-7.<br />
Refill axle housing. Refer to LO 9-<strong>2320</strong>-<strong>211</strong>-12.<br />
Replace rear propeller shafts. Refer to<br />
<strong>TM</strong> 9-<strong>2320</strong>-<strong>211</strong>-20.<br />
Replace rear brake lines, hoses, and connectors.<br />
Refer to Hydraulic Lines and Fittings Removal and<br />
Replacement, <strong>TM</strong> 9-<strong>2320</strong>-<strong>211</strong>-20.<br />
Replace rear wheels on axle assembly after repairs.<br />
Refer to <strong>TM</strong> 9-<strong>2320</strong>-<strong>211</strong>-10.<br />
Remove safety jacks from under each rear spring<br />
seat, and lower truck. Refer to <strong>TM</strong> 9-<strong>2320</strong>-<strong>211</strong>-20.<br />
10-10
<strong>TM</strong> 9-<strong>2320</strong>-<strong>211</strong>-<strong>34</strong>-2-1<br />
By Order of the Secretaries of the Army and the Air Force:<br />
Official:<br />
E. C. MEYER<br />
General, United States Army<br />
Chief of Staff<br />
J. C. PENNINGT<strong>ON</strong><br />
Major General, United States Army<br />
The Adjutant General<br />
Official:<br />
LEW ALLEN, JR., General, USAF<br />
Chief of Staff<br />
VAN L. CRAWFORD, JR., Colonel, USAF<br />
Director of Administration<br />
Distribution:<br />
To be distributed in accordance with DA Form 12-38, Direct and General Support Maintenance<br />
requirements for 5-Ton Truck Chassis: 5-Ton, 6x6, M39A2.<br />
*U.S. GOVERNMENT PRINTING OFFICE:: 1993 - <strong>34</strong>2-421/80023
PIN : 048076 - 000


