301923 ES-T Supp Manual.pdf
301923 ES-T Supp Manual.pdf
301923 ES-T Supp Manual.pdf

You also want an ePaper? Increase the reach of your titles
YUMPU automatically turns print PDFs into web optimized ePapers that Google loves.
User Guide <strong>Supp</strong>lemental<br />
Information<br />
EpiSensor<br />
Force Balance<br />
Accelerometer<br />
Model FBA <strong>ES</strong>-T<br />
Document <strong>301923</strong><br />
Revision NC<br />
July 2009
Document <strong>301923</strong>, Revision NC<br />
Table of Contents<br />
Introduction ......................................................................................................................... 2<br />
Isolated <strong>Supp</strong>ly Option ....................................................................................................... 2<br />
Isolated <strong>Supp</strong>ly Electrical Interface .................................................................................... 4<br />
+12 VDC Option (Non-Isolated) ........................................................................................ 5<br />
Cable drawing for <strong>ES</strong>-T to Rock or Q330 digitizers .......................................................... 6
Document <strong>301923</strong>, Revision NC<br />
Introduction<br />
The EpiSensor <strong>ES</strong>-T with the single supply option has been changed to improve<br />
performance. To take advantage of this improvement the <strong>ES</strong>-T may be ordered preconfigured<br />
for isolated supply operation. This requires different cable wiring. If you wish to use existing<br />
cables that are wired for the older single supply option, you can order the <strong>ES</strong>-T preconfigured<br />
for the +12V <strong>Supp</strong>ly Option or you can remove the upper housing and reconfigure X6 and<br />
X25. Refer to Kinemetrics EpiSensor User Guide, document 301900, revision D for other<br />
information.<br />
Isolated <strong>Supp</strong>ly<br />
Option<br />
The new Isolated <strong>Supp</strong>ly Option separates the power supply common from the signal<br />
common. This is done by using the pin normally used for the -12V supply in the +/-12V<br />
configuration. To accomplish this, a daughter board with configuration jumpers was added to<br />
the oscillator board. To use the isolated ground option these two jumpers must be placed<br />
between pins 1 and 2 on X6 and X25.<br />
<strong>ES</strong>-T User Guide <strong>Supp</strong>lemental Information 2
Document <strong>301923</strong>, Revision NC<br />
Figure 1 - Isolated Ground Configuration<br />
<strong>ES</strong>-T User Guide <strong>Supp</strong>lemental Information 3
Document <strong>301923</strong>, Revision NC<br />
Isolated <strong>Supp</strong>ly<br />
Electrical Interface<br />
When using the Isolated <strong>Supp</strong>ly Option the <strong>ES</strong>-T should be wired according to the table<br />
below. There is a cable drawing at the end of this document for connecting <strong>ES</strong>-Ts to Rock<br />
and Q330 digitizers.<br />
Pin Name I/O Description<br />
L X + signal Output + X axis signal output<br />
M X – signal Output – X axis signal output<br />
N X shield X shield<br />
A Y + signal Output + Y axis signal output<br />
B Y – signal Output – Y axis signal output<br />
P Y shield Y shield<br />
C Z + signal Output + Z axis signal output<br />
D Z – signal Output – Z axis signal output<br />
R Z shield Z shield<br />
E Cal Input Calibration input to excite the calibration coils of all three<br />
sensors. Only active when calibration coil enable (CCE) is<br />
active.<br />
A voltage of 2.5V will produce a nominal output equivalent<br />
to an input of .125g.<br />
F CCE Input Calibration coil enable. Normally the CCE must be<br />
disconnected or set at a voltage below 0.5 volts. To enable the<br />
calibration coil apply a signal of +5 to +12 volts to this pin.<br />
Can be driven to –12 volts in the disable state.<br />
J + 12 V Input +12 VDC power input.<br />
H Isolated ground Input +12 VDC power return<br />
U PGP ground Instrument case ground<br />
K Ground<br />
G Ground<br />
S Ground<br />
T Ground<br />
V Ground<br />
<strong>ES</strong>-T User Guide <strong>Supp</strong>lemental Information 4
Document <strong>301923</strong>, Revision NC<br />
+12 VDC Option<br />
(Non-Isolated)<br />
If you’ve received your <strong>ES</strong>-T preconfigured for isolated operation but you are using existing<br />
cables for the +12 VDC non-isolated version, you can reconfigure your <strong>ES</strong>-T to work with<br />
these cables. Remove the top housing of the <strong>ES</strong>-T and change the jumper settings on the<br />
daughter board. Place the two jumpers between pins 2 and 3 on X6 and X25.<br />
Figure 2 - Non isolated ground configuration<br />
In this case continue to use the wiring information from the current <strong>ES</strong>-T User Guide.<br />
<strong>ES</strong>-T User Guide <strong>Supp</strong>lemental Information 5
Document <strong>301923</strong>, Revision NC<br />
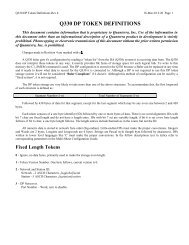
Cable drawing for<br />
<strong>ES</strong>-T to Rock or<br />
Q330 digitizers<br />
<strong>ES</strong>-T User Guide <strong>Supp</strong>lemental Information 6