caralium-installation-instructions - Gerflor
caralium-installation-instructions - Gerflor
caralium-installation-instructions - Gerflor

You also want an ePaper? Increase the reach of your titles
YUMPU automatically turns print PDFs into web optimized ePapers that Google loves.
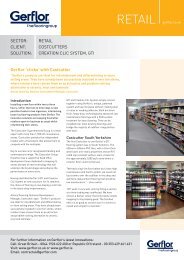
INSTALLATION/MAINTENANCE<br />
GERFLOR CARALIUM TILES<br />
Code of Practice:<br />
The <strong>installation</strong> of this product is covered by<br />
BS8203 Code of Practice for the Installation of Resilient<br />
Floorcoverings.<br />
Subfloors:<br />
The subfloor must be smooth, level, clean, sound,<br />
dry & hard.<br />
Must be dry, smooth and flat. Please refer to<br />
separate SITES & SUBFLOORS data sheet.<br />
The subfloor must be dry:<br />
Relative moisture must be less that 75%Rh (as per<br />
BS8203) if in doubt seek professional advise.<br />
Level Requirements:<br />
No gap greater that 5mm under a 2 metre straight<br />
edge laid on surface of floor (SR2 as per BS8204).<br />
Note:<br />
All solid subfloors must contain an effective<br />
construction damp proof membrane.<br />
Subfloor Preparation :<br />
Caralium can be installed onto either a cement<br />
screed or concrete (a siutable smoothing compound<br />
must be used). Chipboard or timber floorbaords<br />
should be over laid with flooring Grade Plywood<br />
(WBP) minimun 6mm thickness fixed at 150mm<br />
centres.<br />
Important:<br />
Timber subfloors must not be subject to any flexing<br />
or movement.<br />
Under floor heating:<br />
Caralium can be used in conjunction with underfloor<br />
heating systems installed and run fully in<br />
accordance with BS8203 guidelines (The subfloor<br />
interface temperature must not exceed 27 0 C).<br />
The heating must switched off 48hrs prior to<br />
<strong>installation</strong>, during and 48 hrs afterwards.<br />
Clean:<br />
The following equipment can be used to ensure the<br />
subfloor is clean.<br />
Vacum Cleaner<br />
Dust Extractor<br />
Broom<br />
Adhesive/Grout:<br />
Caralium Tile Adhesive and Grout is supplied with<br />
the tiles.<br />
Preparation:<br />
1. The Caralium should be unpacked in the area<br />
they are to be installed 24 hours before laying.<br />
2. Mix up the tiles from 4 –5 boxes to ensure even<br />
colour across the floor area.<br />
3. The pre-defined joint around the tiles may have some<br />
cracked areas; this will not affect the grouting.<br />
4. The floor area must be clear of contaminates and<br />
dirt/dust free.<br />
5. The ambient temperature of the areas to be covered<br />
should be at least 18 o C 24 hours prior, during and<br />
after <strong>installation</strong><br />
Conservatory Installation in addition to<br />
preparation:<br />
For subfloor preparation see Subfloors section.<br />
For under floor heating see under floor heating section<br />
We advise that the conservatory is screened from direct<br />
sunlight 24hrs prior, during & after <strong>installation</strong> and that<br />
an ambient temperature of between 15 o C & 23 o C is<br />
achieved and maintained during <strong>installation</strong>.<br />
Adhesive :<br />
A high temperature acrylic adhesive (F Ball F48 or similar<br />
approved).<br />
Recommended Equipment:<br />
Installation:<br />
Professional trimming knife (Stanley knife or similar)<br />
A2 notched adhesive trowel<br />
68kg roller<br />
Measuring tape<br />
Metal Rule<br />
Jigsaw (optional)<br />
Drill (optional)<br />
Grouting / Cleaning:<br />
1 x Bucket (fill with water just below the tray)<br />
1 x Float Sponge (to clean off any excess grout)<br />
1 x Float applicator (to apply grout)<br />
1 x Small Sponge (for small areas)<br />
1 x Bottle Cleaning Fluid (for cleaning the floor 24 hours<br />
after grouting)<br />
Installing Caralium Tiles:<br />
Setting Out:<br />
1. Measure across the width of the room and divide by<br />
two<br />
2. Using this measurement place a line down the middle<br />
of the area<br />
3. Repeat this on the length of the area ensuring the<br />
cross line is at right angles to the first line<br />
4. If by placing the tiles along these lines there are no<br />
small cuts along any wall or abstacles then use<br />
<strong>Gerflor</strong> Ltd (Technical Dept), Wedgnock House, Wedgnock Lane, Warwick, CV34 5AP, United Kingdom<br />
Tel: +44 (0)1926 401500 Fax: +44 (0)1926 401650<br />
E-Mail: technicaluk@gerflor.com<br />
Jan<br />
2009<br />
Page 1<br />
Of 3
INSTALLATION/MAINTENANCE<br />
GERFLOR CARALIUM TILES<br />
Adhering Caralium Tiles:<br />
1. Sweep or vacuum the floor to remove all debris<br />
2. Working from the furthest point back towards the<br />
doorway apply adhesive evenly over the entire<br />
area using an A2 notched adhesive trowel<br />
(1 Litre = 3sqm coverage)<br />
3. Allow the adhesive to dry completely (until<br />
transparent) approximately 40 minutes<br />
depending on room conditions)<br />
Installing Caralium Tiles:<br />
1. Lay the first tile along the starting line pressing it<br />
down firmly with your hands<br />
2. The second tile can then be placed up to the edge<br />
of the first tile aligning the sides and pressed into<br />
the adhesive<br />
3. It is essential that the tiles are pressed down<br />
firmly from the centre out to the edges to<br />
expel any air and assist adhesion.<br />
4. The tiles can be walked on at this stage<br />
5. When the first row is fitted place the tiles along<br />
the cross axis line in the same manner as the first<br />
row<br />
6. Continue to fit the rest of the floor until all the full<br />
tiles are fitted.<br />
Cutting Caralium Tiles:<br />
1. Place a full tile on top of the tile next to the wall/<br />
obstacle<br />
2. Place a tile up to the wall/obstacle, hold in place<br />
and score a line with a trimming knife along the<br />
front edge.<br />
3. If required score a second time<br />
4. Lift scored tile and apply pressure to scored edge<br />
to break along the line<br />
5. If tile requires cutting into L or U shapes score the<br />
tile and then drill at the corners. This will avoid<br />
breaking the tiles at the corners (deeper scoring<br />
will also be required)<br />
6. Any rough edges can then be trimmed smooth<br />
with a trimming knife<br />
7. A jigsaw can be used for awkward/tricky shapes<br />
8. All final cuts should be carried out on a cutting<br />
board to avoid damage occurring to the fitted tiles<br />
9. Pressure must then be applied over the entire<br />
area of the floor. This can be done using a clean<br />
garden roller or weighted floor roller<br />
10. Cut & install door profile<br />
Important:<br />
Do not use a knife with a retractable blade.<br />
Grouting :<br />
The joints can be grouted as soon as all the tiles and<br />
cuts have been installed and the floor rolled.<br />
After rolling is complete to ensure that the tile is fully<br />
adhered to the subfloor run a small off cut of Caralium tile<br />
through the grout channels applying a small amount of<br />
pressure.<br />
Important:<br />
Allow sufficient grouting and cleaning time. We<br />
recommend that you grout up to 2 sqm at a time and then<br />
clean any excess grout. (Reduce area to 1 to 1.5 sqm<br />
if the grout starts to dry quickly on the surface of<br />
the tiles)<br />
Note:<br />
There may be some breaks on the self-spacing edge<br />
around the tile. This will not have any detrimental effect<br />
on the Caralium tile.<br />
Grout Application:<br />
1. Ensure the gap to be filled is clean and dry<br />
2. Stir the Caralium Grout thoroughly to obtain an even<br />
consistency<br />
3. Fill the joints using the scraper provided ensuring that<br />
you apply sufficient pressure to force the grout into<br />
the spacer<br />
4. Remove any excess by running the scraper diagonally<br />
over the joint<br />
5. Clean any residue left on the tile surface with the<br />
cleaning kit provided<br />
Important:<br />
Do not grout the whole tile. This will make cleaning easier<br />
and reduce the amount of grout you use.<br />
Finishing the Joints/Cleaning Procedure:<br />
1. After the joints are grouted and the scraper used to<br />
remove the excess grout take the sponge float from<br />
the bucket and remove any excess water using the<br />
rollers. Make sure not to over load the sponge with<br />
water.<br />
2. Rub the sponge float across the surface of the floor<br />
using circular motions being careful not to hollow out<br />
the grout by applying too much pressure.<br />
3. Avoid getting water onto non-grouted areas<br />
4. Clean the sponge / float out using the tray rollers<br />
provided with the bucket and repeat the process<br />
across the area until all the residue has been<br />
removed<br />
5. Any visible trace of grout on the surface of the tiles<br />
must be removed<br />
Important:<br />
Rinse the sponge and change water regularly<br />
Once this process has carried out over the entire area<br />
leave floor to dry for 24 hours and avoid walking on the<br />
grouted areas before carrying out the final clean.<br />
<strong>Gerflor</strong> Ltd (Technical Dept), Wedgnock House, Wedgnock Lane, Warwick, CV34 5AP, United Kingdom<br />
Tel: +44 (0)1926 401500 Fax: +44 (0)1926 401650<br />
E-Mail: technicaluk@gerflor.com<br />
Jan<br />
2009<br />
Page<br />
2 of 3
INSTALLATION/MAINTENANCE<br />
Final Clean:<br />
1. Take a rough pad or bristle brush and clean the<br />
floor using the cleaning solution provided to<br />
remove any residue left from the grout<br />
2. Repeat process if required<br />
Note:<br />
The tiles must be subjected to their final clean within<br />
7 days of the grout being applied. After this time it<br />
will be impossible to remove any residue<br />
The room can be used and furniture put in place 48<br />
hours after the joints have been grouted and the<br />
final clean has been carried out.<br />
GERFLOR CARALIUM TILES<br />
Important:<br />
• Do not use acetone or chlorine solvents<br />
Ink, Tomato, Mustard,<br />
Blood or Beetroot<br />
Rust<br />
Food Fats, Ball point or<br />
Felt pens<br />
Diluted Bleach or White<br />
Vinegar (Let it act<br />
without rubbing then<br />
rinse thoroughly)<br />
Oxalic acid or Textile Rust<br />
Remover<br />
(rinse thoroughly)<br />
White Spirit<br />
(rinse thoroughly)<br />
Maintenance:<br />
• Dust daily with either a broom or vacuum<br />
• When required wash using a mop and clean<br />
water to which a neutral agent has been added<br />
(dilution rates must be strictly adhered too),<br />
rinse with clean water and dry either naturally or<br />
with a cloth<br />
• Wash when required dependant on use<br />
Please contact <strong>Gerflor</strong> Technical Department should<br />
further information be required<br />
Precautions:<br />
It is vital that suitable barrier mattings are used to<br />
prevent any dirt and grit being trafficked onto the<br />
floor and that these mattings are themselves maintained<br />
correctly.<br />
• Do not use wax products or varnish<br />
• Use felt pads/cups under the legs of heavy furniture<br />
Stain Removal<br />
Technical Support:<br />
Open 9am—12pm & 1.30pm—5.30pm Monday to Friday<br />
Tel: 01926 401500<br />
Warning:<br />
Rubber can permanently stain PVC floorcoverings.<br />
Avoid using rubber backed mats, rubber furniture<br />
feet or rubber wheeled castors.<br />
<strong>Gerflor</strong> Ltd (Technical Dept), Wedgnock House, Wedgnock Lane, Warwick, CV34 5AP, United Kingdom<br />
Tel: +44 (0)1926 401500 Fax: +44 (0)1926 401650<br />
E-Mail: technicaluk@gerflor.com<br />
Jan<br />
2009<br />
Page<br />
3 of 3