eXMP Quick Start Guide: Windows XP Embedded - MEI's On-line ...
eXMP Quick Start Guide: Windows XP Embedded - MEI's On-line ...
eXMP Quick Start Guide: Windows XP Embedded - MEI's On-line ...

Create successful ePaper yourself
Turn your PDF publications into a flip-book with our unique Google optimized e-Paper software.
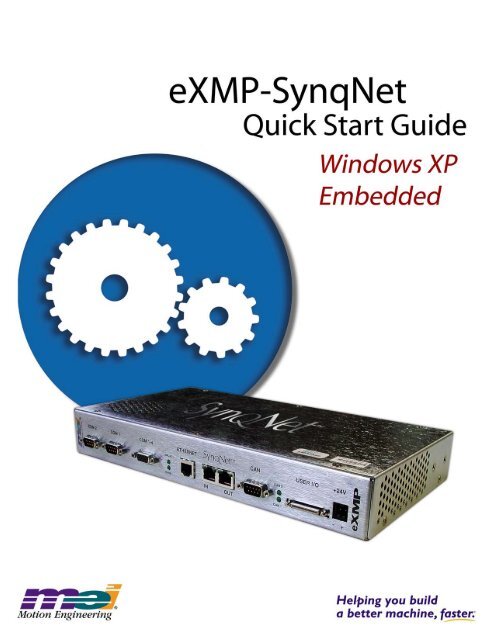
<strong>eXMP</strong>-SynqNet <strong>Quick</strong> <strong>Start</strong> <strong>Guide</strong>: <strong>Windows</strong> <strong>XP</strong> <strong>Embedded</strong><br />
Table of Contents<br />
Safety Warnings……………………………………….…….3<br />
Introduction……………………………………………..……4<br />
Host-side Remote Desktop Connection……………..… 5<br />
Setting Date and Time…………..………………..…...……7<br />
Changing Network Interface Settings……….…………. 8<br />
System Properties……….………………………….….… 10<br />
Changing the Computer Name…………………….….…11<br />
User Accounts……….…………………………….………. 12<br />
File Transfer…………………………………….…….….… 13<br />
Using the <strong>eXMP</strong>-SynqNet Motion Controller.……...… 14<br />
Remote Debugging with MS Visual Studio………...… 15<br />
Board Support Package <strong>Guide</strong>.……………………...… 17<br />
Files on the Compact Flash…………………….…….… 17<br />
Host-side Console Connection..………………...…...…18<br />
<strong>XP</strong> <strong>Embedded</strong> Revision History……….……………..… 21<br />
Copyright © 2005, Motion Engineering, Inc 2 of 21 DCR 785; rev. B
<strong>eXMP</strong>-SynqNet <strong>Quick</strong> <strong>Start</strong> <strong>Guide</strong>: <strong>Windows</strong> <strong>XP</strong> <strong>Embedded</strong><br />
Safety Warnings<br />
During installation, solid electrical contact must be ensured at connectors; otherwise, noise<br />
and power problems will develop. (Connections should be verified through inspection and<br />
testing.)<br />
Standard safety rules prevail during installation of any hardware. Some are summarized<br />
below for the XMP. For more information, refer to local occupational safety regulations and<br />
the manufacturer of your motion drive.<br />
Turn Off All Power Before Installing Equipment<br />
Before installing any motion control equipment, including XMP controllers, power should be<br />
switched OFF. Unplug all power plugs from their sources of power.<br />
Define and Clear a Safety Zone!<br />
During installation and testing of motion control hardware-software, a safety zone should be<br />
defined around moving components and kept clear of personnel, hands, fingers and loose<br />
hardware. During re-powering of the system, motion control components may behave<br />
erratically due to misconnected <strong>line</strong>s, or wrongly configured software settings. Sudden and<br />
unexpected moves by components can cause injury, property damage, or even death!<br />
Under NO circumstances, should a motion system be tested or operated while personnel are<br />
within the safety zone.<br />
Additionally, beware of flying debris from unsecured hardware operating at high speeds. The<br />
use of safety shielding is highly recommended.<br />
Copyright © 2005, Motion Engineering, Inc 3 of 21 DCR 785; rev. B
<strong>eXMP</strong>-SynqNet <strong>Quick</strong> <strong>Start</strong> <strong>Guide</strong>: <strong>Windows</strong> <strong>XP</strong> <strong>Embedded</strong><br />
Introduction<br />
This <strong>Quick</strong> <strong>Start</strong> <strong>Guide</strong> explains how to connect to an <strong>eXMP</strong>-SynqNet controller running<br />
<strong>Windows</strong> <strong>XP</strong> <strong>Embedded</strong>, change its IP address, load MPI software, and configure the startup<br />
characteristics. The <strong>eXMP</strong>-SynqNet has a default run-time image pre-loaded in the<br />
compact flash memory. This image contains the <strong>Windows</strong> <strong>XP</strong> <strong>Embedded</strong> OS, several<br />
<strong>Windows</strong> utilities/applications, and the MEI/XMP device driver (MEIXMP.sys). The MPI<br />
library and utility programs are NOT available in the default compact flash image. You will<br />
need to install an MPI release on the <strong>eXMP</strong> to use the motion controller.<br />
To connect to an <strong>eXMP</strong> running <strong>Windows</strong> <strong>XP</strong> <strong>Embedded</strong> from a host PC, use Microsoft’s<br />
“Remote Desktop Connection” (Programs > Accessories > Communications). The Remote<br />
Desktop Connection application comes with <strong>Windows</strong> <strong>XP</strong>. If you are not using <strong>Windows</strong> <strong>XP</strong>,<br />
then you will need to download the Remote Desktop Connection software from Microsoft.<br />
IMPORTANT NOTE<br />
By default, the <strong>eXMP</strong> is configured at the factory with a static IP address:<br />
192.168.1.74<br />
The user can change his network settings by using Microsoft’s Remote Desktop Connection<br />
or telnet to change the <strong>eXMP</strong>’s IP address.<br />
Copyright © 2005, Motion Engineering, Inc 4 of 21 DCR 785; rev. B
<strong>eXMP</strong>-SynqNet <strong>Quick</strong> <strong>Start</strong> <strong>Guide</strong>: <strong>Windows</strong> <strong>XP</strong> <strong>Embedded</strong><br />
Host-side Remote Desktop Connection<br />
To connect to an <strong>eXMP</strong> running <strong>Windows</strong> <strong>XP</strong> <strong>Embedded</strong> from a host PC, use Microsoft’s<br />
“Remote Desktop Connection” application, which comes with <strong>Windows</strong> <strong>XP</strong>. If you are not<br />
using <strong>Windows</strong> <strong>XP</strong>, then you will need to download the Remote Desktop Connection<br />
software from Microsoft and install it on your host PC.<br />
Run the Remote Desktop Connection program (Programs > Accessories ><br />
Communications). Enter the computer name or IP address for the <strong>eXMP</strong> (default =<br />
192.168.1.74) and select Connect:<br />
After a few seconds, the Host will connect to the <strong>eXMP</strong> (Target) and the Remote Desktop will<br />
show the <strong>Windows</strong> <strong>XP</strong> desktop on the <strong>eXMP</strong>. You will need to login:<br />
User Name: Administrator<br />
Password: exmp<br />
From the Remote Desktop, you can operate the <strong>eXMP</strong>. The desktop is similar to a normal<br />
<strong>Windows</strong> <strong>XP</strong> workstation. In general, you will be able to run any <strong>Windows</strong> application on the<br />
<strong>eXMP</strong>. Applications and performance may be limited by the available compact flash memory<br />
space, memory, CPU speed, and network connection.<br />
Copyright © 2005, Motion Engineering, Inc 5 of 21 DCR 785; rev. B
<strong>eXMP</strong>-SynqNet <strong>Quick</strong> <strong>Start</strong> <strong>Guide</strong>: <strong>Windows</strong> <strong>XP</strong> <strong>Embedded</strong><br />
The Remote Desktop Connection has several Options that can be configured to optimize the<br />
feature set and performance. For example, the login can be automated under the General<br />
tab.<br />
Selecting the "Disk drives" option (Local Resources > Local devices) will allow the <strong>eXMP</strong> to<br />
access the Host’s disk drives. This feature is very useful for transferring files between the<br />
Host PC and the <strong>eXMP</strong>.<br />
Copyright © 2005, Motion Engineering, Inc 6 of 21 DCR 785; rev. B
<strong>eXMP</strong>-SynqNet <strong>Quick</strong> <strong>Start</strong> <strong>Guide</strong>: <strong>Windows</strong> <strong>XP</strong> <strong>Embedded</strong><br />
Setting Date and Time<br />
When connected to the <strong>eXMP</strong> via the Remote Desktop Connection, you can adjust the<br />
<strong>eXMP</strong>'s date and/or time. Right click on the clock located on the taskbar or go to Control<br />
Panel > Date and Time. Then configure the Date and Time properties:<br />
Copyright © 2005, Motion Engineering, Inc 7 of 21 DCR 785; rev. B
<strong>eXMP</strong>-SynqNet <strong>Quick</strong> <strong>Start</strong> <strong>Guide</strong>: <strong>Windows</strong> <strong>XP</strong> <strong>Embedded</strong><br />
Changing Network Interface Settings<br />
After connecting to the <strong>eXMP</strong> via the Remote Desktop, you can change the <strong>eXMP</strong>’s IP<br />
address. From the Control Panel select Network Connections:<br />
Copyright © 2005, Motion Engineering, Inc 8 of 21 DCR 785; rev. B
<strong>eXMP</strong>-SynqNet <strong>Quick</strong> <strong>Start</strong> <strong>Guide</strong>: <strong>Windows</strong> <strong>XP</strong> <strong>Embedded</strong><br />
Right-click on Local Area Connection icon. Go to Properties > Internet Protocol > Properties.<br />
From this window you can configure the <strong>eXMP</strong> to use a dynamic or static IP address:<br />
• Dynamic IP Address:<br />
Select "Obtain an IP address automatically."<br />
• Static IP Address:<br />
Select "Use the following IP Address."<br />
Then specify the IP address and Subnet mask.<br />
When using a Dynamic IP Address, the <strong>eXMP</strong> will be addressed by its computer name<br />
(default = EXMP).<br />
After closing the Local Area Connection Properties window, Remote Desktop will lose its<br />
connection due to the new IP address. You will need to re-launch Remote Desktop with the<br />
new <strong>eXMP</strong> IP address.<br />
Copyright © 2005, Motion Engineering, Inc 9 of 21 DCR 785; rev. B
<strong>eXMP</strong>-SynqNet <strong>Quick</strong> <strong>Start</strong> <strong>Guide</strong>: <strong>Windows</strong> <strong>XP</strong> <strong>Embedded</strong><br />
System Properties<br />
<strong>XP</strong> <strong>Embedded</strong> allows the user to change the System Properties (Control Panel -> System) to<br />
tune the OS performance. In the Advanced tab, under the Performance -> Advanced tab<br />
there is a setting for Virtual memory. DO NOT use Virtual memory. The <strong>eXMP</strong> has a<br />
compact flash (not a hard drive), which is NOT supported for Virtual memory.<br />
Copyright © 2005, Motion Engineering, Inc 10 of 21 DCR 785; rev. B
<strong>eXMP</strong>-SynqNet <strong>Quick</strong> <strong>Start</strong> <strong>Guide</strong>: <strong>Windows</strong> <strong>XP</strong> <strong>Embedded</strong><br />
Changing the Computer Name<br />
When connected to the <strong>eXMP</strong> via the Remote Desktop Connection, you can change the<br />
computer's name. If there are multiple <strong>eXMP</strong>'s on the same network with the same name<br />
using dynamic IP addresses, you will want to configure unique names for each <strong>eXMP</strong>.<br />
Follow these steps to change the computer's name:<br />
1. Go to Control Panel > System. Double-click the System icon.<br />
2. Click on the Computer Name tab and press the Change button.<br />
3. Enter the Computer Name. ex: EXMP<br />
After changing the Computer Name, you will need to restart the <strong>eXMP</strong>. To re-connect to the<br />
<strong>eXMP</strong>, you will need to launch the Remote Desktop Connection with the new Computer<br />
Name.<br />
Copyright © 2005, Motion Engineering, Inc 11 of 21 DCR 785; rev. B
<strong>eXMP</strong>-SynqNet <strong>Quick</strong> <strong>Start</strong> <strong>Guide</strong>: <strong>Windows</strong> <strong>XP</strong> <strong>Embedded</strong><br />
User Accounts<br />
The <strong>eXMP</strong> <strong>XP</strong> <strong>Embedded</strong> image (rev 1.1 and higher) has two user accounts:<br />
Automatic Login Account (default)<br />
User Name: Administrator<br />
Password: exmp<br />
Backup Account<br />
User Name: mei<br />
Password: exmp<br />
You can add more accounts using the Control Panel > User Accounts > Create New<br />
Account:<br />
Be sure to select the Computer Administrator account type. Then select the new user<br />
account and create a password for the account. <strong>XP</strong> embedded requires passwords for all<br />
accounts.<br />
WARNING! You will NOT be able to login to an account via Remote Desktop if the account<br />
does NOT have a password.<br />
The Administrator account supports automatic logon at boot time. This makes it possible to<br />
operate the <strong>eXMP</strong> as a standalone controller without having to logon from Remote Desktop.<br />
If you change the Administrator account, automatic logon will not work. But, there is a workaround<br />
by modifying the registry. For more information, see the Microsoft website.<br />
Copyright © 2005, Motion Engineering, Inc 12 of 21 DCR 785; rev. B
<strong>eXMP</strong>-SynqNet <strong>Quick</strong> <strong>Start</strong> <strong>Guide</strong>: <strong>Windows</strong> <strong>XP</strong> <strong>Embedded</strong><br />
File Transfer<br />
There are a few ways of transfering files between the Host PC and the <strong>eXMP</strong>:<br />
1. <strong>Windows</strong> <strong>XP</strong> Host<br />
Use a copy/paste via the Remote Desktop Connection. Files can be directly copied<br />
from the Host to the <strong>eXMP</strong>, or from the <strong>eXMP</strong> to the Host via the Remote Desktop<br />
Connection.<br />
2. <strong>Windows</strong> Host<br />
Use mapped local or network drives on the <strong>eXMP</strong>.<br />
• Map Local Host Drives<br />
Go to the Disk Drives configuration window in the Remote Desktop<br />
Connection. (Local Resources > Local Devices > Disk Drives)<br />
• Map Network Host Drives<br />
In My Computer, go to Tools > Map Network Drive. After the drives are<br />
mapped, files can be copied to/from the network/local drives.<br />
3. Any Host<br />
Use the <strong>eXMP</strong>’s ftp server. The <strong>eXMP</strong>’s ftp root directory is located in<br />
C:\inetpub\ftproot. From any host, you can login to the ftp server as an<br />
"Anonymous" user and no password is required. File access privileges are read,<br />
write, and delete. From a <strong>Windows</strong> host, you can login to the ftp server with<br />
Microsoft’s Internet Explorer, by specifying the ftp address (default =<br />
ftp://192.168.1.74). Files can be transferred by copy/paste or drag ‘n’ drop.<br />
Copyright © 2005, Motion Engineering, Inc 13 of 21 DCR 785; rev. B
<strong>eXMP</strong>-SynqNet <strong>Quick</strong> <strong>Start</strong> <strong>Guide</strong>: <strong>Windows</strong> <strong>XP</strong> <strong>Embedded</strong><br />
Using the <strong>eXMP</strong>-SynqNet Motion Controller<br />
You will need to install the MPI software on the <strong>eXMP</strong> to use the motion controller features.<br />
Copy the software installation file (xx.xx.xx_WinNTSetup.exe) to the <strong>eXMP</strong>. See the File<br />
Transfer section. After the installation file is copied to the <strong>eXMP</strong>, execute the installation via<br />
the Remote Desktop Connection. Although the InstallShield is slow over the Remote<br />
Desktop Connection, the software installation process is the same as an XMP-Series<br />
controller in a host PC system.<br />
For detailed installation instructions see the Software Installation Instructions. After the<br />
software is installed, you’re ready to connect SynqNet nodes and begin application<br />
development. The SynqNet-XMP <strong>Quick</strong><strong>Start</strong> <strong>Guide</strong> will show you how to connect SynqNet<br />
nodes and use Motion Console to move a motor.<br />
Using the Remote Desktop Connection will greatly simplify application development. All<br />
<strong>Windows</strong> tools (Motion Console, Motion Scope, Bode Tool, etc.) will execute on the <strong>eXMP</strong><br />
via the Remote Desktop Connection. Although the <strong>eXMP</strong> probably doesn’t have enough free<br />
compact flash space to install the MS Visual Studio environment and your application code,<br />
you will find it useful and convenient to build applications on the host and then download<br />
them directly to the <strong>eXMP</strong>.<br />
Copyright © 2005, Motion Engineering, Inc 14 of 21 DCR 785; rev. B
<strong>eXMP</strong>-SynqNet <strong>Quick</strong> <strong>Start</strong> <strong>Guide</strong>: <strong>Windows</strong> <strong>XP</strong> <strong>Embedded</strong><br />
Remote Debugging with MS Visual Studio<br />
Microsoft Visual Studio supports remote debugging. Using remote debug, you can run the<br />
debugger on the host, stepping into the executable code on the target (<strong>eXMP</strong>). To use this<br />
feature, you will need to configure MS Visual Studio to use remote debugging with the<br />
Debugger Remote Connection (Build > Debugger Remote Connection) via a TCP/IP<br />
connection:<br />
You will also need to install the remote debugger monitor on the target system (<strong>eXMP</strong>).<br />
Contact Microsoft for details. Then run the debugger monitor on the target system (<strong>eXMP</strong>)<br />
with the TCP/IP option: msvcmon –tcpip<br />
Copyright © 2005, Motion Engineering, Inc 15 of 21 DCR 785; rev. B
<strong>eXMP</strong>-SynqNet <strong>Quick</strong> <strong>Start</strong> <strong>Guide</strong>: <strong>Windows</strong> <strong>XP</strong> <strong>Embedded</strong><br />
Configure the Host connection via the Settings tab.<br />
Click the Connect button to connect to the host.<br />
And now you will be able to run the debugger remotely from your host system.<br />
Copyright © 2005, Motion Engineering, Inc 16 of 21 DCR 785; rev. B
<strong>eXMP</strong>-SynqNet <strong>Quick</strong> <strong>Start</strong> <strong>Guide</strong>: <strong>Windows</strong> <strong>XP</strong> <strong>Embedded</strong><br />
Board Support Package <strong>Guide</strong><br />
<strong>eXMP</strong> <strong>Start</strong>up<br />
After the BIOS loads, the <strong>Windows</strong> <strong>XP</strong> <strong>Embedded</strong> OS will load from the on-board compact<br />
flash memory. During the BIOS boot, messages will print to the serial console (COM1).<br />
The <strong>Windows</strong> <strong>XP</strong> <strong>Embedded</strong> image will start FTP and Telnet servers at boot time. The FTP<br />
site supports Anonymous login and no password required. The Telnet server uses the same<br />
login name and password as the <strong>Windows</strong> <strong>XP</strong> username and password.<br />
The root directory contains 3 start-up batch files:<br />
• start1.bat<br />
• start2.bat<br />
• start3.bat<br />
These files will be executed each time the OS is booted. By default, the ‘start’ batch files are<br />
empty. You can edit these batch files to launch applications or other utilities (for example,<br />
server.exe).<br />
Files on the Compact Flash (CF)<br />
The Compact Flash is mounted as drive C. <strong>Windows</strong> <strong>XP</strong> <strong>Embedded</strong> defines the directory<br />
structure, which is very similar to a standard <strong>Windows</strong> <strong>XP</strong> directory structure. There are a<br />
few directories:<br />
/inetpub<br />
Contains the FTP server and Web server administration scripts and root directories.<br />
/inetpub/ftproot<br />
Contains the files from the FTP site. There is also a shortcut on the desktop.<br />
/batchfiles<br />
Contains the Devcon.exe and driverswap batch file. These tools are useful for switching<br />
between MPI versions that require different device driver versions.<br />
Copyright © 2005, Motion Engineering, Inc 17 of 21 DCR 785; rev. B
<strong>eXMP</strong>-SynqNet <strong>Quick</strong> <strong>Start</strong> <strong>Guide</strong>: <strong>Windows</strong> <strong>XP</strong> <strong>Embedded</strong><br />
Host-side Console Connection<br />
The <strong>eXMP</strong> supports console output on Com1. During the <strong>eXMP</strong> boot, the BIOS information is directed to<br />
the console. After the BIOS boot is complete, the console is no longer active. However, the console is<br />
useful for debugging purposes, when a TCP/IP connection is not available.<br />
1. Power down Controller.<br />
2. Open HyperTerminal and configure a new connection. Choose a name and icon for this<br />
connection.<br />
3. Console mode is supported on the <strong>eXMP</strong> to gain access to the BIOS information. <strong>On</strong>ce<br />
<strong>Windows</strong> <strong>XP</strong> <strong>Embedded</strong> loads, the console is no longer active. A host system must be attached<br />
to the Com1 / Console port on the <strong>eXMP</strong> via a NULL modem serial cable having RIN (pin 9) and<br />
DTR (pin 4) shorted together on the connector.<br />
The short between these two pins indicates the presence of a valid console device and is<br />
detected during system initialization by the <strong>eXMP</strong>, thereby enabling the Console output to<br />
COM1. This can be done with either an in<strong>line</strong> adapter or modifications to the Null Modem cable<br />
itself.<br />
<strong>On</strong>e example of an in<strong>line</strong> adapter is the MEI C001-0034 (Cable, Serial, <strong>eXMP</strong>, DE9).<br />
Copyright © 2005, Motion Engineering, Inc 18 of 21 DCR 785; rev. B
<strong>eXMP</strong>-SynqNet <strong>Quick</strong> <strong>Start</strong> <strong>Guide</strong>: <strong>Windows</strong> <strong>XP</strong> <strong>Embedded</strong><br />
While MEI does not stock/sell this adapter, MEI can provide customers with a detailed cable<br />
drawing to assist in the manufacturing of their own.<br />
4. After pressing OK, switch “Connect using” to the appropriate COM port. All other fields should<br />
be grayed out after selections have been made.<br />
Copyright © 2005, Motion Engineering, Inc 19 of 21 DCR 785; rev. B
<strong>eXMP</strong>-SynqNet <strong>Quick</strong> <strong>Start</strong> <strong>Guide</strong>: <strong>Windows</strong> <strong>XP</strong> <strong>Embedded</strong><br />
5. Configure the connection as follows:<br />
• Bits per second: 9600<br />
• Data bits: 8<br />
• Parity: None<br />
• Stop bits: 2<br />
• Flow control: None<br />
Click OK. The session is now active. Upon exit, save this session for later use.<br />
6. Power up the <strong>eXMP</strong>-SynqNet. The following BIOS information will appear:<br />
Copyright © 2005, Motion Engineering, Inc 20 of 21 DCR 785; rev. B
<strong>eXMP</strong>-SynqNet <strong>Quick</strong> <strong>Start</strong> <strong>Guide</strong>: <strong>Windows</strong> <strong>XP</strong> <strong>Embedded</strong><br />
<strong>XP</strong> <strong>Embedded</strong> Revision History<br />
Rev 1.1<br />
Add backup account<br />
<strong>XP</strong> embedded requires passwords for account access via Remote Desktop. Ironically, it<br />
does allow users to set the password to NULL (no password), which would make future<br />
account login via Remote Desktop impossible. A back-up user account was added to provide<br />
a way to recover:<br />
User Name: mei<br />
Password: exmp<br />
Add version to <strong>XP</strong>e image<br />
The <strong>XP</strong> embedded image version is located in the file WERUNTIME.INI (root directory). To<br />
read the version, open WERUNTIME.INI with Notepad and find the keyword<br />
RunTimeOEMRev.<br />
Default automatic logon<br />
In the previous image, the default automatic logon was:<br />
User Name: EXMP<br />
Password:<br />
The default automatic logon has been changed to:<br />
User Name: Administrator<br />
Password: exmp<br />
Send IP address information to COM1 (console) at boot<br />
The start1.bat file has been modified to call ipinfo.bat, which will send IP configuration<br />
information to COM1 (console). This is useful for determining the <strong>eXMP</strong>’s IP address, if the<br />
computer name or IP address is unknown. Please DO NOT remove this call from the batch<br />
file.<br />
Rev 1.0 – Initial Release<br />
Copyright © 2005, Motion Engineering, Inc 21 of 21 DCR 785; rev. B