Pc4200 / pc4400 / pc4800 / pc6600 owner's manual - Precision Power
Pc4200 / pc4400 / pc4800 / pc6600 owner's manual - Precision Power
Pc4200 / pc4400 / pc4800 / pc6600 owner's manual - Precision Power

You also want an ePaper? Increase the reach of your titles
YUMPU automatically turns print PDFs into web optimized ePapers that Google loves.
POWERCLASS <br />
PC4200 / PC4400 / PC4800 / PC6600 OWNER’S MANUAL<br />
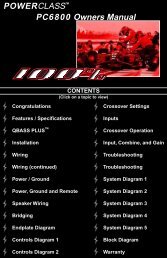
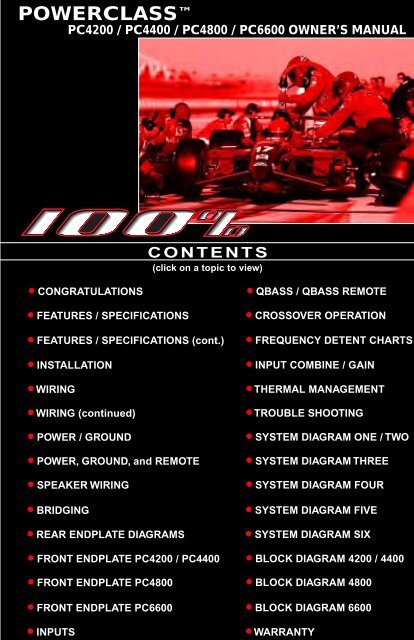
CONTENTS<br />
(click on a topic to view)<br />
• CONGRATULATIONS<br />
• FEATURES / SPECIFICATIONS<br />
• FEATURES / SPECIFICATIONS (cont.)<br />
• INSTALLATION<br />
• WIRING<br />
• WIRING (continued)<br />
• POWER / GROUND<br />
• POWER, GROUND, and REMOTE<br />
• SPEAKER WIRING<br />
• BRIDGING<br />
• QBASS / QBASS REMOTE<br />
• CROSSOVER OPERATION<br />
• FREQUENCY DETENT CHARTS<br />
• INPUT COMBINE / GAIN<br />
• THERMAL MANAGEMENT<br />
• TROUBLE SHOOTING<br />
• SYSTEM DIAGRAM ONE / TWO<br />
• SYSTEM DIAGRAM THREE<br />
• SYSTEM DIAGRAM FOUR<br />
• SYSTEM DIAGRAM FIVE<br />
• REAR ENDPLATE DIAGRAMS<br />
• FRONT ENDPLATE PC4200 / PC4400<br />
• FRONT ENDPLATE PC4800<br />
• SYSTEM DIAGRAM SIX<br />
• BLOCK DIAGRAM 4200 / 4400<br />
• BLOCK DIAGRAM 4800<br />
• FRONT ENDPLATE PC6600 • BLOCK DIAGRAM 6600<br />
• INPUTS<br />
• WARRANTY
Congratulations and thank you.....<br />
for choosing <strong>Precision</strong><strong>Power</strong> audio epuipment. At <strong>Precision</strong><strong>Power</strong> we<br />
proudly design, engineer and manufacture audio products at our facility in<br />
Phoenix, Arizona. Our award winning engineering team utilizes innovative<br />
technology to consistently deliver Absolutely State of the Art TM<br />
performance,<br />
sound quality, reliability, and value. This <strong>Precision</strong><strong>Power</strong> product reflects<br />
our commitment to offer you unparalleled versatility and quality for years of<br />
dependable service and listening enjoyment.<br />
Service<br />
Do not attempt to service <strong>Precision</strong><strong>Power</strong> products yourself.<br />
Performing exploratory surgery on your audio equipment yourself<br />
will void the warranty. Many parts of your <strong>Precision</strong><strong>Power</strong> gear<br />
are custom built to our specifications. Our factory parts are not<br />
made available to anyone else nor are they for sale. Our goal<br />
is to make sure that your <strong>Precision</strong><strong>Power</strong> product will always<br />
sound as good as the day it was purchased. Contact your<br />
authorized <strong>Precision</strong><strong>Power</strong> dealer about obtaining any warranty<br />
service through <strong>Precision</strong><strong>Power</strong>.(See Warranty insde back cover)<br />
FOR YOUR RECORDS:<br />
M o d e l<br />
Serial Number<br />
Purchase Date<br />
Caution!<br />
The extended use of a high powered audio system may<br />
result in hearing loss or damage. While <strong>Precision</strong><strong>Power</strong><br />
systems are capable of "Concert Level" volumes with<br />
incredible accuracy, they are also designed for you to<br />
enjoy at more reasonable levels all of the sonic subtleties<br />
created by musicians. Please observe all local sound<br />
ordinances.<br />
BACK TO CONTENTS
FEATURES / SPECIFICATIONS<br />
Your new amplifier incorporates some or all of the following features:<br />
Adaptive MOSFET Switching <strong>Power</strong> Supply<br />
Fully Complementary Darlington Output Stage<br />
AP III Protection Circuitry (PC4200, PC4400, PC6800)<br />
AM IV Protection Circuitry (PC4800)<br />
QBASS Bass Boost (PC4200, PC4400)<br />
QBASS PLUS (PC4800, PC6600)<br />
QBASS REMOTE Compatible (PC4800, PC6600)<br />
<strong>Power</strong>Lock Speaker and <strong>Power</strong> Wire Connectors<br />
Detented, Variable 3-way Internal Crossover<br />
Non-Fading Sub Channel<br />
Balanced Differential Input Stage<br />
High Voltage Input Capability with Input Attenuation Switch<br />
Gold Plated RCA Input and Output Connectors<br />
Mixed Mono/Stereo Operation<br />
3 Year Warranty when installed by an Authorized <strong>Precision</strong><strong>Power</strong> Dealer<br />
Completely Designed And Handcrafted In The USA<br />
Specifications<br />
<strong>Power</strong> Bandwidth: 4.5 Hz - 100 kHz<br />
Total Harmonic Distortion: 0.02 %<br />
Input Topology:<br />
Differential<br />
Input Sensitivity:<br />
150mv - 12 volts RMS<br />
Input Impedance:<br />
10k Ohms<br />
Load Impedance (stereo)<br />
2 - 8 Ohms<br />
Load Impedance (bridge)<br />
4 - 8 Ohms<br />
Supply Voltage<br />
11 - 15 volts<br />
Damping Factor >500<br />
Slew Rate<br />
>50 V/µS<br />
Idle Current:<br />
PC4200 / PC4400 - 1.5 Amps<br />
PC4800 - 3.0 Amps<br />
PC6600 - 2.0 Amps<br />
Continuous Output <strong>Power</strong><br />
PC4200<br />
PC6600<br />
25 WRMS x 4 @ 4Ω per channel 50 WRMS x 6 @ 4Ω per channel<br />
50 WRMS x 4 @ 2Ω per channel 100 WRMS x 6 @ 2Ω per channel<br />
100 WRMS x 2 @ 4Ω bridged 200 WRMS x 3 @ 4Ω bridged<br />
PC4400 PC4800<br />
50 WRMS x 4 @ 4Ω per channel 100 WRMS x 4 @ 4Ω per channel<br />
100 WRMS x 4 @ 2Ω per channel 200 WRMS x 4 @ 2Ω per channel<br />
200 WRMS x 2 @ 4Ω bridged 400 WRMS x 2 @ 4Ω bridged<br />
1<br />
BACK TO CONTENTS
FEATURES / SPECIFICATIONS<br />
QBASS and QBASS PLUS Specifications<br />
QBASS (PC 4200, PC4400, and PC 6600)<br />
Up to 12dB of Boost centered at 40Hz, with a Q-Factor of 2.<br />
QBASS PLUS (PC 4800)<br />
Up to 18dB of Boost with selectable center frequency at 30Hz, 36Hz,<br />
44Hz or 60Hz. Selectable Q of 2 or 4. Optional remote mounted<br />
Boost Control.<br />
Optional QBASS REMOTE (PC 4800)<br />
This boost control can be mounted<br />
in the dash and will supersede the<br />
boost control on the amplifier endplate.<br />
Optional QPORT expansion module<br />
allows one QBASS REMOTE to<br />
operate multiple amplifiers. Each<br />
QPORT has outputs for four amplifiers<br />
as well as another QPORT for greater<br />
expansion. See your authorized <strong>Precision</strong><strong>Power</strong><br />
0<br />
QBASS REMOTE <br />
QBASS<br />
+18<br />
<br />
Designed and handcrafted in the USA<br />
dealer for more information!<br />
Crossover Specifications<br />
PC4200 / PC4400<br />
Front - 12dB/Octave, Detented High Pass 20-5kHz<br />
Rear - 12dB/Octave, Selectable Detented High or Low Pass 20-5kHz<br />
RCA Out-Summed Mono 24dB/Octave, Linkwitz-Riley Low Pass, 90Hz<br />
QBASS on Rear Channel<br />
PC4800<br />
Front - 12dB/Octave, Detented High Pass 20-5kHz<br />
Rear - Choice of 12dB/Octave Detented High Pass 20-5kHz, or<br />
Summed Mono 24dB/Octave, Linkwitz-Riley Detented Low Pass 44-315Hz<br />
RCA Outputs will be the opposite of your Rear Crossover choice.<br />
QBASS PLUS on Rear Channel<br />
PC6600<br />
Front - 12dB/Octave, Detented High Pass 20-5kHz<br />
Rear - 12dB/Octave, Detented High Pass 20-5kHz<br />
Sub-Summed Stereo 24dB/Octave, Linkwitz-Riley Low Pass at 90Hz<br />
QBASS PLUS on Sub Channel.<br />
Dimensions<br />
PC4200<br />
Length - 12.22"<br />
Height - 2.25"<br />
Width - 8.9"<br />
PC4400<br />
Length - 13.72"<br />
Height - 2.25"<br />
Width - 8.9"<br />
PC6600<br />
Length - 19.72"<br />
Height - 2.25"<br />
Width - 8.9"<br />
PC4800<br />
Length - 23.72"<br />
Height - 2.25"<br />
Width - 8.9"<br />
2<br />
BACK TO CONTENTS
INSTALLATION<br />
Tools/Parts needed for Installation (not supplied)<br />
Small flat blade screwdriver<br />
Phillips Screwdriver (#2 or medium sized)<br />
Wire cutters<br />
Wire strippers<br />
4 - #6 round head screws, and 1 - #8 sheet metal screw<br />
(or nut, bolt, and star washer)<br />
2 - Ring connectors (large enough to accommodate your method of grounding)<br />
In-line fuse or circuit breaker - see fuse chart below<br />
<strong>Power</strong> and ground wire - see <strong>Power</strong> Wire Calculator on page 4<br />
Speaker wire - 16 gauge or larger<br />
Grommets (sized to work with the power wire you plan to use<br />
in your installation)<br />
Tube of silicone sealant<br />
Fuse requirements<br />
Amplifier<br />
PC4200<br />
PC4400<br />
PC4800<br />
PC6600<br />
Maximum Fuse Rating<br />
40 Amp<br />
60 Amp<br />
80 Amp<br />
80 Amp<br />
You will need to install an in-line fuse or circuit breaker in the power<br />
wire within 18" of the battery. This fuse or circuit breaker is to protect<br />
your vehicle from fire in case the power wire shorts to the vehicle<br />
body. If you are only using one amplifier, use the fuse rating indicated<br />
in this chart. If you are using more than one amplifier, add up the fuse<br />
ratings for all the amplifiers. This sum is the rating for your main fuse or<br />
circuit breaker. Use a power distribution block or fuse near your amplifiers<br />
with the appropriate fuse for each individual power wire.<br />
3<br />
BACK TO CONTENTS
WIRING<br />
The following is a basic formula to be used as a guide to determine current<br />
draw. A 50% amplifier efficiency rating is used as an average. Your new<br />
POWERCLASS amplifier is more efficient, other amplifiers will probably<br />
be less. This formula is to be used as a guideline. Using wire of a larger<br />
gauge can only improve the current transfer of your system. Do not use<br />
smaller gauge wire.<br />
Total RMS output x 2 = Total Input Wattage<br />
Total Input Wattage = Current Draw (in Amps)<br />
Supply Voltage<br />
Example: A POWERCLASS 4400 amplifier has four channels at 50 watts<br />
RMS per channel into 4 Ohms (50 x 4 = 200). You would use the<br />
formula in the following way:<br />
200W x 2 = 400W<br />
400W = 33.3A Total current draw.<br />
12V<br />
If the same amplifier is driven into a 2 Ohm stereo or 4 Ohm mono load,<br />
double it's 4 Ohm RMS rating. All POWERCLASS amplifiers will effectively<br />
double their power at this load.<br />
100W x 4 x 2 = 800W<br />
800W = 66.6A Total current draw.<br />
12V<br />
If you are using more than one amplifier, add up the total current draw<br />
for all of them and choose the appropriate gauge based on the grand total.<br />
<strong>Power</strong> Wire Calculator<br />
Recommended MINIMUM Gauge<br />
Total Current Draw<br />
Length Of Wire To Be Run<br />
( in Amps) Up to 4ft. 4 to 7ft. 7 to 10ft. 10 to 13ft. 13 to 16ft. 16 to 19ft. 19 to 22ft. 22 to 28ft.<br />
0-20 14 12 12 10 10 8 8 8<br />
20-35 12 10 8 8 6 6 6 4<br />
35-50 10 8 8 6 6 4 4 4<br />
50-65 8 8 6 4 4 4 4 2<br />
65-85 6 6 4 4 2 2 2 0<br />
85-105 6 6 4 2 2 2 2 0<br />
105-125 4 4 4 2 2 0 0 0<br />
125-150 2 2 2 2 0 0 0 00<br />
(<br />
NOTE: The ground wire should be the same gauge as the power wire.<br />
4<br />
BACK TO CONTENTS
eject<br />
1 2 3 4<br />
5 6 7 8 Trk 1<br />
BASS TREBLE<br />
BALANCE<br />
TRACK<br />
PPI MAR KET ING DPT<br />
VOLUME<br />
LEFT<br />
RIGHT FOWARD REVERSE<br />
WIRING<br />
Before beginning, disconnect the negative (-) terminal of the<br />
battery prior to working on the positive (+) terminal to prevent<br />
a short to ground. This is important, unless you want to spend<br />
the rest of your life with a nickname like "Sparky," or "Smokey."<br />
Reconnect the negative terminal only after all connections have<br />
been made.<br />
Factory Ground wire may<br />
need to be replaced if it is<br />
frayed or broken.<br />
Positive<br />
Battery<br />
Terminal<br />
Fuse must be<br />
installed within<br />
18" of battery<br />
Run signal cables (RCAs)<br />
and remote turn-on lead<br />
down the opposite side of<br />
the vehicle of the power<br />
wire to avoid radiated noise.<br />
Drill a hole in the firewall<br />
and use a rubber grommet<br />
to keep wire from shorting.<br />
Avoid sharp edges that<br />
could chafe through the<br />
insulation.<br />
Run the cables under the<br />
carpet near the side of the<br />
vehicle. Be careful not to<br />
drill or screw into the wires<br />
when you replace the trim.<br />
For systems over 300 watts,<br />
add a ground cable from the<br />
amp to the battery<br />
(see page 6).<br />
Firmly attach Amp<br />
Ground Wire to solid<br />
metal (see page 6).<br />
Warning!<br />
Fuse must be installed within 18" of battery<br />
5<br />
BACK TO CONTENTS
POWER / GROUND<br />
Grounding<br />
Locate an area near the amplifier(s) that is metal and clean an area<br />
about the size of a quarter to bare metal. Inspect the area around<br />
and underneath to be sure you won't drill into wires, brake or fuel lines.<br />
Drill a pilot hole in the middle of this area. Terminate the ground wire<br />
with a ring connector and attach it to the bare metal using a #8 sheet<br />
metal screw and washer or preferably, a bolt, nut and a star washer<br />
(not supplied). We suggest crimping and soldering this connection.<br />
After the connection is complete, coat the area (on both sides) with<br />
silicone or some similar material to prevent rust from developing on<br />
the bare metal.<br />
If your grand total current draw is over 50 amps (or total output<br />
power is over 300 watts), you should run a ground wire beside<br />
your power wire from the battery to the amplifier(s) in addition<br />
to your regular ground wire. Keep the ground and power wires<br />
as close together as possible, and use the same gauge wire for both.<br />
This will ensure that you have a good ground path, and may eliminate<br />
such potential problems as engine noise and overheated amplifiers.<br />
Charging System Considerations<br />
If your grand total current draw is over 100 amps (or total output<br />
power is over 600 watts), you are probably exceeding the capability<br />
of your charging system. Dimming lights and fluctuating voltage are<br />
solid indicators that you need to upgrade your alternator, battery<br />
(or go to multiple batteries), or both.<br />
Keep in mind that your amplifiers simply convert electrical energy<br />
to acoustical energy, and any electrical deficiency will compromise<br />
the performance of your sound system.<br />
For more information about charging system upgrades, see your<br />
local authorized <strong>Precision</strong><strong>Power</strong> Dealer or call the <strong>Precision</strong><strong>Power</strong><br />
technical support office at 1-800-62POWER.<br />
6<br />
BACK TO CONTENTS
POWER / GROUND and REMOTE<br />
Once you have run both the power and ground wires, it's time<br />
to connect the cables to the amplifier. Cut off excess wire and,<br />
using wire strippers, strip the ends of the power and ground<br />
cables approximately 1/4 inch. Locate the <strong>Power</strong>Lock power<br />
and ground connector (supplied). With a small flat bladed screw<br />
driver, loosen the screws before attempting to insert the cables.<br />
Insert the wires into the appropriate hole, and tighten the<br />
screws. Once the wires are secure, the <strong>Power</strong>Lock may be<br />
plugged into the amplifier. The <strong>Power</strong>/Ground <strong>Power</strong>Lock will<br />
accommodate 6 gauge wire for the PC4200 / PC4400, and 4 gauge<br />
wire for the PC4800 and PC6600.<br />
<strong>Power</strong>/Ground <strong>Power</strong>Lock<br />
<strong>Power</strong> wires<br />
Fastening screws<br />
Connect to Amplifier<br />
Remote turn-on<br />
Your head unit should have a lead marked 'remote' or 'power<br />
antenna' which will be used to turn on your amplifier. Extend<br />
this lead through your vehicle along with your RCA signal wires.<br />
Strip 1/4 inch of insulation off the wire and insert the end into<br />
the center terminal of the 5-pin speaker/remote <strong>Power</strong>Lock.<br />
7<br />
BACK TO CONTENTS
SPEAKER WIRING<br />
Using 16 gauge or larger, run the speaker wires from the<br />
amplifier location through the vehicle to the speakers. Observe<br />
the same precautions for routing these wires that you followed<br />
for running the power and remote turn-on wires. Cut off excess<br />
and, using wire strippers, strip 1/4 inch of insulation. Locate<br />
the speaker/remote turn-on <strong>Power</strong>Lock connector. Loosen the<br />
four outer screws on the underside of the connector and insert<br />
the front (PC4200, PC4400 and PC4800) or sub (PC6600)<br />
speaker leads into the end. Check to be sure you've maintained<br />
proper polarity before securing each wire.<br />
Speaker <strong>Power</strong>Lock Connector<br />
Right Speaker negative<br />
Right Speaker positive<br />
Remote turn on<br />
Left Speaker positive<br />
Left Speaker negative<br />
Speaker <strong>Power</strong>Lock Connector<br />
Right Speaker negative<br />
Right Speaker positive<br />
Left Speaker positive<br />
Left Speaker negative<br />
Speaker/Remote <strong>Power</strong>Lock<br />
For the rear channels, locate the four terminal speaker<br />
<strong>Power</strong>Lock connector. (For PC650, the front channel also uses<br />
a four terminal <strong>Power</strong>Lock connector.) On 4 and 6 channel<br />
<strong>Power</strong>Class Amplifiers, all speaker <strong>Power</strong>Locks plug into the<br />
amplifier with the screws facing up. Loosen the screws on the<br />
top of the blocks and insert the stripped ends of the speaker<br />
wires into the end. Double check polarity, secure each wire by<br />
tightening the screws, and plug the <strong>Power</strong>Lock connector into<br />
the amplifier with the screws on top.<br />
8<br />
BACK TO CONTENTS
BRIDGING<br />
Bridging<br />
Any or all pairs of channels (front, rear or sub) on your POWERCLASS <br />
multi channel amplifier are capable of being bridged into a 4 ohm mono<br />
output without switches or bridging modules. This feature permits<br />
the creation of a mono channel for a subwoofer or center channel.<br />
Deriving the mono channel is accomplished by using the left channel<br />
positive wire of the pair as the positive speaker wire and the right<br />
channel negative wire as the negative speaker wire. You should always<br />
be working with the wires of a single <strong>Power</strong>Lock speaker connector<br />
when bridging a pair of channels.<br />
NOTE: It is important that a minimum 4 ohm impedance is observed.<br />
If the impedance drops significantly below 4 ohms while the amplifier<br />
is wired in the bridged configuration, the amplifier's protection circuitry<br />
may engage.<br />
Mixed Mono Output<br />
The ability to run stereo speakers while simultaneously running<br />
a mono output from the same channel pair is accomplished by<br />
running the stereo speakers normally and tapping into the appropriate<br />
wires for the "mixed mono" channel (left channel positive for the<br />
positive speaker wire and right channel negative for the negative<br />
speaker wire). Total speaker impedance should be no lower than<br />
2 ohms on the stereo channels and 4 ohms on the mono channel.<br />
NOTE: Passive crossovers must be used for "mixed mono"<br />
operation. Choose a low pass crossover around 100Hz for your<br />
subwoofer, then choose a high pass crossover for your stereo<br />
channels. The high pass crossover must be at the same or slightly<br />
higher frequency than the low pass crossover to maintain the<br />
correct impedance. See your <strong>Precision</strong><strong>Power</strong> dealer or call<br />
1-800-62POWER for more information about passive crossovers.<br />
9<br />
BACK TO CONTENTS
ENDPLATE DIAGRAMS<br />
POWER / GROUND / QBASS <br />
PC4200<br />
POWER<br />
Designed and Handcrafted in the U.S.A.<br />
+<br />
-<br />
2 1 4<br />
PC4400<br />
POWER / MUTE<br />
Designed and Handcrafted in the U.S.A.<br />
+<br />
-<br />
2 1 3<br />
PC4800<br />
POWER / MUTE<br />
QBASS<br />
Designed and Handcrafted in the U.S.A.<br />
0 +18 QBASS<br />
REMOTE<br />
+<br />
-<br />
5 6<br />
7<br />
2<br />
1 3<br />
PC6600<br />
POWER / MUTE<br />
QBASS<br />
Designed and Handcrafted in the U.S.A.<br />
0 +18 QBASS<br />
REMOTE<br />
+<br />
-<br />
5 6<br />
2 1 3<br />
1. POWER / GROUND <strong>Power</strong>Lock<br />
After you have securely connected your power and ground wires, plug in the<br />
<strong>Power</strong> / Ground <strong>Power</strong>Lock connector here.<br />
2. COOLING VENTS (see page 18).<br />
3. POWER / MUTE indicator<br />
A green light indicates that the amplifier is on, a red light indicates that the amplifiers<br />
muting circuits are engaged.<br />
4. POWER indicator<br />
A green light indicates that the ampilfier is on.<br />
5. QBASS Level<br />
Turn this control clockwise to boost the QBASS PLUS circuit by up to 18dB.<br />
6. QBASS REMOTE plug in<br />
Plug in the data cable from the optional QBASS REMOTE dash mount level control here.<br />
(This will bypass the amplifier's on board QBASS control)<br />
7. FORCED AIR INTAKE VENTS (see page 18 and 19).<br />
10<br />
BACK TO CONTENTS
ENDPLATE DIAGRAM<br />
4200 / 4400<br />
1. REAR HP/LP switch<br />
This switch is used to select whether the amplifier will provide a high<br />
pass (switch in) or low pass (switch out) signal to the rear speakers. (see page 16).<br />
2. REAR GAIN<br />
Use this control to match the output level of the head unit to the rear channel of<br />
the amplifier (see page 18).<br />
3. QBASS Control<br />
Rotate clockwise to boost up to 12dB at 40Hz (see page 15).<br />
4. FRONT GAIN<br />
Use this control to match the output level of the head unit to the front channel of<br />
the amplifier (see page 18).<br />
5. COOLING VENTS (see page 18).<br />
6. SPEAKER/REMOTE CONNECTOR<br />
After connecting remote and speaker wires, plug in the <strong>Power</strong>Lock<br />
connectors here (see pages 7-9).<br />
1<br />
2 3 4 5 6<br />
REAR<br />
HP/LP<br />
REAR<br />
GAIN<br />
QBASS<br />
FRONT<br />
GAIN<br />
REAR<br />
L - L + R + R -<br />
FRONT<br />
L - L + R E M R + R -<br />
L REAR INPUTS R<br />
-12dB COMBINE<br />
FRONT INPUTS L / R<br />
REAR XOVER FREQ.<br />
FRONT HP FREQ.<br />
OUTPUTS L / R<br />
7 8 9 10 11 12 13<br />
7. REAR XOVER FREQ.<br />
Use this control to adjust the rear crossover frequency from 20Hz to 5kHz (see page 16).<br />
8. REAR INPUTS<br />
Plug in the rear RCA leads from your head unit here (see page 14).<br />
9. -12dB<br />
For use with high level inputs (4V up to 12V). Push this switch<br />
in to attenuate the input by 12dB (see page 14).<br />
10. COMBINE<br />
Push this switch in to connect the rear channels to the front inputs (see page 18).<br />
11. FRONT XOVER FREQ.<br />
Use this control to adjust the front crossover frequency from 20Hz to 5kHz (see page 16).<br />
12. FRONT INPUTS<br />
Plug in the front RCA leads from your head unit here (see page 14).<br />
13. L/R OUTPUTS<br />
Left and Right RCA outputs provide summed mono low pass signal to another amplifier.<br />
11<br />
BACK TO CONTENTS
ENDPLATE DIAGRAM<br />
4800<br />
1. REAR LP FREQ.<br />
Use this control to adjust the rear low pass crossover frequency from 44Hz to 315Hz<br />
(see page 16).<br />
2. REAR GAIN<br />
Use this control to match the output level of the head unit to the rear channel of<br />
the amplifier (see page 18).<br />
3. FRONT GAIN<br />
Use this control to match the output level of the head unit to the front channel of<br />
the amplifier (see page 18).<br />
4. QBASS 1<br />
Use this switch with the QBASS 2 to program the QBASS PLUS circuit. (see page 15).<br />
5. QBASS 2<br />
Use this switch with the QBASS 1 to program the QBASS PLUS circuit. (see page 15).<br />
6. Q SELECT 4/2<br />
Push this button in for a Q setting of 4 and out for a setting of 2.<br />
7. FORCED AIR EXHAUST VENTS (see page 18 and 19).<br />
8. SPEAKER/REMOTE CONNECTOR<br />
After connecting remote and speaker wires, plug in the <strong>Power</strong>Lock<br />
connectors here (see pages 7-9).<br />
1 2 3 4 5 6 7 8<br />
REAR LP FREQ.<br />
REAR<br />
GAIN<br />
FRONT<br />
GAIN<br />
QBASS<br />
1 2<br />
Q SELECT<br />
4/2<br />
REAR<br />
L - L + R + R -<br />
FRONT<br />
L - L + R E M R + R -<br />
REAR HP/LP<br />
L REAR INPUTS R<br />
-12dB COMBINE<br />
REAR HP FREQ.<br />
FRONT HP FREQ.<br />
FRONT INPUT L / R<br />
OUTPUT L / R<br />
9 10 11 12 13 14 15 16 17<br />
9. REAR HP/LP switch<br />
This switch is used to select whether the amplifier will provide a high<br />
pass (switch IN) or mono low pass (switch OUT) signal to the rear speakers. (see page 16).<br />
10. REAR HP FREQ.<br />
Use this to adjust the rear high pass crossover frequency from 20Hz to 5kHz (see page 16).<br />
11. REAR INPUTS<br />
Plug in the rear RCA leads from your head unit here (see page 14).<br />
12. -12dB<br />
For use with high level inputs (4V up to 12V). Push this switch<br />
in to attenuate the input by 12dB (see page 14).<br />
13. COMBINE<br />
Push this switch in to connect the rear channels to the front inputs (see page 18).<br />
14. FRONT HP FREQ.<br />
Use this to adjust the rear high pass crossover frequency from 20Hz to 5kHz (see page 16).<br />
15. FRONT INPUTS<br />
Plug in the front RCA leads from your head unit here (see page 14).<br />
16. OUTPUTS<br />
Left and Right RCA outputs provide high pass or mono low pass signal to another amplifier.<br />
17. FORCED AIR INTAKE VENTS (see page 18 and 19).<br />
12<br />
BACK TO CONTENTS
ENDPLATE DIAGRAM<br />
6600<br />
1. FRONT GAIN<br />
Use this control to match the output level of the head unit to the front channel of<br />
the amplifier (see page 18).<br />
2. REAR GAIN<br />
Use this control to match the output level of the head unit to the rear channel of<br />
the amplifier (see page 18).<br />
3. SUB GAIN<br />
Use this control to match the output level of the head unit to the sub channel of<br />
the amplifier (see page 18).<br />
4. COOLING VENTS (see page 18).<br />
5. SPEAKER/REMOTE CONNECTOR<br />
After connecting remote and speaker wires, plug in the <strong>Power</strong>Lock<br />
connectors here with the screws facing up (see pages 7-9).<br />
1 2 3 4 5<br />
FRONT<br />
GAIN<br />
REAR<br />
GAIN<br />
SUB<br />
GAIN<br />
FRONT<br />
L - L + R + R -<br />
REAR<br />
L - L + R + R -<br />
SUB WOOFER<br />
L - L + R E M R + R -<br />
COMBINE<br />
Q SELECT 4/2<br />
1 2<br />
QBASS<br />
XOVER FREQ.<br />
FRONT REAR<br />
-12dB<br />
FRONT INPUTS<br />
L / R<br />
REAR INPUTS<br />
L / R<br />
6 7 8 9 10 11 12 13 14<br />
6. COMBINE<br />
Push this switch in to connect the rear channels to the front inputs (see page 18).<br />
7. Q SELECT 4/2<br />
Push this button in for a Q setting of 4 and out for a setting of 2 (see page 15).<br />
8. QBASS 1<br />
Use this switch with the QBASS 2 to program the QBASS PLUS circuit. (see page 15).<br />
9. QBASS 2<br />
Use this switch with the QBASS 1 to program the QBASS PLUS circuit. (see page 15).<br />
10. FRONT XOVER FREQ.<br />
Use this control to adjust the front crossover frequency from 20Hz to 5kHz (see page 16).<br />
11. REAR XOVER FREQ.<br />
Use this control to adjust the rear crossover frequency from 20Hz to 5kHz (see page 16).<br />
12. -12dB<br />
For use with high level inputs (4V up to 12V). Push this switch<br />
in to attenuate the input by 12dB (see page 14).<br />
13. FRONT INPUTS<br />
Plug in the front RCA leads from your head unit here (see page 14).<br />
14. REAR INPUTS<br />
Plug in the rear RCA leads from your head unit here (see page 14).<br />
13<br />
BACK TO CONTENTS
eject<br />
VOLUME<br />
BASS TREBLE<br />
BALANCE<br />
LEFT<br />
RIGHT<br />
1 2 3 4<br />
5 6 7 8<br />
TRACK<br />
FOWARD REVERSE<br />
PPI MAR KET ING DPT<br />
INPUTS<br />
There are two sets of RCA INPUTS on the front end of your amplifier.<br />
Plug the RCA cables from your head unit into the appropriate set of<br />
inputs, front and rear. If your head unit doesn't have RCA outputs<br />
don't worry. Simply add a set of RCA plugs (available at your dealer)<br />
to your front or rear set of speaker leads (see drawing below), plug<br />
them into the input jacks, and push in the -12dB switch.<br />
SOURCE Headunit<br />
Trk 1<br />
(+) Positive<br />
LEFT input<br />
(-) Negative<br />
(+) Positive<br />
(-) Negative<br />
RIGHT input<br />
WARNING: If you are using a source unit with bridged high powered (or<br />
"floating ground") speaker outputs, a suitable high to low level adapter<br />
must be used. If you are unsure about your head unit see your local<br />
<strong>Precision</strong><strong>Power</strong> dealer or call 1-800-62<strong>Power</strong>.<br />
Balanced Differential Inputs<br />
This circuitry reduces noise radiated into your signal cables by up to<br />
40dB. This is equivalent to a noise reduction of approximately one<br />
hundred times what the noise level would be without this circuitry.<br />
It provides all the benefits of a true 'balanced' line without the need<br />
of any special cables (see diagram below). This type of input works<br />
with any conventional RCA cable.<br />
music noise<br />
(+)<br />
signal and ground ( )<br />
( + =)<br />
music noise music<br />
and noise<br />
music<br />
noise<br />
(+)<br />
( - = 0 )<br />
noise ( )<br />
noise cancels<br />
music<br />
NO noise<br />
14<br />
BACK TO CONTENTS
QBASS and QBASS REMOTE <br />
QBASS <br />
For extra BOOM from your system, we've developed the<br />
QBASS bass control circuit. The QBASS control is located<br />
to the left of the speaker outputs, and allows you to add up to<br />
12dB of boost centered at 40Hz by rotating the control clockwise.<br />
QBASS <br />
QBASS Is a standard feature on the PC4200/PC4400.<br />
QBASS PLUS <br />
On PC4800 and PC6600 amplifiers, we've taken bass control<br />
to a higher level with QBASS PLUS . The two QBASS switches<br />
(labeled 1 and 2) on the front end of the amplifier allow you<br />
to select one of four frequency centers - 30Hz, 36Hz, 44Hz<br />
and 60Hz. The Q SELECT switch determines the width of<br />
boosted frequencies. A 'Q' of 2 (switch out) will give you a<br />
wide boost while a 'Q' of 4 will boost a narrow range of<br />
frequencies. (See chart below.) On the rear end panel you<br />
will find the QBASS PLUS level control and the plug-in<br />
for an optional QBASS REMOTE level control. Adjust the<br />
level control clockwise for up to 18dB of boost at your<br />
selected frequency and Q.<br />
QBASS PLUS Settings<br />
1 2 Freq.<br />
IN IN 30Hz<br />
IN OUT 36Hz<br />
OUT IN 44Hz<br />
OUT OUT 60Hz<br />
+18dB<br />
+12dB<br />
+6dB<br />
0dB<br />
QBASS PLUS <br />
Q = 4 Q = 2<br />
30Hz 36Hz 44Hz 60Hz<br />
CAUTION: QBASS and QBASS PLUS should only be used in<br />
systems with strong subwoofers. 18dB is a lot of bass boost and<br />
could damage full range speakers.<br />
15<br />
BACK TO CONTENTS
CROSSOVER Operation<br />
Your new POWERCLASS amplifier has crossover circuits built-in to provide<br />
exceptional system flexibility without the added expense and installation of an<br />
outboard crossover. See the frequency detent charts on page 17 to set your<br />
amplifier's crossover.<br />
PC4200 / PC4400<br />
The front crossover is high pass and can be adjusted from 20Hz to 5kHz by<br />
turning the FRONT HP FREQ. control. If you need full-range, turn the control<br />
fully counterclockwise to the 20Hz position. The rear crossover can be high<br />
pass or low pass, chosen by the REAR HP/LP switch. The REAR XOVER<br />
FREQ. control determines the rear crossover frequency between 20Hz and<br />
5kHz, 20Hz being fully counterclockwise. The RCA outputs are always mono<br />
low pass at 90Hz to send a subwoofer signal to another amplifier.<br />
PC4800<br />
The front crossover is high pass and can be adjusted from 20Hz to 5kHz by<br />
turning the FRONT HP FREQ. control. If you need full-range, turn the control<br />
fully counterclockwise to the 20Hz position. The rear crossover actually<br />
consists of two crossovers, one high pass and one mono low pass. The<br />
high pass section is a 12dB/octave Linkwitz-Riley type that is adjustable<br />
from 20Hz to 5kHz using the REAR HP FREQ. control. For full range<br />
operation, turn the control fully counterclockwise to the 20Hz position. The<br />
low pass section is a 24dB/octave Linkwitz-Riley type that you can adjust<br />
from 44Hz to 315Hz with the REAR LP FREQ. control. High pass or low<br />
pass to the rear channel is determined by the REAR HP/LP switch, 'OUT'<br />
being low pass and 'IN' being high pass. When you select high pass, the<br />
RCA outputs will be low pass and vice versa.<br />
PC6600<br />
The front and rear crossovers are both high pass, and can be adjusted from<br />
20Hz to 5kHz using the XOVER FREQ. FRONT and REAR controls. For full<br />
range operation, turn the control fully counterclockwise to the 20Hz position.<br />
The subwoofer crossover is a 24dB/octave Linkwitz-Riley type fixed at 90Hz.<br />
See system diagrams starting on page 21 for examples!<br />
16<br />
BACK TO CONTENTS
FREQUENCY DETENT CHARTS<br />
PC4200 / PC4400 / PC4800 / PC6600<br />
The crossover frequency range of your new POWERCLASS amplifier goes from<br />
20Hz - 5kHz, and the controls are detented for accurate tuning. Each "click" counted<br />
from the full counterclockwise position corresponds to a specific frequency. Refer to<br />
this chart for set-up instructions.<br />
PC4200/PC4400 - Front HP & Rear Xover Freq.<br />
PC4800 - Front and Rear HP Freq.<br />
DETENT PC6600 - Front and Rear Xover Freq.<br />
1 20 Hz<br />
2 21 Hz<br />
3 21 Hz<br />
4 21.5 Hz<br />
5 22 Hz<br />
6 23 Hz<br />
7 24.5 Hz<br />
8 26 Hz<br />
9 27.5 Hz<br />
10 30 Hz<br />
11 32 Hz<br />
12 35 Hz<br />
13 39 Hz<br />
14 43 Hz<br />
15 49 Hz<br />
16 56 Hz<br />
17 64 Hz<br />
18 73 Hz<br />
19 80 Hz<br />
20 88 Hz<br />
21 100 Hz<br />
22 114 Hz<br />
23 134 Hz<br />
24 160 Hz<br />
25 196 Hz<br />
26 260 Hz<br />
27 320 Hz<br />
28 368 Hz<br />
29 432 Hz<br />
30 496 Hz<br />
31 608 Hz<br />
32 752 Hz<br />
33 864 Hz<br />
34 1008 Hz<br />
35 1200 Hz<br />
36 1488 Hz<br />
37 1952 Hz<br />
38 2816 Hz<br />
39 4512 Hz<br />
40 4944 Hz<br />
41 5000 Hz<br />
17<br />
DETENT<br />
1 44 Hz<br />
2 44 Hz<br />
3 44 Hz<br />
4 45 Hz<br />
5 46 Hz<br />
6 48 Hz<br />
7 51 Hz<br />
8 54 Hz<br />
9 58 Hz<br />
10 62 Hz<br />
11 67 Hz<br />
12 72 Hz<br />
13 78 Hz<br />
14 85 Hz<br />
15 94 Hz<br />
16 104 Hz<br />
17 115 Hz<br />
18 124 Hz<br />
19 132 Hz<br />
20 141 Hz<br />
21 150 Hz<br />
22 162 Hz<br />
23 175 Hz<br />
24 189 Hz<br />
25 207 Hz<br />
26 227 Hz<br />
27 240 Hz<br />
28 249 Hz<br />
29 258 Hz<br />
30 268 Hz<br />
31 280 Hz<br />
32 287 Hz<br />
33 290 Hz<br />
34 295 Hz<br />
35 298 Hz<br />
36 303 Hz<br />
37 307 Hz<br />
38 311 Hz<br />
39 315 Hz<br />
40 315 Hz<br />
41 315 Hz<br />
BACK TO CONTENTS
INPUT COMBINE and GAIN<br />
Input Combine<br />
Your multi channel POWERCLASS amplifier can use both front<br />
and rear outputs from your head unit to maintain the ability to fade<br />
front to rear, or you can run a single set of RCAs to the front inputs<br />
and push in the COMBINE switch on the amplifier end plate to route<br />
the front signal to the rear channels as well.<br />
Adjusting The Amplifier Input Gain<br />
1. Adjust all amplifier input gain controls to just above minimum<br />
sensitivity (fully counterclockwise).<br />
2. Using the cleanest source (CD), with music playing turn up<br />
the head unit until you can hear distortion. Now turn it down a<br />
bit until you cannot hear the distortion.<br />
3. Increase the Amplifier gain (clockwise) until the onset of<br />
audible distortion. Then decrease the gain to the point just<br />
before the distortion starts. This setting minimizes background<br />
noise and prevents overload.<br />
4. Repeat step 3 for any remaining amplifiers in the system.<br />
Heatsink Cooling<br />
The unique heatsink on your POWERCLASS amplifier has<br />
been designed with fins on the inside of the aluminum mass.<br />
This allows for the transfer of heat from the circuitry to the<br />
heatsink fins and out through the vents in the endplates. Be<br />
sure you have ample space around the amplifier for cooling,<br />
at least 2" on all sides.<br />
18<br />
BACK TO CONTENTS
FORCED AIR THERMAL MANAGEMENT<br />
To manage the additional heat associated with higher output capability,<br />
a thermally controlled fan has been designed into the PC4800.<br />
When the heatsink temperature reaches a predetermined<br />
value, the fan is activated. Cool air is drawn in through<br />
the lower intake vents on the endplate. This cool air<br />
flows below the circuit board, through the fan and<br />
across the internal fins, cooling the heatsink.<br />
The heated air is then forced out through<br />
the upper endplate exhaust vents.<br />
Warm Air Exhaust<br />
Cool Air Intake<br />
19<br />
BACK TO CONTENTS
TROUBLE SHOOTING<br />
NO SOUND Is the LED lit?<br />
YES<br />
NO<br />
Check <strong>Power</strong> and Remote turn-on wire<br />
for voltage. Make sure Ground wire is<br />
secure.<br />
WHAT COLOR ?<br />
RED<br />
GREEN<br />
Central Muting is engaged. Remote Substitute RCA inputs with another<br />
turn-on wire must have more than 8 source, and connect a known good<br />
volts to release central muting. Check speaker to one channel.<br />
Remote turn-on at the head unit. You<br />
may need to install a relay if the head<br />
unit doesn't put out sufficient voltage.<br />
STILL NO SOUND - See your Authorized <strong>Precision</strong><strong>Power</strong> Dealer or Call<br />
1-800-62<strong>Power</strong><br />
SOUND IN ONE CHANNEL ONLY<br />
Reverse left and right speakers by unplugging the speaker connector, turning it<br />
over and plugging it back in.<br />
SOUND IS NOW IN<br />
OPPOSITE CHANNEL<br />
Reverse RCA inputs<br />
AMPLIFIER SHUTS OFF<br />
SOUND IS NOW IN<br />
OPPOSITE CHANNEL<br />
SAME CHANNEL<br />
Reverse RCAs at head unit Problem is in the Amplifier. See your<br />
local Authorized <strong>Precision</strong><strong>Power</strong> Dealer<br />
or call 1-800-62POWER.<br />
SOUND IS NOW IN<br />
OPPOSITE CHANNEL<br />
Problem is in the head unit<br />
SAME CHANNEL<br />
Problem is in the speaker or speaker<br />
wire of the silent channel.<br />
SAME CHANNEL<br />
Problem is in the RCA cables<br />
Short Circuit Protection engaged:<br />
The amplifier will turn off and try to come back on immediately. The<br />
amplifier will cycle like this indefinitely, with "blips" of sound each<br />
time. If this is the case, check your speakers and wiring for low<br />
impedance and short circuits.<br />
Thermal Protection engaged:<br />
The amplifier will turn off and several minutes later will come back<br />
on. In this case, ensure that there is nothing blocking the normal<br />
convective airflow of the amplifier. No obstruction should be within<br />
2" of the amplifier on all sides.<br />
20<br />
BACK TO CONTENTS
Volume<br />
<strong>Power</strong><br />
Volume<br />
<strong>Power</strong><br />
In-Clip<br />
PEQ- 14<br />
F<br />
Fader<br />
R<br />
Sub<br />
eject<br />
VOLUME<br />
+<br />
eject<br />
VOLUME<br />
BASS<br />
TREBLE<br />
BALANCE<br />
LEFT<br />
RIGHT<br />
<strong>Precision</strong><strong>Power</strong><br />
Low<br />
<strong>Precision</strong><strong>Power</strong><br />
Defeat<br />
+<br />
+<br />
BASS<br />
TREBLE<br />
Mid<br />
BALANCE<br />
LEFT<br />
RIGHT<br />
+<br />
Input<br />
Sensitivity<br />
+<br />
Input Sensitivity<br />
+<br />
1 2 3 4<br />
5<br />
6<br />
7<br />
8<br />
TRACK<br />
FOWARD REVERSE<br />
R L<br />
Treble<br />
+<br />
TRACK<br />
FOWARD REVERSE<br />
+<br />
1 2 3 4<br />
5<br />
R<br />
6<br />
7<br />
Input<br />
+<br />
8<br />
L<br />
High-Mid<br />
R L<br />
R<br />
PPI MAR KET ING DPT<br />
PPI MAR KET ING DPT<br />
L<br />
Frequency Adjust<br />
R<br />
L<br />
<strong>Power</strong><br />
LED Select<br />
SYSTEM DIAGRAM<br />
ONE / TWO<br />
Tweeter<br />
Passive<br />
Crossover<br />
Source Unit<br />
Trk 1<br />
Passive<br />
Crossover<br />
Tweeter<br />
MidRange<br />
MidRange<br />
InputOutput <strong>Power</strong><br />
PEQ-114 Made in USA<br />
PEQ-114<br />
Preamp/Equalizer<br />
Sub<br />
Sub<br />
POWERCLASS Amplifier<br />
PC4200, PC4400 or PC4800<br />
Front High Pass 100Hz<br />
Rear Low Pass 100Hz<br />
Tweeter<br />
Passive<br />
Crossover<br />
Source Unit<br />
Trk 1<br />
Passive<br />
Crossover<br />
Tweeter<br />
MidRange<br />
MidRange<br />
Rear<br />
Output<br />
Front<br />
Output<br />
1<br />
2<br />
3<br />
4<br />
PAR-245 Made in USA<br />
Sub Low Low-Mid Treble<br />
Sub Low Low-Mid High-Mid Treble PAR-245<br />
PAR-245<br />
Preamp/Equalizer<br />
Tweeter<br />
Passive<br />
Crossover<br />
Passive<br />
Crossover<br />
Tweeter<br />
MidRange<br />
MidRange<br />
POWERCLASS Amplifier<br />
PC4200, PC4400 or PC4800<br />
Front High Pass 20Hz<br />
Rear High Pass 20Hz<br />
Mixed Mono Sub<br />
Passive<br />
Crossover<br />
Sub<br />
21<br />
BACK TO CONTENTS
Volume<br />
<strong>Power</strong><br />
In-Clip<br />
F<br />
Fader<br />
R<br />
eject<br />
VOLUME<br />
<strong>Precision</strong><strong>Power</strong><br />
Defeat<br />
+<br />
BASS<br />
TREBLE<br />
BALANCE<br />
LEFT<br />
RIGHT<br />
+<br />
Input Sensitivity<br />
1<br />
2<br />
3<br />
4<br />
+<br />
1 2 3 4<br />
5<br />
6<br />
7<br />
8<br />
TRACK<br />
FOWARD REVERSE<br />
+<br />
R<br />
Input<br />
+<br />
L<br />
High-Mid<br />
R<br />
PPI MAR KET ING DPT<br />
L<br />
Frequency Adjust<br />
R<br />
L<br />
<strong>Power</strong><br />
LED Select<br />
SYSTEM DIAGRAM<br />
THREE<br />
Source Unit<br />
Trk 1<br />
Rear<br />
Output<br />
Front<br />
Output<br />
PAR-245 Made in USA<br />
Sub Low Low-Mid Treble<br />
Tweeter<br />
Passive<br />
Crossover<br />
PAR-245<br />
Preamp/Equalizer<br />
Sub Low Low-Mid High-Mid Treble PAR-245<br />
Passive<br />
Crossover<br />
Tweeter<br />
MidRange<br />
Front<br />
Rear<br />
MidRange<br />
Tweeter<br />
Passive<br />
Crossover<br />
Passive<br />
Crossover<br />
Tweeter<br />
MidRange<br />
MidRange<br />
POWERCLASS Amplifier<br />
PC4200, PC4400 or PC4800<br />
Front High Pass 88Hz<br />
Rear High Pass 88Hz<br />
Low Pass RCA Outputs<br />
(for constant sub)<br />
Sub<br />
Sub<br />
POWERCLASS Amplifier<br />
One or Two Channel Amplifier<br />
22<br />
BACK TO CONTENTS
Volume<br />
<strong>Power</strong><br />
In-Clip<br />
F<br />
Fader<br />
R<br />
eject<br />
VOLUME<br />
<strong>Precision</strong><strong>Power</strong><br />
Defeat<br />
+<br />
BASS<br />
TREBLE<br />
BALANCE<br />
LEFT<br />
RIGHT<br />
+<br />
Input Sensitivity<br />
1<br />
2<br />
3<br />
4<br />
+<br />
1 2 3 4<br />
5<br />
6<br />
7<br />
8<br />
TRACK<br />
FOWARD REVERSE<br />
+<br />
R<br />
Input<br />
+<br />
L<br />
High-Mid<br />
R<br />
PPI MAR KET ING DPT<br />
L<br />
Frequency Adjust<br />
R<br />
L<br />
<strong>Power</strong><br />
LED Select<br />
SYSTEM DIAGRAM<br />
FOUR<br />
Source Unit<br />
Trk 1<br />
Rear<br />
Output<br />
Front<br />
Output<br />
PAR-245 Made in USA<br />
Sub Low Low-Mid Treble<br />
Tweeter<br />
Passive<br />
Crossover<br />
PAR-245<br />
Preamp/Equalizer<br />
Sub Low Low-Mid High-Mid Treble PAR-245<br />
Passive<br />
Crossover<br />
Tweeter<br />
MidRange<br />
MidRange<br />
Tweeter<br />
Passive<br />
Crossover<br />
Passive<br />
Crossover<br />
Tweeter<br />
MidRange<br />
MidRange<br />
POWERCLASS Amplifier<br />
PC4800<br />
Front High Pass 320Hz<br />
Rear High Pass 320Hz<br />
RCA Output Low Pass 315Hz<br />
MidBass<br />
MidBass<br />
Sub<br />
Sub<br />
POWERCLASS Amplifier<br />
PC4800<br />
Front High Pass 100Hz<br />
Rear Low Pass 100Hz<br />
23<br />
BACK TO CONTENTS
L<br />
Input<br />
R<br />
Volume<br />
<strong>Power</strong><br />
In-Clip<br />
stereo • out<br />
mono • in<br />
L<br />
F<br />
Fader<br />
R<br />
Output<br />
R<br />
eject<br />
VOLUME<br />
<strong>Precision</strong><strong>Power</strong><br />
Defeat<br />
DEQ-230<br />
25 Hz<br />
<strong>Power</strong><br />
+<br />
-12db<br />
BASS<br />
TREBLE<br />
BALANCE<br />
LEFT<br />
RIGHT<br />
50 Hz<br />
+12db<br />
+<br />
-12db<br />
31.5 Hz<br />
Input Sensitivity<br />
1 0 Hz<br />
+12db<br />
-12db<br />
+<br />
63 Hz<br />
EQ<br />
-12db<br />
+12db<br />
2 0 Hz<br />
+12db<br />
-12db<br />
40 Hz<br />
1 2 3 4<br />
5<br />
6<br />
7<br />
8<br />
TRACK<br />
FOWARD REVERSE<br />
+<br />
126 Hz<br />
Defeat<br />
-12db<br />
R<br />
+12db<br />
4 0 Hz<br />
-12db<br />
Input<br />
+12db<br />
-12db<br />
80 Hz<br />
+<br />
250 Hz<br />
+12db<br />
-12db<br />
+12db<br />
L<br />
8 0 Hz<br />
-12db<br />
High-Mid<br />
+12db<br />
-12db<br />
156 Hz<br />
5 0 Hz<br />
+12db<br />
-12db<br />
+12db<br />
R<br />
PPI MAR KET ING DPT<br />
L<br />
Frequency Adjust<br />
1.6 KHz<br />
-12db<br />
+12db<br />
-12db<br />
320 Hz<br />
1 KHz<br />
+12db<br />
-12db<br />
+12db<br />
3.2 KHz<br />
-12db<br />
+12db<br />
-12db<br />
635 Hz<br />
2 KHz<br />
+12db<br />
-12db<br />
+12db<br />
-12db<br />
R<br />
6.4 KHz<br />
+12db<br />
-12db<br />
1.27 KHz<br />
4 KHz<br />
+12db<br />
+12db<br />
-12db<br />
L<br />
Made in USA<br />
-12db<br />
12.8 KHz<br />
+12db<br />
-12db<br />
2.5 KHz<br />
8 KHz<br />
+12db<br />
-12db<br />
+12db<br />
<strong>Power</strong><br />
LED Select<br />
-12db<br />
+12db<br />
-12db<br />
5 KHz<br />
16 KHz<br />
+12db<br />
+12db<br />
-12db<br />
-12db<br />
10 KHz<br />
+12db<br />
+12db<br />
-12db<br />
20 KHz<br />
+12db<br />
-12db<br />
+12db<br />
SYSTEM DIAGRAM<br />
FIVE<br />
Source Unit<br />
Trk 1<br />
Rear<br />
Output<br />
Front<br />
Output<br />
1<br />
2<br />
3<br />
4<br />
PAR-245 Made in USA<br />
Sub Low Low-Mid Treble<br />
Sub Low Low-Mid High-Mid Treble PAR-245<br />
PAR-245<br />
Preamp/Equalizer<br />
<strong>Precision</strong><strong>Power</strong><br />
Third Octave Equalizer<br />
Ground<br />
Remote<br />
<strong>Power</strong><br />
DEQ-230 third octave EQ<br />
Tweeter<br />
Passive<br />
Crossover<br />
Passive<br />
Crossover<br />
Tweeter<br />
MidRange<br />
MidRange<br />
Tweeter<br />
Passive<br />
Crossover<br />
Passive<br />
Crossover<br />
Tweeter<br />
MidRange<br />
MidRange<br />
Sub<br />
Sub<br />
POWERCLASS Amplifier<br />
PC6600<br />
Front High Pass 88Hz<br />
Rear High Pass 88Hz<br />
24<br />
BACK TO CONTENTS
L<br />
Input<br />
R<br />
Volume<br />
<strong>Power</strong><br />
In-Clip<br />
a tenuation stereo•out<br />
-12dB in mono•in<br />
R<br />
L<br />
F<br />
Fader<br />
Output<br />
R<br />
eject<br />
VOLUME<br />
<strong>Precision</strong><strong>Power</strong><br />
Defeat<br />
20Hz-70Hz<br />
<strong>Power</strong><br />
+<br />
L<br />
BASS<br />
TREBLE<br />
BALANCE<br />
LEFT<br />
RIGHT<br />
+<br />
40Hz-130Hz<br />
H<br />
Q<br />
Input Sensitivity<br />
L<br />
+<br />
80Hz-260Hz<br />
1.5<br />
H<br />
Q<br />
EQ<br />
L<br />
4<br />
1 2 3 4<br />
5<br />
6<br />
7<br />
8<br />
TRACK<br />
FOWARD REVERSE<br />
+<br />
R<br />
160Hz- 50Hz<br />
1.5<br />
H<br />
Cut / B ost<br />
Defeat<br />
Q<br />
Input<br />
L<br />
4<br />
+<br />
-12db<br />
L<br />
30Hz-1KHz<br />
1.5<br />
H<br />
Cut / Boost<br />
+12db<br />
High-Mid<br />
Q<br />
L<br />
4<br />
-12db<br />
R<br />
PPI MAR KET ING DPT<br />
L<br />
Frequency Adjust<br />
940Hz-1.25KHz<br />
1.5<br />
H<br />
Cut / B ost<br />
+12db<br />
Q<br />
L<br />
4<br />
-12db<br />
1.95KHz-4.5Khz<br />
1.5<br />
H<br />
Cut / B ost<br />
+12db<br />
Q<br />
L<br />
4<br />
-12db<br />
R<br />
4KHz-9.37KHz<br />
1.5<br />
H<br />
Cut / B ost<br />
+12db<br />
Q<br />
L<br />
4<br />
-12db<br />
L<br />
9.37KHz-15.75KHz<br />
1.5<br />
H<br />
Cut / B ost<br />
+12db<br />
Q<br />
<strong>Power</strong><br />
LED Select<br />
L<br />
4<br />
-12db<br />
14KHz-23.37KHz<br />
1.5<br />
H<br />
Cut / B ost<br />
+12db<br />
Q<br />
L<br />
4<br />
-12db<br />
1.5<br />
H<br />
Cut / B ost<br />
+12db<br />
Q<br />
4<br />
-12db<br />
1.5<br />
Cut / B ost<br />
+12db<br />
4<br />
-12db<br />
Cut / B ost<br />
+12db<br />
-12db<br />
+12db<br />
Made in USA<br />
SYSTEM DIAGRAM<br />
SIX<br />
Source Unit<br />
Trk 1<br />
Rear<br />
Output<br />
Front<br />
Output<br />
1<br />
2<br />
3<br />
4<br />
PAR-245 Made in USA<br />
Sub Low Low-Mid Treble<br />
Sub Low Low-Mid High-Mid Treble PAR-245<br />
PAR-245<br />
Preamp/Equalizer<br />
<strong>Precision</strong><strong>Power</strong><br />
PMQ-210<br />
10 Band Parametric Equalizer<br />
<strong>Precision</strong><strong>Power</strong><br />
Ground<br />
Remote<br />
<strong>Power</strong><br />
PMQ-210 Ten Band Parametric EQ<br />
POWERCLASS Amplifier<br />
PC6600<br />
Left Channel<br />
POWERCLASS Amplifier<br />
PC6600<br />
Right Channel<br />
Tweeter<br />
Passive<br />
Crossover<br />
Passive<br />
Crossover<br />
Tweeter<br />
MidRange<br />
MidRange<br />
Tweeter<br />
Passive<br />
Crossover<br />
Passive<br />
Crossover<br />
Tweeter<br />
MidRange<br />
MidRange<br />
Sub<br />
Sub<br />
POWERCLASS Amplifiers<br />
2 - PC6600<br />
Front High Pass 88Hz<br />
Rear High Pass 88Hz<br />
All Channels Bridged<br />
25<br />
BACK TO CONTENTS
BLOCK DIAGRAM<br />
4200/4400<br />
RCA<br />
Rear Right<br />
Input<br />
DIF.<br />
SUM<br />
High Pass<br />
Low Pass mute AMP<br />
INPUT ATTENUATION<br />
RCA<br />
Front Left<br />
Input<br />
RCA<br />
Front Right<br />
Input<br />
RCA<br />
Rear Left<br />
Input<br />
DIF.<br />
Input<br />
Combine<br />
Switch<br />
Front Crossover<br />
High Pass<br />
20Hz - 5kHz<br />
12dB / octave<br />
Front<br />
gain<br />
mute<br />
AMP<br />
Rear Crossover<br />
20Hz - 5kHz<br />
QBASS<br />
Rear<br />
gain<br />
12dB / octave<br />
Low Pass<br />
90Hz<br />
Rear<br />
HP/LP<br />
Switch<br />
mute<br />
24dB / octave<br />
Front<br />
Rear<br />
RCA Outputs<br />
26<br />
BACK TO CONTENTS
BLOCK DIAGRAM<br />
4800<br />
RCA<br />
Rear Right<br />
Input<br />
DIF.<br />
SUM<br />
INPUT ATTENUATION<br />
RCA<br />
Front Left<br />
Input<br />
RCA<br />
Front Right<br />
Input<br />
RCA<br />
Rear Left<br />
Input<br />
DIF.<br />
Input<br />
Combine<br />
Switch<br />
Front Crossover<br />
High Pass<br />
20Hz - 5kHz<br />
12dB / octave<br />
Rear Crossover<br />
High Pass<br />
20Hz - 5kHz<br />
12dB / octave<br />
Rear Crossover<br />
Low Pass<br />
44Hz - 315Hz<br />
24dB / octave<br />
QBASS REMOTE<br />
QBASS<br />
PLUS<br />
Rear<br />
HP/LP<br />
Switch<br />
Front<br />
gain Front<br />
mute<br />
AMP<br />
Rear<br />
gain Rear<br />
mute<br />
AMP<br />
mute<br />
RCA Outputs<br />
27<br />
BACK TO CONTENTS
RCA<br />
Front Left<br />
Input<br />
RCA<br />
Front Right<br />
Input<br />
RCA<br />
Rear Left<br />
Input<br />
RCA<br />
Rear Right<br />
Input<br />
DIF.<br />
DIF.<br />
Input<br />
Combine<br />
Switch<br />
SUM<br />
Front Crossover<br />
High Pass<br />
20Hz - 5kHz<br />
12dB / octave<br />
Rear Crossover<br />
High Pass<br />
20Hz - 5kHz<br />
12dB / octave<br />
Low Pass<br />
90Hz<br />
24dB / octave<br />
PLUS<br />
Front<br />
Rear<br />
Sub<br />
mute<br />
mute<br />
mute<br />
AMP<br />
AMP<br />
AMP<br />
BLOCK DIAGRAM<br />
6600<br />
gain Front<br />
gain Rear<br />
gain Sub<br />
QBASS<br />
QBASS REMOTE<br />
INPUT ATTENUATION<br />
28<br />
BACK TO CONTENTS
BACK TO CONTENTS<br />
WARRANTY<br />
Three-Year Limited U.S.A. Warranty<br />
This warranty gives you specific legal rights, and you may also have other rights which vary from<br />
state to state. <strong>Precision</strong><strong>Power</strong> warrants its products to be free from defects in materials and<br />
workmanship under normal use and service for a period of three (3) years from the date of<br />
original purchase when the unit is installed by an Authorized Dealer. Non-Authorized Dealer<br />
installed products carry a one (1) year parts and ninety (90) days labor limited warranty. The<br />
extent and conditions of Limited Warranty are as follows:<br />
1. Authorized Dealer Installed Products: <strong>Precision</strong><strong>Power</strong> will either repair or replace at no charge,<br />
to the original purchaser, any unit which <strong>Precision</strong><strong>Power</strong>’s examination discloses to be defective<br />
and under warranty, provided the defect occurs within three (3) years from the date of original<br />
purchase when the unit is installed by an Authorized Dealer and the product is returned immediately<br />
to <strong>Precision</strong><strong>Power</strong>. This warranty is not transferable.<br />
2. Non-Authorized Dealer Installed Products: <strong>Precision</strong><strong>Power</strong> will either repair or replace at no<br />
charge, to the original purchaser, any unit which <strong>Precision</strong><strong>Power</strong>’s examination discloses to be<br />
defective and under warranty, provided the defect occurs within ninety (90) days from the date of<br />
purchase and the product is returned immediately to <strong>Precision</strong><strong>Power</strong>. Warranty claims beyond<br />
ninety (90) days for Non-Authorized Dealer Installed Products will be for parts only and will<br />
extend for one (1) year from the date of purchase. This warranty is not transferable.<br />
3. The date of purchase and proof of Authorized Dealer Installation of a <strong>Precision</strong><strong>Power</strong> product<br />
must be established by an original sales receipt which must accompany the article being returned<br />
for warranty work.<br />
4. This warranty shall NOT apply to any <strong>Precision</strong><strong>Power</strong> product found to have the original factory<br />
serial number removed or defaced. All products received (by <strong>Precision</strong><strong>Power</strong>) for in warranty<br />
or out of warranty repair, with their original serial numbers removed or defaced, will NOT be<br />
repaired and will be returned to sender, freight collect. Refer to original packaging for the serial<br />
number of your component speakers.<br />
5. The provisions of this warranty shall not apply to any <strong>Precision</strong><strong>Power</strong> product used for a<br />
purpose for which it is not designed, which has been repaired or altered in any way, or which has<br />
been connected, installed, or adjusted other than in accordance with the instructions furnished in<br />
<strong>Precision</strong><strong>Power</strong>’s owner’s <strong>manual</strong>. Nor shall this warranty apply to any part which has been<br />
subject to misuse, neglect, or accident.<br />
6. <strong>Precision</strong><strong>Power</strong> does not authorize any other persons to assume any other liability in connection<br />
with its products. THIS WARRANTY IS THE ONLY EXPRESS WARRANTY MADE BY<br />
PRECISIONPOWER APPLICABLE TO ITS PRODUCTS. ANY IMPLIED WARRANTY OR MER-<br />
CHANTABILITY OR FITNESS FOR A PARTICULAR PURPOSE APPLICABLE TO<br />
PRECISIONPOWER PRODUCTS IS LIMITED IN DURATION TO THE DURATION OF THIS<br />
LIMITED WARRANTY. PRECISIONPOWER SHALL NOT BE LIABLE FOR THE INCIDENTAL,<br />
CONSEQUENTIAL, OR COMMERCIAL DAMAGES RESULTING FROM THE BREACH OF THIS<br />
WRITTEN WARRANTY. Some states or provinces do not allow the exclusion or limitation of<br />
incidental or consequential damages or limitations on how long an implied warranty lasts; so the<br />
above limitations or exclusions may not apply to you.<br />
7. Your product will be serviced on an in-warranty basis within the warranty period for the correction<br />
of warranted defects. If improper operation of your <strong>Precision</strong><strong>Power</strong> product should occur,<br />
contact your Authorized Dealer for assistance with the return and factory repair of your<br />
<strong>Precision</strong><strong>Power</strong><br />
product. If an Authorized Dealer is not available, return the unit including your name, telephone<br />
number, return address, a copy of your sales receipt, and a description of the problem to:<br />
<strong>Precision</strong><strong>Power</strong>,Inc.<br />
Service Department<br />
4829 S. 38th Street<br />
Phoenix, AZ 85040-2964<br />
TO RETURN PRECISIONPOWER PRODUCTS OUT OF WARRANTY: Return the unit, postage<br />
prepaid, in the original protective carton. Please include a description of the problem and, if<br />
desired, a request for an estimate of repair costs. Unless a request for an estimate is included,<br />
the unit will be repaired as necessary. Please contact <strong>Precision</strong><strong>Power</strong> Customer Service at 1-<br />
800-62-POWER for questions concerning out of warranty repair charges. Repaired unit will be<br />
returned with an itemized statement, C.O.D.