Owners Manual - Castiglione Accordions
Owners Manual - Castiglione Accordions
Owners Manual - Castiglione Accordions

You also want an ePaper? Increase the reach of your titles
YUMPU automatically turns print PDFs into web optimized ePapers that Google loves.
®<br />
Owner’s <strong>Manual</strong>
WARNING – To reduce the risk of fire or electric shock, do not expose this device to rain or moisture.<br />
CAUTION<br />
The lightning flash with arrowhead symbol, within an equilateral<br />
triangle, is intended to alert the user to the presence of<br />
uninsulated “dangerous voltage” within the product’s enclosure<br />
that may be of sufficient magnitude to constitute a risk of<br />
electric shock to persons.<br />
The exclamation point within an equilateral triangle is intended<br />
to alert the user to the presence of important operating and<br />
maintenance (servicing) instructions in the literature accompanying<br />
the product.<br />
INSTRUCTIONS PERTAINING TO A RISK OF FIRE, ELECTRIC SHOCK, OR INJURY TO PERSONS.<br />
IMPORTANT SAFETY INSTRUCTIONS<br />
SAVE THESE INSTRUCTIONS<br />
WARNING – When using electric products, basic precautions should always be followed, including the following:<br />
1. Read these instructions.<br />
2. Keep these instructions.<br />
3. Heed all warnings.<br />
4. Follow all instructions.<br />
5. Do not use this apparatus near water.<br />
6. Clean only with a dry cloth.<br />
7. Do not block any of the ventilation openings. Install in accordance<br />
with the manufacturers instructions.<br />
8. Do not install near any heat sources such as radiators, heat<br />
registers, stoves, or other apparatus (including amplifiers)<br />
that produce heat.<br />
9. Do not defeat the safety purpose of the polarized or grounding-type<br />
plug. A polarized plug has two blades with one wider<br />
than the other. A grounding type plug has two blades and a<br />
third grounding prong. The wide blade or the third prong are<br />
provided for your safety. If the provided plug does not fit into<br />
your outlet, consult an electrician for replacement of the obsolete<br />
outlet.<br />
10. Protect the power cord from being walked on or pinched particularly<br />
at plugs, convenience receptacles, and the point<br />
where they exit from the apparatus.<br />
11. Only use attachments/accessories specified by the manufacturer.<br />
12. Unplug this apparatus during lightning storms or when unused<br />
for long periods of time.<br />
13. Refer all servicing to qualified service personnel. Servicing is<br />
required when the apparatus has been damaged in any way,<br />
such as power-supply cord or plug is damaged, liquid has<br />
been spilled or objects have fallen into the apparatus, the apparatus<br />
has been exposed to rain or moisture, does not operate<br />
normally, or has been dropped.<br />
For the U.K.<br />
The technology used in the FR-7x is covered by U.S. Patent No. 6.946.594.
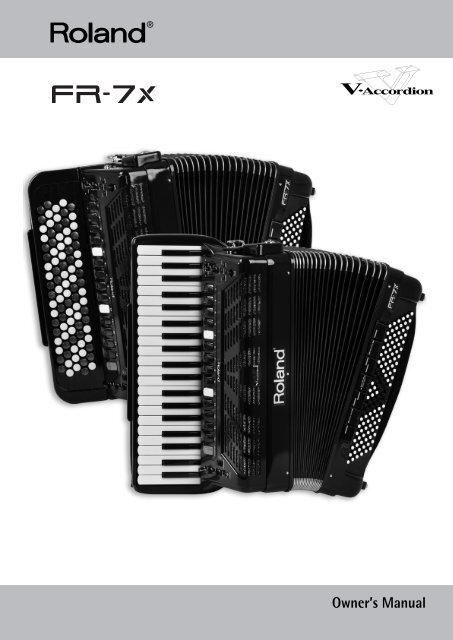
Owner’s <strong>Manual</strong><br />
Congratulations on purchasing the Roland FR-7x V-Accordion.<br />
The FR-7x is the first instrument of its kind to provide powerful digital modeling technology in a traditional, immediately<br />
familiar, accordion design and with performance functions and authentic sounds.<br />
It combines the familiar sounds and nuances of a traditional accordion with the versatility of a modern digital musical<br />
instrument. The FR-7x furthermore contains an audio recorder function and a USB port that can be used to play back<br />
audio files on the connected storage device.<br />
It is equipped with speakers and a battery pack for mobile use, while it can also be connected to an amplification system<br />
if desired.<br />
To get the most out of the FR-7x and to ensure many years of trouble-free service, we urge you to read through this<br />
Owner’s <strong>Manual</strong> thoroughly.<br />
The explanations in this manual include illustrations that depict what should typically be shown by the display. Note,<br />
however, that your unit may incorporate a newer, enhanced version of the system (e.g., includes newer sounds), so<br />
what you actually see in the display may not always match what appears in the manual.<br />
ENGLISH ENGLISH ENGLISH ENGLISH<br />
Before using this instrument, carefully read “USING THE UNIT SAFELY” (p. 4) and “Important notes” (p. 6). Those sections<br />
provide information concerning the proper operation of the FR-7x. Additionally, in order to feel assured that<br />
you have gained a good grasp of every feature provided by your new unit, the manual should be read in its entirety.<br />
The manual should be saved and kept on hand as a convenient reference.<br />
Copyright © 2009 ROLAND EUROPE. All rights reserved. No part of this publication may be reproduced in any form without the written permission of Roland Europe S.p.a.
FR-7x V-Accordion<br />
USING THE UNIT SAFELY<br />
Used for instructions intended to alert<br />
the user to the risk of death or severe<br />
injury should the unit be used<br />
improperly.<br />
Used for instructions intended to alert<br />
the user to the risk of injury or material<br />
damage should the unit be used<br />
improperly.<br />
* Material damage refers to damage or<br />
other adverse effects caused with<br />
respect to the home and all its<br />
furnishings, as well to domestic<br />
animals or pets.<br />
The symbol alerts the user to important instructions<br />
or warnings.The specific meaning of the symbol is<br />
determined by the design contained within the<br />
triangle. In the case of the symbol at left, it is used for<br />
general cautions, warnings, or alerts to danger.<br />
The symbol alerts the user to items that must never<br />
be carried out (are forbidden). The specific thing that<br />
must not be done is indicated by the design contained<br />
within the circle. In the case of the symbol at left, it<br />
means that the unit must never be disassembled.<br />
The ● symbol alerts the user to things that must be<br />
carried out. The specific thing that must be done is<br />
indicated by the design contained within the circle. In<br />
the case of the symbol at left, it means that the powercord<br />
plug must be unplugged from the outlet.<br />
r<br />
4<br />
• Connect the mains plug of this model to a mains outlet<br />
with a protective earthing connection.<br />
...................................................................................................................................<br />
• Do not open or modify the unit or its DC power supply<br />
(FBC-7).<br />
...................................................................................................................................<br />
• Do not attempt to repair the unit, or replace parts within<br />
it (except when this manual provides specific instructions<br />
directing you to do so). Refer all servicing to your retailer,<br />
the nearest Roland Service Center, or an authorized Roland distributor,<br />
as listed on the “Information” page.<br />
...................................................................................................................................<br />
• Never install the unit in any of the following locations.<br />
• Subject to temperature extremes (e.g., direct sunlight<br />
in an enclosed vehicle, near a heating duct, on top of<br />
heat-generating equipment); or are<br />
• Damp (e.g., baths, washrooms, on wet floors); or are<br />
• Exposed to steam or smoke; or are<br />
• Subject to salt exposure; or are<br />
• Humid; or are<br />
• Exposed to rain; or are<br />
• Dusty or sandy; or are<br />
• Subject to high levels of vibration and shakiness.<br />
...................................................................................................................................<br />
• Make sure you always have the FR-7x placed so it is level<br />
and sure to remain stable. Never place it on stands that<br />
could wobble, or on inclined surfaces.<br />
...................................................................................................................................<br />
• The FR-7x should only be connected to a power supply of<br />
the type described in the operating instructions, or as<br />
marked on the rear panel of the FBC-7.<br />
...................................................................................................................................<br />
• Use only the supplied power-supply cord. Also, the supplied<br />
power cord must not be used with any other device.<br />
...................................................................................................................................<br />
• Do not excessively twist or bend the power cord, nor<br />
place heavy objects on it. Doing so can damage the cord,<br />
producing severed elements and short circuits. Damaged<br />
cords are fire and shock hazards!<br />
...................................................................................................................................<br />
• The FR-7x, either alone or in combination with an amplifier<br />
and headphones or speakers, may be capable of producing<br />
sound levels that could cause permanent hearing<br />
loss. Do not operate for a long period of time at a high volume<br />
level, or at a level that is uncomfortable. If you experience any<br />
hearing loss or ringing in the ears, you should immediately stop<br />
using the unit, and consult an audiologist.<br />
....................................................................................................................................<br />
• Do not allow any objects (e.g., flammable material, coins,<br />
pins); or liquids of any kind (water, soft drinks, etc.) to<br />
penetrate the FR-7x.<br />
....................................................................................................................................<br />
• Immediately turn the power off, remove the power cord<br />
from the outlet, and request servicing by your retailer,<br />
the nearest Roland Service Center, or an authorized<br />
Roland distributor, as listed on the “Information” page when:<br />
• The power-supply cord or the plug has been damaged; or<br />
• If smoke or unusual odor occurs<br />
• Objects have fallen into, or liquid has been spilled onto the<br />
FR-7x; or<br />
• The unit has been exposed to rain (or otherwise has become<br />
wet); or<br />
• The FR-7x does not appear to operate normally or exhibits a<br />
marked change in performance.<br />
....................................................................................................................................<br />
• In households with small children, an adult should provide<br />
supervision until the child is capable of following all<br />
the rules essential for the safe operation of the FR-7x.<br />
....................................................................................................................................<br />
• Protect the FR-7x from strong impact.<br />
(Do not drop it!)<br />
....................................................................................................................................<br />
• Do not force the FR-7x’s power-supply cord to share an<br />
outlet with an unreasonable number of other devices. Be<br />
especially careful when using extension cords—the total<br />
power used by all devices you have connected to the extension<br />
cord's outlet must never exceed the power rating (watts/amperes)<br />
for the extension cord. Excessive loads can cause the insulation on<br />
the cord to heat up and eventually melt through.<br />
....................................................................................................................................
V-Accordion r<br />
USING THE UNIT SAFELY<br />
• Before using the FR-7x in a foreign country, consult with<br />
your retailer, the nearest Roland Service Center, or an<br />
authorized Roland distributor, as listed on the “Information”<br />
page.<br />
...................................................................................................................................<br />
• The battery pack must never be heated, taken apart, or<br />
thrown into fire or water.<br />
...................................................................................................................................<br />
• Do not put anything that contains water (e.g., flower<br />
vases) on the FR-7x. Also, avoid the use of insecticides,<br />
perfumes, alcohol, nail polish, spray cans, etc., near the<br />
unit. Swiftly wipe away any liquid that spills on the unit using a<br />
dry, soft cloth.<br />
...................................................................................................................................<br />
• Never expose the FR-7x to excessive heat such as sunshine,<br />
fire or the like.<br />
• If used improperly, the battery pack may explode or leak<br />
and cause damage or injury. In the interest of safety,<br />
please read and observe the following precautions (see<br />
p. 6).<br />
• Remove the battery pack whenever the unit is to<br />
remain unused for an extended period of time.<br />
....................................................................................................................................<br />
• Used battery packs must be disposed of in compliance<br />
with whatever regulations for their safe disposal that<br />
may be observed in the region in which you live.<br />
....................................................................................................................................<br />
• Keep any screws you may remove and related parts in a<br />
safe place out of children’s reach, so there is no chance<br />
of them being swallowed accidentally.<br />
....................................................................................................................................<br />
• The FR-7x and the FBC-7 should be located so their location<br />
or position does not interfere with their proper ventilation.<br />
...................................................................................................................................<br />
• Always grasp only the plug on the power-supply cord<br />
when plugging into, or unplugging from, an outlet or<br />
this unit.<br />
...................................................................................................................................<br />
• At regular intervals, you should unplug the power plug<br />
and clean it by using a dry cloth to wipe all dust and<br />
other accumulations away from its prongs. Also, disconnect<br />
the power plug from the power outlet whenever the unit is to<br />
remain unused for an extended period of time. Any accumulation<br />
of dust between the power plug and the power outlet can result in<br />
poor insulation and lead to fire.<br />
...................................................................................................................................<br />
• Try to prevent cords and cables from becoming entangled.<br />
Also, all cords and cables should be placed so they<br />
are out of the reach of children.<br />
...................................................................................................................................<br />
• Never climb on top of, nor place heavy objects on the<br />
unit.<br />
...................................................................................................................................<br />
• Never handle the power cord or its plugs with wet hands<br />
when plugging into, or unplugging from, an outlet or<br />
this unit.<br />
...................................................................................................................................<br />
• Before moving the unit, disconnect the AC adaptor and<br />
all cords coming from external devices.<br />
...................................................................................................................................<br />
• Before cleaning the unit, turn off the power and unplug<br />
the power cord from the outlet (see p. 18).<br />
...................................................................................................................................<br />
• Whenever you suspect the possibility of lightning in your<br />
area, pull the plug on the power cord out of the outlet.<br />
...................................................................................................................................<br />
5
FR-7x V-Accordion<br />
Important notes<br />
1. Important notes<br />
In addition to the items listed under “USING THE UNIT SAFELY” (p. 4), please read and observe the following:<br />
r<br />
Power supply<br />
• Do not connect this unit to same electrical outlet that is being<br />
used by an electrical appliance that is controlled by an inverter<br />
(such as a refrigerator, washing machine, microwave oven, or air<br />
conditioner), or that contains a motor. Depending on the way in<br />
which the electrical appliance is used, power supply noise may<br />
cause this unit to malfunction or may produce audible noise. If it is<br />
not practical to use a separate electrical outlet, connect a power<br />
supply noise filter between this unit and the electrical outlet.<br />
• The AC adaptor will begin to generate heat after long hours of<br />
consecutive use. This is normal, and is not a cause for concern.<br />
• When installing or replacing the battery pack, always turn off the<br />
power on this unit and disconnect any other devices you may have<br />
connected. This way, you can prevent malfunction and/or damage<br />
to speakers or other devices.<br />
• A battery pack is supplied with the unit. The life of this battery<br />
may be limited, however, since its primary purpose was to enable<br />
testing<br />
• Before connecting this unit to other devices, turn off the power to<br />
all units. This will help prevent malfunctions and/or damage to<br />
speakers or other devices.<br />
• Although the LCD and LEDs are switched off when the POWER<br />
switch is switched off, this does not mean that the unit has been<br />
completely disconnected from the source of power. If you need to<br />
turn off the power completely, first turn off the POWER switch,<br />
then unplug the power cord from the power outlet. For this reason,<br />
the outlet into which you choose to connect the power cord's<br />
plug should be one that is within easy reach and readily accessible.<br />
Placement<br />
• Using the unit near power amplifiers (or other equipment containing<br />
large power transformers) may induce hum. To alleviate the<br />
problem, change the orientation of this unit; or move it farther<br />
away from the source of interference.<br />
• This device may interfere with radio and television reception. Do<br />
not use this device in the vicinity of such receivers.<br />
• Noise may be produced if wireless communications devices, such<br />
as cell phones, are operated in the vicinity of this unit. Such noise<br />
could occur when receiving or initiating a call, or while conversing.<br />
Should you experience such problems, you should relocate such<br />
wireless devices so they are at a greater distance from this unit, or<br />
switch them off.<br />
• Do not expose the unit to direct sunlight, place it near devices that<br />
radiate heat, leave it inside an enclosed vehicle, or otherwise subject<br />
it to temperature extremes. Excessive heat can deform or discolor<br />
the unit.<br />
• Do not expose the unit to direct sunlight, place it near devices that<br />
radiate heat, leave it inside an enclosed vehicle, or otherwise subject<br />
it to temperature extremes. Also, do not allow lighting devices<br />
that normally are used while their light source is very close to the<br />
unit (such as a piano light), or powerful spotlights to shine upon<br />
the same area of the unit for extended periods of time. Excessive<br />
heat can deform or discolor the unit.<br />
• When moved from one location to another where the temperature<br />
and/or humidity is very different, water droplets (condensation)<br />
may form inside the unit. Damage or malfunction may result if<br />
you attempt to use the unit in this condition. Therefore, before<br />
using the unit, you must allow it to stand for several hours, until<br />
the condensation has completely evaporated.<br />
• Do not allow rubber, vinyl, or similar materials to remain on the<br />
unit for long periods of time. Such objects can discolor or otherwise<br />
harmfully affect the finish.<br />
• Do not allow objects to remain on top of the or pedal board. This<br />
can be the cause of malfunction, such as keys ceasing to produce<br />
sound.<br />
• Do not paste stickers, decals, or the like to this instrument. Peeling<br />
such matter off the instrument may damage the exterior finish.<br />
• Depending on the material and temperature of the surface on<br />
which you place the unit, its rubber feet may discolor or mar the<br />
surface.<br />
You can place a piece of felt or cloth under the rubber feet to prevent<br />
this from happening. If you do so, please make sure that the<br />
unit will not slip or move accidentally.<br />
Maintenance<br />
• For everyday cleaning wipe the FR-7x with a soft, dry cloth or one<br />
that has been slightly dampened with water. To remove stubborn<br />
dirt, use a cloth impregnated with a mild, non-abrasive detergent.<br />
Afterwards, be sure to wipe the unit thoroughly with a soft, dry<br />
cloth.<br />
• Never use benzine, thinners, alcohol or solvents of any kind, to<br />
avoid the possibility of discoloration and/or deformation.<br />
Repairs and data<br />
• Unfortunately, it may be impossible to restore the contents of data<br />
that was stored in the unit's memory, or once it has been lost.<br />
Roland Corporation assumes no liability concerning such loss of<br />
data.<br />
Additional precautions<br />
• Use a reasonable amount of care when using the unit's buttons,<br />
sliders, or other controls; and when using its jacks and connectors.<br />
Rough handling can lead to malfunctions.<br />
• Never strike or apply strong pressure to the display.<br />
• When connecting / disconnecting all cables, grasp the connector<br />
itself—never pull on the cable. This way you will avoid causing<br />
shorts, or damage to the cable's internal elements.<br />
• A small amount of heat will radiate from the unit during normal<br />
operation.<br />
• To avoid disturbing your neighbors, try to keep the unit's volume<br />
at reasonable levels. You may prefer to use headphones, so you do<br />
not need to be concerned about those around you (especially<br />
when it is late at night).<br />
• Use only the specified expression pedal (EV-series; sold separately).<br />
By connecting any other expression pedals, you risk causing malfunction<br />
and/or damage to the unit.<br />
• When you need to transport the unit, package it in the box<br />
(including padding) that it came in, if possible. Otherwise, you will<br />
need to use equivalent packaging materials.<br />
Precautions for the included battery<br />
• The temperature range for use of the battery pack is as follows.<br />
Using them outside this range may impair battery performance<br />
and shorten battery service life. Use (discharging): 0~50°C, Storage:<br />
–20~30°C, Charging: 0~40°C.<br />
• Do not use or store a battery pack at high temperature, such as in<br />
strong direct sunlight, in cars during hot weather or directly in<br />
front of heaters. This may cause battery fluid leakage, impaired<br />
performance and shorten the battery’s service life.<br />
• Do not charge a battery pack while it is cold (below 0°C) or outside<br />
when it is freezing. This may cause battery fluid leakage, impaired<br />
performance and shorten the battery’s service life.<br />
• Do not splash fresh or saltwater on a battery pack or allow the terminals<br />
to become damp. This may cause heat generation and formation<br />
of rust on the battery pack and its terminals.<br />
6
V-Accordion r<br />
Important notes<br />
• Use only the supplied FBC-7 to charge the FR-7x’s battery pack.<br />
Failure to follow proper charging procedures may cause excessive<br />
current flow, loss of control during charging, leakage of battery<br />
fluid, heat generation, bursting or fire.<br />
• For the procedure for charging the FR-7x’s battery pack, please<br />
read page 59.<br />
• Do not connect the battery pack directly to a power outlet or<br />
insert it into a cigarette lighter socket in a car. High voltage may<br />
cause excessive current flow, leakage of battery fluid, heat, bursting<br />
or fire.<br />
• If a newly purchased battery pack exhibits rust, generates heat or<br />
seems abnormal in any other way, do not use it. Take it back to<br />
your Roland dealer.<br />
• The battery pack is supplied with residual charge only, so be sure<br />
to fully charge the battery pack with the supplied FBC-7 before<br />
using the FR-7x.<br />
• Keep the battery pack out of reach of babies or small children.<br />
Ensure that babies or small children cannot remove a battery pack<br />
from the FBC-7 while it is being charged.<br />
• Be sure to carefully instruct any person on the proper way of handling<br />
a battery pack.<br />
• Never dispose of the battery pack in a fire. Never heat it. Doing so<br />
may melt the insulation, damage the gas release vents or protective<br />
devices, cause combustion through chemical reaction with<br />
generated hydrogen, ejection of battery fluid, bursting or fire.<br />
• Do not remove the outer tube from a battery pack or damage it.<br />
• Do no strike or drop the battery pack. Strong impact can cause<br />
leakage of battery fluid, heat generation, bursting or fire.<br />
• Do not alter or remove protective mechanisms or other parts.<br />
Never disassemble the battery pack.<br />
• The positive (+) terminal section of the battery is equipped with a<br />
gas release vent. Never deform this section or cover it. Do not<br />
obstruct the release of gas as this could result in leakage of battery<br />
fluid, heat generation, bursting or fire.<br />
• Do not overcharge the battery pack by exceeding the predetermined<br />
charging period of the FBC-7 or indicator. Never recharge a<br />
battery pack that is already fully charged. This could result in leakage<br />
of battery fluid, heat generation, bursting or fire.<br />
• If the battery pack is not fully charged after the predetermined<br />
charging period has elapsed, stop the charging process. Prolonged<br />
charging could result in leakage of battery fluid, heat generation,<br />
bursting or fire.<br />
• If any fluid from a battery pack comes in contact with the eyes,<br />
flush the eyes immediately, washing them thoroughly with clean<br />
water from a tap or other source and consult a doctor. Strong<br />
alkaline fluid can damage the eyes and lead to permanent loss of<br />
eyesight.<br />
• If skin or clothing comes in contact with any fluid from the battery<br />
pack, wash the area immediately with clean water from a tap. Battery<br />
fluid can cause skin damage.<br />
• When a battery pack is no longer usable, dispose of it in accordance<br />
with all applicable local laws and regulations.<br />
• If the battery pack leaks fluid, changes color or shape or changes<br />
in any other way, do not use it, otherwise it may cause heat generation,<br />
bursting or fire.<br />
Storage devices that can be connected to the<br />
FR-7x’s USB port<br />
• The FR-7x allows you to connect commercially available storage<br />
devices, like USB Flash memory, and hard disks. You can purchase<br />
such devices at a computer store, a digital camera dealer, etc.<br />
• Use USB memory sold by Roland. We cannot guarantee operation<br />
if any other USB memory is used.<br />
Before using external USB storage devices<br />
• When connecting a USB storage device, firmly insert it all the way<br />
into the FR-7x’s USB port.<br />
• Do not touch the pins of the FR-7x’s USB port or allow them to<br />
become dirty.<br />
• While using an external storage device, please observe the following<br />
points when handling it:<br />
• To prevent damage from static electrical charges, discharge any<br />
static electricity that might be present in your body before handling<br />
a USB storage device.<br />
• Do not touch the terminals with your fingers or any metal<br />
object.<br />
• Do not bend or drop a USB storage device, or subject it to<br />
strong impact.<br />
• Do not leave a USB storage device in direct sunlight or in locations<br />
such as a closed-up automobile.<br />
• Do not allow a USB storage device to become wet.<br />
• Do not disassemble or modify your external USB storage device.<br />
• When connecting a USB storage device, position it horizontally<br />
with the FR-7x’s USB port and insert it without using excessive<br />
force. The USB port may be damaged if you use excessive force<br />
when inserting a USB storage device.<br />
• Do not insert anything other than a USB storage device (e.g., wire,<br />
coins, other types of device) into the USB port. Doing so will damage<br />
the FR-7x’s USB port.<br />
• Do not apply excessive force to the connected USB storage device<br />
or the FR-7x’s USB port.<br />
• Never connect your USB storage device to the FR-7x via a USB<br />
hub.<br />
Liability and copyright<br />
• The law prohibits the unauthorized recording, public performance,<br />
broadcast, sale, distribution, etc., of a work (musical works, visual<br />
works, broadcasts, live performances, etc.) whose copyright is<br />
owned by a third party. Roland assumes no responsibility for any<br />
infringement of copyright that you may commit using the FR-7x.<br />
• The FR-7x’s audio player is designed to allow you to reproduce<br />
material to which you have copyright, or material which the copyright<br />
owner has granted you permission. Accordingly, the reproduction<br />
of music or other copyrighted material without permission<br />
of the copyright owner avoiding technical prohibiting features<br />
of second-generation and later copying, like SCMS or other<br />
solutions, constitutes copyright infringement and may incur penalties<br />
even in case such reproduction is for your own personal use<br />
and enjoyment (private use).<br />
Consult a copyright specialist or specialized publications for more<br />
detailed information on obtaining such permission from the copyright<br />
holders.<br />
7
FR-7x V-Accordion<br />
Important notes<br />
About audio files<br />
• Audio files in the following formats can be played back:<br />
• WAV format<br />
• 16-bit linear<br />
• Sampling rate of 44.1kHz<br />
• Stereo/mono<br />
• mp3 files:<br />
• MPEG-1 Audio Layer 3<br />
• Sampling frequency: 44.1kHz<br />
• Bit rate: 32/40/48/56/64/80/96/112/128/160/192/224/256/<br />
320kbps, VBR (variable bit rate)<br />
Copyrights<br />
• MPEG Layer-3 audio compression technology is licensed from<br />
Fraunhofer IIS Corporation and THOMSON Multimedia Corporation.<br />
• Copyright ©2003 by Bitstream, Inc. All rights reserved. Bitstream<br />
Vera is a trademark of Bitstream, Inc.<br />
• All product names mentioned in this document are trademarks or<br />
registered trademarks of their respective owners.<br />
r<br />
8
V-Accordion r<br />
Contents<br />
1. Important notes . . . . . . . . . . . . . . . . . . . . . . . . . . . . . . . . . . . . . . . . . . . . . . . . . . . . . . . . . . . . . . . . 6<br />
2. Features. . . . . . . . . . . . . . . . . . . . . . . . . . . . . . . . . . . . . . . . . . . . . . . . . . . . . . . . . . . . . . . . . . . . . . 11<br />
3. Panel descriptions . . . . . . . . . . . . . . . . . . . . . . . . . . . . . . . . . . . . . . . . . . . . . . . . . . . . . . . . . . . . . 12<br />
Treble control panel . . . . . . . . . . . . . . . . . . . . . . . . . . . . . . . . . . . . . . . . . . . . . . . . . . . . . . . . . . . . . . . . . . . . . . . . . 12<br />
Bass control panel . . . . . . . . . . . . . . . . . . . . . . . . . . . . . . . . . . . . . . . . . . . . . . . . . . . . . . . . . . . . . . . . . . . . . . . . . . 13<br />
Display and master bar . . . . . . . . . . . . . . . . . . . . . . . . . . . . . . . . . . . . . . . . . . . . . . . . . . . . . . . . . . . . . . . . . . . . . . 13<br />
Battery compartment and USB port . . . . . . . . . . . . . . . . . . . . . . . . . . . . . . . . . . . . . . . . . . . . . . . . . . . . . . . . . . . 14<br />
Connection panel . . . . . . . . . . . . . . . . . . . . . . . . . . . . . . . . . . . . . . . . . . . . . . . . . . . . . . . . . . . . . . . . . . . . . . . . . . . 14<br />
Connection panel of the FBC-7 . . . . . . . . . . . . . . . . . . . . . . . . . . . . . . . . . . . . . . . . . . . . . . . . . . . . . . . . . . . . . . . 14<br />
4. Before you start using the FR-7x . . . . . . . . . . . . . . . . . . . . . . . . . . . . . . . . . . . . . . . . . . . . . . . . . 16<br />
Installing the battery pack . . . . . . . . . . . . . . . . . . . . . . . . . . . . . . . . . . . . . . . . . . . . . . . . . . . . . . . . . . . . . . . . . . . 16<br />
Connecting the FR-7x to the supplied FBC-7 . . . . . . . . . . . . . . . . . . . . . . . . . . . . . . . . . . . . . . . . . . . . . . . . . . . 16<br />
Other connections . . . . . . . . . . . . . . . . . . . . . . . . . . . . . . . . . . . . . . . . . . . . . . . . . . . . . . . . . . . . . . . . . . . . . . . . . . 17<br />
Switching the power on and off . . . . . . . . . . . . . . . . . . . . . . . . . . . . . . . . . . . . . . . . . . . . . . . . . . . . . . . . . . . . . . 18<br />
Listening through headphones . . . . . . . . . . . . . . . . . . . . . . . . . . . . . . . . . . . . . . . . . . . . . . . . . . . . . . . . . . . . . . . 19<br />
5. Listening to the demo songs . . . . . . . . . . . . . . . . . . . . . . . . . . . . . . . . . . . . . . . . . . . . . . . . . . . . . 20<br />
6. Basic operation of the FR-7x . . . . . . . . . . . . . . . . . . . . . . . . . . . . . . . . . . . . . . . . . . . . . . . . . . . . . 21<br />
The sections of your FR-7x . . . . . . . . . . . . . . . . . . . . . . . . . . . . . . . . . . . . . . . . . . . . . . . . . . . . . . . . . . . . . . . . . . . 21<br />
Practical information. . . . . . . . . . . . . . . . . . . . . . . . . . . . . . . . . . . . . . . . . . . . . . . . . . . . . . . . . . . . . . . . . . . . . . . . 21<br />
About the main page . . . . . . . . . . . . . . . . . . . . . . . . . . . . . . . . . . . . . . . . . . . . . . . . . . . . . . . . . . . . . . . . . . . . . . . . 22<br />
7. Using Sets . . . . . . . . . . . . . . . . . . . . . . . . . . . . . . . . . . . . . . . . . . . . . . . . . . . . . . . . . . . . . . . . . . . . 23<br />
8. Touring the FR-7x’s accordion sections . . . . . . . . . . . . . . . . . . . . . . . . . . . . . . . . . . . . . . . . . . . . 24<br />
Treble section (right hand) . . . . . . . . . . . . . . . . . . . . . . . . . . . . . . . . . . . . . . . . . . . . . . . . . . . . . . . . . . . . . . . . . . . 24<br />
Bass and chord section (left hand) . . . . . . . . . . . . . . . . . . . . . . . . . . . . . . . . . . . . . . . . . . . . . . . . . . . . . . . . . . . . 25<br />
Using the FR-7x’s digital effects . . . . . . . . . . . . . . . . . . . . . . . . . . . . . . . . . . . . . . . . . . . . . . . . . . . . . . . . . . . . . . 26<br />
Playing in Free Bass mode. . . . . . . . . . . . . . . . . . . . . . . . . . . . . . . . . . . . . . . . . . . . . . . . . . . . . . . . . . . . . . . . . . . . 27<br />
Playing the bass part with your right hand (Bass-to-Treble) . . . . . . . . . . . . . . . . . . . . . . . . . . . . . . . . . . . . . . 28<br />
9. Playing the FR-7x’s orchestral sounds . . . . . . . . . . . . . . . . . . . . . . . . . . . . . . . . . . . . . . . . . . . . . 29<br />
Orchestral sounds for the treble section . . . . . . . . . . . . . . . . . . . . . . . . . . . . . . . . . . . . . . . . . . . . . . . . . . . . . . . 29<br />
Orchestral sounds for the bass section. . . . . . . . . . . . . . . . . . . . . . . . . . . . . . . . . . . . . . . . . . . . . . . . . . . . . . . . . 32<br />
Orchestral sounds for the chord section . . . . . . . . . . . . . . . . . . . . . . . . . . . . . . . . . . . . . . . . . . . . . . . . . . . . . . . 33<br />
Orchestral sounds for the Free Bass section . . . . . . . . . . . . . . . . . . . . . . . . . . . . . . . . . . . . . . . . . . . . . . . . . . . . 34<br />
10.Other practical functions . . . . . . . . . . . . . . . . . . . . . . . . . . . . . . . . . . . . . . . . . . . . . . . . . . . . . . . . 35<br />
General remark . . . . . . . . . . . . . . . . . . . . . . . . . . . . . . . . . . . . . . . . . . . . . . . . . . . . . . . . . . . . . . . . . . . . . . . . . . . . . 35<br />
Transpose . . . . . . . . . . . . . . . . . . . . . . . . . . . . . . . . . . . . . . . . . . . . . . . . . . . . . . . . . . . . . . . . . . . . . . . . . . . . . . . . . . 35<br />
Musette Detune . . . . . . . . . . . . . . . . . . . . . . . . . . . . . . . . . . . . . . . . . . . . . . . . . . . . . . . . . . . . . . . . . . . . . . . . . . . . 35<br />
Scale (Tuning) . . . . . . . . . . . . . . . . . . . . . . . . . . . . . . . . . . . . . . . . . . . . . . . . . . . . . . . . . . . . . . . . . . . . . . . . . . . . . . 36<br />
Noise Edit (Valve & Button) . . . . . . . . . . . . . . . . . . . . . . . . . . . . . . . . . . . . . . . . . . . . . . . . . . . . . . . . . . . . . . . . . . 37<br />
11.Using the audio player . . . . . . . . . . . . . . . . . . . . . . . . . . . . . . . . . . . . . . . . . . . . . . . . . . . . . . . . . . 38<br />
Connecting an optional USB memory . . . . . . . . . . . . . . . . . . . . . . . . . . . . . . . . . . . . . . . . . . . . . . . . . . . . . . . . . 38<br />
Playing back audio files. . . . . . . . . . . . . . . . . . . . . . . . . . . . . . . . . . . . . . . . . . . . . . . . . . . . . . . . . . . . . . . . . . . . . . 38<br />
Playlist function . . . . . . . . . . . . . . . . . . . . . . . . . . . . . . . . . . . . . . . . . . . . . . . . . . . . . . . . . . . . . . . . . . . . . . . . . . . . 39<br />
Saving your playlist . . . . . . . . . . . . . . . . . . . . . . . . . . . . . . . . . . . . . . . . . . . . . . . . . . . . . . . . . . . . . . . . . . . . . . . . . 40<br />
Using playlists . . . . . . . . . . . . . . . . . . . . . . . . . . . . . . . . . . . . . . . . . . . . . . . . . . . . . . . . . . . . . . . . . . . . . . . . . . . . . . 42<br />
Editing playlists. . . . . . . . . . . . . . . . . . . . . . . . . . . . . . . . . . . . . . . . . . . . . . . . . . . . . . . . . . . . . . . . . . . . . . . . . . . . . 43<br />
Managing playlists . . . . . . . . . . . . . . . . . . . . . . . . . . . . . . . . . . . . . . . . . . . . . . . . . . . . . . . . . . . . . . . . . . . . . . . . . . 45<br />
12.Recording your performance as audio data . . . . . . . . . . . . . . . . . . . . . . . . . . . . . . . . . . . . . . . . . 47<br />
Recording. . . . . . . . . . . . . . . . . . . . . . . . . . . . . . . . . . . . . . . . . . . . . . . . . . . . . . . . . . . . . . . . . . . . . . . . . . . . . . . . . . 47<br />
Saving your recording . . . . . . . . . . . . . . . . . . . . . . . . . . . . . . . . . . . . . . . . . . . . . . . . . . . . . . . . . . . . . . . . . . . . . . . 47<br />
13.Managing audio files on a USB memory. . . . . . . . . . . . . . . . . . . . . . . . . . . . . . . . . . . . . . . . . . . . 49<br />
9
FR-7x V-Accordion<br />
Contents |<br />
r<br />
10<br />
14.Assigning orchestral to the registers . . . . . . . . . . . . . . . . . . . . . . . . . . . . . . . . . . . . . . . . . . . . . . . 51<br />
Assigning orchestral sounds. . . . . . . . . . . . . . . . . . . . . . . . . . . . . . . . . . . . . . . . . . . . . . . . . . . . . . . . . . . . . . . . . . 51<br />
Saving your settings. . . . . . . . . . . . . . . . . . . . . . . . . . . . . . . . . . . . . . . . . . . . . . . . . . . . . . . . . . . . . . . . . . . . . . . . . 52<br />
About organ sounds. . . . . . . . . . . . . . . . . . . . . . . . . . . . . . . . . . . . . . . . . . . . . . . . . . . . . . . . . . . . . . . . . . . . . . . . . 52<br />
Editing the selected organ sound . . . . . . . . . . . . . . . . . . . . . . . . . . . . . . . . . . . . . . . . . . . . . . . . . . . . . . . . . . . . . 53<br />
15.About the FBC-7 . . . . . . . . . . . . . . . . . . . . . . . . . . . . . . . . . . . . . . . . . . . . . . . . . . . . . . . . . . . . . . . 58<br />
Using the FBC-7 . . . . . . . . . . . . . . . . . . . . . . . . . . . . . . . . . . . . . . . . . . . . . . . . . . . . . . . . . . . . . . . . . . . . . . . . . . . . 58<br />
Charging the battery pack . . . . . . . . . . . . . . . . . . . . . . . . . . . . . . . . . . . . . . . . . . . . . . . . . . . . . . . . . . . . . . . . . . . 59<br />
If the battery pack fails to last 8 hours (or slightly less) . . . . . . . . . . . . . . . . . . . . . . . . . . . . . . . . . . . . . . . . . . 61<br />
16.Editing sounds (Advanced section). . . . . . . . . . . . . . . . . . . . . . . . . . . . . . . . . . . . . . . . . . . . . . . . . 62<br />
Selecting parameters . . . . . . . . . . . . . . . . . . . . . . . . . . . . . . . . . . . . . . . . . . . . . . . . . . . . . . . . . . . . . . . . . . . . . . . . 62<br />
Setting parameter values . . . . . . . . . . . . . . . . . . . . . . . . . . . . . . . . . . . . . . . . . . . . . . . . . . . . . . . . . . . . . . . . . . . . 63<br />
Important remark about saving your settings. . . . . . . . . . . . . . . . . . . . . . . . . . . . . . . . . . . . . . . . . . . . . . . . . . . 64<br />
1. Tuning parameters . . . . . . . . . . . . . . . . . . . . . . . . . . . . . . . . . . . . . . . . . . . . . . . . . . . . . . . . . . . . . . . . . . . . . . . . 64<br />
2. Treble Edit parameters. . . . . . . . . . . . . . . . . . . . . . . . . . . . . . . . . . . . . . . . . . . . . . . . . . . . . . . . . . . . . . . . . . . . . 65<br />
3. Bass Edit parameters . . . . . . . . . . . . . . . . . . . . . . . . . . . . . . . . . . . . . . . . . . . . . . . . . . . . . . . . . . . . . . . . . . . . . . 71<br />
4. Free Bass Edit parameters. . . . . . . . . . . . . . . . . . . . . . . . . . . . . . . . . . . . . . . . . . . . . . . . . . . . . . . . . . . . . . . . . . 74<br />
5. Orch.Bass Edit parameters . . . . . . . . . . . . . . . . . . . . . . . . . . . . . . . . . . . . . . . . . . . . . . . . . . . . . . . . . . . . . . . . . 76<br />
6. Orchestra Edit parameters . . . . . . . . . . . . . . . . . . . . . . . . . . . . . . . . . . . . . . . . . . . . . . . . . . . . . . . . . . . . . . . . . 78<br />
7. Orch. Chord Edit parameters . . . . . . . . . . . . . . . . . . . . . . . . . . . . . . . . . . . . . . . . . . . . . . . . . . . . . . . . . . . . . . . 79<br />
8. Orch.FBass Edit parameters . . . . . . . . . . . . . . . . . . . . . . . . . . . . . . . . . . . . . . . . . . . . . . . . . . . . . . . . . . . . . . . . 81<br />
9. Set Common parameters . . . . . . . . . . . . . . . . . . . . . . . . . . . . . . . . . . . . . . . . . . . . . . . . . . . . . . . . . . . . . . . . . . 82<br />
10. System parameters . . . . . . . . . . . . . . . . . . . . . . . . . . . . . . . . . . . . . . . . . . . . . . . . . . . . . . . . . . . . . . . . . . . . . . 86<br />
11. Utility parameters . . . . . . . . . . . . . . . . . . . . . . . . . . . . . . . . . . . . . . . . . . . . . . . . . . . . . . . . . . . . . . . . . . . . . . . 97<br />
17.Saving settings using the WRITE function . . . . . . . . . . . . . . . . . . . . . . . . . . . . . . . . . . . . . . . . . .103<br />
Saving your changes (automatic approach) . . . . . . . . . . . . . . . . . . . . . . . . . . . . . . . . . . . . . . . . . . . . . . . . . . . 103<br />
Saving your changes (manual approach). . . . . . . . . . . . . . . . . . . . . . . . . . . . . . . . . . . . . . . . . . . . . . . . . . . . . . 103<br />
Ignoring certain settings for the WRITE operation. . . . . . . . . . . . . . . . . . . . . . . . . . . . . . . . . . . . . . . . . . . . . . 104<br />
Saving all Sets or just a single Set. . . . . . . . . . . . . . . . . . . . . . . . . . . . . . . . . . . . . . . . . . . . . . . . . . . . . . . . . . . . 105<br />
Saving all registers or just a single register . . . . . . . . . . . . . . . . . . . . . . . . . . . . . . . . . . . . . . . . . . . . . . . . . . . . 105<br />
Saving just a specific parameter group . . . . . . . . . . . . . . . . . . . . . . . . . . . . . . . . . . . . . . . . . . . . . . . . . . . . . . . 106<br />
18.MIDI functions . . . . . . . . . . . . . . . . . . . . . . . . . . . . . . . . . . . . . . . . . . . . . . . . . . . . . . . . . . . . . . . .107<br />
About MIDI . . . . . . . . . . . . . . . . . . . . . . . . . . . . . . . . . . . . . . . . . . . . . . . . . . . . . . . . . . . . . . . . . . . . . . . . . . . . . . . 107<br />
Global MIDI parameters. . . . . . . . . . . . . . . . . . . . . . . . . . . . . . . . . . . . . . . . . . . . . . . . . . . . . . . . . . . . . . . . . . . . . 109<br />
MIDI parameters for the various sections/parts . . . . . . . . . . . . . . . . . . . . . . . . . . . . . . . . . . . . . . . . . . . . . . . . 113<br />
19.Troubleshooting . . . . . . . . . . . . . . . . . . . . . . . . . . . . . . . . . . . . . . . . . . . . . . . . . . . . . . . . . . . . . . .116<br />
20.Specifications. . . . . . . . . . . . . . . . . . . . . . . . . . . . . . . . . . . . . . . . . . . . . . . . . . . . . . . . . . . . . . . . .119<br />
21.Appendix . . . . . . . . . . . . . . . . . . . . . . . . . . . . . . . . . . . . . . . . . . . . . . . . . . . . . . . . . . . . . . . . . . . .121<br />
Parameter list . . . . . . . . . . . . . . . . . . . . . . . . . . . . . . . . . . . . . . . . . . . . . . . . . . . . . . . . . . . . . . . . . . . . . . . . . . . . . 121<br />
Factory Sets . . . . . . . . . . . . . . . . . . . . . . . . . . . . . . . . . . . . . . . . . . . . . . . . . . . . . . . . . . . . . . . . . . . . . . . . . . . . . . . 126<br />
Demo Songs . . . . . . . . . . . . . . . . . . . . . . . . . . . . . . . . . . . . . . . . . . . . . . . . . . . . . . . . . . . . . . . . . . . . . . . . . . . . . . 126<br />
Orchestral sounds and bellows/velocity control . . . . . . . . . . . . . . . . . . . . . . . . . . . . . . . . . . . . . . . . . . . . . . . . 128<br />
Drum & percussion sounds. . . . . . . . . . . . . . . . . . . . . . . . . . . . . . . . . . . . . . . . . . . . . . . . . . . . . . . . . . . . . . . . . . 129<br />
22.MIDI implementation. . . . . . . . . . . . . . . . . . . . . . . . . . . . . . . . . . . . . . . . . . . . . . . . . . . . . . . . . . .130<br />
MIDI Implementation Chart . . . . . . . . . . . . . . . . . . . . . . . . . . . . . . . . . . . . . . . . . . . . . . . . . . . . . . . . . . . . . . . . . 133<br />
23.Information . . . . . . . . . . . . . . . . . . . . . . . . . . . . . . . . . . . . . . . . . . . . . . . . . . . . . . . . . . . . . . . . . .134<br />
24.Index. . . . . . . . . . . . . . . . . . . . . . . . . . . . . . . . . . . . . . . . . . . . . . . . . . . . . . . . . . . . . . . . . . . . . . . .135
V-Accordion r<br />
Features<br />
2. Features<br />
Battery-powered instrument with built-in<br />
speakers<br />
Though the FR-7x is a fully electronic instrument, you<br />
do not need to connect it to an amplifier in order to<br />
produce sounds. Its onboard amplification system is<br />
powerful enough for small venues, restaurants, etc.<br />
Furthermore, the FR-7x comes with a rechargeable<br />
battery pack (Ni-Mh) so that you do not need to connect<br />
it to a wall outlet.<br />
PBM (Physical Behavior Modeling)<br />
The FR-7x V-Accordion is based on Roland’s sound<br />
generation technology called “PBM” (Physical Behavior<br />
Modeling) whose sonic result is very close to the<br />
sound of traditional accordions.<br />
Super realistic sounds<br />
All sounds the FR-7x produces were obtained by<br />
sampling the most popular traditional acoustic<br />
accordions, allowing you to switch from an Italian<br />
jazz accordion to German folk, French musette or a<br />
historic bandoneon sound – without changing your<br />
technique. Different tuning systems are also available.<br />
The FR-7x is also equipped with orchestral sounds<br />
that can be used in combination with traditional<br />
accordion sounds – complete with full bellows articulation<br />
and unique keyboard modes (Solo, Dual, High<br />
and Low as well as “M” variants of these modes). The<br />
orchestral sounds can be freely assigned to the<br />
desired register for optimum flexibility. You can also<br />
assign other orchestral sounds to the registers.<br />
Tonewheel organ sounds<br />
Thanks to its tonewheel organ sound engine, the<br />
FR-7x allows you to play amazing organ sounds like<br />
an organ player by using the treble (TW Upper), chord<br />
(TW Lower) and bass (TW Pedal) sections.<br />
Drum sounds<br />
You can also use the FR-7x to play simply drum parts<br />
with you left hand by assigning drums and percussion<br />
sounds to the bass and chord buttons.<br />
Sound expansion<br />
The FR-7x provides two internal memories that allow<br />
you to add new sounds.<br />
Sophisticated bellows response<br />
Faster response and higher sensitivity and precision<br />
plus detection of bellows opening/closing with new<br />
bellows pressure sensing circuitry.<br />
A bellows resistance regulator knob allows you to<br />
adjust the bellows’ inertia to your preference.<br />
Audio player and recorder on a connected USB<br />
storage device<br />
The FR-7x provides an audio player function that can<br />
play back mp3 and WAV files on a connected USB<br />
storage device. You can also record your performances<br />
as WAV files.<br />
Intuitive user interface<br />
The FR-7x comes with an organic LED display for<br />
instant and clear visual feedback thanks to a new<br />
graphic interface.<br />
The digital advantage<br />
The V-Accordion includes all functions and sounds of<br />
a traditional accordion, thus conveying a really natural<br />
feel and sound. Yet it also provides the advantages<br />
only an electronic musical instrument can give<br />
you:<br />
• reduced overall weight;<br />
• possibility to choose among a wide variety of sounds;<br />
• you can create and customize the accordion timbres<br />
(program your own sounds);<br />
• you can choose among various bass button operation<br />
modes (Minor 3rd Free Bass, 5th, Bayan, North<br />
Europe, Finnish);<br />
•tuning stability over time and wear resistance of all<br />
mechanical parts;<br />
• you can sound in a different key than the one you are<br />
playing in (transpose function);<br />
• you can play with headphones, i.e. without disturbing<br />
your neighbors or family.<br />
Superb performance flexibility<br />
The V-Accordion allows you to control external MIDIcompatible<br />
instruments. The treble keyboard and<br />
chord/bass buttons are velocity-sensitive, while the<br />
bellows controller provides more articulation possibilities<br />
than any other MIDI keyboard, MIDI wind<br />
instrument, etc., you may know.<br />
11
FR-7x V-Accordion<br />
® Panel descriptions<br />
3. Panel descriptions<br />
Treble control panel<br />
A<br />
C<br />
B<br />
D<br />
B<br />
J<br />
I<br />
K<br />
E<br />
F<br />
L<br />
G<br />
M<br />
H<br />
r<br />
A DATA/ENTER knob<br />
This knob allows you to scroll through and select<br />
menu pages, and to modify parameter values. It also<br />
allows you to start/stop an external MIDI device (see<br />
p. 93).<br />
B UP/DOWN buttons<br />
On the main page, [UP] and [DOWN] allow you to<br />
select 9 important functions.<br />
When the menu is displayed, [UP] and [DOWN] are<br />
used to scroll menu pages.<br />
C EXIT/JUMP button<br />
The [EXIT÷JUMP] button allows you to return to the<br />
main page. After selecting a menu function, briefly<br />
pressing [EXIT÷JUMP] takes you back to a higher level.<br />
Press it again to return to the main page.<br />
By holding down [EXIT÷JUMP] while the main page is<br />
displayed, you activate the JUMP function (see p. 62).<br />
D MENU/WRITE button<br />
This button allows you to select the FR-7x’s MENU<br />
environment where you can set and view all available<br />
functions. By holding down [MENU÷WRITE], you activate<br />
the WRITE function, which allows you to save<br />
your settings.<br />
E VOLUME knob<br />
This knob allows you to set the V-Accordion’s overall<br />
volume.<br />
F BALANCE knob<br />
This knob allows you to set the balance between the<br />
Bass and the Treble sections. Turn it towards “BASS”<br />
to decrease the Treble section’s volume. Turn it<br />
towards “TREBLE” to decrease the Bass section’s volume.<br />
G SET buttons<br />
These two buttons allow you to choose among 80<br />
accordion Sets. Each Set contains suitable settings<br />
for all sections (accordion, orchestral/tonewheel<br />
organ, drums).<br />
H Treble/Orchestra registers<br />
The Treble section contains 14 registers (switches) +<br />
ORCHESTRA selector that allow you to select the<br />
desired sound.<br />
Note: In ORCHESTRA mode registers [1]~[13] provide access<br />
to two sounds (A/B). To select a “B” sound, press the corresponding<br />
register twice.<br />
Note: By pressing and holding any register, you can switch<br />
off the Treble section. Press another register to switch it<br />
back on.<br />
I POWER button<br />
Press this button to switch the V-Accordion on (the<br />
button lights) and off (button dark).<br />
Note: The FR-7x is automatically switched off after 10 minutes<br />
of inaction to save battery power. This can be changed,<br />
however (see p. 92). Be aware that any unsaved changes are<br />
lost when the FR-7x is switched off by that function.<br />
J SORDINA switch<br />
This ON/OFF switch allows you to switch the simulation<br />
of the wooden resonance chamber on and off.<br />
K DELAY knob<br />
The FR-7x contains three digital effects that can be<br />
used simultaneously. This knob is used to set the level<br />
of the delay (echo) effect (see p. 85).<br />
L CHORUS knob<br />
Use this knob to set the level of the chorus effect (see<br />
p. 83).<br />
M REVERB knob<br />
Use this knob to set the level of the reverb effect (see<br />
p. 82).<br />
12
V-Accordion r<br />
Treble control panel<br />
Bass control panel<br />
N<br />
O<br />
P<br />
N Bass registers<br />
These switches allow you to select the desired bass<br />
mix.<br />
Note: By pressing and holding any register, you can switch<br />
off the Bass (or Free Bass) section. Press another register to<br />
switch it back on.<br />
O Bass and chord buttons<br />
These 120 buttons are used to play bass notes and<br />
chords They are velocity-sensitive). They also allow<br />
you to play drum sounds.<br />
P Bellows resistance and air button<br />
This wheel allows you to specify the bellows’ inertia<br />
(the force needed to push and pull it). See page 21.<br />
By pressing it you can purge the air that still remains<br />
in the bellows after playing.<br />
Display and master bar<br />
Q<br />
Q Master bar<br />
In most cases, this bar (which you can<br />
press) recalls a treble register you specify. In<br />
Dual, High or Low mode, however, it allows<br />
you to switch the Orchestra section on and<br />
off.<br />
On the button-type model, the Master bar<br />
can also be used for Aftertouch messages.<br />
R Display<br />
This organic LED display shows information<br />
related to your operation.<br />
R<br />
13
FR-7x V-Accordion<br />
® Treble control panel<br />
Battery compartment and USB port<br />
S<br />
T<br />
S Battery compartment<br />
This is where you install the supplied battery<br />
pack (see p. 16).<br />
T USB port cover<br />
The FR-7x’s USB port allows you to connect<br />
a USB storage device. It can be used to<br />
record your playing, to play back audio files<br />
(MP3 and WAV) and to save and load settings.<br />
Note: Use USB memory sold by Roland. We cannot<br />
guarantee operation if any other USB memory<br />
is used.<br />
Connection panel<br />
U<br />
V<br />
W<br />
U TO FBC-7 socket<br />
Use the supplied cable to connect this socket to the<br />
supplied FBC-7 power supply/footswitch unit/battery<br />
charger.<br />
V OUTPUT L/MONO (TREBLE) & R/MONO (BASS) sockets<br />
These sockets can be connected to an amplifier, a<br />
mixing console or a wireless system.<br />
If you use both connectors, the FR-7x’s output is stereo.<br />
If you only use one jack (connected to the “L” or<br />
“R” socket), the FR-7x’s output is mono.<br />
Note: If you don’t plan to use a commercially available<br />
wireless system, consider connecting the FR-7x to the<br />
FBC-7 when you need to connect it to an external amplifier.<br />
Note: Connecting jacks to these sockets does not mute the<br />
internal speakers.<br />
W PHONES socket<br />
This is where you can connect optional stereo headphones<br />
(Roland RH-series). Connecting a pair of<br />
headphones mutes the internal speakers.<br />
r<br />
Connection panel of the FBC-7<br />
A B C D E F<br />
A POWER ON switch<br />
Press it to switch the FBC-7 on and off.<br />
Note: This switch only switches on the FBC-7. To switch on<br />
the FR-7x, use its [POWER] button.<br />
B AC connector<br />
This is where you need to connect the supplied power<br />
cable. See also page 18.<br />
C MIDI THRU/OUT/IN sockets<br />
Use these sockets to connect the FR-7x to external<br />
MIDI gear (see p. 107).<br />
D OUTPUT R/MONO & L/MONO sockets<br />
Connect these sockets to an external amplifier or<br />
mixing console. For stereo operation, be sure to connect<br />
both jacks.<br />
14
V-Accordion r<br />
Treble control panel<br />
E EXPRESSION PEDAL socket<br />
This is where you can connect an optional EV-series<br />
expression pedal (see p. 58).<br />
F TO V-ACCORDION socket<br />
Use the supplied 19-pin cable to connect this socket<br />
to your FR-7x.<br />
Note: See also “Using the FBC-7” on p. 58 for additional<br />
functions of the FBC-7.<br />
15
FR-7x V-Accordion<br />
® Before you start using the FR-7x<br />
4. Before you start using the FR-7x<br />
Installing the battery pack<br />
The FR-7x comes with a rechargeable battery pack that<br />
is needs to be installed when you first unpack the FR-7x.<br />
You can also decide to use the FBC-7 instead (see “Connecting<br />
the FR-7x to the supplied FBC-7”).<br />
(1) Set the FR-7x upright as shown in the illustration<br />
below.<br />
(2) Prepare a coin.<br />
(3) Remove the cushion located between the Treble<br />
keyboard and the bellows.<br />
(4) Use the coin to loosen the two screws of the battery<br />
pack compartment cover.<br />
(9) Close the FR-7x’s battery compartment and reinstall<br />
the cushion.<br />
Note: Be sure to tighten the two screws all the way to<br />
establish firm contact between the compartment cover and<br />
the instrument. Otherwise, you won’t be able to use your<br />
FR-7x.<br />
Connecting the FR-7x to the<br />
supplied FBC-7<br />
Your FR-7x comes with an FBC-7 footswitch unit that<br />
doubles as power supply for your V-Accordion and also<br />
allows you to recharge a battery pack.<br />
If the rechargeable battery pack is installed, you can<br />
also play your instrument without connecting it to the<br />
FBC-7.<br />
Note: See “About the FBC-7” on p. 58 for details about using<br />
the FBC-7.<br />
(1) Connect the supplied 19-pin cable to the FR-7x.<br />
Turn the ring to lock the jack<br />
and secure the connection<br />
r<br />
(5) Remove the cover from the FR-7x’s battery pack<br />
compartment.<br />
Note: While the compartment cover is open, the FR-7x<br />
cannot be switched on.<br />
(6) Pull out the battery connection cable on the right<br />
side.<br />
(7) Connect the FR-7x’s cable to the battery pack and<br />
insert the battery pack into the FR-7x’s compartment.<br />
(8) Arrange the strip on the battery pack in such a way<br />
that it will not prevent you from installing the battery<br />
pack compartment cover.<br />
16<br />
Holes<br />
Protrusions<br />
The 19-pin cable can only be connected in one way,<br />
so you can’t go wrong. Just be sure to align the protrusions<br />
on the jack with the corresponding holes on<br />
the FR-7x’s socket.<br />
(2) Connect the other end of the 19-in cable to the<br />
FBC-7.<br />
Connecting the FBC-7 to a wall outlet<br />
This is only necessary if you connected the FR-7x to the<br />
FBC-7.<br />
Note: To prevent malfunction and/or damage to speakers or<br />
other devices, always turn down the volume, and turn off the<br />
power on all devices before making any connections.<br />
(1) Connect the FBC-7’s AC INLET socket to a wall outlet.<br />
To a wall outlet
V-Accordion r<br />
Other connections<br />
Other connections<br />
The FR-7x can be used without any connections to either an amplification system or the FBC-7 power supply/battery<br />
charger unit.<br />
Connecting the FR-7x to an amplification system<br />
If you are using the supplied<br />
rechargeable battery pack and need<br />
to connect the FR-7x to a PA system<br />
or mixer, we recommend using<br />
a commercially available wireless<br />
system to avoid using excessively<br />
long signal cables.<br />
The FR-7x is equipped with an<br />
internal speaker system and therefore<br />
does not need to be connected<br />
to an amplifier at all.<br />
You can also use a pair of headphones<br />
(Roland RH-series). See “Listening<br />
through headphones” on<br />
p. 19.<br />
OUTPUT<br />
L/MONO (Treble) + R/MONO (Bass)<br />
INPUT<br />
L + R<br />
Use either a long signal cable (10m or more) or an optional wireless system (recommended).<br />
The FR-7x’s sounds have been arranged in such a way as to provide a natural stereo image. If you connect the V-Accordion to a mixing<br />
console, set the PAN control of the input to which the OUTPUT L socket (treble section) is connected to “11 o’clock”. Set the PAN<br />
control of the channel to which the OUTPUT R socket (bass & chord section) is connected to “3 o’clock” to preserve this balance. Something<br />
like this: T B/C . This setting can be changed, however (see p. 90).<br />
Note: The FR-7x’s OUTPUT sockets are also available if you connect the FR-7x to the FBC-7. Never connect them to any of the FBC-7’s<br />
sockets.<br />
Note: If you use a commercially available wireless transmitter, the FR-7x’s output signals may distort. In that case, change the FR-7x’s<br />
output level (see p. 92).<br />
Connecting the FR-7x to the supplied FBC-7 and an amplification system<br />
If you prefer not to use the supplied battery<br />
pack, you need to connect the V-Accordion to<br />
the FBC-7 using the supplied cable. That cable<br />
powers the FR-7x, transmits pedal messages<br />
and sends the FR-7x’s audio signals to the<br />
OUTPUT L/MONO & R sockets on the FBC-7.<br />
While using the FBC-7, there is no real need to<br />
connect the OUTPUT sockets on the FR-7x to<br />
an external amplifier. Connect the FR-7x as<br />
shown in the illustration. See also “Connecting<br />
the FR-7x to the supplied FBC-7” on p. 16.<br />
Note: This connection is required if you wish to<br />
take advantage of the FR-7x’s MIDI functions (see<br />
p. 107).<br />
INPUT<br />
L + R<br />
To a suitable<br />
wall outlet<br />
Use the supplied 19-pin<br />
cable.<br />
OUTPUT<br />
L/MONO + R/MONO<br />
Note: Do not forget to connect<br />
the FBC-7’s AC socket to a suitable<br />
wall outlet.<br />
17
FR-7x V-Accordion<br />
® Switching the power on and off<br />
Switching the power on and off<br />
The power-on procedure depends on whether you are<br />
using a battery pack or the FBC-7 Foot Pedal/DC Power/<br />
Battery Charger Unit.<br />
■ Important notes<br />
• Before connecting the FR-7x to an amplification system,<br />
be sure to switch off both the FR-7x and the<br />
external device.<br />
• Connect the FR-7x’s OUTPUT sockets to the line<br />
input(s) of your amplifier or mixer.<br />
•After establishing the connections, first switch on the<br />
FR-7x, then the amplifier or mixer.<br />
If the FR-7x is connected to the FBC-7<br />
Once the connections have been completed, turn on the<br />
power to your various devices in the order specified. By<br />
turning on devices in the wrong order, you risk causing<br />
malfunction and/or damage to speakers and other<br />
devices.<br />
■ Turning the power on<br />
(1) Connect the FR-7x to the FBC-7 using the supplied<br />
19-pin cable (see p. 16). Also connect the FBC-7 to<br />
a wall outlet.<br />
(2) Press the FBC-7’s [POWER¥ON] button to switch it<br />
on.<br />
If you are using the battery pack (without the<br />
FBC-7)<br />
Note: Only use the battery pack that either came with your<br />
FR-7x or that you purchased from your Roland dealer. Using<br />
other batteries can severely damage the FR-7x or FBC-7.<br />
Roland assumes no responsibility for damages caused by batteries<br />
that have not been explicitly approved. Such damages<br />
are not covered by Roland’s warranty regulations.<br />
Note: When operating on battery power the main page displays<br />
a battery icon that informs you about the remaining<br />
power (three bars means the battery pack is fully charged). The<br />
message “LOW BATTERY. PLEASE RECHARGE!” will be displayed<br />
when battery power gets too low. Replace or recharge the battery<br />
pack as soon as possible (see p. 59).<br />
■ Turning the power on<br />
(1) Turn the [VOLUME] knob all the way to the left to<br />
minimize the volume.<br />
(2) Press the FR-7’s [POWER] button to switch it on (it<br />
lights).<br />
The POWER ON indicator on the FBC-7’s top panel<br />
lights red.<br />
(3) Turn the FR-7x’s [VOLUME] knob all the way to the<br />
left to minimize the volume.<br />
(4) Press the FR-7x’s [POWER] button (it lights) to<br />
switch it on.<br />
r<br />
(3) Adjust the volume to an appropriate level.<br />
■ Turning the power off<br />
(1) Turn the [VOLUME] knob all the way to the left to<br />
minimize the volume.<br />
(2) Press the [POWER] button again so that it goes<br />
dark.<br />
Note: Expected battery life under continuous use: Ni-MH:<br />
8 hours. This figure will vary depending on the actual conditions<br />
of use.<br />
18<br />
The icon in the display means that the FR-7x is<br />
powered by the FBC-7.<br />
(5) If connected, switch on your amplification system.<br />
(6) Adjust the volume to an appropriate level.<br />
Note: This unit is equipped with a protection circuit. A<br />
brief interval (a few seconds) after power up is required<br />
before the unit will operate normally.
V-Accordion r<br />
Turning the power off<br />
Turning the power off<br />
(1) Turn the FR-7x’s [VOLUME] knob all the way to the<br />
left to minimize the volume.<br />
(2) If connected, switch off your external amplification<br />
system.<br />
(3) Press the FR-7x’s [POWER] button to switch it off<br />
(it goes dark).<br />
Listening through headphones<br />
You can use headphones to enjoy the FR-7x without<br />
disturbing those around you, such as at night.<br />
The display and the [POWER] button will go dark and<br />
the power will turn off.<br />
(4) Press the FBC-7’s [POWER¥ON] button to switch it<br />
off.<br />
Note: If you need to turn off the power completely, first<br />
turn off the [POWER¥ON] button, then unplug the power<br />
cord from the power outlet.<br />
(1) Plug the optional headphones into the PHONES<br />
socket located on the FR-7x’s connection panel.<br />
Note: The FR-7x’s speakers are switched off when you connect<br />
headphones.<br />
(2) Use the FR-7x’s [VOLUME] knob to adjust the headphone<br />
volume.<br />
■ Cautions when using headphones<br />
•To prevent damage to the cord’s internal conductors,<br />
avoid rough handling. When using headphones,<br />
mainly try to handle either the plug or the headset.<br />
• Your headphones may be damaged if the volume of a<br />
device is already turned up when you plug them in.<br />
Minimize the volume before you plug in the headphones.<br />
•Excessive input will not only damage your hearing,<br />
but may also strain the headphones. Please enjoy<br />
music at an appropriate volume.<br />
19
FR-7x V-Accordion<br />
® Listening to the demo songs<br />
5. Listening to the demo songs<br />
The FR-7x contains indeed several of demo songs that illustrate its wide variety of sounds and applications. Here is how<br />
to listen to the demo songs:<br />
(1) Switch on the FR-7x.<br />
See “Switching the power on and off” on page 18.<br />
The display now looks more or less as follows:<br />
(3) Use the SET [√][®] buttons to select another demo<br />
song.<br />
(4) Use the [VOLUME] knob to change the volume if it<br />
is too loud or too soft.<br />
(5) Press [EXIT÷JUMP] (or again SET [√] and [®] simultaneously)<br />
to leave demo mode.<br />
Let us agree to call this page the “main page”.<br />
(2) Simultaneously press and hold the SET [√][®] buttons<br />
to jump to the following display page:<br />
Note: All rights reserved. Unauthorized use of this material<br />
for purposes other than private, personal enjoyment is a<br />
violation of applicable laws.<br />
Note: No data for the music that is played will be output<br />
from MIDI OUT.<br />
Playback starts automatically with the first demo<br />
song (there are 35 demo songs in all). See the table<br />
on page 126.<br />
r<br />
20
V-Accordion r<br />
Basic operation of the FR-7x<br />
6. Basic operation of the FR-7x<br />
Let us first take a look at how the FR-7x is organized and how it is operated. The FR-7x is far more powerful than even the<br />
finest accordion collection, yet the Roland engineers have done their utmost to allow even casual musicians to take<br />
advantage of its power.<br />
The sections of your FR-7x<br />
Let’s briefly look at the various “sections” of your instrument,<br />
as that will help you understand how your<br />
V-Accordion works.<br />
Master bar<br />
Bellows<br />
Bass section<br />
•In accordion mode, it recalls a treble register of your<br />
choice (see “9.8 Master Bar Recall” on p. 86).<br />
•In orchestra mode, it switches the ORCHESTRA part<br />
on and off.<br />
Only for the button-type model:<br />
The FR-7x’s Master bar has two functions:<br />
•Pressing it gently allows you to set aftertouch values<br />
(on the piano-type model, aftertouch is generated by<br />
the keyboard).<br />
•Press it more forcefully (at the end of the stroke) to<br />
use it in the same way as on the piano-type model<br />
(see above).<br />
Treble section<br />
Registers of the bass, chord and orchestral<br />
bass/chord sections<br />
■ Treble section (right-hand manual)<br />
This section is normally used for playing the melody.<br />
There are two keyboard types: a piano keyboard and a<br />
button type.<br />
The FR-7x’s treble section is velocity sensitive and<br />
also provides aftertouch.<br />
Note: On the button-type model, aftertouch messages are<br />
generated with the Master bar.<br />
■ Bass section<br />
This section is normally used to play the accompaniment.<br />
It always uses buttons. There are two general<br />
categories: one is called “Stradella”, and the other<br />
“Free Bass”. The FR-7x allows you to use either type.<br />
The “Stradella” system, also called the “standard bass<br />
system” uses the first 2 (or 3) button rows to play<br />
bass notes. The remaining button rows are used to<br />
play chords.<br />
If you select the “Free Bass” system, all buttons are<br />
used to play chords.<br />
The FR-7x’s bass section is velocity sensitive.<br />
■ Bellows<br />
The bellows is an important part of the accordion.<br />
The movement of the bellows indeed lends expression<br />
and dynamics to the sound. Several techniques<br />
are available, one of which is called “bellows shake”<br />
(rapid opening and closing movements).<br />
The bellows’ inertia can be set with the resistance<br />
regulation and air button.<br />
Practical information<br />
Bellows resistance regulator<br />
Your FR-7x is equipped with a bellows resistance regulator<br />
and air button that allows you to specify the bellows’<br />
inertia (the force needed to push and pull it).<br />
Bellows resistance regulator. Press<br />
and turn to select the bellows’<br />
resistance.<br />
Air button. Press to purge<br />
remaining air after playing.<br />
Located next to one of the bellows clips and mounted<br />
onto the air button (which allows you to release remaining<br />
air from the bellows without producing sound). Each<br />
position corresponds to a lighter (turn towards “MAX”)<br />
or stronger (turn towards “MIN”) inertia. Press the wheel<br />
and rotate it to choose the setting that feels most comfortable<br />
for you.<br />
The air button allows you to purge the remaining air<br />
from the bellows after closing it (pressing it in).<br />
■ Master bar<br />
On a traditional accordion, the Master bar recalls the<br />
“Master” register. The FR-7x allows you to use the<br />
Master bar more flexibly:<br />
21
FR-7x V-Accordion<br />
® About the main page<br />
Bass strap<br />
The FR-7x’s bass strap,<br />
which is used to move the<br />
bellows in and out, is made<br />
of leather. Its slack can be<br />
adjusted according to your<br />
preference by rotating the<br />
adjuster (see the illustration).<br />
Turn it to one side to<br />
tighten the bass strap, and<br />
to the other to loosen it.<br />
Bass strap<br />
Adjuster<br />
About the main page<br />
With the exception of the display and the additional<br />
buttons and knobs, the FR-7x looks and feels like a conventional<br />
accordion. The display contains important<br />
clues about the settings that are currently in effect.<br />
What’s shown in the display depends on the function<br />
you select. When you switch on the FR-7x, or if you<br />
press the [EXIT÷JUMP] button several times, the main<br />
page appears.<br />
In some cases, it may also reappear automatically after<br />
changing a parameter. The main page must be displayed<br />
whenever you wish to play the FR-7x without changing<br />
any of its “internal” settings.<br />
A typical main page display looks like this:<br />
A<br />
B<br />
C<br />
D<br />
E<br />
H<br />
F<br />
G<br />
r<br />
The exact contents of the display depend on the Set that<br />
is currently selected and on how the various sections<br />
and performance functions are set. The A~H fields,<br />
however, are always there:<br />
A Orchestra mode<br />
B Name and number of the currently selected Set<br />
C Battery level/power source indicator<br />
Shows whether the FR-7x is working on the battery<br />
pack or connected to the FBC-7. If you are working<br />
with the battery pack, this field also indicates the<br />
remaining battery power.<br />
D Selected Orchestra register<br />
A bold line below the Orchestra register number<br />
means that a sound of group “B” is selected (see<br />
“Orchestral sounds for the treble section” on p. 29).<br />
E Selected Treble register<br />
F Bass, Free Bass, Orchestra Bass, Orchestra Chord,<br />
Orchestra Free Bass register<br />
Only one of the two available Bass sections (Free Bass<br />
or Bass) can be active at any one time.<br />
G Link symbols<br />
These symbols mean that the Orchestra (upper entry)<br />
and Bass registers change whenever you select a different<br />
Treble register (page 68). The Bass Link function<br />
also applies to the Orchestra Chord section (or<br />
the Orchestra Free Bass section).<br />
H Part Select indicator<br />
This indications tells you whether the Treble keyboard<br />
plays the accordion or orchestral sound.<br />
Note: The information shown in the display may change<br />
when you rotate a knob or press a button. In such cases,<br />
however, the main page reappears after a few seconds.<br />
22
V-Accordion r<br />
Using Sets<br />
7. Using Sets<br />
The FR-7x is a “virtual” accordion. It recreates the sounds of various accordion instruments and can even generate<br />
orchestral sounds (like trumpet, flute, etc.), organ and drum sounds.<br />
The sections discussed on page 21 contain several functions<br />
you can set. Let us agree to call those functions<br />
“parameters”.<br />
Each section has its own parameters. You can save your<br />
settings and recall them whenever you need them.<br />
The various sections are combined into “Sets”. That<br />
way, you only need to select one memory (the Set) in<br />
order to save and recall the settings of all sections.<br />
(1) Use the SET [√][®] buttons on the FR-7x or the SET<br />
([1], [2]) footswitches on the FBC-7 (if it is connected<br />
to the FR-7x) to select the desired Set.<br />
Set 80<br />
COMMON<br />
Reverb<br />
Chorus<br />
Delay<br />
Name<br />
Icon<br />
Master Bar<br />
Set 3<br />
Set 2<br />
Set 1<br />
Treble<br />
1~14<br />
Bass<br />
1~7<br />
Free Bass<br />
1~7<br />
Orch. Chord<br />
1~7<br />
Orch. Bass<br />
1~7<br />
Orchestral<br />
1~26<br />
There are about 40 Set memories that already contain<br />
useful settings right out of the box. But you can replace<br />
them with your own settings. (And if 80 Sets are not<br />
enough, you can archive and load new sets using a USB<br />
memory).<br />
Sets are like the trunk of a car that contains several<br />
accordion instruments (bandoneon, musette, etc.). The<br />
instruments themselves can be recalled via the registers.<br />
There are 14 Treble registers, 7 Bass, Free Bass, Orchestra<br />
Chord, Orchestra Free Bass, and Orchestra Bass registers,<br />
and 26 Orchestra registers per Set. they allow you to<br />
change the footage combinations.<br />
At the factory, the FR-7x’s Sets are programmed to<br />
allow you to decide whether you want to recall orchestral<br />
sounds, virtual organ sounds and/or drum sounds.<br />
Unlike its predecessor (the FR-7), the FR-7x allows you<br />
to assign any of the 49 orchestral sounds to whichever<br />
register you like (see p. 51).<br />
To play orchestral sounds (violin, saxophone, trumpet,<br />
etc.), select Set 30.<br />
To play the FR-7x’s outstanding tonewheel organ<br />
(TW) sounds, select Set 37.<br />
To play a drum part simply by pressing the bass and<br />
chord buttons in the bass section, select Set 36.<br />
(2) Again press a SET [√][®] button to select other<br />
sounds.<br />
Direct Set selection<br />
If you already know which Set you want to use, you can<br />
also select it directly:<br />
(1) While the main page is displayed, press and hold<br />
the SET [√] or [®] button.<br />
(2) Use the treble registers [1]~[10] to enter the number<br />
of the desired Set.<br />
Let us now look at how to select Sets, thereby recalling<br />
other accordion sounds, orchestral sounds (including<br />
tonewheel organ sounds) and drum sounds.<br />
The [10] register is used to enter the number “0”.<br />
To select Set “1”, for instance, you need to press register<br />
[10], then register [1]. To select Set “37”, first<br />
press register [3], then register [7].<br />
Note: If you only press one register ([5], for example), the<br />
FR-7x automatically selects that Set after ±2 seconds.<br />
23
FR-7x V-Accordion<br />
® Touring the FR-7x’s accordion sections<br />
8. Touring the FR-7x’s accordion sections<br />
Let us now have a look at how to play the FR-7x’s accordion sounds.<br />
Treble section (right hand)<br />
The Treble section can be played using the 41-key<br />
“piano” keyboard (piano-type model) or the 92 treble<br />
buttons (button-type model).<br />
The sound it produces is determined by the register (1~<br />
14) you pressed last. This section can be used to play<br />
accordion sounds, orchestral sounds, or both.<br />
These indications refer to the octaves (vertical direction,<br />
) and the number of slightly detuned reeds<br />
that are used (horizontal direction, ).<br />
The detuned reeds are only available for the central 8’<br />
footage.<br />
8–' 4'<br />
2 1<br />
2 / 3 ' 5 / 3 '<br />
8' 16' 8+'<br />
Black dots mean that the Cassotto function (see<br />
p. 66) is off, hollow dots mean that the Cassotto<br />
function is on. Here is what the registers and display<br />
indications mean (remember that the dots can either<br />
be black or white):<br />
Treble registers<br />
1 BASSOON 8 MASTER<br />
Piano-type<br />
Button-type<br />
Note: By pressing and holding any register, you can switch off<br />
the Treble section. (Even in that case, the Treble section continues<br />
to send MIDI commands.) Press another register to<br />
switch it back on.<br />
(1) Connect the FR-7x (if necessary) and switch it on.<br />
See pages 17 and 18.<br />
(2) Press a treble register and start playing on the<br />
“piano” keyboard or the treble buttons.<br />
The FR-7x only produces sound if you move the bellows.<br />
When you don’t move the bellows, you hear<br />
nothing at all (like on an acoustic accordion).<br />
Note: When the FR-7x is controlled via MIDI, or when the<br />
“10.2 Bellows Curves” parameter on p. 86 uses a “Fixed”<br />
setting, there is no need to move the bellows.<br />
(3) Press one of the 14 registers to change the sound.<br />
The display briefly confirms your setting and indicates<br />
which footage you selected.<br />
2 BANDON 9 MUSETTE<br />
3 CELLO 10 CELESTE<br />
4 HARMON 11 TREMOLO<br />
5 ORGAN 12 CLARINET<br />
6 ACCORD 13 OBOE<br />
7 VIOLIN 14 PICCOLO<br />
On the main page, the number of the selected register<br />
appears in the TREBLE field:<br />
r<br />
24
V-Accordion r<br />
Using the Sordina<br />
(4) If you think the sound is too loud or too soft,<br />
change the setting of the [VOLUME] knob.<br />
The FR-7x simulates this effect electronically.<br />
When you switch on the Sordina, the display briefly<br />
confirms your selection:<br />
Note: The Sordina only applies to the Treble section.<br />
Bass and chord section (left hand)<br />
The bass notes and chords section can be played via the<br />
“Stradella” buttons.<br />
(5) If you still can’t hear the Treble notes, set the<br />
[BALANCE] knob to the center position.<br />
Bass buttons<br />
Chord buttons<br />
This knob is used to set the balance between the Treble<br />
and Bass registers. When it is turned all the way<br />
to BASS, the Treble section is inaudible. When you<br />
change the Balance setting, the display briefly confirms<br />
your setting:<br />
The chords use the (sound) register selected for the Bass<br />
section – hence the name of this section. The “real” bass<br />
notes are assigned to the two circled rows. The remaining<br />
buttons are used to play chords.<br />
The sound the bass section produces is determined by<br />
the register you press. This section can be used as<br />
“accordion”, to play orchestral sounds, or both.<br />
(1) Connect the FR-7x (if necessary) and switch it on.<br />
See pages 17 and 18.<br />
(2) Grab the FR-7x, press a register and start playing<br />
on the bass (button) keyboard.<br />
Using the Sordina<br />
The [SORDINA] switch allows you to attenuate the<br />
sound (make it softer). On an acoustic accordion, this<br />
closes the wooden resonance chamber inside the<br />
instrument.<br />
The FR-7x only produces sound if you move the bellows.<br />
Note: When the FR-7x is controlled via MIDI or if<br />
“10.2 Bellows Curves” on p. 86 uses a “Fixed” setting, there<br />
is no need to move the bellows.<br />
Note: By pressing and holding any register, you can switch<br />
off the bass section. (Even in that case, the bass section<br />
continues to send MIDI commands.) Press another register<br />
to switch it back on.<br />
(3) Press another register to change the sound.<br />
The display briefly confirms your setting and indicates<br />
which footage you selected:<br />
2'<br />
4'<br />
8-4'<br />
8'<br />
16'<br />
These indications refer to the octaves (vertical direction)<br />
and the number of slightly detuned reeds that<br />
are used (horizontal direction).<br />
25
FR-7x V-Accordion<br />
® Using the FR-7x’s digital effects<br />
On the main page, the number and name of the<br />
selected register appears in the BASS field:<br />
(4) If you think the sound is too loud or too soft, you<br />
can change the setting of the [VOLUME] knob.<br />
(5) If you still can’t hear the bass and chord notes you<br />
are playing, change the [BALANCE] knob’s setting.<br />
Using the FR-7x’s digital effects<br />
While playing, you may have noticed that the accordion<br />
sounds were enhanced by effects (probably reverb). The<br />
effect settings are part of the parameters you can save<br />
for each Set independently.<br />
The FR-7x contains 3 digital effects that apply to all sections:<br />
DELAY<br />
CHORUS<br />
REVERB<br />
Effect<br />
Explanation<br />
This knob is used to set the balance between the Treble<br />
and Bass registers. When it is turned all the way<br />
to TREBLE, you won’t be able to hear the Bass section.<br />
Note: You can also play an orchestral sound using the<br />
chord buttons, while playing accordion with the bass buttons,<br />
and vice versa.)<br />
Note: The six buttons of the row closest to the FR-7x logo<br />
can be used to set the desired functions (see p. 88).<br />
Note: You can also assign drum sounds to the bass (and<br />
chord) buttons and play them simultaneously with the<br />
accordion sound (see p. 72).<br />
Reverb<br />
Chorus<br />
Delay<br />
This effect gives the impression that you are<br />
playing in a concert hall, a church or a room. It<br />
adds “depth” to the sound.<br />
This effect gives the impression that several<br />
instruments of the same type are playing at the<br />
same time (it is similar to detuning several reeds<br />
of a register).<br />
This effect creates echoes, i.e. repetitions. Short<br />
intervals (called “slapback”) create an effect similar<br />
to reverb. Longer intervals, on the other<br />
hand, create real echoes.<br />
(1) Use the [DELAY], [CHORUS] or [REVERB] knob to<br />
change the level of de corresponding effect.<br />
Turn it counterclockwise (towards the small dot) if<br />
you don’t need the effect in question.<br />
Turn it clockwise (towards the big dot) to increase the<br />
effect’s volume.<br />
The display briefly shows the level you have set for<br />
the effects processor.<br />
r<br />
Note: The settings of these knobs apply to all sections.<br />
After familiarizing yourself with the FR-7x’s parameters,<br />
you will realize that these knobs should usually<br />
only be used as a last resort (i.e. on stage).<br />
Note: You can program the effect level for each section<br />
separately and save those settings to a Set. See pages 67,<br />
73, 75, 77, 78, 80 and 81.<br />
Note: In certain cases, changing the knob position of an<br />
effect may not produce any audible result. This is due to<br />
the Send Level settings of the sections (see page 67, for<br />
example). The knobs described above affect the output<br />
level of the effects processors.<br />
26
V-Accordion r<br />
Playing in Free Bass mode<br />
Playing in Free Bass mode<br />
The FR-7x provides a Free Bass mode, which is chiefly<br />
used by professionals who prefer to play the left-hand<br />
notes (Bass section) differently. In this mode, all bass<br />
buttons play bass notes – no chords.<br />
Reference caps<br />
The FR-7x is supplied with several reference caps (concave<br />
and with lines) designed to help you locate the bass<br />
and chord buttons without looking at them. At the factory,<br />
three caps are installed on the buttons shown in<br />
black in the illustration below. Feel free to remove them<br />
and to slide them over other buttons if that feels more<br />
comfortable.<br />
Ab3 Eb3 Bb3 F3 C3 G3 D3 A3 E3 B3 F#3 C#3 Ab3 Eb3 Bb3 F3 C3 G3 D3 A3<br />
E3 B3 F#3 C#3 Ab3 Eb3 Bb3 D3 A3 E3 B3 F#3 C#3 Ab3 Eb3 Bb3 F3 C3 G3 F3<br />
EM BM F#M C#M AbM EbM BbM FM CM GM DM AM EM BM F#M C#M AbM EbM BbM FM<br />
Bass<br />
buttons<br />
Em Bm F#m C#m Abm Ebm Bbm Fm Cm Gm Dm Am Em Bm F#m C#m Abm Ebm Bbm Fm<br />
F#7 C#7 Ab7 Eb7 Bb7 G7 D7 A7 F#7 C#7 Ab7 Eb7 Bb7 E7 B7 F7 C7 E7 B7 F7<br />
Bass buttons<br />
Note: See page 90 for how to select the note system for Free<br />
Bass mode. That setting is shared by all Sets.<br />
(1) Simultaneously press the three registers labeled<br />
“FREE BASS”.<br />
Edim Bdim F#dim C#dim Abdim Ebdim Bbdim Fdim Cdim Gdim Ddim Adim Edim Bdim F#dim C#dim Abdim Abdim Bbdim Fdim<br />
Chord buttons*<br />
(*) This can be changed to 3 bass and 3 chord rows. See “10.8 Bass&Chd<br />
Mode” on p. 89.<br />
Here is what the caps look like:<br />
Slide up to remove<br />
Reference cap<br />
Slide over button<br />
The display now briefly responds with (depending on<br />
the Set you selected):<br />
8' 8'<br />
L<br />
H<br />
16' 16'<br />
“L” refers to the low range and “H” to the high range.<br />
The exact ranges depend on the FREE BASS mode you<br />
selected. See also the illustration on page 91 where<br />
the high range is indicated by means of black buttons,<br />
and the low range by means of white buttons.<br />
Note: See page 90 for the assignment of the bass buttons<br />
to the available Free Bass notes.<br />
(2) Use the Bass registers to select another registration<br />
(if necessary).<br />
(3) Press the three FREE BASS registers again to return<br />
to the normal Bass mode.<br />
27
FR-7x V-Accordion<br />
® Playing the bass part with your right hand (Bass-to-Treble)<br />
Playing the bass part with your<br />
right hand (Bass-to-Treble)<br />
The FR-7x provides a mode in which it can be used like a<br />
bassoon accordion. In this mode, the bass part is played<br />
with the right hand. The bass and chord buttons are<br />
inactive (a real bassoon accordion doesn’t have bass/<br />
chord buttons and can only be played with one hand).<br />
(1) Switch on the FR-7x.<br />
See “Switching the power on and off” on page 18.<br />
(2) Press and hold the [ORCHESTRA] register and press<br />
register [7] (“BS TO TREB”).<br />
r<br />
(3) Use the Treble registers [1]~[14] to select the<br />
desired bass-to-treble sound.<br />
There are seven accordion sounds and seven orchestral<br />
sounds. The numbers in the table below refer to<br />
the Treble registers you need to press.<br />
Note: Bass-to-Treble mode uses the FREE BASS (accordion<br />
sounds) and ORCHESTRA BASS (orchestral sounds). The<br />
orchestras sound assignments can be different for each<br />
Set.<br />
(4) Start playing the bass part with your right hand.<br />
(5) Press [ORCHESTRA] + register [7] again to leave<br />
Bass-to-Treble mode.<br />
Note: The Bass-to-Treble mode status can be saved to the<br />
current Set.<br />
28<br />
Bass-to-Treble sounds<br />
Accordion sounds Orchestral sounds<br />
1 Low 8 Acous.Bs<br />
2 High 9 Bowed<br />
3 Low+High 10 Finger Bs<br />
4 Lw+HgLow 11 Fretless<br />
5 LwLow+Hig 12 Picked Bs<br />
6 HighLw+Hg 13 Tuba<br />
7 LowHigh 14 Tuba Mix
V-Accordion r<br />
Playing the FR-7x’s orchestral sounds<br />
9. Playing the FR-7x’s orchestral sounds<br />
The FR-7x contains 49 orchestral sounds (of which 26 can be assigned to the registers), 32 tonewheel organ sounds for<br />
the treble section, 32 tonewheel organ sounds for the chord section and 16 tonewheel organ sounds for the bass buttons.<br />
In addition, you can play simple drum parts with your left hand.<br />
Orchestral sounds for the treble<br />
section<br />
The orchestral sounds of the Treble section can be<br />
played in isolation or together with the selected accordion<br />
sound.<br />
The FR-7x’s treble section allows you to select 26<br />
orchestral or tonewheel organ sounds for each Set (13 +<br />
13). The first 13 sounds can be recalled by first pressing<br />
the [ORCHESTRA] register and then a register [1]~[13].<br />
Let us agree to call this set “group A”.<br />
The 13 sounds of the second (“group B”) can be selected<br />
by pressing the treble register in question once again.<br />
Note: Only one orchestral sound can be selected at any one<br />
time.<br />
(1) Press the [ORCHESTRA] register.<br />
The display responds with:<br />
(2) Press one of the registers to select the desired<br />
orchestral sound (see the table below) of the “A”<br />
group.<br />
Press the register again to select a sound of the “B”<br />
group.<br />
This activates the Orchestra part. The display<br />
changes:<br />
Note: The sound name may be different on your instrument.<br />
The display briefly shows both the name of the sound<br />
you selected and the number of the register you<br />
pressed:<br />
By default, the 26 available orchestral sounds and<br />
associated registers are:<br />
Orchestral Treble sounds<br />
1A Trombone 1B Trumpet<br />
2A Tenor Sax2 2B Alto Sax<br />
3A Clarinet 3B Oboe<br />
4A Harmonica 4B Mute Harm<br />
5A Violin 5B Pizzicato<br />
6A Flute 1 6B Pan Flute<br />
7A HighLand* 7B Zampogna*<br />
8A TIPLJAZZ 8B BLUES<br />
9A AMERICA 9B POPULAR<br />
10A JazzScat1 10B Strings<br />
11A Mandolin 11B Vibe<br />
12A Ac. Guitar 12B Nylon & Steel<br />
13A Ac. Piano 13B El. Piano<br />
* See “About the ‘HighLand’ and ‘Zampogna’<br />
sounds” on p. 30.<br />
Note: These assignments have been programmed at the<br />
factory and can be changed (see p. 51), meaning that any<br />
orchestral sound can be assigned to any register.<br />
(3) Play a few notes on the treble keyboard.<br />
You will hear the selected orchestral sound.<br />
(4) Press the [ORCHESTRA] register again to return to<br />
the treble section’s accordion sound.<br />
The keyboard icon in the upper right corner (see<br />
above) and the arrow return to the “TREBLE” field,<br />
which means that the treble keyboard will now play<br />
the selected accordion sound.<br />
The arrow moves from the “TREBLE” to the “ORCH”<br />
line. This means that the Treble registers can now be<br />
used to select orchestral sounds.<br />
29
FR-7x V-Accordion<br />
® Orchestral sounds for the treble section<br />
About the ‘HighLand’ and ‘Zampogna’ sounds<br />
Your FR-7x contains two bagpipe-instrument sounds,<br />
one called “HighLand”, the other called “Zampogna”.<br />
The instruments on which those sounds are based<br />
use one or several drone notes over which the melody<br />
is played.<br />
When you select one of these sounds, the lowest<br />
octave on the Treble keyboard is assigned to the<br />
drone notes.<br />
Note: This aftertouch effect applies to all notes that are<br />
sounding simultaneously. (MIDI buffs call this “channel<br />
aftertouch”.)<br />
Selecting ORCHESTRA mode<br />
The selected ORCHESTRA sound can be played in isolation<br />
or together with the treble accordion sound. There<br />
are several combinations: SOLO, DUAL, HIGH and LOW.<br />
(1) Press and hold the [ORCHESTRA] register and press<br />
treble register [11], [12], [13] or [14] to select the<br />
desired mode.<br />
Can be used to play the melody.<br />
Sound the drone notes.<br />
r<br />
Here is how the drone function works:<br />
• If you press a single gray key (see the illustration),<br />
only that note is held. You can release the key immediately<br />
after playing the note – it will be held indefinitely.<br />
• If you press two (or more) keys simultaneously, those<br />
notes are held (the drone function is polyphonic).<br />
•To switch off the currently sounding drone note(s),<br />
either press another key in the gray area (switch to<br />
another drone note) or press the key(s) of the sounding<br />
drone notes again to stop the drone.<br />
Velocity and aftertouch<br />
■ Velocity<br />
The treble keyboard of the piano-type model is<br />
velocity sensitive. The volume and timbre of the<br />
notes played by the ORCHESTRA section depend on<br />
how hard/fast you press the treble keys (for orchestral<br />
sounds).<br />
Note: The Treble accordion section does not respond to<br />
velocity information generated by the keyboard. To vary its<br />
volume and timbre, simply press/pull the bellows harder<br />
and softer (like on a “real” accordion).<br />
■ Pressure sensitivity (Aftertouch pitch)<br />
The treble keyboard detects whether the musicians is<br />
continuing to exert pressure after the initial strike of<br />
a key.<br />
On the button-type model, you can use the Master<br />
bar to simulate an aftertouch effect: play a note, and<br />
keep holding the corresponding button while you<br />
gently press the Master bar.<br />
For some orchestral sounds and the treble accordion<br />
section, this effect allows you to bend the pitch down<br />
(temporarily lower the note), see “2.11 Aftertouch<br />
Pitch” on p. 67.<br />
If you select an organ sound, aftertouch can be used<br />
to switch between the fast and slow Rotary effect<br />
speeds.<br />
■ SOLO mode (register [14])<br />
When you switch on the ORCHESTRA section (by<br />
pressing the [ORCHESTRA] register and selecting a<br />
sound), you only hear the orchestral instrument<br />
sound. Press CANCEL [14] to return to the Treble<br />
accordion sound.<br />
■ DUAL mode (register [13])<br />
The orchestral sound is added to the treble accordion.<br />
Each note you play sounds an accordion and the<br />
selected instrument playing in unison.<br />
Just as a reminder: here, both the ORCH and TREBLE<br />
fields contain a keyboard icon to indicate that they<br />
sound simultaneously.<br />
■ HIGH mode (register [12])<br />
If you select this mode and play just one note, you<br />
hear the orchestral sound. If you keep holding that<br />
key or button while pressing another (lower) key or<br />
button to its left, the highest note (the one you keep<br />
holding) is played by the orchestral sound. Lower<br />
notes, however, are played by the treble accordion<br />
sound. This is perfect for situations where you need<br />
to play chords and a solo line using different sounds.<br />
30
V-Accordion r<br />
Quickly adding and muting the orchestral sound<br />
Something like this:<br />
Played by the Orchestra sound<br />
The keyboard icon in the “ORCH” field appears when<br />
the ORCHESTRA section is on, and disappears when<br />
the ORCHESTRA section is off (see the illustration<br />
below).<br />
Played by the accordion<br />
Lower notes are<br />
played by the accordion<br />
section.<br />
■ LOW mode (register [11])<br />
This is the opposite of HIGH: notes above the one<br />
whose key you are holding down are sounded by the<br />
accordion register. This can be used in situations<br />
where the melody (or counter-melody) lies above the<br />
notes you wish to hold.<br />
Played by the accordion<br />
This note is played by<br />
the ORCHESTRA section<br />
Played by the Orchestra sound<br />
Look which field contains a keyboard icon, then press<br />
the Master bar again and look at the display. Play a<br />
few notes to understand what happens.<br />
Setting the volume of the (treble) orchestral<br />
sound<br />
There may be times (in DUAL, HIGH or LOW mode) when<br />
the ORCHESTRA sound is too loud or too soft with<br />
respect to the treble accordion sound. In that case, you<br />
can change its volume:<br />
(1) Switch on the ORCHESTRA part.<br />
See “Orchestral sounds for the treble section” on<br />
p. 29.<br />
(2) On the main page, press the [DOWN] button once.<br />
UP<br />
The display briefly confirms your selection.<br />
(2) Again play a few notes and listen to the result.<br />
Note: The ORCHESTRA mode setting can be saved to a Set<br />
(see p. 103). The saved mode is recalled when you activate<br />
the ORCHESTRA part.<br />
DOWN<br />
Quickly adding and muting the orchestral sound<br />
After activating the ORCHESTRA section and selecting a<br />
mode, you can play certain phrases using the accordion<br />
sound and then add the selected ORCHESTRA sound to<br />
it when you repeat such a phrase.<br />
Note: The following switches the Orchestra part on and off in<br />
DUAL, HIGH or LOW mode. The treble accordion part goes on<br />
sounding, however.<br />
(1) Press the Master bar that protrudes from underneath<br />
the Treble keyboard to switch the ORCHES-<br />
TRA part on or off.<br />
(3) Use the [DATA÷ENTER] knob to set the desired<br />
value.<br />
This parameter has a setting range of “Off”, –40~+40.<br />
The “STD” means that the Orchestra part uses its<br />
“normal” volume. Negative values (–) make the<br />
ORCHESTRA part softer, while positive values (+)<br />
make it louder.<br />
(4) Return to the main page by pressing [EXIT÷JUMP].<br />
To return to a state where only the Treble accordion<br />
section sounds:<br />
(5) Press the [CANCEL] register to turn the FR-7x into a<br />
normal accordion again.<br />
To activate the ORCHESTRA part again, repeat steps<br />
(1) and (2) on page 29.<br />
31
FR-7x V-Accordion<br />
® Orchestral sounds for the bass section<br />
Orchestral sounds for the bass<br />
section<br />
The FR-7x’s orchestral functionality actually comprises<br />
four sections: one for the Treble keyboard (called<br />
“Orchestra”) and three for the Bass buttons (called<br />
“Orchestra Bass/Orchestra Chord/Orchestra Free Bass”).<br />
The orchestral bass part can be used instead of the bass<br />
section (thus replacing the accordion sound played by<br />
the bass rows of the button keyboard). Again, the<br />
assignments programmed at the factory can be replaced<br />
with your own preferred assignments. Furthermore, you<br />
can assign TW organ sounds to the bass registers (see<br />
p. 52).<br />
The ORCH BASS part only applies to the bass rows<br />
(the ones closest to the bellows) and has no effect on<br />
the chord buttons.<br />
(1) Simultaneously press the three registers labeled<br />
“ORCH BASS”.<br />
Setting the volume of the ORCH BASS sound<br />
There may be times when the Orchestra Bass sound is<br />
too loud or too soft with respect to the other sounds<br />
you can play simultaneously. In that case, you can<br />
change the ORCH BASS section’s volume:<br />
(1) Select ORCH BASS mode by simultaneously pressing<br />
the three registers labeled “ORCH BASS”.<br />
(2) On the main page, press the [DOWN] button three<br />
times.<br />
UP<br />
DOWN<br />
[7] [6] [5] [4] [3] [2] [1]<br />
The display shows:<br />
Note: The numbers shown in the illustration above do not<br />
appear on the registers themselves. They have been added<br />
for your reference.<br />
The display now briefly responds with an image similar<br />
to the following:<br />
(2) Use the Bass registers to select the desired sound.<br />
Orchestra Bass sounds<br />
1 Acous.Bs 5 Picked Bs<br />
2* Bowed* 6* Tuba*<br />
3 Finger Bs 7 Tuba Mix<br />
4 Fretless<br />
(3) Rotate the [DATA÷ENTER] knob to set the desired<br />
value.<br />
This parameter has a setting range of “Off”, –40~+40.<br />
“STD” means that the ORCH BASS part uses its “normal”<br />
volume. Negative values (–) make the ORCH<br />
BASS part softer, while positive values (+) make it<br />
louder.<br />
(4) Return to the main page by pressing [EXIT÷JUMP].<br />
Note: You can also assign drum sounds to the bass buttons<br />
and play them simultaneously with the orchestral sound<br />
(see “3.7 Bass Drum” on p. 72).<br />
(5) Press the three ORCH BASS registers again to<br />
return to the normal Bass mode.<br />
r<br />
Note: The dynamics of sounds marked with an asterisk (*)<br />
can only be controlled by bellows movements. Those<br />
sounds are not velocity sensitive. For the other sounds, see<br />
also “10.16 Orchestra Bs&Ch Touch” on p. 92.<br />
(3) Press the three ORCH BASS registers again to<br />
return to normal bass mode.<br />
32
V-Accordion r<br />
Orchestral sounds for the Chord section<br />
Orchestral sounds for the Chord<br />
section<br />
The ORCH CHORD part can replace the accordion sound<br />
played by the chord rows of the bass keyboard.<br />
The ORCH CHORD part only applies to the chord rows<br />
and has no effect on the bass rows. The ORCH CHORD<br />
part is not available in Free Bass mode (because there<br />
are no chord buttons in that mode).<br />
(1) Simultaneously press the three registers in the<br />
middle (“ORCH CHORD”).<br />
Setting the volume of the ORCH CHORD sound<br />
There may be times when the orchestral chord sound<br />
is too loud or too soft with respect to the other available<br />
sections. In that case, you can change its volume:<br />
(1) Simultaneously press the three registers in the<br />
middle (“ORCH CHORD”).<br />
(2) Press the [EXIT÷JUMP] button to return to the main<br />
page.<br />
(3) On the main page, press the [DOWN] button twice.<br />
[7] [6] [5] [4] [3] [2] [1]<br />
UP<br />
DOWN<br />
Note: The numbers shown in the illustration above do not<br />
appear on the registers themselves. They have been added<br />
for your reference.<br />
The display now briefly responds with an image similar<br />
to the following:<br />
The display shows:<br />
(2) Use the Bass registers to select the desired sound.<br />
ORCH CHORD sounds<br />
1 Trombone 5 Jazz Scat1<br />
2 Alto Sax 6 Ac. Guitar<br />
3 Clarinet 7 Ac. Piano<br />
4 TYPLJAZZ<br />
(3) Press the three registers in the middle (“ORCH<br />
CHORD”) again to return to normal chord mode.<br />
(4) Use the [DATA÷ENTER] knob to set the desired<br />
value.<br />
This parameter has a setting range of “Off”, –40~+40.<br />
“STD” means that the ORCH CHORD part uses its<br />
“normal” volume. Negative values (–) make the ORCH<br />
CHORD part softer, while positive values (+) make it<br />
louder.<br />
(5) Return to the main page by pressing [EXIT÷JUMP].<br />
(6) Press the three registers in the middle (“ORCH<br />
CHORD”) again to return to normal (accordion)<br />
chord mode.<br />
33
FR-7x V-Accordion<br />
® Orchestral sounds for the Free Bass section<br />
Orchestral sounds for the Free Bass<br />
section<br />
The orchestral Free Bass part can replace the accordion<br />
sound played by the button keyboard while Free Bass<br />
mode is active. In that case, all bass buttons play bass<br />
notes – no chords.<br />
(1) Simultaneously press the three registers labeled<br />
“FREE BASS” to switch to the accordion mode of<br />
the same name.<br />
Setting the volume of the ORCH FREE BS sound<br />
There may be times when the orchestral Free Bass sound<br />
is too loud or too soft with respect to the treble accordion<br />
and/or orchestral sound. In that case, you can<br />
change its volume:<br />
(1) On the main page, press the [DOWN] button four<br />
times.<br />
UP<br />
DOWN<br />
This is not necessary if you are already in Free Bass<br />
mode.<br />
(2) Simultaneously press the three registers in the<br />
middle (“ORCH FREE BS”).<br />
The display shows:<br />
[7] [6] [5] [4] [3] [2] [1]<br />
Note: The numbers shown in the illustration above do not<br />
appear on the registers themselves. They have been added<br />
for your reference.<br />
The display now briefly responds with an image similar<br />
to the following:<br />
(3) Use the Bass registers to select the desired sound.<br />
ORCH FREE BS sounds<br />
1 Trombone 5 TYPLJAZZ<br />
2 Clarinet 6 Ac.Guitar<br />
3 Oboe 7 Ac.Piano<br />
4 Flute1<br />
Note: This volume setting cannot be changed if the ORCH<br />
FREE BS sound is not in use.<br />
(2) Use the [DATA÷ENTER] knob to set the desired<br />
value.<br />
This parameter has a setting range of “Off”, –40~+40.<br />
“STD” means that the ORCH FREE BS part uses its<br />
“normal” volume. Negative values (–) make the ORCH<br />
FREE BS part softer, while positive values (+) make it<br />
louder.<br />
You can save the new value (and the remaining<br />
changes you make). See page 103.<br />
(3) Return to the main page by pressing [EXIT÷JUMP].<br />
(4) To switch off the ORCH FREE BS section, press the<br />
“ORCH FREE BS” registers again to return to normal<br />
Free Bass mode.<br />
Press them yet again to leave Free Bass mode and<br />
return to Bass mode.<br />
r<br />
34
V-Accordion r<br />
Other practical functions<br />
10. Other practical functions<br />
Let us now have a look at the first “purely electronic” functions of your FR-7x. In this chapter, we will discuss functions<br />
that may be new to you but may come in handy once you know what they do and how they work.<br />
General remark<br />
The functions discussed below can be selected via the<br />
front panel, because you may need them at regular<br />
intervals.<br />
Any changes you make are not saved automatically. If<br />
you want to keep them, you must save them (see<br />
p. 103).<br />
Note: The functions discussed in this chapter can also be set<br />
using the FR-7x’s menu.<br />
Transpose<br />
The FR-7x contains a Transpose function that allows<br />
you to change the key of the music you are playing.<br />
The advantage of this system is that you can play a song<br />
in E major (for example), while using the fingering of the<br />
C major scale (for example). This may come in handy<br />
when you are used to playing a given song in one key<br />
and suddenly need to play it in a different key.<br />
Let’s look at an example:<br />
The setting range is –6~+5 semi tones. Select “0” to<br />
switch off the transposition.<br />
(3) Press [EXIT÷JUMP] to return to the main page.<br />
Musette Detune<br />
You probably know that an accordion’s 8’ Treble register<br />
may consist of 2 or even 3 reeds that are usually tuned<br />
apart to provide a richer sound (accordionists call it the<br />
“musette effect”). One reed is tuned slightly above, the<br />
other slightly below the correct pitch, and the third (if<br />
available) is tuned “properly”.<br />
Tuning reeds is a specialist job and usually not performed<br />
by accordion players themselves.<br />
On the FR-7x, however, “tuning” the “reeds” (that do not<br />
really exist) is a matter of turning the [DATA÷ENTER]<br />
knob.<br />
Note: This function is only available for the treble section.<br />
(1) While the main page is displayed, press the [UP]<br />
button twice.<br />
UP<br />
This is what you play…<br />
DOWN<br />
…and this is how it sounds.<br />
Transpose<br />
(1) While the main page is displayed, press the [UP]<br />
button once.<br />
UP<br />
DOWN<br />
(2) Rotate the [DATA÷ENTER] knob to select the a different<br />
tuning for the treble “reeds”.<br />
The possibilities are: Off (no detune), Dry, Classic, F-<br />
Folk, American L, American H, North Eu, German L, D-<br />
Folk L, Italian L, German H, Alpine, Italian H, D-Folk H,<br />
French, Scottish.<br />
(3) Press [EXIT÷JUMP] to return to the main page.<br />
(2) Rotate the [DATA÷ENTER] knob to select the desired<br />
key (transposition).<br />
35
FR-7x V-Accordion<br />
® Scale (Tuning)<br />
Scale (Tuning)<br />
Almost every music culture has its own accordion variety.<br />
Arabic, Indonesian and other musical cultures do<br />
not use the equal temperament that is favored in<br />
Europe, the Americas, etc.<br />
The FR-7x features a “Scale” parameter that allows you<br />
to select the tuning system that best fits the music you<br />
want to play. If the tuning system you need is not<br />
among the factory settings, you can program it yourself<br />
(see “1.4 Scale Edit” on p. 64), save it to a User1~3 memory<br />
and then select it here.<br />
(1) While the main page is displayed, press the [UP]<br />
button three times.<br />
UP<br />
DOWN<br />
Scale<br />
Werckmeister A combination of the Mean Tone and<br />
Pythagorean temperaments, this tuning<br />
allows for playing in any key.<br />
Kirnberger<br />
Description<br />
As a result of improvements made to the<br />
Mean Tone and Just temperaments, this<br />
tuning system is relatively tolerant<br />
towards transposition and can be used to<br />
play in all keys.<br />
Except for “Equal”, you also need to specify the root/<br />
fundamental (“C” for major and “A” for minor)<br />
according to the key of the song to be played.<br />
(3) Press the [DATA÷ENTER] knob to activate the “KEY”<br />
field (so that it is displayed in reverse).<br />
(4) Turn the [DATA÷ENTER] knob to select the desired<br />
root note (C~B).<br />
(5) Press [EXIT÷JUMP] to return to the main page.<br />
(2) Rotate the [DATA÷ENTER] knob to select the a different<br />
tuning system.<br />
The possibilities are:<br />
Scale<br />
Description<br />
Equal (Off) This tuning divides each octave into 12<br />
equal steps (intervals).<br />
User 1~3<br />
Arabic 1 & 2<br />
Just Major<br />
These settings refer to the tuning systems<br />
programmed by yourself (or someone<br />
else). See “1.4 Scale Edit” on p. 64 for<br />
details.<br />
These two settings refer to Arabic tuning<br />
systems. Select “1” to lower the E and B<br />
notes by a quarter tone (–50 cents).<br />
“2” represents a scale where the E and A<br />
are tuned down a quarter tone.<br />
This is a classical (western) tuning that<br />
resolved the ambiguity of fifths and<br />
thirds. Quite beautiful sonorities are produced<br />
with chords, but the scale is unbalanced,<br />
so it is not well-suited for melodies.<br />
r<br />
Just Minor<br />
Pythagorean<br />
Mean-Tone<br />
This is a just scale for pieces in minor keys.<br />
This system was invented in ancient<br />
Greece. It resolves the ambiguity of<br />
fourths and fifths. Though thirds are<br />
somewhat imperfect, melodies sound<br />
clearer.<br />
A temperament that adds some compromises<br />
to the just temperament and facilitates<br />
transposition.<br />
36
V-Accordion r<br />
Noise Edit (Valve & Button)<br />
Noise Edit (Valve & Button)<br />
You will probably agree that electronic sounds must not<br />
only reproduce the basic timbre of an existing sound,<br />
but also the original instrument’s behavior and typical<br />
“noises” in order to be perceived as authentic.<br />
An accordion, produces mechanical valve and button<br />
noises (clicks) that cannot be suppressed on an acoustic<br />
instrument.<br />
On the FR-7x, the volume of those noises can be<br />
changed if you think they are too prominent or too soft.<br />
Note that the parameters on the page shown below<br />
belong to two different MENU sections and can be<br />
found on separate menu pages: “Valve Level” is a Treble<br />
parameter, “Button Level” is a Bass/Free Bass parameter.<br />
■ Treble Valve Noise edit<br />
(1) While the main page is displayed, press the [UP]<br />
button four times.<br />
(2) Rotate the [DATA÷ENTER] knob to select the desired<br />
noise level.<br />
This parameter has a setting range of “Off’, –40~+40.<br />
A negative (–) value decreases the level of the noise<br />
parameter, a positive (+) value increases it. Select<br />
“STD” to return to the factory value, and “Off” if you<br />
do not need the noise in question.<br />
(3) Press the [DATA÷ENTER] knob to select the “TYPE”<br />
parameter and rotate it to select the accordion<br />
type.<br />
The possibilities are: Bandoneon, I-Folk, I-Folk 2, Classic,<br />
Cajun, Jazz, F-Folk, D-Folk, Organetto, F-Folk 2,<br />
Classic 2, Studio, Tradition, Steierische, OldItaly,<br />
TexMex, Trikitixa, F-Jazz, Classic 3, Bajan.<br />
(4) Press [EXIT÷JUMP] to return to the main page.<br />
UP<br />
DOWN<br />
■ Bass Button Valve Noise edit<br />
(1) While the main page is displayed, press the [UP]<br />
button five times.<br />
(2) Rotate the [DATA÷ENTER] knob to select the desired<br />
noise level.<br />
This parameter has a setting range of “Off’, –40~+40.<br />
A negative (–) value decreases the level of the noise<br />
parameter, a positive (+) value increases it. Select<br />
“STD” to return to the factory value, and “Off” if you<br />
do not need the noise in question.<br />
(3) Press the [DATA÷ENTER] knob to select the “TYPE”<br />
parameter and rotate it to select the accordion<br />
type.<br />
The possibilities are: Bandoneon, I-Folk, I-Folk 2, Classic,<br />
Cajun, Jazz, F-Folk, D-Folk, Organetto, F-Folk 2,<br />
Classic 2, Studio, Tradition, Steierische, OldItaly,<br />
TexMex, Trikitixa, F-Jazz, Classic 3, Bajan.<br />
(4) Press [EXIT÷JUMP] to return to the main page.<br />
Note: This parameter has no effect on the FREE BASS,<br />
ORCH BASS or ORCH FREE BASS sections.<br />
UP<br />
DOWN<br />
37
FR-7x V-Accordion<br />
® Using the audio player<br />
11. Using the audio player<br />
Your FR-7x is equipped with a USB port to which you can connect an optional USB memory. The audio files on such an<br />
optional USB memory can be played back through the FR-7x’s internal speakers (and transmitted to its audio outputs). In<br />
addition, you can record your playing as audio data in the WAV format (see “Recording your performance as audio data”<br />
on p. 47).<br />
Connecting an optional USB<br />
memory<br />
(1) Put the FR-7x down (if you are currently playing it)<br />
and turn it around.<br />
The FR-7x’s USB port is located next to the battery<br />
compartment.<br />
Playing back audio files<br />
The FR-7x can play back audio file in the mp3 and WAV<br />
format only directly from a USB memory you connect.<br />
See page 8 for a description of supported files.<br />
Playing back audio files<br />
(1) Press and hold the [ORCHESTRA] register and press<br />
register [10].<br />
(2) Press the two sides of the USB compartment cover<br />
(where it says “PRESS TO OPEN”) and pull the cover<br />
open.<br />
The compartment opens, revealing the location<br />
where the USB memory needs to be inserted.<br />
If you already loaded a song, the display jumps to the<br />
“AUDIO PLAYER” page. In that case, press the<br />
[EXIT÷JUMP] button to view the contents of your USB<br />
memory.<br />
(2) If the songs are located inside a folder, select the<br />
folder by rotating the [DATA÷ENTER] knob and<br />
pressing it to view the folder’s contents.<br />
You can also select the “(level up)” entry and press<br />
the [DATA÷ENTER] knob to return to a higher level<br />
(i.e. leave the current folder).<br />
(3) Rotate the [DATA÷ENTER] knob to select the audio<br />
file you want to listen to.<br />
r<br />
(3) Insert an optional USB memory with the mp3 or<br />
WAV file you want to play back into the port.<br />
The USB memory can only be connected in one direction.<br />
Insert the USB memory without applying excessive<br />
force.<br />
(4) Close the USB compartment cover.<br />
38<br />
(4) Press the [DATA÷ENTER] knob to confirm your<br />
selection.<br />
The display changes to:
V-Accordion r<br />
Changing the playback volume<br />
(5) Press the [DATA÷ENTER] knob to start playback.<br />
You can play the FR-7x while listening to the audio<br />
file.<br />
Note: Playback can also be started and paused with an<br />
FBC-7 footswitch (see p. 88)<br />
(6) To pause playback, rotate the [DATA÷ENTER] knob<br />
to select the [π] icon, then press [DATA÷ENTER].<br />
To continue playback, select the [®] icon with the<br />
[DATA÷ENTER] knob, then press the knob to start<br />
playback.<br />
(7) To stop playback, rotate the [DATA÷ENTER] knob to<br />
select the [ª] icon, then press [DATA÷ENTER].<br />
(8) To move to a different position, rotate the<br />
[DATA÷ENTER] knob to select one of the following<br />
icons and press it.<br />
Icon<br />
Meaning<br />
Playlist function<br />
The Playlist function allows you to prepare lists of mp3<br />
and/or WAV audio files you want to play back in succession.<br />
Programming your playlists<br />
Note: Playlists “know” where the referenced audio files are<br />
stored (they remember the file path). We therefore urge you<br />
never to move mp3 or WAV files to different locations after<br />
compiling a playlist.<br />
(1) Insert the optional USB memory that contains the<br />
desired song files into the USB port.<br />
See “Connecting an optional USB memory” on p. 38.<br />
(2) Press and hold the [ORCHESTRA] register and press<br />
register [9].<br />
[º] Rewind in steps of 2 seconds<br />
[œ]*<br />
Return to the beginning of the selected<br />
audio file. If you press the [DATA÷ENTER]<br />
knob again, you will jump to the beginning<br />
of the preceding song (in descending<br />
alphabetical order).<br />
[‰] Fast-forward in steps of 2 seconds.<br />
[Œ]*<br />
As for [œ], but the alphabetical order is<br />
reversed (ascending).<br />
* This function can also be assigned to an FBC-7 footswitch (see<br />
p. 88).<br />
(9) To select a different song, press the [EXIT÷JUMP]<br />
button and return to step (3).<br />
Changing the playback volume<br />
You can simply press the [UP]/[DOWN] buttons to<br />
change the song’s volume. A second approach is as follows:<br />
(1) While the “AUDIO PLAYER” page is displayed,<br />
rotate the [DATA÷ENTER] knob to select the [VOL]<br />
icon.<br />
(2) Press the [DATA÷ENTER] knob.<br />
The display changes to:<br />
If you haven’t loaded any playlist since switching on<br />
the FR-7x, the display may now show the names of<br />
the playlists already available on the USB memory.<br />
If you have loaded a playlist, press the [EXIT÷JUMP]<br />
button to see the contents of the USB memory.<br />
(3) Press the [MENU÷WRITE] button.<br />
(4) Press the [DATA÷ENTER] knob to confirm the new<br />
playlist.<br />
You have just created a new playlist, which is still<br />
empty and therefore looks like this:<br />
(3) Rotate the [DATA÷ENTER] knob to change the “VOL-<br />
UME” setting (0~127).<br />
(4) Press the [EXIT÷JUMP] button to return to the<br />
“AUDIO PLAYER” page.<br />
Playlists consist of “steps” to which you can assign<br />
one song each.<br />
(5) Press the [DATA÷ENTER] knob.<br />
39
FR-7x V-Accordion<br />
® Saving your playlist<br />
The display shows:<br />
Naming the playlist<br />
(3) Press the [DATA÷ENTER] knob.<br />
The display changes to:<br />
(6) If the song you want to assign is located in a<br />
folder, rotate the [DATA÷ENTER] knob to select the<br />
name of the folder, then press the [DATA÷ENTER]<br />
knob.<br />
Note: To leave the current folder and return to a higher<br />
level, select the “.. (level up)” entry at the top.<br />
(7) Select the song by rotating the [DATA÷ENTER] knob.<br />
(8) Press the [DATA÷ENTER] knob to confirm you selection.<br />
This takes you back to the following page. The song is<br />
assigned to step 01 and step 02 becomes the last one<br />
of your list (-----END-----):<br />
(9) Select the “-----END-----” line and repeat steps<br />
(5)~(8) above to add the required song steps.<br />
(4) Rotate the [DATA÷ENTER] knob to select the name<br />
in the bottom line.<br />
The first character of the default name is already<br />
selected (see the dark line below the first character).<br />
(5) If necessary, select a different character position<br />
(indicated by a dark line) by rotating the<br />
[DATA÷ENTER] knob.<br />
(6) Press the [DATA÷ENTER] knob to confirm your<br />
selection.<br />
Saving your playlist<br />
Preparation for saving<br />
(1) After compiling your playlist, and while the “EDIT”<br />
page is displayed, press the [MENU÷WRITE] button.<br />
The display changes to:<br />
The name of the selected playlist appears next to the<br />
“EDIT” message (top line).<br />
(2) Rotate the [DATA÷ENTER] knob to select “SAVE”,<br />
then press the [DATA÷ENTER] knob.<br />
The display changes to:<br />
The selected character position is indicated by means<br />
of a dark underscore character.<br />
(7) Rotate the [DATA÷ENTER] knob to select the desired<br />
character, then press the knob to confirm your setting.<br />
The new character now appears on a white background.<br />
(8) Repeat steps (5)~(7) above to enter the remaining<br />
characters.<br />
■ Deleting characters<br />
(1) To delete a character, select it by rotating the<br />
[DATA÷ENTER] knob.<br />
The selected character is indicated by means of a dark<br />
underscore character.<br />
r<br />
(2) Press the [EXIT÷JUMP] button.<br />
The FR-7x automatically selects the “Ins” icon.<br />
40
V-Accordion r<br />
Saving the playlist<br />
(3) Rotate the [DATA÷ENTER] knob towards the left to<br />
select [Del].<br />
(4) Press the [DATA÷ENTER] knob to delete the selected<br />
character.<br />
All characters behind the character you have just<br />
deleted move one position to the left to close the<br />
gap.<br />
(5) To go on entering your name, rotate the<br />
[DATA÷ENTER] knob to select the name field (bottom<br />
line).<br />
■ Inserting characters<br />
To insert a character before the currently selected<br />
character and push all subsequent characters one<br />
position to the right, select the character that should<br />
follow the character you are about to insert.<br />
Example: To insert a character before the “s” in “Lovesong”<br />
(creating the name “Love song”), position the<br />
cursor on the “s”. Here is the complete procedure:<br />
(1) Select the name field (bottom line).<br />
(2) Select the position where a character should be<br />
inserted by rotating the [DATA÷ENTER] knob.<br />
The selected character position is indicated by means<br />
of a dark underscore character.<br />
(3) Press the [EXIT÷JUMP] button.<br />
The FR-7x automatically selects the [Ins] icon.<br />
(4) Press the [DATA÷ENTER] knob to insert an “A”.<br />
Saving the playlist<br />
On the “PLAYLIST SAVE” page you can also specify where<br />
the file should be saved on your USB memory.<br />
(1) Press the [EXIT÷JUMP] button.<br />
The FR-7x automatically selects the [Ins] icon.<br />
(2) Rotate the [DATA÷ENTER] knob towards the left to<br />
select [FOLDER].<br />
Note: Skip to step (6) if you don’t need to select a folder,<br />
because you want to save the file in the current folder.<br />
(3) Press the [DATA÷ENTER] knob to jump to the following<br />
page:<br />
The display shows a page with an “OK” field and the<br />
folders.<br />
(4) If you want to save your playlist in a different<br />
location, rotate the [DATA÷ENTER] knob to select<br />
the location and press [DATA÷ENTER] to confirm<br />
your selection.<br />
To save the playlist at the highest (root) level, rotate<br />
the [DATA÷ENTER] knob to select the “.. (level up)”<br />
entry.<br />
(5) Press the [DATA÷ENTER] knob on the “OK” field to<br />
confirm your selection.<br />
(6) Press the [MENU÷WRITE] button to save your playlist.<br />
The display asks you to confirm your intention.<br />
All characters on and after the current position move<br />
one position to the right.<br />
(5) Rotate the [DATA÷ENTER] knob to select the character<br />
that should replace the “A”.<br />
(6) Press the [DATA÷ENTER] knob to confirm your<br />
selection.<br />
If you don’t want to save your file, press [EXIT÷JUMP]<br />
to return to the “PLAYLIST SAVE” page.<br />
(7) Again press the [MENU÷WRITE] button.<br />
If a file of the same name already exists, you are<br />
asked whether you want to overwrite it.<br />
To do so, press [MENU÷WRITE] again.<br />
The display briefly shows a “Function complete” message<br />
and then returns to the “PLAYLIST SAVE” page.<br />
41
FR-7x V-Accordion<br />
® Using playlists<br />
(8) Press the [EXIT÷JUMP] button several times to<br />
return to the main page.<br />
Note: This only saves the playlist (i.e. the references to<br />
existing song files). The song files themselves are not saved.<br />
On the other hand, if you delete a song that is referenced<br />
by a playlist step, playback stops at that (empty) step during<br />
playback and the “Song not found” message appears.<br />
(7) If you want to start with the first song, press the<br />
[DATA÷ENTER] knob.<br />
Otherwise, rotate the [DATA÷ENTER] knob to select<br />
the desired song step from your playlist, then press<br />
the knob.<br />
The display changes to:<br />
Using playlists<br />
Here’s how playlists can be used for your performances:<br />
(1) Insert the optional USB memory that contains the<br />
playlist file (and songs) you need into the USB port.<br />
(2) Press and hold the [ORCHESTRA] register and press<br />
register [9].<br />
The following functions are available:<br />
Icon<br />
[®]/<br />
[π]<br />
Explanation<br />
Allows you to play back/pause playback the current<br />
step. This icon changes to [π] during playback.<br />
[ª] Allows you to stop playback. If the “CHAIN” function<br />
is on, the mp3 player jumps to the beginning<br />
of the next mp3 file.<br />
[º] Allows you to rewind.<br />
[‰] Allows you to fast-forward.<br />
[œ]<br />
Allows you to return to the beginning of the previous<br />
step (mp3 file). If you do so while playback is<br />
running, the mp3 player returns to the beginning<br />
of the current step (press it twice to jump to the<br />
beginning of the preceding step).<br />
r<br />
If you haven’t loaded any playlist since switching on<br />
the FR-7x, the display may now show the names of<br />
playlists already available on the USB memory. If you<br />
have loaded a playlist and you want to use another<br />
one, press the [EXIT÷JUMP] button to see the contents<br />
of the USB memory.<br />
(3) Rotate the [DATA÷ENTER] dial to select the playlist<br />
you want to use.<br />
(4) If the playlist you want to use is located in a folder,<br />
rotate the [DATA÷ENTER] knob to select the name<br />
of the folder, then press the [DATA÷ENTER] knob.<br />
(5) Select the playlist by rotating the [DATA÷ENTER]<br />
knob.<br />
(6) Press the [DATA÷ENTER] knob to confirm you selection.<br />
42<br />
The display shows the names of the songs used in the<br />
selected playlist.<br />
[Œ]<br />
Allows you to jump to the beginning of the next<br />
step (mp3 file). If you do so while playback is running,<br />
the next song will be played back as soon as<br />
the current step is finished.<br />
(8) Press the [DATA÷ENTER] knob to start playback.<br />
If the “CHAIN” function (see p. 45) is set to “CHAIN<br />
PLY”, the next song file is selected automatically at<br />
the end of the current step. (If you stop playback<br />
halfway into the song, then start it again, the next<br />
step is played back.)<br />
If the “CHAIN” function is set to “CHAIN STP”, playback<br />
stops at the end of the current step, the next<br />
step is loaded, but playback needs to be started using<br />
the [®] icon. (If you pause playback halfway into the<br />
song, then start it again, playback resumes from the<br />
place where you stopped it.) If you stop playback<br />
manually, the song of the next step is selected.<br />
(9) To select another playlist step by hand, press and<br />
hold the [ORCHESTRA] register and press register<br />
[9], then continue with step (7) above.<br />
(10) Press the [EXIT÷JUMP] button several times to<br />
return to the main page.
V-Accordion r<br />
Editing playlists<br />
Editing playlists<br />
If, while programming or using a playlist, you notice<br />
that one song is missing from the list, or if you decide<br />
not to use a given song file after all, you can edit your<br />
playlist.<br />
(1) See steps (1)~(6) below “Using playlists” on p. 42.<br />
(2) Press the [MENU÷WRITE] button.<br />
The display changes to:<br />
(3) Rotate the [DATA÷ENTER] knob to select “EDIT”,<br />
then press the [DATA÷ENTER] knob.<br />
The display changes to:<br />
(e) Press the [MENU÷WRITE] button to call up the following<br />
window:<br />
(f) Rotate the [DATA÷ENTER] knob to select the [UP] or<br />
[DOWN] icon.<br />
Note: The “DOWN” function has no effect on the last step<br />
of your playlist.<br />
(g) Press the [DATA÷ENTER] knob once or several times<br />
to move the selected step to the desired position.<br />
(h) Press [EXIT÷JUMP] to see the list of songs.<br />
(i) To save the playlist, see “Saving your playlist” on<br />
p. 40.<br />
Note: There is also a faster way to move steps: in step (d),<br />
press the [UP]/[DOWN] buttons to move the selected song.<br />
Adding steps<br />
To add a step and assign a song to it:<br />
(a) Rotate the [DATA÷ENTER] knob to select the<br />
“-----END-----” message and press the<br />
[DATA÷ENTER] knob.<br />
Assigning a different song to an existing step<br />
You can insert a step between two existing steps.<br />
(a) Perform steps (1)~(3) under “Editing playlists”.<br />
(b) Rotate the [DATA÷ENTER] knob to select the step<br />
before which you want to insert a new step.<br />
(c) Press the [DATA÷ENTER] knob to confirm.<br />
(d) Press the [MENU÷WRITE] button to call up the following<br />
page:<br />
(b) Rotate the [DATA÷ENTER] knob to select the song<br />
you want to assign to the first step.<br />
• If the song you want to assign is located in a folder,<br />
rotate the [DATA÷ENTER] knob to select the name of<br />
the folder, then press the [DATA÷ENTER] knob.<br />
• Select the song by rotating the [DATA÷ENTER] knob.<br />
(c) Press the [DATA÷ENTER] knob to confirm you selection.<br />
This takes you back to the following page. The song is<br />
assigned to the last step of your list, followed by the<br />
“-----END-----” message:<br />
(e) Rotate the [DATA÷ENTER] knob to select the [SONG]<br />
icon.<br />
(f) Press the [DATA÷ENTER] knob.<br />
(g) Rotate the [DATA÷ENTER] knob to select the song<br />
you want to assign to the first step.<br />
• If the song you want to assign is located in a folder,<br />
rotate the [DATA÷ENTER] knob to select the name of<br />
the folder, then press the [DATA÷ENTER] knob.<br />
• Select the song by rotating the [DATA÷ENTER] knob.<br />
(h) Press the [DATA÷ENTER] knob to confirm you selection.<br />
This takes you back to the following page.<br />
If you also need to move the new step…<br />
(d) Rotate the [DATA÷ENTER] knob to select the song<br />
step you have just added and press [DATA÷ENTER].<br />
43
FR-7x V-Accordion<br />
® Editing playlists<br />
The step you selected above now moves down and<br />
makes room for the new step.<br />
(i) See “Saving your playlist” on p. 40.<br />
This takes you back to the following page.<br />
Deleting steps<br />
You can also delete playlist steps you no longer need.<br />
(a) Perform steps (1)~(3) under “Editing playlists” on<br />
p. 43<br />
(b) Rotate the [DATA÷ENTER] knob to select the step<br />
you want to delete.<br />
(c) Press the [DATA÷ENTER] knob to confirm.<br />
(d) Press the [MENU÷WRITE] button to call up the following<br />
window:<br />
Your playlist file is now empty and can be reprogrammed.<br />
(e) See “Saving your playlist” on p. 40 if you want to<br />
save your empty playlist.<br />
(e) Rotate the [DATA÷ENTER] knob to select the<br />
[REMOVE] icon.<br />
(f) Press the [DATA÷ENTER] knob to confirm you selection.<br />
This takes you back to the following page.<br />
The step you selected above is deleted.<br />
All subsequent steps now move up one entry. Example:<br />
if you delete step 04 of a list that contains 10<br />
steps, step 05 becomes 04, step 06 becomes 05, etc.<br />
(g) See “Saving your playlist” on p. 40.<br />
Clearing all steps<br />
It is also possible to remove all steps from the currently<br />
selected playlist. In effect, this means that only the<br />
name is preserved, while the list can/must be programmed<br />
again.<br />
(a) Perform steps (1)~(3) under “Editing playlists” on<br />
p. 43<br />
(b) Press the [MENU÷WRITE] button to call up the following<br />
window:<br />
r<br />
(c) Rotate the [DATA÷ENTER] knob to select the<br />
“CLEAR ALL”.<br />
(d) Press the [DATA÷ENTER] knob to confirm you selection.<br />
44
V-Accordion r<br />
Managing playlists<br />
Managing playlists<br />
Playlists can be renamed and deleted. You can also specify<br />
how the songs of a playlist should be played back<br />
(once or several times).<br />
General procedure<br />
(1) Insert the optional USB memory that contains the<br />
desired playlist and songs into the USB port.<br />
See “Connecting an optional USB memory” on p. 38.<br />
(2) Press and hold the [ORCHESTRA] register and press<br />
register [9].<br />
Specifying the playback behavior (Chain)<br />
Playlists are “merely” lists that allow you to prepare the<br />
desired audio songs for your performances. By default,<br />
you need to select the next song in the list and start<br />
playback by hand. You can, however, “automate” playlist<br />
playback using the “CHAIN” function.<br />
(a) Perform steps (1)~(5) under “General procedure”.<br />
(b) Rotate the [DATA÷ENTER] knob to select “CHAIN”.<br />
The display changes to:<br />
(c) Press the [DATA÷ENTER] knob repeatedly to select<br />
one of the following options:<br />
The display may now show the names of playlists<br />
already available on the USB memory. If you don’t<br />
see a page similar to the one shown above, press the<br />
[EXIT÷JUMP] button.<br />
(3) Rotate the [DATA÷ENTER] dial to select the playlist<br />
you want to rename or delete.<br />
CHAIN option<br />
CHAIN OFF<br />
CHAIN STP<br />
CHAIN PLY<br />
Meaning<br />
At the end of the current playlist step, the<br />
audio player stops. Rotate the<br />
[DATA÷ENTER] knob to select another step,<br />
then start playback. (If you start playback<br />
again without selecting a different step,<br />
the same song file is played back again.)<br />
The next song file is selected automatically<br />
at the end of the current step but<br />
playback of the next step needs to be<br />
started by hand. (If you stop playback<br />
halfway into the song, then start it again,<br />
the next step is played back.)<br />
The next song file is selected automatically<br />
at the end of the current step and<br />
playback of the new step starts automatically.<br />
(If you stop playback halfway into<br />
the song, then start it again, the following<br />
step is played back.)<br />
(4) Press the [DATA÷ENTER] knob to confirm you selection.<br />
(5) Press the [MENU÷WRITE] button.<br />
The display changes to:<br />
(d) Press the [EXIT÷JUMP] knob to return to the previous<br />
page.<br />
Repeating all playlist steps (Repeat)<br />
The FR-7x also allows you to specify whether the<br />
selected playlist should be played once or repeatedly:<br />
(a) Perform steps (1)~(5) under “General procedure”.<br />
(b) Rotate the [DATA÷ENTER] knob to select “REPEAT”.<br />
The display changes to:<br />
45
FR-7x V-Accordion<br />
® Managing playlists<br />
(c) Press the FR-7x knob to select one of the following<br />
options:<br />
(c) Press the [DATA÷ENTER] knob.<br />
CHAIN option<br />
REPEAT ON<br />
REPEAT OFF<br />
Meaning<br />
At the end of the last playlist step, playback<br />
will resume from the beginning until<br />
you stop it. (This option is only useful if<br />
you set the “CHAIN” function to “CHAIN<br />
PLY”.)<br />
The audio player stops at the end of the<br />
last playlist step.<br />
(d) Rotate the [DATA÷ENTER] knob towards the right<br />
until the display looks as follows (the name must<br />
be selected):<br />
(d) Press the [EXIT÷JUMP] knob to return to the previous<br />
page.<br />
Deleting a playlist<br />
Playlists you no longer need can be deleted. This only<br />
disposes of the list file – the audio files it refers to<br />
remain on the USB memory.<br />
(a) Perform steps (1)~(5) under “General procedure”<br />
on p. 45.<br />
(b) Rotate the [DATA÷ENTER] knob to select “DELETE”.<br />
The display changes to:<br />
The first character is already selected (see the dark<br />
line below the first character).<br />
(e) If necessary, select a different character position<br />
(indicated by a dark line) by rotating the<br />
[DATA÷ENTER] knob.<br />
(f) Press the [DATA÷ENTER] knob to confirm your<br />
selection.<br />
(c) Press the [DATA÷ENTER] knob to delete the playlist.<br />
The display shows the “Push ENTER to proceed” message.<br />
Press the [EXIT÷JUMP] button to leave this page without<br />
deleting the playlist.<br />
(6) Press the [DATA÷ENTER] knob to delete the playlist.<br />
The display briefly shows a “Function Complete” message.<br />
Note: Even if you delete the selected list, this “only” disposes<br />
of the playlist proper. The mp3 and WAV files<br />
assigned to the list are not deleted and can thus be used in<br />
isolation or assigned to new/other playlists.<br />
(a) Press the [EXIT÷JUMP] button several times to<br />
return to the main page.<br />
The selected character position appears on a dark<br />
background and is indicated by means of a white<br />
underscore character.<br />
(g) Rotate the [DATA÷ENTER] knob to select the desired<br />
character, then press the knob to confirm your setting.<br />
The new character now appears on a white background.<br />
(h) Repeat steps (e)~(g) above to enter the remaining<br />
characters.<br />
You can also delete and insert characters (see p. 41).<br />
(i) Press the [MENU÷WRITE] button to save your<br />
renamed playlist.<br />
The display asks you to confirm your intention.<br />
r<br />
Renaming a playlist<br />
You can also change the name of an existing playlist.<br />
(a) Perform steps (1)~(5) under “General procedure”<br />
on p. 45.<br />
(b) Rotate the [DATA÷ENTER] knob to select “RENAME”,<br />
then press the [DATA÷ENTER] knob.<br />
The display changes to:<br />
46<br />
(j)<br />
If you don’t want to save your file, press [EXIT÷JUMP]<br />
to return to the “PLAYLIST SAVE” page.<br />
Again press the [MENU÷WRITE] button.
V-Accordion r<br />
Recording your performance as audio data<br />
12. Recording your performance as audio data<br />
Your FR-7x allows you to record your playing as an audio file.<br />
Recording<br />
(1) Prepare everything you want to record.<br />
Select the Set you want to use, and the registers for<br />
the left and right hands, etc.<br />
(2) Insert the optional USB memory that should contain<br />
your audio recording into the FR-7x’s USB<br />
port.<br />
(3) Press and hold the [ORCHESTRA] register and press<br />
register [8].<br />
The display now shows a “Flushing!” message to indicate<br />
that the audio data are being prepared in such a<br />
way that they can be saved. Next, the display page<br />
shown below appears…<br />
Saving your recording<br />
Here is how to save the recording you have just made.<br />
When the “Flushing!” message disappears, the display<br />
changes to:<br />
(1) Press the [DATA÷ENTER] knob.<br />
(2) Rotate the [DATA÷ENTER] knob to select the name<br />
field at the bottom.<br />
(4) Rotate the [DATA÷ENTER] knob to select the [i] icon,<br />
then press the [DATA÷ENTER] knob.<br />
The FR-7x calculates the remaining time available<br />
and goes to the following page:<br />
Check whether the remaining recording time is<br />
enough for the piece you want to record. If it is not,<br />
remove the optional USB memory and select another<br />
one.<br />
(5) Wait for the “AUDIO RECORDER” page to reappear.<br />
(6) Play a few notes to check whether the FR-7x<br />
sounds the way you want it to.<br />
(7) Press the [DATA÷ENTER] knob to start recording.<br />
A “Recording” message appears in the display to signal<br />
that everything you play will be recorded.<br />
Also, the FR-7x has already selected the [ª] icon.<br />
Note: Recording can also be started and stopped with an<br />
FBC-7 footswitch (see “REC Start/Stop” on p. 88).<br />
Note: You cannot start recording while the player is playing<br />
back a song. If you try it nevertheless, the display will<br />
show the “Cannot execute. Audio playback is ON.” message.<br />
(8) At the end of the song, press the [DATA÷ENTER]<br />
knob once again to stop recording.<br />
The first character of the default name is already<br />
selected (see the dark line below the first character).<br />
(3) If necessary, select a different character position<br />
(indicated by a dark line) by rotating the<br />
[DATA÷ENTER] knob.<br />
(4) Press the [DATA÷ENTER] knob to confirm your<br />
selection.<br />
The selected character position is indicated by means<br />
of a dark underscore character.<br />
(5) Rotate the [DATA÷ENTER] knob to select the desired<br />
character, then press the knob to confirm your setting.<br />
The new character now appears on a white background.<br />
(6) Repeat steps (3)~(5) above to enter the remaining<br />
characters.<br />
(7) Press the [MENU÷WRITE] button to save your<br />
recording.<br />
The display asks you to confirm your intention (“Press<br />
WRITE to proceed”). If you don’t want to save your<br />
file, press [EXIT÷JUMP].<br />
47
FR-7x V-Accordion<br />
® Saving your recording<br />
(8) Again press the [MENU÷WRITE] button.<br />
If a file of the same name already exists, you are<br />
asked whether you want to overwrite it. To do so,<br />
press [MENU÷WRITE] again.<br />
The display briefly shows a “Function complete” message<br />
and then returns to the “AUDIO RECORDER”<br />
page.<br />
(9) Press the [EXIT÷JUMP] button to return to the main<br />
page.<br />
(10) See page 38 for how to listen to your file.<br />
In case you decide not to save the audio file…<br />
There may be times when you are unhappy about your<br />
recording and therefore prefer not to save it. In that<br />
case, proceed as follows:<br />
(1) If you are still recording, press the [DATA÷ENTER]<br />
knob to stop the recorder.<br />
The display now shows a “Flushing!” message, and the<br />
the following page appears:<br />
(2) Press the [EXIT÷JUMP] button.<br />
The following warning appears:<br />
(3) Press the [DATA÷ENTER] knob to erase your recording<br />
and return to the “AUDIO RECORDER” page, or<br />
if you change your mind and wish to save the recording<br />
after all, press the [EXIT÷JUMP] button.<br />
r<br />
48
V-Accordion r<br />
Managing audio files on a USB memory<br />
13. Managing audio files on a USB memory<br />
The FR-7x provides several functions that allow you to manage the files on the connected USB memory. Especially the<br />
“DELETE” function may be useful to dispose of recordings you don’t want to keep after all.<br />
(1) If necessary, insert the optional USB memory that<br />
contains the desired song file into the USB port.<br />
See “Connecting an optional USB memory” on p. 38.<br />
(2) Press and hold the [ORCHESTRA] register and press<br />
register [10].<br />
It means that you cannot select any function. Press<br />
the [EXIT÷JUMP] button to return to the list window<br />
and select the file you want to delete.<br />
(c) Rotate the [DATA÷ENTER] knob to select “DELETE”,<br />
then press the [DATA÷ENTER] knob.<br />
The display changes to:<br />
If the display already shows the playback controls,<br />
press the [EXIT÷JUMP] button to select the page<br />
shown above.<br />
(3) Rotate the [DATA÷ENTER] knob to select the song<br />
file you want to delete or rename.<br />
Deleting a song file<br />
Song files you no longer need (recordings you do not<br />
want to keep, for instance) can be deleted.<br />
(a) Perform steps (1)~(3) under “Managing audio files<br />
on a USB memory”.<br />
(b) Press the [MENU÷WRITE] button to select the following<br />
page:<br />
Note: Be aware that a deleted audio file cannot be<br />
recalled.<br />
(d) Press the [DATA÷ENTER] knob to confirm your<br />
selection.<br />
The display briefly shows the “Function complete”<br />
message.<br />
Note: Press the [EXIT÷JUMP] button if you decide not to<br />
delete the selected file.<br />
(e) Press the [EXIT÷JUMP] button to return to the main<br />
page.<br />
Renaming a song file<br />
You can also change the name of an existing song.<br />
(a) Perform steps (1)~(3) under “Managing audio files<br />
on a USB memory”.<br />
(b) Press the [MENU÷WRITE] button to select the following<br />
page:<br />
If “DELETE” and “RENAME” are displayed in gray, no<br />
song file was selected. In that case, first select a song<br />
and then repeat the procedure.<br />
(c) Rotate the [DATA÷ENTER] knob to select “RENAME”,<br />
then press the [DATA÷ENTER] knob.<br />
The display changes to:<br />
If no song file is selected, the menu page looks as follows:<br />
49
FR-7x V-Accordion<br />
® Managing audio files on a USB memory<br />
(d) Press the [DATA÷ENTER] knob.<br />
(e) Rotate the [DATA÷ENTER] knob until the file name<br />
(bottom line) is selected:<br />
The first character is already selected (see the dark<br />
line below the first character).<br />
(f) If necessary, select a different character position<br />
(indicated by a dark line) by rotating the<br />
[DATA÷ENTER] knob.<br />
(g) Press the [DATA÷ENTER] knob to confirm your<br />
selection.<br />
(m) If necessary, use the [DATA÷ENTER] knob to select<br />
the location where you want to save your file.<br />
(n) Press the [DATA÷ENTER] knob to confirm your<br />
selection.<br />
(o) Press the [DATA÷ENTER] knob again on the “OK”<br />
field.<br />
(p) Press the [MENU÷WRITE] button to save your audio<br />
file.<br />
The display asks you to confirm your intention (“Press<br />
WRITE to proceed”). If you don’t want to save your<br />
files, press the [EXIT÷JUMP] button.<br />
(q) Press the [MENU÷WRITE] button again.<br />
If a files of the same name already exists, you are<br />
asked whether you want to overwrite it. To do so,<br />
press [MENU÷WRITE] yet again.<br />
(r) Press the [EXIT÷JUMP] button several times to<br />
return to the main page.<br />
The selected character is indicated by means of a dark<br />
underscore character.<br />
(h) Rotate the [DATA÷ENTER] knob to select the desired<br />
character, then press the knob to confirm your setting.<br />
The new character now appears on a white background.<br />
(i) Repeat steps (f)~(h) above to enter the remaining<br />
characters.<br />
You can also delete and insert characters (see p. 41).<br />
If you don’t want to save the renamed song file in a<br />
different folder, skip to step (p).<br />
(j) Press the [EXIT÷JUMP] button.<br />
The FR-7x automatically selects the [Ins] icon.<br />
(k) Rotate the [DATA÷ENTER] knob towards the left to<br />
select [FOLDER].<br />
r<br />
(l)<br />
50<br />
Press the [DATA÷ENTER] knob to jump to the following<br />
page:
V-Accordion r<br />
Assigning orchestral to the registers<br />
14. Assigning orchestral to the registers<br />
The FR-7x allows you to change the assignments of the orchestral sounds to the treble and bass registers. This is especially<br />
useful if you want to be able to switch between orchestral instruments and organ sounds within the current Set.<br />
The settings you make here are Set parameters and can be different for each of the 80 Set memories.<br />
Assigning orchestral sounds<br />
Choosing the section for which you want to prepare<br />
different sounds<br />
The FR-7x contains four orchestral parts. The availability<br />
of most of them depends on the selected mode (FREE<br />
BASS on or off):<br />
Orchestral part Menu Availability<br />
ORCHESTRA 6 Always (if switched on).<br />
ORCH BASS 5 While Free Bass mode is off.<br />
ORCH CHORD 7 While Free Bass mode is off.<br />
ORCH FREE BASS 8 Only in Free Bass mode.<br />
Each of these parts allows you to assign different<br />
orchestral and/or organ sounds to the associated registers.<br />
The parameter used for this assignment is called<br />
“Timbre”.<br />
Note: You can only select sections that are active (and thus<br />
sound when you play on the Treble or Bass keyboard). If you<br />
select a function of a section that is currently off, the display<br />
tells you that its parameters cannot be changed. In that case,<br />
switch the section on and try again – or select another group.<br />
Section<br />
ORCH BASS<br />
ORCH CHORD<br />
ORCH FREE BS<br />
Procedure<br />
Simultaneously press the three bass registers<br />
labeled “ORCH BASS”.<br />
Simultaneously press the three bass registers<br />
labeled “ORCH CHORD”.<br />
Simultaneously press the three bass registers<br />
labeled “FREE BASS” to switch to<br />
the accordion mode of the same name.<br />
Simultaneously press the three bass registers<br />
labeled “ORCH FREE BS”.<br />
(4) Press the treble or bass register whose assignment<br />
you want to change.<br />
There are two possibilities for the 13 treble registers<br />
(for a total of 26 sounds). You may therefore have to<br />
press the treble register in question twice (to select<br />
the “A” or “B” sound). See “Orchestral sounds for the<br />
treble section” on p. 29.<br />
The display now shows the name of the sound that is<br />
currently assigned to that register.<br />
(5) Press and hold the [EXIT÷JUMP] button until the<br />
display looks as follows:<br />
Procedure for assigning sounds<br />
(1) Connect the FR-7x (if necessary) and switch it on.<br />
See pages 17 and 18.<br />
(2) Use the SET [√][®] buttons to select the Set that you<br />
wish to edit.<br />
(6) Press the treble register that has the number of the<br />
orchestral part you want to edit:<br />
Orchestral part<br />
Treble register to press<br />
ORCHESTRA 6<br />
ORCH BASS 5<br />
ORCH CHORD 7<br />
(3) Switch on the orchestral section whose sound<br />
assignment you want to change:<br />
Section<br />
ORCHESTRA<br />
Procedure<br />
Press the [ORCHESTRA] register.<br />
ORCH FREE BASS 8<br />
Remember that some sections are not available at all<br />
times.<br />
(7) Press treble register [1] to select the corresponding<br />
“Timbre” page.<br />
51
FR-7x V-Accordion<br />
® Saving your settings<br />
The display shows one of the following pages with<br />
the name of the patch selected in step (4) above.<br />
(2) To save the patch to a different register (or register<br />
memory), rotate the [DATA÷ENTER] knob to select<br />
that register for “to”.<br />
Otherwise, continue with the next step.<br />
(3) Press the [MENU÷WRITE] button to save your settings.<br />
The display briefly responds with:<br />
Note: Wait for this message to disappear before switching<br />
the FR-7x off. Otherwise, you risk damaging its entire<br />
memory contents.<br />
When the operation is complete, the display shows<br />
the “Function complete” message and then returns to<br />
the “WRITE” page.<br />
(4) Press [EXIT÷JUMP] several times to return to the<br />
main page.<br />
The “PATCH” parameter allows you to select a different<br />
sound for the current register or register memory<br />
(“A” or “B”).<br />
(8) Press the [DATA÷ENTER] knob to select the patch.<br />
(9) Rotate the [DATA÷ENTER] knob to select a patch.<br />
You can play on the piano or button-type keyboard<br />
to audition the patches while selecting them.<br />
Patches whose names start with “TW” are organ<br />
sounds (“TW”= “tonewheel”). Whenever you select<br />
such a sound, and [EDIT] field is displayed. It means<br />
that you can edit (change) the organ sound in question.<br />
See “Editing the selected organ sound” on p. 53<br />
for details.<br />
(10) Press the [DATA÷ENTER] knob to confirm your<br />
selection.<br />
The sound is assigned to the register you selected<br />
earlier.<br />
(11) See “Saving your settings” below.<br />
About organ sounds<br />
Your FR-7x contains a three-part Virtual ToneWheel<br />
organ that uses the same technology as the Roland<br />
VK-series organs. You can set the (virtual) harmonic<br />
bars—and a number of typical organ effects and<br />
noises—to your liking (like on a real organ).<br />
There are three organ parts: TW UPPER (treble keyboard),<br />
TW LOWER (chord rows of the bass buttons)<br />
and TW PEDAL (bass rows of the bass buttons). You are<br />
free to assign an organ sound to just one section (treble<br />
keyboard, chord rows or bass rows), to two, or to all<br />
three of them. Each assignment applies to the register<br />
you selected prior to changing the setting (see below).<br />
Saving your settings<br />
(1) Press and hold the [MENU÷WRITE] button until the<br />
following page appears:<br />
r<br />
The FR-7x automatically selects the ORCH(ESTRA)<br />
register you have just edited and displays its line and<br />
checkbox.<br />
Note: Even if you don’t save your settings, the FR-7x will<br />
remember them (for any Set and any register) until you<br />
switch it off, or until it is switched off by the “10.12 Auto<br />
Power Off” function (see p. 92).<br />
52
V-Accordion r<br />
Editing the selected organ sound<br />
Editing the selected organ sound<br />
You can edit the selected preset by proceeding as follows:<br />
(1) See steps (1)~(7) of “Procedure for assigning<br />
sounds” on p. 51.<br />
(2) Press the [DATA÷ENTER] knob to select the “PATCH”<br />
field.<br />
(3) Rotate the [DATA÷ENTER] knob counterclockwise to<br />
select a patch whose name starts with “TW” (“TW”=<br />
“tonewheel”).<br />
Whenever you select such a sound, and [EDIT] field is<br />
displayed. It means that you can edit (change) the<br />
organ sound in question.<br />
(4) Use the [DATA÷ENTER] knob to confirm your selection.<br />
If you prefer to use one of the preset memories as a<br />
starting point, rotate the [DATA÷ENTER] knob to<br />
select it, then press the [DATA÷ENTER] knob.<br />
(2) Press the [DATA÷ENTER] knob several times to select<br />
the harmonic bar icon whose setting your want to<br />
change.<br />
(3) Rotate the [DATA÷ENTER] knob to set the level of<br />
the selected harmonic bar.<br />
The setting range is 0~8 (where “0” means that the<br />
harmonic bar in question is inaudible).<br />
Note: You can audition the presets while selecting them by<br />
playing on the assigned (treble or bass) keyboard.<br />
(4) Repeat steps (2) and (3) to set the level of the<br />
remaining harmonic bars to your liking.<br />
(5) Press the [EXIT÷JUMP] button to leave this page.<br />
Note: See “Saving your settings” on p. 52 for how to save<br />
your settings if you are happy with the organ sound. Otherwise<br />
continue with the next section.<br />
The sound is assigned to the register you selected<br />
earlier.<br />
(5) Press the [DATA÷ENTER] knob on the “EDIT” field.<br />
The following organ parameters are available and can<br />
be selected by rotating the [DATA÷ENTER] knob:<br />
Footage levels<br />
Percussion<br />
Leakage<br />
Vibrato/Chorus<br />
Overdrive<br />
Rotary<br />
Bellows Crescendo<br />
Mem. Name (name of the sound you create)<br />
Footage levels<br />
This page allows you to set the level of the 9 virtual<br />
harmonic bars. From left to right, the bar icons represent<br />
the following organ footages: 16’, 5-1/3’, 8’, 4’,<br />
2-2/3’, 2’, 1-3/5’, 1-1/3’ and 1’. For the “TW Pedal”<br />
part, the available footages are 16’ and 8’ (i.e. only<br />
two harmonic bars).<br />
Each harmonic bar is assigned to a sine wave (pure<br />
tone) of a set pitch. By mixing these sine waves, you<br />
can create a variety of organ sounds.<br />
(1) Press the [DATA÷ENTER] knob to select the “TW<br />
UPPER’ (or “TW LOWER” or “TW PEDAL”) environment.<br />
A “USR” field is selected. The FR-7x provides one USR<br />
memory where you can save your own harmonic bar<br />
settings. (There are also 32 or 16 TW presets.)<br />
53
FR-7x V-Accordion<br />
® Editing the selected organ sound<br />
Percussion<br />
The “Percussion” parameter allows you to add a “thumping”<br />
sound to the notes you play, making the organ<br />
more aggressive. You can also specify the pitch, the level<br />
and the speed (onset) of the percussion sound.<br />
Leakage<br />
On tone wheel organs, the sounds of the notes being<br />
played are slightly “contaminated” by audio signals from<br />
tone wheels not related to that note. Formerly, this was<br />
seen as a problem, but today this idiosyncrasy is considered<br />
an important element of the distinctive sound of a<br />
traditional instrument. This parameter allows you to set<br />
the level of the “noise”.<br />
(1) Select the “Percussion” page.<br />
See “Editing the selected organ sound” on p. 53.<br />
(2) Press the [DATA÷ENTER] knob to select the<br />
“PARAM” parameter.<br />
(3) Rotate the [DATA÷ENTER] knob to select one of the<br />
following parameters:<br />
Parameter<br />
Switch<br />
Harmonic<br />
Soft<br />
Slow<br />
Description<br />
Allows you to switch the percussion on or<br />
off. Setting range: Off, On<br />
Allows you to specify the percussion<br />
sound’s pitch.<br />
Setting range: 2nd, 3rd<br />
Sets the percussion sound’s level.<br />
Setting range: Off (normal level), On<br />
(softer level).<br />
Specifies the desired attack (aggressiveness)<br />
of the percussion sound: slow and<br />
longer (On), or fast and more abrupt (Off).<br />
(4) Press the [DATA÷ENTER] knob to confirm your<br />
selection.<br />
(5) Rotate the [DATA÷ENTER] knob to set the value and<br />
press it to confirm.<br />
(6) Press the [DATA÷ENTER] knob to confirm your setting.<br />
(7) Repeat steps (2)~(6) to set the remaining parameters.<br />
Note: See “Saving your settings” on p. 52 for how to save<br />
your settings if you are happy with the organ sound. Otherwise<br />
continue with the next section.<br />
(1) Select the “Leakage” page.<br />
See “Editing the selected organ sound” on p. 53.<br />
(2) Press the [DATA÷ENTER] knob to select the “LEVEL”<br />
parameter.<br />
(3) Rotate the [DATA÷ENTER] knob to set the desired<br />
level (0~127).<br />
(4) Confirm your setting by pressing the [DATA÷ENTER]<br />
knob.<br />
Note: See “Saving your settings” on p. 52 for how to save<br />
your settings if you are happy with the organ sound. Otherwise<br />
continue with the next section.<br />
Vibrato/Chorus<br />
The vibrato effect cyclically modulates the pitch of<br />
organ sounds (which is different from the Rotary effect).<br />
The chorus effect mixes the normal sound of the organ<br />
with a sound to which vibrato has been applied, adding<br />
richness and spaciousness to the sound. Only one of<br />
these two effects can be used at a time (either vibrato or<br />
chorus).<br />
IMPORTANT REMARK: The organ effects described<br />
below apply to all “TW” parts. There is one processor<br />
each for each effect. Therefore, the “TW Lower” and TW<br />
Pedal” parts will use the same settings as the “TW<br />
Upper” part. If the “TW Upper” part is not used (i.e. if the<br />
treble keyboard plays an accordion or orchestral sound),<br />
the effects settings of the “TW Lower” part are used and<br />
also applied to the “TW Pedal” part. (And if only the “TW<br />
Pedal” part is active, it will use its own effects settings.)<br />
r<br />
54<br />
(1) Select the “Vibrato Chorus” page.<br />
See “Editing the selected organ sound” on p. 53.<br />
(2) Press the [DATA÷ENTER] knob to select the<br />
“PARAM” parameter.
V-Accordion r<br />
Overdrive<br />
(3) Rotate the [DATA÷ENTER] knob to select one of the<br />
following parameters:<br />
Parameter<br />
Switch<br />
Type<br />
Vintage<br />
Level<br />
Description<br />
Allows you to switch the effect on or off.<br />
Setting range: Off, On<br />
V-1, V-2, V-3: This applies vibrato (pitch<br />
modulation). Increasing the value will produce<br />
a deeper effect.<br />
C-1, C-2, C-3: This applies chorus to add<br />
depth and spaciousness to the sound.<br />
Increasing the value will produce a deeper<br />
effect.<br />
Allows you to choose the sound of the<br />
selected effect. The settings recreate popular<br />
sounds in different periods.<br />
Setting range: ‘50s, ‘60s, ‘70s<br />
Specifies the level of the effect with<br />
respect to the unprocessed organ signal.<br />
Setting range: 0~127<br />
(4) Press the [DATA÷ENTER] knob to confirm your<br />
selection.<br />
(5) Rotate the [DATA÷ENTER] knob to set the desired<br />
value.<br />
(6) Press the [DATA÷ENTER] knob to confirm your setting.<br />
(7) Repeat steps (2)~(6) to set the remaining parameters.<br />
Note: See “Saving your settings” on p. 52 for how to save<br />
your settings if you are happy with the organ sound. Otherwise<br />
continue with the next section.<br />
Overdrive<br />
This effect distorts the sound, giving it an “edge” and<br />
making it suitable for hard rock and similar musical<br />
genres. See also important remark under “Vibrato/Chorus”.<br />
Parameter<br />
Level<br />
(4) Confirm your setting by pressing the [DATA÷ENTER]<br />
knob.<br />
(5) Rotate the [DATA÷ENTER] knob to set the desired<br />
value.<br />
(6) Confirm your setting by pressing the [DATA÷ENTER]<br />
knob.<br />
(7) Repeat steps (2)~(6) to set the remaining parameters.<br />
Note: See “Saving your settings” on p. 52 for how to save<br />
your settings if you are happy with the organ sound. Otherwise<br />
continue with the next section.<br />
Rotary<br />
The effect in this section simulates the typical sound<br />
modulation generated by a cabinet with rotating loudspeakers.<br />
Most functions (start/stop, rotation speed selection,<br />
etc.), need to be selected with a footswitch. See page 87<br />
for how to define those functions.<br />
(1) Select the “Rotary” page.<br />
See “Editing the selected organ sound” on p. 53.<br />
(2) Press the [DATA÷ENTER] knob to select the<br />
“PARAM” parameter.<br />
(3) Rotate the [DATA÷ENTER] knob to select one of the<br />
following parameters:<br />
Parameter<br />
Description<br />
Specifies the level of the effect with<br />
respect to the unprocessed organ signal.<br />
Setting range: 0~127<br />
Description<br />
(1) Select the “Overdrive” page.<br />
See “Editing the selected organ sound” on p. 53.<br />
(2) Press the [DATA÷ENTER] knob to select the<br />
“PARAM” parameter.<br />
(3) Rotate the [DATA÷ENTER] knob to select one of the<br />
following parameters:<br />
Parameter<br />
Switch<br />
Drive<br />
Description<br />
Allows you to switch the overdrive effect<br />
on or off.<br />
Setting range: Off, On<br />
Specifies how strongly the sound is distorted.<br />
Setting range: 0~127<br />
Level<br />
Send Rev.*<br />
Send Cho.*<br />
Specifies the level of the Rotary effect<br />
with respect to the unprocessed organ<br />
signal.<br />
Setting range: 0~127<br />
Allows yo to specify the level of the rotary<br />
signal that is transmitted to the TW reverb<br />
effect. This is not the same processor as<br />
the one assigned to the [REVERB] knob.<br />
Choose “0” if the sound should not be processed<br />
by the TW reverb processor.<br />
Setting range: 0~127<br />
Allows yo to specify the level of the rotary<br />
signal that is transmitted to the TW chorus<br />
effect. This is not the same processor<br />
as the one assigned to the [CHORUS] knob<br />
Choose “0” if the sound should not be processed<br />
by the TW chorus processor.<br />
Setting range: 0~127<br />
55
FR-7x V-Accordion<br />
® Editing the selected organ sound<br />
Parameter<br />
Send Dly.*<br />
Allows yo to specify the level of the rotary<br />
signal that is transmitted to the TW delay<br />
effect. Choose “0” if the sound should not<br />
be processed by the TW delay processor.<br />
Setting range: 0~127<br />
* There are no programmable parameters for these effects.<br />
The connection of the organ parts (“TW Upper”, “TW<br />
Lower” and “TW Pedal”) to the TW effects processors<br />
is as follows:<br />
Organ part<br />
(Upper, Lower, Pedal)<br />
Rotary<br />
Description<br />
Send<br />
Rev<br />
Send<br />
Cho<br />
(4) Press the [DATA÷ENTER] knob to confirm your<br />
selection.<br />
(5) Rotate the [DATA÷ENTER] knob to set the desired<br />
value.<br />
(6) Confirm your setting by pressing the [DATA÷ENTER]<br />
knob.<br />
(7) Repeat steps (2)~(6) to set the remaining parameters.<br />
Note: See “Saving your settings” on p. 52 for how to save<br />
your settings if you are happy with the organ sound. Otherwise<br />
continue with the next section.<br />
Send<br />
Dly<br />
TW Reverb<br />
TW Chorus<br />
TW Delay<br />
STEREO OUTPUT<br />
sockets<br />
L<br />
R<br />
(3) Rotate the [DATA÷ENTER] knob to select one of the<br />
following parameters:<br />
Parameter<br />
Crescendo<br />
Thres Min<br />
Thres Max<br />
The following illustration may make things clearer:<br />
Volume<br />
Thresh Max<br />
Thresh Min<br />
Description<br />
Sets the organ sound’s sensitivity to<br />
changes in the force with which the bellows<br />
is moved. The higher the value, the<br />
more the bellows will influence the organ<br />
sound.<br />
Setting range: Off, 0~100<br />
This parameter allows you to specify the<br />
pressure you need to apply to the bellows<br />
to start triggering the “Crescendo” effect.<br />
Set a relatively high value if you want to<br />
change the footage levels only for<br />
accented notes.<br />
Setting range: 0~110 (this value cannot<br />
be higher than the “Thresh Max” value)<br />
This parameter allows you to specify the<br />
maximum pressure that will set the levels<br />
of all virtual harmonic bars to “8”. Choosing<br />
a value below “120” means that the<br />
Crescendo effect is no longer applied<br />
when you press the bellows very forcefully.<br />
Setting range: 20~120 (this value cannot<br />
be lower than the “Thresh Min” value)<br />
All harmonic bars use<br />
level “8”.<br />
r<br />
56<br />
Bellows Crescendo<br />
Here is an effect that allows you to use the bellows to<br />
“move” the virtual harmonic bars. Suppose you set only<br />
one bar to the maximum value (see “Footage levels” on<br />
p. 53) but want to be able to increase the level of the<br />
other bars to add special emphasis to certain notes or<br />
chords. In that case, set the “Crescendo” parameter to a<br />
higher value than “0” and move the bellows more forcefully.<br />
This function temporarily increases the level of the harmonic<br />
bars. It has no effect if all harmonic bars are<br />
already set to “8”.<br />
(1) Select the “Bellows Crescendo” page.<br />
See “Editing the selected organ sound” on p. 53.<br />
(2) Press the [DATA÷ENTER] knob to select the<br />
“PARAM” parameter.<br />
The harmonic bars use the settings<br />
made on page 53.<br />
Harmonic bars whose level can<br />
still be increased become<br />
louder.<br />
Note: As stated above, the “Crescendo” effect will not be<br />
audible if all harmonic bars already use level “8”.<br />
(4) Press the [DATA÷ENTER] knob to confirm your<br />
selection.<br />
(5) Rotate the [DATA÷ENTER] knob to set the desired<br />
value and press it to confirm.<br />
(6) Repeat steps (2)~(5) to set the remaining parameters.<br />
Note: See “Saving your settings” on p. 52 for how to save<br />
your settings if you are happy with the organ sound. Otherwise<br />
continue with the next section.
V-Accordion r<br />
Name<br />
Name<br />
After editing the organ sound, you can decide to name it<br />
(8 characters) for easy identification. Your sound resides<br />
in the “User” memory. There is one such memory for<br />
each register or register memory (A/B) whose settings<br />
can be saved.<br />
(1) Select the “Mem. Name” page.<br />
See “Editing the selected organ sound” on p. 53.<br />
(2) Press the [DATA÷ENTER] knob.<br />
The first character is already selected (see the dark<br />
line below the first character).<br />
(3) If necessary, select a different character position<br />
(indicated by a dark line) by rotating the<br />
[DATA÷ENTER] knob.<br />
(4) Press the [DATA÷ENTER] knob to confirm your<br />
selection.<br />
(5) Rotate the [DATA÷ENTER] knob to select the desired<br />
character, then press the knob to confirm your setting.<br />
(6) Repeat steps (3)~(5) above to enter the remaining<br />
characters.<br />
You can also delete and insert characters by pressing<br />
the [EXIT÷JUMP] button to select the [Del] or [Ins] field<br />
and rotating the [DATA÷ENTER] knob (see p. 41).<br />
(7) Press the [EXIT÷JUMP] button several times to<br />
return to the main page.<br />
57
FR-7x V-Accordion<br />
® About the FBC-7<br />
15. About the FBC-7<br />
Your FR-7x comes with an FBC-7 footswitch unit that doubles as power supply for your V-Accordion and also allows you<br />
to recharge a battery pack.<br />
Using the FBC-7<br />
When do you need the FBC-7?<br />
• If you want to select registers and Sets using the SET<br />
and REGISTER footswitches.<br />
• If you want to use the SUSTAIN footswitch and possibly<br />
also an optional expression pedal.<br />
• If you want to take advantage of the FR-7x’s MIDI<br />
functionality. This may include starting and stopping<br />
an external arranger module, selecting other Style<br />
divisions, etc.<br />
• If you do not own a commercially available wireless<br />
system and do not want to use excessively long audio<br />
cables that run from the FR-7x to your amplifier or<br />
mixing console.<br />
• If you need to recharge the battery pack.<br />
Note: See page 18 for how to connect the FR-7x to the<br />
FBC-7, and the FBC-7 to a wall outlet.<br />
Using the footswitches<br />
The FBC-7 has five footswitches that grant you even<br />
more flexibility:<br />
Footswitches<br />
SUSTAIN<br />
Explanation<br />
The SUSTAIN footswitch allows you to<br />
hold the notes of orchestral sounds if that<br />
section is on. It also transmits CC64 messages<br />
via MIDI. If you assign it to another<br />
section (page 87), it only transmits MIDI<br />
messages on the channel of the selected<br />
section (Treble, Bass, Orchestra Bass,<br />
Chord, Orchestra Chord, and/or Orchestra<br />
Free Bass). Its main use is to generate<br />
legato notes for piano and similar sounds<br />
like on an acoustic or digital piano. Notes<br />
whose keys are pressed when you press<br />
the footswitch will be held until you<br />
release the SUSTAIN footswitch.<br />
Connecting an optional expression pedal<br />
You can connect an optional EV-series expression pedal<br />
to the EXPRESSION PEDAL jack. That pedal applies to the<br />
Treble Orchestra part only. It allows you to create swell<br />
effects in much the same way as an organ or guitar<br />
player does.<br />
Note: Use only the specified expression pedal (EV-series; sold<br />
separately). By connecting any other expression pedals, you<br />
risk causing malfunction and/or damage to the unit.<br />
The reason why the Treble and Bass sections do not<br />
respond to this pedal is that you can control their volume<br />
via the strength with which you press and pull the<br />
bellows (like on any accordion).<br />
Footswitches<br />
Explanation<br />
Roland<br />
r<br />
SET<br />
REGISTER<br />
These switches ([1] and [2]) are used to<br />
select Sets. The [1] switch allows you to<br />
select the preceding Set (e.g. Set 18 if you<br />
are currently using Set 19), while the [2]<br />
switch is used to select the next Set. If you<br />
press [2] again after selecting Set 80, the<br />
FR-7x jumps to Set 1. Likewise, if you press<br />
[1] after selecting Set 1, the FR-7x jumps<br />
to Set 80.<br />
The REGISTER switches ([3] and [4]) allow<br />
you to select Treble registers [1]~[14]. They<br />
work the same as the SET footswitches: [3]<br />
selects the preceding register, while [4]<br />
selects the next one. These footswitches<br />
are most effective when you combine<br />
them with the Link function (see p. 68).<br />
The expression pedal can be used to fade the Orchestra<br />
part in and out, which is probably most effective in<br />
DUAL mode (see p. 30). When the expression pedal is all<br />
the way up (heel down), the ORCHESTRA part does not<br />
sound. Press the expression pedal down (toe down) to<br />
increase the ORCHESTRA section’s volume.<br />
Note: The expression pedal can also transmit CC11 messages<br />
via MIDI. See page 115.<br />
58
V-Accordion r<br />
Charging the battery pack<br />
Charging the battery pack<br />
The FR-7 comes with one Ni-Mh battery pack that can<br />
be recharged when it is depleted.<br />
General remarks about the battery pack<br />
• Please read “Precautions for the included battery” on<br />
p. 6.<br />
• The FR-7x’s battery pack is partly charged (and<br />
installed in the FR-7x’s battery compartment). It can<br />
be used right away.<br />
• We recommend depleting the battery pack (wait until<br />
the FR-7x goes off) before recharging it for the first<br />
time. It would actually be a good idea to repeat this<br />
the first three times to avoid the dreaded “memory<br />
effect”.<br />
• A fully charged battery pack should last about 8<br />
hours (continuous use).<br />
• When the battery pack is fully drained, the following<br />
message appears and the FR-7x goes off:<br />
Note: The FR-7x contains an energy saving function that<br />
switches the instrument off when it is left unattended for<br />
more than 10 minutes. You may therefore have to switch it<br />
on again from time to time. You can specify how long the<br />
FR-7x should wait before powering off automatically. See<br />
“10.12 Auto Power Off” on p. 92.<br />
• Never try to insert other batteries into the FR-7x than<br />
the one it came with (or suitable replacement batteries<br />
purchased from your Roland dealer). Only use<br />
“BP-24-45” batteries, part no. K2568101.<br />
Note: You cannot recharge the battery pack inside the<br />
FR-7x and a battery pack connected to the FR-7x simultaneously.<br />
Button<br />
Flashes yellow<br />
after a while<br />
Flashes red<br />
Meaning<br />
If the indicator first lights red and then<br />
starts flashing yellow after a while, the<br />
battery pack is overheating. Disconnect<br />
the FR-7x (or the battery pack) from the<br />
FBC-7 and use the battery pack until it is<br />
depleted. Then, recharge it.<br />
The battery pack cannot be fully<br />
recharged, i.e. it takes more time than<br />
expected to reach full charge. If this happens<br />
once, wait at least half an hour, then<br />
try charging it again.<br />
If the button again flashes red, the battery<br />
pack may have reached the end of its life<br />
cycle. Replace it with a new one if the<br />
button keeps flashing red.<br />
Note: If the red indicator goes off while the battery pack is<br />
being recharged, this means that there has been a power failure<br />
and that the battery pack has probably only been partially<br />
recharged. In that case, you need to recharge it again.<br />
Recharging the battery pack without removing it<br />
from the FR-7x<br />
There is no need to remove the battery pack from the<br />
FR-7x in order to recharge it. Recharging the battery<br />
pack takes ±3~5 hours.<br />
(1) Connect the FR-7x to the FBC-7 using the supplied<br />
19-pin cable.<br />
See “Connecting the FR-7x to the supplied FBC-7” on<br />
p. 16.<br />
(2) Connect the FBC-7 to a suitable wall outlet.<br />
(3) Switch on the FBC-7 by pressing its [POWER¥ON]<br />
button (its red POWER ON indicator lights).<br />
(4) Press the [BATTERY¥CHARGER] button on the<br />
FBC-7.<br />
About the BATTERY CHARGER and EXTERNAL<br />
BATTERY CHARGER indicators<br />
The FBC-7 has two buttons ([BATTERY¥CHARGER] and<br />
[EXTERNAL¥BATTERY¥CHARGER]) that light or flash in<br />
various ways to indicate the current status. Here is how<br />
to “decode” those indications:<br />
Button<br />
Lights red<br />
Lights green<br />
Flashes yellow<br />
right away<br />
Meaning<br />
The battery pack is being charged.<br />
Depending on the button that lights, this<br />
refers to the battery pack in the FR-7x<br />
(BATTERY) or the battery pack connected<br />
to the FBC-7 (EXTERNAL BATTERY).<br />
The battery pack is fully charged and can<br />
be used again.<br />
The charging operation cannot be started<br />
because the ambient temperature lies<br />
outside the 0°~40°C range. Take the<br />
FBC-7 to a place where the ambient temperature<br />
is acceptable, wait a little, and<br />
repeat the charging operation.<br />
The [BATTERY¥CHARGER] button now lights red.<br />
(5) Wait until the [BATTERY¥CHARGER] button lights<br />
green, then switch off the FBC-7 and disconnect<br />
the 19-pin cable from both the FBC-7 and the<br />
FR-7x.<br />
Disconnecting the FR-7x is only necessary if you do<br />
not want to use the FBC-7 during your next performance.<br />
Note: You can use the FR-7x while its battery pack is being<br />
recharged, provided you leave the V-Accordion connected<br />
to the FBC-7.<br />
59
FR-7x V-Accordion<br />
® Charging the battery pack<br />
Recharging the battery pack on the FBC-7<br />
The battery pack installed in the FR-7x’s compartment<br />
can also be removed and recharged on the FBC-7 itself.<br />
That is more tedious, though, and does not speed up the<br />
recharging procedure.<br />
The main use for the method described below is therefore<br />
to recharge a spare battery pack (which is optional)<br />
while using the battery pack inside the FR-7x.<br />
Warning: Before removing the battery pack, be<br />
sure to power off the FR-7x (the blue indicator<br />
must be dark).<br />
(1) Switch off the FR-7x.<br />
(2) Prepare a coin.<br />
(3) Remove the cushion located between the Treble<br />
keyboard and the bellows.<br />
(7) Remove the connector and take the battery pack<br />
out of the battery case.<br />
The battery pack is connected to the FR-7x by means<br />
of a cable. You need to disconnect the cable from the<br />
battery pack by pressing the clip on the connector<br />
before fully removing the battery pack.<br />
(8) Open the FBC-7’s EXTERNAL BATTERY CHARGER<br />
compartment by sliding the cover to the right.<br />
(4) Use the coin to loosen the two screws of the battery<br />
compartment cover.<br />
That portion on the FBC-7 now looks as follows (note<br />
the connector):<br />
(9) Connect the battery pack’s cable to the charger’s<br />
socket.<br />
(5) Remove the cover from the FR-7x’s battery compartment.<br />
Note: While the compartment cover is open, the FR-7x<br />
cannot be switched on.<br />
(6) Pull the battery strip so that the battery pack protrudes<br />
a little from the battery case.<br />
(10) Slide the battery pack into the holder on the<br />
FBC-7.<br />
battery pack<br />
r<br />
(11) Connect the FBC-7 to a suitable wall outlet.<br />
(12) Switch on the FBC-7 by pressing its [POWER¥ON]<br />
button (its red POWER ON indicator lights).<br />
60
V-Accordion r<br />
If the battery pack fails to last 8 hours (or slightly less)<br />
(13) Press the [EXTERNAL¥BATTERY¥CHARGER] button<br />
on the FBC-7.<br />
The button now lights red.<br />
(14) Wait until the [EXTERNAL¥BATTERY¥CHARGER] button<br />
lights green, then switch off the FBC-7 and<br />
disconnect the cable from the socket on the FBC-7<br />
and from the battery pack.<br />
You can leave the battery pack where it is until you<br />
actually need it.<br />
Note: You can use the FR-7x while the battery pack is<br />
being recharged externally.<br />
(15) Close the cover of the EXTERNAL BATTERY<br />
RECHARGER compartment by sliding it to the left<br />
until it clicks into place.<br />
(16) See “Installing the battery pack” on p. 16.<br />
Note: Be sure to tighten the two screws of the battery<br />
compartment cover all the way to establish firm contact<br />
between the compartment cover and the instrument. Otherwise,<br />
you won’t be able to use your FR-7x.<br />
If the battery pack fails to last 8<br />
hours (or slightly less)<br />
The FR-7’s battery pack can be recharged about 300<br />
times before it needs to be replaced with a new one.<br />
Note that it is normal for the battery pack to last<br />
increasingly shorter as time goes by. At the end of its life<br />
cycle, it may only last one hour, for example. But that is<br />
a gradual process.<br />
61
FR-7x V-Accordion<br />
® Editing sounds (Advanced section)<br />
16. Editing sounds (Advanced section)<br />
Almost all sound aspects of your FR-7x can be changed (“edited”) to your liking. On p. 35 we already showed you how to<br />
quickly edit the most important aspects of a sound. All changes you make are temporary. If you want to preserve them,<br />
you need to use the WRITE function (see p. 103).<br />
Selecting parameters<br />
The FR-7x’s parameters can be selected by entering their<br />
numbers or using the Menu structure.<br />
(4) Press a register [1]~[12] to specify the parameter<br />
group.<br />
See “Available parameters” on p. 63 for the complete<br />
list.<br />
(5) Press a register [1]~[14] to specify a parameter<br />
within the selected group.<br />
If the parameter number is higher than “14”, press<br />
the [ORCHESTRA] register to select the first decimal,<br />
then register [1]~[10] to select the unit (register [10] is<br />
used to enter a “0”).<br />
Here is an example: to select parameter “10.20”, press<br />
register [10], then [ORCHESTRA] twice, then register<br />
[10] again.<br />
You can only select parameters of sections that are<br />
active (and thus sound when you play on the Treble<br />
or Bass keyboard). If you select a function of a section<br />
that is currently off, the display tells you that its<br />
parameters cannot be changed. In that case, switch<br />
the section on and try again or select another group.<br />
(6) Proceed with “Setting parameter values” on p. 63.<br />
Selecting parameters using the Jump function<br />
(1) Switch on the FR-7x.<br />
See “Switching the power on and off” on p. 18. The<br />
display now looks more or less as follows:<br />
Selecting parameters via the menu<br />
A second way of selecting parameters goes like this:<br />
(1) Press the [MENU] button.<br />
(2) See “Available parameters” on p. 63 to locate the<br />
parameter you wish to edit.<br />
(3) Press and hold the [EXIT÷JUMP] button until the<br />
display looks as follows:<br />
(2) Rotate the [DATA÷ENTER] knob or the [UP]/[DOWN]<br />
buttons to select one of the function groups.<br />
(3) Press the [DATA÷ENTER] knob to enter that group.<br />
r<br />
The display now responds with (this depends on the<br />
function group you selected):<br />
62
V-Accordion r<br />
Setting parameter values (Advanced)<br />
Note: You can only select sections that are active (and<br />
thus sound when you play on the Treble or Bass keyboard).<br />
If you select a function of a section that is currently off,<br />
the display tells you that its parameters cannot be<br />
changed. In that case, switch the section on and try again –<br />
or select another group.<br />
(The message above means that the ORCHESTRA section<br />
is not active and therefore cannot be edited.)<br />
(4) Rotate the [DATA÷ENTER] knob or the [UP]/[DOWN]<br />
buttons to select the parameter you wish to edit.<br />
(5) Proceed with “Setting parameter values”.<br />
Setting parameter values<br />
(1) Select the parameter you wish to edit (see above).<br />
(2) Press the [DATA÷ENTER] knob to activate that<br />
parameter for editing.<br />
Notice how the display changes.<br />
(3) Rotate the [DATA÷ENTER] knob to change the value.<br />
(4) Press the [DATA÷ENTER] knob to confirm your setting.<br />
If a display page contains two (or three) adjustable<br />
parameters, you may have to rotate the<br />
[DATA÷ENTER] again and repeat the procedure from<br />
step (2). Here is an example of a page with two<br />
parameters:<br />
(5) Press the [EXIT÷JUMP] button once to return to the<br />
function group.<br />
Available parameters<br />
The various groups contain the following parameters:<br />
1. Tuning<br />
1.1 Master Tune . . . . . . . . . . . . . . . . . . . . . . . . . p. 64<br />
1.2 Transpose . . . . . . . . . . . . . . . . . . . . . . . . . . . p. 64<br />
1.3 Scale . . . . . . . . . . . . . . . . . . . . . . . . . . . . . . . p. 64<br />
1.4 Scale Edit . . . . . . . . . . . . . . . . . . . . . . . . . . . p. 64<br />
1.5 Scale Assign . . . . . . . . . . . . . . . . . . . . . . . . . p. 65<br />
2. Treble Edit<br />
2.1 Reed Type . . . . . . . . . . . . . . . . . . . . . . . . . . . p. 65<br />
2.2 Register . . . . . . . . . . . . . . . . . . . . . . . . . . . . . p. 66<br />
2.3 Reed Volume . . . . . . . . . . . . . . . . . . . . . . . . . p. 66<br />
2.4 Treble Octave . . . . . . . . . . . . . . . . . . . . . . . . p. 66<br />
2.5 Valve Noise . . . . . . . . . . . . . . . . . . . . . . . . . . p. 67<br />
2.6 Musette Detune . . . . . . . . . . . . . . . . . . . . . . p. 67<br />
2.7 Bellows Detune . . . . . . . . . . . . . . . . . . . . . . . p. 67<br />
2.8 Reverb Send . . . . . . . . . . . . . . . . . . . . . . . . . p. 67<br />
2.9 Chorus Send . . . . . . . . . . . . . . . . . . . . . . . . . p. 67<br />
2.10 Delay Send. . . . . . . . . . . . . . . . . . . . . . . . . . p. 67<br />
2.11 Aftertouch Pitch . . . . . . . . . . . . . . . . . . . . . p. 67<br />
2.12 Bass Link . . . . . . . . . . . . . . . . . . . . . . . . . . . p. 68<br />
2.13 Orchestra Link . . . . . . . . . . . . . . . . . . . . . . . p. 68<br />
2.14 Orchestra Chord Link . . . . . . . . . . . . . . . . . p. 69<br />
2.15 MIDI TX . . . . . . . . . . . . . . . . . . . . . . . . . . . . p. 70<br />
2.16 Name . . . . . . . . . . . . . . . . . . . . . . . . . . . . . . p. 70<br />
3. Bass Edit<br />
3.1 Reed Type . . . . . . . . . . . . . . . . . . . . . . . . . . . p. 71<br />
3.2 Register . . . . . . . . . . . . . . . . . . . . . . . . . . . . . p. 71<br />
3.3 Reed Volume . . . . . . . . . . . . . . . . . . . . . . . . . p. 71<br />
3.4 Button Noise . . . . . . . . . . . . . . . . . . . . . . . . . p. 72<br />
3.5 Reed Growl . . . . . . . . . . . . . . . . . . . . . . . . . . p. 72<br />
3.6 Bellows Detune . . . . . . . . . . . . . . . . . . . . . . . p. 72<br />
3.7 Bass Drum . . . . . . . . . . . . . . . . . . . . . . . . . . . p. 72<br />
3.8 Chord Drum. . . . . . . . . . . . . . . . . . . . . . . . . . p. 73<br />
3.9 Reverb Send . . . . . . . . . . . . . . . . . . . . . . . . . p. 73<br />
3.10 Chorus Send . . . . . . . . . . . . . . . . . . . . . . . . p. 73<br />
3.11 Delay Send. . . . . . . . . . . . . . . . . . . . . . . . . . p. 73<br />
3.12 Bass MIDI TX . . . . . . . . . . . . . . . . . . . . . . . . p. 73<br />
3.13 Chord MIDI TX . . . . . . . . . . . . . . . . . . . . . . p. 73<br />
3.14 Name . . . . . . . . . . . . . . . . . . . . . . . . . . . . . . p. 73<br />
4. Free Bass Edit<br />
4.1 Reed Type . . . . . . . . . . . . . . . . . . . . . . . . . . . p. 74<br />
4.2 Register . . . . . . . . . . . . . . . . . . . . . . . . . . . . . p. 74<br />
4.3 Reed Volume . . . . . . . . . . . . . . . . . . . . . . . . . p. 74<br />
4.4 Button Noise . . . . . . . . . . . . . . . . . . . . . . . . . p. 75<br />
4.5 Reed Growl . . . . . . . . . . . . . . . . . . . . . . . . . . p. 75<br />
4.6 Bellows Detune . . . . . . . . . . . . . . . . . . . . . . . p. 75<br />
4.7 Reverb Send . . . . . . . . . . . . . . . . . . . . . . . . . p. 75<br />
4.8 Chorus Send . . . . . . . . . . . . . . . . . . . . . . . . . p. 75<br />
4.9 Delay Send. . . . . . . . . . . . . . . . . . . . . . . . . . . p. 75<br />
4.10 MIDI TX . . . . . . . . . . . . . . . . . . . . . . . . . . . . p. 75<br />
4.11 Name . . . . . . . . . . . . . . . . . . . . . . . . . . . . . . p. 75<br />
5. Orch.Bass Edit<br />
5.1 Timbre . . . . . . . . . . . . . . . . . . . . . . . . . . . . . . p. 76<br />
5.2 Lowest Note . . . . . . . . . . . . . . . . . . . . . . . . . p. 76<br />
5.3 Octave . . . . . . . . . . . . . . . . . . . . . . . . . . . . . . p. 76<br />
5.4 Release Time . . . . . . . . . . . . . . . . . . . . . . . . . p. 76<br />
5.5 Volume. . . . . . . . . . . . . . . . . . . . . . . . . . . . . . p. 76<br />
5.6 Panpot . . . . . . . . . . . . . . . . . . . . . . . . . . . . . . p. 77<br />
5.7 Bass Drum . . . . . . . . . . . . . . . . . . . . . . . . . . . p. 77<br />
5.8 Reverb Send . . . . . . . . . . . . . . . . . . . . . . . . . p. 77<br />
5.9 Chorus Send . . . . . . . . . . . . . . . . . . . . . . . . . p. 77<br />
5.10 Delay Send. . . . . . . . . . . . . . . . . . . . . . . . . . p. 77<br />
5.11 MIDI TX . . . . . . . . . . . . . . . . . . . . . . . . . . . . p. 77<br />
6. Orchestra Edit<br />
6.1 Timbre . . . . . . . . . . . . . . . . . . . . . . . . . . . . . . p. 78<br />
6.2 Octave . . . . . . . . . . . . . . . . . . . . . . . . . . . . . . p. 78<br />
6.3 Volume. . . . . . . . . . . . . . . . . . . . . . . . . . . . . . p. 78<br />
6.4 Panpot . . . . . . . . . . . . . . . . . . . . . . . . . . . . . . p. 78<br />
6.5 Bellows Detune . . . . . . . . . . . . . . . . . . . . . . . p. 78<br />
6.6 Reverb Send . . . . . . . . . . . . . . . . . . . . . . . . . p. 78<br />
6.7 Chorus Send . . . . . . . . . . . . . . . . . . . . . . . . . p. 78<br />
6.8 Delay Send. . . . . . . . . . . . . . . . . . . . . . . . . . . p. 78<br />
6.9 Aftertouch Pitch . . . . . . . . . . . . . . . . . . . . . . p. 79<br />
6.10 MIDI TX . . . . . . . . . . . . . . . . . . . . . . . . . . . . p. 79<br />
7. Orch. Chord Edit<br />
7.1 Timbre . . . . . . . . . . . . . . . . . . . . . . . . . . . . . . p. 79<br />
7.2 Lowest note. . . . . . . . . . . . . . . . . . . . . . . . . . p. 79<br />
7.3 Octave . . . . . . . . . . . . . . . . . . . . . . . . . . . . . . p. 80<br />
7.4 Volume. . . . . . . . . . . . . . . . . . . . . . . . . . . . . . p. 80<br />
7.5 Panpot . . . . . . . . . . . . . . . . . . . . . . . . . . . . . . p. 80<br />
7.6 Chord Drum. . . . . . . . . . . . . . . . . . . . . . . . . . p. 80<br />
7.7 Reverb Send . . . . . . . . . . . . . . . . . . . . . . . . . p. 80<br />
7.8 Chorus Send . . . . . . . . . . . . . . . . . . . . . . . . . p. 80<br />
7.9 Delay Send. . . . . . . . . . . . . . . . . . . . . . . . . . . p. 80<br />
7.10 MIDI TX . . . . . . . . . . . . . . . . . . . . . . . . . . . . p. 80<br />
63
FR-7x V-Accordion<br />
® Important remark about saving your settings (Advanced)<br />
r<br />
64<br />
8. Orch.FBass Edit<br />
8.1 Timbre. . . . . . . . . . . . . . . . . . . . . . . . . . . . . . p. 81<br />
8.2 Octave . . . . . . . . . . . . . . . . . . . . . . . . . . . . . . p. 81<br />
8.3 Volume . . . . . . . . . . . . . . . . . . . . . . . . . . . . . p. 81<br />
8.4 Panpot. . . . . . . . . . . . . . . . . . . . . . . . . . . . . . p. 81<br />
8.5 Reverb Send . . . . . . . . . . . . . . . . . . . . . . . . . p. 81<br />
8.6 Chorus Send . . . . . . . . . . . . . . . . . . . . . . . . . p. 81<br />
8.7 Delay Send . . . . . . . . . . . . . . . . . . . . . . . . . . p. 81<br />
8.8 MIDI TX . . . . . . . . . . . . . . . . . . . . . . . . . . . . . p. 81<br />
9. Set Common<br />
9.1 Reverb Macro . . . . . . . . . . . . . . . . . . . . . . . . p. 82<br />
9.2 Reverb Parameters. . . . . . . . . . . . . . . . . . . . p. 82<br />
9.3 Chorus Macro . . . . . . . . . . . . . . . . . . . . . . . . p. 83<br />
9.4 Chorus Parameters. . . . . . . . . . . . . . . . . . . . p. 84<br />
9.5 Delay Macro . . . . . . . . . . . . . . . . . . . . . . . . . p. 85<br />
9.6 Delay Parameters . . . . . . . . . . . . . . . . . . . . . p. 85<br />
9.7 Name. . . . . . . . . . . . . . . . . . . . . . . . . . . . . . . p. 86<br />
9.8 Master Bar Recall . . . . . . . . . . . . . . . . . . . . . p. 86<br />
9.9 Icon . . . . . . . . . . . . . . . . . . . . . . . . . . . . . . . . p. 86<br />
10. System<br />
10.1 LCD Contrast . . . . . . . . . . . . . . . . . . . . . . . p. 86<br />
10.2 Bellows Curves . . . . . . . . . . . . . . . . . . . . . . p. 86<br />
10.3 Pedal Controller . . . . . . . . . . . . . . . . . . . . . p. 87<br />
10.4 Sustain Routing A . . . . . . . . . . . . . . . . . . . p. 88<br />
10.5 Sustain Routing B . . . . . . . . . . . . . . . . . . . p. 88<br />
10.6 Function Switch . . . . . . . . . . . . . . . . . . . . . p. 88<br />
10.7 Function Switches Edit . . . . . . . . . . . . . . . p. 88<br />
10.8 Bass&Chd Mode . . . . . . . . . . . . . . . . . . . . . p. 89<br />
10.9 Free Bass Mode . . . . . . . . . . . . . . . . . . . . . p. 90<br />
10.10 Stereo Width . . . . . . . . . . . . . . . . . . . . . . p. 90<br />
10.11 Output Level . . . . . . . . . . . . . . . . . . . . . . p. 92<br />
10.12 Auto Power Off . . . . . . . . . . . . . . . . . . . . p. 92<br />
10.13 Start-Up . . . . . . . . . . . . . . . . . . . . . . . . . . p. 92<br />
10.14 Start-Up Name . . . . . . . . . . . . . . . . . . . . . p. 92<br />
10.15 Orchestra Touch . . . . . . . . . . . . . . . . . . . . p. 92<br />
10.16 Orchestra Bs&Ch Touch . . . . . . . . . . . . . . p. 92<br />
10.17 Start/Stop MIDI TX . . . . . . . . . . . . . . . . . . p. 93<br />
10.18 Treble Release T. . . . . . . . . . . . . . . . . . . . p. 92<br />
10.19 Expansion . . . . . . . . . . . . . . . . . . . . . . . . . p. 92<br />
10.20 Treble Mode (FR-7xb only) . . . . . . . . . . . p. 92<br />
11. Utility<br />
11.1 Battery Status. . . . . . . . . . . . . . . . . . . . . . . p. 97<br />
11.2 Copy SET . . . . . . . . . . . . . . . . . . . . . . . . . . . p. 97<br />
11.3 Copy Effects . . . . . . . . . . . . . . . . . . . . . . . . p. 97<br />
11.4 Export All FR-7x . . . . . . . . . . . . . . . . . . . . . p. 98<br />
11.5 Export Set . . . . . . . . . . . . . . . . . . . . . . . . . . p. 98<br />
11.6 Import All FR-7x . . . . . . . . . . . . . . . . . . . . . p. 99<br />
11.7 Import Set. . . . . . . . . . . . . . . . . . . . . . . . . . p. 99<br />
11.8 Restore Data. . . . . . . . . . . . . . . . . . . . . . . . p. 99<br />
11.9 FR-7/5 Import . . . . . . . . . . . . . . . . . . . . . . p. 100<br />
11.10 Treble Reg. on current Set . . . . . . . . . . p. 100<br />
11.11 Bass Reg. on current Set . . . . . . . . . . . . p. 101<br />
11.12 FreeBass Reg. on current Set . . . . . . . . p. 101<br />
11.13 Factory Reset . . . . . . . . . . . . . . . . . . . . . p. 102<br />
12. MIDI<br />
12.1 RealTime RX-TX . . . . . . . . . . . . . . . . . . . . p. 109<br />
12.2 Ext. Seq. Playback . . . . . . . . . . . . . . . . . . p. 109<br />
12.3 Bellows TX Resolution . . . . . . . . . . . . . . . p. 110<br />
12.4 Expression MIDI TX . . . . . . . . . . . . . . . . . p. 110<br />
12.5 Global Filters . . . . . . . . . . . . . . . . . . . . . . p. 111<br />
12.6 Bank for ‘Send PC’ . . . . . . . . . . . . . . . . . . p. 111<br />
Important remark about saving<br />
your settings<br />
The FR-7x’s internal memory remembers your settings<br />
while the FR-7x is switched on. While editing, there is no<br />
absolute need to save your settings.<br />
Be aware, however, that all changes are lost when the<br />
FR-7x is switched off. This includes situations where the<br />
FR-7x is switched off by the “10.12 Auto Power Off”<br />
function.<br />
Remember to save all settings as soon as you are<br />
sure that you want to keep them. See page 103 for<br />
how to save your changes.<br />
Note: Changes you haven’t saved yet and that you don’t want<br />
to keep can be “undone” using “11.8 Restore Data” on p. 99.<br />
1. Tuning parameters<br />
The parameters of the<br />
TUNING group apply to the<br />
entire FR-7x and are not<br />
saved to a Set. You can<br />
save most of them to the<br />
FR-7x’s Global memory. See pages 62 and 63 for how to<br />
select and adjust the parameters.<br />
Press [UP] and [DOWN] simultaneously to select the<br />
value that is indicated as “Default setting”.<br />
See page 103 for how to save your changes. Also be sure<br />
to read “Important remark about saving your settings”<br />
on p. 64.<br />
1.1 Master Tune<br />
(415.6~440.0Hz~464.4,<br />
Default setting: 440.0)<br />
This parameter allows you to<br />
change the FR-7x’s overall<br />
tuning, which may be necessary<br />
when you play with acoustic instruments that cannot<br />
be tuned easily. The factory default is “440.0Hz”. The<br />
FR-7x’s tuning can be adjusted in steps of ±50 cents.<br />
1.2 Transpose<br />
(–6~5, F#~F)<br />
This parameter allows you to<br />
transpose all sections of the<br />
FR-7x. See page 35 for details.<br />
1.3 Scale<br />
This page contains two<br />
parameters. The first one<br />
allows you to select the tuning<br />
system and the second one to<br />
specify the fundamental/root<br />
of the key you want to play in. This was already discussed<br />
on page 36.<br />
TYPE: Equal (Off), User 1, User 2, User 3, Arabic1,<br />
Arabic2, Just Major, Just Minor, Pythagorean, Mean-<br />
Tone, Werckmeister, Kirnberger<br />
KEY: C, C#, D, Eb, E, F, F#, G, Ab, A, Bb, B<br />
1.4 Scale Edit<br />
This display page provides<br />
access to three selectable and<br />
adjustable parameters. You<br />
may have noticed that there<br />
are three “User” scales. They<br />
refer to tuning systems you can program yourself. Obviously,<br />
you only need to do this if you would like to use a<br />
special tuning system (a gamelan tuning, for example).<br />
As this is a rather complex matter, the procedure for<br />
programming your tuning is a little different from the<br />
adjustment of other parameters:
V-Accordion r<br />
1.5 Scale Assign (Advanced)<br />
(1) After selecting this page, press the [DATA÷ENTER]<br />
knob to jump to the following page:<br />
(2) Rotate the [DATA÷ENTER] knob to select the User<br />
memory that should contain your customized tuning<br />
system.<br />
(3) Press the [DATA÷ENTER] knob again to jump to the<br />
following page.<br />
2. Treble Edit parameters<br />
The parameters of the TRE-<br />
BLE EDIT group apply to<br />
the Treble section and are<br />
saved to the selected Set.<br />
They allow you to build<br />
your own (virtual) accordion. After setting these parameters,<br />
you probably also need to adjust the BASS EDIT or<br />
FREE BS EDIT parameters (which are also saved to the<br />
Set). See pages 62 and 63 for how to select and adjust<br />
the parameters.<br />
Press [UP] and [DOWN] simultaneously to select the<br />
value that is indicated as “Default setting”.<br />
(–64~0~63, Default setting: 0 for all notes) These<br />
parameters allow you to stray away from the usual<br />
semitone-interval scale (used in western music) by<br />
changing the pitch of the notes to accommodate<br />
other musical cultures.<br />
Each note of the scale can be selected only once. That<br />
is because the value you specify applies to all notes<br />
of the same name. If you change the tuning of the<br />
“C”, that value will be added to or subtracted from all<br />
Cs (C1, C2, C3, etc.). Most of the time, you will probably<br />
select the value “50” or “–50”. Those values correspond<br />
exactly to half a semitone up or down (i.e. a<br />
quarter tone). Other settings may also be interesting,<br />
though.<br />
(4) Press the [DATA÷ENTER] knob to select either the<br />
note (left field) or the “TUNE” value (right field)<br />
and change the entry rotating the [DATA÷ENTER]<br />
knob.<br />
(5) Press the [MENU÷WRITE] button to save your setting.<br />
1.5 Scale Assign<br />
(Treble, Orchestra, Treb&Orch,<br />
Bass&Chord, ALL, Default setting:<br />
Treb&Orch)<br />
This parameter allows you to<br />
specify which section should<br />
be affected by the tuning system you select on the<br />
“1.3 Scale” page. It is perfectly possible to select a single<br />
section (e.g. only the Treble accordion).<br />
Introduction<br />
While familiarizing yourself with and using the following<br />
parameters, try to think of yourself as an accordion<br />
manufacturer. Some parameters in this group indeed<br />
rely on the power of Roland’s “virtual” technology<br />
(called “PBM” or “Physical Behavior Modeling”) and are<br />
in fact a warehouse with all kinds of accordion components<br />
from which you can build your personal accordion<br />
or to customize an existing “model”.<br />
Important note<br />
All changes you make here apply to the last Treble register<br />
you selected. So be sure to press the register ([1]~<br />
[14]) whose settings you wish to change before selecting<br />
and editing any of the TREBLE EDIT parameters. You can,<br />
however, decide to save your settings to a different register<br />
if you realize that you’ve been editing the wrong<br />
one.<br />
See page 103 for how to save your changes. Also be sure<br />
to read “Important remark about saving your settings”<br />
on p. 64.<br />
2.1 Reed Type<br />
This parameter allows you to<br />
do two things that are impossible<br />
on an acoustic accordion:<br />
you can (a) transform the<br />
selected register into a different<br />
instrument and (b) assign different sounds to each<br />
footage the register plays.<br />
Note: Each “FOOT” can be assigned one TYPE (combinations<br />
like “16= Bandoneon, 16= TexMex, 16= Organetto” are impossible).<br />
A register, as you may know, may contain several reeds<br />
tuned to different pitches (“feet”), so that you hear the<br />
16’, 8’ and 4’ reeds when you select it, for example. The<br />
“Register” parameter below allows you to select the<br />
desired footage(s). Here, you specify how each reed (that<br />
can be assigned to a register) should sound. This allows<br />
for complex combinations like the following:<br />
65
FR-7x V-Accordion<br />
® 2. Treble Edit parameters (Advanced)<br />
Bandoneon<br />
Classic<br />
Cajun<br />
F-Folk<br />
(1) Press the [DATA÷ENTER] knob to select the “FOOT”<br />
parameter, then rotate the [DATA÷ENTER] knob to<br />
select the reed you wish to assign another sound<br />
to.<br />
The options are: ALL, 16’, 8’, 8’–, 8’+, 4’, 5-1/3’, 2-2/3’<br />
Steierische<br />
TexMex<br />
Triktixa<br />
<br />
In our example, only 16’, 8’+ and 5-1/3’ are used. 8’+ is<br />
slightly softer than then other two reeds, because the<br />
Cassotto function is on. “Cassotto” is similar to the “Sordina”<br />
function discussed on page 25, but it only muffles<br />
the reed/footage in question (making the sound darker).<br />
The SORDINA switch, on the other hand, applies to all<br />
accordion sounds of the Treble section.<br />
(1) Press the [DATA÷ENTER] knob to select the “FOOT”<br />
parameter, then rotate the [DATA÷ENTER] knob to<br />
select the reed you wish to assign another sound<br />
to.<br />
The options are: 16’, 8’, 8’–, 8’+, 4’, 5-1/3’, 2-2/3’<br />
(2) Press the [DATA÷ENTER] knob to select the “STA-<br />
TUS” parameter, then rotate the [DATA÷ENTER]<br />
knob to specify whether the selected reed should<br />
sound and whether it should be muffled.<br />
The STATUS options are: Off (no sound), On (sounds),<br />
On-Cassotto (muffled sound).<br />
r<br />
(2) Press the [DATA÷ENTER] knob to select the “TYPE”<br />
parameter, then rotate the [DATA÷ENTER] knob to<br />
select a type (“instrument”).<br />
The TYPE options are: Bandoneon, I-Folk, I-Folk2,<br />
Classic, Cajun, Jazz, F-Folk, D-Folk, Organetto, F-Folk2,<br />
Classic2, Studio, Tradition, Steierische, OldItaly,<br />
TexMex, Trikitixa, F-Jazz, Classic3, Bajan.<br />
Note: Whenever you select “ALL” and set a different reed<br />
type, the “Valve Noise” setting (page 67) is automatically<br />
adapted to the reed type you select here. You may have to<br />
change it afterwards if you wish to use a different noise<br />
type.<br />
2.2 Register<br />
The parameters on this page<br />
are used in combination with<br />
the settings above. Here, you<br />
decide which feet should be<br />
audible and how they should<br />
be played. It is therefore on this page that you specify<br />
whether the sounds you selected above will indeed be<br />
used.<br />
Let us first look at an illustration:<br />
Bandoneon<br />
Classic<br />
Cajun<br />
<br />
On Off Off<br />
F-Folk<br />
Steierische<br />
TexMex<br />
Triktixa<br />
On-<br />
Cassotto<br />
Off On Off<br />
2.3 Reed Volume<br />
This is the last parameter that<br />
can be set for each reed/footage<br />
individually. It allows you<br />
to create the desired “mix”<br />
(volume balance) for the<br />
active reeds (see the “2.2 Register” page).<br />
This is a relative parameter: its value is added to or subtracted<br />
from the standard value (“Std”). As a rule, first<br />
decide which reed is most important and set its “Volume”<br />
parameter to “Std”. Then reduce or increase the<br />
volume of the “ancillary” reeds to create the desired balance.<br />
(1) Press the [DATA÷ENTER] knob to select the “FOOT”<br />
parameter, then rotate the [DATA÷ENTER] knob to<br />
select the reed whose volume you want to set.<br />
The options are: ALL (all reeds simultaneously), 16’, 8’,<br />
8’–, 8’+, 4’, 5-1/3’, 2-2/3’<br />
(2) Press the [DATA÷ENTER] knob to select the “LEVEL”<br />
parameter, then rotate the [DATA÷ENTER] knob to<br />
set the volume.<br />
The setting range is: Off, –40~“Std”~40, Default setting:<br />
Std<br />
Note: The overall volume of the Treble section (all registers)<br />
can be changed using the [BALANCE] knob.<br />
2.4 Treble Octave<br />
(–1, 0, +1, Default setting: 0)<br />
This parameter allows you to<br />
transpose the selected register<br />
one octave up (“+1”) or down<br />
(“–1”).<br />
This can be used for two purposes:<br />
• to quickly correct the pitch that results from the<br />
active reeds (see above) –or–<br />
• to avoid overlaps of the selected register when using<br />
an ORCHESTRA sound. (The ORCHESTRA section also<br />
provides an “Octave” parameter.)<br />
66
V-Accordion r<br />
2.5 Valve Noise (Advanced)<br />
2.5 Valve Noise<br />
This is a more elaborate version<br />
of the “Noise” parameter<br />
discussed on page 37. It allows<br />
you to not only set the level of<br />
the “typical” valve noises, but<br />
also to specify what kind of instrument should generate<br />
the noise.<br />
You are free to experiment with any noise type you like,<br />
but using the noise related to the selected instrument<br />
(see “2.1 Reed Type” on p. 65) is usually more realistic.<br />
There is only one “TYPE” for the entire register (i.e. all 7<br />
reeds). The options are: Bandoneon, I-Folk, I-Folk2,<br />
Classic, Cajun, Jazz, F-Folk, D-Folk, Organetto, F-Folk2,<br />
Classic2, Studio, Tradition, Steierische, OldItaly, TexMex,<br />
Trikitixa, F-Jazz, Classic3, Bajan.<br />
Use the LEVEL parameter to specify how prominent the<br />
noise should be (Off, –40~“Std”~40, Default setting:<br />
Std).<br />
Note: Whenever you select “ALL” for “2.1 Reed Type” and set a<br />
different reed type, this noise setting is automatically adapted<br />
to the reed type. It would therefore be a good idea to first<br />
select the reed type and only then change the noise type.<br />
2.6 Musette Detune<br />
This parameter allows you to<br />
choose the system used for<br />
detuning the 8’ reeds. See<br />
page 35 for details.<br />
The options are: Off, Dry, Classic,<br />
F-Folk, American_L, American_H, North_Eur,<br />
German_L, D-Folk_L, Italian_L, German_H, Alpine,<br />
Italian_H, D-Folk_H, French, Scottish.<br />
2.7 Bellows Detune<br />
(Off, Low, Standard, High,<br />
Default setting: Standard)<br />
This parameter further adds to<br />
the realism of the sounds<br />
emulated by your FR-7x. Here,<br />
you can specify how strongly the pitch of the simulated<br />
Treble reed(s) changes when you open or close the bellows<br />
faster than usual.<br />
If the “Standard” setting seems too mild, try “High”. If it<br />
is too strong, use “Low”. If you don’t want any detuning<br />
effect, select “Off”. The most convincing setting usually<br />
depends on the selected instrument(s) (see “2.1 Reed<br />
Type” on p. 65).<br />
2.8 Reverb Send, 2.9 Chorus Send,<br />
2.10 Delay Send<br />
(0~127 for all three)<br />
Use these parameters to set<br />
the Reverb, Chorus or Delay<br />
send levels (how much effect<br />
should be applied to the Treble<br />
section). The higher the value<br />
you set, the more the Treble<br />
section is processed by the<br />
effect in question.<br />
It works much the same way<br />
as a cathedral: the louder you<br />
sing, the more reverb (chorus<br />
or delay) you hear. In the case<br />
of the cathedral, singing louder means that you increase<br />
the effect send level, i.e. the level of the signal (your<br />
voice) that will be processed by the acoustic environment.<br />
The other sections (Bass, Free Bass, etc.) have the same<br />
parameters, so that you can create a sound image with<br />
various “levels” (foreground, background).<br />
The effects themselves can be edited on separate pages<br />
(see p. 82).<br />
2.11 Aftertouch Pitch<br />
(Off, 1/4 Down, 1/2 Down, 1/4<br />
Up, 1/2 Up, Default setting:<br />
Off)<br />
As stated earlier, the treble<br />
keyboard of the piano-type<br />
model also generates aftertouch messages (on the button-type<br />
model, aftertouch can be generated with the<br />
Master bar). “Aftertouch” refers to the fact that you<br />
press a key even further down after playing a note. This<br />
effect allows you to bend the pitch down (temporarily<br />
lower the note) by a quarter tone (“1/4 Down”) or a<br />
semi-tone (“1/2 Down”). Select “1/4 Up” or “1/2 Up” to<br />
bend the notes up a quarter or a semi-tone.<br />
Select “Off” to switch off the treble section’s aftertouch<br />
recognition.<br />
Note: This aftertouch effect applies to all notes that are<br />
sounding simultaneously. If you play a chord and then only<br />
press down one key of the chord’s constituent notes even further,<br />
all notes are bent by the same amount. (MIDI buffs call<br />
this “channel aftertouch”.)<br />
67
FR-7x V-Accordion<br />
® 2. Treble Edit parameters (Advanced)<br />
2.12 Bass Link<br />
Here are two parameters that<br />
allow you specify which Bass<br />
and/or orchestra bass register/<br />
sound are selected whenever<br />
you press the treble register<br />
you are currently editing. That way, you only need to<br />
press one register instead of at least two (one treble, one<br />
bass). There are other parameters that allow you to<br />
associate a Treble Orchestra and/or Chord/Free Bass<br />
Orchestra sounds with the currently selected accordion<br />
register (see below).<br />
The options for the parameters on this page are:<br />
• BASS: No Link, Bass 1~7, Free 1~7 (This selection also<br />
influences the options for the “2.14 Orchestra Chord<br />
Link” parameter.)<br />
• ORC.BASS: No Link, name of the selected 1~7 register.<br />
If you define a “Free” register, the Bass section automatically<br />
switches to Free Bass mode when you press<br />
the Treble register while the “Bass Link” function is<br />
active. (If you define a “Bass” register, the bass section<br />
switches from Free Bass to bass mode at that<br />
time, if necessary.)<br />
If you also define an ORC.BASS sound (other than<br />
“No Link”), the bass section automatically activates<br />
the ORCHESTRA BASS part when you press the treble<br />
register.<br />
Select “No Link” if there should be no connection<br />
between the currently selected Treble register and<br />
the bass or orchestra bass section.<br />
Note that this automatic link is not activated when<br />
you define it on this page – it is merely enabled and<br />
“pre-set”. To activate the Bass Link function, press<br />
and hold down the [ORCHESTRA] register and press<br />
register [4]. (By default, “Bass Link” is on.)<br />
Note: You can specify that this function should be activated<br />
automatically each time you switch the FR-7x on.<br />
See “10.13 Start-Up” on p. 92.<br />
2.13 Orchestra Link<br />
This function allows you to<br />
associate an ORCHESTRA<br />
sound (instrument or organ)<br />
with the treble register you<br />
are currently editing and to<br />
specify which mode should be used. See “Selecting<br />
ORCHESTRA mode” on p. 30 for a detailed explanation<br />
of the available modes and “Assigning orchestral to the<br />
registers” on p. 51.<br />
The options for these parameters are:<br />
• REGISTER: No Link, name of ORCHESTRA register<br />
memory 1A~13B (the FR-7x allows you to name each<br />
register memory).<br />
• MODE: ----, Solo, Dual, Low, High, Low Trb, High Trb,<br />
Solo M, Dual M, Low M, High M, Lo.M Trb, Hi.M Trb.<br />
Select “No Link” if there should be no connection<br />
between the currently selected Treble register and<br />
the Orchestra Treble section.<br />
“––” means that the currently selected mode does<br />
not change.<br />
Mode<br />
Solo<br />
Dual<br />
Low<br />
High<br />
Meaning<br />
Only the ORCHESTRA sound is played.<br />
The ORCHESTRA and accordion sounds<br />
are played.<br />
The first note you press triggers the<br />
ORCHESTRA sound. If you hold down that<br />
key or button and play higher notes,<br />
those notes are played by the accordion<br />
sound.<br />
The first note you press triggers the<br />
ORCHESTRA sound. If you hold down that<br />
key or button and play lower notes, those<br />
notes are played by the accordion sound.<br />
r<br />
68<br />
Note: Simply activating the link does nothing at all (i.e. the<br />
Bass/Free Bass/Orchestra Bass/Orchestra Chord/Orchestra<br />
Free Bass register does not change right away). You need to<br />
select another treble register whose “Bass Link” function is<br />
on for the link to work.<br />
Repeat this procedure to defeat the Bass Link function<br />
if you no longer need it.<br />
On the main page, links are indicated as by means of<br />
white arrows:<br />
Low Trb<br />
High Trb<br />
Solo M<br />
Dual M<br />
Low M<br />
Is similar to Low mode. Here, however,<br />
the ORCHESTRA sound can be switched<br />
on/off using the Master bar.<br />
Is similar to High mode. Here, however,<br />
the ORCHESTRA sound can be switched<br />
on/off using the Master bar.<br />
Is similar to Solo mode. Here, however,<br />
you can alternate between the ORCHES-<br />
TRA and accordion sounds using the<br />
Master bar.<br />
Is similar to Dual mode. Here, however,<br />
you can switch Dual mode on and off<br />
using the Master bar.<br />
Is similar to Low mode. Here, however,<br />
you can switch Low mode on and off<br />
using the Master bar.
V-Accordion r<br />
2.14 Orchestra Chord Link (Advanced)<br />
Mode<br />
High M<br />
Low.M Trb<br />
Hi.M Trb<br />
Meaning<br />
Is similar to High mode. Here, however,<br />
you can switch Low mode on and off<br />
using the Master bar.<br />
Is similar to Low Trb mode. Here, however,<br />
you can switch Low Trb mode on and off<br />
using the Master bar.<br />
Is similar to High Trb mode. Here, however,<br />
you can switch High Trb mode on<br />
and off using the Master bar.<br />
Note that this automatic link is not activated when<br />
you define it on this page – it is merely enabled and<br />
“pre-set”. To activate the “Orchestra Link” function,<br />
you need to press and hold down the [ORCHESTRA]<br />
register and press register [5]. (By default, “Orchestra<br />
Link” is on.)<br />
Note: Simply activating the link does nothing at all (i.e. the<br />
orchestral sound does not change right away). You need to<br />
select another treble register whose “Orchestra Link” function<br />
is on for the link to work.<br />
Repeat this procedure to defeat the Orchestra Link<br />
function if you no longer need it (or assign “CANCEL”<br />
to another Treble register and press it).<br />
Note: You can specify that this function should be activated<br />
automatically each time you switch the FR-7x on.<br />
See “10.13 Start-Up” on p. 92.<br />
2.14 Orchestra Chord Link<br />
This parameter that allows you<br />
to specify which Orchestra<br />
Chord or Orchestra Free Bass<br />
sound is selected whenever<br />
you press the treble register<br />
you are currently editing.<br />
The Orchestra Chord and Orchestra Free Bass sections<br />
are mutually exclusive (there are no chord buttons in<br />
Free Bass mode).<br />
• CHORD-FREE BS:<br />
No Link, name of the selected 1~7 register (the FR-7x<br />
allows you to name each register)<br />
The options depend on the “2.12 Bass Link” setting,<br />
because the ORCH CHORD and ORCH FREE BASS sections<br />
are not always available:<br />
“Bass” and “Free Bass” are two different (and mutually<br />
exclusive) modes. In “Free Bass” mode, all bass<br />
buttons play bass accordion sounds, so that the<br />
“CHD” options wouldn’t make sense. That is why you<br />
cannot even select them.<br />
Similarly, when “Bass” mode is activated (by selecting<br />
one of the seven Bass registers for “2.12 Bass Link” on<br />
p. 68), the Orchestra Free Bass sounds cannot be<br />
used. That is why you cannot even select them here.<br />
Conversely, since “2.12 Bass Link” determines what’s<br />
possible or not, changing that parameter may correct<br />
your “2.14 Orchestra Chord Link” setting.<br />
For this reason, we recommend that you first set<br />
2.12 Bass Link “BASS” (if you need it), and only then<br />
“2.14 Orchestra Chord Link”.<br />
Note: The 2.12 Bass Link “ORC.BASS” setting does not<br />
influence the options available for “2.14 Orchestra Chord<br />
Link”.<br />
Note that this automatic link is not activated when<br />
you define it on this page – it is merely enabled and<br />
“pre-set”. To activate the “Orchestra Chord Link”<br />
function (which also applies to the Orchestra Chord<br />
or Orchestra Free Bass sections), you need to press<br />
and hold down the [ORCHESTRA] register and press<br />
register [4]. (By default, “Orchestra Chord Link” is on.)<br />
Note: Simply activating the link does nothing at all (i.e. the<br />
Orchestra Chord or Orchestra Free Bass sound does not<br />
change right away). You need to select another treble register<br />
whose “Bass Link” function is on for the link to work.<br />
Note: The Orchestra Chord and Orchestra Free Bass Link<br />
functions need to bee activated/deactivated using the<br />
“Bass Link” procedure. There is no separate switching function<br />
for the Orchestra Chord or Orchestra Free Bass section.<br />
Repeat this procedure to defeat the Bass Link function<br />
if you no longer need it (or assign “CANCEL” to<br />
another Treble register and press it).<br />
On the main page, links are indicated as by means of<br />
white arrows:<br />
“2.12 Bass Link”<br />
setting<br />
No Link<br />
Bass 1~7<br />
Free 1~7<br />
Possibilities for “2.14 Orchestra Chord Link”<br />
No Link, name of the selected 1~7 register<br />
No Link, name of the selected CHD1~7<br />
register<br />
No Link, name of the selected FBS1~7<br />
register<br />
69
FR-7x V-Accordion<br />
® 2. Treble Edit parameters (Advanced)<br />
2.15 MIDI TX<br />
This page contains a series of<br />
MIDI parameters for the<br />
selected register. You need to<br />
set them one by one. See<br />
page 113 for details about the<br />
MIDI parameters. These parameters are saved along with<br />
all other Set parameters, which allows you to use different<br />
MIDI settings for each Set – and even each register<br />
within a Set.<br />
(e) Press the [EXIT÷JUMP] button to switch off the [Del]<br />
function.<br />
■ Inserting characters<br />
To insert a missing character, proceed as follows:<br />
(a) Press the [DATA÷ENTER] knob and rotate it to select<br />
the character position that should follow the character<br />
you are about to insert.<br />
(b) Press the [EXIT÷JUMP] button to select [Ins].<br />
2.16 Name<br />
This parameter allows you to<br />
name the currently selected<br />
treble register for easy reference<br />
while performing with<br />
the FR-7x. The procedure is as<br />
follows:<br />
(1) Press the [DATA÷ENTER] knob and rotate it to select<br />
the character position you want to change.<br />
(2) Press the [DATA÷ENTER] knob again to activate the<br />
character position for editing.<br />
(c) Press the [DATA÷ENTER] knob to insert a new position,<br />
then rotate the knob to select the desired<br />
character for that position.<br />
(d) Press the [EXIT÷JUMP] button to switch off the [Ins]<br />
function.<br />
The name is displayed black-on-white now. The black<br />
underline character indicates the character position<br />
you can change.<br />
(3) Rotate the [DATA÷ENTER] knob to select the desired<br />
character.<br />
(4) Confirm your selection by pressing the<br />
[DATA÷ENTER] knob (the name is displayed whiteon-black<br />
again).<br />
(5) Rotate the [DATA÷ENTER] knob to select another<br />
character position, then repeat steps (2)~(4) to<br />
complete your name.<br />
r<br />
■ Deleting characters<br />
To delete characters you no longer need, proceed as<br />
follows:<br />
(a) If the name is displayed black-on-white, press the<br />
[DATA÷ENTER] knob.<br />
(b) Rotate the [DATA÷ENTER] knob to select the character<br />
you want to delete.<br />
(c) Press the [EXIT÷JUMP] button and rotate the<br />
[DATA÷ENTER] knob to select [Del].<br />
(d) Press the [DATA÷ENTER] knob to delete the selected<br />
character.<br />
70
V-Accordion r<br />
3.1 Reed Type (Advanced)<br />
3. Bass Edit parameters<br />
The parameters of the<br />
BASS EDIT group apply to<br />
the Bass section (bass and<br />
chord notes) and are saved<br />
to the selected Set. They<br />
allow you to build your own (virtual) accordion. See<br />
pages 62 and 63 for how to select and adjust the<br />
parameters.<br />
Press [UP] and [DOWN] simultaneously to select the<br />
value that is indicated as “Default setting”.<br />
Important note<br />
All changes you make here apply to the last Bass register<br />
you selected. So be sure to press the register whose settings<br />
you wish to change before selecting and editing<br />
any of the BASS EDIT parameters. You can, however,<br />
decide to save your settings to a different register (see<br />
below) if you realize that you’ve been editing the wrong<br />
one.<br />
These parameters can only be selected when Bass mode<br />
is active (page 25).<br />
See page 103 for how to save your changes. Also be sure<br />
to read “Important remark about saving your settings”<br />
on p. 64.<br />
3.1 Reed Type<br />
This parameter allows you to<br />
transform the selected register<br />
into a different instrument,<br />
and to assign different sounds<br />
to each reed the register plays.<br />
See “2.1 Reed Type” on p. 65 for a discussion of the possibilities<br />
and the aspects you need to pay attention to.<br />
Bear in mind, however, that the parameters on this page<br />
apply to the selected bass register.<br />
(1) Press the [DATA÷ENTER] knob to select the “FOOT”<br />
parameter, then rotate the [DATA÷ENTER] knob to<br />
select the reed you wish to assign another sound<br />
to.<br />
The options are: ALL, 16’, 8’, 8’-4’, 4’, 2’<br />
(2) Press the [DATA÷ENTER] knob to select the “TYPE”<br />
parameter, then rotate the [DATA÷ENTER] knob to<br />
select a type (“instrument”).<br />
The TYPE options are: Bandoneon, I-Folk, I-Folk2,<br />
Classic, Cajun, Jazz, F-Folk, D-Folk, Organetto, F-Folk2,<br />
Classic2, Studio, Tradition, Steierische, Trikitixa,<br />
F-Jazz, Classic3, Bajan<br />
To save time while changing the “TYPE” setting of one<br />
or several reeds, you could proceed as follows: suppose<br />
all reeds are currently set to the wrong TYPE and<br />
you want to use 16’, 8’ and 4’ as “Bandoneon”. In that<br />
case, set FOOT to “ALL” and TYPE to “Bandoneon”.<br />
Now, all reeds use the “Bandoneon” setting. Now use<br />
“TYPE” to switch off the reeds you do not need.<br />
3.2 Register<br />
The parameters on this page<br />
are used in combination with<br />
the parameters above.<br />
Here, you decide which reeds<br />
should be audible and how<br />
they should be played. It is therefore on this page that<br />
you specify whether the sounds you selected above will<br />
be used.<br />
(1) Press the [DATA÷ENTER] knob to select the “FOOT”<br />
parameter, then rotate the [DATA÷ENTER] knob to<br />
select the desired reed.<br />
The options are: 16’, 8’, 8’-4’, 4’, 2’<br />
(2) Press the [DATA÷ENTER] knob to select the “STA-<br />
TUS” parameter, then rotate the [DATA÷ENTER]<br />
knob to specify whether the selected reed should<br />
sound and whether you can or cannot use it to<br />
play chords.<br />
The STATUS options are: Off, Bass, Chord,<br />
Bass&Chord.<br />
The available options depend on the selected footage,<br />
however:<br />
16 8 8-4 4 2<br />
Off yes yes yes yes yes<br />
Chord no no yes yes yes<br />
Bass yes yes no no no<br />
Bass&Chord no no yes yes yes<br />
Note: All reeds (“16’” & “8’” for the bass, “8-4’”, “4’” & “2’”<br />
for the chords) must use the same assignment. If you select<br />
“Bass&Chord” for “4’” and then set “2’” to “Chord”, “4’”<br />
automatically switches to “Chord” (the last selection you<br />
make is adopted by all reeds of the same “yes” group). You<br />
can, however, select “Off” for each reed individually.<br />
Note: Whenever you select “ALL” and set a different reed<br />
type, the “3.4 Button Noise” and “3.5 Reed Growl” settings<br />
are automatically adapted to the reed type you select here.<br />
You may have to change those settings afterwards if you<br />
wish to use different noise type.<br />
3.3 Reed Volume<br />
This is the last parameter that<br />
can be set for each reed individually.<br />
It allows you to create<br />
the desired “mix” (volume<br />
balance) among the active<br />
reeds (see the “3.2 Register” page).<br />
This is a relative parameter: its value is added to or subtracted<br />
from the standard value (“Std”). As a rule, first<br />
decide which reed is most important and set its “Volume”<br />
parameter to “Std”. Then reduce or increase the<br />
volume of the “ancillary” reeds to create the desired balance.<br />
(1) Press the [DATA÷ENTER] knob to select the “FOOT”<br />
parameter, then rotate the [DATA÷ENTER] knob to<br />
select the reed whose volume you want to set.<br />
The options are: ALL (all reeds simultaneously), 16’, 8’,<br />
8’-4’, 4’, 2’<br />
71
FR-7x V-Accordion<br />
® 3. Bass Edit parameters (Advanced)<br />
r<br />
(2) Press the [DATA÷ENTER] knob to select the “LEVEL”<br />
parameter, then rotate the [DATA÷ENTER] knob to<br />
set the volume.<br />
The setting range is: Off, –40~“Std”~40, Default setting:<br />
STD<br />
Note: The overall volume of the bass section (all registers)<br />
can be changed using the [BALANCE] knob.<br />
3.4 Button Noise<br />
The bass section of almost all<br />
accordion instruments can be<br />
played via buttons. Such buttons<br />
produce a typical noise<br />
when pressed.<br />
On this page, you can specify the instrument whose button<br />
noises should be used when you select this register<br />
while playing. (Note that other bass registers can be<br />
assigned different noises.)<br />
(1) Press the [DATA÷ENTER] knob to select the “TYPE”<br />
parameter.<br />
There is only one TYPE for the entire register (i.e. all 5<br />
reeds).<br />
(2) Rotate the [DATA÷ENTER] knob to select the desired<br />
setting.<br />
The options are: Bandoneon, I-Folk, I-Folk2, Classic,<br />
Cajun, Jazz, F-Folk, D-Folk, Organetto, F-Folk2,<br />
Classic2, Studio, Tradition, Steierische, Trikitixa,<br />
F-Jazz, Classic3, Bajan.<br />
(3) Press the [DATA÷ENTER] knob to select the “LEVEL”<br />
parameter.<br />
Use the “LEVEL” parameter to specify how prominent<br />
the noise should be.<br />
(4) Rotate the [DATA÷ENTER] knob to select the desired<br />
setting.<br />
The setting range is: “Off”, –40~“Std”~40, Default<br />
setting: STD.<br />
Note: Whenever you select “ALL” for “3.1 Reed Type” and<br />
set a different reed type, this noise setting is automatically<br />
adapted to the reed type. It would therefore be a good idea<br />
to first select the reed type and only then change the noise<br />
type.<br />
3.5 Reed Growl<br />
This parameter allows you to<br />
simulate the typical noise a<br />
bass reed makes just before it<br />
stops vibrating altogether (a<br />
kind of “musical flatulence” if<br />
you will).<br />
Each instrument of the accordion family produces its<br />
own typical growl. The growl that matches the sound<br />
selected with “3.1 Reed Type” probably yields the most<br />
realistic effect – but feel free to select another one if<br />
you like it better.<br />
(1) Press the [DATA÷ENTER] knob to select the “TYPE”<br />
parameter, then rotate the [DATA÷ENTER] knob to<br />
select one of the available instrument types:<br />
Bandoneon, I-Folk, I-Folk2, Classic, Cajun, Jazz, F-Folk,<br />
D-Folk, Organetto, F-Folk2, Classic2, Studio, Tradition,<br />
Steierische, Trikitixa, F-Jazz, Classic3, Bajan<br />
(2) Press the [DATA÷ENTER] knob to select the “LEVEL”<br />
parameter, then rotate the [DATA÷ENTER] knob to<br />
set the volume of the Reed Growl sound (Off, –40~<br />
“Std”~40).<br />
Note: Whenever you select “ALL” for “3.1 Reed Type” and<br />
set a different reed type, this growl setting is automatically<br />
adapted to the reed type you select. It would therefore be a<br />
good idea to first select the reed type and only then<br />
change the growl type.<br />
3.6 Bellows Detune<br />
(Off, Low, Standard, High,<br />
Default setting: Standard)<br />
This parameter further adds to<br />
the realism of the sounds<br />
emulated by your FR-7x. Here,<br />
you can specify how strongly the pitch of the simulated<br />
Bass reed(s) changes when you open or close the bellows<br />
faster than usual.<br />
If the “Standard” setting seems too mild, try “High”. If it<br />
is too strong, use “Low”. If you do not want any detuning<br />
effect, select “Off”. The most convincing setting usually<br />
depends on the selected instrument(s) (see<br />
“3.1 Reed Type”).<br />
3.7 Bass Drum<br />
This parameter allows you to<br />
assign up to three drum/percussion<br />
sounds to the bass<br />
buttons and to set their levels.<br />
If you assign three sounds, all<br />
three will be played simultaneously whenever you press<br />
a bass button. Note that you can assign different sounds<br />
to the chord buttons (see below), so maybe try to make<br />
“complementary” selections, like selecting a bass drum<br />
for the bass buttons, the snare drum for the chord buttons,<br />
etc.<br />
(1) Press the [DATA÷ENTER] knob to select the “LINK”<br />
parameter, then rotate the [DATA÷ENTER] knob to<br />
select “1”, “2” or “3”.<br />
Each “LINK” corresponds to one drum instrument you<br />
can assign.<br />
(2) Press the [DATA÷ENTER] knob to select the “NOTE”<br />
parameter, then rotate the [DATA÷ENTER] knob to<br />
select the sound you want to assign.<br />
You can play a few notes to audition the sound.<br />
The setting range is: Off, 1~127. Choose “Off” if the<br />
selected “LINK” memory should not trigger any drum<br />
percussion sound. Otherwise, choose the number<br />
that corresponds to the desired sound. See the table<br />
on page 129 for the correspondence between the<br />
numbers and the available sounds.<br />
72
V-Accordion r<br />
3.8 Chord Drum (Advanced)<br />
(3) Press the [DATA÷ENTER] knob to select the “VOL”<br />
parameter, then rotate the [DATA÷ENTER] knob to<br />
set the desired level.<br />
The setting range is –100~0~+100. “0” corresponds<br />
to the volume setting programmed at the factory.<br />
Negative values (–) allow you to make the selected<br />
sound softer, while positive values make the sound<br />
louder.<br />
Note: In some cases, there may be no audible difference<br />
between the “0” and the “+100” setting, because the sound<br />
in question cannot be made any louder.<br />
(4) Press the [DATA÷ENTER] knob and repeat steps (1)~<br />
(3) for the remaining “LINK” memories if each bass<br />
button should trigger more than one drum/percussion<br />
sound.<br />
should transmit, the other does the same for the chord<br />
buttons (the remaining buttons in the bass section).<br />
See page 113 for details about the MIDI parameters.<br />
These parameters are saved along with all other Set<br />
parameters, which allows you to use different MIDI settings<br />
for each Set – and even each register within a Set.<br />
3.14 Name<br />
This parameter allows you to<br />
name the currently selected<br />
bass register for easy reference<br />
while performing with<br />
the FR-7x.<br />
See “2.16 Name” on p. 70 for the procedure.<br />
3.8 Chord Drum<br />
This parameter allows you to<br />
assign up to three drum/percussion<br />
sounds to the chord<br />
buttons and to set their levels.<br />
If you assign three sounds, all<br />
three will be played simultaneously whenever you press<br />
a chord button. Note that you can assign different<br />
sounds to the bass buttons. See “3.7 Bass Drum” on p. 72<br />
for the procedure.<br />
3.9 Reverb Send, 3.10 Chorus Send,<br />
3.11 Delay Send<br />
(0~127 for all three) Use these<br />
parameters to set the Reverb,<br />
Chorus or Delay send levels<br />
(how much effect should be<br />
applied to the bass section).<br />
The higher the value you set,<br />
the more the bass section<br />
(which includes the chord buttons)<br />
will be processed by the<br />
effect in question.<br />
The other sections (treble, Free<br />
Bass, etc.) have the same<br />
parameters, so that you can<br />
create a sound image with various “levels” (foreground,<br />
background).<br />
The effects themselves can be edited on separate pages<br />
(see p. 82).<br />
3.12 Bass MIDI TX, 3.13 Chord MIDI TX<br />
These pages contain a series of<br />
MIDI parameters for the<br />
selected register. You need to<br />
set them one by one. One page<br />
allows you to specify which<br />
MIDI messages the bass notes<br />
(i.e. the two or three button<br />
rows closest to the bellows)<br />
73
FR-7x V-Accordion<br />
® 4. Free Bass Edit parameters (Advanced)<br />
4. Free Bass Edit parameters<br />
The parameters of the<br />
“Free Bass Edit” group<br />
apply to the bass section<br />
when it is used in Free Bass<br />
mode (see p. 27). They can<br />
be saved to the selected Set.<br />
See pages 62 and 63 for how to select and adjust the<br />
parameters.<br />
Press [UP] and [DOWN] simultaneously to select the<br />
value that is indicated as “Default setting”. See also<br />
“Introduction” on p. 65 for some general hints.<br />
Important notes<br />
• All changes you make here apply to the last Free Bass<br />
register you selected. So be sure to press the register<br />
whose settings you wish to change before selecting<br />
and editing any of the FREE BS EDIT parameters. You<br />
can, however, decide to save your settings to a different<br />
register (see below) if you realize that you’ve<br />
been editing the wrong one.<br />
• These parameters can only be selected when Free<br />
Bass mode is active (page 27).<br />
• See page 90 for how to select the note system for<br />
Free Bass mode. That setting is shared by all Sets.<br />
• See page 103 for how to save your changes. Also be<br />
sure to read “Important remark about saving your<br />
settings” on p. 64.<br />
4.2 Register<br />
The parameters on this page<br />
are used in combination with<br />
the parameters above. Here,<br />
you decide which reeds should<br />
be audible and how they<br />
should be played. It is therefore on this page that you<br />
specify whether the sounds you selected above will be<br />
used.<br />
(1) Press the [DATA÷ENTER] knob to select the “FOOT”<br />
parameter, then rotate the [DATA÷ENTER] knob to<br />
select the reed you wish to assign another sound<br />
to.<br />
The options are: 16’, 8’<br />
(2) Press the [DATA÷ENTER] knob to select the “STA-<br />
TUS” parameter, then rotate the [DATA÷ENTER]<br />
knob to specify whether the selected reed should<br />
sound and which bass buttons can be used to play<br />
it.<br />
The STATUS options are: Off (no sound), Low (the<br />
lower half), High (upper half), Whole (all buttons).<br />
These options allow you to program what keyboard<br />
players would call a “split”. You can create several<br />
nifty combinations, like “High” for 8’ and “Low” for<br />
16’ (or vice versa), or “Whole” for 16’ (all buttons) and<br />
“High” for 8’ (only the upper three rows).<br />
Note: Assigning the same partial “STATUS” (“High” or<br />
“Low”) to both reeds means that only half the number of<br />
available bass buttons can be used.<br />
r<br />
4.1 Reed Type<br />
This parameter allows you to<br />
transform the selected register<br />
into a different instrument<br />
and to assign different sounds<br />
to each footage the register<br />
plays.<br />
Note: You will notice that there are fewer options here than<br />
for the Bass section. That’s because you cannot play chords in<br />
Free Bass mode.<br />
(1) Press the [DATA÷ENTER] knob to select the “FOOT”<br />
parameter, then rotate the [DATA÷ENTER] knob to<br />
select the reed you wish to assign another sound<br />
to. The options are: ALL, 16’, 8’<br />
(2) Press the [DATA÷ENTER] knob to select the “TYPE”<br />
parameter, then rotate the [DATA÷ENTER] knob to<br />
select a type (“instrument”).<br />
The TYPE options are: Bandoneon, I-Folk, I-Folk2,<br />
Classic, Cajun, Jazz, F-Folk, D-Folk, Organetto, F-Folk2,<br />
Classic2, Studio, Tradition, Steierische, Trikitixa,<br />
F-Jazz, Classic3, Bajan<br />
Note: Whenever you select “ALL” and set a different reed<br />
type, the “4.4 Button Noise” and “4.5 Reed Growl” settings<br />
are automatically adapted to the reed type you select here.<br />
You may have to change those settings afterwards if you<br />
wish to use different noise type.<br />
4.3 Reed Volume<br />
This is the last parameter that<br />
can be set for each reed individually.<br />
It allows you to create<br />
the desired “mix” (volume<br />
balance) for the active reeds.<br />
This is a relative parameter: its value is added to or subtracted<br />
from the standard value (“Std”). As a rule, first<br />
decide which reed is most important and set its “Volume”<br />
parameter to “Std”. Then reduce or increase the<br />
volume of the “ancillary” reeds to create the desired balance.<br />
(1) Press the [DATA÷ENTER] knob to select the “FOOT”<br />
parameter, then rotate the [DATA÷ENTER] knob to<br />
select the reed whose volume you want to set.<br />
The options are: ALL (both reeds simultaneously), 16’,<br />
8’<br />
(2) Press the [DATA÷ENTER] knob to select the “LEVEL”<br />
parameter, then rotate the [DATA÷ENTER] knob to<br />
set the volume.<br />
The setting range is: Off, –40~“STD”~40, Default setting:<br />
STD.<br />
Note: The overall volume of the Free Bass section (all registers)<br />
can be changed using the [BALANCE] knob.<br />
74
V-Accordion r<br />
4.4 Button Noise (Advanced)<br />
4.4 Button Noise<br />
The bass section of almost all<br />
accordion instruments can be<br />
played via buttons. Such buttons<br />
produce a typical noise<br />
when pressed. On this page,<br />
you can select the instrument whose button noises<br />
should be used when you select this register. (Note that<br />
other Free Bass registers can be assigned different<br />
noises.)<br />
(1) Press the [DATA÷ENTER] knob to select the “TYPE”<br />
parameter.<br />
(2) Rotate the [DATA÷ENTER] knob to select the desired<br />
setting.<br />
The options are: Bandoneon, I-Folk, I-Folk2, Classic,<br />
Cajun, Jazz, F-Folk, D-Folk, Organetto, F-Folk2,<br />
Classic2, Studio, Tradition, Steierische, Trikitixa,<br />
F-Jazz, Classic3, Bajan.<br />
(3) Press the [DATA÷ENTER] knob to select the “LEVEL”<br />
parameter.<br />
Use the “LEVEL” parameter to specify how prominent<br />
the noise should be.<br />
(4) Rotate the [DATA÷ENTER] knob to select the desired<br />
setting.<br />
The setting range is: “Off”, –40~“Std”~40, Default<br />
setting: STD.<br />
Note: Whenever you select “ALL” for “4.1 Reed Type” and<br />
set a different reed type, this noise setting is automatically<br />
adapted to the reed type you select. It would therefore be a<br />
good idea to first select the reed type and only then<br />
change the noise type.<br />
4.5 Reed Growl<br />
This parameter allows you to<br />
simulate the typical noise a<br />
bass reed makes just before it<br />
stops vibrating altogether.<br />
Each instrument of the accordion<br />
family produces its own typical growl. The growl<br />
that matches the sound selected with “4.1 Reed Type”<br />
probably yields the most realistic effect, but feel free to<br />
select another one if you like it better.<br />
(1) Press the [DATA÷ENTER] knob to select the “TYPE”<br />
parameter, then rotate the [DATA÷ENTER] knob to<br />
select one of the available instrument types:<br />
Bandoneon, I-Folk, I-Folk2, Classic, Cajun, Jazz, F-Folk,<br />
D-Folk, Organetto, F-Folk2, Classic2, Studio, Tradition,<br />
Steierische, Trikitixa, F-Jazz, Classic3, Bajan<br />
(2) Press the [DATA÷ENTER] knob to select the “LEVEL”<br />
parameter, then rotate the [DATA÷ENTER] knob to<br />
set the volume of the Reed Growl parameter (Off,<br />
–40~“Std”~40).<br />
Note: Whenever you select “ALL” for “4.1 Reed Type” and<br />
set a different reed type, this growl setting is automatically<br />
adapted to the reed type. It would therefore be a good idea<br />
to first select the reed type and only then change the growl<br />
type.<br />
4.6 Bellows Detune<br />
(Off, Low, Standard, High,<br />
Default setting: Standard)<br />
This parameter further adds to<br />
the realism of the sounds<br />
emulated by your FR-7x. Here,<br />
you can specify how strongly the pitch of the simulated<br />
Free Bass reed(s) changes when you open or close the<br />
bellows faster than usual.<br />
If the “Standard” setting seems too mild, try “High”. If it<br />
is too strong, use “Low”. If you do not want any detuning<br />
effect, select “Off”. The most convincing setting usually<br />
depends on the selected instrument(s) (see “Reed<br />
Type”).<br />
4.7 Reverb Send, 4.8 Chorus Send, 4.9 Delay Send<br />
(0~127 for all three) Use these<br />
parameters to set the Reverb,<br />
Chorus or Delay send level<br />
(how much effect should be<br />
applied to the Free Bass section).<br />
The higher the value you set,<br />
the more the Free Bass section<br />
will be processed by the effect<br />
in question.<br />
The effects themselves can be<br />
edited on separate pages (see<br />
p. 82).<br />
4.10 MIDI TX<br />
This page contains a series of<br />
MIDI parameters for the<br />
selected register. You need to<br />
set them one by one.<br />
See page 113 for details about<br />
the MIDI parameters. These parameters are saved along<br />
with all other Set parameters, which allows you to use<br />
different MIDI settings for each Set – and even each<br />
register within a Set.<br />
4.11 Name<br />
This parameter allows you to<br />
name the currently selected<br />
bass register for easy reference<br />
while performing with<br />
the FR-7x.<br />
See “2.16 Name” on p. 70 for the procedure.<br />
75
FR-7x V-Accordion<br />
® 5. Orch.Bass Edit parameters (Advanced)<br />
5. Orch.Bass Edit parameters<br />
The parameters of the<br />
“ORCH.BS EDIT” group<br />
allow you to edit the<br />
ORCHESTRA BASS section.<br />
See page 32 for details.<br />
This section can also be used to play a TW organ sound<br />
(see p. 52).<br />
See pages 62 and 63 for how to select and adjust the<br />
parameters.<br />
Press [UP] and [DOWN] simultaneously to select the<br />
value that is indicated as “Default setting”.<br />
Important note<br />
The selection of Orchestra Bass sounds can be automated<br />
on the “2.12 Bass Link” page (see p. 68) for each<br />
treble register.<br />
These parameters can only be selected when Orchestra<br />
Bass mode is active (page 32).<br />
See page 103 for how to save your changes. Also be sure<br />
to read “Important remark about saving your settings”<br />
on p. 64.<br />
5.1 Timbre<br />
This parameter group allows<br />
you to assign the desired<br />
orchestral or organ sound to<br />
the selected register.<br />
See “Assigning orchestral to<br />
the registers” on p. 51 for the procedure. As stated there,<br />
each register can select only one type of sound.<br />
5.2 Lowest Note<br />
This parameter allows you to<br />
specify the lowest note the<br />
selected sound can sound.<br />
The ORCHESTRA BASS sounds<br />
(like the orchestral sounds of<br />
the treble section) are PCM waveforms (samples) of<br />
acoustic instruments. Each acoustic instrument has a set<br />
range: it cannot sound notes below or above that range.<br />
A normally tuned 4-string bass guitar allows you to play<br />
a low E, but not the D below it, for instance:<br />
the bass keyboard, it will be sounded one octave above<br />
the corresponding pitch – and sound natural. Here is an<br />
example:<br />
If this is what you play on the bass keyboard…<br />
…after choosing…<br />
Lowest Note= E (28)<br />
…these notes are transposed 1 octave up.<br />
The ORCHESTRA BASS sound thus changes octaves. For<br />
some songs, the default setting (E) may yield odd results,<br />
especially if you need to play walking bass lines, etc. In<br />
that case, you can change the “Lowest Note” setting to<br />
achieve a satisfactory result.<br />
The options are: E, F, F#, G, Ab, A, Bb, B, C; Default setting:<br />
E.<br />
5.3 Octave<br />
(–3~0~+3)<br />
This parameter allows you to<br />
transpose the ORCHESTRA<br />
BASS section (i.e. the selected<br />
orchestral or organ sound) up<br />
or down.<br />
Use it if the part you want to play with the bass buttons<br />
is too low or too high for what you have in mind.<br />
5.4 Release Time<br />
(0~63, Default setting: 0)<br />
This parameter allows you<br />
change the way in which a<br />
note stops when you release<br />
the corresponding button.<br />
Though all ORCHESTRA BASS sounds have been prepared<br />
in such a way as to decay naturally when a button<br />
is released, there may be situations where the end of the<br />
notes is too sudden for comfort.<br />
In that case, you can increase this value. “0” means that<br />
you agree with the preprogrammed Release value. All<br />
other values cause the notes to linger increasingly<br />
longer.<br />
Note: This parameter has no effect when a TW organ sound is<br />
assigned to the selected register.<br />
r<br />
Samples (PCM waveforms), on the other hand, can lower<br />
the pitch of a recorded sound almost indefinitely. But<br />
that doesn’t sound very natural. The “Lowest Note”<br />
parameter allows you to specify the lowest pitch the<br />
sample can use. If you nevertheless play a lower note on<br />
5.5 Volume<br />
(Off, –40~“Std”~40, Default<br />
setting: Std)<br />
This parameter allows you to<br />
set the level of the ORCHES-<br />
TRA BASS part. See also<br />
page 32.<br />
76
V-Accordion r<br />
5.6 Panpot (Advanced)<br />
5.6 Panpot<br />
(Bass 63~0 Treb 0~63 Bass)<br />
Depending on the selected<br />
sound, this parameter allows<br />
you to change the ORCHES-<br />
TRA BASS part’s placement in<br />
the stereo sound field (i.e. between the left and right<br />
speakers) to create a livelier sound image. The “Treb” values<br />
mean that the sound will appear on the same side as<br />
the treble accordion sound. This setting applies to both<br />
the FR-7x’s internal speakers and the L/MONO socket.<br />
The “Bass” values mean that the sound will appear on<br />
the same side as the bass accordion sound (which is not<br />
available while an ORCHESTRA BASS sound is being<br />
used). This setting applies to both the FR-7x’s internal<br />
speakers and the R/MONO socket.<br />
Choose “0” if the ORCHESTRA BASS sound should be at<br />
the center of the stereo image.<br />
Note: If a TW organ sound is assigned to the current ORCHES-<br />
TRA BASS register, the “VALUE” parameter will read “Rotary” to<br />
signal that the “VALUE” parameter cannot be set.<br />
5.11 MIDI TX<br />
This page contains a series of<br />
MIDI parameters for the<br />
ORCHESTRA BASS part you<br />
need to set one by one.<br />
See page 113 for details about<br />
the MIDI parameters. These parameters are saved along<br />
with all other Set parameters, which allows you to use<br />
different MIDI settings for each Set.<br />
5.7 Bass Drum<br />
This parameter allows you to<br />
assign up to three drum/percussion<br />
sounds to the bass<br />
buttons and to set their levels.<br />
If you assign three sounds, all<br />
three will be played simultaneously whenever you press<br />
a bass button. See page 72 for the procedure.<br />
5.8 Reverb Send, 5.9 Chorus Send,<br />
5.10 Delay Send<br />
(0~127 for all three)<br />
Use these parameters to set<br />
the Reverb, Chorus or Delay<br />
send level (how much effect<br />
should be applied to the<br />
ORCHESTRA BASS section).<br />
The higher the value you set,<br />
the stronger the ORCHESTRA<br />
BASS section will be processed<br />
by the effect in question.<br />
The other sections (treble,<br />
bass, etc.) have the same<br />
parameters, so that you can<br />
create a sound image with various “levels” (foreground,<br />
background). Do note, however, that reverb or delay<br />
effects are hardly ever used for bass sounds.<br />
The effects themselves can be edited on separate pages<br />
(see p. 82).<br />
Note: If a TW organ sound is assigned to the current ORCHES-<br />
TRA BASS register, the “LEVEL” value will read “Rotary” to signal<br />
that the register is not processed by the FR-7x’s “general<br />
effects” (see p. 55). In this case, the “LEVEL” parameter cannot<br />
be set.<br />
77
FR-7x V-Accordion<br />
® 6. Orchestra Edit parameters (Advanced)<br />
6. Orchestra Edit parameters<br />
This is a relative parameter, which means that its value is<br />
added to or subtracted from the standard value (“Std”).<br />
r<br />
The parameters of the<br />
ORCH. EDIT group apply to<br />
the ORCHESTRA section.<br />
See page 29 for details<br />
about the ORCHESTRA section.<br />
You may remember that the FR-7x allows you to<br />
choose from 26 sounds (because each register provides<br />
access to an “A” and a “B” sound).<br />
See pages 62 and 63 for how to select and adjust the<br />
parameters.<br />
Press [UP] and [DOWN] simultaneously to select the<br />
value that is indicated as “Default setting”.<br />
Important notes<br />
• The selection of ORCHESTRA sounds and modes can<br />
be automated for each treble register memory using<br />
the “2.13 Orchestra Link” parameter (page 68).<br />
• Remember to press the register you want to edit<br />
once (“A”) or twice (“B”) before you start changing<br />
the settings.<br />
• These parameters can only be selected when<br />
ORCHESTRA mode is active (page 29).<br />
• See page 103 for how to save your changes. Also be<br />
sure to read “Important remark about saving your<br />
settings” on p. 64.<br />
6.1 Timbre<br />
This parameter group allows<br />
you to assign the desired<br />
orchestral or organ sound to<br />
the selected register.<br />
See “Assigning orchestral to<br />
the registers” on p. 51 for the procedure. As stated there,<br />
each register can select only one type of sound. If you<br />
select a TW organ sound, you can also edit and name it.<br />
6.2 Octave<br />
(–3~0~+3)<br />
This parameter allows you to<br />
transpose the ORCHESTRA<br />
section (i.e. the currently<br />
selected orchestral or organ<br />
sound) up or down.<br />
This can be interesting when you are using the Orchestra<br />
part in Dual mode (page 30) and want it to sound<br />
above or below the selected treble accordion register.<br />
6.3 Volume<br />
(Off, –40~“Std”~40, Default<br />
setting: Std)<br />
This parameter allows you to<br />
set the ORCHESTRA section’s<br />
volume.<br />
6.4 Panpot<br />
(Bass 63~0 Treb 0~63 Bass)<br />
Depending on the selected<br />
sound, this parameter allows<br />
you to change the ORCHES-<br />
TRA part’s placement in the<br />
stereo sound field (i.e. between the left and right speakers)<br />
to create a livelier sound image. The “Treb” values<br />
mean that the sound will appear on the same side as the<br />
treble accordion sound. This setting applies to both the<br />
FR-7x’s internal speakers and the L/MONO socket.<br />
The “Bass” values mean that the sound will appear on<br />
the same side as the bass accordion sound. This setting<br />
applies to both the FR-7x’s internal speakers and the R/<br />
MONO socket.<br />
Choose “0” if the ORCHESTRA sound should be at the<br />
center of the stereo image.<br />
Note: If a TW organ sound is assigned to the current ORCHES-<br />
TRA register, the “VALUE” parameter will read “Rotary” to signal<br />
that the “VALUE” parameter cannot be set.<br />
6.5 Bellows Detune<br />
(Off, Low, Standard, High,<br />
Default setting: Standard)<br />
This parameter allows you to<br />
specify how strongly the<br />
orchestral sound’s pitch<br />
should be influenced by opening and closing the bellows<br />
faster than usual.<br />
If the “Standard” setting seems too mild, try “High”. If it<br />
is too strong, use “Low”. If you do not want any detuning<br />
effect, select “Off”. The most convincing setting usually<br />
depends on the selected sound.<br />
6.6 Reverb Send, 6.7 Chorus Send, 6.8 Delay Send<br />
(0~127 for all three)<br />
Use these parameters to set<br />
the Reverb, Chorus or Delay<br />
send level (how much effect<br />
should be applied to the<br />
Orchestra section). The higher<br />
the value you set, the more<br />
the Orchestra section will be<br />
processed by the effect in<br />
question.<br />
The other sections have the<br />
same parameters, so that you<br />
can create a sound image with<br />
various “levels” (foreground, background).<br />
The effects themselves can be edited on separate pages<br />
(see p. 82).<br />
78
V-Accordion r<br />
6.9 Aftertouch Pitch (Advanced)<br />
Note: If a TW organ sound is assigned to the current ORCHES-<br />
TRA register memory, the “LEVEL” value will read “Rotary” to<br />
signal that the register is not processed by the FR-7x’s “general<br />
effects” (see p. 55). In this case, the “LEVEL” parameter cannot<br />
be set.<br />
6.9 Aftertouch Pitch<br />
(Off, 1/4 Down, 1/2 Down, 1/4<br />
Up, 1/2 Up, Default setting:<br />
Off)<br />
The treble keyboard of the<br />
piano-type model generates<br />
aftertouch messages (on the button-type model, aftertouch<br />
can be generated with the Master bar). “Aftertouch”<br />
refers to the fact that you press a key even further<br />
down after playing a note. This effect allows you to<br />
bend the pitch down (temporarily lower the note) by a<br />
quarter (“1/4 Down”) or a semi-tone (“1/2 Down”). Select<br />
“1/4 Up” or “1/2 Up” to bend the notes up a quarter or a<br />
semi-tone. Select “Off” to switch off the Orchestra section’s<br />
aftertouch recognition.<br />
The treble section also contains this parameter. You are<br />
thus free to decide whether both the accordion and the<br />
orchestral sounds should be affected by aftertouch messages<br />
or only one of them.<br />
Note: This aftertouch effect applies to all ORCHESTRA notes<br />
that are sounding simultaneously. (MIDI buffs call this “channel<br />
aftertouch”.)<br />
Note: For organ sounds, aftertouch allows you to alternate<br />
between the fast and slow speeds of the Rotary effect. (That<br />
effect is automatically assigned to an organ sound when you<br />
select it.) The speed switching function cannot be deactivated.<br />
You can, however, also add pitch control to this switching<br />
function, and so control two functions via the aftertouch.<br />
6.10 MIDI TX<br />
This page contains a series of<br />
MIDI parameters for the<br />
Orchestra section you need to<br />
set one by one. See page 113<br />
for details about the MIDI<br />
parameters. These parameters are saved along with all<br />
other Set parameters, which allows you to use different<br />
MIDI settings for each Set.<br />
7. Orch. Chord Edit parameters<br />
The parameters of the<br />
“Orch. Chord Edit” group<br />
apply to the chord button<br />
rows of the Bass section.<br />
As stated earlier, the FR-7x<br />
allows you to play and accordion sound with the bass<br />
rows and an orchestral or organ sound with the chord<br />
rows of the bass keyboard (and vice versa). See page 33<br />
for details about the ORCHESTRA CHORD section. (You<br />
can also combine the ORCHESTRA CHORD section with<br />
the ORCHESTRA BASS section if you like.)<br />
See pages 62 and 63 for how to select and adjust the<br />
parameters.<br />
Press [UP] and [DOWN] simultaneously to select the<br />
value that is indicated as “Default setting”.<br />
Important notes<br />
• The selection of ORCHESTRA CHORD mode can be<br />
automated using the “2.14 Orchestra Chord Link”<br />
parameter (page 69).<br />
• These parameters can only be selected if an ORCHES-<br />
TRA CHORD register is selected (page 33).<br />
• See page 103 for how to save your changes. Also be<br />
sure to read “Important remark about saving your<br />
settings” on p. 64.<br />
7.1 Timbre<br />
This parameter group allows<br />
you to assign the desired<br />
orchestral or organ sound to<br />
the selected register.<br />
See “Assigning orchestral to<br />
the registers” on p. 51 for the procedure. As stated there,<br />
each register can select only one type of sound.<br />
If you select a TW organ sound, you can also edit and<br />
name it.<br />
7.2 Lowest note<br />
This parameter allows you to<br />
specify the lowest note the<br />
selected sound can sound.<br />
The ORCHESTRA CHORD<br />
sounds are PCM waveforms<br />
(samples) of acoustic instruments. Each acoustic instrument<br />
has a set range: it cannot sound notes below or<br />
above that range.<br />
Samples (PCM waveforms), on the other hand, can lower<br />
the pitch of a recorded sound almost indefinitely. But<br />
that doesn’t sound very natural. The “Lowest Note”<br />
parameter allows you to specify the lowest pitch the<br />
sample can use. If you nevertheless play a lower note on<br />
the treble keyboard, it will be sounded one octave above<br />
the corresponding pitch – and sound natural.<br />
79
FR-7x V-Accordion<br />
® 7. Orch. Chord Edit parameters (Advanced)<br />
The ORCHESTRA CHORD sound thus changes octaves.<br />
For some songs, the default setting (E) may yield odd<br />
results, especially if you need to play walking bass lines,<br />
etc. In that case, you can change the “Lowest Note” setting<br />
to achieve a satisfactory result.<br />
The options are: E, F, F#, G, Ab, A3, Bb, B, C; Default setting:<br />
E.<br />
7.3 Octave<br />
(–3~0~+3)<br />
This parameter allows you to<br />
transpose the ORCHESTRA<br />
CHORD section (i.e. the currently<br />
selected orchestral or<br />
organ sound) up or down.<br />
7.4 Volume<br />
(Off, –40~“Std”~40, Default<br />
setting: Std)<br />
This parameter allows you to<br />
set the volume of the<br />
ORCHESTRA CHORD section.<br />
This is a relative parameter, which means that its value is<br />
added to or subtracted from the standard value (“Std”).<br />
7.5 Panpot<br />
(Bass 63~0 Treb 0~63 Bass)<br />
Depending on the selected<br />
sound, this parameter allows<br />
you to change the ORCHES-<br />
TRA CHORD part’s placement<br />
in the stereo sound field (i.e. between the left and right<br />
speakers) to create a livelier sound image. The “Treb” values<br />
mean that the sound will appear on the same side as<br />
the treble accordion sound. This setting applies to both<br />
the FR-7x’s internal speakers and the L/MONO socket.<br />
The “Bass” values mean that the sound will appear on<br />
the same side as the bass accordion sound. This setting<br />
applies to both the FR-7x’s internal speakers and the R/<br />
MONO socket.<br />
Choose “0” if the ORCHESTRA CHORD sound should be<br />
at the center of the stereo image.<br />
Note: If a TW organ sound is assigned to the current ORCHES-<br />
TRA CHORD register, the “VALUE” parameter will read “Rotary”<br />
to signal that the “VALUE” parameter cannot be set.<br />
7.7 Reverb Send, 7.8 Chorus Send, 7.9 Delay Send<br />
(0~127 for all three)<br />
Use these parameters to set<br />
the Reverb, Chorus or Delay<br />
send level (how much effect<br />
should be applied to the<br />
ORCHESTRA CHORD section).<br />
The higher the value you set,<br />
the stronger the ORCHESTRA<br />
CHORD section will be processed<br />
by the effect in question.<br />
The other sections have the<br />
same parameters, so that you<br />
can create a sound image with various “levels” (foreground,<br />
background).<br />
The effects themselves can be edited on separate pages<br />
(see p. 82).<br />
Note: If a TW organ sound is assigned to the current ORCHES-<br />
TRA CHORD register, the “LEVEL” value will read “Rotary” to<br />
signal that the register is not processed by the FR-7x’s “general<br />
effects” (see p. 55). In this case, the “LEVEL” parameter cannot<br />
be set.<br />
7.10 MIDI TX<br />
This page contains a series of<br />
MIDI parameters for the<br />
Orchestra section you need to<br />
set one by one. See page 113<br />
for details about the MIDI<br />
parameters. These parameters are saved along with all<br />
other Set parameters, which allows you to use different<br />
MIDI settings for each Set.<br />
r<br />
7.6 Chord Drum<br />
This parameter allows you to<br />
assign up to three drum/percussion<br />
sounds to the chord<br />
buttons and to set their levels.<br />
If you assign three sounds, all<br />
three will be played simultaneously whenever you press<br />
a chord button. See “3.7 Bass Drum” on p. 72 for the<br />
procedure.<br />
80
V-Accordion r<br />
8.1 Timbre (Advanced)<br />
8. Orch.FBass Edit parameters<br />
The parameters of the<br />
“ORCH.FBASS EDIT” group<br />
apply to the bass buttons<br />
while Free Bass mode is<br />
active. See page 34 for<br />
details about the ORCHESTRA FREE BASS section. This<br />
section is not available while bass mode is active. See<br />
pages 62 and 63 for how to select and adjust the<br />
parameters.<br />
Press [UP] and [DOWN] simultaneously to select the<br />
value that is indicated as “Default setting”.<br />
Important note<br />
• The selection of ORCHESTRA FREE BASS can be automated<br />
using the “2.14 Orchestra Chord Link” parameter<br />
(page 69).<br />
• These parameters can only be selected if an ORCHES-<br />
TRA FREE BASS register is selected (page 33).<br />
• See page 103 for how to save your changes. Also be<br />
sure to read “Important remark about saving your<br />
settings” on p. 64.<br />
8.1 Timbre<br />
This parameter group allows<br />
you to assign the desired<br />
orchestral or organ sound to<br />
the selected register.<br />
See “Assigning orchestral to<br />
the registers” on p. 51 for the procedure. As stated there,<br />
each register can select only one type of sound.<br />
If you select a TW organ sound, you can also edit and<br />
name it.<br />
8.2 Octave<br />
(–3~0~+3)<br />
This parameter allows you to<br />
transpose the ORCHESTRA<br />
FREE BASS section (i.e. the<br />
currently selected orchestral<br />
or organ sound) up or down.<br />
8.3 Volume<br />
(Off, –40~“Std”~40, Default<br />
setting: Std)<br />
This parameter allows you to<br />
set the volume of the<br />
ORCHESTRA FREE BASS section.<br />
This is a relative parameter, which means that its value is<br />
added to or subtracted from the standard value (“Std”).<br />
8.4 Panpot<br />
(Bass 63~0 Treb 0~63 Bass)<br />
Depending on the selected<br />
sound, this parameter allows<br />
you to change the ORCHES-<br />
TRA FREE BASS part’s placement<br />
in the stereo sound field (i.e. between the left and<br />
right speakers) to create a livelier sound image. The<br />
“Treb” values mean that the sound will appear on the<br />
same side as the treble accordion sound. This setting<br />
applies to both the FR-7x’s internal speakers and the L/<br />
MONO socket.<br />
The “Bass” values mean that the sound will appear on<br />
the same side as the bass accordion sound (which is not<br />
currently available). This setting applies to both the<br />
FR-7x’s internal speakers and the R/MONO socket.<br />
Choose “0” if the ORCHESTRA FREE BASS sound should<br />
be at the center of the stereo image.<br />
Note: If a TW organ sound is assigned to the current ORCHES-<br />
TRA FREE BASS register, the “VALUE” parameter will read<br />
“Rotary” to signal that the “VALUE” parameter cannot be set.<br />
8.5 Reverb Send, 8.6 Chorus Send, 8.7 Delay Send<br />
(0~127 for all three) Use these<br />
parameters to set the Reverb,<br />
Chorus or Delay send level<br />
(how much effect should be<br />
applied to the Orchestra Free<br />
Bass section). The higher the<br />
value you set, the more the<br />
Orchestra section will be processed<br />
by the effect in question.<br />
The other sections (Bass, Free<br />
Bass, etc.) have the same<br />
parameters, so that you can<br />
create a sound image with various “levels” (foreground,<br />
background).<br />
The effects themselves can be edited on separate pages<br />
(see p. 82).<br />
Note: If a TW organ sound is assigned to the current ORCHES-<br />
TRA CHORD register, the “LEVEL” value will read “Rotary” to<br />
signal that the register is not processed by the FR-7x’s “general<br />
effects” (see p. 55). In this case, the “LEVEL” parameter cannot<br />
be set.<br />
8.8 MIDI TX<br />
This page contains a series of<br />
MIDI parameters for the<br />
ORCHESTRA FREE BASS section<br />
you need to set one by<br />
one. See page 113 for details<br />
about the MIDI parameters. These parameters are saved<br />
along with all other Set parameters, which allows you to<br />
use different MIDI settings for each Set.<br />
81
FR-7x V-Accordion<br />
® 9. Set Common parameters (Advanced)<br />
r<br />
9. Set Common parameters<br />
The SET COMMON group<br />
contains parameters that<br />
apply to all sections, but<br />
only within the framework<br />
of the currently selected<br />
Set, most notably the parameters that specify the<br />
sound/character of the Reverb, Chorus and Delay<br />
effects.<br />
Important notes<br />
• Never switch off the FR-7x before saving the settings<br />
you wish to keep, because doing so will erase your<br />
changes.<br />
• See page 103 for how to save your changes. Also be<br />
sure to read “Important remark about saving your<br />
settings” on p. 64.<br />
About the effects parameters<br />
The settings you perform here apply to all sections that<br />
use the general reverb, chorus or delay effect. They do<br />
not apply to the TW reverb, chorus or delay processors,<br />
i.e. the effects available for organ sounds. The TW effects<br />
cannot be edited.<br />
The connection of the sections to the general effects<br />
processors is as follows:<br />
Section<br />
(e.g. Treble)<br />
Chorus<br />
Send<br />
Volume<br />
Reverb<br />
Send<br />
Delay<br />
Send<br />
Note: See page 56 for the connection of the organ parts to<br />
the TW effects. Those effects are not related to the processors<br />
discussed here.<br />
9.1 Reverb Macro<br />
This is where you specify what<br />
kind of effect the Reverb processor<br />
should generate and<br />
how loud it should be.<br />
Chorus<br />
Reverb<br />
Delay<br />
STEREO OUTPUT<br />
sockets<br />
Level<br />
Level<br />
Level<br />
Note: You can also copy the<br />
Reverb (or even all effects) settings from another Set. See<br />
page 97.<br />
(1) Press the [DATA÷ENTER] knob to select the “TYPE”<br />
parameter, then rotate the [DATA÷ENTER] knob to<br />
select an effect type.<br />
The “TYPE” parameter on this page is a “Macro” function:<br />
it recalls suitable preset values for all Reverb<br />
parameters (Pre-LPF~RevPre DlyTm) on the “Reverb<br />
L<br />
R<br />
Parameters” page. The Macro therefore also selects a<br />
“Character”. In many instances, editing only the<br />
parameters on this page is enough.<br />
The available options are:<br />
Macro name<br />
Room1,<br />
Room2,<br />
Room3<br />
Hall1, Hall2<br />
Meaning<br />
These types simulate the reverberation of<br />
a room. They provide a well-defined spacious<br />
reverberation.<br />
These types simulate the reverberation of<br />
a concert hall with a deeper reverberation<br />
than the Room reverbs.<br />
Plate This effect type simulates a plate reverb (a<br />
studio device using a metal plate to simulate<br />
natural reverb).<br />
Delay<br />
Panning Dly<br />
This is a conventional delay that produces<br />
echo effects.<br />
(2) Press the [DATA÷ENTER] knob to select the “LEVEL”<br />
parameter, then rotate the [DATA÷ENTER] knob to<br />
set the Reverb processor’s output volume (0~127).<br />
The overall reverb volume depends on three things:<br />
the Send level of the various sections, the output<br />
level of the Reverb processor and the setting of the<br />
[REVERB] knob.<br />
If one of them is set to “0”, there will be no reverb. If<br />
the Send level of a section (Orchestra, for example) is<br />
set to “0”, only the selected sound will have no<br />
reverb. If the “LEVEL” parameter on this page is set to<br />
“0”, the Reverb processor is effectively off for all sections.<br />
9.2 Reverb Parameters<br />
This page contains several<br />
parameters that need to be<br />
selected using the “TYPE”<br />
entry. Always first select the<br />
parameter you want to<br />
change and then set its value.<br />
(1) Press the [DATA÷ENTER] knob to select the “TYPE”<br />
parameter, then rotate the [DATA÷ENTER] knob to<br />
select a parameter.<br />
Parameter<br />
Character<br />
(0~7)<br />
This is a special delay in which the delayed<br />
sounds move left and right. It is effective<br />
when you are listening in stereo.<br />
Explanation<br />
This parameter specifies the reverb type<br />
you need (see the table above). It does not<br />
load preset values for the Pre-LPF~<br />
RevPreDlyTm parameters.<br />
82
V-Accordion r<br />
9.3 Chorus Macro (Advanced)<br />
Parameter<br />
Pre-LPF (0~7) A low-pass filter can be applied to the<br />
high-frequency range before the signals<br />
coming from the various sections are processed<br />
by the reverb. Higher values make<br />
the Send signals darker, which results in a<br />
mellower reverberation. This parameter<br />
only applies to the signals that are sent to<br />
the Reverb processor. It does not alter the<br />
sound of the active sections.<br />
Time (0~127)<br />
Level (0~127)<br />
Dly Fback<br />
(0~127)<br />
Pre-Dly T.<br />
(0~127)<br />
Explanation<br />
This parameter sets the duration of the<br />
reverb effect. Higher values result in<br />
longer reverberation.<br />
This parameter sets the output volume of<br />
the Reverb processor. It is linked to its<br />
namesake on the “Reverb Macro” page.<br />
Higher values result in louder reverberation.<br />
This parameter is only available when you<br />
set “Character” to “6” or “7”. It specifies<br />
the number of echoes: higher values<br />
result in more repetitions.<br />
This parameter sets the time interval<br />
between the original (“dry”) signal and the<br />
onset of the selected reverb effect. Higher<br />
values result in a longer pre-delay time,<br />
simulating a larger reverberant space.<br />
(2) Press the [DATA÷ENTER] knob to select the “VALUE”<br />
parameter, then rotate the [DATA÷ENTER] knob to<br />
set the parameter value (see the indications<br />
between brackets in the table above).<br />
If you change one of the above parameter values, an<br />
“(E)” appears next to the “TYPE” name to signal that<br />
you are no longer using the presets of the macro in<br />
question.<br />
9.3 Chorus Macro<br />
Chorus broadens the spatial<br />
image of the sound, adding<br />
richness. You can choose from<br />
8 types of chorus.<br />
Note: You can also copy the Chorus<br />
(or even all effects) settings from another Set. See page 97.<br />
(1) Press the [DATA÷ENTER] knob to select the “TYPE”<br />
parameter, then rotate the [DATA÷ENTER] knob to<br />
select an effect type.<br />
The “TYPE” parameter on this page is a “Macro” function:<br />
it recalls suitable preset values for all chorus<br />
parameters on the “Chorus Parameters” page. In<br />
many instances, editing only the parameters on this<br />
page is enough.<br />
The available options are:<br />
Parameter<br />
Chorus 1~4<br />
FBack Chr<br />
Flanger<br />
Short Delay<br />
ShortDly FB<br />
Explanation<br />
These are conventional chorus effects that<br />
add spaciousness and depth to the sound.<br />
This is a chorus with a Flanger-like effect<br />
and a soft sound.<br />
This is an effect that sounds somewhat like<br />
a jet airplane taking off or landing.<br />
This is a delay with a short delay time.<br />
This is a short delay with many repeats.<br />
(2) Press the [DATA÷ENTER] knob to select the “LEVEL”<br />
parameter, then rotate the [DATA÷ENTER] knob to<br />
set the Chorus processor’s output volume (0~127).<br />
The overall chorus volume depends on three things:<br />
the Send level of the various sections, the output<br />
level of the Chorus processor and the setting of the<br />
[CHORUS] knob.<br />
If one of them is set to “0”, there will be no chorus. If<br />
the Send level of a section is set to “0”, only that section<br />
will have no chorus. Other sections If the “LEVEL”<br />
parameter on this page is set to “0”, the Chorus processor<br />
is effectively off for all sections.<br />
If you then select another “TYPE”, however, your<br />
changes are lost and replaced by the settings of the<br />
newly selected macro.<br />
Note: Simultaneously press the [UP] and [DOWN] buttons<br />
to recall the factory setting for the currently active parameter.<br />
83
FR-7x V-Accordion<br />
® 9. Set Common parameters (Advanced)<br />
9.4 Chorus Parameters<br />
This page contains several<br />
parameters that need to be<br />
selected using the “TYPE”<br />
entry.<br />
(1) Press the [DATA÷ENTER]<br />
knob to select the “TYPE” parameter, then rotate<br />
the [DATA÷ENTER] knob to select a parameter.<br />
Parameter<br />
Explanation<br />
Pre-LPF (0~7) A low-pass filter can be applied to the<br />
high-frequency range before the signals<br />
coming from the various sections are processed<br />
by the chorus. Higher values make<br />
the Send signals darker, resulting in a mellower<br />
chorus sound. This parameter only<br />
applies to the signals that are sent to the<br />
Chorus processor. It does not alter the<br />
sound of the active sections.<br />
Level (0~127)<br />
Feedback<br />
(0~127)<br />
Delay<br />
(0~127)<br />
Rate (0~127)<br />
Depth<br />
(0~127)<br />
Chr > Rev<br />
(0~127)<br />
This parameter sets the output volume of<br />
the Chorus processor. It is linked to its<br />
namesake on the “Chorus Macro” page.<br />
Higher values result in a more prominent<br />
chorus effect.<br />
This parameter sets the level at which the<br />
Chorus sound is re-input (fed back) into<br />
the Chorus. By using Feedback, a denser<br />
chorus sound can be created. Higher values<br />
result in a greater feedback level.<br />
This parameter sets the delay of the chorus<br />
effect. Higher values will cause greater<br />
deviation in pitch of the chorus sound.<br />
This parameter sets the speed (frequency)<br />
at which the chorus sound is modulated.<br />
Higher values result in faster modulation.<br />
This parameter sets the depth at which<br />
the chorus sound is modulated. Higher<br />
values result in a more pronounced modulation.<br />
This parameter sets the amount of chorus<br />
sound that is sent to the Reverb processor.<br />
The value “127” effectively allows you to<br />
connect the chorus and reverb effects in<br />
series (chorus before reverb). If you do not<br />
want the chorus signal to be processed by<br />
the reverb effect, set this value to “0”.<br />
Chr > Rev<br />
Section<br />
(e.g. Treble)<br />
Chr > Dly<br />
Section<br />
(e.g. Treble)<br />
Chorus<br />
Send<br />
Chorus<br />
Send<br />
Volume<br />
Volume<br />
Reverb<br />
Send<br />
Reverb<br />
Send<br />
Delay<br />
Send<br />
Delay<br />
Send<br />
Chorus<br />
Reverb<br />
Delay<br />
STEREO OUTPUT<br />
sockets<br />
Chorus<br />
Reverb<br />
Delay<br />
STEREO OUTPUT<br />
sockets<br />
Level<br />
Level<br />
Level<br />
Level<br />
Level<br />
Level<br />
(2) Press the [DATA÷ENTER] knob to select the “VALUE”<br />
parameter, then rotate the [DATA÷ENTER] knob to<br />
set the value (see the indications between brackets<br />
above).<br />
If you change one of the above parameter values, an<br />
“(E)” appears next to the “TYPE” name to signal that<br />
you are no longer using the presets of the macro in<br />
question.<br />
If you then select another TYPE, your changes are lost<br />
and replaced by the settings of the newly selected<br />
macro.<br />
Note: Simultaneously press the [UP] and [DOWN] buttons<br />
to recall the factory setting for the currently active parameter.<br />
L<br />
R<br />
L<br />
R<br />
r<br />
Chr > Dly<br />
(0~127)<br />
This parameter sets the amount of chorus<br />
sound that is sent to the Delay processor.<br />
Higher values result in more sound being<br />
sent. The value “127” effectively allows<br />
you to connect the Chorus and Delay<br />
effects in series (Chorus before Delay). If<br />
you do not want the chorus signal to be<br />
processed by the delay effect, set this<br />
value to “0”.<br />
84
V-Accordion r<br />
9.5 Delay Macro (Advanced)<br />
9.5 Delay Macro<br />
A delay effect creates echoes.<br />
It can also broaden a sound by<br />
adding a slightly delayed copy<br />
to the original sound (a technique<br />
often used for rock-’n’-<br />
roll songs and in karaoke bars).<br />
Note: You can also copy the Delay (or even all effects) settings<br />
from another Set. See page 97.<br />
(1) Press the [DATA÷ENTER] knob to select the “TYPE”<br />
parameter, then rotate the [DATA÷ENTER] knob to<br />
select an effect type.<br />
The TYPE parameter on this page is a “Macro” function,<br />
i.e. it recalls suitable preset values for all Delay<br />
parameters on the “Delay Parameters” page. In many<br />
instances, editing only the parameters on this page is<br />
enough.<br />
The available options are:<br />
Parameter<br />
Explanation<br />
Delay 1~3 These are conventional Delays. 1, 2 and 3<br />
have progressively longer delay times.<br />
Delay 4<br />
Pan Delay<br />
1~3<br />
Pan<br />
Delay 4<br />
Delay ><br />
Rev<br />
This is an effect with a rather short delay<br />
time (a kind of “slap back” effect).<br />
The repetitions move between left and right.<br />
This is effective when listening in stereo. “1”,<br />
“2” and “3” have progressively longer delay<br />
times.<br />
This is a rather short delay with the echoes<br />
moving between left and right. It is effective<br />
when listening in stereo (a kind of stereo<br />
“slap back” effect).<br />
Reverb is added to the delay sound which<br />
moves between left and right. It is effective<br />
when listening in stereo.<br />
Pan Repeat The delay signal moves between the left and<br />
right channels, yet the stereo position is different<br />
from the effects listed above. It is<br />
effective when listening in stereo.<br />
(2) Press the [DATA÷ENTER] knob to select the “LEVEL”<br />
parameter, then rotate the [DATA÷ENTER] knob to<br />
set the Delay processor’s output volume (0~127).<br />
The overall delay volume depends on three things:<br />
the Send level of the various sections, the output<br />
level of the Delay processor and the setting of the<br />
[DELAY] knob.<br />
If one of them is set to “0”, there will be no delay<br />
effect. If the Send level of a section is set to “0”, the<br />
sound of that section is not repeated. If the “LEVEL”<br />
parameter on this page is set to “0”, the Delay processor<br />
is effectively off for all sections. This parameter<br />
is connected to the [DELAY] knob.<br />
9.6 Delay Parameters<br />
This page contains several<br />
parameters that need to be<br />
selected using the “TYPE”<br />
entry.<br />
(1) Press the [DATA÷ENTER]<br />
knob to select the “TYPE” parameter, then rotate<br />
the [DATA÷ENTER] knob to select a parameter.<br />
Parameter<br />
Pre-LPF<br />
(0~7)<br />
Level<br />
(0~127)<br />
Time C (ms)<br />
(0.1~1000)<br />
Time L/R (%)<br />
(4~500)<br />
Level C/L/R<br />
(0~127)<br />
Feedback<br />
(–64~0~+63)<br />
Dly > Rev<br />
(0~127)<br />
Explanation<br />
A low-pass filter can be applied to the<br />
high-frequency range before the signals<br />
coming from the various sections are processed<br />
by the Delay processor. Higher values<br />
make the Send signals darker,<br />
resulting in a mellower delay sound. Note<br />
that this parameter only applies to the<br />
signals that are sent to the Delay processor.<br />
It does not alter the sound of the<br />
active sections.<br />
This parameter sets the overall volume of<br />
the three delay lines (center, left and<br />
right). Higher values result in a louder<br />
delay effect.<br />
The delay effect of the FR-7x allows you<br />
to set three delay times: center (C), left (L)<br />
and right (R). “Time C” sets the delay time<br />
of the Delay located at the center.<br />
These parameters sets the delay time of<br />
the left- or right-channel delay line as a<br />
percentage of the central Delay. The value<br />
“100%” means that the left or right delay<br />
repeats at the same speed as the center<br />
delay (see above).<br />
These parameters set the volume of the<br />
central, left and right delays individually,<br />
allowing you to create the desired “mix”.<br />
This parameter specifies the number of<br />
times the delay will repeat. If you select<br />
“0”, the delay will not repeat. Higher values<br />
result in more repetitions. With negative<br />
(–) values, the center delay will be fed<br />
back with inverted phase. This is especially<br />
effective for small “Time C” values.<br />
This parameter sets the amount of delay<br />
sound that is sent to the Reverb. Higher<br />
values mean that the echoes will be more<br />
prominent in the reverb signal. Be careful<br />
not to overdo this effect because it tends<br />
to blur the sound image.<br />
85
FR-7x V-Accordion<br />
® 10. System parameters (Advanced)<br />
r<br />
Section<br />
(e.g. Treble)<br />
Chorus<br />
Send<br />
Volume<br />
Reverb<br />
Send<br />
Delay<br />
Send<br />
Chorus<br />
Reverb<br />
Delay<br />
STEREO OUTPUT<br />
sockets<br />
Level<br />
Level<br />
Level<br />
If you change one of the above parameter values, an<br />
“(E)” appears next to the “TYPE” name to signal that<br />
you are no longer using the presets of the macro in<br />
question.<br />
If you then select another “TYPE”, your changes are<br />
lost and replaced by the settings of the newly<br />
selected macro.<br />
9.7 Name<br />
This function allows you to<br />
name the selected Set (8 characters).<br />
It would be a good<br />
idea to use the name of the<br />
instrument you “built” using<br />
the TREBLE, BASS, FREE BASS, etc., group parameters or<br />
the name of the song you wish to use this Set for.<br />
See “Name” on p. 63 for how to enter names.<br />
9.8 Master Bar Recall<br />
This parameter allows you to<br />
choose the Treble register (1~<br />
14) that can be activated by<br />
pressing the Master bar. This is<br />
only possible while the Treble<br />
section is in Solo mode (page 30) or while the ORCHES-<br />
TRA part is set to “CANCEL”.<br />
In all other cases (Dual, High, Low modes), the Master<br />
bar is used to mute the ORCHESTRA part. In Solo mode,<br />
the first press allows you to return from the ORCHESTRA<br />
part (if it’s on) to the treble section.<br />
Note: If you also take advantage of the Treble register’s “Link”<br />
functions (see p. 68), this “Recall” parameter actually allows<br />
you to reconfigure your entire FR-7x simply by pressing the<br />
Master bar.<br />
9.9 Icon<br />
This parameter allows you to<br />
assign an icon to your Set,<br />
which is displayed above its<br />
name on the main page. In<br />
most cases, you will probably<br />
choose a picture that somehow illustrates the contents<br />
of your settings, but that is entirely up to you. The FR-7x<br />
contains 44 preset icons (stored in its internal memory).<br />
L<br />
R<br />
10. System parameters<br />
The “System” group contains<br />
parameters that are<br />
related to all Sets and all<br />
sections: they apply to the<br />
FR-7x as a whole.<br />
See pages 62 and 63 for how to select and adjust the<br />
parameters.<br />
Press [UP] and [DOWN] simultaneously to select the<br />
value that is indicated as “Default setting”.<br />
10.1 LCD Contrast<br />
(0~12, Default setting: 12)<br />
This parameter allows you to<br />
change the contrast if the<br />
FR-7x’s display is difficult to<br />
read. The smaller the value, the darker the display<br />
becomes.<br />
10.2 Bellows Curves<br />
(Fixed Low, Fixed Med, Fixed<br />
High, X-Light, Light, Standard,<br />
Heavy, X-Heavy)<br />
This parameter allows you to<br />
specify how the FR-7x should<br />
respond to the bellows’ movements. You may remember<br />
that there are several functions that can be controlled<br />
via the strength/speed with which you push or pull the<br />
bellows (2.7 Bellows Detune, 3.6 Bellows Detune,<br />
3.5 Reed Growl, 4.6 Bellows Detune, 6.5 Bellows Detune,<br />
6.1.5 Bellows Crescendo).<br />
If you think those parameters do not respond the way<br />
you would like them to, try another curve that better<br />
“translates” your movements.<br />
There are three “Fixed” curves that always use the same<br />
value, no matter how hard or lightly you push/pull the<br />
bellows (no dynamic control). “Low” means that a low<br />
value is used, “Med” represents a medium value and<br />
“High” a high value. When you select one of these three<br />
options, you do not need to move the bellows in order<br />
to hear the notes you play.<br />
Note: By selecting a “Fixed” option here, you effectively switch<br />
off the bellows sensor. This also means that any setting that<br />
includes “Bellows” for “10.15 Orchestra Touch” or<br />
“10.16 Orchestra Bs&Ch Touch” no longer works, because the<br />
FR-7x no longer monitors the bellows’ movements.<br />
The remaining settings do depend on the strength with<br />
which you push/pull the bellows, but in different ways:<br />
“Light” means that you do not need to push/pull hard to<br />
achieve a meaningful effect. “X-Light” requires even<br />
less strength (the “X” stands for “extra”). “Standard”<br />
refers to a normal response. “Heavy” provides a greater<br />
variety of nuances and “X-Heavy” is even more detailed.<br />
It would be a good idea to select each curve without the<br />
“Fixed” addition, play a few notes, select the next curve,<br />
etc., until you find the response that feels just right.<br />
86
V-Accordion r<br />
10.3 Pedal Controller (Advanced)<br />
10.3 Pedal Controller<br />
This page allows you to assign<br />
functions to the FBC-7’s footswitches.<br />
As you will notice<br />
below, there are also functions<br />
for remotely controlling external<br />
instruments, like an arranger module or any other<br />
device that understands the messages transmitted by<br />
the FBC-7.<br />
Note: The assignments you program here are only meaningful<br />
if you connect the FR-7x to the supplied FBC-7.<br />
(1) Press the [DATA÷ENTER] knob to select the<br />
“SWITCH” parameter, then rotate the [DATA÷ENTER]<br />
knob to select the footswitch on the FBC-7 whose<br />
function you wish to define.<br />
(2) Press the [DATA÷ENTER] knob to select the<br />
“ASSIGN” parameter, then rotate the [DATA÷ENTER]<br />
knob to select one of the following functions:<br />
Parameter<br />
Set Up/<br />
Set Down<br />
Regist Up/<br />
Regist Down<br />
Sust.A*<br />
Sust.B*<br />
Orch.On/Off<br />
Start/Stop*<br />
Explanation<br />
The footswitch allows you to select the<br />
next (Down) or previous (Up) Set memory.<br />
After selecting Set 01 (or 80), pressing the<br />
footswitch again takes you to Set 80 (or<br />
01).<br />
These are the default functions of footswitches<br />
[1] and [2].<br />
The selected footswitch allows you to<br />
select the next (Down) or previous (Up)<br />
treble register. If you combine this with<br />
the “2.12 Bass Link” and “2.13 Orchestra<br />
Link” parameters, this allows you to reconfigure<br />
almost all sections simply by pressing<br />
this footswitch.<br />
The footswitch can be used to hold the<br />
note messages the selected section<br />
(page 88) transmits via MIDI. You can then<br />
release the keys or buttons – the notes go<br />
on sounding until you release the footswitch.<br />
The footswitch can be used to hold the<br />
note messages the selected section<br />
(page 88) transmits via MIDI. You can then<br />
release the keys or buttons – the notes go<br />
on sounding until you release the footswitch.<br />
The footswitch allows you to switch the<br />
ORCHESTRA section on and off.<br />
Pressing the footswitch once will cause<br />
the external device to start playback. Press<br />
the footswitch again to stop playback.<br />
Parameter<br />
Intro*<br />
Fill Up*<br />
Fill Down*<br />
Ending*<br />
PitchUp 1/2<br />
PitchUp 1<br />
PitchDwn 1/2<br />
PitchDwn 1<br />
Rtry Sw**<br />
Rtry<br />
SlowFast**<br />
Rtry Slow**<br />
Explanation<br />
The footswitch can be used to select the<br />
“Intro” pattern of the active Music Style.<br />
Note: Arranger instruments of other manufacturers<br />
may not understand this message.<br />
If in doubt, see their MIDI implementation<br />
section for details. The MIDI message transmitted<br />
by this footswitch is PC83 (program<br />
change) on MIDI channel 10.<br />
The footswitch can be used to select a fillin<br />
pattern of the active Music Style. If the<br />
instrument being controlled provides several<br />
fill-in patterns, you can select them<br />
one after the other in ascending order.<br />
Note: You cannot cycle back to the lowest<br />
level (which is called “Original” on older<br />
Roland arranger instruments).<br />
Note: The MIDI message transmitted by this<br />
footswitch is PC81 (program change) on<br />
MIDI channel 10.<br />
The footswitch can be used to select a fillin<br />
pattern of the active Music Style. If the<br />
instrument being controlled provides several<br />
fill-in patterns, you can select them<br />
one after the other in descending order.<br />
Note: You cannot cycle back to the highest<br />
level (which is called “Variation” on older<br />
Roland arranger instruments).<br />
Note: The MIDI message transmitted by this<br />
footswitch is PC82 (program change) on<br />
MIDI channel 10.<br />
The footswitch can be used to select the<br />
“Ending” pattern of the active Music Style.<br />
Note: The MIDI message transmitted by this<br />
footswitch is PC84 (program change) on<br />
MIDI channel 10.<br />
The selected footswitch allows you to<br />
bend the notes you are playing a semitone<br />
(“1/2”) or two semi-tones (“1”) up.<br />
When you release the footswitch, the<br />
pitch returns to its regular level.<br />
The selected footswitch allows you to<br />
bend the notes you are playing a semitone<br />
(“1/2”) or two semi-tones (“1”) down.<br />
When you release the footswitch, the<br />
pitch returns to its regular level.<br />
The footswitch allows you to switch the<br />
Rotary effect (see p. 55) on and off.<br />
The footswitch allows you to alternate<br />
between the slow and fast rotation<br />
speeds.<br />
Note: The function is only meaningful if the<br />
Rotary effect is currently on.<br />
The footswitch allows you to select the<br />
slow rotation speed.<br />
Note: The function is only meaningful if the<br />
Rotary effect is currently on.<br />
87
FR-7x V-Accordion<br />
® 10. System parameters (Advanced)<br />
Parameter<br />
Rtry Fast**<br />
Brake<br />
OnOff**<br />
Brake On**<br />
Brake Off**<br />
Modul.<br />
Play/Pause<br />
Skip BWD<br />
Explanation<br />
The footswitch allows you to select the<br />
fast rotation speed.<br />
Note: The function is only meaningful if the<br />
Rotary effect is currently on.<br />
The footswitch allows you to switch the<br />
TW organ part’s brake effect on and off.<br />
This simulates the effect you get when you<br />
switch a tonewheel organ off (“On”) or on<br />
(“Off”) while playing.<br />
When you press the footswitch, the pitch<br />
will gradually fall.<br />
When you press the footswitch, the pitch<br />
will gradually rise from a lower to the regular<br />
level.<br />
The footswitch allows you to add vibrato<br />
to the notes you are currently playing.<br />
The footswitch can be used to start and<br />
temporarily stop playback of the selected<br />
audio file (see p. 38).<br />
The footswitch allows you to return to the<br />
beginning of the currently selected audio<br />
file. Press it twice to jump to the beginning<br />
of the previous file in alphabetical order. It<br />
can also be used to select the previous<br />
step of the selected playlist (see p. 42).<br />
(1) Press the [DATA÷ENTER] knob to select the “PART”<br />
parameter, then rotate the [DATA÷ENTER] knob to<br />
select a parameter.<br />
Possibilities for “PART”: All, Treble, Bass, Chord, Orch.,<br />
Orch.Bs, Orch.BsCh, Orch.FBs.<br />
(2) Press the [DATA÷ENTER] knob again to select the<br />
“VALUE” parameter, then rotate the [DATA÷ENTER]<br />
knob to set the value.<br />
Possibilities for “VALUE”: On, Off.<br />
Select “On” to control the section shown below<br />
“PART” with the FBC-7 footswitch that acts as<br />
“Sust.A” or “Sust.B”. Select “Off” for sections that you<br />
do not want to control in this way.<br />
10.6 Function Switch<br />
This parameter allows you to<br />
use the bass button column<br />
closest to the FR-7x logo to<br />
select or control the desired<br />
functions. When this parameter<br />
is set to “On”, the buttons in question can no longer<br />
be used to play notes or chords.<br />
r<br />
88<br />
Skip FWD<br />
REC Start/<br />
Stop<br />
Set 1~80<br />
Register<br />
1~14<br />
Null<br />
The footswitch allows you to jump to the<br />
next audio file in alphabetical order<br />
(“FWD”). It can also be used to select the<br />
next step of the selected playlist.<br />
The footswitch allows you to start and<br />
stop the FR-7x’s audio recorder (see p. 47).<br />
The selected footswitch can be used to<br />
recall the specified Set (i.e. the Set whose<br />
number you choose).<br />
The footswitch can be used to recall the<br />
selected Treble register. That is why you<br />
must specify a number here.<br />
The footswitch has no function.<br />
* This setting only makes sense if you connect the FBC-7’s MIDI<br />
OUT socket to the MIDI IN socket of an arranger module, drum<br />
machine, etc.<br />
** This is only meaningful if you are using an orchestra register<br />
that plays a TW organ sound.<br />
10.4 Sustain Routing A, 10.5 Sustain Routing B<br />
(All, Treble, Bass, Chord, Orch.,<br />
Orch.Bs, Orch.BsCh, Orch.FBs)<br />
The parameters on these<br />
pages allow you to specify<br />
whether or not the available<br />
sections (see “PART”) should<br />
be controlled by the footswitch<br />
that has the “Sust.A”<br />
(“Sustain Routing A”) or<br />
“Sust.B” (“Sustain Routing B”) function (page 87).<br />
At first, the buttons will have the following factory<br />
default settings (they can be changed with the parameter<br />
discussed below):<br />
Bass button<br />
Function<br />
[1] Pitch Down<br />
[2] Modulation<br />
[3] Sustain<br />
[4] Brake Off<br />
[5] Brake On<br />
[6] Rotary Slow/Fast<br />
[1] [6]<br />
10.7 Function Switches Edit<br />
The parameters on this page<br />
allow you to assign the desired<br />
functions to the bass buttons<br />
that can be used as function<br />
switch. Remember that these<br />
functions are only used when the “Function Switch”<br />
parameter (see above) is set to “On”.
V-Accordion r<br />
10.8 Bass&Chd Mode (Advanced)<br />
(1) Press the [DATA÷ENTER] knob to select the<br />
“SWITCH” parameter, then rotate the [DATA÷ENTER]<br />
knob to select the bass button whose function you<br />
wish you define.<br />
(2) Press the [DATA÷ENTER] knob again to select the<br />
“ASSIGN” parameter, then rotate the [DATA÷ENTER]<br />
knob to select one of the available functions.<br />
The functions you can assign are the same as for the<br />
footswitches of the supplied FBC-7 unit. Please refer<br />
to page 87.<br />
10.8 Bass&Chd Mode<br />
(Default setting: 2 Bs Rows)<br />
This parameter allows you to<br />
specify the number of button<br />
rows available for playing bass<br />
notes. The default is 2 bass<br />
rows and 4 chord rows. By selecting “3 Bs Rows”, you<br />
thus gain 20 bass buttons (an entire row) and lose the<br />
“dim” chord buttons – but that may just be more convenient<br />
for you. See also the illustration on page 90.<br />
There are four “3 Bs Rows” options: “A-7th” and<br />
“B-7th” mean that the 6th chord row plays seventh<br />
chords (“7”) that don’t contain the fifth. In the case of a<br />
C7 chord, you therefore hear C-E-Bb (but not the G).<br />
“A-7th” and “B-7th” differ in the arrangement of the<br />
bass notes (see the illustration on page 90).<br />
The “Bx-7th” option reverses the “B-7th” settings (from<br />
right to left), so that the C3 note moves from 9th to<br />
12th position.<br />
Note: This shift does not apply to Free Bass mode, which is an<br />
altogether different mode.<br />
The “A-5dim” and “B-5dim” options mean that those<br />
seventh chords don’t contain the root note. A C7 chord<br />
is then sounded with the notes E-G-Bb (but not the C).<br />
“A-5dim” and “B-5dim” differ in the arrangement of the<br />
bass notes (see the illustration on page 90).<br />
Note: The FR-7x is supplied with several reference caps<br />
designed to help you locate the bass and chord buttons without<br />
looking at them. See also page 27.<br />
89
FR-7x V-Accordion<br />
® 10. System parameters (Advanced)<br />
10.8 Bass&Chd Mode<br />
ORCH BASS<br />
ORCH FREE BS<br />
ORCH CHORD<br />
FREE BASS<br />
ORCH BASS<br />
ORCH FREE BS<br />
ORCH CHORD<br />
FREE BASS<br />
A<br />
G3<br />
D3<br />
A3<br />
E3<br />
B3<br />
“7th”= 1-3-7; “5dim”= 3-5-7<br />
ORCH BASS<br />
ORCH FREE BS<br />
ORCH CHORD<br />
FREE BASS<br />
B<br />
G3<br />
D3<br />
A3<br />
E3<br />
B3<br />
“7th”= 1-3-7; “5dim”= 3-5-7<br />
ORCH BASS<br />
ORCH FREE BS<br />
ORCH CHORD<br />
FREE BASS<br />
Bx<br />
Ab3 C#3 F#3 B3 E3 A3 D3 G3 C3 F3 Bb3 Eb3 Ab3 C#3 F#3 B3 E3 A3 D3 G3<br />
“7th”= 1-3-7<br />
A3 D3 G3 C3 F3 Bb3 Eb3 Ab3 C#3 F#3 B3 E3 A3 D3 G3 C3 F3 Bb3 Eb3 Ab3<br />
F3 Bb3 Eb3 Ab3 C#3 F#3 B3 E3 A3 D3 G3 C3 F3 Bb3 Eb3 Ab3 C#3 F#3 B3 E3<br />
FM BbM EbM AbM C#M F#M BM EM AM DM GM CM FM BbM EbM AbM C#M F#M BM EM<br />
Fm Bbm Ebm Abm C#m F#m Bm Em Am Dm Gm Cm Fm Bbm Ebm Abm C#m F#m Bm Em<br />
F7 Bb7 Eb7 Ab7 C#7 F#7 B7 E7 A7 D7 G7 C7 F7 Bb7 Eb7 Ab7 C#7 F#7 B7 E7<br />
r<br />
90<br />
10.9 Free Bass Mode<br />
(Default setting: Minor 3rd)<br />
This parameter allows you to<br />
choose the note system used<br />
in Free Bass mode. We already<br />
mentioned that there are a<br />
vast number of accordion varieties. The same is true of<br />
Free Bass systems.<br />
Your FR-7x contains the 5 most popular ones (see the<br />
illustration on page 91). Be aware that the system you<br />
select here is only used when you activate the FR-7x’s<br />
Free Bass mode. It is of no consequence for the “regular”<br />
Bass mode.<br />
Note: The FR-7x is supplied with several reference caps<br />
designed to help you locate the bass buttons without looking<br />
at them. See also page 27.<br />
10.10 Stereo Width<br />
(–63~–1, Natural, Wide,<br />
Default setting: –15) As stated<br />
on p. 17, much care has been<br />
taken to provide a natural stereo<br />
image for the accordion<br />
sounds. If you think the stereo image is too wide for<br />
comfort (or if you prefer to set the PAN controls on your<br />
mixing console differently), you can use this parameter<br />
to reduce the stereo image.<br />
“Wide” represents the widest stereo image. “Natural”<br />
means that the original stereo image is used, while<br />
“–63” corresponds to an extremely narrow stereo image.<br />
All other values represent slight (or increasingly drastic)<br />
reductions of the stereo width.
V-Accordion r<br />
10.10 Stereo Width (Advanced)<br />
10.9 Free Bass Mode<br />
ORCH BASS<br />
ORCH FREE BS<br />
ORCH CHORD<br />
FREE BASS<br />
Ab2 Eb2 Bb2 F2 C3 G2 D3 A2 E2 B2 F#2 C#3 Ab2 Eb2 Bb2 F2 C3 G2 D3 A2<br />
E2 B2 F#2 C#3 Ab2 Eb2 Bb2 F2 C3 G2 D3 A2 E2 B2 F#2 C#3 Ab2 Eb2 Bb2 F2<br />
ORCH BASS<br />
ORCH FREE BS<br />
ORCH CHORD<br />
FREE BASS<br />
Ab2 Eb2 Bb2 F2 C3 G2 D3 A2 E2 B2 F#2 C#3 Ab2 Eb2 Bb2 F2 C3 G2 D3 A2<br />
E2 B2 F#2 C#3 Ab2 Eb2 Bb2 F2 C3 G2 D3 A2 E2 B2 F#2 C#3 Ab2 Eb2 Bb2 F2<br />
ORCH BASS<br />
ORCH FREE BS<br />
ORCH CHORD<br />
FREE BASS<br />
Fifth<br />
Ab2 Eb2 Bb2 F2 C3 G2 D3 A2 E2 B2 F#2 C#3 Ab2 Eb2 Bb2 F2 C3 G2 D3 A2<br />
E2 B2 F#2 C#3 Ab2 Eb2 Bb2 F2 C3 G2 D3 A2 E2 B2 F#2 C#3 Ab2 Eb2 Bb2 F2<br />
ORCH BASS<br />
ORCH FREE BS<br />
ORCH CHORD<br />
FREE BASS<br />
Ab2 Eb2 Bb2 F2 C3 G2 D3 A2 E2 B2 F#2 C#3 Ab2 Eb2 Bb2 F2 C3 G2 D3 A2<br />
E2 B2 F#2 C#3 Ab2 Eb2 Bb2 F2 C3 G2 D3 A2 E2 B2 F#2 C#3 Ab2 Eb2 Bb2 F2<br />
ORCH BASS<br />
ORCH FREE BS<br />
ORCH CHORD<br />
FREE BASS<br />
Finnish<br />
Ab2 Eb2 Bb2 F2<br />
C3 G2 D3 A2 E2 B2 F#2 C#3 Ab2 Eb2 Bb2 F2 C3 G2 D3 A2<br />
E2 B2 F#2 C#3 Ab2 Eb2 Bb2 F2 C3 G2 D3 A2 E2 B2 F#2 C#3 Ab2 Eb2 Bb2 F2<br />
D7 B6 Ab6 F6 D6 B5 Ab5 F5 D5 B4 Ab4 F4 D4 B3 Ab3 F3 D3 B2 Ab2 F2<br />
C#7 Bb6 G6 E6 C#6 Bb5 G5 E5 C#5 Bb4 G4 E4 C#4 Bb3 G3 E3 C#3 Bb2 G2 E2<br />
C7 A6 F#6 Eb6 C6 A5 F#5 Eb5 C5 A4 F#4 Eb4 C4 A3 F#3 Eb3 C3 A2 F#2 Eb2<br />
B6 Ab6 F6 D6 B5 Ab5 F5 D5 B4 Ab4 F4 D4 B3 Ab3 F3 D3 B2 Ab2 F2 D2<br />
(C3= note number 48)<br />
Note: The note names on the bass buttons correspond to the MIDI note numbers. The note range of the Bass part is 1 octave.<br />
Note: The actual sound range depends on the type of reed and footage.<br />
ORCH BASS<br />
ORCH FREE BS<br />
ORCH CHORD<br />
FREE BASS<br />
Bx<br />
Ab3 C#3 F#3 B3 E3 A3 D3 G3 C3 F3 Bb3 Eb3 Ab3 C#3 F#3 B3 E3 A3 D3 G3<br />
A3 D3 G3 C3 F3 Bb3 Eb3 Ab3 C#3 F#3 B3 E3 A3 D3 G3 C3 F3 Bb3 Eb3 Ab3<br />
F3 Bb3 Eb3 Ab3 C#3 F#3 B3 E3 A3 D3 G3 C3 F3 Bb3 Eb3 Ab3 C#3 F#3 B3 E3<br />
FM BbM EbM AbM C#M F#M BM EM AM DM GM CM FM BbM EbM AbM C#M F#M BM EM<br />
91
FR-7x V-Accordion<br />
® 10. System parameters (Advanced)<br />
r<br />
92<br />
10.11 Output Level<br />
(–12dB, –6dB, 0dB)<br />
This parameter is only meaningful<br />
when the FR-7x is connected<br />
to an amplifier, a HiFi<br />
mixing console or a commercially<br />
available wireless system. If the FR-7x’s output signal<br />
distorts even if the [VOLUME] knob is set to the minimum<br />
value (or close to it), try “–6dB”. If that is still “too<br />
hot”, set this parameter to “–12dB”.<br />
Note: This parameter has no effect on the FR-7x’s internal<br />
speakers.<br />
10.12 Auto Power Off<br />
(Disabled, 10 min, 15 min, 20<br />
min, Default setting: 10 min)<br />
This parameter allows you to<br />
specify how long the FR-7x<br />
should wait before switching<br />
itself off while you are not using it.<br />
This is meant to preserve battery power and only applies<br />
when the FR-7x is not connected to the FBC-7. To<br />
“wake” the FR-7x, press its [POWER] button. Select “Disabled”<br />
to switch this function off.<br />
WARNING: Be aware that any unsaved changes are lost<br />
when the FR-7x is switched off by this function. Be sure<br />
to save all important settings as soon as you can.<br />
10.13 Start-Up<br />
This page allow you to specify<br />
what the FR-7x should do<br />
when you switch it on.<br />
(1) Press the [DATA÷ENTER]<br />
knob to select “TYPE”,<br />
then rotate the [DATA÷ENTER] knob to choose the<br />
type you want to set. The possibilities are:<br />
TYPE ASSIGN Meaning<br />
Set 1~80 Allows you to specify which Set<br />
should be loaded at power-on.<br />
Bass Link<br />
Orch.Link<br />
On, Off<br />
On, Off<br />
Allow you to specify which Link<br />
function (see p. 68) should be<br />
activated at power-on: Orchestral<br />
Link, Orchestral Chord Link,<br />
Orchestra Free Bass Link, and/or<br />
Bass Link.<br />
(2) Press the [DATA÷ENTER] knob again to select the<br />
“ASSIGN” parameter, then rotate the [DATA÷ENTER]<br />
knob to select the desired setting.<br />
10.14 Start-Up Name<br />
This parameter allows you to<br />
enter a short message (your<br />
name, for example) that is displayed<br />
each time you switch<br />
the FR-7x on.<br />
See p. 70 for details about entering names. You can<br />
enter up to 8 characters.<br />
10.15 Orchestra Touch<br />
(Fixed Low, Fixed Med., Fixed<br />
High, Low, Medium, High,<br />
Fixed Low+Bellows,<br />
Fixed Med.+Bellows,<br />
Fixed High+Bellows, Bellows,<br />
Default setting: Medium)<br />
This parameter allows you to specify the velocity sensitivity<br />
of the Treble keys when they are used to play<br />
orchestral sounds. It has no effect on the “TW Upper”<br />
organ sound.<br />
There are three “Fixed” curves that always use the same<br />
value, no matter how hard or lightly you press the keys<br />
(no dynamic control). “Low” means that a low value is<br />
used, “Med” represents a medium value and “High” a<br />
high value.<br />
“Low” means that even relatively light key presses<br />
already allow you to play loud notes. “High” represents<br />
the most responsive velocity curve that requires a considerable<br />
amount of strength for fortissimo notes, but it<br />
also provides more expressive options.<br />
“Medium” is in the middle. “Fixed Low+Bellows”, “Fixed<br />
Med.+Bellows” and “Fixed High+Bellows” mean that the<br />
selected orchestral sound uses fixed velocity values but<br />
can also be controlled by the bellows movements.<br />
“Bellows” means that the selected orchestral sound is<br />
controlled by the bellows movements – not the velocity<br />
values generated by the keys.<br />
Note: By selecting a “Fixed” option for “10.2 Bellows Curves”<br />
on p. 86, you effectively switch off the bellows sensor. This<br />
also means that any setting that includes “Bellows” no longer<br />
works, because the FR-7x no longer “listens” to the bellows’<br />
movements.<br />
10.16 Orchestra Bs&Ch Touch<br />
(Fixed Low, Fixed Med., Fixed<br />
High, Low, Medium, High,<br />
Fixed Low+Bellows,<br />
Fixed Med.+Bellows.<br />
Fixed High+Bellows, Bellows,<br />
Default setting: Medium)<br />
This parameter allows you to specify the velocity sensitivity<br />
of the bass and chord buttons when they are used<br />
to play one of the orchestral sounds. It has no effect on<br />
the “TW Lower” or “TW Pedal” organ sounds.<br />
See above for an explanation of the various options.<br />
Note: By selecting a “Fixed” option for “10.2 Bellows Curves”<br />
on p. 86, you effectively switch off the bellows sensor. This<br />
also means that any setting that includes “Bellows” no longer<br />
works, because the FR-7x no longer “listens” to the bellows’<br />
movements.
V-Accordion r<br />
10.17 Start/Stop MIDI TX (Advanced)<br />
10.17 Start/Stop MIDI TX<br />
(Off, On, Default setting: Off)<br />
This parameter allows you to<br />
specify whether or not pressing<br />
the [DATA÷ENTER] knob<br />
while the main page is displayed<br />
sends a MIDI Start message the first time, and a<br />
MIDI Stop message the second time.<br />
This may come in handy when you use the FR-7x with a<br />
MIDI sequencer, a drum machine, or an arranger module.<br />
Note that this function is only available if you connect<br />
the FR-7x to the FBC-7, and the FBC-7’s MIDI OUT<br />
port to the MIDI IN socket of your sequencer or module.<br />
Here’s what happens if you select “On” and return to the<br />
main page: the first time you press the [DATA÷ENTER]<br />
knob, the display briefly shows:<br />
Just think of the difference between a cymbal you hit<br />
with and without muting (“choking”) it:<br />
This is where you hit<br />
the cymbal<br />
Release T(ime)<br />
The sound disappears<br />
gradually.<br />
This is where you hit<br />
the cymbal<br />
This is where you choke the<br />
cymbal<br />
Release<br />
T(ime)<br />
Short sound<br />
Of course, the difference is far less dramatic here, but it<br />
may just be what you are looking for. You can also make<br />
the notes longer by selecting a positive value. “0” means<br />
that the original release time doesn’t change.<br />
This means that a MIDI Start message was sent to the<br />
external sequencer, etc.<br />
The second time you press the [DATA÷ENTER] knob, the<br />
display briefly shows:<br />
Set this parameter to “Off” if you don’t want to use the<br />
[DATA÷ENTER] knob for transmitting MIDI Start/Stop<br />
messages.<br />
Note: You can also assign the MIDI Start/Stop functionality to<br />
one of the FBC-7’s foot switches. See “10.3 Pedal Controller”<br />
on p. 87.<br />
10.19 Expansion<br />
The FR-7x allows you to add<br />
new sounds to the internal<br />
sounds. The new sounds (files<br />
with the “.bin” extension)<br />
must be copied to a USB storage<br />
device, after which you can load them with the<br />
FR-7x. “Loading” means that they will be copied to a<br />
permanent internal memory area. There are two such<br />
memory areas (“A” and “B”).<br />
(1) Press the [DATA÷ENTER] knob to select the “Expansion”<br />
parameter.<br />
(2) Rotate the [DATA÷ENTER] knob to select [A] or [B].<br />
Watch the “NAME” line below this parameter. If it is<br />
empty, the memory area in question can be used to<br />
load new sounds. Otherwise, see “How to erase an<br />
expansion memory area” below.<br />
(3) Press the [DATA÷ENTER] knob to select the [LOAD]<br />
field, then press it again to load the sounds.<br />
10.18 Treble Release T.<br />
(–64~0~63, Default setting: 0)<br />
This parameter that allows you<br />
to shorten the Treble accordion<br />
sounds if you feel the virtual<br />
reeds linger a bit long<br />
after you release a key. To do so, select a negative value.<br />
The term “Release” is taken from synthesizers and refers<br />
to the speed at which the notes you play disappear<br />
when you release the keys.<br />
■ How to erase an expansion memory area<br />
If you want to replace the contents of the “A” or “B”<br />
memory areas with other sounds while the “NAME”<br />
line is not empty, you must first erase the contents of<br />
that area:<br />
(a) Press the [DATA÷ENTER] knob, then rotate it to<br />
select [ERASE].<br />
(b) Press the [DATA÷ENTER] knob to erase the selected<br />
memory area.<br />
The following message appears:<br />
(c) Press the [MENU÷WRITE] button to erase the memory<br />
area.<br />
After an “Executing…” message the display will show<br />
the “Expansion” page again. The selected memory<br />
area is now empty.<br />
93
FR-7x V-Accordion<br />
® 10. System parameters (Advanced)<br />
(d) Repeat steps (1)~(3) to load the desired sounds.<br />
10.20 Treble Mode (only for button-type)<br />
(C-Griff Europe, C-Griff 2,<br />
B-Griff Bajan, B-Griff Fin, D-<br />
Griff 1, D Griff 2, Default setting:<br />
C–Griff Europe)<br />
Like for the accordion instrument<br />
itself, there are different varieties of chromatic<br />
instruments, with different Treble button layouts. See<br />
the illustrations below.<br />
Since your FR-7x is an electronic musical instrument,<br />
changing the note assignments to the button keys is a<br />
matter of selecting the preset that best suits your playing<br />
style.<br />
Please look at the illustrations on the following pages to<br />
identify the setting you need. Pay attention to the note<br />
names (all Cs appear on a grey background) and look at<br />
how they are arranged, then make your selection. The<br />
numbers next to the letters refer to the octave. The<br />
numbers below the note names represent the corresponding<br />
MIDI note numbers.<br />
You may have noticed that the Treble buttons are colored<br />
white (for notes without alteration) and black<br />
(notes with alteration, i.e. #/b). This coloring doesn’t<br />
change when you select another system.<br />
(You can, however, unscrew the buttons and install<br />
them in the right places so as to make the white and<br />
black buttons correspond to the notes being played.)<br />
The FR-7x is supplied with additional white and black<br />
buttons that may come in handy. The white buttons<br />
come in two varieties: normal buttons and knurled buttons.<br />
The latter are usually used to indicate the “C”<br />
notes.<br />
r<br />
94
V-Accordion r<br />
10.20 Treble Mode (only for button-type) (Advanced)<br />
10.20 Treble Mode (1/2)<br />
C-Griff Europe C-Griff 2 B-Griff Bajan<br />
95
FR-7x V-Accordion<br />
® 10. System parameters (Advanced)<br />
10.20 Treble Mode (2/2)<br />
B-Griff Fin D-Griff 1 D-Griff 2<br />
r<br />
96
V-Accordion r<br />
11.1 Battery Status (Advanced)<br />
11. Utility parameters<br />
The UTILITY group contains<br />
three kinds of parameters:<br />
those that keep you<br />
informed (to check the<br />
battery pack status), several<br />
parameters that allow you to copy settings and several<br />
parameters for archiving your settings. See pages 62<br />
and 63 for how to select and adjust the parameters.<br />
11.1 Battery Status<br />
The FR-7 comes with an Ni-<br />
Mh battery pack that allows<br />
you to use it without connecting<br />
it to the supplied FBC-7.<br />
Depending on how the FR-7x<br />
is powered, the display shows one of the following:<br />
This message means that the FR-7x<br />
is powered by the battery pack in its<br />
compartment. The battery icon<br />
shows how much power is left<br />
(maximum charge in our example).<br />
It would be a good idea, however, to stop by this page<br />
before you go on stage or start playing, because what<br />
you see then might just convince you to use the FBC-7.<br />
This indication means that the battery<br />
pack is being recharged by the<br />
FBC-7 (the charge indication blocks<br />
flash to indicate that this operation<br />
is still in progress). This is not performed automatically.<br />
You need to connect the FR-7x’s “TO FBC-7” socket to<br />
the “TO V-ACCORDION” socket on the FBC-7 and press<br />
the BATTERY CHARGER button (so that it lights). Please<br />
see “Recharging the battery pack without removing it<br />
from the FR-7x” on p. 59.<br />
This message means that the FR-7x<br />
contains a battery pack, which is not<br />
used, because the FR-7x is connected<br />
to the FBC-7. The FBC-7<br />
therefore supplies the power to your V-Accordion. The<br />
battery icon nevertheless informs you about the battery’s<br />
current charge.<br />
11.2 Copy SET<br />
This parameter allows you to<br />
copy the settings of one Set to<br />
another Set memory. It copies<br />
everything related to a Set:<br />
the Common parameters<br />
(including the effects) as well as the parameters of the<br />
various sections (Treble, Orchestra, Bass, etc.).<br />
Warning: All settings of the target memory are overwritten.<br />
It might therefore be a good idea to archive the<br />
target Set using “ 11.5 Export Set” before proceeding.<br />
(1) On the page shown above, press the [DATA÷ENTER]<br />
button, then turn it to select the Set whose settings<br />
you wish to copy.<br />
By default, the FR-7x selects the number of the Set<br />
you are currently using.<br />
(2) Press the [DATA÷ENTER] knob to select the “TO”<br />
parameter, then turn it to select the Set memory<br />
to which the settings should be copied.<br />
Carefully check whether you have selected the correct<br />
Set memory, then…<br />
(3) Press [MENU÷WRITE] to copy the settings.<br />
The display confirms this operation:<br />
11.3 Copy Effects<br />
This parameter allows you to<br />
copy the settings of the<br />
desired effects processors<br />
from one Set to another. This<br />
may help you save time,<br />
because the effects processors contain an impressive<br />
number of parameters.<br />
Note: This function does not effect the TW organ effects.<br />
(1) Press the [DATA÷ENTER] knob to select the “TYPE”<br />
parameter.<br />
(2) Rotate the [DATA÷ENTER] knob to select one of the<br />
following settings:<br />
Setting<br />
ALL<br />
Reverb<br />
Chorus<br />
Delay<br />
Meaning<br />
Copy the effects settings of all three general<br />
effects processors.<br />
Copy the effects settings of the Reverb<br />
processor (page 82).<br />
Copy the effects settings of the Chorus<br />
processor (page 83).<br />
Copy the effects settings of the Delay processor<br />
(page 85).<br />
(3) Press the [DATA÷ENTER] knob to select the “FROM<br />
SET” parameter.<br />
(4) Rotate the [DATA÷ENTER] knob to select the Set<br />
whose effects settings you wish to copy.<br />
(5) Press the [DATA÷ENTER] knob to select the “TO SET”<br />
parameter.<br />
(6) Rotate the [DATA÷ENTER] knob to select the Set to<br />
which you want to copy the selected effects settings.<br />
(7) Press [MENU÷WRITE] to copy the settings.<br />
97
FR-7x V-Accordion<br />
® 11. Utility parameters (Advanced)<br />
The display confirms this operation:<br />
The briefly shows the following message and then<br />
confirms this operation.<br />
11.4 Export All FR-7x<br />
This parameter allows you to<br />
archive all of the FR-7x’s settings<br />
on the connected USB<br />
storage device. These settings<br />
can be loaded at a later stage<br />
(either on your or someone else’s FR-7x) using the<br />
“Import All FR-7x” function.<br />
(1) Connect a USB storage device to the FR-7x’s USB<br />
port.<br />
(2) Press the [DATA÷ENTER] knob to select the [FOLDER]<br />
field.<br />
(3) Press the [DATA÷ENTER] knob.<br />
(4) Rotate the [DATA÷ENTER] knob to select the location<br />
where you want to save your settings.<br />
To open an existing folder, select it by rotating the<br />
[DATA÷ENTER] knob, then press the [DATA÷ENTER]<br />
knob. You can also select the “(level up)” entry and<br />
press the [DATA÷ENTER] knob to return to a higher<br />
level (i.e. leave the current folder).<br />
(5) Select the “OK” field and press the [DATA÷ENTER]<br />
knob to confirm your choice.<br />
(6) Press the [DATA÷ENTER] knob and rotate it to select<br />
the file name in the bottom row.<br />
(7) Rotate the [DATA÷ENTER] knob to select the character<br />
you want to change.<br />
(8) Press the [DATA÷ENTER] knob.<br />
(9) Enter the desired name for your archive.<br />
See page 70 for how to enter names.<br />
(10) Press [MENU÷WRITE] to archive your settings.<br />
If a file of the same name already exists, the following<br />
message is displayed:<br />
To overwrite that file, press the [MENU÷WRITE] button.<br />
11.5 Export Set<br />
This function allows you to<br />
save the settings of the<br />
selected Set to the connected<br />
USB storage device. In this<br />
case, only the parameters of<br />
the various register types and the “Set Common” parameters<br />
are saved.<br />
(1) Connect a USB storage device to the FR-7x’s USB<br />
port.<br />
(2) Press the [DATA÷ENTER] knob to select the “Export<br />
SET” parameter.<br />
(3) Rotate the [DATA÷ENTER] knob to select the Set<br />
whose settings you want to export.<br />
Note: The Set will be exported with the settings that are<br />
currently in effect (i.e. in its edited state). These settings do<br />
not necessarily correspond to the last setting you saved for<br />
this Set.<br />
(4) Press the [DATA÷ENTER] knob to select the [FOLDER]<br />
field.<br />
(5) Press the [DATA÷ENTER] knob.<br />
r<br />
(11) Press the [MENU÷WRITE] button again.<br />
(6) Rotate the [DATA÷ENTER] knob to select the location<br />
where you want to save your settings.<br />
To open an existing folder, select it by rotating the<br />
[DATA÷ENTER] knob, then press the [DATA÷ENTER]<br />
knob. You can also select the “(level up)” entry and<br />
press the [DATA÷ENTER] knob to return to a higher<br />
level (i.e. leave the current folder).<br />
(7) Select the “OK” field and press the [DATA÷ENTER]<br />
knob to confirm your choice.<br />
98
V-Accordion r<br />
11.6 Import All FR-7x (Advanced)<br />
(8) Press the [DATA÷ENTER] knob twice and rotate it to<br />
select the file name in the bottom row.<br />
(9) Rotate the [DATA÷ENTER] knob to select the character<br />
you want to change.<br />
(5) Press the [DATA÷ENTER] knob to import the settings.<br />
The display shows “Press WRITE to proceed”.<br />
(6) Press the [MENU÷WRITE] button.<br />
After an “Executing… Do NOTE Power Off” message,<br />
the FR-7x imports all Sets.<br />
(10) Press the [DATA÷ENTER] knob.<br />
(11) Enter the desired name for your archive.<br />
See page 70 for how to enter names.<br />
(12) Press [MENU÷WRITE] to archive your settings.<br />
The display shows the following message:<br />
(13) Press [MENU÷WRITE] again to confirm your intention.<br />
The display confirms this operation:<br />
If a file of the same name already exists, the following<br />
message is displayed:<br />
11.7 Import Set<br />
This function allows you to<br />
import the settings of a Set<br />
file. You can choose the Set<br />
memory the settings should<br />
be loaded to.<br />
Note: You cannot select single Sets of a file archived with<br />
“11.4 Export All FR-7x” on p. 98.<br />
(1) Connect a USB storage device to the FR-7x’s USB<br />
port.<br />
(2) Press the [DATA÷ENTER] knob and rotate it to select<br />
the Set memory that should contain the Set settings<br />
you are about to load.<br />
(3) Press the [DATA÷ENTER] knob to select the “FILE”<br />
field.<br />
(4) Press the [DATA÷ENTER] knob to confirm the files<br />
selection.<br />
To open an existing folder, select it by rotating the<br />
[DATA÷ENTER] knob, then press the [DATA÷ENTER]<br />
knob. You can also select the “(level up)” entry and<br />
press the [DATA÷ENTER] knob to return to a higher<br />
level (i.e. leave the current folder).<br />
(5) Rotate the [DATA÷ENTER] knob to select the file to<br />
import and press it to confirm.<br />
(6) Press the [DATA÷ENTER] knob to import the settings.<br />
The display shows the following message:<br />
To overwrite that file, press the [MENU÷WRITE] button.<br />
11.6 Import All FR-7x<br />
This parameter allows you to<br />
load all settings of the<br />
selected FR-7x archive. Be<br />
aware that doing so will overwrite<br />
the entire memory<br />
contents of the FR-7x.<br />
(1) Connect a USB storage device to the FR-7x’s USB<br />
port.<br />
(2) Press the [DATA÷ENTER] knob to select the “FILE”<br />
field.<br />
(3) Press the [DATA÷ENTER] knob to confirm the file<br />
selection.<br />
To open an existing folder, select it by rotating the<br />
[DATA÷ENTER] knob, then press the [DATA÷ENTER]<br />
knob. You can also select the “(level up)” entry and<br />
press the [DATA÷ENTER] knob to return to a higher<br />
level (i.e. leave the current folder).<br />
(4) Rotate the [DATA÷ENTER] knob to select the files<br />
and press it to confirm.<br />
(7) Press [MENU÷WRITE] to confirm your intention.<br />
After an “Executing… Do NOTE Power Off” message,<br />
the FR-7x imports the selected Set.<br />
11.8 Restore Data<br />
(All, Master Tune, Scale Tune,<br />
System, MIDI, All Sets, Set 1~<br />
Set 80)<br />
This function allows you to<br />
undo all or some changes you<br />
made after last saving your settings by reloading the last<br />
version you saved. This can be handy when it turns out<br />
that your changes don’t yield the expected result and<br />
that starting all over again would be quicker than<br />
changing the parameters back.<br />
Note: This function does not necessarily load the factory settings:<br />
it loads the settings stored in the selected memory<br />
area(s).<br />
99
FR-7x V-Accordion<br />
® 11. Utility parameters (Advanced)<br />
(1) Press the [DATA÷ENTER] knob to select the “TYPE”<br />
field.<br />
(2) Rotate the [DATA÷ENTER] knob to select the settings<br />
you want to restore:<br />
(5) Press the [DATA÷ENTER] knob to import the settings.<br />
Setting<br />
Meaning<br />
ALL<br />
Master Tune<br />
Restores all of the FR-7x’s settings.<br />
Restores the last “1.1 Master Tune” setting<br />
you saved (page 64).<br />
Scale Tune Restores the last “1.4 Scale Edit” (page 64)<br />
and “1.5 Scale Assign” settings you saved<br />
(page 65).<br />
System<br />
MIDI<br />
All Sets<br />
Set 1~80<br />
Restores the last “10. System” settings you<br />
saved (page 86).<br />
Restores the last “12. MIDI” settings you<br />
saved (page 107).<br />
Restores the settings of all Sets and the<br />
registers they contain.<br />
Restores the settings of the selected Set.<br />
(3) Press the [DATA÷ENTER] knob to confirm your settings.<br />
(4) Press the [MENU÷WRITE] button to copy the settings.<br />
The display confirms this operation.<br />
(6) Press the [MENU÷WRITE] button to load the settings.<br />
After an “Executing… Do NOTE Power Off” message,<br />
the display shows “Function Complete”.<br />
11.10 Treble Reg. on current Set<br />
This is an environment in its<br />
own right rather than a<br />
parameter. It allows you to set<br />
five parameters for all Treble<br />
registers of the currently<br />
selected Set simultaneously. This may help you save a lot<br />
of time, especially for increasing or decreasing the volume<br />
of some or all reeds, or for selecting a different<br />
noise type.<br />
(1) Select the Set whose Treble registers you want to<br />
edit simultaneously.<br />
(2) Press the [DATA÷ENTER] knob and rotate it to select<br />
the parameter to be edited for all Treble registers.<br />
The possibilities are:<br />
Reed: Reed ALL, Reed 16’, Reed 8’, Reed 8'–, Reed 8'+,<br />
Reed 4', Reed 5-1/3’, Reed 2-2/3’<br />
Volume: Vol ALL, Vol 16’, Vol 8’, Vol 8'–, Vol 8'+,<br />
Vol 4', Vol 5-1/3’, Vol 2-2/3’<br />
Others: Noise, Noise Vol, MusDetune<br />
r<br />
11.9 FR-7/5 Import<br />
This function allows you to<br />
load MIDI bulk data of an<br />
FR-7/5 V-Accordion from a<br />
USB storage device. You<br />
therefore first need to copy<br />
the file in question to a USB storage on your computer.<br />
Parameters that don’t exist on the FR-7/5 are reset to<br />
their factory defaults (on the FR-7x), and Sets 41~80 are<br />
left untouched (the FR-7/5 only has 40 Set memories).<br />
(1) Connect a USB storage device to the FR-7x’s USB<br />
port.<br />
(2) Press the [DATA÷ENTER] knob to select the “FILE”<br />
field.<br />
(3) Press the [DATA÷ENTER] knob to select the file<br />
whose bulk settings you want to load.<br />
To open an existing folder, select it by rotating the<br />
[DATA÷ENTER] knob, then press the [DATA÷ENTER]<br />
knob. You can also select the “(level up)” entry and<br />
press the [DATA÷ENTER] knob to return to a higher<br />
level (i.e. leave the current folder).<br />
(4) Rotate the [DATA÷ENTER] knob to select a file and<br />
press it to confirm.<br />
The “IMPORT” field is now selected.<br />
If you selected “Reed ALL” or “Vol ALL”, the following<br />
warning may be displayed:<br />
This only occurs if the “VALUE” next to it is currently<br />
“---”, which means that the reeds of your Set use different<br />
settings. By proceeding with “ALL”, you would<br />
assign the same value to all registers of the current<br />
Set.<br />
(a) Press the [DATA÷ENTER] knob to set the same value<br />
for all reeds.<br />
(b) Press the [EXIT÷JUMP] button to stop the operation.<br />
(3) Press the [DATA÷ENTER] knob to select “VALUE”,<br />
then rotate the [DATA÷ENTER] knob to select the<br />
desired setting.<br />
100
V-Accordion r<br />
11.11 Bass Reg. on current Set (Advanced)<br />
The possibilities depend on the choice you made in<br />
step (2) above.<br />
Parameter<br />
Reed<br />
Vol<br />
Noise<br />
Noise Vol<br />
Mus. Detune<br />
Setting range<br />
Bandoneon, I-Folk, I-Folk2, Classic, Cajun,<br />
Jazz, F-Folk, D-Folk, Organetto, F-Folk2,<br />
Classic2, Studio, Tradition, Steierische,<br />
OldItaly, TexMex, Trikitixa, F-Jazz,<br />
Classic3, Bajan<br />
Off, –40~Std~+40<br />
Bandoneon, I-Folk, I-Folk2, Classic, Cajun,<br />
Jazz, F-Folk, D-Folk, Organetto, F-Folk2,<br />
Classic2, Studio, Tradition, Steierische,<br />
OldItaly, TexMex, Trikitixa, F-Jazz,<br />
Classic3, Bajan<br />
Off, –40~Std~+40<br />
Off, Dry, Classic, F-Folk, American L,<br />
American H, North_Eur, German L,<br />
D-Folk L, Italian L, German H, Alpine,<br />
Italian H, D-Folk H, French, Scottish<br />
Note: Reeds that are currently off (see “2.2 Register” on<br />
p. 66) adopt the new setting but are not switched on by<br />
this operation.<br />
(4) Press [EXIT÷JUMP] twice to return to the main page<br />
and try out all 14 Treble registers.<br />
(5) If you like your new settings, save them (see<br />
p. 103).<br />
11.11 Bass Reg. on current Set<br />
This is an environment in its<br />
own right that has the same<br />
functionality as “Treble Reg.<br />
on current Set”. It applies to<br />
the Bass registers of the currently<br />
selected Set, however.<br />
(1) Select the Set whose Bass registers you want to<br />
edit simultaneously.<br />
(2) Press the [DATA÷ENTER] knob and rotate it to select<br />
the parameter to be edited for all Bass registers.<br />
The possibilities are:<br />
Reed: Reed ALL, Reed 16’, Reed 8’, Reed 8’-4’, Reed 4',<br />
Reed 2’<br />
Volume: Vol ALL, Vol 16’, Vol 8’, Vol 8'-4’, Vol 4’, Vol 2’<br />
Others: Noise, Noise Vol, Reed Growl, Growl Vol<br />
If you selected “Reed ALL” or “Vol ALL”, the following<br />
warning may be displayed:<br />
(a) Press the [DATA÷ENTER] knob to set the same value<br />
for all reeds.<br />
(b) Press the [EXIT÷JUMP] button to stop the operation<br />
(3) Press the [DATA÷ENTER] knob to select “VALUE”,<br />
then rotate the [DATA÷ENTER] knob to select the<br />
desired setting.<br />
The possibilities depend on the choice you made in<br />
step (2) above.<br />
Parameter<br />
Reed<br />
Vol<br />
Noise<br />
Noise Vol<br />
Reed Growl<br />
Growl Vol<br />
Setting range<br />
Bandoneon, I-Folk, I-Folk2, Classic, Cajun,<br />
Jazz, F-Folk, D-Folk, Organetto, F-Folk2,<br />
Classic2, Studio, Tradition, Steierische,<br />
Trikitixa, F-Jazz, Classic3, Bajan<br />
Off, –40~Std~+40<br />
Bandoneon, I-Folk, I-Folk2, Classic, Cajun,<br />
Jazz, F-Folk, D-Folk, Organetto, F-Folk2,<br />
Classic2, Studio, Tradition, Steierische,<br />
Trikitixa, F-Jazz, Classic3, Bajan<br />
Off, –40~Std~+40<br />
Bandoneon, I-Folk, I-Folk2, Classic, Cajun,<br />
Jazz, F-Folk, D-Folk, Organetto, F-Folk2,<br />
Classic2, Studio, Tradition, Steierische,<br />
Trikitixa, F-Jazz, Classic3, Bajan<br />
Off, –40~Std~+40<br />
Note: Reeds that are currently off (see “3.2 Register” on<br />
p. 71) adopt the new setting but are not switched on by<br />
this operation.<br />
(4) Press [EXIT÷JUMP] twice to return to the main page<br />
and try out all 7 Bass registers.<br />
(5) If you like your new settings, save them (see<br />
p. 103).<br />
11.12 FreeBass Reg. on current Set<br />
This page allows you to set six<br />
parameters for all Free Bass<br />
registers of the currently<br />
selected Set simultaneously.<br />
You will notice that it is very<br />
similar to the “Bass Reg. on current Set” parameter<br />
above, except that there are fewer reeds.<br />
(1) Select the Set whose Free Bass registers you want<br />
to edit simultaneously.<br />
(2) Press the [DATA÷ENTER] knob and rotate it to select<br />
the parameter to be edited for all Free Bass registers.<br />
The possibilities are:<br />
Reed: Reed ALL, Reed 16’, Reed 8’<br />
Volume: Vol ALL, Vol 16’, Vol 8’<br />
Others: Noise, Noise Vol, Reed Growl, Growl Vol<br />
This only occurs if the “VALUE” next to it is currently<br />
“---”, which means that the reeds of your Set use different<br />
settings. By proceeding with “ALL”, you would<br />
assign the same value to all registers of the current<br />
Set.<br />
101
FR-7x V-Accordion<br />
® 11. Utility parameters (Advanced)<br />
If you selected “Reed ALL” or “Vol ALL”, the following<br />
warning may be displayed:<br />
This only occurs if the “VALUE” next to it is currently<br />
“---”, which means that the reeds of your Set use different<br />
settings. By proceeding with “ALL”, you would<br />
assign the same value to all registers of the current<br />
Set.<br />
(a) Press the [DATA÷ENTER] knob to set the same value<br />
for all reeds.<br />
(b) Press the [EXIT÷JUMP] button to stop the operation<br />
(3) Press the [DATA÷ENTER] knob to select “VALUE”,<br />
then rotate the [DATA÷ENTER] knob to select the<br />
desired setting.<br />
The possibilities depend on the choice you made in<br />
step (2) above.<br />
11.13 Factory Reset<br />
You can reset the FR-7x to its<br />
factory settings, which means<br />
that all settings are replaced<br />
by the settings the FR-7x contained<br />
when you first got it.<br />
You may wish to archive your settings to a USB storage<br />
device before initializing the FR-7x (see “11.4 Export All<br />
FR-7x” on p. 98).<br />
(1) Press the [DATA÷ENTER] knob and rotate it to select<br />
“ALL FR-7x” or “SET:1”~”SET: 80”.<br />
Select “ALL FR-7x” to replace all settings. Select “SET:<br />
xx” to load the factory settings only for the selected<br />
Set.<br />
(2) Press the [MENU÷WRITE] button.<br />
The following message appears:<br />
Parameter<br />
Reed<br />
Vol<br />
Noise<br />
Noise Vol<br />
Reed Growl<br />
Growl Vol<br />
Setting range<br />
Bandoneon, I-Folk, I-Folk2, Classic, Cajun,<br />
Jazz, F-Folk, D-Folk, Organetto, F-Folk2,<br />
Classic2, Studio, Tradition, Steierische,<br />
Trikitixa, F-Jazz, Classic3, Bajan<br />
Off, –40~Std~+40<br />
Bandoneon, I-Folk, I-Folk2, Classic, Cajun,<br />
Jazz, F-Folk, D-Folk, Organetto, F-Folk2,<br />
Classic2, Studio, Tradition, Steierische,<br />
Trikitixa, F-Jazz, Classic3, Bajan<br />
Off, –40~Std~+40<br />
Bandoneon, I-Folk, I-Folk2, Classic, Cajun,<br />
Jazz, F-Folk, D-Folk, Organetto, F-Folk2,<br />
Classic2, Studio, Tradition, Steierische,<br />
Trikitixa, F-Jazz, Classic3, Bajan<br />
Off, –40~Std~+40<br />
(3) Press [MENU÷WRITE] to start initializing the FR-7x.<br />
The display briefly shows the message “Executing…<br />
Do not power off”, then “Function complete”.<br />
Note: Reeds that are currently off (see “4.2 Register” on<br />
p. 74) adopt the new setting but are not switched on by<br />
this operation.<br />
(4) Press [EXIT÷JUMP] twice to return to the main page<br />
and try out all 7 Free Bass registers.<br />
(5) If you like your new settings, save them (see<br />
p. 103).<br />
r<br />
102
17. Saving settings using the WRITE function<br />
V-Accordion r<br />
Saving settings using the WRITE function (Advanced)<br />
The FR-7x has a RAM memory that holds the data of all Sets, Registers, Global settings, etc. You can change whatever you<br />
need to change without worrying about saving your changes until you are sure that you want to keep them. Be aware,<br />
however, that all unsaved changes are lost when you switch off the FR-7x or when it is turned off by the “10.12 Auto<br />
Power Off” function (page 92). So be sure to save everything you want to keep at regular intervals.<br />
Saving your changes (automatic<br />
approach)<br />
The FR-7x selects the parameters that need to be saved<br />
for you, depending on the display page where you press<br />
and hold the [MENU÷WRITE] button.<br />
Whenever you press and hold the [MENU÷WRITE] button,<br />
the FR-7x looks which display page is currently shown<br />
and then “checks” (selects) the corresponding parameters.<br />
(See the table to the right for details.)<br />
Here is an example: if you select a “Bass Edit” page and<br />
then press and hold [MENU÷WRITE], the FR-7x checks all<br />
“Bass” boxes on the “WRITE” page.<br />
All you need to do to save the “Bass Edit” settings for all<br />
bass registers is press [MENU÷WRITE] yet again – and<br />
you’re done.<br />
Similarly, if you press and hold [MENU÷WRITE] while the<br />
main page is displayed, the FR-7x “checks” all parameters<br />
of the current Set on the “WRITE” page. Press<br />
[MENU÷WRITE] again to save all settings (all registers, all<br />
Sets, etc., this corresponds to “AllParam”). We recommend<br />
using this approach whenever you don’t remember<br />
what you changed or where you changed it.<br />
Saving your changes (manual<br />
approach)<br />
(1) After making the required changes, press and hold<br />
the [MENU÷WRITE] button.<br />
The display now shows a page similar to the following:<br />
Function<br />
Master Tune<br />
Scale Tune<br />
System<br />
MIDI<br />
Set<br />
Common<br />
Treble<br />
Bass<br />
Free Bass<br />
Orch<br />
Explanation<br />
The “1.1 Master Tune” settings are<br />
saved.<br />
The “1.3 Scale” and “1.4 Scale Edit” settings<br />
are saved.<br />
The “10. System parameters” are saved.<br />
The “Global MIDI parameters” are saved.<br />
Allows you to save Sets (either a specific<br />
one or all). Selecting this option<br />
will check all boxes that belong to the<br />
“Set” group (Common, Treble, Bass, Free<br />
Bass, Orch, Orch Bass, OrchChd,<br />
OrchFBs).<br />
The “9. Set Common parameters” are<br />
saved.<br />
Allows you to save the settings of the<br />
current treble register. You can select a<br />
different destination memory (register)<br />
if you like.<br />
Allows you to save the settings of the<br />
current bass register. You can select a<br />
different destination memory (register)<br />
if you like.<br />
Allows you to save the settings of the<br />
current Free Bass register. You can<br />
select a different destination memory<br />
(register) if you like.<br />
Allows you to save the settings of the<br />
current ORCHESTRA register memory<br />
(remember that there are two memories<br />
per register). You can select a different<br />
destination memory and/or<br />
register if you like.<br />
(2) Rotate the [DATA÷ENTER] knob to select the parameters<br />
you want to save.<br />
The FR-7x’s “WRITE” page goes from the generic (“All<br />
Param”) to the specific (only one register).<br />
Function<br />
All Param.<br />
Explanation<br />
All settings (all Sets, all Global settings,<br />
all registers) are saved. Selecting this<br />
option will check all other boxes of the<br />
“WRITE” list. “To xx” settings you may<br />
have made, however, remain as they<br />
are.<br />
Orch Bass<br />
OrchChd<br />
OrchFBs<br />
Allows you to save the settings of the<br />
current ORCHESTRA BASS register. You<br />
can select a different destination memory<br />
(register) if you like.<br />
Allows you to save the settings of the<br />
current ORCHESTRA CHORD register.<br />
You can select a different destination<br />
memory (register) if you like.<br />
Allows you to save the settings of the<br />
current ORCHESTRA FREE BASS register.<br />
You can select a different destination<br />
memory (register) if you like.<br />
(3) Rotate the [DATA÷ENTER] knob to select the “✔”<br />
mark and press it to confirm your choice.<br />
103
FR-7x V-Accordion<br />
® Ignoring certain settings for the WRITE operation (Advanced)<br />
(4) Press the [MENU÷WRITE] button.<br />
The display briefly shows the following message:<br />
After a while, the following message appears:<br />
Ignoring settings of the ‘Set’ group<br />
When you check the “Set” box, all related settings (Common,<br />
Treble, Bass, Free Bass, Orch, Orch Bass, Orch Chd,<br />
Orch FBs) are also checked. Here is how to deselect some<br />
settings:<br />
(1) After making the required changes, press and hold<br />
the [MENU÷WRITE] button.<br />
The display now shows a page similar to the following:<br />
Ignoring certain settings for the<br />
WRITE operation<br />
Ignoring settings of the ‘AllParam’ group<br />
Here is how to ensure that all settings except the ones<br />
you do not want to save are stored:<br />
(1) On the main page, press and hold the<br />
[MENU÷WRITE] button.<br />
The display now shows a page similar to the following:<br />
All checkboxes are activated automatically.<br />
(2) Rotate the [DATA÷ENTER] knob to select the checkbox<br />
of a section or function group whose settings<br />
you don’t want to save, and press the [DATA÷ENTER]<br />
knob.<br />
(3) Rotate the [DATA÷ENTER] knob to remove the check<br />
mark and press the knob to confirm your selection.<br />
(2) Rotate the [DATA÷ENTER] knob to select the “Set”<br />
check box and press it to confirm.<br />
(3) Rotate the [DATA÷ENTER] knob to select the “✔”<br />
mark and press it to confirm your choice.<br />
All other checkboxes of the “Set” group are activated<br />
automatically.<br />
(4) Rotate the [DATA÷ENTER] knob to select the checkbox<br />
of a section whose settings you don’t want to<br />
save, and press the [DATA÷ENTER] knob.<br />
(5) Rotate the [DATA÷ENTER] knob to remove the check<br />
mark and press the knob to confirm your selection.<br />
Note: Repeat steps (4) and (5) to once again check a<br />
parameter group you have deselected my mistake.<br />
(6) Press the [MENU÷WRITE] button.<br />
The display briefly shows the following message:<br />
r<br />
In the example above, the “Common” and “Bass”<br />
parameters have been deselected. Their settings will<br />
not be saved.<br />
Note: Repeat steps (2) and (3) to once again check a<br />
parameter group you have deselected my mistake.<br />
(4) Press the [MENU÷WRITE] button.<br />
The display briefly shows the following message:<br />
When finished, the display shows the “Function Complete”<br />
message.<br />
When finished, the display shows the “Function Complete”<br />
message.<br />
104
V-Accordion r<br />
Saving all Sets or just a single Set (Advanced)<br />
Saving all Sets or just a single Set<br />
For the “Set” group, you can specify whether you want<br />
to save all Sets or just a specific Set. Saving all Sets<br />
means that all register settings are saved if their boxes<br />
are checked. (You can decide to exclude entire register<br />
sections form this save operation.)<br />
(1) After making the required changes, select the Set<br />
you want to save and press and hold the<br />
[MENU÷WRITE] button.<br />
The display now shows a page similar to the following:<br />
Saving all registers or just a single<br />
register<br />
You can specify whether you want to save all or just a<br />
specific register. If you don’t save the settings of a given<br />
register, it will return to the last version saved for the<br />
current Set when you select that Set while playing.<br />
(1) After making the required changes, press and hold<br />
the [MENU÷WRITE] button.<br />
The display now shows a page similar to the following:<br />
(2) If necessary, deselect (uncheck) the “AllParam”<br />
with the [DATA÷ENTER] knob.<br />
This will uncheck all other boxes as well.<br />
(3) Rotate the [DATA÷ENTER] knob to select the “Set”<br />
check box and press it to confirm.<br />
(2) If necessary, use the [DATA÷ENTER] knob to deselect<br />
“AllParam”.<br />
This will uncheck all other boxes as well.<br />
(3) Rotate the [DATA÷ENTER] knob to select the check<br />
box of the section whose settings you want to save<br />
and press [DATA÷ENTER] to confirm.<br />
(4) Rotate the [DATA÷ENTER] knob to select the “✔”<br />
mark and press it to confirm your choice.<br />
All other checkboxes of the “Set” group are activated<br />
automatically.<br />
(5) Rotate the [DATA÷ENTER] knob to select the “to” or<br />
“ALL” entry to the right of “Set” and press the<br />
[DATA÷ENTER] knob.<br />
(6) Rotate the [DATA÷ENTER] knob to select “ALL” (save<br />
all Sets) or a specific Set number (to save only that<br />
Set) and press the [DATA÷ENTER] knob to confirm.<br />
In the example above, we selected the Treble section.<br />
(4) Rotate the [DATA÷ENTER] knob to activate “Treble”<br />
checkboxes and press [DATA÷ENTER] to confirm.<br />
A “✓” appears in the checkbox.<br />
(5) Rotate the [DATA÷ENTER] knob to select the “to” or<br />
“ALL” entry to the right of the “Treble” field and<br />
press [DATA÷ENTER] to confirm.<br />
(7) Use the [DATA÷ENTER] knob to deselect (uncheck)<br />
sections (Common, Treble, Bass, Orch, Orch.Bass,<br />
OrchChd, OrchFBs) you don’t want to save.<br />
(8) Press the [MENU÷WRITE] button.<br />
The display briefly shows the following message:<br />
(6) Rotate the [DATA÷ENTER] knob to select “ALL” (save<br />
all registers) or a specific Treble register number,<br />
then press the [DATA÷ENTER] knob to confirm.<br />
(7) Press the [MENU÷WRITE] button.<br />
The display briefly shows the following message:<br />
When finished, the display shows the “Function Complete”<br />
message.<br />
When finished, the display shows the “Function Complete”<br />
message.<br />
105
FR-7x V-Accordion<br />
® Saving just a specific parameter group (Advanced)<br />
Saving just a specific parameter<br />
group<br />
You can also decide to save only the “Master Tune”,<br />
“Scale Tune”, “System” or “MIDI” settings:<br />
(1) After making the required changes, press and hold<br />
the [MENU÷WRITE] button.<br />
The display now shows a page similar to the following:<br />
(2) If necessary, use the [DATA÷ENTER] knob to deselect<br />
“AllParam”.<br />
This will uncheck all other boxes as well.<br />
(3) Rotate the [DATA÷ENTER] knob to select the checkbox<br />
of the parameter group whose settings you<br />
want to save, then press [DATA÷ENTER] to confirm.<br />
(4) Rotate the [DATA÷ENTER] knob to select the “✔”<br />
mark and press it to confirm your choice.<br />
(5) Press the [MENU÷WRITE] button.<br />
The display briefly shows the following message:<br />
When finished, the display shows the “Function Complete”<br />
message.<br />
r<br />
106
V-Accordion r<br />
MIDI functions (Advanced)<br />
18. MIDI functions<br />
Your FR-7x also transmits and receives MIDI data. In this chapter we’ll look at what MIDI is and does and which MIDI<br />
functions are available on the FR-7x.<br />
IMPORTANT REMARK: To take advantage of the FR-7x’s MIDI functions, you must connect it to the supplied FBC-7,<br />
because the FR-7x itself has no MIDI sockets.<br />
MIDI OUT<br />
MIDI IN<br />
External MIDI device<br />
About MIDI<br />
Even though your FR-7x is already a remarkably flexible<br />
instrument, you may also want to use it with other<br />
MIDI-compatible instruments, sequencers and computers<br />
to record your performances in the same way as keyboard<br />
players, drummers, guitarists, etc., have been<br />
doing for a while.<br />
Another important application for the FR-7x’s MIDI<br />
functions is controlling an arranger module that supplies<br />
the accompaniment. “Arranger modules” use short<br />
accompaniment patterns that can be selected in realtime<br />
and whose key depends on the note information<br />
they receive. You can select those patterns by assigning<br />
the corresponding MIDI messages to the FBC-7’s footswitches<br />
(see p. 87), so that you do not have to stand or<br />
sit next to your arranger module.<br />
Both module types (and all MIDI-compatible sound<br />
sources) also allow you to use the FR-7x’s Treble and<br />
Bass keyboards for playing sounds the FR-7x does not<br />
provide.<br />
This is possible thanks to a common language for musical<br />
applications, which is called “Musical Instrument<br />
Digital Interface” or “MIDI” for short.<br />
To take advantage of the FR-7x’s MIDI functions, you<br />
must connect the FBC-7 as follows:<br />
Socket<br />
MIDI OUT<br />
MIDI IN<br />
MIDI THRU<br />
Function<br />
This socket transmits messages describing<br />
actions (such as playing on a keyboard) to the<br />
MIDI IN jack on the external device. The<br />
receiving MIDI device executes the incoming<br />
MIDI messages and plays notes, selects other<br />
sounds, etc.<br />
This socket receives the MIDI messages transmitted<br />
by an external MIDI device.<br />
This socket retransmits the MIDI messages<br />
received via the FBC-7’s MIDI IN port. You<br />
can connect it to the MIDI IN port of an<br />
another MIDI device.<br />
Note: The MIDI THRU port does not transmit the MIDI messages<br />
generated by the FR-7x. Those messages are only sent to<br />
the FBC-7’s MIDI OUT port.<br />
MIDI can simultaneously transmit and receive messages<br />
on 16 channels, so that up to 16 instruments (or parts of<br />
a module or synthesizer) can be controlled. Nowadays,<br />
most instruments –like your FR-7x– are multitimbral,<br />
which means that they can play several musical parts<br />
with different sounds. This requires the use of several<br />
MIDI channels. The FR-7x, for instance, has several<br />
accordion and orchestral sections that can be played<br />
simultaneously. They can transmit and receive on different<br />
channels.<br />
107
FR-7x V-Accordion<br />
® About MIDI (Advanced)<br />
The FR-7x’s sections use the following MIDI channels:<br />
Section<br />
Channel<br />
Treble 1<br />
Bass/Free Bass 2<br />
Chord 3<br />
Orchestra (Treble) 4<br />
Orchestra Bass 5<br />
Orchestra Chord 6<br />
Orchestra Free Bass 7<br />
Basic channel (for selecting Sets and<br />
sending program changes)<br />
As you see, there are separate channels for the chord<br />
and bass buttons, even though they both belong to the<br />
Bass section. That separation may look distracting at<br />
first, but it actually makes sense. It allows you to use the<br />
bass buttons for controlling an external bass sound,<br />
while the chord buttons could control a piano sound, for<br />
example. If they used the same MIDI channel, the bass<br />
line would have to be played by a piano, or the chords<br />
would be played by a bass sound (unless you own a MIDI<br />
instrument that allows you to program note ranges for<br />
incoming MIDI messages).<br />
13<br />
If the FR-7x is used as tone generator for an external<br />
sequencer, you must connect the sequencer’s MIDI OUT<br />
socket to the FBC-7’s MIDI IN port (because MIDI data<br />
always go from OUT to IN).<br />
Though you can also play the FR-7x from another MIDI<br />
instrument, we do not really recommend doing so,<br />
because your V-Accordion has far more versatile performance<br />
functions than any other MIDI controller available<br />
today: the FR-7x translates all known accordion<br />
techniques and physical effects into MIDI messages to<br />
precisely reproduce the natural behavior of an acoustic<br />
accordion.<br />
If you use the FR-7x as a MIDI controller while recording<br />
a sequence, all actions you perform on the FR-7x<br />
(including the bellows pressure strength) are included in<br />
the recorded part. They can therefore be sent back to<br />
the FR-7x (by the sequencer) – and then, all expression<br />
details are preserved. Be aware, however, that you also<br />
need a versatile sound source (like the FR-7x’s) to use<br />
the recorded MIDI events to their full potential.<br />
Final note regarding sequencers<br />
If you use the FR-7x as MIDI controller for recording<br />
new songs, always ask yourself which MIDI sound source<br />
should play back the part you are recording.<br />
If the FR-7x’s tone generator is not used for the part<br />
you are recording, you need to connect the external<br />
module’s MIDI IN socket to the sequencer’s MIDI OUT<br />
port and activate the sequencer’s “MIDI Soft Thru” function:<br />
External module<br />
MIDI IN<br />
Working with a sequencer and other tone<br />
generators<br />
The FR-7x can be used as “input device” for recording<br />
your music. In the case of a keyboard instrument, such a<br />
device is usually called a “master keyboard”.<br />
The FR-7x can be used for two things: to “input” new<br />
parts (i.e. MIDI events) and to play them back.<br />
When you play on the FR-7x’s keyboards, it sends MIDI<br />
data to the FBC-7’s MIDI OUT socket. That socket must<br />
be connected to the sequencer’s MIDI IN port. MIDI data<br />
always go from OUT to IN:<br />
External sequencer<br />
MIDI IN<br />
MIDI OUT<br />
(FBC-7)<br />
External sequencer<br />
FR-7x’s tone generator<br />
MIDI OUT<br />
Note that this is only necessary for recording new<br />
material. You do not have to worry about them during<br />
playback.<br />
MIDI IN<br />
MIDI OUT<br />
(FBC-7)<br />
FR-7x’s tone generator<br />
MIDI OUT<br />
r<br />
108
V-Accordion r<br />
Global MIDI parameters (Advanced)<br />
Global MIDI parameters<br />
The parameters discussed here are part of a separate<br />
mode (called “MIDI”). Their settings, however, are saved<br />
to the FR-7x’s Global memory (there is no separate MIDI<br />
memory). Let us first look at the parameters that apply<br />
to all Sets. See page 113 for the parameters that can be<br />
set for each section individually and saved to a Set.<br />
(7) Press the [DATA÷ENTER] knob to confirm your<br />
selection.<br />
Note: Though it is perfectly possible to assign the same<br />
MIDI channel to several sections, the result is usually disappointing<br />
and may lead to a lot of confusion.<br />
(8) If necessary, repeat steps (5)~(7) to assign different<br />
MIDI channels to the remaining parts.<br />
(9) See page 103 for how to save your changes.<br />
MIDI channel numbers<br />
(12.1 RealTime RX-TX)<br />
The table on page 108 specifies the default MIDI channel<br />
assignments the FR-7x uses. Those choices are based<br />
on how most accordion players prefer to use their<br />
instrument. You can, however, change the MIDI channel<br />
assignments.<br />
Bear in mind that the channel assignments set here<br />
apply both to the transmission (“TX”) and reception<br />
(“RX”) of MIDI data.<br />
And finally: in DUAL, HIGH and LOW modes (page 30),<br />
the treble keyboard transmits on two channels simultaneously<br />
– the TREBLE and ORCHESTRA channels. As<br />
stated earlier, the chord buttons of the Bass keyboard<br />
use a separate MIDI channel.<br />
(1) Return to the main page.<br />
(2) Press and hold the [EXIT÷JUMP] button until the<br />
display shows the “JUMP TO” page.<br />
(3) Press register [12] to specify the function group.<br />
The MIDI channels can be set via a parameter of the<br />
“MIDI” group, which is why you need to select that<br />
group.<br />
(4) Press register [1] to select the following page:<br />
Preventing sections from sending MIDI data<br />
(12.2 Ext. Seq. Playback)<br />
By selecting “On” for a section, you switch off its connection<br />
with the internal tone generator (this is what<br />
MIDI buffs call “Local Off”). The section now receives<br />
MIDI data from a sequencer or other instrument you<br />
connect to the FBC-7’s MIDI IN port. (It also transmits<br />
MIDI messages to the FBC-7’s MIDI OUT port.)<br />
(1) While the main page is displayed, press and hold<br />
the [EXIT÷JUMP] button until the display looks as<br />
follows:<br />
(2) Press register [12] to specify the function group.<br />
(3) Press register [2] to select the following page:<br />
(5) Press the [DATA÷ENTER] knob to select “PART” (left<br />
entry), then turn it to select the part whose MIDI<br />
channel you want to set.<br />
The entries you can select are: “Treble”, “Bass/Free”,<br />
“Chord”, “Orc Bass”, “Orchestra”, “Orc Chord”, “Orc<br />
Free Bs”, “Basic Ch”, and “Control Ch”.<br />
The “Basic Ch” (default setting “13”) can be used for<br />
selecting Sets from an external MIDI device (using<br />
program change numbers 1~80). If your external<br />
source sends Bank Select messages along with the<br />
program change number, CC00 and CC32 must both<br />
be set to “0”.<br />
The “Control Ch” (default setting “13”) can only be<br />
used for sending program change messages (see<br />
below).<br />
(6) Press the [DATA÷ENTER] knob to select “CHANNEL”<br />
(right entry), then turn it to select a MIDI channel.<br />
The options are: 1~16 and “Off”. Select “Off” if the<br />
part in question should neither receive nor transmit<br />
MIDI data.<br />
(4) Press the [DATA÷ENTER] knob to select “PART” (left<br />
entry), then turn it to select the part whose setting<br />
you want to change.<br />
The parts you can select here are: “Treble”,<br />
“Bass&Chord”, “Orchestra”, and ALL”. Select “ALL” to<br />
change the status of all available sections.<br />
Note: The “Bass&Chord” entry also includes the Free Bass,<br />
Orchestra Bass, Orchestra Chord and Orchestra Free Bass<br />
sections.<br />
(5) Press the [DATA÷ENTER] knob again to select<br />
“VALUE” (right entry), then turn it to select “On”<br />
(disconnect the part from the internal tone generator)<br />
or “Off” (normal operation).<br />
109
FR-7x V-Accordion<br />
® Global MIDI parameters (Advanced)<br />
A part you disconnect from its keyboard is flagged as<br />
“EXT MIDI” on the main page:<br />
(3) Press register [3] to select the following page:<br />
(In this example, all sections are disconnected from<br />
the FR-7x’s tone generator.)<br />
Note: When you select “On”, the FR-7x’s registers no<br />
longer transmit the sound selection clusters you may have<br />
programmed using “CC00, CC32, PC” on p. 114. Instead,<br />
they transmit their “Std” values.<br />
(6) Press the [DATA÷ENTER] knob to confirm your<br />
selection.<br />
(7) See “Saving settings using the WRITE function” on<br />
p. 103 if you want to save these settings.<br />
If you don’t save them, they are reset when you<br />
switch off the FR-7x.<br />
Solving MIDI buffer problems<br />
(12.3 Bellows TX Resolution)<br />
This parameter allows you to specify how many data the<br />
FR-7x’s bellows may transmit for expression purposes<br />
(see also “Expression” on p. 115).<br />
As long as the external sequencer you work with does<br />
not display a “MIDI buffer overflow” message, you can<br />
leave this setting at “High”. Depending on your<br />
sequencer, you could also select “Super” to achieve the<br />
most natural response.<br />
If, however, the bellows’ data amount is too much for<br />
the receiving sequencer (because such data are transmitted<br />
on several channels simultaneously), select a different<br />
setting. In that case, the amount of data will be<br />
reduced. This leads to a coarser resolution, and maybe<br />
even audible steps, but at least, your sequencer will be<br />
able to record the data. If “Medium” still generates too<br />
many data, select “Low”.<br />
“TX” means that this parameter only applies to data sent<br />
by the FR-7x. Its own MIDI buffer is big enough to<br />
receive high-resolution data.<br />
(1) While the main page is displayed, press and hold<br />
the [EXIT÷JUMP] button until the display looks as<br />
follows:<br />
(4) Press the [DATA÷ENTER] knob to select the “VALUE”<br />
field.<br />
(5) Rotate the [DATA÷ENTER] knob to select “Super”<br />
(double-byte resolution), “High” (high resolution),<br />
“Normal”, or “Low” (low resolution).<br />
(6) Press the [DATA÷ENTER] knob.<br />
(7) See page 103 if you want to save these settings.<br />
If you don’t save them, they are reset when you<br />
switch off the FR-7x.<br />
Specifying which parts transmit expression<br />
messages<br />
(12.4 Expression MIDI TX)<br />
(ALL, Treble, Orch., Bass&Chord, Orch.Bs, Orch.Chd,<br />
Orch. Fbs)<br />
This parameter allows you to specify which section<br />
should transmit Expression messages (see also “Expression”<br />
on p. 115). You can either select all sections (“ALL”)<br />
or specific ones and activate or deactivate them individually.<br />
“TX” means that this parameter only applies to data sent<br />
by the FR-7x.<br />
Note: This parameter applies to the FR-7x as a whole (all Sets).<br />
(1) While the main page is displayed, press and hold<br />
the [EXIT÷JUMP] button until the display looks as<br />
follows:<br />
(2) Press register [12] to specify the function group.<br />
(3) Press register [4] to select the following page:<br />
r<br />
(2) Press register [12] to specify the function group.<br />
(4) Press the [DATA÷ENTER] knob to select the “PART”<br />
parameter.<br />
(5) Rotate the [DATA÷ENTER] knob to select the section<br />
whose setting you want to change.<br />
110
V-Accordion r<br />
Preventing the transmission of certain MIDI messages (Advanced)<br />
(6) Press the [DATA÷ENTER] knob again to select the<br />
“VALUE” parameter.<br />
(7) Rotate the [DATA÷ENTER] knob to select “On”<br />
(transmit Expression messages) or “Off (don’t<br />
transmit Expression messages).<br />
(8) Press the [DATA÷ENTER] knob.<br />
(9) See page 103 if you want to save these settings.<br />
If you don’t save them, they are reset when you<br />
switch off the FR-7x.<br />
Preventing the transmission of certain MIDI<br />
messages<br />
(12.5 Global Filters)<br />
The parameters on this page allow you to filter all or<br />
some MIDI messages each section can transmit (see<br />
“MIDI parameters for the various sections/parts” on<br />
p. 113).<br />
Use these settings if the receiving MIDI device poses<br />
problems whenever the FR-7x transmits a given MIDI<br />
message.<br />
Note: This parameter applies to the FR-7x as a whole (all Sets).<br />
(1) While the main page is displayed, press and hold<br />
the [EXIT÷JUMP] button.<br />
(2) Press register [12] to specify the function group.<br />
(3) Press register [5] to select the following page:<br />
(4) Press the [DATA÷ENTER] knob to select the<br />
“PARAM” parameter.<br />
(5) Rotate the [DATA÷ENTER] knob to select the parameter<br />
whose setting you want to change.<br />
The available options are: Note Tx, CC00, CC32, PC,<br />
AftTouch, Volume, Panpot, Reverb, Chorus (see<br />
p. 113).<br />
(6) Press the [DATA÷ENTER] knob again to select the<br />
“VALUE” parameter.<br />
(7) Rotate the [DATA÷ENTER] knob to select “Tx Off”<br />
(don’t transmit this MIDI message) or “Default” (as<br />
specified for the “MIDI TX” parameter of the register<br />
in question.<br />
(8) Press the [DATA÷ENTER] knob again to confirm your<br />
selection.<br />
(9) Repeat steps (4)~(8) as necessary.<br />
(10) See page 103 if you want to save these settings.<br />
If you don’t save them, they are reset when you<br />
switch off the FR-7x.<br />
Sending program change messages<br />
(Send PC & 12.6 Bank for ‘Send PC’)<br />
Though each register can transmit a program change/<br />
bank select cluster when pressed (see “CC00, CC32, PC”<br />
on p. 114), you can also transmit sound select messages<br />
on the fly – without changing registers on the FR-7x.<br />
These are MIDI messages that cause an external instrument<br />
or device to select a different memory (i.e. another<br />
sound or effect).<br />
This functionality is mainly intended for selecting setting<br />
groups of various sounds on external instruments.<br />
Such setting groups may be called “Performances” or<br />
“Multis”, which you may want to select while playing,<br />
because working with “finished” Performances, etc.,<br />
does away with the need to program sound select<br />
addresses for the FR-7x’s registers (see “CC00, CC32, PC”<br />
on page 114).<br />
This function transmits messages to an external device<br />
whose MIDI IN port is connected to the FBC-7’s MIDI<br />
OUT socket.<br />
Here is how to take advantage of that function:<br />
Defining the ‘PC’ format<br />
Despite the function’s name (“Send PC”), the value you<br />
enter on that page is not really a program change number,<br />
but rather the memory number used by the receiving<br />
device.<br />
“502” (for example) therefore refers to Performance<br />
number 502 of the receiver, but that number cannot be<br />
conveyed as such via MIDI.<br />
The MIDI standard provides only 128 program change<br />
numbers (for selecting memories) and two messages<br />
called “Bank Select” that allow you to select 128 banks<br />
each. Two bank addresses (“MSB” and “LSB”) with 128<br />
possibilities each, plus 128 Program Change numbers<br />
provide 128 x 128 x 128 values= 2,097,152 possible<br />
memories.<br />
The numbers you enter on the “Send PC” page should<br />
therefore be taken to mean “memory XX of the receiving<br />
device”. How does the FR-7x convert it to a MIDI address<br />
that conform to the CC00/CC32/PC format (each of<br />
which supports a maximum of 128 possibilities)? Enter<br />
the following parameter:<br />
111
FR-7x V-Accordion<br />
® Global MIDI parameters (Advanced)<br />
(1) While the main page is displayed, press and hold<br />
the [EXIT÷JUMP] button until the display looks as<br />
follows:<br />
(9) Press [EXIT÷JUMP] several times to return to the<br />
main page.<br />
(10) See page 103 if you want to save these settings.<br />
If you don’t save them, they are reset when you<br />
switch off the FR-7x.<br />
(11) Now use the “Send PC” page to test your assignments.<br />
See below.<br />
r<br />
(2) Press register [12] to specify the function group.<br />
(3) Press register [6] to select the following page:<br />
(4) Press the [DATA÷ENTER] knob to select “PRG NUMB”<br />
(left entry), then turn it to select the memory<br />
group whose “real” MIDI address you want to<br />
define.<br />
The possibilities are: 1~128, 129~256, 257~384,<br />
385~512.<br />
Each “PRG NUMB” entry represents a group of 128<br />
numbers. By selecting an entry, you tell the FR-7x<br />
(for example): “Whenever I select a memory number<br />
between 257 and 384 on the ‘Send PC’ page, please<br />
change that to the corresponding program change<br />
number in the 1~128 range, add the two CC values<br />
to the right on this page, and send the resulting MIDI<br />
messages.”<br />
(5) Press the [DATA÷ENTER] knob to select “CC00” (top<br />
right entry), then turn it to select a value (0~127).<br />
“0” corresponds to the first bank (called the “Capital<br />
bank” on GM2/GS-compatible instruments).<br />
Be sure to select this number based on the information<br />
given in the owner’s manual of the instrument<br />
you wish to control. Also specify the correct CC32<br />
number.<br />
(6) Press the [DATA÷ENTER] knob to select “CC32”, then<br />
turn it to select a value (0~127).<br />
Again, the value to enter here depends on the information<br />
you find in the manual of the instrument you<br />
want to control. Some manufacturers don’t use CC32<br />
messages for sound selection, others use them to<br />
define modes, and still others rely on them as complementary<br />
bank information.<br />
(7) Press the [DATA÷ENTER] knob to confirm your<br />
selection.<br />
(8) Repeat steps (4)~(7) using a different memory<br />
group.<br />
112<br />
Transmitting program changes<br />
(1) Connect the FR-7x to the FBC-7, and the FBC-7’s<br />
MIDI OUT socket to the MIDI IN port of the module,<br />
synthesizer, etc., you wish to control.<br />
(2) Set the module’s MIDI receive channel (often<br />
called “RX”) to “13” (or the number of the FR-7x’s<br />
Control channel).<br />
See its manual for details. If you are unable to<br />
change the receiver’s MIDI channel, set the FR-7x’s<br />
“Control Ch” to match the external instrument’s “RX”<br />
channel. (See “MIDI channel numbers” on p. 109 for<br />
how to set the “Control Ch” parameter.)<br />
(3) Hold down the [ORCHESTRA÷MODE] register while<br />
pressing register [6].<br />
(4) Use Treble registers [1]~[10] to enter the sound<br />
number.<br />
You may have to look in the owner’s manual of the<br />
module or synthesizer you are controlling to find<br />
out which number you need to transmit for the<br />
sound (or memory) you want to select. You can<br />
enter any number from “1” to “512”.<br />
The [10] treble register acts as “0” here. To enter<br />
“502”, for example, press registers [5], [10], and [2].<br />
The numbers you can enter have the following<br />
meaning:<br />
PC numbers<br />
Meaning<br />
001~128 Use the CC00 & CC32 definitions of the<br />
first group.<br />
129~256 Use the CC00 & CC32 definitions of the<br />
second group.<br />
257~384 Use the CC00 & CC32 definitions of the<br />
third group.<br />
385~512 Use the CC00 & CC32 definitions of the<br />
fourth group.
V-Accordion r<br />
MIDI parameters for the various sections/parts (Advanced)<br />
Note: See step (4) below “Defining the ‘PC’ format” for the<br />
“group” concept.<br />
(5) If necessary, press the [EXIT÷JUMP] button to erase<br />
the last entry you made.<br />
Note: The FR-7x uses a smart entry system: after entering<br />
“52” (or “53”, “54”, “55”,… “59”), you can’t add a third number,<br />
because the highest number supported by the “SEND<br />
PC” function is “512”.<br />
Note: The [EXIT÷JUMP] button has two functions here:<br />
when pressed lightly, it deletes the last entry you made<br />
(“backspace”). By holding it for ±1 second, you delete all<br />
figures and return to the main page.<br />
(6) Press the [MENU÷WRITE] button to transmit the<br />
number you entered.<br />
MIDI parameters for the various<br />
sections/parts<br />
The MIDI parameters discussed below belong to separate<br />
groups and are saved for the corresponding sections.<br />
This means that each Set can use different MIDI<br />
settings and thus control external MIDI devices in various<br />
ways. Carefully read the following before editing<br />
the available parameters.<br />
Important remarks<br />
The parameters discussed below apply to the transmission<br />
of MIDI data (“TX”) and therefore only to MIDI messages<br />
that are generated when you yourself play on the<br />
FR-7x.<br />
Bear in mind that the MIDI messages discussed below<br />
are only executed by an external tone generator if its<br />
MIDI receive (“RX”) channel is set to the number you<br />
assigned to the section in question (page 109).<br />
Sections<br />
The parameters discussed here are available in the following<br />
sections: Treble, Bass (and Chord, which is considered<br />
a separate section on the MIDI level), Free Bass,<br />
Orchestra, Orchestra Bass, Orchestra Chord and Orchestra<br />
Free Bass.<br />
The reason why they are included in the section parameters<br />
rather than the MIDI group is that the MIDI group<br />
applies to the entire FR-7x (all sections, all Sets), while<br />
the parameters below can vary from Set to Set.<br />
Procedure for setting these parameters<br />
To access the parameters discussed below, proceed as<br />
follows:<br />
(1) Select the parameter group of the section you wish<br />
to edit.<br />
Either press the [MENU÷WRITE] button and select the<br />
parameter group with the [DATA÷ENTER] knob or use<br />
the “JUMP TO” function (press and hold the<br />
[EXIT÷JUMP] button while the main page is displayed,<br />
then enter the parameter address using the Treble<br />
registers, see p. 62).<br />
(2) Select the parameter.<br />
(If you used the JUMP TO function above, the parameter<br />
is already selected. Otherwise press the<br />
[MENU÷WRITE] button and select the parameter with<br />
the [DATA÷ENTER] knob.)<br />
The following are MIDI functions:<br />
2.15 MIDI TX<br />
3.12 Bass MIDI TX<br />
3.13 Chord MIDI TX<br />
4.10 MIDI TX<br />
5.11 MIDI TX<br />
6.10 MIDI TX<br />
7.10 MIDI TX<br />
8.8 MIDI TX<br />
113
FR-7x V-Accordion<br />
® MIDI parameters for the various sections/parts (Advanced)<br />
r<br />
(3) Press the [DATA÷ENTER] knob to select “MESSAGE”<br />
(left entry), then turn it to select the parameter<br />
you want to set.<br />
The parameters are explained below.<br />
(4) Press the [DATA÷ENTER] knob again to select<br />
“VALUE” (right entry), then turn it to set the<br />
desired value. (Press [DATA÷ENTER] again, select<br />
another parameter and edit its value.)<br />
(5) Press [EXIT÷JUMP] several times to return to the<br />
main page.<br />
(6) See page 103 for how to save your changes.<br />
If you don’t save them, they are reset when you<br />
switch off the FR-7x.<br />
Parameters<br />
Here are the MIDI parameters that can be set for each<br />
register of a section separately. Remember that they<br />
only apply to MIDI messages the FR-7x sends to external<br />
devices. Do not forget to select the register whose MIDI<br />
parameters you wish to edit before actually changing<br />
them.<br />
Here is an example page:<br />
114<br />
■ Note Tx<br />
(On, Off, Default setting: On)<br />
Set this parameter to “Off” if the external instrument<br />
must not double the notes you are playing on the<br />
Treble or Bass keyboard.<br />
■ Octave<br />
(–3~0~3)<br />
This parameter allows you to transpose the Note-on<br />
messages transmitted by the section in question (if<br />
“Note” is set to “On”) up to three octaves up or down.<br />
Each MIDI note has a unique number. This parameter<br />
allows you to add (or subtract) 12 (“1” octave), 24 (“2”<br />
octaves) or 36 (“3” octaves) to (from) the note numbers<br />
generated by your playing.<br />
■ CC00, CC32, PC<br />
(Std, Off, 0~127 for CC00 & CC32; Std, Off, 1~128 for<br />
PC)<br />
These three messages belong together. The “oldest”<br />
message is called “program change” or “PC” for short.<br />
It is used to select sounds or memories on the receiving<br />
instrument simply by recalling another sound (or<br />
memory) on the transmitting instrument.<br />
What you set here is transmitted to the FBC-7’s MIDI<br />
OUT port whenever you select the register you are<br />
currently editing. (You can set separate addresses for<br />
each register.) This allows you to cause an external<br />
module to select sounds.<br />
Select “Off” if a register should not send CC00, CC32<br />
and/or PC messages. Select “Std” to transmit the MIDI<br />
address of the register you assign this setting to (Treble<br />
register [12], for example, which would then send<br />
PC “12” for CC00= 00/CC32= 00). When you select<br />
“Std” for one of the three parameters (CC00, CC32, or<br />
PC), the other two parameters also adopt the “STD”<br />
setting.<br />
See the following “STD” table:<br />
Bank Select & Program Change TX “STD”<br />
BANK SELECT PROGRAM<br />
MSB CC00 LSB CC32 CHANGE Section<br />
0 0 1~14 Treble Registers<br />
0 0 1~7 Bass Registers<br />
0 1 1~7 Free Bass Registers<br />
0 0 1~7 Orch Bass Registers<br />
0 0 1~7 Orch Chord Registers<br />
0 0 1~7 Orch FreeBs Registers<br />
0 0 1~26 Orchestra Registers<br />
0 0 1~40 Sets<br />
Two bank addresses (“MSB” and “LSB”), with 128 possibilities<br />
each, plus 128 Program Change numbers<br />
provide 128 x 128 x 128 values and therefore allow<br />
you to select up to 2,097,152 memories.<br />
To switch banks and select a memory on the external<br />
module you need to transmit:<br />
• A value for control change CC00 (MSB)<br />
• A value for control number CC32 (LSB)<br />
• A program change number<br />
See the manual of the receiving MIDI instrument for<br />
the MSB and LSB values it supports.<br />
Be aware that this system allows you to send program<br />
change numbers to an external instrument that<br />
lie outside the range of the FR-7x’s registers (see the<br />
table above). Such “excess” program numbers are<br />
ignored by the FR-7x when you transmit them back<br />
(from a sequencer, for example).<br />
Note: If PC is set to “Off”, the CC00 and CC32 values are<br />
not transmitted (CC00/CC32 must always be followed by a<br />
program change number).<br />
Note: If one of these parameters is set to “Std”, the register<br />
in question sends its own MIDI address.<br />
Note: When you set the “12.2 Ext. Seq. Playback” parameter<br />
to “On”, the FR-7x’s registers no longer transmit the<br />
sound selection clusters you have programmed here.<br />
Instead, they transmit their “Std” values. This will return to<br />
normal operation when you set “12.2 Ext. Seq. Playback”<br />
back to “Off”.<br />
■ Volume<br />
(Off, 0~127, Default setting: 100)<br />
This parameter allows you to specify the volume<br />
value (CC07) the register should send to an external<br />
device whenever you press it. That way, the MIDI<br />
instrument you are controlling is automatically set to<br />
the desired level. Remember that selecting “0”<br />
silences the receiving MIDI instrument. Select “Off” if<br />
the register should not transmit this message.<br />
Note: The FR-7x does not execute this message if it is<br />
returned to the FR-7x via the external device’s “Soft Thru”<br />
function.<br />
■ Panpot<br />
(Off, 0~127, Default setting: 64)<br />
This parameter allows you to specify the value (CC10)<br />
the register should send to an external device when<br />
you press it. That way, the MIDI instrument you are
V-Accordion r<br />
Parameters (Advanced)<br />
controlling automatically selects the desired stereo<br />
position. “0” corresponds to hard left, “64” to dead<br />
center, and “127” to hard right. Note that the FR-7x<br />
does not execute this message if it is returned to the<br />
FR-7x via the external device’s “Soft Thru” function.<br />
Select “Off” if the register should not transmit this<br />
message.<br />
■ Reverb<br />
(Off, 0~127, Default setting: 40)<br />
This parameter allows you to specify the Reverb Send<br />
Level value (CC91) the register should send to an<br />
external device when you press it. Selecting “0” will<br />
set the receiving MIDI instrument to “dry” (no reverb),<br />
while “127” represents the maximum Reverb Send<br />
level. Select “Off” if the register should not transmit<br />
this message.<br />
Note: If there is no audible change, you may have to check<br />
the reverb effect settings on the receiving MIDI instrument.<br />
Note: Not all MIDI instruments have a reverb effect, and<br />
even if they do, they may not support this control change<br />
number.<br />
■ Chorus<br />
(Off, 0~127, Default setting: 0)<br />
This parameter allows you to specify the Chorus Send<br />
Level value (CC93) the register should send to an<br />
external device whenever you press it. “0” will set the<br />
receiving MIDI instrument to “dry” (no chorus), while<br />
“127” represents the maximum Chorus Send level.<br />
Select “Off” if the register should not transmit this<br />
message.<br />
Note: If there is no audible change, you may have to check<br />
the chorus effect settings on the receiving MIDI instrument.<br />
Note: Not all MIDI instruments have a chorus effect, and<br />
even if they do, they may not support this control change<br />
number.<br />
■ Velocity<br />
(On, 1~127)<br />
Your FR-7x is velocity sensitive. The volume and<br />
brightness of the notes you play on the treble or bass<br />
keyboard therefore depend on how hard (or fast) you<br />
press the keys/buttons. The accordion sounds do not<br />
respond to these playing dynamics, but the Orchestra<br />
(Treble, Bass, Chord, Free Bass) sounds do and so do<br />
most MIDI-compatible sound modules.<br />
Even though the MIDI standard recognizes 128 different<br />
velocity values, only 127 can actually be used<br />
for expression purposes. That explains why the setting<br />
range is 1~127. Value “0” is usually used to signal<br />
the end of a note (i.e. when you release a key or<br />
button).<br />
This parameter allows you to specify whether the<br />
velocity values corresponding to the strength with<br />
which you press a key/button should be transmitted<br />
(“On”) or whether your playing dynamics should not<br />
be translated as such.<br />
In the latter case, you need to select a value (1~127)<br />
that will be applied to all notes that are transmitted<br />
via MIDI. “64” is still relatively soft. Even lower values<br />
are probably not what you want in most cases. Fixed<br />
velocity values can be useful for playing organ<br />
sounds on an external module.<br />
Note that the setting you select here has no effect<br />
when the “Note Tx” parameter is set to “Off”, because<br />
note numbers are always transmitted along with a<br />
velocity value (any value different from “0” also<br />
means “start playing this note”).<br />
■ Expression<br />
(Off, Bellows, Pedal)<br />
You probably noticed that the strength/speed with<br />
which the bellows is pressed or pulled influences the<br />
sound – which corresponds to an acoustic accordion’s<br />
response.<br />
This effect can be translated into a MIDI message<br />
most external instruments understand. The MIDI<br />
standard provides a message (“control change”) for<br />
remotely controlling the volume of an external<br />
instrument: CC11. It is chiefly used for expression<br />
purposes (similar to the way in which a guitarist or<br />
organ player uses a volume pedal).<br />
If you want to use the bellows for expressive purposes,<br />
set this parameter to “Bellows”.<br />
If you don’t (because the external instrument is too<br />
sensitive and therefore changes its volume too<br />
often), select “Off”.<br />
If you purchased an optional EV-series expression<br />
pedal, which you connected to the FBC-7’s EXPRES-<br />
SION PEDAL socket, you can also control the relative<br />
volume by foot. In that case, set this parameter to<br />
“Pedal”.<br />
■ After Touch (only for the Treble and Orchestra<br />
sections)<br />
The treble keyboard of the piano-type model also<br />
generates aftertouch messages (on the button-type<br />
model, aftertouch can be generated with the Master<br />
bar). Aftertouch is usually used for temporary<br />
changes to a sound’s volume, timbre or pitch (this<br />
needs to be set on the receiving instrument). Used<br />
right, it can be a very powerful expressive tool.<br />
Select “Off” if this message type should not be transmitted.<br />
Select “On” if you want to transmit aftertouch<br />
messages.<br />
115
FR-7x V-Accordion<br />
® Troubleshooting (Advanced)<br />
19. Troubleshooting<br />
This section provides an overview of points to check and actions to take when the FR-7x does not function as you expect.<br />
Feel free to contact your Roland dealer if your issue remains unsolved after reading through this section.<br />
r<br />
The screen is difficult or impossible to read<br />
If you have trouble reading the information in the<br />
display, change the “10.1 LCD Contrast” setting<br />
(page 86).<br />
No sound<br />
■Did you turn the [VOLUME] knob all the way to<br />
the small dot?<br />
Set it to a higher value.<br />
■ Did you turn the [BALANCE] knob all the way to<br />
one side?<br />
Change its setting and try again.<br />
■ Are you moving the bellows while triggering<br />
accordion sounds?<br />
The treble and bass/Free Bass sections only produce<br />
sound if you move the bellows while playing notes<br />
(like on an acoustic accordion).<br />
■ Did you connect the audio cables to the correct<br />
sockets?<br />
If so, check whether the external amplifier, mixing<br />
console, etc., is switched on. Also check the cables for<br />
possible damage.<br />
No power<br />
■Did you remove the supplied battery pack?<br />
Be sure to install it again. Alternatively, connect the<br />
FR-7x to the supplied FBC-7.<br />
■ Did you install the cover of the FR-7x’s battery<br />
compartment?<br />
You need to install it before you can switch on the<br />
FR-7x (page 16). Be sure to tighten the screws all the<br />
way.<br />
The FR-7x does not respond to your playing<br />
■You may have selected “Ext. Seq. Playback” mode<br />
for one or all sections.<br />
Those sections therefore only respond to MIDI messages<br />
received from other instruments. Switch off<br />
the “Ext. Seq. Playback” function (page 109).<br />
The chord rows of the bass keyboard don’t play<br />
accordion sounds<br />
■You probably switched on the ORCHESTRA<br />
CHORD section.<br />
Switch it off (see p. 19).<br />
Certain parameters cannot be selected<br />
■Does the FR-7x display a message to inform you<br />
that a parameter or section is not available?<br />
If so, the section is off, which is why its parameters<br />
cannot be edited. Switch the section on and try<br />
again.<br />
116<br />
One section sounds off (flat)<br />
Did you set “1.5 Scale Assign” to just one section? Set<br />
it to “ALL” and try again (page 65).<br />
Issues related to the bass buttons<br />
■When I play bass notes and/or chords, I also hear<br />
drum sounds. How do I switch them off?<br />
See “3.7 Bass Drum” on p. 72 and “3.8 Chord Drum”<br />
on p. 73.<br />
■Some bass and chord buttons don’t play notes<br />
Did you activate the “10.6 Function Switch” parameter<br />
(page 88)? If so, switch it off.<br />
■Why do the bass buttons only provide three<br />
chord rows?<br />
Because you set the “10.8 Bass&Chd Mode” parameter<br />
to “3 Bs Rows” (page 89). Set it to “2 Bs Rows”.<br />
■ Why can’t I play diminished chords using the<br />
bass buttons?<br />
Because you set the “Bass&Chd Mode” parameter to<br />
“3 Bs Rows” (page 89). Set it to “2 Bs Rows”.<br />
■ In Free Bass mode, the bass buttons play the<br />
wrong notes.<br />
You may have changed the “Free Bass Mode” setting.<br />
Be sure to select the system that best suits your playing<br />
style (page 90).<br />
■ In Free Bass mode, only half the buttons play<br />
notes.<br />
That’s because the “STATUS” entry of the<br />
“4.2 Register” parameter uses the same (“High” or<br />
“Low”) setting for both reeds (or “Off” for one of<br />
them and “High”/“Low” for the other). Choose complementary<br />
settings (“High” for one, “Low” for the<br />
other) or set at least one to “Whole” (page 74).<br />
All my changes have gone<br />
■The FR-7x only remembers the changes you<br />
make until you switch it off or until it is<br />
switched off by the “10.12 Auto Power Off”<br />
function (page 92).<br />
Those changes are lost and cannot be restored. Next<br />
time Try to save your changes as quickly as possible.
V-Accordion r<br />
The screen is difficult or impossible to read (Advanced)<br />
Why does the Orchestra mode change when I<br />
press a given Treble register?<br />
Because you established a Link with the Treble section<br />
and also specified a mode using the “MODE”<br />
entry of the “2.13 Orchestra Link” parameter. Set it to<br />
“---” (page 68).<br />
My settings have changed<br />
■Did you establish a “Link”?<br />
If you change the Bass, Free Bass, and/or Orchestra<br />
settings without saving them, and then select<br />
another Treble register while the Link function is on,<br />
the FR-7x selects different settings for the linked sections.<br />
Your changes are therefore lost.<br />
■ Did you save the “SET COMMON” parameters?<br />
Doing so only saves the general Set parameters, not<br />
the settings of the various registers.<br />
■ Did a “Noise” setting change?<br />
Whenever you select “ALL” for “2.1 Reed Type”, and<br />
set a different reed type, the “2.5 Valve Noise” setting<br />
is automatically adapted to that reed type. You may<br />
have to change it afterwards if you wish to use a different<br />
noise type.<br />
Whenever you select “ALL” for “Reed Type” and set a<br />
different reed type, the “3.5 Reed Growl” setting is<br />
automatically adapted to that reed type. It would<br />
therefore be a good idea to first select the reed type<br />
and only then change the growl type. The same<br />
applies to “4.4 Button Noise” and “Reed Type”.<br />
■ Did the effects parameters change unexpectedly?<br />
Each effects processor (Reverb, Chorus, Delay) has a<br />
“Macro” parameter (pages 82 and 85) that not only<br />
recalls a different effect type, but also appropriate<br />
settings for that type. If you select another Macro,<br />
the settings for the previous effect type are lost.<br />
MIDI-related issues<br />
■I selected the “Ext. Seq. Playback” mode, yet the<br />
section in question does not respond to MIDI<br />
messages.<br />
Does the section’s MIDI channel correspond to the<br />
transmit channel of the external device (page 109)?<br />
Do not select “Off” for a section that should receive<br />
MIDI messages.<br />
■ What MIDI channels does the FR-7x use by<br />
default?<br />
See the table on page 108.<br />
■ The MIDI channel setting is correct, yet the section<br />
in question does not transmit notes.<br />
You probably set its “Note” parameter to “Off”<br />
(page 114).<br />
■ The FR-7x does not transmit certain MIDI messages<br />
even though I set them correctly.<br />
You may have activated a global MIDI filter. See<br />
page 111 for details.<br />
■ The FR-7x seems to transmit the wrong bank<br />
select and program change numbers.<br />
This is not a malfunction. When you set the “12.2 Ext.<br />
Seq. Playback” parameter to “On” (see p. 109), the<br />
FR-7x’s registers no longer transmit the sound selection<br />
clusters you programmed (see p. 114). Instead,<br />
they transmit their “Std” values. This will return to<br />
normal operation when you set “12.2 Ext. Seq. Playback”<br />
back to “Off”.<br />
■ The FR-7x does not change sounds when my<br />
sequencer transmits program change numbers,<br />
even though I used the FR-7x to send those<br />
numbers to the sequencer.<br />
You can send program change numbers to an external<br />
instrument that lie outside the range of the<br />
FR-7x’s registers (1~14 for Treble, 1~7 for Bass/Free<br />
Bass/Orch. Bass/Orch Chord/Orch Free Bass, 1~26 for<br />
Orchestra). Such “excess” program numbers are<br />
ignored by the FR-7x when you transmit them back<br />
(from a sequencer, for example).<br />
■ I cannot find the MIDI sockets on my FR-7x.<br />
The FR-7x does not have MIDI sockets. You need to<br />
connect it to the FBC-7 using the supplied 19-pin<br />
cable (page 107).<br />
■ The FR-7x does not receive the MIDI messages I<br />
recorded for it.<br />
That’s because the “Ext. Seq. Playback” parameter of<br />
the sections in question is set to “Off”. You need to<br />
activate it if you wish to use the FR-7x as MIDI tone<br />
generator (page 109).<br />
■ All the FR-7x’s settings have changed.<br />
You probably loaded a file containing 80 Sets (“ALL”)<br />
using “11.6 Import All FR-7x” on p. 99. The settings of<br />
that file have replaced your own settings. We regret<br />
that your settings cannot be restored. Be sure to<br />
archive the internal settings before loading archived<br />
settings. See “11.4 Export All FR-7x” on p. 98.<br />
■ The external sequencer keeps displaying a “MIDI<br />
buffer overflow” message<br />
The bellows sends too many data at once (its data are<br />
transmitted on five channels simultaneously). Select<br />
a different setting (“Medium” or “Low”). This leads to<br />
a coarser resolution, and maybe to audible steps, but<br />
at least, your sequencer will be able to record the<br />
data. See “Solving MIDI buffer problems” on p. 110.<br />
While saving data, the FR-7x displays the “FLASH<br />
WRITE ERROR” message<br />
It means that the data could not be saved in the<br />
FR-7x’s internal memory. Press [EXIT÷JUMP] to leave<br />
this page. WARNING: this will take you to the main<br />
page. Do not select other registers or Sets. First try to<br />
save your settings using the WRITE function<br />
(page 103). If the above message appears again, contact<br />
your Roland dealer to have your FR-7x’s memory<br />
checked.<br />
117
FR-7x V-Accordion<br />
® Troubleshooting (Advanced)<br />
At power-on, the FR-7x displays the following<br />
message<br />
The FR-7x was switched off while it was saving data<br />
(possibly because the battery pack was depleted, or<br />
because of a power failure). When you switch it on<br />
again, it attempts to recover everything it can. It<br />
may, however, also load the data of the corresponding<br />
factory set. In any case, you will have to program<br />
some or all settings again.<br />
r<br />
118
V-Accordion r<br />
Specifications (Advanced)<br />
20. Specifications<br />
■ Keyboards<br />
Piano-type<br />
Button-type<br />
■ Bellows<br />
New sensor for the detection of bellows pressure (highresolution<br />
pressure sensor)<br />
■ Bellows resistance regulator<br />
Wheel with fine adjustment<br />
Right hand: 41 keys, velocity sensitive,<br />
aftertouch<br />
Left hand: 120 velocity-sensitive bass<br />
buttons<br />
Modes: Standard, Free Bass, Orch.Bass,<br />
Orch.Chord, Orch. Free Bass<br />
Right hand: 92 buttons, velocity<br />
sensitive<br />
Treble modes: C Griff Europe, C Griff 2,<br />
B Griff Bajan, B Griff Fin, D Griff 1,<br />
D Griff 2<br />
Aftertouch: generated with the Master<br />
bar<br />
Left hand: 120 velocity-sensitive bass<br />
buttons<br />
Modes: Standard, Free Bass, Orch Bass,<br />
Orch Chord, Orch. Free Bass<br />
■ Sound source<br />
Max polyphony: 128 voices<br />
Wave ROM: 64MB of waveforms, expandable<br />
Tones: 80 user programmable accordion Sets, each one<br />
including: 14 Treble registers, 7 Bass registers, 7 Free<br />
Bass registers, 7 Orchestra Bass registers, 7 Orchestra<br />
Chord registers, 7 Orchestra Free Bass registers, 26<br />
Orchestra sounds (49 in total, 26 assignable simultaneously)<br />
128 Drum sounds (up to 6 simultaneously)<br />
Treble reed footages: 7<br />
Bass reed footages: 5<br />
Chord reed footages: 3<br />
Free Bass footages: 2<br />
■ Organ sounds with harmonic bar simulation (“TW”)<br />
Virtual ToneWheel technology<br />
32 presets (Treble, Chord and Free Bass sections)<br />
16 presets (Bass section)<br />
1 user memory for each register<br />
■ PBM (Physical Behavior Modeling)<br />
Noises: stopping-reed growl, closing valve noise, left<br />
button noise<br />
Individual reed simulation: hysteresis threshold, Expression<br />
curve, pressure-variant filter, pressure-variant pitch<br />
deviation<br />
Reed sound wave switching: by bellows acceleration, by<br />
note repetition speed<br />
■ Musette tuning<br />
Micro tuning presets: 16 (Off, Dry, Classic, F-Folk, American<br />
L/H, North Europe, German L/H, D-Folk L/H, Alpine,<br />
Italian L/H, French, Scottish)<br />
■ Effects<br />
Reverb: 8 types, Chorus: 8 types,<br />
Delay: 10 types, Rotary for orchestral organ sounds<br />
(slow/fast)<br />
“Cassotto” and “Sordina” simulation<br />
Separate reverb, chorus, delay vibrato/chorus and rotary<br />
effects for the TW organ section.<br />
■ Panel controls<br />
Knobs: Volume, Treble/Bass balance, Reverb, Chorus,<br />
Delay, Encoder: [DATA÷ENTER]<br />
Panel Switches: 14 Treble registers + Master + Orchestra,<br />
7 Bass registers<br />
Navigation switches: UP/DOWN, MENU/WRITE, EXIT/<br />
JUMP<br />
Other switches: SET UP/DOWN, SORDINA ON/OFF,<br />
POWER<br />
6 user-assignable function switches (last bass button<br />
row)<br />
■ Audio player/wave recorder<br />
Plays back mp3/WAV files from USB storage device<br />
Also contains an audio wave recorder with data storage<br />
direct to USB storage device<br />
■ Display<br />
128 x 64 graphic, backlit LCD<br />
■ Rated power output<br />
2 x 25W RMS<br />
■ Speakers<br />
2 x 10cm speakers (neodymium transducer magnets),<br />
2 tweeters<br />
■ Connectors on instrument<br />
OUTPUT sockets (stereo),<br />
Multi-connector (towards external FBC-7 power supply/<br />
footswitch unit/battery charger)<br />
HEADPHONE socket (stereo),<br />
USB port (Host port)<br />
■ Power supply:<br />
Rechargeable Ni-Mh battery pack (24V-4500mAh)<br />
External FBC-7 power supply/battery charger: AC 110V,<br />
AC 220V, AC 230V, AC 240V<br />
Power consumption: 140W<br />
■ Dimensions<br />
Piano type: 423 (H) x 528 (W) x 275 (D) mm /16-11/16<br />
(D) x 20-13/16 (W) x 10-7/8 (D) inches<br />
Button type: 397 (H) x 506 (W) x 249 (D) mm /15-11/16<br />
(D) x 19-15/16 (W) x 9-13/16 (D) inches<br />
■ External FBC-7 power supply/battery charger<br />
5 programmable foot switches (SET UP/DOWN, REGISTER<br />
UP/DOWN, SUSTAIN)<br />
Multi-core connector cable (towards accordion)<br />
Expression pedal socket<br />
MIDI IN/OUT/THRU sockets<br />
OUTPUT sockets (L/Mono, R)<br />
Connector for charging a battery pack<br />
AC inlet<br />
■ Weight (without straps, with battery pack)<br />
Piano type: 11.5kg / 25 lbs 6 oz<br />
119
FR-7x V-Accordion<br />
® Specifications (Advanced)<br />
Button type: 10.7kg / 23 lbs 10 oz<br />
■ Supplied accessories<br />
External FBC-7 power supply/battery charger<br />
Battery pack<br />
Owner’s <strong>Manual</strong><br />
Power cable<br />
Reference caps for the Bass buttons<br />
19-pin multicore cable<br />
Accordion cloth<br />
Straps<br />
■ Options<br />
V-Accordion Gig Bag, FBC-7 Gig Bag<br />
RH-200/300 headphones, AMC-4 Audio–MIDI cable,<br />
AAB-1 Music rest & Throne, SA-300 Stage amplifier,<br />
Battery pack (BP-24-25, part no. K2568101),<br />
Roland M-UF-series USB memory<br />
Note: In the interest of product improvement, the specifications<br />
and/or appearance of this unit are subject to<br />
change without prior notice.<br />
r<br />
120
V-Accordion r<br />
Appendix<br />
21. Appendix<br />
Parameter list<br />
VOLUME AND EFFECT<br />
BALANCE<br />
The default value corresponds to the current physical position of potentiometer. The central position is 0. The values<br />
range from 0 to 64 regardless of whether the arrow symbol indicates BASS or TREBLE.<br />
REVERB The default value corresponds to the current physical position of potentiometer. Range: 0~127<br />
CHORUS The default value corresponds to the current physical position of potentiometer. Range: 0~127<br />
DELAY The default value corresponds to the current physical position of potentiometer. Range: 0~127<br />
FULL MODE MENU (all parameters)<br />
1. TUNING<br />
1.1 Master Tune* Value 415.6Hz~440.0Hz~464.4Hz<br />
1.2 Transpose Value (–6~+5 ; F#~F)<br />
1.3 Scale* Type Equal (Off), User 1, User 2, User 3, Arabic1, Arabic2, Just Major, Just Minor, Pythagorean,<br />
Mean-Tone, Werckmeister, Kirnberger<br />
Key<br />
C, C#, D, Eb, E, F, F#, G, Ab, A, Bb, B<br />
1.4 Scale Edit* Type User 1, User 2, User 3<br />
Tune Note C, C#, D, Eb, E, F, F#, G, Ab, A, Bb, B<br />
Tune Value -64~0~63 for each note<br />
1.5 Scale Assign* Part Treble, Orchestra, Treb&Orch, Bass&Chord, ALL<br />
2. TREBLE EDIT<br />
2.1 Reed Type Foot ALL, 16', 8', 8'-, 8'+, 4', 5-1/3', 2-2/3'<br />
Type<br />
Bandoneon, I-Folk, I-Folk2, Classic, Cajun, Jazz, F-Folk, D-Folk, Organetto, F-Folk2, Classic2, Studio,<br />
Tradition, Steierische, OldItaly, TexMex, Trikitixa, F-Jazz, Classic3, Bajan<br />
2.2 Register Foot 16', 8', 8'-, 8'+, 4', 5-1/3', 2-2/3'<br />
Status Off, On, On-Cassotto<br />
2.3 Reed Volume Value ALL, 16', 8', 8'-, 8'+, 4', 5-1/3', 2-2/3'<br />
Level<br />
Off, –40~STD~40<br />
2.4 Treble Octave Value -1, 0, +1<br />
2.5 Valve Noise Type Bandoneon, I-Folk, I-Folk2, Classic, Cajun, Jazz, F-Folk, D-Folk, Organetto, F-Folk2, Classic2, Studio,<br />
Tradition, Steierische, OldItaly, TexMex, Trikitixa, F-Jazz, Classic3, Bajan<br />
Level<br />
Off, -40~STD~40<br />
2.6 Musette Detune Type Off, Dry, Classic, F-Folk, American_L, American_H, North_Eu, German_L, D-Folk_L, Italian_L,<br />
German_H, Alpine, Italian_H, D-Folk_H, French, Scottish<br />
2.7 Bellows Detune Type Off, Low, Standard, High<br />
2.8 Reverb Send Level 0~127<br />
2.9 Chorus Send Level 0~127<br />
2.10 Delay Send Level 0~127<br />
2.11 Aftertouch Pitch Mode Off, 1/4 Down, 1/2 Down, 1/4 Up, 1/2 Up<br />
2.12 Bass Link Bass No Link, Bass 1~Bass 7, Free 1~Free 7<br />
Orc.Bass No Link, name of the selected 1~7 register<br />
2.13 Orchestra Link Register No Link, name of ORCHESTRA register memory 1A~13B<br />
Mode<br />
----, Solo, Dual, Low, High, Low Trb, High Trb, Solo M, Dual M, Low M, High M, Low M Trb,<br />
High M Trb.<br />
2.14 Orchestra Chord Link Chord No Link, CHD 1~7, FBS 1~7<br />
FreeBS No Link, name of the selected 1~7 register or No Link, name of the selected CHD1~7 register or<br />
No Link, name of the selected FBS1~7 register<br />
2.15 MIDI TX Message & value Note [On, Off], Octave [-3~0~3], CC 00 [STD, Off, 0~127], CC 32 [STD, Off, 0~127],<br />
PC [STD, Off, 1~128], Volume [Off, 0~127], Panpot [Off, 0~127], Reverb [Off, 0~127],<br />
Chorus [Off, 0~127], Velocity [On, 1~127], Express [Off, Bellows, Pedal], After Touch[On, Off]<br />
2.16 Name Characters Name of treble register. See the character table below.<br />
121
FR-7x V-Accordion<br />
® Parameter list<br />
r<br />
3. BASS EDIT<br />
122<br />
3.1 Reed Type Foot ALL, 16', 8', 8'-4', 4', 2'<br />
Type<br />
Bandoneon, I-Folk, I-Folk2, Classic, Cajun, Jazz, F-Folk, D-Folk, Organetto, F-Folk2, Classic2, Studio,<br />
Tradition, Steierische, Trikitixa, F-Jazz, Classic3, Bajan<br />
3.2 Register Foot 16', 8', 8'-4', 4', 2'<br />
Status Off, Bass, Chord, Bass&Chord<br />
Note: With the 16' and 8' feet selected the “Status” can only be either “Off” or “Bass”. With the<br />
8'-4', 4' and 2' feet selected the “Status” can only be “Off”, “Chord” or “Bass&Chord”.<br />
3.3 Reed Volume Value ALL, 16', 8', 8'-4', 4', 2'<br />
Level<br />
Off, –40~STD~40<br />
3.4 Button Noise Type Bandoneon, I-Folk, I-Folk2, Classic, Cajun, Jazz, F-Folk, D-Folk, Organetto, F-Folk2, Classic2, Studio,<br />
Tradition, Steierische, Trikitixa, F-Jazz, Classic3, Bajan.<br />
Level<br />
Off, -40~STD~40<br />
3.5 Reed Growl Type Bandoneon, I-Folk, I-Folk2, Classic, Cajun, Jazz, F-Folk, D-Folk, Organetto, F-Folk2, Classic2, Studio,<br />
Tradition, Steierische, Trikitixa, F-Jazz, Classic3, Bajan.<br />
Level<br />
Off, –40~STD~40<br />
3.6 Bellows Detune Type Off, Low, Standard, High<br />
3.7 Bass Drum Link 1~3 Note Off, 1~127 Vol –100~+100<br />
3.8 Chord Drum Link 1~3 Note Off, 1~127 Vol –100~+100<br />
3.9 Reverb Send Level 0~127<br />
3.10 Chorus Send Level 0~127<br />
3.11 Delay Send Level 0~127<br />
3.12 Bass MIDI TX Message & value Note [On, Off], Octave [-3~0~3], CC 00 [STD, Off, 0~127], CC32 [STD, Off, 0~127],<br />
PC [STD, Off, 1~128], Volume [Off, 0~127], Panpot [Off, 0~127], Reverb [Off, 0~127],<br />
Chorus [Off, 0~127], Velocity [On, 1~127], Express [Off, Bellows, Pedal]<br />
3.13 Chord MIDI TX Message & value Note [On, Off], Octave [-3~0~3], CC 00 [STD, Off, 0~127], CC32 [STD, Off, 0~127],<br />
PC [STD, Off, 1~128], Volume [Off, 0~127], Panpot [Off, 0~127], Reverb [Off, 0~127],<br />
Chorus [Off, 0~127], Velocity [On, 1~127], Express [Off, Bellows, Pedal]<br />
3.14 Name Chararacters Name of bass register. See the character table below.<br />
4. FREE BASS EDIT<br />
4.1 Reed Type Foot ALL, 16', 8'<br />
Type<br />
Bandoneon, I-Folk, I-Folk2, Classic, Cajun, Jazz, F-Folk, D-Folk, Organetto, F-Folk2, Classic2, Studio,<br />
Tradition, Steierische, Trikitixa, F-Jazz, Classic3, Bajan<br />
4.2 Register Foot ALL, 16', 8'<br />
Status Off, Low, High, Whole<br />
4.3 Reed Volume Foot ALL, 16', 8'<br />
Level<br />
Off, –40~STD~40<br />
4.4 Button Noise Type Bandoneon, I-Folk, I-Folk2, Classic, Cajun, Jazz, F-Folk, D-Folk, Organetto, F-Folk2, lassic2, Studio,<br />
Tradition, Steierische, Trikitixa, F-Jazz, Classic3, Bajan.<br />
Level<br />
Off, –40~STD~40<br />
4.5 Reed Growl Type Bandoneon, I-Folk, I-Folk2, Classic, Cajun, Jazz, F-Folk, D-Folk, Organetto, F-Folk2, Classic2, Studio,<br />
Tradition, Steierische, Trikitixa, F-Jazz, Classic3, Bajan.<br />
Level<br />
Off, –40~STD~40<br />
4.6 Bellows Detune Type Off, Low, Standard, High<br />
4.7 Reverb Send Level 0~127<br />
4.8 Chorus Send Level 0~127<br />
4.9 Delay Send Level 0~127<br />
4.10 MIDI TX Message & value Note [On, Off], Octave [-3~0~3], CC 00 [STD, Off, 0~127], CC32 [STD, Off, 0~127],<br />
PC [STD, Off, 1~128], Volume [Off, 0~127], Panpot [Off, 0~127], Reverb [Off, 0~127],<br />
Chorus [Off, 0~127], Velocity [On, 1~127], Express [Off, Bellows, Pedal]<br />
4.11 Name Characters Name of bass register. See the character table below.<br />
5. ORC BASS EDIT<br />
5.1 Timbre Patch Assign an orchestra sound. Please see the “Orchestral sounds and bellows/velocity control” on<br />
p. 128.<br />
5.2 Lowest Note Lowest Note E, F, F#, G, Ab, A, Bb, B, C<br />
5.3 Octave Value –3~0~+3
V-Accordion r<br />
Parameter list<br />
5.4 Release Time Release Time 0~63<br />
5.5 Volume Level Off, –40~STD~40<br />
5.6 Panpot Value 63 Bass~0~63 Treb<br />
5.7 Bass Drum Link 1~3 Note Off, 1~127 Vol –100~+100<br />
5.8 Reverb Send Level 0~127<br />
5.9 Chorus Send Level 0~127<br />
5.10 Delay Send Level 0~127<br />
5.11 MIDI TX Message & value Note [On, Off], Octave [-3~0~3], CC 00 [STD, Off, 0~127], CC32 [STD, Off, 0~127],<br />
PC [STD, Off, 1~128], Volume [Off, 0~127], Panpot [Off, 0~127], Reverb [Off, 0~127],<br />
Chorus [Off, 0~127], Velocity [On, 1~127], Express [Off, Bellows, Pedal]<br />
6. ORCHESTRA EDIT<br />
6.1 Timbre Patch Assign an orchestra sound. Please see the “Orchestral sounds and bellows/velocity control” on<br />
p. 128.<br />
6.2 Octave Value –3~0~+3<br />
6.3 Volume Level Off, –40~STD~40<br />
6.4 Panpot Level 63 Bass~0~63 Treb<br />
6.5 Bellows Detune Type Off, Low, Standard, High<br />
6.6 Reverb Send Level 0~127<br />
6.7 Chorus Send Level 0~127<br />
6.8 Delay Send Level 0~127<br />
6.9 Aftertouch Pitch Mode Off, 1/4 Down, 1/2 Down, 1/4 Up, 1/2 Up<br />
6.10 MIDI TX Message & value Note [On, Off], Octave [-3~0~3], CC 00 [STD, Off, 0~127], CC32 [STD, Off, 0~127],<br />
PC [STD, Off, 1~128], Volume [Off, 0~127], Panpot [Off, 0~127], Reverb [Off, 0~127],<br />
Chorus [Off, 0~127], Velocity [On, 1~127], Express [Off, Bellows, Pedal], After Touch [On, Off]<br />
7. Orch. Chord Edit<br />
7.1 Timbre Patch Assign an orchestra sound. Please the “Orchestral sounds and bellows/velocity control” on p. 128<br />
7.2 Lowest note Lowest Note C, C#, D, Eb, E, F, F#, G, Ab, A, Bb, B, C<br />
7.3 Octave Value –3~0~+3<br />
7.4 Volume Level Off, –40~STD~40<br />
7.5 Panpot Level 63 Bass~0~63 Treb<br />
7.6 Chord Drum Link 1~3 Note Off, 1~127 Vol –100~+100<br />
7.7 Reverb Send Level 0~127<br />
7.8 Chorus Send Level 0~127<br />
7.9 Delay Send Level 0~127<br />
7.10 MIDI TX Message & value Note [On, Off], Octave [-3~0~3], CC 00 [STD, Off, 0~127], CC32 [STD, Off, 0~127],<br />
PC [STD, Off, 1~128], Volume [Off, 0~127], Panpot [Off, 0~127], Reverb [Off, 0~127],<br />
Chorus [Off, 0~127], Velocity [On, 1~127], Express [Off, Bellows, Pedal]<br />
8. Orch.FBass Edit<br />
8.1 Timbre Patch Assign an orchestra sound. Please the “Orchestral sounds and bellows/velocity control” on p. 128<br />
8.2 Octave Value –3~0~+3<br />
8.3 Volume Level Off, –40~STD~40<br />
8.4 Panpot Level 63 Bass~0~63 Treb<br />
8.5 Reverb Send Level 0~127<br />
8.6 Chorus Send Level 0~127<br />
8.7 Delay Send Level 0~127<br />
8.8 MIDI TX Message & value Note [On, Off], Octave [-3~0~3], CC 00 [STD, Off, 0~127], CC32 [STD, Off, 0~127],<br />
PC [STD, Off, 1~128], Volume [Off, 0~127], Panpot [Off, 0~127], Reverb [Off, 0~127],<br />
Chorus [Off, 0~127], Velocity [On, 1~127], Express [Off, Bellows, Pedal]<br />
9. Set Common<br />
9.1 Reverb Macro Type Room1, Room2, Room3, Hall1, Hall2, Plate, Delay, Panning Dly<br />
Level 0~127<br />
9.2 Reverb Parameters Parameters Character [0~7], Pre-LPF [0~7], Time [0~127], Level [0~127], DlyFback [0~127], Pre-DlyT. [0~127]<br />
9.3 Chorus Macro Macro Type Chorus1, Chorus2, Chorus3, Chorus4, FBackChr, Flanger, ShortDelay, ShortDlyFB<br />
Level 0~127<br />
123
FR-7x V-Accordion<br />
® Parameter list<br />
r<br />
124<br />
9.4 Chorus Parameters Parameters Pre-LPF [0~7], Level [0~127], Feedback [0~127], Delay [0~127], Rate [0~127], Depth [0~127],<br />
Chr>Rev [0~127], Chr>Dly [0~127]<br />
9.5 Delay Macro Type Delay1, Delay2, Delay3, Delay4, PanDelay1, PanDelay2, PanDelay3, PanDelay4, Delay>Rev,<br />
PanRepeat<br />
Level 0~127<br />
9.6 Delay Parameters Parameters Pre-LPF [0~7], Level [0~127], Time C.(ms) [0.1~1000], Time L.(%) [4~500],<br />
Time R(%) [4~500], Level L [0~127], Level C [0~127], Level R [0~127], Feedback [-64~0~63],<br />
Dly>Rev [0~127]<br />
9.7 Name Characters See the character table below.<br />
9.8 Master Bar Recall Register 1~14<br />
9.9 Icon Bitmap 1~44, preset<br />
10. System<br />
10.1 LCD Contrast Value 0~12 (Default setting: 10)<br />
10.2 Bellows Curves Type Fixed Low, Fixed Med, Fixed High, X-Light, Light, Standard, Heavy, X-Heavy<br />
10.3 Pedal Controller Switch 1~5<br />
Assign Set Up, Set Down, Regist Up, Regist Down, Sust.A, Sust.B, Orch.On/Off,Start/Stop, Intro, Fill Up,<br />
Fill Down, Ending, Pitch Up 1/2, Pitch Up 1, PitchDwn 1/2, PitchDwn 1, Rtry Sw, Rtry Slowfast,<br />
Rtry Slow, Rtry Fast, Brake OnOff, Brake On, Brake Off, Modul., Play/Pause, Skip BWD, Skip FWD,<br />
REC Start/Stop, Set 1~80, Register 1~14, Null.<br />
10.4 Sustain Routing A Part All, Treble, Bass, Chord, Orch., Orch.Bs, Orch.BsCh, Orch.FBs<br />
Value<br />
On, Off<br />
10.5 Sustain Routing B Part All, Treble, Bass, Chord, Orch., Orch.Bs, Orch.BsCh, Orch.FBs Value On, Off<br />
Value<br />
On, Off<br />
10.6 Function Switch Status On, Off<br />
10.7 Function Switches Edit Switch 1~6<br />
Assign Set Up, Set Down, Regist Up, Regist Down, Sust.A, Sust.B, Orch.On/Off,Start/Stop, Intro, Fill Up,<br />
Fill Down, Ending, Pitch Up 1/2, Pitch Up 1, PitchDwn 1/2, PitchDwn 1, Rtry Sw, Rtry Slowfast,<br />
Rtry Slow, Rtry Fast, Brake OnOff, Brake On, Brake Off, Modul., Play/Pause, Skip BWD, Skip FWD,<br />
REC Start/Stop, Set 1~80, Register 1~14, Null.<br />
10.8 Bass&Chd Mode Type 2 Bs Rows, 3 Bs Rows A-7th, 3 Bs Rows A-5dim, 3 Bs Rows B-7th, 3 Bs Rows B-5dim,<br />
3 Bs Rows Bx-7th<br />
10.9 Free Bass Mode Type Minor 3rd, Bajan, Fifth, N.Europe, Finnish<br />
10.10 Stereo Width Type (–63~–1, Natural, Wide)<br />
10.11 Output Level Level –12dB, –6dB, 0dB<br />
10.12 Auto Power Off Type Disabled, 10 min., 15 min., 20 min.<br />
10.13 Start-Up Type Set [1~80], Bass Link [On/Off], Orch Link [On/Off],<br />
Assign 1~80 only for Set type, On/Off<br />
10.14 Start-Up Name Name 8 characters [________ default]<br />
10.15 Orchestra Touch Value Fixed Low, Fixed Med, Fixed High, Low, Medium, High, Fixed L+Bellows, Fixed M+Bellows,<br />
Fixed H+Bellows, Bellows<br />
10.16 Orchestra Bs&Ch Touch Value Fixed Low, Fixed Med, Fixed High, Low, Medium, High, Fixed L+Bellows, Fixed M+Bellows,<br />
Fixed H+Bellows, Bellows<br />
10.17 Start/Stop MIDI TX Value Off, On<br />
10.18 Treble Release T. Value –64~0~63<br />
10.19 Expansion Memory A, B<br />
Load<br />
Load an expansion file<br />
Erase<br />
Erase the selected memory Area<br />
10.20 Treble Mode<br />
(only for button type)<br />
Type C-Griff Europe, C-Griff 2, B-Griff Bajan, B-Griff Fin, DGriff 1, D Griff 2
V-Accordion r<br />
Parameter list<br />
11. Utility<br />
11.1 Battery Status Adapter, Recharging, NO BATTERY Character table<br />
11.2 Copy SET From Set 1~80<br />
To Set 1~80<br />
11.3 Copy Effects Type All, Reverb,<br />
Chorus, Delay<br />
From Set 1~80<br />
To Set 1~80<br />
Characters in gray boxes cannot be used in file names.<br />
11.4 Export All FR-7x Procedure to export All FR-7 setting on USB storage<br />
11.5 Export Set Procedure to export Sets on USB storage<br />
11.6 Import All FR-7x Procedure to import All FR-7x settings from USB storage<br />
11.7 Import Set Procedure to import Sets from USB storage<br />
11.8 Restore Data Type All, Master Tune, Scale Tune, System, MIDI, All Sets, Set 1~ Set 80<br />
11.9 FR-7/5 Import Procedure to import a MIDI FR-7/5 bulk dump file from USB storage.<br />
11.10 Treble Reg. on Type<br />
Reed ALL, Reed 16’, Reed 8’, Reed 8'-, Reed 8'+, Reed 4', Reed 5’-1/3', Reed 2’-2/3', Vol ALL, Vol<br />
current Set<br />
16’, Vol 8’, Vol 8'-, Vol 8'+, Vol 4', Vol 5’-1/3', Vol 2’-2/3', Noise, Noise Vol, MusDetune<br />
Value Reed Bandoneon, I-Folk, I-Folk2, Classic, Cajun, Jazz, F-Folk, D-Folk, Organetto, F-<br />
Folk2, Classic2, Studio, Tradition, Steierische, OldItaly, TexMex, Trikitixa, F-Jazz,<br />
Classic3, Bajan<br />
Vol<br />
Off, –40~std~40<br />
Noise<br />
Bandoneon, I-Folk, I-Folk2, Classic, Cajun, Jazz, F-Folk, D-Folk, Organetto, F-Folk2, Classic2, Studio,<br />
Tradition, Steierische, OldItaly, TexMex, Trikitixa, F-Jazz, Classic3, Bajan<br />
Noise Vol Off, –40~STD~40<br />
Mus Detune Off, Dry, Classic, F-Folk, American_L, American_H, North_Eu, German_L, D-Folk_L, Italian_L,<br />
German_H, Alpine, Italian_H, D-Folk_H, French, Scottish<br />
11.11 Bass Reg. on<br />
current Set<br />
11.12 FreeBass Reg. on<br />
current Set<br />
(space) ! " # $ % & ' ( ) *<br />
+ , - . / 0 1 2 3 4 5<br />
6 7 8 9 : ; < = > ? @<br />
A B C D E F G H I J K<br />
L M N O P Q R S T U V<br />
W X Y Z [ \ ] ^ _ `<br />
a b c d e f g h i j k<br />
l m n o p q r s t u v<br />
w x y z { | }<br />
Type<br />
Reed ALL, Reed 16’, Reed 8’, Reed 8'-4’, Reed 4', Reed 2’, Vol ALL, Vol 16’, Vol 8’, Vol 8'-4’, Vol 4',<br />
Vol 2’, Noise, Noise Vol, Reed Growl, Growl Vol<br />
Value Reed Bandoneon, I-Folk, I-Folk2, Classic, Cajun, Jazz, F-Folk, D-Folk, Organetto, F-<br />
Folk2, Classic2, Studio, Tradition, Steierische, Trikitixa, F-Jazz, Classic3, Bajan<br />
Vol<br />
Off, –40~STD~40<br />
Noise<br />
Bandoneon, I-Folk, I-Folk2, Classic, Cajun, Jazz, F-Folk, D-Folk, Organetto, F-Folk2, Classic2, Studio,<br />
Tradition, Steierische, Trikitixa, F-Jazz, Classic3, Bajan<br />
Noise Vol Off, –40~STD~40<br />
Reed Growl Bandoneon, I-Folk, I-Folk2, Classic, Cajun, Jazz, F-Folk, D-Folk, Organetto, F-Folk2, Classic2, Studio,<br />
Tradition, SteierischeTrikitixa, F-Jazz, Classic3, Bajan<br />
Growl Vol Off, –40~STD~40<br />
Type<br />
Reed ALL, Reed 16’, Reed 8’, Vol ALL, Vol 16’, Vol 8’, Noise, Noise Vol, Reed Growl, Growl Vol<br />
Value Reed Bandoneon, I-Folk, I-Folk2, Classic, Cajun, Jazz, F-Folk, D-Folk, Organetto, F-<br />
Folk2, Classic2, Studio, Tradition, Steierische, Trikitixa, F-Jazz, Classic3, Bajan<br />
Vol<br />
Off, –40~STD~40<br />
Noise<br />
Bandoneon, I-Folk, I-Folk2, Classic, Cajun, Jazz, F-Folk, D-Folk, Organetto, F-Folk2, Classic2, Studio,<br />
Tradition, Steierische, Trikitixa, F-Jazz, Classic3, Bajan<br />
Noise Vol Off, –40~STD~40<br />
Reed Growl Bandoneon, I-Folk, I-Folk2, Classic, Cajun, Jazz, F-Folk, D-Folk, Organetto, F-Folk2, Classic2, Studio,<br />
Tradition, Steierische, Trikitixa, F-Jazz, Classic3, Bajan<br />
Growl Vol Off, –40~STD~40<br />
11.13 Factory Reset Procedure to reset to its factory setting.<br />
12. MIDI<br />
12.1 RealTime RX-TX Part Treble (1), Bass/Free (2), Chord (3), OrcBass (5), Orchestra (4), Orc Chord (6), Orc FreeBs (7),<br />
Basic Ch (13), Control Ch (13) only TX<br />
Channel 1~16, Off (can be set for each part)<br />
12.2 Ext. Seq. Playback* Part Treble, Bass&Chord, Orchestra, All<br />
Value<br />
Off, On (can be set for each part)<br />
12.3 Bellows TX Resolution* Value Super, High, Normal, Low<br />
125
FR-7x V-Accordion<br />
® Factory Sets<br />
12.4 Expression MIDI TX Part All, Treble, Orch., Bass&Chord, Orch.Bs, Orch.Chd, Orch. Fbs<br />
Value<br />
Off, On<br />
12.5 Global Filters Param Note Tx, CC00, CC32, PC, AftTouch, Volume, Panpot, Reverb, Chorus<br />
Value<br />
Tx Off, Default<br />
12.6 Bank for ‘Send PC’* PRG NUM 1~128, 129~256, 257~384, 385~512<br />
CC00 0~127<br />
CC32 0~127<br />
(*) are Global parameters<br />
Factory Sets<br />
01 CONCERTO<br />
02 CLASSIC<br />
03 JAZZ<br />
04 “I” FOLK (Italian Folk)<br />
05 “D” FOLK (German Folk)<br />
06 “F” FOLK (French Folk)<br />
07 “SP” FOLK (Spanish Folk)<br />
08 BallROOM<br />
09 BANDNEON<br />
10 ALPINE<br />
11 CAJUN<br />
12 TEX MEX<br />
13 OldPARIS<br />
14 CiaoROME<br />
15 DiatFOLK<br />
16 STUDIO<br />
17 TRDITION<br />
18 BAROQUE<br />
19 ROMANTIC<br />
20 CONCERTN<br />
21 SCOTTISH<br />
22 IRISH<br />
23 CELTIC<br />
24 XLowReed<br />
25 HalfVALV<br />
26 FUTURE<br />
27 MUSETTE<br />
28 BASSOON<br />
29 MASTER<br />
30 EXAMPLES<br />
31 FRANCE vX<br />
32 FRANCE Ac<br />
33 F JAZZ<br />
34 “I” SCALA<br />
35 BAJAN<br />
36 RHYTHM<br />
37 ORGAN<br />
38 OrPARADE<br />
39 ALL ORCH<br />
40 V-Set<br />
41 WOA1-Ac<br />
42 WOA1-Bs<br />
43 WOA-2 Exp<br />
44 BsToTreb<br />
45~80 empty<br />
Demo Songs<br />
r<br />
126<br />
# DISPLAYED NAME* SONG TITLE PERFORMED BY<br />
1 Organ&Acc By the roundabout, by L. Beier Ludovic Beier<br />
2 OldPARIS Walking in old Paris by S. Scappini Sergio Scappini<br />
3 “I” FOLK Carnival in Venice – Traditional Sergio Scappini<br />
4 BANDNEON Passionate Red Rose by S. Scappini Sergio Scappini<br />
5 EL.PIANO Starry Night by L. Beier Ludovic Beier<br />
6 Organ1 Funky Night by L. Beier Ludovic Beier<br />
7 Organ2 Mad Mouse by L. Beier Ludovic Beier<br />
8 “D”FOLK Bezaubernder Sinaklia by S. Scappini Sergio Scappini<br />
9 NAPLES O Sole Mio – Traditional Sergio Scappini<br />
10 CLASSIC Sonata in C Maj by D. Scarlatti Sergio Scappini<br />
11 ALPINE Edelweiss by S. Scappini Sergio Scappini<br />
12 TEXMEX Mexican Hat Dance – Traditional Luigi Bruti<br />
13 BAROQUE Smells from Toccata by J. S. Bach Sergio Scappini<br />
14 CAPRICCIO Capriccio 13 by N. Paganini Sergio Scappini<br />
15 GarageTNGO Salvador by L. Bruti Luigi Bruti<br />
16 ScatVoice Scat Fantasy by L. Beier Ludovic Beier<br />
17 JAZZ Scattered Jazz by S. Scappini Sergio Scappini<br />
18 BellwSHAKE Figaro by G. Rossini Sergio Scappini<br />
19 CELTIC Trinity Knots by L. Bruti Luigi Bruti<br />
20 MUSETTE Rêve d’amour by L. Bruti Luigi Bruti<br />
21 CAJUN Sugar cane by L. Bruti Luigi Bruti<br />
22 DiatFOLK To my beloved teacher by S. Scappini Sergio Scappini
V-Accordion r<br />
Demo Songs<br />
# DISPLAYED NAME* SONG TITLE PERFORMED BY<br />
23 ElPaso Dancing in the courtyard by L. Beier Ludovic Beier<br />
24 BalMusette Sotto I ponti della Senna Ludovic Beier<br />
25 MrGus Sunny grasslands by L. Beier Ludovic Beier<br />
26 DjangoSwing Hanging around by L. Beier Ludovic Beier<br />
27 CoolKeys Lights and Shadows of the Moon by L. Beier Ludovic Beier<br />
28 JazzMusette Acrobat by L. Beier Ludovic Beier<br />
29 Islands Islands by L. Beier Ludovic Beier<br />
30 BopSwing Fence Jumper by L. Beier Ludovic Beier<br />
31 Bolero Passion in the Atmosphere by L. Beier Ludovic Beier<br />
32 9thBossa 9th Bossa by Yoshiaki Sato Yoshiaki Sato<br />
33 SngFarEast Song from Far East by Yoshiaki Sato Yoshiaki Sato<br />
34 ZakZakFunk Zak-Zak Funk by Yoshiaki Sato Yoshiaki Sato<br />
35 O&B4Beat O&B 4Beat by Yoshiaki Sato Yoshiaki Sato<br />
* Note: #1~26: Copyright ©2009 Roland Europe Spa. All rights reserved.<br />
#27~30: Copyright ©2009 fèbbre. All rights reserved.<br />
Unauthorized use of the demo songs for purposes other than private enjoyment is a violation of applicable laws.<br />
Note: The performance data of the demo songs are not transmitted to the MIDI OUT socket.<br />
127
FR-7x V-Accordion<br />
® Orchestral sounds and bellows/velocity control<br />
Orchestral sounds and bellows/velocity control<br />
Patch Name<br />
Control<br />
Patch Name<br />
Control<br />
TW Upper/Lower/Pedal<br />
Bellows<br />
Clarinet<br />
Bellows<br />
Ac.Piano<br />
Velocity<br />
Oboe<br />
Bellows<br />
Oct Piano<br />
Velocity<br />
Flute1<br />
Bellows<br />
El.Piano<br />
Velocity<br />
Flute2<br />
Bellows<br />
Vibe<br />
Velocity<br />
PanFlute<br />
Bellows<br />
Harmonica<br />
Bellows<br />
FrenchHorn<br />
Bellows<br />
Mute Harm<br />
Bellows<br />
Horn&Orch<br />
Bellows<br />
Ac.Guitar<br />
Velocity<br />
HighLand<br />
Bellows<br />
Steel Gtr<br />
Velocity<br />
Zampogna<br />
Bellows<br />
Nylon&Steel<br />
Velocity<br />
Mandolin<br />
Velocity<br />
Banjo<br />
Velocity<br />
Acoustic Bs<br />
Velocity<br />
Bowed<br />
Bellows<br />
Finger Bs<br />
Velocity<br />
Fretless<br />
Velocity<br />
Picked Bs<br />
Velocity<br />
Rubber Bs<br />
Velocity<br />
Tuba<br />
Bellows<br />
Tuba Mix<br />
Velocity<br />
Strings<br />
Bellows<br />
Sl.Strings<br />
Bellows<br />
HarpsiStr<br />
Velocity<br />
Violin<br />
Bellows<br />
Pizzicato<br />
Velocity<br />
Str&Choir<br />
Bellows<br />
ChorusLuh<br />
Bellows & Velocity<br />
ChorusWoh<br />
Bellows & Velocity<br />
ChoirAahs<br />
Bellows<br />
JazzScat1<br />
Bellows & Velocity<br />
JazzScat2<br />
Bellows & Velocity<br />
JazzScat3<br />
Bellows & Velocity<br />
JazzDoos<br />
Bellows<br />
Pad Voices<br />
Bellows<br />
Brass<br />
Bellows<br />
r<br />
Twin Trump<br />
Trumpet<br />
Muted Trump<br />
Trombone<br />
Alto Sax<br />
Tenor Sax1<br />
Tenor Sax2<br />
Bellows<br />
Bellows<br />
Bellows<br />
Bellows<br />
Bellows<br />
Bellows<br />
Bellows<br />
128
V-Accordion r<br />
Drum & percussion sounds<br />
Drum & percussion sounds<br />
No. Name<br />
Off ----<br />
1 Pop BD1<br />
2 Pop BD2<br />
3 Folk BD<br />
4 Jazz BD1<br />
5 Jazz BD2<br />
6 Jazz BD3<br />
7 Jazz BD4<br />
8 Mex BD<br />
9 TR-909 BD<br />
10 HipHop BD1<br />
11 HipHop BD2<br />
12 Techno BD1<br />
13 Techno BD2<br />
14 Jungle BD<br />
15 Concert BD<br />
16 Folk SD<br />
17 Pop SD1<br />
18 Pop SD2<br />
19 Jazz SD<br />
20 Concert SD<br />
21 TR-909 SD1<br />
22 TR-909 SD2<br />
23 Dance SD<br />
24 Power SD<br />
25 Ghost SD1<br />
26 Ghost SD2<br />
27 Brush SD<br />
28 Snare Roll<br />
29 Pop Stick1<br />
30 Pop Stick2<br />
31 Pop Hi Hat1<br />
32 Pop Hi Hat2<br />
33 Pop Hi Hat3<br />
34 Jazz Hi Hat<br />
35 808 Hi Hat<br />
36 909 OH<br />
37 TR-707 HH1<br />
38 TR-707 HH2<br />
39 CR-78 HH1<br />
40 CR-78 HH2<br />
41 Pop Ride1<br />
42 Pop Ride2<br />
No. Name<br />
43 Jazz Cym1<br />
44 Ride Bell<br />
45 Dance Cym<br />
46 606 Cym<br />
47 Concrt Cy1<br />
48 Concrt Cy2<br />
49 Big Gong<br />
50 Small Gong<br />
51 Bend Gong<br />
52 RAMA Cym<br />
53 Tambourin1<br />
54 Tambourn2<br />
55 Shake Tam<br />
56 Jingle Bell<br />
57 Cowbell<br />
58 Claves<br />
59 Castanets<br />
60 Woodblock1<br />
61 Woodblock2<br />
62 Shaker<br />
63 Shekere<br />
64 Triangle 1<br />
65 Triangle 2<br />
66 Hand Clap<br />
67 Finger Snap<br />
68 ShrWhistle<br />
69 LongWhistle<br />
70 Quide<br />
71 Guiro<br />
72 Caxixi<br />
73 Hoo Lo<br />
74 Hoo Mid<br />
75 Tom Lo<br />
76 Tom Mid<br />
77 HiBongo<br />
78 LoBongo<br />
79 CongaSlap<br />
80 CongaOp<br />
81 909 TomL<br />
82 909 TomM<br />
83 909 TomH<br />
84 Synth Dr 1<br />
85 Synth Dr 2<br />
No. Name<br />
86 Tamorra 1<br />
87 Tamorra 2<br />
88 Tamorra 3<br />
89 Pandeiro 3<br />
90 Pandeiro 4<br />
91 Pandeiro 5<br />
92 Timpni E<br />
93 Timpni F<br />
94 Timpni F#<br />
95 Timpni G<br />
96 Timpni Ab<br />
97 Timpni A<br />
98 Timpni Bb<br />
99 Timpni B<br />
100 Timpni C<br />
101 Timpni C#<br />
102 Timpani D<br />
103 Timpni Eb<br />
104 Timpni E1<br />
105 Wadaiko<br />
106 Wadko Rim<br />
107 Shimedaik<br />
108 Atarigane<br />
109 Hyoushigi<br />
110 Ohkawa<br />
111 Kotsuzumi<br />
112 Udo Long<br />
113 Req Dum<br />
114 Tabla Te<br />
115 Tabla Na<br />
116 Talking Dr<br />
117 DjembeR<br />
118 Timbl Paila<br />
119 CongaSlide<br />
120 Mut Pandr<br />
121 Rain<br />
122 Thunder<br />
123 Wind<br />
124 Seashore<br />
125 Bird1<br />
126 Bird2<br />
127 Gun Shot<br />
129
FR-7x V-Accordion<br />
® MIDI implementation<br />
22. MIDI implementation<br />
r<br />
1. Received data<br />
■ Channel Voice Messages<br />
● Note off<br />
Status 2nd byte 3rd byte<br />
8nH kkH vvH<br />
n = MIDI channel number: 0H~FH (Ch.1~16)<br />
kk = note number: 00H~7FH (0~127)<br />
vv = note off velocity: 00H~7FH (0~127)<br />
● Note on<br />
Status 2nd byte 3rd byte<br />
9nH kkH vvH<br />
n = MIDI channel number: 0H~FH (Ch.1~16)<br />
kk = note number: 00H~7FH (0~127)<br />
vv = note on velocity: 01H~7FH (1~127)<br />
● Control Change<br />
• The value specified by a Control Change message is not reset by a Program<br />
Change, etc.<br />
❍ Bank Select (Controller number 0, 32)<br />
Status 2nd byte 3rd byte<br />
BnH 00H mmH<br />
BnH 20H llH<br />
n = MIDI channel number: 0H~FH (Ch.1~16)<br />
mm = Bank number MSB: 00H~7FH<br />
ll = Bank number LSB:<br />
00H~7FH<br />
• Only for Free Bass.<br />
❍ Expression (Controller number 11)<br />
Status 2nd byte 3rd byte<br />
BnH 0BH vvH<br />
n = MIDI channel number: 0H~FH (Ch.1~16)<br />
vv = Expression: 00H~7FH (0~127)<br />
• This adjusts the volume of a Part. It can be used independently from Volume<br />
(CC07) messages. Expression messages are used for musical expression within<br />
a performance, e.g., expression pedal movements, crescendo and decrescendo.<br />
❍ Hold 1 (Controller number 64)<br />
Status 2nd byte 3rd byte<br />
BnH 40H vvH<br />
n = MIDI channel number: 0H~FH (Ch.1~16)<br />
vv = Control value: 00H~7FH (0~127)<br />
00H~63H= Off/64H~7FH= On<br />
❍ Program Change<br />
Status<br />
2nd byte<br />
CnH<br />
ppH<br />
n = MIDI channel number: 0H~FH (Ch.1~16)<br />
pp = Program number: 00H~0DH: Treble Register 1~14<br />
00H~19H: Orchestra Register 1~26<br />
00H~06H: Bass/FreeBass/Orch.Bass/Orch<br />
Chord, Orch Free Bass Register 1~7<br />
00H~50H: Set 1~80<br />
❍ Channel Pressure<br />
Status<br />
2nd byte<br />
DnH<br />
vvH<br />
n = MIDI channel number: 0H~FH (Ch.1~16)<br />
vv = Channel Pressure: 00H~7FH (0~127)<br />
■ System Realtime Messages<br />
❍ Active Sensing<br />
Status<br />
FEH<br />
• When Active Sensing is received, the FR-7x starts monitoring the intervals of all<br />
further messages. While monitoring, if the interval between messages exceeds<br />
420 ms, the same processing will be carried out as when All Sounds Off, All Notes<br />
Off and Reset All Controllers are received, and message interval monitoring will<br />
be halted.<br />
❍ Start<br />
Status<br />
FAH<br />
• When an FA message is received from an external MIDI device such as sequencer,<br />
the FR-7x sends all necessary MIDI information for a song header setup: Treble,<br />
Orchestra, Bass/Free, Orchestra Bass, sound setup.<br />
130<br />
2. Transmitted data<br />
■ Channel Voice Messages<br />
● Note off<br />
Status 2nd byte 3rd byte<br />
8nH kkH vvH<br />
n = MIDI channel number: 0H~FH (Ch.1~16)<br />
kk = note number: 00H~7FH (0~127)<br />
vv = note off velocity: 00H~7FH (0~127)<br />
● Note on<br />
Status 2nd byte 3rd byte<br />
9nH kkH vvH<br />
n = MIDI channel number: 0H~FH (Ch.1~16)<br />
kk = note number: 00H~7FH (0~127)<br />
vv = note on velocity: 01H~7FH (1~127)<br />
● Pitch Bend change<br />
Status 2nd byte 3rd byte<br />
EnH llH mmH<br />
n = MIDI channel number: 0H~FH (Ch.1~16)<br />
mm, ll= Pitch Bend value: 00 00H~40 00H~7F 7FH (–8192~0~+8192)<br />
● Control Change<br />
❍ Bank Select (Controller number 0, 32)<br />
Status 2nd byte 3rd byte<br />
BnH 00H mmH<br />
BnH 20H llH<br />
n = MIDI channel number: 0H~FH (Ch.1~16)<br />
mm = Bank number MSB: 00H~7FH<br />
ll = Bank number LSB:<br />
00H~7FH<br />
❍ Modulation (Controller number 1)<br />
Status 2nd byte 3rd byte<br />
BnH 01H vvH<br />
n = MIDI channel number: 0H~FH (Ch.1~16)<br />
vv = Volume: 00H~7FH (0~127), Initial value = 64H (100)<br />
❍ Volume (Controller number 7)<br />
Status 2nd byte 3rd byte<br />
BnH 07H vvH<br />
n = MIDI channel number: 0H~FH (Ch.1~16)<br />
vv = Volume: 00H~7FH (0~127), Initial value = 64H (100)<br />
• Volume messages are used to adjust the volume balance of each Part.<br />
❍ Pan (Controller number 10)<br />
Status 2nd byte 3rd byte<br />
BnH 0AH vvH<br />
n = MIDI channel number: 0H~FH (Ch.1~16)<br />
vv = pan:<br />
00H~40H~7FH (Left~Center~Right),<br />
Initial value = 40H (Center)<br />
❍ Expression (Controller number 11)<br />
Status 2nd byte 3rd byte<br />
BnH 0BH vvH<br />
BnH 2BH vvL (only when “Bellows TX Resolution”<br />
on page 110 is set to “Super”).<br />
n = MIDI channel number: 0H~FH (Ch.1~16)<br />
vv = Expression: 00H~7FH (0~127)<br />
• This adjusts the volume of a Part. Expression messages are used for musical expression<br />
within a performance, e.g., expression pedal movements, crescendo and<br />
decrescendo.<br />
❍ Hold 1 (Controller number 64)<br />
Status 2nd byte 3rd byte<br />
BnH 40H vvH<br />
n = MIDI channel number: 0H~FH (Ch.1~16)<br />
vv = Control value: 00H~7FH (0~127)<br />
00H~63H= Off/64H~7FH= On<br />
❍ Effect 1 (Reverb Send Level) (Controller number 91)<br />
Status 2nd byte 3rd byte<br />
BnH 5BH vvH<br />
n = MIDI channel number: 0H~FH (Ch.1~16)<br />
vv = Reverb Send Level: 00H~7FH (0~127), Initial value = 28H (40)<br />
• This message adjusts the Reverb Send Level of each Part.
V-Accordion r<br />
MIDI implementation<br />
❍ Effect 3 (Chorus Send Level) (Controller number 93)<br />
Status 2nd byte 3rd byte<br />
BnH 5DH vvH<br />
n = MIDI channel number: 0H~FH (Ch.1~16)<br />
vv = Chorus Send Level: 00H~7FH (0~127), Initial value = 00H (0)<br />
❍ Program Change<br />
Status<br />
2nd byte<br />
CnH<br />
ppH<br />
n = MIDI channel number: 0H~FH (Ch.1~16)<br />
pp = Program number: 00H~7FH: program no. 1~128<br />
❍ Channel Pressure<br />
Status<br />
2nd byte<br />
DnH<br />
vvH<br />
n = MIDI channel number: 0H~FH (Ch.1~16)<br />
vv = Channel Pressure: 00H~7FH (0~127)<br />
■ System Realtime Messages<br />
❍ Active Sensing<br />
Status<br />
FEH<br />
❍ Start<br />
Status<br />
FAH<br />
❍ Stop<br />
Status<br />
FCH<br />
Transmitted about every 250ms.<br />
This message is transmitted when a footswitch of FBC-7 Pedal,<br />
programmed as Start/Stop, is pressed, or when “10.17 Start/<br />
Stop MIDI TX” is used.<br />
This message is transmitted when a footswitch of FBC-7 Pedal,<br />
programmed as Start/Stop, is pressed, or when “10.17 Start/<br />
Stop MIDI TX” is used.<br />
3. Program change messages<br />
Bank Select & Program Change TX “STD”<br />
BANK SELECT PROGRAM<br />
MSB CC00 LSB CC32 CHANGE Section<br />
0 0 1~14 Treble Registers<br />
0 0 1~7 Bass Registers<br />
0 1 1~7 Free Bass Registers<br />
0 0 1~7 Orch Bass Registers<br />
0 0 1~7 Orch Chord Registers<br />
0 0 1~7 Orch FreeBs Registers<br />
0 0 1~26 Orchestra Registers<br />
0 0 1~80 Sets<br />
BANK SELECT PROGRAM<br />
MSB CC00 LSB CC32 CHANGE Register<br />
TREBLE REGISTER RX<br />
-- -- 1 Bassoon<br />
-- -- 2 Bandon<br />
-- -- 3 Cello<br />
-- -- 4 Harmon<br />
-- -- 5 Organ<br />
-- -- 6 Accord<br />
-- -- 7 Violin<br />
-- -- 8 Master<br />
-- -- 9 Musette<br />
-- -- 10 Celeste<br />
-- -- 11 Tremolo<br />
-- -- 12 Clarinet<br />
-- -- 13 Oboe<br />
-- -- 14 Piccolo<br />
ORCHESTRA REGISTER RX<br />
-- -- 1 (assignable)<br />
-- -- 2 (assignable)<br />
-- -- 3 (assignable)<br />
-- -- 4 (assignable)<br />
-- -- 5 (assignable)<br />
-- -- 6 (assignable)<br />
-- -- 7 (assignable)<br />
-- -- 8 (assignable)<br />
-- -- 9 (assignable)<br />
-- -- 10 (assignable)<br />
-- -- 11 (assignable)<br />
-- -- 12 (assignable)<br />
-- -- 13 (assignable)<br />
-- -- 14 (assignable)<br />
-- -- 15 (assignable)<br />
-- -- 16 (assignable)<br />
-- -- 17 (assignable)<br />
-- -- 18 (assignable)<br />
-- -- 19 (assignable)<br />
-- -- 20 (assignable)<br />
-- -- 21 (assignable)<br />
-- -- 22 (assignable)<br />
-- -- 23 (assignable)<br />
-- -- 24 (assignable)<br />
-- -- 25 (assignable)<br />
-- -- 26 (assignable)<br />
BASS REGISTER RX<br />
-- -- 1 2’<br />
-- -- 2 4’<br />
-- -- 3 8-4’<br />
-- -- 4 16’/8’/8-4’/4’/2’<br />
-- -- 5 8’/4’/2’<br />
-- -- 6 16’/8’/8-4’<br />
-- -- 7 16’/2’<br />
FREE BASS REGISTER RX<br />
0 1 1 low<br />
0 1 2 high<br />
0 1 3 low+high<br />
0 1 4 lw+hglow<br />
0 1 5 lwlow+hi<br />
0 1 6 highlw+h<br />
0 1 7 lowhigh<br />
ORCH BASS REGISTER RX<br />
-- -- 1 (assignable)<br />
-- -- 2 (assignable)<br />
-- -- 3 (assignable)<br />
-- -- 4 (assignable)<br />
-- -- 5 (assignable)<br />
-- -- 6 (assignable)<br />
-- -- 7 (assignable)<br />
ORCH CHORD REGISTER RX<br />
-- -- 1 (assignable)<br />
-- -- 2 (assignable)<br />
-- -- 3 (assignable)<br />
-- -- 4 (assignable)<br />
-- -- 5 (assignable)<br />
-- -- 6 (assignable)<br />
-- -- 7 (assignable)<br />
ORCH FREE BASS REGISTER RX<br />
-- -- 1 (assignable)<br />
-- -- 2 (assignable)<br />
-- -- 3 (assignable)<br />
-- -- 4 (assignable)<br />
-- -- 5 (assignable)<br />
-- -- 6 (assignable)<br />
-- -- 7 (assignable)<br />
Bank Select & Program Change Set RX<br />
BANK SELECT PROGRAM<br />
MSB CC00 LSB CC32 CHANGE Section<br />
-- -- 1 CONCERTO<br />
-- -- 2 CLASSIC<br />
-- -- 3 JAZZ<br />
-- -- 4 “I” FOLK<br />
-- -- 5 “D” FOLK<br />
-- -- 6 “F” FOLK<br />
-- -- 7 “SP” FOLK<br />
-- -- 8 BallROOM<br />
-- -- 9 BANDNEON<br />
-- -- 10 ALPINE<br />
-- -- 11 CAJUN<br />
-- -- 12 TEX MEX<br />
-- -- 13 OldPARIS<br />
-- -- 14 CiaoROME<br />
-- -- 15 DiatFOLK<br />
-- -- 16 STUDIO<br />
-- -- 17 TRDITION<br />
-- -- 18 BAROQUE<br />
-- -- 19 ROMANTIC<br />
-- -- 20 CONCERTN<br />
-- -- 21 SCOTTISH<br />
-- -- 22 IRISH<br />
-- -- 23 CELTIC<br />
-- -- 24 XLowReed<br />
-- -- 25 HalfVALV<br />
-- -- 26 FUTURE<br />
-- -- 27 MUSETTE<br />
-- -- 28 BASSOON<br />
-- -- 29 MASTER<br />
-- -- 30 EXAMPLES<br />
-- -- 31 FRANCE vX<br />
-- -- 32 FRANCE Ac<br />
-- -- 33 FJAZZ<br />
-- -- 34 “I” SCALA<br />
-- -- 35 BAJAN<br />
-- -- 36 RHYTHM<br />
-- -- 37 ORGAN<br />
-- -- 38 OrPARADE<br />
-- -- 39 ALL ORCH<br />
-- -- 40 V-Set<br />
-- -- 41 WOA1-Ac<br />
-- -- 42 WOA1-Bs<br />
-- -- 43 WOA2-Exp<br />
131
FR-7x V-Accordion<br />
® Program change messages<br />
-- -- 44 BsToTreb<br />
-- -- 45 EMPTY<br />
-- -- 46 EMPTY<br />
-- -- 47 EMPTY<br />
-- -- 48 EMPTY<br />
-- -- 49 EMPTY<br />
-- -- 50 EMPTY<br />
-- -- 51 EMPTY<br />
-- -- 52 EMPTY<br />
-- -- 53 EMPTY<br />
-- -- 54 EMPTY<br />
-- -- 55 EMPTY<br />
-- -- 56 EMPTY<br />
-- -- 57 EMPTY<br />
-- -- 58 EMPTY<br />
-- -- 59 EMPTY<br />
-- -- 60 EMPTY<br />
-- -- 61 EMPTY<br />
-- -- 62 EMPTY<br />
-- -- 63 EMPTY<br />
-- -- 64 EMPTY<br />
-- -- 65 EMPTY<br />
-- -- 66 EMPTY<br />
-- -- 67 EMPTY<br />
-- -- 68 EMPTY<br />
-- -- 69 EMPTY<br />
-- -- 70 EMPTY<br />
-- -- 71 EMPTY<br />
-- -- 72 EMPTY<br />
-- -- 73 EMPTY<br />
-- -- 74 EMPTY<br />
-- -- 75 EMPTY<br />
-- -- 76 EMPTY<br />
-- -- 77 EMPTY<br />
-- -- 78 EMPTY<br />
-- -- 79 EMPTY<br />
-- -- 80 EMPTY<br />
r<br />
132
V-Accordion r<br />
MIDI Implementation Chart<br />
MIDI Implementation Chart<br />
[V-Accordion] Date: July 2009<br />
Model: FR-7x Version: 1.00<br />
Function... Transmitted Recognized Remarks<br />
Basic<br />
Channel<br />
Default<br />
Changed<br />
1~16<br />
1~16, Off<br />
1~16<br />
1~16, Off<br />
7 Parts: 1= Treble, 2= Bass/Free<br />
Bass, 3= Chord, 5= Orchestra<br />
Bass, 4= Orchestra, 6= Orchestra<br />
Chord, 7= Orchestra Free Bass,<br />
2 Logical parts: 13= Basic MIDI<br />
Channel for SET change,<br />
13= Control MIDI Channel only TX<br />
Mode<br />
Default<br />
Message<br />
Altered<br />
Mode 3<br />
*****<br />
*****<br />
Mode 3<br />
*****<br />
Note<br />
Number<br />
True Voice<br />
0~127 *1<br />
*****<br />
0~127<br />
0~127<br />
Velocity<br />
Note ON<br />
Note OFF<br />
O *1<br />
O<br />
O<br />
O<br />
After<br />
Touch<br />
Key’s<br />
Ch’s<br />
X<br />
O *1<br />
X<br />
O<br />
Pitch Bend O O<br />
Control<br />
Change<br />
0,32<br />
1<br />
7<br />
10<br />
11<br />
64<br />
91<br />
93<br />
O *1<br />
O *1<br />
O *1<br />
O *1<br />
O *1<br />
O *1<br />
O *1<br />
O *1<br />
O<br />
O *1<br />
X<br />
X<br />
O<br />
O<br />
X<br />
X<br />
Bank Select<br />
Modulation<br />
Volume<br />
Panpot<br />
Expression<br />
Hold 1<br />
Reverb Send<br />
Chorus Send<br />
Program<br />
Change True #<br />
O *1<br />
0~127<br />
O<br />
0~9<br />
Program Number 1~128<br />
transmitted<br />
Recognized: 1~80:<br />
- 1~14 TrebleRegister<br />
- 1~7 Bass<br />
- 1~7 Free Bass<br />
- 1~7 Orchestra Bass<br />
- 1~7 Orchestra Chord<br />
- 1~7 Orchestra Free Bass<br />
- 1~26 Orchestra<br />
- 1~80 SET<br />
System Exclusive X X<br />
System<br />
Common<br />
Song Position Pointer<br />
Song Sel<br />
Tune<br />
X<br />
X<br />
X<br />
X<br />
X<br />
X<br />
System<br />
Real Time<br />
Clock<br />
Commands<br />
X<br />
O *3<br />
X<br />
X<br />
Aux<br />
Messages<br />
All Sounds Off<br />
Reset All Controllers<br />
Local On/Off<br />
All Notes Off<br />
Active Sense<br />
Reset<br />
X<br />
X<br />
X<br />
X<br />
O<br />
X<br />
X<br />
X<br />
X<br />
X<br />
O<br />
X<br />
Notes<br />
Mode 1: OMNI ON, POLY<br />
Mode 3: OMNI OFF, POLY<br />
*1 O X is selectable<br />
*2 Recognized as M=1 even if M≠1<br />
*3 Transmit Start (FA), Stop (FC)<br />
Mode 2: OMNI ON, MONO<br />
Mode 4: OMNI OFF, MONO<br />
O: Yes<br />
X: No<br />
133
FR-7x V-Accordion<br />
® Information<br />
23. Information<br />
When you need repair service, call your nearest Roland Service Center or authorized<br />
Roland distributor in your country as shown below.<br />
r<br />
AFRICA<br />
EGYPT<br />
Al Fanny Trading Office<br />
9, EBN Hagar Al Askalany<br />
Street,<br />
ARD E1 Golf, Heliopolis,<br />
Cairo 11341, EGYPT<br />
TEL: (022)-417-1828<br />
REUNION<br />
Maison FO - YAM Marcel<br />
25 Rue Jules Hermann,<br />
Chaudron - BP79 97 491<br />
Ste Clotilde Cedex,<br />
REUNION ISLAND<br />
TEL: (0262) 218-429<br />
SOUTH AFRICA<br />
T.O.M.S. Sound & Music<br />
(Pty)Ltd.<br />
2 ASTRON ROAD DENVER<br />
JOHANNESBURG ZA 2195,<br />
SOUTH AFRICA<br />
TEL: (011)417 3400<br />
Paul Bothner(PTY)Ltd.<br />
Royal Cape Park, Unit 24<br />
Londonderry Road, Ottery 7800<br />
Cape Town, SOUTH AFRICA<br />
TEL: (021) 799 4900<br />
ASIA<br />
CHINA<br />
Roland Shanghai Electronics<br />
Co.,Ltd.<br />
5F. No.1500 Pingliang Road<br />
Shanghai 200090, CHINA<br />
TEL: (021) 5580-0800<br />
Roland Shanghai Electronics<br />
Co.,Ltd.<br />
(BEIJING OFFICE)<br />
10F. No.18 3 Section Anhuaxili<br />
Chaoyang District Beijing<br />
100011 CHINA<br />
TEL: (010) 6426-5050<br />
HONG KONG<br />
Tom Lee Music Co., Ltd.<br />
Service Division<br />
22-32 Pun Shan Street, Tsuen<br />
Wan, New Territories,<br />
HONG KONG<br />
TEL: 2415 0911<br />
Parsons Music Ltd.<br />
8th Floor, Railway Plaza, 39<br />
Chatham Road South, T.S.T,<br />
Kowloon, HONG KONG<br />
TEL: 2333 1863<br />
INDIA<br />
Rivera Digitec (India) Pvt. Ltd.<br />
411, Nirman Kendra<br />
Mahalaxmi Flats Compound<br />
Off. Dr. Edwin Moses Road,<br />
Mumbai-400011, INDIA<br />
TEL: (022) 2493 9051<br />
INDONESIA<br />
PT Citra IntiRama<br />
Jl. Cideng Timur No. 15J-15O<br />
Jakarta Pusat<br />
INDONESIA<br />
TEL: (021) 6324170<br />
KOREA<br />
Cosmos Corporation<br />
1461-9, Seocho-Dong,<br />
Seocho Ku, Seoul, KOREA<br />
TEL: (02) 3486-8855<br />
MALAYSIA<br />
Roland Asia Pacific Sdn. Bhd.<br />
45-1, Block C2, Jalan PJU 1/39,<br />
Dataran Prima, 47301 Petaling<br />
Jaya, Selangor, MALAYSIA<br />
TEL: (03) 7805-3263<br />
VIET NAM<br />
VIET THUONG<br />
CORPORATION<br />
386 CACH MANG THANG<br />
TAM ST. DIST.3,<br />
HO CHI MINH CITY<br />
VIET NAM<br />
TEL: 9316540<br />
134<br />
PHILIPPINES<br />
G.A. Yupangco & Co. Inc.<br />
339 Gil J. Puyat Avenue<br />
Makati, Metro Manila 1200,<br />
PHILIPPINES<br />
TEL: (02) 899 9801<br />
SINGAPORE<br />
SWEE LEE MUSIC<br />
COMPANY PTE. LTD.<br />
150 Sims Drive,<br />
SINGAPORE 387381<br />
TEL: 6846-3676<br />
TAIWAN<br />
ROLAND TAIWAN<br />
ENTERPRISE CO., LTD.<br />
Room 5, 9fl. No. 112 Chung<br />
Shan N.Road Sec.2, Taipei,<br />
TAIWAN, R.O.C.<br />
TEL: (02) 2561 3339<br />
THAILAND<br />
Theera Music Co. , Ltd.<br />
100-108 Soi Verng<br />
Nakornkasem, New<br />
Road,Sumpantawongse,<br />
Bangkok 10100 THAILAND<br />
TEL: (02) 224-8821<br />
OCEANIA<br />
AUSTRALIA/<br />
NEW ZEALAND<br />
Roland Corporation<br />
Australia Pty.,Ltd.<br />
38 Campbell Avenue<br />
Dee Why West. NSW 2099<br />
AUSTRALIA<br />
For Australia<br />
Tel: (02) 9982 8266<br />
For New Zealand<br />
Tel: (09) 3098 715<br />
CENTRAL/LATIN<br />
AMERICA<br />
ARGENTINA<br />
Instrumentos Musicales S.A.<br />
Av.Santa Fe 2055<br />
(1123) Buenos Aires<br />
ARGENTINA<br />
TEL: (011) 4508-2700<br />
BARBADOS<br />
A&B Music Supplies LTD<br />
12 Webster Industrial Park<br />
Wildey, St.Michael, Barbados<br />
TEL: (246)430-1100<br />
BRAZIL<br />
Roland Brasil Ltda.<br />
Rua San Jose, 211<br />
Parque Industrial San Jose<br />
Cotia - Sao Paulo - SP, BRAZIL<br />
TEL: (011) 4615 5666<br />
CHILE<br />
Comercial Fancy II S.A.<br />
Rut.: 96.919.420-1<br />
Nataniel Cox #739, 4th Floor<br />
Santiago - Centro, CHILE<br />
TEL: (02) 688-9540<br />
COLOMBIA<br />
Centro Musical Ltda.<br />
Cra 43 B No 25 A 41 Bododega 9<br />
Medellin, Colombia<br />
TEL: (574)3812529<br />
COSTA RICA<br />
JUAN Bansbach Instrumentos<br />
Musicales<br />
Ave.1. Calle 11, Apartado<br />
10237,<br />
San Jose, COSTA RICA<br />
TEL: 258-0211<br />
CURACAO<br />
Zeelandia Music Center Inc.<br />
Orionweg 30<br />
Curacao, Netherland Antilles<br />
TEL:(305)5926866<br />
DOMINICAN REPUBLIC<br />
Instrumentos Fernando Giraldez<br />
Calle Proyecto Central No.3<br />
Ens.La Esperilla<br />
Santo Domingo,<br />
Dominican Republic<br />
TEL:(809) 683 0305<br />
ECUADOR<br />
Mas Musika<br />
Rumichaca 822 y Zaruma<br />
Guayaquil - Ecuador<br />
TEL:(593-4)2302364<br />
EL SALVADOR<br />
OMNI MUSIC<br />
75 Avenida Norte y Final<br />
Alameda Juan Pablo II,<br />
Edificio No.4010 San Salvador,<br />
EL SALVADOR<br />
TEL: 262-0788<br />
GUATEMALA<br />
Casa Instrumental<br />
Calzada Roosevelt 34-01,zona 11<br />
Ciudad de Guatemala<br />
Guatemala<br />
TEL:(502) 599-2888<br />
HONDURAS<br />
Almacen Pajaro Azul S.A. de C.V.<br />
BO.Paz Barahona<br />
3 Ave.11 Calle S.O<br />
San Pedro Sula, Honduras<br />
TEL: (504) 553-2029<br />
MARTINIQUE<br />
Musique & Son<br />
Z.I.Les Mangle<br />
97232 Le Lamantin<br />
Martinique F.W.I.<br />
TEL: 596 596 426860<br />
Gigamusic SARL<br />
10 Rte De La Folie<br />
97200 Fort De France<br />
Martinique F.W.I.<br />
TEL: 596 596 715222<br />
MEXICO<br />
Casa Veerkamp, s.a. de c.v.<br />
Av. Toluca No. 323, Col. Olivar<br />
de los Padres 01780 Mexico<br />
D.F. MEXICO<br />
TEL: (55) 5668-6699<br />
NICARAGUA<br />
Bansbach Instrumentos<br />
Musicales Nicaragua<br />
Altamira D'Este Calle Principal<br />
de la Farmacia 5ta.Avenida<br />
1 Cuadra al Lago.#503<br />
Managua, Nicaragua<br />
TEL: (505)277-2557<br />
PANAMA<br />
SUPRO MUNDIAL, S.A.<br />
Boulevard Andrews, Albrook,<br />
Panama City, REP. DE<br />
PANAMA<br />
TEL: 315-0101<br />
PARAGUAY<br />
Distribuidora De<br />
Instrumentos Musicales<br />
J.E. Olear y ESQ. Manduvira<br />
Asuncion PARAGUAY<br />
TEL: (595) 21 492147<br />
PERU<br />
Audionet<br />
Distribuciones Musicales SAC<br />
Juan Fanning 530<br />
Miraflores<br />
Lima - Peru<br />
TEL: (511) 4461388<br />
TRINIDAD<br />
AMR Ltd<br />
Ground Floor<br />
Maritime Plaza<br />
Barataria Trinidad W.I.<br />
TEL: (868) 638 6385<br />
URUGUAY<br />
Todo Musica S.A.<br />
Francisco Acuna de Figueroa<br />
1771<br />
C.P.: 11.800<br />
Montevideo, URUGUAY<br />
TEL: (02) 924-2335<br />
VENEZUELA<br />
Instrumentos Musicales<br />
Allegro,C.A.<br />
Av.las industrias edf.Guitar<br />
import<br />
#7 zona Industrial de Turumo<br />
Caracas, Venezuela<br />
TEL: (212) 244-1122<br />
EUROPE<br />
AUSTRIA<br />
Roland Elektronische<br />
Musikinstrumente HmbH.<br />
Austrian Office<br />
Eduard-Bodem-Gasse 8,<br />
A-6020 Innsbruck, AUSTRIA<br />
TEL: (0512) 26 44 260<br />
BELGIUM/FRANCE/<br />
HOLLAND/<br />
LUXEMBOURG<br />
Roland Central Europe N.V.<br />
Houtstraat 3, B-2260, Oevel<br />
(Westerlo) BELGIUM<br />
TEL: (014) 575811<br />
CROATIA<br />
ART-CENTAR<br />
Degenova 3.<br />
HR - 10000 Zagreb<br />
TEL: (1) 466 8493<br />
CZECH REP.<br />
CZECH REPUBLIC<br />
DISTRIBUTOR s.r.o<br />
Voctárova 247/16<br />
CZ - 180 00 PRAHA 8,<br />
CZECH REP.<br />
TEL: (2) 830 20270<br />
DENMARK<br />
Roland Scandinavia A/S<br />
Nordhavnsvej 7, Postbox 880,<br />
DK-2100 Copenhagen<br />
DENMARK<br />
TEL: 3916 6200<br />
FINLAND<br />
Roland Scandinavia As, Filial<br />
Finland<br />
Elannontie 5<br />
FIN-01510 Vantaa, FINLAND<br />
TEL: (0)9 68 24 020<br />
GERMANY<br />
Roland Elektronische<br />
Musikinstrumente HmbH.<br />
Oststrasse 96, 22844<br />
Norderstedt, GERMANY<br />
TEL: (040) 52 60090<br />
GREECE/CYPRUS<br />
STOLLAS S.A.<br />
Music Sound Light<br />
155, New National Road<br />
Patras 26442, GREECE<br />
TEL: 2610 435400<br />
HUNGARY<br />
Roland East Europe Ltd.<br />
Warehouse Area ‘DEPO’ Pf.83<br />
H-2046 Torokbalint,<br />
HUNGARY<br />
TEL: (23) 511011<br />
IRELAND<br />
Roland Ireland<br />
G2 Calmount Park, Calmount<br />
Avenue, Dublin 12<br />
Republic of IRELAND<br />
TEL: (01) 4294444<br />
ITALY<br />
Roland Italy S. p. A.<br />
Viale delle Industrie 8,<br />
20020 Arese, Milano, ITALY<br />
TEL: (02) 937-78300<br />
NORWAY<br />
Roland Scandinavia Avd.<br />
Kontor Norge<br />
Lilleakerveien 2 Postboks 95<br />
Lilleaker N-0216 Oslo<br />
NORWAY<br />
TEL: 2273 0074<br />
POLAND<br />
ROLAND POLSKA SP. Z O.O.<br />
ul. Kty Grodziskie 16B<br />
03-289 Warszawa, POLAND<br />
TEL: (022) 678 9512<br />
PORTUGAL<br />
Roland Iberia, S.L.<br />
Portugal Office<br />
Cais das Pedras, 8/9-1 Dto<br />
4050-465, Porto, PORTUGAL<br />
TEL: 22 608 00 60<br />
ROMANIA<br />
FBS LINES<br />
Piata Libertatii 1,<br />
535500 Gheorgheni,<br />
ROMANIA<br />
TEL: (266) 364 609<br />
RUSSIA<br />
MuTek<br />
Dorozhnaya ul.3,korp.6<br />
117 545 Moscow, RUSSIA<br />
TEL: (095) 981-4967<br />
SLOVAKIA<br />
DAN Acoustic s.r.o.<br />
Povazská 18.<br />
SK - 940 01 Nové Zámky<br />
TEL: (035) 6424 330<br />
SPAIN<br />
Roland Iberia, S.L.<br />
Paseo García Faria, 33-35<br />
08005 Barcelona SPAIN<br />
TEL: 93 493 91 00<br />
SWEDEN<br />
Roland Scandinavia A/S<br />
SWEDISH SALES OFFICE<br />
Danvik Center 28, 2 tr.<br />
S-131 30 Nacka SWEDEN<br />
TEL: (0)8 702 00 20<br />
SWITZERLAND<br />
Roland (Switzerland) AG<br />
Landstrasse 5, Postfach,<br />
CH-4452 Itingen,<br />
SWITZERLAND<br />
TEL:(061)975-9987<br />
UKRAINE<br />
EURHYTHMICS Ltd.<br />
P.O.Box: 37-a.<br />
Nedecey Str. 30<br />
UA - 89600 Mukachevo,<br />
UKRAINE<br />
TEL: (03131) 414-40<br />
UNITED KINGDOM<br />
Roland (U.K.) Ltd.<br />
Atlantic Close, Swansea<br />
Enterprise Park, SWANSEA<br />
SA7 9FJ,<br />
UNITED KINGDOM<br />
TEL: (01792) 702701<br />
MIDDLE EAST<br />
BAHRAIN<br />
Moon Stores<br />
No.1231&1249 Rumaytha<br />
Building Road 3931, Manama<br />
339 BAHRAIN<br />
TEL: 17 813 942<br />
IRAN<br />
MOCO INC.<br />
No.41 Nike St., Dr.Shariyati Ave.,<br />
Roberoye Cerahe Mirdamad<br />
Tehran, IRAN<br />
TEL: (021)-2285-4169<br />
ISRAEL<br />
Halilit P. Greenspoon & Sons<br />
Ltd.<br />
8 Retzif Ha'alia Hashnia St.<br />
Tel-Aviv-Yafo ISRAEL<br />
TEL: (03) 6823666<br />
JORDAN<br />
MUSIC HOUSE CO. LTD.<br />
FREDDY FOR MUSIC<br />
P. O. Box 922846<br />
Amman 11192 JORDAN<br />
TEL: (06) 5692696<br />
KUWAIT<br />
EASA HUSAIN AL-YOUSIFI<br />
& SONS CO.<br />
Al-Yousifi Service Center<br />
P.O.Box 126 (Safat) 13002<br />
KUWAIT<br />
TEL: 00 965 802929<br />
LEBANON<br />
Chahine S.A.L.<br />
George Zeidan St., Chahine<br />
Bldg., Achrafieh, P.O.Box: 16-<br />
5857<br />
Beirut, LEBANON<br />
TEL: (01) 20-1441<br />
OMAN<br />
TALENTZ CENTRE L.L.C.<br />
Malatan House No.1<br />
Al Noor Street, Ruwi<br />
SULTANATE OF OMAN<br />
TEL: 2478 3443<br />
QATAR<br />
Al Emadi Co. (Badie Studio &<br />
Stores)<br />
P.O. Box 62, Doha, QATAR<br />
TEL: 4423-554<br />
SAUDI ARABIA<br />
aDawliah Universal<br />
Electronics APL<br />
Behind Pizza Inn<br />
Prince Turkey Street<br />
aDawliah Building,<br />
PO BOX 2154,<br />
Alkhobar 31952<br />
SAUDI ARABIA<br />
TEL: (03) 8643601<br />
SYRIA<br />
Technical Light & Sound<br />
Center<br />
PO BOX 13520 BLDG No.17<br />
ABDUL WAHAB<br />
KANAWATI.ST RAWDA<br />
DAMASCUS, SYRIA<br />
TEL: (011) 223-5384<br />
TURKEY<br />
ZUHAL DIS TICARET A.S.<br />
Galip Dede Cad. No.37<br />
Beyoglu - Istanbul / TURKEY<br />
TEL: (0212) 249 85 10<br />
U.A.E.<br />
Zak Electronics & Musical<br />
Instruments Co. L.L.C.<br />
Zabeel Road, Al Sherooq Bldg.,<br />
No. 14, Ground Floor, Dubai,<br />
U.A.E.<br />
TEL: (04) 3360715<br />
NORTH AMERICA<br />
CANADA<br />
Roland Canada Ltd.<br />
(Head Office)<br />
5480 Parkwood Way<br />
Richmond B. C., V6V 2M4<br />
CANADA<br />
TEL: (604) 270 6626<br />
Roland Canada Ltd.<br />
(Toronto Office)<br />
170 Admiral Boulevard<br />
Mississauga On L5T 2N6<br />
CANADA<br />
TEL: (905) 362 9707<br />
U. S. A.<br />
Roland Corporation U.S.<br />
5100 S. Eastern Avenue<br />
Los Angeles, CA 90040-2938,<br />
U. S. A.<br />
TEL: (323) 890 3700<br />
As of Jan. 1, 2009 (ROLAND)
V-Accordion r<br />
24. Index<br />
Numerics<br />
2 Bass Rows . . . . . . . . . . . . . . . . . . . . . . . .89<br />
3 Bass Rows . . . . . . . . . . . . . . . . . . . . . . . .89<br />
A<br />
AC adapter . . . . . . . . . . . . . . . . . . . . . . . . .16<br />
AfterT. . . . . . . . . . . . . . . . . . . . . . . . . . . . .115<br />
Aftertouch . . . . . . . . . . . . . . . . . . . . . . . . .30<br />
PitchDown . . . . . . . . . . . . . . . . . . . . 67, 79<br />
Alpine. . . . . . . . . . . . . . . . . . . . . . . . . . 35, 67<br />
American. . . . . . . . . . . . . . . . . . . . . . . 35, 67<br />
Arabic. . . . . . . . . . . . . . . . . . . . . . . . . . . . . .36<br />
Audio . . . . . . . . . . . . . . . . . . . . . . . . . . . . . .38<br />
Recording. . . . . . . . . . . . . . . . . . . . . . . . .47<br />
Auto Power OFF . . . . . . . . . . . . . . . . . . . . .92<br />
B<br />
Bagpipe sounds . . . . . . . . . . . . . . . . . . . . .30<br />
Bajan . . . . . . . . . . 66, 67, 71, 72, 74, 75<br />
Balance . . . . . . . . . . . . . . . . . . . . . . . . 25, 26<br />
Bandoneon . . . . . 66, 67, 71, 72, 74, 75<br />
Bank<br />
For Send PC . . . . . . . . . . . . . . . . . . . . . .112<br />
Bars (organ) . . . . . . . . . . . . . . . . . . . . . . . .52<br />
Bass<br />
& Chord Mode. . . . . . . . . . . . . . . . . . . . .89<br />
Edit . . . . . . . . . . . . . . . . . . . . . . . . . . . . . .71<br />
Link . . . . . . . . . . . . . . . . . . . . . . . . . . . . . .68<br />
MIDI TX. . . . . . . . . . . . . . . . . . . . . . . . . . .73<br />
Orchestra . . . . . . . . . . . . . . . . . . . . . . . . .32<br />
Panel functions. . . . . . . . . . . . . . . . . . . .13<br />
Reg. on current Set . . . . . . . . . . . . . . .101<br />
Rows . . . . . . . . . . . . . . . . . . . . . . . . . . . . .89<br />
To Treble. . . . . . . . . . . . . . . . . . . . . . . . . .28<br />
Touch . . . . . . . . . . . . . . . . . . . . . . . . . . . .92<br />
Using. . . . . . . . . . . . . . . . . . . . . . . . . . . . .25<br />
Bass Drum. . . . . . . . . . . . . . 72, 73, 77, 80<br />
Bass strap . . . . . . . . . . . . . . . . . . . . . . . . . .22<br />
Bassoon. . . . . . . . . . . . . . . . . . . . . . . . . . . .28<br />
Battery. . . . . . . . . . . . . . . . . . . . . . . . . . 6, 59<br />
Installing . . . . . . . . . . . . . . . . . . . . . . . . .16<br />
Status . . . . . . . . . . . . . . . . . . . . . . . . . . . .97<br />
Battery Charger . . . . . . . . . . . . . . . . . . . . .59<br />
Bellows<br />
Crescendo . . . . . . . . . . . . . . . . . . . . . . . .56<br />
Curve. . . . . . . . . . . . . . . . . . . . . . . . . . . . .86<br />
Detune . . . . . . . . . . . . . . . 67, 72, 75, 78<br />
No movement necessary . . . . . . . . . . . .86<br />
Resistance regulator . . . . . . . . . . . . . . .21<br />
TX Resolution . . . . . . . . . . . . . . . . . . . .110<br />
Bend. . . . . . . . . . . . . . . . . . . . . . . . . . . . . . .79<br />
Bending notes . . . . . . . . . . . . . . . . . . . . . .67<br />
Brake . . . . . . . . . . . . . . . . . . . . . . . . . . . . . .88<br />
BS TO TREB . . . . . . . . . . . . . . . . . . . . . . . . .28<br />
Button . . . . . . . . . . . . . . . . . . . . . . . . . . . . .37<br />
Noise. . . . . . . . . . . . . . . . . . . . . . . . . 72, 75<br />
C<br />
C-1~C-3 . . . . . . . . . . . . . . . . . . . . . . . . . . .55<br />
Cajun . . . . . . . . . . 66, 67, 71, 72, 74, 75<br />
Cancel . . . . . . . . . . . . . . . . . . . . . . . . . . . . .31<br />
Cassotto. . . . . . . . . . . . . . . . . . . . . . . .24, 66<br />
CC00. . . . . . . . . . . . . . . . . . . . . . . . . . . . . 114<br />
CC32. . . . . . . . . . . . . . . . . . . . . . . . . . . . . 114<br />
Chain . . . . . . . . . . . . . . . . . . . . . . . . . .39, 45<br />
Character. . . . . . . . . . . . . . . . . . . . . . . . . . .82<br />
Charging . . . . . . . . . . . . . . . . . . . . . . . . . . .59<br />
Chord . . . . . . . . . 25, 69, 79, 81, 89, 108<br />
MIDI TX . . . . . . . . . . . . . . . . . . . . . . . . . . .73<br />
Orchestra . . . . . . . . . . . . . . . . . . . . .33, 69<br />
Chorus . . . . . . . . . . . . . . . . . . . . . . . . . . . . .26<br />
Macro Type . . . . . . . . . . . . . . . . . . . . . . .83<br />
MIDI . . . . . . . . . . . . . . . . . . . . . . . . . . . 115<br />
Organ . . . . . . . . . . . . . . . . . . . . . . . . . . . .54<br />
Parameters. . . . . . . . . . . . . . . . . . . . . . . .84<br />
Send . . . . . .67, 73, 75, 77, 78, 80, 81<br />
Classic . . . . . .35, 66, 67, 71, 72, 74, 75<br />
Classic2 . . . . . . . . 66, 67, 71, 72, 74, 75<br />
Clear ALL . . . . . . . . . . . . . . . . . . . . . . . . . . .44<br />
Clear All . . . . . . . . . . . . . . . . . . . . . . . . . . . .44<br />
Common . . . . . . . . . . . . . . . . . . . . . . . . . . .82<br />
Connecting<br />
AC adapter . . . . . . . . . . . . . . . . . . . . . . . .16<br />
Connections . . . . . . . . . . . . . . . . . . . . . . . .17<br />
Contrast. . . . . . . . . . . . . . . . . . . . . . . . . . . .86<br />
Convert PC . . . . . . . . . . . . . . . . . . . . . . . 111<br />
Copy<br />
Set . . . . . . . . . . . . . . . . . . . . . . . . . . . . . . .97<br />
Copy Effects . . . . . . . . . . . . . . . . . . . . . . . .97<br />
Copying settings . . . . . . . . . . . . . . . . . . . .97<br />
Crescendo . . . . . . . . . . . . . . . . . . . . . . . . . .56<br />
Curve . . . . . . . . . . . . . . . . . . . . . . . . . . . . . .86<br />
D<br />
Data . . . . . . . . . . . . . . . . . . . . . . . . . . . . . . .31<br />
Write Error . . . . . . . . . . . . . . . . . . . . . . 117<br />
Del . . . . . . . . . . . . . . . . . . . . . . . . . . . . . . . .70<br />
Delay . . . . . . . . . . . . . . . . . . . . . . 26, 82, 84<br />
Fback. . . . . . . . . . . . . . . . . . . . . . . . . . . . .83<br />
Macro Type . . . . . . . . . . . . . . . . . . . . . . .85<br />
Parameters. . . . . . . . . . . . . . . . . . . . . . . .85<br />
Send . . . . . .67, 73, 75, 77, 78, 80, 81<br />
Delete<br />
Steps . . . . . . . . . . . . . . . . . . . . . . . . . . . . .44<br />
Demo songs . . . . . . . . . . . . . . . . . . . . . . . .20<br />
Detune. . . . . . . . . . . . . 35, 67, 72, 75, 78<br />
Global changes . . . . . . . . . . . . . . . . . . 100<br />
D-Folk . . . . . .35, 66, 67, 71, 72, 74, 75<br />
Drive. . . . . . . . . . . . . . . . . . . . . . . . . . . . . . .55<br />
Drone . . . . . . . . . . . . . . . . . . . . . . . . . . . . . .30<br />
Drum sounds . . . . . . . . . . . . . . . . . . . . . 129<br />
Dry . . . . . . . . . . . . . . . . . . . . . . . . . . . .35, 67<br />
Dual . . . . . . . . . . . . . . . . . . . . . . . . . . . . . . .30<br />
Duration . . . . . . . . . . . . . . . . . . . . . . . . . . .93<br />
Dynamics. . . . . . . . . . . . . . . . . . . . . . . . . . .30<br />
E<br />
Echo . . . . . . . . . . . . . . . . . . . . . . . . . . .26, 85<br />
Editing . . . . . . . . . . . . . . . . . . . . . . . . . . . . .62<br />
Effect<br />
Chorus. . . . . . . . . . . . . . . . . . . . . . . . . . . 26<br />
Delay . . . . . . . . . . . . . . . . . . . . . . . . . . . . 26<br />
Level . . . . . . . . . . . . . . . . . . . . . . . . . . . . 26<br />
Reverb. . . . . . . . . . . . . . . . . . . . . . . . . . . 26<br />
Ending . . . . . . . . . . . . . . . . . . . . . . . . . . . . 87<br />
Enter. . . . . . . . . . . . . . . . . . . . . . . . . . . . . . 31<br />
Equal . . . . . . . . . . . . . . . . . . . . . . . . . . . . . 36<br />
Expansion . . . . . . . . . . . . . . . . . . . . . . . . . 93<br />
Export<br />
All FR-7x. . . . . . . . . . . . . . . . . . . . . . . . . 98<br />
Set . . . . . . . . . . . . . . . . . . . . . . . . . . . . . . 98<br />
Expression . . . . . . . . . . . . . . . . . . . . . . . . 115<br />
MIDI Tx . . . . . . . . . . . . . . . . . . . . . . . . . 110<br />
Pedal . . . . . . . . . . . . . . . . . . . . . . . . . . . . 58<br />
Ext. Seq. Playback. . . . . . . . . . . . . . . . . . 109<br />
External Battery Charger . . . . . . . . .59, 60<br />
F<br />
Factory Setup . . . . . . . . . . . . . . . . . . . . . 102<br />
FBC-7 . . . . . . . . . . . . . . . . . . . . . . . . . . . . . 58<br />
Connecting. . . . . . . . . . . . . . . . . . . . . . . 17<br />
Footswitch functions . . . . . . . . . . . . . . 87<br />
Feedback . . . . . . . . . . . . . . . . . . . . . . . . . . 85<br />
F-Folk . . . . . . .35, 66, 67, 71, 72, 74, 75<br />
F-Folk2 . . . . . . . . . 66, 67, 71, 72, 74, 75<br />
Fill . . . . . . . . . . . . . . . . . . . . . . . . . . . . . . . . 87<br />
Filter . . . . . . . . . . . . . . . . . . . . . . . . . . . . . 111<br />
F-Jazz . . . . . . . . . . 66, 67, 71, 72, 74, 75<br />
Flanger. . . . . . . . . . . . . . . . . . . . . . . . . . . . 83<br />
Flushing . . . . . . . . . . . . . . . . . . . . . . . .47, 48<br />
Foot . . . . . . . . . . . . . . . . . . . . . . . . . . .66, 74<br />
Footswitches. . . . . . . . . . . . . . . . . . . .58, 87<br />
FR-7/5 Import. . . . . . . . . . . . . . . . . . . . . 100<br />
Free Bass . . . . . . . . . . . . . . . . . . . . . . . . . . 27<br />
Edit . . . . . . . . . . . . . . . . . . . . . . . . . . . . . 74<br />
MIDI TX . . . . . . . . . . . . . . . . . . . . . . . . . . 75<br />
Mode. . . . . . . . . . . . . . . . . . . . . . . . . . . . 90<br />
Orchestra . . . . . . . . . . . . . . . . . . . . . . . . 34<br />
Orchestra Link . . . . . . . . . . . . . . . . . . . . 69<br />
Panel functions . . . . . . . . . . . . . . . . . . . 13<br />
Reg. on current Set. . . . . . . . . . . . . . . 101<br />
French . . . . . . . . . . . . . . . . . . . . . . . . .35, 67<br />
Function Switch . . . . . . . . . . . . . . . . . . . . 88<br />
Function Switches Edit . . . . . . . . . . . . . . 88<br />
G<br />
German . . . . . . . . . . . . . . . . . . . . . . . .35, 67<br />
Global Filters. . . . . . . . . . . . . . . . . . . . . . 111<br />
Growl . . . . . . . . . . . . . . . . . . . . . . . . . .72, 75<br />
Global changes . . . . . . . . . . . . . . . . . . 101<br />
H<br />
Hall . . . . . . . . . . . . . . . . . . . . . . . . . . . . . . . 82<br />
Harmonic. . . . . . . . . . . . . . . . . . . . . . . . . . 54<br />
Harmonics bars. . . . . . . . . . . . . . . . . . . . . 52<br />
Headphones . . . . . . . . . . . . . . . . . . . .14, 19<br />
High . . . . . . . . . . . . . . . . . . . . . . . . . . .30, 74<br />
HighLand . . . . . . . . . . . . . . . . . . . . . . . . . . 30<br />
135
FR-7/FR-5 V-Accordion<br />
Index |<br />
r<br />
I<br />
i (Information) . . . . . . . . . . . . . . . . . . . . . .47<br />
Icon . . . . . . . . . . . . . . . . . . . . . . . . . . . . . . .86<br />
I-Folk . . . . . . . . . . .66, 67, 71, 72, 74, 75<br />
Import<br />
All FR-7x. . . . . . . . . . . . . . . . . . . . . . . . . .99<br />
FR-7/5. . . . . . . . . . . . . . . . . . . . . . . . . . .100<br />
Set. . . . . . . . . . . . . . . . . . . . . . . . . . . . . . .99<br />
Information . . . . . . . . . . . . . . . . . . . . . . .134<br />
Initialize. . . . . . . . . . . . . . . . . . . . . . . . . . .102<br />
Ins. . . . . . . . . . . . . . . . . . . . . . . . . . . . . . . . .70<br />
Intro. . . . . . . . . . . . . . . . . . . . . . . . . . . . . . .87<br />
Italian . . . . . . . . . . . . . . . . . . . . . . . . . 35, 67<br />
J<br />
Jazz . . . . . . . . . . . .66, 67, 71, 72, 74, 75<br />
Jump . . . . . . . . . . . . . . . . . . . . . . . . . . 51, 62<br />
Just. . . . . . . . . . . . . . . . . . . . . . . . . . . . . . . .36<br />
K<br />
Key . . . . . . . . . . . . . . . . . . . . . . . . . . . . 35, 36<br />
Kirnberger. . . . . . . . . . . . . . . . . . . . . . . . . .36<br />
L<br />
LCD Contrast . . . . . . . . . . . . . . . . . . . . . . .86<br />
Leakage . . . . . . . . . . . . . . . . . . . . . . . . . . . .54<br />
Level. . . . . . . . . . . . . . . . . . . 66, 67, 72, 74<br />
Chorus . . . . . . . . . . . . . . . . . . . . . . . . . . .83<br />
Distortion. . . . . . . . . . . . . . . . . . . . . . . . .55<br />
Growl . . . . . . . . . . . . . . . . . . . . . . . . . . . .72<br />
Reverb. . . . . . . . . . . . . . . . . . . . . . . . . . . .83<br />
Vibrato/Chorus . . . . . . . . . . . . . . . . . . . .55<br />
Level up. . . . . . . . . . . . . . . . . . . . . . . . . . . .98<br />
Link. . . . . . . . . . . . . . . . . . . . . . . . . . . . 68, 69<br />
Drums . . . . . . . . . . . . . . . . . . . . . . . . . . . .72<br />
Low . . . . . . . . . . . . . . . . . . . . . . . . . . . 31, 74<br />
Lower. . . . . . . . . . . . . . . . . . . . . . . . . . . . . .52<br />
Lowest Note . . . . . . . . . . . . . . . . . . . . 76, 79<br />
M<br />
Macro . . . . . . . . . . . . . . . . . . . . . 82, 83, 85<br />
Main page. . . . . . . . . . . . . . . . . . . . . . . . . .22<br />
Master bar . . . . . . . . . . . . . . . . . . . . . . . . .31<br />
Master Bar Recall . . . . . . . . . . . . . . . . . . .86<br />
Master Tune . . . . . . . . . . . . . . . . . . . . . . . .64<br />
Mean-Tone . . . . . . . . . . . . . . . . . . . . . . . . .36<br />
Mem. Name . . . . . . . . . . . . . . . . . . . . . . . .57<br />
Memory Error. . . . . . . . . . . . . . . . . . . . . .118<br />
Menu . . . . . . . . . . . . . . . . . . . . . . . . . . . . . .62<br />
MIDI<br />
Channels . . . . . . . . . . . . . . . . . . .108, 109<br />
Implementation . . . . . . . . . . . . . . . . . .130<br />
Parts . . . . . . . . . . . . . . . . . . . . . . . . . . . .113<br />
Program change . . . . . . . . . . . . . . . . . .111<br />
Remote control. . . . . . . . . . . . . . . . . . . .87<br />
Sections . . . . . . . . . . . . . . . . . . . . . . . . .113<br />
Start/Stop . . . . . . . . . . . . . . . . . . . . . . . .93<br />
TX. . . . . . . . .70, 73, 75, 77, 79, 80, 81<br />
Mode . . . . . . . . . . . . . . . . . . . . . . . . . . 30, 68<br />
Modulation. . . . . . . . . . . . . . . . . . . . . . . . .88<br />
Module . . . . . . . . . . . . . . . . . . . . . . . . . . .108<br />
mp3 . . . . . . . . . . . . . . . . . . . . . . . . . . . . . . .38<br />
Multi . . . . . . . . . . . . . . . . . . . . . . . . . . . . .111<br />
Musette Detune. . . . . . . . . . . . . . . . . 35, 67<br />
136<br />
N<br />
Name . . . . . . . . . . . . . . . . . . . . . . . . . .86, 92<br />
No Link . . . . . . . . . . . . . . . . . . . . . . . .68, 69<br />
Noise . . . . . . . . . . . . . . . . . . . . . . . . . .67, 75<br />
Edit . . . . . . . . . . . . . . . . . . . . . . . . . . . . . .37<br />
Global changes . . . . . . . . . . . . . .100, 101<br />
North Eur . . . . . . . . . . . . . . . . . . . . . .35, 67<br />
Note . . . . . . . . . . . . . . . . . . . . . . . . . . . . . . .72<br />
Note Tx . . . . . . . . . . . . . . . . . . . . . . . . . . 114<br />
O<br />
Octave . . . . . . . . 66, 76, 78, 80, 81, 114<br />
OldItaly . . . . . . . . . . . . . . . . . . . . . . . .66, 67<br />
Orc Bass<br />
MIDI TX. . . . . . . . . . . . . . . . . . . . . . . . . . .77<br />
Release Time . . . . . . . . . . . . . . . . . . . . . .76<br />
Volume . . . . . . . . . . . . . . . . . . . . . . .32, 76<br />
ORC.BASS . . . . . . . . . . . . . . . . . . . . . . . . . .76<br />
ORCH<br />
CHORD EDIT. . . . . . . . . . . . . . . . . . .79, 81<br />
EDIT . . . . . . . . . . . . . . . . . . . . . . . . . . . . . .78<br />
Orch<br />
Chord . . . . . . . . . . . . . . . . . . . . . . . . . . . .33<br />
Orch.On/Off. . . . . . . . . . . . . . . . . . . . . . . . .87<br />
Orchestra. . . . . . . . . . . . . . . . . . . . . . . . . . .29<br />
Bass . . . . . . . . . . . . . . . . . . . . . . . . . .32, 76<br />
Chord . . . . . . . . . . . . . . . . . . . . . . . . . . . .33<br />
Chord Edit . . . . . . . . . . . . . . . . . . . .79, 81<br />
Chord Link . . . . . . . . . . . . . . . . . . . . . . . .69<br />
Chord MIDI TX . . . . . . . . . . . . . . . . .80, 81<br />
Chord Volume . . . . . . . . . . . . . . . . . . . . .80<br />
Edit . . . . . . . . . . . . . . . . . . . . . . . . . . . . . .78<br />
Free Bass. . . . . . . . . . . . . . . . . . . . . . . . . .34<br />
Free Bass Volume . . . . . . . . . . . . . . . . . .81<br />
Link . . . . . . . . . . . . . . . . . . . . . . . . . . . . . .68<br />
MIDI TX. . . . . . . . . . . . . . . . . . . . . . . . . . .79<br />
Mode. . . . . . . . . . . . . . . . . . . . . . . . . . . . .30<br />
Octave. . . . . . . . . . . . . . . . . . . . 78, 80, 81<br />
Touch . . . . . . . . . . . . . . . . . . . . . . . . . . . .92<br />
Volume . . . . . . . . . . . . . . . . . . . . . . .31, 78<br />
Orchestra Free Bass Volume. . . . . . . . . . .34<br />
Orchestral sound . . . . . . . . . . . . . . . . . . 128<br />
Organ. . . . . . . . . . . . . . . . . . . . . . . . . . . . . .52<br />
Organetto . . . . . . 66, 67, 71, 72, 74, 75<br />
Output . . . . . . . . . . . . . . . . . . . . . . . . . . . . .17<br />
Output Level . . . . . . . . . . . . . . . . . . . . . . . .92<br />
P<br />
Pan . . . . . . . . . . . . . . . . . . . . . . . . . . . . . . . .17<br />
Delay. . . . . . . . . . . . . . . . . . . . . . . . .82, 85<br />
Dlay . . . . . . . . . . . . . . . . . . . . . . . . . . . . . .85<br />
Panel functions . . . . . . . . . . . . . . . . . . . . .12<br />
Panpot . . . . . . . . . . . . 77, 78, 80, 81, 114<br />
Part. . . . . . . . . . . . . . . . . . . . . . . . . . . . . . . .88<br />
Patch . . . . . . . . . . . . . . . . . . . . . . . . . . . . . .52<br />
PBM . . . . . . . . . . . . . . . . . . . . . . . . . . . . . . .65<br />
PC . . . . . . . . . . . . . . . . . . . . . . . . . . . . . . . 111<br />
Pedal . . . . . . . . . . . . . . . . . . . . . . . . . . . . . .52<br />
Pedal Controller . . . . . . . . . . . . . . . . . . . . .87<br />
Percussion. . . . . . . . . . . . . . . . . . . . . . . . . .54<br />
Percussion sounds . . . . . . . . . . . . . . . . . 129<br />
Performance. . . . . . . . . . . . . . . . . . . . . . 111<br />
Personalizing . . . . . . . . . . . . . . . . . . . . . . .92<br />
PHONES. . . . . . . . . . . . . . . . . . . . . . . .14, 19<br />
Physical Behavior Modeling. . . . . . . . . . .65<br />
Pitch. . . . . . . . . . . . . . . . . . . . . . . . . . . . . . .35<br />
Pitch Down . . . . . . . . . . . . . . . . . . . . . . . . .88<br />
PitchDwn. . . . . . . . . . . . . . . . . . . . . . . . . . .87<br />
PitchUp . . . . . . . . . . . . . . . . . . . . . . . . . . . .87<br />
Plate . . . . . . . . . . . . . . . . . . . . . . . . . . . . . . .82<br />
Play<br />
List. . . . . . . . . . . . . . . . . . . . . . . . . . . . . . .39<br />
Player . . . . . . . . . . . . . . . . . . . . . . . . . . . . . .38<br />
Pre-Dly T.. . . . . . . . . . . . . . . . . . . . . . . . . . .83<br />
Pre-LPF. . . . . . . . . . . . . . . . . . . . . . . . . . . . .83<br />
PRG NUMB . . . . . . . . . . . . . . . . . . . . . . . 112<br />
Pythagorean . . . . . . . . . . . . . . . . . . . . . . . .36<br />
Q<br />
Quarter tone . . . . . . . . . . . . . . . . . . . . . . . .65<br />
R<br />
RealTime RX-TX . . . . . . . . . . . . . . . . . . . 109<br />
REC. . . . . . . . . . . . . . . . . . . . . . . . . . . . . . . .47<br />
Recharging . . . . . . . . . . . . . . . . . . . . . . . . .59<br />
Recorder . . . . . . . . . . . . . . . . . . . . . . . . . . .38<br />
Recording . . . . . . . . . . . . . . . . . . . . . . . . . .47<br />
Audio. . . . . . . . . . . . . . . . . . . . . . . . . . . . .47<br />
Recovering Data. . . . . . . . . . . . . . . . . . . 118<br />
Reed<br />
Global changes . . . . . . . . . . . . . 100, 101<br />
Growl . . . . . . . . . . . . . . . . . . . . . . . .72, 75<br />
Type. . . . . . . . . . . . . . . . . . . . . . 65, 71, 74<br />
Volume . . . . . . . . . . . . . . . . . . . 66, 71, 74<br />
Register<br />
Bass . . . . . . . . . . . . . . . . . . . . . . . . . .13, 71<br />
Footswitches . . . . . . . . . . . . . . . . . . . . . .58<br />
Free Bass. . . . . . . . . . . . . . . . . . . . . . . . . .74<br />
Treble . . . . . . . . . . . . . . . . . . . . . . . .12, 66<br />
Release<br />
T. . . . . . . . . . . . . . . . . . . . . . . . . . . . . . . . .93<br />
Time. . . . . . . . . . . . . . . . . . . . . . . . . . . . . .76<br />
Remove . . . . . . . . . . . . . . . . . . . . . . . . . . . .44<br />
Rename<br />
Playlist . . . . . . . . . . . . . . . . . . . . . . .46, 49<br />
Repeat . . . . . . . . . . . . . . . . . . . . . . . . . . . . .45<br />
Resetting . . . . . . . . . . . . . . . . . . . . . . . . . 102<br />
Resolution. . . . . . . . . . . . . . . . . . . . . . . . 110<br />
Restore<br />
Data. . . . . . . . . . . . . . . . . . . . . . . . . . . . . .99<br />
Reverb . . . . . . . . . . . . . . . . . . . . . . . . . . . . .26<br />
Macro Type. . . . . . . . . . . . . . . . . . . . . . . .82<br />
MIDI. . . . . . . . . . . . . . . . . . . . . . . . . . . . 115<br />
Parameters. . . . . . . . . . . . . . . . . . . . . . . .82<br />
Send . . . . . .67, 73, 75, 77, 78, 80, 81<br />
Room . . . . . . . . . . . . . . . . . . . . . . . . . . . . . .82<br />
Root note . . . . . . . . . . . . . . . . . . . . . . . . . .36<br />
Rotary . . . . . . . . . . . . . . . . . . . . . . . . . . . . .55<br />
Rotary Slow/Fast . . . . . . . . . . . . . . . . . . . .88<br />
S<br />
Save . . . . . . . . . . . . . . . . . . . . . . . . . . . . . 114<br />
Recording. . . . . . . . . . . . . . . . . . . . . . . . .47<br />
Saving settings. . . . . . . . . . . . . . . . . . . . 103<br />
Scale. . . . . . . . . . . . . . . . . . . . . . . . . . .36, 64<br />
Assign . . . . . . . . . . . . . . . . . . . . . . . . . . . .65<br />
Edit . . . . . . . . . . . . . . . . . . . . . . . . . . . . . .64<br />
Scottish . . . . . . . . . . . . . . . . . . . . . . . .35, 67
V-Accordion r<br />
Send. . . . . . . .67, 73, 75, 77, 78, 80, 81<br />
Cho . . . . . . . . . . . . . . . . . . . . . . . . . . . . . .55<br />
Dly . . . . . . . . . . . . . . . . . . . . . . . . . . . . . . .56<br />
Rev . . . . . . . . . . . . . . . . . . . . . . . . . . . . . .55<br />
Send PC . . . . . . . . . . . . . . . . . . . . . . . . . . .111<br />
Sequencer . . . . . . . . . . . . . . . .93, 108, 109<br />
Remarks . . . . . . . . . . . . . . . . . . . . . . . . .108<br />
Set . . . . . . . . . . . . . . . . . . . . . . . . . . . . . . . .23<br />
Bass Reg. . . . . . . . . . . . . . . . . . . . . . . . .101<br />
Common. . . . . . . . . . . . . . . . . . . . . . . . . .82<br />
Copying . . . . . . . . . . . . . . . . . . . . . . . . . .97<br />
Description. . . . . . . . . . . . . . . . . . . . . . . .23<br />
Footswitches . . . . . . . . . . . . . . . . . . . . . .58<br />
Free Bass Reg. . . . . . . . . . . . . . . . . . . . .101<br />
Global changes . . . . . . . . . . . . . .100, 101<br />
Name . . . . . . . . . . . . . . . . . . . . . . . . . . . .86<br />
Program change . . . . . . . . . . . . . . . . . .109<br />
Selecting . . . . . . . . . . . . . . . . . . . . . . . . .51<br />
Treble Reg . . . . . . . . . . . . . . . . . . . . . . .100<br />
Skip FWD/BWD. . . . . . . . . . . . . . . . . . . . . .88<br />
Slow . . . . . . . . . . . . . . . . . . . . . . . . . . . . . . .54<br />
Soft<br />
Organ . . . . . . . . . . . . . . . . . . . . . . . . . . . .54<br />
Solo . . . . . . . . . . . . . . . . . . . . . . . . . . . . . . .30<br />
Sordina . . . . . . . . . . . . . . . . . . . . . . . . . . . .25<br />
Sound list . . . . . . . . . . . . . . . . . . . .128, 129<br />
Specifications. . . . . . . . . . . . . . . . . . . . . .119<br />
Start/Stop . . . . . . . . . . . . . . . . . . . . . . 87, 93<br />
Startup . . . . . . . . . . . . . . . . . . . . . . . . . . . .92<br />
Name . . . . . . . . . . . . . . . . . . . . . . . . . . . .92<br />
Status . . . . . . . . . . . . . . . . . . . . . 66, 71, 74<br />
STD . . . . . . . . . . . . . . . . . . . . . . . . . . . . 32, 33<br />
Std . . . . . . . . . . . . . . . . . . . . . . . . . . .37, 114<br />
Steierische. . . . . . 66, 67, 71, 72, 74, 75<br />
Stereo<br />
Position . . . . . . . . . . . . . . . . . . . . . . . . . .17<br />
Width . . . . . . . . . . . . . . . . . . . . . . . . . . . .90<br />
Studio . . . . . . . . . 66, 67, 71, 72, 74, 75<br />
Sust.A. . . . . . . . . . . . . . . . . . . . . . . . . . . . . .87<br />
Sust.B. . . . . . . . . . . . . . . . . . . . . . . . . . . . . .87<br />
Sustain. . . . . . . . . . . . . . . . . . . . . . . . . 58, 88<br />
Sustain Routing A/B . . . . . . . . . . . . . . . . .88<br />
Switch . . . . . . . . . . . . . . . . . . . . . . . . . 54, 55<br />
Switching on/off . . . . . . . . . . . . . . . . . . . .18<br />
System. . . . . . . . . . . . . . . . . . . . . . . . . . . . .86<br />
T<br />
TexMex . . . . . . . . . . . . . . . . . . . . . . . . 66, 67<br />
Timbre . . . . . . . . . . . . . 51, 76, 78, 79, 81<br />
Time . . . . . . . . . . . . . . . . . . . . . . . . . . . . . . .83<br />
TO FBC-7 . . . . . . . . . . . . . . . . . . . . . . . . . . .14<br />
Tone Generator . . . . . . . . . . . . . . . . . . . .108<br />
Touch. . . . . . . . . . . . . . . . . . . . . . . . . . . . . .92<br />
Tradition . . . . . . . 66, 67, 71, 72, 74, 75<br />
Transpose . . . . . . . . . . . . . . . . . . . . . . 35, 64<br />
Treble . . . . . . . . . . . . . . . . . . . . . . . . . . . . . .12<br />
Edit . . . . . . . . . . . . . . . . . . . . . . . . . . . . . .65<br />
MIDI TX. . . . . . . . . . . . . . . . . . . . . . . . . . .70<br />
Octave. . . . . . . . . . . . . . . . . . . . . . . . . . . .66<br />
Orchestra . . . . . . . . . . . . . . . . . . . . . . . . .29<br />
Panel functions. . . . . . . . . . . . . . . . . . . .12<br />
Playing bass parts. . . . . . . . . . . . . . . . . .28<br />
Reg. on current Set . . . . . . . . . . . . . . .100<br />
Release T . . . . . . . . . . . . . . . . . . . . . . . . .93<br />
Using. . . . . . . . . . . . . . . . . . . . . . . . . . . . .24<br />
Treble Mode . . . . . . . . . . . . . . . . . . . . . . . .94<br />
Trikitixa . . . . . . . . 66, 67, 71, 72, 74, 75<br />
Troubleshooting . . . . . . . . . . . . . . . . . . . 116<br />
Tuning . . . . . . . . . . . . . . . . . . . . . . . . .36, 64<br />
Tuning system . . . . . . . . . . . . . . . . . . . . . .64<br />
Type . . . . . . . . . . . . . . . . . . . . . . . 55, 64, 66<br />
Reed . . . . . . . . . . . . . . . . . . . . . . . . .71, 74<br />
U<br />
Upper . . . . . . . . . . . . . . . . . . . . . . . . . . . . . .52<br />
USB. . . . . . . . . . . . . . . . . . . . . . . . . . . . . . . .38<br />
User 1~3 . . . . . . . . . . . . . . . . . . . . . . . . . . .36<br />
V<br />
V-1~V-3 . . . . . . . . . . . . . . . . . . . . . . . . . . .55<br />
Valve . . . . . . . . . . . . . . . . . . . . . . . . . . . . . .37<br />
Noise . . . . . . . . . . . . . . . . . . . . . . . . . . . . .67<br />
Velocity . . . . . . . . . . . . . . . . . . . . . . .30, 115<br />
Velocity sensitivity. . . . . . . . . . . . . . . . . . .30<br />
Vibrato. . . . . . . . . . . . . . . . . . . . . . . . . . . . .54<br />
Vintage . . . . . . . . . . . . . . . . . . . . . . . . . . . .55<br />
Virtual TonwWheel . . . . . . . . . . . . . . . . . .52<br />
Vol . . . . . . . . . . . . . . . . . . . . . . . . . . . . . . . .73<br />
Volume . . . . . . . . . . . . . . . . . . .25, 26, 114<br />
Effects. . . . . . . . . . . . . . . . . . . . . . . . . . . .26<br />
Global changes . . . . . . . . . . . . . 100, 101<br />
Headphones. . . . . . . . . . . . . . . . . . . . . . .19<br />
Orc.Chord . . . . . . . . . . . . . . . . . . . . . . . . .33<br />
Orchestra . . . . . . . . . . . . . . . . . . . . .31, 78<br />
Orchestra Bass. . . . . . . . . . . . . . . . .32, 76<br />
Orchestra Chord . . . . . . . . . . . . . . . . . . .80<br />
Orchestra Free Bass . . . . . . . . . . . .34, 81<br />
Swells . . . . . . . . . . . . . . . . . . . . . . . . . . . .58<br />
W<br />
Warning. . . . . . . . . . . . . . . . . . . . . . . . . . 117<br />
WAV<br />
Recording. . . . . . . . . . . . . . . . . . . . . . . . .47<br />
Werckmeister . . . . . . . . . . . . . . . . . . . . . . .36<br />
Whole. . . . . . . . . . . . . . . . . . . . . . . . . . . . . .74<br />
Wrap . . . . . . . . . . . . . . . . . . . . . . . . . .76, 79<br />
Write . . . . . . . . . . . . . . . . . . . . . . . . . . . . 103<br />
ALL. . . . . . . . . . . . . . . . . . . . . . . . . . . . . 114<br />
Z<br />
Zampogna. . . . . . . . . . . . . . . . . . . . . . . . . .30<br />
137
FR-7x V-Accordion<br />
®<br />
For For China China<br />
r<br />
138
For EU Countries countries<br />
For EU Countries<br />
This product complies with the requirements of European Directives EMC 89/336/EEC and LVD 73/23/EEC.<br />
For the USA<br />
For Canada
R®<br />
602.00.0346.01 RES 738-09 FR-7x Owner's <strong>Manual</strong> - E