ER-A160/A180 Operation-Manual GB - Sharp
ER-A160/A180 Operation-Manual GB - Sharp
ER-A160/A180 Operation-Manual GB - Sharp

You also want an ePaper? Increase the reach of your titles
YUMPU automatically turns print PDFs into web optimized ePapers that Google loves.
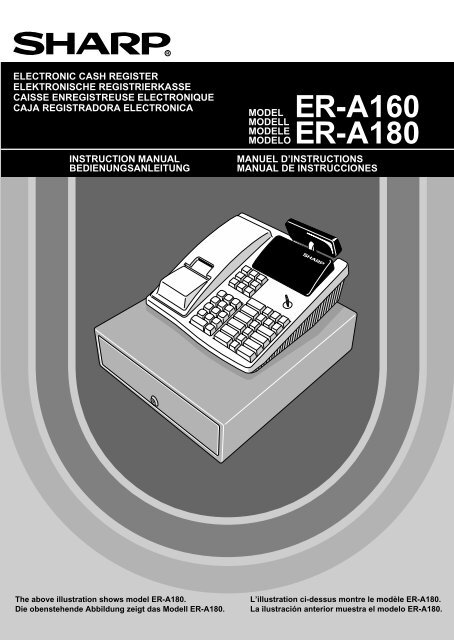
ELECTRONIC CASH REGIST<strong>ER</strong><br />
ELEKTRONISCHE REGISTRI<strong>ER</strong>KASSE<br />
CAISSE ENREGISTREUSE ELECTRONIQUE<br />
CAJA REGISTRADORA ELECTRONICA<br />
INSTRUCTION MANUAL<br />
BEDIENUNGSANLEITUNG<br />
MODEL<br />
MODELL<br />
MODELE<br />
MODELO<br />
<strong>ER</strong>-<strong>A160</strong><br />
<strong>ER</strong>-<strong>A180</strong><br />
MANUEL D’INSTRUCTIONS<br />
MANUAL DE INSTRUCCIONES<br />
The above illustration shows model <strong>ER</strong>-<strong>A180</strong>.<br />
Die obenstehende Abbildung zeigt das Modell <strong>ER</strong>-<strong>A180</strong>.<br />
L’illustration ci-dessus montre le modèle <strong>ER</strong>-<strong>A180</strong>.<br />
La ilustración anterior muestra el modelo <strong>ER</strong>-<strong>A180</strong>.
CAUTION:<br />
The cash register should be securely fitted to the supporting platforms to avoid instability<br />
when the drawers are open.<br />
CAUTION:<br />
The socket-outlet shall be installed near the equipment and shall be easily accessible.<br />
VORSICHT:<br />
Die Netzsteckdose muß nahe dem Gerät angebracht und leicht zugänglich sein.<br />
ATTENTION:<br />
La prise de courant murale devra être installée a proximité de l’équipement et devra être<br />
facilement accessible.<br />
AVISO:<br />
El tomacorriente debe estar instalado cerca del equipo y debe quedar bien accesible.<br />
VARNING:<br />
Det matande vägguttaget skall placeras nära apparaten och vara lätt atkomligt.<br />
CAUTION:<br />
For a complete electrical disconnection pull out the mains plug.<br />
VORSICHT:<br />
Zur vollständigen elektrischen Trennung vom Netz den Netzstecker ziehen.<br />
ATTENTION:<br />
Pour obtenir une mise hors-circuit totale, débrancher la prise de courant secteur.<br />
AVISO:<br />
Para una desconexión eléctrica completa, desenchufar el enchufe de tomacorriente.<br />
VARNING:<br />
För att helt koppla fran strömmen, dra ut stickproppen.
INTRODUCTION<br />
Thank you very much for your purchase of the SHARP Electronic Cash Register, Model <strong>ER</strong>-<strong>A160</strong>/<strong>ER</strong>-<strong>A180</strong>.<br />
Please read this manual carefully before operating your machine in order to gain full understanding of<br />
functions and features.<br />
Please keep this manual for future reference, it will help you, if you encounter any operational problems.<br />
English<br />
CAUTION!<br />
Never install the batteries into the cash register before initializing it. Before you start operating the cash<br />
register, you must first initialize it, then install the batteries. Otherwise, distorted memory contents and<br />
malfunction of the cash register will occur. For their procedures, please refer to page 6.<br />
IMPORTANT<br />
• Install your register in a location that is not subject to direct radiation, unusual temperature changes,<br />
high humidity or exposed to water sources.<br />
Installation in such locations could cause damage to the cabinet and the electronic components.<br />
• Never operate the register with wet hands.<br />
The water could seep into the interior of the register and cause component failure.<br />
• When cleaning your register, use a dry, soft cloth. Never use solvents, such as benzine and/or<br />
thinner.<br />
The use of such chemicals will lead to discoloration or deterioration of the cabinet.<br />
• The register plugs into any standard wall outlet (Official (nominal) voltage).<br />
Other electrical devices on the same electrical circuit could cause the register to malfunction.<br />
• If the register malfunctions, call your local dealer for service - do not try to repair the register<br />
yourself.<br />
• For a complete electrical disconnection, pull out the mains plug.<br />
English<br />
English<br />
English<br />
1
CONTENTS<br />
INTRODUCTION ............................................................................................................................................1<br />
IMPORTANT ..................................................................................................................................................1<br />
CONTENTS....................................................................................................................................................2<br />
PARTS AND THEIR FUNCTIONS.................................................................................................................3<br />
GETTING STARTED......................................................................................................................................6<br />
BASIC SALES ENTRY ................................................................................................................................10<br />
OTH<strong>ER</strong> TYPES OF ENTRIES......................................................................................................................12<br />
1 Item entries..........................................................................................................................................12<br />
Single item entries ........................................................................................................................12<br />
Repeat entries ..............................................................................................................................12<br />
Multiplication entries .....................................................................................................................13<br />
Single item cash sale (SICS) entry...............................................................................................13<br />
2 Displaying subtotals ............................................................................................................................14<br />
3 Finalization of transaction....................................................................................................................14<br />
Cheque or credit sale ...................................................................................................................14<br />
4 Computation of VAT/tax ......................................................................................................................14<br />
VAT/tax system ............................................................................................................................14<br />
5 Auxiliary entries ...................................................................................................................................15<br />
Percent calculations (premium or discount) .................................................................................15<br />
Discount entries............................................................................................................................16<br />
Refund entries ..............................................................................................................................16<br />
Printing of non-add code numbers ...............................................................................................16<br />
6 Payment treatment ..............................................................................................................................17<br />
Currency exchange ......................................................................................................................17<br />
Received on account entries ........................................................................................................18<br />
Paid out entries.............................................................................................................................18<br />
No sale (exchange) ......................................................................................................................18<br />
7 Receipt issuance after finalization.......................................................................................................18<br />
8 Automatic sequence key (` key) entries ..........................................................................................18<br />
9 Override entries...................................................................................................................................19<br />
CORRECTION .............................................................................................................................................19<br />
READING (X) AND RESETTING (Z) OF SALES TOTALS ........................................................................21<br />
1 Summery of reading (X) and resetting (Z) reports...............................................................................21<br />
2 Sample reports ....................................................................................................................................22<br />
PROGRAMMING .........................................................................................................................................24<br />
1 Programming the VAT/tax rate............................................................................................................24<br />
2 Programming for departments.............................................................................................................24<br />
3 PLU(Price Lookup) programming........................................................................................................26<br />
4 Programming for miscellaneous keys .................................................................................................27<br />
5 Programming various functions...........................................................................................................29<br />
6 Reading stored program......................................................................................................................33<br />
PROGRAMMING FOR EURO .....................................................................................................................34<br />
OP<strong>ER</strong>ATOR MAINTENANCE......................................................................................................................37<br />
1 Replacing the batteries........................................................................................................................37<br />
2 Replacing the paper roll ......................................................................................................................38<br />
3 Replacing the ink ribbon......................................................................................................................39<br />
4 Ink refill (<strong>ER</strong>-<strong>A180</strong> only) ......................................................................................................................40<br />
5 Drawer handling ..................................................................................................................................41<br />
6 Opening the drawing by hand .............................................................................................................42<br />
7 Installing the fixing angle bracket ........................................................................................................42<br />
8 In case of power failure or paper jam ..................................................................................................43<br />
9 Program resetting................................................................................................................................43<br />
10 Before calling for service .....................................................................................................................43<br />
LIST OF OPTIONS.......................................................................................................................................44<br />
SPECIFICATIONS .......................................................................................................................................44<br />
2
PARTS AND THEIR FUNCTIONS<br />
1 External view<br />
<strong>ER</strong>-<strong>A160</strong><br />
Printer cover<br />
Operator display<br />
Paper bed<br />
Receipt paper<br />
Customer display<br />
(Pop-up type)<br />
Take-up spool<br />
Battery compartment<br />
cover<br />
Ink ribbon cover<br />
Drawer lock<br />
Power cord<br />
Drawer<br />
Keyboard<br />
Mode switch<br />
Front view Rear view Printer<br />
<strong>ER</strong>-<strong>A180</strong><br />
Printer cover<br />
Receipt paper<br />
Operator display<br />
Power cord<br />
Customer display<br />
(Pop-up type)<br />
Paper bed<br />
Take-up spool<br />
Battery compartment<br />
cover<br />
Ink ribbon cover<br />
Logo stamp<br />
Drawer lock<br />
Keyboard<br />
Mode switch<br />
Drawer<br />
Front view Rear view Printer<br />
3
2<br />
Standard keyboard layout<br />
<strong>ER</strong>-<strong>A160</strong><br />
RCPT<br />
/PO<br />
Keyboard<br />
RA<br />
AUTO<br />
1<br />
CASH<br />
#<br />
AUTO<br />
2<br />
<strong>ER</strong>-<strong>A180</strong><br />
RCPT<br />
/PO<br />
RA<br />
AUTO<br />
1<br />
CASH<br />
#<br />
AUTO<br />
2<br />
RF<br />
ESC<br />
RF<br />
ESC<br />
PLU<br />
AMT<br />
EX<br />
PLU<br />
AMT<br />
EX<br />
• CL<br />
5<br />
%1 %2<br />
• CL<br />
5<br />
10<br />
%1 %2<br />
7 8 9<br />
4<br />
CR<br />
7 8 9<br />
4<br />
9<br />
CR<br />
4 5 6<br />
3<br />
CH<br />
4 5 6<br />
3<br />
8<br />
CH<br />
1 2 3<br />
2<br />
#/TM/ST<br />
1 2 3<br />
2<br />
7<br />
#/TM/ST<br />
0<br />
00<br />
1<br />
TL/NS<br />
0<br />
00<br />
1<br />
6<br />
TL/NS<br />
Standard key names<br />
Paper feed key<br />
PLU<br />
(<strong>ER</strong>-<strong>A180</strong>) PLU (<strong>ER</strong>-<strong>A160</strong>) PLU/Subdepartment key<br />
RA<br />
Received-on account key<br />
AMT<br />
Amount key<br />
CASH<br />
#<br />
Cashier code entry key<br />
Discount key<br />
RCPT<br />
/PO<br />
Receipt print/Paid-out key<br />
EX<br />
Foreign currency exchange key<br />
AUTO<br />
1<br />
AUTO<br />
2<br />
Auto 1 and 2 keys<br />
1<br />
~<br />
5<br />
Department keys<br />
Void key<br />
~<br />
6 10<br />
(<strong>ER</strong>-<strong>A180</strong> only) Department keys<br />
RF<br />
Refund key<br />
%1 %2<br />
Percent 1 and 2 keys<br />
ESC<br />
Escape key<br />
CR<br />
Credit key<br />
Multiplication key<br />
CH<br />
Cheque key<br />
•<br />
Decimal point key<br />
#/TM/ST<br />
Non-add code/Time display/Subtotal key<br />
CL<br />
Clear key<br />
TL/NS<br />
Total/No sale key<br />
00<br />
0 ~ 9 Numeric keys<br />
VAT<br />
Option keys<br />
Value added tax key<br />
You can change the number of departments to 10 or 15 (<strong>ER</strong>-<strong>A160</strong>), or to 5, 15, 20 or 30 (<strong>ER</strong>-<strong>A180</strong>). The key<br />
layout of 15, 20, 30 departments are as follows. (The layout of 5 and 10 departments are as shown above.)<br />
Consult your dealer for changing the number of departments.<br />
15 departments 20 departments 30 departments<br />
PLU<br />
AMT<br />
(SHIFT)<br />
(<strong>ER</strong>-<strong>A180</strong> only) Department shift key<br />
(Ex. Ó ö =Department 16)<br />
PLU<br />
AMT<br />
PLU<br />
AMT<br />
15<br />
20<br />
20<br />
25<br />
30<br />
5<br />
10<br />
15<br />
5<br />
10<br />
5<br />
10<br />
15<br />
14<br />
19<br />
19<br />
24<br />
29<br />
4<br />
9<br />
14<br />
4<br />
9<br />
4<br />
9<br />
14<br />
13<br />
18<br />
18<br />
23<br />
28<br />
3<br />
8<br />
13<br />
3<br />
8<br />
3<br />
8<br />
13<br />
12<br />
17<br />
17<br />
22<br />
27<br />
2<br />
7<br />
12<br />
2<br />
7<br />
2<br />
7<br />
12<br />
11<br />
16<br />
16<br />
21<br />
26<br />
4<br />
1<br />
6<br />
11<br />
1<br />
6<br />
1<br />
6<br />
11
3<br />
Mode switch and mode keys<br />
The mode switch can be operated by inserting one of the two supplied mode keys - manager (MA) and operator<br />
(OP) keys. These keys can be inserted or removed only in the “REG” or “ ” position.<br />
4<br />
MA<br />
Displays<br />
Operator display<br />
PLU<br />
OP<br />
REG<br />
OPX/Z MGR<br />
X1/Z1<br />
PGM<br />
Manager key (MA)<br />
Operator key (OP)<br />
X2/Z2<br />
;;;;;;<br />
;;;;;;<br />
;;;;;;<br />
;;;;;;<br />
;;;;;;<br />
;;;;;;<br />
;;;;;;<br />
;;;;;;<br />
;;;;;;<br />
;;;;;;<br />
MA<br />
OP<br />
The mode switch has these settings:<br />
: This mode locks all register operations. (AC power becomes off.)<br />
No change occurs to register data.<br />
OP X/Z: To take individual cashier X or Z reports, and to take flash reports.<br />
And it can be used to toggle receipt state “ON” and “OFF” by<br />
pressing the Ü key.<br />
REG: For entering sales.<br />
PGM: To program various items.<br />
: Enters into the void mode. This mode allows correction after<br />
finalizing a transaction.<br />
MGR: For manager's entries. The manager can use this mode for an<br />
override entry.<br />
X1/Z1: To take the X/Z report for various daily totals<br />
X2/Z2: To take the X/Z report for periodic (weekly or monthly)<br />
consolidation<br />
Customer display (Pop-up type)<br />
DEPT<br />
REPEAT<br />
RCPT<br />
OFF<br />
cashier code<br />
Amount: Appears in the far-right eight (max.) positions. When the amount is minus, the minus symbol “-”<br />
appears before the amount.<br />
Number of repeats for repetitive registrations:<br />
The number of repeats is displayed, starting at “2” and incremented with each repeat. When you<br />
have registered ten times, the display will show “0.”(2 → 3 ..... 9 → 0 → 1 → 2 ... )<br />
Receipt function status:<br />
The indicator “_” appears in the ninth position when the receipt function is in the OFF status.<br />
Time: Appears in the first to fifth positions (using 24-hour format) in the OP X/Z, REG, , or MGR<br />
mode. In the REG, , or MGR mode, press the Ñ key to display the time.<br />
Machine state symbols (appears in the tenth place)<br />
: Appears during programming.<br />
: Appears when an error is detected.<br />
: Appears when the subtotal is displayed or when the amount tendered is smaller than the sale amount.<br />
: Appears when the e key is pressed to calculate a subtotal in foreign currency.<br />
: Appears when a transaction is finalized by pressing the É, ' or î key.<br />
: Appears when the change due amount is displayed.<br />
: Appears when the voltage of the installed batteries is under the required level. You must replace them<br />
with new ones within two days. Refer to page 37 for details.<br />
: Appears when the batteries are not installed, or the installed batteries are dead. You must replace<br />
them with new ones immediately. Refer to page 37 for details.<br />
5
GETTING STARTED<br />
Follow these steps when you use the cash register for the first time.<br />
1<br />
Unpack the cash register and place it in a location near a wall outlet. Be sure to locate it in such a<br />
location as described in “IMPORTANT” (page 1).<br />
To prevent the register from moving the drawer, fix the drawer with the fixing angle bracket. To fix the drawer,<br />
please refer “Installing the fixing angle bracket” of “OP<strong>ER</strong>ATOR MAINTENANCE” (page 42).<br />
2<br />
Install the Cash Register<br />
Initialize the Cash Register<br />
In order for your cash register to operate properly, you must initialize the cash register before<br />
programming for the first time. Use the following procedure:<br />
Before initializing the cash register, make sure that the plug is not connected to the<br />
outlet, and the batteries are not mounted in the register.<br />
1. Turn the mode switch to the “PGM” position.<br />
2. Insert the plug into the outlet.<br />
The right most decimal point will blink for a few seconds, then the register will<br />
sound three beeps and display “ 0.00” .<br />
OPX/Z<br />
PGM<br />
REG<br />
MGR<br />
X1/Z1<br />
X2/Z2<br />
3<br />
Install Batteries<br />
Purchase and install three R6 or LR 6 batteries (“AA” size). The batteries prevent the data and userprogrammed<br />
settings from being erased, when the AC cord is accidentally disconnected or in case of a power<br />
failure.<br />
The batteries will last approximately one year. If the low battery symbol “ ” appears on the far left of the<br />
display, you must replace within two days. And if the no battery symbol “ ” appears, you must replace them at<br />
once.<br />
To install the batteries, use the following procedure.<br />
1. Turn the mode switch to the “OP X/Z” position.<br />
The display will change to time display with the symbol “ ”.<br />
OPX/Z REG X1/Z1<br />
X2/Z2<br />
PGM<br />
2. Remove the printer cover.<br />
Lift up the rear of the printer and detach it.<br />
Be very careful with the manual cutter mounted on the<br />
cover, so as not to cut yourself.<br />
6
3. Open the battery compartment cover located in front of the<br />
paper bed.<br />
Press the tab toward you then pull and lift the cover to<br />
expose the battery compartment.<br />
4. Install three new batteries in the battery compartment. Be<br />
sure that the positive (+) and negative (-) poles of each<br />
battery are facing in the proper direction. When they are<br />
correctly installed, “ ” symbol will disappear.<br />
5. Close the battery compartment cover.<br />
Tab<br />
Battery compartment<br />
cover<br />
Paper bed<br />
CAUTION!<br />
View from rear<br />
Incorrectly using batteries can cause them to burst or leak, possibly damaging the interior of the cash register.<br />
Note the following precautions:<br />
• Be sure that the positive (+) and negative (-) poles of each battery are facing in the proper direction.<br />
• Never mix batteries of different types.<br />
• Never mix old batteries and new ones.<br />
• Never leave dead batteries in the battery compartment.<br />
• Remove the batteries if you do not plan to use the cash register for long periods. However, the data and userprogrammed<br />
settings will be erased.<br />
• If a battery leaks, clean out the battery compartment immediately, taking care to avoid letting the battery fluid<br />
come into direct contact with your skin.<br />
• Do not throw any spent batteries into combustible waste and do not burn any spent batteries.<br />
Your cash register comes with a battery caution label. Please cut off the appropriate half and<br />
attach it to the battery compartment cover.<br />
4<br />
Install the Paper Roll<br />
Precaution: Be very careful for the manual cutter mounted on the printer cover when removing<br />
and replacing the cover, so as not to hurt yourself.<br />
1. Turn the mode switch to the “REG” position.<br />
2. Set the provided paper roll correctly and drop it in the paper<br />
bed.<br />
3. Make a fold in the paper five centimeters from the end.<br />
4. While press the á key, insert the folded end straight into the<br />
paper inlet. The inserted end appears at the printing area.<br />
5. When not using the take-up spool (using as receipt<br />
paper):<br />
• Lead the end of the paper out through the manual cutter<br />
on the printer cover. (Press the á key to advance the<br />
paper more if required.)<br />
REG<br />
OPX/Z<br />
PGM<br />
MGR<br />
X1/Z1<br />
X2/Z2<br />
To the printer<br />
7
When using the take-up spool (using as journal paper):<br />
• Insert the end of the paper into the slit in the spool. (Press the á<br />
key to feed more paper if required.)<br />
• Wind the paper two or three turns around the spool shaft.<br />
• If the holding plate is not attached to the spool, attach it by<br />
inserting the spool shaft into the large hole and sliding it into the<br />
small one.<br />
• Set the spool on the bearing, and press the á key to take up<br />
excess slack in the paper.<br />
6. Replace the printer cover.<br />
Hook the cover on the pawls on the cabinet and shut it.<br />
• When using a paper roll as journal paper, you must change the printer type. Refer to<br />
“Programming print format” on page 30.<br />
• You can use 2-ply journal/receipt paper. For the installation procedure, refer to Note on “Installing<br />
the paper roll” (page 39).<br />
Program Items as Necessary<br />
5<br />
Before programming, insert the manager (MA) key and turn the mode switch to<br />
REG<br />
“PGM”.<br />
OPX/Z<br />
• On the key operation examples shown below, numeric such as 1234<br />
PGM<br />
indicates the number or parameter which must be entered using the<br />
corresponding numeric keys.<br />
• On the receipt, the programmed data is printed together with header (date) and footer (e.g.<br />
consecutive number).<br />
Setting the date<br />
Enter day (one or two digits), month (two digits), and year (two digits) in this sequence.<br />
Date (five or six digits)<br />
Ñ 3 ≈ Ñ É<br />
MGR<br />
X1/Z1<br />
X2/Z2<br />
Example: March 26, 2001<br />
Key operation example<br />
Ñ 3 ≈<br />
260301 ÑÉ<br />
Print<br />
Date (Day-Month-Year)<br />
Setting the time<br />
Set the time using the 24-hour format. For example, when the time is set to 2:30 AM, enter 230; and when it is<br />
set to 2:30 PM, enter 1430.<br />
Time (max. four digits)<br />
Ñ 4 ≈ Ñ É<br />
8<br />
Example: 14:30<br />
Key operation example<br />
Ñ 4 ≈<br />
1430 ÑÉ<br />
Print<br />
Time (Hour-Minute)
Programming the VAT(Value Added Tax) rate<br />
If you program the VAT/tax rate, your cash register can calculate the sales tax. In the VAT system, the tax is<br />
included in the price you enter in the register, and the tax amount is calculated when tendered according to the<br />
VAT rate programmed. In the tax system, the tax is calculated when tendered according to the tax rate<br />
programmed, and added to the price. Your cash register can provide totally 6 kinds of tax system and 3 kinds of<br />
rates.<br />
In the factory setting, the VAT/tax system is set to "Automatic VAT 1-3 system", and all the departments are<br />
programmed as taxable in VAT 1/tax 1 rate. So, if you set VAT 1 rate by executing the procedure shown below,<br />
VAT 1 can be calculated automatically to all the goods sold.<br />
In the current VAT/tax system, you can also use VAT 2 and VAT 3 rates when you need more than one VAT<br />
rate. Refer to "Programming the VAT/tax rate" to program multiple VAT rates, and "Programming for<br />
departments" to allocate the taxable status to departments.<br />
If you make nontaxable for some goods, program a department as nontaxable for all VAT rates. (Please note<br />
that all the goods belonging to that department are subjected to nontaxable.)<br />
If you need other types of VAT/tax system, refer to "Computation of VAT/tax" on page 14, and consult your<br />
dealer for the change of your VAT/tax system.<br />
Ñ<br />
*1: VAT rate: 0.0001 to 100.0000<br />
Example: VAT 1 rate 10%<br />
Key operation example<br />
9 ≈ 1<br />
Ñ 9 ≈<br />
1 ≈<br />
10 ÑÉ<br />
VAT rate<br />
number (1)<br />
≈<br />
Print<br />
To program "0"<br />
* 1 VAT rate<br />
Ñ É<br />
?<br />
To inhibit this VAT rate<br />
VAT1 rate<br />
6<br />
Program for EURO<br />
Your register can be modified to correspond with each period set for the introduction of EURO. To<br />
execute the automatic modification operation, please refer to “PROGRAMMING FOR EURO” on page 34.<br />
Before the modification operation, you must go to X2/Z2 mode and make cashier assignment first. For cashier<br />
assignment, please refer to page 10.<br />
Now you are ready for the sales operation. However, you can program other various convenient functions<br />
depending on your need. For details, please refer to “PROGRAMMING”.<br />
9
BASIC SALES ENTRY<br />
OPX/Z<br />
PGM<br />
REG<br />
MGR<br />
X1/Z1<br />
X2/Z2<br />
1<br />
Prior to entries<br />
Before registrations, insert the operator or manager key into the mode switch and turn it to the “REG” position<br />
and check the following items:<br />
Receipt ON/OFF function<br />
When you use the printer to issue receipts, you can disable receipt printing in the REG mode to save paper<br />
using the receipt function. To disable receipt printing, press the Ü key in the OP X/Z position. This key toggles<br />
the receipt printing status “ON” and “OFF”. When the status is “OFF”, the receipt off indicator “_” illuminates in<br />
the display. Your register will print reports regardless of the receipt state, so the paper roll must be installed<br />
even when the receipt state is “OFF”.<br />
Cashier assignment<br />
Prior to any item entries, cashiers must enter their cashier codes into the register. However, the code entry may<br />
not be necessary when the same cashier handles the next transaction.<br />
■ Sign-on (in REG, MGR, , OP X/Z, X1/Z1, X2/Z2 mode) ■ Sign-off (in REG, MGR, mode)<br />
To display the signed-on cashier code<br />
*Cashier code<br />
‹<br />
*Cashier code: 1-6(<strong>ER</strong>-<strong>A160</strong>) 1-8(<strong>ER</strong>-<strong>A180</strong>)<br />
Enter the code using numeric keys.<br />
‹<br />
‹<br />
2 Basic sales entry<br />
1. Enter the price for the first item with numeric keys.<br />
2. Press the appropriate department key.<br />
3. Repeat steps 1 and 2 for all the items.<br />
4. Press the Ñ key to display the amount due. (You can omit this step.)<br />
5. Enter the amount received from the customer with numeric keys. (You can omit this step if the amount<br />
tendered is the same as the subtotal.)<br />
6. Press the É key, and change due is displayed with the symbol “ ” and the drawer is opened.<br />
7. Tear off the receipt and give it to the customer with his or her change displayed.<br />
8. Close the drawer.<br />
• When you finalize the transaction with the É key without tendering, the total sales amount is<br />
displayed.<br />
• If you enter the amount tendered which is smaller than the subtotal, the register shows a deficit<br />
with the symbol “ ”. Make an additional tender entry.<br />
10
Example:<br />
Key operation example<br />
500 ù<br />
800 û<br />
Ñ<br />
2000 É<br />
Print<br />
Date<br />
Department code<br />
Unit price<br />
Subtotal<br />
VAT 1<br />
Sales total<br />
Amount tendered<br />
Change<br />
Register number<br />
Consecutive number<br />
Cashier code<br />
Time<br />
In this example, the department 4 and 5 are set as taxable 1(default setting) and VAT 1 rate is programmed as<br />
10%.<br />
3<br />
Error warning<br />
In the following examples, your register will go into an error state accompanied with a warning beep and the<br />
error symbol “ ” on the display. Clear the error state by pressing the c key and take proper action.<br />
• When you enter an over 13-digit number (entry limit overflow): Cancel the entry and re-enter a correct number.<br />
• When you make an error in key operation: Clear the error and continue operation.<br />
• When you make an entry beyond a programmed amount entry limit: Check to see if the entered amount is<br />
correct. If it is correct, it can be rung up in the MGR mode.<br />
• When an including-tax subtotal exceeds eight digits: Delete the subtotal by pressing the c key and press the<br />
É, ' or î key to finalize the transaction.<br />
Error escape function<br />
When you want to quit a transaction because of an error or something uncontrollable, use the error escape<br />
function as shown below:<br />
Transaction<br />
To clear the error state<br />
c<br />
Ã<br />
Ã<br />
The transaction is voided (treated as a subtotal void) and the receipt is issued by this function. If you have<br />
already entered tendered amount, the operation is finalized as a cash sale.<br />
When you use the error escape function, “ ” is printed on the receipt.<br />
11
OTH<strong>ER</strong> TYPES OF ENTRIES<br />
1<br />
On the key operation examples except that of "Computation of VAT/tax", all<br />
PGM<br />
the departments are programmed as non-taxable. Also on all the examples,<br />
numeric such as 1234 indicates that they are entered using the corresponding numeric keys.<br />
Single item entries<br />
Department<br />
PLU<br />
Item entries<br />
Subdepartment<br />
When using a programmed unit price<br />
Unit price * 1<br />
(max. 7 digits)<br />
PLU code<br />
*<br />
Ó<br />
Ö<br />
* To shift the department key,<br />
press the department shift key at<br />
this point. (<strong>ER</strong>-<strong>A180</strong> only)<br />
* 1 Less than the programmed entry digit limit<br />
• When those departments and PLUs for which the unit price has been programmed as zero (0) are<br />
entered, only the sales quantity is added.<br />
• When using PLU function, you must program the preset price, and associated department.<br />
When using subdepartment function, you must change the mode to subdepartment mode, and<br />
program the associated department. Refer to page 26 for programming details.<br />
Key operation example<br />
Print<br />
1200 ¯˘<br />
2 Ö<br />
1200 å11 Ö<br />
É<br />
Department key<br />
Unit price *<br />
å Ö<br />
1<br />
PLU code (max. 7 digits)<br />
OPX/Z<br />
REG<br />
MGR<br />
X1/Z1<br />
X2/Z2<br />
Repeat entries<br />
You can use this function for entering a sale of two or more same items.<br />
Key operation example<br />
Print<br />
Repeated<br />
department entry<br />
Repeated PLU<br />
entry<br />
Repeated<br />
subdepartment<br />
entry<br />
200 ¯¯<br />
10 Ö<br />
Ö<br />
500 å<br />
11 Ö<br />
ÖÉ<br />
12
Multiplication entries<br />
Use this feature when you sell a large quantity of items or need to enter quantities that contain decimals.<br />
Q'ty<br />
≈<br />
When you use a programmed unit price<br />
Unit price<br />
PLU code<br />
Unit price<br />
*<br />
Ó<br />
Ö<br />
å<br />
Dept. key<br />
PLU code<br />
Ö<br />
* To shift the department key, press the<br />
department shift key before pressing<br />
the department key. (<strong>ER</strong>-<strong>A180</strong> only)<br />
• Q'ty: Up to three digits integer + three digits decimal or four digits integer + two digits decimal<br />
• Unit price: Less than a programmed entry digit limit<br />
• Q'ty x unit price: Up to seven digits<br />
Key operation example<br />
Print<br />
7 . 5 ≈<br />
165 ¯<br />
5 ≈<br />
10 Ö<br />
3 ≈<br />
100 å<br />
11 Ö<br />
É<br />
Department<br />
entry<br />
PLU entry<br />
Subdepartment<br />
entry<br />
Single item cash sale (SICS) entry<br />
• This function is useful when a sale is for only one item and is for cash; such as a pack of cigarettes. It is<br />
applicable only to those departments programmed as SICS or to their associated PLUs or subdepartments.<br />
• The transaction is finalized as soon as you press the department key or Ö key.<br />
Key operation example<br />
For finishing<br />
the transaction<br />
250<br />
û<br />
Print<br />
If an entry to a department or PLU/subdepartment set for SICS follows the ones to departments or<br />
PLUs/subdepartments not set for SICS, it does not finalize and results in a normal sale.<br />
13
2<br />
Displaying subtotals<br />
The subtotal is displayed by pressing the Ñ key. When you press it, the subtotal of all entries which have<br />
been made is displayed and the symbol “ ” will light up in the display.<br />
If you want to print the subtotal when you press the Ñ key, change the setting by programming.<br />
Refer to “Selection of the subtotal printing” (page 31).<br />
3<br />
Finalization of transaction<br />
Cheque or credit sale<br />
Cheque sale<br />
Press the ' key at the end of the transaction. The amount tendered can be entered like a cash sale and the<br />
change due is displayed.<br />
Key operation example<br />
Ñ<br />
1000 '<br />
*The amount tendered: Less than<br />
programmed entry digit limit<br />
Credit sale<br />
Press the î key at the end of the transaction. The amount tendered cannot be entered.<br />
Key operation example<br />
Ñî<br />
*The total sales amount: Less than<br />
programmed entry digit limit<br />
Mixed-tender sale<br />
You can perform mixed-tendering of cheque and cash, cash and credit, and cheque and credit.<br />
Key operation example<br />
Print<br />
Print<br />
Print<br />
Ñ<br />
950 É<br />
î<br />
4<br />
Computation of VAT/tax<br />
VAT/ tax system<br />
The machine may be programmed for the following six tax systems by your dealer.<br />
Automatic VAT 1-3 system (This is the factory default system)<br />
This system, at settlement, calculates VAT for taxable 1 through 3 subtotals by using the corresponding<br />
programmed rate.<br />
Automatic tax 1-3 system<br />
This system, at settlement, calculates taxes for taxable 1 through 3 subtotals by using the corresponding<br />
programmed rate, and also adds the calculated taxes to those subtotals, respectively.<br />
14
<strong>Manual</strong> VAT 1-3 system<br />
Ñ<br />
This system provides the VAT calculation for taxable 1 through 3 subtotals. This calculation is performed using<br />
the corresponding programmed rate when the ◊ key is pressed just after the Ñ key.<br />
<strong>Manual</strong> VAT 1 system<br />
Ñ<br />
This system enables the VAT calculation for the then subtotal. This calculation is performed using the VAT 1<br />
preset rate when the ◊ key is pressed just after the Ñ key. For this system, the keyed-in VAT rate(0.0001 to<br />
99.9999) can be used.<br />
<strong>Manual</strong> tax 1-3 system<br />
Ñ<br />
◊<br />
To use a programmed rate<br />
This system provides the tax calculation for taxable 1 through 3 subtotals. This calculation is performed using<br />
the corresponding programmed rate when the ◊ key is pressed just after the Ñ key. After this calculation,<br />
you must finalize the transaction.<br />
Automatic tax 1-2 and automatic VAT 3 system<br />
This system enables the calculation in the combination with automatic tax 1 and 2 and automatic VAT 3. The<br />
combination can be VAT3 corresponding to taxable 3 and any of tax 1 and 2 corresponding to taxable 1 and<br />
taxable 2 for each item. The tax amount is calculated automatically with the corresponding programmed rates.<br />
• Tax statuses of PLU is depending on that of the department which the PLU belongs to.<br />
• VAT/tax assignment symbol can be printed at the fixed right position near the amount on the<br />
receipt as follows:<br />
VAT1 VT1 Tax1 TX1<br />
VAT2 VT2 Tax2 TX2<br />
VAT3 VT Tax3 TX<br />
When the multiple VAT/tax is assigned to a department or a PLU, a symbol of the lowest number<br />
assigned to VAT/tax rate will be printed. For details, contact your authorized SHARP dealer.<br />
Key operation example<br />
VAT rate<br />
◊<br />
550 ù<br />
Ñ<br />
◊<br />
(When the manual VAT<br />
1-3 system is selected) É<br />
◊<br />
Print<br />
5<br />
Auxiliary entries<br />
Percent calculations (premium or discount)<br />
• Your register provides the percent calculation for subtotal and/or each item entry depending on programming.<br />
• Percentage: 0.01 to 100.00% (Depending on programming) (Application of preset rate (if programmed) and<br />
manual rate entry are available.)<br />
15
Percent calculation for the subtotal<br />
Key operation example<br />
Print<br />
140 ¯<br />
570 ˘Ñ∞É<br />
(When 10% is programmed<br />
for the ∞ key)<br />
Percent calculation for item entries<br />
Key operation example<br />
Print<br />
800 ¯§<br />
2 Ö<br />
7 . 5 §<br />
É<br />
(When premium and 15% are<br />
programmed for the § key)<br />
Discount entries<br />
Your register allows you to deduct a preset amount or a certain amount manually entered, which are less than a<br />
programmed upper limit. These calculations can be after the entry of an item and/or the computation of subtotal<br />
depending on the programming.<br />
Discount for the subtotal<br />
Discount for item entries<br />
Key operation example<br />
Print<br />
Key operation example<br />
Print<br />
575 ¯<br />
675<br />
10 Ö<br />
˘-É<br />
Ñ<br />
100 - (When a discount amount<br />
É<br />
of 75 is programmed.)<br />
Refund entries<br />
If a refund item is the one entered into a department, enter the amount of the refund, then press the © key and<br />
the corresponding department key in this order; and if an item entered into a PLU is returned, enter the<br />
corresponding PLU code, then press the © and Ö keys.<br />
Key operation example<br />
Print<br />
250 ©¯<br />
10 ©Ö<br />
É<br />
Printing of non-add code numbers<br />
Enter a non-add code number such as a customer’s code number and credit card number within a maximum of<br />
8 digits and press the Ñ key at any point during the entry of a sale. Your register will print it at once.<br />
Key operation example<br />
1230 Ñ<br />
1500 ¯î<br />
Print<br />
16
6<br />
Payment treatment<br />
Currency exchange<br />
Your register allows payment entries of foreign currency. Pressing the e key creates a subtotal in foreign<br />
currency.<br />
For an additional payment in foreign currency<br />
After an entry<br />
is completed<br />
or<br />
After the amount<br />
tendered is found<br />
smaller than the<br />
sales amount in<br />
a sales entry<br />
Preset exchange rate<br />
*Exchange rate<br />
e<br />
Reentry<br />
For direct finalization<br />
Amount<br />
tendered<br />
(max. 8 digits)<br />
c<br />
É<br />
'<br />
î<br />
Next registration<br />
or<br />
payment in<br />
domestic currency<br />
*Exchange rate: 0.000000 to 999.999999<br />
• When the amount tendered is short, the deficit is shown in domestic currency.<br />
• Availability of credit and cheque tendering is depending on programming (only for preset<br />
exchange rate).<br />
• A programmed foreign currency symbol is printed when you apply preset rate.<br />
• If you want to print the exchange rate on receipt/journal, please consult your dealer.<br />
Applying preset exchange rate<br />
Key operation example<br />
Currency<br />
exchange<br />
Amount<br />
tendered in<br />
foreign currency<br />
2300 ¯<br />
4650<br />
ĕ<br />
15000 É<br />
Print<br />
Domestic currency<br />
Foreign currency<br />
Domestic currency<br />
Applying manual exchange rate<br />
Key operation example<br />
2300 ¯<br />
4650 ˘<br />
1 . 0190 e<br />
10000 É<br />
Print<br />
17
Received on account entries<br />
*<br />
Amount<br />
(max. 8 digits)<br />
r<br />
(Available cash only)<br />
*Less than the programmed entry digit limit<br />
Key operation example<br />
4800 r<br />
Print<br />
Paid out entries<br />
*<br />
Amount<br />
(max. 8 digits)<br />
Ü<br />
(Available cash only)<br />
*Less than the programmed entry digit limit<br />
Key operation example<br />
3000 Ü<br />
Print<br />
No sale (exchange)<br />
Simply press the É key without any entry. The drawer will open and the printer will print “NS” on the journal or<br />
the receipt.<br />
7<br />
Receipt issuance after finalization<br />
If your customer wants a receipt after you have finalized a transaction with the receipt function being in the<br />
“OFF” status (no receipting), press the Ü key after transaction. This will produce a receipt.<br />
• Pressing the Ü key in the OP X/Z mode before registration toggles the status “ON” and “OFF”.<br />
• When more than 64 lines are entered, the receipt will be issued in the format of summary receipt<br />
print.<br />
8<br />
Automatic sequencing key (` key) entries<br />
You can achieve a programmed transaction simply by pressing a corresponding automatic sequencing key.<br />
For programming the ` key, refer to page 32.<br />
Key operation example<br />
Print<br />
~É<br />
(~ = 2 Ö )<br />
18
9<br />
Override entries<br />
You can override the entry digit limit setting by making an entry in the MGR mode.<br />
1. Turn the mode switch to the MGR position using the manager (MA) key.<br />
2. Make an override entry.<br />
REG-mode entries<br />
On this example, the register has been programmed not to allow discount entries over 2<br />
digits.<br />
Key operation example<br />
Turn the mode switch to the MGR position.<br />
Return the mode switch to the REG position.<br />
1500 ˘<br />
250 - ... Error<br />
c<br />
250 -<br />
É<br />
CORRECTION<br />
1<br />
Correction of the last entry (direct void)<br />
If you make an incorrect entry relating to a department, PLU/subdepartment, percentage (∞ and §),<br />
discount (-) or refund, you can void this entry by pressing the ? key immediately after the incorrect entry.<br />
Key operation example<br />
Print<br />
1250 ¯?<br />
328 ˘<br />
28 -<br />
?<br />
250 © ¯?É<br />
19
2<br />
Correction of the next-to-last or earlier entry (indirect void)<br />
With the ? key, you can void any incorrect department entry, PLU/subdepartment entry or item refund entry<br />
made during a transaction if you find it before finalizing the transaction (e.g. pressing the É key).<br />
Key operation example<br />
Correction of a<br />
department entry<br />
Correction of a PLU entry<br />
Correction of a refund entry<br />
1310 ¯<br />
1755 ˘<br />
10 Ö<br />
2 Ö<br />
250 © ¯<br />
825 ˘<br />
1310 ? ¯<br />
2 ? Ö<br />
250 © ? ¯É<br />
Print<br />
3<br />
Subtotal void<br />
You can void an entire transaction. Once subtotal void is executed, the transaction is aborted and the register<br />
issues a receipt.<br />
Key operation example<br />
Print<br />
1310 ˘<br />
10 Ö<br />
Ñ?Ñ<br />
Subtotal void<br />
4<br />
Correction after finalizing a transaction<br />
If you find errors during the tendering operation or after finalizing a transaction, you can void the whole entries<br />
made in an incorrect receipt in the void mode in the following procedure. (If you find the errors during the<br />
tendering operation, enter the void mode after finalizing a transaction.)<br />
1. Turn the mode switch to the position using the manager (MA) key to enter<br />
the void mode.<br />
2. Repeat the entries that are recorded on an incorrect receipt. (All data for the<br />
incorrect receipt are removed from register memory; the voided amounts are<br />
added to the void-mode transaction totalizer.)<br />
Cancellation receipt<br />
Void mode symbol<br />
20
READING (X) AND RESETTING (Z)<br />
OF SALES TOTALS<br />
OPX/Z REG MGR<br />
PGM<br />
X1/Z1<br />
X2/Z2<br />
REG<br />
OPX/Z MGR<br />
PGM<br />
X1/Z1<br />
X2/Z2<br />
REG<br />
OPX/Z MGR<br />
PGM<br />
X1/Z1<br />
X2/Z2<br />
• Use the reading function (X) when you need to take a reading of sales information entered since the last<br />
resetting. You can take this reading any number of times. It does not affect the register’s memory.<br />
• Use the resetting function (Z) when you need to clear the register’s memory. Resetting prints all sales<br />
information and clears the entire memory except for the GT, reset count, and consecutive number.<br />
1<br />
Summary of reading (X) and resetting (Z) reports<br />
X1 and Z1 reports: Daily sales reports<br />
X2 and Z2 reports: Periodic (monthly) consolidation reports<br />
Item<br />
Flash report:<br />
(Only display)<br />
To clear the display,<br />
press the c key or<br />
turn the mode switch to<br />
another position.<br />
General report<br />
Mode switch position<br />
--<br />
X1/Z1<br />
X1, Z1<br />
X2/Z2<br />
X -- --<br />
X2, Z2<br />
Reading<br />
.<br />
Key operation<br />
É<br />
Resetting<br />
Reading<br />
Individual cashier<br />
report . ‹<br />
X, Z -- --<br />
Resetting<br />
(The report of the cashier currently signed-on)<br />
Full cashier report<br />
PLU sales report<br />
Hourly sales report<br />
OPX/Z<br />
--<br />
--<br />
--<br />
X1, Z1 --<br />
X1, Z1 --<br />
X1, Z1 --<br />
Dept. key or<br />
:Department total amount<br />
Ó<br />
Dept. key (<strong>ER</strong>-<strong>A180</strong> only)<br />
≈ key: Amount of cash in drawer<br />
É key: Sales total<br />
Reading<br />
. ‹<br />
Resetting<br />
Start<br />
PLU code<br />
All PLUs<br />
End<br />
PLU code<br />
• In the reports, when both of sales quantity and sales amount are zero, their printing is skipped. If<br />
you do not want to skip, change the programming. (Refer to “Programming print format”.)<br />
• “X” represents read symbol and “Z” represents reset symbol in the reports.<br />
≈<br />
Reading<br />
. Ñ<br />
Resetting<br />
Reading<br />
.<br />
Resetting<br />
Ö<br />
21
2<br />
Sample report<br />
General report<br />
• Sample X1 report<br />
Read symbol*1<br />
Dept. code<br />
Sales q'ty<br />
Sales amount<br />
Received on account<br />
counter and total<br />
Paid-out counter<br />
and total<br />
No-sale counter<br />
Cash sale<br />
counter and total<br />
Cheque sale<br />
counter and total<br />
Dept. total<br />
Credit sale<br />
counter and total<br />
Subtotal â counter<br />
and total<br />
Subtotal percent 1<br />
counter and total<br />
Subtotal percent 2<br />
counter and total<br />
Exchange<br />
(in preset rate entry)<br />
Counter, total and amount<br />
in domestic currency<br />
Exchange cheque<br />
(in preset rate entry)<br />
Net sales total<br />
Taxable 1 total<br />
VAT 1 total<br />
Taxable 2 total<br />
VAT 2 total<br />
Taxable 3 total<br />
VAT 3 total<br />
VAT total<br />
Item â counter<br />
and total<br />
Item percent 1<br />
counter and total<br />
Item percent 2<br />
counter and total<br />
*2<br />
*1: In X2 report, 2 is printed here.<br />
Exchange credit<br />
(in preset rate entry)<br />
Exchange<br />
(in manual rate entry)<br />
Customer counter<br />
Sales total<br />
Cash in drawer<br />
*2: When the tax system is automatic tax 1-3,<br />
manual tax 1-3, or the combination of automatic<br />
tax 1-2 and automatic VAT 3, the net sales total<br />
plus tax 1, 2, 3 are printed here.<br />
Refund counter<br />
and total<br />
Direct & indirect void<br />
counter and total<br />
Taxable 1 total<br />
Tax 1 total<br />
Subtotal void counter<br />
and total<br />
Void-mode item<br />
counter and total<br />
Void-mode transaction<br />
counter and total<br />
VAT/tax total<br />
Net sales total plus tax<br />
22
• Sample Z1 report<br />
• Sample Z2 report<br />
Reset symbol<br />
Reset symbol<br />
Reset counter for Z1 report<br />
GT (Net Grand total)<br />
Reset counter for Z1 report<br />
Reset counter for Z2 report<br />
GT (Net Grand total)<br />
The subsequent printout occurs in the same<br />
format as in the sample X1 report.<br />
The subsequent printout occurs in the same<br />
format as in the sample X1 report.<br />
Cashier reports<br />
Individual cashier report<br />
• Sample X1 report<br />
Read symbol*<br />
Cashier code<br />
Customer counter<br />
Sales total<br />
Full cashier report<br />
The printout occurs in the same format as in the<br />
sample report of individual cashier, but all cashier’s<br />
sales data are printed in the order of cashier code<br />
number (from #1 to #6 for <strong>ER</strong>-<strong>A160</strong>, from #1 to #8<br />
for <strong>ER</strong>-<strong>A180</strong>).<br />
Direct + Indirect void counter and total<br />
Subtotal void counter and total<br />
Void mode item counter and total<br />
Void mode transaction counter and total<br />
*:When you take Z report,“Z” is printed.<br />
Hourly sales report<br />
• Sample X1 report<br />
PLU sales report<br />
• Sample X1 report<br />
Read symbol*<br />
Read symbol*<br />
Time<br />
Customer counter<br />
Sales total<br />
PLU code<br />
Sales q'ty and total<br />
*:When you take Z report,“Z” is printed.<br />
*:When you take Z report,“Z” is printed.<br />
23
PROGRAMMING<br />
This chapter illustrates how to program your cash register. Program every item<br />
necessary for your store by following the appropriate procedure.<br />
OPX/Z<br />
PGM<br />
REG<br />
MGR<br />
X1/Z1<br />
X2/Z2<br />
On the key operation examples, numeric such as 1234 indicates the number or parameter which<br />
must be entered using the corresponding numeric keys.<br />
1<br />
Programming the VAT/tax rate<br />
Ñ<br />
*<br />
≈<br />
*<br />
A<br />
≈ Sign and<br />
9<br />
1-3<br />
≈<br />
?<br />
To inhibit this VAT/tax rate<br />
*1: VAT/tax rate number (1-3)<br />
*2: Sign and VAT/tax rate: XYYY.YYYY (X:Sign -/+ = 1/0, YYY.YYYY:VAT/tax rate = 000.0001 to 100.0000)<br />
*3: Max. five digits: 0 to 99999<br />
Key operation example<br />
Ñ 9 ≈<br />
2 ≈<br />
4 ≈<br />
12 ÑÉ<br />
To program "0"<br />
Print<br />
For VAT rate<br />
To program "0"<br />
* 3 Lowest taxable<br />
amount Ñ É<br />
VAT/tax rate<br />
Lowest taxable amount<br />
In VAT system, the sign and the lowest taxable amount are ignored. They are valid only when you<br />
select add on tax system.<br />
2<br />
Programming for departments<br />
Your machine is equipped with 5 (<strong>ER</strong>-<strong>A160</strong>) or 10 (<strong>ER</strong>-<strong>A180</strong>) standard departments. You can increase the<br />
number of departments up to 15 (<strong>ER</strong>-<strong>A160</strong>) or 30 (<strong>ER</strong>-<strong>A180</strong>).<br />
Functional programming<br />
Sign<br />
Assign plus department for normal sales, or minus department for minus transaction.<br />
Tax status<br />
Assign a tax status to each department. When entries are made into taxable departments in a<br />
transaction, tax is automatically computed according to the associated tax rate as soon as the<br />
transaction is completed.<br />
SICS (Single Item Cash Sale)<br />
If the first registration is to a department set for SICS, the sale is finalized as soon as the department<br />
key is pressed.<br />
Entry digit limits<br />
Set the number of allowable digits for the maximum entry amount for each department. The limit is<br />
effective for operations in the REG mode and can be overridden in the MGR mode.<br />
24
To set all zeros<br />
ABCDEF<br />
≈<br />
*<br />
Ó<br />
Dept. key<br />
É<br />
*To shift the department key, press the<br />
department shift key at this point.(<strong>ER</strong>-<br />
<strong>A180</strong> only)<br />
To program another dept.<br />
* Item: Selection: Entry:<br />
A Sign Minus department 1<br />
Plus department 0<br />
B Taxable in VAT 3/tax 3 rate Yes 1<br />
No 0<br />
C Taxable in VAT 2/tax 2 rate Yes 1<br />
No 0<br />
D Taxable in VAT 1/tax 1 rate Yes 1<br />
No 0<br />
E SICS / Normal SICS 1<br />
Normal 0<br />
F Entry digit limit 0-7<br />
Key operation example<br />
011007 ≈<br />
úÉ<br />
Print<br />
SICS/Normal / Entry digit limit (E,F)<br />
Tax status (BCD)<br />
Sign (A)<br />
• The tax system of your machine has been factory–set to automatic VAT1–3. If you desire to<br />
select any of automatic tax 1–3, manual VAT1–3, manual VAT1, manual tax 1–3, and the<br />
combination of the automatic tax 1–2 and the automatic VAT 3, consult your dealer.<br />
• When the combination of the automatic tax 1–2 and the automatic VAT 3 system is selected, one<br />
of the tax 1–2 can be selected in combination with VAT3(B).<br />
Example: BCD = 101 or 110<br />
Unit price<br />
To set zero<br />
Unit price(max. six digits)<br />
*<br />
Ó<br />
Dept. key<br />
É<br />
*To shift the department key, press<br />
the department shift key at this<br />
point. (<strong>ER</strong>-<strong>A180</strong> only)<br />
To program another dept.<br />
Key operation example<br />
Print<br />
1000 ¯É<br />
Unit price<br />
25
3<br />
PLU (Price lookup) programming<br />
Unit price and associated department assignment<br />
Unit price (max. six digits)<br />
You will usually have unit prices programmed for individual PLUs as PLU preset unit prices. If you program<br />
unit price “0” for a PLU, you can enter only the selling quantity of the PLU, i.e. the PLU can be used only<br />
as a counter.<br />
Associated department<br />
When a PLU is associated with a department, the following functions of the PLU depend on the<br />
programming for the corresponding department.<br />
• Tax status, entry digit limit (only for the subdepartment), single item cash sale, and sign<br />
To inhibit<br />
?<br />
To program zero<br />
PLU code* 1<br />
Ö<br />
Unit price<br />
(max. six digits)<br />
*<br />
Ó<br />
2<br />
Dept. key<br />
É<br />
To program the following PLU<br />
To program another PLU<br />
*1: 1 through 200 (<strong>ER</strong>-<strong>A160</strong>) or 1 through 400 (<strong>ER</strong>-<strong>A180</strong>)<br />
*2: To shift the department key, press the department shift key at this point. (<strong>ER</strong>-<strong>A180</strong> only)<br />
Key operation example<br />
Print<br />
Associated dept.<br />
1 Ö<br />
125 Unit price<br />
˘É<br />
PLU/subdepartment mode<br />
If the PLU mode (i.e. automatic preset unit price entry) is selected, individual PLU entries can be made by<br />
entering the assigned code and depressing the Ö key. If the subdepartment mode is selected, the following<br />
key operations must be performed: Enter the price, press the å key, enter the PLU code, and press the Ö<br />
key.<br />
To program "0"<br />
* 1 PLU code<br />
Ö<br />
* 2 A<br />
Ñ<br />
To program the following PLU<br />
To program another PLU<br />
É<br />
*1: 1 through 200 (<strong>ER</strong>-<strong>A160</strong>) or<br />
1 through 400 (<strong>ER</strong>-<strong>A180</strong>)<br />
*2: 0 for subdepartment mode or 1 for<br />
PLU mode<br />
26<br />
Key operation example<br />
1 Ö<br />
0 ÑÉ<br />
Print<br />
Subdepartment mode
4<br />
Programming for miscellaneous keys<br />
Programming the rate (%, e)<br />
To program zero<br />
*Rate<br />
or<br />
∞<br />
e<br />
§<br />
To program another rate<br />
Key operation example<br />
Print<br />
10 . 25 ∞<br />
0 . 6068 e<br />
É<br />
É<br />
*: Rate<br />
0.00 — 100.00 (% rate)<br />
0.000000 — 999.999999 (Currency<br />
exchange rate)<br />
Percent rate<br />
Currency exchange rate (0.606800)<br />
You must use a decimal point when setting rates that are fractional.<br />
Programming the discount key amount (-)<br />
To program zero<br />
Discount amount (max. six digits)<br />
Key operation example<br />
Print<br />
1000 -<br />
É<br />
-<br />
É<br />
Discount amount<br />
Programming the percent rate limitation (%)<br />
You can program the upper limit of percent rates for percent entries. Percent entries that exceed the upper limit<br />
may be overridden in the MGR mode.<br />
Ñ<br />
To program zero<br />
Percentage limit (0.00 -100.00) or<br />
10 ≈<br />
∞ § É<br />
To program for another percent key<br />
10.00% can be entered as 10or 1 0.00. The . key is needed only for<br />
fractional entry.<br />
Key operation example<br />
Print<br />
Ñ 10 ≈<br />
15 . 00 ∞<br />
É<br />
Percentage limit<br />
27
+/- sign<br />
Programming function parameters for - and % keys<br />
Programming of the +/- sign assigns the premium or discount function for each key.<br />
Item % / Item â<br />
Percent/discount calculation for the individual department and PLU<br />
Subtotal % / Subtotal â<br />
Percent/discount calculation for the subtotals<br />
Entry digit limit (For discount key only)<br />
The limit is in effect for the REG-mode operations but can be overridden in the MGR mode.<br />
*: Item: Selection: Entry:<br />
A +/- sign + (premium) sign 0<br />
- (discount) sign 1<br />
B Item % / Item â Enable 0<br />
Disable 1<br />
C Subtotal % / Subtotal â Enable 0<br />
Disable 1<br />
D Entry digit limit* 0-7<br />
* When programming for percent keys, always enter 0.<br />
The default setting is ABCD = 1007 for - key and 1000 for % key.<br />
Key operation example<br />
To program “0” for all items<br />
*ABCD<br />
, or<br />
≈ - ∞ § É<br />
1006 ≈<br />
-É<br />
To program for another key<br />
Print<br />
From left, BCD<br />
Sign<br />
Programming function parameters for e key<br />
Currency exchange rate entry selection<br />
You can enable or disable preset and manual entry of currency exchange rate.<br />
Number of digits after decimal point<br />
Set the number of digits after decimal point which is printed on the receipts for currency exchange amount.<br />
Foreign currency symbol<br />
Foreign currency symbol for e key is printed on a foreign currency exchange amount of which rate is preset by<br />
programming.<br />
To program “0” for all items<br />
*ABCD<br />
≈<br />
e<br />
É<br />
*: Item: Selection: Entry:<br />
A <strong>Manual</strong> rate entry Enable 0<br />
Disable 1<br />
B Preset rate entry Enable 0<br />
Disable 1<br />
C Number of digits after decimal point 0-3<br />
D Foreign currency symbol 0<br />
(space) 1<br />
2<br />
28<br />
The default setting is ABCD = 0021.
Key operation example<br />
0001 ≈<br />
eÉ<br />
Print<br />
From left, ABCD<br />
Programming an entry digit limit for ', î, r and p keys<br />
The limit is in effect for REG-mode operation but can be overridden in the MGR mode.<br />
When “0” is set, the operation of the corresponding key is prohibited.<br />
To program “0”<br />
Entry digit limit(0-8)<br />
≈<br />
or<br />
',î,r p É<br />
To program for another key<br />
Key operation example<br />
8 ≈î É<br />
Print<br />
Entry digit limit<br />
5<br />
Programming various functions<br />
• Be very careful not to enter a wrong number for the number entry after the first Ñ key. Be sure<br />
to enter the number described in the "Procedure".<br />
• You can continue programming until É key is pressed for the programming described in this<br />
section. To continue programming, repeat from the first numeric key entry.<br />
Setting the register number<br />
When your store has two or more registers, it is practical to set separate register numbers for their identification.<br />
To set the register number “0”<br />
Register number (one to three digits)<br />
Ñ 1 ≈ Ñ É<br />
Key operation example<br />
Ñ 1 ≈<br />
123 ÑÉ<br />
Print<br />
Setting the consecutive number<br />
The consecutive number is increased by one each time a receipt is issued.<br />
To begin the count from 0001<br />
A number (one to four digits) that is one<br />
Ñ 2 ≈ Ñ É<br />
less than the desired starting number<br />
Key operation example<br />
Ñ 2 ≈<br />
1000 ÑÉ<br />
Print<br />
29
Programming optional feature selection<br />
You can enable or disable the operation of Paid out, Received-on account, Refund, No-sale, Void in the<br />
REG-mode, and also select if you enable fractional quantity entry or not.<br />
* Item: Selection: Entry:<br />
A Paid-out in the REG-mode Enable 0<br />
Disable 1<br />
B Received on account in the REG-mode Enable 0<br />
Disable 1<br />
C Subtotal void in the REG-mode Enable 0<br />
Disable 1<br />
D Indirect void in the REG-mode Enable 0<br />
Disable 1<br />
E Direct void in the REG-mode Enable 0<br />
Disable 1<br />
F Refund entry in the REG-mode Enable 0<br />
Disable 1<br />
G No sale in the REG-mode Enable 0<br />
Disable 1<br />
H Fractional quantity entry Enable 0<br />
Disable 1<br />
The default setting is ABCDEFGH = 00000000.<br />
Key operation example<br />
Ñ 5 ≈<br />
00000100 ÑÉ<br />
To set “0” for all items<br />
Ñ 5 ≈ *ABCDEFGH Ñ É<br />
Print<br />
Programming print format<br />
You can program;<br />
Printer type - Use printer as journal printer or for issuance of receipt<br />
If you select the journal printer type and complete journal information is mandatory, the receipt<br />
ON/OFF function should be in the “ON” state.<br />
Receipt print form - Detailed receipt print or summary receipt print<br />
On the summary receipt print, the details of each item are not printed.<br />
Date print selection<br />
Consecutive number print selection<br />
Zero skip for reports<br />
To set “0” for all items<br />
Ñ 6 ≈ *ABCDEFGH Ñ É<br />
30
* Item: Selection: Entry:<br />
A Printer type Journal printer 0<br />
Receipt printer 1<br />
B Receipt print form Total 0<br />
Detailed 1<br />
C Always enter 0. 0<br />
D Date print Yes 0<br />
No 1<br />
E Consecutive no. print Yes 0<br />
No 1<br />
F Always enter 0. 0<br />
G Zero skip in PLU report Yes 1<br />
No 0<br />
H Zero skip in general/cashier/hourly Yes 1<br />
report No 0<br />
The default setting is ABCDEFGH = 11000011.<br />
Key operation example<br />
Ñ 6 ≈<br />
10000011 ÑÉ<br />
Print<br />
Selection of the subtotal printing<br />
You can make selection of subtotal print when Ñ key is pressed.<br />
To set “0” for all items<br />
Ñ 7 ≈ *ABCDEFGH Ñ É<br />
* Item: Selection: Entry:<br />
A - B Always enter 0. 0<br />
C Subtotal print with a press of subtotal key Yes 1<br />
No 0<br />
D - H Always enter 0. 0<br />
Key operation example<br />
Ñ 7 ≈<br />
00100000 ÑÉ<br />
Print<br />
Programming EURO system settings<br />
For details of EURO system settings, please refer to “PROGRAMMING FOR EURO”.<br />
Printing exchange total amount and change amount on receipt or journal<br />
Total and change amounts in exchange currency are printed respectively below each of the total and change<br />
amounts in domestic currency.<br />
Cheque and credit operation when tendering in foreign currency<br />
Exchange calculation method<br />
“Division” or “Multiplication” can be selected for the conversion method from domestic currency to exchange<br />
currency, and the calculation is performed as follows:<br />
In case that “Division” is selected:<br />
Domestic currency amount Exchange rate = Exchange amount<br />
In case that “Multiplication” is selected<br />
Domestic currency amount Exchange rate = Exchange amount<br />
31
* Item: Selection: Entry:<br />
A Printing exchange total amount and Yes 1<br />
change amount on receipt or journal No 0<br />
B Always enter 0. 0<br />
C Cheque and credit operation when Yes 1<br />
tendering in foreign currency No 0<br />
D Exchange calculation method Division 1<br />
Multiplication 0<br />
Key operation example<br />
Ñ 8 ≈<br />
1000 ÑÉ<br />
To set “0” for all items<br />
Ñ 8 ≈ Ñ É<br />
*ABCD<br />
Print<br />
Programming the AUTO key — Automatic sequencing key —<br />
If you program frequently performed transactions or report sequences for the AUTO keys, you can call those<br />
transactions and/or reports simply by pressing the corresponding AUTO keys in key operations in the<br />
appropriate mode (REG, MGR, , OP X/Z, X1/Z1 or X2/Z2).<br />
~<br />
¡<br />
Delete<br />
Transaction<br />
max. 20 times<br />
~<br />
¡<br />
Programming for ~ ; entering a PLU 2 item (programmed unit price: 1.50)<br />
É<br />
Key operation example<br />
AUTO1 setting<br />
~<br />
2 Ö<br />
~É<br />
Print<br />
Step<br />
Key no.<br />
Key number list<br />
keys nos.<br />
0 00<br />
1 01<br />
2 02<br />
3 03<br />
4 04<br />
5 05<br />
6 06<br />
7 07<br />
8 08<br />
9 09<br />
º 10<br />
keys nos.<br />
. 11<br />
≈ 12<br />
c 13<br />
É 14<br />
Ñ 15<br />
' 16<br />
î 17<br />
∞ 18<br />
§ 19<br />
- 20<br />
keys nos.<br />
e 21<br />
Ö 22<br />
å 23<br />
? 24<br />
© 25<br />
Ü 26<br />
r 27<br />
‹ 28<br />
◊ 29<br />
Ó 30<br />
keys nos.<br />
¯ 51<br />
˘ 52<br />
ú 53<br />
ù 54<br />
û 55<br />
ü 56<br />
ä 57<br />
ô 58<br />
ã 59<br />
Ä 60<br />
keys nos.<br />
ñ 61<br />
à 62<br />
è 63<br />
Õ 64<br />
ì 65<br />
32
6<br />
Reading stored programs<br />
Key sequence for reading stored program<br />
Report name<br />
Key sequence<br />
Programming report<br />
É<br />
Auto key programming report 1 É<br />
PLU programming report Start PLU code ≈ End PLU code Ö<br />
Sample printouts<br />
1 Programming report<br />
Date<br />
Dept. code<br />
Dept. function (E&F)<br />
Tax status<br />
Dept. unit price w/sign<br />
*When the tax system is automatic tax 1-3,<br />
manual tax 1-3,or the combination of automatic<br />
tax 1-2 and automatic VAT 3, the lowest taxable<br />
amount is printed under the tax rate.<br />
Tax rate<br />
Lowest taxable amount<br />
Minus sign<br />
Discount<br />
function parameters (B-D)<br />
Discount amount w/sign<br />
Percent<br />
function parameters (B-D)<br />
Percent limit<br />
Percent rate with sign<br />
2 Auto key programming report<br />
Step<br />
Key no.<br />
' entry digit limit<br />
î entry digit limit<br />
r entry digit limit<br />
p entry digit limit<br />
Exchange<br />
function parameters (A-D)<br />
Exchange rate (0.606800)<br />
Optional feature selection (A-H)<br />
Print format (A-H)<br />
Subtotal printing (C only)<br />
EURO system setting (A-D)<br />
3 PLU programming report<br />
PLU code<br />
Mode parameter<br />
Unit price<br />
Associated department code<br />
VAT rate*<br />
Machine no./Conseutive no.<br />
Time/Cashier code<br />
33
PROGRAMMING FOR EURO<br />
Your register can be modified to correspond with each period set for the introduction of EURO, and in your<br />
register each currency is treated as shown on the table below depending on which period you are in.<br />
Basically your register can be automatically modified to correspond to the introduction of EURO by executing the<br />
modification operation in the X2/Z2 mode. However, there are several options you must set depending on your<br />
needs.<br />
How currencies are treated in your register<br />
Currency<br />
EURO<br />
National currency<br />
(DM, F, etc.)<br />
Foreign currency<br />
Receipt samples<br />
Period 1<br />
Period 1<br />
After the introduction of<br />
EURO, and before EURO<br />
banknotes and coins begin to<br />
circulate<br />
Exchange key<br />
(Preset rate entry)<br />
Domestic currency<br />
Exchange key<br />
(<strong>Manual</strong> rate entry)<br />
Period 2<br />
After EURO banknotes and<br />
coins begin to circulate, and<br />
before national currency is<br />
withdrawn from circulation.<br />
(Co-existence of EURO and<br />
national currency)<br />
Domestic currency<br />
Exchange key<br />
(Preset rate entry)<br />
Exchange key<br />
(<strong>Manual</strong> rate entry)<br />
Period 3<br />
After the national currency is<br />
withdrawn from circulation<br />
Domestic currency<br />
Exchange key<br />
Sales total amount in national currency (as domestic currency)<br />
Sales total amount in EURO*<br />
Tendered amount in national currency<br />
Change in national currency<br />
Change in EURO*<br />
*: They are printed for infomation purposes only.<br />
Period 2<br />
Sales total amount in EURO (as domestic currency)<br />
Sales total amount in national currency*<br />
Tendered amount in EURO<br />
Change in EURO<br />
Change in national currency*<br />
*: They are printed for infomation purposes only.<br />
Period 3<br />
34
Automatic Modification of Register System for Introduction of EURO<br />
To make your register correspond to the introduction of EURO, your register system can be automatically<br />
modified. According to the steps of the introduction, you can make your register correspond to EURO.<br />
Set the manager key (MA) to X2/Z2 position, and use the following sequence.<br />
800 . ≈ É<br />
*A<br />
*A=1: Applicable for period 1<br />
*A=2: Applicable for period 2<br />
*A=3: Applicable for period 3<br />
REG<br />
OPX/Z MGR<br />
• A cashier must be signed-on before this operation.<br />
• You can perform each operation only once with the substitution of “A=1”, “A=2” and “A=3”. If you<br />
perform the operation with the substitution of “A=2” first, you cannot perform the operation with<br />
the substitution of “A=1”. If you perform the operation with the substitution of “A=3” first, you<br />
cannot perform the operation with the substitution of “A=1” and “A=2”.<br />
The details of the automatic register system modification are as follows:<br />
(As for PGM functions described below, please refer to “Programming EURO system settings” and<br />
“Programming function parameters for e key”.)<br />
When “1” is substituted to “A”:<br />
1. Issuing a general Z1 report<br />
2. Issuing a general Z2 report<br />
3. Setting “printing” for a PGM function “Printing exchange total amount and change amount on receipt or<br />
journal”<br />
4. Setting “division” for a PGM function “Exchange calculation method”<br />
5. Setting the EURO symbol ( ) for the currency symbol of exchange key, and setting “2” for the number of<br />
digits after decimal point of exchange amount<br />
6. Setting the round-off function for currency exchange<br />
After the execution of the procedure with the substitution of “1”, treat EURO as foreign currency using the<br />
exchange key (e) with the preset rate entry.<br />
When “2” is substituted to “A”:<br />
1. Issuing a general Z1 report<br />
2. Issuing a general Z2 report<br />
3. Resetting GT<br />
4. Setting “printing” for a PGM function “Printing exchange total amount and change amount on receipt or<br />
journal”<br />
5. Setting “multiplication” for a PGM function “Exchange calculation method”<br />
6. Changing the domestic currency symbol to the EURO symbol ( ) and setting the number of digits after<br />
decimal point of the domestic currency amount to 2<br />
7. For the setting of the currency symbol and the number of digits after decimal point of exchange amount, the<br />
ones that had been set to the domestic currency are set.<br />
8. Setting the round-off function for currency exchange<br />
After the execution of the procedure with the substitution of “2”, treat EURO as domestic currency, and previous<br />
national currency as foreign currency using the exchange key (e) with the preset rate entry.<br />
Since EURO becomes domestic currency in your register after execution of the procedure with the substitution<br />
of “2”, you must change unit prices in each department and PLU to make prices correspond to EURO before<br />
actually you start operating your register again. As for the miscellaneous keys, also please change the rates or<br />
amounts so that they are based on amounts in EURO.<br />
PGM<br />
X1/Z1<br />
X2/Z2<br />
35
When “3” is substituted to “A”:<br />
1. Issuing a general Z1 report<br />
2. Issuing a general Z2 report<br />
3. Resetting GT<br />
4. Setting “not printing” for a PGM function “Printing exchange total amount and change amount on receipt or<br />
journal”<br />
5. Setting “multiplication” for a PGM function “Exchange calculation method”<br />
6. Changing the domestic currency symbol to the EURO symbol ( ) and setting the number of digits after<br />
decimal of the domestic currency amount to 2<br />
7. Setting the round-off function for currency exchange<br />
After the execution of the procedure with the substitution of “3”, treat EURO as domestic currency.<br />
When the operation with the substitution of “2” has been performed already, “3. Resetting GT” is not executed.<br />
When the operation with the substitution of “1” or “2” has been performed already, the currency symbol of<br />
exchange key is overwritten with a space.<br />
• If you want to check the current status you are in, set the manager key (MA) to X2/Z2 position,<br />
and use the following sequence.<br />
800 ≈ É<br />
Current status<br />
Optional Programming for the Introduction of EURO<br />
Some programming relating with the function of exchange key (e) cannot be changed automatically with the<br />
execution of modification operation described in the previous section.<br />
Currency exchange rate for e key<br />
For period 1 and period 2, set the EURO conversion rate. For programming details, refer to “Programming the<br />
rate”.<br />
Exchange rate entry selection<br />
When you treat EURO currency in the exchange key, you must apply preset rate entry. So, make enable for<br />
preset rate entry for period 1 and period 2. For programming details, refer to “Programming function parameters<br />
for e key”.<br />
Cheque/credit operation<br />
For period 1 and period 2, enable cheque/credit operation when tendering in foreign currency so that you can<br />
treat cheque and credit for EURO currency and national currency. For programming details, refer to<br />
“Programming EURO system setting”.<br />
Displaying the Change Amount in Exchange Currency<br />
You can display a change amount in exchange currency by pressing the e key when the change amount is<br />
displayed. This may be convenient when you want to give the change in exchange currency in the period 1 and<br />
2. When pressing the e key again, the displayed amount returns to the amount in domestic currency.<br />
The conditions that you can display a change amount in exchange currency are as follows:<br />
• "Printing" is selected for a PGM function "Printing exchange total amount and change amount on receipt or<br />
journal.<br />
• Exchange rate is not zero.<br />
36
OP<strong>ER</strong>ATOR MAINTENANCE<br />
1<br />
Replacing the batteries<br />
If the low battery symbol “ ” appears on the far left of the display, the voltage of the batteries is less than the<br />
required level. In this situation, you must replace new batteries within two days.<br />
And if the no battery symbol “ ” appears on the far left of the display, less than three batteries are installed in<br />
your register, or the batteries are dead. In this situation, you must replace new ones immediately. If the AC<br />
power is accidentally disconnected or in case of a power failure, all programmed settings will be reset to the<br />
default settings and any data stored in memory will be cleared.<br />
CAUTION!<br />
Incorrectly using batteries can cause them to burst or leak, possibly damaging the interior of the cash register.<br />
Note the following precautions:<br />
• Be sure that the positive (+) and negative (-) poles of each battery are facing in the proper direction.<br />
• Never mix batteries of different types.<br />
• Never mix old batteries and new ones.<br />
• Never leave dead batteries in the battery compartment.<br />
• Remove the batteries if you do not plan to use the cash register for long periods. However, the data and<br />
user-programmed settings will be erased.<br />
• If a battery leaks, clean out the battery compartment immediately, taking care to avoid letting the battery<br />
fluid come into direct contact with your skin.<br />
• Do not throw any spent batteries into combustible waste and do not burn any spent batteries.<br />
To replace the batteries:<br />
1. Make sure that the register is plugged in.<br />
2. Turn the mode switch to the “OP X/Z” position.<br />
3. Remove the printer cover.<br />
4. Open the battery compartment cover located in front of<br />
the paper bed and remove the old batteries.<br />
5. Install three new R6 or LR6 batteries (“AA” size) in the<br />
battery compartment. Be sure that the positive and<br />
negative poles of each battery are facing in the proper<br />
direction.<br />
When they are installed correctly, the “ ” or “ ”<br />
symbol will disappear.<br />
6. Close the battery compartment cover.<br />
7. Replace the printer cover.<br />
Tab<br />
Battery compartment<br />
cover<br />
Paper bed<br />
View from rear<br />
37
2<br />
Replacing the paper roll<br />
Precaution: Be very careful for the manual cutter mounted on the printer cover when removing and<br />
replacing the cover, so as not to hurt yourself.<br />
Removing the paper roll<br />
When a red dye appears on the paper roll, it is time to replace the existing paper roll. Replace the paper roll<br />
with new one.<br />
1. Remove the printer cover.<br />
2. Turn the mode switch to the “REG” position with the AC cord connected.<br />
3. When the take-up spool is not used:<br />
• Cut the paper near the paper roll as shown on the second sketch,<br />
and remove the used paper roll.<br />
• Remove the rest of paper by pressing the á key.<br />
When the take-up spool is used:<br />
• Press the á key to advance the paper until its printed part is out of<br />
the way.<br />
• Cut the paper, and remove the take-up spool from the cradle.<br />
• Cut the paper near the paper roll, and remove the used paper roll.<br />
• Remove the rest of paper by pressing the á key.<br />
• Remove the used paper roll from the take-up spool.<br />
Slide up the holding plate to move the spool shaft<br />
from the small hole in the plate to the large one.<br />
Remove the holding plate form the spool shaft.<br />
Installing the paper roll<br />
Be sure to use paper rolls specified by SHARP.<br />
The use of any other paper rolls than specified could cause paper jamming, resulting in register malfunction.<br />
Paper specification<br />
Paper width: 57.5 ± 0.5 mm Max. outside diameter: 70 mm<br />
Before staring the installation, make sure that the AC cord is connected, and the mode switch is in the “REG”<br />
position. Remove the printer cover, if it is not.<br />
1. Set the paper roll correctly and drop it in the paper bed.<br />
To the printer<br />
38
2. Make a fold in the paper approx. five centimeters from the end.<br />
3. While pressing the á key, insert the folded end straight into the<br />
paper inlet. The inserted end appears at the printing area.<br />
4 When not using the take-up spool (using as receipt paper):<br />
• Lead the end of the paper out through the manual cutter on the<br />
printer cover. (Press the á key to advance the paper more if<br />
required.)<br />
When using the take-up spool (using as journal paper):<br />
• Insert the end of the paper into the slit in the spool.<br />
(Press the á key to feed more paper if required.)<br />
• Wind the paper two or three turns around the spool shaft.<br />
• If the holding plate is not attached to the spool, attach it by inserting<br />
the spool shaft into the large hole and sliding it into the small one.<br />
• Set the spool on the bearing, and press the á key to take up<br />
excess slack in the paper.<br />
5. Replace the printer cover.<br />
• When using a paper roll as journal paper, you must change<br />
the printer type. Refer to “Programming print format” on<br />
page 30.<br />
• When using 2-ply journal/receipt paper, follow the same<br />
instructions as above, but lead the end of the receipt paper<br />
out through the manual cutter after winding the journal<br />
paper on the take-up spool shaft.<br />
3<br />
Replacing the ink ribbon<br />
When printing becomes faded, replace the ink ribbon with a new one specified by SHARP.<br />
Removal<br />
To prevent the ink ribbon form drying or becoming dirty, do not remove it from its bag until just<br />
before using.<br />
1. Remove the printer cover.<br />
2. Cut off the paper and press the á key to remove it.<br />
3. Detach the ink ribbon cover.<br />
Pull the tab in the direction of arrow to lift the cover.<br />
39
4. Remove the ink ribbon.<br />
Remove the reel that is not locked by the reel stopper first, and tip the<br />
stopper to the opposite side and remove the another reel. To remove<br />
the reels, pull them upwards.<br />
Installation<br />
The protruding side of reels must face downward. So, note which reel is the left one and which is the right.<br />
1. Install the reel at the side that the reel stopper is not tipped. Rotate<br />
the reel to the right or to the left until it clicks into place.<br />
2. Run the ink ribbon correctly through the printer as shown on the right<br />
sketch. Note that the ribbon is placed along the outside of the metal<br />
brackets.<br />
3. Install the other reel in the same way, and rotate either reel to take up<br />
slack from the ribbon.<br />
4. Replace the ink ribbon cover.<br />
4<br />
Ink refill (<strong>ER</strong>-<strong>A180</strong> only)<br />
If the logo becomes too light, it’s time to refill the logo ink. You must use the logo ink specified by SHARP.<br />
Consult your dealer for the logo ink. For refilling the logo ink, follow the procedure given below.<br />
1. Remove the printer cover.<br />
2. Remove the logo by pulling it straight up in the direction of the arrow.<br />
40
3. Pour two or three drops of logo ink through the ink inlet situated on the<br />
back of the logo.<br />
4. Replace the logo by the reverse procedure to removing.<br />
5. Replace the printer cover.<br />
Precautions:<br />
The logo ink first gives a clear print 6 to 10 hours after being applied into the logo. Therefore, refilling at the end<br />
of daily business is most effective. Overinking should be avoided. This will create a blurry print.<br />
Do not apply the logo ink to the ink ribbon.<br />
5<br />
Drawer handling<br />
Locking the drawer<br />
To lock the drawer, insert the key into the drawer lock and turn it 90 degrees<br />
counterclockwise.<br />
To unlock the drawer, insert the drawer key into the lock and turn it 90 degrees clockwise.<br />
SK1-1<br />
Drawer lock key<br />
Removing the till and the drawer<br />
The till in the register is detachable. After closing your business for the day, remove the till from the drawer and<br />
keep the drawer open. To detach the drawer, pull it forward fully with the till removed, and remove it by lifting it<br />
up.<br />
<strong>ER</strong>-<strong>A160</strong><br />
Coin case<br />
Bill case<br />
Bill<br />
separator<br />
Coin case<br />
Till<br />
Drawer<br />
5-denomination coin case<br />
(detatchable)<br />
<strong>ER</strong>-<strong>A180</strong><br />
Coin case<br />
Bill case<br />
Till<br />
Drawer<br />
8-denomination coin case<br />
(detatchable)<br />
41
6<br />
Opening the drawer by hand<br />
The drawer automatically opens in the usual way. However, when power failure is encountered or the machine<br />
becomes out of order, slide the lever located on the machine bottom in the direction of the arrow. (See the<br />
figure shown below.) The drawer will not open, if it is locked with a drawer lock key.<br />
<strong>ER</strong>-<strong>A160</strong><br />
<strong>ER</strong>-<strong>A180</strong><br />
Lever<br />
Lever<br />
7<br />
Installing the fixing angle bracket<br />
To prevent the register from moving when the drawer opens, use the supplied fixing angle bracket to fix the<br />
drawer to the platform.<br />
How to install the fixing angle bracket<br />
1. Thoroughly clean the location where the fixing angle bracket (B) is to be placed.<br />
2. Peel off the adhesive tape on the fixing angle bracket.<br />
3. Hook the angle bracket onto the hook (A) that is located at the bottom rear of the<br />
register.<br />
4. Firmly stick the fixing angle bracket to the table surface that your cleaned above.<br />
B<br />
A<br />
How to remove the register from the fixing angle bracket<br />
1. Lift up the front of the register and pull the register towards you.<br />
42
8<br />
When power is lost, the machine retains its memory contents and all information on sales entries.<br />
The following situations occur during a power failure or paper jam. (Batteries must be correctly installed.)<br />
When a power failure occurs when the register is turned on or during a computation process:<br />
When power returns, the register resumes operation from the point of failure.<br />
When a power failure occurs during the printing of a sales transaction or of X/Z<br />
reports:<br />
When power returns, the register prints “” and then resumes correct<br />
printing of the transaction or reports.<br />
What to do when the printer motor locks:<br />
If the printer motor happens to lock, the printing stalls, and an intermittent beeping<br />
starts. If this occurs, please follow the procedure below.<br />
1. Turn the mode switch to “ ” position.<br />
2. Insure the printer is clear of any obstructions (e.g. paper jams, etc).<br />
To clear the printer, remove the printer cover and the ribbon cover.<br />
3. Turn the mode switch to the previous position. The “----------” appears in the display.<br />
4. Feed the paper roll to the proper position.<br />
5. Press the c key.<br />
6. The register will resume correct printing after printing “”.<br />
9<br />
If your register is locked, perform the program resetting. When the program resetting is performed, the register<br />
returns to the initial state without erasing the sales data and user-programmed settings. The procedure is as<br />
follows:<br />
1. Unplug the power code from the outlet.<br />
2. Turn the mode switch to “PGM” position.<br />
3. While pressing the á key, plug the power code to the outlet.<br />
When the program resetting is done successfully, “ 2” is printed.<br />
10<br />
In case of power failure or paper jam<br />
Program resetting<br />
Before calling for service<br />
The malfunctions shown in the left-hand column below, labelled “Fault,” do not necessarily indicate functional<br />
faults of the machine. It is therefore advisable to refer to the “Checking” shown in the right-hand column before<br />
calling for service.<br />
Fault<br />
(2) The display won't be illuminated even when<br />
the mode switch is turned to any other<br />
position than “ ”.<br />
(3) The display is illuminated, but the whole machine<br />
refuses registrations.<br />
(4) No receipt is issued.<br />
Checking<br />
(1) The display shows symbols that do not make sense. • Was the machine initialized?<br />
(5) No journal paper is taken up.<br />
(6) Printing is unusual.<br />
• Is power supplied to the electrical outlet?<br />
• Is the power cord plug out or loosely connected to the<br />
electrical outlet?<br />
• Is a cashier code assigned to the register?<br />
• Is the mode switch set properly at the “REG” position?<br />
• Is the paper roll properly installed?<br />
• Is there a paper jam?<br />
• Is the receipt function in the “OFF” status?<br />
• Is the take-up spool installed on the bearing properly?<br />
• Is there a paper jam?<br />
• Is the paper roll properly installed?<br />
• Is the ink ribbon worn out?<br />
• Is the ink ribbon installed properly?<br />
• Has the ink ribbon folded?<br />
43
LIST OF OPTIONS<br />
For your register, the following options are available. For details, contact your dealer.<br />
•Key kit models<br />
By using the following key kits, you can change the keyboard layout of your register.<br />
• <strong>ER</strong>-11KT7: 30 regular size keys • <strong>ER</strong>-12KT7: 30 1 x 2 size keys<br />
• <strong>ER</strong>-22KT7: 10 2 x 2 size keys<br />
• <strong>ER</strong>-11DK7G: 30 regular size dummy keys<br />
• <strong>ER</strong>-51DK7G: 10 5 x 1 size dummy keys<br />
SPECIFICATIONS<br />
Model:<br />
<strong>ER</strong>-<strong>A160</strong>/<strong>ER</strong>-<strong>A180</strong><br />
Dimensions: <strong>ER</strong>-<strong>A160</strong>: 330 (W) x 364 (D) x 238 (H) mm <strong>ER</strong>-<strong>A180</strong>: 355 (W) x 424 (D) x 252 (H) mm<br />
Weight: <strong>ER</strong>-<strong>A160</strong>: 8.7 kg <strong>ER</strong>-<strong>A180</strong>: 10.7 kg<br />
Power source:<br />
Official (nominal) voltage and frequency<br />
Power consumption: Stand-by 8W<br />
Operating 17W (max.)<br />
Working temperature: 0 °C to 40 °C<br />
Electronics:<br />
LSI (CPU) etc.<br />
Display:<br />
Operator display: 7-segment display (10 positions)<br />
Customer display: 7-segment display (7 positions)<br />
Printer:<br />
Type:<br />
One-station print wheel selective type<br />
Printing speed:<br />
Approx. 3.2 lines/second<br />
Printing capacity: 12 digits<br />
Other functions: Receipt (ON-OFF) function<br />
Paper roll:<br />
Width: 57.5 ± 0.5 mm<br />
Max. diam.: 70 mm<br />
Weight: 52.3 to 64 g/m 2 Superior quality paper<br />
Thickness: 0.06 to 0.085 mm<br />
Ink ribbon:<br />
Width: 13 mm Length: 4 m Colour: Purple (single colour)<br />
Cash drawer:<br />
<strong>ER</strong>-<strong>A160</strong>: 3 slots for bill and 7 for coin denominations<br />
<strong>ER</strong>-<strong>A180</strong>: 5 slots for bill and 8 for coin denominations<br />
Accessories: Manager key 2<br />
Operator key 2<br />
Drawer lock key 2<br />
Paper roll 1<br />
Take-up spool 1<br />
Ink ribbon<br />
1 (mounted on the printer)<br />
Battery caution label 1<br />
Fixing angle bracket 1<br />
Instruction manual<br />
1 copy<br />
Bill separator<br />
1 (<strong>ER</strong>-<strong>A160</strong> only) (set in the drawer)<br />
Logo stamp<br />
1 (<strong>ER</strong>-<strong>A180</strong> only) (mounted on the printer)<br />
* Specifications and appearance subject to change without notice for improvement.<br />
44
FOR CUSTOM<strong>ER</strong>S IN U.K.<br />
IMPORTANT<br />
The wires in this mains lead are coloured in accordance with the following code:<br />
BLUE:<br />
BROWN:<br />
Neutral<br />
Live<br />
As the colours of the wires in the mains lead of this apparatus may not correspond with the coloured<br />
markings identifying the terminals in your plug, proceed as follows.<br />
The wire which is coloured BLUE must be connected to the terminal which is marked with the letter<br />
N or coloured black.<br />
The wire which is coloured BROWN must be connected to the terminal which is marked with the<br />
letter L or coloured red.<br />
The apparatus must be protected by a 3A fuse in the mains plug or distribution board.<br />
CAUTION: DO NOT CONNECT THE LIVE (BROWN) WIRE OR THE NEUTRAL (BLUE) WIRE<br />
TO THE EARTH T<strong>ER</strong>MINAL OF YOUR 3-PIN MAINS PLUG.<br />
Environment Protection<br />
The device is supported by a battery. To dispose the battery safely to protect the environment,<br />
please note the following points:<br />
• Take the used battery to your local waste depot, dealer or customer service centre for recycling.<br />
• Do not throw the used battery into fire, into water or into the household waste!<br />
Umweltschutz<br />
Das Gerät wird durch eine Batterie gestützt. Um die Batterie sicher und umweltschonend zu<br />
entsorgen, beachten Sie bitte folgende Punkte:<br />
• Bringen Sie die leere Batterie zu Ihrer örtlichen Mülldeponie, zum Händler oder zum<br />
Kundenservice-Zentrum zur Entsorgung.<br />
• Werfen Sie die leere Batterie niemals ins Feuer, ins Wasser oder in den Hausmüll.<br />
Protection de l’environnement<br />
L’appareil est supporté sur pile. Afin de protéger l’environnement, nous vous recommendons de<br />
traiter la pile usagée la façon suivante:<br />
• Apporter la pile usagée à votre centre de traitement des ordures ménagères le plus proche ou,<br />
à votre revendeur ou, au service après-vente, pour recyclement.<br />
• Ne jamais jeter la pile usagée dans une source de chaleur, dans l’eau ou dans les vide-ordures.<br />
Miijöskydd<br />
Denna produkt nöddrivs av batteri.<br />
Vid batteribyte skall följande iakttagas:<br />
• Det förbrukade batteriet skall inlämnas till er lokala handlare eller till kommunal miljöstation för<br />
återinssamling.<br />
• Kasta ej batteriet i vattnet eller i hushållssoporna. Batteriet får ej heller utsätttas för öppen eld.<br />
<strong>ER</strong>-<strong>A160</strong><br />
<strong>ER</strong>-<strong>A180</strong><br />
Geräuschpegel: 56 dB (A)<br />
Gemessen nach DIN 45635 bzw. EN27779<br />
(Spitzenwert bei Aufspringen der Kassenschublade: 70 dB (A))<br />
Geräuschpegel: 57 dB (A)<br />
Gemessen nach DIN 45635 bzw. EN27779<br />
(Spitzenwert bei Aufspringen der Kassenschublade: 67 dB (A))
SHARP CORPORATION<br />
Printed in Korea / Imprimé en Corée / Gedruckt in Korea / Impreso en Corea<br />
T(TINSM2406BHZZ) ➁