owner's manual for the cadence okki nokki record cleaner
owner's manual for the cadence okki nokki record cleaner
owner's manual for the cadence okki nokki record cleaner

You also want an ePaper? Increase the reach of your titles
YUMPU automatically turns print PDFs into web optimized ePapers that Google loves.
OWNER’S MANUAL FOR THE CADENCE OKKI NOKKI RECORD CLEANER<br />
February 2005<br />
Introduction<br />
You are now <strong>the</strong> proud owner of <strong>the</strong> Cadence Okki N<strong>okki</strong> Record Cleaner.<br />
It will give you many years of good service if you read and follow this instruction <strong>manual</strong>.<br />
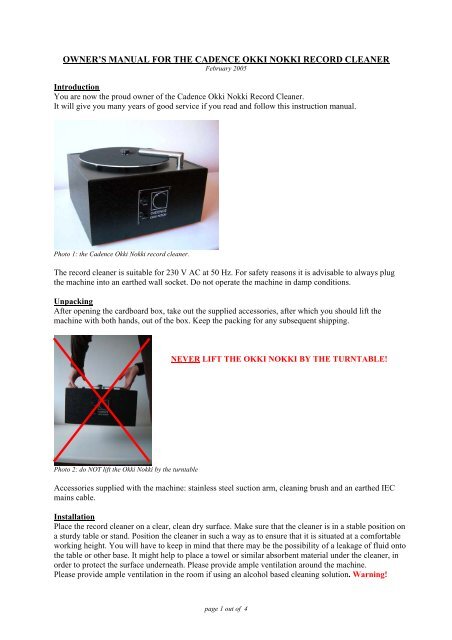
Photo 1: <strong>the</strong> Cadence Okki N<strong>okki</strong> <strong>record</strong> <strong>cleaner</strong>.<br />
The <strong>record</strong> <strong>cleaner</strong> is suitable <strong>for</strong> 230 V AC at 50 Hz. For safety reasons it is advisable to always plug<br />
<strong>the</strong> machine into an ear<strong>the</strong>d wall socket. Do not operate <strong>the</strong> machine in damp conditions.<br />
Unpacking<br />
After opening <strong>the</strong> cardboard box, take out <strong>the</strong> supplied accessories, after which you should lift <strong>the</strong><br />
machine with both hands, out of <strong>the</strong> box. Keep <strong>the</strong> packing <strong>for</strong> any subsequent shipping.<br />
NEVER LIFT THE OKKI NOKKI BY THE TURNTABLE!<br />
Photo 2: do NOT lift <strong>the</strong> Okki N<strong>okki</strong> by <strong>the</strong> turntable<br />
Accessories supplied with <strong>the</strong> machine: stainless steel suction arm, cleaning brush and an ear<strong>the</strong>d IEC<br />
mains cable.<br />
Installation<br />
Place <strong>the</strong> <strong>record</strong> <strong>cleaner</strong> on a clear, clean dry surface. Make sure that <strong>the</strong> <strong>cleaner</strong> is in a stable position on<br />
a sturdy table or stand. Position <strong>the</strong> <strong>cleaner</strong> in such a way as to ensure that it is situated at a com<strong>for</strong>table<br />
working height. You will have to keep in mind that <strong>the</strong>re may be <strong>the</strong> possibility of a leakage of fluid onto<br />
<strong>the</strong> table or o<strong>the</strong>r base. It might help to place a towel or similar absorbent material under <strong>the</strong> <strong>cleaner</strong>, in<br />
order to protect <strong>the</strong> surface underneath. Please provide ample ventilation around <strong>the</strong> machine.<br />
Please provide ample ventilation in <strong>the</strong> room if using an alcohol based cleaning solution. Warning!<br />
page 1 out of 4
Stainless steel suction arm<br />
Place <strong>the</strong> suction arm in <strong>the</strong> aperture provided <strong>for</strong> it, at <strong>the</strong> right hand, front side <strong>the</strong> machine. Place <strong>the</strong><br />
arm parallel with <strong>the</strong> side, towards <strong>the</strong> rear of <strong>the</strong> machine (photo 3).<br />
Give <strong>the</strong> stainless steel suction arm a regular check; <strong>the</strong> black velvet protection strips should be free of<br />
greasy substances, such as natural grease from your fingers. Check <strong>for</strong> dust, dirt and any traces of<br />
damage. Dust and dirt can be removed with a clean, dry brush (a soft bristle toothbrush would suffice).<br />
Photo 3: position of <strong>the</strong> suction arm<br />
Connecting <strong>the</strong> machine <strong>for</strong> operation<br />
Plug <strong>the</strong> mains lead into <strong>the</strong> socket at <strong>the</strong> rear of <strong>the</strong> machine, <strong>the</strong>n insert <strong>the</strong> plug in an ear<strong>the</strong>d wall<br />
socket, of 230 V AC– 50 Hz. Locate <strong>the</strong> two switches at <strong>the</strong> front of <strong>the</strong> machine. The top switch marked<br />
“Motor” should be in <strong>the</strong> centre “ OFF” position. Switch it upwards to <strong>the</strong> “L” position and <strong>the</strong> platter<br />
will now start revolving in a left hand direction. Repeat this with <strong>the</strong> switch in <strong>the</strong> downward “R”<br />
position; <strong>the</strong> platter will now revolve in a right hand direction. Some noise from <strong>the</strong> motor will be heard,<br />
this is normal. Put <strong>the</strong> switch in a horizontal position and <strong>the</strong> turntable will stop turning. Now engage <strong>the</strong><br />
suction motor by placing <strong>the</strong> switch marked “Vacuum” in <strong>the</strong> downwards “ON” position and you will<br />
hear <strong>the</strong> noise of an old fashioned vacuum <strong>cleaner</strong>. Your cleaning machine is now ready <strong>for</strong> operation!!<br />
Drain Down hose<br />
Check that <strong>the</strong> drain down hose at <strong>the</strong> rear of <strong>the</strong> <strong>cleaner</strong> is closed with <strong>the</strong> red end cap.<br />
Never operate <strong>the</strong> machine without <strong>the</strong> end cap in place and in <strong>the</strong> closed position!! Warning!<br />
Cleaning test<br />
We recommend a practice run on an old unwanted LP in order to ensure that <strong>the</strong> machine is set up and<br />
working correctly and to acquaint yourself with <strong>the</strong> correct cleaning procedure.<br />
Cleaning operation.<br />
Remove <strong>the</strong> locking nut from <strong>the</strong> turntable spindle, place <strong>the</strong> <strong>record</strong> in position, taking care that it is<br />
correctly centered on <strong>the</strong> spindle. Replace <strong>the</strong> locking nut on <strong>the</strong> spindle and screw down onto <strong>the</strong> <strong>record</strong><br />
to secure it and prevent it from slipping.<br />
Be<strong>for</strong>e applying fluid, it is advisable to remove any obvious <strong>for</strong>eign substances from <strong>the</strong> LP surface.<br />
Place <strong>the</strong> plat<strong>for</strong>m switch in an upward position; <strong>the</strong> turntable will now revolve in a left hand direction.<br />
Apply <strong>the</strong> correct quantity of cleaning fluid on <strong>the</strong> grooved section of <strong>the</strong> <strong>record</strong>, place <strong>the</strong> cleaning brush<br />
on <strong>the</strong> <strong>record</strong>, right above one of <strong>the</strong> support wheels underneath <strong>the</strong> turntable (photographs 4 and 5).<br />
Photo’s 4 and 5: distributing <strong>the</strong> cleaning fluid<br />
page 2 out of 4
Apply <strong>the</strong> liquid to <strong>the</strong> <strong>record</strong>, making sure that it is evenly distributed over <strong>the</strong> surface, <strong>the</strong>n slightly push<br />
<strong>the</strong> <strong>record</strong> down and let it run about three times, longer if necessary. Try to prevent <strong>the</strong> <strong>record</strong> label<br />
from getting wet, wipe off any spilled fluid immediately.<br />
Swivel <strong>the</strong> suction arm until it is above <strong>record</strong> and is pointing at <strong>the</strong> spindle. The notch on <strong>the</strong> vertical<br />
section of <strong>the</strong> suction arm should be right above <strong>the</strong> slot of <strong>the</strong> suction arm holder. Lower <strong>the</strong> tube, lock<br />
<strong>the</strong> notch in <strong>the</strong> slot and <strong>the</strong>n switch on <strong>the</strong> suction motor. Two revolutions are sufficient and<br />
recommended to suck up all <strong>the</strong> fluid – any more may damage your <strong>record</strong>s. Switch off <strong>the</strong> motor, at<br />
<strong>the</strong> same time lifting <strong>the</strong> suction arm. Move <strong>the</strong> suction arm towards <strong>the</strong> rear of <strong>the</strong> <strong>record</strong> <strong>cleaner</strong>.<br />
Repeat <strong>the</strong>se actions in <strong>the</strong> opposite direction, i.e. with <strong>the</strong> turntable turning clockwise. This side of <strong>the</strong><br />
<strong>record</strong> is now clean and dry. Remove <strong>the</strong> lock nut and repeat <strong>the</strong> procedure <strong>for</strong> <strong>the</strong> o<strong>the</strong>r side of <strong>the</strong><br />
<strong>record</strong>.<br />
USEFUL HINTS FOR CLEANING RECORDS<br />
1. Turn <strong>the</strong> suction arm away from you if not in use.<br />
2. Always position <strong>the</strong> cleaning brush right above a support wheel underneath <strong>the</strong> turntable.<br />
3. Always try and use <strong>the</strong> correct amount of liquid, experience will teach you!<br />
If you are not covering <strong>the</strong> surface of <strong>the</strong> <strong>record</strong> evenly – too little.<br />
If <strong>the</strong>re is liquid spilling all over <strong>the</strong> top plate of <strong>the</strong> <strong>cleaner</strong> – too much.<br />
4. Remove any spilled liquid immediately.<br />
Emptying <strong>the</strong> cleaning liquid reservoir<br />
After having cleaned not more than seven (7) <strong>record</strong>s, <strong>the</strong> waste liquid has to be drained from <strong>the</strong><br />
reservoir. Cleaning more than seven <strong>record</strong>s without draining <strong>the</strong> reservoir may cause damage to<br />
<strong>the</strong> machine and will nullify your warranty!!<br />
Remove <strong>the</strong> red cap from <strong>the</strong> draining hose and place <strong>the</strong> hose in a bottle, or some o<strong>the</strong>r receptacle. Lift<br />
<strong>the</strong> front of <strong>the</strong> machine about 15 centimetres. And hold <strong>the</strong> machine in this position till <strong>the</strong>re is no liquid<br />
flowing from <strong>the</strong> drainage hose. Always replace <strong>the</strong> red cap on <strong>the</strong> drainage hose and make sure it is<br />
secured and closed. Failure to do so will nullify your warranty!!<br />
NB. Sometimes when you check <strong>the</strong> drain down tube, <strong>the</strong>re will be little or no fluid. This may be<br />
because you are using an alcohol based mix, which is prone to evaporation due to heat generated<br />
inside <strong>the</strong> machine. However this is no excuse <strong>for</strong> not checking <strong>the</strong> drain down tube every seven (7)<br />
LPs and it must be done. Warranty Warning!<br />
Photo 6: draining <strong>the</strong> cleaning liquid<br />
Useful hints and recommendations<br />
1. If liquids drain from <strong>the</strong> machine spontaneously, it means that you were late with <strong>the</strong> draining.<br />
If this happens, you should drain <strong>the</strong> fluid as described above.<br />
2. Never use more than two (2) revolutions to suck <strong>the</strong> <strong>record</strong> dry. Vacuuming <strong>for</strong> longer periods has<br />
<strong>the</strong> opposite result, generating static electricity and may damage your valuable <strong>record</strong>s.<br />
Never vacuum a dry <strong>record</strong>!.<br />
3. Always switch off <strong>the</strong> suction motor first be<strong>for</strong>e stopping <strong>the</strong> turntable.<br />
page 3 out of 4
4. Give <strong>the</strong> velvet strips on <strong>the</strong> suction arm a regular check <strong>for</strong> dirt, any wear or tear and/or damage.<br />
These velvet strips will last about 200 cleaning operations; <strong>the</strong>y should be replaced on a regular basis.<br />
Sets of strips are available from your local dealer.<br />
5. After cleaning operations, <strong>the</strong> cleaning brush should be rinsed with warm water.<br />
6. You will notice that some of your <strong>record</strong>s, such as those that have been played “wet” or are badly<br />
contaminated, will benefit if cleaned several times.<br />
7. NEVER use a cleaning agent containing more than 25 % alcohol.<br />
8. NEVER use an alcohol based fluid on 78-rpm shellac <strong>record</strong>s or acetates.<br />
9. Avoid any naked flames or smoking when using cleaning fluids containing alcohol, in order to<br />
prevent explosions or fire.<br />
10. The cleaning arm supplied is only suitable <strong>for</strong> 12 inch <strong>record</strong>s; special arms <strong>for</strong> 7 and 10 inch <strong>record</strong>s<br />
will be available in <strong>the</strong> near future.<br />
Maintenance<br />
The turntable should be cleaned regularly with a household vacuum <strong>cleaner</strong>. Wipe <strong>the</strong> frame regularly<br />
clean with a damp cloth. Replace <strong>the</strong> velvet strips on <strong>the</strong> suction arm regularly.<br />
FROM NOW ON, YOUR RECORDS WILL SOUND OKKI NOKKI!!!<br />
Conditions of warranty<br />
You have a one-year warranty on your Cadence Okki N<strong>okki</strong> <strong>record</strong> <strong>cleaner</strong>. Always keep your<br />
original invoice / receipt of purchase; this determines your warranty period.<br />
The warranty on <strong>the</strong> machine will be void if you fail to operate this machine in a responsible<br />
manner as advised in this <strong>manual</strong>!!<br />
Should <strong>the</strong> machine fail to operate, please contact your dealer or distributor. Under no<br />
circumstances must you open <strong>the</strong> machine and attempt repairs or alter <strong>the</strong> machine in any way.<br />
No repairs may be carried out by an unauthorized service agent<br />
No responsibility is accepted <strong>for</strong> damage to <strong>record</strong>s if <strong>the</strong> machine is used in an incorrect or<br />
improper way.<br />
Please contact your dealer <strong>for</strong> any questions, complaints or comments.<br />
Distribution Cadence <strong>for</strong> Germany:<br />
Hifi-Studio Wittmann<br />
Brucknerstraße 17<br />
70195 Stuttgart<br />
Phone +49-(0)711-696774<br />
Fax +49-(0)711-696775<br />
Mail info@wittmann-hifi.de<br />
Web www.wittmann-hifi.de<br />
page 4 out of 4