
Create successful ePaper yourself
Turn your PDF publications into a flip-book with our unique Google optimized e-Paper software.
<strong>Western</strong> <strong>Wood</strong><br />
Page 5<br />
cracks in the framing need to be repaired and then the framing needed fairing to assure that the new bottom<br />
will be smooth. I planned a WEST System bottom and tried to follow their instructions in every detail. Dry<br />
fit the 3 mm sheet of ply. Seal the framing and the inner side of the ply with thinned (10% acetone) epoxy.<br />
This cured overnight before being epoxied and stapled into place. I like to remove all staples after epoxy<br />
cure so I try to staple through a couple of layers of plastic strapping material. If the strapping is strong<br />
enough, it is easy to pull on one end of the strap and the staples pop out. In retrospect more fairing should<br />
have been done between ply layers as the highs and lows got accentuated with each additional layer of ply,<br />
causing a major fairing project after the third layer of ply. Interior clean up is very important and it is very<br />
helpful to be small or have a small friend that does not mind wearing a vapor mask in confined spaces. I<br />
found that 3 inch clear packaging tape could be put on<br />
the side of some frame members for protection prior to<br />
epoxy work. This was very helpful in minimizing clean<br />
up time.<br />
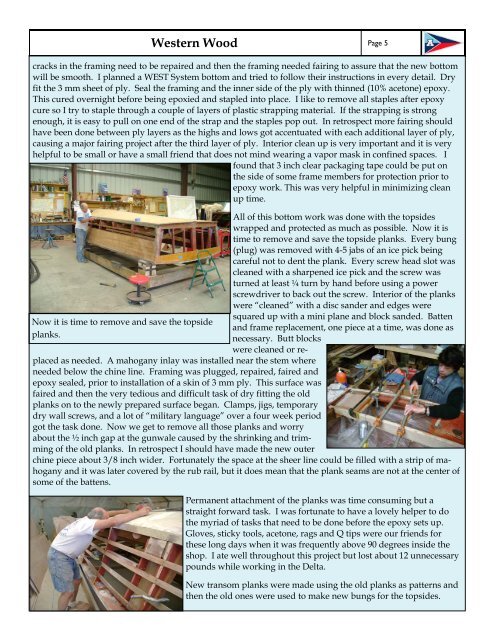
Now it is time to remove and save the topside<br />
planks.<br />
All of this bottom work was done with the topsides<br />
wrapped and protected as much as possible. Now it is<br />
time to remove and save the topside planks. Every bung<br />
(plug) was removed with 4-5 jabs of an ice pick being<br />
careful not to dent the plank. Every screw head slot was<br />
cleaned with a sharpened ice pick and the screw was<br />
turned at least ¼ turn by hand before using a power<br />
screwdriver to back out the screw. Interior of the planks<br />
were “cleaned” with a disc sander and edges were<br />
squared up with a mini plane and block sanded. Batten<br />
and frame replacement, one piece at a time, was done as<br />
necessary. Butt blocks<br />
were cleaned or replaced<br />
as needed. A mahogany inlay was installed near the stem where<br />
needed below the chine line. Framing was plugged, repaired, faired and<br />
epoxy sealed, prior to installation of a skin of 3 mm ply. This surface was<br />
faired and then the very tedious and difficult task of dry fitting the old<br />
planks on to the newly prepared surface began. Clamps, jigs, temporary<br />
dry wall screws, and a lot of “military language” over a four week period<br />
got the task done. Now we get to remove all those planks and worry<br />
about the ½ inch gap at the gunwale caused by the shrinking and trimming<br />
of the old planks. In retrospect I should have made the new outer<br />
chine piece about 3/8 inch wider. Fortunately the space at the sheer line could be filled with a strip of mahogany<br />
and it was later covered by the rub rail, but it does mean that the plank seams are not at the center of<br />
some of the battens.<br />
Permanent attachment of the planks was time consuming but a<br />
straight forward task. I was fortunate to have a lovely helper to do<br />
the myriad of tasks that need to be done before the epoxy sets up.<br />
Gloves, sticky tools, acetone, rags and Q tips were our friends for<br />
these long days when it was frequently above 90 degrees inside the<br />
shop. I ate well throughout this project but lost about 12 unnecessary<br />
pounds while working in the Delta.<br />
New transom planks were made using the old planks as patterns and<br />
then the old ones were used to make new bungs for the topsides.