KD-R521/KD-R422 - JVC Mobile In-Car Entertainment
KD-R521/KD-R422 - JVC Mobile In-Car Entertainment
KD-R521/KD-R422 - JVC Mobile In-Car Entertainment

Create successful ePaper yourself
Turn your PDF publications into a flip-book with our unique Google optimized e-Paper software.
Having TROUBLE with operation?<br />
Please reset your unit<br />
Dear Customer,<br />
This apparatus is in conformance with the valid<br />
European directives and standards regarding<br />
electromagnetic compatibility and electrical safety.<br />
European representative of Victor Company of<br />
Japan, Limited is:<br />
<strong>JVC</strong> Technical Services Europe GmbH<br />
Postfach 10 05 04<br />
61145 Friedberg<br />
Germany<br />
Refer to page of How to reset your unit<br />
Vous avez des PROBLÈMES de fonctionnement?<br />
Réinitialisez votre appareil<br />
Référez-vous à la page intitulée Comment réinitialiser votre appareil<br />
EN, FR<br />
© 2010 Victor Company of Japan, Limited<br />
Cher(e) client(e),<br />
Cet appareil est conforme aux directives et<br />
normes européennes en vigueur concernant la<br />
compatibilité électromagnétique et à la sécurité<br />
électrique.<br />
Représentant européen de la société Victor<br />
Company of Japan, Limited:<br />
<strong>JVC</strong> Technical Services Europe GmbH<br />
Postfach 10 05 04<br />
61145 Friedberg<br />
Allemagne<br />
1010DTSMDTJEIN<br />
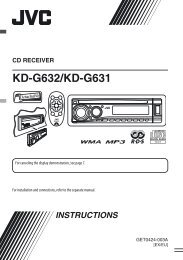
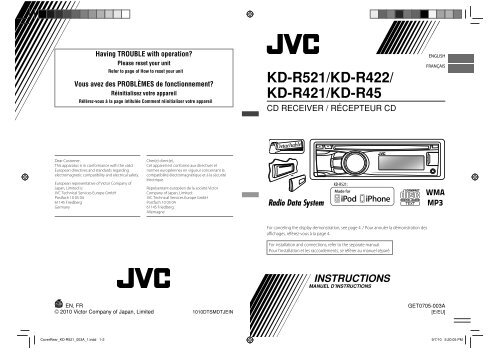
<strong>KD</strong>-<strong>R521</strong>/<strong>KD</strong>-<strong>R422</strong>/<br />
<strong>KD</strong>-R421/<strong>KD</strong>-R45<br />
CD RECEIVER / RÉCEPTEUR CD<br />
For canceling the display demonstration, see page 4. / Pour annuler la démonstration des<br />
affichages, référez-vous à la page 4.<br />
For installation and connections, refer to the separate manual.<br />
Pour l’installation et les raccordements, se référer au manuel séparé.<br />
INSTRUCTIONS<br />
MANUEL D’INSTRUCTIONS<br />
ENGLISH<br />
FRANÇAIS<br />
GET0705-003A<br />
[E/EU]<br />
CoverRear_<strong>KD</strong>-<strong>R521</strong>_003A_1.indd 1-2 9/7/10 5:20:05 PM
Thank you for purchasing a <strong>JVC</strong> product.<br />
Please read all instructions carefully before operation, to ensure your complete understanding and<br />
to obtain the best possible performance from the unit.<br />
IMPORTANT FOR LASER PRODUCTS<br />
1. CLASS 1 LASER PRODUCT<br />
2. CAUTION: Do not open the top cover. There are no user serviceable parts inside the unit; leave<br />
all servicing to qualified service personnel.<br />
3. CAUTION: Visible and/or invisible class 1M laser radiation when open. Do not view directly with<br />
optical instruments.<br />
4. REPRODUCTION OF LABEL: CAUTION LABEL, PLACED OUTSIDE THE UNIT.<br />
Products<br />
<strong>In</strong>formation for Users on Disposal of<br />
Old Equipment and Batteries<br />
[European Union only]<br />
These symbols indicate that the product and<br />
the battery with this symbol should not be<br />
disposed as general household waste at its<br />
end-of-life.<br />
If you wish to dispose of this product and<br />
the battery, please do so in accordance with<br />
applicable national legislation or other rules<br />
in your country and municipality.<br />
By disposing of this product correctly, you<br />
will help to conserve natural resources and<br />
will help prevent potential negative effects<br />
on the environment and human health.<br />
Notice:<br />
The sign Pb below the symbol for batteries<br />
indicates that this battery contains lead.<br />
<strong>JVC</strong> bears no responsibility for any loss of data<br />
in an iPod/iPhone and/or USB mass storage<br />
class device while using this System.<br />
2 ENGLISH<br />
Battery<br />
WARNING:<br />
Stop the car before operating the unit.<br />
Caution:<br />
Adjust the volume so that you can hear sounds<br />
outside the car. Driving with the volume too<br />
high may cause an accident.<br />
Caution on volume setting:<br />
Digital devices (CD/USB) produce very little<br />
noise compared with other sources. Lower the<br />
volume before playing these digital sources to<br />
avoid damaging the speakers by the sudden<br />
increase of the output level.<br />
Caution for DualDisc playback:<br />
The Non-DVD side of a “DualDisc” does not<br />
comply with the “Compact Disc Digital Audio”<br />
standard. Therefore, the use of Non-DVD side<br />
of a DualDisc on this product may not be<br />
recommended.<br />
Condensation : When the car is airconditioned,<br />
moisture may collect on the<br />
laser lens. This may cause disc read errors. <strong>In</strong><br />
this case, remove the disc and wait for the<br />
moisture to evaporate.<br />
Temperature inside the car : If you have<br />
parked the car for a long time in hot or cold<br />
weather, wait until the temperature in the car<br />
becomes normal before operating the unit.<br />
EN02-19_<strong>KD</strong>-<strong>R521</strong>_003A_f.indd 2 10/13/10 12:45:32 PM
How to attach/detach the control<br />
panel<br />
How to reset your unit<br />
Your preset adjustments will<br />
also be erased.<br />
How to forcibly eject a disc<br />
[Hold]<br />
• Be careful not to drop the disc when it ejects.<br />
• If this does not work, reset your unit.<br />
Maintenance<br />
Cleaning the unit<br />
Wipe off the dirt on the panel with a dry silicon<br />
or soft cloth. Failure to observe this precaution<br />
may result in damage to the unit.<br />
Cleaning the connector<br />
Wipe off dirt on the connector of the unit and<br />
panel. Use a cotton swab or cloth.<br />
About discs<br />
This unit can only play the CDs with:<br />
Discs that cannot be used:<br />
• Discs that are not round.<br />
• Discs with coloring on the recording surface<br />
or discs that are dirty.<br />
• You cannot play a Recordable/ReWritable<br />
disc that has not been finalized. (For the<br />
finalization process refer to your disc writing<br />
software, and your disc recorder instruction<br />
manual.)<br />
• 3-inch CD cannot be used. Attempt to insert<br />
using an adapter can cause malfunction.<br />
CONTENTS<br />
3 How to attach/detach the control<br />
panel<br />
3 How to reset your unit<br />
3 How to forcibly eject a disc<br />
3 Maintenance<br />
3 About discs<br />
4 Canceling the display<br />
demonstration<br />
4 Setting the clock<br />
5 Basic operations<br />
6 Listening to the radio<br />
8 Listening to a disc<br />
9 Connecting the other external<br />
components<br />
9 Listening to the other external<br />
components<br />
10 Listening to a USB device<br />
11 Listening to an iPod/iPhone<br />
(Available for <strong>KD</strong>-<strong>R521</strong>)<br />
12 Selecting a preset sound mode<br />
13 Menu operations<br />
15 Using the remote controller<br />
(For <strong>KD</strong>-<strong>R521</strong>/<strong>KD</strong>-<strong>R422</strong>/<strong>KD</strong>-R421: optionally<br />
purchased)<br />
16 Troubleshooting<br />
18 Using Bluetooth ® devices<br />
19 Specifications<br />
Handling discs:<br />
• Do not touch the recording surface of the<br />
disc.<br />
• Do not stick tape etc. on the disc, or use a disc<br />
with tape stuck on it.<br />
• Do not use any accessories for the disc.<br />
• Clean from the center of the disc and move<br />
outward.<br />
• Clean the disc with a dry silicon or soft cloth.<br />
Do not use any solvents.<br />
• When removing discs from this unit, pull them<br />
out horizontally.<br />
• Remove the rims from the center hole and<br />
disc edge before inserting a disc.<br />
ENGLISH<br />
EN02-19_<strong>KD</strong>-<strong>R521</strong>_003A_f.indd 3 10/13/10 12:45:33 PM<br />
3
Canceling the display demonstration<br />
Display demonstration will be activated automatically if no operation is done for about 20 seconds.<br />
1 Turn on the power.<br />
4 Select .<br />
2<br />
3<br />
1 Turn on the power.<br />
2<br />
3 Select .<br />
4 Select .<br />
5 Adjust the hour.<br />
4 ENGLISH<br />
[Hold]<br />
[Hold]<br />
[Hold]<br />
(<strong>In</strong>itial setting)<br />
(<strong>In</strong>itial setting)<br />
Setting the clock<br />
[Hold]<br />
(<strong>In</strong>itial setting)<br />
(<strong>In</strong>itial setting)<br />
5<br />
6 Finish the procedure.<br />
6 Adjust the minute.<br />
7 Select .<br />
8 Select or<br />
.<br />
9 Finish the procedure.<br />
EN02-19_<strong>KD</strong>-<strong>R521</strong>_003A_f.indd 4 10/13/10 12:45:33 PM
Basic operations<br />
Detaches the panel<br />
Loading slot<br />
Control dial Display window Ejects the disc<br />
Remote sensor (for <strong>KD</strong>-<strong>R521</strong>/<strong>KD</strong>-<strong>R422</strong>/<strong>KD</strong>-R421)<br />
You can control this unit with an optionally<br />
purchased remote control, RM-RK52 (page 15, 16).<br />
When you press or hold the following button(s)...<br />
Button General operation<br />
/ SOURCE<br />
Control dial<br />
(turn)<br />
Control dial<br />
(press)<br />
EQ<br />
Front auxiliary<br />
input jack<br />
USB (Universal Serial<br />
Bus) input terminal<br />
• Turns on/off [Hold].<br />
• Selects the sources (FM, CD, USB or USB-IPOD, F-AUX, BT AUDIO or R-AUX or<br />
BT PHONE, AM). “CD” or “USB” is selectable only when a disc is loaded or a USB<br />
device is connected.<br />
• Adjusts the volume level.<br />
• Selects items.<br />
• Mutes the sound during playback. If the source is “CD” or “USB/USB-IPOD”<br />
playback pauses. Press the button again to cancel muting or resume playback.<br />
• Confirms selection.<br />
• Selects the sound mode.<br />
• Enters tone level adjustment directly [Hold]. (page 12)<br />
BRIGHTNESS Enters menu directly. (page 13)<br />
• Activates/deactivates TA Standby Reception.<br />
• Enters PTY Searching mode [Hold].<br />
T/P BACK • <strong>KD</strong>-<strong>R521</strong>: Selects the controlling terminal of an iPod/iPhone [Hold]. (page 11)<br />
• Returns to the previous menu.<br />
• Exit from the menu [Hold].<br />
• Changes the display information.<br />
DISP<br />
• Scrolls the display information [Hold].<br />
<strong>KD</strong>-<strong>R521</strong>/<strong>KD</strong>-<strong>R422</strong>/<strong>KD</strong>-R421 is equipped with the steering wheel remote control function.<br />
• For details, refer also to the instructions supplied with the remote adapter.<br />
ENGLISH<br />
EN02-19_<strong>KD</strong>-<strong>R521</strong>_003A_f.indd 5 10/13/10 12:45:34 PM<br />
5
Listening to the radio<br />
~<br />
Improving the FM reception<br />
1<br />
2<br />
] ] ] <br />
Reception improves, but stereo effect<br />
will be lost.<br />
To restore the stereo effect, repeat the same<br />
procedure to select .<br />
Automatic presetting (FM)—<br />
SSM (Strong-station Sequential Memory)<br />
You can preset up to 18 stations for FM.<br />
While listening to a station...<br />
1<br />
2<br />
] ] ]<br />
<br />
“SSM” flashes and local stations with the<br />
strongest signal are searched and stored<br />
automatically.<br />
To preset another 6 stations, repeat the<br />
above procedure by selecting one of the other<br />
SSM setting ranges.<br />
6 ENGLISH<br />
[Hold]<br />
[Hold]<br />
Ÿ<br />
• [Press] Searches for stations automatically.<br />
• [Hold] Searches for stations manually.<br />
“M” flashes, then press the button<br />
] “FM” or “AM”<br />
repeatedly.<br />
“ST” lights up when receiving an FM stereo broadcast with sufficient signal strength.<br />
Manual presetting (FM/AM)<br />
You can preset up to 18 stations for FM and 6<br />
stations for AM.<br />
1<br />
2<br />
3<br />
] Tune in to a station you want to<br />
preset.<br />
“PRESET MODE” flashes.<br />
] Selects preset number.<br />
Preset number flashes and “MEMORY”<br />
appears.<br />
Selecting a preset station<br />
1<br />
or<br />
[Hold]<br />
2<br />
Changing the display information (for non-<br />
Radio Data System station)<br />
Frequency j Clock<br />
EN02-19_<strong>KD</strong>-<strong>R521</strong>_003A_f.indd 6 10/13/10 12:45:34 PM
The following features are available<br />
only for FM Radio Data System stations.<br />
Searching for your favourite<br />
FM Radio Data System<br />
programme—PTY Search<br />
You can tune in to a station broadcasting your<br />
favourite programme by searching for a PTY<br />
code.<br />
1<br />
2<br />
[Hold]<br />
The last selected PTY code appears.<br />
] Select one of your favourite<br />
programme types or a PTY code, and<br />
start searching.<br />
If there is a station broadcasting a<br />
programme of the same PTY code as you<br />
have selected, that station is tuned in.<br />
PTY codes: NEWS, AFFAIRS, INFO, SPORT,<br />
EDUCATE, DRAMA, CULTURE, SCIENCE,<br />
VARIED, POP M (music), ROCK M (music),<br />
EASY M (music), LIGHT M (music), CLASSICS,<br />
OTHER M (music), WEATHER, FINANCE,<br />
CHILDREN, SOCIAL, RELIGION, PHONE IN,<br />
TRAVEL, LEISURE, JAZZ, COUNTRY,<br />
NATION M (music), OLDIES, FOLK M (music),<br />
DOCUMENT<br />
Standby receptions<br />
TA Standby Reception<br />
TA Standby Reception allows the unit to switch<br />
temporarily to Traffic Announcement (TA) from<br />
any source other than AM.<br />
To activate TA Standby Reception<br />
If the TP indicator lights up, TA<br />
Standby Reception is activated.<br />
If the TP indicator flashes, TA<br />
Standby Reception is not yet<br />
activated.<br />
• To activate the reception, tune in to another<br />
station providing Radio Data System signals<br />
required for TA Standby Reception.<br />
• To deactivate the reception, press T/P BACK<br />
again.<br />
NEWS Standby Reception<br />
NEWS Standby Reception allows the unit to<br />
switch temporarily to your NEWS programme<br />
from any source other than AM.<br />
To activate NEWS Standby Reception, see<br />
. (page 14)<br />
Tracing the same programme—<br />
Network-Tracking Reception<br />
When driving in an area where FM reception is<br />
not sufficient enough, this unit automatically<br />
tunes in to another FM Radio Data System<br />
station of the same network, possibly<br />
broadcasting the same programme with<br />
stronger signals.<br />
To change the Network-Tracking Reception<br />
setting, see . (page 14)<br />
Automatic station selection—<br />
Programme Search<br />
Usually when you select a preset number, the<br />
station preset in that number is tuned in.<br />
If the signals from the FM Radio Data System<br />
preset station are not sufficient for good<br />
reception, this unit, using the AF data, tunes in<br />
to another frequency possibly broadcasting the<br />
same programme as the original preset station<br />
is broadcasting.<br />
To activate Programme Search, see<br />
. (page 14)<br />
Changing the display information<br />
Station name (PS) = Station<br />
Frequency = Programme type<br />
(PTY) = Clock = (back to the<br />
beginning)<br />
ENGLISH<br />
EN02-19_<strong>KD</strong>-<strong>R521</strong>_003A_f.indd 7 10/13/10 12:45:34 PM<br />
7
Listening to a disc<br />
Stopping playback and ejecting<br />
the disc<br />
If the ejected disc is not<br />
removed within 15 seconds, it<br />
will automatically reload into<br />
the loading slot.<br />
Basic operations<br />
8 ENGLISH<br />
Selects folder of the MP3/WMA.<br />
[Press] Selects track.<br />
[Hold] Fast-forwards<br />
or reverses the track.<br />
Changing the display information<br />
Disc title/Album name/performer (folder<br />
name)* = Track title (file name)* = Current<br />
track number with the elapsed playing time =<br />
Current track number with the clock time =<br />
(back to the beginning)<br />
* “NO NAME” appears for conventional CDs or if<br />
not recorded.<br />
Playback starts automatically.<br />
All tracks will be played repeatedly until you change the<br />
source or eject the disc.<br />
Selecting a track/folder from the<br />
list<br />
• If the MP3/WMA disc contains many tracks,<br />
you can fast search (±10, ±100) through the<br />
disc by turning the control dial quickly.<br />
• To return to the previous menu, press<br />
T/P BACK.<br />
Selecting the playback modes<br />
You can use only one of the following playback<br />
modes at a time.<br />
1<br />
2<br />
3<br />
[Hold]<br />
] “REPEAT” j “RANDOM”<br />
REPEAT<br />
TRACK RPT : Repeats current track<br />
FOLDER RPT : Repeats current folder<br />
RANDOM<br />
FOLDER RND : Randomly plays all tracks<br />
of current folder, then<br />
tracks of next folders<br />
ALL RND : Randomly plays all tracks<br />
To cancel repeat play or random play, select<br />
“RPT OFF” or “RND OFF.”<br />
EN02-19_<strong>KD</strong>-<strong>R521</strong>_003A_f.indd 8 10/13/10 4:16:29 PM
Connecting the other external components<br />
You can connect an external component to the auxiliary input jack on the control panel (F-AUX)<br />
and/or on the rear side of the unit (R-AUX).<br />
Summary of using the external components through the auxiliary input jacks:<br />
External component Auxiliary<br />
input jack<br />
Preparation<br />
Menu setting Sub-<br />
item item<br />
Setting<br />
Source<br />
name<br />
Connecting<br />
cable/device<br />
(not supplied)<br />
Portable audio<br />
player<br />
Front<br />
Rear<br />
SRC SELECT<br />
SRC SELECT<br />
F-AUX<br />
R-AUX<br />
ON<br />
ON<br />
F-AUX<br />
R-AUX<br />
See below.<br />
Bluetooth device Rear SRC SELECT R-AUX BT ADAPTER BT AUDIO/ KS-BTA100<br />
BT PHONE * (page 18)<br />
* ”BT PHONE” appears when a Bluetooth phone is in use.<br />
On the control panel (F-AUX): On the rear panel (R-AUX):<br />
3.5 mm stereo mini plug<br />
(not supplied)<br />
3.5 mm stereo mini plug<br />
(with “L” shaped connector)<br />
(not supplied)<br />
Listening to the other external components<br />
For details, refer also to the instructions supplied with the external components.<br />
~ ] “F-AUX” or “R-AUX”<br />
Portable audio player,<br />
etc.<br />
Ÿ<br />
Portable audio player,<br />
etc.<br />
Recommended to use a 3-terminal plug head stereo mini plug for<br />
optimum audio output.<br />
Turn on the connected component and<br />
start playing the source.<br />
ENGLISH<br />
EN02-19_<strong>KD</strong>-<strong>R521</strong>_003A_f.indd 9 10/13/10 12:45:35 PM<br />
9
Listening to a USB device<br />
You can operate the USB device in the same way you operate the files on a disc. (page 8)<br />
• This unit can play MP3/WMA files stored in a USB mass storage class device (such as a USB<br />
memory, Digital Audio Player, etc.).<br />
~ [Hold] Ÿ<br />
USB input terminal<br />
] Turn on the power.<br />
10 ENGLISH<br />
USB cable (not supplied)<br />
All tracks will be played repeatedly until you change the source or disconnect the USB<br />
device.<br />
Cautions:<br />
• Make sure all important data has been backed<br />
up.<br />
• You cannot connect a computer or portable<br />
HDD to the USB input terminal of the unit.<br />
• Avoid using the USB device if it might hinder<br />
your safety driving.<br />
• Electrostatic shock at connecting a USB device<br />
may cause abnormal playback of the device.<br />
<strong>In</strong> this case, disconnect the USB device then<br />
reset this unit and the USB device.<br />
• Do not leave a USB device in the car, expose<br />
to direct sunlight, or high temperature to<br />
avoid deformation or cause damages to the<br />
device.<br />
• This unit may not play back files in a USB<br />
device properly when using a USB extension<br />
cord.<br />
• USB devices equipped with special functions<br />
such as data security functions cannot be<br />
used with the unit.<br />
• When connecting a USB cable, use the USB<br />
2.0 cable.<br />
• Do not use a USB device with 2 or more<br />
partitions.<br />
• Depending on the shape of the USB devices<br />
and connection ports, some USB devices may<br />
not be attached properly or the connection<br />
might be loose.<br />
• This unit cannot recognize a USB device<br />
whose rating is other than 5 V and exceeds<br />
500 mA.<br />
• Do not pull out and attach the USB device<br />
repeatedly while “READING” is shown on the<br />
display.<br />
• This unit may not recognize a memory card<br />
inserted into the USB card reader.<br />
• Connect only one USB device to the unit at a<br />
time. Do not use a USB hub.<br />
• Operation and power supply may not work as<br />
intended for some USB devices.<br />
• The maximum number of characters for:<br />
– Folder names : 63 characters<br />
– File names : 63 characters<br />
– MP3 Tag : 60 characters<br />
– WMA Tag : 60 characters<br />
• This unit can recognize a total of 65 025 files,<br />
255 folders (255 files per folder including<br />
folder without unsupported files), and of 8<br />
hierarchies.<br />
EN02-19_<strong>KD</strong>-<strong>R521</strong>_003A_f.indd 10 10/13/10 12:45:35 PM
Listening to an iPod/iPhone<br />
Available for <strong>KD</strong>-<strong>R521</strong><br />
~ [Hold]<br />
] Turn on the power.<br />
Ÿ<br />
USB 2.0 cable (accessory of the iPod/iPhone)<br />
Apple iPod/iPhone<br />
All tracks will be played repeatedly until you change the source or disconnect the iPod/<br />
iPhone.<br />
Cautions:<br />
• Avoid using the iPod/iPhone if it might hinder<br />
your safety driving.<br />
• Make sure all important data has been backed<br />
up to avoid losing the data.<br />
Selecting the control terminal<br />
[Hold]<br />
] <br />
• For details, see setting on<br />
page 15.<br />
Basic operations<br />
Not applicable under .<br />
[Press] Selects track/<br />
chapter.<br />
[Hold] Fast-forwards or<br />
reverses the track.<br />
USB input terminal<br />
Selecting a track from the menu<br />
Not applicable under .<br />
1<br />
2<br />
3<br />
] Select the desired menu.<br />
PLAYLISTS j ARTISTS j ALBUMS<br />
j SONGS j PODCASTS j GENRES<br />
j COMPOSERS j (back to the<br />
beginning)<br />
] Select the desired track.<br />
Repeat this step until the desired track<br />
is selected.<br />
• If the selected menu contains many tracks,<br />
you can fast search (±10, ±100, ±1 000,<br />
±10 000) through the menu by turning the<br />
control dial quickly.<br />
• To return to the previous menu, press<br />
T/P BACK.<br />
Continued...<br />
ENGLISH 11<br />
EN02-19_<strong>KD</strong>-<strong>R521</strong>_003A_f.indd 11 10/13/10 12:45:35 PM
Selecting the playback modes<br />
• You can use only one of the following<br />
playback modes at a time.<br />
• Not applicable under .<br />
1<br />
2<br />
3<br />
12 ENGLISH<br />
[Hold]<br />
] “REPEAT” j “RANDOM”<br />
REPEAT<br />
ONE RPT : Functions the same as<br />
“Repeat One” of the iPod<br />
ALL RPT : Functions the same as<br />
“Repeat All” of the iPod<br />
RANDOM<br />
ALBUM RND : Functions the same as<br />
“Shuffle Albums” of the iPod<br />
SONG RND : Functions the same as<br />
“Shuffle Songs” of the iPod<br />
• To cancel random play, select “RND OFF.”<br />
• “ALBUM RND” is not available for some iPod/<br />
iPhone.<br />
• To return to the previous menu, press<br />
T/P BACK.<br />
You can select a preset sound mode suitable<br />
for the music genre.<br />
FLAT = NATURAL = DYNAMIC = VOCAL<br />
BOOST = BASS BOOST = USER = (back to<br />
the beginning)<br />
While listening, you can adjust the subwoofer<br />
level and tone level of the selected sound mode.<br />
1<br />
Changing the display information<br />
Selecting a preset sound mode<br />
[Hold]<br />
Album name/performer = Track title =<br />
Current track number with the elapsed playing<br />
time = Current track number with the clock<br />
time = (back to the beginning)<br />
Additional information<br />
• Made for<br />
iPod touch (1st, 2nd, and 3rd generation)<br />
iPod classic<br />
iPod with video *<br />
iPod nano (1st *, 2nd, 3rd, 4th, and 5th generation)<br />
iPhone 4<br />
iPhone 3GS<br />
iPhone 3G<br />
iPhone<br />
* are not available.<br />
• Update iPod/iPhone software to the latest version. For<br />
details, visit .<br />
• It is not possible to browse video files on the “Videos”<br />
menu in .<br />
• The song order displayed on the selection menu of<br />
this unit may differ from that of the iPod.<br />
• When operating an iPod/iPhone, some operations<br />
may not be performed correctly or as intended. <strong>In</strong> this<br />
case, visit the following <strong>JVC</strong> web site: (English website only).<br />
2<br />
Adjust the level:<br />
SUB.W *: 00 to 08<br />
BASS/ MID/ TRE: –06 to +06<br />
The sound mode is automatically stored<br />
and changed to “USER.”<br />
* Subwoofer level is adjustable only when<br />
is set to . (page 14)<br />
EN02-19_<strong>KD</strong>-<strong>R521</strong>_003A_f.indd 12 10/13/10 12:45:35 PM
Storing your own sound mode<br />
You can store your own adjustments in<br />
memory.<br />
1<br />
2<br />
[Hold]<br />
] ] <br />
Menu operations<br />
1<br />
[Hold]<br />
If no operation is done<br />
for about 60 seconds, the<br />
operation will be canceled.<br />
3<br />
4<br />
2 3<br />
Adjust the sound elements (see table<br />
below) of the selected tone.<br />
Repeat steps 2 and 3 to adjust other<br />
tones.<br />
The adjustments made is automatically<br />
stored and changed to “USER.”<br />
Frequency / Level / Q [<strong>In</strong>itial: Underlined]<br />
BASS 60/ 80/ 100/ 200 Hz –06 to +06 [ 00 ] Q1.0/ 1.25/ 1.5/ 2.0<br />
MIDDLE 0.5/ 1.0/ 1.5/ 2.5 kHz –06 to +06 [ 00 ] Q0.75/ 1.0/ 1.25<br />
TREBLE 10.0/ 12.5/ 15.0/ 17.5 kHz –06 to +06 [ 00 ] Q FIX<br />
Repeat step 2 if necessary.<br />
• To return to the previous<br />
menu, press T/P BACK.<br />
• To exit from the menu, press<br />
DISP or MENU.<br />
Menu item Selectable setting, [<strong>In</strong>itial: Underlined]<br />
DEMO For settings, see page 4.<br />
CLOCK SET For settings, see page 4.<br />
24H/12H For settings, see page 4.<br />
CLOCK ADJ *<br />
Continued...<br />
ENGLISH 13<br />
1 AUTO : The built-in clock is automatically adjusted using the CT (clock time) data in the<br />
Radio Data System signal. / OFF : Cancels.<br />
DIMMER SET AUTO : Changes the display and button illumination between the Day/Night adjustments<br />
in setting when you turn off/on the car headlights * 2. / ON : Selects the<br />
Night adjustments in setting for the display and button illumination. /<br />
OFF : Selects the Day adjustments in setting for the display and button<br />
illumination.<br />
BRIGHTNESS DAY [ 25 ] / NIGHT [ 11 ] : Selects the display and button illumination brightness level<br />
[00 — 31] for day and night.<br />
SCROLL * 3 ONCE : Scrolls the displayed information once. / AUTO : Repeats scrolling (at 5-second<br />
intervals). / OFF : Cancels.<br />
(Pressing DISP for more than one second can scroll the display regardless of the setting.)<br />
TAG DISPLAY ON : Shows the Tag information while playing MP3/WMA tracks. / OFF : Cancels.<br />
* 1 Takes effect only when CT (clock time) data is received.<br />
* 2 The illumination control lead connection is required. (See “<strong>In</strong>stallation/Connection Manual.”) This setting may not work<br />
correctly on some vehicles (particularly on those having a control dial for dimming). <strong>In</strong> this case, change the setting to<br />
any other than .<br />
* 3 Some characters or symbols will not be shown correctly (or will be blanked) on the display.<br />
CLOCK<br />
DIMMER<br />
DISPLAY<br />
EN02-19_<strong>KD</strong>-<strong>R521</strong>_003A_f.indd 13 10/13/10 12:45:36 PM
Menu item Selectable setting, [<strong>In</strong>itial: Underlined]<br />
PRO EQ For settings, see page 13.<br />
FADER * 4, * 5 R06 — F06 [ 00 ] : Adjusts the front and rear speaker output balance.<br />
BALANCE * 5 L06 — R06 [ 00 ] : Adjusts the left and right speaker output balance.<br />
LOUD ON : Boost low and high frequencies to produce a well-balanced sound at a low volume<br />
level. / OFF : Cancels.<br />
VOL ADJUST –05 — +05 [ 00 ] : Presets the volume adjustment level of each source (except<br />
“FM”), compared to the FM volume level. The volume level will automatically increase or<br />
decrease when you change the source. Before adjustment, select the source you want to<br />
adjust. (“VOL ADJ FIX” appears on the display if “FM” is selected as the source.)<br />
L/O MODE * 6 SUB.W : Selects if the REAR/SW terminals are used for connecting a subwoofer (through<br />
an external amplifier). / REAR : Selects if the REAR/SW terminals are used for connecting<br />
the speakers (through an external amplifier).<br />
SUB.W LPF * 7 LOW 55Hz / LOW 85Hz / LOW 120Hz : Frequencies lower than<br />
55 Hz/85 Hz/120 Hz are sent to the subwoofer.<br />
SUB.W LEVEL * 7 00 — 08 [ 04 ] : Adjusts the subwoofer output level.<br />
HPF * 6 ON : Activates the High Pass Filter. Low frequency signals are cut off from the front/rear<br />
speakers. / OFF : Deactivates (all signals are sent to the front/rear speakers).<br />
BEEP ON / OFF : Activates or deactivates the keypress tone.<br />
TEL MUTING * 8 ON : Mutes the sounds while using the cellular phone (not connected through<br />
KS-BTA100). / OFF : Cancels.<br />
AMP GAIN * 9 LOW POWER : VOLUME 00 – VOLUME 30 (Selects if the maximum power<br />
of each speaker is less than 50 W to prevent damaging the speakers.) /<br />
HIGH POWER : VOLUME 00 – VOLUME 50<br />
SSM Displayed only when the source is “FM.” For settings, see page 6.<br />
AF-REG * 10 AF ON : When the currently received signals become weak, the unit switches to another<br />
station (the programme may differ from the one currently received). (The AF indicator<br />
lights up.) / AF-REG ON : When the currently received signals become weak, the<br />
unit switches to another station broadcasting the same programme. (The AF and REG<br />
indicators light up.) / OFF : Cancels.<br />
NEWS-STBY * 10 Displayed only when the source is “FM.” NEWS ON / NEWS OFF : Activates or<br />
deactivates NEWS Standby Reception.<br />
P-SEARCH * 10 SEARCH ON / SEARCH OFF : Activates Programme Search (if AF-REG is turn on)<br />
or deactivates.<br />
MONO Displayed only when the source is “FM.” For settings, see page 6.<br />
IF BAND AUTO : <strong>In</strong>creases the tuner selectivity to reduce interference noises between adjacent<br />
stations. (Stereo effect may be lost.) / WIDE : Subject to interference noises from<br />
adjacent stations, but sound quality will not be degraded and the stereo effect will remain.<br />
* 4 If you are using a two-speaker system, set the fader level to “00.”<br />
* 5 For <strong>KD</strong>-<strong>R521</strong>/<strong>KD</strong>-<strong>R422</strong>/<strong>KD</strong>-R421: This adjustment will not affect the subwoofer output.<br />
*6 For <strong>KD</strong>-<strong>R521</strong>/<strong>KD</strong>-<strong>R422</strong>/<strong>KD</strong>-R421.<br />
* 7 For <strong>KD</strong>-<strong>R521</strong>/<strong>KD</strong>-<strong>R422</strong>/<strong>KD</strong>-R421: Displayed only when is set to .<br />
* 8 This setting does not work if is selected for of the .<br />
* 9 The volume level automatically changes to “VOLUME 30” if you change to with the volume level set<br />
higher than “VOLUME 30.”<br />
* 10 Only for FM Radio Data System stations.<br />
AUDIO<br />
TUNER<br />
14 ENGLISH<br />
EN02-19_<strong>KD</strong>-<strong>R521</strong>_003A_f.indd 14 10/15/10 9:05:02 AM
Menu item Selectable setting, [<strong>In</strong>itial: Underlined]<br />
IPOD SWITCH * 11 HEAD MODE : Controls iPod playback through the unit. / IPOD MODE : Controls<br />
iPod playback through the iPod/iPhone. / EXT MODE : The sound of any functions<br />
(musics, games, applications, etc.) running on the connected iPod/iPhone is emitted<br />
through the speakers connected to this unit. The display always show “EXT MODE.”<br />
AM * 12 ON / OFF : Enable or disable “AM” in source selection.<br />
F-AUX * 12 ON / OFF : Enable or disable “F-AUX” in source selection.<br />
R-AUX * 12 ON / OFF : Enable or disable “R-AUX” in source selection. / BT ADAPTER : Selects if<br />
the rear auxiliary input jack is connected to the Bluetooth adapter, KS-BTA100. (page 9)<br />
The source name changed to “BT AUDIO.”<br />
* 11 For <strong>KD</strong>-<strong>R521</strong>: Displayed only when “USB-IPOD” is selected.<br />
* 12 Displayed only when any source other than “AM/ F-AUX/ R-AUX/ BT AUDIO” is selected separately.<br />
SRC SELECT<br />
Using the remote controller<br />
<strong>KD</strong>-<strong>R521</strong>/<strong>KD</strong>-<strong>R422</strong>/<strong>KD</strong>-R421 can be remotely controlled as instructed here (with an optionally<br />
purchased remote controller). We recommend that you use remote controller RM-RK52 with your<br />
unit.<br />
<strong>In</strong>stalling the lithium coin battery<br />
(CR2025)<br />
CR2025<br />
Caution:<br />
• Danger of explosion if battery is incorrectly<br />
replaced. Replace only with the same or<br />
equivalent type.<br />
• Battery shall not be exposed to excessive heat<br />
such as sunshine, fire, or the like.<br />
If the effectiveness of the remote controller<br />
decreases, replace the battery.<br />
Before using the remote controller:<br />
• Aim the remote controller directly at the<br />
remote sensor on the unit.<br />
• DO NOT expose the remote sensor to bright<br />
light (direct sunlight or artificial lighting).<br />
Remote sensor<br />
1 • Mutes the sound during playback. If the<br />
source is “CD” or “USB/USB-IPOD” playback<br />
pauses. Press the button again to cancel<br />
muting or resume playback.<br />
2 • Changes the preset stations.<br />
• Changes the folder of the MP3/WMA.<br />
3 Adjusts the volume level.<br />
4 Selects the sound mode.<br />
5 Selects the source.<br />
6 • [Press] Searches for stations automatically.<br />
• [Hold] Searches for stations manually.<br />
• [Hold] Fast-forwards or reverses the track.<br />
• [Press] Changes the tracks/chapters.<br />
Continued...<br />
ENGLISH 15<br />
EN02-19_<strong>KD</strong>-<strong>R521</strong>_003A_f.indd 15 10/13/10 12:45:36 PM
Warning (to prevent accidents and damage):<br />
• Do not install any battery other than CR2025 or its equivalent.<br />
• Do not leave the remote controller in a place (such as dashboards) exposed to direct sunlight for<br />
a long time.<br />
• Store the battery in a place where children cannot reach.<br />
• Do not recharge, short, disassemble, heat the battery, or dispose of it in a fire.<br />
• Do not leave the battery with other metallic materials.<br />
• Do not poke the battery with tweezers or similar tools.<br />
• Wrap the battery with tape and insulate when throwing away or saving it.<br />
Troubleshooting<br />
General<br />
FM/AM<br />
Disc playback<br />
MP3/WMA<br />
playback<br />
16 ENGLISH<br />
Symptom Remedy/Cause<br />
Sound cannot be heard from the Adjust the volume to the optimum level. / Make sure the unit is not<br />
speakers.<br />
muted/paused. (page 5) / Check the cords and connections.<br />
“MISWIRING CHK WIRING THEN RESET Check to be sure the terminals of the speaker leads are covered with<br />
UNIT” appears on the display and no insulating tape properly, then reset the unit. (page 3)<br />
operations can be done.<br />
If the message does not disappear, consult your <strong>JVC</strong> IN-CAR<br />
ENTERTAINMENT dealer or a company supplying kits.<br />
The unit does not work at all. Reset the unit. (page 3)<br />
“F-AUX” or “R-AUX” cannot be selected. Check the = setting. (page 15)<br />
Sound is sometimes interrupted while Check to be sure the recommended stereo mini plug is used for<br />
listening to an external component<br />
connected to the auxiliary input jack.<br />
connection. (page 9)<br />
The correct characters are not displayed This unit can only display letters (upper case), numbers, and a<br />
(e.g. album name).<br />
limited number of symbols.<br />
SSM automatic presetting does not<br />
work.<br />
Store stations manually.<br />
Static noise while listening to the radio. Connect the aerial firmly.<br />
“AM” cannot be selected. Check the = setting. (page 15)<br />
Disc cannot be played back. <strong>In</strong>sert the disc correctly.<br />
CD-R/CD-RW cannot be played back <strong>In</strong>sert a finalized CD-R/CD-RW (finalize with the component which<br />
and track cannot be skipped.<br />
you used for recording).<br />
Disc sound is sometimes interrupted. Stop playback while driving on rough roads. / Change the disc. /<br />
Check the cords and connections.<br />
“NO DISC” appears on the display. <strong>In</strong>sert a playable disc into the loading slot.<br />
“PLEASE” and “EJECT“ appear<br />
alternately on the display.<br />
Press 0, then insert a disc correctly.<br />
“IN DISC” appears on the display. The disc cannot be ejected properly. Make sure nothing is blocking<br />
the loading slot.<br />
Disc cannot be played back. Use a disc with MP3/WMA tracks recorded in a format compliant<br />
with ISO 9660 Level 1, Level 2, Romeo, or Joliet. / Add the extension<br />
code or to the file names.<br />
Noise is generated. Skip to another track or change the disc.<br />
“READING” keeps flashing on the A longer readout time is required. Do not use too many hierarchical<br />
display.<br />
levels and folders.<br />
EN02-19_<strong>KD</strong>-<strong>R521</strong>_003A_f.indd 16 10/13/10 12:45:36 PM
Symptom Remedy/Cause<br />
Tracks do not play back in the order you<br />
have intended them to play.<br />
The playback order is determined when the files are recorded.<br />
The elapsed playing time is not correct. This sometimes occurs during playback. This is caused by how the<br />
tracks are recorded on the disc.<br />
“READING” keeps flashing on the A longer readout time is required. Do not use too many hierarchical<br />
display.<br />
levels and folders. / Turn off the power then on again. / Reattach<br />
the USB device again.<br />
“NO FILE” appears on the display. Check whether the device contains playable files.<br />
Noise is generated. Skip to another file.<br />
“NOT SUPPORT” appears and track skips. Check whether the track is a playable file format.<br />
Tracks/folders are not played back in the The playback order is determined by the file name. Folders with<br />
order you have intended.<br />
numbers on the initial of their names are sorted in numerical order.<br />
However, folders with no numbers on the initial of their names are<br />
sorted according to the file system of the USB device.<br />
“CANNOT PLAY” flashes on the display. / Check whether the connected USB device is compatible with this<br />
“NO USB” appears on the display. / The<br />
unit cannot detect the USB device.<br />
unit. / Reattach the USB device again.<br />
While playing a track, sound is<br />
The tracks have not been properly copied into the USB device. Copy<br />
sometimes interrupted.<br />
tracks again into the USB device, and try again.<br />
The iPod does not turn on or does not Check the connecting cable and its connection. / Update the<br />
work.<br />
firmware version of the iPod/iPhone. / Charge the battery of<br />
the iPod/iPhone. / Reset the iPod/iPhone. / Check whether<br />
setting is appropriate. (page 15)<br />
The sound is distorted. Deactivate the equalizer either on this unit or the iPod/iPhone.<br />
Noise is generated. Turn off (uncheck) the “VoiceOver” feature of the iPod. For details,<br />
visit .<br />
Playback stops. The headphones are disconnected during playback. Restart the<br />
playback operation. (page 11)<br />
“NO FILE” appears on the display. Check whether the device contains playable files.<br />
“CANNOT PLAY” flashes on the display. Check whether the connected iPod/iPhone is compatible with this<br />
unit. (page 12)<br />
MP3/WMA<br />
playback<br />
USB playback<br />
iPod/iPhone playback<br />
(For <strong>KD</strong>-<strong>R521</strong>)<br />
Additional information<br />
• This unit can play back multi-session discs; however,<br />
unclosed sessions will be skipped while playing.<br />
• This unit can play back files with the extension code<br />
or (regardless of the letter<br />
case—upper/lower).<br />
• This unit can play back the files meeting the conditions<br />
below:<br />
– Bit rate: MP3/WMA: 8 kbps — 320 kbps<br />
– Sampling frequency:<br />
MP3: 48 kHz, 44.1 kHz, 32 kHz, 24 kHz, 22.05 kHz,<br />
16 kHz, 12 kHz, 11.025 kHz, 8 kHz<br />
WMA: 48 kHz, 44.1 kHz, 32 kHz, 22.05 kHz<br />
• This unit can show WMA Tag and ID3 Tag Version<br />
1.0/1.1/2.2/2.3/2.4 (for MP3).<br />
• The search function works but search speed is not<br />
constant.<br />
• This unit can play back files recorded in VBR (variable<br />
bit rate). (Files recorded in VBR have a discrepancy in<br />
elapsed time indication.)<br />
• The maximum number of characters for file/folder<br />
names vary depending on the disc format used (includes<br />
4 extension characters— or ).<br />
ISO 9660 Level 1 and 2, Romeo: 64 characters, Joliet:<br />
32 characters, Windows long file name: 64 characters<br />
• This unit cannot play back the following files:<br />
– MP3 files: encoded in MP3i and MP3 PRO format; an<br />
inappropriate format; layer 1/2.<br />
– WMA files: encoded in lossless, professional, and<br />
voice format; not based upon Windows Media®<br />
Audio; copy-protected with DRM.<br />
– Files which have data such as AIFF, ATRAC3, etc.<br />
ENGLISH<br />
EN02-19_<strong>KD</strong>-<strong>R521</strong>_003A_f.indd 17 10/14/10 10:06:24 AM<br />
17
Using Bluetooth ® devices<br />
For Bluetooth operations, it is required to connect the Bluetooth adapter, KS-BTA100 (not supplied)<br />
to the auxiliary input jack (R-AUX/BT ADAPTER) on the rear of the unit. (page 9)<br />
• For details, refer also to the instructions supplied with the Bluetooth adapter and the Bluetooth<br />
device.<br />
• Operations may be different according to the connected device.<br />
Preparation<br />
1 Register (pair) a Bluetooth device with KS-BTA100.<br />
Refer to the instructions manual supplied with KS-BTA100.<br />
2 Change the settings of this unit.<br />
18 ENGLISH<br />
[Hold]<br />
Using the Bluetooth mobile phone<br />
(Low) (High)<br />
KS-BTA100<br />
Microphone<br />
Adjusting the microphone volume<br />
Volume level: High/ Normal (initial)/ Low<br />
[Hold]<br />
Using the Bluetooth audio device<br />
1<br />
2<br />
] ] ]<br />
<br />
• Receiving a call<br />
When a call comes in...<br />
• Making a call<br />
Making a call to the last connected number from<br />
your phone.<br />
• Switching between handsfree and phone<br />
While talking...<br />
• Ends/rejects call<br />
• Voice dialing<br />
Voice dialing is available only when the connected<br />
mobile phone has the voice recognition system.<br />
] “BT AUDIO”<br />
(CD receiver)<br />
If playback does not start, operate the Bluetooth audio player to start playback.<br />
[Press] Selects track.<br />
[Hold] Fast-forwards or reverses the track.<br />
About microphone volume:<br />
• When you turn off the power of the CD receiver, the volume level changes to Normal.<br />
EN02-19_<strong>KD</strong>-<strong>R521</strong>_003A_f.indd 18 10/13/10 12:45:36 PM
Specifications<br />
AUDIO AMPLIFIER SECTION<br />
Maximum Power Output :<br />
Front/Rear : 50 W per channel<br />
Continuous Power Output (RMS) :<br />
Front/Rear : 20 W per channel into 4 Ω,<br />
40 Hz to 20 000 Hz at no more than 1% total<br />
harmonic distortion.<br />
Load Impedance : 4 Ω (4 Ω to 8 Ω allowance)<br />
Frequency Response : 40 Hz to 20 000 Hz<br />
Signal-to-Noise Ratio : 70 dB<br />
Line-Out or Subwoofer-Out Level/Impedance<br />
(for <strong>KD</strong>-<strong>R521</strong>/<strong>KD</strong>-<strong>R422</strong>/<strong>KD</strong>-R421) :<br />
2.5 V/20 kΩ load (full scale)<br />
Output Impedance : ≤ 600 Ω<br />
Other Terminal : USB input terminal, Front<br />
auxiliary input jack, Rear auxiliary/Bluetooth<br />
adapter input jack, Aerial input<br />
TUNER SECTION<br />
Frequency Range :<br />
FM : 87.5 MHz to 108.0 MHz<br />
AM : MW : 531 kHz to 1 611 kHz<br />
LW : 153 kHz to 279 kHz<br />
FM Tuner :<br />
Usable Sensitivity : 9.3 dBf (0.8 μV/75 Ω)<br />
50 dB Quieting Sensitivity : 16.3 dBf<br />
(1.8 μV/75 Ω)<br />
Alternate Channel Selectivity (400 kHz) :<br />
65 dB<br />
Frequency Response : 40 Hz to 15 000 Hz<br />
Stereo Separation: 40 dB<br />
MW Tuner :<br />
Sensitivity/Selectivity : 20 μV/40 dB<br />
LW Tuner :<br />
Sensitivity : 50 μV<br />
CD PLAYER SECTION<br />
Type : Compact disc player<br />
Signal Detection System : Non-contact optical<br />
pickup (semiconductor laser)<br />
Number of Channels : 2 channels (stereo)<br />
Frequency Response : 5 Hz to 20 000 Hz<br />
Signal-to-Noise Ratio : 98 dB<br />
Wow and Flutter : Less than measurable limit<br />
MP3 Decoding Format (MPEG1/2 Audio<br />
Layer 3) : Max. Bit Rate: 320 kbps<br />
WMA (Windows Media® Audio) Decoding<br />
Format : Max. Bit Rate: 192 kbps<br />
USB SECTION<br />
USB Standard : USB 1.1, USB 2.0<br />
Data Transfer Rate (Full Speed) : Max. 12 Mbps<br />
Compatible Device : Mass Storage Class<br />
Compatible File System : FAT 32/16/12<br />
Playable Audio Format : MP3/WMA<br />
Max. Current : DC 5 V 500 mA<br />
GENERAL<br />
Power Requirement : Operating Voltage :<br />
DC 14.4 V (11 V to 16 V allowance)<br />
Grounding System : Negative ground<br />
Allowable Operating Temperature :<br />
0°C to +40°C<br />
Dimensions (W × H × D) : (approx.)<br />
– <strong>In</strong>stallation Size :<br />
182 mm × 52 mm × 159 mm<br />
– Panel Size :<br />
188 mm × 59 mm × 9 mm<br />
Mass : 1.2 kg (excluding accessories)<br />
Subject to change without notice.<br />
Microsoft and Windows Media are either<br />
registered trademarks or trademarks of<br />
Microsoft Corporation in the United States<br />
and/or other countries.<br />
<strong>KD</strong>-<strong>R521</strong>:<br />
• “Made for iPod,” and “Made for iPhone”<br />
mean that an electronic accessory has<br />
been designed to connect specifically<br />
to iPod, or iPhone, respectively, and has<br />
been certified by the developer to meet<br />
Apple performance standards. Apple is not<br />
responsible for the operation of this device<br />
or its compliance with safety and regulatory<br />
standards. Please note that the use of this<br />
accessory with iPod, or iPhone may affect<br />
wireless performance.<br />
• iPhone, iPod, iPod classic, iPod nano, and<br />
iPod touch are trademarks of Apple <strong>In</strong>c.,<br />
registered in the U.S. and other countries.<br />
ENGLISH<br />
EN02-19_<strong>KD</strong>-<strong>R521</strong>_003A_f.indd 19 10/13/10 4:44:06 PM<br />
19
Merci pour avoir acheté un produit <strong>JVC</strong>.<br />
Veuillez lire attentivement toutes les instructions avant d’utiliser l’appareil afin de bien comprendre<br />
son fonctionnement et d’obtenir les meilleures performances possibles.<br />
IMPORTANT POUR PRODUITS LASER<br />
1. PRODUIT LASER CLASSE 1<br />
2. ATTENTION: N’ouvrez pas le couvercle supérieur. Il n’y a aucune pièce réparable par l’utilisateur à<br />
l’intérieur de l’appareil; confiez toute réparation à un personnel qualifié.<br />
3. ATTENTION: Rayonnement laser visible et/ou invisible de classe 1M une fois ouvert. Ne pas<br />
regarder directement avec des instruments optiques.<br />
4. REPRODUCTION DE L’ÉTIQUETTE: ÉTIQUETTE DE PRÉCAUTION PLACÉE À L’EXTÉRIEUR DE L’APPAREIL.<br />
Produits<br />
<strong>In</strong>formations relatives à l’élimination<br />
des appareils et des piles usagés, à<br />
l’intention des utilisateurs<br />
[Union européenne seulement]<br />
Ces symboles signifient que le produit et les<br />
piles ne doivent pas être éliminés en tant<br />
que déchet ménager à la fin de son cycle<br />
de vie.<br />
Si vous souhaitez éliminer ce produit et les<br />
piles, faites-le conformément à la législation<br />
nationale ou autres règles en vigueur dans<br />
votre pays et votre municipalité.<br />
En éliminant correctement ce produit, vous<br />
contribuez à la conservation des ressources<br />
naturelles et à la prévention des éventuels<br />
effets négatifs sur l’environnement et la<br />
santé humaine.<br />
Notification:<br />
La marque Pb en dessous du symbole des<br />
piles indique que cette pile contient du<br />
plomb.<br />
<strong>JVC</strong> ne peut être tenu responsable pour toute<br />
perte de données dans un iPod/iPhone et/<br />
ou un périphérique USB à mémoire de grande<br />
capacité lors de l’utilisation de ce système.<br />
2 FRANÇAIS<br />
Pile<br />
AVERTISSEMENT:<br />
Arrêtez la voiture avant de manipuler l’appareil.<br />
Attention:<br />
Ajustez le volume de façon à pouvoir entendre<br />
les sons extérieurs à la voiture. Conduire avec<br />
le volume trop haut peut être la cause d’un<br />
accident.<br />
Précautions sur le réglage du volume:<br />
Les appareils numériques (CD/USB) produisent<br />
très peut de bruit par rapport aux autres<br />
sources. Réduisez le volume avant de<br />
reproduire ces sources numériques afin d’éviter<br />
d’endommager les enceintes par la soudaine<br />
augmentation du niveau de sortie.<br />
Précautions pour la lecture de disques à<br />
double face:<br />
La face non DVD d’un disque à “DualDisc” n’est<br />
pas compatible avec le standard “Compact Disc<br />
Digital Audio”. Par conséquent, l’utilisation de la<br />
face non DVD d’un disque à double face sur cet<br />
appareil n’est pas recommandée.<br />
Condensation : Quand une voiture est<br />
climatisée, de la condensation peut se<br />
produire sur la lentille du laser. Cela peut être<br />
la cause d’une erreur de lecture du disque.<br />
Dans ce cas, retirez le disque et attendez que<br />
l’humidité s’évapore.<br />
Température à l’intérieur de la voiture :<br />
Si votre voiture est restée garée pendant<br />
longtemps dans un climat chaud ou froid,<br />
attendez que la température à l’intérieur de<br />
la voiture redevienne normale avant d’utiliser<br />
l’appareil.<br />
FR02-19_<strong>KD</strong>-<strong>R521</strong>[E_EU]1.indd 2 9/24/10 10:00:33 AM
Comment attacher/détacher le<br />
panneau de commande<br />
Comment réinitialiser votre appareil<br />
Vos ajustements préréglés<br />
sont aussi effacés.<br />
Comment forcer l’éjection d’un<br />
disque<br />
[Maintenez pressée]<br />
• Faites attention de ne pas faire tomber le<br />
disque quand il est éjecté.<br />
• Si cela ne fonctionne pas, essayez de<br />
réinitialiser l’autoradio.<br />
Entretien<br />
Nettoyage de l’appareil<br />
Essuyez la saleté sur le panneau avec un chiffon<br />
sec au silicone ou un chiffon doux. Ne pas<br />
respecter ces précautions peut entraîner des<br />
dommages à l'appareil.<br />
Nettoyage du connecteur<br />
Essuyez toute les saletés sur le connecteur de<br />
l’appareil et le panneau. Utilisez une coton-tige<br />
ou un chiffon.<br />
À propos des disques<br />
Cet appareil ne peut lire que les CD comportant:<br />
Disques qui ne peuvent pas être utilisés:<br />
• Disques qui ne sont pas ronds<br />
• Disques avec des colorations sur la surface<br />
d’enregistrement ou disques sales<br />
• Vous ne pouvez pas reproduire un disque<br />
enregistrable/réinscriptible qui n’a pas été finalisé.<br />
(Pour le processus de finalisation, reportez-vous<br />
au logiciel utilisé pour graver le disque et au<br />
mode d’emploi du graveur de disque.)<br />
• Les CD de 3 pouces ne peuvent pas être<br />
utilisés. Essayer d’insérer un disque à l’aide d’un<br />
adaptateur peut entraîner un dysfonctionnement<br />
de l’appareil.<br />
TABLE DES MATIERES<br />
3 Comment attacher/détacher le<br />
panneau de commande<br />
3 Comment réinitialiser votre appareil<br />
3 Comment forcer l’éjection d’un disque<br />
3 Entretien<br />
3 À propos des disques<br />
4 Annulation des démonstrations des<br />
affichages<br />
4 Réglage de l’horloge<br />
5 Opérations de base<br />
6 Écoute de la radio<br />
8 Écoute d’un disque<br />
9 Connexion d’autres appareils<br />
extérieurs<br />
9 Écoute d’un autre appareil extérieur<br />
10 Écoute d’un périphérique USB<br />
11 Écoute d’un iPod/iPhone<br />
(Disponible pour le <strong>KD</strong>-<strong>R521</strong>)<br />
12 Sélection d’un mode sonore préréglé<br />
13 Utilisation des menus<br />
15 Utilisation de la télécommande<br />
(Pour le <strong>KD</strong>-<strong>R521</strong>/<strong>KD</strong>-<strong>R422</strong>/<strong>KD</strong>-R421: vendu en option)<br />
16 Guide de dépannage<br />
18 Utilisation de périphériques<br />
Bluetooth ®<br />
19 Spécifications<br />
Manipulation des disques:<br />
• Ne pas toucher la surface d’enregistrement du<br />
disque.<br />
• Ne pas coller de ruban adhésif, etc. sur les disques<br />
et ne pas utiliser de disque avec du ruban adhésif<br />
collé dessus.<br />
• N’utilisez aucun accessoire pour le disque.<br />
• Nettoyez le disque en partant du centre vers<br />
l’extérieur.<br />
• Nettoyez le disque avec un chiffon sec au silicone<br />
ou un chiffon doux. N’utilisez aucun solvant.<br />
• Pour retirer les disques de cet appareil, tirez-les<br />
horizontalement.<br />
• Retirez les ébarbures du bord du trou central du<br />
disque avant d’insérer un disque.<br />
FRANÇAIS<br />
FR02-19_<strong>KD</strong>-<strong>R521</strong>[E_EU]1.indd 3 10/8/10 4:00:31 PM<br />
3