KD-G162/KD-G161 - JVC Mobile In-Car Entertainment
KD-G162/KD-G161 - JVC Mobile In-Car Entertainment
KD-G162/KD-G161 - JVC Mobile In-Car Entertainment

Create successful ePaper yourself
Turn your PDF publications into a flip-book with our unique Google optimized e-Paper software.
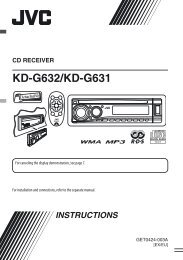
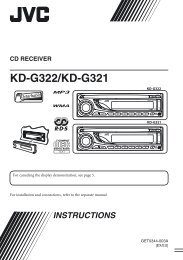
CD RECEIVER<br />
<strong>KD</strong>-<strong>G162</strong>/<strong>KD</strong>-<strong>G161</strong><br />
<strong>KD</strong>-<strong>G162</strong><br />
<strong>KD</strong>-<strong>G161</strong><br />
For canceling the display demonstration, see page 5.<br />
For installation and connections, refer to the separate manual.<br />
INSTRUCTIONS<br />
<strong>KD</strong>-<strong>G162</strong><br />
<strong>KD</strong>-<strong>G161</strong><br />
GET0334-003A<br />
[EX/EU]
ENGLISH<br />
2<br />
Thank you for purchasing a <strong>JVC</strong> product.<br />
Please read all instructions carefully before operation, to ensure your complete understanding and to<br />
obtain the best possible performance from the unit.<br />
IMPORTANT FOR LASER PRODUCTS<br />
1. CLASS 1 LASER PRODUCT<br />
2. CAUTION: Do not open the top cover. There are no user serviceable parts inside the unit; leave<br />
all servicing to qualified service personnel.<br />
3. CAUTION: Visible and invisible laser radiation when open and interlock failed or defeated.<br />
Avoid direct exposure to beam.<br />
4. REPRODUCTION OF LABEL: CAUTION LABEL, PLACED OUTSIDE THE UNIT.<br />
Warning:<br />
If you need to operate the unit while driving,<br />
be sure to look ahead carefully or you may be<br />
involved in a traffic accident.<br />
How to reset your unit<br />
• Your preset adjustments will also be erased.<br />
How to forcibly eject a disc<br />
• If this does not work, reset your unit.<br />
• Be careful not to drop the disc when it ejects.<br />
How to detach/attach the control<br />
panel<br />
Detaching...<br />
Attaching...<br />
Note: Only for [EX] model users in UK and<br />
European countries<br />
For security reasons, a numbered ID card<br />
is provided with this unit, and the same ID<br />
number is imprinted on the unit’s chassis.<br />
Keep the card in a safe place, as it will help the<br />
authorities to identify your unit if stolen.
How to read this manual<br />
• Button operations are mainly explained with<br />
the illustrations in the table below.<br />
• is used to indicate an indicator is<br />
displayed for the correspnding operation.<br />
• Some related tips and notes are explained in<br />
“More about this unit” (see pages 14 and 15).<br />
Press briefly.<br />
Press repeatedly.<br />
Press and hold until your<br />
desired response begins.<br />
Press and hold both<br />
buttons at the same time.<br />
How to use the M MODE button<br />
If you press M MODE, the unit goes into<br />
functions mode, then the number buttons work<br />
as different function buttons.<br />
Ex.: When number button 2 works as<br />
MO (monaural) button.<br />
Time countdown indicator<br />
Press either<br />
one.<br />
To use these buttons for their original<br />
functions again after pressing M MODE, wait<br />
for 5 seconds without pressing any of these<br />
buttons until the functions mode is cleared or<br />
press M MODE again.<br />
CONTENTS<br />
Control panel — <strong>KD</strong>-<strong>G162</strong> and <strong>KD</strong>-<strong>G161</strong> ........ 4<br />
Getting started ................................. 5<br />
Basic operations .................................................... 5<br />
Radio operations .............................. 6<br />
FM RDS operations ............................ 7<br />
Searching for your favorite FM RDS programme ... 7<br />
Disc operations ................................. 9<br />
Playing a disc in the unit ...................................... 9<br />
Sound adjustments ........................... 10<br />
General settings — PSM ................... 11<br />
Maintenance .................................... 13<br />
More about this unit ......................... 14<br />
Troubleshooting ............................... 16<br />
Specifications ................................... 17<br />
Caution on volume setting:<br />
Discs produce very little noise compared<br />
with other sources. Lower the volume<br />
before playing a disc to avoid damaging<br />
the speakers by the sudden increase of the<br />
output level.<br />
For safety...<br />
• Do not raise the volume level too much, as<br />
this will block outside sounds, making driving<br />
dangerous.<br />
• Stop the car before performing any<br />
complicated operations.<br />
Temperature inside the car...<br />
If you have parked the car for a long time in hot<br />
or cold weather, wait until the temperature in<br />
the car becomes normal before operating the<br />
unit.<br />
ENGLISH<br />
3
ENGLISH<br />
4<br />
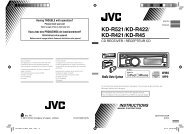
Control panel — <strong>KD</strong>-G612/<strong>KD</strong>-G611/<strong>KD</strong>-G511<br />
<strong>KD</strong>-<strong>G162</strong> and <strong>KD</strong>-<strong>G161</strong><br />
Display window<br />
1 (standby/on/attenuator) button<br />
2 SOURCE button<br />
3 BAND button<br />
4 Loading slot<br />
5 Display window<br />
6 0 (eject) button<br />
7 TP/PTY (traffic programme/programme<br />
type) button<br />
8 ¢/4 buttons<br />
9 Control dial<br />
p SEL (select) button<br />
q DISP (display) button<br />
w EQ (equalizer) button<br />
e MO (monaural) button<br />
r SSM (Strong-station Sequential Memory)<br />
button<br />
t Number buttons<br />
y RPT (repeat) button<br />
u RND (random) button<br />
Parts identification<br />
i M MODE button<br />
o (control panel release) button<br />
Display window<br />
; DISC indicator<br />
a RND (disc random) indicator<br />
s RPT (repeat) indicator<br />
d LOUD (loudness) indicator<br />
f EQ (equalizer) indicator<br />
g Sound mode (C-EQ: custom equalizer)<br />
indicators—JAZZ, CLASSIC, HIP HOP,<br />
POPS, ROCK, USER<br />
h Source display / Volume level indicator /<br />
Time countdown indicator<br />
j Main display<br />
k RDS indicators—TP, PTY, AF, REG<br />
l Tuner reception indicators—ST (stereo),<br />
MO (monaural)
Getting started<br />
Basic operations<br />
~ Turn on the power.<br />
Ÿ<br />
* You cannot select “DISC” as the<br />
playback source if there is no disc in<br />
the unit.<br />
! For FM/AM tuner<br />
⁄ Adjust the volume.<br />
Volume level appears.<br />
Volume level indicator<br />
@ Adjust the sound as you want. (See<br />
page 10.)<br />
To drop the volume in a<br />
moment (ATT)<br />
To restore the sound,<br />
press it again.<br />
To turn off the power<br />
Basic settings<br />
• See also “General settings — PSM” on pages<br />
11 and 12.<br />
1<br />
2<br />
1 Canceling the display<br />
demonstrations<br />
Select “DEMO,” then “DEMO OFF.”<br />
2 Setting the clock<br />
Select “CLOCK H” (hour), then adjust<br />
the hour.<br />
Select “CLOCK M” (minute), then<br />
adjust the minute.<br />
Select “24H/12H,” then “24H” (hour) or<br />
“12H” (hour).<br />
3 Finish the procedure.<br />
To check the current clock time while...<br />
The power is turned off<br />
Listening to...<br />
An FM (non-RDS) or AM station:<br />
Frequency Ô Clock<br />
An FM RDS station:<br />
Station name (PS) = Station Frequency =<br />
Programme type (PTY) = Clock = (back to<br />
the beginning)<br />
Listening to a disc...<br />
Elapsed playing time<br />
with track number Ô<br />
Clock<br />
ENGLISH<br />
5
ENGLISH<br />
6<br />
Radio operations<br />
~<br />
Ÿ<br />
Selected band appears.<br />
Lights up when receiving an FM stereo<br />
broadcast with sufficient signal strength.<br />
! Start searching for a station.<br />
When a station is received,<br />
searching stops.<br />
To stop searching, press the<br />
same button again.<br />
To tune in to a station manually<br />
<strong>In</strong> step ! above...<br />
1<br />
2 Select the desired station frequencies.<br />
When an FM stereo broadcast is hard to<br />
receive<br />
Lights up when monaural mode is activated.<br />
Reception improves, but stereo effect will be<br />
lost.<br />
To restore the stereo effect, repeat the same<br />
procedure. “MONO OFF” appears and the MO<br />
indicator goes off.<br />
Storing stations in memory<br />
You can preset six stations for each band.<br />
FM station automatic presetting —<br />
SSM (Strong-station Sequential<br />
Memory)<br />
1 Select the FM band (FM1 – FM3) you<br />
want to store into.<br />
2<br />
3<br />
“SSM” flashes, then disappears when<br />
automatic presetting is over.<br />
Local FM stations with the strongest signals are<br />
searched and stored automatically in the FM<br />
band.
Manual presetting<br />
Ex.: Storing FM station of 92.5 MHz into preset<br />
number 4 of the FM1 band.<br />
1<br />
2<br />
3<br />
1<br />
Preset number flashes for a while.<br />
Listening to a preset station<br />
2 Select the preset station (1 – 6) you<br />
want.<br />
FM RDS operations<br />
What you can do with RDS<br />
RDS (Radio Data System) allows FM stations<br />
to send an additional signal along with their<br />
regular programme signals.<br />
By receiving the RDS data, this unit can do the<br />
following:<br />
• Programme Type (PTY) Search (see the<br />
following)<br />
• TA (Traffic Announcement) and PTY<br />
Standby Receptions (see pages 8 and 12)<br />
• Tracing the same programme automatically<br />
—Network-Tracking Reception (see page 9)<br />
• Programme Search (see page 12)<br />
Searching for your favorite<br />
FM RDS programme<br />
You can tune in to a station broadcasting your<br />
favorite programme by searching for a PTY code.<br />
• To store your favorite programme types, see<br />
page 8.<br />
~ The last selected PTY<br />
code appears.<br />
Ÿ Select one of your favorite<br />
programme types.<br />
or<br />
Select one of the PTY codes (see<br />
page 15).<br />
To be continued...<br />
ENGLISH<br />
7
ENGLISH<br />
8<br />
! Start searching for your favorite<br />
programme.<br />
If there is a station<br />
broadcasting a programme<br />
of the same PTY code as you<br />
have selected, that station is<br />
tuned in.<br />
Storing your favorite programme<br />
types<br />
You can store six favorite programme types.<br />
Preset programme types in the number buttons<br />
(1 to 6):<br />
1 Select a PTY code (see page 7).<br />
2 Select the preset number (1 – 6) you<br />
want to store into.<br />
Ex.: When “ROCK M” is selected<br />
3 Repeat steps 1 and 2 to store other<br />
PTY codes into other preset numbers.<br />
4 Finish the procedure.<br />
Using the standby receptions<br />
TA Standby Reception<br />
TA Standby Reception allows the unit to switch<br />
temporarily to Traffic Announcement (TA)<br />
from any source other than AM.<br />
The volume changes to the preset TA volume<br />
level if the current level is lower than the preset<br />
level (see page 12).<br />
To activate TA Standby Reception<br />
The TP (Traffic Programme)<br />
indicator either lights up or<br />
flashes.<br />
• If the TP indicator lights up, TA Standby<br />
Reception is activated.<br />
• If the TP indicator flashes, TA Standby<br />
Reception is not yet activated. (This occurs<br />
when you are listening to an FM station<br />
without the RDS signals required for TA<br />
Standby Reception.)<br />
To activate TA Standby Reception, tune in to<br />
another station providing these signals. The<br />
TP indicator will stop flashing and remain lit.<br />
To deactivate the TA Standby Reception<br />
The TP indicator goes off.<br />
PTY Standby Reception<br />
PTY Standby Reception allows the unit to<br />
switch temporarily to your favorite PTY<br />
programme from any source other than AM.<br />
To activate and select your favorite PTY code<br />
for PTY Standby Reception, see page 12.<br />
The PTY indicator either lights up or flashes.<br />
• If the PTY indicator lights up, PTY Standby<br />
Reception is activated.<br />
• If the PTY indicator flashes, PTY Standby<br />
Reception is not yet activated.<br />
To activate PTY Standby Reception, tune in<br />
to another station providing these signals. The<br />
PTY indicator will stop flashing and remain lit.<br />
To deactivate the PTY Standby Reception,<br />
select “OFF” for the PTY code (see page 12).<br />
The PTY indicator goes off.
Tracing the same programme—<br />
Network-Tracking Reception<br />
When driving in an area where FM reception<br />
is not sufficient enough, this unit automatically<br />
tunes in to another FM RDS station of the<br />
same network, possibly broadcasting the same<br />
programme with stronger signals (see the<br />
illustration on page 15).<br />
When shipped from the factory, Network-<br />
Tracking Reception is activated.<br />
To change the Network-Tracking Reception<br />
setting, see “AF-REG” on page 11.<br />
Disc operations<br />
Playing a disc in the unit<br />
All tracks will be played repeatedly until you<br />
change the source or eject the disc.<br />
To stop play and eject the<br />
disc<br />
To fast-forward or reverse<br />
the track<br />
To go to the next or<br />
previous tracks<br />
To locate a particular track<br />
To select a number from 01 – 06:<br />
To select a number from 07 – 12:<br />
Prohibiting disc ejection<br />
You can lock a disc in the loading slot.<br />
To cancel the prohibition, repeat the same<br />
procedure.<br />
Selecting the playback modes<br />
You can use only one of the following playback<br />
modes at a time.<br />
1<br />
2 Select your desired playback mode.<br />
7 Repeat play<br />
Mode Plays repeatedly<br />
TRK RPT : The current track.<br />
RPT OFF : Cancels.<br />
7 Random play<br />
Mode Plays at random<br />
DISC RND : All tracks of the current disc.<br />
RND OFF : Cancels.<br />
ENGLISH<br />
9
ENGLISH<br />
10<br />
Sound adjustments<br />
You can select a preset sound mode suitable to<br />
the music genre (C-EQ: custom equalizer).<br />
1<br />
2<br />
Preset values<br />
<strong>In</strong>dication (For)<br />
Ex.: When “ROCK” is selected<br />
BAS TRE LOUD<br />
(bass) (treble) (loudness)<br />
USER (Flat sound) 00 00 OFF<br />
ROCK<br />
(Rock or disco music)<br />
+03 +01 ON<br />
CLASSIC<br />
(Classical music)<br />
+01 –02 OFF<br />
POPS (Light music) +04 +01 OFF<br />
HIP HOP<br />
(Funk or rap music)<br />
+02 00 ON<br />
JAZZ (Jazz music) +02 +03 OFF<br />
Adjusting the sound<br />
You can adjust the sound characteristics to your<br />
preference.<br />
1<br />
2<br />
<strong>In</strong>dication, [Range]<br />
BAS* 1 (bass), [–06 to +06]<br />
Adjust the bass.<br />
TRE* 1 (treble), [–06 to +06]<br />
Adjust the treble.<br />
FAD* 2 (fader), [R06 to F06]<br />
Adjust the front and rear speaker balance.<br />
BAL (balance), [L06 to R06]<br />
Adjust the left and right speaker balance.<br />
LOUD* 1 (loudness), [LOUD ON or LOUD OFF]<br />
Boost low and high frequencies to produce a<br />
well-balanced sound at low volume level.<br />
VOL (volume), [00 to 30 or 50* 3]<br />
Adjust the volume.<br />
* 1 When you adjust the bass, treble, or loudness,<br />
the adjustment you have made is stored for<br />
the currently selected sound mode (C-EQ)<br />
including “USER.”<br />
* 2 If you are using a two-speaker system, set the<br />
fader level to “00.”<br />
* 3 Depending on the amplifier gain control<br />
setting. (See page 12 for details.)
General settings — PSM<br />
You can change PSM (Preferred Setting Mode)<br />
items listed in the table below.<br />
1<br />
2 Select a PSM item.<br />
<strong>In</strong>dications Selectable settings, [reference page]<br />
DEMO<br />
Display demonstration<br />
CLOCK H<br />
Hour adjustment<br />
CLOCK M<br />
Minute adjustment<br />
24H/12H<br />
Time display mode<br />
CLK ADJ<br />
Clock adjustment<br />
AF-REG<br />
Alternative frequency/<br />
regionalization reception<br />
DEMO ON : [<strong>In</strong>itial]; Display demonstration will be activated<br />
automatically if no operation is done for about<br />
20 seconds, [5].<br />
DEMO OFF : Cancels.<br />
0 – 23 (1 – 12), [5]<br />
[<strong>In</strong>itial: 0 (0:00)]<br />
00 – 59, [5]<br />
[<strong>In</strong>itial: 00 (0:00)]<br />
12H O 24H, [5]<br />
[<strong>In</strong>itial: 24H]<br />
3 Adjust the PSM item selected.<br />
4 Repeat steps 2 and 3 to adjust other<br />
PSM items if necessary.<br />
5 Finish the procedure.<br />
AUTO : [<strong>In</strong>itial]; The built-in clock is automatically adjusted<br />
using the CT (clock time) data in the RDS signal.<br />
OFF : Cancels.<br />
When the received signals from the current FM RDS station become<br />
weak...<br />
AF : [<strong>In</strong>itial]; Switches to another station (the programme<br />
may differ from the one currently received), [9].<br />
• The AF indicator lights up.<br />
AF REG : Switches to another station broadcasting the same<br />
programme.<br />
• The AF and REG indicators light up.<br />
OFF : Cancels.<br />
To be continued...<br />
ENGLISH<br />
11
ENGLISH<br />
12<br />
<strong>In</strong>dications Selectable settings, [reference page]<br />
PTY-STBY<br />
PTY standby<br />
TA VOL<br />
Traffic announcement<br />
volume<br />
P-SEARCH<br />
Programme search<br />
TEL<br />
Telephone muting<br />
AMP GAIN<br />
Amplifier gain control<br />
IF BAND<br />
<strong>In</strong>termediate frequency<br />
band<br />
* Depends on the amplifier gain control.<br />
Activates PTY Standby Reception with one of the PTY codes, [8].<br />
OFF [<strong>In</strong>itial] = PTY codes, [15] = (back to the beginning)<br />
[<strong>In</strong>itial: VOL 15]; VOL 00 — VOL 30 or 50*, [8]<br />
ON : Using the AF data, the unit tunes in to another<br />
frequency broadcasting the same programme as the<br />
original preset RDS station is if the preset station<br />
signals are not sufficient.<br />
OFF : [<strong>In</strong>itial]; Cancels.<br />
MUTING 1/MUTING 2 : Select either one which mutes the sounds<br />
while using a cellular phone.<br />
OFF : [<strong>In</strong>itial]; Cancels.<br />
You can change the maximum volume level of this unit.<br />
LOW PWR : VOL 00 – VOL 30 (Select this if the maximum power<br />
of the speaker is less than 45 W to prevent them from<br />
damaging the speaker.)<br />
HIGH PWR : [<strong>In</strong>itial]; VOL 00 – VOL 50<br />
AUTO : [<strong>In</strong>itial]; <strong>In</strong>crease the tuner selectivity to reduce<br />
interference noises between close stations. (Stereo<br />
effect may be lost.)<br />
WIDE : Subject to the interference noises from adjacent<br />
stations, but sound quality will not be degraded and<br />
maintains the stereo effect.
Maintenance<br />
How to clean the connectors<br />
Frequent detachment will deteriorate the<br />
connectors.<br />
To minimize this possibility, periodically wipe<br />
the connectors with a cotton swab or cloth<br />
moistened with alcohol, being careful not to<br />
damage the connectors.<br />
Connector<br />
Moisture condensation<br />
Moisture may condense on the lens inside the<br />
CD player in the following cases:<br />
• After starting the heater in the car.<br />
• If it becomes very humid inside the car.<br />
Should this occur, the CD player may<br />
malfunction. <strong>In</strong> this case, eject the disc and<br />
leave the unit turned on for a few hours until<br />
the moisture evaporates.<br />
How to handle discs<br />
When removing a disc from Center holder<br />
its case, press down the center<br />
holder of the case and lift the<br />
disc out, holding it by the edges.<br />
• Always hold the disc by the<br />
edges. Do not touch its recording surface.<br />
When storing a disc into its case, gently insert<br />
the disc around the center holder (with the<br />
printed surface facing up).<br />
• Make sure to store discs into the cases after<br />
use.<br />
To keep discs clean<br />
A dirty disc may not play correctly.<br />
If a disc does become dirty, wipe it<br />
with a soft cloth in a straight line<br />
from center to edge.<br />
• Do not use any solvent (for example,<br />
conventional record cleaner, spray, thinner,<br />
benzine, etc.) to clean discs.<br />
To play new discs<br />
New discs may have some rough<br />
spots around the inner and outer<br />
edges. If such a disc is used, this<br />
unit may reject the disc.<br />
To remove these rough spots, rub the edges<br />
with a pencil or ball-point pen, etc.<br />
Do not use the following discs:<br />
Warped disc<br />
Sticker<br />
Disc<br />
Sticker residue<br />
Stick-on label<br />
ENGLISH<br />
13
ENGLISH<br />
14<br />
More about this unit<br />
Basic operations<br />
Turning on the power<br />
• By pressing SOURCE on the unit, you can<br />
also turn on the power. If the source is ready,<br />
playback also starts.<br />
Turning off the power<br />
• If you turn off the power while listening to a<br />
disc, disc play will start from where playback<br />
has been stopped previously, next time you<br />
turn on the power.<br />
Selecting the sources<br />
• When no disc is loaded in the unit, “DISC”<br />
cannot be selected.<br />
Tuner operations<br />
Storing stations in memory<br />
• During SSM search...<br />
– All previously stored stations are erased and<br />
stations are stored newly.<br />
– Received stations are preset in No. 1 (lowest<br />
frequency) to No. 6 (highest frequency).<br />
– When SSM is over, the station stored in<br />
No. 1 will be automatically tuned in.<br />
• When storing a station manually, the<br />
previously preset station is erased when a new<br />
station is stored in the same preset number.<br />
FM RDS operations<br />
• Network-Tracking Reception requires<br />
two types of RDS signals—PI (Programme<br />
Identification) and AF (Alternative<br />
Frequency) to work correctly. Without<br />
receiving these data correctly, Network-<br />
Tracking Reception will not operate correctly.<br />
• If a Traffic Announcement is received, the<br />
volume level automatically changes to the<br />
preset level (TA VOL) if the current level is<br />
lower than the preset level.<br />
• When Alternative Frequency Reception<br />
is activated (with AF selected), Network-<br />
Tracking Reception is also activated<br />
automatically. On the other hand, Network-<br />
Tracking Reception cannot be deactivated<br />
without deactivating Alternative Frequency<br />
Reception. (See page 11.)<br />
• If you want to know more about RDS, visit<br />
«http://www.rds.org.uk».<br />
Disc operations<br />
Caution for DualDisc playback<br />
• The Non-DVD side of a “DualDisc” does<br />
not comply with the “Compact Disc Digital<br />
Audio” standard. Therefore, the use of Non-<br />
DVD side of a DualDisc on this product may<br />
not be recommended.<br />
General<br />
• This unit has been designed to reproduce<br />
CDs, and CD-Rs (Recordable)/CD-RWs<br />
(Rewritable) in audio CD (CD-DA format).<br />
• When a disc has been loaded, selecting<br />
“DISC” for the playback source starts disc<br />
play.<br />
<strong>In</strong>serting a disc<br />
• When a disc is inserted upside down, the disc<br />
automatically ejects.<br />
• Do not insert 8 cm discs (single CD) and<br />
unusual shape discs (heart, flower, etc.) into<br />
the loading slot.
Playing a CD-R or CD-RW<br />
• Use only “finalized” CD-Rs or CD-RWs.<br />
• This unit can play back multi-session discs;<br />
however, unclosed sessions will be skipped<br />
while playing.<br />
• Some CD-Rs or CD-RWs may not play<br />
back on this unit because of their disc<br />
characteristics, or for the following causes:<br />
– Discs are dirty or scratched.<br />
– Moisture condensation occurs on the lens<br />
inside the unit.<br />
– The pickup lens inside the unit is dirty.<br />
– CD-R/CD-RW on which the files are<br />
written with “Packet Write” method.<br />
– There are improper recording conditions<br />
(missing data, etc.) or media conditions<br />
(stained, scratched, warped, etc.).<br />
• CD-RWs may require a longer readout time<br />
since the reflectance of CD-RWs is lower than<br />
that of regular CDs.<br />
• Do not use the following CD-Rs or CD-RWs:<br />
– Discs with stickers, labels, or protective seal<br />
stuck to the surface.<br />
– Discs on which labels can be directly<br />
printed by an ink jet printer.<br />
Using these discs under high temperatures or<br />
high humidities may cause malfunctions or<br />
damage to the unit.<br />
Changing the source<br />
• If you change the source, playback also stops<br />
(without ejecting the disc).<br />
Next time you select “DISC” for the playback<br />
source, disc play starts from where it has been<br />
stopped previously.<br />
Ejecting a disc<br />
• If the ejected disc is not removed within<br />
15 seconds, the disc is automatically inserted<br />
again into the loading slot to protect it from<br />
dust. (Disc will not play this time.)<br />
General settings—PSM<br />
• If you change the “AMP GAIN” setting from<br />
“HIGH PWR” to “LOW PWR” while the<br />
volume level is set higher than “VOL 30,” the<br />
unit automatically changes the volume level to<br />
“VOL 30.”<br />
PTY codes<br />
NEWS, AFFAIRS, INFO, SPORT, EDUCATE, DRAMA, CULTURE,<br />
SCIENCE, VARIED, POP M (music), ROCK M (music), EASY<br />
M (music), LIGHT M (music), CLASSICS, OTHER M (music),<br />
WEATHER, FINANCE, CHILDREN, SOCIAL, RELIGION, PHONE<br />
IN, TRAVEL, LEISURE, JAZZ, COUNTRY, NATION M (music),<br />
OLDIES, FOLK M (music), DOCUMENT<br />
Network-Tracking Reception<br />
Programme A broadcasting on different frequency areas<br />
(01 – 05)<br />
ENGLISH<br />
15
ENGLISH<br />
16<br />
Troubleshooting<br />
What appears to be trouble is not always serious. Check the following points before calling a service<br />
center.<br />
General<br />
FM/AM<br />
Disc playback<br />
Symptoms Remedies/Causes<br />
• Sound cannot be heard from the<br />
speakers.<br />
• Adjust the volume to the optimum level.<br />
• Check the cords and connections.<br />
• The unit does not work at all. Reset the unit (see page 2).<br />
• SSM automatic presetting does not<br />
work.<br />
Store stations manually.<br />
• Static noise while listening to the radio. Connect the aerial firmly.<br />
• Disc cannot be played back. <strong>In</strong>sert the disc correctly.<br />
• CD-R/CD-RW cannot be played back.<br />
• Tracks on the CD-R/CD-RW cannot be<br />
skipped.<br />
• Disc can be neither played back nor<br />
ejected.<br />
• <strong>In</strong>sert a finalized CD-R/CD-RW.<br />
• Finalize the CD-R/CD-RW with the component<br />
which you used for recording.<br />
• Unlock the disc (see page 9).<br />
• Eject the disc forcibly (see page 2).<br />
• Disc sound is sometimes interrupted. • Stop playback while driving on rough roads.<br />
• Change the disc.<br />
• Check the cords and connections.<br />
• “NO DISC” appears on the display. <strong>In</strong>sert a playable disc into the loading slot.
Specifications<br />
AUDIO AMPLIFIER SECTION<br />
Maximum Power Output:<br />
Front: 45 W per channel<br />
Rear: 45 W per channel<br />
Continuous Power Output (RMS):<br />
Front: 17 W per channel into 4 Ω, 40 Hz<br />
to 20 000 Hz at no more than 0.8%<br />
total harmonic distortion.<br />
Rear: 17 W per channel into 4 Ω, 40 Hz<br />
to 20 000 Hz at no more than 0.8%<br />
total harmonic distortion.<br />
Load Impedance: 4 Ω (4 Ω to 8 Ω allowance)<br />
Tone Control Range:<br />
Bass: ±10 dB at 100 Hz<br />
Treble: ±10 dB at 10 kHz<br />
Frequency Response: 40 Hz to 20 000 Hz<br />
Signal-to-Noise Ratio: 70 dB<br />
Line-Out Level/Impedance:<br />
2.0 V/20 kΩ load (full scale)<br />
Output Impedance: 1 kΩ<br />
TUNER SECTION<br />
Frequency Range:<br />
FM: 87.5 MHz to 108.0 MHz<br />
AM: (MW) 522 kHz to 1 620 kHz<br />
(LW) 144 kHz to 279 kHz<br />
[FM Tuner]<br />
Usable Sensitivity: 11.3 dBf (1.0 μV/75 Ω)<br />
50 dB Quieting Sensitivity:<br />
16.3 dBf (1.8 μV/75 Ω)<br />
Alternate Channel Selectivity (400 kHz): 65 dB<br />
Frequency Response: 40 Hz to 15 000 Hz<br />
Stereo Separation: 30 dB<br />
Capture Ratio: 1.5 dB<br />
[MW Tuner]<br />
Sensitivity: 20 μV<br />
Selectivity: 35 dB<br />
[LW Tuner]<br />
Sensitivity: 50 μV<br />
CD PLAYER SECTION<br />
Type: Compact disc player<br />
Signal Detection System: Non-contact optical<br />
pickup (semiconductor laser)<br />
Number of Channels: 2 channels (stereo)<br />
Frequency Response: 5 Hz to 20 000 Hz<br />
Dynamic Range: 96 dB<br />
Signal-to-Noise Ratio: 98 dB<br />
Wow and Flutter: Less than measurable limit<br />
GENERAL<br />
Power Requirement:<br />
Operating Voltage:<br />
DC 14.4 V (11 V to 16 V allowance)<br />
Grounding System: Negative ground<br />
Allowable Operating Temperature:<br />
0°C to +40°C<br />
Dimensions (W × H × D):<br />
<strong>In</strong>stallation Size (approx.):<br />
182 mm × 52 mm × 150 mm<br />
Panel Size (approx.):<br />
188 mm × 58 mm × 11 mm<br />
Mass (approx.):<br />
1.2 kg (excluding accessories)<br />
Design and specifications are subject to change<br />
without notice.<br />
ENGLISH<br />
17
Having TROUBLE with operation?<br />
Please reset your unit<br />
EN, FR<br />
© 2005 Victor Company of Japan, Limited<br />
Refer to page of How to reset your unit<br />
1005DTSMDTJEIN