Strong at the finish - StarMark Cabinetry
Strong at the finish - StarMark Cabinetry
Strong at the finish - StarMark Cabinetry

You also want an ePaper? Increase the reach of your titles
YUMPU automatically turns print PDFs into web optimized ePapers that Google loves.
<strong>Strong</strong> <strong>at</strong><br />
<strong>the</strong> <strong>finish</strong><br />
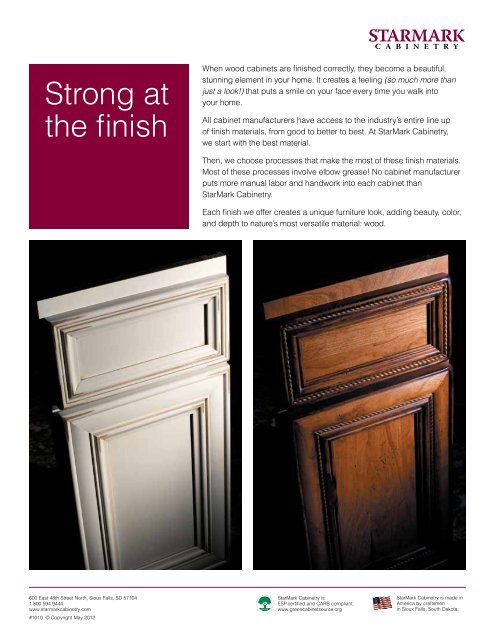
When wood cabinets are <strong>finish</strong>ed correctly, <strong>the</strong>y become a beautiful,<br />
stunning element in your home. It cre<strong>at</strong>es a feeling (so much more than<br />
just a look!) th<strong>at</strong> puts a smile on your face every time you walk into<br />
your home.<br />
All cabinet manufacturers have access to <strong>the</strong> industry’s entire line up<br />
of <strong>finish</strong> m<strong>at</strong>erials, from good to better to best. At <strong>StarMark</strong> <strong>Cabinetry</strong>,<br />
we start with <strong>the</strong> best m<strong>at</strong>erial.<br />
Then, we choose processes th<strong>at</strong> make <strong>the</strong> most of <strong>the</strong>se <strong>finish</strong> m<strong>at</strong>erials.<br />
Most of <strong>the</strong>se processes involve elbow grease! No cabinet manufacturer<br />
puts more manual labor and handwork into each cabinet than<br />
<strong>StarMark</strong> <strong>Cabinetry</strong>.<br />
Each <strong>finish</strong> we offer cre<strong>at</strong>es a unique furniture look, adding beauty, color,<br />
and depth to n<strong>at</strong>ure’s most vers<strong>at</strong>ile m<strong>at</strong>erial: wood.<br />
600 East 48th Street North, Sioux Falls, SD 57104<br />
1.800.594.9444<br />
www.starmarkcabinetry.com<br />
#1010 © Copyright May 2012<br />
<strong>StarMark</strong> <strong>Cabinetry</strong> is<br />
ESP certified and CARB compliant.<br />
www.greencabinetsource.org<br />
<strong>StarMark</strong> <strong>Cabinetry</strong> is made in<br />
America by craftsmen<br />
in Sioux Falls, South Dakota.
Finishes<br />
Stain<br />
A stain is a basic <strong>finish</strong> th<strong>at</strong> adds color to wood while revealing<br />
<strong>the</strong> beauty of <strong>the</strong> grain. The same stain looks different on each<br />
specie. <strong>StarMark</strong> <strong>Cabinetry</strong> species are Alder, Rustic Alder,<br />
Cherry, Rustic Cherry, Hickory, Rustic Hickory, Lyptus, Maple,<br />
Oak and Quarter Sawn Oak.<br />
For <strong>the</strong> richest, most consistent color coverage, we apply <strong>the</strong><br />
stain and <strong>the</strong>n hand rub it into <strong>the</strong> wood. There are no machine<br />
shortcuts: elbow grease is <strong>the</strong> only way to coax <strong>the</strong> luster from<br />
stained wood.<br />
Tinted Varnish<br />
The best way to describe Tinted Varnish is to say it gives<br />
cabinetry a paint-like <strong>finish</strong>. Throughout <strong>the</strong> country, this type of<br />
<strong>finish</strong> is also called “enamel” or “opaque”. We use Tinted Varnish<br />
on maple and oak cabinetry, and each specie yields a different<br />
look. The grain of maple wood is concealed by Tinted Varnish,<br />
while <strong>the</strong> grain of oak shows through Tinted Varnish.<br />
Glaze<br />
Glaze adds depth to stain and Tinted Varnish. The profiles on a<br />
door, moulding, corbels and o<strong>the</strong>r details on cabinetry, such as<br />
rosettes, shells or a fleur-de-lis, are stunning when glazed. The<br />
best way to glaze? Yes, more handwork. We apply a wet glaze<br />
by hand and <strong>the</strong>n wipe it off by hand. This handwork helps <strong>the</strong><br />
glaze settle into <strong>the</strong> open grain areas. Also, when a craftsman<br />
wipes off <strong>the</strong> glaze, he or she can best use <strong>the</strong> glaze to define<br />
<strong>the</strong> details in th<strong>at</strong> particular kitchen.<br />
O<strong>the</strong>r cabinet manufactures are s<strong>at</strong>isfied with shortcuts:<br />
using a dry glaze, applying <strong>the</strong> glaze with a brush, or even<br />
faking <strong>the</strong> look with markers. We take pride in handcrafting<br />
every component—door, drawer, moulding, panels—<br />
th<strong>at</strong> goes into your kitchen.<br />
We currently have six glazes: Bronze, Chocol<strong>at</strong>e, Ebony, Nickel,<br />
L<strong>at</strong>te and Vanilla.<br />
DISTRESSING<br />
So a stain, a Tinted Varnish and a glaze will put color on your<br />
cabinetry. You can go fur<strong>the</strong>r and add p<strong>at</strong>ina to <strong>the</strong> cabinetry.<br />
For instance, a maple door <strong>finish</strong>ed in White Tinted Varnish with<br />
Chocol<strong>at</strong>e glaze can receive <strong>the</strong> Cottage tre<strong>at</strong>ment, resulting in<br />
worn edges, rounded corners and light chain distressing.<br />
We also have Amaretto, Bordeaux, Ch<strong>at</strong>eaux, Linen, O<strong>at</strong>meal,<br />
Villa, Old World Distressing, and à la carte distressing. All<br />
characteristics, for example, worm holes, rasping, knife marks,<br />
are added by hand. There is no machine and <strong>the</strong>re is no robot<br />
th<strong>at</strong> can successfully duplic<strong>at</strong>e wh<strong>at</strong> <strong>the</strong> eyes and hands of an<br />
artisan achieve through personal handling of <strong>the</strong> cabinetry.<br />
The Process<br />
Depending on <strong>the</strong> <strong>finish</strong> you choose, your cabinetry may go<br />
through 8, 10 or 14 steps in our factory so we can lay down <strong>the</strong><br />
most beautiful, smooth and durable <strong>finish</strong> possible. “Baking” a<br />
<strong>finish</strong> is necessary to achieve <strong>the</strong> most durable <strong>finish</strong>, so all of<br />
our <strong>finish</strong>es require <strong>the</strong> cabinetry component to go through our<br />
industrial oven <strong>at</strong> least twice.<br />
More important than <strong>the</strong> number of steps in our <strong>finish</strong> process are<br />
our employees. We have inspectors <strong>at</strong> every step, including <strong>the</strong><br />
final step, to ensure quality. All employees are empowered to pull<br />
any component off <strong>the</strong> line if it does not meet <strong>the</strong>ir standards.<br />
Terminology<br />
C<strong>at</strong>alyz<strong>at</strong>ion<br />
<strong>StarMark</strong> <strong>Cabinetry</strong>’s <strong>finish</strong>es are C<strong>at</strong>alyzed Conversion Varnishes.<br />
When <strong>the</strong> acidic c<strong>at</strong>alyst is mixed with <strong>the</strong> sealer or topco<strong>at</strong>, it<br />
causes <strong>the</strong>m to cure (dry). Without a c<strong>at</strong>alyst, <strong>the</strong> sealer and top<br />
co<strong>at</strong> would be sticky.<br />
Seal Sanding<br />
Seal sanding gives wood a scr<strong>at</strong>ch p<strong>at</strong>tern so <strong>the</strong> top co<strong>at</strong> will<br />
stick to <strong>the</strong> sealer. It cre<strong>at</strong>es a mechanical bond between <strong>the</strong><br />
sealer and top co<strong>at</strong>. Sanding also smooths <strong>the</strong> sealer and knocks<br />
down any raised fibers. This helps <strong>the</strong> top co<strong>at</strong> lay fl<strong>at</strong>. The end<br />
result is <strong>the</strong> smoo<strong>the</strong>st <strong>finish</strong> possible. At <strong>StarMark</strong> <strong>Cabinetry</strong>,<br />
all seal sanding is done by hand. It takes more time, but no o<strong>the</strong>r<br />
method works as well.<br />
Sealer<br />
Sealer does just th<strong>at</strong>, it seals <strong>the</strong> wood. When <strong>the</strong> top co<strong>at</strong> is<br />
applied, it lies on top of <strong>the</strong> sealer and does not soak into <strong>the</strong><br />
wood. Without sealer, <strong>the</strong> top co<strong>at</strong> would soak into <strong>the</strong> wood,<br />
and <strong>the</strong> wood would appear dull and feel rough.<br />
Top co<strong>at</strong><br />
The top co<strong>at</strong> lies on top of <strong>the</strong> sealer and Tinted Varnish. It is<br />
responsible for giving <strong>the</strong> cabinets a smooth, even, KCMAapproved<br />
durable <strong>finish</strong>. The top co<strong>at</strong> for Tinted Varnish is called<br />
Enamel. We specifically chose our top co<strong>at</strong> for its lustrous feel,<br />
incredible build depth, and underst<strong>at</strong>ed, elegant s<strong>at</strong>in sheen.<br />
Toner<br />
The clarity of a stain is enhanced by using a two-step process.<br />
The first step is applying a toner, <strong>the</strong> second step is applying<br />
<strong>the</strong> stain. This combin<strong>at</strong>ion aids in building <strong>the</strong> color. This is<br />
especially true for darker stains, such as Chestnut and Java,<br />
where it is difficult to apply all of <strong>the</strong> color in just one pass.<br />
We build most of our stain colors using <strong>the</strong> two-step process.<br />
The toner applic<strong>at</strong>ion allows <strong>the</strong> wood fibers to begin to take on<br />
color prior to <strong>the</strong> applic<strong>at</strong>ion of stain, and it helps to neutralize<br />
any inconsistencies in <strong>the</strong> color of <strong>the</strong> raw wood product.