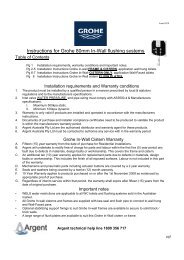
Bette Whirlpool Installation Instructions - Argent Australia
Bette Whirlpool Installation Instructions - Argent Australia
Bette Whirlpool Installation Instructions - Argent Australia

You also want an ePaper? Increase the reach of your titles
YUMPU automatically turns print PDFs into web optimized ePapers that Google loves.
<strong>Bette</strong> <strong>Whirlpool</strong><br />
<strong>Installation</strong> <strong>Instructions</strong><br />
www.argentaust.com.au<br />
Feb 13
CONTENTS<br />
Important Notes .............................................................. 2<br />
Preliminary Fit................................................................. 2<br />
Electrical Supply ............................................................. 3<br />
Access & Framing........................................................3-4<br />
Testing & Sheeting ......................................................... 5<br />
Need Any Help................................................................ 5<br />
Operating <strong>Instructions</strong>..................................................6-8<br />
Cleaning & Care <strong>Instructions</strong> .......................................... 9<br />
Trouble Shooting Guide................................................ 10<br />
Warranty ....................................................................... 11<br />
<strong>Bette</strong> <strong>Whirlpool</strong> <strong>Installation</strong> <strong>Instructions</strong> Page 1 of 11 Feb 13
1. Important Notes<br />
Please take a little time to read these installation instructions before proceeding. Your whirlpool<br />
has been factory tested and checked; therefore it is imperative that you reinspect it within 24 hours<br />
of delivery, for any imperfections or damage, paying particular attention to the edges and<br />
pipework, prior to commencing this installation.<br />
If you find anything of concern, please advise the retailer immediately, as no claim for<br />
imperfections or damage will be accepted after installation.<br />
Lifting;<br />
When moving the whirlpool, it should only be lifted by the edge of the bath or the steel<br />
frame, do not lift by pumps or piping. The producer assumes no liability for damage resulting<br />
from incorrect transporting or incorrect lifting and handling.<br />
2. Preliminary Fit<br />
Check the whirlpool’s condition, clear the area where the whirlpool is going to be installed by<br />
removing any unwanted material including dust, cement remants, etc, as this will prevent damage<br />
to the system from the induction of debris.<br />
Position the whirlpool where it is to be installed. Use a spirit level on the top edges to make sure<br />
everything is perfectly horizontal. The height adjustable feet allow for easy adjustment of the<br />
horizontal alignment, additional whirlpool support fixing must be provided around the perimeter, as<br />
per the example below, in compliance with local regulator standards to comply to Building<br />
Standards AS/NZ 2023. A mimumum height of 180mm from bottom of the whirpool to floor<br />
level is required to allow for the waste fittings.<br />
Check that all feet are standing firmly on the ground, and adjust as required.<br />
<strong>Bette</strong> <strong>Whirlpool</strong> <strong>Installation</strong> <strong>Instructions</strong> Page 2 of 11 Feb 13
3. Electrical Supply<br />
The 3 pin plug will need to be reattached by an electrician; this was deliberately removed<br />
after factory testing to ensure this unit is retested on site by a suitably qualified person<br />
prior to connecting to the power supply.<br />
All electrical equipment, including the reattachment of the 3 pin electrical plug to the whirlpool,<br />
should be performed by a qualified person to the National Regulatory authority requirements.<br />
If a heater has been specified, this system will require 15 amp power connections, to be<br />
installed by an electrician.<br />
The whirlpool control box has been factory sealed; any evidence of tampering with this item will<br />
void the warranty.<br />
4. Access & Framing<br />
The pumps and technical systems of the whirlpool must remain accessible via an access panel,<br />
(one has been supplied with this whirlpool, which will allow for a variable access panel sizing of up<br />
to 400mm high x 1000mm wide, the maximum weight of the completed access panel should not<br />
exceed 12 kg’s).<br />
This access panel must be completely removable. Minimum recommended size of access panel<br />
should be 300mm high x 450mm wide and positioned in a location that allows for access to and/or<br />
removal of all components and pumps. <strong>Whirlpool</strong>s with heaters will need additional access<br />
opening to allow for service on the heater if required. The access panel system allows you to tailor<br />
the opening to any tile sizing, allowing for a much more discrete access.<br />
No Access Panel = No Warranty Service<br />
Typical Minimum Access requirement<br />
<strong>Bette</strong> <strong>Whirlpool</strong> <strong>Installation</strong> <strong>Instructions</strong> Page 3 of 11 Feb 13
Access & Framing (continued)<br />
Tiling Lip - Where any of the edges of the whirlpool are in an alcove or will form part of or join the<br />
walls, the plastic tiling bead supplied should be adhered to these edges using a suitable wet area<br />
silicon sealant. Where the tiling bead forms a corner, this should be cut at a 45 degree angle. See<br />
diagram.<br />
Tile<br />
Wet seal membrane<br />
Flexible Silicone Sealant<br />
Stud or masonary wall<br />
Wall sheeting<br />
Tiling lip<br />
Flexible Silicone Sealant / Mastic Compound<br />
Bath or shower tray<br />
Support Mechanism;<br />
1) Support Batten for Baths<br />
2) Mortar slurry for shower trays<br />
Complete the supporting framework of the whirlpool including allowance for the access panel<br />
system. Do not sheet up yet!<br />
Once you have completed the framework to the<br />
approved standard, with the whirlpool fitted to its final<br />
position, the waste fitting can now be connected to the<br />
plumbing discharge/waste pipe.<br />
Note:<br />
When framing up, please be aware of the fact that the<br />
control pads and various other fittings may protrude<br />
below the rim of the whirlpool and care should be taken<br />
to avoid damage or constriction of these fittings.<br />
Typical Framing Detail<br />
<strong>Bette</strong> <strong>Whirlpool</strong> <strong>Installation</strong> <strong>Instructions</strong> Page 4 of 11 Feb 13
5. Testing & Sheeting<br />
IMPORTANT: SURGE GUARD PROTECTION IS STRONGLY RECOMMENDED FOR USE<br />
WITH ALL WHIRLPOOL SYSTEMS<br />
Although the whirlpool was fully tested in the factory prior to dispatch, damage may have occurred<br />
during transport or installation. Therefore the following procedures should be carried out now;<br />
- Check to make sure the electrician has tested the whirlpool and connected the 3 pin power plug<br />
to the whirlpool system (This will have been removed after testing by the factory)<br />
- Check that the whirlpool is clean and free of debris.<br />
- Fill the bath with water above the level of the jets.<br />
- Switch on the system (see Operating <strong>Instructions</strong> Step 7, pages 5-8)<br />
- Now check all functions are working.<br />
- Check all water seals for possible leaks.<br />
- Allow the whirlpool to run for 10 minutes.<br />
- Check again for leaks, (check pipes, joints, coupling and jets)<br />
Once you have completed these checks, sheeting with villa board or similar<br />
approved wet area product can be performed. Remember to install and allow<br />
for access panel fittings when sheeting up.<br />
An approved wet seal membrane will need to be applied after sheeting has<br />
occurred and prior to tiling proceeding in accordance with the approved<br />
standard.<br />
Once tiling and grouting have been completed, apply a bead of approved<br />
silicon based sealant to the edges of the bath where it meets the tiles.<br />
6. Need any Help<br />
Ring <strong>Argent</strong> Technical advice hotline if required, Toll Free on 1800 356 717.<br />
If taking advantage of this service, please have your warranty number detail, which is located on<br />
the control box and will start with the following prefix PMFG, prior to ringing to allow our team to<br />
assist you as efficiently as possible.<br />
<strong>Bette</strong> <strong>Whirlpool</strong> <strong>Installation</strong> <strong>Instructions</strong> Page 5 of 11 Feb 13
7. Operating <strong>Instructions</strong><br />
Your whirlpool is made from the highest quality steel with a unique glazed finish and it has a hard<br />
smooth surface, it features a German whirlpool system that enhances the hydrotherapy power of<br />
water.<br />
This whirlpool has the following standard features,<br />
1) Titanium based steel shell (30 year warranty)<br />
2) Safety suction (prevents getting stuck on the waste suction)<br />
3) Corrosion resistant galvanised base frame with adjustable feet<br />
4) Low level water sensor (pump will not start without water)<br />
5) German operating system and pumps (1 year warranty)<br />
6) Rigorous electrical and function testing prior to dispatch<br />
7) Integral waste/overflow/suction system<br />
8) Combination of Midi and Micro jets, directionally adjustable<br />
9) Power matched pump to jet system<br />
10) Air induced Venturis<br />
This whirlpool may also have the following optional features;<br />
1) Diode LED light<br />
2) Sanitising system/ Aromatherapy dispenser<br />
3) 15Amp in line heater<br />
Please Note;<br />
- This product is not intended for use by persons with reduced physical, sensory or mental<br />
capacities, or lack of experience or knowledge, unless they have been given supervision or<br />
instruction concerning the use of this whirlpool by a person responsible for their safety.<br />
- People who have difficulty walking or have another handicap must be extra careful when getting<br />
in and out!<br />
- Children should be supervised to ensure their safety and that they do not play with the whirlpool<br />
fittings and controls.<br />
- Please observe the cleaning and care instructions on page 7.<br />
- <strong>Whirlpool</strong> pump will not start if the water level sensor is not covered by water.<br />
Fill the bath to 50mm above the highest jet; please remember that once you get in the whirlpool,<br />
water displacement will increase the water level. You may choose to decrease your initial water<br />
level to allow for this displacement; also this will allow you to save water. Importantly, the system<br />
will not start until the low level water sensor is covered.<br />
Always Switch <strong>Whirlpool</strong> OFF<br />
Before Exiting Bath<br />
<strong>Bette</strong> <strong>Whirlpool</strong> <strong>Installation</strong> <strong>Instructions</strong> Page 6 of 11 Feb 13
Operating <strong>Instructions</strong> continued…<br />
Make sure the power is connected / turned on at the main supply<br />
Depending on the whirlpool system you have selected, you will have either one or two control<br />
buttons on the rim of your whirlpool.<br />
Main Control Pad, On/Off Button, Light switch<br />
Every <strong>Bette</strong> whirlpool has this control switch, it has two key pad features, the On/Off pad and the<br />
Light control pad.<br />
On/Off Button<br />
• 1 st Press – Pump starts and runs continuously<br />
• 2 nd Press – this shuts the system down.<br />
Light Switch<br />
This function is only active if you have specified the 256 diode LED light with your whirlpool.<br />
• 1 st Press – Light will cascade thought the myriad of colour combinations offered by the<br />
LED light.<br />
• 2 nd Press – Light will remain assigned to white light.<br />
• 3 rd Press – Light switches off.<br />
Air Venturi’s<br />
Air Venturi’s are the additional chrome control(s) located just below the rim of the<br />
<strong>Bette</strong> <strong>Whirlpool</strong>. Opening the air venturis allows for the induction of air into the<br />
water via the jets. This has the simultaneous benefit of both softening the water<br />
and increasing the massaging effect.<br />
Simply turn the air venturi control anti clockwise to open. You may have up to 3 of these,<br />
depending on the amount of jets you have on your whirlpool, see the chart below.<br />
10 jet <strong>Bette</strong> whirlpool 4 midi jets + 6 micro jets 1 air venturi<br />
18 jet <strong>Bette</strong> whirlpool 6 midi jets + 12 micro jets 2 air venturi<br />
26 jet <strong>Bette</strong> whirlpool 26 micro jets 3 air venturi<br />
Each air venturi will operate different banks of jets to allow you to customise your whirlpool<br />
experience.<br />
<strong>Bette</strong> <strong>Whirlpool</strong> <strong>Installation</strong> <strong>Instructions</strong> Page 7 of 11 Feb 13
Operating <strong>Instructions</strong> continued…<br />
Additional Control Pad, Sanitising system<br />
If you have ordered the optional sanitising system/bath<br />
product dispenser, you will have an additional control<br />
pad and a chrome filling closure included beside each<br />
other on the top of your <strong>Bette</strong> whirlpool rim. (Pictured<br />
here)<br />
The function on the RHS of this pad is used to activate<br />
the sanitising feature.<br />
The function on the LHS indicates when the dispenser<br />
needs refilling and the LED light will light up.<br />
The storage filling closure is top filling and will hold up to<br />
1.5litres of product.<br />
To operate<br />
Press the RHS button on the control pad for 8 seconds and the liquid contained in the dispenser<br />
will be dispersed with the pump running for 30 seconds, and then the pump will shut down. This<br />
will disperse approximately 1ml of product to each litre of water. (This will amount to about 100ml<br />
in 30 seconds)<br />
Leave the sanitised water solution in the whirlpool for 30 minutes, then empty and rinse the<br />
whirlpool. You can choose to run the pump for some of this time; however, air venturis should be<br />
in the off position to prevent excessive foaming of the sanitising agent.<br />
The sanitising function has a dry running protection sensor that prevents the system from<br />
operating should there be no product in the reservoir.<br />
Cleaning frequency<br />
Your whirlpool should be sanitised regularly, and the amount of times you initiate this is relative to<br />
how often you are using the whirlpool, notwithstanding, this should happen no less than once a<br />
year even if you have not used the whirlpool.<br />
<strong>Bette</strong> <strong>Whirlpool</strong> <strong>Installation</strong> <strong>Instructions</strong> Page 8 of 11 Feb 13
8. Cleaning & Care <strong>Instructions</strong><br />
With the correct care and proper treatment, you will enjoy your whirlpool for a long time. Your<br />
whirlpool can be cleaned easily and without significant effort if the following techniques are<br />
employed.<br />
Wipe your whirlpool down after use with a moistened soft cloth or chamois, if there is a residue,<br />
you can additionally use mild detergent (dish washing liquid or mild soap) to assist in the removal<br />
of any residue.<br />
For lime deposits, remove these deposits with a vinegar solution diluted with water (Ratio 1: 1).<br />
Chrome plated fittings can also be cleaned with mild detergent and a soft cloth, polish with a dry<br />
soft cloth afterwards.<br />
For whirlpools without the optional sanitising system, the inside of the jets can be cleaned by using<br />
a small bottle brush. The jets are directionally adjustable and non-removable.<br />
Important Care and cleaning detail;<br />
Relative to cleaning product, Check the manufacturer’s instructions and warning notes before<br />
using any type of cleaner on your whirlpool.<br />
Use only soft cloths, sponges or chamois to clean the surface, under no circumstances should<br />
scrubbing brushes/ sponges, steel wool or any tools be used.<br />
Do Not Use any scouring or aggressive and or rough cleaning agents. Chorine based disinfectants<br />
and aggressive cleaners (EG acetone, thinners etc) may attack and or bleach the fittings or<br />
enamelled surface.<br />
<strong>Bette</strong> <strong>Whirlpool</strong> <strong>Installation</strong> <strong>Instructions</strong> Page 9 of 11 Feb 13
9. Trouble Shooting Guide<br />
SITUATION ACTION ALTERNATIVE RESULT<br />
<strong>Whirlpool</strong> won’t start 1) Check to make sure<br />
that the power is<br />
connected and turned<br />
on.<br />
2) is water level 50mm<br />
above the highest jet<br />
1) Use an appliance<br />
that you know works<br />
and plug it in to the<br />
power point to<br />
check the power<br />
supply.<br />
2) fill water level<br />
1 & 2) Still won’t<br />
start, ring the<br />
Technical advice<br />
hotline<br />
No air, just water<br />
coming out of jets<br />
Sanitising system<br />
does not start.<br />
Light will not turn on<br />
No access panel<br />
Page 6, turn air<br />
venturis anti clock wise<br />
to open.<br />
Page 7, Check that<br />
there is product in the<br />
reservoir<br />
Check to make sure<br />
that the power is<br />
connected and turned<br />
on.<br />
Contact your builder/<br />
installer as there was a<br />
kit supplied with your<br />
whirlpool.<br />
above highest jet<br />
Different air venturis<br />
operate different<br />
banks of jets, check<br />
all air venturis are<br />
open<br />
Check that indicator<br />
light is on advising<br />
that there is power<br />
to the unit<br />
Light will not turn on<br />
until whirlpool has<br />
water above the low<br />
level sensor<br />
Access panel may<br />
not be initially<br />
obvious due to its<br />
discreet nature<br />
Still no air coming<br />
out of jets, ring the<br />
Technical advice<br />
hotline<br />
Still won’t start, ring<br />
the Technical advice<br />
hotline<br />
Still won’t start, ring<br />
the Technical advice<br />
hotline<br />
Contact builder/<br />
installer as it is their<br />
responsibility to<br />
facilitate this<br />
access.<br />
No access panel =<br />
No service<br />
<strong>Bette</strong> <strong>Whirlpool</strong> <strong>Installation</strong> <strong>Instructions</strong> Page 10 of 11 Feb 13
10. Warranty<br />
PURCHASE NOTES<br />
Bath Model<br />
Purchase Date<br />
Retailer<br />
Invoice Number<br />
Additional Notes<br />
WARRANTY SUMMARY<br />
• <strong>Bette</strong> enamelled bath shell is covered by a 30 year guarantee for manufacturer’s defects.<br />
• Baths must be inspected within 48 hours of delivery for visible signs of transport damage<br />
or visible faults.<br />
• The guarantee on enamelled bath shell covers faults outside of tolerances set down in<br />
<strong>Australia</strong>n Standards AS2023.<br />
• Waste overflow connections are covered by a 2 year guarantee.<br />
• <strong>Whirlpool</strong> pump/blowers/switches and pipe systems are covered by a 1 year guarantee.<br />
• Consequently, damage and the cost of building in removal of products are not covered by<br />
the product guarantee.<br />
• To receive a full warranty statement please contact <strong>Argent</strong> <strong>Australia</strong>.<br />
For more information contact the <strong>Argent</strong> Central Technical Advice Hotline 1800 356 787<br />
Ph: 1300 365 748<br />
Fx: 1300 656 057<br />
ac@argentaust.com.au<br />
www.argentaust.com.au<br />
<strong>Bette</strong> <strong>Whirlpool</strong> <strong>Installation</strong> <strong>Instructions</strong> Page 11 of 11 Feb 13