IC-F3102D/F4102D Manual - Icom UK
IC-F3102D/F4102D Manual - Icom UK
IC-F3102D/F4102D Manual - Icom UK

You also want an ePaper? Increase the reach of your titles
YUMPU automatically turns print PDFs into web optimized ePapers that Google loves.
Limited functions only<br />
INSTRUCTION MANUAL<br />
Limited functions only<br />
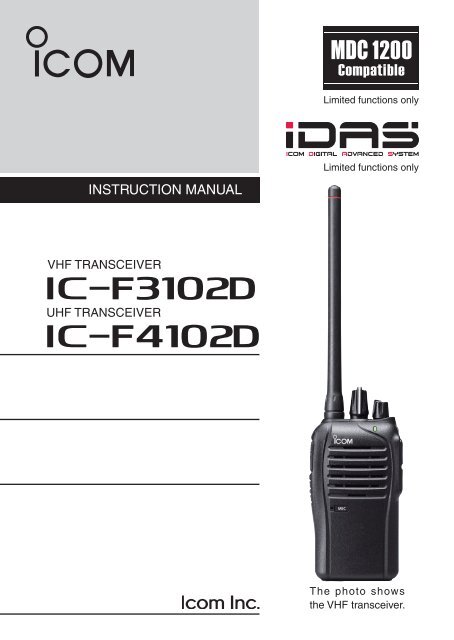
VHF TRANSCEIVER<br />
i<strong>F3102D</strong><br />
UHF TRANSCEIVER<br />
i<strong>F4102D</strong><br />
The photo shows<br />
the VHF transceiver.
FOREWORD<br />
READ ALL INSTRUCTIONS carefully and completely before<br />
using the transceiver.<br />
SAVE THIS INSTRUCTION MANUAL— This instruction<br />
manual contains important operating instructions for the <strong>IC</strong>-<strong>F3102D</strong><br />
VHF TRANSCEIVER and the <strong>IC</strong>-<strong>F4102D</strong> UHF TRANSCEIVER.<br />
EXPL<strong>IC</strong>IT DEFINITIONS<br />
WORD<br />
RDANGER!<br />
RWARNING!<br />
CAUTION<br />
NOTE<br />
DEFINITION<br />
Personal death, serious injury or an explosion<br />
may occur.<br />
Personal injury, fire hazard or electric shock<br />
may occur.<br />
Equipment damage may occur.<br />
If disregarded, inconvenience only. No risk<br />
of personal injury, fire or electric shock.<br />
i<br />
<strong>Icom</strong>, <strong>Icom</strong> Inc. and the <strong>Icom</strong> logo are registered trademarks of <strong>Icom</strong> Incorporated<br />
(Japan) in Japan, the United States, the United Kingdom, Germany, France,<br />
Spain, Russia and/or other countries.
VO<strong>IC</strong>E CODING TECHNOLOGY<br />
The AMBE+2 voice coding Technology embodied in this product<br />
is protected by intellectual property rights including patent rights,<br />
copyrights and trade secrets of Digital Voice Systems, Inc. This<br />
voice coding Technology is licensed solely for use within this Communications<br />
Equipment. The user of this Technology is explicitly<br />
prohibited from attempting to extract, remove, decompile, reverse<br />
engineer, or disassemble the Object Code, or in any other way<br />
convert the Object Code into a human-readable form. U.S. Patent<br />
Nos.<br />
#5,870,405, #5,826,222, #5,754,974, #5,701,390, #5,715,365,<br />
#5,649,050, #5,630,011, #5,581,656, #5,517,511, #5,491,772,<br />
#5,247,579, #5,226,084 and #5,195,166.<br />
ii
PRECAUTIONS<br />
R DANGER! NEVER short the terminals of the battery pack.<br />
R DANGER! Use and charge only specified <strong>Icom</strong> battery packs<br />
with <strong>Icom</strong> radios or <strong>Icom</strong> chargers. Only <strong>Icom</strong> battery packs are<br />
tested and approved for use with <strong>Icom</strong> radios or charged with <strong>Icom</strong><br />
chargers. Using third-party or counterfeit battery packs or chargers<br />
may cause smoke, fire, or cause the battery to burst.<br />
R WARNING! NEVER hold the transceiver so that the antenna<br />
is very close to, or touching exposed parts of the body, especially<br />
the face or eyes, while transmitting. The transceiver will perform<br />
best if the microphone is 5 to 10 cm away from the lips and the<br />
transceiver is vertical.<br />
R WARNING! NEVER operate the transceiver with a headset<br />
or other audio accessories at high volume levels. Hearing experts<br />
advise against continuous high volume operation. If you experience<br />
a ringing in your ears, reduce the volume level or discontinue use.<br />
R WARNING! NEVER operate the transceiver while driving a<br />
vehicle. Safe driving requires your full attention—anything less may<br />
result in an accident.<br />
CAUTION: MAKE SURE the flexible antenna and battery pack<br />
are securely attached to the transceiver, and that the antenna and<br />
battery pack are dry before attachment. Exposing the inside of<br />
the transceiver to water will result in serious damage to the transceiver.<br />
DO NOT operate the transceiver near unshielded electrical blasting<br />
caps or in an explosive atmosphere.<br />
DO NOT push [PTT] when not actually intending to transmit.<br />
DO NOT use or place the transceiver in direct sunlight or in areas<br />
with temperatures below –25°C or above +55°C.<br />
iii
DO NOT modify the transceiver. The transceiver warranty does<br />
not cover any problems caused by unauthorized modification.<br />
DO NOT use harsh solvents such as benzine or alcohol when<br />
cleaning, as they will damage the transceiver surfaces.<br />
BE CAREFUL! The transceiver will become hot when operating<br />
it continuously for long periods of time.<br />
KEEP the transceiver away from heavy rain, and never immerse<br />
it in the water. The transceiver meets IP54* requirements for dustprotection<br />
and splash resistance. However, once the transceiver<br />
has been dropped, dust-protection and splash resistance cannot<br />
be guaranteed because of possible damage to the transceiver’s<br />
case or the waterproof seal.<br />
* Only when the battery pack/case and jack cover are attached.<br />
MAKE SURE to turn the transceiver power OFF before connecting<br />
the supplied/optional equipment.<br />
iv
TABLE OF CONTENTS<br />
FOREWORD......................................................................................... i<br />
EXPL<strong>IC</strong>IT DEFINITIONS...................................................................... i<br />
VO<strong>IC</strong>E CODING TECHNOLOGY......................................................... ii<br />
PRECAUTIONS.............................................................................. iii, iv<br />
TABLE OF CONTENTS...................................................................v, vi<br />
1 ACCESSORIES.......................................................................... 1–4<br />
■ Supplied accessories.................................................................. 1<br />
■ Accessory attachments............................................................... 1<br />
2 PANEL DESCRIPTION............................................................. 5–11<br />
■ Front, top and side panels........................................................... 5<br />
■ LED indicator............................................................................... 7<br />
■ Programmable function keys....................................................... 8<br />
3 BAS<strong>IC</strong> OPERATION............................................................... 12–24<br />
■ Turning power ON..................................................................... 12<br />
■ Channel selection...................................................................... 13<br />
■ Call procedure........................................................................... 14<br />
■ Receiving and transmitting........................................................ 15<br />
■ Setting the microphone gain..................................................... 18<br />
■ Setting the squelch level........................................................... 19<br />
■ Setting the Beep level............................................................... 20<br />
■ Setting the Ringer level............................................................. 21<br />
■ Output power level selection..................................................... 22<br />
■ Priority A channel selection....................................................... 22<br />
■ MDC 1200 system operation..................................................... 23<br />
■ Lone Worker Emergency Call.................................................... 23<br />
■ Emergency Call......................................................................... 24<br />
v<br />
4 IDAS OPERATION................................................................. 25–30<br />
■ IDAS operation.......................................................................... 25<br />
■ IDAS-Trunk operation................................................................ 25<br />
■ Receiving a call......................................................................... 26<br />
■ Transmitting a call...................................................................... 28
■ Position data transmission........................................................ 30<br />
■ Status message transmission................................................... 30<br />
■ Encryption function.................................................................... 30<br />
5 BATTERY CHARGING........................................................... 31–41<br />
■ Caution (for the BP-264 ni-mh battery).................................... 31<br />
■ Caution (for the BP-265 Li-ion battery).................................... 33<br />
■ Battery chargers........................................................................ 36<br />
6 BATTERY CASE........................................................................... 42<br />
■ Optional battery case (BP-263)................................................. 42<br />
7 OPTIONS................................................................................ 43–48<br />
■ VOX function.............................................................................. 46<br />
8 COUNTRY CODE LIST................................................................ 49<br />
1<br />
2<br />
3<br />
4<br />
5<br />
6<br />
7<br />
8<br />
9<br />
10<br />
11<br />
12<br />
13<br />
14<br />
15<br />
16<br />
17<br />
18<br />
19<br />
20<br />
vi
1 ACCESSORIES<br />
■ Supplied accessories<br />
The following accessories are supplied with the transceiver.<br />
Battery pack*<br />
Flexible antenna<br />
(This illustration is for the VHF type.)<br />
Battery charger*<br />
AC adapter*<br />
Belt clip*<br />
Jack cover<br />
(with screws)<br />
* Not supplied, or the shape is different, depending on the version.<br />
■ Accessory attachments<br />
D Flexible antenna<br />
Connect the flexible antenna to the antenna<br />
connector.<br />
CAUTION:<br />
• NEVER HOLD just the antenna<br />
when carrying the transceiver.<br />
• Transmitting without an antenna will<br />
damage the transceiver.<br />
1
ACCESSORIES<br />
D Belt clip<br />
To attach the belt clip:<br />
➥ Slide the belt clip in the direction of the arrow until the belt clip<br />
locks in place, and makes a ‘click’ sound.<br />
Belt clip<br />
1<br />
1<br />
2<br />
3<br />
4<br />
5<br />
Battery pack<br />
6<br />
7<br />
8<br />
9<br />
10<br />
To detach the belt clip:<br />
q Remove the battery pack from the transceiver, if it is attached.<br />
(p. 3)<br />
w Lift the tab up (q), and slide the belt clip in the direction of the<br />
arrow (w).<br />
q<br />
w<br />
11<br />
12<br />
13<br />
14<br />
15<br />
16<br />
17<br />
Tab<br />
18<br />
19<br />
20<br />
2
1 ACCESSORIES<br />
D Battery pack or case<br />
To attach the battery pack or case:<br />
q Fit the battery pack/case in the direction of the arrow, then close<br />
it.<br />
w Hook the latch until it makes a ‘click’ sound.<br />
q<br />
Battery pack/case<br />
w<br />
Latch<br />
To remove the battery pack/case:<br />
Be careful! The latch is tightly locked, so use caution when releasing<br />
it. DO NOT use your finger nail. Use the edge of a coin<br />
or screwdriver tip to carefully release it.<br />
q Unhook the latch.<br />
w Lift up the battery pack/case in the direction of the arrow.<br />
w<br />
q<br />
3
ACCESSORIES<br />
NEVER remove or attach the battery pack/case when the transceiver<br />
is wet or soiled. This may result in water or dust getting into<br />
the transceiver, battery pack/case, and may result in them being<br />
damaged.<br />
NOTE: Keep the battery terminals clean. It’s a good idea to clean<br />
the battery terminals once a week.<br />
D Jack cover<br />
Attach the jack cover when the optional equipment is not used.<br />
To attach the jack cover:<br />
q Attach the jack cover to the<br />
[SP M<strong>IC</strong>] jack.<br />
w Tighten the screws.<br />
q<br />
w<br />
w<br />
1<br />
To detach the jack cover:<br />
q Remove the screws with a<br />
phillips screwdriver.<br />
w Detach the jack cover to connect<br />
the optional equipment.<br />
q<br />
q<br />
w<br />
1<br />
2<br />
3<br />
4<br />
5<br />
6<br />
7<br />
8<br />
9<br />
10<br />
11<br />
12<br />
13<br />
14<br />
15<br />
16<br />
17<br />
18<br />
19<br />
20<br />
4
2 PANEL DESCRIPTION<br />
■ Front, top and side panels<br />
i ANTENNA<br />
CONNECTOR<br />
u PTT SWITCH<br />
y UPPER KEY<br />
t LOWER KEY<br />
q ROTARY<br />
SELECTOR<br />
w VOLUME<br />
CONTROL<br />
e LED IND<strong>IC</strong>ATOR<br />
Speaker<br />
r SPEAKER-<br />
M<strong>IC</strong>ROPHONE<br />
JACK<br />
Microphone<br />
q ROTARY SELECTOR<br />
Rotate to select the pre-programmed memory channels or scan<br />
lists, depending on the pre-programming.<br />
w VOLUME CONTROL [VOL]<br />
Rotate to turn the power ON or OFF, and adjust the audio level.<br />
5
PANEL DESCRIPTION<br />
e LED IND<strong>IC</strong>ATOR (p. 7)<br />
➥ Lights red* while transmitting.<br />
*When the optional battery case is attached, the LED indicator<br />
lights orange.<br />
➥ Lights green while receiving a signal, or when the squelch is<br />
open.<br />
➥ Lights/blinks orange when the matched 2/5-tone code is received,<br />
depending on the pre-programming.<br />
r SPEAKER-M<strong>IC</strong>ROPHONE JACK [SP M<strong>IC</strong>]<br />
Connect the optional speaker-microphone or VOX adapter<br />
cable.<br />
t LOWER KEY [Lower]<br />
y UPPER KEY [Upper]<br />
The desired function can be assigned by your dealer. (p. 8)<br />
u PTT SWITCH [PTT]<br />
Hold down to transmit; release to receive.<br />
i ANTENNA CONNECTOR<br />
Connect the antenna.<br />
Jack cover<br />
NOTE: Attach the jack cover<br />
when the optional equipment<br />
is not used. (p. 4)<br />
2<br />
1<br />
2<br />
3<br />
4<br />
5<br />
6<br />
7<br />
8<br />
9<br />
10<br />
11<br />
12<br />
13<br />
14<br />
15<br />
16<br />
17<br />
18<br />
19<br />
20<br />
6
2 PANEL DESCRIPTION<br />
■ LED indicator<br />
The LED indicator indicates the status of various<br />
parameters of the transceiver as follows;<br />
(Ref.; R=Red, G=Green, O=Orange)<br />
• TX: Lights Red while transmitting a signal.<br />
R*<br />
• RX: Lights Green while receiving a signal.<br />
G<br />
• Call LED (ON): Turns ON while receiving a matched 2/5-tone.<br />
D ON<br />
O<br />
• Call LED (Blink): Blinks while receiving a matched 2/5-tone.<br />
D Blink<br />
O<br />
O<br />
an<br />
• Fast/Slow scan: Blinks when the Fast/Slow scan is activated.<br />
G<br />
G<br />
• Low Battery 1: You should charge the battery. (blinks slowly)<br />
BATT1<br />
G G<br />
• Low Battery 2: You must charge the battery. (blinks fast)<br />
ATT2<br />
G G G G<br />
• TX low Battery 1: Low Battery was detected during TX mode.<br />
BATT1<br />
R* R*<br />
• TX low Battery 2: Very Low Battery was detected during TX mode.<br />
BATT2 R* R* R* R*<br />
• Channel Error: A non-programmed channel is selected.<br />
R O R O R O R O R O R O R O R O<br />
7<br />
* Lights (or blinks) orange when the optional battery case is attached.
PANEL DESCRIPTION<br />
■ Programmable function keys<br />
The following functions can be assigned to the [Upper] and [Lower]<br />
programmable function keys.<br />
Consult your <strong>Icom</strong> dealer or system operator for details concerning<br />
your transceiver’s programming.<br />
SCAN<br />
Push to start and cancel the scanning operation.<br />
• When the scan started with the Power ON Scan or Auto Scan function,<br />
push to pause the scanning operation. The paused scan resumes<br />
after the specified time period has passed.<br />
PRIORITY A CHANNEL, PRIORITY B CHANNEL<br />
Push to select the Priority A or Priority B channel.<br />
PRIORITY A CHANNEL (REWRITE),<br />
PRIORITY B CHANNEL (REWRITE)<br />
➥ Push to select the Priority A or Priority B channel.<br />
➥ Hold down [Prio A (Rewrite)] or [Prio B (Rewrite)] for 1 second to<br />
assign the operating channel to Priority A or Priority B channel,<br />
respectively.<br />
MEMORY CHANNELS 1, 2, 3, 4<br />
Push to directly select memory channel 1, 2, 3 or 4, if programmed.<br />
Consult your dealer for details.<br />
LONE WORKER (p. 23)<br />
➥ Push to turn the Lone Worker function OFF.<br />
➥ Hold down to turn the Lone Worker function ON.<br />
• When the Lone Worker function is turned ON, and no operation is<br />
performed for the specified time period, the Emergency function is<br />
automatically turned ON.<br />
2<br />
1<br />
2<br />
3<br />
4<br />
5<br />
6<br />
7<br />
8<br />
9<br />
10<br />
11<br />
12<br />
13<br />
14<br />
15<br />
16<br />
17<br />
18<br />
19<br />
20<br />
8
2 PANEL DESCRIPTION<br />
MONITOR, MONITOR (AUDIBLE)<br />
➥ Push to turn the CTCSS (DTCS) or 2/5-tone squelch Mute ON<br />
or OFF.<br />
• Only during LMR operation, push to open any squelch functions,<br />
or deactivate any mute functions.<br />
• Only during PMR operation, push to activate one or two of the<br />
following functions* on each channel.<br />
- Hold down to un-mute the channel (Audible mode).<br />
- Push to mute the channel (Inaudible mode).<br />
- Push to send a ‘reset code’ after the communication is finished.<br />
*Ask your dealer for details.<br />
NOTE: The un-mute condition may automatically return to<br />
the mute condition, after a specified time period.<br />
➥ Depending on the presetting, holding down this key for 1 second<br />
cancels a scan.<br />
LOCK<br />
Hold down to electronically lock all programmable keys except<br />
[Moni(Audi)], [Call] (including Call A and Call B), [Emergency],<br />
Surveillance] and [Lone Worker].<br />
HIGH/LOW (p. 22)<br />
Select the transmit output power level temporarily or permanently,<br />
depending on the presetting.<br />
• Ask your dealer for the output power level for each selection.<br />
TALK AROUND<br />
➥ Push to turn the Talk Around function OFF.<br />
➥ Hold down to turn the Talk Around function ON.<br />
• The Talk Around function equalizes the transmit frequency to the<br />
receive frequency for transceiver-to-transceiver communication.<br />
DTMF AUTODIAL<br />
Push to transmit a programmed DTMF code.<br />
9
PANEL DESCRIPTION<br />
WIDE/NARROW<br />
➥ Push to switch the IF bandwidth to Wide.<br />
• The wide passband width can be selected from 20 or 25 kHz using<br />
the optional cloning software (PMR operation only). Ask your dealer<br />
for details.<br />
➥ Hold down to switch the IF bandwidth to Narrow.<br />
CALL, CALL A, CALL B<br />
Push to transmit a 2/5-tone code.<br />
• Tone call transmission may be necessary before you call another station,<br />
depending on your signalling system.<br />
• [Call A] and/or [Call B] keys may be available when your system employs<br />
selective ‘Individual/Group’ calls. Ask your dealer which call is<br />
assigned to each key.<br />
EMERGENCY<br />
Hold down for specified time period to transmit an emergency call.<br />
• The emergency call transmits with beeps, and the LED lights red.<br />
• The transceiver can transmit an emergency call without the beep<br />
sounding and the LED indicator lighting. Ask your dealer for details.<br />
• If you want to cancel the emergency call, hold down the key again<br />
before transmitting the call.<br />
• The emergency call is transmitted one time only, or repeatedly until receiving<br />
an acknowledgement signal, or until the power is turned OFF.<br />
When a matched 5-tone code signal is received, the emergency function<br />
can be cancelled depending on the presetting. (PMR operation<br />
only)<br />
SURVEILLANCE<br />
➥ Push to turn the Surveillance function OFF.<br />
➥ Hold down to turn the Surveillance function ON.<br />
• When this function is turned ON, the beep is not heard and the LED<br />
does not light when a signal is received, or a key is pushed.<br />
2<br />
1<br />
2<br />
3<br />
4<br />
5<br />
6<br />
7<br />
8<br />
9<br />
10<br />
11<br />
12<br />
13<br />
14<br />
15<br />
16<br />
17<br />
18<br />
19<br />
20<br />
10
2 PANEL DESCRIPTION<br />
SIREN<br />
Hold down for 1 second to emit a siren sound.<br />
This function can be used for situations other than an emergency<br />
alert, such as a security alarm for example.<br />
The transceiver emits the siren sound until the power is turned<br />
OFF.<br />
ENCRYPTION<br />
Push to turn the Voice Encryption function ON or OFF while operating<br />
in the digital mode.<br />
ANNOUNCE<br />
Push to turn the Channel Announce function ON or OFF.<br />
• When this function is turned ON, the transceiver announces the position<br />
of [ROTARY SELECTOR] between 1 and 16 when rotating [RO-<br />
TARY SELECTOR] to a desired scale.<br />
11
BAS<strong>IC</strong> OPERATION<br />
■ Turning power ON<br />
3<br />
Prior to using the transceiver for the first time, the battery pack<br />
must be fully charged for optimum life and operation. (p. 31)<br />
➥ Rotate [VOL] to turn power ON.<br />
[VOL]<br />
D Battery type selection<br />
The battery type must be selected according to the battery pack or<br />
case when it is changed, but only the first time it is used.<br />
Check the battery type before you begin the selection procedure.<br />
One to three beep(s) sound in sequence, so you must repeat the<br />
steps until the number of beeps matches your battery type.<br />
For example, if your battery type is a Li-ion battery pack, you must<br />
repeat the procedure until one beep is heard.<br />
q Set [ROTARY SELECTOR] to any<br />
[ROTARY SELECTOR]<br />
channel other than Channel 16.<br />
[VOL]<br />
w Rotate [VOL] to turn OFF the transceiver’s<br />
power.<br />
e While holding down [PTT], rotate<br />
[VOL] to turn ON the power.<br />
• You should hold [PTT] until the beep<br />
sounds. (It takes approximately 5<br />
[PTT]<br />
second.)<br />
• One beep sounds when the Li-ion<br />
battery is selected.<br />
• Two beeps sound when the battery case is selected.<br />
• Three beeps sound when the Ni-MH battery is selected.<br />
r After the beep sounds, release [PTT].<br />
t Repeat steps w to r until you select the attached battery type.<br />
NOTE: This operation may not be available, depending on the<br />
presetting. Ask your dealer for details.<br />
1<br />
2<br />
3<br />
4<br />
5<br />
6<br />
7<br />
8<br />
9<br />
10<br />
11<br />
12<br />
13<br />
14<br />
15<br />
16<br />
17<br />
18<br />
19<br />
20<br />
12
3 BAS<strong>IC</strong> OPERATION<br />
■ Channel selection<br />
Several types of channel selecting methods are available. They<br />
may differ, according to your system set up.<br />
To select a desired operating channel, do one of the following.<br />
• Rotate [ROTARY SELECTOR].<br />
• Push one of memory channel keys, [MR-CH 1] to [MR-CH 4].<br />
• Push one of these keys, [Prio A], [Prio B], [Prio A (Rewrite)] and<br />
[Prio B (Rewrite)].<br />
AUTOMAT<strong>IC</strong> SCAN TYPE:<br />
Selecting a channel is not necessary for this type. When turning ON<br />
the power, the transceiver automatically starts scanning. Scanning<br />
stops when a call is received.<br />
NOTE: If the Move to Priority A channel at Power ON function<br />
(p. 22) is turned ON, the transceiver does not start scanning at<br />
power ON.<br />
13
■ Call procedure<br />
BAS<strong>IC</strong> OPERATION<br />
When your system employs tone signalling (excluding CTCSS and<br />
DTCS), the tone call procedure may be necessary prior to voice<br />
transmission. The tone signalling that is employed in the transceiver<br />
may be a selective calling system, which allows you to call only<br />
specific station(s), and prevent unwanted stations from contacting<br />
you.<br />
q Select a desired TX code channel or 2/5-tone code, according to<br />
your System Operator’s instructions.<br />
• This may not be necessary, depending on programming.<br />
w Push [Call] (assigned to one of the dealer programmable keys.)<br />
(p. 10)<br />
e After transmitting a 2/5-tone code, the remainder of your communication<br />
can be carried out normally.<br />
Selective calling<br />
Non-selective calling<br />
3<br />
1<br />
2<br />
3<br />
4<br />
5<br />
6<br />
7<br />
8<br />
9<br />
10<br />
11<br />
12<br />
13<br />
14<br />
15<br />
16<br />
17<br />
18<br />
19<br />
20<br />
14
3 BAS<strong>IC</strong> OPERATION<br />
■ Receiving and transmitting<br />
CAUTION: Transmitting without an antenna will damage the<br />
transceiver. See page 1 for antenna attachment.<br />
Receiving:<br />
q Rotate [VOL] to turn ON the power.<br />
w Rotate [ROTARY SELECTOR], or push one of the memory channel<br />
keys, [MR-CH 1] to [MR-CH 4], to select a channel.<br />
e When receiving a call, adjust the audio output to a comfortable<br />
listening level.<br />
NOTE: When a matched RX code signal is received, audio from<br />
the microphone is automatically transmitted for a specified time<br />
period.*<br />
* Depending on the presetting. Ask your dealer for details.<br />
Transmitting:<br />
Wait for the channel to become clear to avoid interference.<br />
q While holding down [PTT], speak into the microphone at a normal<br />
voice level.<br />
w Release [PTT] to return to receive.<br />
IMPORTANT: To maximize the readability of your signal;<br />
1. Pause briefly after pushing [PTT].<br />
2. Hold the microphone 5 to 10 cm (2 to 4 inches) from your mouth,<br />
then speak into the microphone at a normal voice level.<br />
15
BAS<strong>IC</strong> OPERATION<br />
D Transmitting notes<br />
• Transmit inhibit function<br />
The transceiver has several inhibit functions, which restrict transmission<br />
under the following conditions:<br />
- The channel is muted. (PMR operation only)<br />
- The channel is busy.<br />
- A signal with the un-matched (or matched) CTCSS (or DTCS) tone<br />
is received.<br />
- The selected channel is a ‘receive only’ channel.<br />
• Time-out timer<br />
After continuously transmitting longer than the pre-programmed time<br />
period, the time-out timer activates, and stops further transmitting.<br />
• Penalty timer<br />
Once the time-out timer activates, transmitting is further inhibited for<br />
a time period determined by the penalty timer.<br />
• PTTID call<br />
The transceiver automatically sends the ID code (5-tone, DTMF,<br />
BIIS, MDC system or IDAS operations) when [PTT] is pushed (beginning<br />
of the transmission) and/or released (end of transmission),<br />
depending on the presetting.<br />
3<br />
1<br />
2<br />
3<br />
4<br />
5<br />
6<br />
7<br />
8<br />
9<br />
10<br />
11<br />
12<br />
13<br />
14<br />
15<br />
16<br />
17<br />
18<br />
19<br />
20<br />
16
3 BAS<strong>IC</strong> OPERATION<br />
D DTMF transmission<br />
If the transceiver has [DTMF Autodial] assigned to it, the automatic<br />
DTMF transmission function is usable.<br />
➥ Push [DTMF Autodial] to transmit the DTMF code.<br />
D Receiving a Stun, Kill and Revive command<br />
The dispatcher can send a 2/5-tone signal that will stun, kill or revive<br />
your transceiver.<br />
When the Stun command is received, a beep sounds*, and the<br />
transceiver becomes unusable. Receiving a Revive command is<br />
necessary to operate the transceiver again in this case.<br />
When the Kill command is received, a beep sounds*, and the transceiver<br />
becomes unusable (the transceiver switches to the cloning<br />
required condition). Cloning the transceiver is necessary to operate<br />
the transceiver again in this case.<br />
* Depending on the presetting. Ask your dealer for details.<br />
17
■ Setting the microphone gain<br />
Adjusts the microphone gain.<br />
BAS<strong>IC</strong> OPERATION<br />
q Rotate [VOL] to turn the transceiver<br />
power OFF.<br />
[ROTARY SELECTOR]<br />
[VOL]<br />
w Set [ROTARY SELECTOR] to<br />
Channel 16.<br />
e While holding down [Upper], rotate<br />
[VOL] to turn ON the power<br />
and enter the microphone gain<br />
adjustment mode.<br />
r Push [Upper] to increase, or<br />
push [Lower] to decrease the [Upper]<br />
microphone gain.<br />
• The adjustable range is 1 (minimum)<br />
to 4 (maximum).<br />
• A beep sounds after pushing<br />
[Upper] or [Lower].<br />
An error beep sounds if you try<br />
to decrease more than 1 or try<br />
to increase more than 4.<br />
Therefore, you can determine the current level setting by the type<br />
of beep that sounds.<br />
t Rotate [VOL] to turn the power OFF, then ON again to exit the<br />
microphone gain adjustment mode.<br />
NOTE:<br />
• This operation may not be available, depending on the presetting.<br />
Ask your dealer for details.<br />
• When using the VOX function, we recommend setting the microphone<br />
gain to 3. However, you can adjust it to suit your operating<br />
environment (including your headset performance).<br />
3<br />
1<br />
2<br />
3<br />
4<br />
5<br />
6<br />
7<br />
8<br />
9<br />
10<br />
11<br />
12<br />
13<br />
14<br />
15<br />
16<br />
17<br />
18<br />
19<br />
20<br />
18
3 BAS<strong>IC</strong> OPERATION<br />
■ Setting the squelch level<br />
The squelch circuit mutes the received audio signal, depending on<br />
the signal strength.<br />
q Rotate [VOL] to turn the transceiver<br />
power OFF.<br />
[VOL]<br />
[ROTARY SELECTOR]<br />
w Set [ROTARY SELECTOR] to<br />
any channel other than Channel<br />
16.<br />
e While holding down [Upper], rotate<br />
[VOL] to turn ON the power<br />
and enter the squelch level adjustment<br />
mode.<br />
r Push [Upper] to increase the [Upper]<br />
squelch level (tight squelch), or<br />
push [Lower] to decrease the<br />
squelch level (loose squelch).<br />
• The adjustable range is 0 (loose<br />
squelch) to 9 (tight squelch).<br />
• A beep sounds after pushing<br />
[Upper] or [Lower].<br />
An error beep sounds if you try to decrease more than 0 or try to<br />
increase more than 9.<br />
Therefore, you can determine the current level setting by the type<br />
of beep that sounds.<br />
t Rotate [VOL] to turn the power OFF, then ON again to exit the<br />
squelch level adjustment mode.<br />
NOTE: This operation may not be available, depending on the<br />
presetting. Ask your dealer for details.<br />
19
■ Setting the Beep level<br />
BAS<strong>IC</strong> OPERATION<br />
The beep function can be turned ON or OFF, and its level can be<br />
adjusted between 1 and 5, or 1 (linked) and 5 (linked). When a<br />
Linked option is selected, the beep level is adjustable with [VOL].<br />
q Rotate [VOL] to turn the transceiver<br />
power OFF.<br />
[VOL]<br />
[ROTARY SELECTOR]<br />
w Set [ROTARY SELECTOR] to<br />
any channel other than Channel<br />
16.<br />
e While holding down [Lower], rotate<br />
[VOL] to turn ON the power<br />
and enter the beep level adjustment<br />
mode.<br />
r Push [Upper] to change the beep<br />
[Lower]<br />
level, or push [Lower] to turn the<br />
beep function ON or OFF.<br />
• The adjustable range is 1 to 5 or<br />
1 (Linked) to 5 (Linked).<br />
• If the level is set on 1 to 4 or 1<br />
(Linked) to 4 (Linked), pushing<br />
[Upper] increases the level.<br />
If the level is 5 or 5 (Linked), 1 (Linked) or 1 is selected after pushing<br />
[Upper], respectively.<br />
• A beep sounds after pushing [Upper]. Therefore, you can determine<br />
the current level setting by the type of beep that sounds.<br />
• One beep sounds when the beep function is turned ON after pushing<br />
[Lower].<br />
t Rotate [VOL] to turn the power OFF, then ON again to exit the<br />
beep level adjustment mode.<br />
NOTE: This operation may not be available, depending on the<br />
presetting. Ask your dealer for details.<br />
3<br />
1<br />
2<br />
3<br />
4<br />
5<br />
6<br />
7<br />
8<br />
9<br />
10<br />
11<br />
12<br />
13<br />
14<br />
15<br />
16<br />
17<br />
18<br />
19<br />
20<br />
20
3 BAS<strong>IC</strong> OPERATION<br />
■ Setting the Ringer level<br />
The Ringer level can be adjusted between 1 and 5, or 1 (Linked)<br />
and 5 (Linked). When a Linked option is selected, the Ringer level<br />
is adjustable with [VOL].<br />
q Rotate [VOL] to turn the transceiver<br />
power OFF.<br />
[VOL]<br />
[ROTARY SELECTOR]<br />
w Set [ROTARY SELECTOR] to<br />
Channel 16.<br />
e While holding down [Lower], rotate<br />
[VOL] to turn ON the power<br />
and enter the Ringer level adjustment<br />
mode.<br />
r Push [Upper] to increase, or<br />
push [Lower] to decrease the<br />
Ringer level.<br />
[Lower]<br />
• The adjustable range is 1 to 5 or<br />
1 (Linked) to 5 (Linked).<br />
• If the level is set on 5 or 5<br />
(Linked), pushing [Upper] selects<br />
1 (Linked) or 1, respectively. If the<br />
level is 1 or 1 (Linked), pushing<br />
[Lower] selects 5 (Linked) or 5,<br />
respectively.<br />
• A beep sounds after pushing [Upper] or [Lower]. Therefore, you<br />
can determine the current level setting by the type of beep that<br />
sounds.<br />
t Rotate [VOL] to turn the power OFF, then ON again to exit the<br />
beep level adjustment mode.<br />
NOTE: This operation may not be available, depending on the<br />
presetting. Ask your dealer for details.<br />
21
BAS<strong>IC</strong> OPERATION<br />
■ Output power level selection<br />
If the transceiver has [High/Low] assigned to it, the transmit output<br />
power level can be selected, depending on the presetting.<br />
When the battery case is selected as the battery type, or the battery<br />
voltage drops to a low power level and the LED indicator status<br />
is “Low Battery 2,” the output power automatically switches to<br />
“Low 1.” (pp. 7, 12)<br />
➥ Push [High/Low] to select the transmit output power level.<br />
• One beep sounds when “Low 1” is selected.<br />
• Two beeps sound when “Low 2” is selected.<br />
• Three beeps sound when “High” is selected.<br />
■ Priority A channel selection<br />
When one of the following operations is performed, the transceiver<br />
automatically selects the Priority A channel.<br />
• Turning the power ON<br />
The Priority A channel is selected each time the transceiver power<br />
is turned ON.<br />
• Auto reset<br />
The Priority A channel is selected when the Auto Reset timer<br />
ends.<br />
3<br />
1<br />
2<br />
3<br />
4<br />
5<br />
6<br />
7<br />
8<br />
9<br />
10<br />
11<br />
12<br />
13<br />
14<br />
15<br />
16<br />
17<br />
18<br />
19<br />
20<br />
22
3 BAS<strong>IC</strong> OPERATION<br />
■ MDC 1200 system operation<br />
The MDC 1200 signaling system enhances your transceiver’s capabilities.<br />
It allows PTT ID* and Emergency signaling.<br />
*When [PTT] is pushed and/or released, the transceiver transmits your<br />
station ID.<br />
D Transmitting an Emergency Call<br />
The MDC 1200 system’s Emergency feature can be accessed<br />
using the [Emergency] key. The transceiver will send an Emergency<br />
MDC 1200 system command once, or repeatedly for a programmed<br />
number of times until it receives an acknowledgement signal.<br />
The emergency call can be transmitted without a beep sound, depending<br />
on how the emergency function is programmed. Ask your<br />
dealer for details.<br />
■ Lone Worker Emergency Call<br />
When the Lone Worker function is turned ON, and no operation is<br />
performed for the specified time period*, the transceiver enters the<br />
emergency mode, and then the countdown for the emergency call<br />
transmission starts.<br />
After the specified time period* has passed, an emergency call is<br />
automatically transmitted once, or repeatedly*.<br />
If someone operates the transceiver before the call is transmitted, the<br />
transceiver exits the emergency mode, and the emergency call is cancelled.<br />
* Depending on the presetting. Ask your dealer for details.<br />
q Hold down [Lone Worker] to turn ON the Lone Worker function.<br />
w Push [Lone Worker] to turn OFF the Lone Worker function.<br />
23
■ Emergency Call<br />
BAS<strong>IC</strong> OPERATION<br />
When [Emergency] is held down for the specified time period*, the<br />
emergency signal is transmitted once, or repeatedly, on the specified<br />
emergency channel.<br />
A repeat emergency signal is automatically transmitted until you<br />
turn the power OFF.<br />
Depending on the pre-programmed settings, receiving a matching<br />
5-tone code cancels the transmission.<br />
When no emergency channel is specified, the signal is transmitted<br />
on the previously selected channel.<br />
If you want to cancel the emergency call, hold down [Emergency]<br />
again before transmitting the call.<br />
If your transceiver is programmed for Silent operation, you can<br />
transmit an Emergency call without the beep sounding and the LED<br />
indicator lighting.<br />
IMPORTANT: It is recommended to set an emergency channel<br />
individually to provide the certain emergency call operation.<br />
D NOTES<br />
Depending on the presetting, the following functions are automatically<br />
activated. Ask your dealer for details.<br />
• Auto TX function<br />
After the emergency call transmission, audio from the microphone<br />
is automatically transmitted for a specified time period.*<br />
• Auto RX function<br />
After the emergency call transmission, the transceiver stands by in<br />
the audible mode for the specified time period.*<br />
* Depending on the presetting. Ask your dealer for details.<br />
3<br />
1<br />
2<br />
3<br />
4<br />
5<br />
6<br />
7<br />
8<br />
9<br />
10<br />
11<br />
12<br />
13<br />
14<br />
15<br />
16<br />
17<br />
18<br />
19<br />
20<br />
24
4 IDAS OPERATION<br />
■ IDAS operation<br />
The <strong>IC</strong>-<strong>F3102D</strong> and <strong>IC</strong>-<strong>F4102D</strong> provide <strong>Icom</strong> Digital Advanced<br />
System (IDAS) that meets the 6.25 kHz emission mask requirements<br />
for narrow banding, and increases efficiency of channel allocation<br />
and use of spectrum.<br />
NOTE: During IDAS operation, BIIS 1200 and MDC 1200 system<br />
operations are not available.<br />
■ IDAS-Trunk operation<br />
The IDAS-Trunk system enables further effective channel management<br />
by sharing a minimum of channels with a large number of<br />
users.<br />
Rotate [ROTARY SELECTOR] to select the memory channel that is<br />
programmed in the IDAS-Trunk zone.<br />
NOTE: During IDAS-Trunk operation, you can receive and transmit<br />
digital calls in the same way with the following IDAS operation.<br />
25
■ Receiving a call<br />
IDAS OPERATION<br />
D Receiving a Call Alert<br />
q When a Call Alert is received;<br />
• The transceiver will automatically transmit the acknowledgement.<br />
• The LED indicator blinks orange.<br />
• Beeps sound.<br />
w Hold down [PTT], then speak into the microphone.<br />
e Release [PTT] to receive a response.<br />
NOTE: The LED indicator or Beeps may differ, depending on the<br />
presetting. Ask your dealer for details.<br />
D Receiving a Stun, Kill or Revive<br />
If an individual call with Stun or Kill command is received (RAN<br />
code matching is not necessary depending on the presetting), the<br />
transceiver will automatically transmit the acknowledgement, and<br />
then you cannot receive* or transmit.<br />
* Depending on the received Stun command setting.<br />
➥ When a Stun command is received;<br />
• The transceiver cannot be operated until the individual call with<br />
Revive command is received (RAN code matching is not necessary<br />
depending on the presetting) or until the data cloning is<br />
performed.<br />
• Even if [ROTARY SELECTOR] is changed, the transceiver will<br />
keep the same channel as the Stun command is received.<br />
➥ When a Kill command is received;<br />
• The LED indicator alternately blinks red and green.<br />
• The transceiver cannot be operated until the data cloning is<br />
performed. Ask your dealer for details.<br />
NOTE: Depending on the presetting, the transceiver ignores the<br />
Stun, Revive and Kill commands, which are from a non-specified<br />
station.<br />
4<br />
1<br />
2<br />
3<br />
4<br />
5<br />
6<br />
7<br />
8<br />
9<br />
10<br />
11<br />
12<br />
13<br />
14<br />
15<br />
16<br />
17<br />
18<br />
19<br />
20<br />
26
4 IDAS OPERATION<br />
D Receiving a Remote Monitor or Radio Check Call<br />
If an individual call with Remote monitor or Radio check command<br />
is received (RAN code matching is not necessary depending on the<br />
presetting), the transceiver will automatically transmit.<br />
➥ When a Remote monitor command is received;<br />
• The transceiver will automatically transmit the acknowledgement,<br />
and then it transmits the microphone audio for the set<br />
time period.<br />
➥ When a Radio check command is received;<br />
• The transceiver will automatically transmit the acknowledgement.<br />
27
■ Transmitting a call<br />
IDAS OPERATION<br />
IDAS operation allows you to make a call to a specific station (Individual<br />
call) or to a particular group (Talkgroup call). Other digital<br />
mode transceivers on the channel will not receive a call that does<br />
not match their individual or talkgroup ID and/or RAN (Radio Access<br />
Number) code.<br />
D Transmitting an Emergency Call<br />
When [Emergency] is held down for the specified time period, the<br />
emergency signal (digital command) is transmitted once or repeatedly*<br />
on the specified emergency channel. When no emergency channel<br />
is specified, the signal is transmitted on the operating channel.<br />
* When the Repeat Cancel function is ON, the transceiver cancels<br />
repeating after receiving an acknowledgement.<br />
When the Repeat Cancel function is OFF, the transceiver repeats<br />
calling according to the number of repeat cycles, even after receiving<br />
an acknowledgement.<br />
Individual or Talkgroup call types of emergency calls can be prefixed.<br />
If the call type is not pre-fixed, the default or selected call<br />
type is used.<br />
If you want to cancel the emergency call, hold down [Emergency]<br />
again before transmitting the call.<br />
If your transceiver is programmed for Silent operation, you can<br />
transmit an Emergency call without the beep sounding and the LED<br />
indicator lighting.<br />
The transceiver can also be programmed to keep the microphone<br />
open during an emergency call, allowing monitoring of the situation.<br />
Ask your dealer for details.<br />
4<br />
1<br />
2<br />
3<br />
4<br />
5<br />
6<br />
7<br />
8<br />
9<br />
10<br />
11<br />
12<br />
13<br />
14<br />
15<br />
16<br />
17<br />
18<br />
19<br />
20<br />
28
4 IDAS OPERATION<br />
IMPORTANT: It is recommended to set an emergency channel<br />
individually to provide the certain emergency call operation.<br />
NOTE: The Digital Request Ack function is activated, the transceiver<br />
transmits the emergency call with the request to send<br />
back an acknowledgment.<br />
29
■ Position data transmission<br />
IDAS OPERATION<br />
When an optional HM-171GP or any other GPS receiver is connected<br />
to the transceiver, the position (longitude and latitude) data<br />
can be transmitted automatically when;<br />
• After sending a Status Call<br />
- Set the ‘Send with Status Call’ item as ‘Enable.’<br />
• After sending an Emergency Call<br />
- Set the ‘Send with Emergency’ item as ‘Enable.’<br />
• After sending a Voice Call<br />
- Set the ‘Send with Voice Call’ item as ‘Enable.’<br />
Ask your dealer or system operator for connection details.<br />
■ Status message transmission<br />
The status message can be transmitted automatically.<br />
The status message is transmitted when the transceiver is turned<br />
ON or OFF.<br />
- Select a status message to be transmitted in ‘Power ON Status’<br />
or ‘Power OFF Status’ item, respectively.<br />
- Select a target station ID in ‘Power Status ID’.<br />
■ Encryption function<br />
The encryption function enables voice scrambling, which provides<br />
private digital communication between stations.<br />
Push [Encryption] to turn the encryption function ON or OFF.<br />
4<br />
1<br />
2<br />
3<br />
4<br />
5<br />
6<br />
7<br />
8<br />
9<br />
10<br />
11<br />
12<br />
13<br />
14<br />
15<br />
16<br />
17<br />
18<br />
19<br />
20<br />
30
5 BATTERY CHARGING<br />
■ Caution (for the BP-264 ni-mh battery)<br />
R DANGER! NEVER short terminals (or charging terminals) of the<br />
battery pack. Also, current may flow into nearby metal objects such<br />
as a necklace, so be careful when placing battery packs (or the<br />
transceiver) in handbags, etc.<br />
Simply carrying with or placing near metal objects such as a necklace,<br />
etc. may cause shorting. This may damage not only the battery<br />
pack, but also the transceiver.<br />
R DANGER! NEVER incinerate used battery packs. Internal battery<br />
gas may cause an explosion.<br />
R DANGER! NEVER immerse the battery pack in water. If the battery<br />
pack becomes wet, be sure to wipe it dry BEFORE attaching<br />
it to the transceiver.<br />
CAUTION: Always use the battery within the specified temperature<br />
range, –5˚C to +55˚C. Using the battery out of its specified temperature<br />
range will reduce the battery’s performance and battery life.<br />
CAUTION: Shorter battery life could occur if the battery is left completely<br />
discharged, or in an excessive temperature environment<br />
(above +60˚C) for an extended period of time. If the battery must<br />
be left unused for a long time, it must be detached from the radio<br />
after charging. Keep it safely in a cool dry place at the following<br />
temperature range:<br />
–20˚C to +45˚C (up to a month)<br />
–20˚C to +35˚C (up to six months)<br />
–20˚C to +25˚C (up to a year*)<br />
* We recommend charging the battery pack every 6 months.<br />
Clean the battery terminals to avoid rust or misscontact.<br />
Keep the battery terminals clean. It’s a good idea to clean the battery<br />
terminals once a week.<br />
31
BATTERY CHARGING<br />
If your Ni-MH battery pack seems to have no capacity, even after<br />
being charged, completely discharge it by leaving the power ON<br />
overnight. Then, fully charge the battery pack again. If the battery<br />
pack still does not retain a charge (or only very little charge), a new<br />
battery pack must be purchased. (p. 43)<br />
Prior to using the transceiver for the first time, the battery pack<br />
must be fully charged for optimum life and operation.<br />
• Recommended temperature range for charging:<br />
between +10°C and +40°C (rapid charge: with BC-191) or<br />
between 0°C and +45°C (regular charge: with BC-192)<br />
• Use the supplied charger or optional charger (BC-191 for rapid<br />
charging, BC-192 for regular charging) only. NEVER use other<br />
manufacturers’ chargers.<br />
The battery pack contains a rechargable battery.<br />
Charge the battery pack before first operating the transceiver, or<br />
when the battery pack becomes exhausted.<br />
If you want to prolong the battery life, the following points should<br />
be observed:<br />
• Avoid over charging. The charging time period by the BC-192<br />
should be less than 48 hours.<br />
• Use the battery pack until it becomes almost completely exhausted,<br />
under normal conditions. We recommend battery charging<br />
after transmitting becomes impossible.<br />
5<br />
1<br />
2<br />
3<br />
4<br />
5<br />
6<br />
7<br />
8<br />
9<br />
10<br />
11<br />
12<br />
13<br />
14<br />
15<br />
16<br />
17<br />
18<br />
19<br />
20<br />
32
5 BATTERY CHARGING<br />
■ Caution (for the BP-265 Li-ion battery)<br />
Misuse of Li-ion batteries may result in the following hazards:<br />
smoke, fire, or the battery may rupture. Misuse can also cause<br />
damage to the battery or degradation of battery performance.<br />
R DANGER! NEVER short terminals (or charging terminals) of the<br />
battery pack. Also, current may flow into nearby metal objects such<br />
as a necklace, so be careful when placing battery packs (or the<br />
transceiver) in handbags, etc.<br />
Simply carrying with or placing near metal objects such as a necklace,<br />
etc. may cause shorting. This may damage not only the battery<br />
pack, but also the transceiver.<br />
D Battery caution<br />
R DANGER! DO NOT hammer or otherwise impact the battery. Do<br />
not use the battery if it has been severely impacted or dropped, or if<br />
the battery has been subjected to heavy pressure. Battery damage<br />
may not be visible on the outside of the case. Even if the surface<br />
of the battery does not show cracks or any other damage, the cells<br />
inside the battery may rupture or catch fire.<br />
R DANGER! NEVER use or leave battery packs in areas with temperatures<br />
above +60˚C. High temperature buildup in the battery,<br />
such as could occur near fires or stoves, inside a sun heated car,<br />
or in direct sunlight may cause the battery to rupture or catch fire.<br />
Excessive temperatures may also degrade battery performance or<br />
shorten battery life.<br />
R DANGER! DO NOT expose the battery to rain, snow, seawater,<br />
or any other liquids. Do not charge or use a wet battery. If the battery<br />
gets wet, be sure to wipe it dry before using. The battery is not<br />
waterproof.<br />
33
BATTERY CHARGING<br />
R DANGER! NEVER incinerate used battery packs, since internal<br />
battery gas may cause them to rupture, or may cause an explosion.<br />
R DANGER! NEVER solder the battery terminals or NEVER modify<br />
the battery pack. This may cause heat generation, and the battery<br />
may rupture, emit smoke or catch fire.<br />
R DANGER! Use the battery only with the transceiver for which it<br />
is specified. Never use a battery with any other equipment, or for<br />
any purpose that is not specified in this instruction manual.<br />
R DANGER! If fluid from inside the battery gets in your eyes, blindness<br />
can result. Rinse your eyes with clean water, without rubbing<br />
them, and see a doctor immediately.<br />
R WARNING! Immediately stop using the battery if it emits an abnormal<br />
odor, heats up, or is discolored or deformed. If any of these<br />
conditions occur, contact your <strong>Icom</strong> dealer or distributor.<br />
R WARNING! Immediately wash, using clean water, any part of<br />
the body that comes into contact with fluid from inside the battery.<br />
R WARNING! NEVER put the battery in a microwave oven, highpressure<br />
container, or in an induction heating cooker. This could<br />
cause a fire, overheating, or cause the battery to rupture.<br />
CAUTION: Always use the battery within the specified temperature<br />
range, –20˚C to +55˚C. Using the battery out of its specified temperature<br />
range will reduce the battery’s performance and battery<br />
life.<br />
5<br />
1<br />
2<br />
3<br />
4<br />
5<br />
6<br />
7<br />
8<br />
9<br />
10<br />
11<br />
12<br />
13<br />
14<br />
15<br />
16<br />
17<br />
18<br />
19<br />
20<br />
34
5 BATTERY CHARGING<br />
CAUTION: Shorter battery life could occur if the battery is left fully<br />
charged, completely discharged, or in an excessive temperature<br />
environment (above +50˚C) for an extended period of time. If the<br />
battery must be left unused for a long time, it must be detached<br />
from the radio after discharging.<br />
You may use the battery until the remaining capacity is about half,<br />
then keep it safely in a cool dry place within the temperature range<br />
as shown below:<br />
–20˚C to +50˚C (up to a month)<br />
–20˚C to +35˚C (up to three months)<br />
–20˚C to +20˚C (up to a year)<br />
D Charging caution<br />
R DANGER! NEVER charge the battery pack in areas with extremely<br />
high temperatures, such as near fires or stoves, inside<br />
a sun heated car, or in direct sunlight. In such environments, the<br />
safety/protection circuit in the battery will activate, causing the battery<br />
to stop charging.<br />
R WARNING! DO NOT charge or leave the battery in the battery<br />
charger beyond the specified time for charging. If the battery is not<br />
completely charged by the specified time, stop charging and remove<br />
the battery from the battery charger. Continuing to charge the<br />
battery beyond the specified time limit may cause a fire, overheating,<br />
or the battery may rupture.<br />
R WARNING! NEVER insert the transceiver (battery attached to<br />
the transceiver) into the charger if it is wet or soiled. This could<br />
corrode the battery charger terminals or damage the charger. The<br />
charger is not waterproof.<br />
CAUTION: DO NOT charge the battery outside of the specified<br />
temperature range: BC-193 (+10˚C to +40˚C). <strong>Icom</strong> recommends<br />
charging the battery at +20˚C. The battery may heat up or rupture<br />
if charged out of the specified temperature range. Additionally, battery<br />
performance or battery life may be reduced.<br />
35
■ Battery chargers<br />
BATTERY CHARGING<br />
D Using the BC-191 to rapid charge the BP-264<br />
The BC-191 provides rapid charging of the Ni-MH battery pack<br />
(BP-264 only). Never use for any other battery pack.<br />
Charging time period: Approximately 2 hours (for the BP-264)<br />
The following item is additionally required:<br />
• An AC adapter (not supplied with some versions) or the DC power<br />
cable (OPC-515L/CP-23L).<br />
Battery pack Transceiver<br />
Turn OFF the power<br />
AC adapter<br />
(A different type,<br />
or no AC adapter<br />
is supplied,<br />
depending on<br />
the version.)<br />
Optional OPC-515L*<br />
(for power source) or<br />
CP-23L (for 12 V cigarette<br />
lighter socket)<br />
can be used instead<br />
of the AC adapter.<br />
* About OPC-515L<br />
White line:<br />
Black line :<br />
CAUTION: NEVER connect the<br />
OPC-515L to a power source<br />
using reverse polarity.<br />
This will ruin the battery charger.<br />
Status indicator<br />
• Lights orange:<br />
While charging.<br />
• Lights green:<br />
Charging is completed.<br />
5<br />
Screws*<br />
(Self tapping screw:<br />
M3.5 × at least 30 mm)<br />
*Purchase separately.<br />
Using screws is recommended<br />
to secure the<br />
charger.<br />
1<br />
2<br />
3<br />
4<br />
5<br />
6<br />
7<br />
8<br />
9<br />
10<br />
11<br />
12<br />
13<br />
14<br />
15<br />
16<br />
17<br />
18<br />
19<br />
20<br />
36
5 BATTERY CHARGING<br />
D Using the BC-192 to regular charge the BP-264<br />
The BC-192 provides regular charging of the Ni-MH battery pack<br />
(BP-264 only). Never use for any other battery pack.<br />
Charging time period (with BC-147S): Approximately 16 hours (for<br />
the BP-264)<br />
The following item is additionally required:<br />
• An AC adapter (not supplied with some versions) or the DC power<br />
cable (OPC-515L).<br />
Battery pack Transceiver<br />
Turn OFF the power<br />
37<br />
AC adapter<br />
(A different type,<br />
or no AC adapter<br />
is supplied, depending<br />
on the<br />
version.)<br />
Optional OPC-515L*<br />
(for power source)<br />
can be used instead<br />
of the AC adapter.<br />
* About OPC-515L<br />
White line:<br />
Black line :<br />
CAUTION: NEVER connect the<br />
OPC-515L to a power source<br />
using reverse polarity.<br />
This will ruin the battery charger.<br />
Charging time period differs<br />
depending on the input voltage.<br />
12 V : Approx. 36 hours<br />
13.8 V : Approx. 21 hours<br />
16 V : Approx. 16 hours<br />
Screws*<br />
(Self tapping screw:<br />
M3.5 × at least 30 mm)<br />
*Purchase separately.<br />
Using screws is recommended<br />
to secure the<br />
charger.<br />
Status indicator<br />
Lights green while charging.<br />
NOTE:<br />
The status indicator will not go<br />
out even after a battery pack is<br />
fully charged.
BATTERY CHARGING 5<br />
D Using the BC-193 to rapid charge the BP-265<br />
The BC-193 provides rapid charging of the Li-ion battery pack<br />
(BP-265 only). Never use for any other battery pack.<br />
Charging time period: Approximately 2.5 hours (for the BP-265)<br />
The following item is additionally required:<br />
• An AC adapter (not supplied with some versions) or the DC power<br />
cable (OPC-515L/CP-23L).<br />
Battery pack Transceiver<br />
Turn OFF the power<br />
AC adapter<br />
(A different type,<br />
or no AC adapter<br />
is supplied,<br />
depending on<br />
the version.)<br />
Optional OPC-515L*<br />
(for power source) or<br />
CP-23L (for 12 V cigarette<br />
lighter socket)<br />
can be used instead<br />
of the AC adapter.<br />
* About OPC-515L<br />
White line:<br />
Black line :<br />
CAUTION: NEVER connect the<br />
OPC-515L to a power source<br />
using reverse polarity.<br />
This will ruin the battery charger.<br />
Screws*<br />
(Self tapping screw:<br />
M3.5 × at least 30 mm)<br />
*Purchase separately.<br />
Using screws is recommended<br />
to secure the<br />
charger.<br />
Status indicator<br />
• Lights orange:<br />
While charging.<br />
• Lights green:<br />
Charging is completed.<br />
1<br />
2<br />
3<br />
4<br />
5<br />
6<br />
7<br />
8<br />
9<br />
10<br />
11<br />
12<br />
13<br />
14<br />
15<br />
16<br />
17<br />
18<br />
19<br />
20<br />
38
5 BATTERY CHARGING<br />
D Using the BC-197 to rapid charge the BP-264 or<br />
BP-265<br />
The BC-197 rapidly charges up to six battery packs.<br />
Charging time for BP-264: Approximately 2 hours<br />
Charging time for BP-265: Approximately 2.5 hours<br />
The following additional item is required:<br />
• An AC adapter (not supplied with some versions) or the DC power<br />
cable (OPC-656)<br />
Battery pack<br />
Transceiver<br />
Turn OFF the power<br />
Charger adapters* are<br />
installed in each slot.<br />
* The shape of charger adapter depends<br />
on the version of the BC-197.<br />
AC adapter<br />
(An AC adapter is<br />
not supplied with<br />
some versions.)<br />
Status indicator<br />
(each indicator independently functions)<br />
DC power cable (OPC-656)<br />
(Connect to a DC power supply;<br />
12 to 16 V/at least 7 A)<br />
Red line : + Black line : _<br />
39
BATTERY CHARGING<br />
There are two types of BC-197 chargers for the <strong>IC</strong>-<strong>F3102D</strong> or <strong>IC</strong>-<br />
<strong>F4102D</strong>; one is for Ni-MH batteries, and the other is for Li-ion batteries.<br />
Before you purchase a BC-197, check the type of battery you are<br />
using, and then be sure to choose the suitable charger.<br />
BC-197 Charger Type<br />
With AD-120* charger adapters<br />
With AD-121* charger adapters<br />
Chargeable Battery<br />
BP-264 Ni-MH battery<br />
BP-265 Li-ion battery<br />
* The type of the charger adapter, AD-120 or AD-121 is printed on the<br />
inside bottom of the charger adapter, and the type of battery it holds is<br />
printed on the top right corner of the adapter.<br />
5<br />
1<br />
2<br />
3<br />
4<br />
5<br />
6<br />
7<br />
8<br />
9<br />
10<br />
11<br />
12<br />
13<br />
14<br />
15<br />
16<br />
17<br />
18<br />
19<br />
20<br />
40
5 BATTERY CHARGING<br />
IMPORTANT:<br />
Ensure the tabs on the battery pack are correctly aligned with<br />
the guide rails inside the charger.<br />
Tabs<br />
BC-191, BC-192, BC-193<br />
Guide rail<br />
41
BATTERY CASE<br />
■ Optional battery case (BP-263)<br />
When using the optional battery case, install 6 × AA (LR6) size<br />
alkaline batteries, as illustrated below.<br />
q Remove the battery case, if it is attached. (pp. 3, 4)<br />
w Install 6 × AA (LR6) size alkaline batteries.<br />
• Install only alkaline batteries.<br />
• Be sure to observe the correct polarity.<br />
e Attach the battery case. (pp. 3, 4)<br />
6<br />
Be careful! The negative<br />
terminals of the battery case<br />
protrude from the body, so<br />
pay attention not to injure<br />
your fingers when inserting<br />
the batteries.<br />
CAUTION:<br />
• When installing batteries, make sure they are all the same<br />
brand, type and capacity. Also, do not mix new and old batteries<br />
together.<br />
• Keep the battery terminals clean. It’s a good idea to clean the<br />
battery terminals once a week.<br />
• Never incinerate used battery cells since internal battery gas<br />
may cause them to rupture.<br />
• Never expose a detached battery case to water. If the battery<br />
case gets wet, be sure to wipe it dry before using it.<br />
• Never use batteries whose insulated cover is damaged.<br />
NOTE: When the optional battery case is attached, the battery<br />
type must be selected as “Battery case operation” when turning<br />
the transceiver ON. Ask your dealer for details. (p. 12)<br />
1<br />
2<br />
3<br />
4<br />
5<br />
6<br />
7<br />
8<br />
9<br />
10<br />
11<br />
12<br />
13<br />
14<br />
15<br />
16<br />
17<br />
18<br />
19<br />
20<br />
42
7 OPTIONS<br />
D BATTERY PACK<br />
Battery pack Voltage Capacity Battery life* 1<br />
BP-263<br />
Battery case for<br />
AA (LR6) × 6 alkaline<br />
BP-264 7.2 V 1400 mAh (typ.)<br />
BP-265<br />
7.4 V<br />
1900 mAh (min.)<br />
2000 mAh (typ.)<br />
VHF<br />
UHF<br />
VHF<br />
UHF<br />
—* 2<br />
12 hrs.<br />
11.3 hrs.<br />
17.5 hrs.<br />
16.1 hrs.<br />
* 1 When the power save function is turned ON, and the operating time<br />
is calculated under the following conditions;<br />
TX : RX : standby = 5 : 5 : 90<br />
* 2 The average operating time depends on the alkaline cells used.<br />
D BELT CLIPS<br />
• MB-124 belt clip<br />
Exclusive alligator-type belt clip.<br />
D CHARGERS<br />
• BC-191 desktop charger + BC-123S ac adapter<br />
For rapid charging of the Ni-MH battery pack. An AC adapter is<br />
supplied with the charger, depending on the version.<br />
Charging time period: approximately 2 hours for the BP-264.<br />
• BC-192 desktop charger + BC-147S ac adapter<br />
For regular charging of the Ni-MH battery pack. An AC adapter is<br />
supplied with the charger, depending on the version.<br />
Charging time period: approximately 16 hours for the BP-264.<br />
• BC-193 desktop charger + BC-123S ac adapter<br />
For rapid charging of the Li-ion battery pack. An AC adapter is<br />
supplied with the charger, depending on the version.<br />
Charging time period: approximately 2.5 hours for the BP-265.<br />
43
OPTIONS<br />
• BC-197 multi-charger<br />
For rapid simultaneously charging of up to six battery packs. An<br />
AC adapter may be supplied with the charger, depending on the<br />
version. There are two types of BC-197 chargers for the <strong>IC</strong>-<strong>F3102D</strong>/<br />
<strong>IC</strong>-<strong>F4102D</strong>.<br />
BC-197 Charger Type Chargeable Battery Charging time<br />
With AD-120* BP-264 Ni-MH battery Approx. 2 hrs.<br />
With AD-121* BP-265 Li-ion battery Approx. 2.5 hrs.<br />
*Either AD-120 or AD-121 charger adapters are installed in the BC-<br />
197, depending on the chargeable battery pack.<br />
D DC POWER CABLES<br />
• CP-23L cigarette lighter cable<br />
Allows charging of the battery pack through a 12 V cigarette lighter<br />
socket. (For BC-191/BC-193)<br />
• OPC-515L/OPC-656 dc power cable<br />
For charging of the battery packs using a 12 V DC power source<br />
instead of the AC adapter.<br />
(OPC-515L for BC-191/BC-192/BC-193: OPC-656 for BC-197)<br />
D ANTENNAS<br />
• FA-SC73US/FA-SC56VS/FA-SC57VS stubby antennas<br />
FA-SC73US : 450–490 MHz FA-SC56VS : 150–162 MHz<br />
FA-SC57VS : 160–174 MHz<br />
• FA-SC25U/FA-SC57U/FA-SC72U/<br />
FA-SC25V/FA-SC55V antennas<br />
FA-SC25U : 400–430 MHz FA-SC57U : 430–470 MHz<br />
FA-SC72U : 470–520 MHz FA-SC25V : 136–155 MHz<br />
FA-SC55V : 146–174 MHz<br />
• FA-SC61VC/FA-SC61UC cut antennas<br />
FA-SC61VC : 136–174 MHz FA-SC61UC : 380–520 MHz<br />
7<br />
1<br />
2<br />
3<br />
4<br />
5<br />
6<br />
7<br />
8<br />
9<br />
10<br />
11<br />
12<br />
13<br />
14<br />
15<br />
16<br />
17<br />
18<br />
19<br />
20<br />
44
7 OPTIONS<br />
D OTHER OPTIONS<br />
• AD-98FSC antenna connector converter<br />
Allows you to connect an external antenna with a BNC connector.<br />
• HM-158L/HM-159L speaker-microphone<br />
Combination speaker-microphone that provides convenient operation<br />
while hanging the transceiver on your belt.<br />
• HM-171GP speaker-microphone<br />
GPS speaker-microphone for BIIS and Digital modes operation.<br />
• HS-94/HS-95/HS-97 headset + OPC-2004 plug adapter cable<br />
HS-94 : Ear hook type<br />
HS-95 : Neck-arm type<br />
HS-97 : Throat microphone<br />
OPC-2004 : Allows you to connect the HS-94/HS-95/HS-97 to the<br />
transceiver. After connection, the VOX function can<br />
be used.<br />
• SP-27 tube earphone<br />
Provides clear audio in noisy environments.<br />
Approved <strong>Icom</strong> optional equipment is designed for optimal performance<br />
when used with an <strong>Icom</strong> transceiver.<br />
<strong>Icom</strong> is not responsible for the destruction or damage to an <strong>Icom</strong> transceiver<br />
in the event the <strong>Icom</strong> transceiver is used with equipment that is<br />
not manufactured or approved by <strong>Icom</strong>.<br />
Some options may not be available in some countries. Please ask your<br />
dealer for details.<br />
45
■ VOX function<br />
OPTIONS<br />
The transceiver has a VOX function, which allows you hands-free<br />
operation.<br />
An optional headset (HS-94/HS-95/HS-97) and a plug adapter<br />
cable (OPC-2004) are additionally required for operation.<br />
• The VOX (voice operated transmission) function starts transmitting<br />
when you speak into the microphone, without needing to push the PTT<br />
switch; then, automatically returns to receive when you stop speaking.<br />
D Optional unit connection<br />
q Rotate [VOL] to turn the transceiver power OFF.<br />
w Remove the jack cover. (p. 4)<br />
e Connect the optional headset (HS-94, HS-95 or HS-97) and<br />
OPC-2004 as described below.<br />
[VOL]<br />
q<br />
OPC-2004<br />
w<br />
e<br />
HS-94<br />
7<br />
1<br />
2<br />
3<br />
4<br />
5<br />
6<br />
7<br />
8<br />
9<br />
10<br />
11<br />
12<br />
13<br />
14<br />
15<br />
16<br />
17<br />
18<br />
19<br />
20<br />
46
7 OPTIONS<br />
D Turning the VOX function ON or OFF<br />
The VOX function can be turned ON or OFF when turning the transceiver<br />
power ON.<br />
q Rotate [VOL] to turn the transceiver<br />
power OFF.<br />
w Set [ROTARY SELECTOR] to<br />
any channel other than Channel<br />
16.<br />
e While holding down [PTT] and<br />
[Upper], rotate [VOL] to turn ON<br />
the power to switch the VOX<br />
function ON or OFF.<br />
• One beep sounds when the VOX<br />
function is turned OFF.<br />
• Two beeps sound when the VOX<br />
function is turned ON.<br />
[ROTARY SELECTOR]<br />
[VOL]<br />
[PTT]<br />
[Upper]<br />
NOTE: This operation may not be available, depending on the<br />
presetting. Ask your dealer for details.<br />
47
OPTIONS 7<br />
D Setting the VOX gain<br />
The VOX sensitivity level can be adjusted from 1 (minimum) to 10<br />
(maximum).<br />
q Connect the optional headset [ROTARY SELECTOR]<br />
(HS-94, HS-95 or HS-97) and<br />
[VOL]<br />
OPC-2004. (p. 46)<br />
w Rotate [VOL] to turn the transceiver<br />
power OFF.<br />
e Set [ROTARY SELECTOR] to<br />
Channel 16.<br />
[PTT]<br />
r While holding down [PTT] and<br />
[Upper], rotate [VOL] to turn ON<br />
[Upper]<br />
the power and enter the VOX<br />
gain adjustment mode.<br />
t Push [Upper] to increase, or<br />
push [Lower] to decrease the<br />
VOX gain while speaking into<br />
the optional headset.<br />
• The adjustable range is 1 (minimum)<br />
to 10 (maximum).<br />
• A beep sounds after pushing [Upper] or [Lower].<br />
If the level is set on 1 or 10, an error beep sounds after pushing.<br />
Therefore, you can determine the current level setting by the type<br />
of beep that sounds.<br />
y Rotate [VOL] to turn the power OFF, then ON to exit the VOX<br />
gain adjustment mode.<br />
NOTE:<br />
• This operation may not be available, depending on the presetting.<br />
Ask your dealer for details.<br />
• Set the microphone gain before setting the VOX gain. (p. 18)<br />
1<br />
2<br />
3<br />
4<br />
5<br />
6<br />
7<br />
8<br />
9<br />
10<br />
11<br />
12<br />
13<br />
14<br />
15<br />
16<br />
17<br />
18<br />
19<br />
20<br />
48
49<br />
8 COUNTRY CODE LIST<br />
• ISO 3166-1<br />
Country Codes Country Codes<br />
1<br />
2<br />
3<br />
4<br />
5<br />
6<br />
7<br />
8<br />
9<br />
10<br />
11<br />
12<br />
13<br />
14<br />
15<br />
16<br />
17<br />
Austria<br />
Belgium<br />
Bulgaria<br />
Croatia<br />
Czech Republic<br />
Cyprus<br />
Denmark<br />
Estonia<br />
Finland<br />
France<br />
Germany<br />
Greece<br />
Hungary<br />
Iceland<br />
Ireland<br />
Italy<br />
Latvia<br />
AT<br />
BE<br />
BG<br />
HR<br />
CZ<br />
CY<br />
DK<br />
EE<br />
FI<br />
FR<br />
DE<br />
GR<br />
HU<br />
IS<br />
IE<br />
IT<br />
LV<br />
18<br />
19<br />
20<br />
21<br />
22<br />
23<br />
24<br />
25<br />
26<br />
27<br />
28<br />
29<br />
30<br />
31<br />
32<br />
33<br />
Liechtenstein<br />
Lithuania<br />
Luxembourg<br />
Malta<br />
Netherlands<br />
Norway<br />
Poland<br />
Portugal<br />
Romania<br />
Slovakia<br />
Slovenia<br />
Spain<br />
Sweden<br />
Switzerland<br />
Turkey<br />
United Kingdom<br />
LI<br />
LT<br />
LU<br />
MT<br />
NL<br />
NO<br />
PL<br />
PT<br />
RO<br />
SK<br />
SI<br />
ES<br />
SE<br />
CH<br />
TR<br />
GB
MEMO<br />
1<br />
2<br />
3<br />
4<br />
5<br />
6<br />
7<br />
8<br />
9<br />
10<br />
11<br />
12<br />
13<br />
14<br />
15<br />
16<br />
17<br />
18<br />
19<br />
20<br />
50
MEMO
MEMO<br />
1<br />
2<br />
3<br />
4<br />
5<br />
6<br />
7<br />
8<br />
9<br />
10<br />
11<br />
12<br />
13<br />
14<br />
15<br />
16<br />
17<br />
18<br />
19<br />
20
Intended Country of Use ><br />
BE CY CZ DK<br />
FR DE GR HU<br />
LV LT LU MT<br />
PT SK SI ES<br />
IS LI NO CH<br />
TR HR<br />
AT<br />
FI<br />
IT<br />
PL<br />
GB<br />
RO<br />
EE<br />
IE<br />
NL<br />
SE<br />
BG<br />
A-6891D-1EU-q<br />
Printed in Japan<br />
© 2011 <strong>Icom</strong> Inc.<br />
Printed on recycled paper with soy ink.<br />
1-1-32 Kamiminami, Hirano-ku, Osaka 547-0003, Japan
ABOUT CE<br />
DECLARATION<br />
OF CONFORMITY<br />
We <strong>Icom</strong> Inc. Japan<br />
1-1-32, Kamiminami, Hirano-ku<br />
Osaka 547-0003, Japan<br />
Declare on our sole responsibility that this equipment complies with the<br />
essential requirements of the Radio and Telecommunications Terminal<br />
Equipment Directive, 1999/5/EC, and that any applicable Essential Test<br />
Suite measurements have been performed.<br />
Kind of equipment: VHF TRANSCEIVER<br />
Type-designation: iC- f3102d<br />
136–174 MHz 6.25 kHz/12.5 kHz/25 kHz<br />
136–174 MHz 6.25 kHz/12.5 kHz/20 kHz<br />
Version (where applicable):<br />
This compliance is based on conformity with the following harmonised<br />
standards, specifications or documents:<br />
i) EN 300 086-2 V1.3.1 (2010-06)<br />
ii) EN 300 113-2 V1.4.2 (2009-11)<br />
iii) EN 300 219-2 V1.1.1 (2001-03)<br />
iv) EN 301 166-2 V1.2.3 (2009-11)<br />
v) EN 301 489-1 V1.8.1 (2008-04)<br />
vi) EN 301 489-5 V1.3.1 (2002-08)<br />
vii) EN 60950-1:2006/A1:2010<br />
Bad Soden 3rd Jun. 2011<br />
Place and date of issue<br />
<strong>Icom</strong> (Europe) GmbH<br />
Communication Equipment<br />
Auf der Krautweide 24,<br />
65812 Bad Soden am Taunus,<br />
Germany<br />
Authorized representative name<br />
Y. Furukawa<br />
General Manager<br />
Signature<br />
MAY.2011<br />
Versions of the <strong>IC</strong>-<strong>F3102D</strong> which display the “CE”<br />
symbol on the serial number label, comply with the<br />
essential requirements of the European Radio and<br />
Telecommunication Terminal Directive 1999/5/EC.<br />
This warning symbol indicates that this equipment<br />
operates in non-harmonised frequency bands and/<br />
or may be subject to licensing conditions in the<br />
country of use. Be sure to check that you have the<br />
correct version of this radio or the correct programming<br />
of this radio, to comply with national licensing<br />
requirement.<br />
A-6891D-2EU
ABOUT CE<br />
DECLARATION<br />
OF CONFORMITY<br />
We <strong>Icom</strong> Inc. Japan<br />
1-1-32, Kamiminami, Hirano-ku<br />
Osaka 547-0003, Japan<br />
Declare on our sole responsibility that this equipment complies with the<br />
essential requirements of the Radio and Telecommunications Terminal<br />
Equipment Directive, 1999/5/EC, and that any applicable Essential Test<br />
Suite measurements have been performed.<br />
Kind of equipment: UHF TRANSCEIVER<br />
Type-designation: iC- f4102d<br />
400–470 MHz 6.25 kHz/12.5 kHz/25 kHz<br />
400–470 MHz 6.25 kHz/12.5 kHz/20 kHz<br />
Version (where applicable):<br />
This compliance is based on conformity with the following harmonised<br />
standards, specifications or documents:<br />
i) EN 300 086-2 V1.3.1 (2010-06)<br />
ii) EN 300 113-2 V1.4.2 (2009-11)<br />
iii) EN 300 219-2 V1.1.1 (2001-03)<br />
iv) EN 301 166-2 V1.2.3 (2009-11)<br />
v) EN 301 489-1 V1.8.1 (2008-04)<br />
vi) EN 301 489-5 V1.3.1 (2002-08)<br />
vii) EN 60950-1:2006/A1:2010<br />
Bad Soden 8th Jul. 2011<br />
Place and date of issue<br />
<strong>Icom</strong> (Europe) GmbH<br />
Communication Equipment<br />
Auf der Krautweide 24,<br />
65812 Bad Soden am Taunus,<br />
Germany<br />
Authorized representative name<br />
Y. Furukawa<br />
General Manager<br />
Signature<br />
JUN.2011<br />
Versions of the <strong>IC</strong>-<strong>F4102D</strong> which display the “CE”<br />
symbol on the serial number label, comply with the<br />
essential requirements of the European Radio and<br />
Telecommunication Terminal Directive 1999/5/EC.<br />
This warning symbol indicates that this equipment<br />
operates in non-harmonised frequency bands and/<br />
or may be subject to licensing conditions in the<br />
country of use. Be sure to check that you have the<br />
correct version of this radio or the correct programming<br />
of this radio, to comply with national licensing<br />
requirement.<br />
A-6891D-3EU