
Create successful ePaper yourself
Turn your PDF publications into a flip-book with our unique Google optimized e-Paper software.
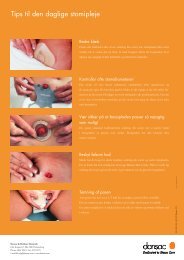
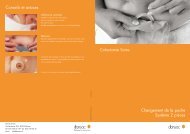
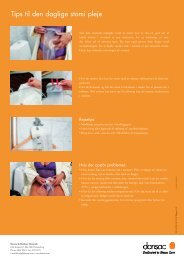
<strong>Tips</strong> <strong>for</strong> <strong>daily</strong> <strong>stoma</strong> <strong>care</strong><br />
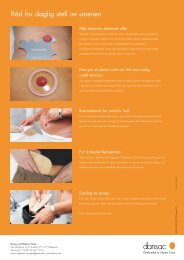
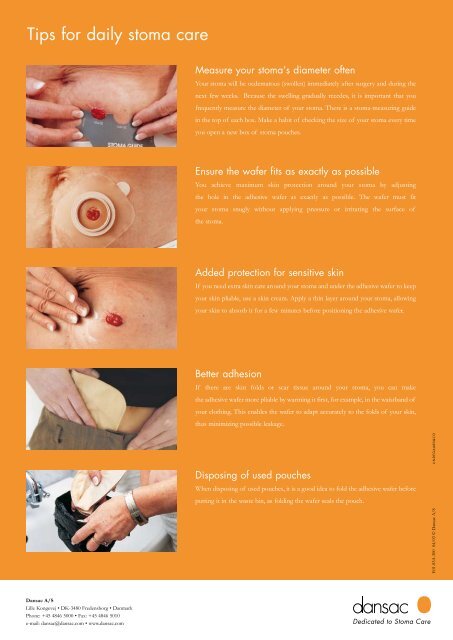
Measure your <strong>stoma</strong>’s diameter often<br />
Your <strong>stoma</strong> will be oedematous (swollen) immediately after surgery and during the<br />
next few weeks. Because the swelling gradually recedes, it is important that you<br />
frequently measure the diameter of your <strong>stoma</strong>. There is a <strong>stoma</strong>-measuring guide<br />
in the top of each box. Make a habit of checking the size of your <strong>stoma</strong> every time<br />
you open a new box of <strong>stoma</strong> pouches.<br />
Ensure the wafer fits as exactly as possible<br />
You achieve maximum skin protection around your <strong>stoma</strong> by adjusting<br />
the hole in the adhesive wafer as exactly as possible. The wafer must fit<br />
your <strong>stoma</strong> snugly without applying pressure or irritating the surface of<br />
the <strong>stoma</strong>.<br />
Added protection <strong>for</strong> sensitive skin<br />
If you need extra skin <strong>care</strong> around your <strong>stoma</strong> and under the adhesive wafer to keep<br />
your skin pliable, use a skin cream. Apply a thin layer around your <strong>stoma</strong>, allowing<br />
your skin to absorb it <strong>for</strong> a few minutes be<strong>for</strong>e positioning the adhesive wafer.<br />
Better adhesion<br />
If there are skin folds or scar tissue around your <strong>stoma</strong>, you can make<br />
the adhesive wafer more pliable by warming it first, <strong>for</strong> example, in the waistband of<br />
your clothing. This enables the wafer to adapt accurately to the folds of your skin,<br />
thus minimizing possible leakage.<br />
Disposing of used pouches<br />
When disposing of used pouches, it is a good idea to fold the adhesive wafer be<strong>for</strong>e<br />
putting it in the waste bin, as folding the wafer seals the pouch.<br />
E01-83A-300 04/03 © Dansac A/S L I N D E G A A R D & C O<br />
Dansac A/S<br />
Lille Kongevej • DK-3480 Fredensborg • Danmark<br />
Phone: +45 4846 5000 • Fax: +45 4846 5010<br />
e-mail: dansac@dansac.com • www.dansac.com<br />
Dedicated to Stoma Care
-p<br />
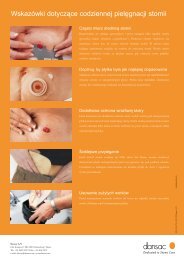
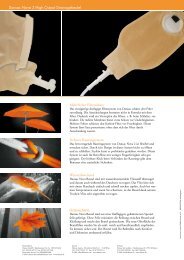
Colostomy Care at home<br />
Change of a 1-piece appliance
Changing a<br />
colostomy pouch<br />
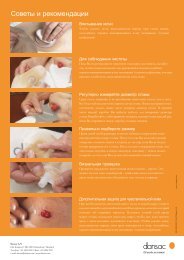
1 2<br />
Begin by <strong>care</strong>fully removing the used pouch. As an added precaution to avoid<br />
spillage, place a disposable plastic bag in your waistband.<br />
Tighten the skin on your abdomen by pressing it with one hand, while you <strong>care</strong>fully<br />
remove the adhesive wafer.<br />
5 6<br />
Cleanse your <strong>stoma</strong> and surrounding skin thoroughly.<br />
Dry with clean, dry non-woven wipes. It is important that the skin<br />
surrounding your <strong>stoma</strong> is completely dry be<strong>for</strong>e putting on a new pouch.<br />
9 10<br />
Begin putting on your pouch by positioning the adhesive wafer on the skin immediately<br />
below your <strong>stoma</strong>.<br />
Press the wafer from centre to edge with your fingers to ensure it is securely in<br />
place. Continue around the <strong>stoma</strong> until you are certain the wafer fits snugly and<br />
securely.
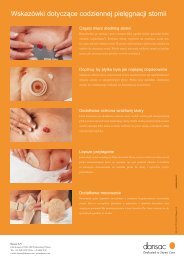
Colostomy<br />
A colostomy is a surgically created opening in the large bowel. The<br />
bowel is brought through the abdominal wall and sutured to the<br />
skin. The output, volume and consistency vary in each individual<br />
case and on the location of the <strong>stoma</strong> within the colon. The <strong>stoma</strong><br />
is red and moist; there are no nerve endings in the <strong>stoma</strong> and there<strong>for</strong>e<br />
no sensation.<br />
3 4<br />
Empty the pouch contents, by cutting open the bottom of the pouch, and<br />
flush the contents away. Place the used pouch into a small disposal bag,<br />
tying a knot be<strong>for</strong>e placing into a waste bin.<br />
Dampen a few non-woven wipes in lukewarm water.<br />
7 8<br />
Use the <strong>stoma</strong> guide to check the starter hole of the adhesive wafer. If your <strong>stoma</strong><br />
is uneven or oval, adjust the starter hole with small, sharp scissors. Remember: it is<br />
important that the hole fits your <strong>stoma</strong> snugly without applying any pressure. This<br />
prevents redness in the immediate area around your <strong>stoma</strong>.<br />
Remove the protective covering of the adhesive wafer immediately be<strong>for</strong>e application.<br />
11<br />
Task completed.