Freeform Surfacing using Pro/ENGINEER Wildfire 5.0
Freeform Surfacing using Pro/ENGINEER Wildfire 5.0
Freeform Surfacing using Pro/ENGINEER Wildfire 5.0

You also want an ePaper? Increase the reach of your titles
YUMPU automatically turns print PDFs into web optimized ePapers that Google loves.
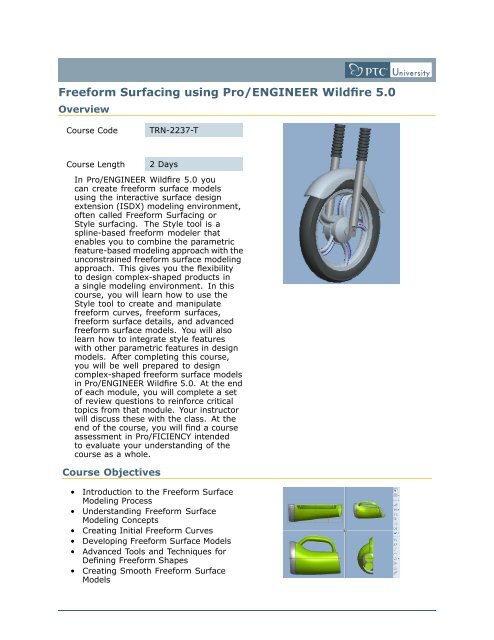
<strong>Freeform</strong> <strong>Surfacing</strong> <strong>using</strong> <strong>Pro</strong>/<strong>ENGINEER</strong> <strong>Wildfire</strong> <strong>5.0</strong><br />
Overview<br />
Course Code<br />
TRN-2237-T<br />
Course Length<br />
2 Days<br />
In <strong>Pro</strong>/<strong>ENGINEER</strong> <strong>Wildfire</strong> <strong>5.0</strong> you<br />
can create freeform surface models<br />
<strong>using</strong> the interactive surface design<br />
extension (ISDX) modeling environment,<br />
often called <strong>Freeform</strong> <strong>Surfacing</strong> or<br />
Style surfacing. The Style tool is a<br />
spline-based freeform modeler that<br />
enables you to combine the parametric<br />
feature-based modeling approach with the<br />
unconstrained freeform surface modeling<br />
approach. This gives you the flexibility<br />
to design complex-shaped products in<br />
a single modeling environment. In this<br />
course, you will learn how to use the<br />
Style tool to create and manipulate<br />
freeform curves, freeform surfaces,<br />
freeform surface details, and advanced<br />
freeform surface models. You will also<br />
learn how to integrate style features<br />
with other parametric features in design<br />
models. After completing this course,<br />
you will be well prepared to design<br />
complex-shaped freeform surface models<br />
in <strong>Pro</strong>/<strong>ENGINEER</strong> <strong>Wildfire</strong> <strong>5.0</strong>. At the end<br />
of each module, you will complete a set<br />
of review questions to reinforce critical<br />
topics from that module. Your instructor<br />
will discuss these with the class. At the<br />
end of the course, you will find a course<br />
assessment in <strong>Pro</strong>/FICIENCY intended<br />
to evaluate your understanding of the<br />
course as a whole.<br />
Course Objectives<br />
• Introduction to the <strong>Freeform</strong> Surface<br />
Modeling <strong>Pro</strong>cess<br />
• Understanding <strong>Freeform</strong> Surface<br />
Modeling Concepts<br />
• Creating Initial <strong>Freeform</strong> Curves<br />
• Developing <strong>Freeform</strong> Surface Models<br />
• Advanced Tools and Techniques for<br />
Defining <strong>Freeform</strong> Shapes<br />
• Creating Smooth <strong>Freeform</strong> Surface<br />
Models
• Integrating Style and Parametric<br />
Features<br />
• Techniques for Creating Common<br />
Detailed Shapes<br />
• Creating Complex, High Quality<br />
<strong>Freeform</strong> Models<br />
Prerequisites<br />
• Introduction to <strong>Pro</strong>/<strong>ENGINEER</strong> <strong>Wildfire</strong> <strong>5.0</strong>.<br />
Audience<br />
• Design engineers, mechanical designers, who have a need to create styled surface<br />
geometry.
Agenda<br />
Day 1<br />
Module 1 Introduction to the <strong>Freeform</strong> Surface Modeling <strong>Pro</strong>cess<br />
Module 2 Understanding <strong>Freeform</strong> Surface Modeling Concepts<br />
Module 3 Creating Initial <strong>Freeform</strong> Curves<br />
Module 4 Developing <strong>Freeform</strong> Surface Models<br />
Day 2<br />
Module 5 Advanced Tools and Techniques for Defining <strong>Freeform</strong> Shapes<br />
Module 6 Creating Smooth <strong>Freeform</strong> Surface Models<br />
Module 7 Integrating Style and Parametric Features<br />
Module 8 Techniques for Creating Common Detailed Shapes<br />
Module 9 Creating Complex, High Quality <strong>Freeform</strong> Models
Course Content<br />
Module 1. Introduction to the <strong>Freeform</strong> Surface Modeling <strong>Pro</strong>cess<br />
i. Introduction to <strong>Freeform</strong> Surface Modeling<br />
ii. Understanding Surface Modeling Paradigms<br />
iii. Combining <strong>Freeform</strong> and Parametric Modeling<br />
iv. Typical <strong>Pro</strong>/<strong>ENGINEER</strong> <strong>Freeform</strong> Modeling <strong>Pro</strong>cess<br />
Knowledge Check Questions<br />
Module 2. Understanding <strong>Freeform</strong> Surface Modeling Concepts<br />
i. Understanding the Style Tool<br />
ii. Understanding Style Features<br />
iii. Understanding Datum Features within Style<br />
iv. Understanding the Style Modeling Environment<br />
v. Using Style Tool Shortcut Menus<br />
vi. Using Style Tool Key Combinations<br />
vii. Understanding Active Planes<br />
viii. Understanding the Style Tool 4-View Layout<br />
ix. Understanding Style Preferences<br />
Knowledge Check Questions<br />
Module 3. Creating Initial <strong>Freeform</strong> Curves<br />
i. Understanding Style Curves<br />
ii. Creating Basic Style Curves<br />
iii. Creating Style Curves as Circles or Arcs<br />
iv. Manipulating Style Point Locations<br />
v. Connecting Curves <strong>using</strong> Soft Points<br />
vi. Manipulating Soft Points<br />
vii. Defining Endpoint Tangency<br />
viii. Defining Soft Endpoint Tangency<br />
ix. Editing Curves<br />
x. Creating Radial Path Planar Curves<br />
xi. Using the 4-View Layout to Modify Curves<br />
xii. Analyzing Curves<br />
Knowledge Check Questions<br />
Module 4. Developing <strong>Freeform</strong> Surface Models<br />
i. Understanding Style Surfaces<br />
ii. Creating Boundary Surfaces<br />
iii. Creating Loft Surfaces<br />
iv. Using Multiple Curves as a Single Boundary<br />
v. Creating a Blend Surface <strong>using</strong> the Radial Option<br />
vi. Creating a Blend Surface <strong>using</strong> the Uniform Option
vii. Creating N-Sided Surfaces<br />
viii. Using Surfaces to Define Curves<br />
ix. Creating a Curve on Surface Type Curve<br />
x. Intersecting to Create a Curve on Surface<br />
xi. Creating a Curve <strong>using</strong> Curve from Surface<br />
xii. Manipulating Curve on Surface Type Curves<br />
Knowledge Check Questions<br />
Module 5. Advanced Tools and Techniques for Defining <strong>Freeform</strong> Shapes<br />
i. Manipulating Shapes <strong>using</strong> Internal Curves<br />
ii. Copying and Moving Curves<br />
iii. Copying Curves <strong>Pro</strong>portionally<br />
iv. Offsetting Curves<br />
v. Modifying Curve Shapes <strong>Pro</strong>portionally<br />
vi. Unlinking Style Curves<br />
vii. Making Curves Planar Between Endpoints<br />
viii. Editing Style Surfaces<br />
ix. Resolving Failed Style Geometry<br />
x. Using References from Design Models<br />
xi. Importing Images to Create a Trace Sketch<br />
xii. Using Imported 3-D Data<br />
Knowledge Check Questions<br />
Module 6. Creating Smooth <strong>Freeform</strong> Surface Models<br />
i. Understanding Curvature<br />
ii. Using the Curvature Analysis Tool<br />
iii. Manipulating Surface Boundary Connections<br />
iv. Understanding Surface Connection Order<br />
v. Analyzing Continuity of <strong>Freeform</strong> Designs<br />
vi. Using the Shaded Curvature Analysis Tool<br />
vii. Using the Reflection Analysis Tool<br />
viii. Using the Dihedral Angle Analysis Tool<br />
Knowledge Check Questions<br />
Module 7. Integrating Style and Parametric Features<br />
i. Understanding Parallel Modeling<br />
ii. Using Surfaces to Define Solid Geometry<br />
iii. Exporting Curve Parameters for Modification<br />
iv. Referencing a Parametric Framework<br />
v. Manipulating Style Geometry <strong>using</strong> Editing Tools<br />
Knowledge Check Questions<br />
Module 8. Techniques for Creating Common Detailed Shapes<br />
i. Creating Common Detailed Shapes
ii. Creating Scoops or Bulges <strong>using</strong> Intersecting Surfaces<br />
iii. Creating Scoops or Bulges with Definite Boundaries<br />
iv. Creating Scoops or Bulges with Blurred Boundaries<br />
v. Creating Split Surface Geometry<br />
Knowledge Check Questions<br />
Module 9. Creating Complex, High Quality <strong>Freeform</strong> Models<br />
i. Understanding Singularity in Triangular Surfaces<br />
ii. Reparameterizing a Surface<br />
iii. Understanding Four-Boundary Surfaces<br />
iv. Using the Overbuild Technique<br />
v. Using the Create Boundaries Technique<br />
vi. Using the Void Boundary Technique<br />
vii. Creating a Four-Boundary Rounded Shape<br />
viii. Creating a Triangular Shape <strong>using</strong> Four Boundaries<br />
Knowledge Check Questions