2006 - 888 RC2X
2006 - 888 RC2X
2006 - 888 RC2X

You also want an ePaper? Increase the reach of your titles
YUMPU automatically turns print PDFs into web optimized ePapers that Google loves.
© Marzocchi Suspension<br />
<strong>2006</strong> - <strong>888</strong> <strong>RC2X</strong><br />
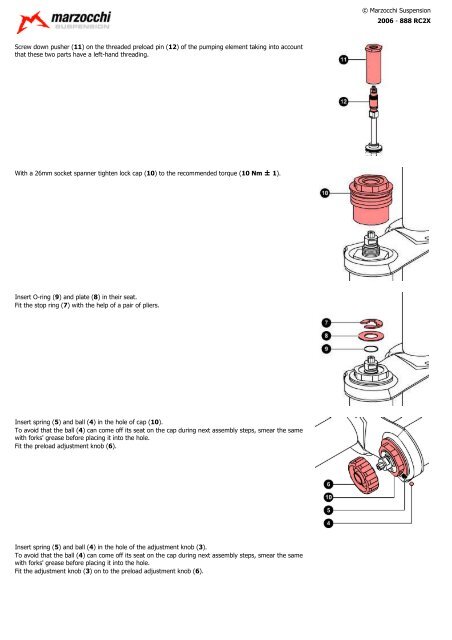
Screw down pusher (11) on the threaded preload pin (12) of the pumping element taking into account<br />
that these two parts have a left-hand threading.<br />
With a 26mm socket spanner tighten lock cap (10) to the recommended torque (10 Nm ± 1).<br />
Insert O-ring (9) and plate (8) in their seat.<br />
Fit the stop ring (7) with the help of a pair of pliers.<br />
Insert spring (5) and ball (4) in the hole of cap (10).<br />
To avoid that the ball (4) can come off its seat on the cap during next assembly steps, smear the same<br />
with forks' grease before placing it into the hole.<br />
Fit the preload adjustment knob (6).<br />
Insert spring (5) and ball (4) in the hole of the adjustment knob (3).<br />
To avoid that the ball (4) can come off its seat on the cap during next assembly steps, smear the same<br />
with forks' grease before placing it into the hole.<br />
Fit the adjustment knob (3) on to the preload adjustment knob (6).