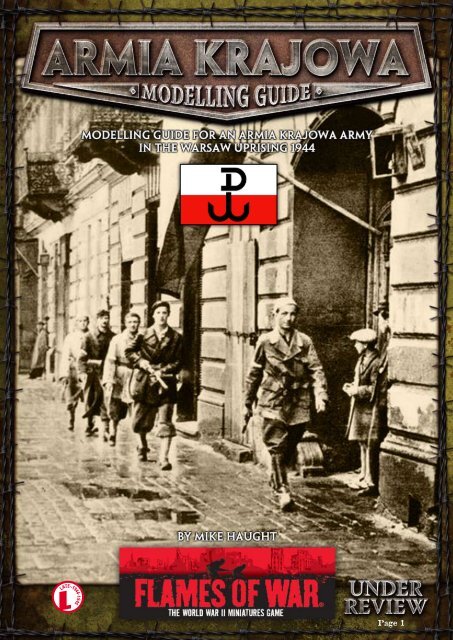
Modelling Your Armiya Krajowa PDF... - Flames of War
Modelling Your Armiya Krajowa PDF... - Flames of War
Modelling Your Armiya Krajowa PDF... - Flames of War

Create successful ePaper yourself
Turn your PDF publications into a flip-book with our unique Google optimized e-Paper software.
Page
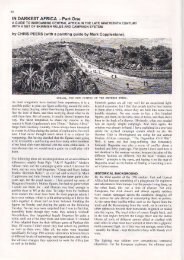
RESEARCHING THE ARMIA KRAJOWA<br />
One <strong>of</strong> the most remarkable things to come out <strong>of</strong> the<br />
<strong>War</strong>saw Uprising was the sheer number <strong>of</strong> photographs and<br />
films taken by the Polish insurgants themselves. It is even<br />
more amazing that these managed to survive to provide us<br />
with an intimate view <strong>of</strong> the battles that were fought.<br />
Several civilians took it upon themselves to document the<br />
uprising through photography. They risked their lives to take<br />
many <strong>of</strong> dramatic and telling photos. After the uprising the<br />
Germans, and later the Soviets, actively pursued these photos<br />
and destroyed as many as they could find. Photographers<br />
began hiding their negatives to protect them. As time wore<br />
on and <strong>War</strong>saw was rebuilt many <strong>of</strong> these photos were lost.<br />
However, now and again a stash <strong>of</strong> negatives and photos are<br />
uncovered which tell new stories <strong>of</strong> the Uprising.<br />
Its through the lens <strong>of</strong> the brave civilian photographer that<br />
we can see the Uprising unfold. Pictures <strong>of</strong> soldiers, terrain<br />
and equipment help us remember the sacrifices <strong>of</strong> the Polish<br />
people during the summer <strong>of</strong> 1944.<br />
I’ve dedicated this section to showcase the source material<br />
available on the <strong>War</strong>saw Uprising, including some interesting<br />
photos. These highlight the wide variety <strong>of</strong> people and<br />
equipment that fought. Hopefully, you will find these photos<br />
helpful when you start you own Armyia <strong>Krajowa</strong> force for<br />
<strong>Flames</strong> Of <strong>War</strong>.<br />
I’ve also included a bibliography <strong>of</strong> sources that I found<br />
useful when researching the <strong>War</strong>saw Uprising so that you<br />
can begin your own research into this historic event.<br />
<strong>War</strong>saw Uprising Bibliography<br />
Books:<br />
Davies, Norman. Rising ‘44: The Battle for <strong>War</strong>saw. Penguin<br />
Publishing, 2005.<br />
Forczyk, Robert. <strong>War</strong>saw 1944: Poland’s bid for freedom.<br />
Osprey Publishing, 2009.<br />
Mountfield, David. The Partisans: Secret Armies <strong>of</strong> World<br />
<strong>War</strong> II. Hamlyn Publishing, 1979.<br />
Magazines:<br />
After the Battle, The <strong>War</strong>saw Uprising. Issue 143 (2009).<br />
Websites (active as <strong>of</strong> 2009):<br />
European Resistance Archive<br />
(Interviews with resistance members across Europe)<br />
http://www.resistance-archive.org/<br />
Poland on the Web<br />
(Essays on the <strong>War</strong>saw Uprising)<br />
http://www.info-poland.buffalo.edu/web/history/WWII/<br />
powstanie/link.shtml<br />
<strong>War</strong>sawUprising.com<br />
(General History <strong>of</strong> the Uprising)<br />
http://www.warsawuprising.com<br />
Muzeum Powstania <strong>War</strong>szawskiego<br />
(Museum <strong>of</strong> the <strong>War</strong>saw Uprising)<br />
http://www.1944.pl/<br />
Above: These Polish soldiers demonstrate the variety in uniforms that the<br />
AK employed. They are wearing Waffen-SS camo smocks with non-SS<br />
trousers, most likely <strong>of</strong> old Polish army issue. They are also wearing both<br />
jack and low boots.<br />
Above: More than 4,000 women fought in the <strong>War</strong>saw Uprising. Initially,<br />
they served in support roles such as this dispatch runner. However, as the<br />
rebellion progressed they began to take up arms along side the men and<br />
fight. After the uprising, over 2000 women soldiers marched into captivity.,<br />
having proudly served the cause.<br />
Page
Above: This photograph demonstrates further diversity in Polish AK uniforms and equipment. The solider to the left and right appears to be wearing<br />
German fieldgrey Panzer style jackets, while the one on the right has found a Waffen-SS smock.<br />
Also <strong>of</strong> note are their helmets. The man just right <strong>of</strong> the woman is wearing an Polish wz.31 helmet and the others have standard German helmets with<br />
Waffen-SS helmet covers.<br />
Above: AK troops don their new Waffen-SS uniforms.<br />
Page
Above: An AK-controlled 5cm PaK38 anti-tank gun. The crew is wearing full SS uniforms including trousers, boots, s<strong>of</strong>t caps, and jacket. The gun itself<br />
appears to have been left in its original camouflage.<br />
Above: This heavy weapons squad is taking a break between missions. Again you can see the difference in the sorts <strong>of</strong> uniforms worn by AK soldiers. Their<br />
trousers and shirts are various colours and most likely a mix <strong>of</strong> civilian and military issue.<br />
They have also white eagles painted in white. The eagle insignia is based upon the Polish coat <strong>of</strong> arms. They have been painted very large to help in identification<br />
and provide an interesting painting opportunity.<br />
Page
MODEL CHECKLIST FOR AN AK ARMY<br />
Building an AK army can be challenging and one <strong>of</strong> the most<br />
difficult tasks is sorting out which models you need for your<br />
army. Below is a list <strong>of</strong> models you can use for your army sorted<br />
out by infantry, gun and vehicle teams.<br />
The AK’s variety <strong>of</strong> equipment <strong>of</strong>fers great modelling potential.<br />
For example, their heavy machine guns varied from Maksim<br />
guns to captured German ones. So modelling your heavy<br />
machine-gun platoon with both examples would help replicate<br />
the hodge-podge nature <strong>of</strong> AK equipment.<br />
Infantry platoons also <strong>of</strong>fer excellent modelling opportunities<br />
where you can pull figures from a great deal <strong>of</strong> sources for your<br />
teams. You can be as creative as you like building an AK army!<br />
Infantry<br />
Polish Unit Model to Use Original Nationality Product Code<br />
AK and Kedyw<br />
infantry & gun teams<br />
SS-Panzergrenadierkompanie German GBX18<br />
AK and Kedyw<br />
infantry teams<br />
SS-Panzergrenadier Platoon (Mid) German GE791<br />
AK mortar teams SS-Mortar Platoon (Late) German GE815<br />
AK, Kedyw, and<br />
Polish Strelkovy<br />
Battle Hardened Strelkovy Platoon Soviet SU802<br />
infantry teams<br />
AK infantry Partisans & Polizei Soviet SBX09<br />
AK and Kedyw Flame-Thrower Platoon (late) Soviet SU737<br />
flame-thrower teams<br />
Gun teams<br />
Polish Unit Model to Use Original Nationality Product Code<br />
AK machine-gun teams Machine-Gun Company (late) Soviet SU734<br />
AK anti-tank gun teams 3.7cm PaK36 gun (x2) German GE501<br />
AK anti-tank gun teams 5cm PaK38 gun (x2) German GE510<br />
AK Artillery Battery Artillery Battery German GBX13<br />
AK Artillery Battery 10.5cm leFH18 howitzer (x2) (Late) German GE572<br />
Polish Strelkovy Company 45mm obr 1937 gun (x2) Soviet SU500<br />
Polish Strelkovy Company Mortar Company (late) Soviet SU735<br />
Polish Strelkovy Company Anti-tank Rifle Platoon (late) Soviet SU738<br />
Vehicles<br />
Polish Unit Model to Use Original Nationality Product Code<br />
Kedyw Assault Platoon Panzergrenadier Company HQ German GBX17<br />
Kedyw Tank Platoon Ernst Barkmann German GBX21<br />
Kedyw Tank Platoon Panther A German GE061<br />
Kedyw Tank Platoon Panzer IV H German GE046<br />
Kedyw Tank Platoon Hetzer German GE101<br />
Kedyw Tank Platoon Tiger I E (Zimmerit) German GE071<br />
Kedyw Armoured Car Platoon SdKfz 221 (MG) German GE300<br />
Be Creative!<br />
Remember, at its very core the AK army is ad-hoc. This gives you a great deal <strong>of</strong> latitude as you construct your force. Using all<br />
sorts <strong>of</strong> figures and bits from your collection will give the army a very different look from a normal <strong>Flames</strong> Of <strong>War</strong> force.<br />
Page
BUILDING AN ARMIA KRAJOWA ARMY<br />
In order to make themselves look pr<strong>of</strong>essional the irregular troops the AK attempted to use a standard uniform whenever<br />
possible. A good portion <strong>of</strong> these were captured <strong>of</strong>f the Germans during the uprising. The SS uniforms captured on the first<br />
day went a long way to adding a sense <strong>of</strong> uniformity to the AK. However, not all the troops had access to the uniforms and<br />
used whatever they had on their backs.<br />
<strong>Modelling</strong> AK Infantry<br />
The AK’s mixture <strong>of</strong> uniforms can easily be<br />
replicated using figures from several sources.<br />
When I began working on my AK army, I<br />
collected some Waffen-SS, civilian, and<br />
Soviet figures.<br />
The bulk <strong>of</strong> my army will be sporting SS uniforms. For the<br />
most part I used the late-war Waffen-SS figures. Some old<br />
veterans <strong>of</strong> the Polish Army wore captured SS tunics and<br />
their old army-issue brown trousers and black boots. For<br />
these troops, I used a few mid-war SS<br />
figures.<br />
The SS-Panzergrenadierkompanie<br />
box set (GBX18) is an ideal place to<br />
start since it includes anti-tank guns,<br />
machine-guns and infantry—indeed,<br />
an entire AK army in a box!<br />
I started by picking out all <strong>of</strong> the figures armed with rifles<br />
and setting aside all the SMG and MG teams. The AK didn’t<br />
have many machine-guns at its disposal and those they did<br />
have were organised into heavy machine-gun platoons.<br />
Soviet Rifleman with an<br />
SS head swap<br />
Converted<br />
SS Rifleman<br />
There were many submachine-guns<br />
available as well, but these were largely<br />
reserved for the assault troops. So I set<br />
aside most <strong>of</strong> the SMG miniatures for<br />
SMG teams.<br />
I also did several head-swaps throughout<br />
the whole force. The AK had<br />
several varieties <strong>of</strong> headgear, ranging<br />
from Soviet, German and old Polish helmets, to s<strong>of</strong>t caps<br />
and berets. The old wz.31 model Polish helmet looks similar<br />
to the Soviet helmet, so I swapped several Soviet heads with<br />
German ones, being careful not to destroy them so I could<br />
use them later.<br />
Painting AK Infantry<br />
Once I got all <strong>of</strong> the assembly things worked out, it was onto<br />
painting—and lots <strong>of</strong> it! As demonstrated by the historical<br />
photos shown here the AK troops had a large variety <strong>of</strong><br />
uniform colours.<br />
I made use <strong>of</strong> the Partisan & Polizei<br />
box. Setting aside the Polizei for<br />
another project, I used the Russian<br />
civilians to augment the German<br />
figures.<br />
Painting civilian troops is rather fun<br />
in that your paint selection is widened<br />
Partisan Figure from the<br />
Partisans and Polizei beyond the usual camo tones to<br />
box set include whites, blues, reds and other<br />
bright colours.<br />
You can also convert military tunics into civilian ones just by<br />
changing its colour. Civilian dress will yeild all sorts <strong>of</strong> colour<br />
combinations if you think outside<br />
the box. I even found myself looking<br />
up 1930s fashions on the internet<br />
and watching period movies to get<br />
inspiration for civilian clothing.<br />
I also painted the AK identification<br />
armband on each figure’s right arm,<br />
and a similar band around most <strong>of</strong><br />
the German helmets.<br />
Soviet <strong>of</strong>ficer with a<br />
British Commando<br />
head swap<br />
Left & Below: The front and back <strong>of</strong> an AK rifle team<br />
from my AK force. I intentionally went with three guys<br />
on the stand so that I could add more detail to the base.<br />
More on basing tips later.<br />
Page
When large numbers <strong>of</strong> helmets fell into<br />
Polish hands, some AK squads painted the<br />
Polish eagle on them.<br />
On some <strong>of</strong> the figures’ helmets without<br />
covers, I painted the Polish eagle emblem. I<br />
painted a very simple ‘V’ with a line down<br />
the middle. Then, another small line at the<br />
bottom to simulate the eagle’s feet.<br />
<strong>Modelling</strong> Kedyw<br />
Rifleman with an<br />
eagle emblem on<br />
the helmet<br />
The Kedyw were the elite troops <strong>of</strong> the AK.<br />
They were tasked with the most difficult<br />
assignments to secure critical buildings and<br />
locations. To complete their mission, they<br />
received a lot <strong>of</strong> the AK’s precious few heavy<br />
weapons.<br />
Heer Panzerfaust The Kedyw teams use the same equipment<br />
figure. with<br />
as the other AK teams, only they had many<br />
civilian trousers.<br />
more submachine-guns and heavy weapons.<br />
The Waffen-SS figures are ideal for Kedyw platoons as they<br />
used a significant portion <strong>of</strong> the captured uniforms. For my<br />
force I used the SS figures for all <strong>of</strong> my Kedyw troops with a<br />
few head swaps here and there.<br />
Mid-war SS Figure (note<br />
the jack boots)<br />
The most tricky <strong>of</strong> these would be the<br />
SS cam<strong>of</strong>lage smocks and trousers.<br />
The AK’s SS camouflage was in the<br />
Pea Dot pattern, so I used James<br />
Brown’s excellent tutorial found in<br />
Art <strong>of</strong> <strong>War</strong> II: Wehrmacht Edition on<br />
page 30. For some troops I painted<br />
both tunic and trousers in Pea Dot,<br />
while for others I mixed in a few<br />
civilian pants here and there.<br />
The Kedyw had a lot <strong>of</strong> hand-held anti-tank weapons as<br />
well, ranging from PIAT projectors to Panzerfaust launchers.<br />
German Panzerfaust figures are perfect for Kedyw troops.<br />
PIAT teams are a bit more tricky, but <strong>of</strong>ten a head-swap with<br />
a British figure or two will suffice.<br />
<strong>Modelling</strong> ‘<strong>War</strong>saw’ Bases<br />
The key feature <strong>of</strong> the <strong>War</strong>saw Uprising was, not surprisingly,<br />
the city itself. The terrain enabled the AK fighters to contain<br />
German strongholds and force a fierce street-by-street fight.<br />
Urban bases can be a bit challenging, especially when you<br />
have to cover a lot <strong>of</strong> bases in a large force. The secret is to<br />
keep the bases simple enough in construction to repeat across<br />
a large force, yet <strong>of</strong>fer detail so as to not look too dull.<br />
For my force I focused largely on strewn rubble. I used copper<br />
wire for exposed plumbing, small squares <strong>of</strong> aluminum foil<br />
for newspapers, balsa wood splinters for wood and assorted<br />
bits such as wagon wheels.<br />
However, there was a fair amount <strong>of</strong> fighting in non-urban<br />
terrain such as parks, airfields, and forests so AK troops based<br />
accordingly would be just as accurate.<br />
The Stuff <strong>of</strong> Buildings<br />
Consider how the building was built and what sorts <strong>of</strong><br />
things would be exposed when it was destroyed, such as<br />
plumbing and timber frames. Was the building burned?<br />
Smoke and fire marks help tell the story <strong>of</strong> your building.<br />
For the exposed plumbing, I used copper wire and stuck<br />
several pipes close together, bent every which way. Then<br />
I heavily washed them with watered-down black and<br />
brown paint to take some <strong>of</strong> the shine <strong>of</strong>f the wire. The<br />
matt varnish at the end helps tie it into the base.<br />
Fabric & Paper<br />
In the example shown here, the disgraced flag and<br />
crumpled newspaper are made from aluminum foil.<br />
Cut the foil to the right size, put some glue on the back<br />
side and set it on the base. Then take a stiff-bristled paint<br />
brush and press it into the base so that the foil takes on<br />
the shape <strong>of</strong> the texture underneath.<br />
Page
Urban Basing Theory<br />
My theory <strong>of</strong> basing is that bases should set the scene for the<br />
story your army tells. Sometimes that scene is simple, like<br />
a late-spring pasture or a winter wonderland. Or, they can<br />
be complex, like urban basing. In the end basing is just as<br />
important (if not more) to me as the figures themselves.<br />
For my <strong>War</strong>saw force, rather than just making random<br />
urban bases, I carefully thought about the scene and how<br />
and where each platoon in the force fit. Photographs really<br />
helped at this stage.<br />
For example, anti-tank guns will be in the street with improvised<br />
cover around them. The infantry will be found in<br />
trickier terrain such as a destroyed building. But overall,<br />
these platoons are found near each other and thus similar<br />
rubble and wreckage will be found on each base.<br />
Though a neat effect, bases don’t have to be inter-connecting<br />
as if it were a puzzle. They just have to look as though they<br />
connect, and having a scene established in your head is a<br />
great way to make sure you don’t deviate and end up with a<br />
random assortment <strong>of</strong> urban bases.<br />
When working on rubble from a ruined building, it really<br />
helps to know ahead <strong>of</strong> time what your building looked like<br />
before and after it was destroyed, even if you aren’t modelling<br />
the whole building. Basically, you want to know how<br />
the building lived, and how it died.<br />
For example, if your troops will be fighting in and around<br />
a department store, think about the colour <strong>of</strong> the building<br />
and decorative architecture, such as fascades and cast-iron<br />
embellishments.<br />
Also think about what was inside. Was it looted? Was it fully<br />
stocked? Is there anything inside that the civilians would<br />
have pulled out to make barricades?<br />
In the example here I wanted to focus on the corner <strong>of</strong> an<br />
abandoned German HQ building (though you probably<br />
can’t easily see it now!). This helps make the stand ‘make<br />
sense’ and scenic.<br />
For rubble I used several sizes <strong>of</strong> model railway ballast.<br />
Mixing small and medium grains help vary the size <strong>of</strong> the<br />
rubble so that it doesn’t look like the building collapsed in<br />
tidy, uniform, easy-to-clean bits.<br />
When painting rubble remember the colour you chose for<br />
the building. The bricks or stone blocks would be painted<br />
on one side. I base coated all my rubble in a brick-coloured<br />
red-brown to simulate bricks. I then painted several light<br />
grey (the colour I chose for the exterior <strong>of</strong> my building).<br />
Rubble isn’t clean either. When a building collapses a good<br />
portion <strong>of</strong> the material is pulverised into dust and grit. At<br />
the end <strong>of</strong> the painting process, I dry-brushed the rubble<br />
with brick red and shades <strong>of</strong> khaki.<br />
Then add ambient wreckage, from wood splinters, exposed<br />
plumbing, wall paper, recruiting posters, graffiti, and more.<br />
Below: Broken<br />
brick and<br />
pulverised dust<br />
Left: Exposed<br />
plumbing and<br />
shattered timber<br />
Right: Ambient<br />
wreckage and<br />
litter, such as<br />
newspapers and<br />
recruiting posters<br />
<strong>Modelling</strong> a Barricade<br />
Before I started modelling, I found several pictures from the<br />
uprising to see what sorts <strong>of</strong> things would be used in the barricade<br />
and found that it was pretty much anything the troops<br />
could haul into the streets such as overturned automobiles,<br />
bricks rubble, timber, bed frames, furniture, etc..<br />
Barricades are Barrier fortifications which makes them<br />
8”/20cm long and 2”/5cm deep. For this project, I’ve split<br />
the barricade into two 4”/10cm x 2”/5cm sections so that<br />
they can fit between buildings on narrow streets or put them<br />
side-by-side in larger areas.<br />
Zis-5 3-ton<br />
truck (SU422)<br />
Model<br />
Railroad Rod<br />
Iron Pieces<br />
The barricades need to be big enough to stop vehicles so I<br />
made sure that the barricade topped about 1”/2.5cm. I used<br />
a few model railroading bits for the cast-iron pieces and some<br />
extra pieces in my spare parts drawers for rest.<br />
Ages ago I dropped an old soviet truck and the resin broke,<br />
so I weathered it and stuck it on the base as well, concealing<br />
the base with rubble. I used some Schürzen pieces and some<br />
match sticks foe lumber. Some barricades were manned, so<br />
you can put some troops on them as well for aesthetic value.<br />
Model<br />
Railroad Rock<br />
Ballast<br />
Cart<br />
Staff Team<br />
Table<br />
Ammo Boxes<br />
Schurzen<br />
Plates<br />
Wagon<br />
Wheels<br />
Static Rocket<br />
Launcher<br />
frame<br />
Spare Tyre<br />
Match-Stick<br />
Lumber<br />
55-Gallon<br />
Barrel<br />
Page
<strong>Modelling</strong> Vehicles<br />
The AK captured several armoured vehicles during the<br />
Uprising including two Panthers, a Tiger, a Panzer IV, a<br />
Hetzer and some armoured cars. These were left in the<br />
original colours that they were captured in. The AK painted<br />
large Polish symbols all over the tank, including Polish flags,<br />
eagles and other such nationalistic markings. They were<br />
painted oversized so that they could not be mistaken for<br />
German tanks.<br />
A common marking was ‘WP’ which stood for Wojsko Polskie<br />
(Polish Army). This originated from the Polish underground<br />
flag which itself was also commonly found painted on Polish<br />
vehicles during the uprising.<br />
The AK also constructed a few examples <strong>of</strong> their own<br />
armoured transports, including Kubus, a converted 3-ton<br />
Chevorlet truck. These were <strong>of</strong>ten just painted in whatever<br />
colour was handy.<br />
The exception to this was ‘Kubus’ which was specifically<br />
painted in camouflage because it was too valuable to risk<br />
getting knocking it out. The camouflage scheme was a series<br />
<strong>of</strong> dark grey streaks over an overall medium-grey basecoat,<br />
which helped the vehicle blend into the urban terrain.<br />
Left: Barkmann’s Panther model<br />
(GBX21) provided me with an open<br />
turret hatch so I could model the<br />
scene photographed above.<br />
Above: A Kedyw Panther tank crew pause to plan their next move.<br />
<strong>Modelling</strong> AK Vehicles<br />
Painting AK vehicles is quite simple. Basically,<br />
paint them as though they are German and then<br />
paint Polish markings all over it.<br />
There are numerous pictures <strong>of</strong> an AK Panther<br />
tank which appears to have no discolouration that<br />
one would expect from a camouflaged vehicle,<br />
indicating that it was painted in standard dark<br />
yellow (Middlestone 882).<br />
As you can see from the photo above the German<br />
Balkenkreuz was not painted over and was still<br />
visible.<br />
The crews painted several Polish flags and insignia<br />
all around the turret and hull to help identify the<br />
vehicle. Inspirational and patriotic slogans and<br />
other such graffiti were also applied to vehicles<br />
Some half-tracks and tanks also received the Polish<br />
‘checkerboard’ insignia. This was first used as a<br />
personal insignia <strong>of</strong> the Polish fighter pilot Stefan<br />
Stec during World <strong>War</strong> I and was eventually<br />
adopted as the Polish national symbol in 1918.<br />
There are several examples <strong>of</strong> this symbol being<br />
used in <strong>War</strong>saw.<br />
Above: A captured Sd Kfz 251 half-track with the Polish checkerboard insignia.<br />
Page