Available (PDF) - Ford Racing
Available (PDF) - Ford Racing
Available (PDF) - Ford Racing

You also want an ePaper? Increase the reach of your titles
YUMPU automatically turns print PDFs into web optimized ePapers that Google loves.
M-2005-GT<br />
<strong>Ford</strong> GT Power Upgrade Kit<br />
INSTALLATION INSTRUCTIONS<br />
NO PART OF THIS DOCUMENT MAY BE REPRODUCED WITHOUT PRIOR AGREEMENT AND WRITTEN PERMISSION OF<br />
FORD RACING PERFORMANCE PARTS.<br />
Please visit www.fordracingparts.com for the most current instruction information<br />
! ! ! PLEASE READ ALL OF THE FOLLOWING INSTRUCTIONS CAREFULLY PRIOR TO INSTALLATION.<br />
AT ANY TIME YOU DO NOT UNDERSTAND THE INSTRUCTIONS, PLEASE CALL THE FORD RACING<br />
TECHLINE AT 1-800-367-3788 ! ! !<br />
POWER UPGRADE KIT INCLUDES:<br />
Item # Qty<br />
Description<br />
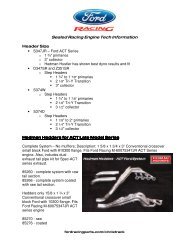
1 1 Pulley<br />
2 1 Motorcraft TA-16 Gasket Maker Tube<br />
3 2 Motorcraft XL-4 Synthetic Supercharger Fluid<br />
4 2 Shims 11mm ID<br />
5 2 Shims 8.26mm ID<br />
6 1 Pro-Cal Tool<br />
NOTE:<br />
NOTE:<br />
Before starting this installation, verify that the kit contents are complete.<br />
It is necessary to have a <strong>Ford</strong> GT shop manual to reference. Shop manuals can be<br />
purchased from Helm Publications at 1-800-782-4356 or www.helminc.com.<br />
INSTALLATION INSTRUCTIONS:<br />
STEP 1:<br />
STEP 2:<br />
STEP 3:<br />
STEP 4:<br />
STEP 5:<br />
STEP 6:<br />
Flash the vehicle with the Pro-Cal tool. Follow the instructions that come with the Pro-Cal tool.<br />
When the green indicator light comes on the flash is complete, go to STEP 2. If the green light does<br />
not come on, contact the Techline at 1-800-367-3788.<br />
Put vehicle on hoist. Refer to section 100-02 of the shop manual.<br />
Disconnect battery ground cable. Refer to section 414-01 of the shop manual.<br />
Remove the supercharger. Refer to section 303-12-5 of the shop manual.<br />
Put the supercharger on a bench being careful not to scratch the assembly or the gasket surface.<br />
Loosen and remove the six (6) snout bolts. Make sure to place a drain pan under this as fluid will leak out.<br />
Factory <strong>Ford</strong> shop manuals are available from Helm Publications, 1-800-782-4356<br />
Techline 1-800-367-3788 Page 1 of 5 IS-1850-0263
M-2005-GT<br />
<strong>Ford</strong> GT Power Upgrade Kit<br />
INSTALLATION INSTRUCTIONS<br />
NO PART OF THIS DOCUMENT MAY BE REPRODUCED WITHOUT PRIOR AGREEMENT AND WRITTEN PERMISSION OF<br />
FORD RACING PERFORMANCE PARTS.<br />
Pic. 1<br />
STEP 7: Remove the snout from the supercharger (see Pic. 1).<br />
Pic. 2<br />
STEP 8: Remove the rubber isolator from the snout (see Pic. 2).<br />
Pic. 3<br />
STEP 9:<br />
Position the snout in a press by safely putting a “bearing puller” around the pulley and pressing only on<br />
the shaft (see Pic. 3).<br />
Factory <strong>Ford</strong> shop manuals are available from Helm Publications, 1-800-782-4356<br />
Techline 1-800-367-3788 Page 2 of 5 IS-1850-0263
M-2005-GT<br />
<strong>Ford</strong> GT Power Upgrade Kit<br />
INSTALLATION INSTRUCTIONS<br />
NO PART OF THIS DOCUMENT MAY BE REPRODUCED WITHOUT PRIOR AGREEMENT AND WRITTEN PERMISSION OF<br />
FORD RACING PERFORMANCE PARTS.<br />
Pic. 4<br />
STEP 10: Press the snout out of the pulley (see Pic. 4).<br />
Pic. 5<br />
STEP 11: Position the new pulley on the press (see Pic. 5).<br />
Pic. 6 Pic. 7 Pic. 8<br />
STEP 12:<br />
Press the snout onto the pulley by only pressing on the backside of the shaft to avoid bearing damage<br />
(see Pics. 6, 7 and 8).<br />
Factory <strong>Ford</strong> shop manuals are available from Helm Publications, 1-800-782-4356<br />
Techline 1-800-367-3788 Page 3 of 5 IS-1850-0263
M-2005-GT<br />
<strong>Ford</strong> GT Power Upgrade Kit<br />
INSTALLATION INSTRUCTIONS<br />
NO PART OF THIS DOCUMENT MAY BE REPRODUCED WITHOUT PRIOR AGREEMENT AND WRITTEN PERMISSION OF<br />
FORD RACING PERFORMANCE PARTS.<br />
Pic. 9 Pic. 10<br />
STEP 13: Press the shaft into the pulley until the shaft is flush with the front of the pulley (see Pics. 9 and 10).<br />
Pic. 11<br />
STEP 14: Reinstall the rubber isolator onto the shaft drive (see Pic. 11).<br />
STEP 15:<br />
Clean all gasket surfaces.<br />
Pic. 12<br />
STEP 16:<br />
Apply sealant (Motorcraft gasket maker TA-16) to the snout assembly (see Pic. 12) and install back onto<br />
the supercharger making sure to line up the rubber isolator to the supercharger shaft.<br />
Factory <strong>Ford</strong> shop manuals are available from Helm Publications, 1-800-782-4356<br />
Techline 1-800-367-3788 Page 4 of 5 IS-1850-0263
M-2005-GT<br />
<strong>Ford</strong> GT Power Upgrade Kit<br />
INSTALLATION INSTRUCTIONS<br />
NO PART OF THIS DOCUMENT MAY BE REPRODUCED WITHOUT PRIOR AGREEMENT AND WRITTEN PERMISSION OF<br />
FORD RACING PERFORMANCE PARTS.<br />
STEP 17:<br />
STEP 18:<br />
STEP 19:<br />
Install the six (6) snout bolts and torque to 25Nm.<br />
Clean off excess sealant from around snout assembly.<br />
Fill supercharger to the bottom of the fill plug (with the supercharger flat on the table as installed position)<br />
with Motorcraft Synthetic Supercharger Fluid (part #XL-4). It will take about 8oz. Reinstall fill plug.<br />
Pic. 13<br />
STEP 20:<br />
STEP 21:<br />
STEP 22:<br />
While the supercharger is off and the belt is not under tension, remove the four (4) power steering pump<br />
bolts and install supplied shims between the pump and the block (see Pic. 13). This modification is done<br />
to allow use of the stock length belt. Be careful to notice that two (2) of the shims have larger holes for the<br />
alignment dowels.<br />
Reinstall power steering pump bolts and torque to 25Nm.<br />
Reinstall supercharger in reverse order by referencing the shop manual. Replace the supercharger<br />
gasket if necessary. The gasket can be purchased from a <strong>Ford</strong> dealer, part number 4G7Z-9H486-AA.<br />
Factory <strong>Ford</strong> shop manuals are available from Helm Publications, 1-800-782-4356<br />
Techline 1-800-367-3788 Page 5 of 5 IS-1850-0263