Owner's Manual - FIMCO Industries
Owner's Manual - FIMCO Industries
Owner's Manual - FIMCO Industries
Create successful ePaper yourself
Turn your PDF publications into a flip-book with our unique Google optimized e-Paper software.
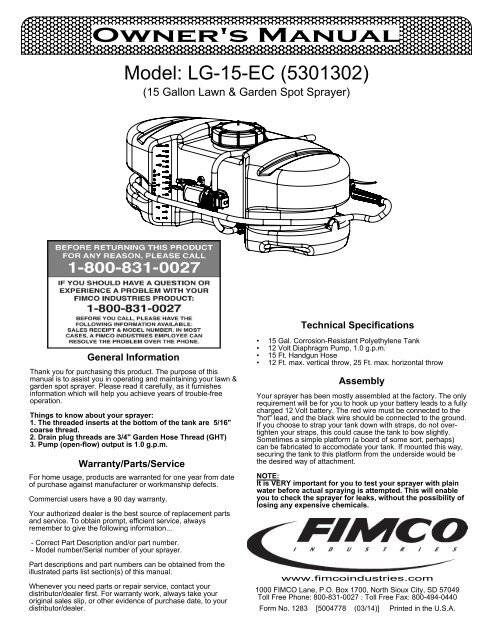
<strong>Owner's</strong> <strong>Manual</strong><br />
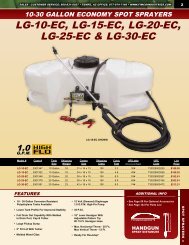
Model: LG-15-EC (5301302)<br />
(15 Gallon Lawn & Garden Spot Sprayer)<br />
Technical Specifications<br />
General Information<br />
Thank you for purchasing this product. The purpose of this<br />
manual is to assist you in operating and maintaining your lawn &<br />
garden spot sprayer. Please read it carefully, as it furnishes<br />
information which will help you achieve years of trouble-free<br />
operation.<br />
Things to know about your sprayer:<br />
1. The threaded inserts at the bottom of the tank are 5/16"<br />
coarse thread.<br />
2. Drain plug threads are 3/4" Garden Hose Thread (GHT)<br />
3. Pump (open-flow) output is 1.0 g.p.m.<br />
Warranty/Parts/Service<br />
For home usage, products are warranted for one year from date<br />
of purchase against manufacturer or workmanship defects.<br />
Commercial users have a 90 day warranty.<br />
Your authorized dealer is the best source of replacement parts<br />
and service. To obtain prompt, efficient service, always<br />
remember to give the following information...<br />
• 15 Gal. Corrosion-Resistant Polyethylene Tank<br />
• 12 Volt Diaphragm Pump, 1.0 g.p.m.<br />
• 15 Ft. Handgun Hose<br />
• 12 Ft. max. vertical throw, 25 Ft. max. horizontal throw<br />
Assembly<br />
Your sprayer has been mostly assembled at the factory. The only<br />
requirement will be for you to hook up your battery leads to a fully<br />
charged 12 Volt battery. The red wire must be connected to the<br />
"hot" lead, and the black wire should be connected to the ground.<br />
If you choose to strap your tank down with straps, do not overtighten<br />
your straps, this could cause the tank to bow slightly.<br />
Sometimes a simple platform (a board of some sort, perhaps)<br />
can be fabricated to accomodate your tank. If mounted this way,<br />
securing the tank to this platform from the underside would be<br />
the desired way of attachment.<br />
NOTE:<br />
It is VERY important for you to test your sprayer with plain<br />
water before actual spraying is attempted. This will enable<br />
you to check the sprayer for leaks, without the possibility of<br />
losing any expensive chemicals.<br />
- Correct Part Description and/or part number.<br />
- Model number/Serial number of your sprayer.<br />
Part descriptions and part numbers can be obtained from the<br />
illustrated parts list section(s) of this manual.<br />
Whenever you need parts or repair service, contact your<br />
distributor/dealer first. For warranty work, always take your<br />
original sales slip, or other evidence of purchase date, to your<br />
distributor/dealer.<br />
www.fimcoindustries.com<br />
1000 <strong>FIMCO</strong> Lane, P.O. Box 1700, North Sioux City, SD 57049<br />
Toll Free Phone: 800-831-0027 : Toll Free Fax: 800-494-0440<br />
Form No. 1283 [5004778 (03/14)] Printed in the U.S.A.
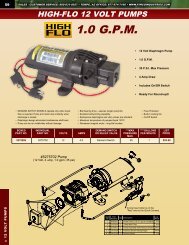
Pump Model: 5277980<br />
1<br />
2<br />
Available Replacement Parts<br />
3<br />
1<br />
Item<br />
No<br />
1<br />
2<br />
3<br />
4<br />
Part<br />
Number<br />
5095202<br />
5157204<br />
5275531<br />
5157201<br />
Qty Description<br />
1<br />
1<br />
1<br />
1<br />
Mounting Feet (Pkg of 4)<br />
5 Amp 'Mini Blade' Fuse<br />
Pump Assembly with Pressure Switch<br />
Pressure Switch w/Diaphragm<br />
4<br />
Troubleshooting the Pump:<br />
Motor does not run:<br />
°<br />
°<br />
°<br />
°<br />
°<br />
is in the 'ON' position. "I" is the 'ON' position, and 'O' is the 'OFF' position.<br />
Check for defective pressure switch. Make sure you are connected to a good<br />
12 volt power source. Make sure any on/off switch is in the 'on' position.<br />
Remove the cap to the pressure switch. Pull both red wires off of their terminals,<br />
and touch the two ends together. If your pump runs when you do this,<br />
your pressure switch will need to be replaced.<br />
Pump does not prime:<br />
°<br />
°<br />
°<br />
°<br />
Check for air leaks in supply line.<br />
Check for clogged strainer/filter.<br />
Check for cracks in the pump housing.<br />
Check for empty product supply.<br />
Pulsating flow (surging):<br />
°<br />
°<br />
°<br />
°<br />
°<br />
°<br />
°<br />
Check for defective pressure switch.<br />
Check for leaks in the discharge line.<br />
Check for restriction in the discharge line.<br />
Check for debris in nozzle orifice.<br />
Discharge hose may be too long.<br />
Check for clogged strainer.<br />
Motor continues to run after discharge is shut off:<br />
°<br />
°<br />
°<br />
°<br />
°<br />
Check for loose wiring connection(s).<br />
Make sure the 'ON/OFF' switch in the lead wire assembly<br />
Check the fuse.<br />
Check for low voltage at the power supply.<br />
Check for empty product supply.<br />
Check for open bypass valve. (if equipped)<br />
Check for low voltage.<br />
Check for leak in discharge line.<br />
Check for defective pressure switch.<br />
Fuse<br />
Flow Rate:<br />
Current:<br />
Check Valve:<br />
Port Type:<br />
Motor Voltage:<br />
Wetted Parts Housing: Polypropylene<br />
Diaphragm:<br />
Liquid Temperature:<br />
2.250<br />
Pump Specifications<br />
1.0 GPM @ Open Flow<br />
2.2 Amps @ 30 PSI<br />
Viton<br />
3/8" Hose Barb<br />
12 Volts DC<br />
Santoprene<br />
110° F max.<br />
GPM = Gallons Per Minute<br />
PSI = Pounds per Square Inch<br />
DC = Direct Current<br />
Outlet<br />
12V Connection<br />
Pump Model Number<br />
3.188<br />
Inlet<br />
Pump Serial Number<br />
Page 2
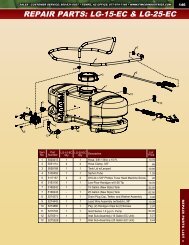
Exploded View/Parts List: LG-15-EC (5301302)<br />
7<br />
1<br />
2<br />
3<br />
3<br />
4<br />
8<br />
13<br />
10<br />
11<br />
9<br />
6<br />
3<br />
5<br />
12.3<br />
Approximate Unit Dimensions:<br />
Length = 35"<br />
Width = 17"<br />
Height = 14"<br />
12.4<br />
3<br />
12.2<br />
12.1<br />
14<br />
Operation<br />
Item<br />
No<br />
Part<br />
Number<br />
Qty<br />
Description<br />
1 5020524 1 Hose, 3/8"-1 Brd. x 15 Ft.<br />
2 5051122 1 5/8" Black Nylon Loom Cable Clamp<br />
3 5051144 4 Hose Clamp, 3/8"<br />
4 5058188 1 Tank Lid w/Lanyard<br />
5 5100452 1 Siphon Tube<br />
6 5117167 4 #10-24 x 5/8" Phillips Truss Head Machine Screw<br />
7 5117234 1 #10-24 x 1/2" Phillips Truss Head Machine Screw<br />
8 5163100 1 Low-Flow Spray Wand w/X-26 Tip<br />
9 5169242 1 15 Gallon Tank (White/Side-Mount Pump)<br />
10 5274373 1 Drain Plug Cap, Tether, and Washer Assembly<br />
11 5274880 1 Handgun Clips & Screws (Pkg/2) (#10-24 Thread)<br />
12 5275511 1 Inlet Sub-Assembly (EC Units)<br />
12.1 5149034 1 Poly Swivel, 3/8" Hose Barb<br />
12.2 5006209 1 Poly Knurled Swivel Nut, 3/4" FGHT<br />
12.3 5116242 1 Strainer, 1" Filter Washer<br />
12.4 5020095 1 Hose, 3/8"-1 Brd. x 6 1/2"<br />
13 5277980 1 High Flo Gold Series 1.0 GPM Pump<br />
14 5278017 1 Lead Wire Assembly w/5A Fuse & 30A Clips (96" Long)<br />
Your sprayer is equipped with (1) ON/OFF switch. It is on<br />
the wire assembly that you hook up to your battery. The "-" is<br />
the "ON" position and the "o" is the "OFF" position. Make sure<br />
the switch is depressed in the "-" position for operation.<br />
The pump is equipped with an electronic pressure switch that<br />
is factory pre-set for it to shut off at 35 p.s.i.. This switch<br />
assembly is the 'square box' on the head portion of the pump.<br />
Always fill the tank with a desired amount of water first, and<br />
then add the chemical slowly, mixing as you pour the chemical<br />
into the tank. You may use the handgun to spray into the<br />
solution in order to mix the chemical and water.<br />
Initially begin spraying by opening the handgun. This will<br />
enable the air in the line to be purged through the handgun tip,<br />
while building pressure.<br />
The pumping system draws solution from the tank, through the<br />
strainer/filter, and to the pump. The pump forces the solution<br />
under pressure to the handgun and/or boom nozzles.<br />
• Open the handgun by squeezing the handle lever.<br />
• Rotating the adjustable nozzle tip on the handgun will<br />
change the tip pattern from a straight stream to a cone<br />
pattern (finer mist).<br />
Page 3


