Vitotronic 200 HO1B Operating instructions485 KB - Viessmann
Vitotronic 200 HO1B Operating instructions485 KB - Viessmann
Vitotronic 200 HO1B Operating instructions485 KB - Viessmann

You also want an ePaper? Increase the reach of your titles
YUMPU automatically turns print PDFs into web optimized ePapers that Google loves.
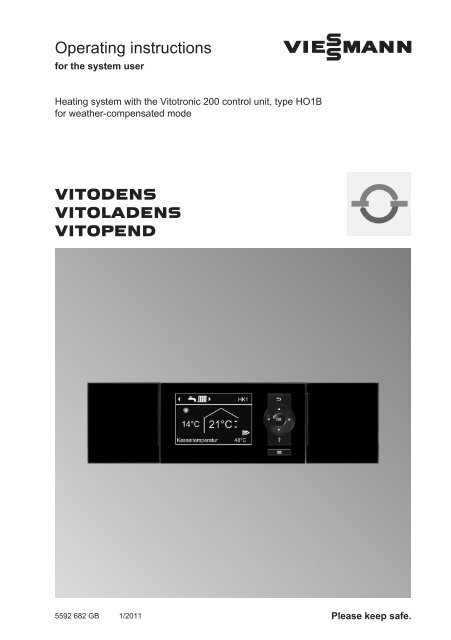
<strong>Operating</strong> instructions<br />
for the system user<br />
VIESMANN<br />
Heating system with the <strong>Vitotronic</strong> <strong>200</strong> control unit, type <strong>HO1B</strong><br />
for weather-compensated mode<br />
VITODENS<br />
VITOLADENS<br />
VITOPEND<br />
5592 682 GB 1/2011 Please keep safe.
Safety instructions<br />
For your safety<br />
Please follow these safety instructions closely to prevent accidents and material<br />
losses.<br />
Safety instructions explained<br />
Danger<br />
This symbol warns against the<br />
risk of injury.<br />
!<br />
Please note<br />
This symbol warns against the<br />
risk of material losses and environmental<br />
pollution.<br />
Note<br />
Details identified by the word "Note" contain<br />
additional information.<br />
Target group<br />
These operating instructions are for the<br />
heating system user.<br />
This unit is not designed to be used by<br />
persons (including children) with limited<br />
bodily, sensory or mental capacities, or<br />
lacking experience and/or lacking knowledge,<br />
unless they are supervised by a<br />
person responsible for their safety, or<br />
have received instructions from such a<br />
person as to how to use the unit.<br />
Please note<br />
! Children should be supervised.<br />
Ensure that children do not play<br />
with the unit.<br />
Danger<br />
Incorrectly executed work on the<br />
heating system can lead to lifethreatening<br />
accidents.<br />
■ Work on gas appliances must<br />
only be carried out by a registered<br />
gas fitter.<br />
■ Work on electrical equipment<br />
must only be carried out by a<br />
qualified electrician.<br />
If you smell gas<br />
Danger<br />
Escaping gas can lead to explosions<br />
which may result in serious<br />
injury.<br />
■ Do not smoke. Prevent naked<br />
flames and sparks. Never<br />
switch lights or electrical appliances<br />
ON or OFF.<br />
■ Close the gas shut-off valve.<br />
■ Open windows and doors.<br />
■ Remove all people from the<br />
danger zone.<br />
■ Notify your gas or electricity<br />
supplier and your heating contractor<br />
from outside the building.<br />
■ Shut off the electricity supply to<br />
the building from a safe place<br />
(outside the building).<br />
5592 682 GB<br />
2
Safety instructions<br />
For your safety (cont.)<br />
If you smell flue gas<br />
Danger<br />
Flue gas can lead to life-threatening<br />
poisoning.<br />
■ Shut down the heating system.<br />
■ Ventilate the boiler room.<br />
■ Close all doors in the living<br />
space.<br />
In case of fire<br />
Danger<br />
Fire creates the risk of burning<br />
and explosions.<br />
■ Shut down the heating system.<br />
■ Close the shut-off valves of the<br />
fuel lines.<br />
■ Use a tested fire extinguisher,<br />
class ABC.<br />
Ancillary components, spare and<br />
wearing parts<br />
Please note<br />
! Components that are not tested<br />
with the heating system may lead<br />
to damage to the heating system,<br />
or may affect their various functions.<br />
Installation or replacement work<br />
must only be carried out by qualified<br />
personnel.<br />
Boiler room requirements<br />
5592 682 GB<br />
!<br />
Please note<br />
Incorrect ambient conditions can<br />
lead to damage to the heating<br />
system and put the safe operation<br />
at risk.<br />
■ Ensure ambient temperatures<br />
above 0 ºC and below 35 ºC.<br />
■ Prevent air contamination by<br />
halogenated hydrocarbons<br />
(e.g. as contained in paints,<br />
solvents or cleaning fluids) and<br />
excessive dust (e.g. through<br />
grinding/polishing work).<br />
■ Avoid continuously high humidity<br />
levels (e.g. through frequent<br />
drying of washing).<br />
■ Never close existing ventilation<br />
apertures.<br />
3
Index<br />
Index<br />
Introductory information<br />
Commissioning..................................................................................................... 6<br />
Your system is preset at the factory..................................................................... 6<br />
Terminology.......................................................................................................... 7<br />
Tips on saving energy.......................................................................................... 7<br />
Operation<br />
Controls................................................................................................................ 9<br />
■ Programming unit.............................................................................................. 9<br />
Menu.................................................................................................................... 10<br />
How to use the controls........................................................................................ 12<br />
Start-up/shutdown<br />
Starting the heating system.................................................................................. 15<br />
Shutting down the heating system....................................................................... 16<br />
■ With frost protection monitoring........................................................................ 16<br />
■ Without frost protection monitoring (shutdown)................................................ 16<br />
Central heating<br />
Required settings (central heating)...................................................................... 17<br />
Selecting a heating circuit.................................................................................... 17<br />
Setting the room temperature............................................................................... 18<br />
Setting the heating program for central heating................................................... 19<br />
Setting the time program for central heating........................................................ 19<br />
Changing the heating curve................................................................................. 20<br />
Stopping the central heating................................................................................. 21<br />
Comfort and energy saving functions.............................................................. 22<br />
DHW heating<br />
Required settings (DHW heating)......................................................................... 25<br />
Setting the DHW temperature.............................................................................. 25<br />
Setting the heating program for DHW heating..................................................... 25<br />
Setting the time program for DHW heating.......................................................... 26<br />
■ Heating system with DHW circulation pump..................................................... 27<br />
Stopping the DHW heating................................................................................... 28<br />
Further adjustments<br />
Setting the display contrast.................................................................................. 29<br />
Setting the display brightness.............................................................................. 29<br />
Entering names for the heating circuits................................................................ 29<br />
Changing the standard menu............................................................................... 30<br />
Setting the time and date..................................................................................... 30<br />
4<br />
5592 682 GB
Index<br />
Index (cont.)<br />
Language selection.............................................................................................. 31<br />
Setting the temperature unit (°C/°F)..................................................................... 31<br />
Restoring factory settings..................................................................................... 31<br />
Scanning<br />
Scanning information............................................................................................ 32<br />
Scanning the service messages........................................................................... 33<br />
Scanning fault messages..................................................................................... 34<br />
Emissions test mode......................................................................................... 36<br />
What to do if...<br />
Rooms are too cold.............................................................................................. 37<br />
Rooms are too hot................................................................................................ 38<br />
There is no hot water............................................................................................ 38<br />
The DHW is too hot.............................................................................................. 39<br />
"ã" flashes and "Fault" is displayed.................................................................... 39<br />
"ë" flashes and "Service" is displayed................................................................ 39<br />
"Controls locked out" is displayed........................................................................ 39<br />
"External hook-up" is displayed............................................................................ 39<br />
"External program" is displayed........................................................................... 39<br />
Maintenance........................................................................................................ 40<br />
Appendix<br />
Ordering fuel oil.................................................................................................... 41<br />
Menu overview..................................................................................................... 42<br />
■ Extended menu................................................................................................. 42<br />
■ Scanning options in the extended menu........................................................... 43<br />
Terminology.......................................................................................................... 44<br />
Keyword index.................................................................................................... 49<br />
5592 682 GB<br />
5
Introductory information<br />
Commissioning<br />
The commissioning and matching of the<br />
control unit to local conditions and building<br />
characteristics, as well as instructing<br />
the user in the operation of the system,<br />
must be carried out by your heating contractor.<br />
As the user of new combustion equipment,<br />
you may be obliged to notify your<br />
local flue gas inspector of the installation<br />
[check local regulations]. Your local flue<br />
gas inspector will also inform you [where<br />
appropriate] about work he may be<br />
required to perform on your combustion<br />
equipment (e.g. regular checks, cleaning).<br />
Your system is preset at the factory<br />
The control unit is factory-set to "Heating<br />
and DHW".<br />
Your heating system is therefore ready<br />
for use:<br />
Central heating<br />
■ Between 6:00 and 22:00 h, the rooms<br />
are heated with 20 °C "Set room<br />
temp" (standard heating mode).<br />
■ Between 22:00 and 6:00 h, the rooms<br />
are heated with 3 °C "Set reduced<br />
room temp" (reduced heating mode,<br />
frost protection).<br />
■ Your heating contractor can make further<br />
settings for you during commissioning.<br />
You can change any settings individually<br />
at any time to suit your requirements<br />
(see chapter "Central heating").<br />
DHW heating<br />
■ Between 5:30 and 22:00 h, the DHW<br />
is heated to 50 °C "Set DHW temperature".<br />
Any installed DHW circulation<br />
pump is ON.<br />
■ Between 22:00 and 05:30 h, the DHW<br />
cylinder temperature will not be reheated.<br />
Any installed DHW circulation<br />
pump is OFF.<br />
■ Your heating contractor can make further<br />
settings for you during commissioning.<br />
You can change any settings individually<br />
at any time to suit your requirements<br />
(see chapter "DHW heating").<br />
Frost protection<br />
■ Your boiler and DHW cylinder are protected<br />
against frost.<br />
Wintertime/summertime changeover<br />
■ This changeover is automatic.<br />
Time and date<br />
■ The day and time were set by your<br />
heating contractor during commissioning.<br />
5592 682 GB<br />
6
Your system is preset at the factory (cont.)<br />
Introductory information<br />
Power failure<br />
■ All data is saved if there is a power<br />
failure.<br />
Terminology<br />
To provide you with a better understanding<br />
of the functions of your control unit,<br />
the appendix contains the chapter "Terminology"<br />
(see page 44).<br />
Tips on saving energy<br />
Utilise the setting options for the control<br />
unit and remote control (if installed):<br />
■ Never overheat your rooms. Every<br />
degree by which the room temperature<br />
is reduced saves up to 6 % on heating<br />
costs.<br />
Never set your room temperature<br />
higher than 20 °C (see page 18).<br />
■ Never set the DHW temperature too<br />
high (see page 25).<br />
■ Only activate the DHW circulation<br />
pump for times when DHW is drawn<br />
off. Set the time program for this (see<br />
page 27).<br />
■ Select the heating program that meets<br />
your current requirements:<br />
– For short absences (e.g. shopping<br />
trips), select "Economy mode"<br />
(see page 23).<br />
As long as economy mode is activated,<br />
the room temperature is<br />
reduced.<br />
– If you are going away, set the "Holiday<br />
program" (see page 23).<br />
As long as the holiday program is<br />
activated, the room temperature is<br />
reduced and DHW heating is off.<br />
– In summer, when you don't want to<br />
heat any rooms but do need DHW,<br />
select the heating program "Only<br />
DHW" (see page 25).<br />
5592 682 GB<br />
7
Introductory information<br />
Tips on saving energy (cont.)<br />
In conjunction with a solar thermal<br />
system:<br />
DHW heating is set at the factory to<br />
start at 05:30 h. On sunny days, the<br />
DHW cylinder receives sufficient<br />
heat from the solar thermal system<br />
that the DHW temperature is still<br />
high enough the next morning. You<br />
can program DHW heating to start at<br />
10:00 h, for example.<br />
– If you don't want to heat the rooms<br />
and you don't require DHW for an<br />
extended period, select the heating<br />
program "Standby mode" (see<br />
page 16).<br />
For additional energy saving functions of<br />
the control unit, please contact your<br />
heating contractor.<br />
Further recommendations:<br />
■ Correct ventilation/airing.<br />
Briefly open windows fully and at the<br />
same time close the thermostatic radiator<br />
valves.<br />
■ Close roller shutters (if installed) at<br />
dusk.<br />
■ Set thermostatic valves correctly.<br />
■ Never cover radiators or thermostatic<br />
valves.<br />
■ Controlled DHW consumption: A<br />
shower generally uses less energy<br />
than a full bath.<br />
5592 682 GB<br />
8
Operation<br />
Controls<br />
You can change any settings on your<br />
heating system centrally at the programming<br />
unit of the control unit.<br />
If remote control units are installed in<br />
your rooms, you can also adjust the settings<br />
at the remote control units.<br />
Note<br />
The programming unit can be placed in<br />
a wall mounting base. This is available<br />
as an accessory. Ask your heating contractor<br />
for more information.<br />
Remote control operating instructions<br />
Programming unit<br />
HC1<br />
14°C 21°C<br />
Boiler temperature<br />
48°C<br />
Takes you to the previous step in<br />
the menu or cancels a setting that<br />
has been started.<br />
Cursor keys<br />
To scroll in the menu or to set values.<br />
OK Confirms your selection or saves<br />
the setting.<br />
Calls up help texts for the selected<br />
menu option.<br />
Calls up the extended menu.<br />
Menu "Help"<br />
5592 682 GB<br />
You can view a short guide giving an<br />
explanation of the controls and information<br />
about heating circuit selection (see<br />
page 17).<br />
Call up the short guide as follows:<br />
■ If the screen saver is active (see<br />
page 12):<br />
Press .<br />
■ If you are somewhere in the menu:<br />
Press until the standard menu is<br />
shown (see the following chapter).<br />
Press .<br />
9
Operation<br />
Menu<br />
There are two control levels available,<br />
the "Standard menu" and the "Extended<br />
menu".<br />
Standard menu<br />
D<br />
A<br />
HC1<br />
B<br />
C<br />
14°C 21°C<br />
Boiler temperature<br />
48°C<br />
A Header (shows the heating program<br />
for the displayed heating circuit<br />
D)<br />
B Current outside temperature<br />
Note<br />
■ If your heating system has 2 or 3 heating<br />
circuits:<br />
You can select the heating circuit<br />
"HC1", "HC2" or "HC3" to be displayed<br />
in the standard menu (see<br />
page 30).<br />
■ If your heating system only has one<br />
heating circuit:<br />
No heating circuit name "HC..." is<br />
shown in the header.<br />
C Set room temperature<br />
D Heating circuit which is selected for<br />
operation in the standard menu<br />
In the standard menu, you can adjust<br />
and scan the most frequently used settings<br />
for the heating circuit shown in<br />
the header:<br />
■ Set room temperature<br />
Press the following keys:<br />
/ for the required value.<br />
OK to confirm.<br />
■ Heating program<br />
Heating programs:<br />
Standby mode with frost protection<br />
monitoring<br />
Only DHW<br />
Heating and DHW<br />
5592 682 GB<br />
10
Operation<br />
Menu (cont.)<br />
Press the following keys:<br />
/ for the required heating program.<br />
OK to confirm.<br />
Note<br />
For any other connected heating circuits,<br />
use the settings in the extended menu.<br />
Note<br />
2 minutes after any setting has been<br />
made, the display automatically reverts<br />
to the standard menu.<br />
Call up the standard menu as follows:<br />
■ If the screen saver is active (see<br />
page 12):<br />
Press any key except .<br />
■ If you are somewhere in the menu:<br />
Keep pressing until the standard<br />
menu appears.<br />
Symbols on the display<br />
These symbols are not always displayed,<br />
but appear subject to the system<br />
version and the operating state.<br />
Heating programs:<br />
Standby mode with frost protection<br />
monitoring<br />
Only DHW<br />
Heating and DHW<br />
Displays<br />
HC1 (2, 3) To display the heating circuit<br />
selected in the standard<br />
menu.<br />
To change this, see<br />
page 30.<br />
Frost protection monitoring<br />
Messages<br />
Service message<br />
Fault message<br />
Central heating with standard<br />
room temperature<br />
Central heating with<br />
reduced room temperature<br />
Party mode enabled<br />
Economy mode enabled<br />
In conjunction with a solar<br />
thermal system:<br />
Solar circuit pump is running<br />
Burner in operation<br />
5592 682 GB<br />
11
Operation<br />
Menu (cont.)<br />
Extended menu<br />
Menu<br />
E<br />
Heating<br />
DHW<br />
Solar energy<br />
Test mode<br />
Continue with<br />
OK<br />
E Dialogue line<br />
In the extended menu, you can adjust<br />
and scan the settings from the control<br />
unit's range of functions used less frequently,<br />
e.g. time programs and holiday<br />
programs.<br />
The menu overview can be found on<br />
page 42.<br />
Call up the extended menu as follows:<br />
■ If the screen saver is active:<br />
Press any key except , and then<br />
press .<br />
■ If you are somewhere in the menu:<br />
Press .<br />
How to use the controls<br />
The screen saver will become active if<br />
you have not adjusted any settings on<br />
the programming unit for a few minutes.<br />
The display brightness is reduced.<br />
5592 682 GB<br />
12
Operation<br />
How to use the controls (cont.)<br />
B<br />
14°C 21°C<br />
C<br />
B Current outside temperature<br />
1. Press OK. This takes you to the<br />
standard menu (see page 10).<br />
2. Press . This takes you to the<br />
extended menu (see page 12).<br />
The selected menu option is highlighted<br />
in white.<br />
The dialogue line E (see diagram on<br />
page 12) then shows the necessary<br />
instructions.<br />
C Set room temperature<br />
The following diagram shows how to<br />
make settings with different dialogue<br />
lines, using the set room temperature<br />
setting as an example.<br />
5592 682 GB<br />
13
Operation<br />
How to use the controls (cont.)<br />
HC1<br />
14°C 21°C<br />
Boiler temperature<br />
48°C<br />
Menu<br />
Heating<br />
DHW<br />
Solar energy<br />
Test mode<br />
Continue with<br />
OK<br />
OK<br />
Heating circuit 1<br />
Ù<br />
HC1<br />
Ú<br />
Party mode<br />
ê<br />
Economy mode<br />
ê<br />
Set room temperature<br />
Set reduced room temp<br />
Continue with OK<br />
v/<br />
v<br />
Ú<br />
Htg circ. selection Ù HC2Ú<br />
Heating circuit 2<br />
Was selected<br />
OK / v/<br />
v<br />
Heating circuit 1<br />
HC1<br />
Heating circuit 2<br />
Ù<br />
HC1 HC2<br />
Ú<br />
Party mode<br />
Economy mode<br />
Set room temperature<br />
OK<br />
ê<br />
ê<br />
Party mode<br />
Economy mode<br />
Set room temperature<br />
ê<br />
ê<br />
Set reduced room temp<br />
Set reduced room temp<br />
Continue with<br />
OK<br />
Continue with<br />
OK<br />
OK<br />
OK<br />
Set room temperature<br />
HC1<br />
Set room temperature<br />
HC2<br />
20°C<br />
20°C<br />
Change with (<br />
V or v<br />
Change with (<br />
V or v<br />
Set room temperature<br />
HC1<br />
Set room temperature<br />
HC2<br />
22°C<br />
22°C<br />
Adopt with<br />
OK<br />
Adopt with<br />
OK<br />
OK<br />
OK<br />
Set room temperature<br />
HC1<br />
Set room temperature<br />
HC2<br />
22°C<br />
22°C<br />
Adopted<br />
Adopted<br />
5592 682 GB<br />
14
Start-up/shutdown<br />
Starting the heating system<br />
A B<br />
C<br />
D<br />
HC1<br />
14°C 21°C<br />
1 2 3<br />
0 4<br />
bar<br />
Boiler temperature<br />
48°C<br />
E<br />
5592 682 GB<br />
A Fault indicator (red)<br />
B ON indicator (green)<br />
C Reset button<br />
1. Check the heating system pressure<br />
at the pressure gauge. The system<br />
pressure is too low if the indicator<br />
points to the area below 1.0 bar. In<br />
this case, top up with water or notify<br />
your local heating contractor.<br />
2. For open flue operation:<br />
Check that the ventilation apertures<br />
of the installation room are open and<br />
unrestricted.<br />
Note<br />
With open flue operation, the combustion<br />
air is drawn from the installation<br />
room.<br />
D ON/OFF switch<br />
E Pressure gauge<br />
3. For Vitodens and Vitopend:<br />
Open the gas shut-off valve.<br />
For Vitoladens:<br />
Open the shut-off valves in the oil<br />
lines (at the oil tank and filter).<br />
Note<br />
Ask your heating contractor to<br />
explain the positioning and handling<br />
of these components.<br />
4. Switch ON the power supply, e.g. at<br />
a separate MCB/fuse or a mains isolator.<br />
5. Turn the ON/OFF switch " " ON.<br />
After a short time, the standard menu<br />
is displayed (see page 10) and the<br />
green ON indicator illuminates. Your<br />
heating system and, if installed, your<br />
remote control unit are now ready for<br />
operation.<br />
15
Start-up/shutdown<br />
Shutting down the heating system<br />
With frost protection monitoring<br />
For every heating circuit, select the heating<br />
program "Standby mode".<br />
■ No central heating.<br />
■ No DHW heating.<br />
■ Frost protection for the boiler and the<br />
DHW cylinder is enabled.<br />
For the heating circuit displayed in<br />
the header<br />
Standard menu<br />
1. / for the heating program<br />
"Standby mode" (frost protection<br />
monitoring).<br />
2. OK as confirmation.<br />
3. Select the heating circuit if necessary<br />
(see page 17).<br />
4. "Heating program"<br />
5. "Standby mode" (frost protection<br />
monitoring).<br />
Note<br />
The circulation pumps are briefly started<br />
every 24 hours to prevent them from<br />
seizing up.<br />
Ending the heating program "Standby<br />
mode"<br />
Select another heating program.<br />
For the other heating circuits<br />
Extended menu<br />
1.<br />
2. "Heating"<br />
Without frost protection monitoring (shutdown)<br />
1. Switch the ON/OFF switch OFF.<br />
2. Close the shut-off valves in the oil<br />
lines (at the tank and filter) or close<br />
the gas shut-off valve.<br />
3. Isolate the heating system from its<br />
main power supply, e.g. at a separate<br />
MCB/fuse or a mains isolator.<br />
Information on a prolonged shutdown<br />
■ Circulation pumps may seize up as<br />
they are not supplied with power.<br />
■ After an extended shutdown, it may be<br />
necessary to reset the date and time<br />
(see page 30).<br />
4. Where outside temperatures of<br />
below 3 °C are anticipated, please<br />
take suitable measures to protect the<br />
heating system against frost. If necessary,<br />
contact your heating contractor.<br />
5592 682 GB<br />
16
Central heating<br />
Required settings (central heating)<br />
If you want central heating, check the<br />
following points:<br />
■ Have you selected the heating circuit?<br />
For settings, see the next chapter.<br />
■ Have you set the required room temperature?<br />
For settings, see page 18.<br />
■ Have you set the correct heating program?<br />
For settings, see page 19.<br />
■ Have you set the required time program?<br />
For settings, see page 19.<br />
Selecting a heating circuit<br />
The heating of all rooms can, if necessary,<br />
be split over several heating circuits.<br />
■ In the case of heating systems with<br />
several heating circuits, for all central<br />
heating settings, first select the heating<br />
circuit where you want to make a<br />
change.<br />
■ This selection is not possible in heating<br />
systems with only one heating circuit.<br />
Example:<br />
■ "Heating circuit 1" is the heating circuit<br />
for the rooms occupied by you.<br />
■ "Heating circuit 2" is the heating circuit<br />
for the rooms of a separate apartment.<br />
The heating circuits are marked at the<br />
factory as "Heating circuit 1" (HC1),<br />
"Heating circuit 2" (HC2) and "Heating<br />
circuit 3" (HC3).<br />
If you or your heating contractor have<br />
renamed the heating circuits (e.g. as<br />
"Apartment", etc.), the name is displayed<br />
instead of "Heating circuit ..." (see<br />
page 29).<br />
Extended menu<br />
1.<br />
2. "Heating"<br />
Menu<br />
Heating<br />
DHW<br />
Solar energy<br />
Test mode<br />
Continue with<br />
OK<br />
3. / for the required heating circuit.<br />
5592 682 GB<br />
17
Central heating<br />
Selecting a heating circuit (cont.)<br />
Heating circuit 1<br />
Ù<br />
HC1<br />
Ú<br />
Htg circ. selection<br />
Ù HC2<br />
Ú<br />
Party mode<br />
Economy mode<br />
Set room temperature<br />
Set reduced room temp<br />
ê<br />
ê<br />
Ú<br />
Heating circuit 2<br />
Continue with<br />
OK<br />
Was selected<br />
Note<br />
If you return to the standard menu with<br />
, the header will again display "HC1"<br />
(see page 10).<br />
For changes to the heating circuit display<br />
in the standard menu, see page 30.<br />
Setting the room temperature<br />
Setting the room temperature for<br />
standard heating mode<br />
Factory setting: 20 °C<br />
For the heating circuit displayed in<br />
the header<br />
Proceed as described on page 10.<br />
For the other heating circuits<br />
Extended menu<br />
1.<br />
2. "Heating"<br />
3. Select the heating circuit if necessary<br />
(see page 17).<br />
4. "Set room temperature"<br />
5. Set the required value.<br />
Setting the room temperature for<br />
reduced heating mode (night setback)<br />
Factory setting: 3 °C<br />
Extended menu<br />
1.<br />
2. "Heating"<br />
3. Select the heating circuit if necessary<br />
(see page 17).<br />
4. "Set reduced room temp"<br />
5. Set the required value.<br />
The rooms are heated to this temperature:<br />
■ Between the time phases for standard<br />
heating mode (see page 19).<br />
■ In the holiday program (see<br />
page 23).<br />
5592 682 GB<br />
18
Central heating<br />
Setting the heating program for central heating<br />
Factory setting: "Heating and DHW"<br />
For the heating circuit displayed in<br />
the header<br />
Proceed as described on page 10.<br />
For the other heating circuits<br />
Extended menu<br />
1.<br />
2. "Heating"<br />
3. Select the heating circuit if necessary<br />
(see page 17).<br />
4. "Heating program"<br />
5. "Heating and DHW"<br />
■ The rooms of the selected heating circuit<br />
are heated in accordance with the<br />
room temperature and time program<br />
settings.<br />
■ DHW is reheated in accordance with<br />
the set DHW temperature and time<br />
program (see chapter "DHW heating").<br />
Setting the time program for central heating<br />
5592 682 GB<br />
■ The time program for central heating is<br />
made up of time phases. One time<br />
phase from 6:00 to 22:00 h for every<br />
day of the week is set at the factory.<br />
■ You can set the time program individually,<br />
to be the same for every day of<br />
the week or different:<br />
You can select up to 4 time phases per<br />
day for standard heating mode. Set the<br />
start and end points for each time<br />
phase. Between these time phases,<br />
the rooms are heated with the reduced<br />
room temperature (see chapter "Setting<br />
the room temperature for reduced<br />
heating mode").<br />
Extended menu:<br />
1.<br />
2. "Heating"<br />
3. Select the heating circuit if necessary<br />
(see page 17).<br />
4. "Heating time program"<br />
5. Select part of the week or a day.<br />
■ When setting, bear in mind that your<br />
heating system requires some time to<br />
heat the rooms to the required temperature.<br />
■ In the extended menu, you can scan<br />
the current time program under "Information"<br />
(see chapter "Scanning information",<br />
"Heating circuit ..." group).<br />
6. Select the time phase !, ?, § or<br />
$.<br />
7. Set the start and end points for the<br />
relevant time phase.<br />
19
Central heating<br />
Setting the time program for central heating (cont.)<br />
Example shown:<br />
■ Time program for Monday to Friday<br />
("Mo-Fr")<br />
■ Time phase !:<br />
From 05:00 to 08:30 h<br />
■ Time phase ?:<br />
From 16:30 to 23:00 h<br />
Heating<br />
! ?<br />
Mo-Fr<br />
? 16:30 - 23:00 u<br />
HC1<br />
0 2 4 6 8 10 12 14 16 18 20 22 24<br />
! 05:00 - 08:30 u<br />
Normal<br />
Normal<br />
Select with (<br />
Example:<br />
You want to set the same time program<br />
for every day except Monday:<br />
Select the period "Monday–Sunday"<br />
and set the time program.<br />
Then select "Monday" and set the time<br />
program for this.<br />
Note<br />
If you want to terminate the setting process<br />
prematurely, keep pressing until<br />
the required display appears.<br />
Deleting a time phase<br />
Set the time for the end point to the same<br />
time that was set for the start point. The<br />
display shows the selected time phase<br />
"- - : - -".<br />
Heating<br />
§ - -:- - - - -:- - u<br />
Adopt with<br />
Mo-Fr<br />
HC1<br />
0 2 4 6 8 10 12 14 16 18 20 22 24<br />
? - -:- - - - -:- - u<br />
Normal<br />
Normal<br />
OK<br />
Changing the heating curve<br />
Your system's heating characteristics<br />
are affected by the slope and the level of<br />
the selected heating curve. Further<br />
information about the heating curve can<br />
be found under "Terminology" on<br />
page 45.<br />
Factory setting:<br />
■ Slope: 1.4<br />
■ Heating curve level: 0<br />
■ Standard room temperature (set<br />
value): 20 ºC<br />
■ Reduced room temperature (set<br />
value): 3 ºC<br />
Extended menu:<br />
1.<br />
2. "Heating"<br />
3. Select the heating circuit if necessary<br />
(see page 17).<br />
4. "Heating curve"<br />
5592 682 GB<br />
20
Central heating<br />
Changing the heating curve (cont.)<br />
5. "Slope" or "Level"<br />
Note<br />
Tips on when and how to change the<br />
heating curve slope and level are displayed<br />
by pressing ?.<br />
6. Set the required value.<br />
Example:<br />
Change the heating curve slope to 1.5.<br />
A graph clearly shows the change in the<br />
heating curve as soon as you alter the<br />
value for the slope or level.<br />
Heating curve<br />
100°C<br />
23°C<br />
41°C<br />
55°C<br />
68°C<br />
HC1<br />
81°C<br />
20 10 0 -10 -20 -30<br />
Slope 1.5<br />
Change with (<br />
Depending on various outside temperatures<br />
(shown on the horizontal axis), the<br />
assigned set flow temperatures for the<br />
heating circuit are highlighted white.<br />
Stopping the central heating<br />
For the heating circuit displayed in<br />
the header<br />
Standard menu<br />
1. / for the heating program<br />
"Only DHW" (summer mode, no central<br />
heating)<br />
or<br />
"Standby mode" (frost protection<br />
monitoring).<br />
2. OK as confirmation.<br />
4. "Heating program"<br />
5. "Only DHW" (summer mode, no central<br />
heating)<br />
or<br />
"Standby mode" (frost protection<br />
monitoring).<br />
For the other heating circuits<br />
Extended menu<br />
1.<br />
2. "Heating"<br />
3. Select the heating circuit if necessary<br />
(see page 17).<br />
5592 682 GB<br />
21
Comfort and energy saving functions<br />
Comfort and energy saving functions<br />
Selecting the comfort function "Party mode"<br />
With this function, you can change the<br />
room temperature for several hours, e.g.<br />
if guests unexpectedly stay longer in the<br />
evening. You do not have to change any<br />
existing control settings. The DHW is<br />
boosted in this function to the specified<br />
set temperature.<br />
Extended menu<br />
1.<br />
2. "Heating"<br />
3. Select the heating circuit if necessary<br />
(see page 17).<br />
4. "Party mode"<br />
Heating circuit 1<br />
Party mode<br />
Economy mode<br />
Set room temperature<br />
Set reduced room temp<br />
Continue with<br />
Ù HC1Ú<br />
OK<br />
ê<br />
ê<br />
5. Set the required room temperature<br />
during party mode.<br />
Display in the standard menu<br />
14°C 21°C<br />
HC1<br />
Boiler temperature 48°C<br />
■ The rooms are heated to the required<br />
temperature.<br />
■ DHW is reheated to the selected set<br />
temperature.<br />
Ending the comfort function<br />
■ Automatic after 8 hours<br />
or<br />
■ Automatic when the system switches<br />
to standard heating mode in accordance<br />
with the time program<br />
or<br />
■ In the extended menu, set "Party<br />
mode" to "OFF".<br />
Party mode<br />
HC1<br />
21°C<br />
Change with (<br />
5592 682 GB<br />
22
Comfort and energy saving functions (cont.)<br />
Comfort and energy saving functions<br />
Selecting the energy saving function "Economy mode"<br />
To save energy, you can reduce the<br />
room temperature in standard heating<br />
mode. For example, if you want to leave<br />
your home for a few hours.<br />
Extended menu<br />
1.<br />
2. "Heating"<br />
3. Select the heating circuit if necessary<br />
(see page 17).<br />
4. "Economy mode"<br />
Note<br />
The display of the selected set room<br />
temperature does not change.<br />
Ending economy mode<br />
■ Automatic when the system switches<br />
to reduced heating mode in accordance<br />
with the time program.<br />
■ In the extended menu, set "Economy<br />
mode" to "OFF".<br />
Heating circuit 1<br />
Ù HC1Ú<br />
Party mode<br />
Economy mode<br />
Set room temperature<br />
Set reduced room temp<br />
Continue with<br />
OK<br />
ê<br />
ê<br />
Display in the standard menu<br />
HC1<br />
14°C 21°C<br />
Boiler temperature 48°C<br />
5592 682 GB<br />
Selecting the energy saving function "Holiday program"<br />
To save energy, for example over long<br />
holidays, you can activate the "Holiday<br />
program".<br />
23
Comfort and energy saving functions<br />
Comfort and energy saving functions (cont.)<br />
The control unit is set up so that the holiday<br />
program applies to all heating circuits.<br />
If you want to make changes, contact<br />
your local heating contractor.<br />
Depending on the heating program<br />
selected, the holiday program can have<br />
various effects:<br />
■ Heating program "Heating and<br />
DHW":<br />
The rooms are heated to the selected<br />
reduced room temperature (see<br />
page 18). DHW heating is switched<br />
OFF.<br />
■ Heating program "Only DHW":<br />
For all heating circuits, frost protection<br />
monitoring is only enabled for the<br />
boiler and the DHW cylinder.<br />
■ The holiday program starts at 00:00 h<br />
the day following your departure and<br />
ends at 00:00 h on the day of your<br />
return. This means the selected time<br />
program is active on the days of departure<br />
and return (see page 19).<br />
Extended menu:<br />
1.<br />
2. "Heating"<br />
3. "Holiday program"<br />
Heating circuit 1<br />
Heating program<br />
Heating time program<br />
Holiday program<br />
Heating curve<br />
Continue with<br />
Ù HC1Ú<br />
OK<br />
ê<br />
4. Set the required departure and return<br />
dates.<br />
Holiday program<br />
Leaving date:<br />
Date<br />
Return date:<br />
HC1<br />
Tu 21/12/2010<br />
Date We 22/12/2010<br />
Select with (<br />
Terminating or deleting a holiday program<br />
Extended menu<br />
1.<br />
2. "Heating"<br />
3. "Holiday program"<br />
4. "Delete program"<br />
5592 682 GB<br />
24
DHW heating<br />
Required settings (DHW heating)<br />
If you want DHW heating, check the following<br />
points:<br />
■ Have you set the required DHW temperature?<br />
For settings, see the next chapter.<br />
■ Have you set the required time program?<br />
For settings, see page 26.<br />
■ Have you set the correct heating program?<br />
For settings, see page 25.<br />
Setting the DHW temperature<br />
Extended menu<br />
1.<br />
2. "DHW"<br />
3. "Set DHW temperature"<br />
4. Set the required value.<br />
Menu<br />
Heating<br />
DHW<br />
Solar energy<br />
Test mode<br />
Continue with<br />
OK<br />
Setting the heating program for DHW heating<br />
5592 682 GB<br />
Note<br />
The control unit is set up so that DHW<br />
heating applies to all heating circuits. If<br />
you want to make changes, contact your<br />
local heating contractor.<br />
Extended menu<br />
1.<br />
2. "Heating"<br />
3. Select the heating circuit if necessary<br />
(see page 17).<br />
4. "Heating program"<br />
5. "Heating and DHW" (with central<br />
heating)<br />
or<br />
"Only DHW" (summer mode, no central<br />
heating)<br />
25
DHW heating<br />
Setting the time program for DHW heating<br />
■ The time program for DHW heating is<br />
made up of time phases. One time<br />
phase from 5:30 to 22:00 h for every<br />
day of the week is set at the factory.<br />
■ Automatic mode is set at the factory<br />
for DHW heating. This means that, in<br />
standard heating mode, the DHW is<br />
reheated to the set temperature. To<br />
ensure that hot water is available at<br />
the start of standard heating mode, the<br />
time phase for DHW heating begins<br />
automatically half an hour earlier than<br />
the time phase for standard heating<br />
mode.<br />
Extended menu:<br />
1.<br />
2. "DHW"<br />
3. "DHW time prog"<br />
4. "Individual"<br />
5. Select part of the week or a day.<br />
6. Select the time phase !, ?, § or<br />
$.<br />
7. Set the start and end points for the<br />
relevant time phase.<br />
■ If you don't want the automatic mode,<br />
you can select up to 4 individual time<br />
phases per day for DHW heating,<br />
which can be the same for every day<br />
of the week or different. Set the start<br />
and end points for each time phase.<br />
■ When setting, bear in mind that your<br />
heating system requires some time to<br />
heat the DHW to the required temperature.<br />
■ In the "Extended menu", you can scan<br />
the current time program under "Information"<br />
(see chapter "Scanning information",<br />
"DHW" group).<br />
Example shown:<br />
■ Time program for Monday to Friday<br />
("Mo-Fr")<br />
■ Time phase !:<br />
From 04:30 to 06:30 h<br />
■ Time phase ?:<br />
From 15:30 to 20:30 h<br />
DHW<br />
! ?<br />
Mo-Fr<br />
HC1<br />
0 2 4 6 8 10 12 14 16 18 20 22 24<br />
! 04:30 - 06:30 u ON<br />
? 15:30 - 20:30 u ON<br />
Select with (<br />
Example:<br />
You want to set the same time program<br />
for every day except Monday:<br />
Select the period "Monday–Sunday"<br />
and set the time program.<br />
Then select "Monday" and set the time<br />
program for this.<br />
5592 682 GB<br />
26
DHW heating<br />
Setting the time program for DHW heating (cont.)<br />
Note<br />
If you want to terminate the setting process<br />
prematurely, keep pressing until<br />
the required display appears.<br />
Deleting a time phase<br />
Set the time for the end point to the same<br />
time that was set for the start point. The<br />
display shows the selected time phase<br />
"- - : - -".<br />
DHW<br />
§ - -:- - - - -:- - u<br />
Adopt with<br />
Mo-Fr<br />
HC1<br />
0 2 4 6 8 10 12 14 16 18 20 22 24<br />
? - -:- - - - -:- - u<br />
OK<br />
ON<br />
---<br />
DHW heating once, no longer in the<br />
time program<br />
Note<br />
At least one heating circuit of your system<br />
must not be in standby mode.<br />
Extended menu<br />
1.<br />
2. "Heating"<br />
3. Select the heating circuit if necessary<br />
(see page 17).<br />
4. "Party mode"<br />
5. Deactivate "Party mode" again with<br />
"OFF", to prevent unintentional central<br />
heating with standard room temperature.<br />
Heating system with DHW circulation pump<br />
Further information about the DHW circulation<br />
pump can be found under "Terminology"<br />
on page 48.<br />
■ Automatic mode is set for the DHW<br />
circulation pump time program. In<br />
other words, the DHW circulation<br />
pump operates in parallel to the DHW<br />
heating time program.<br />
■ If you don't want the automatic mode,<br />
you can select up to 4 individual time<br />
phases per day for the DHW circulation<br />
pump, which can be the same for<br />
every day of the week or different. Set<br />
the start and end points for each time<br />
phase.<br />
■ In the "Information" menu, you can<br />
scan the current time program (see<br />
chapter "Scanning information",<br />
"DHW" group).<br />
5592 682 GB<br />
27
DHW heating<br />
Setting the time program for DHW heating (cont.)<br />
Note<br />
Activating the DHW circulation pump is<br />
only advisable for those times when<br />
DHW is actually drawn.<br />
Extended menu:<br />
1.<br />
2. "DHW"<br />
3. "DHW circ time prog"<br />
4. "Individual"<br />
5. Select part of the week or a day.<br />
6. Select the time phase !, ?, § or<br />
$.<br />
7. Set the start and end points for the<br />
relevant time phase.<br />
Note<br />
If you want to terminate the setting process<br />
prematurely, keep pressing until<br />
the required display appears.<br />
Deleting a time phase for DHW circulation<br />
pump<br />
Set the time for the end point to the same<br />
time that was set for the start point. The<br />
display shows the selected time phase<br />
"- - : - -".<br />
DHW circulation<br />
§ - -:- - - - -:- - u<br />
Adopt with<br />
Mo-Fr<br />
HC1<br />
0 2 4 6 8 10 12 14 16 18 20 22 24<br />
? - -:- - - - -:- - u<br />
OK<br />
---<br />
---<br />
Stopping the DHW heating<br />
You do not want to have DHW or heat<br />
your rooms.<br />
For the heating circuit displayed in<br />
the header<br />
Standard menu<br />
1. / for the heating program "Standby<br />
mode" (frost protection monitoring).<br />
2. OK as confirmation.<br />
For the other heating circuits<br />
Extended menu<br />
1.<br />
2. Select the heating circuit if necessary<br />
(see page 17).<br />
3. "Heating"<br />
4. "Heating program"<br />
5. "Standby mode" (frost protection<br />
monitoring).<br />
You do not want DHW, but do want to<br />
heat the rooms.<br />
Extended menu<br />
1.<br />
2. Select the heating circuit if necessary<br />
(see page 17).<br />
3. "Heating"<br />
4. "Heating program"<br />
5. "Heating and DHW"<br />
6. until the menu is displayed.<br />
7. "DHW"<br />
8. "Set DHW temperature"<br />
9. Select 10 °C.<br />
5592 682 GB<br />
28
Further adjustments<br />
Setting the display contrast<br />
Extended menu<br />
1.<br />
2. "Settings"<br />
3. "Contrast"<br />
4. Set the required contrast.<br />
Setting the display brightness<br />
If you would like the texts in the menu to<br />
be more clearly legible, change the<br />
brightness for "Control".<br />
You can also alter the screen saver<br />
brightness.<br />
3. "Brightness"<br />
4. "Control" or "Screen saver"<br />
5. Set the required brightness.<br />
Extended menu<br />
1.<br />
2. "Settings"<br />
Entering names for the heating circuits<br />
You can give heating circuits 1, 2 and 3<br />
("HC1", "HC2" and "HC3") individual<br />
names. The abbreviations "HC1",<br />
"HC2" and "HC3" will be retained.<br />
Extended menu<br />
1.<br />
2. "Settings"<br />
3. "Name for heating circ."<br />
4. "Heating circuit 1", "Heating circuit<br />
2" or "Heating circuit 3"<br />
5. "Change"<br />
6. You can select the required character<br />
using "Change with (".<br />
7. "Select with Ø" takes you to the next<br />
character.<br />
8. Press OK to accept all entered characters<br />
at once and simultaneously exit<br />
this menu.<br />
Note<br />
The entered term is deleted with<br />
"Reset?"; then "Heating circuit 1"<br />
will be shown again.<br />
Example:<br />
Name for "Heating circuit 2": Apartment<br />
5592 682 GB<br />
29
Further adjustments<br />
Entering names for the heating circuits (cont.)<br />
Heating circuit 2<br />
g<br />
f<br />
Heating e circuit 1<br />
d<br />
c<br />
Change with (<br />
Heating circuit 2<br />
HC2<br />
HC2<br />
The menu shows "Apartment" for "Heating<br />
circuit 2".<br />
Apartment<br />
Apartment<br />
Set room temp.<br />
Heating program<br />
Party mode<br />
Economy mode<br />
Ù HC2Ú<br />
22 °C<br />
ß<br />
Select with (<br />
Apartment<br />
Adopted<br />
Changing the standard menu<br />
You want to have details about heating<br />
circuit 2 (HC2) or heating circuit 3 (HC3)<br />
displayed in the header of the standard<br />
menu (see page 10).<br />
3. "Standard menu"<br />
4. Select the heating circuit.<br />
Extended menu<br />
1.<br />
2. "Settings"<br />
Setting the time and date<br />
The time and date are factory-set. If your<br />
heating system has been shut down for<br />
a long time, it may be necessary to set<br />
the time and date.<br />
30<br />
Extended menu<br />
1.<br />
2. "Settings"<br />
3. "Time/Date"<br />
4. Set the time and date.<br />
5592 682 GB
Further adjustments<br />
Language selection<br />
Extended menu<br />
1.<br />
2. "Settings"<br />
3. "Language"<br />
4. Select the required language.<br />
Setting the temperature unit (°C/°F)<br />
Factory setting: °C<br />
Extended menu<br />
1.<br />
2. "Settings"<br />
3. "Temperature unit"<br />
4. Select the temperature unit "°C" or<br />
"°F".<br />
5592 682 GB<br />
Restoring factory settings<br />
You can restore the factory settings for<br />
each heating circuit separately.<br />
Extended menu<br />
1.<br />
2. "Settings"<br />
3. "Standard setting"<br />
4. "Heating circuit 1", "Heating circuit<br />
2" or "Heating circuit 3"<br />
The following settings and values are<br />
reset:<br />
■ Set room temperature<br />
■ Set reduced room temperature<br />
■ Heating program<br />
■ Set DHW temperature<br />
■ Time program for central heating<br />
■ Time program for DHW heating<br />
■ Time program for DHW circulation<br />
pump<br />
■ Heating curve slope and level<br />
Party mode, economy mode and holiday<br />
program are deleted.<br />
31
Scanning<br />
Scanning information<br />
Subject to the connected components<br />
and settings made, you can scan current<br />
temperatures and operating conditions.<br />
The extended menu splits the information<br />
into groups:<br />
■ "General"<br />
■ "Heating circuit 1"<br />
■ "Heating circuit 2"<br />
■ "Heating circuit 3"<br />
■ "DHW"<br />
■ "Solar"<br />
■ "Reset data"<br />
Note<br />
If heating circuits have been given<br />
names, the name is displayed (see chapter<br />
"Entering names for the heating circuits").<br />
For detailed scanning options for the<br />
individual groups, see chapter "Scanning<br />
options in the extended menu".<br />
Extended menu<br />
1.<br />
2. "Information"<br />
3. Select the category.<br />
4. Select the required scan.<br />
Scanning in conjunction with solar<br />
thermal systems<br />
Extended menu<br />
1.<br />
2. "Solar energy"<br />
The flashing line on the graph indicates<br />
that the current day is not yet over.<br />
Solar energy<br />
4.0<br />
0<br />
We Th Fr Sa Su Mo Tu We<br />
kWh Su 03.10.10<br />
1.3<br />
Select with<br />
(<br />
Note<br />
Further scanning options, e.g. for the<br />
solar circuit pump hours run, can be<br />
found in the extended menu under<br />
"Information" in the "Solar" group.<br />
Resetting data<br />
You can reset the following data:<br />
■ Burner hours run.<br />
■ Fuel consumption, if set by your heating<br />
contractor.<br />
■ In conjunction with a solar thermal system:<br />
Solar energy yield, solar circuit pump<br />
hours run and hours run output 22.<br />
■ All the above data simultaneously.<br />
Extended menu<br />
1.<br />
2. "Information"<br />
3. "Reset data"<br />
The solar energy yield for the past 7 days<br />
is displayed on a graph.<br />
5592 682 GB<br />
32
Scanning<br />
Scanning the service messages<br />
If your heating system is due for a service,<br />
the symbol flashes in the display,<br />
and "Service" appears.<br />
1. You can call up the reason for the<br />
service with OK.<br />
Service<br />
Service<br />
Burner<br />
05500 h<br />
Continue with<br />
OK<br />
Acknowledge with<br />
OK<br />
2. Pressing calls up information on the<br />
service that is due.<br />
3. If you want to acknowledge the service<br />
message, follow the instructions in<br />
the menu.<br />
Contact your local heating contractor.<br />
The service message is transferred to<br />
the menu.<br />
Standard menu<br />
HC1<br />
14°C 21°C<br />
Boiler temperature 48°C<br />
5592 682 GB<br />
33
Scanning<br />
Scanning the service messages (cont.)<br />
Extended menu<br />
Menu<br />
Service<br />
Heating<br />
DHW<br />
Solar energy<br />
Select with<br />
ë<br />
Note<br />
If the service can only be carried out at a<br />
later date, the service message is displayed<br />
again the following Monday.<br />
Calling up an acknowledged service<br />
message<br />
Extended menu<br />
1.<br />
2. "Service"<br />
Scanning fault messages<br />
If any faults have occurred in your heating<br />
system, the symbol " " flashes in the<br />
display, and "Fault" appears. The red<br />
fault indicator also flashes (see chapter<br />
"Starting the heating system").<br />
1. You can call up the cause of the fault<br />
with OK.<br />
Fault<br />
Outside temp sensor<br />
Fault<br />
18<br />
A2<br />
Fault<br />
Acknowledge with<br />
OK<br />
Continue with<br />
OK<br />
2. Pressing ? calls up information on the<br />
heating system behaviour.<br />
Tips on which measures you can take<br />
yourself before notifying your heating<br />
contractor are also displayed.<br />
5592 682 GB<br />
34
Scanning<br />
Scanning fault messages (cont.)<br />
3. Make a note of the cause of the fault<br />
and the fault code next to it on the<br />
right. In this example: "Outside temp<br />
sensor 18" and "Fault A2".<br />
This enables the heating contractor to<br />
be better prepared for the service call<br />
and may save additional travelling<br />
costs.<br />
4. If you want to acknowledge the fault<br />
message, follow the instructions in the<br />
menu.<br />
The fault message is transferred to<br />
the menu.<br />
Standard menu<br />
HC1<br />
Note<br />
■ If you have connected up signalling<br />
equipment (e.g. an alarm) for fault<br />
messages, this is deactivated when<br />
the fault message is acknowledged.<br />
■ If the fault can only be rectified at a<br />
later date, the fault message will be<br />
displayed again the next day and<br />
the signalling equipment will be<br />
switched on again.<br />
Calling up an acknowledged fault<br />
message<br />
Extended menu<br />
1.<br />
2. "Fault"<br />
14°C 21°C<br />
Boiler temperature 48°C<br />
Extended menu<br />
Menu<br />
Fault<br />
Heating<br />
DHW<br />
Solar energy<br />
Continue with<br />
ã<br />
OK<br />
5592 682 GB<br />
35
Emissions test mode<br />
Emissions test mode<br />
Emissions test mode should only be activated<br />
by your flue gas inspector during<br />
the annual inspection.<br />
Extended menu<br />
1.<br />
2. "Test mode"<br />
3. "Flue gas test ON"<br />
Test mode<br />
Boiler temperature 62°C<br />
Terminate with<br />
OK<br />
If the burner is on, the symbol<br />
shown.<br />
is<br />
Note<br />
Emissions test mode ends automatically<br />
after 30 min. You can also end emissions<br />
test mode with OK.<br />
5592 682 GB<br />
36
What to do if...<br />
Rooms are too cold<br />
Cause<br />
The heating system is off.<br />
Control unit or remote control incorrectly<br />
adjusted.<br />
Only when operating with DHW heating:<br />
DHW priority is enabled.<br />
No fuel.<br />
"Combustion controller" is shown on<br />
the display.<br />
"Fault" is displayed, and the red fault<br />
indicator flashes.<br />
Mixer motor faulty.<br />
Remedy<br />
■ Switch the ON/OFF switch ON (see diagrams<br />
from page 15).<br />
■ Switch ON the mains isolator, if installed<br />
(outside the boiler room).<br />
■ Reset the MCB in the power distribution<br />
board (main domestic MCB).<br />
Check settings and correct if required:<br />
■ "Heating and DHW" must be selected<br />
(see page 19).<br />
■ Room temperature (see page 18).<br />
■ Time (see page 30).<br />
■ Time program (see page 19).<br />
Wait until the DHW cylinder has been<br />
heated up.<br />
In the case of operation with an instantaneous<br />
water heater, stop DHW draw-off.<br />
With oil/LPG:<br />
Check the fuel reserves and re-order if<br />
required.<br />
With natural gas:<br />
Open the gas shut-off valve. If necessary,<br />
check with your gas supply utility.<br />
Press R (see page 15).<br />
Acknowledge the fault (see page 35).<br />
Notify your heating contractor if this fault<br />
recurs.<br />
The fault message is displayed until the<br />
cause is rectified.<br />
Scan and acknowledge the type of fault<br />
(see page 35). If necessary, notify your<br />
heating contractor.<br />
Adjust the mixer manually.<br />
5592 682 GB<br />
37
What to do if...<br />
Rooms are too hot<br />
Cause<br />
Control unit or remote control is incorrectly<br />
adjusted.<br />
"Fault" is displayed, and the red fault<br />
indicator flashes.<br />
Mixer motor faulty.<br />
Remedy<br />
Check settings and correct if required:<br />
■ Room temperature (see page 18).<br />
■ Time (see page 30).<br />
■ Time program (see page 19).<br />
Scan and acknowledge the type of fault<br />
(see page 35). If necessary, notify your<br />
heating contractor.<br />
Adjust the mixer manually.<br />
There is no hot water<br />
Cause<br />
The heating system is off.<br />
Control unit or remote control incorrectly<br />
adjusted.<br />
No fuel.<br />
"Fault" is displayed, and the red fault<br />
indicator flashes.<br />
Remedy<br />
■ Switch the ON/OFF switch ON (see diagrams<br />
from page 15).<br />
■ Switch ON the mains isolator, if installed<br />
(outside the boiler room).<br />
■ Reset the MCB in the power distribution<br />
board (main domestic MCB).<br />
Check settings and correct if required:<br />
■ DHW heating must be enabled (see<br />
page 25).<br />
■ DHW temperature (see page 25).<br />
■ Time program (see page 26).<br />
■ Time (see page 30).<br />
With oil/LPG:<br />
Check the fuel reserves and re-order if<br />
required.<br />
With natural gas:<br />
Open the gas shut-off valve. If necessary,<br />
check with your gas supply utility.<br />
Scan and acknowledge the type of fault<br />
(see page 35). If necessary, notify your<br />
heating contractor.<br />
5592 682 GB<br />
38
What to do if...<br />
The DHW is too hot<br />
Cause<br />
The control unit is incorrectly adjusted.<br />
Remedy<br />
Check and correct the DHW temperature<br />
if required (see page 25).<br />
"ã" flashes and "Fault" is displayed<br />
Cause<br />
Remedy<br />
Heating system fault. Proceed as described on page 34.<br />
"ë" flashes and "Service" is displayed<br />
Cause<br />
The time for a service, as specified by<br />
your heating contractor, has arrived.<br />
Remedy<br />
Proceed as described on page 33.<br />
"Controls locked out" is displayed<br />
Cause<br />
This function is disabled.<br />
Remedy<br />
Your heating contractor can lift this<br />
block.<br />
"External hook-up" is displayed<br />
Cause<br />
The heating program set at the control<br />
unit was changed by an external device,<br />
e.g. extension EA1.<br />
Remedy<br />
No remedy is required.<br />
"External program" is displayed<br />
5592 682 GB<br />
Cause<br />
The heating program set at the control<br />
unit was changed over by the Vitocom<br />
communication interface.<br />
Remedy<br />
You can change the heating program.<br />
39
Maintenance<br />
Maintenance<br />
Cleaning<br />
You can clean the surface of the programming<br />
unit with a microfibre cloth.<br />
All equipment can be cleaned with a<br />
commercially available domestic cleaning<br />
agent (non-scouring).<br />
Inspection and maintenance<br />
Inspection and maintenance of your<br />
heating system is prescribed by the<br />
Energy Savings Order and DIN 4755,<br />
DVGW-TRGI <strong>200</strong>8 and DIN 1988-8.<br />
Regular maintenance ensures troublefree,<br />
energy efficient, environmentally<br />
responsible and safe heating. Your heating<br />
system must be serviced by an<br />
authorised contractor at least every<br />
2 years. For this, we advise you to<br />
arrange an inspection and maintenance<br />
contract with your local heating contractor.<br />
Boiler<br />
Increasing boiler contamination raises<br />
the flue gas temperature and thereby<br />
increases energy losses. For that reason,<br />
all boilers should be cleaned annually.<br />
DHW cylinder (if installed)<br />
The DIN 1988-8 and EN 806 specify that<br />
maintenance and cleaning should be<br />
carried out no later than two years after<br />
commissioning and thereafter as<br />
required.<br />
Only a qualified heating contractor<br />
should clean the inside of a DHW cylinder<br />
and the DHW connections.<br />
Refill any water treatment equipment<br />
(e.g. a lock or injection system) in good<br />
time, if such equipment is installed in the<br />
cold water supply of the DHW cylinder.<br />
Observe the manufacturer's instructions.<br />
Additionally for a Vitocell 100:<br />
We recommend that the correct function<br />
of the sacrificial anode is checked annually<br />
by your heating contractor.<br />
The anode function can be checked without<br />
interrupting the system operation.<br />
The heating contractor will check the<br />
earth current with an anode tester.<br />
Safety valve (DHW cylinder)<br />
The safety valve function should be<br />
checked every six months by venting,<br />
either by the system user or the local<br />
heating contractor. The valve seat may<br />
become contaminated (see the valve<br />
manufacturer's instructions).<br />
Potable water filter (if installed)<br />
To maintain high hygienic standards,<br />
proceed as follows:<br />
■ Replace filter element on non-back<br />
flushing filters every six months (visual<br />
inspection every two months).<br />
■ On back flushing filters, back flush<br />
every two months.<br />
5592 682 GB<br />
40
Appendix<br />
Ordering fuel oil<br />
Fuel oil quality<br />
Vitoladens are approved for the combustion<br />
of low sulphur fuel oil to DIN 51603-<br />
EL-1 (max. sulphur content 50 ppm).<br />
A condensate neutralising system is not<br />
required (according to Code of Practice<br />
ATV-DVWK-A 251 [Germany]) when<br />
using this low sulphur fuel.<br />
Fuel oil additives<br />
Fuel oil additives are materials that can<br />
be used providing they offer the following<br />
characteristics:<br />
■ Improvement of stability during fuel<br />
storage.<br />
■ Improvement of the thermal stability of<br />
the fuel.<br />
■ Reduction of odour development during<br />
filling.<br />
Please note<br />
! Fuel oil additives can create residues<br />
and impair the safe operation<br />
of your heating system.<br />
The use of fuel oil additives that<br />
leave residues is not permissible.<br />
Combustion improvers<br />
Combustion improvers are additives for<br />
optimising fuel oil combustion.<br />
<strong>Viessmann</strong> oil burners do not require<br />
combustion improvers, as these burners<br />
operate with clean and efficient combustion.<br />
Please note<br />
! Combustion improvers can create<br />
residues and impair the safe<br />
operation of your heating system.<br />
The use of combustion improvers<br />
that leave residues is not permissible.<br />
Biofuels<br />
Biofuels are made from vegetable oil,<br />
e.g. sunflower or rapeseed oil.<br />
Please note<br />
! Biofuels can lead to damage on<br />
<strong>Viessmann</strong> oil burners.<br />
Their use is not acceptable.<br />
If in doubt refer to your local heating contractor.<br />
5592 682 GB<br />
41
Appendix<br />
Menu overview<br />
Extended menu 12<br />
5592 682 GB<br />
Heating<br />
DHW<br />
Solar energy<br />
Test mode<br />
Information<br />
Settings<br />
Time / Date<br />
Language DE<br />
Contrast<br />
Brightness<br />
Temperature unit<br />
Name for heating circ.<br />
Standard menu<br />
Standard setting<br />
General<br />
Heating circuit 1 HC1<br />
Heating circuit 2 HC2<br />
Heating circuit 3 HC3<br />
DHW<br />
Solar<br />
Reset data<br />
Set DHW temperature<br />
DHW time prog<br />
DHW circ time prog<br />
Detailed<br />
scan<br />
options<br />
see following<br />
page<br />
Party mode<br />
Economy mode<br />
Set room temperature<br />
Set reduced room temp<br />
Heating program<br />
Heating time program<br />
Holiday program<br />
Heating curve<br />
Heating and DHW<br />
Only DHW<br />
Standby mode<br />
42
Appendix<br />
Menu overview (cont.)<br />
Scanning options in the extended menu<br />
Note<br />
Subject to the actual equipment level, not all of the scans listed here may be available.<br />
You can view more details on the information marked with .<br />
5592 682 GB<br />
General<br />
"Outside temp"<br />
"Boiler temperature"<br />
"Common flow temp"<br />
(Common flow temperature)<br />
"Burner"<br />
"Hours run"<br />
"Burner stage 1"<br />
"Hours run"<br />
"Burner stage 2"<br />
"Hours run"<br />
"Fuel consumpt."<br />
"Feed pump"<br />
"Central fault mess."<br />
"Subscriber no."<br />
"Input ext. EA1"<br />
"Time"<br />
"Date"<br />
"Radio clock signal"<br />
Heating circuit 1 (HC1)<br />
"Heating program"<br />
"<strong>Operating</strong> status:"<br />
"Time program"<br />
"Set room temperature"<br />
"Room temperature"<br />
"Set reduced room temp"<br />
"Set ext. room temp"<br />
"Set party temp"<br />
"Slope"<br />
"Level"<br />
"Heating circ pump"<br />
"Holiday program"<br />
Heating circuit 2, 3 (HC2, HC3)<br />
"Heating program"<br />
"<strong>Operating</strong> status:"<br />
"Time program"<br />
"Set room temperature"<br />
"Room temperature"<br />
"Set reduced room temp"<br />
"Set ext. room temp"<br />
"Set party temp"<br />
"Slope"<br />
"Level"<br />
"Heating circ pump"<br />
"Mixer"<br />
"Flow temperature"<br />
"Return temperature"<br />
"Holiday program"<br />
DHW<br />
"DHW time prog"<br />
"DHW circ time prog"<br />
"DHW temperature"<br />
"Cylinder prim pump"<br />
"DHW circ pump"<br />
"Flow switch"<br />
43
Appendix<br />
Menu overview (cont.)<br />
Solar<br />
"Collector temp"<br />
"Solar DHW"<br />
"Solar circuit pump"<br />
"Solar energy history"<br />
"Solar energy"<br />
"Solar circuit pump"<br />
"Solar circ pump speed"<br />
"Heating suppr. DHW"<br />
"SM1 output 22"<br />
"SM1 output 22 h"<br />
"Sensor 7"<br />
"Sensor 10"<br />
"Heat suppr. heating"<br />
Terminology<br />
Setback mode (reduced heating<br />
mode)<br />
See "Reduced heating mode".<br />
Heating program<br />
The heating program determines<br />
whether you heat your rooms and DHW,<br />
or only heat DHW, or whether you shut<br />
down your heating system with frost protection<br />
monitoring.<br />
You can select the following heating programs:<br />
■ "Heating and DHW"<br />
The rooms are heated and DHW is<br />
provided (winter mode).<br />
■ "Only DHW"<br />
DHW is provided but there is no central<br />
heating (summer mode).<br />
■ "Standby mode"<br />
Frost protection for the boiler and the<br />
DHW cylinder is enabled, no central<br />
heating, no DHW heating.<br />
5592 682 GB<br />
44
Appendix<br />
Terminology (cont.)<br />
Note<br />
No heating program is available for central<br />
heating without DHW heating. When<br />
you want central heating, hot water is<br />
generally also required (winter mode).<br />
If you do want just central heating, select<br />
the heating program "Heating and<br />
DHW" and set the DHW temperature to<br />
10 °C (see page 28). This means that<br />
you will not heat DHW unnecessarily but<br />
the DHW cylinder is protected against<br />
frost.<br />
<strong>Operating</strong> status<br />
In the heating program "Heating and<br />
DHW", the operating status changes<br />
from "Standard heating mode" (see<br />
page 47) to the operating status<br />
"Reduced heating mode" (see<br />
page 48) and vice versa. The times for<br />
the operating status change are defined<br />
when the time program is set.<br />
Extension kit for heating circuit with<br />
mixer<br />
Assembly (accessory) for controlling a<br />
heating circuit with mixer.<br />
See "Mixer".<br />
Heating curve<br />
Heating curves illustrate the relationship<br />
between the outside temperature, room<br />
temperature (set value) and boiler water<br />
or (heating circuit) flow temperature. The<br />
lower the outside temperature, the<br />
higher the boiler water or (heating circuit)<br />
flow temperature.<br />
In order to guarantee sufficient heat and<br />
minimum fuel consumption at any outside<br />
temperature, the conditions of your<br />
building and your heating system must<br />
be taken into consideration. The heating<br />
curve is set by your heating contractor<br />
for this purpose.<br />
Note<br />
If your heating system includes heating<br />
circuits with mixers, then the flow temperature<br />
for the heating circuit without<br />
mixer is higher by a selected differential<br />
than the flow temperature for the heating<br />
circuits with mixer.<br />
The illustrated heating curves apply with<br />
the following settings:<br />
■ Heating curve level = 0<br />
■ Standard room temperature (set<br />
value) = 20 ºC<br />
5592 682 GB<br />
45
Appendix<br />
Terminology (cont.)<br />
Boiler water or<br />
Flow temperature in °C<br />
90<br />
80<br />
70<br />
60<br />
50<br />
40<br />
35 30 25 20 15 10 5<br />
30<br />
Set room temperature in °C<br />
3.0 3.2<br />
3.4<br />
2.6 2.8<br />
2.4<br />
2.2<br />
2.0<br />
1.8<br />
Slope<br />
1.6<br />
1.4<br />
1.2<br />
1.0<br />
0.8<br />
0.6<br />
0.4<br />
0.2<br />
C<br />
B<br />
A<br />
10<br />
0 -10 -20 -30<br />
-14<br />
Outside temperature in °C<br />
Example:<br />
For outside temperature −14 °C:<br />
A Underfloor heating system, slope<br />
0.2 to 0.8<br />
B Low temperature heating system,<br />
slope 0.8 to 1.6<br />
C Heating system with a boiler water<br />
temperature in excess of 75 °C,<br />
slope 1.6 to 2.0<br />
5592 682 GB<br />
46
Appendix<br />
Terminology (cont.)<br />
Factory settings: slope = 1.4 and level =<br />
0.<br />
110<br />
3.5<br />
Actual temperature<br />
Current temperature at the time of the<br />
scan; e.g. actual DHW temperature.<br />
Mixer<br />
5592 682 GB<br />
Boiler water or<br />
flow temperature in °C<br />
A<br />
B<br />
+20 -20<br />
Outside temperature in °C<br />
1.4<br />
0.2<br />
A Changing the slope:<br />
The steepness of the heating curve<br />
changes.<br />
B Changing the level:<br />
The heating curves are shifted in<br />
parallel in a vertical direction.<br />
Heating circuit<br />
A heating circuit is a sealed circuit<br />
between the boiler and radiators, in<br />
which the heating water circulates.<br />
A heating system may comprise several<br />
heating circuits. For example, one heating<br />
circuit for the rooms occupied by you<br />
and one heating circuit for the rooms of<br />
a separate apartment.<br />
Heating circuit pump<br />
Circulation pump for the circulation of the<br />
heating water in the heating circuit.<br />
A mixer mixes the water heated in the<br />
boiler with the cooled water returning<br />
from the heating circuit. The water,<br />
heated to the right temperature in line<br />
with demand, is delivered to the heating<br />
circuit by the heating circuit pump. The<br />
control unit adjusts the heating circuit<br />
flow temperature via the mixer to the various<br />
conditions, e.g. different outside<br />
temperature.<br />
Night setback<br />
See "Reduced heating mode".<br />
Standard heating mode<br />
When you are in the house during the<br />
day, you can heat the rooms in standard<br />
heating mode. Set the periods using the<br />
time program for central heating. During<br />
these times, the rooms are heated to the<br />
standard room temperature.<br />
Standard room temperature<br />
Set the standard room temperature<br />
when you are at home during the day<br />
(see page 18).<br />
Open flue operation<br />
The combustion air is drawn from the<br />
room where the boiler is installed.<br />
47
Appendix<br />
Terminology (cont.)<br />
Balanced flue operation<br />
The combustion air is drawn from outside<br />
the building.<br />
Reduced heating mode<br />
When you are out or during the night, you<br />
can heat the rooms in reduced heating<br />
mode (setback mode). Set the periods<br />
using the time program for central heating.<br />
During these times, the rooms are<br />
heated to a reduced room temperature.<br />
Reduced room temperature<br />
When you are out or during the night, set<br />
the reduced room temperature (see<br />
page 18). See also "Reduced heating<br />
mode".<br />
Safety valve<br />
A safety device that must be installed by<br />
your heating contractor in the cold water<br />
pipe. The safety valve opens automatically<br />
to prevent excess pressure in the<br />
DHW cylinder.<br />
Solar circuit pump<br />
In conjunction with solar thermal systems.<br />
The solar circuit pump delivers the<br />
cooled heat transfer medium from the<br />
DHW cylinder indirect coil to the collectors.<br />
Set temperature<br />
Default temperature that should be<br />
reached; e.g. set DHW temperature.<br />
Summer mode<br />
Heating program "Only DHW".<br />
At warmer times of the year, i.e. when<br />
the rooms do not have to be heated, you<br />
can stop heating mode. The boiler<br />
remains enabled for DHW heating.<br />
Cylinder primary pump<br />
Circulation pump for heating the DHW in<br />
the DHW cylinder.<br />
Potable water filter<br />
A device that removes solids from the<br />
water. The potable water filter is installed<br />
in the cold water pipe upstream of the<br />
DHW cylinder or the instantaneous<br />
water heater.<br />
Weather-compensated mode<br />
In weather-compensated mode, the<br />
heating flow temperature is controlled<br />
according to the outside temperature.<br />
This means that no unnecessary heat is<br />
generated in order to heat the rooms to<br />
the set room temperature you selected.<br />
The outside temperature is captured and<br />
transmitted to the control unit by a sensor<br />
fitted outside the building.<br />
DHW circulation pump<br />
The DHW circulation pump transfers the<br />
hot water around a circuit between the<br />
DHW cylinder and the draw-off points<br />
(e.g. hot tap). This makes hot water<br />
available quickly at the draw-off point.<br />
5592 682 GB<br />
48
Keyword index<br />
Keyword index<br />
5592 682 GB<br />
A<br />
Actual temperature.............................47<br />
Additives for fuel oil............................41<br />
B<br />
Balanced flue operation.....................48<br />
Biofuels..............................................41<br />
C<br />
Central heating 11<br />
■ Deleting a time phase.....................20<br />
■ Factory setting..................................6<br />
■ Heating program.......................10, 19<br />
■ Required settings............................17<br />
■ Room temperature....................10, 18<br />
■ Selecting a heating circuit...............17<br />
■ Starting.....................................10, 17<br />
■ Stopping.........................................21<br />
■ Time program.................................19<br />
Cleaning.............................................40<br />
Cleaning information..........................40<br />
Cold rooms.........................................37<br />
Combustion improvers.......................41<br />
Comfort function<br />
■ Ending............................................22<br />
■ Selecting.........................................22<br />
Commissioning..............................6, 15<br />
Controls................................................9<br />
Controls locked out............................39<br />
Cylinder primary pump.......................48<br />
D<br />
Date.........................................6, 16, 30<br />
Day temperature (standard room temperature)........................................6,<br />
10<br />
DHW circulation pump 48<br />
■ Deleting a time phase.....................28<br />
■ Time program.................................27<br />
DHW heating 6<br />
■ DHW temperature...........................25<br />
■ Factory setting..................................6<br />
■ Heating program.............................25<br />
■ Required settings............................25<br />
■ Starting...........................................25<br />
■ Stopping.........................................28<br />
■ Time program.................................26<br />
■ Time program, DHW circulation<br />
pump...............................................27<br />
DHW heating outside of the time program...................................................27<br />
Display elements................................11<br />
Display illumination............................29<br />
E<br />
Economy mode<br />
■ Ending............................................23<br />
■ Starting...........................................23<br />
Emissions test mode..........................36<br />
Ending<br />
■ DHW heating..................................28<br />
■ Economy mode...............................23<br />
■ Holiday program.............................24<br />
Energy saving function<br />
■ Economy mode...............................23<br />
■ Ending a holiday program...............24<br />
■ Ending economy mode...................23<br />
■ Holiday program.............................23<br />
■ Selecting.........................................23<br />
Extended menu<br />
■ Control............................................12<br />
■ Menu structure................................42<br />
Extension kit.......................................45<br />
F<br />
Factory setting.....................................6<br />
Fault display.................................11, 39<br />
Fault indicator....................................15<br />
Fault message<br />
■ Acknowledging...............................34<br />
■ Calling up (acknowledged).............35<br />
■ Scanning.........................................34<br />
49
Keyword index<br />
Keyword index (cont.)<br />
Filter...................................................48<br />
Frost protection<br />
■ Factory setting..................................6<br />
Frost protection monitoring................................6,<br />
11, 16, 21, 28<br />
Fuel oil<br />
■ Additives.........................................41<br />
■ Ordering..........................................41<br />
■ Quality............................................41<br />
Further settings..................................30<br />
G<br />
Glossary.............................................44<br />
H<br />
Heating and DHW................................6<br />
Heating circuit....................................47<br />
Heating circuit designation.................29<br />
Heating circuit pump..........................47<br />
Heating circuit with mixer...................45<br />
Heating curve<br />
■ Explanation.....................................45<br />
■ setting.............................................20<br />
Heating mode<br />
■ Reduced...................................18, 48<br />
■ Setting......................................10, 19<br />
■ Standard...................................18, 47<br />
Heating program<br />
■ Central heating.........................10, 19<br />
■ DHW heating..................................25<br />
■ DHW only.......................................48<br />
■ Heating and DHW...........................10<br />
■ Only DHW.......................................10<br />
■ Standby mode................................10<br />
■ Terminology....................................44<br />
Heating system<br />
■ Shutting down.................................16<br />
■ Starting...........................................15<br />
Heating times.....................................19<br />
Heating without DHW heating 28<br />
■ ........................................................28<br />
Help......................................................9<br />
Holiday...............................................23<br />
Holiday program.................................23<br />
■ Deleting..........................................24<br />
■ Terminating.....................................24<br />
Hot rooms..........................................38<br />
Hot water............................................39<br />
How to use the controls.....................12<br />
I<br />
Inspection...........................................40<br />
K<br />
Keys.....................................................9<br />
L<br />
Language selection............................31<br />
Level............................................20, 45<br />
M<br />
Maintenance......................................40<br />
Maintenance contract.........................40<br />
Menu<br />
■ Extended menu..............................12<br />
■ Help..................................................9<br />
■ Standard menu...............................10<br />
■ Structure.........................................42<br />
■ Where to find the controls...............10<br />
Mixer..................................................47<br />
Modifying the boiler heating characteristics......................................................20<br />
N<br />
Names for the heating circuits...........29<br />
Night setback.....................................47<br />
Night temperature (reduced room temperature)..............................................6<br />
No hot water.......................................38<br />
Notice of completion............................6<br />
O<br />
ON/OFF switch............................15, 16<br />
ON indicator.......................................15<br />
Only heating.......................................28<br />
Open flue operation...........................47<br />
5592 682 GB<br />
50
Keyword index<br />
Keyword index (cont.)<br />
5592 682 GB<br />
<strong>Operating</strong> procedure..........................12<br />
<strong>Operating</strong> status.................................45<br />
Operation.............................................9<br />
■ Controls............................................9<br />
■ Menu...............................................10<br />
■ Process...........................................12<br />
Ordering oil........................................41<br />
P<br />
Party mode<br />
■ Ending............................................22<br />
■ Starting...........................................22<br />
Potable water filter.............................48<br />
Power failure........................................7<br />
Pressure display................................15<br />
Pressure gauge..................................15<br />
Process..............................................12<br />
Programming unit.................................9<br />
Pump<br />
■ Cylinder..........................................48<br />
■ DHW circulation..............................48<br />
■ Heating circuit.................................47<br />
■ Solar circuit.....................................48<br />
R<br />
Reduced heating mode..................6, 48<br />
Reduced room temperature.........18, 48<br />
Remote control.....................................9<br />
Reset..................................................31<br />
Resetting data....................................32<br />
Resetting fuel consumption................32<br />
Resetting hours run............................32<br />
Restoring factory settings..................31<br />
Rooms too cold..................................37<br />
Rooms too hot....................................38<br />
Room temperature<br />
■ For reduced heating mode.............18<br />
■ Reduced.........................................48<br />
■ Setting for standard heating<br />
mode.........................................10, 18<br />
S<br />
Safety valve.......................................48<br />
Saving energy<br />
■ Economy mode...............................23<br />
■ Holiday program.............................23<br />
■ Tips...................................................7<br />
Scan<br />
■ Fault message................................34<br />
■ Information......................................32<br />
■ <strong>Operating</strong> conditions.......................32<br />
■ Service message............................33<br />
■ Solar thermal system......................32<br />
■ Temperatures.................................32<br />
Scanning information.........................32<br />
Scanning operating conditions...........32<br />
Scanning the actual temperature.......32<br />
Screen saver......................................12<br />
Selecting a heating circuit..................17<br />
Service...............................................39<br />
Service message...............................11<br />
■ Acknowledging...............................33<br />
■ Calling up (acknowledged).............34<br />
■ Scanning.........................................33<br />
Setback mode..............................44, 48<br />
Set temperature.................................48<br />
Setting programs<br />
■ For central heating..........................19<br />
■ For DHW circulation pump.............27<br />
■ For DHW heating............................26<br />
Settings<br />
■ For central heating....................10, 17<br />
■ For DHW heating............................25<br />
Setting the brightness........................29<br />
Setting the contrast............................29<br />
Setting the DHW temperature............25<br />
Shutdown...........................................16<br />
Shutting down<br />
■ Heating system with frost protection<br />
monitoring.......................................16<br />
■ Heating system without frost protection<br />
monitoring................................16<br />
Shutting down the heating system.....16<br />
Slope............................................20, 45<br />
51
Keyword index<br />
Keyword index (cont.)<br />
Solar circuit pump..............................48<br />
Solar energy.......................................32<br />
Standard heating mode............6, 18, 47<br />
Standard menu<br />
■ Changing........................................30<br />
■ Control............................................10<br />
Standard room temperature (day temperature)..................................6,<br />
10, 18<br />
Standard settings...............................31<br />
Standby mode..................16, 21, 28, 44<br />
Starting<br />
■ Central heating.........................10, 17<br />
■ Comfort function.............................22<br />
■ DHW heating..................................25<br />
■ Energy saving function...................23<br />
■ Frost protection monitoring.............16<br />
■ Heating system...............................15<br />
■ Standby mode..........................16, 21<br />
■ Summer mode................................21<br />
Starting the appliance........................15<br />
Stopping<br />
■ Central heating...............................21<br />
■ Comfort function.............................22<br />
■ DHW heating..................................28<br />
■ Economy mode...............................23<br />
■ Holiday program.............................24<br />
Summer mode.......................21, 44, 48<br />
Summertime changeover.....................6<br />
Symbols on the display......................11<br />
T<br />
Temperature<br />
■ Actual temperature.........................47<br />
■ DHW...............................................25<br />
■ Reduced room temperature............18<br />
■ Scanning.........................................32<br />
■ Set temperature..............................48<br />
■ Standard room temperature.....10, 18<br />
Temperature unit................................31<br />
Terminology.......................................44<br />
Test mode..........................................36<br />
Time.........................................6, 16, 30<br />
■ DHW circulation pump....................27<br />
■ DHW heating..................................26<br />
■ Heating times..................................19<br />
Time phase<br />
■ Central heating, deleting.................20<br />
■ DHW circulation pump, deleting.....28<br />
■ DHW heating, deleting....................27<br />
■ Setting central heating....................19<br />
■ Setting DHW circulation pump........27<br />
■ Setting DHW heating......................26<br />
Time program<br />
■ For central heating............................6<br />
■ For DHW circulation pump...............6<br />
■ For DHW heating..............................6<br />
■ Setting central heating....................19<br />
■ Setting DHW circulation pump........27<br />
■ Setting DHW heating......................26<br />
Troubleshooting.................................37<br />
W<br />
Water too cold....................................38<br />
Water too hot.....................................39<br />
Weather-compensated mode.............48<br />
Where to find the controls....................9<br />
Winter mode.......................................44<br />
Wintertime/summertime changeover...6<br />
Wintertime changeover........................6<br />
5592 682 GB<br />
52
5592 682 GB<br />
53
54<br />
5592 682 GB
5592 682 GB<br />
55
Printed on environmentally friendly,<br />
chlorine-free bleached paper<br />
Applicability<br />
Herstell-Nr.:<br />
7441800 7441802 7452520<br />
Your contact<br />
Contact your local contractor if you have any questions regarding the maintenance<br />
and repair of your system. You may, for example, find local contractors on the internet<br />
under www.viessmann.com.<br />
56<br />
<strong>Viessmann</strong> Werke GmbH&Co KG<br />
D-35107 Allendorf<br />
Telephone: +49 6452 70-0<br />
Fax: +49 6452 70-2780<br />
www.viessmann.com<br />
<strong>Viessmann</strong> Limited<br />
Hortonwood 30, Telford<br />
Shropshire, TF1 7YP, GB<br />
Telephone: +44 1952 675000<br />
Fax: +44 1952 675040<br />
E-mail: info-uk@viessmann.com<br />
5592 682 GB Subject to technical modifications.