M216KASPC BLADE BRAKE CLUTCH MODEL - Exmark
M216KASPC BLADE BRAKE CLUTCH MODEL - Exmark
M216KASPC BLADE BRAKE CLUTCH MODEL - Exmark
Create successful ePaper yourself
Turn your PDF publications into a flip-book with our unique Google optimized e-Paper software.
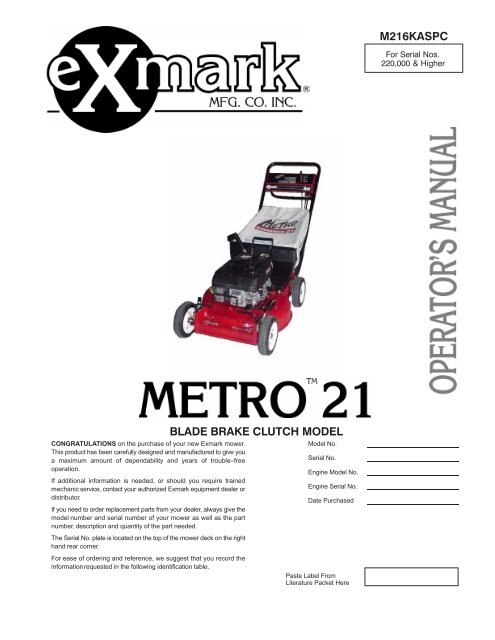
CONGRATULATIONS on the purchase of your new <strong>Exmark</strong> mower.<br />
This product has been carefully designed and manufactured to give you<br />
a maximum amount of dependability and years of trouble–free<br />
operation.<br />
If additional information is needed, or should you require trained<br />
mechanic service, contact your authorized <strong>Exmark</strong> equipment dealer or<br />
distributor.<br />
If you need to order replacement parts from your dealer, always give the<br />
model number and serial number of your mower as well as the part<br />
number, description and quantity of the part needed.<br />
The Serial No. plate is located on the top of the mower deck on the right<br />
hand rear corner.<br />
<br />
Model No.<br />
Serial No.<br />
Engine Model No.<br />
Engine Serial No.<br />
Date Purchased<br />
For ease of ordering and reference, we suggest that you record the<br />
information requested in the following identification table.<br />
Paste Label From<br />
Literature Packet Here
IMPORTANT<br />
When the mower is used or operated on any California forest-, brush- or<br />
grass-covered land, a working spark arrester must be attached to the muffler. If not,<br />
the operator is violating state law, Section 4442 Public Resource Code. To acquire<br />
a spark arrester for your unit, see you Engine Service Dealer.<br />
POTENTIAL HAZARD<br />
• This product is a powerful machine.<br />
WARNING<br />
WHAT CAN HAPPEN<br />
• Failure to follow safe operating practices can result in serious operator injury or<br />
even death.<br />
HOW TO AVOID THE HAZARD<br />
• Keep all shields, guards, and safety devices (especially the grass discharge<br />
system) in place and in proper working condition.<br />
• Stop engine and remove spark plug wire(s) or remove key and wait for all moving<br />
parts to stop before adjusting, servicing, or performing maintenance.<br />
• If mower deck becomes clogged, stop engine and remove spark plug wire(s) or<br />
remove key and wait for all moving parts to stop before cleaning blockage.<br />
• Keep hands, feet, and clothing away from power driven parts.<br />
• Keep off mower unless seat platform is provided.<br />
• Keep others off mower.<br />
WARNING<br />
POTENTIAL HAZARD<br />
• Gasoline is harmful or fatal if swallowed. Long-term exposure to vapors has<br />
caused cancer in laboratory animals.<br />
WHAT CAN HAPPEN<br />
• Failure to use caution may cause serious injury or illness.<br />
HOW TO AVOID THE HAZARD<br />
• Avoid prolonged breathing of vapors.<br />
• Keep face away from nozzle and gasoline tank/container opening.<br />
• Keep gasoline away from eyes and skin.<br />
• Never siphon gasoline by mouth.<br />
This spark ignition system complies with Canadian ICES-002.<br />
Ce système d’allumage par étincelle de véhicule est conforme à la norme NMB-002 du Canada.<br />
<strong>Exmark</strong> reserves the right to make changes to add improvements to its products at any time without<br />
incurring any obligation to make such changes to products manufactured previously. <strong>Exmark</strong>, or its<br />
distributors and dealers, accept no responsibility for variations which may be evident in the actual<br />
specifications of its products and the statements and descriptions contained in this publication.
EXMARK PARTS PLUS ® PROGRAM<br />
<br />
<br />
<br />
<br />
<br />
<br />
<br />
<br />
<br />
<br />
<br />
<br />
<br />
<br />
<br />
<br />
<br />
<br />
<br />
<br />
<br />
®<br />
<br />
<br />
<br />
<br />
<br />
<br />
<br />
<br />
<br />
<br />
<br />
<br />
<br />
<br />
<br />
<br />
The following restrictions apply –– The <strong>Exmark</strong> Parts Plus ® Program is available only through participating <strong>Exmark</strong> Dealers and<br />
applies only to orders submitted on this program Monday through Thursday. Parts Plus service is available only in the 48 contiguous United States.<br />
UPS has initiated a Saturday delivery program to many areas of the continental United States and can be requested for an overnight shipment on<br />
Friday to be delivered Saturday. The next day air charge, plus the Saturday delivery fee will be the responsibility of the purchaser. <strong>Exmark</strong> Mfg. will<br />
assume no responsibility for Saturday delivery shipments. To qualify, all <strong>Exmark</strong> Parts Plus ® orders must be received by <strong>Exmark</strong> by 3:00 p.m.<br />
central time. Orders must be six line items or less. Exclusions from the <strong>Exmark</strong> Parts Plus ® Program are: Any wholegood or accessory in its entirety,<br />
engines and engine replacement parts, 5–speed Peerless transmissions and 5–speed transaxles, hydraulic or hydrostatic wheel motors, cutter decks<br />
and engine decks or any item exceeding United Parcel Service size and weight restrictions.<br />
Due to UPS restrictions, aerosol spray paint is considered a hazardous material and cannot be shipped via UPS next day or Second Day Air.<br />
<strong>Exmark</strong> Manufacturing stocks a limited supply of parts for transaxles, pumps and wheel motors. These parts can be ordered for Next Day Air shipment<br />
but will not be guaranteed per the Parts Plus Program.
CONGRATULATIONS on the purchase of your <strong>Exmark</strong> Mower. This product has been carefully<br />
designed and manufactured to give you a maximum amount of dependability and years of trouble-free<br />
operation.<br />
OPERATOR’S MANUAL<br />
This manual contains assembly, operating, maintenance, adjustment and safety instructions for<br />
your <strong>Exmark</strong> mower.<br />
BEFORE OPERATING YOUR MOWER, CAREFULLY READ THIS MANUAL IN ITS ENTIRETY.<br />
By following the operating, maintenance and safety instructions, you will prolong the life of your<br />
mower, maintain its maximum efficiency and promote safe operation.<br />
If additional information is needed, or should you require trained mechanic service, contact your<br />
authorized <strong>Exmark</strong> equipment dealer or distributor.<br />
All <strong>Exmark</strong> equipment dealers and distributors are kept informed of the latest methods of servicing<br />
and are equipped to provide prompt and efficient service in the field or at their service stations. They<br />
carry ample stock of service parts or can secure them for you from the factory.<br />
All <strong>Exmark</strong> parts are thoroughly tested and inspected before leaving the factory; however, attention<br />
is required on your part if you are to obtain the fullest measure of satisfaction and performance.
Contents<br />
Page<br />
Specifications . . . . . . . . . . . . . . . . . . . . . . . . . . . . . . . 1<br />
Introduction . . . . . . . . . . . . . . . . . . . . . . . . . . . . . . . . 1<br />
Safety . . . . . . . . . . . . . . . . . . . . . . . . . . . . . . . . . . . . . 2<br />
Safe Operating Practices . . . . . . . . . . . . . . . . . . . 2<br />
<strong>Exmark</strong> Lawn Mower Safety . . . . . . . . . . . . . . . . 3<br />
Safety and Instruction Decals . . . . . . . . . . . . . . . 4<br />
Assembly . . . . . . . . . . . . . . . . . . . . . . . . . . . . . . . . . . 4<br />
Installing the Handle . . . . . . . . . . . . . . . . . . . . . . 4<br />
Installing the Discharge Tunnel Plug . . . . . . . . . . 5<br />
Before Starting . . . . . . . . . . . . . . . . . . . . . . . . . . . . . . 5<br />
Filling the Crankcase with Oil . . . . . . . . . . . . . . . 5<br />
Filling the Fuel Tank with Gasoline . . . . . . . . . . 6<br />
Operation . . . . . . . . . . . . . . . . . . . . . . . . . . . . . . . . . . 7<br />
Controls . . . . . . . . . . . . . . . . . . . . . . . . . . . . . . . . 7<br />
Starting the Engine . . . . . . . . . . . . . . . . . . . . . . . . 7<br />
Stopping the Engine . . . . . . . . . . . . . . . . . . . . . . . 8<br />
Operating the Blade and the Self-Propel Drive . . 8<br />
Using the Discharge Tunnel Plug . . . . . . . . . . . . 8<br />
Checking the Blade Brake Clutch . . . . . . . . . . . . 8<br />
Adjusting the Cutting Height . . . . . . . . . . . . . . . . 10<br />
Using the Grass Bag . . . . . . . . . . . . . . . . . . . . . . . 10<br />
Operating Tips . . . . . . . . . . . . . . . . . . . . . . . . . . . 11<br />
Maintenance . . . . . . . . . . . . . . . . . . . . . . . . . . . . . . . . 13<br />
Recommended Maintenance Schedule . . . . . . . . 13<br />
Checking the Engine Oil Level . . . . . . . . . . . . . . 14<br />
Cleaning the Underside of the Lawn Mower<br />
Housing . . . . . . . . . . . . . . . . . . . . . . . . . . . . . . . 14<br />
Cleaning the Discharge Tunnel and Plug . . . . . . 15<br />
Servicing the Air Filter . . . . . . . . . . . . . . . . . . . . 15<br />
Changing the Engine Oil . . . . . . . . . . . . . . . . . . . 15<br />
Maintaining the Cutting Blade . . . . . . . . . . . . . . 16<br />
Cleaning the Blade Brake Clutch Shield . . . . . . . 17<br />
Emptying the Fuel Tank and Cleaning the<br />
Fuel Filter . . . . . . . . . . . . . . . . . . . . . . . . . . . . . 18<br />
Cleaning Under the Belt Cover . . . . . . . . . . . . . . 19<br />
Lubricating the Pivot Arms . . . . . . . . . . . . . . . . . 19<br />
Adjusting the Self-propel Drive . . . . . . . . . . . . . . 19<br />
Servicing the Spark Plug . . . . . . . . . . . . . . . . . . . 19<br />
Lubricating the Gear Case . . . . . . . . . . . . . . . . . . 20<br />
Adjusting Blade Brake Cable . . . . . . . . . . . . . . . 20<br />
Servicing the Wheels . . . . . . . . . . . . . . . . . . . . . . 21<br />
Storage . . . . . . . . . . . . . . . . . . . . . . . . . . . . . . . . . . . . 21<br />
Preparing the Fuel System . . . . . . . . . . . . . . . . . . 21<br />
Preparing the Engine . . . . . . . . . . . . . . . . . . . . . . 22<br />
General Information . . . . . . . . . . . . . . . . . . . . . . . 22<br />
Removing From Storage . . . . . . . . . . . . . . . . . . . 22<br />
Accessories . . . . . . . . . . . . . . . . . . . . . . . . . . . . . . . . 22<br />
Page<br />
Troubleshooting . . . . . . . . . . . . . . . . . . . . . . . . . . . . . 23<br />
Limited Warranty<br />
<strong>Exmark</strong> Commercial Turf Equipment . . . . . . . . . . 25<br />
Specifications<br />
Model Number:<br />
Engine:<br />
<strong>M216KASPC</strong><br />
Kawasaki 6.0 hp OHV<br />
3300 RPM (No load)<br />
Fuel System:<br />
Capacity: 1.37 qt. (1.3 L)<br />
Fuel filter:<br />
Replaceable inline<br />
Transmission:<br />
3 speeds forward<br />
Speed range:<br />
First<br />
Second<br />
Third<br />
Cutting Width:<br />
1.8 mph (2.9 km/h)<br />
2.7 mph (4.3 km/h)<br />
3.8 mph (6.1 km/h)<br />
Cutting Height:<br />
Adjusts in 1/2 in. (1.3 cm) increments from<br />
3/4 in. (1.9 cm) to 3-1/4 in. (8.3 cm)<br />
21 in.<br />
Grass Catcher Capacity 2.5 Bu. (88 L)<br />
Weight (with bag):<br />
Introduction<br />
115 lbs. (52.2 kg)<br />
Read this manual carefully to learn how to operate and<br />
maintain your product properly. The information in this<br />
manual can help you and others avoid injury and product<br />
damage. Although <strong>Exmark</strong> designs and produces safe<br />
products, you are responsible for operating the product<br />
properly and safely.<br />
This manual identifies potential hazards and has special<br />
safety messages that help you and others avoid personal<br />
injury and even death. Danger, Warning, and Caution are<br />
signal words used to identify the level of hazard.<br />
However, regardless of the hazard, be extremely careful.<br />
Danger signals an extreme hazard that will cause serious<br />
injury or death if you do not follow the recommended<br />
precautions.<br />
Warning signals a hazard that may cause serious injury or<br />
death if you do not follow the recommended precautions.<br />
1<br />
Printed in USA
Caution signals a hazard that may cause minor or<br />
moderate injury if you do not follow the recommended<br />
precautions.<br />
This manual uses two other words to highlight<br />
information. Important calls attention to special<br />
mechanical information and Note: emphasizes general<br />
information worthy of special attention.<br />
Safety<br />
To ensure maximum safety and best performance, and<br />
to gain knowledge of the product, it is essential that<br />
you and any other operator of the lawn mower read<br />
and understand the contents of this manual before the<br />
engine is ever started.<br />
This is the safety alert symbol. It is used to alert<br />
you to potential personal injury hazards. Obey all<br />
safety messages that follow this symbol to avoid<br />
possible injury or death.<br />
Improperly using or maintaining this lawn mower<br />
could result in injury or death. To reduce this potential,<br />
comply with the following safety instructions.<br />
Safe Operating Practices<br />
The following instructions are from the ANSI/OPEI<br />
B71.4–1999 standard.<br />
Training<br />
• Read the Operator’s Manual and other training<br />
material. If the operator(s) or mechanic(s) can not read<br />
English it is the owner’s responsibility to explain this<br />
material to them.<br />
• Become familiar with the safe operation of the<br />
equipment, operator controls, and safety signs.<br />
• All operators and mechanics should be trained. The<br />
owner is responsible for training the users.<br />
• Never let children or untrained people operate or<br />
service the equipment. Local regulations may restrict<br />
the age of the operator.<br />
• The owner/user can prevent and is responsible for<br />
accidents or injuries occurring to themselves, other<br />
people, or property.<br />
Preparation<br />
• Only use accessories and attachments approved by the<br />
manufacturer.<br />
• Wear appropriate clothing including hard hat, safety<br />
glasses, and ear protection. Long hair, loose clothing<br />
or jewelry may get tangled in moving parts.<br />
• Inspect the area where the equipment is to be used and<br />
remove all objects such as rocks, toys and wire which<br />
can be thrown by the machine.<br />
• Use extra care when handling gasoline and other fuels.<br />
They are flammable and vapors are explosive.<br />
– Use only an approved container.<br />
– Never remove gas cap or add fuel with engine<br />
running. Allow engine to cool before refueling. Do<br />
not smoke.<br />
– Never refuel or drain the machine indoors.<br />
• Check that operator’s presence controls, safety<br />
switches and shields are attached and functioning<br />
properly. Do not operate unless they are functioning<br />
properly.<br />
Operation<br />
• Never run an engine in an enclosed area.<br />
• Only operate in good light, keeping away from holes<br />
and hidden hazards.<br />
• Only start engine from the operator’s position.<br />
• Be sure of your footing, especially when backing up.<br />
Walk, don’t run. Never operate on wet grass. Reduced<br />
footing could cause slipping.<br />
• Slow down and use extra care on hillsides. Be sure to<br />
mow across the face of slopes. Turf conditions can<br />
affect the machine’s stability. Use caution while<br />
operating near drop–offs.<br />
• Do not change the engine governor setting or<br />
overspeed the engine.<br />
• Stop on level ground and shut off engine before<br />
leaving the operator’s position for any reason<br />
including emptying the catcher or unclogging the<br />
chute.<br />
• Stop equipment and inspect blade after striking objects<br />
or if an abnormal vibration occurs. Make necessary<br />
repairs before resuming operations.<br />
• Keep hands and feet away from the cutting units.<br />
• Look behind and down before backing up to be sure of<br />
a clear path.<br />
• Keep pets and bystanders away.<br />
• Slow down and use caution when crossing roads and<br />
sidewalks. Stop blade if not mowing.<br />
• Be aware of the mower discharge direction and do not<br />
point it at anyone.<br />
• Do not operate the mower under the influence of<br />
alcohol or drugs.<br />
2
• Use care when approaching blind corners, shrubs,<br />
trees, or other objects that may obscure vision.<br />
• Do not operate the lawn mower without either the<br />
grass catcher or the guard in place.<br />
Maintenance and Storage<br />
• Stop engine and disconnect spark plug wire. Wait for<br />
all movement to stop before adjusting, cleaning or<br />
repairing.<br />
• Clean grass and debris from cutting unit, drive,<br />
muffler, and engine to help prevent fires. Clean up oil<br />
or fuel spillage.<br />
• Let engine cool before storing and do not store near<br />
flame.<br />
• Shut off fuel while storing or transporting (if<br />
applicable). Do not store fuel near flames or drain<br />
indoors.<br />
• Park the machine on level ground. Never allow<br />
untrained personnel to service machine.<br />
• Remove spark plug wire before making any repairs.<br />
• Use care when checking blade. Wrap the blade or wear<br />
gloves, and use caution when servicing them. Only<br />
replace blade. Never straighten or weld it.<br />
• Keep hands and feet away from moving parts. If<br />
possible, do not make adjustments with the engine<br />
running.<br />
• Keep all parts in good working condition and all<br />
hardware tightened. Replace all worn or damaged<br />
decals.<br />
<strong>Exmark</strong> Lawn Mower Safety<br />
This product is capable of amputating hands and feet and<br />
throwing objects. Always follow all safety instructions to<br />
avoid serious injury or death.<br />
The following list contains safety information specific to<br />
<strong>Exmark</strong> products or other safety information that you<br />
must know that is not included in the ANSI/OPEI<br />
standard.<br />
• Use this product only for cutting and mulching grass<br />
or, when equipped with a grass bagger, for catching cut<br />
grass.<br />
• Stop the lawn mower if anyone enters the area.<br />
• Do not touch the lawn mower or attachment parts<br />
which may be hot from operation. Allow the lawn<br />
mower to cool down before attempting to maintain,<br />
adjust, or service it.<br />
3
Safety and Instruction Decals<br />
Safety decals and instructions are easily visible to the operator and are located near any<br />
area of potential danger. Replace any decal that is damaged or lost.<br />
On Control Panel<br />
(Part No. 63-9060)<br />
On Belt Cover<br />
(Part No. 74-1970)<br />
On Belt Cover<br />
(Part No. 52-2620)<br />
On Plug<br />
(Part No. 76-2110)<br />
On Mower Housing<br />
(Part No. 43-8480)<br />
On Discharge Tunnel<br />
(Part No. 93-7398)<br />
On Control Panel<br />
(Part No. 100-3282)<br />
On Handle<br />
(Part No. 104-1329)<br />
Assembly<br />
Note: Determine the left and right sides of the machine<br />
from the normal operating position.<br />
2<br />
3<br />
Installing the Handle<br />
1. Mount the handle to the outside of the lawn mower<br />
housing (using the bottom hole) with two 5/16–18 x<br />
1–1/4 in. (8 mm x 31 mm) cap screws, washers, and<br />
thin nylon insert locknuts.<br />
6<br />
1<br />
5<br />
4<br />
2. Secure the handle latches to the handle with two<br />
5/16–18 x 1-1/2 in. (8 mm x 38 mm) cap screws,<br />
washers, and nylon insert locknuts (Fig. 1).<br />
m-3850<br />
1. Bag support rod<br />
2. Carriage bolt<br />
3. Bag aligning plate<br />
Figure 1<br />
4. Cap locknuts<br />
5. Handle<br />
6. Handle latch<br />
4
Note: You can adjust the handle height for comfortable<br />
operation. Stand behind the handle to determine the<br />
height. To adjust the handle height, position the cap<br />
screws and the locknuts that secure the handle latches to<br />
the handle into the other mounting holes in the latches.<br />
1<br />
3. Slide the bag support rod through the bag aligning<br />
plate and into the second from the top mounting holes<br />
in the handle and secure each end with a cap locknut<br />
(Fig. 1).<br />
4. Install the carriage bolt through the bag aligning plate<br />
and the top hole on the left side of the handle, and<br />
secure it with a cap locknut.<br />
5. Use a cable tie to secure the control cables to the left<br />
handle below the bag support rod.<br />
1. Spring clip<br />
Figure 3<br />
m–1915<br />
Installing the Discharge Tunnel<br />
Plug<br />
1. Open the discharge door by pulling forward on the<br />
handle and moving it rearward (Fig. 2). Hold the<br />
discharge door handle to prevent the spring-loaded<br />
door from closing while you insert the plug.<br />
1<br />
2<br />
4. Release the discharge door handle to lock the top of<br />
the plug.<br />
Before Starting<br />
Filling the Crankcase with Oil<br />
Initially, fill the crankcase with 19 ounces (0.55 liters) of<br />
oil. Use only high-quality SAE 30 or SAE 10W30 weight<br />
detergent oil that has the American Petroleum Institute<br />
(API) service classification SF, SG, SH, or SJ.<br />
Before each use, ensure that the oil level is between the<br />
Add and Full marks on the dipstick (Fig. 4).<br />
Figure 2<br />
1. Discharge door handle 2. Plug rotated clockwise<br />
m–1914<br />
1<br />
2. Since the plug is slightly wider than the discharge<br />
tunnel opening, rotate the plug clockwise slightly<br />
while inserting it (Fig. 2).<br />
Note: Ensure that the arrow on the plug decal points<br />
upward.<br />
3. Push the plug all the way in until the spring clip on the<br />
bottom of the plug clicks into place, locking the plug<br />
securely into the discharge tunnel (Fig. 3).<br />
1. Dipstick<br />
Figure 4<br />
Note: When the crankcase is empty, pour about<br />
three-fourths of the crankcase capacity of oil in the<br />
crankcase, then follow the procedure in this section.<br />
To add oil:<br />
1. Move the lawn mower to a level surface.<br />
2. Clean around the dipstick (Fig. 4).<br />
3. Remove the dipstick by rotating the cap<br />
counterclockwise and pulling it out.<br />
5
4. Wipe the dipstick clean with a clean cloth.<br />
5. Insert the dipstick into the filler neck, then remove it.<br />
Note: To ensure an accurate oil level reading, you must<br />
fully install the dipstick.<br />
6. Read the oil level on the dipstick (Fig. 4).<br />
7. If the oil level reading is below the Add mark on the<br />
dipstick, slowly pour only enough oil into the filler<br />
hole to raise the oil level to the Full mark on the<br />
dipstick.<br />
Important Do not overfill the crankcase with oil and<br />
run the engine; engine damage will result. Drain the<br />
excess oil until the oil level on the dipstick reads Full.<br />
8. Insert the dipstick into the filler neck and rotate the<br />
cap clockwise until it is tight.<br />
Filling the Fuel Tank with<br />
Gasoline<br />
For best results, use clean, fresh, lead-free gasoline,<br />
including oxygenated or reformulated gasoline, with an<br />
octane rating of 87 or higher. To ensure freshness,<br />
purchase only the quantity of gasoline that you expect to<br />
use in 30 days. Using unleaded gasoline results in fewer<br />
combustion deposits and longer engine life. You may use<br />
leaded gasoline if unleaded gasoline is not available.<br />
Important Do not add oil to the gasoline.<br />
Important Do not use methanol, gasoline containing<br />
methanol, gasohol containing more than 10% ethanol,<br />
premium gasoline, or white gas. Using these fuels can<br />
damage the engine’s fuel system.<br />
Important Do not use gasoline that is more than 30<br />
days old.<br />
Danger<br />
In certain conditions, gasoline is extremely<br />
flammable and highly explosive. A fire or<br />
explosion from gasoline can burn you and others<br />
and can damage property.<br />
• Fill the fuel tank outdoors, in an open area, and<br />
when the engine is cold. Wipe up any gasoline<br />
that spills.<br />
• Do not fill the fuel tank completely full. Add<br />
gasoline to the fuel tank until the level is 1/4 to<br />
1/2 in. (6 to 13 mm) below the bottom of the<br />
filler neck. This empty space in the tank allows<br />
the gasoline to expand.<br />
• Never smoke when handling gasoline, and stay<br />
away from an open flame or where a spark may<br />
ignite the gasoline fumes.<br />
• Store gasoline in an approved fuel container<br />
and keep it out of the reach of children.<br />
• Never buy more than a 30-day supply of<br />
gasoline.<br />
Danger<br />
When fueling, under certain circumstances, a<br />
static charge can develop, igniting the gasoline. A<br />
fire or explosion from gasoline can burn you and<br />
others and damage property.<br />
• Always place gasoline containers on the ground<br />
and away from your vehicle before filling.<br />
• Do not fill gasoline containers inside a vehicle<br />
or on a truck or trailer bed because interior<br />
carpets or plastic truck bed liners may insulate<br />
the container and slow the loss of any static<br />
charge.<br />
• When practical, remove gasoline-powered<br />
equipment from the truck or trailer and refuel<br />
the equipment with its wheels on the round.<br />
• If this is not possible, then refuel such<br />
equipment on a truck or trailer from a portable<br />
container, not from a gasoline dispenser nozzle.<br />
• If you must use a gasoline dispenser nozzle,<br />
keep the nozzle in contact with the rim of the<br />
fuel tank or container opening at all times until<br />
fueling is complete.<br />
Use a fuel stabilizer/conditioner regularly during<br />
operation and storage. A stabilizer/conditioner cleans the<br />
engine during operation and prevents gum-like varnish<br />
deposits from forming in the engine during periods of<br />
storage.<br />
Important Do not use fuel additives other than a fuel<br />
stabilizer/conditioner. Do not use fuel stabilizers with an<br />
alcohol base such as ethanol, methanol, or isopropanol.<br />
6
1. Clean around the fuel tank cap (Fig. 5).<br />
Controls<br />
The blade control bail and the throttle control are on the<br />
upper handle as shown in Figure 6.<br />
1<br />
2<br />
Figure 5<br />
1. Fuel tank cap 2. Fuel valve<br />
2. Remove the fuel tank cap.<br />
3. Fill the fuel tank with unleaded gasoline to within 1/4<br />
to 1/2 inch (6 to 13 mm) from the top of the tank. Do<br />
not fill into the filler neck.<br />
Important Do not fill the tank more than 1/4 inch<br />
(6 mm) from the top of the tank because the gasoline must<br />
have room to expand.<br />
4. Install the fuel tank cap and wipe up any spilled<br />
gasoline.<br />
2<br />
1<br />
Figure 6<br />
1. Blade control bail 2. Throttle control<br />
Starting the Engine<br />
1. Connect the wire to the spark plug (Fig. 7).<br />
222<br />
Operation<br />
Note: Determine the left and right sides of the machine<br />
from the normal operating position.<br />
Each time before you mow, make sure that the self-propel<br />
drive and the blade control bail operate properly. When<br />
you release the blade control bail, the engine and the<br />
blade should stop. If they do not, contact an Authorized<br />
Service Dealer.<br />
Caution<br />
This machine produces sound levels in excess of<br />
85dBA at the operator’s ear and can cause<br />
hearing loss through extended periods of<br />
exposure.<br />
Wear hearing protection when operating this<br />
machine.<br />
1. Spark-plug wire<br />
1<br />
Figure 7<br />
2. Open the fuel valve (Fig. 5).<br />
3. Move the throttle control to the (Choke) position<br />
(Fig. 6).<br />
4. Move the ground speed control to the (Neutral)<br />
position (Fig. 8).<br />
m-4353<br />
1<br />
1. Ground speed control<br />
Figure 8<br />
224<br />
7
5. Pull the starter handle (Fig. 9) lightly until until you<br />
feel resistance, then pull it sharply. Allow the rope to<br />
return slowly.<br />
1<br />
1. Starter handle<br />
Figure 9<br />
6. When the engine starts, regulate the throttle and the<br />
ground speed control as desired.<br />
Stopping the Engine<br />
1. Release the blade control bail and move the throttle<br />
control to the (Off) position.<br />
2. Disconnect the wire from the spark plug if you do not<br />
use the lawn mower or if you leave it unattended.<br />
Operating the Blade and the<br />
Self-Propel Drive<br />
1. Have the blade control bail in the A position (Fig. 10).<br />
<br />
<br />
<br />
Figure 10<br />
m-3769<br />
2. Slide the blade control bail to the right and raise it to<br />
the B position to engage the blade (Fig. 10).<br />
3. Squeeze the blade control bail against the handle to the<br />
C position to drive (Fig. 10).<br />
Note: To disengage the traction drive but keep the blade<br />
engaged, gradually release the blade control bail to the B<br />
position. To self-propel with the blade disengaged,<br />
squeeze the blade control bail against handle to the C<br />
position without sliding the blade control bail to the right.<br />
The lawn mower has three ground speeds: 1 is slow, 2 is<br />
medium, and 3 is fast. The ground speed control is located<br />
at the rear of the belt cover (Fig. 8).<br />
Note: You can vary the ground speed by increasing or<br />
decreasing the distance between the blade control bail and<br />
the handle. Lower the blade control bail to slow the lawn<br />
mower when making a turn or if the lawn mower is<br />
moving too fast for you. If you lower the blade control<br />
bail too far, the lawn mower stops self-propelling.<br />
Squeeze the blade control bail closer to the handle to<br />
increase the ground speed. When you hold the blade<br />
control bail tight against the handle, the lawn mower<br />
self-propels at the maximum ground speed. Move the<br />
ground speed control to the (Neutral) position when<br />
you use the lawn mower for trimming and when you leave<br />
the lawn mower.<br />
Using the Discharge Tunnel<br />
Plug<br />
1. Stop the engine and wait for all moving parts to stop.<br />
2. Insert the plug; refer to Installing the Discharge Tunnel<br />
Plug on page 5.<br />
3. To remove the plug, move the discharge door handle<br />
rearward and lift up the spring clip on the bottom of<br />
the plug. When the plug is unlocked, pull it out of the<br />
discharge tunnel.<br />
Note: When the grass is thick and lush, clippings may<br />
collect on and around the discharge tunnel plug. This may<br />
make removing the plug difficult. Clean the plug<br />
thoroughly after each use.<br />
Checking the Blade Brake<br />
Clutch<br />
Check the blade brake clutch (BBC) system before each<br />
use to ensure that it is operating properly.<br />
Normal Test<br />
1. Stop the engine and wait for all moving parts to stop.<br />
2. Move the lawn mower onto a paved surface in a<br />
non-windy area.<br />
3. Set all four wheels in to the 2-1/2 in. (64 mm) cutting<br />
height setting (Fig. 15).<br />
4. Set the ground speed selector to the (Neutral)<br />
position.<br />
5. Take a half sheet of newspaper and crumple it into a<br />
ball small enough to go under the deck (about three<br />
inches or 76 mm in diameter) as shown in Figure 11.<br />
8
756<br />
m-5085<br />
Figure 14<br />
1. 5 in. (12.7 cm)<br />
Figure 11<br />
6. Place the ball of newspaper five inches (12.7 cm) in<br />
front of the lawn mower (Fig. 11).<br />
7. Start the engine with the blade control bail down to its<br />
lowest position (Fig. 12).<br />
10. Immediately push the lawn mower over the newspaper<br />
ball.<br />
11. Stop the engine and wait for all moving parts to stop.<br />
12. Walk around the lawn mower to check for the<br />
newspaper ball. If the ball did not go under the deck,<br />
repeat steps 6 through 11.<br />
13. Pull the lawn mower away from the newspaper. If the<br />
newspaper ball unravels or is shredded, the blade has<br />
not properly stopped, resulting in an unsafe operating<br />
condition. Contact an Authorized Service Dealer.<br />
Danger<br />
Figure 12<br />
m-5085<br />
8. Move the blade control bail to the right and then lift it<br />
up to about one inch (2.5 cm) below the handle; refer<br />
to position A in Figure 13.<br />
Note: The fan-like noise indicates that the lawn<br />
mower blade is turning.<br />
<br />
1. 1 in. (2.5 cm)<br />
<br />
m-5085<br />
Figure 13<br />
9. Release the blade control bail; refer to position B in<br />
Figure 14. You should hear a “bang.” The blade should<br />
stop in three seconds.<br />
If the blade brake clutch system is inoperative, the<br />
blade will continue to rotate when you release the<br />
blade control bail. Contact with the blade could<br />
occur, causing serious injury.<br />
• Check the BBC operation before each use.<br />
• Never use a BBC-equipped lawn mower with an<br />
inoperative safety system.<br />
• Take your lawn mower to an Authorized<br />
Service Dealer for repair if the safety system<br />
fails to operate properly.<br />
Test Using the Grass Bag<br />
You can use the grass bag to perform an additional test to<br />
check the blade brake clutch mechanism:<br />
1. Install the empty grass bag on the discharge tunnel.<br />
2. Start the engine.<br />
3. Push the blade control bail (Fig. 12) down to its lowest<br />
position.<br />
4. Move the blade control bail to the right and then lift it<br />
to about one inch (2.5 cm) below the handle. The bag<br />
should begin to inflate, indicating that the blade is<br />
engaged and rotating.<br />
5. Release the blade control bail. If the bag does not<br />
immediately deflate, it indicates that the blade is still<br />
rotating. The blade brake clutch mechanism may be<br />
9
deteriorating, and, if ignored, could result in an unsafe<br />
operating condition. Have the lawn mower inspected<br />
and serviced by an Authorized Service Dealer.<br />
Adjusting the Cutting Height<br />
Each wheel is adjusted individually with a wheel height<br />
adjustment lever. Cutting heights are 1 inch (25 mm),<br />
1-1/2 inches (38 mm), 2 inches (51 mm), 2-1/2 inches<br />
(64 mm), 3 inches (76 mm), and 3-1/2 inches (89 mm).<br />
Danger<br />
Adjusting the cutting height levers could bring<br />
your hands into contact with a moving blade and<br />
result in serious injury.<br />
• Stop the engine and wait for all movement to<br />
stop before adjusting the cutting height.<br />
• Do not put your fingers under the housing when<br />
adjusting the cutting height.<br />
1. Pull the wheel height adjustment lever toward the<br />
wheel (Fig. 15) and move it to the desired setting.<br />
Using the Grass Bag<br />
Occasionally, you may wish to use the grass bag for<br />
bagging extra long grass, lush grass, or leaves.<br />
Installing the Grass Bag<br />
1. Stop the engine and wait for all moving parts to stop.<br />
2. Ensure that the discharge door handle is fully forward<br />
and that the pin is engaged in the catch (Fig. 16).<br />
1<br />
1. Bag frame on retaining<br />
post<br />
2. Pin engaged in catch<br />
Figure 16<br />
2<br />
3<br />
m-1912<br />
3. Handle fully forward.<br />
Discharge door closed.<br />
<br />
m-225<br />
3. Slide the hole in the bag frame onto the retaining post<br />
on the discharge tunnel (Fig. 16).<br />
4. Set the rear of the bag frame onto the bag support rod.<br />
5. Pull the discharge door handle forward until the pin<br />
clears the catch, and move the handle rearward until<br />
the pin locks in the bag notch (Fig. 17).<br />
1. Wheel height adjustment<br />
lever<br />
Figure 15<br />
1<br />
2. Release the wheel height adjustment lever and seat it<br />
securely in the notch.<br />
3. Adjust all the wheels to the same cutting height<br />
setting.<br />
m-1913<br />
1. Pin locked in bag notch<br />
Figure 17<br />
Note: The discharge door in the lawn mower housing<br />
is now open.<br />
10
Mowing with the Grass Bag<br />
Warning<br />
A worn grass bag could allow small stones and<br />
other similar debris to be thrown in the operator’s<br />
or bystander’s direction and result in serious<br />
personal injury or death to the operator or<br />
bystanders.<br />
Check the grass bag frequently. If it is damaged,<br />
install a new <strong>Exmark</strong> replacement bag.<br />
Cut the grass until the bag is full.<br />
Important Do not overfill the bag.<br />
Removing the Grass Bag<br />
1. Stop the engine and wait for all moving parts to stop.<br />
2. Raise the discharge door handle and move it forward<br />
to engage the pin with the catch (Fig. 16).<br />
3. Grasp the handles at the front and the rear of the bag<br />
and lift the bag off the lawn mower.<br />
4. Gradually tip the bag forward to empty the clippings.<br />
5. To install the bag, refer to Installing the Grass Bag on<br />
page 10.<br />
Danger<br />
If the discharge door does not close completely,<br />
the lawn mower could throw objects, causing<br />
serious personal injury or death.<br />
If you cannot close the door because the grass<br />
clippings clog the discharge area, stop the engine<br />
and gently move the discharge door handle back<br />
and forth until you can close the door completely.<br />
If you still cannot close the door, remove the<br />
obstruction with a stick, not your hand.<br />
Danger<br />
The lawn mower can throw grass clippings and<br />
other objects through an open discharge tunnel.<br />
Objects thrown with enough force could cause<br />
serious personal injury or death to the operator or<br />
bystander.<br />
Never open the door on the discharge tunnel when<br />
the engine is running.<br />
Operating Tips<br />
• Review the safety instructions and read this manual<br />
carefully before operating the lawn mower.<br />
• Clear the area of sticks, stones, wire, branches, and<br />
other debris that the blade could hit and throw.<br />
• Keep everyone, especially children and pets, away<br />
from the area of operation.<br />
• Avoid striking trees, walls, curbs, or other solid<br />
objects. Never deliberately mow over any object.<br />
• If the lawn mower strikes an object or starts to vibrate,<br />
immediately stop the engine, disconnect the wire from<br />
the spark plug, and examine the lawn mower for<br />
damage.<br />
• Maintain a sharp blade throughout the cutting season.<br />
Periodically file down nicks on the blade.<br />
• Replace the blade when necessary with an original<br />
<strong>Exmark</strong> replacement blade.<br />
• Mow only dry grass or leaves. Wet grass and leaves<br />
tend to clump on the yard and can cause the lawn<br />
mower to plug or the engine to stall.<br />
Warning<br />
Wet grass or leaves can cause you to slip, contact<br />
the blade, and seriously injure you.<br />
Mow only in dry conditions.<br />
• Clean the underside of the lawn mower deck after each<br />
mowing. See Cleaning the Underside of the Lawn<br />
Mower Housing on page 14.<br />
• Keep the engine in good running condition.<br />
• Set the engine speed to the fastest position for the best<br />
cutting results.<br />
Warning<br />
Operating a lawn mower with its engine running<br />
at a speed greater than the factory setting can<br />
cause the lawn mower to throw a part of the blade<br />
or engine into the operator’s or bystander’s area<br />
and result in serious personal injury or death.<br />
• Do not change the engine speed setting.<br />
• If you suspect the engine speed is faster than<br />
normal, contact an Authorized Service Dealer.<br />
• Clean the air filter frequently. Mulching stirs up more<br />
clippings and dust which clogs the air filter and<br />
reduces engine performance.<br />
11
Cutting Grass<br />
• Grass grows at different rates at different times of the<br />
year. In the summer heat, it is best to cut grass at the<br />
2 in. (51 mm), 2-1/2 in. (64 mm), or 3 in. (76 mm)<br />
cutting height settings. Cut only about a third of the<br />
grass blade at a time. Do not cut below the two-inch<br />
(51 mm) setting unless the grass is sparse or it is late<br />
fall when grass growth begins to slow down.<br />
• When cutting grass over six inches (15 cm) tall, first<br />
mow at the highest cutting height setting and walk<br />
slower; then mow again at a lower setting for the best<br />
lawn appearance. If the grass is too long and the leaves<br />
clump on top of the lawn, the lawn mower may plug<br />
and cause the engine to stall.<br />
• Alternate the mowing direction. This helps disperse<br />
the clippings over the lawn for even fertilization.<br />
If the finished lawn appearance is unsatisfactory, try one<br />
or more of the following:<br />
• Sharpen the blade.<br />
• Walk at a slower pace while mowing.<br />
• Raise the cutting height on your lawn mower.<br />
• Cut the grass more frequently.<br />
• Overlap cutting swaths instead of cutting a full swath<br />
with each pass.<br />
• Set the cutting height on the front wheels one notch<br />
lower than the rear wheels. For example, set the front<br />
wheels at 1-/ in. (44 mm) and the rear wheels at<br />
2-1/2 in. (64 mm).<br />
Cutting Leaves<br />
• After cutting the lawn, ensure that half of the lawn<br />
shows through the cut leaf cover. You may need to<br />
make more than one pass over the leaves.<br />
• For light leaf coverage, set all the wheels at the same<br />
cutting height setting.<br />
• If there are more than five inches (12.7 cm) of leaves<br />
on the lawn, set the front cutting height one or two<br />
notches higher than the rear cutting height. This makes<br />
it easier to feed the leaves under the lawn mower deck.<br />
• Slow down your mowing speed if the lawn mower<br />
does not cut the leaves finely enough.<br />
• If you mow over oak leaves, you can add lime to the<br />
grass in the spring to reduce the acidity of the oak<br />
leaves.<br />
12
Maintenance<br />
Note: Determine the left and right sides of the machine from the normal operating position.<br />
Recommended Maintenance Schedule<br />
Maintenance Service<br />
Interval<br />
Each Use<br />
Maintenance Procedure<br />
• Check the engine oil level.<br />
• Check the stopping time of the blade brake. The blade must stop within three<br />
seconds of releasing the bail; if it does not, contact an Authorized Service Dealer<br />
for repair.<br />
• Remove grass clippings and dirt from under the housing.<br />
• Clean the discharge tunnel and the discharge tunnel plug.<br />
5 Hours • Check the blade and the engine mounting fasteners. Tighten loose fasteners.<br />
25 Hours • Clean the foam pre-cleaner of the air cleaner.<br />
50 Hours<br />
• Change the engine oil. 1<br />
• Sharpen or replace the blade; maintain it more frequently if the edge dulls<br />
quickly in rough or in sandy conditions.<br />
• Clean the blade brake clutch shield.<br />
• Check for leaks in the fuel system and/or a deteriorating fuel hose. Replace<br />
parts if necessary.<br />
• Clean the fuel filter.<br />
• Remove grass clippings and debris from under the belt cover.<br />
• Lubricate the pivot arms.<br />
75 Hours • Adjust the self-propel drive system.<br />
100 Hours<br />
150 Hours<br />
Storage<br />
• Inspect the spark plug and replace it if necessary.<br />
• Clean the cooling system; remove grass clippings, debris, or dirt from the engine<br />
air cooling fins and starter. Clean the system more frequently in dirty or<br />
high-chaff conditions.<br />
• Lubricate the gear case.<br />
• Adjust the blade brake cable.<br />
• Service the wheels.<br />
• Replace the paper air filter. Replace it more frequently in dusty operating<br />
conditions.<br />
• Empty the fuel tank before repairs as directed or before storage.<br />
1 Change the engine oil after the first eight operating hours.<br />
Important Refer to your engine operator’s manual for additional maintenance procedures.<br />
Caution<br />
If you leave the wire on the spark plug, someone could accidently start the engine and seriously<br />
injure you or other bystanders.<br />
Disconnect the wire from the spark plug before you do any maintenance. Set the wire aside so<br />
that it does not accidently contact the spark plug.<br />
13
Checking the Engine Oil Level<br />
Before you use the lawn mower, make sure that the oil<br />
level is between the Add and the Full marks as shown on<br />
the dipstick (Fig. 4). If the oil level is below the Add<br />
mark, and oil. Refer to Filling the Crankcase with Oil on<br />
page 5.<br />
Cleaning the Underside of the<br />
Lawn Mower Housing<br />
To ensure the best performance, keep the underside of the<br />
lawn mower housing clean (Fig. 18).<br />
7. Start the lawn mower, engage the blade, and let it run<br />
for a few minutes to dry out the moisture on the lawn<br />
mower and its components.<br />
Scraping Method<br />
If washing does not remove all debris from under the lawn<br />
mower, scrape it clean.<br />
1. Disconnect the wire from the spark plug (Fig. 7).<br />
2. Drain the fuel from the fuel tank. Refer to Emptying<br />
the Fuel Tank and Cleaning the Fuel Filter on page 18.<br />
Warning<br />
Washing Method<br />
Figure 18<br />
1. Position the lawn mower on a flat concrete or asphalt<br />
surface near a garden hose.<br />
2. Start the engine.<br />
3. Hold the running garden hose at handle level, turn on<br />
the water, and direct the water to flow on the ground<br />
just in front of the right rear tire (Fig. 19).<br />
796<br />
Tipping the lawn mower may cause the fuel to<br />
leak from the carburetor or the fuel tank.<br />
Gasoline is extremely flammable, highly explosive,<br />
and, under certain conditions, can cause personal<br />
injury or property damage.<br />
Avoid fuel spills by running the engine dry or by<br />
removing the gasoline with a hand pump; never<br />
siphon.<br />
3. Tip the lawn mower onto its right side (air filter up).<br />
4. Remove the dirt and grass clippings with a hardwood<br />
scraper. Avoid burrs and sharp edges.<br />
5. Turn the lawn mower upright.<br />
6. Fill the fuel tank.<br />
7. Connect the wire to the spark plug.<br />
1<br />
1093<br />
1. Rear right wheel<br />
Figure 19<br />
4. Engage the blade.<br />
Note: The blade will draw in water and wash out<br />
clippings. Let the water run until you no longer see<br />
clippings being washed out from under the housing.<br />
5. Disengage the blade, stop the engine, and wait for all<br />
moving parts to stop.<br />
6. Turn off the water.<br />
14
Cleaning the Discharge Tunnel<br />
and Plug<br />
Remove the plug from the discharge tunnel and clean it<br />
after each use.<br />
Always be sure that the discharge tunnel door closes<br />
securely when you release the handle. If the debris<br />
prevents the discharge door from closing securely, clean<br />
the inside of the discharge tunnel and the door thoroughly.<br />
Warning<br />
Grass clippings and other objects can be thrown<br />
from an open discharge tunnel and cause serious<br />
injury or kill the operator or bystanders.<br />
Never start or operate the lawn mower unless one<br />
of the following is true:<br />
• The discharge tunnel plug is locked securely in<br />
the discharge tunnel.<br />
• The grass bag is locked in place.<br />
• The optional side discharge chute is locked in<br />
place.<br />
• The discharge tunnel door is locked in place.<br />
Servicing the Air Filter<br />
Clean the foam pre-cleaner every 25 operating hours.<br />
Replace the paper air filter once every season or every<br />
150 operating hours; replace it more frequently in dusty<br />
conditions.<br />
Important Do not operate the engine without the air<br />
filter assembly; extreme engine damage will occur.<br />
1. Stop the engine and wait for all moving parts to stop.<br />
2. Disconnect the wire from the spark plug (Fig. 7).<br />
3. Remove the bolt that secures the air cleaner cover<br />
(Fig. 20).<br />
1. Bolt<br />
2. Cover<br />
Figure 20<br />
1<br />
2<br />
3<br />
4<br />
3. Paper air filter<br />
4. Foam pre-cleaner<br />
4. Remove the cover and clean it thoroughly (Fig. 20).<br />
5. Remove the foam pre-cleaner and wash it with a mild<br />
detergent and water, then blot it dry (Fig. 20).<br />
6. Saturate the pre-cleaner with oil, then squeeze it (do<br />
not twist) to remove the excess oil.<br />
7. Remove the paper air filter and discard it (Fig. 20).<br />
Important Do not try to clean a paper filter.<br />
8. Install the foam pre-cleaner on the new paper air filter.<br />
9. Install the air cleaner assembly.<br />
10. Install the cover and secure it with the bolt.<br />
11. Connect the wire to the spark plug.<br />
Changing the Engine Oil<br />
Change the oil after the first eight operating hours and<br />
then after every 50 operating hours.<br />
1. Run the engine to warm the engine oil.<br />
Note: Warm oil flows better and carries more<br />
contaminants.<br />
Warning<br />
Oil may be hot after engine has been run, and<br />
contact with hot oil can cause severe personal<br />
injury.<br />
Avoid contacting the hot engine oil when you<br />
drain it.<br />
2. Stop the engine and wait for all moving parts to stop.<br />
3. Disconnect the wire from the spark plug (Fig. 7).<br />
4. Place a suitable drain pan under the side oil drain plug.<br />
15
5. Raise the left side of the lawn mower at least 12 inches<br />
(30 cm) and open the side oil drain plug (Fig. 21).<br />
2<br />
1<br />
Figure 21<br />
1. Oil drain tube 2. Side oil drain plug<br />
m-4354<br />
6. Insert the oil drain tube over the drain plug and lower<br />
the lawn mower (Fig. 21).<br />
7. Raise the right side of the lawn mower to drain the oil<br />
into the drain pan.<br />
8. Lower the right side of the lawn mower.<br />
9. Remove the oil drain tube and tighten the side oil<br />
drain plug.<br />
Important Do not overtighten the side oil drain plug;<br />
it may damage the crankcase cover. Torque the side oil<br />
drain plug to 190 in-lb (23 N-m).<br />
10. Fill the crankcase to the Full line on the dipstick with<br />
fresh oil. Refer to the Filling the Crankcase with Oil<br />
on page 5.<br />
11. Wipe up any spilled oil.<br />
12. Connect the wire to the spark plug.<br />
13. Recycle the used oil according to local codes.<br />
Maintaining the Cutting Blade<br />
Always mow with a sharp blade. A sharp blade cuts<br />
cleanly and without tearing or shredding the grass blades.<br />
1. Stop the engine and wait for all moving parts to stop.<br />
2. Disconnect the wire from the spark plug (Fig. 7).<br />
3. Drain the gasoline from the fuel tank; refer to<br />
Emptying the Fuel Tank and Cleaning the Fuel Filter<br />
on page 18.<br />
4. Tip the mower onto its right side (air filter up)<br />
(Fig. 22).<br />
Inspecting the Blade<br />
Figure 22<br />
Carefully examine the blade for sharpness and wear,<br />
especially where the flat and the curved parts meet<br />
(Fig. 23A). Because sand and abrasive material can wear<br />
away the metal that connects the flat and curved parts of<br />
the blade, check the blade before using the lawn mower. If<br />
you notice a slot or wear (Figs. 23B and 23C), replace the<br />
blade; refer to Removing the Blade on page 17.<br />
1<br />
<br />
<br />
<br />
1. Sail<br />
2. Flat part of blade<br />
3<br />
4<br />
Figure 23<br />
2<br />
1<br />
270<br />
3. Wear<br />
4. Slot formed<br />
Note: For the best performance, install a new blade before<br />
the cutting season begins. During the year, file down any<br />
small nicks to maintain the cutting edge.<br />
Danger<br />
A worn or damaged blade can break, and a piece<br />
of the blade could be thrown into the operator’s<br />
or bystander’s area, resulting in serious personal<br />
injury or death.<br />
• Inspect the blade periodically for wear or<br />
damage.<br />
• Replace a worn or damaged blade.<br />
1<br />
796<br />
16
Removing the Blade<br />
1. Grasp the end of the blade using a rag or a thickly<br />
padded glove.<br />
2. Remove the blade nuts, the anti-scalp cup, the blade<br />
accelerator, and the blade (Fig. 24).<br />
4<br />
3<br />
Figure 26<br />
1007<br />
Note: You can also check the balance using a<br />
commercially manufactured blade balancer.<br />
2. If either end of the blade rotates downward, file that<br />
end (not the cutting edge or the end near the cutting<br />
edge). The blade is properly balanced when neither<br />
end drops.<br />
1. Blade<br />
2. Blade nuts<br />
2<br />
Figure 24<br />
1<br />
3. Anti-scalp cup<br />
4. Accelerator<br />
796<br />
Installing the Blade<br />
1. Install a sharp, balanced <strong>Exmark</strong> blade, the blade<br />
accelerator, the anti-scalp cup, and the blade nuts<br />
(Fig. 24).<br />
2. Torque the blade nuts to 15 to 27 ft-lb (20 to 37 Nm).<br />
Sharpening the Blade<br />
File the top side of the blade to maintain its original<br />
cutting angle (Fig. 25A) and inner cutting edge radius<br />
(Fig. 25B).<br />
<br />
1<br />
153<br />
<br />
2<br />
Figure 25<br />
1. Sharpen at this angle only 2. Maintain the original<br />
radius here<br />
<br />
Note: The blade will remain balanced if you remove the<br />
same amount of material from both cutting edges.<br />
Balancing the Blade<br />
1. Check the balance of the blade by placing the center<br />
hole of the blade over a nail or screwdriver shank<br />
clamped horizontally in a vise (Fig. 26).<br />
Warning<br />
Operating the lawn mower without the<br />
accelerator in place can cause the blade to flex,<br />
bend, or break, resulting in serious injury or<br />
death to the operator or bystanders.<br />
Do not operate the lawn mower without the<br />
accelerator.<br />
3. Connect the wire to the spark plug.<br />
Cleaning the Blade Brake<br />
Clutch Shield<br />
Clean the BBC (blade brake clutch) shield at the end of<br />
each mowing season to ensure the best performance and to<br />
prevent parts from degrading. Clean the BBC shield when<br />
you sharpen the blade because you need to remove the<br />
blade in order to remove the BBC shield.<br />
1. Stop the engine and wait for all moving parts to stop.<br />
2. Disconnect the wire from the spark plug (Fig. 7).<br />
3. Drain the gasoline from the fuel tank; refer to<br />
Emptying the Fuel Tank and Cleaning the Fuel Filter<br />
on page 18.<br />
4. Tip the lawn mower onto its right side (air filter up).<br />
17
Warning<br />
Tipping the lawn mower may cause the fuel to<br />
leak from the carburetor or the fuel tank.<br />
Gasoline is extremely flammable, highly explosive,<br />
and, under certain conditions, can cause personal<br />
injury or property damage.<br />
Avoid fuel spills by emptying the fuel tank as<br />
directed; never siphon.<br />
5. Remove the two blade nuts, the anti-scalp cup, the<br />
accelerator, and the blade (Fig. 27).<br />
1<br />
2<br />
Figure 28<br />
1. Tube clamp 2. Fuel tube<br />
<br />
<br />
<br />
m-796<br />
4. Open the fuel valve by turning the lever to the open<br />
position (Fig. 5).<br />
5. Drain the gasoline completely from the tank and fuel<br />
line into an approved fuel container.<br />
6. Remove the fuel tube on the fuel tank by loosening the<br />
tube clamp (Fig. 29).<br />
1. Tabs and nuts<br />
2. BBC shield<br />
Figure 27<br />
3. Tab and bolt<br />
6. Loosen the tabs that secure the BBC shield to the deck<br />
by loosening the nuts or the bolts on the tabs (Fig. 27).<br />
Rotate the tabs 180 to move them out of the way.<br />
7. Remove the BBC shield and brush or blow all the<br />
debris from under the shield and around the BBC<br />
system.<br />
8. Install the BBC shield. Rotate the tabs 180 back into<br />
position. Tighten the nuts or the bolts on tabs to secure<br />
the BBC shield to the deck.<br />
9. Install the blade, the accelerator, the anti-scalp cup,<br />
and the two blade nuts.<br />
10. Turn the lawn mower upright.<br />
11. Connect the wire to the spark plug.<br />
2<br />
1<br />
Figure 29<br />
1. Fuel tube 2. Fuel filter<br />
7. Remove the fuel filter from the fuel tank (Fig. 29).<br />
8. Clean the fuel filter with high flash-point solvent.<br />
9. Firmly install the filter, tubes, and clamps.<br />
10. Connect the wire to the spark plug.<br />
Emptying the Fuel Tank and<br />
Cleaning the Fuel Filter<br />
Clean the fuel filter element every 50 operating hours.<br />
1. Stop the engine and wait for it to cool down.<br />
Important Drain gasoline from a cold engine only.<br />
2. Disconnect the wire from the spark plug (Fig. 7).<br />
3. Remove the fuel tube by loosening the tube clamp at<br />
the carburetor (Fig. 28).<br />
18
Cleaning Under the Belt Cover<br />
Keep the area under the belt cover free of debris.<br />
1. Stop the engine and wait for all moving parts to stop.<br />
2. Remove the two bolts that secure the belt cover<br />
(Fig. 30) to the mower housing.<br />
2<br />
1<br />
2<br />
Adjusting the Self-propel Drive<br />
If the lawn mower does not self-propel or has a tendency<br />
to creep forward when the blade control bail is more than<br />
1-1/2 inches (3.8 cm) from the handle, adjust the wheel<br />
drive control knob on the rear of the gear box.<br />
1. Close the door in the lawn mower housing and remove<br />
the grass bag.<br />
2. Rotate the control knob clockwise / turn if the lawn<br />
mower does not self-propel. If the lawn mower creeps<br />
forward, rotate the knob / turn counterclockwise to<br />
loosen the belt (Fig. 32).<br />
Figure 30<br />
1. Belt cover 2. Bolt (2)<br />
3. Lift off the belt cover and brush out all the debris<br />
around the belt area.<br />
4. Install the belt cover.<br />
Lubricating the Pivot Arms<br />
After every 50 operating hours or when the season ends,<br />
lubricate the pivot arms.<br />
1. Move the rear wheel cutting height levers to the center<br />
setting.<br />
2. Wipe the grease fittings with a clean rag (Fig. 31).<br />
224<br />
1. Control knob<br />
Figure 32<br />
m-228<br />
3. Slowly pull the lawn mower backward while you<br />
gradually move the blade control bail toward the<br />
handle.<br />
Note: The adjustment is correct when the rear wheels stop<br />
turning and the blade control bail is about one inch (2.5<br />
cm) from the handle (Fig. 33).<br />
<br />
<br />
1. One inch (2.5 cm)<br />
Figure 33<br />
m-513a<br />
1. Grease fitting (2)<br />
Figure 31<br />
<br />
m-232<br />
3. Install a grease gun onto the fitting and gently apply<br />
two or three pumps of #2 multi-purpose lithium base<br />
grease (Fig. 31).<br />
Note: Excessive grease pressure may damage the seals.<br />
Servicing the Spark Plug<br />
Check the spark plug after every 100 operating hours. Use<br />
an NGK BPR5ES spark plug or equivalent.<br />
1. Stop the engine and wait for all moving parts to stop.<br />
2. Disconnect the wire from the spark plug (Fig. 7).<br />
3. Clean around the spark plug.<br />
4. Remove the spark plug from the cylinder head.<br />
19
Important Replace a cracked, fouled, or dirty spark<br />
plug. Do not clean the electrodes because grit entering the<br />
cylinder can damage the engine.<br />
5. Set the gap on the plug to 0.030 in. (0.76 mm)<br />
(Fig. 34).<br />
1. 0.030 in. (0.76 mm)<br />
Figure 34<br />
6. Install the spark plug and the gasket seal.<br />
7. Torque the plug to 17 ft-lb (23 Nm).<br />
8. Connect the wire to the spark plug.<br />
<br />
m-110<br />
Lubricating the Gear Case<br />
After every 100 operating hours, grease the gear case.<br />
1. Remove the grass bag.<br />
2. Install a grease gun onto the fitting through the belt<br />
cover opening (Fig. 35).<br />
<br />
<br />
Warning<br />
Overtightening the blade brake cable can cause<br />
the blade brake to fail to stop a rotating blade<br />
when you release the blade control bail. A rotating<br />
blade can cause serious personal injury.<br />
• Check the blade brake each time you adjust the<br />
brake cable to ensure that the brake stops the<br />
blade in three seconds or less.<br />
• If the blade does not stop rotating in three<br />
seconds or less, bring the lawn mower to an<br />
Authorized Service Dealer for repair.<br />
1. Stop the engine and wait for all moving parts to stop.<br />
2. Disconnect the wire from the spark plug (Fig. 7).<br />
3. Loosen the cable clamp screw until the cable conduit<br />
slides (Fig. 36).<br />
1<br />
1. Spring<br />
2. Cable clamp screw<br />
Figure 36<br />
2<br />
3<br />
3. Cable conduit<br />
278<br />
Figure 35<br />
1. Belt cover 2. Grease fitting<br />
m-224<br />
4. Pull the cable to remove the slack, but do not put<br />
tension on the spring.<br />
5. Tighten the screw to lock the adjustment in place.<br />
6. Connect the wire to the spark plug.<br />
3. Gently apply one to two pumps of #2 multi-purpose<br />
lithium-base grease.<br />
4. Install the grass bag.<br />
Adjusting Blade Brake Cable<br />
Whenever you install a new blade brake cable assembly or<br />
replace the blade brake belt, adjust the blade brake cable.<br />
20
Servicing the Wheels<br />
Removing the Wheels<br />
1. Stop the engine and wait for all moving parts to stop.<br />
2. Disconnect the wire from the spark plug (Fig. 7).<br />
3. Remove the cap screw, the wheel spacer, and the<br />
locknut mounting the wheel to the pivot arm (Fig. 37).<br />
2 3 6 7 5<br />
2<br />
7. Install the wheel to the pivot arm with the cap screws,<br />
a spacer, and a locknut. Ensure that the spacer is<br />
positioned between the wheel hub and the pivot arm<br />
(Fig. 37).<br />
8. Connect the wire to the spark plug.<br />
Storage<br />
To prepare the lawn mower for off-season storage,<br />
perform the recommended maintenance procedures. Refer<br />
to Maintenance on page 13.<br />
Store the lawn mower in a cool, clean, and dry place.<br />
Cover the lawn mower to keep it clean and protected.<br />
1<br />
4 5 4 8 9<br />
1. Plastic cover (rear wheels<br />
only)<br />
2. Locknuts<br />
3. Wheel spacer<br />
4. Lug<br />
Figure 37<br />
5. Wheel half<br />
6. Bearing/hub assembly<br />
7. Bearing spacer<br />
8. Bearing (2)<br />
9. Cap screw<br />
4. Separate the wheel halves from the tire by removing<br />
four cap screws and four locknuts (Fig. 37).<br />
Note: If you remove the bearings from the bearing/hub<br />
assembly, remove them by pressing on the bearing spacer<br />
(Fig. 37).<br />
Assembling the Wheels<br />
1. Position the tire onto one wheel half, aligning the lugs<br />
on each (Fig. 37).<br />
2. Place the bearing/hub assembly into the center hole of<br />
the wheel half. Ensure that the legs of the hub are<br />
positioned over the flange of the hole (Fig. 37).<br />
3. Place the other wheel half onto the bearing/hub<br />
assembly, aligning the wheel and the tire lugs and the<br />
mounting holes (Fig. 37).<br />
4. Using two 1/4–20 x 1.50 in. (6 x 38 mm) fully<br />
threaded screws or bolts and non-locking nuts, loosely<br />
secure the wheel halves together. Mount the screws or<br />
bolts in the opposing holes (Fig. 37).<br />
5. Check the alignment of all parts and tighten the<br />
screws, alternating from side to side for a uniform fit,<br />
until the wheel halves are drawn together (Fig. 37).<br />
6. Install the two cap screws and the two locknuts<br />
previously removed in the remaining holes in the<br />
wheel halves and tighten. Remove the two long screws<br />
or bolts and replace them with two cap screws and two<br />
locknuts (Fig. 37).<br />
209<br />
Preparing the Fuel System<br />
Warning<br />
Gasoline can vaporize if you store it over long<br />
periods of time and explode if it comes into<br />
contact with an open flame.<br />
• Do not store gasoline over long periods of time.<br />
• Do not store the lawn mower with gasoline in<br />
the fuel tank or the carburetor in an enclosure<br />
with an open flame. (For example, a furnace or<br />
a water heater pilot light.)<br />
• Allow the engine to cool before storing it in any<br />
enclosure.<br />
Empty the fuel tank when mowing the last time before<br />
storing the lawn mower.<br />
1. Run the lawn mower until the engine stops from<br />
running out of fuel.<br />
2. Prime the engine and start it again.<br />
3. Allow the engine to run until it stops. When you can<br />
no longer start the engine, it is sufficiently dry.<br />
21
Preparing the Engine<br />
1. While the engine is still warm, drain oil from<br />
crankcase. Refer to the Refer to Changing the Engine<br />
Oil on page 15.<br />
2. Remove the spark plug (Fig. 7).<br />
3. Using an oil can, squirt about one tablespoon of oil<br />
through the spark plug hole.<br />
4. Slowly rotate the engine several times, using the<br />
starter rope, to distribute the oil.<br />
5. Install the spark plug but do not connect the wire to<br />
the spark plug.<br />
Accessories<br />
You may purchase the following accessory from an<br />
Authorized Service Dealer:<br />
Side Discharge Kit<br />
You can install the side discharge kit installs in seconds. It<br />
is rear mounted in place of the grass bag. It disperses<br />
clippings while trimming on both sides (Fig. 38).<br />
General Information<br />
1. Clean the mower housing. Refer to the Cleaning the<br />
Underside of the Mower Housing on page 14.<br />
2. Clean any dirt and chaff from the cylinder, the cylinder<br />
head fins, and the blower housing.<br />
3. Remove grass clippings, dirt, and grime from the<br />
external parts of the engine, the shrouding, and the top<br />
of the mower housing.<br />
1. Side discharge chute<br />
<br />
Figure 38<br />
2047<br />
4. Clean BBC shield; refer to Cleaning Blade Brake<br />
Clutch Shield on page 17.<br />
5. Check the condition of the blade. Refer to the<br />
Maintaining the Cutting Blade on page 16.<br />
6. Service the air filter; refer to Servicing the Air Filter<br />
on page 15.<br />
7. Tighten all nuts, bolts, and screws.<br />
8. Touch up all rusted or chipped paint surfaces with<br />
paint available from an Authorized Service Dealer.<br />
Removing From Storage<br />
1. Check and tighten all fasteners.<br />
2. Remove the spark plug and spin the engine rapidly<br />
using the starter to blow excess oil from the cylinder.<br />
3. Clean the spark plug or replace it if it is cracked,<br />
broken, or if the electrodes are worn.<br />
4. Install the spark plug and torque it to 17 ft-lb<br />
(23 Nm).<br />
5. Perform the recommended maintenance procedures.<br />
Refer to Maintenance on page 13.<br />
6. Fill the fuel tank with fresh, clean gasoline.<br />
7. Check the engine oil level.<br />
8. Connect the wire to the spark plug.<br />
22
Troubleshooting<br />
<strong>Exmark</strong> designed and built your lawn mower for trouble-free operation. Check the following components and items<br />
carefully, and refer to Maintenance on page 13 for more information. If a problem continues, contact an Authorized<br />
Service Dealer.<br />
Problem Possible Causes Corrective Action<br />
Engine does not start<br />
Engine starts hard or loses power<br />
Engine runs rough<br />
1. The fuel tank is empty or the<br />
fuel system contains stale fuel.<br />
2. The throttle control is not in the<br />
Choke position.<br />
3. The wire is not connected to<br />
the spark plug.<br />
4. The spark plug is pitted, fouled,<br />
or the gap is incorrect.<br />
1. The fuel tank contains stale<br />
fuel.<br />
2. The fuel cap vent hole is<br />
plugged.<br />
3. The air filter element is dirty<br />
and is restricting the air flow.<br />
4. The underside of the lawn<br />
mower deck contains clippings<br />
and debris.<br />
5. The spark plug is pitted, fouled,<br />
or the gap is incorrect.<br />
6. The engine oil level is low or<br />
the oil is dirty.<br />
1. The wire is not connected to<br />
the spark plug.<br />
2. The spark plug is pitted, fouled,<br />
or the gap is incorrect.<br />
3. The throttle control is not in the<br />
Fast position.<br />
4. The air filter element is dirty<br />
and is restricting the air flow.<br />
1. Drain and/or fill the fuel tank<br />
with fresh gasoline. If the<br />
problem persists, contact an<br />
Authorized Service Dealer.<br />
2. Move the throttle control to the<br />
Choke position.<br />
3. Connect the wire to the spark<br />
plug.<br />
4. Check the spark plug and<br />
adjust the gap if necessary.<br />
Replace the spark plug if it is<br />
pitted, fouled, or cracked.<br />
1. Drain and fill the fuel tank with<br />
fresh gasoline.<br />
2. Clean the fuel cap vent hole or<br />
replace the fuel cap.<br />
3. Clean the air filter pre-cleaner<br />
and/or replace the paper air<br />
filter.<br />
4. Clean the underside of the lawn<br />
mower deck.<br />
5. Check the spark plug and<br />
adjust the gap if necessary.<br />
Replace the spark plug if it is<br />
pitted, fouled, or cracked.<br />
6. Check the engine oil. Change<br />
the oil if it is dirty or add oil if it<br />
is low.<br />
1. Connect the wire to the spark<br />
plug.<br />
2. Check the spark plug and<br />
adjust the gap if necessary.<br />
Replace the spark plug if it is<br />
pitted, fouled, or cracked.<br />
3. Move the throttle control to the<br />
Fast position.<br />
4. Clean the air filter pre-cleaner<br />
and/or replace the paper air<br />
filter.<br />
23
Problem<br />
Lawn mower or engine vibrates<br />
excessively<br />
Uneven cutting pattern<br />
Discharge chute plugs<br />
Lawn mower does not self-propel<br />
Possible Causes<br />
1. The blade is bent or is out of<br />
balance.<br />
2. The blade nuts are loose.<br />
3. The underside of the lawn<br />
mower deck contains clippings<br />
and debris.<br />
4. The engine mounting bolts are<br />
loose.<br />
1. All four wheels are not at the<br />
same height.<br />
2. The blade is dull.<br />
3. You are mowing in the same<br />
pattern repeatedly.<br />
4. The underside of the lawn<br />
mower deck contains clippings<br />
and debris.<br />
1. The throttle control is not in the<br />
Fast position.<br />
2. The cutting height is too low.<br />
3. You are mowing too fast.<br />
4. The grass is wet.<br />
5. The underside of the lawn<br />
mower deck contains clippings<br />
and debris.<br />
1. The self-propel drive cable is<br />
out of adjustment or is<br />
damaged.<br />
2. There is debris under the belt<br />
cover.<br />
Corrective Action<br />
1. Balance the blade. If the blade<br />
is bent, replace it.<br />
2. Tighten the blade nuts.<br />
3. Clean the underside of the lawn<br />
mower deck.<br />
4. Tighten the engine mounting<br />
bolts.<br />
1. Place all four wheels at the<br />
same height.<br />
2. Sharpen and balance the<br />
blade.<br />
3. Change the mowing pattern.<br />
4. Clean the underside of the lawn<br />
mower deck.<br />
1. Move the throttle control to the<br />
Fast position.<br />
2. Raise the cutting height.<br />
3. Slow down.<br />
4. Allow the grass to dry before<br />
mowing.<br />
5. Clean the underside of the lawn<br />
mower deck.<br />
1. Adjust the self-propel drive<br />
cable. Replace the cable if<br />
necessary.<br />
2. Clean the debris from under<br />
the belt cover.<br />
24
<strong>Exmark</strong> Mfg. Co. Inc. and its affiliate, <strong>Exmark</strong> Warranty Company,<br />
pursuant to an agreement between them, jointly warrant pursuant<br />
to the terms and conditions herein, that we will repair, replace or<br />
adjust any parts manufactured by <strong>Exmark</strong> and found by <strong>Exmark</strong> (in<br />
the exercise of its reasonable discretion) to be defective in factory<br />
material or workmanship.<br />
This warranty is limited to one year from the date of original retail<br />
purchase (90 days for rental use) for any <strong>Exmark</strong> mower that is<br />
used for commercial or any other income producing purpose. The<br />
blade spindle assemblies will be warranted for three years, one<br />
year parts and labor with an additional two years parts only, from<br />
date of original retail purchase against defects in materials or<br />
workmanship. The hydrostatic traction drive system will be<br />
warranted for two full years from date of original retail purchase<br />
against defects in materials or workmanship—excluding hoses.<br />
We will extend the Peerless 5-speed transmission manufacturer’s<br />
warranty from 90 days to one year. Belts and tires are warranted for<br />
90 days against defects in materials or workmanship.<br />
The engine warranty is covered by its respective engine manufacturer.<br />
Please refer to the engine manufacturer’s warranty statement<br />
that is included in the literature packet. We are not authorized<br />
to handle warranty adjustments on engines. Engine warranties<br />
should be referred to the nearest authorized service outlet of the<br />
engine manufacturer.<br />
This warranty extends only to the original retail purchaser of the<br />
equipment. The warranty may not be assigned or transferred<br />
without the prior express written consent of <strong>Exmark</strong> and <strong>Exmark</strong><br />
Warranty Company. The warranty commences upon the date of<br />
original retail purchase.<br />
The <strong>Exmark</strong> turf equipment, including any defective part, must be<br />
returned to an authorized <strong>Exmark</strong> service dealer within the<br />
warranty period. The warranty shall cover the cost to repair or<br />
replace (as determined by us) the defective part, including labor.<br />
The expense of delivering the mower to the dealer for warranty<br />
work and the expense of returning it back to the owner after repair<br />
or replacement will be paid for by the owner. Our responsibility in<br />
respect to claims is limited to making the required repairs or<br />
replacements. No claim of breach of warranty shall arise from<br />
cancellation or rescission of the contract of sale of any <strong>Exmark</strong><br />
mower. Proof of purchase may be required by the dealer to<br />
substantiate any warranty claim. All warranty work must be<br />
performed by an authorized <strong>Exmark</strong> service dealer.<br />
This warranty extends only to turf equipment operated under<br />
normal conditions and properly serviced and maintained. The<br />
warranty expressly does not cover (1) any defects, damage or<br />
deterioration due to normal use, wear and tear, or exposure; (2)<br />
normal maintenance services, such as oil change, cleaning,<br />
lubrication, or adjustment; (3) replacement of service items, such<br />
as oil, lubricants, spark plugs, belts, rubber hoses, or other items<br />
subject to normal service replacement; (4) damage or defects<br />
arising out of or relating to misuse, neglect, alteration, negligence,<br />
or accident; (5) repair or replacement arising from operation of or<br />
use of the turf equipment which is not in accordance with operating<br />
instructions as specified in the operator’s manual or other<br />
operational instructions provided by <strong>Exmark</strong> or <strong>Exmark</strong> Warranty<br />
Company; (6) repair or replacement arising as a result of any<br />
operation from turf equipment that has been altered or modified so<br />
as to, in determination of <strong>Exmark</strong>, adversely affect the operation,<br />
performance or durability of the equipment or that has altered,<br />
modified or affected the turf equipment so as to change the<br />
intended use of the product; (7) repair or replacement necessitated<br />
by use of parts, accessories or supplies, including gasoline, oil, or<br />
lubricants, incompatible with the turf equipment or other than as<br />
recommended in the operator’s manual or other operational<br />
instructions provided by <strong>Exmark</strong>; (8) repairs or replacements<br />
resulting from parts or accessories which have adversely affected<br />
the operation, performance, or durability of the turf equipment; or<br />
Limited Warranty<br />
<strong>Exmark</strong> Commercial Turf Equipment<br />
(9) damage or defects due to or arising out of repair of turf<br />
equipment by person or persons other than an authorized <strong>Exmark</strong><br />
service dealer or the installation of parts other than genuine<br />
<strong>Exmark</strong> or <strong>Exmark</strong> recommended parts.<br />
As a condition to this warranty, customer shall have read the<br />
operator’s manual and shall have returned to <strong>Exmark</strong> Warranty<br />
Company, within the prescribed time, the enclosed warranty<br />
registration card.<br />
The sole liability of <strong>Exmark</strong> and <strong>Exmark</strong> Warranty Company, with<br />
respect to this warranty, shall be repair and replacement as set<br />
forth herein. Neither <strong>Exmark</strong> nor <strong>Exmark</strong> Warranty Company shall<br />
have liability for any other cost, loss, or damage, including, but not<br />
limited to, any incidental or consequential loss or damage. In<br />
particular, <strong>Exmark</strong> shall have no liability or responsibility for (1)<br />
expenses relating to gasoline, oil, or lubricants; (2) loss, cost, or<br />
expense relating to transportation or delivery of turf equipment<br />
from the location of owner or location where used by owner to or<br />
from any authorized <strong>Exmark</strong> service dealer; (3) travel time,<br />
overtime, after hours time, or other extraordinary repair charges of<br />
charge relating to repairs or replacements outside of normal<br />
business hours at the place of business of the authorized <strong>Exmark</strong><br />
service dealer; (4) rental of like or similar replacement equipment<br />
during the period of any warranty, repair, or replacement work; (5)<br />
any telephone or telegram charges or travel charges; (6) loss or<br />
damage to person or property other than that covered by the terms<br />
of this warranty; (7) any claims for lost revenue, lost profit, or<br />
additional cost as a result of a claim of breach of warranty; or (8)<br />
attorney’s fees.<br />
There are no representations or warranties to the buyer of the turf<br />
equipment other than as set forth in this warranty. Any and all<br />
statements or representations made by any seller of this equipment,<br />
including those set forth in any sales literature or made orally<br />
by any sales representative, are superseded by the terms of this<br />
warranty. Any affirmation of fact or promise made by <strong>Exmark</strong>,<br />
<strong>Exmark</strong> Warranty Company, or any of their representatives, to the<br />
buyer, which relates to the goods that are the subject of this<br />
warranty, shall not be deemed to create any express warranty that<br />
such goods shall conform to the affirmation or promise.<br />
THERE ARE NO OTHER UNDERSTANDINGS, AGREEMENTS,<br />
REPRESENTATIONS, OR WARRANTIES, EXPRESS OR IM-<br />
PLIED (INCLUDING BUT NOT LIMITED TO ANY REGARDING<br />
THE MERCHANTABILITY OR FITNESS FOR A PARTICULAR<br />
PURPOSE), NOT SPECIFIED HEREIN, RESPECTING THE<br />
EQUIPMENT WHICH IS THE SUBJECT OF THIS WARRANTY.<br />
This warranty applies to all <strong>Exmark</strong> turf equipment sold in the<br />
United States and Canada and intended to be used for commercial<br />
purposes.<br />
Rev. 11/05/1999
SERVICE RECORD<br />
Date Description Work Done Service Done By
SERVICE RECORD<br />
Date Description Work Done Service Done By
SEE EXMARK’S COMPLETE<br />
LINE OF PRODUCTS FOR TURF CARE<br />
LAZER Z ® LAZER Z ® HP<br />
TURF RANGER ® TURF TRACER ®<br />
TURF TRACER ® HP<br />
VIKING HYDRO<br />
METRO ® METRO ® HP<br />
ULTRA VAC<br />
GRASS CATCHER<br />
SELF STEERING SULKY<br />
MICRO-MULCH ACCESSORY<br />
Warning<br />
The engine exhaust from this product<br />
contains chemicals known to the State of<br />
California to cause cancer, birth defects, or<br />
other reproductive harm.<br />
2001<br />
EXMARK MFG. CO. INC.<br />
INDUSTRIAL PARK BOX 808<br />
BEATRICE, NE 68310<br />
ALL RIGHTS RESERVED<br />
FORM NO. 3325-147<br />
(402) 223-6300<br />
FAX (402) 223-5489<br />
PRINTED IN U. S. A.


