NORDIC SKI PREPARATION
NORDIC SKI PREPARATION
NORDIC SKI PREPARATION

You also want an ePaper? Increase the reach of your titles
YUMPU automatically turns print PDFs into web optimized ePapers that Google loves.
WWW.SWIXSCHOOL.COM<br />
<strong>NORDIC</strong> <strong>SKI</strong><br />
<strong>PREPARATION</strong><br />
RACING 2010-2011<br />
i
Photo: Stian L. Solum<br />
SWIX TRIAC®<br />
Your winning margin in every detail!<br />
FAC TS<br />
HANDLE<br />
• Lightweight and proven geometri in<br />
World Cup<br />
• Improved fixation and adjustments<br />
• Perfect control<br />
Swix has reinvented the XC ski pole and created the next<br />
generation of ski poles: Swix Triac®!<br />
The Swix Triac® 1.0 is built with the most advanced materials<br />
and technology available today. Starting from scratch, we<br />
have utilized both internal and external resources; Swix racing<br />
service, world cup athletes, university research teams, and our<br />
own engineering department to develop the world’s finest ski<br />
pole. Every detail has been thoroughly reviewed and tested<br />
before being placed into production.<br />
When only the very best will do, there is no room for<br />
compromise.<br />
For more information, visit www.swixtriac.com<br />
CONTENTS<br />
Factors Influencing Waxing<br />
Snow Classification System<br />
Structure in Ski Bases & Tools<br />
2<br />
3<br />
4 - 11<br />
STEP BY STEP<br />
Swix Cera Nova System<br />
12 - 20<br />
Base Brushing<br />
21 - 25<br />
Ironing<br />
26 - 27<br />
Post-Treatment of Stone Ground Skis<br />
28 - 31<br />
FAC TS<br />
STRAP<br />
• Optimized tumb/palm support<br />
• Easy to adjust<br />
• Less energy loss<br />
FAC TS<br />
BASKET<br />
• Interchangeable baskets for<br />
different snow conditions<br />
• Lightweight<br />
• Mechanical 3D/triple locking<br />
fixation systems (patent pending)<br />
Practical Application of Glide Waxes<br />
Application of Cera F<br />
Swix Kick Waxes for Classic Skiing<br />
Zero-Conditions<br />
32 - 33<br />
34 - 46<br />
48 - 57<br />
58 - 61<br />
Application of Hard Waxes<br />
62 - 63<br />
Application of Base Klister<br />
64<br />
Application of Klisters<br />
65<br />
After the Race - Base Cleaning<br />
66 - 68<br />
FAC TS<br />
SHAFT<br />
• High stiffness and strength<br />
• Super lightweight<br />
• Ultimate pendelum<br />
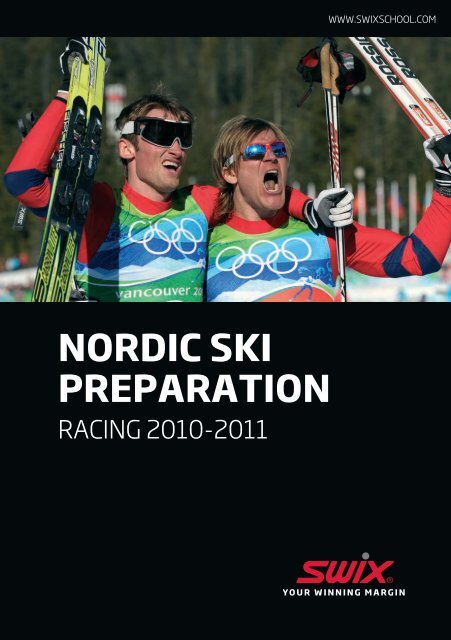
COVER:<br />
Petter Northug and<br />
Øystein Pettersen<br />
Photo: Nordic Focus<br />
Aker is the main sponsor of<br />
Petter Northug and Øystein<br />
Pettersen the Norwegian<br />
Cross Country Team.<br />
With this manual it is the objective to present the most up<br />
to date waxing methods based upon the feed back from our<br />
World Cup Service Teams.<br />
For more information about Swix products please visit us<br />
web pages www.swixsport.com and www.swixschool.com.<br />
ii 1
FACTORS INFLUENCING WAXING<br />
The purpose of waxing is either to create friction,<br />
or grip, in the case of kick wax, or to reduce it as<br />
with glide wax. The intention with the waxing<br />
process is to make the ski base as compatible as<br />
possible with the features of the snow surface.<br />
However, the snow conditions change with time<br />
and temperature. Even when temperatures<br />
remain below freezing, time (hours and days) will<br />
progressively deform sharp, classic snow crystals<br />
into more rounded forms. We call this transformed<br />
snow. The higher the temperature, the faster the<br />
transformation will proceed.<br />
Water also plays a significant role. Water<br />
molecules surround snow crystals as thin water<br />
films even when temperatures are below the<br />
freezing point. Above freezing, water plays a<br />
greater role as free water mixes with the snow<br />
pack. The distribution of water and ice will influence<br />
friction and abrasiveness. Therefore<br />
modern Swix waxes take into consideration many<br />
factors in their formulation and composition. The<br />
result is different waxes for different conditions.<br />
In this chapter Swix will guide you through the<br />
main features of snow and friction to make the<br />
choice of the proper ski wax easier.<br />
Temperature<br />
Taking a reading of the air temperature in the<br />
shade is the first basic starting point for wax<br />
selection.<br />
This should be done at several points along<br />
the course. Snow temperature at the surface can<br />
also be helpful. But remember that once the temperature<br />
reaches the freezing point (0°C or 32°F),<br />
snow will remain at that temperature regardless<br />
of rising air temperature. At this point it is best<br />
to use air temperatures and focus on the proper<br />
steps for dealing with the increased water content<br />
of the snow.<br />
Humidity<br />
Humidity is important, but more as a local climate<br />
trend rather than a need to measure every percentile.<br />
It is important to know if the competition<br />
is taking place in a dry climate, meaning average<br />
humidity below 50%; a normal climate of 50% to<br />
80%, or a high humidity climate 80% to 100%.<br />
Beyond this, of course, is adjusting to the situation<br />
of falling precipitation.<br />
Snow Granulation<br />
The appearance of the snow crystal and consequent<br />
snow surface is important for wax selection.<br />
Falling, or very fresh new fallen snow is<br />
the most critical situation for waxing. The sharp<br />
crystals require a wax that will resist snow crystal<br />
penetration, but at warmer temperatures must<br />
also have the ability to repel water. It is in this<br />
special, critical waxing situation that Cera F excels.<br />
Man-made snow is today common racing<br />
situations. Freshly made snow at cold temperature<br />
definitely require the addition of synthetic<br />
paraffin such as with CH4, LF4, HF4, HF4BW and<br />
CH6, LF6, HF6 and HF6BW. After man-made snow<br />
has “settled” for some days and the surrounding<br />
atmosphere has affected the snow surface,<br />
the gliding characteristics of the snow improve<br />
and normal waxing considerations return.<br />
At rising air temperatures above 0°C (32°F)<br />
the snow temperature still remains at 0°C (32°F).<br />
The water surrounding the snow crystals increases<br />
until the snow pack becomes saturated with<br />
water. Waxes that are highly water repellent and<br />
coarse base structures are needed.<br />
Snow friction<br />
The friction on ice and snow is a mixed friction.<br />
It means that it is neither a true dry friction nor<br />
a true fluid friction. The contact is partly dry,<br />
partly wet. At very low temperatures the frictional<br />
mechanisms gradually might be described by laws<br />
governing dry friction.<br />
At intermediate freezing temperatures,<br />
around -4°C to -10°C (25°F to 14°F), the water<br />
film between the frictional partners has the optimal<br />
thickness to create low kinetic friction.<br />
Approaching the freezing point, the water film<br />
increases in thickness, and when conditions for<br />
melting is present, free water enters the system.<br />
The contact area between ski and snow<br />
increases and the friction will increase.<br />
Suction gradually builds up as the amount<br />
of water increases.<br />
Swix Snow Classification<br />
System<br />
Swix has introduced a simple classification<br />
system for snow identification. The symbols<br />
are created to help skiers find the best wax<br />
for actual conditions.<br />
Group 1.<br />
Falling and new fallen snow characterized by<br />
relatively sharp crystals, demanding relatively<br />
hard ski wax.<br />
Group 2.<br />
An intermediate transformation stage, characterized<br />
by grains no longer possible to identify as the<br />
original snow-crystal shape; often called “finegrained”<br />
snow in ski-wax terminology.<br />
Group 3.<br />
The final stage of transformation. Uniform, rounded,<br />
bonded grains characterize the snow surface.<br />
Also called “old” snow.<br />
Group 4.<br />
Wet snow. If snow-grains belonging to group 1,<br />
2 or 3 are exposed to warm weather, the result<br />
is wet snow.<br />
Group 5.<br />
Frozen or refrozen. When wet snow freezes it<br />
is identified as group 5, characterized by large<br />
grains with frozen melt water in between.<br />
The snow surface is hard and icy, normally requiring<br />
a klister as kick wax.<br />
1. NEW FALLEN SNOW<br />
Below freezing<br />
3. OLD / GRAINED /<br />
TRANSFORMED SNOW<br />
Below freezing<br />
2. FINE GRAINED SNOW<br />
Below freezing<br />
4. WET CORN SNOW<br />
Above freezing<br />
5. FROZEN CORN (Old) SNOW (Melted/Frozen)<br />
Below freezing<br />
2 3
BASE STRUCTURES AND<br />
SWIX RILLING / IMPRINT TOOLS<br />
Structure is a term used to describe patterns<br />
cut into the base to reduce base contact on the<br />
snow and to release surface tension from water<br />
films caused by base friction. These structure patterns<br />
are most often produced by stone grinding<br />
machines at the factory during production or by<br />
shops that specialize in the stone grinding process.<br />
It is also possible to produce structures using<br />
hand tools.<br />
For a period of time there was much experimentation<br />
and testing of many types of patterns<br />
in order to find the best structure for different<br />
snow types. The search with different stone<br />
grinders, different structure depths, widths,<br />
and patterns, all aiming to find “the ultimate<br />
structure”, was overwhelming. Recently however,<br />
the development showed signs of simplification.<br />
Now service technicians agree more that<br />
snow types can be classified in more general<br />
terms to which more certain structure patterns<br />
can be matched. An appropriate structure is still<br />
of absolute importance, but it is applied with a<br />
set of basic principles in mind. The result is that<br />
variations in machine set structures are fewer<br />
and standardized. The tendency to “simplify”<br />
variations in stone grinding can allow for a more<br />
accurate comparison of other significant factors<br />
such as skis and waxes, and in theory it is possible<br />
to travel with fewer pairs of skis.<br />
Last but not least, structures made by hand<br />
on top of structures produced by machine have<br />
proven to give outstanding results. Manually set<br />
structures in combination with stone grinding can<br />
match the day’s conditions more accurately and<br />
therefore enhance the effectiveness of a basic<br />
stone ground base.<br />
There is an important difference between<br />
structures produced by machine and those produced<br />
by hand. Stone ground structures are cut<br />
into the base, and are more permanent in nature.<br />
Hand structures use “imprint” tools that press<br />
the structure into the base, and consequently are<br />
temporary.<br />
Swix imprint tools have the advantage of<br />
being easy and quick to use while at the same<br />
time offer the most adaptability of adjusting the<br />
structure to match the snow type. During the process<br />
of rewaxing the heat from the iron will cause<br />
the pattern to leave the base while keeping the<br />
stone ground pattern intact. In this way the base<br />
is ready once again for the next hand produced<br />
structure treatment and it is possible to apply the<br />
perfectly matching structure according to the<br />
conditions of the day.<br />
Although there are variations in the patterns<br />
applied, structures can be classified into “fine”,<br />
“medium-fine”, “medium-coarse” and “coarse”<br />
structures. The most frequently used structures<br />
in World Cup are “fine” and “medium-fine”.<br />
For classic races more coarse structures are used<br />
as well. The difference between classic and skating<br />
is related to more varying conditions in a skating<br />
coarse than in a classic track. Also the factor of<br />
“feeling” that has to do with the resistance when<br />
“pushing” the ski forward is significant in skating,<br />
but less in classic. The “free feeling” can be lost,<br />
especially when skating uphill, when the structure<br />
is too coarse.<br />
Four Different Grades of<br />
Stone Grinding<br />
The Norwegian XC-team has introduced a color<br />
coding system to select corresponding skis and<br />
structure of the glide zone:<br />
Green (-5°C and colder): Fine<br />
Blue (0°C to -5°C): Medium/Fine<br />
White (0°C to+3°C - moist): Medium/Coarse<br />
Red (+1°C to +10°C - wet): Coarse<br />
It is normal to apply two or more labels on the skis.<br />
At the tip the colored labels (one or two) indicate<br />
actual snow condition range for the actual pair,<br />
i.e. green and blue. In front of the binding there<br />
is only one label, i.e. green, to indicate existing<br />
structure. For optimal performance of this pair in<br />
“blue” snow conditions, it is therefore necessary<br />
to run a hand-made structure to transform “Fine”<br />
to “Medium / Fine”. In this way, good skis might be<br />
utilized in more snow conditions. In addition, the<br />
number of skis taken to races is perhaps reduced.<br />
In free-technique (skating) the coarse structure<br />
is seldom used. Consequently, a free-technique<br />
ski for wet, coarse-grained snow often has<br />
a red label on the tip and a white label in front of<br />
the binding.<br />
Fine structures:<br />
Fine structures are mainly used on new snow and<br />
fine grained snow. For skating; fine structures are<br />
normally used from 0°C (32°F) and colder, for classic;<br />
-5°C (23°F) and colder.<br />
Sharp crystals (present in dry new/fine snow)<br />
and a sharp structure is not optimal. A newly<br />
set (fresh) structure will in general give a<br />
“sharp” structure. In dry, cold, new and fine<br />
snow conditions (usually lower than -7°C<br />
(19°F)), the fine “sharp” structure should be<br />
“rounded” with Fibertex T264 (or a plexi scraper).<br />
Though, this process is normally more important<br />
for skating than for classic skiing. On the other<br />
hand, in new snow with high humidity close to 0°C<br />
(32°F) the structure should preferably be sharper.<br />
Medium/Fine structures:<br />
This structure is a widely used structure.<br />
For skating it is used in most snow conditions<br />
normally from -7°C (19°F) up to wet snow.<br />
In very wet conditions a medium/fine structure<br />
combined with the use of an imprint tool has<br />
proven good results.<br />
For classic skiing we recommend this structure<br />
in new and fine grained snow (normally<br />
between -7°C (19°F) and 0°C (32°F)).<br />
STRUCTURE EXAMPLES<br />
FINE<br />
MEDIUM/FINE<br />
COARSE<br />
4 5
Medium/Coarse structures:<br />
Mainly for classic skiing on coarse moist snow<br />
and wet, glazy new snow between 0°C (32°F)<br />
and +3°C (37°F), a medium/coarse structure is<br />
preferred.<br />
This structure is also used sometimes in free<br />
technique (skating) on wet, coarse-grained snow.<br />
In this case, most racers would prefer to adjust a<br />
medium structure towards a more coarse structure<br />
by using a manual tool. Reference the table<br />
below for specific recommendations.<br />
Coarse structures:<br />
This structure is rarely used in skating. For classic<br />
skiing it is used on coarse wet snow.<br />
Note!<br />
In general, it is better to use a somewhat finer<br />
structure than a structure too coarse.<br />
SWIX SUPER RILLER (T0401)<br />
with Medium 0.75 mm blade.<br />
Swix World Cup Imprint Tool Set<br />
T0405<br />
The Swix World Cup Imprint Tool T0405 is a hand<br />
crafted, high quality tool. It comes with imprint<br />
rollers manufactured in a very high steel quality<br />
undergoing advanced production processes.<br />
The T0405 creates structure in a different<br />
way than other imprint tools by pressing the most<br />
accurate yet shallow base structure in the market.<br />
Structure is applied in a rolling movement. The<br />
steel rollers have a cross-hatch (fishbone) structure<br />
for the optimal result.<br />
Due to high production cost, the T0405 has<br />
been mostly used at top racing levels, but Swix<br />
expects its advantages to be recognized by<br />
club teams, colleges, specialty tune-up shops,<br />
and dedicated World Loppet skiers. See chart on<br />
page 11.<br />
Improving Stone Ground Skis<br />
by using Swix Imprint Tools<br />
The following chapter describes how to improve<br />
and adjust standard stone-ground skis to actual<br />
snow conditions by using manual structure tools.<br />
Swix manual structure tools can be used on all<br />
basic stone-ground structures. We then have the<br />
possibility to adjust less number of skis to actual<br />
conditions. This is convenient for all racers from<br />
World Cup to citizen racers. All Swix structure<br />
tools have rollers which imprint the structure,<br />
except the simple rilling tool T0401 which has<br />
treaded steel producing the pattern.<br />
Swix «Super Riller» Structure Tool<br />
T0401<br />
Swix Super Riller is used in combination with<br />
stone-grinding, normally after scraping, brushing<br />
of glidewax and Cera F powder.<br />
T0401 is delivered with standard 0.75 mm<br />
structure steel. The 0.75 mm steel, and certainly<br />
the 1.00 mm steel, are frequently used as a<br />
”booster” by World Cup servicemen. See table for<br />
details.<br />
The range of optional blades for the T0401:<br />
Fine<br />
0.5 mm<br />
Medium<br />
0.75 mm<br />
Coarse<br />
1.0 mm<br />
X Coarse<br />
2.0 mm<br />
Swix T0405 is delivered with two imprint<br />
rollers:<br />
FINE 0.3 mm:<br />
To be used in new, fine grained and coarse snow<br />
from -12°C to -5°C (10°F to 23°F).<br />
MEDIUM 0.5 mm:<br />
To be used in new, fine grained, coarse, and icy<br />
snow from -5°C to +1°C (23°F to 34°F).<br />
In addition we have:<br />
MEDIUM 0.75 mm:<br />
To be used in fine grained and coarse grained<br />
snow from -1°C to +3°C (30°F to 37°F).<br />
COARSE 1.0 mm:<br />
To be used in wet- and very wet-, coarse snow.<br />
From 0°C to +20°C (32°F to 68°F).<br />
STRUCTURE TOOL SET (T0405)<br />
Steel, with two Fishbone structures,<br />
0.3 mm and 0.5 mm.<br />
For Racing Service and Team use.<br />
1 mm<br />
6 7
Swix Structure Tool T0406<br />
T0406 is the new World Cup tool with imprint<br />
rollers running in the speed direction. The tool<br />
is delivered with the following four rollers to be<br />
inserted for selected structure combinations.<br />
Linear structure:<br />
T0406075G<br />
T0406100G<br />
0.75 mm<br />
1.0 mm<br />
Swix Structure Tool T0404<br />
A successful World Cup tool, used extensively<br />
in Middle Europe. Delivered with two rollers,<br />
1.5 mm right and left screw structure. Delivers<br />
a long broken diamond structure that has been<br />
used with excellent results in -2°C and warmer.<br />
Very well suited for skating skis.<br />
Screw structure:<br />
T0406100SL<br />
T0406150SR<br />
In addition:<br />
T0406100SR<br />
T0406150SL<br />
T0406GU<br />
1.0 mm left screw<br />
1.5 mm right screw<br />
1.0 mm right screw<br />
1.5 mm left screw<br />
Rubber roller<br />
T0406<br />
T0404<br />
These rollers also fit into the T0405 tool.<br />
Swix Structure Tool T0403<br />
An economic and practical alternative to handmilled<br />
specialty tools. Delivered with standard<br />
broken 0.5 mm V-roller. It is simple to change the<br />
roller and the following rollers are available:<br />
Broken structure:<br />
T0403030V<br />
T0403075V<br />
T0403100V<br />
0.3 mm<br />
0.75 mm<br />
1.0 mm<br />
T0403<br />
Linear structure:<br />
T0403075G<br />
T0403100G<br />
Screw structure:<br />
T0403100SL<br />
T0403100SR<br />
T0403150SL<br />
T0403150SR<br />
0.75 mm<br />
1.0 mm<br />
1.0 mm left screw<br />
1.0 mm right screw<br />
1.5 m left screw<br />
1.5 mm right screw<br />
AKER is the main sponsor of Marit Bjørgen and the Norwegian Cross Country Team.<br />
8 9
Practical advice for the use<br />
of Swix manual structure<br />
tools<br />
Linear, broken and screw structures:<br />
There are no exact rules when to use the different<br />
structures. We have to do tests at the actual<br />
site to find the best alternatives. Generally, we<br />
can say that linear structure and broken linear<br />
structure (V) are mostly used in classic races.<br />
Screw and cross-structures often give a good<br />
“feeling” in free technique (skating) races.<br />
Procedure when choosing structure:<br />
1. Check snow type, temperature and air humidity.<br />
2. Course is classic or free technique (skating)?<br />
3. Decide the stone-grinding structure.<br />
4. Set the hand-structure as the last step,<br />
after brushing.<br />
Use of the different imprint steels will vary with<br />
the underlying stone grind. If the base has a fine<br />
structure it can be taken to “medium” by using the<br />
coarse imprint steel. In this way you will be able to<br />
make a fine stone grind fit “medium” conditions.<br />
However, it is not possible to make a coarse stone<br />
grind ‘fine’ with a ‘fine’ steel.<br />
• Manually produced structure should be set<br />
after waxing, application of Cera F and brushing.<br />
After setting the structure, brush once more with<br />
the Blue Nylon brush.<br />
• Always apply manual structures on race day<br />
since the intended effect can be reduced over<br />
time.<br />
• For skating skis, start from the tip applying<br />
light pressure for the first third of the base, slowly<br />
increase pressure from the front of the binding<br />
using medium pressure until the back of binding,<br />
from there to the tail use firm pressure.<br />
• For classic skis, use even pressure, but preferably<br />
lighter pressure on the front part.<br />
• If two or more imprint steels are used in combination,<br />
always start by using the coarser steel.<br />
• With higher air-humidity, use more coarse<br />
structure.<br />
• When in doubt, use finer hand-structure.<br />
• Finer stone-grinding combined with ”coarse”<br />
hand-structure is better than coarse stone-grinding,<br />
combined with ”finer” hand-structure.<br />
• On wet snow conditions, apply harder pressure<br />
on the tool.<br />
• Run the rollers two times.<br />
• Keep the rollers and steels clean and well protected<br />
during transport.<br />
CLASSSIC SKATING<br />
Linear Linear broken V Screw Linear Linear broken V<br />
0.5 mm T401<br />
0.3 mm T403 or T405<br />
0.5 mm T401<br />
0.3 mm T403 or T405<br />
0.5 mm T403 or T405<br />
0.5 mm T401<br />
1.0 mm T403 or T406<br />
COLD
CERA F POWDERS,<br />
SOLIDS AND LIQUID<br />
SWIX CERA F<br />
• The Reference for Competitors and<br />
Athletes.<br />
• The Fastest and most frequently used.<br />
• The Highest Purity.<br />
• The Most Podium Results.<br />
New productions and additional research within<br />
the field of Cera F has made Swix able to improve<br />
the quality on our Cera F products the coming<br />
season. Testing within the laboratory as well as in<br />
the field is an important part of the work aiming<br />
for further refinements in the quest to be able to<br />
supply racers and snowboard riders with the best<br />
possible glide performance.<br />
There are many fluorocarbon products in the<br />
market, but very few have gone through the<br />
synthesizing steps to modify the fluorocarbon<br />
powder like Cera F for specific use on ski and<br />
snowboard bases.<br />
Swix Cera F has a coded batch production system<br />
for tracking quality control. The result is:<br />
• High speed and acceleration<br />
• High resistance to snow contaminants<br />
• Exceptional purity for best performance<br />
• High longevity, outstanding base bonding<br />
capacity<br />
Also, Cera F powders, waxes and liquids do not<br />
contain CFCs and are not harmful to the environment.<br />
“Dr. Wax” Leif Axell Torgersen measures contact<br />
angles between water and wax.<br />
Safety reminder<br />
Neither Cera F powder or its vapor from ironing<br />
should be exposed to temperatures<br />
above 300°C (570°F). Therefore avoid exposure<br />
to torches, heat guns, space heater, and<br />
cigarette smoking.<br />
Recommended ironing temperature for<br />
Cera F is approximately 150°C (300°F) to<br />
165°C (330°F), which is far below the level<br />
for Cera F decomposition.<br />
12 13
Category 1:<br />
100% Fluorocarbon<br />
Cera F Powder<br />
Category 1:<br />
100% Fluorocarbon<br />
Cera F Solid Turbo<br />
The Cera F powders are now delivered in larger<br />
containers, still containing 30 grams. The new<br />
vials make it easier to distribute the powder by<br />
reducing the lumps.<br />
FC78 - Super Cera F Powder Old Snow<br />
A sensational new Cera F powder with a wide<br />
ideal range from +1°C to -10°C. Positioned<br />
between FC8X and FC7. High melting point 144°C.<br />
Recommended iron setting 165°C (330°F). FC78 is<br />
ironed twice during application. Iron, brush back<br />
to powder form, and iron again. The base waxes<br />
for FC78 are generally HF6, HF6BW, HF7, HF7BW,<br />
HF8 and HF8BW.<br />
OBS! Should be used by experienced waxers to<br />
avoid overheating of ski base.<br />
FC7 - Cera F Powder Cold<br />
The Cera F for cold conditions. Very wide range in<br />
colder and dryer conditions, new or old snow, -2°C<br />
to -30°C (28°F to -22°F). Iron temperature setting<br />
of 160°C (320°F). One pass with the iron taking<br />
no more than 4 or 5 seconds. FC7 is most often<br />
ironed for better base bonding, and because of its<br />
high melting point (hardness). FC7 is ironed twice<br />
during application. Ironed, brushed back to powder<br />
form, and ironed again. FC7 can also be applied<br />
using the Roto-Cork/Roto-Fleece, or by hand corking.<br />
The base waxes for FC7 are generally HF6,<br />
HF6BW or LF6, HF7, HF7BW or LF7.<br />
FC8X – Cera F Powder<br />
The temperature range for this powder falls<br />
within the average, normal winter temperatures,<br />
and therefore FC8X is the most used of all Cera F<br />
waxes. Temperature range is +4°C to -4°C (40°F<br />
to 25°F). FC8X is ironed once. Maximum ironing<br />
temperature setting of 160°C (320°F). One pass<br />
with the iron taking no more than 4 or 5 seconds.<br />
Roto-Cork/Roto-Fleece or hand corking application<br />
is also possible. The base waxes for FC8X are<br />
HF8, HF8BW or LF8.<br />
FC10X - Cera F Powder Wet<br />
This powder is designed for very wet conditions.<br />
The temperature range is from 0°C to +20°C<br />
(32°F to 68°F). Good during thawing conditions,<br />
late season when there is strong sun effect,<br />
and wet falling snow at 0°C (32°F). Iron once at<br />
maximum ironing setting of 160°C (320°F) with<br />
a 4 or 5 second pass of the iron. Application with<br />
the Roto-Cork, Roto-Fleece or hand corking is also<br />
possible. The base waxes for FC10X are HF10,<br />
HF10BW or LF10.<br />
FC10B0 - Cera F “Black Snow” Powder<br />
Cera F for wet transformed “dirty” snow, 0°C to<br />
+20°C. FC10 with black lubricant additive that<br />
reduces friction in polluted wet snow. Iron once at<br />
maximum ironing setting of 150°C (300°F) with<br />
a 4 or 5 second pass of the iron. Application with<br />
the Roto-Cork, Roto-Fleece or hand corking is also<br />
possible. Used with HF10BW or HF8BW.<br />
Cera F Turbos are square sintered 20 g blocks<br />
of 100% Cera F Powders. The Turbos are used<br />
in shorter races from 1 km to 5 km such as sprints.<br />
The consistency of the blocks is designed so<br />
rub-on application is easier. The rub-on application<br />
also is an economical way to use Cera F.<br />
Apply a layer covering the base. Cork-in with<br />
a Swix Natural Cork (T20) or use the new Swix<br />
Combi Brush (T196) with cork on one side and fine<br />
nylon bristles on the other. After corking, finish by<br />
brushing with a fine nylon brush such as T196 or<br />
T160.<br />
Roto-Corking and Roto-Fleece is also often<br />
used in World Cup when applying the Turbos.<br />
In this case, the Turbo Waxes are used as a<br />
“booster” over Cera F powder or Cera Nova Glide<br />
Wax to get extra speed the first few kilometers.<br />
FC7WS - Cera F Solid “Cold Turbo”<br />
100% fluorocarbon solid block of wax.<br />
Temperature range from 0°C to -20°C. For transformed/man<br />
made snow. Used alone or as the<br />
final “accelerator” layer.<br />
FC8XWS - Solid White Uni Turbo<br />
100% fluorocarbon solid block of wax.<br />
Temperature range from +4°C to -4°C.<br />
For fine grained snow. For clean white snow covering<br />
most normal winter conditions. Wide range.<br />
Used alone or as the final “accelerator” layer.<br />
FC10BS - Solid Wet Turbo<br />
100% fluorocarbon solid block of wax.<br />
Temperature range from 0°C/+20°C.<br />
For wet/polluted/coarse snow. The black lubricant<br />
additive has positive effect in polluted snow. Used<br />
alone or as the final “accelerator” layer.<br />
14 15
Category 1:<br />
100% Fluorocarbon<br />
Cera F Liquid<br />
Category 2:<br />
HFBW Waxes<br />
Swix Cera F Liquid is designed for use as the final<br />
layer when waxing for top-level competitions.<br />
Based on Cera F technology, Swix Cera F Liquid<br />
offers the same high performance quality as the<br />
Cera F Powder Waxes. It is based on pure Cera F,<br />
Fluor Carbons. It’s liquid state guarantees a perfect<br />
distribution on the ski.<br />
Quick and easy to apply, Cera F Liquid is also<br />
ideal for the quick performance fix at events with<br />
multiple runs, such as Cross Country Sprints.<br />
FC8L Cera F Liquid<br />
100% fluorocarbon. For normal snow conditions<br />
+4°C to -4°C (40°F to 25°F). 29 ml.<br />
FC10L Cera F Liquid<br />
100% fluorocarbon.<br />
+2°C to +20°C (36°F to 68°F). For wet fine<br />
grained snow and very wet corn snow. 29 ml.<br />
FC8A - Cera F Rocket Spray<br />
100% fluorinated. +4°C to -4°C. For transformed<br />
and fine grained snow. Apply on top of HF10, HF8,<br />
HF7 or HF10BW, HF8BW, HF7BW. Also used on<br />
top of Cera F powder as “topping”.<br />
Upside down spray-on for better controlled<br />
application. Bottle of 70 ml.<br />
Use of Cera F Liquid as the final layer<br />
will absolutely assure that there are no<br />
voids in the pure fluorocarbon wax layer<br />
resulting in the highest possible speed<br />
performance.<br />
HFBW Black Wolf is a result of years of intensive<br />
research to improve our gliding products. The<br />
waxes have provided excellent results in both<br />
the World Cup and World Championships, in cross<br />
country, biathlon and alpine skiing. The Black Wolf<br />
series strength is it’s performance on artificial<br />
snow, transformed snow and dirty snow and also<br />
at cold conditions when the dry frictional phenomena<br />
is relatively high. This patented additive<br />
gives lower frictional coefficient to the waxes<br />
than the BD-additive. Available in 40 gram or 180<br />
gram bar size.<br />
HF4BW<br />
Black, -10°C to -32°C. Made for extremely cold<br />
conditions, contributing to a high portion of dry<br />
friction. To be used alone or as a base for Swix<br />
Cera F FC7.<br />
HF6BW<br />
Black, -6°C to -12°C. Very well suited for<br />
man-made snow during cold conditions. The<br />
BW-additive reduces friction towards snow-particles<br />
and has excellent wear resistance. Mainly<br />
used as a base for Swix Cera F FC7 or FC78.<br />
HF7BW<br />
Black, -2°C to -8°C. Easy application. Good dirt<br />
resistance. To be used on man-made snow or<br />
transformed snow, partly polluted. Used as a base<br />
for Swix Cera F FC7, FC78 and FC8X.<br />
HF8BW<br />
Black, +1°C to -4°C. Performs extremely well on<br />
man-made snow or transformed natural snow as<br />
well as dirty snow due to resistance towards pollutants.<br />
Normally used as a base for Swix Cera F<br />
FC78 or FC8X.<br />
HF10BW<br />
Black, +10°C to 0°C. The softest wax in the Black<br />
Wolf -line. The preferred choice on wet, dirty,<br />
coarse-grained snow as a base for Swix Cera F<br />
FC10 or FC10B0.<br />
16 17
Category 3:<br />
Category 4:<br />
HF Waxes<br />
LF Waxes<br />
HF stands for High Fluorocarbon. There are 5 main<br />
waxes in this category, which are fluorinated<br />
hydrocarbon blends having a high percentage of<br />
a low-melt point fluorocarbon additive - a result<br />
of Cera F technology. The waxes are unique<br />
because they provide fast acceleration, work in a<br />
wide range of temperatures, and are durable and<br />
dirt resistant. HF waxes are excellent when used<br />
alone, but ideal when used in combination with<br />
Cera F as an over layer. Availble in 40g or 180g<br />
bar size.<br />
HF4 – With Nano!<br />
Light green, -10°C to -32°C (14°F to -25°F).<br />
Normally at temperatures this cold, the advantages<br />
of fluorocarbon content become less. However<br />
when the humidity is very high, above 80%, and it<br />
is very cold, this wax is excellent.<br />
HF6<br />
Light blue, -6°C to -12°C (21°F to 10°F).<br />
At this temperature point the base blend to which<br />
the fluorocarbon is added also contains a combination<br />
of hard synthetic paraffins which have<br />
proven very effective at colder temperatures and<br />
abrasive man-made snow. Recommended final<br />
Cera F powder layer: FC7.<br />
HF7<br />
Violet, -2°C to -8°C (28°F to 18°F).<br />
HF7 fits the important wax conditions that fall<br />
between -2°C to -8°C (28°F to 18°F). This popular<br />
formulation requested by World Cup technicians<br />
can be used alone or mixed with other waxes.<br />
Its consistency makes it easy to iron and scrape.<br />
Cera F Powder FC78 or FC7.<br />
HF8<br />
Red/pink, +1°C to -4°C (34°F to 25°F).<br />
This wax falls into in a common wintertime temperature<br />
and therefore is used often. The combination<br />
of HF8 and FC78/FC8X Cera F powder<br />
as the final layer has become a highly successful<br />
racing standard.<br />
HF10<br />
Yellow, +10°C to 0°C (50°F to 32°F).<br />
For very wet conditions. Falling wet snow, rain,<br />
and a water saturated snow surface. HF10 is best<br />
used with Cera F FC10X/FC10B0 powder as an<br />
overlayer.<br />
HF12<br />
COMBI. Contents HF7 Violet 20 g and HF8 Pink<br />
20 g. Two of the most used HF waxes in one package.<br />
An economical way to get into the<br />
HF-line.<br />
LF stands for Low Fluorocarbon. These are fluorinated<br />
hydrocarbon waxes having a lower percentage<br />
of fluoro additive. They are often used as<br />
training waxes. Can also be used as racing waxes<br />
with Cera F as a final layer, or alone as a race wax<br />
mostly at lower temperatures.<br />
The temperature ranges and wax colors of the<br />
LF waxes coincide with the HF category, however<br />
they are distinguished from the HF waxes by the<br />
60 gram bar size. They are also available in packages<br />
of 180 gram.<br />
LF3<br />
LF3 Cold Powder.<br />
-10°C to -32°C (14°F to -25°F).<br />
A very hard powder wax having a high content<br />
of fluorocarbon material. Used when the snow is<br />
very fine-grained and very cold. Easy to iron. Also<br />
helps to reduce base abrasion on cold, aggressive<br />
snow. 30 gram.<br />
LF4<br />
Light green, -10°C to -32°C (14°F to -25°F).<br />
For use alone at low humidity at very cold<br />
temperatures and harsh man-made snow.<br />
LF6<br />
Light blue, -6°C to -12°C (21°F to 10°F).<br />
Very good as a base layer for other waxes. Also a<br />
very good training and racing wax alone in low<br />
humidity conditions. Resistant against wear on<br />
aggressive man-made snow. For racing at normal<br />
and high humidity Cera F FC7 is recommended<br />
as final overlayer.<br />
LF7<br />
Violet, -2°C to -8°C (28°F to 18°F).<br />
Very good race wax at low humidity.<br />
LF8<br />
Red/pink, +1°C to -4°C (34°F to 25°F).<br />
The low-percent fluorocarbon counterpart<br />
to HF8. For racing it is recommended to use Cera<br />
F FC8X as the final overlayer within this temperature<br />
range. Also used very often as a wax for<br />
training, travelling and cleaning.<br />
LF10<br />
Yellow, +10°C to 0°C (50°F to 32°F).<br />
For very wet conditions. Also good for base<br />
preparation and to protect the bases when traveling.<br />
The snow is often dirty at the temperatures<br />
calling for LF10, therefore an overlayer of Cera F<br />
FC10X/FC10B0 is recommended.<br />
18 19
Category 5:<br />
CH Waxes<br />
BASE BRUSHING<br />
The Swix Brush Programme<br />
in General<br />
CH stands for Hydrocarbon. This category has no<br />
fluorocarbon material in the blends. They are<br />
100% high performance hydrocarbon paraffins.<br />
Although they can be looked upon as an economical<br />
racing wax group, the colder waxes perform<br />
very well alone, and the warmer waxes make an<br />
acceptable base layer for Cera F.<br />
Their colors and temperature ranges coincide<br />
with the HF and LF Waxes. The CH waxes can be<br />
distinguished from the LF waxes by their darker<br />
shade of color. Comes in 60 gram or 180 gram bar<br />
size (CH3 in 30 gram).<br />
CH3<br />
-12°C to -32°C (12°F to -25°F).<br />
A pure white hydrocarbon powder for very cold<br />
conditions. Can be used alone or as a base for<br />
other waxes during abrasive conditions. Easier to<br />
apply and scrape than other cold conditions<br />
waxes.<br />
CH4<br />
Green, -10°C to -32°C (14°F to -25°F).<br />
Is somewhat harder than HF4 and LF4. Can be<br />
used alone or mixed with other LF or HF waxes<br />
to increase durability on aggressive snow. In dry<br />
conditions can it be used up to -7/-8°C. Should be<br />
scraped while still warm. See wax application section.<br />
CH6<br />
Blue, -6°C to -12°C (21°F to 10°F).<br />
For common cold conditions. Contains also some<br />
synthetic wax, which makes it durable in aggressive<br />
snow. Good training wax alone. It offers good<br />
glide plus base protection at an economical price.<br />
CH7<br />
Violet, -2°C to -8°C (28°F to 18°F).<br />
CH7 is a good general purpose pre-wax and travel<br />
wax because its range for use falls in the middle<br />
of the system. CH7 makes a good base bonding<br />
wax for warmer waxes. Good alone for training<br />
and to get skis “driven in”.<br />
CH8<br />
Red/pink, +1°C to -4°C (34°F to 25°F).<br />
A very good, reliable and economical racing wax,<br />
as well as a general base prep wax and travel wax<br />
for “cold” skis.<br />
CH10<br />
Yellow, +10°C to 0°C (50°F to 32°F).<br />
For very wet, saturated snow. This is the Worlds<br />
most frequently used wax for base prep/saturation<br />
and as travel wax for warm skis.<br />
The Swix Brush Program is subject to continuous<br />
development based on feedback from the Swix<br />
Racing Service Department that serves World Cup<br />
technicians, athletes, and teams throughout each<br />
season. As a result, Swix customers are guaranteed<br />
the highest quality products taking into<br />
account the latest developments and methods of<br />
World Cup technicians.<br />
Swix Brushes are divided into three main categories<br />
of use, plus the economy line.<br />
• The Swix “Pre-Wax” Brushes are designed to<br />
use before waxing for base restoration (“freshening”)<br />
by removing the burnish and oxidization<br />
from the base surface, and brushing old wax out<br />
of the structures (base patterns) in ski and snowboard<br />
bases to clean and “open” the base for better<br />
wax absorption.<br />
• The Swix “Post-Wax” Brushes are for use after<br />
waxing and scraping to brush the wax out of the<br />
base patterns. To many, these brushes are the<br />
most important. The base must be waxed, yet the<br />
structure patterns must also be revealed to minimize<br />
friction.<br />
• The Swix “Cera F” Brushes have the purpose of<br />
“application brushing” and final finish brushing.<br />
Professional technicians reserve these brushes<br />
just for use with Cera F so the final waxing result<br />
cannot be compromised with wax other than<br />
Cera F.<br />
For each of these categories the Swix brushes are<br />
carefully selected with special qualities in mind.<br />
Swix selects not only the specific material for<br />
each purpose, but also the certain length of each<br />
fiber, a certain thickness and stiffness for each<br />
fiber, and lastly, the bristle density. By specifying<br />
the characteristics thoroughly, each of the Swix<br />
brushes has its own “person ality” and fulfils a<br />
specific purpose.<br />
It is recommended to use separate<br />
brushes for the waxes from the<br />
brushes used for Cera F.<br />
20 21
A fully equipped range of brushes should<br />
contain:<br />
- The Fine Steel Brush used before waxing to<br />
clean the structure and remove oxidized material<br />
(T191B). Also used as second brush on waxes.<br />
- The Medium Coarse Steel Brush to use after<br />
waxing and scraping (T179).<br />
- The Blue Nylon Brush as final finish (T160).<br />
For Cera F Powder the following three brushed<br />
are needed:<br />
1) One stiff Black Nylon Brush (T194) for the<br />
“brush up” step and after ironing.<br />
2) One Wild Boar Brush (T164).<br />
3) One Blue Nylon Brush (T160 or T196) for final<br />
finish.<br />
Tip: The Blue Nylon Brush T196 has cork on one<br />
side for hand corking with Cera F Turbo Solid or<br />
Liquid.<br />
Brushes after waxing and scraping<br />
T179 Steel Brush<br />
(or T162 Bronze Brush)<br />
A medium coarse steel or bronze brush to use<br />
after waxing and scraping. 10-12 strokes.<br />
T160 Blue Fine Nylon Brush<br />
A fine nylon brush for polishing. 4-5 strokes.<br />
T191B Steel Brush Ultra Fine<br />
An ultra fine steel brush for renewal and cleaning<br />
of bases in-between heats in sprint races.<br />
Also used as brush number two on glide waxes.<br />
T179B<br />
T162B<br />
T179O<br />
T162O<br />
Brushes for Cera F Powder<br />
T160B<br />
T160O<br />
T194 Stiff Nylon Brush<br />
For “brush up” (not away) of Cera F powder after<br />
ironing (and before ironing FC7 and FC78 the second<br />
time). 4-5 strokes back and forth.<br />
T191B<br />
T164 Wild Boar Brush)<br />
(or T157 Horsehair Brush)<br />
Second brush on Cera F powder. An “animal” brush<br />
for brushing powder away. 10-12 strokes.<br />
T194B<br />
T194O<br />
T160 Blue Fine Nylon Brush<br />
A fine nylon brush for polishing. 4-5 strokes.<br />
One brush for Cera F Solid Turbo<br />
T164B<br />
T164O<br />
T196 Combi “Turbo”Brush<br />
This is another handy brush, that some World Cup<br />
Technicians use at the race start site for secondrun<br />
or in between sprints Cera F Solid application.<br />
This brush has natural cork on one side and short,<br />
fine nylon bristles on the other.<br />
T157B<br />
T157O<br />
T196<br />
AKER is the main sponsor of Petter Northug and the Norwegian Cross Country Team.<br />
22 23
ROTO BRUSH PROGRAM<br />
Use of a Roto Brush is a great way to save time<br />
when there are many skis or boards to prepare.<br />
For club team racers where coaches and parents<br />
are preparing the skis for the entire team, a Roto<br />
Brush is almost a necessity.<br />
RPMs from about 1500 are used for brushing.<br />
T16M Horsehair<br />
The best all round brush. The initial brush on<br />
all waxes. Used on regular waxes and Cera F.<br />
(Do not use the same brush on regular wax and<br />
Cera F.) 100 mm wide.<br />
T17W White or Blue Nylon<br />
Polish brush for wax and Cera F. 100 mm wide.<br />
T15HS Horsehair and Steel<br />
Wax brush. The most used wax brush in World<br />
Cup. Horsehair is used first finish with steel.<br />
Horsehair is used first to avoid that the steel<br />
is “clogging” up. Deburr the steel lightly with<br />
sandpaper #100 before using it first time on skis.<br />
140 mm wide.<br />
T15DB Horsehair and Soft Nylon<br />
Economy all round brush for both wax and Cera F<br />
powder. Start with the horsehair and finish with<br />
the nylon. 140mm wide.<br />
T19S Steel<br />
Fine steel brush to clean base structures before<br />
waxing. Can be used as second brush on wax after<br />
T16M Horsehair brush.<br />
T18C Cork<br />
High quality cork for application of Cera F powder,<br />
Cera Solid and Cera Liquid. Specially recommended<br />
for Cera Solid. 100 mm wide.<br />
T18F Fleece<br />
The Fleece-Roto improves Cera F performance<br />
when the snow is warmer than -4°C. Apply the<br />
Cera powder to the base with a wax iron first. The<br />
Fleece-roto should be used a couple of times to<br />
get optimal performance. NB! Use separate Fleece<br />
brushes for each type of Cera F. 100 mm wide.<br />
T16M<br />
T17W<br />
T14HN<br />
T14HPS<br />
T14SS - 100 mm<br />
T14SM - 140 mm<br />
T15HPS<br />
Handle with 140 mm driveshaft and 100 mm wide<br />
protection cover.<br />
T19S<br />
T14SL - 200 mm<br />
T14HPS<br />
Handle with 100 mm driveshaft and protection<br />
cover.<br />
T18C<br />
T15HS<br />
T18F<br />
T15DB<br />
NOTE!<br />
• Always use safety glasses when rotobrushing.<br />
• Use the Protective Cover (T12PS) to avoid<br />
getting wax particles and powder in the<br />
face.<br />
• Don’t press too hard, let the brush do<br />
the work!<br />
• Brush from tip to tail with the brush rotation<br />
throwing the wax particles towards the tail.<br />
24 25
IRONING<br />
Important rules:<br />
1: Use an iron build for skiwaxing to ensure<br />
stable temperatures and avoid “burned” bases.<br />
2: Use the proper iron pass speed, like 4 to 5 seconds<br />
per length for Cera F (skating ski).<br />
3: Iron at normal room temperature.<br />
4: Have the proper ski base condition at the start<br />
of the process.<br />
“T71” World Cup Waxing Iron (T71110)<br />
For Professional Racing. 1000 Watt.<br />
A 25 mm thick plate gives stable temperature<br />
and optimal control when applying Cera F.<br />
Temperature reaches 180°C. Easy to set temperature<br />
with LED buttons. The iron remembers the<br />
last plotted temperature if current is interrupted.<br />
The temperature is regulated at 1°C deviation<br />
by a micro processor. The thick plate facilitates<br />
the use of the iron at lower temperatures than<br />
normal room temperature. The heating plate has<br />
an angle to facilitate application of Cera F. In front<br />
it is straight to control glide zone waxing of classical<br />
skis.<br />
The choice of World Cup Service Men!<br />
165°C 330°F<br />
<br />
160°C<br />
320°F<br />
150°C<br />
300°F<br />
150°C<br />
300°F<br />
140°C<br />
280°F<br />
“T73” Performance Waxing Iron (T73110)<br />
500 Watt.<br />
8 mm plate gives a stable temperature. T73 has<br />
manual choice of temperature by indication of<br />
degrees and is simply done by an adjustmentwheel.<br />
Adjustment range from 100°C to 165°C.<br />
Note! When waxing with Cera F Powders like FC78<br />
Super Cera, FC7 and FC8X it is important to have<br />
an optimal iron like T71 to get a good result.<br />
135°C<br />
275°F<br />
“T74 Sport” iron (T74110)<br />
400 Watt.<br />
Reasonable and reliable waxing iron with temperature<br />
control showing the degrees. Standard iron<br />
plate. Control light for temperature regulation.<br />
“T72” Racing Digital Iron (T72110)<br />
550 Watt.<br />
A 12 mm plate gives optimal temperature stability.<br />
The iron is controlled by a micro processor and has<br />
digital temperature regulation. On the back, the<br />
heating plate has an angle to facilitate application<br />
of Cera F. In front it is straight to control glide<br />
zone waxing and classical skis..<br />
120°C<br />
245°F<br />
110°C<br />
230°F<br />
26 27
POST-TREATMENT OF NEW <strong>SKI</strong>S OR NEWLY STONE GROUND<br />
<strong>SKI</strong>S<br />
Skis put through a stone grinder need accurate follow-up treatment for optimum performance.<br />
This process depends partly on the type of pattern given to the base.<br />
Cold snow patterns need more extensive treatment than wet snow patterns. It is very critical that<br />
all micro-burrs are removed from the base in cold snow conditions. This means that the work performed<br />
using Fibertex polishing, back and forth on the base has to be repeated many times more on a cold<br />
snow ski with finer structure than on a wet snow ski with a coarser structure.<br />
1.<br />
Brush lightly with the Steel Brush (T179) or<br />
Bronze Brush (T162).<br />
5.<br />
Brush firmly with the Bronze Brush (T162).<br />
The ski is now ready for application of new<br />
glide wax.<br />
6.<br />
Saturate the base with a relatively soft wax<br />
(CH10). The temperature of the waxing<br />
iron should be regulated to be hot enough<br />
to give immediate melting of the wax.<br />
Approximately 115°C (235°F).<br />
2.<br />
Moisten a piece of Fiberlene (T150) with Glide<br />
Wax Cleaner (I84) and apply to the glide zone of<br />
the base.<br />
7.<br />
Start at the ski tip and move the iron in<br />
one continuous motion toward the tail.<br />
This technique prevents overheating<br />
the base.<br />
Let ski cool down approx. 5 minutes.<br />
3.<br />
Rub forward and backward a few times with a<br />
Nylon Brush (T161B).<br />
8.<br />
Apply CH10, iron in, and wait 5 minutes.<br />
Iron in three times, apply more wax if necessary.<br />
No scraping in between.<br />
4.<br />
Wipe off as much as possible with Fiberlene<br />
(T150).<br />
9.<br />
Scrape off after cooling to room temperature<br />
(5-10 minutes).<br />
Let the ski dry for 5-10 minutes.<br />
28 29
10.<br />
Use the Medium Coarse Bronze Brush (T162) or<br />
Steel Brush (T179). Use the brush in tip to tail<br />
direction, approx. 5-10 times.<br />
15.<br />
“COLD SNOW” <strong>SKI</strong>: Apply LF6 for the second<br />
time. Iron in. Let cool for 5-10 minutes.<br />
Scrape and brush.<br />
11.<br />
Apply the harder LF6/HF6. Iron temperature<br />
approx. 140°C (280°F).<br />
16.<br />
Use White Fibertex (T266). 20-25 strokes.<br />
12.<br />
Scrape off after cooling to room temperature<br />
(5-10 minutes).<br />
17.<br />
Saturate the base with LF8 if it is a “wet snow”<br />
ski or with LF6 if it is a “cold snow” ski. Wait 5<br />
minutes. Iron in three times. Apply more wax if<br />
necessary. No scraping in between. Scrape off<br />
and brush with Bronze Brush (T162) or Steel<br />
Brush (T179) 10 strokes.<br />
13.<br />
Brush with the Bronze Brush (T162) or<br />
Steel Brush (T179) approx. 10-20 times.<br />
“WET SNOW” <strong>SKI</strong>: Continue to # 16.<br />
14.<br />
“COLD SNOW” <strong>SKI</strong>: Use Purple Fibertex (T266N)<br />
to cut micro burrs. 20-25 strokes back and<br />
forth.<br />
“Wet snow” skis don’t need Fibertex treatment.<br />
T824 T162 T160<br />
30 31
GLIDE-WAXING<br />
Practical Application of CH, LF and HF Waxes<br />
This is a general description of the methods and procedures used by servicemen on top level.<br />
T793 + T79-1<br />
T71<br />
T88<br />
1.<br />
Scrape off the travel wax applied after the last<br />
race or training. Use the Plexi scraper (T824)<br />
and the groove scraper (T88).<br />
5.<br />
Don’t forget to remove all excess-wax<br />
in the groove and on the sides with a scraper<br />
(T87 or T88). We recommend scraping the<br />
groove before the base to protect the surface<br />
in case the groove scraper slips and<br />
makes scratches.<br />
2.<br />
Brush with the Bronze Medium Coarse Brush<br />
(T162) or Steel Brush (T179). 5-10 repetitions<br />
from tip to tail, to remove remaining wax.<br />
3.<br />
Apply the actual wax for today’s conditions.<br />
Use the iron, dripping wax on both sides of the<br />
groove.<br />
6.<br />
If the actual waxes are hard, brittle like CH4/<br />
CH6, LF4/LF6 or HF4/HF6, scrape off most of<br />
the wax before it becomes solid. After the ski<br />
has cooled off, continue scraping using a sharp<br />
Plexi scraper (T824).<br />
Other waxes like CH7/CH8/CH10, LF7/LF8/<br />
LF10 or HF7/HF8/HF10 are scraped when the<br />
ski has cooled off to room temperature, 5 min.<br />
7.<br />
Brush the base with the Bronze Medium<br />
Coarse Brush (T162) or Steel Brush (T179).<br />
5-10 strokes.<br />
4.<br />
The wax should easily melt. Check the<br />
temperature recommendation on the wax.<br />
Keep the iron in steady motion from tip to tail.<br />
On pass should take approx. 10-15 sec. on a<br />
skating ski. Repeat 2-3 times. Let the ski cool<br />
off to room temperature approx. 5-10 min.<br />
8.<br />
Do the final brushing and polishing with<br />
the Blue Nylon Polish Brush (T160).<br />
32 33
APPLICATION OF CERA F<br />
Powder, Solid Turbo and Liquid<br />
Cera F Powder Application Tips<br />
Base Pretreatment<br />
Before Cera F is applied, the base is treated with<br />
the wax matching the day’s conditions. The higher<br />
the fluoro content in the wax (such as HF),<br />
the better the Cera F is bonded to the base.<br />
Scraping and thorough brushing is required before<br />
applying Cera F.<br />
Application by ironing<br />
When there is a need for Cera F to stay on the<br />
base for a long time, as in distances above 5 km,<br />
Cera F should be applied with an iron. First<br />
the powder is distributed evenly on the base.<br />
A 30 gram container will be enough for approximately<br />
4 pairs of classic skis, or 3 pairs of skating<br />
skis.<br />
The recommended temperature setting on the<br />
iron is 160°C (320°F) for FC7, FC8X and FC10X.<br />
The recommended temperature for ironing<br />
FC78 is 165°C (330°F).<br />
When ironing FC8X and FC10X only one<br />
continuous pass of the iron is needed. Make one<br />
pass with the iron on each side of the groove.<br />
The movement of the iron should be approximately<br />
4-5 seconds from tip to tail (skating ski).<br />
When using FC78 and FC7, after cooling, the<br />
powder is “brushed up“ (not brushed away) by<br />
using a back and forth scrubbing motion with the<br />
stiff Black Nylon Brush (T194). Afterwards, make<br />
another single pass with the iron. See page 36-39<br />
for “Step by Step Application”.<br />
APPLICATION BY IRONING<br />
FC78 and FC7<br />
FC8X and FC10X<br />
Brushing<br />
Before brushing allow the skis to cool for about<br />
5 minutes. Use the Swix Black Nylon Brush (T194)<br />
first, then the Wildboar Brush (T164). No scraping<br />
is needed.<br />
Finish with the Swix Polishing Brush (T160).<br />
All final brushing is done in a direction from tip<br />
to tail.<br />
Application of powder by corking<br />
This applies to short sprint cross country races of<br />
about 2 to 5 km.<br />
The powder is distributed evenly on the base.<br />
Less is used than when ironing. Use the Swix<br />
Synthetic Cork (T0010), or Swix Natural Cork<br />
(T0020). Use firm back and forth pressure to create<br />
heat to form a waxy layer. Next “brush-up” the<br />
powder with a Horsehair Brush (T157), and then<br />
cork into the base once again. Finish by brushing<br />
with the Swix Horsehair Brush (T157), and then<br />
the Swix Polishing Brush (T160).<br />
SAFETY RECOMMENDATIONS<br />
• Wax room ventilation. Make the extra effort to see that the area where<br />
you work on skis has exhaust fans and fresh air supply. Race organizers<br />
usually give the location for working on race equipment too low a priority,<br />
and often the waxing areas have little or no ventilation.<br />
• Do not expose waxes to open flames such as from a waxing torch, heat<br />
guns, space heaters, fire places, etc. Do not smoke cigarettes while waxing<br />
with fluorocarbon or fluorinated hydrocarbon waxes. In fact, don’t<br />
smoke at all! There is a chemical danger associated with fluorocarbon<br />
waxes when they are overheated. If fluorocarbon waxes are exposed to<br />
a heat source having a temperature higher than approximately 300°C<br />
(570°F), the fluorocarbon material disintegrates developing a poisonous<br />
gas. Normal iron temperatures will not cause a harmful breakdown of Swix<br />
waxes.<br />
• When using power brushes for brushing waxes a substantial amount of<br />
wax “dust” particles occur. To prevent inhalation of the particles use a<br />
“particle” mask. This can be the paper-type used in wood working.<br />
• Use safety glasses when power brushing.<br />
• If you question the quality of the waxes you are using, or feel that your<br />
exposure amount to waxing is extensive, use a respirator mask. It should<br />
be a cartridge type for filtering organic vapors. This type of mask is important<br />
to use when doing base repair with a burning polyethylene repair<br />
candle or base welder.<br />
• Be aware of the type of base cleaner you are using. Have good ventilation.<br />
And dispose of the rags or Fiberlene properly.<br />
• The addition of fluorocarbon materials into the hardwaxes and klisters<br />
means they must not be exposed to open flames of any type.<br />
Waxing torches should not be used for application or removal of fluorinated<br />
kick waxes. During application the warming-in of the wax with an iron is<br />
acceptable. Use a solvent for removal.<br />
Application by Roto Fleece<br />
Some teams prefer this method as it saves the ski<br />
somewhat from the very hot irons. Has also given<br />
excellent results re. Glide. See page 40 for “Step<br />
by Step Application”.<br />
34 35
RECOMMENDED APPLICATION OF CERA F POWDER<br />
IRONED TWICE - FC78 SUPER CERA AND FC7<br />
A standard package of 30 grams normally is enough to wax 3 pairs of free-technique skis<br />
(skating skis) or 4 pairs of classical skis (tip and tail waxing). A sufficient layer of powder<br />
has to be applied. If the layer is too thin, the high temperature of the iron may damage or<br />
destroy the base.<br />
Before the application of Cera F, the skis need to be waxed with the traditional wax<br />
for the day’s conditions. This will act as a base layer for the Cera F you are about to apply.<br />
Follow steps 3 to 8 given in the section “Glide-Waxing”, pages 32-33.<br />
When applying FC78 or FC7, it is very important to use a high quality waxing iron.<br />
We recommend our T71 or T72 iron. These high quality irons will help prevent damage to<br />
your ski base from an iron that does not have proper and precise temperature regulation.<br />
1.<br />
Distribute the Cera F powder in an even layer.<br />
Apply enough powder to protect the ski base<br />
from the high temperature of the iron and<br />
allow penetration into the base material.<br />
3.<br />
Brush the powder up but not away from the<br />
base with the Black Stiff Nylon Brush (T194).<br />
4.<br />
Iron the powder once more as described in<br />
#2. Let the ski cool down 5-10 minutes.<br />
You might still see white spots, but they are<br />
less than after the first pass with the iron.<br />
5.<br />
Brush with the Stiff Nylon Brush (T194),<br />
5-10 strokes, and continue with the Wild Boar<br />
Brush (T164), 10-20 strokes.<br />
2.<br />
Move the iron in one continuous pass on<br />
each side of the groove. Recommended iron<br />
temperature for FC78 is 165°C. For FC7 it is<br />
160°C. The velocity of the iron corresponds to<br />
a time of approximately 4-5 seconds for one<br />
ski (skating ski).<br />
6.<br />
Finish with the Blue Nylon Brush (T160),<br />
3-4 strokes.<br />
IMPORTANT:<br />
The powder will not completely melt and<br />
the base might look partly white after this<br />
initial treatment.<br />
36 37
RECOMMENDED APPLICATION OF CERA F POWDER<br />
IRONED ONCE - FC8X, FC10X, FC10B0<br />
A standard package of 30 grams normally is enough to wax 3 pairs of free-technique skis<br />
(skating skis) or 4 pairs of classical skis (tip and tail waxing). A sufficient layer of powder<br />
has to be applied. If the layer is too thin, the high temperature of the iron might destroy<br />
the base.<br />
Before the application of Cera F, the skis have to be waxed with the actual, traditional<br />
wax for today’s conditions. Follow steps 3 to 8 given in the section “Glide-Waxing For<br />
Today’s Competition”, pages 32-33.<br />
3.<br />
After cooling to room temperature (5 min.)<br />
brush the powder up from the base with the<br />
Stiff Black Nylon Brush (T194). 5-10 strokes.<br />
1.<br />
Distribute the Cera F powder evenly on the<br />
base. Don’t forget to apply enough powder to<br />
protect the base from direct contact with the<br />
iron.<br />
4.<br />
Continue with the Wild Boar Brush (T164).<br />
10-20 strokes.<br />
2.<br />
Move the iron in one continuous pass<br />
from tip to tail on each side of the groove.<br />
Recommended iron temperature setting<br />
for FC8X and FC10X is 160°C. For FC10B0 the<br />
temperature setting should be approx. 150°C.<br />
One pass with the iron from tip to tail takes<br />
approx. 5 seconds.<br />
5.<br />
Finish with the Blue Nylon Brush (T160).<br />
3 - 4 strokes.<br />
IMPORTANT:<br />
The powder will not completely melt and<br />
the base might look partly white after this<br />
initial treatment.<br />
38 39
CERA F POWDER ROTO FLEECE APPLICATION<br />
The initial steps before Cera F Roto Corking are the same as for the ironing in method of Cera F.<br />
It is recommended to have one separate T18F Roto Fleece for eatch different Cera F.<br />
CERA F TURBO ROTO FLEECE APPLICATION<br />
1.<br />
Rub on an even layer.<br />
1.<br />
Apply Cera F evenly.<br />
You can “fix” the powder to the base by using<br />
a waxing iron temperature of 150°F (300°F)<br />
by quickly going over, approx. 3 seconds.<br />
2.<br />
Use the T18C Roto Cork first at a speed of<br />
approx. 1.500 RPM. Start from the tip and work<br />
the Cera F into the base by moving the drill back<br />
and forth approx. a foot at a time as you work<br />
your way towards the tail. Use light pressure.<br />
Repeat the procedure above with Roto Fleece<br />
(T18F).<br />
3.<br />
Use the T16M/T15DB Horsehair Roto Brush<br />
with speed 1.500 RPM. Start from the tip and<br />
move back and forth approx. a foot at a time<br />
towards the tail. Use light pressure.<br />
(OBS! Do not use the same brush as for standard<br />
waxes.) You can also use a Horsehair<br />
Hand-Brush (T157). 10 strokes.<br />
2.<br />
Use the T18C Roto Cork first at a speed of<br />
approx. 1.500 RPM. Start from the tip and<br />
work the Cera F into the base by moving<br />
the drill back and forth approx. a foot at a time<br />
as you work your way towards the tail.<br />
Use light pressure.<br />
Repeat the procedure above with Roto Fleece<br />
(T18F).<br />
3.<br />
Use the T16M/T15DB Horsehair Roto Brush<br />
with speed 1.500 RPM. Start from the tip and<br />
move back and forth approx. a foot at a time<br />
towards the tail. Use light pressure.<br />
(OBS! Do not use the same brush as for standard<br />
waxes.) You can also use a Wild Boar<br />
Hand-Brush (T164). 10 strokes.<br />
4.<br />
Finish with the T17W/T15DB Soft Nylon Roto<br />
Brush with speed 1.500 RPM. Start from the<br />
tip and move back and forth approx. a foot at<br />
a time towards the tail. (OBS! Do not use the<br />
same brush as on standard waxes.) Use light<br />
pressure. You can also use a Blue Nylon Hand-<br />
Brush (T160). 3 - 4 strokes.<br />
40 41
CERA F TURBO HAND CORK APPLICATION<br />
1.<br />
Rub on an even layer.<br />
FC8A ROCKET ROTO FLEECE APPLICATION<br />
1.<br />
Spray on the FC8A by moving the bottle<br />
along both sides of the groove while pressing<br />
the button. Keep the nozzle<br />
4-5 cm above the base.<br />
Let dry for approximately 5 minutes.<br />
2. a<br />
Cork in with a Natural Cork (T20).<br />
2.<br />
Use the T18C Roto Cork first at a speed of<br />
approx. 1.500 RPM. Start from the tip and<br />
work the Cera F into the base by moving<br />
the drill back and forth approx. a foot at a time<br />
as you work your way towards the tail.<br />
Use light pressure.<br />
2. b<br />
Or the Combi Cork/Brush (T196).<br />
Approx. 20 strokes.<br />
3.<br />
Repeat the procedure above with Roto Fleece<br />
(T18F).<br />
3.<br />
Brush with the Blue Nylon Brush (T196 or<br />
T160). Approx. 10 strokes.<br />
4.<br />
Finish with the Blue Nylon Brush (T160).<br />
Approx. 5 strokes.<br />
42 43
FC8A ROCKET HAND CORK APPLICATION<br />
CERA F LIQUID ROTO FLEECE APPLICATION<br />
1.<br />
Spray on the FC8A by moving the bottle along<br />
both sides of the groove while pressing the<br />
button. Keep the nozzle 4-5 cm above the<br />
base.<br />
1.<br />
Apply with Fiberlene or felt applicator.<br />
Let dry for 5 minutes.<br />
Let dry approximately 5 minutes.<br />
2.<br />
Work the liquid into the base with a Natural<br />
Cork (T20) or Combi Cork/Brush (T196).<br />
Approx. 20 strokes.<br />
2.<br />
Use the T18C Roto Cork first at a speed of<br />
approx. 1.500 RPM. Start from the tip and<br />
work the Cera F into the base by moving<br />
the drill back and forth approx. a foot at a time<br />
as you work your way towards the tail.<br />
Use light pressure.<br />
Repeat the procedure above with Roto Fleece<br />
(T18F).<br />
3.<br />
Finish with the Blue Nylon Brush (T160 or<br />
T196). Approx. 5 strokes.<br />
3.<br />
Brush with the Wild Boar Brush (T164) alt.<br />
Horsehair Brush (T157). Approx. 10 strokes.<br />
4.<br />
Finish with the Blue Nylon Brush (T160).<br />
Approx. 5 strokes.<br />
44 45
Winter Week has<br />
races for all tastes!<br />
Vasaloppet Week 2011 is getting nearer. For<br />
Vasaloppet is not just one competition, but eight.<br />
From the shortest race of 3 km to the 90 km classic distance.<br />
There’s something for all ages, sexes, and families. No matter where you start,<br />
everyone finishes in the same place. In Mora. Register now and begin training tomorrow!<br />
CERA F LIQUID HAND CORK APPLICATION<br />
1.<br />
Apply with Fiberlene or felt applicator.<br />
Let dry for 5 minutes.<br />
REGISTRATION FEES 2011 (EUR)<br />
01.06.-31.10. 01.11.-31.01. Later Entries<br />
KortVasan 41 53 63<br />
TjejVasan 69 81 101<br />
UngdomsVasan 15 15 15<br />
Öppet Spår, Sunday 95 107 120<br />
Öppet Spår, Monday 73 88 105<br />
HalvVasan 71 79 95<br />
StafettVasan 238 247 276<br />
Vasaloppet 136 151 171<br />
SkejtVasan, 30 km<br />
Comp. 17-18 21 23 27<br />
Comp 19-20 21 23 27<br />
Recr. 12-18 20 20 20<br />
Recr. 19- 31 33 37<br />
SkejtVasan 45 km<br />
Comp 21- 43 55 67<br />
Recr. 17- 39 51 57<br />
Dream – Challenge –Adventure<br />
Vasaloppet 2010 in figures:<br />
16,462 registered skiers<br />
3,500 functionaries worked<br />
91,500 buns were eaten<br />
686,000 paper mugs were used<br />
4,290 km competition tracks laid<br />
Vasaloppet is the oldest, the<br />
longest and the biggest crosscountry<br />
ski race in the world.<br />
90 km an endurance test in<br />
finest nature & perhaps one of<br />
the greatest challenges you can<br />
take up.<br />
2.<br />
Cork in with a Natural Cork (T20) or the Combi<br />
Cork/Brush (T196).<br />
Approx. 20 strokes.<br />
3.<br />
Finish with the Blue Nylon (T196 or T160).<br />
Approx. 5 strokes<br />
COMPETITION FACTS WINTER WEEK 2011<br />
Date Distance Start Technique Min.age born<br />
KortVasan Feb 25 30 km Oxberg Classic 1999<br />
TjejVasan Feb 26 30 km Oxberg Classic 1994<br />
UngdomsVasan Feb 27 3/5/7/9 km Mora Classic 2002<br />
Öppet Spår Feb 27-28 90 km Sälen Classic 1994<br />
HalvVasan March 1 45 km Oxberg Classic 1994<br />
StafettVasan March 4 5 person team Sälen Classic 1999<br />
SkejtVasan March 4 30/45 km Oxberg Free 1992/1999<br />
Vasaloppet March 6 90 km Sälen Classic 1992<br />
Vasaloppet Winter Week 2011, 25 Feb – 6 March<br />
www.vasaloppet.se<br />
46 47
SWIX HARD WAXES<br />
AND KLISTERS<br />
About Kick Waxing in General<br />
It is relatively simple to apply kick waxes with<br />
some experience and knowledge of the performance<br />
of the waxes you are using; however, the<br />
most experienced skier can still become confused<br />
before a race. Nerves are brittle and wax tips<br />
come from all over. This racing manual will give<br />
you some helpful advice and guidelines for competitions<br />
and will give you information that will<br />
improve your everyday skiing experience, both for<br />
touring and training.<br />
In many situations, ski waxing means compromising.<br />
The final goal is superb kick and great<br />
glide; however, many times the conditions are<br />
variable and that can make this goal difficult. Most<br />
important is to find the best balance between kick<br />
and glide that will give you the best overall performance.<br />
A common mistake is to wax too slippery.<br />
Skiers are afraid of loosing glide and wax either<br />
too thin or too hard a wax. Experience tells us that<br />
a racer will lose more time uphill, due to bad kick<br />
than gaining speed on the downhill with good<br />
glide. Swix wants to kill the myth that top-racers<br />
use slippery skis to gain better glide. Truth is that<br />
many racers apply kick waxes somewhat softer<br />
than what is suggested by temperature, create a<br />
longer kick zone and wax thicker than many recreational<br />
skiers might believe.<br />
We will start with a few, general tips, based<br />
upon many years of field experience by the Swix<br />
World Cup service team. Following the guidelines<br />
written below we will give you a good foundation<br />
for making waxing decisions in stressful and difficult<br />
situations.<br />
• Remember, practice makes perfect. The more<br />
you test and experiment during training the better<br />
you will be able to wax for competitions.<br />
• Do not experiment with products or wax combinations<br />
that you have not previously used in<br />
training.<br />
• When you are out training and you have poorly<br />
performing skis, take the additional 5 minutes to<br />
stop and re-wax. It makes no sense to continue on<br />
bad skis.<br />
To see and learn how to wax correctly please visit<br />
www.swixschool.com. Also remember the Swix<br />
Wax Wizard at our web site www.swixsport.com.<br />
Sanding of the Kick Zone<br />
As a general rule, the kick zone usually starts at<br />
the heel and goes 65-70 cm forward. Most shops<br />
who specialize in selling racing skis will be able<br />
to make an exact measurement of the kick zone.<br />
You might get an approximate idea yourself by<br />
using the “paper method”. Place the skis on the<br />
floor. Stand on both skis, with half of your body<br />
weight on each ski. Let somebody move a piece<br />
of paper forward and backward between the ski<br />
and the floor. Make a sign at the points where the<br />
paper meets resistance.<br />
Use sandpaper to treat the kick zone.<br />
You might use a special cork (T11) with #100<br />
grit sandpaper on one side or a paper (T330).<br />
Move the paper in both directions. Do not sand<br />
sideways as this could round the edges of the ski,<br />
this will make work later on with the iron less precise.<br />
A new ski or a new stone grained ski needs<br />
thorough treatment, while a pre sanded ski only<br />
needs a few additional passes with sandpaper.<br />
Sanding of the kick zone is also done before each<br />
race. Always sand after the treatment of the glide<br />
zones has been completed. Avoid fluoro powder<br />
remaining in the kick zone before kick waxing;<br />
otherwise, the adhesion of the wax is critically<br />
reduced. Make a distinct divide between the glide<br />
and kick zone by applying a small piece of tape to<br />
separate the zones. Remove dirt and burr with<br />
Fiberlene (T150) before applying the kick wax.<br />
Tip:<br />
Take a cork or a sanding block and fold the sandpaper<br />
around it. Use it on the edge at the point<br />
exactly where you start the sanding.<br />
Application of Hard Waxes<br />
In most cases we recommend to apply base wax<br />
(VG35) as a first layer. For longer distances or<br />
on aggressive snow, this is a safe choice. On less<br />
aggressive snow (cold, fine grained snow) we recommend<br />
the base wax VG30 as first layer.<br />
VG30<br />
BLUE BASE WAX<br />
+1°C to -20°C (30°F to -4°F).<br />
To be used as first layer for all<br />
hard waxes in new and fine<br />
grained snow.<br />
VG35<br />
GREEN BASE BINDER<br />
-1°C to -22°C (30°F to -7°F).<br />
A durable base wax for the<br />
VR- and V-waxes, for coarse<br />
grained and old snow colder<br />
than -1°C (30°F).<br />
We recommend using an iron when applying<br />
base wax. Apply a thin layer and iron it into the<br />
base (iron temp. 110°C) until it completely covers<br />
the entire sanded area. After the treatment you<br />
may want to make a few passes with a waxing<br />
cork, let the ski cool before applying a layer of<br />
V30. Iron once more using only light pressure to<br />
prevent the two layers from mixing. Finish with<br />
light corking and let the ski cool off to outside<br />
temperature before applying today’s wax.<br />
Base waxes are frequently used in top level<br />
racing in conditions demanding dry / hard waxes.<br />
Many of the best national teams now consequently<br />
prefer Swix base waxes. In citizen races<br />
accurate base-waxing is decisive. Both VG35 and<br />
VG30 hold the ordinary dry-waxes, conserving the<br />
kick, without reducing the kick.<br />
Tip:<br />
Base wax is much easier to apply when it is cold.<br />
Store it in the fridge or in the snow before application.<br />
48 49
Today’s Hard Wax<br />
The choice of today’s hard wax is based upon<br />
temperature, air-humidity, and snow consistency<br />
and on your own personal experience. The<br />
temperature declarations on the boxes give a<br />
good starting point, but often you have to adjust.<br />
Apply more thin layers. By this we mean a layer,<br />
evenly distributed, without lumps. Because skis<br />
are different in stiffness, length of kick zone etc.,<br />
it is difficult to give a general rule suggesting the<br />
number of layers. But normally we recommend<br />
about 4 to 10 layers. If you need fewer layers the<br />
skis are probably too soft, and if you need more<br />
layers, the skis are probably too stiff.<br />
To avoid creating a sharp edge at the ends of<br />
the kick zone, we normally apply the hard waxes<br />
in a pyramid shape; which means that the layers<br />
gradually are applied thinner and thinner, and the<br />
wax thickness will have its peak at the highest<br />
point of the ski curvature. Normally, we apply 3-4<br />
full length layers, and then gradually shorten the<br />
layers.<br />
The waxing cork is an essential tool. Each layer<br />
has to be corked before applying a new one. Also,<br />
run the cork down the groove a few times (with<br />
the oval edge) to smooth the wax in this area. The<br />
closer to freezing (0°C), and the fresher the snow,<br />
the more important it is to cork the wax to an even<br />
and smooth surface, reducing the risk of icing up.<br />
For the hardest (coldest) waxes we recommend<br />
not corking too hard. A slight structure in the wax<br />
might contribute to better kick.<br />
Three possible scenarios<br />
When you have finished waxing and are ready<br />
to test your skis, be prepared for one of the following<br />
three scenarios (we assume that you<br />
have applied the wax correctly length/thickness<br />
according to the stiffness of the ski and the kick<br />
zones):<br />
A: You have correctly selected and applied the wax<br />
properly and have perfect kick.<br />
B: You have applied too hard a wax and have<br />
slippery skis.<br />
C: You have applied too soft a wax and the skis are<br />
icing up.<br />
Scenario A<br />
Shortly: Congratulations and enjoy the trip!<br />
Scenario B<br />
If you have slippery skis, first try to apply a thicker<br />
layer of the same wax. If this does not work you<br />
probably have chosen a wax that was too hard. If<br />
this is the case then go to a wax one step softer,<br />
this may give you satisfactory kick. If you still need<br />
additional grip, continue the same way. If you<br />
feel you are getting close, more often one or two<br />
extra layers is better than going even softer.<br />
Scenario C<br />
In this case we are referring to snow and ice building<br />
up under the skis.<br />
By icing up there is no way out of this situation<br />
other than scraping off the warm wax and reapply<br />
a harder colder wax. The initially chosen wax was<br />
too soft and collected snow particles witch were<br />
not removed by gliding. This situation usually only<br />
happens with new transformed snow. Coarsegrained<br />
snow seldom causes icing, only slow skis<br />
from using too soft a wax.<br />
There is another type of icing. In this case<br />
there will be an almost invisible thin layer of ice on<br />
the wax, creating both slippery and slow skis. (Ice<br />
on top of snow is by no means an ideal condition).<br />
You might see some blank spots in the kick zone.<br />
If you try to put on more wax it may not work. You<br />
have to remove the ice and the ski must be dry.<br />
Then try a harder wax.<br />
About V- and VR-Waxes<br />
Swix V-line waxes are a series of hard waxes containing<br />
somewhat less expensive raw materials<br />
than the VR-series. However, all the V-waxes are<br />
composed of the traditionally high quality Swixraw<br />
materials. The V-line waxes are still used from<br />
time to time at top level racing, most notably the<br />
classic Swix “Blue Extra”.<br />
The difference in performance between<br />
V- and VR-series is that the VR-waxes are more<br />
flexible, covering a wider range of conditions.<br />
VR-waxes contain fluorine additives and will provide<br />
better glide in all temperature ranges above<br />
and below freezing. It should also be mentioned<br />
that some V-waxes are slightly softer (warmer)<br />
than the corresponding VR-waxes.<br />
In the last couple of years many VR-waxes<br />
have had the formulas adjusted. Thus VR30,<br />
VR40, VR45 and VR50 now have improved grip<br />
(kick) without reducing the glide characteristics.<br />
The “feeling”, going on flat or moderate uphill terrain,<br />
has been improved.<br />
Application of Klisters<br />
We recommend applying klister indoors; and if<br />
possible, at room temperature. Klisters are softer<br />
and much easier to handle in these conditions.<br />
Tools like a waxing table, waxing profile, waxing<br />
iron and heat gun will simplify the application and<br />
give a better final result.<br />
Always start by application of base klister.<br />
KB20 makes an excellent binder. It is possible<br />
to spray directly on the ski (look for more exact<br />
application information on page 64 of this manual).<br />
KR20 can also be used. Heat the tube with<br />
a heat gun. Apply a thin string on each side of the<br />
groove. Then iron the klister into the base (110°C).<br />
The iron might be put on edge passing the base.<br />
This gives a more controlled and better distribution<br />
of the klister. It should not enter the groove<br />
or side edges only cover the sanded kick zone. The<br />
klister could be corked afterwards to remove any<br />
small irregularities. Let the klister cool to room<br />
temperature before application of the next layer.<br />
As a mid layer we recommend KR30 or KR35.<br />
The purpose of this layer is to “glue” the klister<br />
you have selected preventing it from moving<br />
“backwards” and to improve wear. Heat the tube<br />
and apply the klister in a thin layer in a “fishbone”-like<br />
pattern. The best way to smooth the<br />
klister is to use the thumb, but you can also use a<br />
synthetic cork. The heat gun could also be used to<br />
soften the klister.<br />
The last layer is today’s actual klister. Like hard<br />
waxes, the klister is applied full length in the kick<br />
zone, but remember that klister “builds” more<br />
than hard waxes. If you use the same pair of<br />
skis on both hard wax and klister conditions, you<br />
should wax somewhat shorter when using klister.<br />
Also remember that it is the top layer which gives<br />
most of the kick. This layer should be thicker than<br />
the base and middle layers put together; therefore,<br />
be careful not to apply the first layers too<br />
thick.<br />
If you have to adjust your klister after an initial<br />
snow test, be careful to remove all humidity from<br />
the klister. Use a heat gun or hand, not an iron.<br />
Moisture in the klister before reapplication will<br />
cause an undesirable, grayish chewing gum like<br />
consistency.<br />
Tip:<br />
If you want to mix two klisters, in the same layer,<br />
you might apply every other string in fish bone<br />
pattern and then smooth it out together.<br />
”Orange skin pattern”<br />
The term “orange skin” is used as a description<br />
of the surface pattern of klister that has been<br />
applied correctly. After testing your skis you<br />
might recheck your klister application. If you have<br />
satisfactory kick and observe many small imprints<br />
(orange skin) in the surface, this is a good indication<br />
that your klister is working. This pattern is<br />
caused by snow particles that are penetrating<br />
the surface of the klister and then released when<br />
you start skiing. The imprints are most visible<br />
when using the softer klisters (KR35, KR60, KR70,<br />
K22n).<br />
Covering Klisters with Hard Waxes<br />
To reduce icing, klisters can be covered by hard<br />
waxes. In order to do this, the klister must be<br />
cold in order to apply the hard wax in an even<br />
layer. Use at least three layers, carefully corked in<br />
between each layer to cover the klister. We want<br />
a distinct border between the two different wax<br />
types.<br />
The most actual klister subjects for covering<br />
are KR35, KR50 and K21. The most actual<br />
hard waxes used for covering are VR40, VR45,<br />
VR50 and VR55. When covering klister, the hard<br />
wax is often somewhat harder than the temperature<br />
should indicate. The reason is that a harder<br />
50 51
wax gives a better icing protection.<br />
KR35 is primarily a mid layer klister, but it can<br />
also be used alone. A good mid layer klister on top<br />
of green klister. Prevents the top klister, red or<br />
universal, to slide backwards.<br />
KR50 is designed for changing conditions; i.e. a<br />
mix of coarse grained and fine grained snow with<br />
rising temperatures around freezing. By cold temperatures<br />
KR50 could be covered by VR40/VR45,<br />
around freezing VR50 and even VR55 are actual<br />
waxes to make the klister less tacky.<br />
K21n works well down to -3°C/-4°C, but works<br />
better than KR50 in moist/wet mixed conditions<br />
or on icey trails around freezing. Current waxes<br />
for covering K21n are VR45, VR50, VR55 or VR60.<br />
Tip:<br />
Covering klister with hard wax should take place<br />
outdoors after the skis have adjusted to the outside<br />
temperature. Do not use too much pressure<br />
on either wax or cork, it is better to apply more<br />
thin layers of wax.<br />
52 53
VR-LINE HARD WAXES<br />
New fallen snow<br />
-7°C to -20°C (19°F to -4°F)<br />
Old, transformed snow<br />
-10°C to -30°C (14°F to -22°F)<br />
New fallen snow<br />
+2°C to 0°C (36°F to 32°F)<br />
Old, transformed snow<br />
0°C to -3°C (32°F to 27°F)<br />
New fallen snow<br />
+2°C to +5°C (36°F to 41°F)<br />
VR75 KLISTERWAX SOFT<br />
Yellow. For wet snow, glazy tracks.<br />
Must be applied evenly. To be used in<br />
tracks only.<br />
VR30 LIGHT BLUE<br />
Designed for cold to extremely cold conditions.<br />
New recipe 2007.<br />
VR55 SILVER/VIOLET<br />
For moist snow around freezing and for<br />
older, more coarse snow just below freezing.<br />
Perfect balance between kick and glide.<br />
V-LINE HARD WAXES<br />
New fallen snow<br />
-2°C to -8°C (28°F to 18°F)<br />
New fallen snow<br />
+2°C to 0°C (36°F to 32°F)<br />
New fallen snow<br />
-8°C to -15°C (18°F to 5°F)<br />
New fallen snow<br />
0°C (32°F)<br />
Old, transformed snow<br />
-4°C to -12°C (25°F to 10°F)<br />
Old, transformed snow<br />
+1°C to -2°C (34°F to 28°F)<br />
Old, transformed snow<br />
-10°C to -18°C (12°F to 0°F)<br />
Old, transformed snow<br />
-1°C to -3°C (30°F to 27°F)<br />
VR40 BLUE<br />
For normal, subfreezing temperatures.<br />
New recipe 2007.<br />
VR60 SILVER<br />
Designed for wet snow with little water content.<br />
When used below freezing high humidity and<br />
transformed snow is required.<br />
V20 GREEN<br />
New fallen snow<br />
-2°C to -10°C (28°F to 14°F)<br />
V50 VIOLET<br />
New fallen snow<br />
+1°C to 0°C (34°F to 32°F)<br />
New fallen snow<br />
0°C to -4°C (32°F to 25°F)<br />
New fallen snow<br />
+3°C to 0°C (38°F to 32°F)<br />
Old, transformed snow<br />
-5°C to -15°C (23°F to 5°F)<br />
Old, transformed snow<br />
0°C to -2°C (32°F to 28°F)<br />
Old, transformed snow<br />
-2°C to -8°C (28°F to 18°F)<br />
Old, transformed snow<br />
+1°C to -1°C (34°F to 30°F)<br />
V30 BLUE<br />
V55 RED SPECIAL<br />
VR45 FLEXI<br />
Light violet. A flexible wax for temperatures<br />
around freezing and colder.<br />
New recipe with better kick 2007.<br />
VR65 RED/YELLOW/SILVER<br />
A great kick wax! Used on fresh- and moist to<br />
moderately wet snow.<br />
New fallen snow<br />
-1°C to -7°C (30°F to 19°F)<br />
Old, transformed snow<br />
-3°C to -10°C (27°F to 12°F)<br />
New fallen snow<br />
+3°C to 0°C (38°F to 32°F)<br />
Old, transformed snow<br />
+1°C to -1°C (34°F to 30°F)<br />
New fallen snow<br />
+1°C to -2°C (34°F to 28°F)<br />
New fallen snow<br />
+3°C to +1°C (38°F to 34°F)<br />
V40 BLUE EXTRA<br />
V60 RED/SILVER<br />
Old, transformed snow<br />
0°C to -5°C (32°F to 23°F)<br />
VR50 VIOLET<br />
Designed for moist to dry snow around freezing<br />
0°C (32°F). When used below freezing high<br />
humidity and transformed snow is required.<br />
New recipe without silver 2008.<br />
Old, transformed snow<br />
+2°C to 0°C (36°F to 32°F)<br />
VR70 KLISTERWAX<br />
Red. For wet and moist new snow. Works also<br />
on wet transformed snow down to 0°C (32°F).<br />
Apply thicker if very wet.<br />
V45 VIOLET SPECIAL<br />
New fallen snow<br />
0°C to -3°C (32°F to 27°F)<br />
Old, transformed snow<br />
-2°C to -6°C (28°F to 21°F)<br />
TIP:<br />
On older, transformed snow you wax<br />
softer than on fresh, new snow at the<br />
same temperature.<br />
54 55
KR-LINE KRYSTAL KLISTERS<br />
Frozen corn (old) snow<br />
KR20 BASE KLISTER<br />
Green Base Klister.<br />
-3°C to -25°C (27°F to -13°F).<br />
This is mainly a Base Klister and has<br />
high resistance against ice and hard<br />
coarse snow. To be used as the first<br />
layer for better adhesion of the other<br />
klisters to the base. Always apply indoors with a<br />
waxing iron appr. 110°C (230°F). Only cover the<br />
sanded grip zone. Heat the tube slightly for easier<br />
application. By “edging” the waxing iron you get a<br />
controlled equal distribution of the klister.<br />
Frozen corn (old) snow<br />
Frozen corn (old) snow<br />
Wet corn snow<br />
KR35 VIOLET SPECIAL KLISTER<br />
+1°C to -4°C (34°F to 25°F).<br />
For conditions around 0°C (32°F) and<br />
slightly colder. Good mid layer klister<br />
on top of green klister. Top klister, red<br />
or universal, will then not slide backwards.<br />
Frozen corn snow<br />
Transformed moist<br />
fine grained snow<br />
Wet corn snow<br />
KR60 VARIO KLISTER<br />
Red Klister for wet to moist snow.<br />
0°C to 5°C (32°F to 41°F).<br />
For changeable conditions right<br />
around freezing with the ideal range<br />
on the warm side. It works in moist, medium<br />
coarse to coarse snow up to appr. +5°C (41°F).<br />
Wet corn snow<br />
KB20 GREEN BASE KLISTER SPRAY<br />
First klister layer to be applied.<br />
To be used with regular klister<br />
on top, or aerosol Quick Klister.<br />
For Racing, Sport and Recreation.<br />
Spray noozle for upside down application<br />
that gives better control and<br />
less waste. The new spray nozzle<br />
makes it easy to apply a thin layer of<br />
base klister with only one stroke.<br />
Frozen corn snow<br />
Wet corn snow<br />
K22N VM UNIVERSAL KLISTER<br />
+10°C to -3°C (50°F to 27°F).<br />
Improved flexibility toward finegrained<br />
moist snow, without icing<br />
up. Improved grip on wet, coarsegrained<br />
snow. Improved “feeling”. To be applied<br />
as the final layer of klister. Comparable to the old,<br />
famous VM-klister from 1982. Frequently used in<br />
World Cup competition.<br />
KR30 ICE KLISTER<br />
Blue ice klister.<br />
0°C to -15°C (32°F to 5°F).<br />
For coarse snow/hard tracks and<br />
icy conditions. Is excellent on hard<br />
packed coarse cold snow, but can also<br />
be an alternative to KR20 as base klister.<br />
It is easier to apply than KR20. It is also often<br />
used as the “in between” klister on top of KR20.<br />
KR30 is rarely used as the last layer in a ski race<br />
due to the preparation of the tracks. For general<br />
skiing on cold mornings after it has been wet the<br />
day before, it is a highly useful product.<br />
Transformed moist<br />
fine grained snow<br />
Wet corn snow<br />
KR50 FLEXI KLISTER<br />
Violet Flexi klister.<br />
+3°C to -4°C (37°F to 25°F).<br />
Flexi differs from the other klisters by being<br />
made for more varied snow, from fine to coarse.<br />
The ideal range is slightly on the colder side,<br />
but gives also grip above freezing.(32F). It is the<br />
klister that can take the most fine grained snow<br />
of all klisters in the market. The reason is that<br />
KR50 contains silver. Compared to KR21N Silver<br />
Universal it is slightly harder and can thus take<br />
colder and more finegrained snow.<br />
KR70 AQUA KLISTER<br />
Dark Red klister for wet coarse<br />
snow +2°C to +12°C (36°F to 52°F).<br />
Used when the snow has a high water<br />
content such as slush. The KR70 is<br />
the softest among the Swix klisters<br />
and will thus handle coarse wet snow<br />
the best.<br />
Frozen corn snow<br />
Transformed moist<br />
fine grained snow<br />
Wet corn snow<br />
K21N SILVER UNIVERSAL<br />
+3°C to -5°C (37°F to 23°F).<br />
For mixed wet and dry snow conditions<br />
(fine/medium coarse) to coarse, moist<br />
snow. Can be used on both sides of freezing but is<br />
more used on finer snow than K22 VM Universal.<br />
K21N is somewhat softer than KR50 FLEXI and<br />
gives better grip when it gets warmer and has<br />
thus a wider range than KR50.<br />
56 57
ZERO-CONDITIONS<br />
First, we must define what we mean by the<br />
term ”zero-conditions”. In ski terminology “zeroconditions”<br />
means a situation characterized by<br />
air-temperature close to the melting-point, 0°C,<br />
in addition, there is typically falling or new fallen<br />
snow, which is usually moist. The conditions are<br />
further characterized by shiny, icy tracks after<br />
some use. Note that temperatures close to zero<br />
do not always result in the same challenge to<br />
waxing. If the snow has gone through one or more<br />
cycles of melt-freeze, the snow consistency does<br />
not change that rapidly around the critical temperature<br />
of 0°C.<br />
Due to the fact that kick waxes for these conditions<br />
are relatively soft, they are vulnerable to<br />
icing. Although it might be somewhat difficult<br />
to find the right wax for skating, the problems<br />
are mainly involving classical skiing. There are<br />
no exact rules to follow; however, we will give<br />
some general advice. As always, the choice of wax<br />
depends upon snow consistency, air-humidity and<br />
temperature. Just small variations in temperature<br />
cause large changes in snow consistency around<br />
the melting point where both ice, water and<br />
water-vapor might exist together. Falling or new<br />
fallen snow around zero normally calls for a soft<br />
type of hard-wax. Klisters are too soft. With more<br />
transformed snow and snow gradually building up<br />
free water, klisters begin to work.<br />
In between the extremes of using hard-wax<br />
and klister, there are many possible combinations,<br />
involving thin layers of klister, covered by hard<br />
wax. The hard wax protects towards icing and the<br />
bottom klister works as a “pillow”, giving improved<br />
kick.<br />
The Kick Zone<br />
Advanced skiers frequently have more than one<br />
pair of skis, selected for different snow conditions.<br />
In the racing shops you will find assistance<br />
to measure your personal kick-zone, depending<br />
upon weight, technique and ambition level.<br />
For racing, it is often common to have pairs for<br />
dry snow and pairs for klister conditions. The kick<br />
zone then is adjusted to the different conditions.<br />
If you have only one pair, to be used in all conditions,<br />
it is practical to have kick zone markings<br />
for dry snow, zero-conditions and klister. In this<br />
case the length will be shortest for the klister.<br />
However, it is hard to find a pair, working well in all<br />
conditions, due to differences in ski-constructions<br />
and base materials, but it is possible to do efficient<br />
adjustments to the glide zones using rilling<br />
tools.<br />
Waxing alternatives for different<br />
snow conditions<br />
Below we have given alternative solutions for<br />
waxing by different conditions. As mentioned,<br />
zero-conditions imply that small differences in the<br />
choice of wax might have large conse quences on<br />
the performance. Therefore, we always recommend<br />
accurate testing on the actual site. Even<br />
“experts” fail from time to time. Learn from experience<br />
and do the experiments while training and<br />
then trust your knowledge when racing!<br />
Falling and new-fallen moist snow<br />
Apply one layer of VG30 base wax by warming it<br />
into the base with an iron temperature of 110°C.<br />
Let the skis cool down to room-temperature.<br />
Apply a layer of V30 Blue, which also is warmed by<br />
iron at 110°C. Work carefully so that the blue wax<br />
covers the base wax and does not blend into it.<br />
Let it cool and work by cork T10 or T12 synthetic<br />
cork to make the surface smooth.<br />
Then cover this with thin layers of VR55,<br />
corking in between each layer. The number of<br />
layers depends upon ski stiffness, but normally<br />
we recommend 3-4 layers. If the skis are slippery,<br />
more layers or working with the softer waxes<br />
(VR60, VR65, VR70, VR75) are the two alternatives.<br />
It is not always necessary to start with the<br />
VR55. After some experience you might go directly<br />
to one of the softer waxes. However, there is a<br />
general rule to start hard and go softer. A soft wax<br />
which ices up has to be removed before a harder<br />
wax is applied.<br />
Tip 1: Use a relatively new cork working with soft<br />
kick waxes. On zero-conditions we stress the<br />
importance of exact corking. All irregularities in<br />
wax thickness might introduce icing.<br />
Tips 2: Do sufficient testing to judge the kick.<br />
In zero weather the skis often feel slippery in the<br />
beginning, but work well after the first 5-600<br />
meters. It is a common mistake to judge too early<br />
by testing too short, and go back and apply a wax a<br />
little softer, which might ice up or go too slow.<br />
Slush and falling wet snow («rubbingconditions»)<br />
Alt. 1<br />
Apply VG30 and V30 as described above. Apply 3<br />
layers of VR70, the last layer melted at 80-85°C.<br />
Work slightly to obtain a smooth, shiny surface,<br />
without pushing the wax to the sides or into the<br />
groove.<br />
Alt. 2<br />
Same procedure as Alt. 1, but substitute VR70<br />
with VR75. This might be a good alternative in<br />
steady precipitation.<br />
Alt. 3<br />
Spray on a layer of KB20 spray base klister. Then<br />
apply a thin layer of K21 silver universal klister.<br />
Once more we repeat the importance of a smooth,<br />
even layer. Let the skis cool down to surrounding<br />
temperature. Then add a layer of VR75 which<br />
should be ironed at 80°C (same as Alt. 1).<br />
Alt. 4<br />
Use Zero-skis (or rubbed skis). In many cases this<br />
will correspond to the ideal range of Zero-skis.<br />
See treatment of those below.<br />
Tip: Keep the skis moving; do not take off the skis<br />
outside the track. To go outside the trail, might<br />
cause instant icing.<br />
Glossy, shiny trails<br />
Alt. 1<br />
Spray on a layer of KB20 spray base klister. Then<br />
apply one thin layer of K22 VM universal klister.<br />
Smooth, even the layer out. Cool to surrounding<br />
temperature. Apply one layer of VR70 which then<br />
is ironed at 80-85°C.<br />
Alt. 2<br />
As Alt. 1, but K22 VM and K21 are blended in equal<br />
ratio.<br />
Alt. 3<br />
Apply one layer of KB20 spray base klister. Cover<br />
this with one layer of K22 VM universal klister.<br />
This alternative demands wet snow conditions.<br />
General tip: Zero conditions seldom cause much<br />
wear. A thick layer of wax is not necessary and<br />
might reduce glide too much.<br />
58 59
Zero skis<br />
The new Zero skis might be an ideal alternative<br />
on falling or new fallen snow close to 0°C.<br />
All major ski brands now carry such models. They<br />
have a special rubber/polymer blend material in<br />
the kick zone, which to a certain degree can be<br />
manipulated by sanding paper. The grit# to use<br />
is determined by track and snow conditions. Most<br />
common are #60 to #100.<br />
General tip<br />
With precipitation a combination of #80 and<br />
#100 is satisfactory. These conditions are characterized<br />
by a continuously supply of moist snow,<br />
never creating very hard or glossy trails.<br />
With shiny tracks a more coarse paper might<br />
be used such as #60 and #80.<br />
Remember that Zero skis are not always the<br />
solution for difficult conditions. During long lasting<br />
competitions or tracks having large altitude<br />
differences, conditions might alternate or change.<br />
In such cases, the alternatives of using traditional<br />
wax, might work better.<br />
PROCEDURE FOR RUBBING<br />
1.<br />
Set the marks for the kick zone, about the same<br />
length as for soft kick waxes.<br />
2.<br />
Roll the sanding paper around a waxing cork to<br />
get a stable surface for working.<br />
3.<br />
Sand the kick zone by working at a 45 degree<br />
angle, towards the running direction along the<br />
kick zone. Repeat the process from the other side,<br />
thus creating an arrow pattern towards speed<br />
direction.<br />
4.<br />
Remove dust and debris with Fiberlene (T150) or<br />
similar.<br />
5.<br />
You can now repeat point 2-4 using a finer grit#<br />
paper. Two different grits are often used, but<br />
always start with the more coarse one.<br />
6.<br />
Lastly, treat the base with Zero spray (N0002).<br />
Keep the bottle 4-5 cm from the base, spray on<br />
both sides of the groove (4-5 sec. on each side).<br />
Let the skis dry for 2-3 minutes before use. It is<br />
also possible to work in Cera F powder (FC8X) by<br />
hand to the rubbed kick zone.<br />
a<br />
b<br />
c<br />
SANDING<br />
PAPER<br />
#60 Coarse<br />
Abrasive<br />
55 cm/60 cm<br />
SANDING<br />
PAPER<br />
#80 Medium<br />
Coarse Abrasive<br />
55 cm/60 cm<br />
7.<br />
The kick zone will always collect dirt. Cleaning<br />
with a wax remover (I64 or I74) is recommended.<br />
Let the ski dry for 30 minutes.<br />
d<br />
3 min.<br />
60 61
APPLICATION OF BASE WAX<br />
1.<br />
Sand the grip zone with #100 grit paper (T330 Sand<br />
Paper or T11 Combi Sanding Block) approximately<br />
60-65 cm. Wipe off dirt and base residue with<br />
Fiberlene (T150). We recommend sanding only in the<br />
tip to tail direction of the ski to prevent rounding-off<br />
of the side-edges. Sanding should always take place<br />
AFTER treatment of the glide zones, to avoid getting<br />
glide wax/powder into the kick zone.<br />
2.<br />
Apply a thin layer of base wax (VG35 or VG30)<br />
in the kick zone.<br />
3.<br />
Iron (110°C to 80°C) and let the wax cool off for<br />
a few minutes.<br />
4.<br />
Apply a layer of V30 Blue (or V40 Blue Extra).<br />
5.<br />
Swiftly move the warm iron over the kickzone<br />
once more. This wax layer should melt<br />
on top of the base wax and not mix with it.<br />
Let cool off and cork out.<br />
HARD WAXES<br />
(0°C and colder)<br />
Grip waxes are available in many different consistencies<br />
(hardness and tackiness) meaning different<br />
application methods are essential for the best<br />
results. Hard waxes for colder snow temperatures<br />
(VR30-VR50 and V05-V45) are easier to apply<br />
than the softer, warmer ones (VR55-VR75 and<br />
V50-V60); but a few simple tricks make it easy to<br />
use the soft waxes.<br />
Tip 1:<br />
It is possible to build the layers like a “pyramid”,<br />
applying thinner and thinner layers, ending up<br />
with the thickest layer under the foot.<br />
Tip 2:<br />
Try not to apply the wax with thick layers. You will<br />
get a better result by applying more thin layers<br />
than fewer thick ones.<br />
Tips 3:<br />
When corking in the hard wax do not apply too<br />
much pressure. You will have better performance<br />
from your kick wax if you leave some “structure or<br />
texture” in the wax.<br />
Tips 4:<br />
Apply the first layers indoors, but it is always<br />
an advantage to apply the last layers outdoors.<br />
Let the ski adjust to the air temperature outside<br />
before testing.<br />
6.<br />
Select the actual kick wax of the day.<br />
Apply 4-8 thin layers, cork between<br />
each layer.<br />
SOFT WAXES<br />
(0°C and warmer)<br />
Base wax is applied the same way as described in<br />
points 1 to 5 above. As an alternative, points 2 and<br />
3 could be substituted with Application of Base<br />
Klister (page 62 in this manual).<br />
Try to apply the layers of wax as thin as possible.<br />
Softer kick waxes will naturally be thicker<br />
than when using harder waxes; therefore, it is<br />
normal to apply fewer layers of soft waxes.<br />
Tip 1:<br />
The colder the wax, the more easy the application.<br />
Apply outdoors or put the wax in the fridge or the<br />
snow before application.<br />
Tips 2:<br />
Soft waxes are easier to cork out using a new<br />
cork. If you cork too hard you risk the wax getting<br />
a “chewing gum consistency”. Consequently, use<br />
light pressure and more strokes.<br />
Tips 3:<br />
Cork to an exact, even layer. This way the risk of<br />
icing-up is greatly reduced.<br />
TIP:<br />
Angle the wax against the base and<br />
the application becomes easier!<br />
62 63
APPLICATION OF BASE KLISTER (KB20)<br />
APPLICATION OF KLISTERS<br />
1.<br />
Sand the grip zone with #100 grit paper<br />
(T330 Sand Paper or T11 Combi Sanding Block)<br />
approx. 60-65 cm. We recommend sanding<br />
only along the length of the ski to prevent<br />
rounding of the ski side-edges. Sanding<br />
should always take place AFTER treatment of<br />
the glide zones, to avoid getting glide wax/<br />
powder into the kick zone. Wipe off dirt and<br />
base residue with Fiberlene (T150).<br />
2.<br />
Fasten a small piece of tape at the end of each<br />
kick zone to prevent any klister in the glide<br />
zones.<br />
3.<br />
Apply the base klister by holding the<br />
bottle upside-down and move it slowly<br />
along the ski on both sides of the groove.<br />
Distance between base and nozzle should be<br />
4-5 cm.<br />
4.<br />
Use the forefinger to remove klister in<br />
the groove.<br />
5.<br />
Then carefully use your thumb on each side<br />
of the groove to smooth out the klister. It is<br />
important that you smooth out the klister<br />
immediately after spraying.<br />
Remove the tape and let the klister dry for<br />
2-3 minutes. The ski is now ready for the next<br />
klister/wax layer (step 4 and 5 page 65).<br />
1.<br />
Sand the kick zone with #100 grit paper (T330<br />
Sand Paper or T11 Combi Sanding Block).<br />
Approx. 60-65 cm.<br />
Always do the sanding after the glidezones<br />
are all finished and brushed to avoid getting<br />
glidewax like Cera F powder into the kick zone.<br />
The kick zone for klister in top racing is generally<br />
about the same as for hard wax, somewhat<br />
longer than many realize.<br />
2.<br />
Apply the first layer of klister very thin,<br />
just covering the sandpapered area.<br />
KB20 or KR20 is a strong and durable klister<br />
normally selected as a base for KR30, KR35,<br />
KR50, KR60 and KR70. KR30 can also be used<br />
as the first layer of klister, i.e. as a base for<br />
KR60 or KR70 in wet snow conditions.<br />
3.<br />
Iron the first layer of klister carefully into the<br />
ski base. Thereby a much better contact is<br />
achieved between klister and ski.<br />
Let the ski cool.<br />
4.<br />
Apply the middle layer of klister. KR35 and<br />
KR30 are the most used. Apply it in a fish bone<br />
pattern. Use a heatgun lightly to<br />
soften it, and rub it in with the thumb to<br />
an even layer.<br />
Let the ski cool.<br />
5.<br />
Select and apply the klister of the day.<br />
Use a heatgun lightly and rub it in with the<br />
thumb to an even layer. Scrape the groove<br />
with the Groovescraper (T88).<br />
64 65
AFTER THE RACE<br />
5.<br />
Brush firmly with the Bronze Brush (T162).<br />
The ski is now ready for application of new<br />
glide wax.<br />
THE USE OF GLIDE WAX CLEANER (I84) -<br />
GLIDE SECTION/SKATING <strong>SKI</strong>S<br />
1.<br />
Brush lightly with the Steel<br />
Brush (T179) or Bronze Brush<br />
(T162).<br />
6.<br />
Apply the travel wax: The most likely wax to be<br />
used in the next race. National Teams use often<br />
HF8 or LF8. BP88 is also an alternative. Iron in.<br />
2.<br />
Moisten a piece of Fiberlene (T150) and apply<br />
to the glide zone of the base.<br />
KICK SECTION<br />
1.<br />
Remove as much as possible<br />
using a scraper (T87 or T85).<br />
3.<br />
Rub forward and backward a few times with<br />
a Nylon Brush (T161B).<br />
2.<br />
The remainder is taken away with wax remover<br />
(I64) and Fiberlene (T150).<br />
Don’t forget the sides and the tops of the skis.<br />
4.<br />
Wipe off as much as possible with Fiberlene<br />
(T150).<br />
Let the ski dry for 5-10 minutes.<br />
3.<br />
Wipe off as much as possible with Fiberlene<br />
(T150).<br />
Let the ski dry for 5-10 minutes.<br />
66 67
Base Cleaners and<br />
Accessories for Removal of<br />
Hard Waxes, Klisters and<br />
Glide Waxes<br />
Waxes and klisters to a high degree consist<br />
of water-resistant, inert, tough stable materials.<br />
This means that they are also difficult to remove<br />
from the ski base. Solvents are necessary for thorough<br />
base cleaning.<br />
Swix Base Cleaner and Swix Citrus Solvent are<br />
both formulated to minimize health and fire hazards.<br />
Traditional solvents like trichlorethylene or<br />
methylenechloride were frequently used as<br />
solvents for oil, fat and also waxes. These high<br />
aromatic solvents, however, are considered<br />
as health hazards and should be avoided. They are<br />
not found in the Swix wax removers.<br />
SWIX BASE CLEANER<br />
The active ingredient in<br />
the 500 ml (I0064) and 1<br />
liter (I0067) is a low aromatic<br />
hydrocarbon with good<br />
solven t capacity.<br />
CLEANER FOR FLUOR GLIDE<br />
WAX / CONDITIONER FOR<br />
RACING <strong>SKI</strong>S<br />
Makes the ski faster!<br />
Cleaner for fluoro glide wax<br />
and CH wax. Solves fluoro<br />
components, improves glide<br />
and conditions the base.<br />
For glide sections on all racing<br />
skis.<br />
I0084: 500 ml/17.5 fl. oz.<br />
I0084-150: 150 ml/5 fl.oz.<br />
SWIX WAXING TABLES AND PROFILES<br />
To secure good waxing results it is mandatory to have the right working conditions: Good light and<br />
stable waxing benches.<br />
SWIX CROSS COUNTRY<br />
ADJUSTABLE PROFILE (T0793)<br />
mounted with legs (T0079-1).<br />
• Turns your profile into a traveling<br />
wax bench.<br />
• Ideal for the traveling racer and<br />
coach.<br />
• Provides great stability.<br />
• Use alone on your existing wax<br />
bench or with legs (T0079-1).<br />
• Compact, fits into your ski bag.<br />
• Adjustable length.<br />
• Locks into the skibinding.<br />
SWIX WAXING TABLE (T0076) mounted with profile (T0769),<br />
skiholder (T0076SH) and waxing light (T0076WL).<br />
SWIX CITRUS SOLVENT<br />
(I0074)<br />
500 ml Citrus Solvent is a<br />
100% citrus-based product,<br />
which also is a strong solvent.<br />
FIBERLENE CLEANING TOWEL,<br />
50 m (T0150).<br />
68 69
PR1023E<br />
ENGLISH $5<br />
SWIX SPORT AS<br />
P.O Box 814, N-2626 Lillehammer.<br />
Tel.: (+47) 61 22 21 00<br />
www.swixsport.com<br />
Cover photo: Nordic Focus<br />
Photos: Swix Sport AS & Nordic Focus<br />
Printed on recycled paper in Norway<br />
by BK Gruppen<br />
70