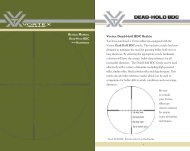
Download Brochure (3 MB) - Vortex Optics
Download Brochure (3 MB) - Vortex Optics
Download Brochure (3 MB) - Vortex Optics

You also want an ePaper? Increase the reach of your titles
YUMPU automatically turns print PDFs into web optimized ePapers that Google loves.
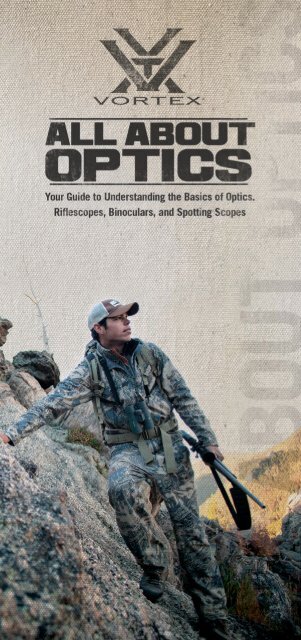
THE BASICS OF OPTICS<br />
QUALITY p.4 SPECIFICATIONS p. 6 TRADE-OFFS p.10<br />
For hundreds of years, people have used optics to<br />
enhance vision, as well as optimize effectiveness of<br />
shooting equipment. Whether glassing up that big buck,<br />
taking aim, or simply observing the natural world, great<br />
optics make great experiences. <strong>Optics</strong> can be very taskspecifi<br />
c. For that reason, we want to make sure you’re<br />
armed with enough information to choose the right tool<br />
for the job. So come on in and let’s talk optics.<br />
For specifi c information, see page references below.<br />
Rifl escopes – p. 12 | Binoculars – p. 24 |<br />
Spotting Scopes – p. 32<br />
2<br />
<strong>Vortex</strong> <strong>Optics</strong><br />
<strong>Vortex</strong> <strong>Optics</strong> at www.vortexoptics.com<br />
3
DETERMINING QUALITY<br />
OPTICAL GLASS<br />
Quality optics use dense optical glass that is painstakingly<br />
designed, shaped, and polished to eliminate flaws. When a<br />
product features more sophisticated optical design techniques<br />
and glass, the results are better images. The quality of the optical<br />
glass will make a difference in how bright, sharp, and colorful a<br />
view will be.<br />
ANTI-REFLECTIVE LENS COATINGS<br />
Metallic compounds, such as magnesium fluoride, are<br />
vaporized and applied to the optical glass in extremely thin<br />
layers to reduce internal reflections, light scattering and<br />
glare. The result of adding more layers of an anti-reflective<br />
lens coating to a greater number of glass surfaces is an<br />
improvement in image brightness, sharpness and contrast in<br />
low light.<br />
Standard glass provides good image quality.<br />
Extra-low Dispersion Glass achieves the highest possible image<br />
resolution, contrast, and color fidelity—exact properties vary<br />
among manufacturers. Some of the common names for this type of<br />
glass include: HD (High Density or High Definition), ED (Extra-low<br />
Dispersion) and XD (Extra-low Dispersion).<br />
CONSTRUCTION<br />
You may pay more for products using higher quality materials,<br />
more sophisticated designs and stricter tolerances, but this adds<br />
up to greater reliability in the field.<br />
Waterproof / Fogproof binoculars are sealed with o-rings to inhibit<br />
moisture, dust, and debris. The inside of the binocular is then purged<br />
of atmospheric air and filled with an inert gas that has no moisture<br />
content. This will prevent internal fogging from high humidity or<br />
altitude changes.<br />
>> Nitrogen gas purging delivers fogproof, waterproof performance.<br />
>> Argon gas purging guarantees superior fogproof and waterproof<br />
performance.<br />
TIP Keep in mind that an investment in better optics may cost<br />
more. However, investing in higher quality optics not only yields<br />
better optical gain, but greater reliability when it counts.<br />
Why anti-reflective coatings are needed.<br />
Anti-reflective coatings increase the amount of light that<br />
passes through the optical system so more light gets to your<br />
eye. The type and number of coatings applied to the lenses in<br />
a binocular or spotting scope make a significant difference in<br />
how brilliant and crisp the views will be.<br />
Each time light strikes an uncoated glass surface about 4–5<br />
percent of the light is reflected. Without lens coatings, almost<br />
50 percent of the light could be lost as it passes through<br />
the multiple air-to-glass surfaces of a standard binocular or<br />
spotting scope.<br />
UNCOATED LENSES<br />
COATED LENSES<br />
TIP The application of more coatings results in an increase of<br />
light transmission, resolution, contrast, and color fi delity.<br />
Levels of anti-reflective coatings<br />
Fully multi-coated optics have all air-to-glass surfaces coated with<br />
multiple anti-reflective coating films, and offer the highest image<br />
quality.<br />
Fully-coated optics have all air-to-glass surfaces coated with an<br />
anti-reflective coating film.<br />
Multi-coated optics have one or more surfaces coated with multiple<br />
anti-reflective coating films.<br />
Coated optics have one or more surfaces coated with one or more<br />
anti-reflective coating films.<br />
THE BASICS OF OPTICS<br />
4 <strong>Vortex</strong> <strong>Optics</strong><br />
<strong>Vortex</strong> <strong>Optics</strong> at www.vortexoptics.com<br />
5
SPECIFICATIONS<br />
Knowing what features matter to your use of optics is important.<br />
What follows is an explanation of basic features and specifications<br />
to understand so you select optics that will perform to the level<br />
you need when out in the field.<br />
EYE RELIEF<br />
The term eye relief refers to the distance between the ocular lens<br />
and where the image comes to focus and the entire field of view<br />
can be viewed. Proper eye relief is important for safe, comfortable<br />
viewing.<br />
FIELD OF VIEW<br />
Another important number to understand is the field of view.<br />
When looking through an optic, you’ll see the field of view as the<br />
area between the left and right edges of the image. The field of<br />
view can be measured either in linear feet or in angular degrees.<br />
(One degree equals 52.5 feet).<br />
» Riflescopes: measured in feet @ 100 yards<br />
» Binoculars: measured in feet @ 1,000 yards<br />
» Spotting Scopes: measured in feet @ 1,000 yards<br />
Riflescopes: A minimum distance of three inches or more provides<br />
safe eye relief when viewing.<br />
FIELD OF VIEW<br />
Binoculars and Spotting Scopes: Proper eye relief is important to<br />
people who must wear eyeglasses or sunglasses while looking through<br />
optics. However, anyone planning to view for long stretches of time will<br />
also benefit from optics with longer eye relief.<br />
TWIST-STYLE EYECUPS<br />
Adjustable eyecups allow for the best viewing if you wear eyeglasses.<br />
Eyecups that twist up-and-down or fold back are common styles that are<br />
easily adjusted to accomodate eyeglasses or sunglasses.<br />
CLOSE FOCUS<br />
This is the minimum distance to which you can focus an optic on<br />
your subject. Close focus is more important for some applications<br />
than others. For example, many binoculars will focus down to ten<br />
feet or less—a feature that is especially important for watching<br />
butterflies, insects and birds.<br />
FOLD-STYLE EYECUPS<br />
A wide fi eld of view has advantages when following fast-moving action<br />
or scanning dense habitats. When comparing optics with the same<br />
size objective lenses, higher magnifi cations will generally have a<br />
narrower fi eld of view.<br />
THE BASICS OF OPTICS<br />
6 <strong>Vortex</strong> <strong>Optics</strong><br />
<strong>Vortex</strong> <strong>Optics</strong> at www.vortexoptics.com<br />
7
EXIT PUPIL<br />
This is the beam of light that exits each eyepiece and enters the<br />
user’s eyes. You’ll want to have an exit pupil that is adequate for<br />
the lighting situation in which you’ll be viewing. A person’s eye<br />
pupil can dilate from roughly 2 mm to 8 mm, depending on the<br />
person’s age and the lighting situation:<br />
RESOLUTION<br />
Resolution refers to the ability of an optic to distinguish details.<br />
A resolution chart contains groups of lines set in a series with<br />
progressively smaller spacing—a design used to ascertain the<br />
limiting number of lines per millimeter that optics can resolve.<br />
RESOLUTION CHART<br />
» In bright light the pupil will dilate to about 2–3 mm.<br />
» At dawn or dusk the pupil will dilate to about 4–5 mm.<br />
» In dark light the pupil will dilate to about 7–8 mm.<br />
A larger exit pupil will deliver brighter images—especially under<br />
low light conditions.<br />
EXIT PUPIL<br />
Look for the exit pupil by holding the optics a short distance from<br />
your face—seen as clear circles in the center of the eyepiece.<br />
TIP Calculate the exit pupil by dividing the objective lens by the<br />
magnifi cation.<br />
Example: 10x50 Binocular<br />
50 ÷ 10 = 5.0 mm<br />
TIP Use a resolution chart to determine how well a binocular,<br />
spotting scope, or rifl escope can resolve fi ne details.<br />
WARRANTY<br />
A manufacturer’s warranty ought to be considered a feature of<br />
the binocular—especially if you use the optics outdoors where<br />
anything can happen. Most warranties offer a warranty limited<br />
only to initial defects with no protection from accidental damage<br />
or regular wear and tear. Progressive warranties cover optics in<br />
any situation, no matter what happens or who is at fault.<br />
TIP The <strong>Vortex</strong> VIP warranty is an unconditional, unlimited<br />
warranty that offers the ultimate in customer service and protection<br />
for your optics.<br />
THE BASICS OF OPTICS<br />
8 <strong>Vortex</strong> <strong>Optics</strong><br />
<strong>Vortex</strong> <strong>Optics</strong> at www.vortexoptics.com<br />
9
TRADE-OFFS TO CONSIDER<br />
Yes, there are trade-offs and, no, there are no perfect optics. So,<br />
consider the following trade-offs when selecting optics.<br />
OBJECTIVE LENS SIZE<br />
Objective lens size is the main trade-off to consider. A larger<br />
objective lens will deliver brighter images, especially under low<br />
light conditions, but it will be heavier and bulkier than a smaller<br />
lens. Think about how much you want to carry!<br />
OPTICAL GLASS QUALITY<br />
Optical glass changes in weight as the quality increases. <strong>Vortex</strong><br />
offsets the extra weight of the high-quality glass components by<br />
using rugged, yet lightweight, housing materials.<br />
MAGNIFICATION<br />
Choosing the higher magnification option has benefits, but it may<br />
not always be the best choice for observation.<br />
Binoculars: As the magnification increases, you’ll see a shallower<br />
depth of field, a diminished field of view, and you may experience a<br />
greater chance of image shake when viewing.<br />
Spotting Scopes: As the magnification increases, you’ll see a reduction<br />
in image brightness.<br />
CLOSE FOCUS AND DEPTH OF FIELD<br />
In general, optics with a close focus will generally have a shallow<br />
depth of field.<br />
MORE OPTICS TERMS<br />
Alignment or Collimation – All elements (lenses or prisms) are in<br />
line along the optical axis. The misalignment of elements results in<br />
diminished performance and can cause eye strain and fatigue.<br />
Astigmatism – Because the lenses in a binocular or spotting scope<br />
usually have a curved shape, the light rays passing through the lens<br />
will not all converge on the same focal plane. If this physical reality<br />
isn’t remedied in the overall optical design, images will either be in<br />
focus in the center area or at the edge—but not in both areas at the<br />
same time. Astigmatism cannot be eliminated completely, but it can<br />
be kept to a minimum. Avoid optics that exhibit too much astigmatism.<br />
Chromatic Aberrations – Diminished resolution and color fidelity<br />
display as green or purple fringing. This is the result of a physical<br />
reality of color. Different colors move at slightly different wavelengths<br />
and will have slightly different focal lengths when passing through<br />
optical glass. The XD and ED glass types reduce or eliminate this<br />
inherent problem of chromatic aberrations.<br />
Contrast – This refers to differences in brightness between the light<br />
and dark areas of an image. Because we see much of the color<br />
spectrum, contrast also refers to differences in the dimensions<br />
of hue, saturation, brightness, or lightness. <strong>Optics</strong> with superior<br />
contrast transmit colors that appear very dense and well-saturated.<br />
Distortion – This is the inability of an optical system to deliver an<br />
image that is a true-to-scale reproduction of an object. There are<br />
two types of distortion. In either case, the distortion is due to a poor<br />
or compromised optical design. Any binocular or scope that exhibits<br />
distortion should be avoided.<br />
Barrel distortion – Image bows outward and looks bulged.<br />
Pincushion distortion – Image bends inward.<br />
Light Transmission – This is the percentage of light that passes<br />
through the binocular, spotting scope, or riflescope to reach the<br />
user’s eyes. Light transmission will be higher through more expensive<br />
optics than through modestly priced optics due to better optical<br />
designs, glass quality, and improved optical coatings.<br />
Resolution – Essentially the same as image sharpness, resolution<br />
is the ability of the binocular to separate and distinguish thin lines<br />
with clarity.<br />
THE BASICS OF OPTICS<br />
10 <strong>Vortex</strong> <strong>Optics</strong><br />
<strong>Vortex</strong> <strong>Optics</strong> at www.vortexoptics.com<br />
11
RIFLESCOPES<br />
THE CONTROLS p.14 THE NU<strong>MB</strong>ERS p. 21 RETICLES p.22<br />
Ready. Aim. Fire! Rifl escopes and their features are<br />
as varied as the firearms they can sit atop. The<br />
firearm, as well as its intended application will dictate<br />
which rifl escope will be the best fi t. Understanding the<br />
basics will make the right choice clear.<br />
12 <strong>Vortex</strong> <strong>Optics</strong><br />
<strong>Vortex</strong> <strong>Optics</strong> at www.vortexoptics.com<br />
13
UNDERSTANDING THE CONTROLS<br />
Windage, oculars and parallax—oh my! Riflescopes generally have<br />
several adjustable features. When broken down to the basics,<br />
many are commonly shared and relatively simple. Once basic<br />
feature terminology and their functions are understood, you’ll be<br />
able to select the right riflescope with pinpoint accuracy.<br />
Reticle Focus<br />
Magnifi cation<br />
Adjustment Ring<br />
Elevation<br />
Adjustment Knob<br />
Side Focus<br />
(Select Models)<br />
OCULAR FOCUS<br />
Use the ocular focus to tune the reticle image for maximum<br />
sharpness. This adjustment will be slightly different for every<br />
shooter, and only needs to be set one time. To adjust, begin by<br />
backing the focus out until the reticle is clearly fuzzy. While<br />
taking short, quick looks through the scope, turn the focus in<br />
until reticle image is sharp and crisp to the eye immediately<br />
upon viewing. Do NOT use this focus to adjust the target image.<br />
ADJUST THE RETICLE FOCUS<br />
Ocular Lens<br />
Windage<br />
Adjustment Knob<br />
Objective Lens<br />
TUBE DIAMETER<br />
Riflescope main tubes come in several diameters, including<br />
1 inch, 30 mm, 34 mm and 35 mm. Larger diameter tubes<br />
can provide increased travel ranges for windage and elevation<br />
adjustments as well as greater strengths. Being aware of tube<br />
diameter is also very important when selecting rings to mount the<br />
scope.<br />
1-Inch Tube<br />
30 mm Tube<br />
Tip A common misconception about greater tube diameter is<br />
that it always provides a brighter image; this is usually not the case.<br />
MAGNIFICATION ADJUSTMENT<br />
Use the magnification adjustment to change the “power” level<br />
of the riflescope— adjusting from low to high magnification<br />
depending on the shooter’s preference.<br />
Lower magnifications will provide brighter images and wider fields<br />
of view which can be helpful in low light and/or close-range shooting<br />
and with moving targets.<br />
Higher magnifications will have narrower fields of view and dimmer<br />
images, but will offer better ability to shoot smaller targets at longer<br />
ranges.<br />
ADJUST THE MAGNIFICATION<br />
RIFLESCOPES<br />
14 <strong>Vortex</strong> <strong>Optics</strong><br />
<strong>Vortex</strong> <strong>Optics</strong> at www.vortexoptics.com<br />
15
ELEVATION AND WINDAGE TURRETS<br />
Turrets are used to adjust the bullet’s point of impact down<br />
range, and will be marked in either MOA or MRAD scales.<br />
Turrets come in several styles, depending on user preferences.<br />
Exposed target-style turrets are used by long range shooters<br />
who routinely “dial” elevation corrections for bullet drop at long<br />
range.<br />
Arc Measurements<br />
MRAD (Milliradian) arc measurements are based on the concept of the<br />
radian. A radian is the angle subtended at the center of a circle by an<br />
arc that is equal in length to the radius of the circle. There are 6.283<br />
radians in all circles. Since there are 1,000 milliradians in a radian,<br />
there are 6,283 milliradians (MRADs) in a circle. An MRAD will always<br />
subtend 3.6 inches for each 100 yards distance.<br />
Most riflescopes using MRAD turrets will use 1/10 mrad mechanical<br />
clicks which subtend .36 inches for each 100 yards of distance.<br />
Elevation<br />
Knob<br />
Bullet Drop<br />
Windage Knob<br />
1 Radian<br />
1,000 Milliradians<br />
(MRADs)<br />
Capped style turrets are often used by shorter range shooters<br />
and hunters, who may prefer the security and lower profile of<br />
this type.<br />
Elevation<br />
Knob<br />
Windage Knob<br />
MOA (Minute of Angle) arc measurements are based on the concept of<br />
degrees and minutes in a circle. There are 360 degrees in a circle, 60<br />
minutes in a degree for a total of 21,600 minutes in a circle. An MOA<br />
will always subtend 1.05 inches for each 100 yards distance. Most<br />
riflescopes using MOA turrets will use ¼ minute mechanical “clicks”<br />
on the turret which subtend .26 inches for each 100 yards distance.<br />
Bullet Drop<br />
57.3 Degrees<br />
3,438 Minutes-of-Angle<br />
(MOAs)<br />
RIFLESCOPES<br />
16 <strong>Vortex</strong> <strong>Optics</strong><br />
<strong>Vortex</strong> <strong>Optics</strong> at www.vortexoptics.com<br />
17
IMAGE SHARPNESS<br />
Some riflescope models feature an adjustment that allows you to<br />
tune the target image for maximum sharpness. This adjustment<br />
may be on the objective lens or near the turrets on the side of the<br />
riflescope.<br />
Adjustable Objective Lens Focus – This adjustment dial is marked with<br />
approximate yardages to aid in initial setting, and should be matched to<br />
the targets distance. Final focus setting should be checked by moving<br />
shooters head back and forth slightly, watching for any shift of the<br />
reticle on the target (parallax). If shift is observed, the dial should be<br />
adjusted slightly until shift is removed. Once this focus is correctly set,<br />
shooting errors due to parallax will be eliminated.<br />
What is parallax<br />
Parallax is a phenomenon that results when the target image does<br />
not quite fall on the same optical plane as the reticle within the<br />
scope. This can cause an apparent movement of the reticle in<br />
relation to the target if the shooter’s eye is off-centered.<br />
» When the target image is not focused on the reticle plane<br />
and your eye is off-center behind the scope, parallax occurs.<br />
This is because the line of sight from the eye to the focused<br />
target image does not coincide with the reticle aiming point.<br />
Focused Image<br />
Reticle Aiming Point<br />
Adjustable Objective<br />
Lens Focus<br />
Reticle Plane<br />
Eye is not centered<br />
behind the scope.<br />
» When the target image is not focused on the reticle plane<br />
and your eye is centered directly behind the scope, no parallax<br />
occurs. This is because the line of sight from the eye to the<br />
focused target image coincides with the reticle aiming point.<br />
Side Focus Adjustment – This adjustment serves the exact same<br />
purpose as an adjustable objective, but is more conveniently located<br />
on the left side of the riflescope. The adjustment dial is marked with<br />
approximate yardages to aid in initial setting, and should be matched to<br />
the targets distance. Final focus setting should be checked by moving<br />
shooters head back and forth slightly, watching for any shift of the<br />
reticle on the target (parallax). If shift is observed, the dial should be<br />
adjusted slightly until shift is removed. Once this focus is correctly set,<br />
shooting errors due to parallax will be eliminated.<br />
Adjustable Side Focus<br />
Focused Image<br />
Tip Correctly focus the target image so it falls on the same optical<br />
plane as the reticle within the rifl escope.<br />
» When the target image is focused on the reticle plane,<br />
parallax cannot occur—even if your eye is not centered<br />
behind the scope. This is because the line of sight from the<br />
eye to the focused target image always coincides with the<br />
reticle aiming point no matter where you position your eye.<br />
Focused Image<br />
Reticle Plane<br />
Reticle Plane<br />
Reticle Aiming Point<br />
Reticle Aiming Point<br />
Eye is centered directly<br />
behind the scope.<br />
Eye can be centered anywhere<br />
behind the scope.<br />
RIFLESCOPES<br />
18 <strong>Vortex</strong> <strong>Optics</strong><br />
<strong>Vortex</strong> <strong>Optics</strong> at www.vortexoptics.com<br />
19
RETICLE ILLUMINATION ADJUSTMENT<br />
Use the reticle illumination adjustment to “light up” all or a portion<br />
of the reticle within a riflescope—allowing the reticle to be more<br />
easily seen against a dark background. The intensity level can<br />
usually be adjusted and is commonly placed on the ocular or left<br />
side of the scope, though it can be located in other positions.<br />
Illumination is normally powered by a small watch type battery.<br />
UNDERSTANDING THE NU<strong>MB</strong>ERS<br />
THE RIFLESCOPE CONFIGURATION<br />
Magnification is indicated by the first set of numbers in the example<br />
of a 4–16x50 riflescope—the magnification ranges from 4x up to<br />
16x. Some riflescopes do not have a zoom eyepiece and use a single<br />
number to indicate a fixed magnification, as in a 2x20 scope.<br />
Illumination Adjustment<br />
Knob<br />
Magnifi cation<br />
Scale<br />
ZERO STOP ADJUSTMENT<br />
Use the zero stop adjustment to prevent the elevation turret from<br />
being rotated downward past the point of original zero. It is most<br />
useful for shooters who routinely adjust the elevation turret “up”<br />
for long range shots, allowing them to always easily and accurately<br />
return “down” to their original zero setting. Zero stops are usually<br />
seen on higher quality long range or tactical riflescopes.<br />
Objective Lens Size is indicated by the last number in the 4–16x50<br />
example—referring to the diameter of the objective lens in<br />
millimeters. If all other things are equal, larger objectives can yield<br />
brighter images at high magnifications. This is an advantage for<br />
hunting at dusk and dawn when animals are most active.<br />
Adjusting the zero point.<br />
Objective Lens<br />
EYE RELIEF<br />
With proper eye relief, there will be a space cushion that<br />
protects the eye from recoil of the firearm. Keep in mind that<br />
eye relief typically decreases as magnification increases.<br />
RIFLESCOPES<br />
20 <strong>Vortex</strong> <strong>Optics</strong><br />
<strong>Vortex</strong> <strong>Optics</strong> at www.vortexoptics.com<br />
21
UNDERSTANDING RETICLES<br />
From the simple Plex crosshair to first focal plane hashmarkbased,<br />
mrad reticles with wind dot references—every reticle<br />
shines under certain conditions and when paired with an<br />
appropriate firearm.<br />
FIRST AND SECOND FOCAL PLANE RETICLES<br />
All reticles will be termed either first (FFP) or second (SFP) focal<br />
plane, depending on their internal location within the riflescope.<br />
FFP – This style of reticle will grow and shrink as magnification is<br />
changed. The main advantage to this style reticle is that the reticle<br />
subtensions used for ranging, bullet drop compensation and wind drift<br />
corrections are always accurate at any magnification.<br />
HOW TO RANGE WITH MRAD AND MOA RETICLES<br />
Using simple formulas, both MOA and mrad hashmarked reticles can<br />
be used to estimate distance. This is a useful skill—and provides a<br />
good back-up should your laser rangefinder fail or lose battery power.<br />
To range with a reticle formula, you can use either the vertical or<br />
horizontal scale. Place the reticle on a target of known width or<br />
height and read the number of mrads or MOAs spanned. You will<br />
obtain maximum accuracy in ranging by calculating as exact a<br />
measurement as possible—down to fractions of an mrad or MOA.<br />
Accurate measuring will depend on a very steady hold. The rifle<br />
should be solidly braced using a rest, bipod or sling when measuring<br />
the size of the target or nearby object. Once you have an accurate<br />
reading, use a formula to calculate the distance.<br />
Mrad Ranging Formulas<br />
Known Width or Height of Target (Yards) x 1000<br />
Target Width or Height (Measured on Reticle in MRADS)<br />
=<br />
Range (Yards)<br />
Known Width or Height of Target (Meters) x 1000<br />
Target Width or Height (Measured on Reticle in MRADS)<br />
=<br />
Range (Meters)<br />
Low Magnifi cation<br />
High Magnifi cation<br />
SFP – This style of reticle does not change size when magnification<br />
is changed. The advantage to this style of reticle is that it always<br />
maintains the same ideal visual appearance and will not appear “too<br />
fine” at low magnification or “too heavy” at high magnifications.<br />
Known Width or Height of Target (Inches) x 27.8<br />
Target Width or Height (Measured on Reticle in MRADS)<br />
MRAD EXAMPLE – Ranging a 6-foot<br />
target stand (2 yards) at 4 mrads to<br />
get 500 yards.<br />
=<br />
Range (Yards)<br />
Low Magnifi cation<br />
High Magnifi cation<br />
2 x 1000<br />
4 mrads<br />
500 Yards<br />
MOA Ranging Formula<br />
=<br />
Known Width or Height of Target (Inches) x 95.5<br />
Target Width or Height (Measured on Reticle in MOAs)<br />
MOA EXAMPLE – Ranging a 6-foot<br />
target stand (72 inches) at 10 MOA<br />
to get 688 yards.<br />
72 x 95.5<br />
10 MOA<br />
=<br />
688 Yards<br />
=<br />
Range (Yards)<br />
TIP You can substitute 100 for 95.5 for faster calculating,<br />
but this will produce a five percent over-estimation error of the<br />
yardage distance.<br />
RIFLESCOPES<br />
22 <strong>Vortex</strong> <strong>Optics</strong><br />
<strong>Vortex</strong> <strong>Optics</strong> at www.vortexoptics.com<br />
23
BINOCULARS<br />
DESIGN p.26 THE NU<strong>MB</strong>ERS p. 28 BASIC ADJUSTMENTS p.29<br />
What binocular should I get The answer to this<br />
question is generally found by asking another.<br />
What do you plan on using it for A person scouring a<br />
vast western landscape will have different needs from<br />
another who finds themself immersed in a stand of<br />
Midwest hardwoods. Read ahead about the various<br />
features of different binoculars and you’ll SEE what<br />
we’re talking about.<br />
24 <strong>Vortex</strong> <strong>Optics</strong><br />
<strong>Vortex</strong> <strong>Optics</strong> at www.vortexoptics.com<br />
25
BINOCULAR DESIGN<br />
There are three main binocular designs: the roof prism, Porro<br />
prism, and reverse Porro prism. These designs come in a variety of<br />
weights and sizes. The greatest factor in determining the weight of<br />
a binocular is the size of the objective lens: the larger the lens, the<br />
heavier the binocular.<br />
Compact binoculars generally have objective lenses of 28 mm or less<br />
and can weigh from a few ounces to under a pound.<br />
Mid-size binoculars include models with objective lenses between<br />
30 mm and 35 mm.<br />
Full-size binoculars generally have objective lenses over 35 mm and<br />
can weigh from twenty ounces to around two pounds.<br />
PORRO PRISM<br />
Many people will recognize the traditional binocular shape of a<br />
Porro prism by its offset barrels. Named after the Italian optical<br />
designer, Ignazio Porro, Porro prism binoculars have objective<br />
lenses that are spaced wider apart than the eyepieces. This design<br />
offers a rich depth of field, wide field of view, a three-dimensional<br />
image, and delivers good quality at a reasonable cost.<br />
Ocular Lens<br />
Center Focus<br />
Twist-up Eyecup<br />
Diopter<br />
Adjustment<br />
Strap<br />
Attachment<br />
Full-Size<br />
Models<br />
Mid-Size<br />
Model<br />
Compact<br />
Models<br />
ROOF PRISM<br />
Named for the roof-like appearance of the prisms, the roof prism<br />
binocular has objective lenses and eyepieces positioned in a<br />
straight line and is appreciated for a streamlined, durable chassis.<br />
Phase correction coatings on the prism glass keeps the light in<br />
correct color phases—enhancing the resolution, contrast and color<br />
fidelity. Fine quality in this complex prism design is possible as a<br />
result of care in engineering and design.<br />
Ocular Lens<br />
Diopter<br />
Adjustment<br />
Center Focus<br />
Tripod Adapter Socket<br />
Twist-up Eyecup<br />
Strap<br />
Attachment<br />
Objective Lens<br />
Objective Lens<br />
REVERSE PORRO PRISM<br />
The reverse Porro prism is a compact version of the full-size Porro<br />
prism binocular with the eyepieces spaced wider apart than the<br />
objective lenses.<br />
Ocular Lens<br />
Diopter<br />
Adjustment<br />
Center Focus<br />
Twist-up Eyecup<br />
Strap<br />
Attachment<br />
Objective Lens<br />
BINOCULARS<br />
26 <strong>Vortex</strong> <strong>Optics</strong><br />
<strong>Vortex</strong> <strong>Optics</strong> at www.vortexoptics.com<br />
27
THE NU<strong>MB</strong>ERS<br />
IDENTIFYING THE CONFIGURATION<br />
When you look at your binocular, you’ll notice numbers like 10x50<br />
(read as “ten by fifty”) printed on the binocular.<br />
10 x 50 Model<br />
The fi rst number (10x) refers to the magnification provided by<br />
the binocular (or how many times larger an object will appear<br />
than when viewed without magnification). Binoculars vary in<br />
magnification, but 8x and 10x are most common.<br />
TIP As magnifi cation increases, it may be more diffi cult to<br />
hold the binocular steady so the image may appear to shake. In<br />
addition, an increase in magnifi cation generally causes a decrease<br />
in image brightness. 7x or 8x magnifi cation is considered adequate<br />
for woodland settings, while 10x is preferred for viewing at greater<br />
distances.<br />
BASIC ADJUSTMENTS<br />
ADJUST THE INTERPUPILLARY DISTANCE<br />
The interpupillary distance (IPD) is a measurement of the distance<br />
between the centers of a person’s left and right eye pupils. A<br />
binocular also has an IPD measurement that can be adjusted.<br />
The hinged design of a binocular allows you to match the IPD of<br />
your eyes to that of the binocular so that you see a single image<br />
that is free of shading. If the IPD is not correctly adjusted, you<br />
may see shading over part of the image. With correctly adjusted<br />
binoculars, you will see a single image without the shading.<br />
IPD<br />
The IPD corresponds to<br />
the spacing between a<br />
person’s eyes.<br />
To adjust the IPD of your binocular, simply rotate the binocular<br />
barrels inward or outward to line up the ocular lenses with your<br />
eyes.<br />
The second number (50) refers to the diameter of the objective<br />
lens in millimeters. Objective lenses vary in size from 15 mm to<br />
50 mm and beyond. The size of the objective lens determines<br />
how much light the binoculars can receive and how bright the<br />
resulting images will be. The size of the objective lens also<br />
affects the size of a binocular.<br />
Exit pupil is especially important for viewing in low light conditions.<br />
If your primary time for viewing is during the bright light of day, then<br />
a binocular with a smaller objective lens of 26 mm or less will do<br />
just fine. If you want the brightest possible image during near-dark<br />
conditions, you’ll want to choose a binocular with an objective lens in<br />
the 33 mm to 56 mm range.<br />
Wide field of view has advantages when following fast-moving action<br />
and scanning dense habitats. The field of view is measured in feet at<br />
1,000 yards or degrees:<br />
Example: 388 feet @ 1000 yards<br />
6.0 degrees<br />
Close-focus binocular will focus down to ten feet or less. This feature<br />
is especially important for watching birds, insects and butterflies.<br />
Adjust the IPD of your binocular<br />
for the best viewing possible.<br />
IPD<br />
BINOCULARS<br />
28 <strong>Vortex</strong> <strong>Optics</strong><br />
<strong>Vortex</strong> <strong>Optics</strong> at www.vortexoptics.com<br />
29
ADJUST THE EYECUPS<br />
Adjusting the eyecups up or down allows the user to see a full field<br />
of view. This is important for people who must use eyeglasses or<br />
sunglasses. The two main styles of eyecup design are:<br />
Retractable eyecups that twist up and down. Multi-position eyecups let<br />
you choose the most comfortable position.<br />
Flexible eyecups that fold back for maximum eye relief with eyeglasses.<br />
PROPERLY FOCUS THE BINOCULAR<br />
For the best views, follow this two-step process to properly<br />
adjust the center focus and diopter. Choose an object that is<br />
about 20 yards away from you and stay in the same spot until<br />
you have adjusted the binocular for your eyes.<br />
1. Adjust the center focus – Start by closing your right eye or<br />
covering the right objective lens with your hand. Focus your<br />
left eye on the object and adjust the center focus wheel until<br />
the image is in focus. Leave the center focus in this position<br />
as you adjust the diopter.<br />
TWIST EYECUPS<br />
FOLD BACK EYECUPS<br />
Adjust the center focus.<br />
With Glasses – If you wear eyeglasses or sunglasses, rest the eyecups<br />
of the binocular against your glasses with the eyecups folded back<br />
or twisted down. If the eyecups stay fully extended when wearing<br />
eyeglasses, images will appear as if you are looking at them through<br />
a tunnel.<br />
Retract the eyecups when viewing<br />
with eyeglasses or sunglasses.<br />
2. Adjust the diopter – Start by closing your left eye or<br />
covering the left objective lens with your hand. Look through<br />
your right eye and adjust the diopter ring (generally found<br />
on the right eyepiece) until the object is in focus. Make note<br />
of this diopter setting in case you need to set it again. From<br />
this point on, you will only need to use the center focus<br />
wheel.<br />
Without Glasses – If you do not wear eyeglasses or sunglasses, extend<br />
the eyecups to provide the proper distance for seeing the full field of<br />
view. If the eyecups do not stay fully extended, you may see black<br />
crescents in the field of view.<br />
Extend the eyecups when viewing<br />
without eyeglasses or sunglasses.<br />
Adjust the diopter setting.<br />
TIP Locking Diopters – Some models feature a diopter that<br />
locks the settings. If the diopter locks, lift the diopter ring (or follow<br />
manufacturer instructions) to unlock. Then, looking through your<br />
right eye, adjust the diopter so that the object is in focus. Make<br />
note of this diopter setting in case you need to set it again. Push the<br />
diopter ring down to lock—from this point on, you will only need to<br />
use the center focus wheel.<br />
BINOCULARS<br />
30 <strong>Vortex</strong> <strong>Optics</strong><br />
<strong>Vortex</strong> <strong>Optics</strong> at www.vortexoptics.com<br />
31
SPOTTING SCOPES<br />
RIFLESCOPES DESIGN p.34 p.12 THE BINOCULARS NU<strong>MB</strong>ERS p. p. 3520 BASIC SPOTTING ADJUSTMENTS SCOPES p.29 p.36<br />
OW cculla hen dolorem true long-distance re magni cullandam, spotting and ex subject exces maior<br />
molent evaluation et latur, are tempori the name tiundignatum of the game, etur it’s Obit time pa<br />
voles to break ut utat out ligenihi. a spotting scope. As with other optics,<br />
spotting scopes have specifi c features you’ll want to<br />
be familiar with. Zoom in on the facts to ensure all your<br />
spotting needs are met.<br />
32 <strong>Vortex</strong> <strong>Optics</strong><br />
<strong>Vortex</strong> <strong>Optics</strong> at www.vortexoptics.com<br />
33
SPOTTING SCOPE DESIGN<br />
Spotting scopes provide higher magnification than available<br />
through most binoculars and are designed for viewing wildlife and<br />
landscapes at longer distances. In many cases, manufacturers<br />
make a spotting scope design available with both an angled and a<br />
straight body style. Though one design is not better than the other,<br />
each offers distinct advantages.<br />
The angled body features an eyepiece that is set at a 45-degree angle.<br />
This style lets people of different heights share without adjusting the<br />
tripod. Because angled scopes can sit lower on a tripod, users will<br />
benefit from the added stability.<br />
THE NU<strong>MB</strong>ERS<br />
IDENTIFYING THE CONFIGURATION<br />
The name of a spotting scope frequently includes a group of<br />
numbers such as 20–60x85. This range of numbers is called the<br />
configuration and indicates the magnification and the size of the<br />
objective lens.<br />
The fi rst set of numbers (20–60x) indicates the magnification<br />
range. Since spotting scopes feature high magnifications for longdistance<br />
viewing and large objective lenses, these optics must be<br />
mounted on a tripod.<br />
Ocular Lens<br />
Twist-up Eyecup<br />
Magnifi cation Adjustment Ring<br />
Fast Focus Dial<br />
Fine Focus Dial<br />
TIP Some eyepieces vary in magnifi cation<br />
and allow you to “zoom” from low to high power;<br />
other eyepieces are fi xed at a single power. In<br />
some cases, the same eyepiece may be used<br />
with models of varying objective lens sizes with<br />
the result that the magnifi cation will be 18x in<br />
a 65 mm model and 23x in an 85 mm model.<br />
Tripod Mount Collar<br />
Tripod Mount Foot<br />
Objective Lens<br />
Retractable<br />
Sunshade<br />
The straight body features an eyepiece in line with the objective lens.<br />
This natural line of sight works well with a car window mount.<br />
The last number (85) indicates the size of the objective lens<br />
in millimeters. This size directly affects the overall size of the<br />
spotting scope resulting in anything from extremely compact to<br />
full-size models.<br />
65 mm<br />
50 mm<br />
85 mm<br />
TIP Spotting scopes with an objective lens of 50 mm to 65 mm<br />
are fairly portable and compact—offering performance at a<br />
lower price than the same model with a larger objective lens.<br />
Spotting scopes with an objective lens of 80 mm and larger will<br />
be brighter than more compact models, but are generally heavier<br />
and bulkier.<br />
SPOTTING SCOPES<br />
34 <strong>Vortex</strong> <strong>Optics</strong><br />
<strong>Vortex</strong> <strong>Optics</strong> at www.vortexoptics.com<br />
35
BASIC ADJUSTMENTS<br />
ADJUST THE EYECUP<br />
Spotting scopes typically feature an adjustable eyecup in one of<br />
two styles: twist or fold. Adjusting the eyecup up or down allows<br />
you to see a full field of view whether or not you wear eyeglasses.<br />
Even if you wear sunglasses, making this adjustment will enhance<br />
your viewing experience.<br />
TWIST EYECUP<br />
FOLD EYECUP<br />
ADJUST THE FOCUS<br />
Some spotting scopes provide both fast and fine focus dials. After<br />
setting the magnification, some refocusing is usually required.<br />
1. Slowly turn the fast focus dial until the subject is<br />
nearly in focus.<br />
2. Turn the fine focus dial to pick out the finest details.<br />
Adjust by twisting the eyecup.<br />
Adjust by folding the eyecup.<br />
Fast Focus Dial<br />
Fine Focus Dial<br />
Extended<br />
Position<br />
Extended<br />
Position<br />
When wearing eyeglasses, retract the eyecup to view the full fi eld of view.<br />
Retracted<br />
Position<br />
ADJUST THE MAGNIFICATION<br />
Change the magnification of your spotting scope by simply turning<br />
the magnification adjustment ring in a clockwise or counterclockwise<br />
direction.<br />
Folded Back<br />
Position<br />
ADJUST THE VIEWING ANGLE<br />
Some spotting scopes provide a rotating tripod collar that allows<br />
you to rotate the spotting scope body for greater viewing flexibility.<br />
Rotating Tripod Collar<br />
Rotate the spotting scope body for<br />
the most comfortable viewing.<br />
SPOTTING SCOPES<br />
36 <strong>Vortex</strong> <strong>Optics</strong><br />
<strong>Vortex</strong> <strong>Optics</strong> at www.vortexoptics.com<br />
37
ADJUST THE SUNSHADE<br />
Some spotting scopes provide a built-in sunshade that extends<br />
to effectively block out disturbing stray light. The sunshade also<br />
shields the objective lens from mechanical damage and guards<br />
against soiling by fingerprints and precipitation.<br />
This sunshade shield easily<br />
extends or retracts as needed.<br />
CUSTOMER SERVICE<br />
When you choose <strong>Vortex</strong> <strong>Optics</strong>, you join a brethren<br />
of hunters and shooters. A group of seasoned<br />
pros that understand what it means to put great optics<br />
in your pack, on your rifl e, or around your neck. In<br />
fact, our customer service department stands behind<br />
you and your optics all the way up the mountain, into<br />
camp, down the trail—right down to pulling the trigger or<br />
releasing the arrow.<br />
For any other questions or concerns,<br />
feel free to contact us:<br />
800.426.0048<br />
www.<strong>Vortex</strong><strong>Optics</strong>.com<br />
38 <strong>Vortex</strong> <strong>Optics</strong><br />
<strong>Vortex</strong> <strong>Optics</strong> at www.vortexoptics.com<br />
39