OPERATING INSTRUCTIONS - KTM
OPERATING INSTRUCTIONS - KTM
OPERATING INSTRUCTIONS - KTM

You also want an ePaper? Increase the reach of your titles
YUMPU automatically turns print PDFs into web optimized ePapers that Google loves.
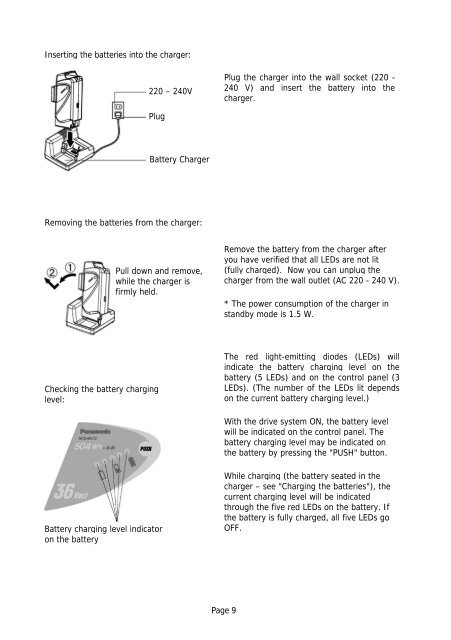
Inserting the batteries into the charger:<br />
Removing the batteries from the charger:<br />
Checking the battery charging<br />
level:<br />
Battery charging level indicator<br />
on the battery<br />
220 – 240V<br />
Plug<br />
Battery Charger<br />
Pull down and remove,<br />
while the charger is<br />
firmly held.<br />
Plug the charger into the wall socket (220 -<br />
240 V) and insert the battery into the<br />
charger.<br />
Remove the battery from the charger after<br />
you have verified that all LEDs are not lit<br />
(fully charged). Now you can unplug the<br />
charger from the wall outlet (AC 220 - 240 V).<br />
* The power consumption of the charger in<br />
standby mode is 1.5 W.<br />
The red light-emitting diodes (LEDs) will<br />
indicate the battery charging level on the<br />
battery (5 LEDs) and on the control panel (3<br />
LEDs). (The number of the LEDs lit depends<br />
on the current battery charging level.)<br />
With the drive system ON, the battery level<br />
will be indicated on the control panel. The<br />
battery charging level may be indicated on<br />
the battery by pressing the "PUSH" button.<br />
While charging (the battery seated in the<br />
charger – see "Charging the batteries"), the<br />
current charging level will be indicated<br />
through the five red LEDs on the battery. If<br />
the battery is fully charged, all five LEDs go<br />
OFF.<br />
Page 9