CAVITY WALL TIES - mkm.strawberryadm...
CAVITY WALL TIES - mkm.strawberryadm...
CAVITY WALL TIES - mkm.strawberryadm...
Create successful ePaper yourself
Turn your PDF publications into a flip-book with our unique Google optimized e-Paper software.
<strong>CAVITY</strong><br />
<strong>WALL</strong> <strong>TIES</strong><br />
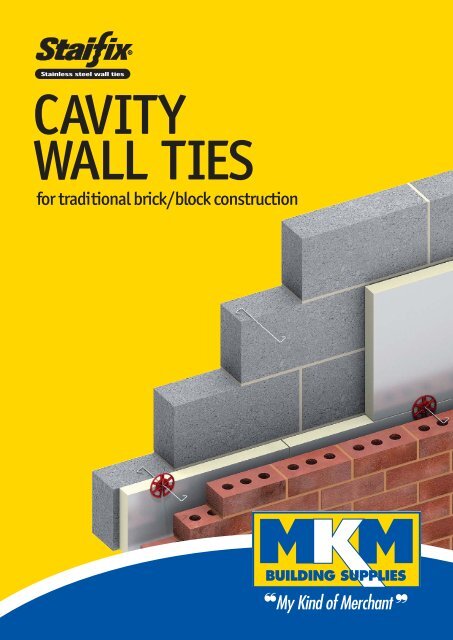
for traditional brick/block construction
Stainless Steel<br />
All Ancon and Staifix wall ties are<br />
manufactured from Stainless Steel for<br />
its corrosion resistance and strength.<br />
The use of Stainless Steel means that<br />
no costly remedial measures are required<br />
during the lifetime of the structure.<br />
Approvals<br />
Look for these logos.<br />
These products are<br />
approved by the British<br />
Board of Agrément.<br />
These products meet the<br />
technical requirements of<br />
the National House<br />
Building Council.<br />
These products are Type A<br />
ties and suitable for internal<br />
separating walls to<br />
Approved Document E.<br />
Safety<br />
All Ancon and Staifix wall ties have specially<br />
designed safety ends to reduce the risk of<br />
injury during handling and installation.<br />
Correct Installation<br />
Wall ties should be pressed down in, and<br />
then surrounded by, fresh mortar.<br />
In order to show more details of the<br />
application, mortar has been excluded from<br />
the photography in this literature.<br />
rev. 0508 v.1<br />
MKM acknowledges that any accreditations/certifications are attributed to the brand/manufacturer.<br />
MKM has compiled this booklet from information supplied by manufacturers in good faith and accepts no responsibility for any errors or omissions in this literature.
Cavity Wall Ties<br />
for traditional brick/block construction<br />
Wall ties are an important element in the<br />
stability of cavity walls. The correct<br />
selection, spacing and installation of ties is<br />
essential to avoid damp penetration and<br />
the distortion or cracking of brickwork.<br />
Many factors including cavity width, type<br />
and height of building, and location must all<br />
be considered in the selection of the most<br />
appropriate tie.<br />
BS1243: Metal ties for cavity<br />
wall construction<br />
BS1243 was withdrawn in 2005. Butterfly<br />
and Double Triangle ties to BS1243 do not<br />
meet a current British Standard. Wall ties<br />
should be selected to BS5628-1: 2005<br />
(see page 4).<br />
Pages 4 and 5 provide information on wall<br />
tie selection, density and positioning, tie<br />
length, embedment depths and installation.<br />
3
Wall Tie Selection to BS5628-1: 2005<br />
Maximum<br />
Building Geographical<br />
Type Application Density Height Location<br />
Type 1 Heavy duty tie suitable for 2.5 ties/m 2 Any<br />
3-4 ties/m Height<br />
at unbonded<br />
edges<br />
most building sizes and<br />
types. Not very flexible<br />
and not recommended for<br />
applications where there is<br />
expected to be excessive<br />
differential movement<br />
between leaves<br />
Type 2 General purpose tie for As Type 1 15m<br />
domestic and small<br />
commercial buildings.<br />
May be suitable for<br />
buildings exceeding 15<br />
metres if shown to be<br />
adequate by calculation<br />
Type 3 Basic wall tie generally as As Type 1 15m<br />
Type 2 above<br />
Type 4 Light duty wall tie As Type 1 10m<br />
suitable for box-form<br />
domestic dwellings with<br />
leaves of similar thickness<br />
Type 6* Timber frame tie suitable 4.4 ties/m 2 15m<br />
for domestic houses and<br />
small commercial<br />
developments of up to<br />
3-4 ties/m<br />
at unbonded<br />
edges<br />
four storeys<br />
For complete information refer to BS5628-1: 2005 and BS5268-6: 1: 1996<br />
*Based on BS5268-6: 1: 1996<br />
Suitable for most sites.<br />
However, for relatively<br />
tall or unusually shaped<br />
buildings in vulnerable<br />
areas, the tie provision<br />
should be calculated<br />
Suitable for buildings<br />
on flat sites where the<br />
basic wind speed is up<br />
to 31m/s and altitude is<br />
not more than 150m<br />
above sea level<br />
Suitable for buildings on<br />
flat sites in towns and<br />
cities where the basic<br />
wind speed is limited to<br />
25m/s and altitude is<br />
not more than 150m<br />
above sea level<br />
Suitable for flat sites in<br />
towns and cities where the<br />
basic wind speed does<br />
not exceed 25m/s and<br />
altitude is not more than<br />
150m above sea level<br />
Suitable for flat sites in<br />
towns and cities where the<br />
basic wind speed does not<br />
exceed 25m/s and altitude<br />
is not more than 150m<br />
above sea level<br />
≤ 31m/s<br />
≤ 25m/s<br />
Information taken from BS 6399-2: 1997 Code of<br />
Practice for Wind Loads<br />
Wall Tie Selection to Approved Document E<br />
Type<br />
Application<br />
Type A<br />
Suitable for internal separating walls of new build attached dwellings<br />
up to any height*<br />
For complete information refer to Approved Document E - Resistance to the Passage of Sound<br />
*Restrictions may apply to particularly tall buildings and coastal/exposed sites<br />
Length of Tie and Embedment<br />
Wall ties should be of the correct length to ensure they are properly<br />
embedded in the masonry. Ancon recommends tie lengths which<br />
achieve an embedment of between 62.5mm and 75mm.<br />
A tie, 225mm long, would be the minimum length recommended<br />
by Ancon for a 100mm cavity.<br />
62.5mm + 100mm + 62.5mm = 225mm<br />
The embedment depths for Staifix-Thor Helical thin-joint ties differ<br />
from the information above.<br />
Insulation retaining clip<br />
Multiple drips<br />
4<br />
Embedment<br />
Cavity width<br />
Embedment
Density and Positioning of Ties<br />
Typical Layout of Wall Ties Indicating Maximum Spacing<br />
Standard spacing for cavity brickwork 900mm x 450mm centres in a staggered pattern (2.5 ties per m 2 )<br />
TECHNICAL<br />
INFORMATION<br />
Head restraints<br />
at centres to<br />
suit wind<br />
loading<br />
Horizontal movement joint<br />
450-900mm<br />
Vertical<br />
movement<br />
joint<br />
225mm<br />
450mm<br />
450mm<br />
225mm<br />
450mm<br />
300mm<br />
Usually 225mm<br />
to suit block<br />
courses<br />
300mm<br />
Usually 225mm<br />
to suit block<br />
courses<br />
Debonded<br />
ties at<br />
edges<br />
450mm<br />
225<br />
mm<br />
225<br />
mm<br />
225<br />
mm<br />
900<br />
mm<br />
225<br />
mm<br />
For walls in which both leaves are 90mm or thicker, ties should be used at not less than 2.5 per square metre<br />
(900mm horizontal and 450mm vertical centres). This spacing may be varied by building regulations. Ties should<br />
be evenly distributed over the wall area, except around openings, and should be preferably staggered.<br />
At vertical edges of an opening, unreturned or unbonded edges, and vertical expansion joints, additional ties should<br />
be used. Such ties should be located at 300mm vertical centres, positioned not more than 225mm from the edge.<br />
Installation of Ties<br />
Wall ties should be pressed down in, and surrounded by, fresh<br />
mortar. In order to show more details of the application, mortar has<br />
been excluded from the images in this literature.<br />
To ensure cavity wall ties are effective at tying the leaves together<br />
they should be installed as the inner leaf is constructed and not<br />
simply pushed into a joint.<br />
Ties should be installed with a slight fall to the outer leaf, never<br />
towards the inner leaf as this could provide a path for moisture to<br />
cross the cavity.<br />
The drip part of the tie should point downwards and be positioned<br />
near the centre of the open cavity. Ties with multiple drips, like the<br />
Staifix RT2, can often be positioned centrally as part of the drip will<br />
normally be near the centre of the open section of a partial fill cavity.<br />
Installed ties should be clear of mortar droppings to allow the drip to<br />
function and prevent water from crossing to the inner leaf of masonry.<br />
5
Staifix HRT4 Tie (Type 4/Type A Tie)<br />
Length (mm) Cavity (mm)<br />
200 50-75<br />
225 76-100<br />
Patent Nos. GB 2359831<br />
IE 83574<br />
Application<br />
Type 4 wall tie for use in the external walls<br />
of houses not greater than 10 metres in<br />
height. Type A tie for internal separating<br />
walls of buildings of any height. Please refer<br />
to page 4 for more details.<br />
REPLACES BS1243<br />
BUTTERFLY TIE<br />
Staifix RT2 General Purpose Tie (Type 2 Tie)<br />
Length (mm) Cavity (mm)<br />
200 50-75<br />
225 76-100<br />
250 101-125<br />
Patent Nos. GB 2359831<br />
IE 83574<br />
Application<br />
Type 2 wall tie for use in the external walls<br />
of houses and small commercial<br />
developments not greater than 15 metres<br />
in height. This tie is unsuitable for internal<br />
separating walls of new build attached<br />
dwellings. Please refer to page 4 for more<br />
details.<br />
6<br />
REPLACES BS1243<br />
DOUBLE TRIANGLE TIE
Ancon ST1 Heavy Duty Tie (Type 1 Tie)<br />
Length (mm) Cavity (mm)<br />
200 50-75<br />
225 76-100<br />
250 101-125<br />
275 126-150<br />
300 150*<br />
*With greater embedment to simplify installation<br />
UK Patent Nos. 2 255 358<br />
2 260 348<br />
2 260 349<br />
MASONRY TO MASONRY<br />
<strong>WALL</strong> <strong>TIES</strong><br />
Application<br />
Type 1 wall tie for use in the external walls<br />
of buildings of any height. This tie is<br />
unsuitable for internal separating walls of<br />
new build attached dwellings. Please refer<br />
to page 4 for more details.<br />
REPLACES BS1243<br />
VERTICAL-TWIST TIE<br />
Staifix Universal Insulation Retaining Clip<br />
Application<br />
Insulation retaining clip for use in partial fill<br />
cavities with all* standard Ancon and Staifix<br />
wall ties.<br />
*The TJ Clip should be used with Staifix-Thor Helical TJ2 ties.<br />
Flat Ties<br />
HRT4<br />
RT2<br />
Double Triangle<br />
ST1<br />
7
Staifix Starter Tie<br />
for joining new walls to existing masonry<br />
Application<br />
Screw-in tie supplied with an 8mm nylon<br />
plug for joining new masonry to existing<br />
walls without the need for jointing.<br />
Ideal for the construction of conservatories,<br />
extensions and garden walls.<br />
AVAILABLE<br />
SINGULARLY - NO<br />
JOB TOO SMALL<br />
8
Staifix Starter Tie Installation<br />
1<br />
Starter Ties should be fixed at<br />
225mm vertical centres in a line<br />
central to the new leaf. Drill 8mm<br />
diameter holes, 45mm deep into<br />
the existing wall at an angle of 30˚<br />
to the horizontal.<br />
2<br />
Bend the tie into the bed joint<br />
of the new brickwork. Build the tie<br />
in ensuring it is surrounded<br />
by mortar.<br />
This tie is suitable for use in masonry up to 8 metres in height. For buildings in particularly exposed areas,<br />
especially if the wall is higher than 5 metres or the construction is single leaf, it would be advisable to carry<br />
out a check calculation using the wind code and increase the density of starter ties if necessary.<br />
Staifix Cavity Starter Tie<br />
for the build of a new inner leaf of blockwork<br />
Application<br />
Screw-in tie that simplifies the build of an inner leaf of blockwork within an<br />
existing structure. Supplied with an 8mm nylon plug and a neoprene ‘o’ ring.<br />
Staifix Cavity Starter Tie Installation<br />
IDEAL FOR BARN<br />
CONVERSIONS<br />
Drill an 8mm diameter hole<br />
horizontally into existing outer leaf<br />
of masonry. Position the hole such<br />
that when the tie is installed the<br />
safety end will be located in the<br />
bed joint of the new inner leaf of<br />
blockwork.<br />
Insert the nylon plug. Slide the<br />
neoprene ‘o’ ring on the tie and<br />
screw into the plug. Build the tie<br />
into the inner leaf of blockwork<br />
ensuring it is surrounded by mortar.<br />
9
Staifix Timber Frame Tie (Type 6 Tie)<br />
for fixing masonry to timber frames<br />
To Suit Cavities (mm)<br />
50, 75, 100<br />
Application<br />
Cavity wall tie for use in the construction of<br />
timber-framed buildings up to 4 storeys in<br />
height. Supplied complete with an annular<br />
ring shank nail.<br />
CRANKED, TO<br />
EASE INSTALLATION<br />
10
Installation<br />
1<br />
Position the tie on fresh mortar in<br />
the bed joint of the outer leaf of<br />
masonry with the upstand against<br />
the timber.<br />
2<br />
Hammer the nail, through the hole<br />
in the upstand, into the timber<br />
framework.<br />
3<br />
Build the tie into the bed joint of<br />
the new masonry ensuring it is<br />
surrounded by mortar.<br />
Density of Timber Frame Ties<br />
Timber Frame Ties should be installed at a density of 4.4 ties per<br />
square metre in buildings where the basic wind speed does not<br />
exceed 25m/s (BS6399-2: 1997 Code of Practice for Wind Loads).<br />
The density should be increased to 7 ties per square metre in more<br />
severe situations.<br />
11
References for Bespoke Ancon Wall Ties<br />
Ancon wall ties may be specified and ordered<br />
by using a reference letter for the tail, shank<br />
and head of the tie.<br />
Example using<br />
Reference System<br />
Tail D<br />
Shank P<br />
Head 21<br />
Ancon DP21<br />
wall tie<br />
TAIL<br />
Most can be used<br />
at either end of tie<br />
S _ _<br />
SHANK<br />
_ D _<br />
50<br />
HEAD<br />
10<br />
10<br />
30<br />
30<br />
10<br />
20<br />
8x30mm slot<br />
_ _ V<br />
_ _ U without slot<br />
7mm diameter<br />
hole<br />
_ _ B<br />
_ P _<br />
L<br />
_ _ 21<br />
To fit 21/18<br />
Omega Channel<br />
25mm<br />
L _ _<br />
W _ _<br />
10mm<br />
L<br />
L<br />
P _ _<br />
D _ _<br />
6x60mm welded<br />
dowel<br />
_ V _<br />
_ F _<br />
L<br />
10mm<br />
To suit channel<br />
_ _ 25 To fit 25/14<br />
_ _ 28 To fit 28/15<br />
_ _ 30 To fit 30/20<br />
_ _ 36 To fit 36/8<br />
_ _ 38* To fit 38/17<br />
*Tie will be 25mm wide<br />
_ _ X<br />
7mm diameter<br />
hole<br />
260mm<br />
T _ _<br />
10mm<br />
15mm<br />
15mm<br />
10mm<br />
Y _ _<br />
6x60mm loose<br />
dowel<br />
M_ _<br />
_ H _<br />
105mm<br />
_ _ G<br />
6.5mm<br />
diameter holes<br />
6x60mm loose<br />
dowel<br />
Ancon Remedial Wall Ties<br />
MM63<br />
Lengths 195, 220, 250,<br />
300mm<br />
RM63<br />
Lengths 195, 220, 250,<br />
300mm<br />
AC31<br />
Lengths 175, 200, 225mm<br />
AC31C<br />
Lengths 175, 200, 225mm<br />
HAVE A<br />
QUESTION CALL<br />
0114 238 1 238<br />
Setting tools, resin cartridges, resin guns and mixing nozzles are all<br />
available. Contact Ancon for more details on our range of remedial<br />
wall ties and ancillary products.<br />
12
Staifix-Thor Helical Crack Stitching Kit<br />
for the permanent repair of cracked masonry<br />
500mm<br />
500mm<br />
Wall Slot Bar<br />
Thickness Depth Depth<br />
102mm 30mm 20mm<br />
215mm 40mm 30mm<br />
THE HIGH STRENGTH,<br />
NON-DISRUPTIVE REPAIR<br />
SOLUTION<br />
500mm<br />
500mm<br />
Application<br />
This kit contains all the necessary<br />
components to permanently repair vertical<br />
or stepped cracks in masonry.<br />
•Grout mixing paddle<br />
•Cementitious grout (3 litres)<br />
•Grout applicator gun<br />
•Flat grout nozzle<br />
•Stainless steel helical bar (10 x 1000mm)<br />
•Finger trowel<br />
Notes:<br />
1. This system is also suitable for rendered/plastered walls<br />
2. Vertical spacing is normally every 4 to 6 brick courses<br />
(300 - 450mm), however this should be checked with the<br />
structural engineer<br />
3. Where cracks are within 500mm of corners or reveals, the bar<br />
should be bent and bonded 100mm around the corner<br />
4. If two or more cracks are close together, bars can be lapped.<br />
Laps should be at least 500mm and the bar should extend<br />
500mm from the outer cracks<br />
13
Installation<br />
It is essential that the cause of the cracking is established by a structural engineer<br />
and then eliminated, prior to the installation of this system.<br />
1<br />
2<br />
3<br />
Cut a slot in the mortar joint to the<br />
specified depth that extends just over<br />
500mm each side of the crack<br />
(recommended equipment: Twin-bladed<br />
diamond-tipped wall chaser). Ensure the<br />
mortar is completely removed to reveal<br />
the top and bottom faces of the<br />
masonry. Remove all loose mortar from<br />
the slot and flush with clean water.<br />
Connect the paddle to a power drill,<br />
blend the components of the grout<br />
together in the tub and load into the gun.<br />
Apply a continuous bead (approximately<br />
10-15mm thick) to the back of the slot<br />
using the flat grout nozzle.<br />
Push the helical bar into the face of the<br />
grout, to the depth specified, so that<br />
the bar extends 500mm each side of<br />
the crack.<br />
4<br />
5<br />
Apply a second, continuous bead of<br />
grout to the slot, ensuring the bar is<br />
covered. With the finger trowel, force the<br />
grout back into the slot 10mm from the<br />
surface, and ensure the bar/grout<br />
composite is tightly packed.<br />
Make good the bed joint and fill the<br />
vertical crack with an appropriate filler<br />
or mortar.<br />
14
Helical Nails for Pitched Roofs<br />
European Patent No. 1307303<br />
Super-7 Thor-Helical Nails<br />
Super-7 nails install flush to the<br />
counterbatten. They are manufactured<br />
from stainless steel and are engineered<br />
with the precise Thor-Helical patented<br />
helix, and so provide maximum<br />
corrosion resistance and excellent<br />
holding power. They are stocked in six<br />
standard lengths and meet the technical<br />
requirements of the NHBC.<br />
15
Nail Lengths<br />
Stocked Lengths (mm)<br />
140, 150, 160, 165, 175, 185<br />
Note: Other lengths are available in increments of 5mm<br />
Pack Sizes<br />
Nail Length<br />
Quantity per Box<br />
160mm and under 400<br />
165mm and above 200<br />
Super-7 Alignment Tool<br />
This innovative Alignment Tool vertically<br />
aligns and centres a nail on the<br />
counterbatten to rafter arrangement,<br />
improving build quality.<br />
The tool features a levelling indicator to<br />
identify a vertical plane.<br />
Recommended Nail Length<br />
and Fixing Centres<br />
This information should be calculated<br />
using HeliCalc, a free web-based<br />
program available at www.helicalc.co.uk.<br />
Users simply input details of their site<br />
location and roof construction, and<br />
HeliCalc calculates the length, density<br />
and quantity of Super-7 nails required<br />
for the project. Alternatively, contact<br />
Ancon with your project details.<br />
Note: HeliCalc results are specific to Super-7 Thor-Helical<br />
nails. The data is calculated using a design method, formulated<br />
by Ancon Ltd and independently approved by the Building<br />
Research Establishment, which is applied to the results of a<br />
comprehensive and independent test programme carried out by<br />
CERAM Building Technology. Wind load calculations are to<br />
BS6399: Part 2: 1997. Snow load calculations are to BS6399:<br />
Part 3: 1988. Partial safety factors are from National Annexes to<br />
Eurocodes 0 and 5 and are applied in respect of timber<br />
connections, dead loads, wind loads and snow loads.<br />
Test Results<br />
Test data is available on request.<br />
Patent pending<br />
90˚<br />
Two widths to<br />
accommodate<br />
38mm and 50mm<br />
counterbattens<br />
Top, with level to ensure<br />
correct angle of entry<br />
Eyelet to allow tool<br />
to be secured to<br />
person/structure<br />
Super-7s can be hammered in or<br />
power-driven. SDS drill attachments<br />
are available.<br />
16
Helical Nails for Flat Roofs<br />
Super-8 Headed Helical Nails<br />
Headed helical nails are designed to<br />
secure plywood/insulation composite<br />
roof decks to timber joists. They are<br />
manufactured from zinc coated steel in<br />
two standard lengths which suit panel<br />
depths from 70mm to 126mm. Other<br />
lengths are available on request.<br />
Super-8s should be installed at a rate of<br />
8.6 per square metre, using a hammer.<br />
The 20mm diameter head simplifies<br />
installation.<br />
17
Nail Lengths<br />
Standard Lengths (mm)<br />
135, 165<br />
Note: Other lengths are available on request<br />
Pack Sizes<br />
Quantity per Bag Quantity per Box<br />
25 500<br />
Recommended Lengths<br />
Composite<br />
Panel Depth<br />
70-96mm<br />
96-126mm<br />
Recommended<br />
Nail Length<br />
135mm<br />
165mm<br />
Super-8 nails should achieve a minimum<br />
embedment of 35mm in the joist.<br />
Recommended Axial Spacings<br />
Joist Centres 400mm 600mm<br />
Axial Spacings 400mm x 400mm 600mm x 300mm<br />
400mm<br />
600mm<br />
400mm<br />
300mm<br />
Test Results<br />
Test data is available on request.<br />
18
GREAT PRODUCTS.<br />
GREAT SERVICE.<br />
GREAT PRICES.<br />
FREE LOCAL<br />
DELIVERY<br />
GETTING TO<br />
KNOW MKM<br />
WHO ARE MKM<br />
• The UK’s 8th largest and<br />
fastest growing Builders’<br />
Merchant with an<br />
expanding branch network<br />
• Employing a local ‘hand<br />
picked’ team of experts<br />
WHAT SERVICES CAN<br />
WE PROVIDE<br />
• A fast, friendly, reliable<br />
and efficient counter and<br />
telephone service<br />
• Our team are<br />
knowledgeable and<br />
here to help you get<br />
exactly what you need<br />
OUR PRODUCTS<br />
•A one-stop-shop for all<br />
building, plumbing, timber<br />
and landscape materials<br />
For all your BUILDING, PLUMBING,<br />
TIMBER and LANDSCAPING needs<br />
NEED HELP We have an expert on hand to<br />
help you get exactly what you need<br />
HOW DO I START TRADING<br />
• Call into the branch,<br />
meet our team and<br />
activate an account<br />
There’s an<br />
near you...<br />
OPEN TO TRADE & PUBLIC - MONDAY TO SATURDAY<br />
for your nearest branch call 08701 222 656 or visit www.<strong>mkm</strong>bs.co.uk


