Create successful ePaper yourself
Turn your PDF publications into a flip-book with our unique Google optimized e-Paper software.
9<br />
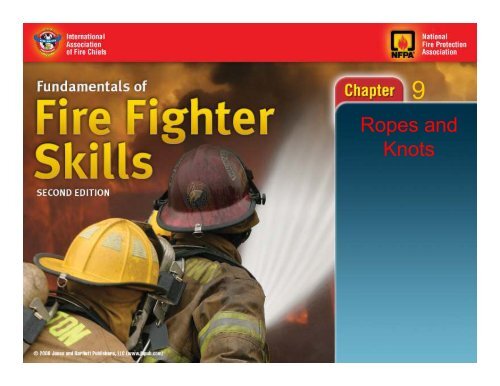
<strong>Ropes</strong> <strong>and</strong><br />
<strong>Knots</strong>
9<br />
Skill Drill 9-1<br />
Caring for Life Safety <strong>Ropes</strong><br />
• Protect the rope from sharp <strong>and</strong> abrasive edges;<br />
use edge protectors.<br />
• Protect the rope from rubbing against other<br />
ropes.<br />
• Protect the rope from heat, chemicals, flames,<br />
<strong>and</strong> sunlight.<br />
• Avoid stepping on a rope.
9<br />
Skill Drill 9-2<br />
Cleaning Fire Department <strong>Ropes</strong> (1 of 2)<br />
1. Wash the rope with mild<br />
soap <strong>and</strong> water.<br />
2. Use a rope washer or<br />
machine if recommended by<br />
the rope’s manufacturer.
9<br />
Skill Drill 9-2<br />
Cleaning Fire Department <strong>Ropes</strong> (2 of 2)<br />
3. Air dry the rope out of<br />
direct sunlight.
9<br />
Skill Drill 9-3<br />
Inspecting Fire Department <strong>Ropes</strong><br />
• Inspect the rope after each use or at regular<br />
intervals.<br />
• Examine the core by looking for depressions, flat<br />
spots, or lumps.<br />
• Check the sheath by looking for discolorations,<br />
abrasions, flat spots, or anything embedded.<br />
• Remove the rope from service if it is damaged.
Skill Drill 9-4<br />
Placing a Life Safety Rope in a Rope Bag (1 of 2)<br />
9<br />
1. Tie a figure eight knot on<br />
a bight in the first end of the<br />
rope to go into the bag.<br />
2. Load the rope into the<br />
bag.
Skill Drill 9-4<br />
Placing a Life Safety Rope in a Rope Bag (2 of 2)<br />
9<br />
3. Do not coil the rope in<br />
the bag.
9<br />
Skill Drill 9-5<br />
Tying a Safety Knot (1 of 2)<br />
1. Take the loose end of the<br />
rope, beyond the knot, <strong>and</strong><br />
form a loop around the<br />
st<strong>and</strong>ing part of the rope.<br />
2. Pass the loose end of the<br />
rope through the loop.
9<br />
Skill Drill 9-5<br />
Tying a Safety Knot (2 of 2)<br />
3. Tighten the safety knot<br />
by pulling on both ends at<br />
the same time.
9<br />
Skill Drill 9-6<br />
Tying a Half Hitch (1 of 2)<br />
1. Grab the rope with your<br />
palm facing away from you.<br />
2. Rotate your h<strong>and</strong> so your<br />
palm is facing you. This will<br />
make a loop in the rope.
9<br />
Skill Drill 9-6<br />
Tying a Half Hitch (2 of 2)<br />
3. Pass the loop over the<br />
end of the object.<br />
4. Finish the half-hitch knot<br />
by positioning it <strong>and</strong> pulling<br />
tight.
9<br />
Skill Drill 9-7<br />
Tying a Clove Hitch in the Open (1 of 3)<br />
1. Starting from left to right<br />
on the rope, grab the rope<br />
with crossed h<strong>and</strong>s, with the<br />
left h<strong>and</strong> positioned higher.<br />
2. Holding onto the rope,<br />
uncross your h<strong>and</strong>s. This<br />
will create a loop in each<br />
h<strong>and</strong>.
9<br />
Skill Drill 9-7<br />
Tying a Clove Hitch in the Open (2 of 3)<br />
3. Slide the right-h<strong>and</strong> loop<br />
behind the left-h<strong>and</strong> loop.<br />
4. Slide both loops over the<br />
object.
9<br />
Skill Drill 9-7<br />
Tying a Clove Hitch in the Open (3 of 3)<br />
5. Pull in opposite<br />
directions to tighten the<br />
clove hitch. Tie a safety<br />
knot in the working end of<br />
the rope.
9<br />
Skill Drill 9-8<br />
Tying a Clove Hitch Around an Object (1 of 3)<br />
1. Place the working end of<br />
the rope over the object.<br />
2. Make a complete loop<br />
around the object, working<br />
end down.
9<br />
Skill Drill 9-8<br />
Tying a Clove Hitch Around an Object (2 of 3)<br />
3. Make a second loop<br />
around the object. Now pass<br />
the working end of the rope<br />
under the second loop.<br />
4. Tighten the knot <strong>and</strong><br />
secure it by pulling on both<br />
ends.
9<br />
Skill Drill 9-8<br />
Tying a Clove Hitch Around an Object (3 of 3)<br />
5. Tie a safety knot in the<br />
working end of the rope.
9<br />
Skill Drill 9-9<br />
Tying a Figure Eight Knot (1 of 2)<br />
1. Form a bight in the rope. 2. Loop the working end of<br />
the rope completely around<br />
the st<strong>and</strong>ing part of the<br />
rope.
9<br />
Skill Drill 9-9<br />
Tying a Figure Eight Knot (2 of 2)<br />
3. Thread the working end<br />
back through the bight.<br />
4. Tighten the knot by<br />
pulling on both ends<br />
simultaneously.
9<br />
Skill Drill 9-10<br />
Tying a Figure Eight on a Bight (1 of 3)<br />
1. Form a bight <strong>and</strong> identify<br />
the end of the bight as the<br />
working end.<br />
2. Holding both sides of the<br />
bight together, form a loop.
9<br />
Skill Drill 9-10<br />
Tying a Figure Eight on a Bight (2 of 3)<br />
3. Feed the working end<br />
of the bight back through<br />
the loop.<br />
4. Pull the knot tight.
9<br />
Skill Drill 9-10<br />
Tying a Figure Eight on a Bight (3 of 3)<br />
5. Secure the loose end of<br />
the rope with a safety<br />
knot.
Skill Drill 9-11<br />
Tying a Figure Eight with a Follow-Through (1 of 2)<br />
9<br />
1. Tie a regular figure eight,<br />
leaving approximately 2<br />
inches of rope at the<br />
working end.<br />
2. Loop the working end<br />
around or through the object<br />
to be secured.
Skill Drill 9-11<br />
Tying a Figure Eight with a Follow-Through (2 of 2)<br />
9<br />
3. Pull the knot tight. 4.Tie a safety knot in the<br />
working end.
9<br />
Skill Drill 9-12<br />
Tying a Bowline (1 of 3)<br />
1. Make the desired<br />
sized loop <strong>and</strong> bring the<br />
working end back to the<br />
st<strong>and</strong>ing part.<br />
2. Form another small loop<br />
in the st<strong>and</strong>ing part of the<br />
rope, with the section close<br />
to the working end on top.
9<br />
Skill Drill 9-12<br />
Tying a Bowline (2 of 3)<br />
3. Pass the working end<br />
over the loop, around the<br />
st<strong>and</strong>ing part, <strong>and</strong> back<br />
through the same opening.<br />
4. Tighten the knot by<br />
holding the working end <strong>and</strong><br />
pulling the st<strong>and</strong>ard part of<br />
the rope backward.
9<br />
Skill Drill 9-12<br />
Tying a Bowline (3 of 3)<br />
5. Tie a safety knot in the<br />
working end of the rope.
9<br />
Skill Drill 9-13<br />
Tying a Sheet or Becket Bend (1 of 3)<br />
1. Using your left h<strong>and</strong>, form<br />
a bight at the working end of<br />
the first (larger) rope.<br />
2. Thread the working end<br />
of the second (smaller) rope<br />
up through the bight.
9<br />
Skill Drill 9-13<br />
Tying a Sheet or Becket Bend (2 of 3)<br />
3. Loop the second (smaller)<br />
rope completely around both<br />
sides of the bight.<br />
4. Tighten the knot.
9<br />
Skill Drill 9-13<br />
Tying a Sheet or Becket Bend (3 of 3)<br />
5. Tie a safety knot in the<br />
working end of each rope.
9<br />
Skill Drill 9-14<br />
Hoisting an Axe (1 of 4)<br />
1. The team that needs the<br />
axe should lower a rope with<br />
extra rope to tie the required<br />
knot around the axe.<br />
2. Tie a figure eight on a<br />
bight to make a small loop.
9<br />
Skill Drill 9-14<br />
Hoisting an Axe (2 of 4)<br />
3. Place the loop over the<br />
axe h<strong>and</strong>le near the head.<br />
4. Pass the st<strong>and</strong>ing part of<br />
the rope around the head of<br />
the axe.
9<br />
Skill Drill 9-14<br />
Hoisting an Axe (3 of 4)<br />
5. Place the st<strong>and</strong>ing part<br />
of the rope parallel to the<br />
axe h<strong>and</strong>le.<br />
6. Tie one or two half<br />
hitches along the axe<br />
h<strong>and</strong>le.
9<br />
Skill Drill 9-14<br />
Hoisting an Axe (4 of 4)<br />
7. Prepare to raise the axe.
9<br />
Skill Drill 9-15<br />
Hoisting a Pike Pole (1 of 3)<br />
1. The team that needs the<br />
pike pole should lower a<br />
rope with extra rope for the<br />
required knot <strong>and</strong> tag line.<br />
2. Tie a clove hitch in the<br />
open <strong>and</strong> slip it over the<br />
h<strong>and</strong>le. Secure it near the<br />
head.
9<br />
Skill Drill 9-15<br />
Hoisting a Pike Pole (2 of 3)<br />
3. Place a half hitch around<br />
the h<strong>and</strong>le below the clove<br />
hitch.<br />
4. Place a second half hitch<br />
around the h<strong>and</strong>le near<br />
bottom of the pike pole.
9<br />
Skill Drill 9-15<br />
Hoisting a Pike Pole (3 of 3)<br />
5. Prepare to raise the<br />
pike pole.
9<br />
Skill Drill 9-16<br />
Hoisting a Ladder (1 of 4)<br />
1. The team that needs the<br />
ladder should lower a rope<br />
with enough extra rope to tie<br />
onto the ladder.<br />
2. Tie a figure eight on a<br />
bight to make a loop 3 or 4<br />
feet in diameter.
9<br />
Skill Drill 9-16<br />
Hoisting a Ladder (2 of 4)<br />
3. Pass the rope between<br />
the rungs of the ladder,<br />
three or four rungs from<br />
the top.<br />
4. Place the loop around the<br />
top of the ladder.
9<br />
Skill Drill 9-16<br />
Hoisting a Ladder (3 of 4)<br />
5. Remove the slack from<br />
the rope <strong>and</strong> allow the loop<br />
to slide down the ladder.<br />
6. Attach a tag line below to<br />
control the ladder as it is<br />
hoisted.
9<br />
Skill Drill 9-16<br />
Hoisting a Ladder (4 of 4)<br />
7. Prepare to raise the<br />
ladder.
9<br />
Skill Drill 9-17<br />
Hoisting a Charged Hose Line (1 of 3)<br />
1. The team that needs the<br />
hose should lower a rope<br />
with extra line available to<br />
tie onto the hose.<br />
2. Make sure that the nozzle<br />
is completely closed <strong>and</strong><br />
secure.
9<br />
Skill Drill 9-17<br />
Hoisting a Charged Hose Line (2 of 3)<br />
3. Tie a clove hitch around<br />
the hose, 1 or 2 feet behind<br />
the nozzle.<br />
4. Make a bight in the rope.
9<br />
Skill Drill 9-17<br />
Hoisting a Charged Hose Line (3 of 3)<br />
5. Pass the bight through<br />
the nozzle h<strong>and</strong>le (bale)<br />
<strong>and</strong> slip the bight over the<br />
nozzle tip.<br />
6. Prepare to hoist the hose.
9<br />
Skill Drill 9-18<br />
Hoisting an Uncharged Hose Line (1 of 2)<br />
1. The team that needs the<br />
hose should lower enough<br />
rope so that the ground<br />
crew can tie on the hose.<br />
2. Fold 3 feet of hose on<br />
itself <strong>and</strong> place the nozzle<br />
on top of the hose. Tie a<br />
half hitch over the nozzle.
9<br />
Skill Drill 9-18<br />
Hoisting an Uncharged Hose Line (2 of 2)<br />
3. Tie a clove hitch near the<br />
end of the rope, wrapping<br />
the rope around both the<br />
nozzle <strong>and</strong> the hose.<br />
4. Prepare to hoist the<br />
hose line with the fold at<br />
the top <strong>and</strong> the nozzle<br />
pointing down.
9<br />
Skill Drill 9-19<br />
Hoisting an Exhaust Fan or Power Tool (1 of 3)<br />
1. The team that needs the<br />
equipment lowers enough<br />
rope so that the ground<br />
crew can tie on the fan.<br />
2. Tie a figure eight knot in<br />
the rope about 3 feet from<br />
the working end of the rope.
9<br />
Skill Drill 9-19<br />
Hoisting an Exhaust Fan or Power Tool (2 of 3)<br />
3. Loop the working end of<br />
the rope around the fan<br />
h<strong>and</strong>le <strong>and</strong> back to the<br />
figure eight knot.<br />
4. Secure the rope by tying<br />
a figure eight with a followthrough.<br />
Thread the working<br />
end back through the knot.
9<br />
Skill Drill 9-19<br />
Hoisting an Exhaust Fan or Power Tool (3 of 3)<br />
5. Attach a tag line to the<br />
fan for better control.<br />
6. Prepare to hoist the fan.


