

Newair AI-120S Portable Ice Maker & Ice Dispenser ... - Air & Water
Newair AI-120S Portable Ice Maker & Ice Dispenser ... - Air & Water
Newair AI-120S Portable Ice Maker & Ice Dispenser ... - Air & Water

You also want an ePaper? Increase the reach of your titles
YUMPU automatically turns print PDFs into web optimized ePapers that Google loves.
SECTION 4: USING YOUR ICE MAKER<br />
4.1 How to Start the Unit<br />
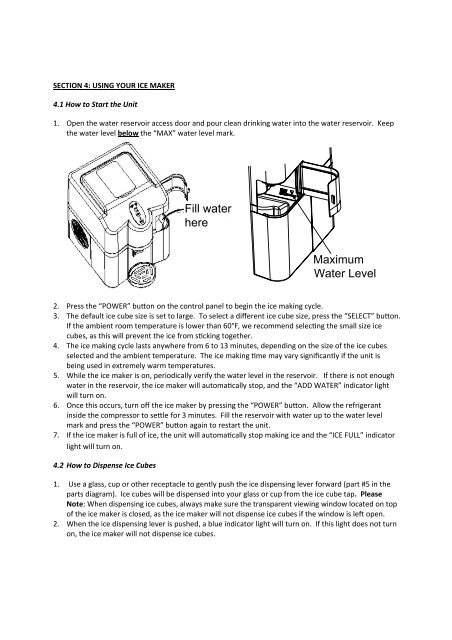
1. Open the water reservoir access door and pour clean drinking water into the water reservoir. Keep<br />
the water level below the “MAX” water level mark.<br />
Maximum<br />
<strong>Water</strong> Level<br />
2. Press the “POWER” button on the control panel to begin the ice making cycle.<br />
3. The default ice cube size is set to large. To select a different ice cube size, press the “SELECT” button.<br />
If the ambient room temperature is lower than 60°F, we recommend selecting the small size ice<br />
cubes, as this will prevent the ice from sticking together.<br />
4. The ice making cycle lasts anywhere from 6 to 13 minutes, depending on the size of the ice cubes<br />
selected and the ambient temperature. The ice making time may vary significantly if the unit is<br />
being used in extremely warm temperatures.<br />
5. While the ice maker is on, periodically verify the water level in the reservoir. If there is not enough<br />
water in the reservoir, the ice maker will automatically stop, and the “ADD WATER” indicator light<br />
will turn on.<br />
6. Once this occurs, turn off the ice maker by pressing the “POWER” button. Allow the refrigerant<br />
inside the compressor to settle for 3 minutes. Fill the reservoir with water up to the water level<br />
mark and press the “POWER” button again to restart the unit.<br />
7. If the ice maker is full of ice, the unit will automatically stop making ice and the “ICE FULL” indicator<br />
light will turn on.<br />
4.2 How to Dispense <strong>Ice</strong> Cubes<br />
Fill water<br />
here<br />
1. Use a glass, cup or other receptacle to gently push the ice dispensing lever forward (part #5 in the<br />
parts diagram). <strong>Ice</strong> cubes will be dispensed into your glass or cup from the ice cube tap. Please<br />
Note: When dispensing ice cubes, always make sure the transparent viewing window located on top<br />
of the ice maker is closed, as the ice maker will not dispense ice cubes if the window is left open.<br />
2. When the ice dispensing lever is pushed, a blue indicator light will turn on. If this light does not turn<br />
on, the ice maker will not dispense ice cubes.


