WR2 Rain Sensor - Thewatershed.biz
WR2 Rain Sensor - Thewatershed.biz
WR2 Rain Sensor - Thewatershed.biz
Create successful ePaper yourself
Turn your PDF publications into a flip-book with our unique Google optimized e-Paper software.
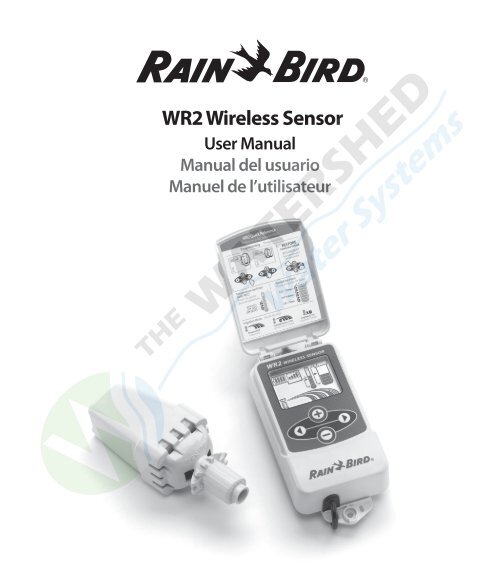
<strong>WR2</strong> Wireless <strong>Sensor</strong><br />
User Manual<br />
Manual del usuario<br />
Manuel de l’utilisateur
EN<br />
EN<br />
ES<br />
page 11<br />
FR<br />
page 22<br />
Contents<br />
Safety Information ..............................................1<br />
Interference With Other Electronic Devices .....................1<br />
Introduction. . . . . . . . . . . . . . . . . . . . . . . . . . . . . . . . . . . . . . . . . . . . . . . . . . . . . 1<br />
<strong>WR2</strong> Components ...............................................2<br />
<strong>WR2</strong> Benefits ....................................................2<br />
Mounting the Controller Interface ...............................2<br />
Wiring the Controller Interface to the Irrigation Controller .......3<br />
Initial Power Up .................................................4<br />
Controller Interface Display Icons ................................4<br />
<strong>Sensor</strong> Status .................................................4<br />
Environmental Conditions .....................................4<br />
Irrigation Modes .............................................5<br />
Synchronize the <strong>Sensor</strong> and Controller Interface .................5<br />
Programming the Set Points .....................................6<br />
<strong>Rain</strong>fall Set Point ..............................................6<br />
Temperature Set Point (<strong>Rain</strong>/Freeze <strong>Sensor</strong> only) ................6<br />
Programming Irrigation Modes ..................................6<br />
Saving, Resetting and Restoring Settings ........................7<br />
Save Contractor Default Settings ...............................7<br />
Reset Contractor Default Settings ..............................7<br />
Restore Contractor Default Settings ............................7<br />
Restore Standard Setting ......................................7<br />
Select the <strong>Sensor</strong> Location .......................................7<br />
<strong>Sensor</strong> Mounting Instructions ...................................8<br />
Using Multiple Controller Interface Units ........................8<br />
<strong>WR2</strong> Wireless <strong>Sensor</strong> Alerts & Troubleshooting ..................9<br />
Replacement or Spare Parts .....................................9<br />
Declaration of Conformity ......................................10
Safety Information<br />
Symbols used in this manual:<br />
F<br />
Symbol alerts the user to the presence of<br />
un-insulated “dangerous voltage” within<br />
the product’s enclosure that may be of<br />
sufficient magnitude to constitute a risk of<br />
electric shock.<br />
!<br />
Symbol alerts the user to the presence<br />
of important operating or maintenance<br />
(servicing) instructions.<br />
Interference With Other<br />
Electronic Devices<br />
<br />
<br />
<br />
electronic interference:<br />
<br />
<br />
<br />
<br />
Controller Interface or <strong>Sensor</strong>.<br />
<br />
<br />
<br />
<br />
This device may not cause harmful interference and<br />
<br />
including interference that may cause undesired<br />
operation.<br />
!<br />
THE IRRIGATION CONTROLLER / TIMER<br />
SHOULD BE ISOLATED VIA A CIRCUIT<br />
BREAKER OR CUTOFF SWITCH.<br />
!<br />
BATTERIES<br />
!<br />
CHANGES<br />
REMOVED FROM THE SENSOR<br />
SHOULD BE DISPOSED OF IN ACCOR-<br />
DANCE WITH LOCAL REGULATIONS.<br />
OR MODIFICATIONS NOT<br />
EXPRESSLY APPROVED BY THE PARTY<br />
RESPONSIBLE FOR COMPLIANCE COULD<br />
VOID THE USER'S AUTHORITY TO<br />
OPERATE THE EQUIPMENT.<br />
Introduction<br />
Congratulations on your purchase of the<br />
<strong>WR2</strong> Wireless <strong>Sensor</strong>.<br />
The <strong>Rain</strong> Bird Wireless <strong>Rain</strong> <strong>Sensor</strong> is designed for<br />
<br />
<br />
<br />
temperature events.<br />
Programming logic can suspend irrigation using the “Quick<br />
<br />
Wireless <strong>Rain</strong> / Freeze<br />
<strong>Sensor</strong> <br />
<br />
<br />
<br />
<br />
<strong>Rain</strong> Bird’s commitment to this Intelligent Use of Water. The<br />
<br />
<br />
<br />
Please read through these instructions in their<br />
entirety or refer to the programming demo (www.<br />
rainbird.com/<strong>WR2</strong>) before installing your <strong>WR2</strong><br />
Wireless <strong>Sensor</strong>. Also, reference your irrigation<br />
system controller / timer installation instructions<br />
for the proper connection of rain sensors.<br />
<strong>WR2</strong> Wireless <strong>Sensor</strong> 1
DO NOT insert battery cassette into <strong>Sensor</strong> until Controller<br />
Interface is powered up and you are ready to “pair” the units.<br />
No inserte las pilas en su compartimento hasta que se encienda el sensor<br />
del interfaz del programador y este preparado para sincronizarlos.<br />
Controller Interface - Mounting<br />
Montaje de la interfaz del Control <strong>WR2</strong><br />
Controller Interface - Wiring<br />
Instalación del cableado entre la interfaz de control<br />
RED ROJO - 24VAC<br />
BLACK NEGRO - 24VAC<br />
WHITE BLANCO - <strong>Sensor</strong> Input (or Common) Entrada para sensore (o Common)<br />
GREEN VERDE - <strong>Sensor</strong> Input (or "Field") Entrada para sensore (o "Field")<br />
Controller Interface -<br />
Initial Power Up<br />
Interfaz de control -<br />
Puesta en marcha<br />
inicial<br />
Pair Controller Interface & <strong>Sensor</strong><br />
Sincronización del sensor y la interfaz del Control <strong>WR2</strong><br />
1<br />
4<br />
2<br />
Programming Set Points<br />
Programación de los niveles preestablecidos<br />
1<br />
2<br />
3<br />
blink<br />
Intermitente<br />
<strong>WR2</strong> Components<br />
1 Controller Interface<br />
2 <strong>Sensor</strong><br />
3 Battery Cassette and Lithium CR2032 Battery<br />
4 <br />
5 <br />
6 User’s Manual<br />
7 Quick Reference Guides<br />
8 <br />
2<br />
<strong>WR2</strong> Benefits<br />
<br />
<br />
<br />
<br />
<br />
<br />
<br />
<br />
All settings are programmed through the Controller<br />
Interface device<br />
Large easy to understand icons communicate irrigation<br />
mode and sensor status.<br />
<br />
installation time<br />
Battery is easy to install / replace<br />
<br />
<br />
surfaces or rain gutters<br />
“Quick Shut Off” interrupts active irrigation cycle during a<br />
rain event<br />
Enhanced antenna array provides superior signal<br />
<br />
6<br />
1<br />
5<br />
7<br />
4<br />
<strong>Rain</strong> Bird’s Wireless <strong>Rain</strong> or <strong>Rain</strong> / Freeze <strong>Sensor</strong><br />
Quick Reference Guide Guía de referencia rápida<br />
!<br />
1<br />
2<br />
3<br />
4<br />
5<br />
Cable length<br />
30" (76.2 cm)<br />
Longitud del cableado<br />
30" (76.2 cm)<br />
8<br />
3<br />
NOTE: Tools needed for installation: drill, drill bit, and<br />
Phillip's head screwdriver<br />
1<br />
Mounting the Controller<br />
Interface<br />
Choose a location near the irrigation<br />
controller / timer.<br />
!<br />
The cable harness is 30 inches (76.2 cm)<br />
long, so before mounting the device,<br />
ensure the wires easily reach the irrigation<br />
controller’s connection terminals.<br />
<br />
<br />
<br />
It is recommended that the<br />
<br />
<br />
<br />
<br />
<br />
maximize communication range.<br />
<br />
supplied. Attach the Controller<br />
<br />
2 <strong>WR2</strong> Wireless <strong>Sensor</strong>
2<br />
Wiring the Controller<br />
Interface to the Irrigation<br />
Controller<br />
!<br />
This unit is designed to be installed in<br />
conjunction with 24VAC circuits only. Do<br />
not use with 110 or 220/230 VAC circuits.<br />
!<br />
The Controller Interface has 4 wires that<br />
must be connected to the irrigation<br />
controller / timer. If your timer does not<br />
have an internal 24VAC power source,<br />
you will need to splice the red and black<br />
Controller Interface wires to a 24VAC transformer<br />
(example: <strong>Rain</strong> Bird part number<br />
63747301S).<br />
Controllers with sensor inputs (with or without<br />
pump start / master valve)<br />
TO VALVES<br />
Controllers with no sensor inputs (with or without<br />
pump start / master valve)<br />
RED or<br />
BLACK<br />
WHITE<br />
GREEN<br />
TO VALVES<br />
COMMON<br />
FROM VALVES<br />
<br />
<br />
on the irrigation controller.<br />
<br />
controller.<br />
<br />
<br />
<br />
controller.<br />
<br />
!<br />
Ensure the sensor switch on the irrigation<br />
controller panel is in the active position.<br />
RED or<br />
BLACK<br />
GREEN or<br />
WHITE<br />
ESP-MC and ESP LX Modular Controllers<br />
TO VALVES<br />
<br />
<br />
on the irrigation controller.<br />
<br />
terminals.<br />
<br />
<br />
!<br />
Ensure the sensor switch on the irrigation<br />
controller panel is in the active position.<br />
RED<br />
BLACK<br />
GREEN<br />
WHITE<br />
<br />
<br />
irrigation controller.<br />
<br />
terminals.<br />
<br />
the controller.<br />
<br />
!<br />
Ensure the sensor switch on the irrigation<br />
controller panel is in the active position.<br />
<strong>WR2</strong> Wireless <strong>Sensor</strong> 3
3<br />
Initial Power Up<br />
Environmental Conditions<br />
<br />
<br />
<strong>Rain</strong>fall Set Point:<br />
Select from six (6) set points ranging<br />
from 1/8” (3mm) to 1/2” (13mm). A<br />
set point closer to the top of the icon<br />
<br />
<br />
<strong>Rain</strong>fall Indicator:<br />
Illustrates approximate amount of<br />
rainfall relative to <strong>Rain</strong>fall Set Point.<br />
Controller Interface Display Icons<br />
<strong>Sensor</strong> Status<br />
Battery Life Remaining: Four<br />
<br />
<br />
<br />
Signal Strength: Illustrates<br />
strength of the radio signal<br />
<br />
<br />
indicate maximum signal<br />
strength.<br />
<strong>Sensor</strong> Indicator / Pairing<br />
Status: The <strong>Sensor</strong> and<br />
Controller Interface synchronize<br />
communication addresses.<br />
Battery Life and Signal Strength<br />
<br />
<br />
<strong>Rain</strong>fall Trip Indicator:<br />
<br />
suspended irrigation due to "Quick<br />
Shut Off" or satisfying rainfall set<br />
point.<br />
Temperature Set Point<br />
(<strong>Rain</strong>/Freeze <strong>Sensor</strong> only):<br />
Select from three (3) set points:<br />
<br />
<br />
<br />
Temperature Indicator<br />
(<strong>Rain</strong>/Freeze <strong>Sensor</strong> only):<br />
Illustrates approximate temperature<br />
relative to Temperature Set Point<br />
Temperature Trip Indicator<br />
(<strong>Rain</strong>/Freeze <strong>Sensor</strong> only):<br />
<br />
has suspended irrigation due to<br />
<br />
temperature set point.<br />
4 <strong>WR2</strong> Wireless <strong>Sensor</strong>
Irrigation Modes<br />
Programmed Irrigation:<br />
<strong>WR2</strong> Wireless <strong>Sensor</strong><br />
is actively managing<br />
the irrigation controller<br />
/ timer. Once a set<br />
<br />
<br />
<br />
<br />
<br />
4<br />
Synchronize the <strong>Sensor</strong> and<br />
Controller Interface<br />
After the Controller Interface is wired to the irrigation<br />
timer, the <strong>Sensor</strong> and Controller Interface need to<br />
establish a radio communication link. When the link<br />
is established, the <strong>Sensor</strong> and Controller Interface are<br />
considered “paired.”<br />
<br />
<br />
<br />
installation sequence.<br />
Suspend Irrigation for 72 Hours:<br />
User has elected to<br />
temporarily suspend<br />
irrigation for 72 hours.<br />
<br />
resume programmed<br />
irrigation mode after 72 hours<br />
<br />
to programmed irrigation mode if set points are satisfied).<br />
Override <strong>Sensor</strong> for 72 Hours:<br />
User has elected to<br />
permit irrigation in<br />
<br />
the timer schedule<br />
regardless of environmental conditions (i.e. rainfall or<br />
<br />
automatically resume programmed irrigation mode after<br />
<br />
returning to programmed irrigation mode if set points are<br />
satisfied).<br />
<br />
<br />
<br />
<br />
<br />
<br />
<br />
Lower<br />
Casing<br />
Battery Cassette<br />
and CR2032 battery<br />
Unlocked<br />
Position<br />
<br />
<br />
<br />
<br />
Locked<br />
Position<br />
LED flashes when<br />
cassette is locked<br />
<br />
<strong>WR2</strong> Wireless <strong>Sensor</strong> 5
5. The <strong>Sensor</strong> is successfully paired to the Controller<br />
<br />
<br />
<br />
<br />
the <strong>Sensor</strong> indicates signal strength for 20 minutes<br />
<br />
features are an indication that your <strong>WR2</strong> Wireless <strong>Sensor</strong> is<br />
operational.<br />
5<br />
Programming the Set Points<br />
<br />
<br />
<br />
the contractor may elect to use the “Standard Setting”:<br />
<br />
irrigation” mode. The ”Standard Setting” is programmed at<br />
the factory and is active after successful pairing.<br />
Temperature Set Point<br />
(<strong>Rain</strong>/Freeze <strong>Sensor</strong> only)<br />
<br />
keypad to navigate to the<br />
Temperature Indicator icon.<br />
2. When the Temperature<br />
<br />
+ / – <br />
to set programming details.<br />
Select one of three temperature<br />
<br />
or 41°F (5°C).<br />
<br />
accept programming details<br />
and to navigate to next icon.<br />
<strong>Rain</strong>fall Set Point<br />
<br />
keypad to navigate to the<br />
<strong>Rain</strong>fall Indicator icon.<br />
2. When the <strong>Rain</strong>fall Indicator<br />
+ / –<br />
<br />
programming details. Each<br />
<br />
set point. Select from six (6) set<br />
points ranging from 1/8” (3mm)<br />
to 1/2” (13mm).<br />
<br />
accept programming details<br />
and to navigate to next icon.<br />
6<br />
Programming Irrigation<br />
Modes<br />
<br />
keypad to navigate to the<br />
Irrigation Mode icon.<br />
2. When the Irrigation Mode icon<br />
<br />
+ / – <br />
to set programming details.<br />
Manually set one of three<br />
irrigation modes. See Irrigation<br />
Modes.<br />
<br />
accept programming details<br />
and to navigate to next icon.<br />
6 <strong>WR2</strong> Wireless <strong>Sensor</strong>
7<br />
Saving, Resetting and<br />
Restoring Settings<br />
Save Contractor Default Settings<br />
Once the Controller Interface<br />
<br />
<br />
<br />
for five (5) seconds to save<br />
contractor default setting. All<br />
<br />
in unison one time to indicate<br />
program is saved.<br />
Reset Contractor Default Settings<br />
The Contractor default setting stores programming details<br />
related to rainfall and temperature set points.<br />
Restore Standard Setting<br />
8<br />
Press the –<br />
<br />
<br />
<br />
to cancel the Contractor<br />
default setting and restore<br />
the ”Standard Setting”:<br />
<br />
<br />
“programmed irrigation”<br />
<br />
”Standard Setting” is active.<br />
Select the <strong>Sensor</strong> Location<br />
The communication range for the <strong>WR2</strong><br />
Wireless <strong>Sensor</strong> is 700 feet (213.4 meters).<br />
<br />
Section 5 and 7 .<br />
Restore Contractor Default Settings<br />
<br />
restore.<br />
<br />
<br />
<br />
successful pairing. The <strong>Sensor</strong> updates its signal<br />
<br />
<br />
<br />
<br />
placement can improve signal strength.<br />
Press + and – <br />
<br />
<br />
<br />
default settings are restored.<br />
Signal<br />
GOOD<br />
Install<br />
POOR<br />
DO NOT install<br />
<strong>Sensor</strong> LED<br />
1-4 Blinks<br />
Does not blink<br />
<br />
<br />
<br />
<br />
<br />
receives as much rain and sunlight as the landscape. Be<br />
<br />
<strong>WR2</strong> Wireless <strong>Sensor</strong> 7
9<br />
<strong>Sensor</strong> Mounting Instructions<br />
This section provides detailed instructions on<br />
how to install the sensor.<br />
<strong>Sensor</strong> Bracket<br />
Assembly<br />
Components:<br />
Attachment<br />
Bracket<br />
Extension<br />
Arm<br />
Installing the <strong>Sensor</strong> in the<br />
attachment bracket.<br />
<br />
<br />
<br />
neck of the sensor up through the opening of the extension<br />
arm. Reinstall the cap. A clicking sound indicates that the<br />
<br />
cap.<br />
1<br />
remove cap<br />
2<br />
insert<br />
Attaching the bracket to a gutter.<br />
<br />
<br />
<br />
1 2<br />
3<br />
replace<br />
cap<br />
click<br />
mounting<br />
<br />
gutter<br />
Attaching the bracket to a Flat Surface.<br />
<br />
<br />
10<br />
Using Multiple Controller<br />
Interface Units<br />
<br />
(1) sensor.<br />
<br />
2. Synchronize the <strong>Sensor</strong> to the first Controller Interface in<br />
4 .<br />
<br />
<br />
<br />
<br />
8 <strong>WR2</strong> Wireless <strong>Sensor</strong>
<strong>Sensor</strong>. The Controller Interface “<strong>Sensor</strong> Indicator /<br />
<br />
<br />
ming the second Controller Interface.<br />
4. Repeat step 3 to pair additional Controller Interface units<br />
to the <strong>Sensor</strong>.<br />
5. When multiple Controller Interface units are paired to<br />
<br />
tions only.<br />
<strong>WR2</strong> Wireless <strong>Sensor</strong> Alerts & Troubleshooting<br />
<br />
<br />
Alert LCD Display Description Resolution<br />
Initial Power<br />
Up Failure<br />
<br />
<br />
do not appear indicating the<br />
Controller Interface is not<br />
<br />
<br />
Interface to the Irrigation Controller.<br />
No <strong>Sensor</strong> Paired<br />
“<strong>Sensor</strong> Indicator / Pairing<br />
Status” icon continues to<br />
<br />
During Installation: The sensor<br />
does not pair and is not commu<br />
<br />
Interface.<br />
1. Pair the sensor (see Section 4 ).<br />
<br />
<br />
<strong>Sensor</strong> Pairing<br />
Broken<br />
“<strong>Sensor</strong> Indicator / Pairing<br />
Status” icon does not<br />
<br />
signal strength<br />
After the <strong>WR2</strong> Wireless <strong>Sensor</strong> is<br />
in operation: A sensor that does<br />
<br />
signal strength to the Controller<br />
Interface is no longer paired.<br />
<br />
<br />
reacquires the Controller Interface.<br />
2. If you replace a sensor that is paired to the<br />
<br />
<br />
Low Battery<br />
“Battery Life Remaining”<br />
<br />
illuminated<br />
The <strong>Sensor</strong> has transmitted a<br />
<br />
<br />
<br />
<br />
<br />
<br />
<br />
<br />
<br />
<br />
four (4) or more years.<br />
Replacement or Spare Parts<br />
<br />
<br />
<strong>WR2</strong> Wireless <strong>Sensor</strong> 9


