
You also want an ePaper? Increase the reach of your titles
YUMPU automatically turns print PDFs into web optimized ePapers that Google loves.
Table of Contents<br />
Product Overview ........................................................3<br />
Package Contents....................................................3<br />
System Requirements .............................................3<br />
Introduction ..............................................................4<br />
Features ...................................................................5<br />
Hardware Overview .................................................6<br />
Installation ....................................................................7<br />
Getting Started ........................................................7<br />
Remove Existing Installations ............................7<br />
Disable Other Wireless Adapters .......................8<br />
Wireless Installation Considerations ......................10<br />
Adapter Installation ................................................11<br />
Configuration .............................................................17<br />
D-<strong>Link</strong> Wireless Connection Manager ...................17<br />
Wireless Networks ...........................................18<br />
Wi-Fi Protected Setup (WPS) ..........................19<br />
My Wireless Networks .....................................23<br />
Add Profile ...................................................24<br />
Modify Profile ...............................................25<br />
Support ............................................................26<br />
About ...............................................................27<br />
Connect to a Wireless Network ................................28<br />
® ...............................................................................28<br />
Using Windows Vista<br />
Using Windows ® XP ...............................................30<br />
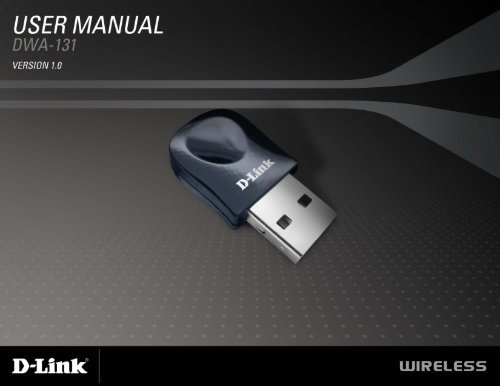
D-<strong>Link</strong> DWA-131 User Manual<br />
Table of Contents<br />
Wireless Security .......................................................31<br />
What is WPA? ........................................................31<br />
Configure WPA/WPA2 Passphrase ........................32<br />
Using the D-<strong>Link</strong> Wireless Connection ............32<br />
Using Windows ® Vista ......................................34<br />
Using the Windows ® XP Utility .........................36<br />
Configure WPA/WPA2 (RADIUS) ...........................38<br />
Using the D-<strong>Link</strong> Wireless Connection ............38<br />
Troubleshooting .........................................................39<br />
Wireless Basics .........................................................43<br />
Wireless Modes .....................................................47<br />
Networking Basics ....................................................48<br />
Check your IP address ..........................................48<br />
Windows ® XP/2000 Users ................................48<br />
Windows Vista ® Users ......................................48<br />
Statically Assign an IP address .............................49<br />
Windows ® XP/2000 Users ................................49<br />
Windows Vista ® Users ......................................50<br />
Technical Specifications ...........................................51<br />
Contacting Technical Support ..................................52<br />
Warranty .....................................................................53<br />
Registration ................................................................59
Section 1 - Product Overview<br />
D-<strong>Link</strong> DWA-131 User Manual<br />
Product Overview<br />
Package Contents<br />
• D-<strong>Link</strong> DWA-131 Wireless N Nano USB Adapter<br />
• Manual and Warranty on CD<br />
• D-<strong>Link</strong> Wireless Connection Manager on CD<br />
• Quick Installation Guide<br />
System Requirements<br />
• A computer or laptop with an available USB 2.0 port<br />
• Windows ® Vista, 2000 (Service Pack 4) or XP (Service Pack 2 or higher)<br />
• CD-ROM Drive<br />
• 300MHz processor and at least 64MB of RAM<br />
• A draft 802.11n or 802.11g access point or wireless router<br />
3
Section 1 - Product Overview<br />
D-<strong>Link</strong> DWA-131 User Manual<br />
Introduction<br />
The DWA-131 Wireless N Nano USB Adapter is a convenient wireless connectivity solution for desktop or notebook<br />
PCs. Instead of stringing Ethernet cables to your PC or dismantling your desktop computer case, the DWA-131 can<br />
enable Draft 802.11n wireless connectivity by simply utilizing your desktop or notebook PC’s USB port.<br />
Powered by Wireless N technology, the DWA-131 provides a faster wireless connection and superior reception than<br />
802.11g*. The DWA-131 is designed for use in bigger homes and for those that demand higher bandwidth networking.<br />
Maximize wireless performance by connecting this USB Adapter to a Wireless N router and stay connected from virtually<br />
anywhere in the home. This USB Adapter supports WPA and WPA2 encryption to prevent outside intrusion and protect<br />
your personal information from being exposed.<br />
D-<strong>Link</strong>’s Quick Setup Wizard guides you step-by-step through the installation process. You’ll be able to configure this<br />
USB Adapter without having to call the teenager from down the street to help you. The D-<strong>Link</strong> Wireless Manager is<br />
included with this product to keep track of all your most frequently accessed networks.<br />
Compact in size, robust in speed the DWA-131 Wireless N Nano USB Adapter is great for travel and a convenient<br />
solution for providing high performance wireless connectivity to your desktop or notebook PC. Enjoy the many benefits<br />
of wireless connectivity today!<br />
* Maximum wireless signal rate derived from IEEE Standard 802.11g and Draft 802.11n specifications. Actual data throughput will vary. Network<br />
conditions and environmental factors, including volume of network traffic, building materials and construction, and network overhead, lower actual<br />
data throughput rate. Environmental conditions will adversely affect wireless signal range.
Section 1 - Product Overview<br />
• Compact size for placement anywhere<br />
• Convenience of Plug & Play installation<br />
• Fully 802.11g compatible<br />
• Draft 802.11n compliant<br />
D-<strong>Link</strong> DWA-131 User Manual<br />
Features<br />
• Powered by the USB port; no external power source required<br />
• USB 2.0 standard *<br />
• You can securely connect to a wireless network using WPA/WPA2 (Wi-Fi Protected Access) providing<br />
you a much higher level of security for your data and communication than has previously been available.<br />
You may also use 802.1x for wireless authentication.<br />
• Position the DWA-131 almost anywhere in your workspace to achieve the best reception possible<br />
• Supports Infrastructure networks via an access point<br />
• User-friendly configuration and diagnostic utilities<br />
* Using a USB 1.1 port will adversely affect throughput.
Section 1 - Product Overview<br />
D-<strong>Link</strong> DWA-131 User Manual<br />
USB Port<br />
Used to connect the DWA-131<br />
to your computer.<br />
Hardware Overview<br />
WPS Button<br />
Press the WPS button to automatically<br />
connect to a WPS-enabled wireless<br />
router or access point and establish<br />
connectivity. Refer to page 19.
Section - Installation<br />
D-<strong>Link</strong> DWA-131 User Manual<br />
Installation<br />
This section will walk you through the installation process. If you have a built-in wireless adapter, please disable it in<br />
device manager before installing your D-<strong>Link</strong> adapter. Also, if you have previously installed another wireless adapter,<br />
please make sure any software is uninstalled.<br />
Getting Started<br />
Before installing your new D-<strong>Link</strong> wireless adapter, please verify the following:<br />
• Remove any previous installations of wireless adapters<br />
• Disable any built-in wireless adapters<br />
• Verify the settings such as the SSID and security settings of the network(s) you want to connect to<br />
Remove Existing Installations<br />
If you’ve installed a different manufacture’s adapter or a different model D-<strong>Link</strong> adapter, make sure the software is<br />
uninstalled before installing the new software. Some utilities may cause a conflict with the new software. If you plan<br />
to use multiple adapters at different times, make sure the utilities are not set to load when your computer boots up.<br />
Windows ® XP users may use the built-in wireless utility for all adapters.<br />
To remove any old software:<br />
Windows ® XP/Vista ® users: Click Start > Control Panel > Programs and Features.<br />
Windows ® 2000 users: Click Start > Settings > Control Panel > Add or Remove Programs.
Section - Installation<br />
D-<strong>Link</strong> DWA-131 User Manual<br />
Disable Other Wireless Adapters<br />
Most newer laptops may include a built-in wireless adapter. To prevent any conflicts with the D-<strong>Link</strong> wireless adapter,<br />
it is recommended to disable the wireless adapter (as well as any unused Ethernet adapters).<br />
From the desktop, right-click on the My Computer icon and select<br />
Properties.<br />
Click the Hardware tab and then click Device Manager. Scroll down<br />
the list and click the + sign to the left of Network Adapters.<br />
Right-click the adapter you would like to disable and select Disable.
Section - Installation<br />
Click Yes to disable the adapter.<br />
The adapter is now disabled. When disabled, a red X will be<br />
displayed.<br />
Disabling the adapter will not remove the drivers. If you would like<br />
to use the adapter, simply right-click it and select Enable.<br />
D-<strong>Link</strong> DWA-131 User Manual
Section - Installation<br />
D-<strong>Link</strong> DWA-131 User Manual<br />
Wireless Installation Considerations<br />
The D-<strong>Link</strong> wireless adapter lets you access your network using a wireless connection from virtually anywhere within<br />
the operating range of your wireless network. Keep in mind, however, that the number, thickness and location of walls,<br />
ceilings, or other objects that the wireless signals must pass through, may limit the range. Typical ranges vary depending<br />
on the types of materials and background RF (radio frequency) noise in your home or business. The key to maximizing<br />
wireless range is to follow these basic guidelines:<br />
1. Keep the number of walls and ceilings between the D-<strong>Link</strong> adapter and other network devices to a<br />
minimum - each wall or ceiling can reduce your adapter’s range from 3-90 feet (1-30 meters.) Position<br />
your devices so that the number of walls or ceilings is minimized.<br />
2. Be aware of the direct line between network devices. A wall that is 1.5 feet thick (.5 meters), at a<br />
45-degree angle appears to be almost 3 feet (1 meter) thick. At a 2-degree angle it looks over 42 feet<br />
(14 meters) thick! Position devices so that the signal will travel straight through a wall or ceiling (instead<br />
of at an angle) for better reception.<br />
3. Building Materials make a difference. A solid metal door or aluminum studs may have a negative effect on<br />
range. Try to position access points, wireless routers, and computers so that the signal passes through<br />
drywall or open doorways. Materials and objects such as glass, steel, metal, walls with insulation, water<br />
(fish tanks), mirrors, file cabinets, brick, and concrete will degrade your wireless signal.<br />
4. Keep your product away (at least 3-6 feet or 1-2 meters) from electrical devices or appliances that<br />
generate RF noise.<br />
5. If you are using 2.4GHz cordless phones or X-10 (wireless products such as ceiling fans, lights, and<br />
home security systems), your wireless connection may degrade dramatically or drop completely. Make<br />
sure your 2.4GHz phone base is as far away from your wireless devices as possible. The base transmits<br />
a signal even if the phone in not in use.<br />
10
Section - Installation<br />
Warning: Do NOT install the DWA-131 USB Adapter into your computer before installing the driver software<br />
from the D-<strong>Link</strong> CD.<br />
Turn on the computer and Insert the D-<strong>Link</strong> DWA-131 Driver CD in the CD-ROM drive.<br />
If the CD Autorun function does not automatically start on your computer, go to Start > Run. In the run box type<br />
“D:\DWA131.exe” (where D: represents the drive letter of your CD-ROM drive).<br />
When the autorun screen appears, click Install Drivers.<br />
Click Install Drivers<br />
D-<strong>Link</strong> DWA-131 User Manual<br />
Adapter Installation<br />
11
Section - Installation<br />
The InstallShield Wizard window will appear.<br />
Click Next<br />
By default setup will install to the default location: C:\Program<br />
Files\D-<strong>Link</strong>\DWA-131, where C: represents the drive letter of<br />
your hard drive. To install to a different location click Browse<br />
and specify the location.<br />
Click Next<br />
Select the Program Files folder location.<br />
D-<strong>Link</strong> DWA-131 User Manual<br />
1
Section - Installation<br />
Insert the adapter into an available USB port on your computer.<br />
If the Found New Hardware Wizard appears, click Cancel.<br />
Click Next<br />
The Wireless Connection Wizard will now appear.<br />
If you want to manually connect to a wireless network, refer to<br />
page 17. The following instructions will connect you to a wireless<br />
network using Wi-Fi Protected Setup (WPS).<br />
Click Next<br />
D-<strong>Link</strong> DWA-131 User Manual<br />
13
Section - Installation<br />
D-<strong>Link</strong> DWA-131 User Manual<br />
Wireless Connection Wizard<br />
Connect to your network by selecting to Manually type your<br />
Network Name or using the Wifi protected Setup (WPS).<br />
Enter the network name (SSID) manually. If you enter the SSID<br />
incorrectly, you will automatically be brought to the site survey<br />
page. Click Scan to display the site survey page.<br />
Click Next<br />
Click the Scan button to display a list of wireless networks (site<br />
survey). Select the network name (SSID) and click Next.<br />
Click Next<br />
1
Section - Installation<br />
Click Finish to continue. If you are prompted to reboot your<br />
computer, select Yes, I want to restart my computer now.<br />
Click Finish<br />
D-<strong>Link</strong> DWA-131 User Manual<br />
1
Section - Installation<br />
D-<strong>Link</strong> DWA-131 User Manual<br />
Push Button Configuration (PBC)<br />
Select “Use the WiFi Proctected Setup (WPS)” to initiate the<br />
configuration and click Next.<br />
To connect to your network using the WPS push button<br />
configuration method, click the virtual button as shown in the<br />
screenshot.<br />
Note: You may also connect to your network by pressing the<br />
WPS button on the adaper and holding for two seconds until the<br />
wizard screen comes up. Then, press the WPS button on the<br />
router/access point to continue.<br />
Press the WPS button on your access point or wireless router<br />
within 2 minutes to establish connectivity.<br />
1
Section 3 - Configuration<br />
D-<strong>Link</strong> DWA-131 User Manual<br />
Configuration<br />
This section will show you how to configure your new D-<strong>Link</strong> wireless adapter using the D-<strong>Link</strong> Utility as well as the<br />
Windows ® XP Zero Configuration Utility and Vista WLAN Autoconfiguration.<br />
D-<strong>Link</strong> Wireless Connection Manager<br />
The D-<strong>Link</strong> DWA-131 uses the Wireless Connection Manager as the management software. The manager provides<br />
the user an easy interface to change any settings related to the wireless adapter. Clicking on the Wireless Connection<br />
Manager icon on the desktop will start the Configuration.<br />
If you are using Windows Vista ® please skip to page 27 or Windows ® XP skip to page 29.<br />
Double-click the Wireless Connection<br />
Manager icon on your desktop.<br />
1
Section 3 - Configuration<br />
D-<strong>Link</strong> DWA-131 User Manual<br />
Wireless Networks<br />
The Wireless Networks (Site Survey) page will display all wireless networks that are available in your area. To connect<br />
to a network, simply highlight the wireless network (SSID) and click Connect.<br />
SSID:<br />
MAC:<br />
Signal:<br />
Security:<br />
Channel:<br />
WPS Button:<br />
Refresh Button:<br />
Connect Button:<br />
Activate Button:<br />
The SSID (Service Set Identifier) is the name<br />
of the wireless network.<br />
Displays the MAC address of the wireless<br />
device.<br />
Displays the <strong>Link</strong> Quality of the wireless<br />
connection.<br />
If there is a “lock” icon, this means the wireless<br />
network is secure. You must know the encryption<br />
key/security settings to connect.<br />
Displays the channel of the wireless network.<br />
Connect to a wireless network using Wi-Fi<br />
Protected Setup. Refer to the next page.<br />
Rescans for available wireless networks in your<br />
area.<br />
Highlight a wireless network and click the<br />
Connect button. If the network is secure, a<br />
pop-up window will appear. Enter the security<br />
information to connect (refer to the Wireless<br />
Security section for more information).<br />
Select a wireless network profile from the<br />
drop-down menu and click Activate to connect.<br />
Allow up to 30 seconds to connect.<br />
1
Section 3 - Configuration<br />
D-<strong>Link</strong> DWA-131 User Manual<br />
Wi-Fi Protected Setup (WPS)<br />
Wi-Fi Protected Setup (WPS) System is designed for easy setup<br />
of security-enabled Wi-Fi networks. It is recommended to have<br />
the access point or wireless router nearby during setup.<br />
For more information on WPS, visit the Wi-Fi Alliance website at<br />
www.wi-fi.org.<br />
“Push Button Configuration” (PBC) is a virtual button in<br />
the utility that connects you to other WPS-enabled devices. A<br />
connection can be established by clicking on the virtual button,<br />
then pushing the physical button on the access point or wireless<br />
router within 120 seconds. Refer to page 14.<br />
“Personal Identification Number” (PIN) is a unique number<br />
generated randomly by the wireless adapter’s utility. Entering<br />
this number in the utility of the WPS-enabled wireless router or<br />
access point connects you with the intended wireless network.<br />
Refer to the next page for more information.<br />
1
Section 3 - Configuration<br />
D-<strong>Link</strong> DWA-131 User Manual<br />
Push Button<br />
1. To connect to your network, press the WPS button on the<br />
adapter and hold for two seconds until the wizard screen<br />
appears.<br />
2. Press the WPS button located on your access point or<br />
router to continue. This screen will appear once you have<br />
successfully established connection with your network.<br />
0
Section 3 - Configuration<br />
If you want to connect using the PBC method, refer to page 14. To<br />
use the PIN method, select PIN (Personal Identification Number)<br />
and click Next.<br />
Click Next<br />
Make sure your access point or wireless router is close by. Write<br />
down the number on the screen. Enter this number in your access<br />
point or wireless router. Please refer to the manufacture’s manual<br />
for instructions.<br />
Once you click Next, you will have 2 minutes to enter this number<br />
in your access point or wireless router.<br />
Click Next<br />
D-<strong>Link</strong> DWA-131 User Manual<br />
Personal Identification Number (PIN)<br />
1
Section 3 - Configuration<br />
The adapter will try to establish connectivity to your access point<br />
or wireless router.<br />
When this screen appears, you have successfully established<br />
connectivity. Click Finish to complete your setup.<br />
Click Finish<br />
D-<strong>Link</strong> DWA-131 User Manual
Section 3 - Configuration<br />
D-<strong>Link</strong> DWA-131 User Manual<br />
My Wireless Networks<br />
The My Wireless Networks page will allow you to create, edit, and delete wireless network profiles. Every time you<br />
connect to a network using the Wireless Networks page, a profile will automatically be created.<br />
New Button:<br />
Modify:<br />
Delete:<br />
Activate:<br />
Profile Details:<br />
Click New to create a new wireless network<br />
profile (refer to page 23).<br />
Click Modify to edit a current profile (refer to<br />
page 24).<br />
Click Delete to remove a profile.<br />
Click Activate to use a profile. Allow up to 30<br />
seconds to connect to the wireless network.<br />
The Profile Details section will display information<br />
about the wireless network such as the network<br />
name (SSID), network type (Infrastructure), and<br />
if the network is secured.<br />
3
Section 3 - Configuration<br />
D-<strong>Link</strong> DWA-131 User Manual<br />
Add Profile<br />
You may add a new network by clicking the New button from the My Wireless Networks page.<br />
Profile Name:<br />
SSID:<br />
Network Type:<br />
Security Type:<br />
Enter a name for your profile (e.g. Home, Office,<br />
Coffee Shop).<br />
Enter the SSID of the wireless network.<br />
Select the network type. If you are connecting<br />
to a wireless router or access point, select<br />
Infrastructure. (Ad-hoc mode is not supported)<br />
Select the type of security used. Please refer to the<br />
Wireless Security section for more information.<br />
OK Button:<br />
Click OK to save your settings.
Section 3 - Configuration<br />
D-<strong>Link</strong> DWA-131 User Manual<br />
Modify Profile<br />
You may edit an existing profile by selecting the profile and clicking the Modify button from the My Wireless Networks<br />
page.<br />
Profile Name:<br />
SSID:<br />
Network Type:<br />
Security Type:<br />
Enter a name for your profile (e.g. Home, Office,<br />
Coffee Shop).<br />
Displays the SSID of the network.<br />
Displays the network type.<br />
Select the type of security used. Please refer<br />
to the Wireless Security section for more<br />
information.<br />
OK Button:<br />
Click OK to save your settings.
Section 3 - Configuration<br />
D-<strong>Link</strong> DWA-131 User Manual<br />
Support<br />
If you need help, click the Support button. A panel will appear to the right of the utility which will display information<br />
about the utility.
Section 3 - Configuration<br />
The About screen gives you information about the Firmware and Utility Versions of the DWA-131.<br />
D-<strong>Link</strong> DWA-131 User Manual<br />
About
Section 3 - Configuration<br />
D-<strong>Link</strong> DWA-131 User Manual<br />
Connect to a Wireless Network<br />
Using Windows Vista ®<br />
Windows Vista ® users may use the built-in wireless utility. If you are using another company’s utility or Windows ® 2000,<br />
please refer to the user manual of your wireless adapter for help with connecting to a wireless network. Most utilities<br />
will have a “site survey” option similar to the Windows Vista ® utility as seen below.<br />
If you receive the Wireless Networks Detected bubble, click<br />
on the center of the bubble to access the utility.<br />
or<br />
Right-click on the wireless computer icon in your system tray<br />
(lower-right corner next to the time). Select Connect to a<br />
network.<br />
The utility will display any available wireless networks in your<br />
area. Click on a network (displayed using the SSID) and click<br />
the Connect button.<br />
If you get a good signal but cannot access the Internet, check you<br />
TCP/IP settings for your wireless adapter. Refer to the Networking<br />
Basics section in this manual for more information.
Section 3 - Configuration<br />
Enter the same security key or passphrase that is<br />
on your router and click Connect.<br />
It may take 20-30 seconds to connect to the wireless<br />
network. If the connection fails, please verify that the<br />
security settings are correct. The key or passphrase<br />
must be exactly the same as on the wireless<br />
router.<br />
D-<strong>Link</strong> DWA-131 User Manual
Section 3 - Configuration<br />
D-<strong>Link</strong> DWA-131 User Manual<br />
Connect to a Wireless Network<br />
Using Windows ® XP<br />
Windows ® XP users may use the built-in wireless utility (Zero Configuration Utility). The following instructions are for<br />
Service Pack 2 users. If you are using another company’s utility or Windows ® 2000, please refer to the user manual<br />
of your wireless adapter for help with connecting to a wireless network. Most utilities will have a “site survey” option<br />
similar to the Windows ® XP utility as seen below.<br />
If you receive the Wireless Networks Detected bubble, click<br />
on the center of the bubble to access the utility.<br />
or<br />
Right-click on the wireless computer icon in your system tray<br />
(lower-right corner next to the time). Select View Available<br />
Wireless Networks.<br />
The utility will display any available wireless networks in your<br />
area. Click on a network (displayed using the SSID) and click the<br />
Connect button.<br />
If you get a good signal but cannot access the Internet, check your<br />
TCP/IP settings for your wireless adapter. Refer to the Networking<br />
Basics section in this manual for more information.<br />
30
Section - Wireless Security<br />
D-<strong>Link</strong> DWA-131 User Manual<br />
Wireless Security<br />
This section will show you the different levels of security you can use to protect your data from intruders. The<br />
DWA-131 offers the following types of security:<br />
• WPA2 (Wi-Fi Protected Access 2) • WPA2-PSK (Pre-Shared Key)<br />
• WPA (Wi-Fi Protected Access) • WPA-PSK (Pre-Shared Key)<br />
• 802.1x (RADIUS)<br />
What is WPA?<br />
WPA, or Wi-Fi Protected Access, is a Wi-Fi standard that was designed to improve the security features of WEP (Wired<br />
Equivalent Privacy).<br />
The 2 major improvements over WEP:<br />
• Improved data encryption through the Temporal Key Integrity Protocol (TKIP). TKIP scrambles the keys<br />
using a hashing algorithm and, by adding an integrity-checking feature, ensures that the keys haven’t been<br />
tampered with. WPA2 is based on 802.11i and uses Advanced Encryption Standard instead of TKIP.<br />
• User authentication, which is generally missing in WEP, through the extensible authentication protocol<br />
(EAP). WEP regulates access to a wireless network based on a computer’s hardware-specific MAC<br />
address, which is relatively simple to be sniffed out and stolen. EAP is built on a more secure public-key<br />
encryption system to ensure that only authorized network users can access the network.<br />
WPA-PSK/WPA2-PSK uses a passphrase or key to authenticate your wireless connection. The key is an alpha-numeric<br />
password between 8 and 63 characters long. The password can include symbols (!?*&_) and spaces. This key must<br />
be the exact same key entered on your wireless router or access point.<br />
WPA/WPA2 incorporates user authentication through the Extensible Authentication Protocol (EAP). EAP is built on a<br />
more secure public key encryption system to ensure that only authorized network users can access the network.<br />
31
Section - Wireless Security<br />
D-<strong>Link</strong> DWA-131 User Manual<br />
Configure WPA/WPA2 Passphrase<br />
Using the D-<strong>Link</strong> Wireless Connection Manager<br />
It is recommended to enable WPA-PSK on your wireless router or access point before configuring your wireless adapter.<br />
If you are joining an existing network, you will need to know the WPA-PSK passphrase being used.<br />
1. Open the Wireless Connection Manager by double-clicking on the D-<strong>Link</strong><br />
icon on your desktop.<br />
2. Highlight the wireless network (SSID) you would like to connect to and<br />
click Connect. If the network is using WPA-PSK, the screen (as shown<br />
to the bottom-right) will appear.<br />
3. Enter the WPA-PSK passphrase exactly as it is on your wireless router<br />
or access point. Click the Show text in the password field box to see<br />
the passphrase. Unchecking it will hide it.<br />
4. Click OK to connect to the network. Allow up to 30 seconds to<br />
connect.<br />
If you would like to create a new network and enter the WPA-PSK<br />
settings, refer to the next page.<br />
3
Section - Wireless Security<br />
It is recommended to enable WPA-PSK on your wireless router or access point before configuring your wireless adapter.<br />
Make sure you enter the passphrase exactly the same on all wireless devices.<br />
1. Open the Wireless Connection Manager by double-clicking on the D-<strong>Link</strong> icon on your desktop. Click on New to<br />
create a new profile or highlight an existing profile and click Modify.<br />
2. Select WPA/WPA2-Personal under Set Security Option.<br />
3. Select TKIP or AES.<br />
4. Enter the passphrase exactly as it is on your wireless router<br />
or access point.<br />
5. Click OK to connect to the network. Allow up to 30 seconds<br />
to connect.<br />
D-<strong>Link</strong> DWA-131 User Manual<br />
33
Section - Wireless Security<br />
D-<strong>Link</strong> DWA-131 User Manual<br />
Configure WPA/WPA2 Passphrase<br />
Using Windows ® Vista<br />
It is recommended to enable wireless security (WPA/WPA2) on your wireless router or access point before configuring<br />
your wireless adapter. If you are joining an existing network, you will need to know the security key or passphrase<br />
being used.<br />
1. Open the Windows Vista ® Wireless Utility by right-clicking<br />
on the wireless computer icon in your system tray (lower<br />
right corner of screen). Select Connect to a network.<br />
2. Highlight the wireless network (SSID) you would like to<br />
connect to and click Connect.<br />
3
Section - Wireless Security<br />
3. Enter the same security key or passphrase that is on your router<br />
and click Connect.<br />
It may take 20-30 seconds to connect to the wireless network. If the<br />
connection fails, please verify that the security settings are correct.<br />
The key or passphrase must be exactly the same as on the wireless<br />
router.<br />
D-<strong>Link</strong> DWA-131 User Manual<br />
3
Section - Wireless Security<br />
D-<strong>Link</strong> DWA-131 User Manual<br />
Configure WPA/WPA2 Passphrase<br />
Using the Windows ® XP Utility<br />
It is recommended to enable WPA-PSK on your wireless router or access point before configuring your wireless adapter.<br />
If you are joining an existing network, you will need to know the WPA-PSK key being used.<br />
1. Open the Windows ® XP Wireless Utility by right-clicking<br />
on the wireless computer icon in your system tray<br />
(lower-right corner of screen). Select View Available<br />
Wireless Networks.<br />
2. Highlight the wireless network (SSID) you would like<br />
to connect to and click Connect.<br />
3
Section - Wireless Security<br />
3. The Wireless Network Connection box will appear. Enter the<br />
WPA-PSK passphrase and click Connect.<br />
It may take 20-30 seconds to connect to the wireless network. If the<br />
connection fails, please verify that the WPA-PSK settings are correct.<br />
The WPA-PSK passphrase must be exactly the same as on the<br />
wireless router or access point.<br />
D-<strong>Link</strong> DWA-131 User Manual<br />
3
Section - Wireless Security<br />
D-<strong>Link</strong> DWA-131 User Manual<br />
Configure WPA/WPA2 (RADIUS)<br />
Using the D-<strong>Link</strong> Wireless Connection Manager<br />
WPA and WPA2 are for advanced users who are familiar with using a RADIUS server and setting up certificates.<br />
1. Open the Wireless Connection Manager by double-clicking on the D-<strong>Link</strong><br />
icon on your desktop. Click on New to create a new profile or highlight an<br />
existing profile and click Modify.<br />
2. Select WPA/WPA2-Enterprise under Set Security Option and then select<br />
TKIP or AES.<br />
3. Click on Advanced Config to continue.<br />
4. Next to EAP Type, select EAP-TLS, EAP-TTLS, or PEAP. Extensible<br />
Authentication Protocols allow devices on the network to request<br />
authentication from the RADIUS server in the network. All the devices<br />
on the network must use the same EAP type when using a RADIUS<br />
server for authentication. Some RADIUS servers require that the Validate<br />
Server field be selected. Check this field if your RADIUS server requires<br />
validation.<br />
5. Select a User Certificate from the drop-down menu.<br />
6. Enter the login information required to authenticate.<br />
7. Click Add to enter the IP address(es) of your RADIUS servers.<br />
8. Click OK to save your settings.<br />
3
Section - Troubleshooting<br />
Troubleshooting<br />
This chapter provides solutions to problems that can occur during the installation and operation of the DWA-131. Read<br />
the following descriptions if you are having problems. The examples below are illustrated in Windows ® XP. If you have<br />
a different operating system, the screenshots on your computer will look similar to the following examples.<br />
1. How do I know if my adapter is installed properly?<br />
Go to Start > My Computer > Properties.<br />
Select the Hardware Tab.<br />
D-<strong>Link</strong> DWA-131 User Manual<br />
3
Section - Troubleshooting<br />
Click the + sign next to Network Adapters.<br />
Right-click on D-<strong>Link</strong> DWA-131 USB Adapter.<br />
Select Properties to check that the drivers are<br />
installed properly.<br />
Look under Device Status to check that the device<br />
is working properly. Click OK to continue.<br />
D-<strong>Link</strong> DWA-131 User Manual<br />
D-<strong>Link</strong> DWA-131 USB Adapter<br />
D-<strong>Link</strong> DWA-131<br />
Wireless USB Adapter<br />
0
Section - Troubleshooting<br />
2. The computer does not recognize the DWA-131 Wireless USB Adapter.<br />
Make sure that the DWA-131 Wireless USB Adapter is properly seated in the computer’s USB port.<br />
If Windows does not detect the hardware upon insertion of the adapter, make sure to completely remove drivers that<br />
were previously loaded.<br />
3. The computer with the DWA-131 installed is unable to connect to the wireless network and/or the Internet.<br />
• Check that the LED indicators for the broadband modem are indicating normal activity. If not, there may<br />
be a problem with the broadband connection.<br />
• Check that the LED indicators on the wireless router are functioning properly. If not, check that the AC<br />
power and Ethernet cables are firmly connected.<br />
• Check that the IP Address, subnet mask, gateway, and DNS settings are correctly entered for the<br />
network<br />
• In Infrastructure mode, make sure the same Service Set Identifier (SSID) is specified on the settings<br />
for the wireless clients and access points. The SSID factory default setting for D-<strong>Link</strong> products is default.<br />
(Double-click on the WLAN icon in the taskbar. The <strong>Link</strong> Info screen will display the SSID setting.)<br />
D-<strong>Link</strong> DWA-131 User Manual<br />
1
Section - Troubleshooting<br />
Check that the Network Connection for the wireless client is configured properly. Select AP (Infrastructure) when<br />
connecting to an access point. Double-click on the WLAN icon in the taskbar > click on Configuration to change the<br />
settings for the wireless adapter.<br />
If Security is enabled, make sure that the correct encryption keys are entered on both the DWA-131 and the access<br />
point. Double-click on the WLAN icon in the taskbar > click Encryption. Check to see that the key selected is set to<br />
the same key as other devices on the network.<br />
D-<strong>Link</strong> DWA-131 User Manual
Appendix A - Wireless Basics<br />
D-<strong>Link</strong> DWA-131 User Manual<br />
Wireless Basics<br />
D-<strong>Link</strong> wireless products are based on industry standards to provide easy-to-use and compatible high-speed wireless<br />
connectivity within your home, business or public access wireless networks. Strictly adhering to the IEEE standard,<br />
the D-<strong>Link</strong> wireless family of products will allow you to securely access the data you want, when and where you want<br />
it. You will be able to enjoy the freedom that wireless networking delivers.<br />
A wireless local area network (WLAN) is a cellular computer network that transmits and receives data with radio signals<br />
instead of wires. Wireless LANs are used increasingly in both home and office environments, and public areas such<br />
as airports, coffee shops and universities. Innovative ways to utilize WLAN technology are helping people to work and<br />
communicate more efficiently. Increased mobility and the absence of cabling and other fixed infrastructure have proven<br />
to be beneficial for many users.<br />
Wireless users can use the same applications they use on a wired network. Wireless adapter cards used on laptop<br />
and desktop systems support the same protocols as Ethernet adapter cards.<br />
Under many circumstances, it may be desirable for mobile network devices to link to a conventional Ethernet LAN in<br />
order to use servers, printers or an Internet connection supplied through the wired LAN. A Wireless Router is a device<br />
used to provide this link.<br />
3
Appendix A - Wireless Basics<br />
What is Wireless?<br />
Wireless or Wi-Fi technology is another way of connecting your computer to the network without using<br />
wires. Wi-Fi uses radio frequency to connect wirelessly, so you have the freedom to connect computers<br />
anywhere in your home or office network.<br />
Why D-<strong>Link</strong> Wireless?<br />
D-<strong>Link</strong> is the worldwide leader and award winning designer, developer, and manufacturer of networking<br />
products. D-<strong>Link</strong> delivers the performance you need at a price you can afford. D-<strong>Link</strong> has all the products<br />
you need to build your network.<br />
How does wireless work?<br />
Wireless works similar to how cordless phone work, through radio signals to transmit data from one point<br />
A to point B. But wireless technology has restrictions as to how you can access the network. You must<br />
be within the wireless network range area to be able to connect your computer. There are two different<br />
types of wireless networks Wireless Local Area Network (WLAN), and Wireless Personal Area Network<br />
(WPAN).<br />
Wireless Local Area Network (WLAN)<br />
In a wireless local area network, a device called an Access Point (AP) connects computers to the network.<br />
The access point has a small antenna attached to it, which allows it to transmit data back and forth over<br />
radio signals. With an indoor access point as seen in the picture, the signal can travel up to 300 feet.<br />
With an outdoor access point the signal can reach out up to 30 miles to serve places like manufacturing<br />
plants, industrial locations, college and high school campuses, airports, golf courses, and many other<br />
outdoor venues.<br />
D-<strong>Link</strong> DWA-131 User Manual
Appendix A - Wireless Basics<br />
Wireless Personal Area Network (WPAN)<br />
Bluetooth is the industry standard wireless technology used for WPAN. Bluetooth devices in WPAN operate<br />
in a range up to 30 feet away.<br />
Compared to WLAN the speed and wireless operation range are both less than WLAN, but in return it<br />
doesn’t use nearly as much power which makes it ideal for personal devices, such as mobile phones,<br />
PDAs, headphones, laptops, speakers, and other devices that operate on batteries.<br />
Who uses wireless?<br />
Wireless technology as become so popular in recent years that almost everyone is using it, whether it’s<br />
for home, office, business, D-<strong>Link</strong> has a wireless solution for it.<br />
Home<br />
• Gives everyone at home broadband access<br />
• Surf the web, check email, instant message, and etc.<br />
• Gets rid of the cables around the house<br />
• Simple and easy to use<br />
Small Office and Home Office<br />
• Stay on top of everything at home as you would at office<br />
• Remotely access your office network from home<br />
• Share Internet connection and printer with multiple computers<br />
• No need to dedicate office space<br />
D-<strong>Link</strong> DWA-131 User Manual
Appendix A - Wireless Basics<br />
Where is wireless used?<br />
Tips<br />
Wireless technology is expanding everywhere not just at home or office. People like the freedom of mobility<br />
and it’s becoming so popular that more and more public facilities now provide wireless access to attract<br />
people. The wireless connection in public places is usually called “hotspots”.<br />
Using a D-<strong>Link</strong> USB Adapter with your laptop, you can access the hotspot to connect to Internet from<br />
remote locations like: Airports, Hotels, Coffee Shops, Libraries, Restaurants, and Convention Centers.<br />
Wireless network is easy to setup, but if you’re installing it for the first time it could be quite a task not<br />
knowing where to start. That’s why we’ve put together a few setup steps and tips to help you through the<br />
process of setting up a wireless network.<br />
Here are a few things to keep in mind, when you install a wireless network.<br />
Centralize your router or Access Point<br />
Make sure you place the router/access point in a centralized location within your network for the best<br />
performance. Try to place the router/access point as high as possible in the room, so the signal gets<br />
dispersed throughout your home. If you have a two-story home, you may need a repeater to boost the<br />
signal to extend the range.<br />
Eliminate Interference<br />
Place home appliances such as cordless telephones, Nanowaves, and televisions as far away as possible<br />
from the router/access point. This would significantly reduce any interference that the appliances might<br />
cause since they operate on same frequency.<br />
D-<strong>Link</strong> DWA-131 User Manual
Appendix A - Wireless Basics<br />
Security<br />
Don’t let you next-door neighbors or intruders connect to your wireless network. Secure your wireless<br />
network by turning on the WPA or WEP security feature on the router. Refer to product manual for detail<br />
information on how to set it up.<br />
There are basically two modes of networking:<br />
• Infrastructure – All wireless clients will connect to an access point or wireless router.<br />
• Ad-Hoc – Directly connecting to another computer, for peer-to-peer communication, using wireless<br />
network adapters on each computer. Unfortunately 802.11g/n products such as the DWA-131 do not<br />
support ad-hoc mode.<br />
An Infrastructure network contains an Access Point or wireless router. All the wireless devices, or clients, will connect<br />
to the wireless router or access point.<br />
An Ad-Hoc* network contains only clients, such as laptops with wireless USB Adapters. All the adapters must be in<br />
Ad-Hoc mode to communicate.<br />
* Not supported with the DWA-131.<br />
D-<strong>Link</strong> DWA-131 User Manual<br />
Wireless Modes
Appendix B - Networking Basics<br />
Check your IP address<br />
D-<strong>Link</strong> DWA-131 User Manual<br />
Networking Basics<br />
After you install your new D-<strong>Link</strong> wireless adapter and have established a wireless connection, by default, the TCP/IP<br />
settings should be set to obtain an IP address from a DHCP server (i.e. router) automatically. To verify your IP address,<br />
please follow the steps below.<br />
Windows ® XP/2000 Users<br />
• Click on Start > Run. In the run box type cmd and click OK.<br />
• At the prompt, type ipconfig and press Enter.<br />
• This will display the IP address, subnet mask, and the default gateway of your<br />
adapter.<br />
Windows Vista ® Users<br />
• Click Start > All Programs > Accessories > Command Prompt. You may<br />
need administrative access to run this application.<br />
• For all additional prompt windows inquiring of running the command prompt<br />
application, select Yes, OK, or Continue.<br />
• At the prompt, type ipconfig and press Enter.<br />
• This will display the IP address, subnet mask, and default gateway of your<br />
adapter.<br />
If the address is 0.0.0.0, check your adapter installation, security settings, and the settings on your router. Some firewall software programs<br />
may block a DHCP request on newly installed adapters.
Appendix B - Networking Basics<br />
D-<strong>Link</strong> DWA-131 User Manual<br />
Statically Assign an IP address<br />
If you are not using a DHCP capable gateway/router, or you need to assign a static IP address, please follow the steps<br />
below:<br />
Windows ® XP/2000 Users<br />
• Windows ® XP - Click on Start > Control Panel. Make sure you are in Classic View. Double-click on the Network Connections<br />
icon.<br />
Windows ® 2000 – From the desktop, right-click My Network Places > Properties.<br />
• Right-click on the Local Area Connection which represents your D-<strong>Link</strong> wireless network adapter (or other adapter) which will<br />
be connected to your router.<br />
• Highlight Internet Protocol (TCP/IP) and click Properties.<br />
• Click Use the following IP address and enter an IP address that is on the same subnet<br />
as your network or LAN IP address on your router.<br />
Example: If the router’s LAN IP address is 192.168.0.1, make your IP address 192.168.0.X<br />
where X is a number between 2 and 99. Make sure that the number you choose is not<br />
in use on the network.<br />
• Set Default Gateway the same as the LAN IP address of your router or gateway.<br />
• Set Primary DNS the same as the LAN IP address of your router or gateway.<br />
• The Secondary DNS is optional (you may enter a DNS server from your ISP).<br />
• Click OK to save your settings.
Appendix B - Networking Basics<br />
Windows Vista ® Users<br />
• Click on Start > Control Panel. Make sure you are in Classic View. Double-click on the Network and Sharing Center icon. Along<br />
the left panel in the window, click on Manage network connections.<br />
• Right-click on the Local Area Connection which represents your D-<strong>Link</strong> wireless network adapter which will be connected to your<br />
network.<br />
• Highlight Internet Protocol Version 4 (TCP /IPv4) and click Properties.<br />
• Click Use the following IP address and enter an IP address that is on<br />
the same subnet as your network or LAN IP address on your router or<br />
network.<br />
Example: If the router’s LAN IP address is 192.168.0.1, make your IP<br />
address 192.168.0.X where X is a number between 2 and 99. Make sure<br />
that the number you choose is not in use on the network.<br />
• Set Default Gateway the same as the LAN IP address of your router or<br />
gateway.<br />
• Set Primary DNS the same as the LAN IP address of your router or<br />
gateway.<br />
• The Secondary DNS is optional (you may enter a DNS server from your<br />
ISP).<br />
• Click OK to save your settings.<br />
D-<strong>Link</strong> DWA-131 User Manual<br />
0
Appendix C - Technical Specifications<br />
Standards<br />
• IEEE 802.11n (draft 2.0)<br />
• IEEE 802.11g<br />
Bus Type<br />
• USB 2.0 (1.1 compatible)<br />
Security<br />
• WPA/WPA2 - Wi-Fi Protected Access (TKIP, MIC, AES,<br />
IV Expansion, Shared Key Authentication)<br />
• 802.1x<br />
• WPS (PIN and PBC)<br />
Media Access Control<br />
• CSMA/CA with ACK<br />
Frequency Range<br />
• 2.4GHz to 2.462GHz (North America)<br />
Modulation Technology<br />
• Orthogonal Frequency<br />
Division Multiplexing (OFDM)<br />
• Complementary Code Keying (CCK)<br />
Transmitter Power Output<br />
• 14 dBm (802.11g/n)<br />
D-<strong>Link</strong> DWA-131 User Manual<br />
Technical Specifications<br />
Operating Voltage<br />
• 5 VDC +/- 10%<br />
Operating Temperature<br />
• 32°F to 104°F ( 0°C to 40°C)<br />
Operating Humidity<br />
• 10% to 90% maximum (non-condensing)<br />
Dimensions<br />
• 1.1” x 3.4” x 0.5”<br />
Weight<br />
• 0.06 lbs (27.22g)<br />
Certifications<br />
• FCC Class B<br />
• IC<br />
Warranty<br />
• 1 Year<br />
* Maximum wireless signal rate derived from IEEE Standard 802.11n-draft and 802.11g specifications. Actual data throughput will vary. Network<br />
conditions and environmental factors, including volume of network traffic, building materials and construction, and network overhead, lower actual<br />
data throughput rate. Environmental factors will adversely affect wireless signal range.<br />
1
Appendix D - Contacting Technical Support<br />
D-<strong>Link</strong> DWA-131 User Manual<br />
Contacting Technical Support<br />
Before you contact technical support, please have the following ready:<br />
• Model number of the product (e.g. DWA-131)<br />
• Hardware Revision (located on the label on the adapter (e.g. rev C1))<br />
• Serial Number (s/n number located on the label on the adapter).<br />
You can find software updates and user documentation on the D-<strong>Link</strong> website as well as frequently asked questions<br />
and answers to technical issues.<br />
For customers within the United States:<br />
Phone Support:<br />
(877) 453-5465<br />
Internet Support:<br />
http://support.dlink.com<br />
For customers within Canada:<br />
Phone Support:<br />
(800) 361-5265<br />
Internet Support:<br />
http://support.dlink.com
Appendix E - Warranty<br />
D-<strong>Link</strong> DWA-131 User Manual<br />
Warranty<br />
Subject to the terms and conditions set forth herein, D-<strong>Link</strong> Systems, Inc. (“D-<strong>Link</strong>”) provides this Limited Warranty:<br />
• Only to the person or entity that originally purchased the product from D-<strong>Link</strong> or its authorized reseller or distributor, and<br />
• Only for products purchased and delivered within the fifty states of the United States, the District of Columbia, U.S. Possessions<br />
or Protectorates, U.S. Military Installations, or addresses with an APO or FPO.<br />
Limited Warranty:<br />
D-<strong>Link</strong> warrants that the hardware portion of the D-<strong>Link</strong> product described below (“Hardware”) will be free from material defects in<br />
workmanship and materials under normal use from the date of original retail purchase of the product, for the period set forth below<br />
(“Warranty Period”), except as otherwise stated herein.<br />
• Hardware (excluding power supplies and fans): One (1) year<br />
• Power supplies and fans: One (1) year<br />
• Spare parts and spare kits: Ninety (90) days<br />
The customer’s sole and exclusive remedy and the entire liability of D-<strong>Link</strong> and its suppliers under this Limited Warranty will be, at<br />
D-<strong>Link</strong>’s option, to repair or replace the defective Hardware during the Warranty Period at no charge to the original owner or to refund the<br />
actual purchase price paid. Any repair or replacement will be rendered by D-<strong>Link</strong> at an Authorized D-<strong>Link</strong> Service Office. The replacement<br />
hardware need not be new or have an identical make, model or part. D-<strong>Link</strong> may, at its option, replace the defective Hardware or any part<br />
thereof with any reconditioned product that D-<strong>Link</strong> reasonably determines is substantially equivalent (or superior) in all material respects<br />
to the defective Hardware. Repaired or replacement hardware will be warranted for the remainder of the original Warranty Period or ninety<br />
(90) days, whichever is longer, and is subject to the same limitations and exclusions. If a material defect is incapable of correction, or if<br />
D-<strong>Link</strong> determines that it is not practical to repair or replace the defective Hardware, the actual price paid by the original purchaser for the<br />
defective Hardware will be refunded by D-<strong>Link</strong> upon return to D-<strong>Link</strong> of the defective Hardware. All Hardware or part thereof that is replaced<br />
by D-<strong>Link</strong>, or for which the purchase price is refunded, shall become the property of D-<strong>Link</strong> upon replacement or refund.<br />
3
Appendix E - Warranty<br />
Limited Software Warranty:<br />
D-<strong>Link</strong> warrants that the software portion of the product (“Software”) will substantially conform to D-<strong>Link</strong>’s then current functional specifications<br />
for the Software, as set forth in the applicable documentation, from the date of original retail purchase of the Software for a period of ninety<br />
(90) days (“Software Warranty Period”), provided that the Software is properly installed on approved hardware and operated as contemplated<br />
in its documentation. D-<strong>Link</strong> further warrants that, during the Software Warranty Period, the magnetic media on which D-<strong>Link</strong> delivers the<br />
Software will be free of physical defects. The customer’s sole and exclusive remedy and the entire liability of D-<strong>Link</strong> and its suppliers under<br />
this Limited Warranty will be, at D-<strong>Link</strong>’s option, to replace the non-conforming Software (or defective media) with software that substantially<br />
conforms to D-<strong>Link</strong>’s functional specifications for the Software or to refund the portion of the actual purchase price paid that is attributable<br />
to the Software. Except as otherwise agreed by D<strong>Link</strong> in writing, the replacement Software is provided only to the original licensee, and<br />
is subject to the terms and conditions of the license granted by D-<strong>Link</strong> for the Software. Replacement Software will be warranted for the<br />
remainder of the original Warranty Period and is subject to the same limitations and exclusions. If a material non-conformance is incapable<br />
of correction, or if D-<strong>Link</strong> determines in its sole discretion that it is not practical to replace the non-conforming Software, the price paid by<br />
the original licensee for the non-conforming Software will be refunded by D-<strong>Link</strong>; provided that the non-conforming Software (and all copies<br />
thereof) is first returned to D-<strong>Link</strong>. The license granted respecting any Software for which a refund is given automatically terminates.<br />
Non-Applicability of Warranty:<br />
The Limited Warranty provided hereunder for Hardware and Software portions of D-<strong>Link</strong>’s products will not be applied to and does not cover<br />
any refurbished product and any product purchased through the inventory clearance or liquidation sale or other sales in which D-<strong>Link</strong>, the<br />
sellers, or the liquidators expressly disclaim their warranty obligation pertaining to the product and in that case, the product is being sold<br />
“As-Is” without any warranty whatsoever including, without limitation, the Limited Warranty as described herein, notwithstanding anything<br />
stated herein to the contrary.<br />
Submitting A Claim:<br />
The customer shall return the product to the original purchase point based on its return policy. In case the return policy period has expired<br />
and the product is within warranty, the customer shall submit a claim to D-<strong>Link</strong> as outlined below:<br />
• The customer must submit with the product as part of the claim a written description of the Hardware defect or Software<br />
nonconformance in sufficient detail to allow D<strong>Link</strong> to confirm the same, along with proof of purchase of the product (such<br />
as a copy of the dated purchase invoice for the product) if the product is not registered.<br />
• The customer must obtain a Case ID Number from D-<strong>Link</strong> Technical Support at 1-877-453-5465, who will attempt to assist<br />
the customer in resolving any suspected defects with the product. If the product is considered defective, the customer must<br />
obtain a Return Material Authorization (“RMA”) number by completing the RMA form and entering the assigned Case ID<br />
Number at https://rma.dlink.com/.<br />
D-<strong>Link</strong> DWA-131 User Manual
Appendix E - Warranty<br />
• After an RMA number is issued, the defective product must be packaged securely in the original or other suitable shipping<br />
package to ensure that it will not be damaged in transit, and the RMA number must be prominently marked on the outside<br />
of the package. Do not include any manuals or accessories in the shipping package. D<strong>Link</strong> will only replace the defective<br />
portion of the product and will not ship back any accessories.<br />
• The customer is responsible for all in-bound shipping charges to D-<strong>Link</strong>. No Cash on Delivery (“COD”) is allowed. Products<br />
sent COD will either be rejected by D-<strong>Link</strong> or become the property of D-<strong>Link</strong>. Products shall be fully insured by the customer<br />
and shipped to D-<strong>Link</strong> Systems, Inc., 17595 Mt. Herrmann, Fountain Valley, CA 92708. D-<strong>Link</strong> will not be held responsible<br />
for any packages that are lost in transit to D-<strong>Link</strong>. The repaired or replaced packages will be shipped to the customer via<br />
UPS Ground or any common carrier selected by D-<strong>Link</strong>. Return shipping charges shall be prepaid by D-<strong>Link</strong> if you use an<br />
address in the United States, otherwise we will ship the product to you freight collect. Expedited shipping is available upon<br />
request and provided shipping charges are prepaid by the customer. D-<strong>Link</strong> may reject or return any product that is not<br />
packaged and shipped in strict compliance with the foregoing requirements, or for which an RMA number is not visible from<br />
the outside of the package. The product owner agrees to pay D-<strong>Link</strong>’s reasonable handling and return shipping charges<br />
for any product that is not packaged and shipped in accordance with the foregoing requirements, or that is determined by<br />
D-<strong>Link</strong> not to be defective or non-conforming.<br />
What Is Not Covered:<br />
The Limited Warranty provided herein by D-<strong>Link</strong> does not cover:<br />
Products that, in D-<strong>Link</strong>’s judgment, have been subjected to abuse, accident, alteration, modification, tampering, negligence, misuse, faulty<br />
installation, lack of reasonable care, repair or service in any way that is not contemplated in the documentation for the product, or if the<br />
model or serial number has been altered, tampered with, defaced or removed; Initial installation, installation and removal of the product for<br />
repair, and shipping costs; Operational adjustments covered in the operating manual for the product, and normal maintenance; Damage<br />
that occurs in shipment, due to act of God, failures due to power surge, and cosmetic damage; Any hardware, software, firmware or other<br />
products or services provided by anyone other than D-<strong>Link</strong>; and Products that have been purchased from inventory clearance or liquidation<br />
sales or other sales in which D-<strong>Link</strong>, the sellers, or the liquidators expressly disclaim their warranty obligation pertaining to the product.<br />
While necessary maintenance or repairs on your Product can be performed by any company, we recommend that you use only an Authorized<br />
D-<strong>Link</strong> Service Office. Improper or incorrectly performed maintenance or repair voids this Limited Warranty.<br />
Disclaimer of Other Warranties:<br />
EXCEPT FOR THE LIMITED WARRANTY SPECIFIED HEREIN, THE PRODUCT IS PROVIDED “AS-IS” WITHOUT ANY WARRANTY<br />
OF ANY KIND WHATSOEVER INCLUDING, WITHOUT LIMITATION, ANY WARRANTY OF MERCHANTABILITY, FITNESS FOR A<br />
PARTICULAR PURPOSE AND NONINFRINGEMENT.<br />
D-<strong>Link</strong> DWA-131 User Manual
Appendix E - Warranty<br />
IF ANY IMPLIED WARRANTY CANNOT BE DISCLAIMED IN ANY TERRITORY WHERE A PRODUCT IS SOLD, THE DURATION OF<br />
SUCH IMPLIED WARRANTY SHALL BE LIMITED TO THE DURATION OF THE APPLICABLE WARRANTY PERIOD SET FORTH ABOVE.<br />
EXCEPT AS EXPRESSLY COVERED UNDER THE LIMITED WARRANTY PROVIDED HEREIN, THE ENTIRE RISK AS TO THE QUALITY,<br />
SELECTION AND PERFORMANCE OF THE PRODUCT IS WITH THE PURCHASER OF THE PRODUCT.<br />
Limitation of Liability:<br />
TO THE MAXIMUM EXTENT PERMITTED BY LAW, D-LINK IS NOT LIABLE UNDER ANY CONTRACT, NEGLIGENCE, STRICT LIABILITY<br />
OR OTHER LEGAL OR EQUITABLE THEORY FOR ANY LOSS OF USE OF THE PRODUCT, INCONVENIENCE OR DAMAGES OF ANY<br />
CHARACTER, WHETHER DIRECT, SPECIAL, INCIDENTAL OR CONSEQUENTIAL (INCLUDING, BUT NOT LIMITED TO, DAMAGES FOR<br />
LOSS OF GOODWILL, LOSS OF REVENUE OR PROFIT, WORK STOPPAGE, COMPUTER FAILURE OR MALFUNCTION, FAILURE OF<br />
OTHER EQUIPMENT OR COMPUTER PROGRAMS TO WHICH D-LINK’S PRODUCT IS CONNECTED WITH, LOSS OF INFORMATION<br />
OR DATA CONTAINED IN, STORED ON, OR INTEGRATED WITH ANY PRODUCT RETURNED TO D-LINK FOR WARRANTY SERVICE)<br />
RESULTING FROM THE USE OF THE PRODUCT, RELATING TO WARRANTY SERVICE, OR ARISING OUT OF ANY BREACH OF<br />
THIS LIMITED WARRANTY, EVEN IF D-LINK HAS BEEN ADVISED OF THE POSSIBILITY OF SUCH DAMAGES. THE SOLE REMEDY<br />
FOR A BREACH OF THE FOREGOING LIMITED WARRANTY IS REPAIR, REPLACEMENT OR REFUND OF THE DEFECTIVE OR<br />
NONCONFORMING PRODUCT. THE MAXIMUM LIABILITY OF D-LINK UNDER THIS WARRANTY IS LIMITED TO THE PURCHASE<br />
PRICE OF THE PRODUCT COVERED BY THE WARRANTY. THE FOREGOING EXPRESS WRITTEN WARRANTIES AND REMEDIES<br />
ARE EXCLUSIVE AND ARE IN LIEU OF ANY OTHER WARRANTIES OR REMEDIES, EXPRESS, IMPLIED OR STATUTORY.<br />
Governing Law:<br />
This Limited Warranty shall be governed by the laws of the State of California. Some states do not allow exclusion or limitation of incidental<br />
or consequential damages, or limitations on how long an implied warranty lasts, so the foregoing limitations and exclusions may not apply.<br />
This Limited Warranty provides specific legal rights and you may also have other rights which vary from state to state.<br />
Trademarks:<br />
D-<strong>Link</strong> is a registered trademark of D-<strong>Link</strong> Corporation/D-<strong>Link</strong> Systems, Inc. Other trademarks or registered trademarks are the property<br />
of their respective owners.<br />
Copyright Statement:<br />
No part of this publication or documentation accompanying this product may be reproduced in any form or by any means or used to make<br />
any derivative such as translation, transformation, or adaptation without permission from D-<strong>Link</strong> Corporation/D-<strong>Link</strong> Systems, Inc., as<br />
stipulated by the United States Copyright Act of 1976 and any amendments thereto. Contents are subject to change without prior notice.<br />
Copyright ©2009 by D-<strong>Link</strong> Corporation/D-<strong>Link</strong> Systems, Inc. All rights reserved.<br />
D-<strong>Link</strong> DWA-131 User Manual
Appendix E - Warranty<br />
FCC Statement:<br />
This device has been tested for compliance with FCC RF Exposure (SAR) limits in the typical laptop computer configuration and this device<br />
can be used in desktop or laptop computers with side mounted USB ports which can provide 2 cm separation distance from the antenna<br />
to the body of the user or a nearby person. This device cannot be used with handheld PDAs (personal digital assistants). This device and<br />
its antenna must not be co-located or operated in conjunction with any other antenna or transmitter.<br />
This equipment has been tested and found to comply with the limits for a Class B digital device, pursuant to part 15 of the FCC Rules.<br />
These limits are designed to provide reasonable protection against harmful interference in a residential installation. This equipment<br />
generates, uses, and can radiate radio frequency energy and, if not installed and used in accordance with the instructions, may cause<br />
harmful interference to radio communication. However, there is no guarantee that interference will not occur in a particular installation. If<br />
this equipment does cause harmful interference to radio or television reception, which can be determined by turning the equipment off<br />
and on, the user is encouraged to try to correct the interference by one or more of the following measures:<br />
• Reorient or relocate the receiving antenna.<br />
• Increase the separation between the equipment and receiver.<br />
• Connect the equipment into an outlet on a circuit different from that to which the receiver is connected.<br />
• Consult the dealer or an experienced radio/TV technician for help.<br />
This device complies with Part 15 of the FCC Rules. Operation is subject to the following two conditions:<br />
(1) This device may not cause harmful interference, and (2) this device must accept any interference received, including interference that<br />
may cause undesired operation.<br />
IMPORTANT NOTICE:<br />
FCC Radiation Exposure Statement:<br />
This equipment complies with FCC radiation exposure limits set forth for an uncontrolled environment. End users must follow the specific<br />
operating instructions for satisfying RF exposure compliance. This transmitter must not be co-located or operating in conjunction with any<br />
other antenna or transmitter. IEEE 802.11b or 802.11g operation of this product in the U.S.A. is firmware-limited to channels 1 through 11.<br />
This equipment has been SAR-evaluated for use in laptops (notebooks) with side slot configuration.<br />
For detailed warranty information applicable to products purchased outside the United States, please contact the corresponding local<br />
D-<strong>Link</strong> office.<br />
D-<strong>Link</strong> DWA-131 User Manual
Appendix E - Warranty<br />
Industry Canada Notice:<br />
This device complies with Canadian RSS-210<br />
“This Class B digital apparatus complies with Candadian ICES-003”<br />
Cet appareil numérique de la classe B est conforme à la norme NMB-003 du Canada.<br />
IC statement<br />
Operation is subject to the following two conditions:<br />
(1)This device may not cause interference and<br />
(2)This device must accept any interference, including interference that may cause undesired operation of the<br />
device.<br />
This device has been designed to operate with an antenna having a maximum gain of 2 dBi. Antenna having a higher<br />
gain is strictly prohibited per regulations of Industry Canada. The required antenna impedance is 50 ohms.<br />
IMPORTANT NOTE:<br />
IC Radiation Exposure Statement:<br />
This equipment complies with IC radiation exposure limits set forth for an uncontrolled environment. End users must<br />
follow the specific operating instructions for satisfying RF exposure compliance. This equipment should be installed<br />
and operated with minimum distance 20cm between the radiator & your body.<br />
This transmitter must not be co-located or operating in conjunction with any other antenna or transmitter.<br />
Règlement d’Industry Canada<br />
Les conditions de fonctionnement sont sujettes à deux conditions:<br />
(1)Ce périphérique ne doit pas causer d’interférence et.<br />
(2)Ce périphérique doit accepter toute interférence, y compris les interférences pouvant perturber le bon fonctionnement<br />
de ce périphérique.<br />
D-<strong>Link</strong> DWA-131 User Manual
Appendix F - Registration<br />
D-<strong>Link</strong> DWA-131 User Manual<br />
Registration<br />
Product registration is entirely voluntary and failure to complete or return this form will not diminish your warranty<br />
rights.<br />
Version 1.0<br />
July 23, 2009