839 Apache/Havoc Manual.qxd - EECH Central
839 Apache/Havoc Manual.qxd - EECH Central
839 Apache/Havoc Manual.qxd - EECH Central

You also want an ePaper? Increase the reach of your titles
YUMPU automatically turns print PDFs into web optimized ePapers that Google loves.
www.razorworks.com
DISCLAIMER<br />
By installing, copying, or otherwise using this Software product, you agree to be bound by<br />
the limitations set out below.<br />
LIMITED WARRANTY<br />
Empire Interactive warrants that the software will perform substantially in accordance with<br />
the accompanying written materials for a period of ninety (90) days from the date of<br />
receipt. Any implied warranties on the software are limited to ninety (90) days, unless the<br />
effect of this clause has been specifically excluded by applicable law.<br />
CUSTOMER REMEDIES<br />
Empire Interactive’s entire liability and your exclusive remedy shall be, at Empire Interactive’s<br />
option, either (a) return of the price paid, or (b) replacement of the software or hardware<br />
that does not meet this Limited Warranty and which is returned to the place of purchase<br />
with a copy of your receipt. This Limited Warranty is void if failure of the software has<br />
resulted from accident, abuse, or misapplication. Any replacement software will be<br />
warranted for the remainder of the original warranty or thirty (30) days, whichever is longer.<br />
NO OTHER WARRANTIES<br />
To the maximum extent permitted by applicable law, Empire Interactive and its suppliers<br />
disclaim all other representations, warranties, conditions or other terms, either express or<br />
implied, including, but not limited to implied warranties and/or conditions of<br />
merchantability and fitness for a particular purpose, with regard to the software and the<br />
accompanying written materials.<br />
NO LIABILITY FOR CONSEQUENTIAL DAMAGES<br />
To the maximum extent permitted by applicable law, in no event shall Empire Interactive or<br />
its suppliers be liable for any damages whatsoever (including without limitation, direct or<br />
indirect damages for personal injury, loss of business profits, business interruption, loss of<br />
business information, or any other pecuniary loss) arising out of the use of or inability to<br />
use this product, even if Empire Interactive has been advised of the possibility of such<br />
damages. In any case, Empire Interactive’s and its suppliers’ entire liability under any<br />
provision of this agreement shall be limited to the amount actually paid by you for the<br />
software, unless the effect of this clause has been specifically excluded by applicable law.<br />
This Software Licence Agreement is governed by the law of the laws of England.<br />
ENEMY ENGAGED - APACHE HAVOC AND EMPIRE INTERACTIVE ARE TRADEMARKS OF ENTERTAINMENT<br />
INTERNATIONAL (UK) LTD. SOFTWARE ©1998 RAZORWORKS LTD. ALL RIGHTS RESERVED. PUBLISHED BY<br />
EMPIRE INTERACTIVE. DOLBY AND THE DOUBLE D SYMBOL ARE TRADEMARKS OF DOLBY LABORATORIES<br />
LICENSING CORPORATION.
i<br />
TECHNICAL SUPPORT<br />
If you experience any technical problems with this or any other Empire product, please<br />
contact our technical support staff.<br />
When you call, it helps if you have the following information to hand: computer type,<br />
available hard disk space, total RAM, type of video card and a list of the options you choose<br />
when you installed the game. If possible be at your computer when you call.<br />
TECHNICAL SUPPORT: (0)181 343 9143 10am-6pm<br />
If you prefer to write to us, be sure to enclose the same details.<br />
Empire Interactive<br />
Technical Support Dept.<br />
The Spires, 677 High Road,<br />
North Finchley<br />
London N12 0DA<br />
If you have internet access and would like to contact us on-line, you will find us at:<br />
support@empire.co.uk
Contents ii<br />
1. Introduction 1.0<br />
Getting Started . . . . . . . . . . . . . . . . . . . . . . . . . . . . . . . . . . . . . . . . . . . . . . . . . . . . . . . . . . . . . . . . . . . . . . . 1.1<br />
Getting in the Air – Fast! . . . . . . . . . . . . . . . . . . . . . . . . . . . . . . . . . . . . . . . . . . . . . . . . . . . . . . . . . . . . . 1.1<br />
Game Play . . . . . . . . . . . . . . . . . . . . . . . . . . . . . . . . . . . . . . . . . . . . . . . . . . . . . . . . . . . . . . . . . . . . . . . . . . . . . 1.2<br />
The Main Interface . . . . . . . . . . . . . . . . . . . . . . . . . . . . . . . . . . . . . . . . . . . . . . . . . . . . . . . . . . . . . . . . . . . . 1.3<br />
Pilots . . . . . . . . . . . . . . . . . . . . . . . . . . . . . . . . . . . . . . . . . . . . . . . . . . . . . . . . . . . . . . . . . . . . . . . . . . . . . . . . . . . 1.4<br />
Game Options . . . . . . . . . . . . . . . . . . . . . . . . . . . . . . . . . . . . . . . . . . . . . . . . . . . . . . . . . . . . . . . . . . . . . . . . 1.4<br />
Multiplayer . . . . . . . . . . . . . . . . . . . . . . . . . . . . . . . . . . . . . . . . . . . . . . . . . . . . . . . . . . . . . . . . . . . . . . . . . . . . 1.5<br />
Game Types . . . . . . . . . . . . . . . . . . . . . . . . . . . . . . . . . . . . . . . . . . . . . . . . . . . . . . . . . . . . . . . . . . . . . . . . . . . 1.6<br />
Campaigns . . . . . . . . . . . . . . . . . . . . . . . . . . . . . . . . . . . . . . . . . . . . . . . . . . . . . . . . . . . . . . . . . . . . . . . . . . . . . 1.6<br />
Missions . . . . . . . . . . . . . . . . . . . . . . . . . . . . . . . . . . . . . . . . . . . . . . . . . . . . . . . . . . . . . . . . . . . . . . . . . . . . . . . 1.8<br />
Weapon Loading, Repairs and Refueling . . . . . . . . . . . . . . . . . . . . . . . . . . . . . . . . . . . . . . . . . . . . 1.8<br />
Campaign Maps . . . . . . . . . . . . . . . . . . . . . . . . . . . . . . . . . . . . . . . . . . . . . . . . . . . . . . . . . . . . . . . . . . . . . . . 1.8<br />
Radio Communications . . . . . . . . . . . . . . . . . . . . . . . . . . . . . . . . . . . . . . . . . . . . . . . . . . . . . . . . . . . . . . . 1.9<br />
2. Ground School 2.0<br />
Basic Principles . . . . . . . . . . . . . . . . . . . . . . . . . . . . . . . . . . . . . . . . . . . . . . . . . . . . . . . . . . . . . . . . . . . . . . . 2.1<br />
Tactical Flying . . . . . . . . . . . . . . . . . . . . . . . . . . . . . . . . . . . . . . . . . . . . . . . . . . . . . . . . . . . . . . . . . . . . . . . . . 2.23<br />
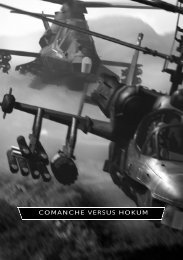
3. <strong>Apache</strong> Versus <strong>Havoc</strong> 3.0<br />
4. Campaign Scenarios 4.0<br />
Cuban Crisis . . . . . . . . . . . . . . . . . . . . . . . . . . . . . . . . . . . . . . . . . . . . . . . . . . . . . . . . . . . . . . . . . . . . . . . . . . . 4.2<br />
The Opium War . . . . . . . . . . . . . . . . . . . . . . . . . . . . . . . . . . . . . . . . . . . . . . . . . . . . . . . . . . . . . . . . . . . . . . . 4.4<br />
Caspian Black Gold . . . . . . . . . . . . . . . . . . . . . . . . . . . . . . . . . . . . . . . . . . . . . . . . . . . . . . . . . . . . . . . . . . . 4.5<br />
5. <strong>Apache</strong> Cockpit 5.0<br />
6. <strong>Havoc</strong> Cockpit 6.0<br />
7. Recognition Guide 7.0<br />
USA . . . . . . . . . . . . . . . . . . . . . . . . . . . . . . . . . . . . . . . . . . . . . . . . . . . . . . . . . . . . . . . . . . . . . . . . . . . . . . . . . . . . 7.1<br />
Russian . . . . . . . . . . . . . . . . . . . . . . . . . . . . . . . . . . . . . . . . . . . . . . . . . . . . . . . . . . . . . . . . . . . . . . . . . . . . . . . . 7.19<br />
8. Appendices 8.0<br />
Acronyms . . . . . . . . . . . . . . . . . . . . . . . . . . . . . . . . . . . . . . . . . . . . . . . . . . . . . . . . . . . . . . . . . . . . . . . . . . . . . . 8.1<br />
Credits . . . . . . . . . . . . . . . . . . . . . . . . . . . . . . . . . . . . . . . . . . . . . . . . . . . . . . . . . . . . . . . . . . . . . . . . . . . . . . . . . 8.2
iii
1. INTRODUCTION
1.1<br />
INTRODUCTION<br />
Getting Started<br />
Installation<br />
<strong>Apache</strong>-<strong>Havoc</strong> is a Windows® 95/98 product. Insert your <strong>Apache</strong>-<strong>Havoc</strong> CD into your drive.<br />
If Autorun is enabled, the Setup program will start. Follow the on-screen instructions. The<br />
program requires the <strong>Apache</strong>-<strong>Havoc</strong> CD in your drive at all times. If Autorun is not enabled<br />
on your system, from Windows Explorer, click on the Autorun.exe icon on the <strong>Apache</strong>-<br />
<strong>Havoc</strong> CD. Once all files have been copied to your hard drive, the installation process will<br />
create an <strong>Apache</strong>-<strong>Havoc</strong> shortcut for you.<br />
Please note that a hardware graphics system capable of accelerating Direct3D will be<br />
required to run <strong>Apache</strong>-<strong>Havoc</strong>.<br />
Starting<br />
Click on the Razorworks <strong>Apache</strong>-<strong>Havoc</strong> shortcut created by the installation program. The<br />
first time you run <strong>Apache</strong>-<strong>Havoc</strong>, the system creates the graphics and map files used by the<br />
game. This process depends on the speed of your processor, but typically takes about 3<br />
minutes. Thereafter, this process is not required, and loading times will be significantly<br />
shorter. Note that <strong>Apache</strong>-<strong>Havoc</strong> needs the full resources of your computer system, so<br />
terminate all other running applications before starting.<br />
Getting in the Air – Fast!<br />
You want to get into the air quickly, so at the main menu:<br />
Click on Combat missions<br />
Click on Free Flight<br />
Choose a flying area: Cuban Crisis, The Opium War or Caspian Black Gold<br />
Choose your helicopter: <strong>Apache</strong> or <strong>Havoc</strong><br />
First Flight<br />
The keyboard commands for flight are the same for both the <strong>Apache</strong> and <strong>Havoc</strong>.<br />
Take-off sequence<br />
1. Release Rotor Brake<br />
2. Release the Wheel Brake<br />
R<br />
B<br />
3. Increase Collective to 65%–75% Q . This is dependent upon loading and altitude<br />
4. The helicopter will rise slowly, check altitude and rate of ascent<br />
5. Align the helicopter to the desired heading by applying the Tail Rotor Z and X
6. Push the Cyclic forward gently to initiate forward movement<br />
7. Adjust the Collective to maintain a constant altitude Q and<br />
8. The Tail Rotor will have a reduced effect as you increase speed to around 60 knots (90<br />
km/hr in the <strong>Havoc</strong>). To turn you must use the Cyclic to bank the helicopter left or right<br />
and<br />
9. Reduce forward speed by gently pulling back on the Cyclic and balancing the<br />
collective Q and A<br />
10. Try to come to a Hover by reducing forward speed to zero. The Collective should be<br />
approximately 65%. Now engage the Hover-hold<br />
you apply strong cyclic forces<br />
H . Hover-hold will disengage when<br />
Landing sequence<br />
1. From the Hover position reduce Collective<br />
approximately 60%<br />
A to give a slow rate of decent,<br />
2. Use the Cyclic to maintain a constant position<br />
3. Use Tail Rotor to align helicopter to the desired heading Z and<br />
4. Settle gently on the ground being careful to avoid ground objects and parked aircraft<br />
5. Reduce Collective to zero<br />
6. Apply Rotor Brake<br />
7. Apply Wheel Brake<br />
Game Play<br />
R<br />
B<br />
A<br />
INTRODUCTION 1.2<br />
At the heart of <strong>Apache</strong>-<strong>Havoc</strong> is a fully dynamic war model, there are no scripted events or<br />
outcomes, the war will rage around you, the path you take will be unique and dependant<br />
on your skill and time in the game.<br />
The Dynamic Campaign system has been specifically developed to reflect the war model<br />
and immerse the player within the simulation. When you enter a Campaign, you will be<br />
transferred to a base and can join one of the Flight Groups attached to the base, landed or<br />
actually flying a mission. As you progress through the game you will fly between bases, each<br />
has its own set of mission orders that it receives. Campaigns will use a Tour of Duty Time<br />
system to add to the challenge. Your progress within a campaign is monitored and should<br />
you fail to complete missions, or continually fire upon friendly forces you will be relieved<br />
from active duty.<br />
It is important that you select and fly those missions which will have a critical effect on the<br />
enemy. Losing valuable helicopters, or failing to protect your ground forces, will severely<br />
limit the capability of your side and thus deny you victory.<br />
A<br />
X
1.3<br />
INTRODUCTION<br />
To win a campaign you must take-over all the areas outlined in black on the campaign maps,<br />
these are called “objective sectors”.An objective sector is considered to be “taken” when<br />
there are no enemy forces within the sector, and you have landed at that location yourself,<br />
or a friendly ground unit moves into the sector.<br />
Additionally you may also be required to win a campaign by exceeding the “balance of<br />
power criteria” which is shown on the Campaign Status screen. This information is available<br />
only at Bases or FARP’s. A campaign that is always played in real time, using no time<br />
acceleration, could take days to complete. Time acceleration is allowed when you are<br />
playing a single player campaign, but not in Multiplayer games.<br />
The co-ordination of your forces is an important part in a successful campaign. Use the<br />
radio communication facilities to call for assistance and to direct air and ground unit strikes.<br />
Weather conditions across the campaign maps are variable and you cannot predict precisely<br />
how these will affect your mission.<br />
However, enemy force information and dispositions will “degrade” with age and you cannot<br />
be sure that enemy forces are in the exact positions indicated. Friendly forces will reveal the<br />
disposition of enemy units. Reconnaissance will be done by aircraft or ground forces. This<br />
information will be updated on the campaign map.<br />
Promotion<br />
As you gain experience and complete missions, you will be promoted. The gaining of<br />
promotion has another purpose than simply the recognition of your success: gaining<br />
promotion allows you to select more difficult assignments as your campaign progresses.<br />
Promotion will boost the Tour of Duty Time whilst in a Campaign.<br />
The Main Interface<br />
All selections are made with the mouse unless otherwise stated.<br />
Yellow text indicates selected options.<br />
Main Screen<br />
Select Pilot<br />
Choose this option to select or create a different pilot<br />
Game Options<br />
Choose this option to alter the graphical and realism settings<br />
Multiplayer Setup<br />
Choose this option for the multiplayer connections<br />
Combat Missions<br />
Choose this to advance to the game types available in <strong>Apache</strong>-<strong>Havoc</strong>
Pilots<br />
To create a new pilot, choose “Add”. A prompt allows you to type the name of the new pilot.<br />
This name will then appear in the list, along with date of creation and rank.<br />
To remove a pilot from the list, select the pilot you wish to remove and click “Delete”.<br />
Game Options<br />
Graphics<br />
Set the graphic options provided to suit your processor speed.<br />
Terrain and object detail can be set to low, medium or high. The higher the level of detail,<br />
the greater demands that are made upon your system.<br />
Rain textures and cockpit rotor blur can be set on or off more as a matter of preference<br />
than of processor demands.<br />
Device: All hardware graphics devices are listed. Choose the hardware that has the best<br />
Direct3D support.<br />
Controls<br />
Keyboard, joystick and throttle options are set here. You must ensure that you have<br />
calibrated your joystick and other equipment in the Control Panel/Game Controllers, before<br />
launching <strong>Apache</strong>-<strong>Havoc</strong>.<br />
Sound<br />
Music, speech, and sound effects can be adjusted to suit your preferences.<br />
Realism<br />
Co-Pilot Target ID – Refer to <strong>Apache</strong> and <strong>Havoc</strong> Flight <strong>Manual</strong>s<br />
Co-Pilot Countermeasures – Your Co-Pilot will handle all countermeasures (flares,<br />
chaff etc.).<br />
Flight Dynamics:<br />
Wind<br />
Highlight to enable wind effects<br />
INTRODUCTION 1.4<br />
Retreating Blade Stall – (see Ground School 2.20)<br />
Highlight to enable the effect of blade stall. The imbalance of lift created by this effect<br />
will cause the helicopter to roll and the pilot to apply constant cyclic corrections.
1.5<br />
INTRODUCTION<br />
Cross-Coupling<br />
With this option turned on the pilot will notice minimal turning effect upon large<br />
collective inputs. Removing the cross coupling will require constant yaw input to<br />
maintain heading.<br />
Ground Effect – (see Ground School 2.8)<br />
Select to enable the effect, this simulates low altitude air cushioning created by the<br />
rotor downwash.<br />
Reverse Throttle Input<br />
This option allows you to reverse the throttle input if you prefer a “jet style” throttle<br />
motion.<br />
A helicopter’s collective operates in the opposite sense to that of a jet’s.<br />
Keyboard Assistance<br />
Helicopter flight requires subtle inputs, unobtainable by normal keyboards. Keyboard<br />
assistance implements a damping factor to help provide these inputs and allow<br />
smoother flight.<br />
Multiplayer<br />
To enable the facility of multiplayer games, select a service provider. Details may need to be<br />
supplied depending on your connection method. If you are not using multiplayer or wish to<br />
disable it, set to “none”.<br />
By selecting a service provider you can both create and join multiplayer games.<br />
To create a multiplayer game choose a game type (see below) and that game will be<br />
broadcast over whatever form of service provider was enabled. The creator of the game is<br />
known as the host and controls the game. If the host quits the game, all joined players will<br />
be terminated.<br />
If a campaign game type is chosen the host is the only player allowed to save the game.<br />
The choice of game type is significant as multiplayer games are categorised under their<br />
created game type and will only appear to others under their according category.<br />
You can join a multiplayer game at any time after it has started as long as they have enabled<br />
the identical service provider for connection.<br />
Note: When connecting to another player via a modem connection, the player who answers<br />
the call is automatically assigned the host status. The host must wait in the multiplayer<br />
setup to connect to an incoming call.
Game Types<br />
All three game types offer the choice of <strong>Apache</strong> or <strong>Havoc</strong> in the three campaigns: Cuban<br />
Crisis, The Opium War and Caspian Black Gold.<br />
Free Flight<br />
Choosing this option activates all airbases, aircraft carriers and FARP’s, allowing you to roam<br />
around the areas and practice your flying techniques, refuelling and re-arming. Any enemy<br />
encountered will not engage fire. No opportunities of promotion are offered.<br />
Dynamic Missions<br />
Dynamic missions are quick action missions without entering a full-on campaign. All<br />
missions throughout the selected scenario are on offer (dependent on your pilot’s rank).<br />
Upon mission selection you are immediately transported to the attached base for that<br />
mission. Enemy will engage and offer resistance upon your sight. No opportunities of<br />
promotion are offered.<br />
Campaigns<br />
You enter the campaign in the lower rankings and work your way up as the campaign<br />
unfolds. You are automatically stationed at a base and from there must succeed in your<br />
missions to gain experience which will offer you more complicated missions and eventually<br />
earn the opportunity to transfer to another base with more important sectors to capture.<br />
Promotion is gained by earning experience and ‘tour of duty’ bonus time (see later).<br />
Campaigns will last for an unknown length of time. You can save the state of gameplay only<br />
when you are landed at a base.<br />
Demo<br />
Select to watch one of the <strong>Apache</strong>-<strong>Havoc</strong> scenarios in action. Press Esc to quit at any time.<br />
Special<br />
It is envisaged that Special missions will be put on the Internet for downloading.<br />
This is where you will be able to load these games.<br />
Campaigns<br />
Tour of Duty Time<br />
INTRODUCTION 1.6<br />
In single player mode only you are given an initial ‘tour of duty’ time which you will see on<br />
screen. This is the amount of time you are allowed to be in the current campaign.<br />
Successful completion of missions will award you with additional ‘tour of duty’ time.<br />
Mission failure or being the cause of ‘friendly fire’ incidents will have the opposite effect
1.7<br />
INTRODUCTION<br />
and cause your time allocation to drop. If your ‘tour of duty’ time drops below zero you will<br />
be relieved from active duty and will have to restart the campaign from scratch.<br />
It is essential to gain additional ‘tour of duty‘ time to enable you to be part of the campaign<br />
and see it through to conclusion. Getting ‘killed’ by the enemy, or getting ‘killed’ by crashing<br />
your helicopter does not necessarily end the campaign. You will be taken back to the base<br />
screen where you can re-assign yourself to a new helicopter if one is available. You will of<br />
course lose the allocated valuable ‘tour of duty’ time for that mission, and thus reduce<br />
significantly your chances of a successful outcome for the campaign. Your Pilot log will also<br />
reflect your ‘death’.<br />
Flight Groups at the Base<br />
On entry to a campaign you will be stationed at either an airbase or an aircraft carrier. The<br />
Base name appears at the top of the screen. The flight groups containing attack helicopters<br />
stationed at your base are listed at the top left of the screen and alongside each is an<br />
indicator informing you of their status. Once you’ve chosen a flight group, its members are<br />
listed at the bottom right of the screen. By default you are assigned an attack helicopter,<br />
illustrated by your pilot’s name being placed alongside the choice. You are free to choose<br />
any group member if the group contains more than one attack helicopter. Greyed out<br />
helicopters are not a valid choice to fly, although you can select them and hit ‘view’ to watch<br />
them carry-out their mission.<br />
Keep a note that your ‘tour of duty’ time is ticking away as you make your choices!<br />
Saving a Campaign<br />
You can only save your progress within a campaign when you are safely back at base. Click<br />
on ‘Save’ to do this. Each pilot can only save once throughout each campaign. The saved<br />
game will then appear in the campaigns list as ‘Saved ’.<br />
Status<br />
The ‘status’ button at the bottom of the base screen shows the base assets that are<br />
available to you and a full report on the current state of your campaign.<br />
It is important to keep note of the supplies as you fly your missions and plan your campaign.<br />
Details shown are the total time elapsed within the campaign, your ‘tour of duty’ time left,<br />
the number of allied and enemy losses and kills, the total number of objective sectors<br />
required to win the campaign, and the number of objective sectors the allied forces occupy.<br />
The large bar in the centre of the screen shows the current balance of allied and enemy<br />
forces and is measured by total campaign unit numbers. The level required to achieve an<br />
outright victory is marked for both sides.
Missions<br />
The mission screen shows all of the missions that are available to your flight group. Some<br />
missions may be greyed out. This shows the mission may not be suitable to your group or<br />
you are not of high enough rank to perform it.<br />
Once a suitable mission has been chosen you can view the mission route by clicking on<br />
‘map' option. The mission waypoints and objective location are shown on the map. All allied<br />
and the last known intelligence of enemy forces will be shown. You cannot edit the<br />
waypoints for the mission in the campaign map view mode.<br />
Repeat the above process until you find a mission you wish to accept, then choose commit.<br />
You will now go to the campaign map again, this time you can edit the waypoints,<br />
(see Campaign Maps, below).<br />
You can check your weapons loading by choosing weapons on the campaign map,<br />
(see Weapon Loading, Repairs and Refueling, below).<br />
Weapon Loading, Repairs and Refueling<br />
The weapons loading screen is part of the campaign. This is to say that whilst weapons<br />
loading and refueling are taking place, you are exposed to enemy action.<br />
Both <strong>Apache</strong> and <strong>Havoc</strong> helicopters have a large number of weapons configurations.<br />
Choose a weapons configuration that is suited best for your chosen mission. For a full<br />
description of the weaponry and their capabilities see the relevant sections in the Flight<br />
<strong>Manual</strong>s for each helicopter.<br />
Two preset weapons configurations are offered; for air-to-air press F2 , or air-to-ground<br />
press F3 .<br />
To select the weapons configuration of your choice use the to navigate<br />
around each weapons hardpoint and select weapons.<br />
Refueling is automatic once landed, the current fuel load is shown on the right hand side<br />
of the screen.<br />
Repairs to a damaged helicopter are automatic but will take some time, check the progress<br />
bar on the left-hand side of the screen.<br />
Campaign Maps<br />
INTRODUCTION 1.8<br />
At any time during the campaign toggles between game and campaign map.<br />
Use the to pan around the map view. < key zooms out key<br />
zooms in. The inset navigation map can also be clicked upon to pan the view.<br />
toggles the inset map through one of four screen positions.<br />
Red and blue forces are illustrated by coloured icons. When you are landed at a base the<br />
1.9<br />
INTRODUCTION<br />
base icon flashes indicating that you are landed there. Once in the air you are represented<br />
by a flashing helicopter icon. Icons are updated in realtime. Those enemy units that have<br />
been spotted by your air or ground forces will also be shown. The disposition of your own<br />
forces will be shown accurately.<br />
It is possible to make a stop-off at an allied base or FARP that you come across midmission.<br />
You will only be allowed to refuel or rearm, not having the option to get new<br />
mission instructions that originate from that base.<br />
A base, aircraft carrier or FARP with insufficient supplies will appear as a grey icon. Always<br />
check on the campaign map before landing.<br />
Note: If you land at a base without supplies you will be unable to change the weapons<br />
configuration or refuel.<br />
Radio Communications<br />
You can communicate with other players, computer pilots or the campaign Command HQ<br />
whilst in-cockpit.<br />
Pressing activates the radio transmitter and message system and then press keys 1<br />
through to 8 to send the required message. Pressing the message key sends the message<br />
and then switches of the radio transmitter. The key is a toggle key activating and<br />
deactivating the system. If you want to send a keyboard composed text message to another<br />
human player, the entire keyboard will be used, so make sure that your helicopter is in a<br />
stable state before typing messages. To finish and send a keyboard message, press<br />
The keyboard now will activate for normal flight mode.<br />
.
2. GROUND SCHOOL
2.1<br />
GROUND SCHOOL<br />
Helicopters - Basic Principles and Handling<br />
This chapter is intended as a strictly practical guide for those who know little or nothing<br />
about how to fly a helicopter. It concentrates on what you need to know as a pilot and<br />
contains very little aerodynamic theory. Helicopters are untidy pragmatical machines which<br />
defy any attempt at elegant theoretical analysis, but the basic principles are simple enough.<br />
Once you understand what the controls do, and where the pitfalls are, flying a helicopter is<br />
(like any other job requiring more than one hand) mainly a matter of coordination and<br />
practice. In this writer’s experience, it seems to be easier than learning to juggle - you have<br />
a lot more time to think about what happens next.<br />
Conventional Helicopter Layout<br />
- Main and Tail Rotors<br />
Back cockpit<br />
(pilot)<br />
Front cockpit<br />
(gunner)<br />
Rotor mast/hub<br />
Diagram 2.1: Conventional attack helicopter layout<br />
Stub wing<br />
Main rotor<br />
Tail rotor<br />
Tail boom<br />
The <strong>Apache</strong> and the <strong>Havoc</strong> are both entirely conventional helicopters in their general<br />
layout; they have a large main rotor and a much smaller tail rotor, driven by powerful<br />
turboshaft engines. The main rotor, as you probably know, provides the thrust which lifts<br />
the helicopter and moves it forward (or backward, or sideways). The tail rotor’s purpose is<br />
less obvious.
Imagine yourself sitting in a swivel chair, with your feet tucked up so the chair can spin<br />
freely. Your arms are above your head, supporting the middle of a long heavy plank. The<br />
plank is the helicopter’s main rotor and you are the engine. The swivel chair is the rest of<br />
the helicopter, off the ground and free to pivot. Now start spinning the plank round and<br />
round like a rotor. As you do this, you’ll find yourself spinning around in the opposite<br />
direction to the rotor. The harder you spin the rotor, the faster you spin yourself - and in<br />
this example, there’s nothing you can do to stop yourself spinning except put your feet on<br />
the ground, which equates to landing the helicopter. This tendency for the engine to spin<br />
the whole helicopter in the opposite direction to the main rotor can be called Main Rotor<br />
Torque Effect.<br />
The tail rotor solves this problem by creating a thrust in the opposite direction to the<br />
main rotor torque effect. Its small size is compensated by the fact that it’s mounted at the<br />
end of a long lever (the tail-boom) which magnifies its effect. Also, by changing the<br />
amount of thrust the tail rotor produces you can pivot the whole helicopter on the spot, in<br />
either direction.<br />
How Rotors Work<br />
A rotor is simply a set of long thin wings attached to a central hub. The wings are<br />
more commonly called Rotor Blades, and when the rotor is spinning, the whole assembly<br />
is often referred to as the Rotor Disc. Just as in an ordinary aircraft, the wings generate a<br />
lift force when they are moved through the air. How much lift a wing generates is governed<br />
by three factors:<br />
1: The Density of the Air<br />
The atmosphere is densest (and provides most lift) at sea level. As you climb above sea level<br />
the density decreases and the wing produces less lift. Air temperature also affects density<br />
– hot air is less dense than cold air, and gives less lift. ‘Hot and high’ is the worst<br />
combination of conditions, and in practical terms this means you can lift less weight and<br />
have less ‘performance’ available.<br />
2: The Wing’s Speed Through the Air<br />
GROUND SCHOOL 2.2<br />
The faster a wing moves through the air, the more lift it generates. In sophisticated modern<br />
helicopters the rotors spin up to a set flying speed before take-off and hardly change speed<br />
in flight, unless you demand more power than the engines can provide or something goes<br />
wrong with the engines or the transmission system. You don’t control lift by changing the<br />
rotor speed, so at first sight this factor seems irrelevant – and it is indeed irrelevant in<br />
hovering or vertical flight. However, when the helicopter is moving forward at high speed<br />
this factor becomes critically important, and determines the maximum safe flying speed –<br />
and what happens when you exceed it [see page 2.20 – Retreating Blade Stall].
2.3<br />
GROUND SCHOOL<br />
3: The Angle at Which the Wing Meets the Airflow<br />
This is generally known as the Angle of Attack and up to a point which varies with the wing<br />
design, the greater the angle of attack the more lift the wing generates (and the more<br />
power is required to drive it through the air at a given speed). All of the helicopter’s main<br />
flying controls work by changing the pitch angle of the main or tail rotor blades.<br />
Rotor<br />
moving<br />
this way<br />
Pitch angle/angle of attack<br />
Diagram 2.2: Rotor pitch angle/angle of attack in still air<br />
Relative<br />
airflow<br />
this way<br />
If the rotor were operating in still air, pitch angle and angle of attack would be identical, but<br />
this situation exists only in the first few seconds as the rotor spins up [diagram 2.2]. Once<br />
the rotor is spinning it sets up a constant air current (the rotor downwash) through the<br />
rotor disc. This means that the effective angle of attack is less than the blade pitch angle –<br />
though not much less because the rotor’s speed is generally much higher than the speed<br />
of the air current down through the disc [diagram 2.3].<br />
If there is an air current across the disc (as there is when you are hovering in a wind or<br />
moving over the ground at any significant speed) this also changes the effective angle of<br />
attack (and airspeed) of the rotor blades [diagram 2.4]. Blades advancing into the wind<br />
have a higher angle of attack (and higher airspeed), and generate more lift than the<br />
retreating blades. At the same time, the effect of the downwash air current is reduced<br />
because you are constantly moving into undisturbed air.<br />
The net result is that the rotor generates more lift altogether (‘Translational Lift’), and more<br />
lift on the advancing than on the retreating side of the disc, so there is a slight tendency to<br />
roll (a ‘rolling moment’) around the wind axis – an imaginary line through the centre of the<br />
helicopter drawn in the direction of the airflow [diagram 2.5].
A) Advancing blade<br />
Airflow due to wind or<br />
horizontal flight<br />
Airflow due to<br />
downwash<br />
B) Retreating blade<br />
Airflow due to<br />
downwash<br />
Actual direction<br />
of airflow<br />
Airflow due to<br />
rotor motion<br />
GROUND SCHOOL 2.4<br />
Angle of attack<br />
(less than pitch angle)<br />
Pitch angle<br />
Diagram 2.3: Pitch angle/angle of attack with rotor downwash<br />
Reduced angle of attack<br />
Blade Pitch angle<br />
Resulting airflow<br />
Airflow due to<br />
rotor motion<br />
Resulting airflow<br />
Airflow due to<br />
rotor motion<br />
Airflow due to wind or<br />
horizontal flight<br />
Diagram 2.4: Pitch angle/angle of attack with airflow across rotor disc<br />
Angle of attack<br />
Blade pitch angle<br />
Advancing side of disc<br />
Retreating side of disc<br />
Airflow due to<br />
downwash
2.5<br />
GROUND SCHOOL<br />
Wind axis<br />
More lift from advancing<br />
blade than from retreating blade.<br />
Tendency to roll<br />
Less lift generated<br />
by retreating blade<br />
Diagram 2.5: Rolling moment with airflow across rotor disc<br />
Flying Controls of a Helicopter<br />
More lift generated<br />
by advancing blade<br />
Direction of flight<br />
Three controls are used to fly a helicopter; the collective lever, the cyclic stick, and the yaw<br />
pedals [diagram 2.6]. Each has a Primary (main) and a Secondary (side) effect.<br />
Collective Lever:<br />
This is mounted on the left side of the seat, and pivots up and down about its back<br />
end, like the handbrake on most European cars. It is used with the left hand, and has a<br />
friction clamp so that when you take your hand off, it stays in the position where you left<br />
it. The three phrases commonly used to describe what you can do with it are ‘raising the<br />
collective’, ‘lowering the collective’, and ‘bottoming the collective’. All three are simple,<br />
literal descriptions.<br />
When you raise the collective, you are increasing the angle of attack of all the main rotor<br />
blades by the same amount, so that the rotor generates more thrust. Lowering the<br />
collective has the opposite effect. Bottoming the collective reduces main rotor thrust to<br />
effectively nothing. If you were hovering, raising the collective would cause the helicopter<br />
to climb straight up, lowering the collective would cause the helicopter to descend. This is<br />
the primary effect of the collective control.<br />
The secondary effect of the collective is due to the fact that it takes more power to drive<br />
the rotor through the air at a high angle of attack than at a low one. In older (or simpler)<br />
helicopters, the pilot has to use a twist-grip on the collective lever to add or reduce power.<br />
More sophisticated modern helicopters do this automatically. In either case, because the
engine must develop more or less power, the main rotor torque effect becomes larger or<br />
smaller and the whole helicopter tends to start rotating one way or the other. The yaw<br />
pedals [see page 2.7 – Yaw Pedals] are used to counter this tendency.<br />
Cyclic Stick:<br />
Pedals<br />
Cyclic<br />
Diagram 2.6: Main flying controls<br />
GROUND SCHOOL 2.6<br />
Collective<br />
The cyclic stick (commonly called ‘the cyclic’) is mounted centrally in front of the pilot’s<br />
seat, with a pivot at the base which allows it to be tilted forward, backward and to either<br />
side. It is normally held with the right hand, and spring-loaded to a more or less central,<br />
upright position.<br />
When you tilt the cyclic away from the upright position, each main rotor blade changes its<br />
angle of attack as it moves around the hub. Over half the circle, the angle of attack is<br />
greater than the level set by the collective, producing more lift, while over the other half it<br />
is less, and less lift is generated. The maximum and minimum points are the same for all<br />
blades, so the main rotor’s thrust is tilted in the same direction as the cyclic stick itself, the<br />
helicopter itself tilts the same way, and starts to move over the ground in that same<br />
direction.<br />
Proper handling of the cyclic (especially at low speeds, or in the hover) demands a light<br />
touch and intelligent anticipation or the helicopter will slide and wallow about in an<br />
apparently endless series of overcorrections. A student pilot’s first attempts to hover on the<br />
spot will usually have spectators gasping with laughter and alarm by turns – especially in<br />
variable winds.
2.7<br />
GROUND SCHOOL<br />
Yaw Pedals:<br />
The two yaw pedals (also called ‘torque pedals’ or just ‘pedals’) are mounted in the obvious<br />
place for pedals, one at each end of a bar which pivots in the middle. Push one pedal<br />
forward and the other moves back by the same amount. They operate on the tail rotor in<br />
much the same way that the collective operates on the main rotor, by changing the pitch<br />
(and hence the angle of attack) of all the blades at once, thus increasing and decreasing the<br />
tail rotor’s thrust, or even reversing its direction. As described above, they are used to pivot<br />
the helicopter on the spot (a ‘pedal turn’), and to keep the helicopter pointing in your<br />
chosen direction when the collective is raised or lowered by compensating for the changing<br />
strength of the main rotor torque effect.<br />
Pushing on the left pedal turns the helicopter to the left, and vice versa for the right pedal.<br />
In this respect they work like the rudder pedals of an aircraft – and in exactly the opposite<br />
sense to a bike’s handlebars. This can confuse beginners, but practice will quickly sort you<br />
out – and it seems to do no permanent harm to your ability to steer a bike.<br />
Putting it all Together<br />
Now that you’ve been told what each of the controls does by itself, it’s time to show<br />
how they’re used together when actually flying a helicopter. We’ll look at the sequence of<br />
actions required to take off, transition to forward flight, climb and dive, make gentle turns,<br />
slow to a stop and land. Read through the exercise before trying it out for the first time. It<br />
is worth emphasising that all your control movements (‘control inputs’) should be as<br />
smooth and deliberate as possible. Sudden, violent control inputs are to be avoided. Make<br />
sure that you know where to find airspeed, altitude and vertical velocity readouts on the<br />
Head-Up Display (HUD).<br />
1: Taking Off and Rising to the Hover<br />
We’ll start with the helicopter sitting on the ground, engines running and rotor spun up to<br />
flying speed, in calm conditions. In order to lift off we need to raise the collective slowly<br />
and carefully, until we have just enough lift to raise the helicopter off the ground and start<br />
climbing vertically. At the same time, we need to feed in some pedal. If we don’t do this,<br />
then as soon as the weight comes off the wheels, we’ll start slewing round on the spot<br />
because of the main rotor torque effect. This is one excellent reason for raising the<br />
collective gently – the harder you yank on the collective, the bigger the torque effect.<br />
One awkward complication arises when it comes to deciding which pedal to use. From the<br />
swivel-chair example, you know that the main rotor torque effect acts to turn the helicopter<br />
in the opposite direction to the rotor. The problem is that <strong>Apache</strong> and <strong>Havoc</strong> main rotors<br />
turn in opposite directions, as is, regrettably, traditional for Western and Russian<br />
helicopters. Seen from above, the <strong>Apache</strong>’s main rotor turns anti-clockwise, so the torque<br />
effect is clockwise, and you need to feed in left pedal as you raise the collective, while the
opposite is true for the <strong>Havoc</strong>. In either case, as the helicopter lifts off you’ll need to<br />
balance out the pedal forces to maintain your chosen heading. Here’s a table to summarise<br />
how the pedals are used to balance collective changes in both helicopters:<br />
<strong>Apache</strong> <strong>Havoc</strong><br />
Collective Up Left Pedal Right Pedal<br />
Collective Down Right Pedal Left Pedal<br />
Ground Effect<br />
If you were very slow and cautious in raising the collective, you may find that the helicopter<br />
slowly rises a short distance and comes to the hover a few feet off the ground without any<br />
change in the collective setting. If this happens, you can congratulate yourself on having<br />
demonstrated ground effect. The helicopter is, in effect, riding on an air cushion produced<br />
by the rotor downwash. Ground effect magnifies the lifting power available for a given<br />
collective setting, but the effect falls off quite rapidly with height, and disappears altogether<br />
at a height equal to the diameter of the rotor disc. Rough or sloping ground, violent<br />
manoeuvering or strong, gusty winds will all tend to spill the air cushion, push it off to one<br />
side, or prevent it forming in the first place, so a wise pilot is cautious about depending on<br />
ground effect for the lift needed to stay airborne.<br />
In any case, for our first transition to forward flight we want to climb rather higher<br />
than this – say to a minimum of 100 feet/30 metres. As you approach the desired height,<br />
ease the collective down slightly and wait to see the effect. Remember that the helicopter<br />
has momentum – the faster you were climbing (or descending), the longer it will take for<br />
your vertical speed to change till it actually reflects the new collective setting. As you lower<br />
the collective, you’ll also need to coordinate with pedal input. With practice, you can<br />
anticipate the effects of your control inputs, but be careful in the early stages – it’s hard to<br />
avoid over-correcting.<br />
2: Transition From the Hover to Forward Flight<br />
Once you’re above the minimum height and your climb rate is reduced to a low figure (a<br />
perfect hover is too much to expect, but DON’T start this exercise while descending!),<br />
check that there is a long clear run ahead, with no high obstacles. If necessary, use the<br />
pedals to turn onto a clear heading. Now, without changing the collective setting, ease the<br />
cyclic a little forward and hold it there, watching the HUD altitude readout. You’ll see three<br />
effects from this control input:<br />
1) The helicopter tilts forward.<br />
2) The helicopter starts to accelerate forward.<br />
3) The helicopter starts to lose height.<br />
GROUND SCHOOL 2.8<br />
Effects 1 and 2 are easy enough to understand – we’re tilting the rotor disc, which tilts the<br />
helicopter and directs some of the main rotor thrust forwards, accelerating us forward. The<br />
third effect is more indirect, but obviously important. We started in the hover (or very nearly
2.9<br />
GROUND SCHOOL<br />
so), with the main rotor producing just enough thrust (directed straight down) to support<br />
the helicopter’s weight. Now we have tilted the rotor disc (and its thrust vector) in order<br />
to accelerate forwards. This leaves less thrust acting straight down to support the<br />
helicopter’s weight, so it starts to descend. In order to maintain height, we must raise the<br />
collective slightly (not forgetting the pedal input), increasing the total main rotor thrust so<br />
that its downwards component is large enough to support the full weight of the helicopter.<br />
At the risk of stating the obvious, it should be pointed out that this effect applies whenever<br />
the cyclic is tilted away from the central position in ANY direction – the further away from<br />
the central position, the smaller the lift component.<br />
Translational Lift<br />
As the helicopter gathers speed, you’ll find that you start gaining height again. This is due<br />
to a phenomenon called Translational Lift, which is hard to explain simply, but is basically<br />
due to the fact that the angle of the airflow passing through the main rotor has changed<br />
due to the tilting of the rotor disc and the helicopter’s motion (translation) through the air.<br />
This increases the effective angle of attack of the main rotor blades, producing more thrust.<br />
Translational lift appears at quite low speeds, but disappears again with rising speed – and<br />
its effects are felt whether the helicopter moves forwards, sideways or backwards.<br />
3: Climbing and Diving<br />
To gain height in a helicopter flying forwards, you can a) pull back on the cyclic, b) raise the<br />
collective, or c) use both controls together or in sequence – this is what normally happens.<br />
If you just pull back on the cyclic, the helicopter’s nose will rise and it will start to climb,<br />
but it will also start to lose forward speed – you’re redirecting the main rotor thrust so that<br />
you have more lift force and less horizontal thrust. Provided that the cyclic is still forward<br />
of the central (hover) position, forward speed will stabilise at a lower figure than you<br />
started with.<br />
If you simply raise the collective (with pedal input) in forward flight, you’re increasing the<br />
main rotor thrust without changing its angle, so you have more lift AND more thrust<br />
available. The helicopter will climb and accelerate. If you want to climb without losing or<br />
gaining speed, you need to pull back on the cyclic AND simultaneously raise the collective.<br />
In a similar (though not identical) way, you can lose height using cyclic input or collective<br />
input or both. If you push forward on the cyclic you will lose height and gain speed (more<br />
horizontal thrust, less lift). If you lower the collective you will lose both height and speed<br />
(less total thrust, so less horizontal thrust and less lift).<br />
Once you appreciate the effects of the controls and have some experience in using them,<br />
you can choose the right combination of cyclic and collective inputs to make the helicopter<br />
do what you want, up to the limits of performance.
A)<br />
B)<br />
C)<br />
Rotor thrust Lift<br />
Weight<br />
Rotor thrust Lift component<br />
Helicopter motion<br />
Weight<br />
Rotor thrust Lift component<br />
Helicopter motion<br />
Thrust component<br />
Thrust component<br />
Diagram 2.7: Lift and thrust components<br />
GROUND SCHOOL 2.10<br />
Cyclic upright.<br />
No collective input.<br />
Lift equals weight.<br />
Helicopter hovers.<br />
Cyclic tilted.<br />
No collective input.<br />
Lift less than weight.<br />
Helicopter descends.<br />
Thrust component starts<br />
horizontal acceleration.<br />
Cyclic as in B).<br />
Collective raised.<br />
Lift equals weight.<br />
Helicopter accelerates horizontally<br />
without gaining or losing height.
2.11<br />
GROUND SCHOOL<br />
4: Turning in Forward Flight<br />
When the helicopter is hovering or flying at low speed, if you want to turn you do it mainly<br />
or exclusively with the pedals. At higher forward speeds, turning is accomplished by tilting<br />
the cyclic left or right to bank the helicopter just like a fixed-wing aircraft, though there is<br />
no need to use pedal inputs to coordinate the turn. If you fly sustained or steeply-banked<br />
turns, however, you’ll need to either raise the collective (with pedal input) or ease back on<br />
the cyclic, sacrificing some forward speed. If you do neither then you’ll lose height because<br />
banking tilts the rotor disc (and thrust vector) further away from the vertical, trading off lift<br />
for the sideways thrust component which causes the turn [diagram 2.7].<br />
5: Slowing to the Hover from Forward Flight<br />
This technique is called Flaring, and is essentially similar for all wing-borne flying machines,<br />
though the helicopter variant is the most complex and demanding since it requires precisely<br />
coordinated use of all three controls. The object of the exercise is to slow to a stop in the<br />
minimum distance without losing or gaining height. Losing height can be unhealthy<br />
for obvious reasons, while gaining height (and exposing yourself unnecessarily) is in<br />
military terms ‘tactically unsound’ – a phrase normally used as a diplomatic substitute for<br />
‘lethally stupid’.<br />
Throughout this manoeuvre you should constantly scan the HUD altimeter/vertical velocity<br />
indicator (to see and correct altitude changes) and the view forward (to crosscheck the<br />
altimeter and keep yourself heading in a straight line).<br />
You start the manoeuvre by pulling back on the cyclic to tilt the helicopter backwards – use<br />
a moderate nose-up angle to start with, and experiment with steeper angles as you gain<br />
experience and confidence. This directs the rotor thrust backwards, which will tend to slow<br />
you down, but it also increases the rotor blades’ effective angle of attack, and therefore the<br />
total thrust – which means that you’ll climb unless you simultaneously lower the collective.<br />
As the helicopter slows, main rotor thrust diminishes (slowly raise the collective to<br />
compensate), and as you approach the hover you’ll need to ease the cyclic forward again<br />
to bring the helicopter level, simultaneously raising the collective to the hover setting.<br />
[Diagram 2.8] shows the relationship between cyclic and collective movements for the<br />
whole manoeuvre. Pedal is used as necessary to compensate for collective movement and<br />
to keep the helicopter straight.<br />
6: Landing Problems and Techniques<br />
Though we’ve just gone through the Flare manoeuvre, with the emphasis on slowing to the<br />
hover without gaining or losing height, this technique generally needs modifying to convert<br />
it into a sensible approach to a landing. The reason for this is that unless you’re already<br />
flying very low indeed, the flare will leave you hovering higher than you want to be for a<br />
safe and sensible vertical descent to touchdown. The problem is mainly one of visibility, and<br />
is particularly acute in combat helicopters.
Attitude<br />
Cyclic<br />
Collective<br />
Visibility Factors<br />
GROUND SCHOOL 2.12<br />
Forward flight Flare starts Slowing… Hover<br />
Diagram 2.8: Coordinating cyclic and collective in the flare<br />
In a combat helicopter like the <strong>Apache</strong> or <strong>Havoc</strong> with classical crew arrangement (gunner in<br />
front of pilot, both on the centreline), you as pilot have an excellent field of view to either<br />
side. Your forward view is restricted by the gunner’s cockpit and the length of the nose in<br />
front of you (more of a problem in the hover or the flare than in forward flight), and your<br />
view behind is obstructed to either side by engine pods, stub wings and armament and<br />
totally obscured directly behind by the solid bulk of the fuselage. You have no view at all<br />
straight down, so whenever you’re descending vertically you are effectively exploring<br />
the unknown, tail-end first. It’s a lot like trying to sit down in the dark in an area infested<br />
with scorpions.<br />
You need to touch down at a chosen point on a reasonably smooth, level surface, preferably<br />
without striking anything with your main or tail rotors. A combat helicopter’s main rotor<br />
system is amazingly robust – it’s designed to support tons of helicopter through violent<br />
manoeuvres and shrug off cannon shells. If you’re prepared to explain the damage to your<br />
maintenance crew and superior officers you can chop down small trees with it and still fly<br />
away. The tail rotor, however, is smaller and inevitably more delicate. It also projects further<br />
beyond the main rotor disc than any other part of the helicopter, and it’s right in the middle<br />
of your blind spot behind.<br />
Though you can largely compensate for the restricted view by doing pedal turns, and by<br />
picking visual reference points on either side, descending vertically from a high hover is<br />
usually far more trouble than it’s worth [see also page 2.20 – Vortex Ring Effect]. The
2.13<br />
GROUND SCHOOL<br />
normal helicopter landing approach is very much like a fixed-wing aircraft’s, until you reach<br />
the final stages.<br />
Circuit Pattern<br />
The obvious conclusion is that whenever you’re landing in an unfamiliar area with potential<br />
hazards and obstructions you should always check it first. The standard technique for doing<br />
this is to fly a ‘circuit’ [diagrams 2.9 and 2.10].<br />
The first piece of information you need is the wind direction and if possible its strength and<br />
gustiness. You may know this already, it may be provided for you by someone on the ground<br />
with a radio (or a set of marker panels), or if not then you can usually observe it for yourself<br />
by looking for drifting smoke, flags or other such clues.<br />
The reason why wind direction is important is that you should try to land with your nose<br />
pointing into the wind. While this is a nearly inviolable rule for fixed-wing aircraft because<br />
it reduces speed over the ground and the length of the landing run, helicopter pilots have<br />
more choice in the matter [see page 2.18 – Sideways]. Nevertheless, your life will be easier<br />
if you can land facing into wind.<br />
The wind direction (or the layout of the site) establishes the direction of your landing<br />
approach, and the orientation of the circuit pattern. Use the downwind and base legs of the<br />
Base<br />
leg<br />
Final approach<br />
Downwind leg<br />
Diagram 2.9: Circuit pattern for a clear landing area<br />
Wind direction<br />
Visual references for<br />
touchdown point
Diagram 2.10: Circuit pattern for an obstructed landing area<br />
circuit to inspect the landing area and reduce your height and speed. As you pass the<br />
touchdown point on the downwind leg, look for visual reference points on either side which<br />
you can use to locate yourself once the touchdown point has disappeared under your nose.<br />
The size of the pattern, your entry height and speed should be determined by the size and<br />
nature of the landing area, and the likelihood of enemy action. If the landing site is large<br />
and unobstructed (and the enemy isn’t watching or shooting) then you can afford a large<br />
circuit, entering high (say 500-1000 feet/150-300 metres) and at relatively high speed. If<br />
the landing area is cramped and obstructed, or you wish to avoid enemy attention, you<br />
should fly a much smaller, tighter circuit, entering at lower speed and altitude.<br />
Final Approach<br />
GROUND SCHOOL 2.14<br />
Wind direction<br />
You should ideally make your final descent towards the touchdown point with the<br />
helicopter as nearly level as possible. Avoid pushing the collective forward to dive at the<br />
ground, and try to ensure that by the time you reach this stage you’re travelling slowly<br />
enough that a very moderate flare – or ideally a constant slightly nose-up attitude – will be<br />
enough to bring you to the hover a few feet above your touchdown point. Now all you have<br />
to do is gently lower the collective and touch down.
2.15<br />
GROUND SCHOOL<br />
If you find yourself too high and/or too fast on the final approach, you should abandon the<br />
landing and go around again [diagram 2.11]. If you attempt to kill off speed using a radical<br />
flare at low altitude then you risk striking your tail rotor on the ground. If you try to descend<br />
at too steep an angle from an excessively high approach then you’ll suffer from all the<br />
visibility problems we discussed earlier, plus running the risk of Vortex Ring Effect [diagram<br />
2.14]. Just raise the collective to arrest your descent (or climb if there are obstacles to<br />
clear), fly on over and past the touchdown point, and turn into another circuit – smaller,<br />
lower and slower than the first. Keep it in mind that you’ll find it much easier to establish<br />
the second circuit if you continue some way along the approach line past the touchdown<br />
point before you turn.<br />
First approach<br />
too high/too fast<br />
Diagram 2.11: Going around again<br />
We Don’t Need no Stinking Circuits!<br />
Overfly touchdown point,<br />
then enter second smaller circuit<br />
Oh yes, you do. It’s not just a piece of textbook ritual. The procedure described above may<br />
seem formal and longwinded but it really is useful. Not only does it give you the chance to<br />
scout the landing area, but the sequence of legs and turns lets you judge and adjust your<br />
speed and rate of descent relative to the touchdown point – and the turns can be used to<br />
kill off a great deal of speed. A straight-in approach looks much simpler and is perfectly
Learn to recognise<br />
this angle<br />
Diagram 2.12: Judging offset and height in the circuit<br />
GROUND SCHOOL 2.16<br />
Key point: opposite touchdown<br />
point on downwind leg<br />
practical for landing in the middle of a wide open airfield, but as soon as you have to deal<br />
with obstructions and previously unseen landing sites, the circuit pattern is much safer,<br />
usually faster, and saves a great deal of wear and tear on your nerves.<br />
The key to a successful circuit of any size is to select the correct combination of height and<br />
lateral offset (between downwind and final legs). This can be done by learning to recognise<br />
the angle, or range of angles, you see when you look down on the touchdown point from<br />
the downwind leg. This skill, like any other, can only be acquired by means of practice.
2.17<br />
GROUND SCHOOL<br />
Turning force<br />
exerted by tail fin<br />
Thrust available<br />
from tail rotor<br />
Direction of flight<br />
Direction of<br />
relative wind<br />
Diagram 2.13: Turning forces in backwards flight<br />
No lever arm<br />
No tail surface exposed<br />
No turning force<br />
Lever arm<br />
Some tail surface exposed<br />
Turning force exists<br />
Lever arm<br />
More tail surface exposed<br />
More turning force<br />
If you fly backwards faster<br />
than your maximum controllable<br />
sideways speed, once the<br />
helicopter turns past a certain<br />
angle, you cannot stop the turn
Sideways, Backwards and Crosswinds<br />
If you have absorbed and understood the basic principles of helicopter flight it should be<br />
obvious that you can fly the helicopter in any direction from the hover, without turning, by<br />
tilting the cyclic the way you want to go. You can also hover on the spot in a wind blowing<br />
from any direction by tilting the cyclic into the wind. There are, however, a few pitfalls which<br />
should be pointed out.<br />
Weather-Cocking<br />
The helicopter’s tailboom is there for two main reasons. We’ve already mentioned that it<br />
provides a convenient mounting point for the tail rotor, outside the worst of the main rotor<br />
downwash, and at the end of a long lever arm. Those same factors also make it the best<br />
place to mount a vertical fin (or fins) very like what you find at the tail end of most fixedwing<br />
aircraft, and serving exactly the same purpose; to provide automatic directional<br />
stability in fast forward flight, just like the fletching of a dart or an arrow.<br />
The tail fin works against you when you try to fly sideways or hover in a cross-wind,<br />
generating a force which tends to turn the helicopter’s nose into the relative wind. The<br />
whole helicopter acts like a weather-vane. To counter this effect you must use pedal inputs<br />
– and the faster you fly (or the stronger the crosswind) the larger the input needed to<br />
maintain heading. Eventually you’ll reach a point where the tail rotor simply cannot provide<br />
any more thrust, and the nose will inexorably turn into the relative wind. This is one of the<br />
main reasons why a helicopter’s maximum sideways speed is much lower than the<br />
maximum forward speed – and a wise pilot will always try to avoid flight regimes which can<br />
only be maintained by jamming any control hard against its stops.<br />
Stability in Backwards Flight<br />
Backwards flight is something that obviously needs to be done carefully – you can’t see<br />
where you’re going, and you’re flying tail rotor first. There are less obvious problems which<br />
affect you even if you have unlimited space for manoeuvre, or if you’re simply trying to<br />
hover in a strong tail-wind. The explanation involves some basic physics, but the diagram<br />
should help you grasp what’s going on.<br />
The strength of the turning force generated by the tail fin depends mainly on three factors:<br />
1) The speed of the relative wind.<br />
2) How large a surface the tail fin presents to the relative wind.<br />
GROUND SCHOOL 2.18<br />
3) The effective length of the tail fin’s lever-arm with respect to the relative wind and the<br />
helicopter’s centre of mass, which we can assume will be more or less directly under the<br />
main rotor hub.<br />
Taking these factors in order; 1) more airspeed means more force. In fact, because the force<br />
is proportional to the square of the airspeed, a little more speed means a lot more force.<br />
2) When the tail is pointing straight into the wind, it is exposing the least possible area and<br />
generating the least possible force. As the tail swings out across the wind, it presents more
2.19<br />
GROUND SCHOOL<br />
and more surface area, generating more and more force. 3) When the tail is pointing<br />
straight into the wind, it is in line with the centre-of-mass and there is no leverage. As the<br />
tail swings out across the wind, the length of the lever-arm increases and so does the<br />
turning force. Factors 2 and 3 both reach their maximum when the helicopter is broadsideon<br />
to the wind, as it is when you’re flying sideways.<br />
Because the tail fin exerts no turning effect when pointing straight into the relative wind (and<br />
the helicopter’s fuselage is generating little or no more drag than it does when flying forwards)<br />
it is possible to accelerate to much higher speeds in backwards than in sideways flight.<br />
The catch comes when the tail turns out of line. The moment any turning force is<br />
generated, it tends to turn the helicopter even further off the wind, generating even more<br />
turning force, and so on in a vicious circle. At high speeds this happens so quickly that you<br />
have very little time to correct the swing, and if you are moving faster than your maximum<br />
stable sideways speed, once the swing goes beyond a certain point you don’t have enough<br />
tail-rotor thrust to stop it anyway.<br />
At this point you’ve lost control of the turn, which is almost exactly like a handbrake turn<br />
or U-turn in a car. The helicopter swaps ends in an instant, the main rotor blades flap and<br />
thrash madly, and if you’re lucky they don’t smash the cockpit canopy or chop off the tail<br />
boom as the rotor disc tries to re-align itself with the suddenly and violently changing<br />
attitude of the rotor mast.<br />
It is possible (and even potentially tactically useful) to perform milder variants of this<br />
manoeuvre under control, but work up to it cautiously. Approach it as you would approach<br />
the problem of performing a backflip while whirling a sharp sword around your head.<br />
Hazards and Emergencies:<br />
Landing on Slopes<br />
When necessary, it is entirely possible to land safely on a smooth moderate slope, but the<br />
technique needs practice. Though at first sight it might seem natural to land facing up the<br />
slope, the preferred direction is sideways, facing into the wind. If you don’t think the<br />
helicopter will be stable standing across the slope, then the slope is too steep, and you<br />
must find somewhere else.<br />
Approach as normal, but slow your final descent so that you hover with your uphill wheel<br />
just touching the ground. Now very gently lower the collective, and as the helicopter leans,<br />
move the cyclic in the opposite direction so that the rotor disc remains horizontal. Once<br />
both wheels are on the ground, carefully lower the collective to transfer the weight to the<br />
wheels, keeping the rotor disc horizontal, to oppose the pull of gravity, rather than tilting it<br />
to match the cross-slope.<br />
Take-off can be accomplished by simply reversing the landing drill. The important things are<br />
to keep the rotor disc horizontal and to use a very delicate touch on the collective when<br />
the wheels are on the ground.
Retreating Blade Stall<br />
Diagram 2.14: Vortex rings<br />
GROUND SCHOOL 2.20<br />
We have already talked about the difference in lift developed by the advancing and<br />
retreating blades of the main rotor in horizontal flight, which is due to the difference in their<br />
effective airspeeds. Lift is directly and sensitively proportional to airspeed, but for any given<br />
wing at any angle of attack there will be a critical speed below which lift suddenly collapses<br />
– the wing stalls. For any reasonably powerful or streamlined helicopter, the maximum safe<br />
airspeed is determined by the speed at which the retreating rotor blade starts to stall.<br />
In this situation, you suddenly start to lose lift on the retreating blade side, and the<br />
helicopter rolls towards it. Provided that you are not diving too steeply, you may be able to<br />
reduce speed by lowering the collective and pulling back on the cyclic before you lose<br />
control, but beware of violent panicky manoeuvres, which may stall more blade area or set<br />
the blades flapping violently.<br />
Like all aerodynamic effects, retreating blade stall is affected by air density and by<br />
temperature. It will happen at lower speeds at higher altitudes and/or higher temperatures.<br />
Vortex Ring Effect<br />
The commonest visible example of a vortex ring (or ring vortex) is a smoke-ring. In fact they<br />
are quite a widespread phenomenon, but like all flow patterns they are usually impossible<br />
A) Airflow pattern and motion of a vortex ring<br />
B) Helicopter descending in vortex ring effect
2.21<br />
GROUND SCHOOL<br />
to see directly. All you need to start one is a stream with a more or less circular crosssection<br />
(like your rotor downwash) which satisfies certain other conditions.<br />
In a helicopter, you can unintentionally create a vortex ring around your main rotor if you<br />
make a sustained high-speed descent vertically or at a steep angle. Once the ring has<br />
formed, it is surprisingly stable, and moves with you as you descend. The extra downwash<br />
of the circulating vortex ring destroys most of the main rotor’s lift, and you cannot escape<br />
by raising the collective – you will only pump energy into the ring’s circulation. You are<br />
already descending too fast to escape downwards and outrun it. The only way out is to use<br />
the cyclic to move laterally, because lateral movement disrupts the vortex, just as vertical<br />
movement maintains it.<br />
Coping with Reduced Power<br />
If you lose an engine in a powerful twin-engined helicopter like the <strong>Apache</strong> or the <strong>Havoc</strong><br />
you can still fly, land and take off, provided that you don’t try to lift heavy weights in hot<br />
and high conditions or leap tall buildings at a single bound. The keys to achieving this are<br />
translational lift and ground effect. Every time you raise the collective for more lift you put<br />
more strain on the surviving engine, and the rotor speed may slow to dangerous levels.<br />
Ground effect multiplies your main rotor lift and may let you hover with reduced power.<br />
It also provides a convenient low-friction environment in which to accelerate to a speed<br />
where translational lift can let you climb out of ground effect. When approaching for a<br />
landing, or descending and decelerating for any other reason, let yourself gently down at a<br />
shallow angle or a low speed, or both. The ground effect cushion is no deeper than your<br />
main rotor diameter.<br />
If you cannot even hover in ground effect, you may still be able to achieve a running<br />
landing, if space is available. The approach is flown very like a low speed approach to a runway<br />
in a fixed-wing aircraft. Just as in an aircraft, you round out your descent by pulling smoothly<br />
back on the cyclic before you touch the ground so that you kiss it gently rather than crash into<br />
it at an angle. At the same time you must avoid plunging your tail-rotor into the ground.<br />
If you’re running out of horizontal speed but close to the ground you can probably afford<br />
to raise the cyclic to slow the last seconds of descent. If you run out of forward speed and<br />
rotor rpm at the same time, you’d better hope that you don’t have too far to fall.<br />
Running takeoffs are also possible if space, surface and wind direction permit. The idea here<br />
is to accelerate on the ground to a speed where translational lift will let you lift off and (you<br />
hope) climb. If you can’t climb out of ground effect then you need a clear run to a lower<br />
altitude, or another rolling landing. Failing these, you’re in trouble.<br />
Autorotations<br />
If a helicopter loses all engine power in flight, it can still be landed without serious<br />
damage or injury provided that the pilot does everything right, and there is a clear space in<br />
the right place for a landing. The technique and options vary according to your height when<br />
power is lost.
1) Loss of Power at Altitude<br />
The standard Autorotation procedure assumes that the helicopter is flying at 500 feet / 150<br />
metres or more. The key technique is to preserve the rotational energy stored in the main<br />
rotor system (treating it as a giant flywheel) until it can be used up in the last few seconds<br />
of flight to halt your descent and lower the helicopter more or less smoothly to the ground.<br />
Two steps are essential to accomplish this. In the first place, as soon as the engine thrust<br />
disappears you must instantly bottom the collective, which reduces the main rotor pitch<br />
angle to its lowest value and minimises the drag on the rotor blades. At the same time, if<br />
you have the height and space to manoeuvre, you should try to preserve the helicopter’s<br />
forward motion and minimise the rate of descent by using the cyclic to trim your speed to<br />
the minimum-rate-of-descent figure – about 70-80 knots/130-150 kmh. The resulting<br />
airflow will actually drive the main rotor around, just as it does in an autogyro (which has a<br />
powered propeller to give it forward speed, which drives its unpowered rotor). This is what<br />
the word Autorotation means. It is to a helicopter what gliding flight is to a fixedwing<br />
aircraft.<br />
Unfortunately, a heavy combat helicopter glides about as well as a fast jet does. Because of<br />
the low speeds involved, and the rotor’s ability to deliver braking thrust straight down, it is<br />
still possible to land safely, but a very steep descent may be required to keep the main rotor<br />
turning. Your pull-out/round-out manoeuvre must be finely judged to avoid either hitting<br />
the ground in the dive or finding yourself running out of airspeed and rotor rpm with the<br />
ground still an uncomfortable distance below.<br />
At the same time as the collective is bottomed and the cyclic trimmed, the pilot must also<br />
scan the area below and ahead (and preferably upwind) for the best place to put down and<br />
steer towards it. There is no time for hesitation or indecision in this sequence unless you<br />
have a great deal of height to spare. Action and decision must be nearly instantaneous, and<br />
once you’ve made your choice of landing area you are committed.<br />
2) Loss of Power at Low Level<br />
GROUND SCHOOL 2.22<br />
This is a more likely scenario for an attack helicopter than the classic autorotation described<br />
above. Your options are essentially limited to flaring more or less straight ahead, and/or<br />
raising the collective to convert rotational energy into braking thrust before you hit the<br />
ground. The helicopter will probably take severe damage, but its structure is designed to<br />
absorb energy and protect the crew in precisely this situation. Combat helicopter crews can<br />
expect to survive crashes which would be instantly fatal in most kinds of aircraft.
2.23<br />
GROUND SCHOOL<br />
Tactical Flying<br />
The most important, most fundamental piece of advice for a brand-new attack helicopter<br />
pilot who knows more about fast jets than ground combat is to stop thinking like a fighter<br />
pilot and start thinking like an infantryman or a tank commander. Cover, vantage points,<br />
fields of fire, and lines of retreat are everything. Fly high and fast in the neighbourhood of<br />
the enemy and you simply expose yourself.<br />
Unless you are planning a slashing surprise attack on a known enemy position, every time<br />
you come to a skyline which may expose you to an enemy on the other side you should<br />
either avoid it or creep up to it and peer cautiously over the top. A pair, or a larger unit of<br />
attack helicopters advancing to contact with the enemy should ideally leapfrog forward in<br />
the classic pattern of advancing infantry; one group holds position at a point which<br />
combines cover with good fields of view and fire, while the other group scuttles forward<br />
to the next vantage point, to cover the next advance.<br />
Withdrawal or retreat is also usually handled the same way, with one group providing<br />
covering fire, or at least attracting the enemy's attention while the other group concentrates<br />
on falling back to the next available cover while minimising their own exposure.<br />
Security: Cover, Speed and Manoeuvre<br />
Using Cover<br />
Crests, valleys, forests, rivers with steep<br />
or wooded banks, sunken roads and<br />
buildings can all provide cover. At the<br />
personal level and on a small scale,<br />
everyone who has ever played hideand-seek<br />
understands the concept well.<br />
The difference between this and the<br />
military concept of cover is mainly one<br />
of scale. Hiding yourself is rarely<br />
difficult in any normal environment.<br />
Hiding troops, vehicles or helicopters<br />
requires the use of much larger<br />
obstacles and, especially, landscape.<br />
For a helicopter there is no better form<br />
of cover available than high ground<br />
between you and the enemy.<br />
When you know roughly where the<br />
enemy is, it is not too difficult to<br />
identify the 'dead ground' which he<br />
cannot see or sweep with fire. These<br />
are the areas you can use to approach,<br />
to launch an attack, to hide, or to
etreat safely. If the terrain favours you, and you exploit it properly, you may be able to<br />
approach, attack and withdraw without exposing yourself for longer than it takes to fire.<br />
On the other hand, there may not be continuous cover between your current position and<br />
the place where you want to go next. If the target is stationary you need to get closer, you<br />
must now risk exposed dashes between dead zones. If the target is moving, however, its<br />
dead ground changes rapidly, and if you can predict how it will change, you can often use<br />
broken cover as effectively as the continuous kind.<br />
Valleys and depressions are the best places to find dead ground, since they can shield you<br />
from view all around, or at least over wide angles, but the same is obvious to any competent<br />
enemy, and roads often run down valleys. Cover is valuable to everyone, and the enemy may<br />
have got there first.<br />
Obstacles like hills, woods or groups of buildings provide a different sort of cover. If the<br />
enemy is moving, you must move around your cover to stay behind it. Clearings in woods,<br />
or open spaces surrounded by buildings, can be considered as shallow depressions or<br />
valleys.<br />
Moving from cover to cover may be the safest way to advance, but it doesn't guarantee<br />
complete safety. Whenever you expose yourself, consider what you can do if the enemy<br />
appears over the horizon at the worst possible moment.<br />
Using Speed and Manoeuvre<br />
If you don't have cover, then the next best things are speed and agility. A helicopter<br />
stationary in the open is an easy high-value target. A helicopter flying slowly, or in a straight<br />
line, is not much harder to hit. If you must expose yourself to enemy fire, try to build up<br />
speed before you break cover, and fly a tight three-dimensional zigzag. Don't just put your<br />
head down and run; change your path every few seconds. The gain in safety under fire is<br />
well worth the minor loss of speed. If you must fly straight, to line up for an attack with<br />
unguided rockets, for example, then try to zigzag vertically. The vertical zigzag is your best<br />
tactic against radar-directed gunfire from any direction except close ahead and behind.<br />
Offensive Tactics<br />
Just as there are two basic forms of defence; cover on the one hand, manoeuvre on the<br />
other, there are two corresponding modes of attack available to a combat helicopter;<br />
Sniping and Slashing. Each has its advantages and disadvantages. Be prepared to use both,<br />
and to switch rapidly from one mode to the other.<br />
Sniping Attack<br />
GROUND SCHOOL 2.24<br />
This method is usually the safer of the two, especially against a numerous enemy. As the<br />
description suggests, you set yourself up in cover and expose yourself only as much as is<br />
necessary to pick your targets and fire, though if you're using the older-model laser-guided<br />
Hellfire in the <strong>Apache</strong>, or the radio-guided Ataka missile in the <strong>Havoc</strong>, you will have to stay<br />
exposed long enough to keep your sights on the target until the missile reaches it.
2.25<br />
GROUND SCHOOL<br />
If you don't have a fire-and-forget missile available, this means that in some ways you're<br />
safer sniping from close range. The missile flight time is shorter, and so you are exposed for<br />
less time while you guide it.<br />
The best way to use this technique at the individual level is to fire a single missile, or a short<br />
salvo, duck back into cover, and move to a new position before popping up (or sideways)<br />
to shoot again. If two or more helicopters cooperate, taking turns to attack from widely<br />
separated positions, the technique is even more effective.<br />
At a slightly higher tactical level, the sniping attack is also a relatively low-risk way to grab<br />
the enemy's attention and focus it in one direction, while a second force approaches to<br />
strike from a fresh direction, preferably the enemy's flank (side) or rear.<br />
Slashing Attack<br />
Used properly, this technique resembles a cavalry charge, or a firing pass by a ground-attack<br />
aircraft. As noted above, as the range closes your weapons' flight time grows shorter, and<br />
your unguided weapons also become more accurate. If you can surprise the enemy and<br />
make your run from an unexpected direction, you will have a vital few seconds - how long<br />
depends on the enemy's state of readiness - before sensors and weapons can be reoriented<br />
against you. You must make the most of this grace period to take out the enemy's<br />
most dangerous air defence systems.<br />
Another vitally important question to consider is what happens at the end of your run. If<br />
you do not succeed in suppressing the enemy's air defence systems, then you will need to<br />
find cover quickly. Don't even think about turning round and retreating to your starting<br />
position - you must keep your speed up and open the range as fast as possible, dodging as<br />
hard as you can.<br />
As ever, intelligent cooperation can vastly increase the effectiveness of the tactic, and<br />
reduce the risks. If several helicopters attack from different directions simultaneously, the
enemy must divide the available defensive fire between them. Another tactical variation<br />
worth considering is to attack in a series of waves. As the first wave passes the enemy's<br />
position and the defences swing to follow them, a second attack wave may enjoy a few<br />
seconds of immunity while the defences re-orient against them - and this also takes the<br />
pressure off the first wave as it retreats.<br />
A well-executed slashing attack can be devastating, but used wrongly, this tactic will<br />
devastate your own forces. The classic example of the wrong way to take the offensive<br />
comes from the mass infantry attacks of the first world war. If the enemy knows where<br />
you're coming from; if his weapons are already pointed in your direction; if his forces are<br />
behind cover while you must cross open ground, then you are inviting disaster.<br />
Another situation where the basic principles of the slashing attack are important is the<br />
unexpected engagement. If you must cover ground quickly, and a cautious leapfrog advance<br />
is not possible, then every time you cross a ridgeline or come around a bend in a valley you<br />
may find the enemy in your path. Unless he saw you coming he'll be just as surprised as<br />
you. If you have the weight of fire to do him serious damage, or there is cover available<br />
beyond, a hasty slashing attack may be the best form of defence - your fastest way out of<br />
a dangerous situation.<br />
Defensive Tactics<br />
In those cases where attack is not a practicable form of defence - when faced with superior<br />
forces in open ground, for example - the first essentials are cover and a line of retreat.<br />
Ducking into cover without a line of retreat amounts to trapping yourself. Mobility is the<br />
helicopter's prime asset, and its only defence against area weapons like large blast warheads<br />
or submunitions clusters. Remember that when the enemy knows where you're hiding he<br />
can attack you with mortars or artillery, even if you are out of sight, or outflank your<br />
position by advancing around it, either with ground forces or other helicopters.<br />
The only guaranteed counter to a properly executed flanking manoeuvre is to retreat. If you<br />
don't have the space and the cover to do this, then outside intervention may be your only<br />
hope. The moral of the story is simple - keep your line of retreat open, especially in a<br />
sniping engagement. If it is threatened by enemy movement, use it straight away while you<br />
still can. If you know in advance that you're going to have to make a fighting withdrawal,<br />
pick out in advance the places where you can turn and fire back at your pursuers, and be<br />
aware of places where you can find friendly fire support. Lead the enemy to them if<br />
possible.<br />
Air-to-Air Tactics<br />
GROUND SCHOOL 2.26<br />
If you have to fight another combat helicopter, or an aircraft, remember the mantra "this is<br />
not a jet fighter". To a fighter pilot, altitude is a resource, a source of potential energy to be<br />
converted into speed. To you, as a combat helicopter pilot, altitude means exposure to<br />
enemy ground fire. Speed, too, works differently for a helicopter pilot. If an enemy aircraft<br />
makes a high-speed slashing attack on you while your own speed is low, the advantage<br />
swings to you as soon as the enemy is past. He is the prisoner of his own momentum, you<br />
can pedal-turn and launch your own weapons from his blind spot.
2.27<br />
GROUND SCHOOL<br />
Use cover and ambush tactics when the enemy is chasing you. When you're chasing him,<br />
beware of the same tactics. Some classic air-to-air doctrines still apply to helicopter<br />
combat; If you're part of a formation attacked by enemy helicopters, the formation should<br />
split up. At the least, the enemy must divide his forces to pursue the different elements. If<br />
the enemy leaves any of your elements unengaged, these should then turn around and<br />
come in on the enemy's own tail.<br />
Another classic air-combat tactic that may work for you is turning towards your opponent's<br />
approach. This brings your own weapons to bear and shortens his firing time.<br />
Using Ground-attack Weapons in Air Combat<br />
Even if you're not carrying specialised air-to-air missiles, you should be aware of the antiaircraft<br />
potential of your ground-attack weapons. Cannon, rockets and anti-tank missiles<br />
may all be usable, if less than ideal. If you have to use these weapons against aircraft, try<br />
to do it at short range, and set up a low-deflection shot from ahead or behind. Remember<br />
that your guided weapons may fly a pursuit path to the target, rather than an intercept<br />
path, which reduces their effective range. Anti-tank missiles also generally have lower<br />
acceleration and top speeds, higher drag, and much less agility than anti-aircraft missiles -<br />
launching a Hellfire at a passing or retreating fast jet is most likely to achieve nothing more<br />
than the waste of an expensive missile.
3. APACHE VERSUS HAVOC
3.1<br />
APACHE VERSUS HAVOC<br />
AH-64D <strong>Apache</strong> Longbow<br />
The basic <strong>Apache</strong> design represents the second, or perhaps the third generation of<br />
American attack helicopter development. Though helicopters have been used for antisubmarine<br />
work ever since they first became practical, the first combat helicopter - a<br />
helicopter which was primarily a air-to-ground weapons platform rather than a utility type<br />
- was the HueyCobra. Though its development may have been influenced by early<br />
experience in Vietnam, it was a natural element of the US Army’s Airmobile concept.<br />
If you exploit the helicopter’s mobility to move troops and supplies rapidly and flexibly, then<br />
you need an equally mobile and flexible source of fire support. Ever since 1916, infantry<br />
have increasingly operated with tanks and lighter armoured vehicles mounting heavy<br />
weapons. Lightly-armed troops who have just piled out of a helicopter are highly vulnerable.<br />
The helicopter gunship can provide instant, accurate heavy fire support under close control.<br />
Though the HueyCobra gave good service and its descendants are still in widespread use,<br />
early versions were distinctly underpowered, making them slower than the troop-carrying<br />
‘slicks’ they escorted, and limiting the size of the weapons load and the weight of armour<br />
the airframe could carry. The next step forward should be a more powerful, faster and<br />
altogether nastier helicopter.<br />
The result was the development of the Lockheed AH-56 Cheyenne. This was an ambitious<br />
and unconventional design that straddled the boundary between helicopter gunship and
APACHE VERSUS HAVOC 3.2<br />
ground attack aircraft. Its most novel design feature was the pusher propeller at the tip of<br />
the tail-boom, aft of the tail-rotor. The Cheyenne’s outstanding performance feature was<br />
speed - a prototype reached 220 knots (407 km/hour), but it was over-complex and<br />
mechanically unreliable. The design emphasis on speed, together with its large size and<br />
weight, robbed it of the agility necessary to exploit ground cover in a period when SAMs of<br />
all sorts and radar-laid anti-aircraft cannon were coming into widespread service.<br />
The Cheyenne project was cancelled, and a new Advanced Attack Helicopter requirement<br />
issued, specifying well-chosen and demanding criteria for performance, weapon load,<br />
endurance, toughness and crew protection. Electro-optical systems (infrared cameras, laser<br />
rangefinding and designation) were to be fitted to allow target detection and attack at<br />
longer ranges, and at night. Faced with the numerical superiority of the Warsaw Pact, NATO<br />
needed to multiply the effectiveness of its smaller forces. One direct and obvious way to<br />
do this was to develop night-fighting equipment and techniques. An additional advantage<br />
of this approach was that it posed a technical and industrial as well as a military challenge<br />
to the Soviet Union.<br />
Five designs were submitted, by Bell, Boeing/Grumman, Hughes, Lockheed and Sikorsky.<br />
Bell and Hughes were selected to build their designs for a fly-off. Bell’s YAH-63, a tubby,<br />
rounded, subtly dated-looking machine, was eventually rejected after these tests. With the<br />
benefit of hindsight, it seems clear that the Hughes YAH-64 was superior in the functionality<br />
and development potential of its design. It also undoubtedly looks the part, which is a real<br />
asset to any weapon.<br />
After a troubled production run and service introduction, assailed by political agitation and<br />
some principled scepticism about the concept of the ‘flying tank’, the <strong>Apache</strong> decisively<br />
proved itself in Iraq in 1991 fighting very much the same equipment and systems it was<br />
designed against in the seventies.<br />
Vindication in combat and export orders from discriminating customers in Europe gave<br />
impetus to the Longbow development program. The Longbow radar can see further, over<br />
a wider angle, in worse weather than the optical sensors, and the datalink allows crews to<br />
communicate and cooperate more effectively than ever before. The cockpit is updated with<br />
multi-functional displays displacing analogue instruments, the avionics and services are<br />
modernised and streamlined, and the engines are replaced with an uprated version. Despite<br />
all the new features, the parts count has been substantially reduced, which strongly<br />
suggests that maintainability has actually improved.<br />
When the AH-64D was tested in realistic combat exercises against the AH-64A, the loss<br />
ratio in favour of the D-model was seven to one, and the A-models made many fratricidal<br />
kills. The margin was so decisive that the exercises were cut short. Among those who have<br />
flown and evaluated the AH-64D <strong>Apache</strong> Longbow, the common verdict seems to be that<br />
the new capabilities represent a revolutionary change, and the possibilities they open up will<br />
take years to explore. The Main Battle Tank may no longer be the master of the battlefield.
3.3<br />
APACHE VERSUS HAVOC<br />
Specifications - AH-64D <strong>Apache</strong> Longbow<br />
Country Of Origin USA<br />
Type Attack helicopter<br />
Manufacturer The Boeing Company<br />
Dimensions<br />
Main rotor diameter 15.25 m (50.0 ft)<br />
Tail rotor diameter 2.89 m (9.48 ft)<br />
Overall length (turning rotors) 17.74 m (58.2 ft)<br />
Height 5.18 m (17.0 ft)<br />
Fuselage width (at engine nacelles) 2.82 m (9.25 ft)<br />
Wing span 4.99 m (16.37 ft)<br />
Weight<br />
Normal take-off weight 7,270 kg (16,028 lbs)<br />
Maximum take-off weight 10,107 kg (22,282 lbs)<br />
Power plant<br />
Turboshafts 2 x General Electric T700-GE-701C<br />
Take-off power 2 x 1889 shp (shaft horse power)<br />
Performance<br />
Maximum speed 273 km/h (147 kts)<br />
Cruise speed 273 km/h (147 kts)<br />
Hover ceiling (in ground effect) 4,465 m (14,649 ft)<br />
Hover ceiling (out of ground effect) 3,206 m (10,518 ft)<br />
Maximum vertical rate of climb at sea level 541 m/min (1,775 ft/min)<br />
Maximum rate of climb at sea level 803 m/min (2,635 ft/min)<br />
Range 400 km (216 nm)
Avionics<br />
● Mast-mounted Longbow fire-control radar (FCR)<br />
● Target acquisition and designation system (TADS)<br />
● Integrated helmet and display sighting system (IHADSS)<br />
● Pilot night vision system (PNVS)<br />
● Doppler navigation system and global positioning system<br />
Armament<br />
● M230 30mm Chain Gun<br />
● AIM-92 Stinger IR guided air-to-air missiles<br />
● AGM-114L Longbow Hellfire radar guided anti-tank missiles<br />
● AGM-114K Hellfire II laser guided anti-tank missiles<br />
● Hydra 70 M255 unguided rockets (HE)<br />
● Hydra 70 M261 unguided rockets (MPSM)<br />
Combat Survivability<br />
● Radar and laser warning receivers<br />
● Chaff and flare dispensers<br />
● Electronic counter measures (IR and radar jammers)<br />
● Armour protected key components<br />
● Airframe designed for crash-survival<br />
● Energy absorbing seats<br />
● Crash-resistant and self-sealing fuel cells<br />
75189<br />
D A N G E R<br />
UNITED STATES ARMY<br />
APACHE VERSUS HAVOC 3.4
3.5<br />
APACHE VERSUS HAVOC<br />
MIL Mi-28N <strong>Havoc</strong> B<br />
Though Russian interest and experiments in helicopter development go back to the early<br />
1930s, it was not until the US Army demonstrated the military applications of helicopters,<br />
first in Korea and then in Vietnam, that the resources were committed for serious<br />
development of military helicopters. Russian commanders faced with the daunting task of<br />
defending the long, desolate border with China seized on the Airmobile Infantry concept<br />
with both hands. The military version of the Mi-8 Hip medium transport helicopter,<br />
introduced in 1967, could carry 24 armed troops, and strap a respectable load of rockets<br />
or bombs onto its external ordnance racks.<br />
For the same reasons as the US army, magnified by the need to be able to concentrate<br />
firepower rapidly at any point along a border thousands of miles long, Russian forces also<br />
needed a heavily armed and armoured helicopter with real anti-tank capability. The result<br />
was the Mi-24 Hind. Possibly driven by the long-proven interdependence of tanks and<br />
infantry, or by the reflection that while a helicopter can dominate territory, only infantry can<br />
hold it, Mil’s designers included a cabin holding up to eight troops. Just as the Russians had<br />
upped the stakes in armoured personnel carrier (APC) design by combining the roles of<br />
battle-taxi and tank destroyer to produce the BMP series of infantry fighting vehicles (IFV),<br />
so the Hind could be seen as a flying IFV, combining the roles of battle-taxi and armoured<br />
ground-attack aircraft.<br />
The Hind was a near-contemporary of the ill-fated Cheyenne project, and both aircraft
APACHE VERSUS HAVOC 3.6<br />
display a similar emphasis on high speed and aircraft-like attack profiles. Unlike the<br />
Cheyenne, though, the Hind evolved into a very practical aircraft, and extensive combat<br />
experience in Afghanistan amply demonstrated the value of its heavy armament and armour.<br />
Though the troop compartment was rarely used for its intended purpose, it made the Hind<br />
an exceptionally versatile machine, with a range of capabilities no other helicopter could<br />
match.<br />
By the late seventies, however, Russian army aviation had come to accept the American<br />
conclusion that small size and agility were the essential attributes of a battlefield helicopter,<br />
and issued a requirement for a helicopter to counter the <strong>Apache</strong>. The Mil and Kamov design<br />
bureaux produced the Mi-28 <strong>Havoc</strong> and the Ka-50 Hokum which both flew for the first time<br />
in 1982. While Kamov used the bureau’s trademark coaxial rotor system to produce a novel<br />
design, the <strong>Havoc</strong>’s layout corresponds almost point-for-point with the <strong>Apache</strong>’s.<br />
The <strong>Havoc</strong>’s general layout is much like the <strong>Apache</strong>’s, but it is more powerful and carries a<br />
heavier weapon-load. Though perhaps not quite as agile in all respects as its US<br />
counterpart, the difference in performance is minor, and the two helicopters are wellmatched.<br />
One interesting legacy of the Hind design is the <strong>Havoc</strong>’s small cargo<br />
compartment. As well as its general utility, this can also permit one <strong>Havoc</strong> to rescue the<br />
crew of another. Like the <strong>Havoc</strong>’s elaborate automated system for canopy jettison and<br />
escape slide inflation, this should be seen as part of the admirable Russian aviation tradition<br />
of making the best possible provision for crew escape.<br />
When the <strong>Havoc</strong> and Hokum were evaluated against each other in 1986, the Mil bureau,<br />
which had designed all the Soviet Army’s helicopters to date, was shocked to find that<br />
Kamov’s Hokum was preferred, on the grounds of cost-effectiveness, performance,<br />
survivability and weapon effectiveness. Mil’s considerable political influence was exerted to<br />
the utmost in an effort to force the reversal of this verdict, but the result stood. The only<br />
concession extracted was permission to continue <strong>Havoc</strong> development for possible export<br />
sales.<br />
In the event, the disintegration of the Soviet Union and the collapse of the Russian defence<br />
budget left both helicopters without real volume production orders, and a vicious<br />
propaganda war between the Mil and Kamov bureaux continues to this day. Both<br />
helicopters have been substantially developed in the interval, but neither has yet found a<br />
true launch customer. Many potential users are sceptical about the safety of the Hokum’s<br />
coaxial rotors (a point loudly trumpeted by Mil), but on the other hand, the <strong>Havoc</strong> may well<br />
have suffered in part because it is undeniably one of the ugliest helicopters ever to fly,<br />
possessing neither the sleek menace of the Hind nor the functional brutality of the <strong>Apache</strong>.
3.7<br />
APACHE VERSUS HAVOC<br />
Specifications - MIL Mi-28N <strong>Havoc</strong> B<br />
Country Of Origin CIS<br />
Type Attack helicopter<br />
Manufacturer MIL Moscow Helicopter Plant<br />
Dimensions<br />
Main rotor diameter 15.65 m (51.3 ft)<br />
Tail rotor diameter 4.15 m (13.6 ft)<br />
Overall length (turning rotors) 21.02 m (69.0 ft)<br />
Height 4.85 m (15.9 ft)<br />
Fuselage width (at engine nacelles) 3.61 m (11.8 ft)<br />
Wing span 5.94 m (19.49 ft)<br />
Weight<br />
Normal take-off weight 10,700 kg (23,589 lbs)<br />
Maximum take-off weight 11,660 kg (25,706 lbs)<br />
Power plant<br />
Turboshafts 2 x Klimov TV3-117VMA<br />
Take-off power 2 x 2,200 shp (shaft horse power)<br />
Performance<br />
Maximum speed 300 km/h (162 kts)<br />
Cruise speed 270 km/h (146 kts)<br />
Hover ceiling (in ground effect) 4,760 m (15,617 ft)<br />
Hover ceiling (out of ground effect) 3,600 m (11,811 ft)<br />
Maximum vertical rate of climb at sea level 580 m/min (1,903 ft/min)<br />
Maximum rate of climb at sea level 816 m/min (2,677 ft/min)<br />
Range 450 km (243 nm)
Avionics<br />
● Mast-mounted millimetric radar<br />
● Stabilised surveillance and sighting system with thermal and TV channels<br />
● Helmet-mounted target designation and indication system<br />
● Night vision goggles<br />
● Inertial navigation system and global positioning system<br />
● Communications facilities<br />
Armament<br />
● 2A42 30mm cannon (armour piercing and high explosive rounds)<br />
● Igla-V IR guided air-to-air missiles<br />
● Ataka radio command guided anti-tank missiles<br />
● 80mm unguided rockets<br />
● 130mm unguided rockets<br />
● GSh-23L 23mm cannon pods<br />
Combat Survivability<br />
● Radar and laser warning receivers<br />
● Chaff and flare dispensers<br />
● Electronic counter measures (IR and radar jammers)<br />
● IR engine exhaust suppressors<br />
● Redundancy and shielding of vital components<br />
● Ballistically tolerant cockpits (up to 20mm calibre ammunition)<br />
● Energy absorbing seats and airframe<br />
APACHE VERSUS HAVOC 3.8
3.9<br />
APACHE VERSUS HAVOC
4. CAMPAIGN SCENARIOS
4.1<br />
CAMPAIGN SCENARIOS<br />
Cuban Crisis<br />
In CUBA, Fidel Castro's heirs want the US out of Guantánamo Bay, and they're<br />
saying it with artillery. The USA has only two options, evacuate or invade, and<br />
one of those is unthinkable ...<br />
The Opium War<br />
In THE GOLDEN TRIANGLE where Myanmar, Laos and Thailand come together<br />
and most of the world's opium poppies grow, the Chinese have mounted the<br />
biggest drugs bust of all time. But they didn't have a search warrant for<br />
Thailand. Can the US face down the spectre of Vietnam and come to the aid of<br />
its ally?<br />
Caspian Black Gold<br />
In GEORGIA a brand new hyper-nationalistic Russian government is determined<br />
to wipe out the humiliations of the post-Soviet era and take control of the<br />
Caspian Sea oilfields. The only force that can stand in the way of their whirlwind<br />
advance is a battalion of US attack helicopters in north-eastern Turkey.<br />
North America<br />
<strong>Central</strong> America<br />
and the<br />
Caribbean<br />
Pacific Ocean<br />
CUBA<br />
Greenland<br />
Atlantic<br />
Ocean<br />
South America<br />
Arctic Region<br />
Europe<br />
<strong>Central</strong><br />
GEORGIA<br />
Asia<br />
East Asia<br />
South West<br />
Asia South<br />
Northern Africa<br />
Asia<br />
South East<br />
THE GOLDEN<br />
TRIANGLE<br />
Asia<br />
Southern<br />
Africa<br />
Antarctica<br />
Russian Federation<br />
Indian Ocean<br />
5000 km<br />
5000 miles<br />
Australia
Cuban Crisis<br />
BLUE<br />
FORCE<br />
Caribbean<br />
Sea<br />
CAMPAIGN SCENARIOS 4.2<br />
North Atlantic<br />
Ocean<br />
Cuba<br />
U.S. Naval Base Guantánamo Bay<br />
From a general briefing document for officers of the US task force en route to Guantánamo<br />
Situation<br />
One month ago the Cuban Government announced that it was unilaterally tearing up the<br />
long-standing treaty by which the US Government leases the military base at Guantánamo,<br />
near the south-eastern tip of Cuba. The US Government was given twenty-eight days to<br />
evacuate. According to that treaty, the American government cannot be evicted against its<br />
will unless it violates the terms of the agreement, which it has not done.<br />
The US Government has vigorously refused to recognise the notice to quit, but nonessential<br />
personnel have been rotated out, the base security detachment has been substantially<br />
reinforced, and the local defence plans reviewed. The elements of this amphibious force<br />
were also brought to readiness.<br />
At 1200 local time yesterday the Cuban notice period expired. Two minutes later rocket and<br />
tube artillery concealed in the city of Guantánamo opened fire, cratering the midpoint of<br />
the main runway, then scattering anti-personnel mines. Twelve hours later, the airbase's<br />
ramp; the main parking area for aircraft, was also seeded with mines. At 1200 local time<br />
today the aviation fuel storage area was seeded, and the mines on the runway began<br />
detonating on time-delay fuses. Casualties and damage to this point have been light, but if<br />
every batch of mines is set to begin self-destructing 24 hours after landing, starting 1200<br />
local time tomorrow, Guantánamo's fuel installations will also self-destruct. The Cuban<br />
artillery is well concealed in an urban area packed with civilians, so precision air attack is<br />
impractical. Direct assault is also ruled out by the civilian shield ...
4.3<br />
CAMPAIGN SCENARIOS<br />
Intentions<br />
Before we can strike directly at the Cuban artillery we must strip away the civilian<br />
shield, without causing casualties. We shall land forces to create a wide defensive perimeter<br />
and blockade on the high ground around the Guantánamo area, anchored on the coast at<br />
both ends. At the same time we shall establish a cordon outside the city, preventing all<br />
inward traffic.<br />
Unarmed civilians will be encouraged to leave the city; food, shelter and medical care will<br />
be provided to the best of our ability when they do. We estimate that food shortages will<br />
drive most of the population out into our hands within a week, and our intelligence of the<br />
artillery dispositions can only improve in that time. When we have the necessary<br />
information, and the time is right, we take the artillery out.<br />
Cuban air and ground forces will certainly challenge the perimeter, and a full-scale assault<br />
is possible. The Cuban military has recently been re-equipped with brand-new first-line<br />
Russian systems, and many of their senior personnel have substantial combat experience<br />
from Angola and elsewhere. On the other hand, there is increasing popular resistance to the<br />
Cuban government, not least because of their decision to spend vast amounts on weaponry<br />
when their infrastructure is crumbling, and their inability to provide a convincing explanation<br />
of where the money came from in the first place. If we can throw back their attacks without<br />
using disproportionate force or causing civilian casualties, there is a strong possibility of<br />
popular uprisings against the government, which we may be able to assist and exploit. It is<br />
of the utmost importance that all US personnel at all levels treat prisoners and noncombatants<br />
with maximum courtesy, care and consideration, and that the news media can<br />
see this and report it ...<br />
RED<br />
FORCE<br />
Edited Transcript of a TV broadcast by the leader of the Cuban Junta<br />
“Citizens and Soldiers of Cuba! One month ago we politely asked the Americans to leave<br />
the base at Guantánamo. When they refused, we told them again to leave, in terms they<br />
could not misunderstand. In response to our strictly limited use of force they have launched<br />
a full-scale invasion of our country, and besieged the city of Guantánamo!<br />
We, the people of Cuba, have always known that the American government is greedy,<br />
arrogant and vengeful. The rich and powerful who jerk the strings of the puppets in<br />
Washington have always coveted this country as a captive market for their factories, its<br />
natural resources as a treasure to be plundered, and its people as a pool of cheap labour<br />
to be ruthlessly exploited.<br />
Now these things are clear to all the freedom-loving people of the world. Now we must<br />
fight for our lives and our independence, but we will not fight alone. Now we and our<br />
friends around the world will teach the American government and its corporate puppetmasters<br />
that they cannot conquer Cuba, just as they could not conquer Vietnam.<br />
For the sake of our beloved country, for the cause of justice, in the name and the memory<br />
of Fidel Castro and all the other heroes of the revolution, Cubans, rise up and fight!”
The Opium War<br />
RED<br />
FORCE<br />
Myanmar<br />
(Burma)<br />
Thailand<br />
China<br />
From a Chinese Government press release<br />
CAMPAIGN SCENARIOS 4.4<br />
Laos<br />
Vietnam<br />
With full cooperation from the governments of Laos and Myanmar, Chinese forces have<br />
taken control of the region commonly known as The Golden Triangle, near the point where<br />
the borders of Laos, Myanmar and Thailand meet. The purpose of this action is to restore<br />
law and order in a region controlled only by local warlords, and to destroy the opium trade<br />
which enriches them at the expense of all other Asians. Regrettably, the Thai government<br />
has declined to sanction this police action, or to act themselves against the drug trade<br />
within their own borders. We will not speculate as to why this should be so, but unbiased<br />
observers will no doubt draw their own conclusions.<br />
The People's Republic of China has not taken this step lightly, or without good reason. We<br />
urge the international community to recognise that we act in the common interest of all<br />
Asia, in a region that falls within our legitimate sphere of influence, and where we are the<br />
only power with both the strength and the will to act against an urgent problem. Any<br />
attempt at intervention by outside forces must invite comparison with the shameful Opium<br />
War fought by the British in the nineteenth century solely to protect their own lucrative drug<br />
trade and enslave the people of China.<br />
BLUE<br />
FORCE<br />
From a US news network bulletin<br />
“... US government spokesmen have declined to comment on widespread rumours that the<br />
President will shortly announce the deployment of US forces to South-East Asia in response<br />
to urgent requests from the government of Thailand. No western reporters have been
4.5<br />
CAMPAIGN SCENARIOS<br />
allowed access to the area of northern Thailand now occupied by Chinese forces, but<br />
refugees say that the Chinese are there in force, and are rounding up the entire local<br />
population for processing through internment camps.<br />
Since China is a permanent member of the UN Security Council, there is no prospect of<br />
United Nations endorsement for US intervention, but several members of ASEAN, the<br />
Association of Southeast Asian Nations, have already agreed to send military aid to Thailand,<br />
and have let it be known that they would welcome US participation in an alliance to return<br />
the affected areas to their respective national governments.<br />
Though the military government of Myanmar, like the Laotian government, has officially<br />
invited and endorsed the Chinese occupation, there have been widespread popular protests<br />
in Rangoon and other cities. These have led to violent confrontations with the security<br />
forces, who have reacted harshly even by the standards of a country where brutal<br />
suppression of civil disorder is an everyday fact of life. Reports speak of hundreds of<br />
demonstrators shot down on the streets, but details are scanty since the military<br />
government recently expelled all foreign reporters and shut down most international<br />
communications. Other unconfirmed reports suggest that elements of the ruling junta are<br />
also outraged at the Chinese intervention, and their colleagues' role in sanctioning it. The<br />
situation is ripe for an all-out civil war ...”<br />
Caspian Black Gold<br />
RED<br />
FORCE<br />
Black<br />
Sea<br />
Russian Federation<br />
Turkey<br />
Georgia<br />
Armenia Azerbaijan<br />
From a videotaped presidential address to the Russian armed forces<br />
Caspian<br />
Sea<br />
“Soldiers, Sailors and Airmen of the Motherland, this is the day all patriots have longed for,<br />
the day when Russia reclaims its independence and its rightful place among the world's<br />
greatest powers. Since the end of the Soviet Union our wealth has been stolen, our pride
and power lost and our people impoverished and exploited by an unholy alliance of<br />
despicable politicians, criminals and greedy western capitalists. This ends now, today.<br />
The Russian people gave this government a mandate to restore all we have lost, and you,<br />
the long-suffering, uncomplaining defenders of the Motherland, are the key to achieving<br />
this. Our enemies have lectured us for a decade about the supremacy of market forces, and<br />
the survival of the fittest. I know that every one of you will take the greatest pleasure in<br />
demonstrating to them just what the law of the jungle really means.<br />
Your mission is to close the oil pipeline through Georgia to Turkey, as a first step towards<br />
recovering for the Motherland the vast resources of the Caspian oilfields. The oil flowing<br />
through this pipeline is rightfully ours, but at the moment it enriches only the traitor<br />
Shevardnadze and his cronies, and the oil corporations of the West.<br />
Yours is the burden, but also the honour and the privilege of reminding the world that<br />
Russians are no-one's lackeys or poor relations. We are a great nation, and you are our<br />
champions. Remember this day, for it will go down in history as the day when Russia<br />
reclaimed its soul.”<br />
BLUE<br />
FORCE<br />
CAMPAIGN SCENARIOS 4.6<br />
Verbal orders to the CO of a US attack helicopter battalion on detachment to the<br />
Turkish Army<br />
"... you are hereby authorised to deploy across the Georgian border under Turkish command<br />
in aid of the government of Georgia, and assist in defending the pipeline against the Russian<br />
forces advancing from the Black Sea coast. Your first objective will be to seize the natural<br />
chokepoint west of the pipeline junction at Khashuri and delay the Russian advance while<br />
Georgian forces redeploy from the north and we try to put together some reinforcements.<br />
The amphibious landing and blitzkrieg took us all by surprise, and the Spetsnaz operations<br />
have tied the Georgians in knots, but it's all straight out of the old Soviet manuals.<br />
We haven't taken our eyes off the massed Russian forces north of the Caucasus mountains,<br />
since we believe that these will probably also cross the border sooner or later. We<br />
intercepted a pep-talk for the Russian troops from their new president, and it's scary stuff.<br />
These people mean business.<br />
We should have additional forces with you in a few days at most, but for the moment yours<br />
is the only unit with any chance to stop the Russians short of the pipeline. Good luck<br />
and Godspeed."
4.7<br />
CAMPAIGN SCENARIOS
5. APACHE COCKPIT
5.1<br />
APACHE COCKPIT<br />
Cockpit Views<br />
There are 28 ‘fixed’ cockpit views which are panned by pressing:-<br />
Ctrl + keys.<br />
There is also a ‘virtual’ cockpit view which is panned by pressing:-<br />
Alt + keys.<br />
When the virtual cockpit keys are released the view snaps to the nearest fixed cockpit view.<br />
The virtual cockpit can be ‘padlocked’ to the selected target by pressing Ctrl + Enter .<br />
To return to a fixed cockpit view press Ctrl + Enter again.<br />
Additionally there are large left and right multi-function display (MFD) fixed views.<br />
There are shortcut keys to the most frequently used fixed cockpit views:-<br />
F1 selects the forward view<br />
F2 selects the instrument view<br />
F3 selects the large left MFD view (pressing F3 again selects the instrument view)<br />
F4 selects the large right MFD view (pressing F4 again selects the instrument view)<br />
In wet weather conditions the wiper should be used. The Y key operates the wiper.<br />
Alt + Y toggles ‘intermittent’ wipe which is useful in lighter rain.<br />
The blurred main rotor blades visible from the cockpit can be switched off in the ‘Graphics’<br />
‘Game Options’ menu.
Instrument Panel<br />
APACHE COCKPIT 5.2<br />
The <strong>Apache</strong> Longbow has a modern ‘glass’ cockpit with two multi-function displays (MFDs)<br />
and a few backup instruments.<br />
The instruments and displays use a mixture of imperial and metric values.<br />
Airspeed Indicator<br />
The airspeed indicator shows the indicated airspeed of the helicopter.<br />
Indicated Airspeed<br />
Scale knots<br />
Full scale deflection 0 to 250 knots<br />
Barometric Altimeter<br />
The barometric altimeter shows the barometric altitude (height above sea level). The needle<br />
reading should be added to the digital readout to get the barometric altitude.<br />
Barometric Altitude<br />
Scale feet x 100 (one revolution = 1,000 feet)<br />
Digital readout feet x 1,000
5.3<br />
APACHE COCKPIT<br />
Artificial Horizon<br />
The artificial horizon shows the helicopter’s pitch and roll attitude relative to the ground.<br />
Standby Compass<br />
The standby compass shows the helicopter’s heading. The cardinal points North, South,<br />
East and West are indicted as ‘N’, ‘S’, ‘E’ and ‘W’.<br />
Mission Clock<br />
Pitched up Rolled left<br />
Pitched down Rolled right<br />
Diagram 5.1: Pitch up/down rolled left/right<br />
The mission clock is an analogue clock and shows the time of day.
Fire Warning Lights<br />
The fire warning lights indicate if an engine or the auxiliary power unit (APU) is on fire. In<br />
case of a fire use the fire extinguisher. The fire extinguisher can only be used once per<br />
mission.<br />
Ctrl + F activate fire extinguisher<br />
Warning Lights<br />
RBRK rotor brake engaged<br />
TRQ engine over torque<br />
RPM low rotor RPM<br />
WBRK wheel brake engaged<br />
AP auto-pilot active<br />
HVR hover hold active<br />
RDR radar active<br />
R JAM radar jammer active<br />
I JAM infra-red jammer active<br />
Upfront Display<br />
The upfront display shows system messages.<br />
APACHE COCKPIT 5.4
5.5<br />
APACHE COCKPIT<br />
Multi-Function Displays (MFDs)<br />
The multi-function displays have 8 selectable ‘pages’:-<br />
ground radar<br />
air radar<br />
target acquisition and designation sight (TADS)<br />
tactical situation display (TSD)<br />
aircraft survivability equipment (ASE)<br />
weapon<br />
system<br />
engine<br />
The pages can be cycled through on each display.<br />
select next left MFD page<br />
Shift + select previous left MFD page<br />
select next right MFD page<br />
Shift + select previous right MFD page<br />
There are shortcut keys to select any page on either MFD.<br />
Left MFD:-<br />
Ctrl + 1 ground radar<br />
Ctrl + 2 air radar<br />
Ctrl + 3 target acquisition and designation sight (TADS)<br />
Ctrl + 4 tactical situation display (TSD)<br />
Ctrl + 5 aircraft survivability equipment (ASE)<br />
Ctrl + 6 weapon<br />
Ctrl + 7 system<br />
Ctrl + 8 engine<br />
Right MFD:-<br />
Alt + 1 ground radar<br />
Alt + 2 air radar<br />
Alt + 3 target acquisition and designation sight (TADS)<br />
Alt + 4 tactical situation display (TSD)<br />
Alt + 5 aircraft survivability equipment (ASE)<br />
Alt + 6 weapon<br />
Alt + 7 system<br />
Alt<br />
+ 8 engine
Ground Radar MFD<br />
See the ‘Acquiring Targets’ section.<br />
Air Radar MFD<br />
See the ‘Acquiring Targets’ section.<br />
Target Acquisition and Designation Sight (TADS)<br />
MFD<br />
See the ‘Acquiring Targets’ section.<br />
Tactical Situation Display (TSD) MFD<br />
APACHE COCKPIT 5.6<br />
The Tactical Situation Display shows navigation information, targets, anti-aircraft threats and<br />
air threats and is essential during combat situations.<br />
Radar scan<br />
limits<br />
Helicopter datum<br />
Sensor type<br />
Diagram 5.2: TSD MFD (target declutter)<br />
Targets/threats Selected target<br />
range<br />
TSD range<br />
Declutter level<br />
(target)<br />
Threat range<br />
Selected target<br />
Threat is targeting<br />
helicopter<br />
(flashes when a missile<br />
is launched)
5.7<br />
APACHE COCKPIT<br />
Helicopter Datum<br />
The TSD shows a plan view of the battlefield with the helicopter located at the bottom<br />
of the display.<br />
Declutter Level<br />
The TSD has 3 declutter levels:-<br />
ALL display both target and navigation information<br />
TGT display target information only<br />
NAV display navigation information only<br />
D<br />
next TSD declutter level<br />
Shift + D previous TSD declutter level<br />
TSD Range<br />
The TSD range is selectable between 2, 5, 10 and 25Km. This also changes the range<br />
of the ASE display.<br />
E<br />
next TSD range<br />
Shift + E previous TSD range<br />
Sensor Type<br />
NO ACQ no sensor is active<br />
FCR/GND ground radar<br />
FCR/AIR air radar<br />
TADS/FLIR TADS forward-looking infra-red<br />
TADS/DTV TADS daylight TV<br />
TADS/DVO TADS direct view optics<br />
Radar Scan Limits<br />
The scan limits of the active ground or air radar.<br />
Targets<br />
Targets are displayed using the radar symbology (see the ‘Acquiring Targets’ section).<br />
Target symbols are displayed using two different colours for clarity. The selected target<br />
is marked by a cursor and it’s range is shown in the lower right corner of the display.<br />
Threats<br />
Threat range circles are drawn around enemy anti-aircraft units. If the helicopter is<br />
inside the circle then you are in range of enemy fire. If a threat (anti-aircraft or airborne)<br />
is targeting the helicopter then a line is drawn between the threat and the helicopter<br />
datum. When this line flashes a missile has been launched.<br />
Waypoint Route<br />
The waypoint route shows the planned mission route. Information for the current<br />
waypoint is shown in the lower left corner of the display.
Current waypoint<br />
range<br />
Current waypoint<br />
identifier<br />
Time to reach<br />
current waypoint<br />
(HH:MM:SS)<br />
Diagram 5.3: TSD MFD (navigation declutter)<br />
APACHE COCKPIT 5.8<br />
Declutter level<br />
(navigation)<br />
Waypoints<br />
Waypoint route
5.9<br />
APACHE COCKPIT<br />
Aircraft Survivability Equipment (ASE) MFD<br />
The Aircraft Survivability Equipment display shows anti-aircraft, airborne and missile threats.<br />
It also shows if jamming is active and the number of chaff and flares remaining.<br />
The ASE MFD “auto-pages” when a threat engages the helicopter. ASE auto-paging is<br />
enabled at the start of a mission but can be disabled.<br />
Ctrl<br />
+ A toggle ASE auto-page<br />
Time to impact of closest<br />
incoming IR missile (seconds)<br />
Time to impact of<br />
closest incoming RF<br />
missile (seconds)<br />
Airborne threats<br />
Auto-countermeasures<br />
active<br />
IR and radar<br />
jammer status<br />
Diagram 5.4: ASE MFD<br />
Threat range<br />
circles<br />
Threat is targeting helicopter<br />
(flashes when a missile is lanched)<br />
Incoming<br />
missiles<br />
Number of remaining<br />
chaff and flares<br />
ASE range<br />
Helicopter datum<br />
Anti-aircraft threats<br />
Auto-countermeasures<br />
active
Helicopter Datum<br />
The ASE shows a plan view of the battlefield with the helicopter located centrally.<br />
ASE Range<br />
The ASE range is selectable between 2, 5, 10 and 25Km. This also changes the range<br />
of the TSD display.<br />
E<br />
next ASE range<br />
Shift + E previous ASE range<br />
APACHE COCKPIT 5.10<br />
Threats<br />
Threat range circles are drawn around enemy anti-aircraft units. If the helicopter is<br />
inside the circle then you are in range of enemy fire. If a threat (anti-aircraft or airborne)<br />
is targeting the helicopter then a line is drawn between the threat and the helicopter<br />
datum. When this line flashes a missile has been launched. Threats are displayed using<br />
the radar symbology (see the ‘Acquiring Targets’ section). Target symbols are displayed<br />
using two different colours for clarity.<br />
The ASE will not indicate threats from infantry tracking the helicopter with shoulder<br />
launched IR guided missiles. The launched missile, however, will be indicated.<br />
When a threat is tracking the helicopter with radar a warning beep is emitted in the<br />
cockpit.<br />
Incoming Missiles<br />
Incoming missiles are shown as Xs. The time to impact for the closest incoming missile<br />
is shown (in seconds) in the upper left corner of the display. There are separate<br />
readouts for IR and RF guided missiles.<br />
When a missile is launced at the helicopter a high pitched warning beep is emitted in<br />
the cockpit.<br />
Jammers<br />
The status of the infra-red and radar jammers is shown in the lower left corner of the<br />
display. “AUTO” indicates that auto-countermeasures are active.<br />
Chaff And Flares<br />
The number of remaining chaff and flares is shown in the lower right corner of the<br />
display. “AUTO” indicates that auto-countermeasures are active.
5.11<br />
APACHE COCKPIT<br />
Weapon MFD<br />
The Weapon MFD displays a schematic diagram of the weapons configuration as viewed<br />
from behind the helicopter. The selected weapon is highlighted.<br />
‘RF’ indicates RF Hellfires<br />
‘LSR’ indicates laser Hellfires<br />
‘HE’ indicates high explosive rockets<br />
‘MP’ indicates multi-purpose sub-munition rockets<br />
Stinger missiles<br />
Auto-countermeasures<br />
active<br />
Hellfire missiles<br />
(highlighted indicated<br />
selected weapon)<br />
Type of Hellfire<br />
missile<br />
Fired weapon<br />
(hollow circle)<br />
Diagram 5.5: Weapon MFD<br />
Type of rocket<br />
Remaining chaff<br />
Rocket salvo size<br />
Weapons armed<br />
Remaining rounds<br />
Remaining flares<br />
Available weapon<br />
(solid circle)<br />
Rocket pod<br />
(number indicates<br />
rockets remaining)<br />
Chain gun
Damaged hardpoints<br />
Diagram 5.6: Weapon MFD showing damaged hardpoints<br />
System MFD<br />
The System MFD displays the status of important helicopter components.<br />
Diagram 5.7: System MFD<br />
APACHE COCKPIT 5.12
5.13<br />
APACHE COCKPIT<br />
Engine MFD<br />
The Engine MFD page displays values for both engines and also monitors the fuel level.<br />
‘1’ refers to the port (left) engine<br />
‘2’ refers to the starboard (right) engine<br />
‘NP’ engine RPM<br />
‘NR’ rotor shaft RPM<br />
The fuel weight is measured in LBS and a full internal fuel load will last for approximately<br />
1<br />
– 2 2<br />
hours.<br />
Engine torque Engine temperature Engine and rotor<br />
shaft RRM<br />
Diagram 5.8: Emgine MFD<br />
Fuel
Integrated Helmet And Display Sighting System<br />
(IHADSS)<br />
The <strong>Apache</strong> pilot’s helmet has a built-in display system known as the IHADSS. It is used<br />
much like a conventional “head up display” but has the advantage of always being in the<br />
pilot’s view. A compact display screen is used to project the imagery into the pilot’s<br />
right eye.<br />
The TADS and PNVS (Pilot Night Vision Sensor) optical units are slaved to the IHADSS so<br />
that they ‘look’ where the pilot is looking. The IHADSS can be used to acquire targets simply<br />
by looking at them.<br />
The IHADSS display colour can be cycled to make it easier to read when the outside<br />
conditions change.<br />
H<br />
select next HUD colour<br />
Shift + H select previous HUD colour<br />
The IHADSS has two display modes; ‘navigation’ and ‘combat’.<br />
Engine torque<br />
Bank scale<br />
True airspeed<br />
IHADSS centre<br />
datum<br />
Current waypoint<br />
identifier<br />
Command heading Current heading Heading scale<br />
Time to reach<br />
current waypoint<br />
(HH:MM:SS)<br />
Current waypoint<br />
distance<br />
Diagram 5.9: IHADSS in navigation mode<br />
APACHE COCKPIT 5.14<br />
Pitch ladder Altitude scale<br />
Barometric<br />
altitude<br />
Vertical speed<br />
indicator<br />
Radar altitude<br />
(up to 1,500 feet)<br />
Radar altitude<br />
(up to 200 feet)
5.15<br />
APACHE COCKPIT<br />
IHADSS Centre Datum<br />
Indicates the centre of the display.<br />
Heading Scale and Command Heading<br />
The heading scale is calibrated every 30 degrees. The command heading indicates the<br />
direction to the next waypoint.<br />
Pitch Ladder<br />
The pitch ladder indicates the helicopters pitch and bank attitude. Pitch bars are<br />
calibrated every 10°. Solid lines are draw above the horizon and dashed lines are drawn<br />
below the horizon.<br />
Bank Scale<br />
The bank scale indicates the helicopter’s bank angle up to 30°.<br />
True Airspeed<br />
True airspeed in knots.<br />
Barometric Altitude<br />
Digital readout of the barometric altitude (height above sea level) in feet.<br />
Radar Altitude<br />
Digital readout of the radar altitude (height above ground) in feet. This value is valid up<br />
to 1,500 feet.<br />
The analogue radar altitude bar is valid up to 200 feet and is read against the<br />
altitude scale.<br />
Vertical Speed Indicator<br />
When the vertical speed indicator is above the altitude scale centre line the helicopter<br />
is climbing. When it is below the centre line the helicopter is sinking. The full scale<br />
deflection of the vertical speed indicator is ±1,000 feet per minute.<br />
Engine Torque<br />
Digital readout of the engine torque.<br />
Current Waypoint<br />
The current waypoint identifier, distance and time to reach (hours:minutes:seconds) are<br />
shown in the lower left corner of the display.<br />
IHADSS In Combat Mode<br />
See the ‘Acquiring Targets’ and ‘Weapons’ sections.
Acquiring Targets<br />
The <strong>Apache</strong> Longbow has 3 target acquisition systems:<br />
1. a mast-mounted fire control radar (FCR) which can be used to scan for ground targets<br />
or airborne targets<br />
2. target acquisition and designation sight (TADS) with forward-looking infra-red (FLIR),<br />
daylight television (DTV) and direct view optics (DVO) channels plus a laser range-finder<br />
for accurately measuring distance to targets<br />
3. the Integrated Helmet And Display Sighting System (IHADSS)<br />
All three systems are integrated and a target acquired with one system may be passed to<br />
another system as long as it falls within the targeting restraints of that system. Any target<br />
which has been acquired is kept on a target list and all of the target acquisition systems are<br />
able to cycle through this list.<br />
CP/G Assistance: Target ID<br />
The Co-pilot/Gunner (CP/G) can assist you to identify targets. There are 3 levels of<br />
assistance; ‘novice’, ‘realistic’ and ‘off’. This is selected in the ‘Game Options’ menu.<br />
Novice<br />
Ground radar<br />
Select Target Acquisition System<br />
Radar<br />
Air radar IHADSS<br />
Insert Home Page Up<br />
FLIR DTV DVO<br />
Delete End Page Down<br />
Diagram 5.10: Select target acquisition system<br />
EOS<br />
APACHE COCKPIT 5.16<br />
The CP/G identifies the target immediately and reports them using simplistic names such as<br />
“Enemy Tank” and “Allied Aircraft”.
5.17<br />
APACHE COCKPIT<br />
Realistic<br />
The CP/G attempts to make a visual identification (using the TADS where possible). It may<br />
take the CP/G a few moments to make the identification depending on target range and<br />
adverse weather conditions. During this time the message “CP/G IDENTIFYING...” is<br />
displayed instead of the target name. If there is no line of sight to the target then no<br />
identification can be made. If you have selected an inappropriate TADS system (you cannot<br />
use FLIR in heavy rain or DTV/DVO at night) the message “LOW LIGHT” is displayed in place<br />
of the target name. In this case select a more suitable system. Once the identification is<br />
made the NATO reporting name is given for the target and you must decide if it is an allied<br />
or enemy target.<br />
Off<br />
The CP/G gives you no help whatsoever. Once a target has been selected then use the TADS<br />
systems to make the identification yourself. The ‘Recognition Guide’ will assist you in<br />
spotting key recognition features.<br />
Fire Control Radar<br />
The fire control radar scans for targets and a symbolic image of the returns is shown on the<br />
MFD display. The radar can only acquire targets to which it has line of sight (LOS). If an<br />
acquired target masks behind buildings or terrain features the radar will still display the<br />
target but the target category symbol will change. If the target was moving the radar will<br />
attempt to interpolate the target’s new position. Target symbols are displayed using two<br />
different colours for clarity.<br />
Target Categories LOS No LOS<br />
Wheeled vehicle<br />
Tracked vehicle<br />
Air defence unit<br />
Aircraft<br />
Helicopter<br />
Ship<br />
Structure<br />
Using radar will alert enemy targets of your presence and may attract hostile fire. Ensure<br />
that you switch the radar off when you have finished using it!
Ground Radar<br />
Scan position<br />
Maximum<br />
scan limits<br />
Radar clutter<br />
Diagram 5.11: Ground radar display<br />
Num Lock<br />
Scan left<br />
Auto-target<br />
7<br />
> Target<br />
< Target (shift)<br />
Activate<br />
single radar<br />
sweep<br />
+ Scan size<br />
/ -<br />
Diagram 5.12: Ground radar controls<br />
8<br />
Single/<br />
continuous<br />
radar sweep<br />
Scan centre Scan right<br />
*<br />
4 5 6<br />
– Scan size<br />
Target priority Auto-target<br />
engaged<br />
Target locked Target identity<br />
(see CP/G<br />
assistance)<br />
Target Acquisition System Controls<br />
+ Target<br />
priority<br />
– Target<br />
priority<br />
1 2 3<br />
9<br />
Switch off (ctrl)<br />
– Range<br />
+ Range<br />
Lock/unlock<br />
target<br />
+<br />
0 Del Enter<br />
TADS field of<br />
regard box<br />
Current<br />
heading<br />
+ = Increase<br />
– = Decrease<br />
> = Select Next<br />
< = Select Previous<br />
APACHE COCKPIT 5.18<br />
TADS field of<br />
view marker<br />
Heading scale Radar range<br />
Target range<br />
MFD ‘focus’<br />
light<br />
Selected<br />
target<br />
No line of<br />
sight to target
5.19<br />
APACHE COCKPIT<br />
The ground radar can acquire battlefield targets and low slow flying helicopters. It can<br />
categorise targets but cannot differentiate between allied and enemy. The ground radar<br />
sweep is limited to a 90° arc ahead of the helicopter.<br />
The ground radar shows cities and other built up areas as ‘radar clutter’. It is only possible to<br />
target certain strategic and tactical structures such as bridges and hardened aircraft shelters.<br />
At the bottom of the ground radar display is the TADS field of regard box and the field of<br />
view marker. As you cycle through the targets you will see the CP/G moving the field of view<br />
marker on to the target. In realistic target ID assistance mode the CP/G cannot identify the<br />
target until the marker is on the target. Therefore if you are flying erratically the CP/G will<br />
be unable to make an identification.<br />
Range<br />
Select ground radar range (500m, 1, 2, 4 or 8Km).<br />
Scan size<br />
Adjust the radar scan arc size. Minimising the arc size will reduce your visibility to enemy<br />
targets and will increase the scan rate.<br />
Scan direction<br />
Adjust the radar scan direction left or right of centre.<br />
Scan centre<br />
Centre the radar scan.<br />
Single/continuous radar sweep<br />
Toggle between single sweep and continuous sweep.<br />
Activate single radar sweep<br />
Activate radar sweep in single sweep mode. Use single sweep mode to reduce your<br />
visibility to enemy targets.<br />
Target priority<br />
Adjust the target priority (ALL, LOW, MEDIUM or HIGH) to declutter the radar. The<br />
ground radar priority for each target is given in the ‘Recognition Guide’. Generally any<br />
target which can fire at the helicopter is high priority, other armour and battlefield<br />
targets are medium priority and soft targets are low priority.<br />
Next/previous target<br />
Cycle forwards or backwards through the targets.<br />
Auto-target<br />
Toggle auto-target mode. In auto-target mode the ground radar automatically assesses<br />
the highest threat target. This will only select targets of the selected priority.<br />
Lock/unlock target<br />
Lock the current target to prevent the auto-target system from selecting another target.<br />
Switch off<br />
Switch the ground radar off.<br />
MFD ‘Focus’ Light<br />
The focus light indicates that this MFD page is being used by the selected target<br />
acquisition system.
Air Radar<br />
MFD ‘focus’<br />
light<br />
Scan position<br />
Scan centre<br />
Selected target<br />
Diagram 5.13: Air radar display<br />
Num Lock<br />
Display allied<br />
aircraft<br />
Scan left<br />
Auto-target<br />
7<br />
> Target<br />
< Target (shift)<br />
Activate<br />
single radar<br />
sweep<br />
+ Scan size<br />
/ -<br />
Diagram 5.14: Air radar controls<br />
8<br />
Single/<br />
continuous<br />
radar sweep<br />
Scan centre Scan right<br />
*<br />
4 5 6<br />
– Scan size<br />
Enemy or all<br />
targets<br />
Target Acquisition System Controls<br />
1 2 3<br />
9<br />
Switch off (ctrl)<br />
– Range<br />
+ Range<br />
Lock/unlock<br />
target<br />
+<br />
0 Del Enter<br />
Auto-target<br />
engaged<br />
Target locked Target identity<br />
(see CP/G assistance)<br />
+ = Increase<br />
– = Decrease<br />
> = Select Next<br />
< = Select Previous<br />
APACHE COCKPIT 5.20<br />
Target range<br />
Radar range<br />
Scan limits<br />
No line of<br />
sight to target
5.21<br />
APACHE COCKPIT<br />
The air radar can acquire airborne targets. It can categorise targets and identify between<br />
allied and enemy. The air radar can sweep through 360°.<br />
Range<br />
Select air radar range (500m, 1, 2, 4 or 8Km).<br />
Scan size<br />
Adjust the radar scan arc size. Minimising the arc size will reduce your visibility to enemy<br />
targets and will increase the scan rate.<br />
Scan direction<br />
Adjust the radar scan direction left or right of centre.<br />
Scan centre<br />
Centre the radar scan.<br />
Single/continuous radar sweep<br />
Toggle between single sweep and continuous sweep.<br />
Activate single radar sweep<br />
Activate radar sweep in single sweep mode. Use single sweep mode to reduce your<br />
visibility to enemy targets.<br />
Display allied aircraft<br />
Toggle display ALL aircraft targets or ENEMY targets only.<br />
Next/previous target<br />
Cycle forwards or backwards through the targets.<br />
Auto-target<br />
Toggle auto-target mode. In auto-target mode the air radar automatically assesses the<br />
highest threat target.<br />
Lock/unlock target<br />
Lock the current target to prevent the auto-target system from selecting another target.<br />
Switch off<br />
Switch the air radar off.<br />
MFD ‘Focus’ Light<br />
The focus light indicates that this MFD page is being used by the selected target<br />
acquisition system.
APACHE COCKPIT 5.22<br />
Target Acquisition and Designation Sight (TADS)<br />
Target locked<br />
Diagram 5.15: Electro-optical system display<br />
Num Lock<br />
Pan left<br />
7<br />
> Target<br />
< Target (shift)<br />
Pan up<br />
Sensor type<br />
(FLIR, DTV or DVO)<br />
Target identity<br />
(see CP/G assistance)<br />
Target Acquisition System Controls<br />
Pan centre<br />
/ -<br />
Diagram 5.16: TADS system controls<br />
8<br />
Pan right<br />
*<br />
4 5 6<br />
Pan down<br />
1 2 3<br />
9<br />
Switch off (ctrl)<br />
– Zoom<br />
+ Zoom<br />
Lock/unlock<br />
target<br />
+<br />
0 Del Enter<br />
TADS heading<br />
(not helicopter heading)<br />
TADS field of<br />
view marker<br />
+ = Increase<br />
– = Decrease<br />
> = Select Next<br />
< = Select Previous<br />
TADS field of<br />
regard box<br />
Field of view<br />
MFD ‘focus’<br />
light<br />
TADS gates<br />
Target<br />
TADS boresight<br />
datum<br />
Target range
5.23<br />
APACHE COCKPIT<br />
The TADS system is located at the front of the helicopter in the chin turret. The unit can move<br />
±120° in azimuth (left or right) and from +30 to -60° in elevation (up or down). The system<br />
comprises a forward-looking infra-red (FLIR) channel, a daylight TV (DTV) channel, a direct view<br />
optics (DVO) channel and a laser range finder which provides target range data. The image from<br />
the TADS system is shown on either MFD.<br />
The TADS system is used to locate, identify and designate targets. If you have selected no target<br />
ID assistance then you can use TADS to identify targets before firing. Using TADS is more<br />
stealthy than using the radar as enemy targets are less likely to know that they are<br />
being targeted.<br />
To locate targets select the widest field of view available and slew the TADS in the direction of<br />
the area of interest. Targets are brighter than the surrounding terrain. When you have located a<br />
target, zoom in by reducing the field of view. When the TADS is aimed directly towards the<br />
target the TADS gates appear and you can lock the target to keep it centred in the display and<br />
make an identification. TADS is especially useful for finding enemy armour lurking in the<br />
tree-lines.<br />
It is very difficult to use the TADS system when the helicopter is moving. You are recommended<br />
to use this system when the helicopter is in a steady hover. Use the auto-hover facility H .<br />
If the light conditions are inappropriate for the selected sensor then a “LOW LIGHT” appears on<br />
the TADS display.<br />
Forward-Looking Infra-Red (FLIR)<br />
The FLIR has 3 fields of view; wide, medium and narrow. The FLIR is ineffective in adverse<br />
weather conditions.<br />
Daylight TV (DTV)<br />
The DTV only has a narrow field of view. The DTV is ineffective at night.<br />
Direct View Optics (DVO)<br />
The DVO has 2 fields of view; medium and narrow. The DVO is ineffective at night.<br />
Zoom<br />
Select TADS field of view (WIDE, MEDIUM or NARROW).<br />
Pan<br />
Pan the TADS left, right, up and down. On an external view of the <strong>Apache</strong> you can see the<br />
TADS housing move as you steer it.<br />
Pan Centre<br />
Centre the TADS pan.<br />
Next/previous target<br />
Cycle forwards or backwards through the targets.<br />
Lock/unlock target<br />
Lock the current target to prevent the auto-target system from selecting another target.<br />
Switch off<br />
Switch the TADS system off.<br />
MFD ‘Focus’ Light<br />
The focus light indicates that this MFD page is being used by the selected target<br />
acquisition system.
APACHE COCKPIT 5.24<br />
Integrated Helmet And Display Sighting System<br />
(IHADSS) in Combat Mode<br />
The IHADSS enables the pilot to acquire targets simply by looking at them. Effectively the<br />
radar or TADS are slaved to the IHADSS. At night-time the Pilot Night Vision Sensor (PNVS)<br />
must be used. To activate PNVS press the N key.<br />
The IHADSS display moves with your head and remains in the centre of the screen. You can<br />
pan your view using the fixed cockpit or virtual cockpit keys. The functionality of these keys<br />
is duplicated on to the numeric keypad arrow keys when IHADSS mode is selected.<br />
Page<br />
To find targets with IHADSS first select IHADSS mode Up and make sure that you have a<br />
weapon selected . IHADSS will boresight targets near to the display datum. When a<br />
target is seen the target marker will appear.<br />
If you have a fixed cockpit view press Enter to lock the target and the fixed cockpit view<br />
will pan automatically keeping the target in view. If you pan the virtual cockpit to locate a<br />
target then when the target marker appears release the virtual cockpit keys to track<br />
(padlock) the target. Locking the target will ensure that a different target is not acquired.<br />
You can return to a fixed cockpit view by pressing Ctrl + Enter .<br />
Horizon line<br />
Weapon type<br />
Number of weapons<br />
remaining<br />
Target identity<br />
(see CP/G assistance)<br />
Target range<br />
Target marker<br />
Diagram 5.17: IHADSS in combat mode - weapons covered in detail in the ‘Weapons’ section<br />
Target lock type<br />
Sensor type<br />
Target locked
5.25<br />
APACHE COCKPIT<br />
The weapon type indicates the selected weapon:<br />
Gun 30 mm Chain Gun<br />
AAM AIM-92 Stinger IR guided air-to-air missiles<br />
AGM(RF) AGM-114L Longbow Hellfire radar guided anti-tank missiles<br />
AGM(LSR) AGM-114K Hellfire II laser guided anti-tank missiles<br />
RKT(HE) Hydra 70 M255 70 mm high explosive unguided rockets<br />
RKT(MP) Hydra 70 M261 70 mm multi-purpose unguided rockets<br />
The sensor type indicates the active target acquisition system:<br />
GND RDR ground radar<br />
AIR RDR air radar<br />
FLIR forward-looking infra-red<br />
DTV daylight TV<br />
DVO direct view optics<br />
IHADSS IHADSS<br />
The target lock type indicates if the weapon has a valid lock else the reason for lock failure:<br />
NO ACQUIRE no target acquisition system is active<br />
NO WEAPON no weapon is selected<br />
NO TARGET no target has been designated<br />
INVALID TARGET the target is unsuitable for the weapon<br />
SEEKER LIMIT the target exceeds the weapon seeker limit<br />
NO LOS no line of sight to the target<br />
NO BORESIGHT the target must be ahead of the helicopter for unguided rockets<br />
MIN RANGE the target is too near<br />
MAX RANGE the target is too far<br />
VALID LOCK the lock is good<br />
Num Lock<br />
7<br />
Pan left<br />
(ctrl/shift/alt)<br />
> Target<br />
< Target (shift)<br />
Target Acquisition System Controls<br />
Pan up<br />
(ctrl/shift/alt)<br />
/ -<br />
Diagram 5.18: IHADSS controls<br />
8<br />
*<br />
4 5 6<br />
Pan down<br />
(ctrl/shift/alt)<br />
1 2 3<br />
9<br />
Pan right<br />
(ctrl/shift/alt)<br />
Switch off (ctrl)<br />
Lock/unlock<br />
target<br />
+<br />
0 Del Enter<br />
+ = Increase<br />
– = Decrease<br />
> = Select Next<br />
< = Select Previous
Pan<br />
Pan the HMS left, right up and down.<br />
These keys should be used with Ctrl or Shift for panning the fixed cockpit views and<br />
used with Alt to pan the virtual cockpit view.<br />
Next/previous target<br />
Cycle forwards or backwards through the targets.<br />
Lock/unlock target<br />
Lock the current target to prevent the IHADSS from selecting another target.<br />
Switch off<br />
Switch the IHADSS target acquisition mode off.<br />
Weapons<br />
The <strong>Apache</strong> Longbow is a heavily armed attack helicopter able to engage and destroy<br />
armoured and unarmoured battlefield targets and airborne targets.<br />
The <strong>Apache</strong> has four hardpoints two on each stub wing and can carry many weapons mixes<br />
depending on the mission requirements. Stinger air-to-air missiles are carried in wingtip<br />
mounts.<br />
Selecting a weapon automatically switches the IHADSS display to combat mode. Making the<br />
weapons safe returns the IHADSS display to navigation mode.<br />
select next weapon<br />
Shift + select previous weapon<br />
Ctrl<br />
+ weapons safe<br />
To fire a weapon press the Spacebar . If the weapon fails to launch check the lock failure<br />
status on the IHADSS display.<br />
Chain Gun<br />
The <strong>Apache</strong> has a powerful 30mm Chain Gun in the chin turret and is loaded with 1200<br />
high explosive dual purpose rounds.<br />
The gun automatically tracks the selected target and can be rotated ±110° in azimuth (left<br />
or right) and from +11 to -60° in elevation (up or down).<br />
The Chain Gun can be used against ground or air targets.<br />
Type 30 mm Chain Gun<br />
Rate of fire 625 rounds per minute<br />
Maximum range 1,200 metres<br />
Muzzle velocity 792 metres per second<br />
Weight 0.495 Kg<br />
APACHE COCKPIT 5.26
5.27<br />
APACHE COCKPIT<br />
Target marker<br />
without valid lock<br />
AIM-92 Stinger<br />
Diagram 5.19: IHADSS Display for the Chain Gun showing an out of range target<br />
Diagram 5.20: IHADSS Display for the Chain Gun showing a valid target lock<br />
The <strong>Apache</strong> Longbow carries Stinger short-range air-to-air guided missiles. They are<br />
mounted in pairs on the wingtips and a maximum of 4 can be carried.<br />
The Stinger is a heat seeking missile and is effective against airborne targets. If a ground<br />
target is selected then “INVALID TARGET” is displayed on the IHADSS display.<br />
Enemy targets will use flares and IR jammers to distract this missile.<br />
Type short-range air-to-air<br />
Guidance infra-red homing (fire-and-forget)<br />
Maximum range 5,000 metres<br />
Cruise speed Mach 2.0<br />
Seeker field of view 80°<br />
Weight 13.6 Kg<br />
Target out<br />
of range<br />
Target marker<br />
with valid lock
When the Stinger is seeking for a target a pair of dashed concentric circles move around the<br />
IHADSS display to indicate the seeker head position. When a valid lock on has been achieved<br />
the dashed circles become solid and indicate the target position. A tone is emitted to<br />
indicate the valid lock.<br />
Hellfires<br />
Seeker head<br />
position<br />
Turn left to get<br />
a target lock<br />
Diagram 5.21: IHADSS display for the Stinger seeking a target<br />
APACHE COCKPIT 5.28<br />
Current target<br />
is outside the<br />
seeker limit<br />
Target marker<br />
Diagram 5.22: IHADSS display for the Stinger showing a valid target lock<br />
The <strong>Apache</strong> Longbow carries Hellfire short-range anti-tank guided missiles. They are<br />
mounted in racks of 4 so a maximum of 16 can be carried.<br />
There are two types of Hellfire missile; the AGM-114L Longbow Hellfire and the AGM-114K<br />
Hellfire II. Hellfires are effective against armoured battlefield targets but may also be used<br />
against slow moving airborne targets.<br />
The AGM-114L Longbow Hellfire is an active radar guided missile. This is fire and forget
5.29<br />
APACHE COCKPIT<br />
missile. When the missile has been launched you can select another target and launch<br />
another missile.<br />
The AGM-114K Hellfire II is a semi-active laser guided missile. The missile requires the target<br />
to be ‘painted’ with laser.<br />
Hellfire missiles can be launched in one of two modes; lock on before launch (LOBL) and<br />
lock on after launch (LOAL). The lock on mode is toggled with the L key.<br />
In LOBL mode the missile requires a line of sight to the target. If a radar guided Hellfire is<br />
used then the helicopter can mask behind cover after the missile is launched. If a laser<br />
guided Hellfire is used then the target must be laser designated throughout the missiles<br />
flight. The missile’s time to target (in seconds) is shown in the lower left corner of the<br />
IHADSS display. If more than one missile is launched then the flight time of the most<br />
recently launched missile is shown.<br />
In LOAL mode the missiles can be launched from behind cover. The missile follows a high<br />
launch profile. When a target is selected the missile steers towards it but only if the target<br />
is within the missile’s seeker limits. With radar guided Hellfires it is not necessary for the<br />
helicopter to unmask but with laser guided missiles it is necessary to unmask in order to<br />
designate the target.<br />
Type short-range anti-tank guided missile (ATGM)<br />
Guidance active radar (AGM-114L) semi-active laser (AGM-114K)<br />
Maximum range 8,000 metres<br />
Cruise speed Mach 1.3<br />
Seeker field of view 60°<br />
Weight 45.0 Kg<br />
Lock on before<br />
launch<br />
Target marker<br />
showing invalid<br />
target lock<br />
Diagram 5.23: IHADSS display for a Hellfire missile in LOBL launch mode<br />
showing an invalid target lock
Lock on before<br />
launch<br />
Missile’s time to<br />
target (seconds)<br />
Diagram 5.24: IHADSS display for a Hellfire missile in LOBL launch<br />
mode showing a valid target lock<br />
Invalid target lock<br />
Lock on after<br />
launch<br />
APACHE COCKPIT 5.30<br />
Diagram 5.25: IHADSS display for a Hellfire missile in LOAL launch mode<br />
showing an invalid target lock<br />
Lock on after<br />
launch<br />
Valid target lock<br />
Target marker<br />
showing invalid<br />
lock<br />
Target marker<br />
Diagram 5.26: IHADSS display for a Hellfire missile in LOAL launch mode<br />
showing a valid target lock
5.31<br />
APACHE COCKPIT<br />
Hydra 70 Rockets<br />
The <strong>Apache</strong> Longbow carries Hydra 70 mm folding-fin aerial rockets (FFARs). These rockets<br />
are unguided so it is necessary to boresight the target by steering the helicopter towards it.<br />
Use the forward cockpit view F1 .<br />
Hydra rockets are mounted in pods of 19 giving a maximum capacity of 76.<br />
Rockets can be fired in salvos to increase the damage area and kill probability.<br />
S<br />
increase salvo size<br />
Shift + S decrease salvo size<br />
There are two types of warheads; the M255 high explosive (HE) warhead and the M261<br />
multi-purpose sub-munition (MPSM) warhead.<br />
The M255 HE warhead is effective against soft battlefield targets and helicopters. The<br />
M261 MPSM warhead is effective against armoured vehicles.<br />
The rocket pods have automatic adjustable elevation (from +4.9° to -15.0°). It is only<br />
necessary to line the helicopter’s heading up with the target if the elevation is within limits.<br />
This makes using rockets in the <strong>Apache</strong> far easier than in the <strong>Havoc</strong> and the kill probability<br />
is increased.<br />
The rocket pods will not elevate at speeds in excess of 100 knots. It the helicopter’s speed<br />
is above this limit the rockets must be boresighted manually as in the <strong>Havoc</strong>.<br />
Type folding-fin aerial rocket<br />
Maximum range 5,000 metres<br />
Weight 6.0 Kg<br />
The IHADSS display shows the target marker and an ‘I-beam’. It is necessary to line up the<br />
target marker with the I-beam in order to get a valid lock. With airborne targets the I-beam<br />
must be lined up with the computed intercept point instead.<br />
Target marker<br />
Rocket salvo size<br />
➝<br />
Steer towards<br />
I-beam<br />
Dashed I-beam<br />
marker indicating<br />
no boresight<br />
Diagram 5.27: IHADSS display for unguided rockets showing I-beam not<br />
lined up with ground target
Solid I-beam<br />
indicating valid lock<br />
Diagram 5.28: IHADSS display for unguided rockets showing I-beam<br />
lined up with ground target<br />
Computed<br />
intercept point<br />
APACHE COCKPIT 5.32<br />
Diagram 5.29: IHADSS display for unguided rockets showing I-beam not<br />
lined up with air target intercept point<br />
Computerised<br />
intercept point<br />
Solid I-beam<br />
indicating<br />
valid lock<br />
Target marker<br />
➝<br />
Steer towards<br />
I-beam<br />
Target marker<br />
Dashed I-beam<br />
indicating<br />
no boreshight<br />
Target marker<br />
Diagram 5.30: IHADSS display for unguided rockets showing I-beam<br />
lined up with air target intercept point
5.33<br />
APACHE COCKPIT<br />
Countermeasures<br />
When the ASE display indicates a radar or infra-red threat then the following<br />
countermeasures may be used to increase survivability.<br />
Radar Jammer<br />
The radar jammer is used to fool enemy radar of the helicopter’s position by creating<br />
spurious targets.<br />
J<br />
radar jammer on/off<br />
IR Jammer<br />
The IR jammer pumps out intense IR radiation to confuse the seeker head of an<br />
incoming IR missile to break lock.<br />
I<br />
IR jammer on/off<br />
Chaff<br />
Chaff comprises millions of strips of aluminised Mylar film which when released<br />
generate a cloud of radar signature to fool incoming radar guided missiles.<br />
C<br />
release chaff cartridge<br />
Flares<br />
Flares are hot pyrotechnic cartridges used to create false targets for incoming IR<br />
missiles.<br />
F<br />
release flare cartridge<br />
The disadvantage of electronic countermeasures (ECM) such as the radar and IR jammers<br />
is that they unmask the helicopter and increase its visibility. They should be used as<br />
required.<br />
The disadvantage of chaff and flares is that they run out! The <strong>Apache</strong> Longbow carries 30<br />
of each.<br />
Automatic Countermeasures<br />
The Co-pilot/Gunner can assist you with operating the countermeasures.<br />
This option is selected in the ‘Game Options’ menu and can also be changed in-flight.<br />
Ctrl<br />
+ C automatic countermeasures on/off.<br />
Pilot Night Vision Sensor (PNVS)<br />
The <strong>Apache</strong> pilot has night vision sensor to aid flying at night.<br />
N<br />
PNVS on/off
6. HAVOC COCKPIT
6.1<br />
HAVOC COCKPIT<br />
Cockpit Views<br />
There are 28 'fixed' cockpit views which are panned by pressing:-<br />
M<br />
Ctrl<br />
+ to Ctrl + keys.<br />
There is also a 'virtual' cockpit view which is panned by pressing:-<br />
Alt<br />
M<br />
+ to Alt + keys.<br />
When the virtual cockpit keys are released the view snaps to the nearest fixed cockpit view.<br />
The virtual cockpit can be 'padlocked' to the selected target by pressing Ctrl + Enter .<br />
To return to a fixed cockpit view press Ctrl + Enter again.<br />
Additionally there is a large TV Display fixed view and a large HUD fixed view.<br />
There are shortcut keys to the most frequently used fixed cockpit views:-<br />
F1<br />
F2<br />
selects the forward view.<br />
selects the instrument view.<br />
F3 selects the large TV Display view (pressing F3 again selects the instrument view).<br />
F4 selects the large HUD view (pressing F4 again selects the forward view).<br />
In wet weather conditions the wiper should be used. The Y key operates the wiper.<br />
Alt + Y toggles 'intermittent' wipe which is useful in lighter rain.<br />
The blurred main rotor blades visible from the cockpit can be switched off in the 'Game<br />
Options' menu.
Instrument Panel<br />
The <strong>Havoc</strong> cockpit differs considerably from the modern 'glass' cockpit of the <strong>Apache</strong><br />
Longbow in that it has more traditional instrumentation and only a single TV display.<br />
The blue cockpit panel with a bold white line highlighting the primary flight instruments is<br />
typical of Soviet aircraft.<br />
All of the instruments and displays use metric values.<br />
Airspeed Indicator<br />
The airspeed indicator shows the indicated airspeed of the helicopter and also the sideslip<br />
(sideways velocity).<br />
Side slip<br />
Indicated Airspeed<br />
Scale km/h x 10<br />
Full scale deflection -50 to 450 km/h<br />
Sideslip<br />
Scale km/h x 10<br />
Full scale deflection ±100 km/h<br />
Barometric Altimeter<br />
The barometric altimeter shows the barometric altitude of the helicopter (height above sea<br />
level).<br />
Barometric Altitude<br />
Large needle scale metres x 100 (one revolution = 1,000 metres)<br />
Small needle scale metres x 1,000 (one revolution = 10,000 metres)<br />
HAVOC COCKPIT 6.2
6.3<br />
HAVOC COCKPIT<br />
Vertical Speed Indicator<br />
The vertical speed indicator shows the rate of climb of the helicopter.<br />
5<br />
Climb<br />
10<br />
0 30<br />
5 20<br />
10<br />
Descend<br />
Rate of Climb<br />
Scale metres per minute ÷ 10 (scale is non-linear)<br />
Full scale deflection ±300 metres per minute<br />
Artificial Horizon<br />
The artificial horizon shows the helicopter’s pitch and roll attitude relative to the ground.<br />
20<br />
Diagram 6.1: Direction of climb and descent<br />
Pitched up Rolled left<br />
Pitched down Rolled right<br />
Diagram 6.2: Pitch up/down rolled left/right
Horizontal Situation Indicator (HSI)<br />
HAVOC COCKPIT 6.4<br />
The Horizontal Situation Indicator (HSI) aids the pilot in navigating the flight plan. The<br />
instrument is controlled by the helicopter's navigation computer.<br />
The helicopter's heading is indicated by the rotary heading scale and the heading datum<br />
marker at the top dead centre of the dial. On the heading scale 'C' represents North, '9' East,<br />
'18' South and '27' West.<br />
The automatic direction finder needle points in the direction of the current waypoint. When<br />
this needle is aligned with the heading datum then the helicopter is flying towards the<br />
current waypoint.<br />
The designated flight path needle indicates the direction from the previous waypoint to the<br />
current waypoint. When both needles are aligned with the heading datum the helicopter is<br />
following the correct route.<br />
The digital readout in the top left corner shows the distance to the current waypoint in<br />
kilometres (the yellow digit tenths of a kilometre). The readout in the top right corner<br />
shows the current waypoint identifier (‘A’, ‘B’, ‘C’, etc.).<br />
In windy conditions crosswinds will cause the helicopter to drift off course. The navigation<br />
system computes the amount of heading correction required to compensate for the wind.<br />
The heading correction is indicated by the angle of drift needle. In windy conditions the<br />
automatic direction finder needle should be aligned with the angle of drift needle to fly to<br />
the current waypoint.<br />
Angle of drift scale<br />
Heading scale<br />
Distance to current<br />
waypoint (km)<br />
Diagram 6.3: Horizontal situation indicator<br />
Heading datum<br />
Angle of drift needle<br />
Current waypoint<br />
identifier<br />
Designated flight path<br />
needle (direction from<br />
the previous waypoint to<br />
the current waypoint)<br />
Automatic direction finder<br />
needle (direction to<br />
current waypoint)
6.5<br />
HAVOC COCKPIT<br />
G Meter<br />
The G meter shows the G force exerted on the helicopter. For straight and level flight the<br />
reading will be 1G.<br />
G Force<br />
Scale 1G<br />
Full scale deflection -2 to 4Gs<br />
Radar Altimeter<br />
The radar altimeter shows the helicopter's altitude above ground.<br />
Radar Altitude<br />
Scale metres (the scale is non-linear)<br />
Full scale deflection 0 to 300 metres<br />
Main Rotor RPM Indicator<br />
The main rotor RPM indicator shows the helicopter’s main rotor RPM as a % of maximum<br />
RPM. The nominal operation main rotor RPM is 100% (which is approximately 240 RPM).<br />
Main Rotor RPM<br />
Scale % x 10<br />
Full scale deflection 0 to 100%<br />
Mission Clock<br />
The mission clock is an analogue clock and shows the time of day.
Fuel Gauge<br />
HAVOC COCKPIT 6.6<br />
The fuel gauge shows the internal fuel load. The yellow dot in the centre of the dial helps<br />
locate the instrument. This is common in Soviet aircraft.<br />
Fuel Weight<br />
Scale kg x 100<br />
Full scale deflection 0 to 1500kg<br />
Engine Torque Indicator<br />
The engine torque indicator shows the left and right engine torque.<br />
Left engine<br />
torque<br />
Right engine<br />
torque<br />
Engine Torque<br />
Scale %<br />
Full scale deflection 0 to 110%<br />
Engine RPM and Temperature Indicators<br />
The engine RPM indicator (inner scale) shows the left and right engine RPM. The engine<br />
temperature indicator (outer scale) shows the left and right engine temperatures.<br />
Temp<br />
orange bar<br />
RPM<br />
white bar<br />
Left Right<br />
Temp<br />
RPM<br />
Engine RPM<br />
Scale %<br />
Full scale deflection 0 to 110%<br />
Engine Temperature<br />
Scale °C x 100<br />
Full scale deflection 0 to 1000 °C
6.7<br />
HAVOC COCKPIT<br />
Engine Oil Pressure Gauges<br />
The oil pressure gauges show the left and right engine oil pressure.<br />
Left Right<br />
Engine Oil Temperature Gauges<br />
The oil temperature gauges show the left and right engine oil temperature.<br />
Left Right<br />
Standby Compass<br />
The standby compass shows the helicopter's heading.<br />
‘'C'’ North<br />
90 East<br />
18 South<br />
27 West<br />
Master Caution Light<br />
The master caution light flashes, accompanied by an audible warning, to indicate that there<br />
is a problem. The problem will be reported on either the warning lights, status lights or<br />
EKRAN display. To acknowledge the caution press the<br />
caution light and silences the audible warning.<br />
M key. This extinguishes the master
Warning Lights<br />
L ENG left engine fire<br />
R ENG right engine fire<br />
TRQ engine over torque<br />
RDR radar active<br />
AP auto-pilot active<br />
HVR hover hold active<br />
R JAM radar jammer active<br />
I JAM infra-red jammer active<br />
Status Lights<br />
RDR radar failure<br />
FLIR FLIR failure<br />
LLLTV LLLTV failure<br />
LSR laser range finder failure<br />
R JAM radar jammer failure<br />
I JAM infra-red jammer failure<br />
NAV navigation computer failure<br />
COMM communications failure<br />
RWS radar warning system failure<br />
HUD head up display failure<br />
HMS helmet-mounted sight failure<br />
TV TV display failure<br />
TWD threat warning display failure<br />
NVG night vision goggles failure<br />
FRX fire extinguisher used<br />
RBRK rotor brake engaged<br />
WBRK wheel brake engaged<br />
AC automatic counter measures active<br />
EKRAN Display<br />
HAVOC COCKPIT 6.8<br />
The EKRAN automatic check-up system monitors necessary systems and critical values<br />
and shows text warnings on this display and sends audible warnings to the pilot's<br />
headphones.<br />
Alpha-numeric Display<br />
L ENG R ENG<br />
TRQ RDR<br />
AP HVR<br />
R JAM I JAM<br />
RDR FLIR<br />
LSR R JAM<br />
NAV COMM<br />
HUD HMS<br />
TWD NVG<br />
RBRK WBRK<br />
LLLTV<br />
I JAM<br />
RWS<br />
TV<br />
FRX<br />
AC
6.9<br />
HAVOC COCKPIT<br />
Weapons Status Lights<br />
The weapon status lights indicate the weapon availability.<br />
Right inner pylon<br />
Left inner pylon<br />
Left outer pylon<br />
Unlit none available<br />
Green available (flashes when armed)<br />
Red hardpoint damaged<br />
Chaff and Flare Status Lights<br />
The chaff and flare status lights indicate their availability.<br />
Chaff Flares<br />
Unlit none available<br />
Green available<br />
Red dispenser damaged<br />
TV Display<br />
Right outer pylon<br />
High explosive cannon<br />
Amour piercing cannon<br />
The centrally mounted TV display is used with the radar and electro-optics sensors. See the<br />
'Acquiring Targets' section.
Threat Warning Display (TWD)<br />
HAVOC COCKPIT 6.10<br />
The Threat Warning Display (TWD) alerts the pilot to the direction of enemy threats and<br />
incoming missiles. The TWD is capable of indicating multiple threats simultaneously.<br />
The warning systems detect if the helicopter is being illuminated by an enemy threat such<br />
as an aircraft or SAM launcher and displays the threat type and bearing. The threat bearing<br />
is indicated by the large orange lamps encircling the aircraft symbol.<br />
If a missile is launched then the large red missile lock lamp behind the aircraft symbol<br />
illuminates and the missile’s bearing is indicated by the small green lamps encircling the<br />
aircraft symbol. When there is more than one incoming missile the 'closest' missile is<br />
measured by time to impact. The missile bearing lamp flashes to indicate the bearing of the<br />
closest missile and the appropriate threat type lamp flashes to indicate if it is a radar guided<br />
or infra-red guided missile. The two semi-circular lamps in the centre of the aircraft symbol<br />
indicate if the closest missile is above or below the helicopter. As the missile approaches the<br />
helicopter the missile proximity lamps unwind in a clockwise direction to indicate time to<br />
impact. Each segment represents one second.<br />
Aircraft datum<br />
Threat bearing<br />
RF Missile IR Missile<br />
Flashing lamp indicates<br />
type of ‘closest’ missile<br />
Diagram 6.4: Threat warning display<br />
Airborne<br />
Radar<br />
Incoming missile bearing<br />
(flashing lamp indicates the<br />
bearing of the ‘closest’ missile)<br />
Threat types<br />
Note: The ‘closest’ missile is measured by time to impact.<br />
SAM AAA EWR<br />
Closest missile<br />
above aircraft<br />
Closest missile<br />
below aircraft<br />
Missile locked<br />
onto aircraft<br />
‘Closest’<br />
missile proximity<br />
(each segment<br />
represents one<br />
second)
6.11<br />
HAVOC COCKPIT<br />
Head Up Display (HUD)<br />
The head up display (HUD) is located centrally above the instrument panel. The HUD is used<br />
to display primary flight and navigation information. In combat modes the HUD is used in<br />
conjunction with the helmet-mounted sight (HMS) to display targeting information.<br />
The helmet-mounted sight is activated when either a weapon or target acquisition system<br />
is selected. To return to the HUD navigation mode either make the weapons safe or switch<br />
off the target acquisition system.<br />
The HUD display colour can be cycled to make it easier to read when the outside conditions<br />
change. In addition to the large HUD view the HUD size may be enlarged on the forward<br />
view.<br />
select next HUD colour<br />
Shift + K select previous HUD colour<br />
Alt + K toggle HUD size<br />
Head Up Display in Navigation Mode<br />
True airspeed<br />
Flight path marker<br />
Bank scale<br />
HUD centre datum<br />
Diagram 6.5: Head up display in navigation mode<br />
K<br />
Heading scale Current heading<br />
Current waypoint<br />
identifier<br />
Current waypoint<br />
distance<br />
Aircraft datum<br />
‘R’ indicates radar<br />
altitude<br />
Altitude<br />
Engine torque<br />
Angle of pitch<br />
Vertical speed<br />
scale<br />
Current vertical<br />
speed
HUD Centre Datum<br />
Indicates the centre of the display.<br />
Heading Scale and Current Heading<br />
The heading scale is marked every 10 degrees. The current heading is indicated by the<br />
triangular marker.<br />
Angle of Pitch<br />
The horizontal line indicates the direction of the horizon and digital readout shows the<br />
helicopter’s pitch angle.<br />
Helicopter pitched up horizontal line is below the HUD centre datum<br />
Helicopter pitched down horizontal line is above the HUD centre datum<br />
Aircraft Datum and Bank Scale<br />
The aircraft datum shows the orientation of the helicopter relative to the horizon. The<br />
bank angle is indicated by the bank scale.<br />
True Airspeed<br />
True airspeed in km/h.<br />
Altitude<br />
Altitude in metres. Below 500m the readout is prefixed with an 'R' and shows radar<br />
altitude (height above ground) and above 500m the readout shows barometric altitude<br />
(height above sea level).<br />
Engine Torque<br />
Digital readout of the engine torque.<br />
Vertical Speed Scale and Current Vertical Speed<br />
The full scale deflection of the vertical speed scale is ±10 metres per second. The<br />
current vertical speed is indicated by the arrow.<br />
Flight Path Marker<br />
The small circle indicates the bearing and relative altitude of the current waypoint.<br />
Current Waypoint Identifier<br />
The identifier for the current waypoint as shown on the waypoint route on the<br />
map screen.<br />
Current Waypoint Distance<br />
The distance to the current waypoint in kilometres.<br />
Head Up Display/Helmet-Mounted Sight in Combat Mode<br />
See the 'Acquiring Targets' and 'Weapons' sections.<br />
HAVOC COCKPIT 6.12
6.13<br />
HAVOC COCKPIT<br />
Acquiring Targets<br />
The <strong>Havoc</strong> has 3 target acquisition systems:<br />
1. a mast-mounted millimetric radar which can be used to scan for ground targets or<br />
airborne targets<br />
2. an electro-optical system (EOS) with forward-looking infra-red (FLIR) and low light level<br />
TV (LLLTV) channels plus a laser range-finder for accurately measuring distance to<br />
targets<br />
3. a helmet-mounted sight<br />
All three systems are integrated and a target acquired with one system may be passed to<br />
another system as long as it falls within the targeting restraints of that system. Any target<br />
which has been acquired is kept on a target list and all of the target acquisition systems are<br />
able to cycle through this list.<br />
Ground radar<br />
Select Target Acquisition System<br />
Radar<br />
Air radar HMS<br />
Insert Home Page Up<br />
FLIR LLLTV<br />
Delete End Page Down<br />
EOS<br />
Diagram 6.6: Select target acquisition system<br />
CP/G Assistance: Target ID<br />
The Co-pilot/Gunner (CP/G) can assist you to identify targets. There are 3 levels of<br />
assistance; ‘novice, ‘realistic’ and ‘off’. This is selected in the ‘Game Options’ menu.<br />
Novice<br />
The CP/G identifies the target immediately and reports them using simplistic names such as<br />
"Enemy Tank" and "Allied Aircraft".<br />
Realistic<br />
The CP/G attempts to make a visual identification (using the EOS where possible). It may<br />
take the CP/G a few moments to make the identification depending on the target range and<br />
adverse weather conditions. During this time the message "CP/G IDENTIFYING..." is<br />
displayed instead of the target name. If there is no line of sight to the target then no<br />
identification can be made. If you have selected an inappropriate EOS system (you cannot<br />
use FLIR in heavy rain or LLLTV at night) the message "LOW LIGHT" is displayed in place of
the target name. In this case select a more suitable system. Once the identification is made<br />
the NATO reporting name is given for the target and you must decide if it is an allied or<br />
enemy target.<br />
Off<br />
The CP/G gives you no help whatsoever. Once a target has been selected then use the FLIR<br />
or LLLTV to make the identification yourself. The 'Recognition Guide' will assist you in<br />
spotting key recognition features.<br />
Mast-Mounted Radar<br />
The mast-mounted radar scans for targets and a symbolic image of the returns is shown on<br />
the TV display. The radar can only acquire targets to which it has line of sight (LOS). If an<br />
acquired target masks behind buildings or terrain features the radar will still display the<br />
target but the target category symbol will change. If the target is moving the radar will<br />
attempt to interpolate the target’s new position. Target symbols are displayed using two<br />
different colours for clarity.<br />
Target Categories LOS No LOS<br />
Wheeled vehicle<br />
Tracked vehicle<br />
Air defence unit<br />
Aircraft<br />
Helicopter<br />
Ship<br />
Structure<br />
HAVOC COCKPIT 6.14<br />
Using radar will alert enemy targets of your presence and may attract hostile fire. Ensure<br />
that you switch the radar off when you have finished using it!
6.15<br />
HAVOC COCKPIT<br />
Ground Radar<br />
Scan position<br />
Maximum<br />
scan limits<br />
Radar clutter<br />
Diagram 6.7: Ground radar display<br />
Num Lock<br />
Scan left<br />
Auto-target<br />
7<br />
> Target<br />
< Target (shift)<br />
Activate<br />
single radar<br />
sweep<br />
+ Scan size<br />
/ -<br />
Diagram 6.8: Ground radar controls<br />
8<br />
Single/<br />
continuous<br />
radar sweep<br />
Scan centre Scan right<br />
*<br />
4 5 6<br />
– Scan size<br />
Target priority Auto-target<br />
engaged<br />
Target locked Target identity<br />
(see CP/G<br />
assistance)<br />
Target Acquisition System Controls<br />
+ Target<br />
priority<br />
– Target<br />
priority<br />
1 2 3<br />
9<br />
Switch off (ctrl)<br />
– Range<br />
+ Range<br />
Lock/unlock<br />
target<br />
+<br />
0 Del Enter<br />
EOS field of<br />
regard box<br />
Current<br />
heading<br />
EOS field of<br />
view marker<br />
+ = Increase<br />
– = Decrease<br />
> = Select Next<br />
< = Select Previous<br />
Heading scale Radar range<br />
Target range<br />
Scan limits<br />
Selected<br />
target<br />
No line of<br />
sight to target
HAVOC COCKPIT 6.16<br />
The ground radar can acquire battlefield targets and low slow flying helicopters. It can<br />
categorise targets but cannot differentiate between allied and enemy. The ground radar<br />
sweep is limited to a 90° arc ahead of the helicopter.<br />
The ground radar shows cities and other built up areas as 'radar clutter'. It is only possible to<br />
target certain strategic and tactical structures such as bridges and hardened aircraft shelters.<br />
At the bottom of the ground radar display is the EOS field of regard box and the field of<br />
view marker. As you cycle through the targets you will see the CP/G moving the field of view<br />
marker on to the target. In realistic target ID assistance mode the CP/G cannot identify the<br />
target until the marker is on the target. Therefore if you are flying erratically the CP/G will<br />
be unable to make an identification.<br />
Range<br />
Select ground radar range (1, 2, 4 or 6km).<br />
Scan size<br />
Adjust the radar scan arc size. Minimising the arc size will reduce your visibility to enemy<br />
targets and will increase the scan rate.<br />
Scan direction<br />
Adjust the radar scan direction left or right of centre.<br />
Scan centre<br />
Centre the radar scan.<br />
Single/continuous radar sweep<br />
Toggle between single sweep and continuous sweep.<br />
Activate single radar sweep<br />
Activate radar sweep in single sweep mode. Use single sweep mode to reduce your<br />
visibility to enemy targets.<br />
Target priority<br />
Adjust the target priority (ALL, LOW, MEDIUM or HIGH) to declutter the radar. The<br />
ground radar priority for each target is given in the 'Recognition Guide'. Generally any<br />
target which can fire at the helicopter is high priority, other armour and battlefield<br />
targets are medium priority and soft targets and structures are low priority.<br />
Next/previous target<br />
Cycle forwards or backwards through the targets.<br />
Auto-target<br />
Toggle auto-target mode. In auto-target mode the ground radar automatically assesses<br />
the highest threat target. This will only select targets of the selected priority.<br />
Lock/unlock target<br />
Lock the current target to prevent the auto-target system from selecting another target.<br />
Switch off<br />
Switch the ground radar off.
6.17<br />
HAVOC COCKPIT<br />
Air Radar<br />
Current target<br />
Scan centre<br />
Diagram 6.9: Air radar display<br />
Num Lock<br />
Display allied<br />
aircraft<br />
Scan left<br />
Auto-target<br />
7<br />
> Target<br />
< Target (shift)<br />
Activate<br />
single radar<br />
sweep<br />
+ Scan size<br />
/ -<br />
Diagram 6.10: Air radar controls<br />
8<br />
Single/<br />
continuous<br />
radar sweep<br />
Scan centre Scan right<br />
*<br />
4 5 6<br />
– Scan size<br />
Enemy or all<br />
targets<br />
Target locked Target identity<br />
(see CP/G assistance)<br />
Target Acquisition System Controls<br />
1 2 3<br />
9<br />
Switch off (ctrl)<br />
– Range<br />
+ Range<br />
Lock/unlock<br />
target<br />
+<br />
0 Del Enter<br />
Auto-target<br />
engaged<br />
+ = Increase<br />
– = Decrease<br />
> = Select Next<br />
< = Select Previous<br />
Target range<br />
Radar range<br />
Scan limits<br />
No line of<br />
sight to target
The air radar can acquire airborne targets. It can categorise targets and identify between<br />
allied and enemy. The air radar can sweep through 360°.<br />
Range<br />
Select air radar range (1, 2, 4 or 6km).<br />
Scan size<br />
Adjust the radar scan arc size. Minimising the arc size will reduce your visibility to enemy<br />
targets and will increase the scan rate.<br />
Scan direction<br />
Adjust the radar scan direction left or right of centre.<br />
Scan centre<br />
Centre the radar scan.<br />
Single/continuous radar sweep<br />
Toggle between single sweep and continuous sweep.<br />
Activate single radar sweep<br />
Activate radar sweep in single sweep mode. Use single sweep mode to reduce your<br />
visibility to enemy targets.<br />
Display allied aircraft<br />
Toggle display ALL aircraft targets or ENEMY targets only.<br />
Next/previous target<br />
Cycle forwards or backwards through the targets.<br />
Auto-target<br />
Toggle auto-target mode. In auto-target mode the air radar automatically assesses the<br />
highest threat target.<br />
Lock/unlock target<br />
Lock the current target to prevent the auto-target system from selecting another target.<br />
Switch off<br />
Switch the air radar off.<br />
HAVOC COCKPIT 6.18
6.19<br />
HAVOC COCKPIT<br />
Electro-Optical System (EOS)<br />
EOS Azimuth<br />
scale<br />
Current EOS<br />
Azimuth<br />
EOS elevation<br />
scale<br />
Current EOS<br />
elevation<br />
Diagram 6.11: Electro-optical system display<br />
Num Lock<br />
Pan left<br />
7<br />
> Target<br />
< Target (shift)<br />
Pan up<br />
Pan centre<br />
/ -<br />
8<br />
Pan right<br />
Diagram 6.12: Electro-optical system controls<br />
*<br />
4 5 6<br />
Pan down<br />
Sensor type<br />
(FLIR or LLLTV)<br />
Target locked Target identity<br />
(see CP/G assistance)<br />
Target Acquisition System Controls<br />
1 2 3<br />
9<br />
Switch off (ctrl)<br />
– Zoom<br />
+ Zoom<br />
Lock/unlock<br />
target<br />
+<br />
0 Del Enter<br />
EOS heading (not<br />
helicopter heading)<br />
+ = Increase<br />
– = Decrease<br />
> = Select Next<br />
< = Select Previous<br />
Field of view<br />
Target range<br />
EOS gates<br />
Target<br />
Current<br />
target<br />
range<br />
Target<br />
range<br />
scale (0<br />
top, 5km<br />
bottom<br />
EOS bore<br />
sight<br />
datum
The electro-optical surveillance system is located at the front of the helicopter below the<br />
distinctive rounded nose. The unit can move ±110° in azimuth (left or right) and from +13°<br />
to -40° in elevation (up or down). The turret gun can move the same amount and in<br />
synchronisation with the EOS. The system comprises a forward-looking infra-red (FLIR)<br />
channel, a low light level TV (LLLTV) channel and a laser range finder which provides target<br />
range data. The image from the EOS system is shown on the TV display.<br />
The EOS is used to locate, identify and designate targets. If you have selected no target ID<br />
assistance then you can use the EOS to identify targets before firing. Using the EOS is more<br />
stealthy than using the radar as enemy targets are less likely to know that they are being<br />
targeted.<br />
To locate targets select the widest field of view available and slew the EOS in the direction<br />
of the area of interest. Targets are brighter than the surrounding terrain. When you have<br />
located a target, zoom in by reducing the field of view. When the EOS is aimed directly<br />
towards the target the EOS gates appear and you can lock the target to keep it centred in<br />
the display and make an identification. The EOS is especially useful for finding enemy<br />
armour lurking in the tree-lines.<br />
It is very difficult to use the EOS system when the helicopter is moving. You are<br />
recommended to use this system when the helicopter is in a steady hover. Use the autohover<br />
facility H .<br />
If the light conditions are inappropriate for the selected sensor then "LOW LIGHT" appears<br />
on the EOS display.<br />
Forward-Looking Infra-Red (FLIR)<br />
The FLIR has 3 fields of view; wide, medium and narrow. The FLIR is ineffective in<br />
adverse weather conditions.<br />
Low Light Level TV (LLLTV)<br />
The LLLTV has 2 fields of view; medium and narrow. The LLLTV is ineffective at night.<br />
Zoom<br />
Select EOS field of view (WIDE, MEDIUM or NARROW).<br />
Pan<br />
Pan the EOS left, right, up and down. On an external view of the <strong>Havoc</strong> you can see the<br />
EOS housing slew left and right as you steer it.<br />
Pan Centre<br />
Centre the EOS pan.<br />
Next/previous target<br />
Cycle forwards or backwards through the targets.<br />
Lock/unlock target<br />
Lock the current target to prevent the auto-target system from selecting another target.<br />
Switch off<br />
Switch the EOS off.<br />
HAVOC COCKPIT 6.20
6.21<br />
HAVOC COCKPIT<br />
Helmet-Mounted Sight (HMS)<br />
The helmet-mounted sight enables the pilot to acquire targets simply by looking at them.<br />
Effectively the radar or EOS are slaved to the HMS. At night-time Night Vision Goggles<br />
(NVG) must be used. To activate night vision goggles press the N key.<br />
The HMS display moves with your head and remains in the centre of the screen. You can<br />
pan your view using the fixed cockpit or virtual cockpit keys. The functionality of these keys<br />
is duplicated on to the numeric keypad arrow keys when HMS mode is selected.<br />
Page<br />
To find targets with the helmet-mounted sight first select HMS mode Up and make sure<br />
that you have a weapon selected . The HMS will boresight targets near to the HMS<br />
datum. When a target is seen the target marker will appear.<br />
If you have a fixed cockpit view press Enter to lock the target and the fixed cockpit view<br />
will pan automatically keeping the target in view. If you pan the virtual cockpit to locate a<br />
target then when the target marker appears release the virtual cockpit keys to track<br />
(padlock) the target. Locking the target will ensure that a different target is not acquired.<br />
You can return to a fixed cockpit view by pressing Ctrl + Enter .<br />
The weapon range scale indicates the minimum and maximum ranges of the selected<br />
weapon and the range to the current target. The maximum range of the scale changes<br />
according to the selected weapon and the is shown as a digital readout in kilometres.<br />
The weapon type indicates the selected weapon:<br />
Gun(HE) 30mm Turret Gun (high-explosive rounds)<br />
Gun(AP) 30mm Turret Gun (armour piercing rounds)<br />
Igla-V Igla-V IR guided air-to-air missiles<br />
Ataka Ataka radio command guided anti-tank missiles<br />
S-8 80mm unguided rockets<br />
S-13 130mm unguided rockets<br />
GSh-23L GSh-23L 23mm cannon pods<br />
The sensor type indicates the active target acquisition system:<br />
GND RDR ground radar<br />
AIR RDR air radar<br />
FLIR forward-looking infra-red<br />
LLLTV low light level TV<br />
HMS helmet-mounted sight<br />
The target lock type indicates the weapon lock status:<br />
NO ACQUIRE no target acquisition system is active<br />
NO WEAPON no weapon is selected<br />
NO TARGET no target has been designated<br />
INVALID TARGET the target is unsuitable for the weapon<br />
SEEKER LIMIT the target exceeds the weapon seeker limit
Maximum range of<br />
scale (km)<br />
Weapon range<br />
scale<br />
Current target<br />
range<br />
Minimum range<br />
of weapon<br />
Weapon type<br />
HAVOC COCKPIT 6.22<br />
Diagram 6.13: Helmet-mounted sight display – weapons covered in detail in the ‘Weapons’ section<br />
NO LOS no line of sight to the target<br />
NO BORESIGHT the target must be ahead of the helicopter for rockets and cannon pod<br />
MIN RANGE the target is too near<br />
MAX RANGE the target is too far<br />
VALID LOCK the lock is good<br />
Pan<br />
Pan the HMS left, right up and down. These keys should be used with Ctrl or Shift<br />
for panning the fixed cockpit views and used with Alt to pan the virtual cockpit view.<br />
Next/previous target<br />
Cycle forwards or backwards through the targets.<br />
Lock/unlock target<br />
Lock the current target to prevent the HMS from selecting another target.<br />
Switch off<br />
Switch the HMS off.<br />
Maximum range of<br />
weapon<br />
Number of weapons<br />
remaining<br />
HMS centre datum<br />
Target marker<br />
Sensor type<br />
Target lock type<br />
Target locked<br />
Target identity<br />
(see CP/G<br />
assistance)
6.23<br />
HAVOC COCKPIT<br />
Num Lock<br />
7<br />
Pan left<br />
(ctrl/shift/alt)<br />
> Target<br />
< Target (shift)<br />
Target Acquisition System Controls<br />
Pan up<br />
(ctrl/shift/alt)<br />
/ -<br />
8<br />
Diagram 6.15: Helmet-mounted sight controls<br />
*<br />
4 5 6<br />
Pan down<br />
(ctrl/shift/alt)<br />
1 2 3<br />
9<br />
Pan right<br />
(ctrl/shift/alt)<br />
Switch off (ctrl)<br />
Target marker<br />
with invalid lock<br />
Target market<br />
with valid lock<br />
Diagram 6.14: HMS display target marker<br />
Lock/unlock<br />
target<br />
+<br />
0 Del Enter<br />
+ = Increase<br />
– = Decrease<br />
> = Select Next<br />
< = Select Previous<br />
Target marker with central<br />
dot indicates an unguided<br />
weapon is being used<br />
against a ground target<br />
When targets are in range<br />
of the turret gun or cannon<br />
pods the target marker<br />
switches to a gun pipper<br />
which unwinds counterclockwise<br />
as the target<br />
distance closes
Weapons<br />
HAVOC COCKPIT 6.24<br />
The <strong>Havoc</strong> is a heavily armed attack helicopter able to engage and destroy armoured and<br />
unarmoured battlefield targets as well as airborne targets.<br />
The <strong>Havoc</strong> has four hardpoints two on each stub wing and can carry many weapons mixes<br />
depending on the mission requirements.<br />
Selecting a weapon automatically switches the head up display to combat mode and<br />
activates the helmet-mounted sight display. Making the weapons safe returns the head up<br />
display to navigation mode and switches the helmet-mounted sight off.<br />
select next weapon.<br />
Shift<br />
+ select previous weapon.<br />
Ctrl<br />
+ weapons safe.<br />
Alt + select turret gun.<br />
To fire a weapon press the Spacebar . If the weapon fails to launch check the target lock<br />
type on the helmet mounted sight display.<br />
Turret Gun<br />
The <strong>Havoc</strong> has a powerful 30mm 2A42 cannon in the chin turret. The cannon is installed<br />
between two cartridge containers each holding 130 rounds. The gun is fed selectively from<br />
the containers allowing a choice of either high-explosive or armour-piercing ammunition.<br />
The gun automatically tracks the selected target and can be rotated ±110° in azimuth (left<br />
or right) and from +13° to -40° in elevation (up or down).<br />
The cannon can be used against ground or air targets. Armour-piercing rounds are effective<br />
against armoured battlefield targets and high-explosive rounds are effective against soft<br />
ground targets and aircraft.<br />
Type 30 mm cannon<br />
Rate of fire 300 rounds per minute<br />
Maximum range 2,000 metres<br />
Muzzle velocity 1,000 metres per second<br />
Weight 1 Kg per round
6.25<br />
HAVOC COCKPIT<br />
Target within<br />
min/max range<br />
limits<br />
Diagram 6.16: HMS display for turret gun showing valid ground target<br />
Target range is<br />
beyond the<br />
maximum range<br />
of the turret gun<br />
Gun pipper<br />
unwinds counterclockwise<br />
as target<br />
range decreases<br />
Standard target<br />
marker without<br />
valid lock indication<br />
Diagram 6.17: HMS display for turret gun showing out of range ground target<br />
Aiming point of<br />
gun to intercept<br />
the air target<br />
Diagram 6.18: HMS display for turret gun showing valid air target
Igla-V<br />
HAVOC COCKPIT 6.26<br />
The <strong>Havoc</strong> carries Igla-V short-range air-to-air guided missiles. They are mounted in racks<br />
of 4 so a maximum of 16 missiles can be carried.<br />
The Igla-V is a heat seeking missile and is effective against airborne targets. If a ground<br />
target is selected then "INVALID TARGET" is displayed on the HMS display.<br />
Enemy targets will use flares and IR jammers to distract this missile.<br />
Type short-range air-to-air<br />
Guidance infra-red homing (fire-and-forget)<br />
Maximum range 5,200 metres<br />
Cruise speed Mach 2.5<br />
Seeker field of view 60°<br />
Weight 18.2 Kg<br />
Steering the HMS centre datum towards the computed intercept point will reduce the<br />
amount of manoeuvering that the missile will have to do in flight and therefore increase the<br />
kill probability.<br />
Computed intercept<br />
point of weapon<br />
with target<br />
Diagram 6.19: HMS display for Igla-V showing valid air target<br />
Target market<br />
indicating<br />
valid lock
6.27<br />
HAVOC COCKPIT<br />
Ataka<br />
The <strong>Havoc</strong> carries Ataka short-range anti-tank guided missiles. They are mounted in racks<br />
of 8 but can only be fitted to the outer hardpoints so a maximum of 16 missiles can carried.<br />
The Ataka is radio-command guided via a transmitter in the <strong>Havoc</strong>’s nose. The target must<br />
remain in line of sight of the helicopter throughout the missiles flight time. The missile flight<br />
time (in seconds) is displayed on the HMS. If multiple weapons are fired then the flight time<br />
of the most recently launched missile is displayed.<br />
The Ataka is effective against armoured battlefield targets but may also be used against<br />
slow moving airborne targets.<br />
Type short-range anti-tank guided missile (ATGM)<br />
Guidance radio-command<br />
Maximum range 6,000 metres<br />
Cruise speed Mach 1.1<br />
Seeker field of view 50°<br />
Weight 42.5 Kg<br />
Missile flight time to<br />
impact (seconds)<br />
Target marker<br />
indicating<br />
valid lock<br />
Diagram 6.20: HMS display for Ataka showing valid ground target
Unguided Rockets<br />
HAVOC COCKPIT 6.28<br />
The <strong>Havoc</strong> carries 80 mm (S-8) and 130 mm (S-13) folding-fin aerial rockets (FFARs).<br />
These rockets are unguided so it is necessary to boresight the target by steering the<br />
helicopter towards it. Use the forward cockpit view F1 .<br />
Rockets can be fired in salvos to increase the damage area.<br />
S<br />
increase salvo size.<br />
Shift + S decrease salvo size.<br />
S-8<br />
The S-8 rockets are mounted in pods of 20 giving a maximum capacity of 80. They are<br />
effective against unarmoured battlefield targets, soft structures and slow moving aircraft.<br />
Type folding-fin aerial rocket<br />
Maximum range 4,000 metres<br />
Weight 11.3 Kg<br />
S-13<br />
The S-13 rockets are mounted in pods of 5 giving a maximum capacity of 20. They are<br />
effective against unarmoured battlefield targets, hardened structures and slow moving<br />
aircraft.<br />
Type folding-fin aerial rocket<br />
Maximum range 6,000 metres<br />
Weight 68.0 Kg<br />
Rocket salvo size<br />
Boresight<br />
Steer helicopter<br />
boresight towards<br />
the target<br />
Target<br />
Diagram 6.21: HMS display showing unguided rocket not lined up with<br />
ground target
6.29<br />
HAVOC COCKPIT<br />
Diagram 6.22: HMS display showing unguided rocket lined up with<br />
ground target<br />
Boresight<br />
Target lined up<br />
with boresight<br />
Steer boresight<br />
towards<br />
the intercept point<br />
Computed<br />
intercept point<br />
Target marker<br />
Diagram 6.23: HMS display showing unguided rocket not lined up with air target<br />
Target marker<br />
Boresight lined<br />
up with intercept<br />
point<br />
Diagram 6.24: HMS display showing unguided rocket lined up with air target
Cannon Pods<br />
The <strong>Havoc</strong> carries cannon pods each containing twin-barrelled GSh-23L 23 mm cannons.<br />
Each pod contains 250 rounds of ammunition. The cannon pods are effective against soft<br />
ground targets and aircraft.<br />
The cannon pods are aligned with the helicopter body-axis and so it is necessary to steer<br />
the helicopter towards the target. Use the forward cockpit view F1 .<br />
Type twin-barrelled 23 mm cannon<br />
Rate of fire 1,000 rounds per minute<br />
Maximum range 2,000 metres<br />
Muzzle velocity 930 metres per second<br />
Weight 0.2 Kg per round<br />
Countermeasures<br />
HAVOC COCKPIT 6.30<br />
Diagram 6.25: HMS display showing cannon pods lined up with ground target<br />
When the threat warning display indicates a radar or infra-red threat then the following<br />
counter measures may be used to increase survivability.<br />
Radar Jammer<br />
The radar jammer is used to fool enemy radar of the helicopter’s position by creating<br />
spurious targets.<br />
J<br />
radar jammer on/off.<br />
IR Jammer<br />
The IR jammer pumps out intense IR radiation to confuse the seeker head of an<br />
incoming IR missile.<br />
I<br />
IR jammer on/off.<br />
Boresight<br />
Gun pipper lined<br />
up with boresight<br />
Target
6.31<br />
HAVOC COCKPIT<br />
Chaff<br />
Chaff comprises millions of strips of aluminised Mylar film which when released<br />
generate a cloud of radar signature to fool incoming radar guided missiles.<br />
C<br />
release chaff cartridge.<br />
Flares<br />
Flares are hot pyrotechnic cartridges used to create false targets for incoming IR<br />
missiles.<br />
F<br />
release flare cartridge.<br />
The disadvantage of electronic countermeasures (ECM) such as the radar and IR<br />
jammers is that they unmask the helicopter and increase its visibility to the enemy. Use<br />
your jammers when required and do not forget to turn them off.<br />
The disadvantage of chaff and flares is that they run out! The <strong>Havoc</strong> carries 30 of each.<br />
Automatic Countermeasures<br />
The Co-pilot/Gunner can assist you with operating the countermeasures.<br />
This option is selected in the ‘Game Options’ menu and can also be changed in-flight.<br />
Ctrl<br />
+ C automatic countermeasures on/off.<br />
When automatic countermeasures are active the AC status light is illuminated.<br />
Night Vision Goggles (NVG)<br />
The <strong>Havoc</strong> pilot has night vision goggles to aid flying at night.<br />
N<br />
NVG on/off.
7. RECOGNITION GUIDE
7.1<br />
RECOGNITION GUIDE<br />
USA COMBAT HELICOPTERS<br />
Type: Attack<br />
AH-64D <strong>Apache</strong><br />
Longbow<br />
Recognition features:<br />
● 4-bladed rotor with ‘Swiss<br />
cheese’ style radome, 4-bladed<br />
‘X’ shaped tail rotor<br />
● tandem cockpits with<br />
single canopy<br />
● stub wings with wing-tip<br />
missile mounts<br />
● engine nacelles on each side of<br />
fuselage with ‘fish-tail’ exhaust<br />
cooling vanes to rear<br />
● enlarged flat-sided sponsons<br />
(avionics bays)<br />
● nose-mounted<br />
TADS/PNVS turrets<br />
● chain gun turret mounted under<br />
forward fuselage<br />
● all-moving tail-plane<br />
● fixed undercarriage and tail wheel<br />
Armament:<br />
● M230 30mm Chain Gun<br />
● AIM-92 Stinger IR guided<br />
air-to-air missiles<br />
● AGM-114L Longbow Hellfire<br />
radar guided anti-tank missiles<br />
● AGM-114K Hellfire II laser guided<br />
anti-tank missiles<br />
● Hydra 70 M255 unguided<br />
rockets (HE)<br />
● Hydra 70 M261 unguided<br />
rockets (MPSM)<br />
Decoys:<br />
● chaff<br />
● flares<br />
Game notes:<br />
● radar symbol:<br />
● ground radar priority: medium
USA COMBAT HELICOPTERS<br />
Type: Reconnaissance/attack<br />
RAH-66 Comanche<br />
Recognition features:<br />
● 5-bladed ‘low-profile’ main rotor<br />
and integral ‘fenestron’ tail rotor<br />
● distinctive angular stealth<br />
fuselage design<br />
● tandem cockpits with single<br />
flush-sided canopy<br />
● angular engine nacelles/inlets<br />
● nose mounted TADS/PNVS turret<br />
● weapons pylons retractable into<br />
internal bays<br />
● retractable undercarriage and<br />
tail wheel<br />
Armament:<br />
● 20mm cannon<br />
● AIM-92 Stinger IR guided<br />
air-to-air missiles<br />
● AGM-114L Longbow Hellfire<br />
radar guided anti-tank missiles<br />
Decoys:<br />
● chaff<br />
● flares<br />
RECOGNITION GUIDE 7.2<br />
Game notes:<br />
● radar symbol:<br />
● ground radar priority: medium<br />
● stealth features reduce<br />
radar signature
7.3<br />
RECOGNITION GUIDE<br />
USA COMBAT HELICOPTERS<br />
Type: Attack/assault<br />
UH-60 Black Hawk<br />
Recognition features:<br />
● 4-bladed main rotor and<br />
4-bladed tail rotor<br />
● twin seat side-by-side cockpit<br />
● low and wide appearance to main<br />
fuselage section with flat<br />
underside and elongated nose<br />
● sliding doors on either side of<br />
main cabin<br />
● IR suppressors fitted to engine<br />
exhaust outlets<br />
● external stores supports for<br />
weapon pylons<br />
● all-moving tail-plane<br />
● fixed undercarriage and tail wheel<br />
Armament:<br />
● AGM-114C Hellfire radar guided<br />
anti-tank missiles<br />
● Hydra 70 M255 unguided<br />
rockets (MPSM)<br />
Decoys:<br />
● chaff<br />
● flares<br />
Game notes:<br />
● radar symbol:<br />
● ground radar priority: medium
USA COMBAT HELICOPTERS<br />
Type: Marine assault<br />
CH-46E Sea Knight<br />
Recognition features:<br />
● twin 3-bladed tandem<br />
main rotors<br />
● twin seat side-by-side cockpit<br />
inside glazed nose<br />
● long rectangular fuselage with<br />
elevated engine housings and<br />
rearward stub wings<br />
● rear hinged loading ramp to<br />
cargo hold<br />
● fixed tricycle undercarriage with<br />
main rear wheels supported by<br />
stub wings<br />
Decoys:<br />
● chaff<br />
● flares<br />
RECOGNITION GUIDE 7.4<br />
Game notes:<br />
● radar symbol:<br />
● ground radar priority: medium
7.5<br />
RECOGNITION GUIDE<br />
USA TRANSPORT HELICOPTERS<br />
Type: Medium-lift<br />
CH-3<br />
(Jolly Green Giant)<br />
Recognition features:<br />
● 5-bladed main rotor and<br />
5-bladed tail rotor<br />
● twin seat side-by-side cockpit<br />
behind shallow nose<br />
● long main fuselage with sloping<br />
rear section and short tail boom<br />
● rear hinged loading ramp to<br />
cargo hold<br />
● semi-retractable tricycle<br />
undercarriage with main rear<br />
wheel housings in stub wings<br />
Decoys:<br />
● chaff<br />
● flares<br />
Game notes:<br />
● radar symbol:<br />
● ground radar priority: medium
USA TRANSPORT HELICOPTERS<br />
Type: Heavy-lift<br />
CH-47D Chinook<br />
Recognition features:<br />
● twin 3-bladed tandem<br />
main rotors<br />
● twin seat side-by-side cockpit<br />
inside glazed nose<br />
● long rectangular fuselage (bulging<br />
along lower sides), elevated front<br />
and rear engine housings<br />
● external engine nacelles on rear<br />
sides of fuselage<br />
● rear hinged loading ramp to<br />
cargo hold<br />
● fixed 4-wheeled undercarriage<br />
Decoys:<br />
● chaff<br />
● flares<br />
RECOGNITION GUIDE 7.6<br />
Game notes:<br />
● radar symbol:<br />
● ground radar priority: medium
7.7<br />
RECOGNITION GUIDE<br />
USA COMBAT AIRCRAFT<br />
Type: Close air support<br />
A-10A Thunderbolt<br />
Recognition features:<br />
● low-wing, square leading and<br />
trailing edge with upward canted<br />
outer sections and down-turned<br />
wing-tips, projecting fairings over<br />
main landing gear<br />
● short nose with ‘up-front’<br />
cockpit arrangement<br />
● twin fin assembly<br />
● large pair of circular engine<br />
nacelles mounted on upper<br />
rear fuselage<br />
● many under-wing weapon<br />
hard points and large nose<br />
mounted cannon<br />
● semi-retractable tricycle<br />
undercarriage<br />
Armament:<br />
● 30mm cannon<br />
● AIM-9M Sidewinder IR guided<br />
air-to-air missiles<br />
● LAU-69/A unguided rockets<br />
Decoys:<br />
● chaff<br />
● flares<br />
Game notes:<br />
● radar symbol:<br />
● ground radar priority: medium
USA COMBAT AIRCRAFT<br />
Type: Multi-role fighter<br />
F-16 Fighting Falcon<br />
Recognition features:<br />
● mid-wing, swept leading edge,<br />
square trailing edge, wings<br />
blended to fuselage<br />
● long bubble-shaped canopy and<br />
short sharp nose<br />
● single large curved air intake<br />
under nose<br />
● single large tail fin, downward<br />
canted all-moving tail plane<br />
● wing-tip missile mounts,<br />
under-wing hard-points<br />
● retractable tricycle undercarriage<br />
Armament:<br />
● 20mm cannon<br />
● AIM-9M Sidewinder IR guided<br />
air-to-air missiles<br />
● AIM-120 AMRAAM radar guided<br />
air-to-air missiles<br />
● AGM-65D Maverick IR guided<br />
air-to-surface missiles<br />
Decoys:<br />
● chaff<br />
● flares<br />
RECOGNITION GUIDE 7.8<br />
Game notes:<br />
● radar symbol:<br />
● ground radar priority: medium
7.9<br />
RECOGNITION GUIDE<br />
USA COMBAT AIRCRAFT<br />
Type: Carrier-borne attack<br />
AV-8B Harrier<br />
Recognition features:<br />
● high-wing, swept leading<br />
and trailing edges, sharp<br />
downward cant<br />
● swept tail fin, downward canted<br />
all-moving tail plane<br />
● compact bulbous fuselage with<br />
rounded main air intakes<br />
immediately aft of either side<br />
of cockpit<br />
● short nose with ‘up-front’<br />
cockpit arrangement<br />
● thrust vectoring nozzles under<br />
wings on either side of fuselage<br />
● under-wing hard-points, underfuselage<br />
bulging cannon housing<br />
● retractable main landing gear<br />
with under-wing retractable<br />
stabilisers<br />
Armament:<br />
● 25mm cannon<br />
● AIM-9M Sidewinder IR guided<br />
air-to-air missiles<br />
● LAU-69/A unguided rockets<br />
Decoys:<br />
● chaff<br />
● flares<br />
Game notes:<br />
● radar symbol:<br />
● ground radar priority: medium
USA COMBAT AIRCRAFT<br />
Type: Carrier-borne interceptor<br />
F/A-18 Hornet<br />
Recognition features:<br />
● mid-wing, swept leading edge<br />
extended into ‘hood’ along<br />
forward fuselage, square<br />
trailing edge<br />
● long slender nose section and<br />
canopy, with wings centred well<br />
aft of fuselage centre line<br />
● swept all-moving tail plane well<br />
aft of tall sharply canted twin<br />
tail fins<br />
● engine intakes either side of<br />
fuselage under wing leading<br />
edge, closely-spaced rear nozzles<br />
● under-wing and fuselage<br />
hard-points with wing-tip<br />
missile mounts<br />
● retractable tricycle undercarriage<br />
Armament:<br />
● 20mm cannon<br />
● AIM-9M Sidewinder IR guided<br />
air-to-air missiles<br />
● AIM-120 AMRAAM radar guided<br />
air-to-air missiles<br />
● AGM-65F Maverick IR guided<br />
air-to-surface missiles<br />
Decoys:<br />
● chaff<br />
● flares<br />
RECOGNITION GUIDE 7.10<br />
Game notes:<br />
● radar symbol:<br />
● ground radar priority: medium
7.11<br />
RECOGNITION GUIDE<br />
USA ARMOURED VEHICLES<br />
Type: Main battle tank<br />
M1A2 Abrams<br />
Recognition features:<br />
● tracked - 7 road wheels plus drive sprocket<br />
and idler on either side<br />
● long low flat-sided hull, flat raised rear section<br />
behind turret, flattened rear end with engine<br />
louvres and circular lamp housings<br />
● large angular low profile turret topped by<br />
small thermal sighting turret and large<br />
hatch-mounted MG with stowage racks to rear<br />
● long high calibre main gun barrel overhangs<br />
hull front<br />
Armament:<br />
● 120mm gun ● 12.7mm machine gun<br />
Decoys:<br />
● smoke grenades<br />
Type: Infantry fighting vehicle<br />
M2A2 Bradley<br />
Recognition features:<br />
● tracked - 6 road wheels plus drive sprocket<br />
and idler on either side<br />
● angular high-sided hull, sloping front and<br />
port-side inset driver’s hatch, flattened rear<br />
end with troop compartment loading ramp and<br />
large projecting stowage bins on either side<br />
● small angular turret with secondary armour<br />
panels to rear, short low calibre main gun<br />
barrel and side mounted flip-up TOW launcher<br />
Armament:<br />
● 25mm cannon<br />
● M220 TOW2B tube-launched optically-tracked<br />
wire-guided missiles<br />
Decoys:<br />
● smoke grenades<br />
Game notes:<br />
● radar symbol:<br />
● ground radar priority: medium<br />
● surface-to-air ceiling 1,000m<br />
● surface-to-air range 2,000m<br />
● armoured<br />
● night vision equipment<br />
Game notes:<br />
● radar symbol:<br />
● ground radar priority: high<br />
● surface-to-air ceiling 2,000m<br />
● surface-to-air range 4,000m<br />
● armoured<br />
● night vision equipment
USA ARMOURED VEHICLES<br />
Type: Armoured personnel carrier<br />
M113A2<br />
Recognition features:<br />
● tracked - 5 road wheels plus drive sprocket<br />
and idler on either side<br />
● high-sided box-shaped hull, backward sloping<br />
front and flattened rear end with loading ramp<br />
to troop compartment<br />
● hatch mounted MG on hull topside (no turret)<br />
Armament:<br />
● 12.7mm machine gun<br />
Type: Scout car<br />
M1025 HMMWV (HumVee)<br />
Recognition features:<br />
● high 4-wheeled chassis<br />
● distinctive flat-sided wide and low-profiled<br />
body, square front, slightly sloping bonnet,<br />
vertical windshield, downward slope at rear<br />
end of cab roof<br />
● roof-mounted MG<br />
RECOGNITION GUIDE 7.12<br />
Game notes:<br />
● radar symbol:<br />
● ground radar priority: high<br />
● surface-to-air ceiling 1,000m<br />
● surface-to-air range 2,000m<br />
● armoured<br />
● night vision equipment<br />
Game notes:<br />
● radar symbol:<br />
● ground radar priority: low
7.13<br />
RECOGNITION GUIDE<br />
USA SELF-PROPELLED ARTILLERY<br />
Type: Artillery (howitzer)<br />
M109A2 (155mm)<br />
Recognition features:<br />
● tracked - 7 road wheels plus drive sprocket and<br />
idler on either side, no side-skirts over tracks<br />
● wide angular hull with bevelled nose section<br />
and downward sloping top at front, flattened<br />
rear with hull access door and stowed<br />
entrenching ‘spades’<br />
● large flat-topped turret centred aft with sloping<br />
curved front and flat sides, thermal sighting<br />
turret and hatch-mounted MG atop, flattened<br />
rear end with projecting stowage<br />
box and racks<br />
● very long high calibre main gun extending<br />
well forward of hull front with large<br />
open-sided muzzle<br />
Armament:<br />
● 155mm howitzer ● 12.7mm machine gun<br />
Type: Multiple rocket systems<br />
M270 MLRS (227mm)<br />
Recognition features:<br />
● tracked - 6 road wheels plus drive sprocket<br />
and idler on either side, no side-skirts<br />
over tracks<br />
● box-shaped cab section at front with backward<br />
sloping front-face and protective louvres over<br />
windows, rear flatbed platform for launcher<br />
● large box-shaped turret-mounted multiple<br />
rocket launcher stowed horizontally at rear,<br />
turned and pitched to firing position<br />
Armament:<br />
● 227mm rockets<br />
Game notes:<br />
● radar symbol:<br />
● ground radar priority: medium<br />
● surface-to-air ceiling 1,000m<br />
● surface-to-air range 2,000m<br />
● armoured<br />
● night vision equipment<br />
Game notes:<br />
● radar symbol:<br />
● ground radar priority: low
USA AIR DEFENCE VEHICLES<br />
Type: AAA<br />
M163 Vulcan<br />
Recognition features:<br />
● tracked - 5 road wheels plus drive sprocket<br />
and idler on either side<br />
● high-sided box-shaped hull, backward sloping<br />
front with bulged section, box-shaped bulges<br />
along upper sides, flattened rear end<br />
● small circular turret with sloping sides and flat<br />
open top, small side-mounted radar dish,<br />
distinctive multi-barrelled cannon on pivoting<br />
‘skeleton’ mount<br />
Armament:<br />
● 20mm cannon<br />
Type: SAM<br />
M1037 Avenger<br />
Recognition features:<br />
● high 4-wheeled chassis<br />
● distinctive flat-sided wide and low-profiled<br />
body, square front, slightly sloping bonnet,<br />
vertical windshield to cut-short cab, flatbed<br />
launcher platform to rear<br />
● platform-mounted box-shaped sloping-top<br />
turret with pivoting side-mounted rectangular<br />
rocket launchers<br />
Armament:<br />
● FIM-92A Stinger IR guided<br />
surface-to-air missiles<br />
RECOGNITION GUIDE 7.14<br />
Game notes:<br />
● radar symbol:<br />
● ground radar priority: high<br />
● surface-to-air ceiling 1,000m<br />
● surface-to-air range 2,000m<br />
● armoured<br />
● night vision equipment<br />
● range-only radar<br />
Game notes:<br />
● radar symbol:<br />
● ground radar priority: high<br />
● surface-to-air ceiling 3,000m<br />
● surface-to-air range 5,000m<br />
● night vision equipment
7.15<br />
RECOGNITION GUIDE<br />
USA SELF-PROPELLED ARTILLERY<br />
Type: SAM<br />
M48A1 Chaparral<br />
Recognition features:<br />
● tracked - 5 road wheels plus drive sprocket<br />
and idler on either side<br />
● box-section hull with sloping front, raised<br />
rectangular forward cab section and flatbed<br />
launcher platform to rear<br />
● platform-mounted flat-sided curved roof turret<br />
on circular base with Chaparral missile pairs<br />
mounted on either side<br />
Armament:<br />
● Chaparral IR guided surface-to-air missiles<br />
USA TRANSPORT VEHICLES<br />
Type: Light 4x4 vehicle<br />
M998 HMMWV (HumVee)<br />
Recognition features:<br />
● high 4-wheeled chassis<br />
● distinctive flat-sided wide and low-profiled<br />
body, square front, slightly sloping bonnet,<br />
vertical windshield to cut-short cab, flatbed<br />
cargo area to rear<br />
Game notes:<br />
● radar symbol:<br />
● ground radar priority: high<br />
● surface-to-air ceiling 3,000m<br />
● surface-to-air range 5,000m<br />
● night vision equipment<br />
● FLIR<br />
Game notes:<br />
● radar symbol:<br />
● ground radar priority: low
USA TRANSPORT VEHICLES<br />
Type: Utility vehicle (truck)<br />
M923A1 “Big Foot”<br />
Recognition features:<br />
● high 6-wheeled truck chassis - 2 wheels in<br />
front, 4 at rear<br />
● large flat radiator grille with integral headlights,<br />
flat tapering bonnet, box-shaped cab with<br />
vertical windshield, angled mud guards over<br />
front wheels<br />
● high sided canvas covered cargo area to rear<br />
Type: Fuel tanker<br />
M978 (HEMTT)<br />
Recognition features:<br />
● high 8-wheeled chassis - 2 pairs of 4 wheels<br />
● distinctive forward-projecting cab with steeply<br />
angled large flat windshield and underside,<br />
narrow rectangular section behind cab with<br />
side-mounted spare wheel<br />
● large curved-sided flat-topped fuel tank to rear<br />
and adjoining downward angled curved rear<br />
end section<br />
RECOGNITION GUIDE 7.16<br />
Game notes:<br />
● radar symbol:<br />
● ground radar priority: low<br />
Game notes:<br />
● radar symbol:<br />
● ground radar priority: low
7.17<br />
RECOGNITION GUIDE<br />
USA WARSHIPS<br />
Type: Amphibious assault ship<br />
Tarawa Class<br />
Recognition features:<br />
● wide and high-sided box-section hull, long<br />
bow, square stern section<br />
● continuous flight deck<br />
● port side outboard aircraft lift, stern inboard<br />
aircraft lift, large stern water-line loading door<br />
● long narrow rectangular starboard side<br />
superstructure, large forward-mounted lattice<br />
mast and aft-mounted structures atop<br />
● two storey bridge<br />
● large deck-side crane<br />
Armament:<br />
● 25mm cannons<br />
● Sea Sparrow radar guided<br />
surface-to-air missiles<br />
Type: Frigate<br />
Oliver Hazard Perry Class<br />
Recognition features:<br />
● slender low-profile hull with sharp high-sided<br />
bow, square inward sloping shallow stern<br />
● long high-sided box-section superstructure<br />
forward raised bridge section, small spherical<br />
radome atop<br />
● tall central lattice mast with large outboard<br />
aerials, shorter forward mast with large<br />
rectangular radar dish atop<br />
● small forward deck gun position on<br />
circular base<br />
● aft deck-level helicopter landing pad<br />
Armament:<br />
● 76mm guns<br />
● SM-1MR Standard radar guided<br />
surface-to-air missiles<br />
Game notes:<br />
● radar symbol:<br />
● ground radar priority: high<br />
● surface-to-air ceiling 5,000m<br />
● surface-to-air range 1,0000m<br />
● air search radar<br />
Game notes:<br />
● radar symbol:<br />
● ground radar priority: high<br />
● surface-to-air ceiling 5,000m<br />
● surface-to-air range 10,000m<br />
● air search radar
USA WARSHIPS<br />
Type: Landing craft<br />
Tarawa Landing Craft<br />
Recognition features:<br />
● flat rectangular hull with squarely angled-in<br />
bow and stern, raised gusseted sides to<br />
cargo deck<br />
● hinged bow loading ramp, twin crane<br />
booms astern<br />
● narrow box-shaped superstructure<br />
on starboard side cargo deck, single<br />
pole-mounted radar antenna<br />
Type: Hovercraft<br />
LCAC<br />
Recognition features:<br />
● rectangular flat-bed hull, widely projecting<br />
all-round inflatable skirt with square corners<br />
● long and narrow deck-side superstructures<br />
with top-mounted engine intakes/exhausts<br />
● hinging bow and stern loading ramps<br />
● prop-shafts to aft-mounted twin 5-bladed<br />
propellers in circular enclosures with rudder<br />
planes attached<br />
RECOGNITION GUIDE 7.18<br />
Game notes:<br />
● radar symbol:<br />
● ground radar priority: low<br />
Game notes:<br />
● radar symbol:<br />
● ground radar priority: low
7.19<br />
RECOGNITION GUIDE<br />
RUSSIAN COMBAT HELICOPTERS<br />
Type: Attack<br />
Mi-28N <strong>Havoc</strong>-B<br />
Recognition features:<br />
● 5-bladed main rotor with<br />
spherical radome, 4-bladed ‘X’<br />
shaped tail rotor<br />
● tandem ‘stepped’ separate<br />
cockpit arrangement<br />
● nose-mounted radome with FLIR<br />
turret underneath<br />
● rounded engine nacelles with<br />
downward pointing rearward<br />
exhaust outlets<br />
● stub-wings (downward sloping)<br />
with pylons and wing-tip<br />
ECM pods<br />
● chin-mounted cannon turret with<br />
ammo panniers<br />
● asymmetrical tail plane<br />
arrangement<br />
● fixed undercarriage and tail wheel<br />
Armament:<br />
● 30mm cannon (both armour<br />
piercing and high explosive<br />
rounds)<br />
● Igla-V IR guided air-to-air missiles<br />
● Ataka radio command guided<br />
anti-tank missiles<br />
● 80mm unguided rockets<br />
● 130mm unguided rockets<br />
● GSh-23L 23mm cannon pods<br />
Decoys:<br />
● Chaff<br />
● Flares<br />
Game notes:<br />
● radar symbol:<br />
● ground radar priority: medium
RUSSIAN COMBAT HELICOPTERS<br />
Type: Reconnaissance/attack<br />
Ka-52 Hokum-B<br />
Recognition features:<br />
● twin 3-bladed co-axial main<br />
rotors (no tail rotor)<br />
● twin seat side-by-side cockpit<br />
● distinctive main tail fin and tail<br />
plane with endplate fins<br />
● engine nacelles each side<br />
of fuselage<br />
● nose-mounted FLIR turret,<br />
mast-mounted radome<br />
● stub wings with weapons pylons<br />
and wing-tip pods<br />
● side-mounted 30mm cannon<br />
● retractable tricycle undercarriage<br />
Armament:<br />
● 30mm cannon (both armour<br />
piercing and high explosive<br />
rounds)<br />
● Igla-V IR guided air-to-air missiles<br />
● Vikhr laser guided anti-tank<br />
missiles<br />
Decoys:<br />
● chaff<br />
● flares<br />
RECOGNITION GUIDE 7.20<br />
Game notes:<br />
● radar symbol:<br />
● ground radar priority: medium
7.21<br />
RECOGNITION GUIDE<br />
RUSSIAN COMBAT HELICOPTERS<br />
Type: Attack/assault<br />
Mi-24D Hind<br />
Recognition features:<br />
● 5-bladed main rotor, 3-bladed<br />
tail rotor<br />
● tandem stepped cockpits with<br />
domed canopies<br />
● tall and narrow appearance to<br />
main fuselage<br />
● hinged loading doors on either<br />
side of main cabin<br />
● IR suppressors fitted to engine<br />
exhaust outlets<br />
● sharply downward angled stub<br />
wings with weapons pylons and<br />
down turned wing-tips<br />
● chin-mounted gun-turret and<br />
sight/radar mounts<br />
● retractable tricycle undercarriage<br />
Armament:<br />
● 12.7mm Gatling gun<br />
● AT-6 Spiral radio command<br />
guided anti-tank missiles<br />
● 57mm unguided rockets<br />
● 80mm unguided rockets<br />
Decoys:<br />
● chaff<br />
● flares<br />
Game notes:<br />
● radar symbol:<br />
● ground radar priority: medium
RUSSIAN COMBAT HELICOPTERS<br />
Type: Marine assault<br />
Ka-29 Helix-B<br />
Recognition features:<br />
● twin 3-bladed co-axial main<br />
rotors (no tail rotor)<br />
● twin seat side-by-side cockpit<br />
● short rectangular section fuselage<br />
with distinctive flat nose and tail<br />
plane with endplate fins<br />
● hinged loading doors on either<br />
side of main cabin<br />
● weapon pylons supported on<br />
outboard racks<br />
● fixed 4-wheeled undercarriage<br />
with main gear outboard of<br />
fuselage sides<br />
Armament:<br />
● 57mm unguided rockets<br />
● 80mm unguided rockets<br />
Decoys:<br />
● chaff<br />
● flares<br />
RECOGNITION GUIDE 7.22<br />
Game notes:<br />
● radar symbol:<br />
● ground radar priority: medium
7.23<br />
RECOGNITION GUIDE<br />
RUSSIAN TRANSPORT HELICOPTERS<br />
Type: Medium-lift<br />
Mi-17 Hip<br />
Recognition features:<br />
● 5-bladed main rotor and<br />
3-bladed tail rotor<br />
● twin seat side-by-side cockpit<br />
inside glazed nose<br />
● long rounded main fuselage and<br />
slender tail boom<br />
● rear fuselage has ‘clam shell’<br />
cargo hold doors<br />
● IR suppressor fitted to engine<br />
exhaust outlets<br />
● weapon pylons supported on<br />
outboard racks<br />
● fixed tricycle undercarriage<br />
with outboard struts supporting<br />
main wheels<br />
Armament:<br />
● 57mm unguided rockets<br />
● 80mm unguided rockets<br />
Decoys:<br />
● chaff<br />
● flares<br />
Game notes:<br />
● radar symbol:<br />
● ground radar priority: medium
RUSSIAN TRANSPORT HELICOPTERS<br />
Type: Heavy-lift<br />
Mi-6 Hook<br />
Recognition features:<br />
● 5-bladed main rotor and<br />
4-bladed tail rotor<br />
● twin seat side-by-side cockpit<br />
aft of glazed observers station<br />
in nose<br />
● extremely long rounded main<br />
fuselage section with shorter<br />
tail boom<br />
● large wings, tail plane and<br />
external fuel tanks<br />
● rear fuselage has ‘clam shell’<br />
cargo hold doors<br />
● fixed tricycle undercarriage<br />
with outboard struts supporting<br />
main wheels<br />
Decoys:<br />
● chaff<br />
● flares<br />
RECOGNITION GUIDE 7.24<br />
Game notes:<br />
● radar symbol:<br />
● ground radar priority: medium
7.25<br />
RECOGNITION GUIDE<br />
RUSSIAN COMBAT AIRCRAFT<br />
Type: Close air support<br />
Su-25 Frogfoot<br />
Recognition features:<br />
● high-wing, swept leading<br />
edge, square trailing edge,<br />
wing-tip pods<br />
● single tall tail fin with smaller aft<br />
upward canted tail plane on aft<br />
projecting boom<br />
● short sloping nose and canopy,<br />
flattened fuselage sides and<br />
bottom, rounded engine nacelles<br />
with aft projecting circular outlets<br />
● many under-wing weapon<br />
hard points and large nose<br />
mounted cannon<br />
● fully retractable tricycle<br />
undercarriage<br />
Armament:<br />
● 30mm cannon<br />
● AA-8A Aphid IR guided<br />
air-to-air missiles<br />
● 80mm unguided rockets<br />
Decoys:<br />
● chaff<br />
● flares<br />
Game notes:<br />
● radar symbol:<br />
● ground radar priority: medium
RUSSIAN COMBAT AIRCRAFT<br />
Type: Multi-role fighter<br />
Mig-29 Fulcrum<br />
Recognition features:<br />
● low-wing, swept leading and<br />
trailing edges, wings blended<br />
to fuselage<br />
● all-moving swept tail plane and<br />
canted twin tail fins<br />
● downward-pointing nose,<br />
‘humped-back’ fuselage aft of<br />
cockpit tapering to flattened<br />
projecting ‘fish-tail’ section at<br />
rear, flattened fuselage underside<br />
● separated under-fuselage engine<br />
nacelles with canted and angled<br />
rectangular air intakes and widely<br />
spaced rear nozzles<br />
● under-wing hard points and<br />
side-mounted cannon<br />
● retractable tricycle undercarriage<br />
Armament:<br />
● 30mm cannon<br />
● AA-10A Alamo radar guided<br />
air-to-air missiles<br />
● AA-10B Alamo IR guided<br />
air-to-air missiles<br />
● AA-11 Archer IR guided<br />
air-to-air missiles<br />
● AS-10 Karen IR guided<br />
air-to-surface missiles<br />
Decoys:<br />
● chaff<br />
● flares<br />
RECOGNITION GUIDE 7.26<br />
Game notes:<br />
● radar symbol:<br />
● ground radar priority: medium
7.27<br />
RECOGNITION GUIDE<br />
RUSSIAN COMBAT AIRCRAFT<br />
Type: Carrier-borne attack<br />
Yak-41 Freestyle<br />
Recognition features:<br />
● high-wing, swept leading edge,<br />
square trailing edge with slight<br />
sweep along outer section,<br />
wing-tip pods<br />
● compact square-sided fuselage<br />
with angled side air intakes and<br />
short nose with ‘up-front’ cockpit<br />
● distinctive twin tail booms and<br />
canted fins, cutaway for<br />
extendable thrust vectoring<br />
engine nozzle<br />
● under-wing hard-points<br />
● retractable tricycle undercarriage<br />
Armament:<br />
● 30mm cannon<br />
● AA-8A Aphid IR guided<br />
air-to-air missiles<br />
● 80mm unguided rockets<br />
Decoys:<br />
● chaff<br />
● flares<br />
Game notes:<br />
● radar symbol:<br />
● ground radar priority: medium
RUSSIAN COMBAT AIRCRAFT<br />
Type: Carrier-borne interceptor<br />
Su-33 Flanker<br />
Recognition features:<br />
● low-wing, swept leading<br />
and trailing edge, blended<br />
to fuselage, swept canard<br />
foreplanes<br />
● downward angled forward<br />
fuselage with enlarged bulbous<br />
nose section, ‘humped-back’<br />
central fuselage tapering to<br />
flattened projecting ‘tail-sting’<br />
at rear<br />
● swept tail plane and twin<br />
vertical tail fins<br />
● separated under-fuselage engine<br />
nacelles with canted and angled<br />
rectangular air intakes and large<br />
widely spaced rear nozzles<br />
● under-wing and fuselage<br />
hard-points with wing-tip<br />
missile mounts<br />
● retractable tricycle undercarriage<br />
Armament:<br />
● 30mm cannon<br />
● AA-8A Aphid IR guided<br />
air-to-air missiles<br />
● AA-8B Aphid radar guided<br />
air-to-air missiles<br />
● AA-10A Alamo radar guided<br />
air-to-air missiles<br />
● AA-10B Alamo IR guided<br />
air-to-air missiles<br />
● AS-14 Kedge laser guided<br />
air-to-surface missiles<br />
Decoys:<br />
● chaff<br />
● flares<br />
RECOGNITION GUIDE 7.28<br />
Game notes:<br />
● radar symbol:<br />
● ground radar priority: medium
7.29<br />
RECOGNITION GUIDE<br />
RUSSIAN ARMOURED VEHICLES<br />
Type: Main battle tank<br />
T-80U<br />
Recognition features:<br />
● tracked - 6 road wheels plus drive sprocket and<br />
idler on either side<br />
● long and low flat-sided hull with front and rear<br />
splashers curving down over track ends, front<br />
top-side of hull slopes down between side-skirts,<br />
distinctive pair of fuel barrels mounted on rear<br />
● distinctive low circular domed turret with hatch<br />
mounted MG and stowed snorkel on brackets<br />
at rear<br />
● long high calibre main gun barrel overhangs<br />
hull front<br />
Armament:<br />
● 125mm gun ● 12.7mm machine gun<br />
● AT-11 Sniper laser beam riding anti-tank missiles<br />
Decoys:<br />
● smoke grenades<br />
Type:Infantry fighting vehicle<br />
BMP-2<br />
Recognition features:<br />
● tracked - 6 road wheels plus drive sprocket<br />
and idler on either side<br />
● angular low-profile hull with sloping underside<br />
and sharply pointed leading edge, flattened<br />
rear with bulged access doors, curved-ended<br />
splashers to tracks projecting along sides<br />
● small circular turret with sloping sides and<br />
flat top offset to aft, long slender low calibre<br />
main gun barrel and turret mounted tubular<br />
missile launcher<br />
Armament:<br />
● 30mm cannon<br />
● AT-5 Spandrel radar guided anti-tank missiles<br />
Decoys:<br />
● smoke grenades<br />
Game notes:<br />
● radar symbol:<br />
● ground radar priority: medium<br />
● surface-to-air ceiling 1,000m<br />
● surface-to-air range 2,000m<br />
● armoured<br />
● night vision equipment<br />
Game notes:<br />
● radar symbol:<br />
● ground radar priority: high<br />
● surface-to-air ceiling 2,000m<br />
● surface-to-air range 4,000m<br />
● armoured<br />
● night vision equipment
RUSSIAN ARMOURED VEHICLES<br />
Type: Infantry fighting vehicle<br />
BMP-3<br />
Recognition features:<br />
● tracked - 6 road wheels plus drive sprocket and<br />
idler on either side<br />
● high-sided box shaped hull, sloping underside to<br />
front with pointed leading edge and flattened<br />
rear end, troop compartment main access doors<br />
on rear topside and rear end of hull<br />
● small circular flat-topped turret, high calibre main<br />
gun barrel with box-shaped laser sight mounted<br />
over base and side-mounted co-axial cannon<br />
Armament:<br />
● 100mm gun ● 30mm cannon<br />
● AT-10 Stabber laser beam riding<br />
anti-tank missiles<br />
Decoys:<br />
● smoke grenades<br />
Type: Armoured personnel carrier<br />
BTR-80<br />
Recognition features:<br />
● high 8-wheeled chassis, 2 pairs of 4 wheels<br />
● angular long narrow hull with sloping<br />
underside to front, flattened rear end and<br />
sloped upper sides with angular wheel<br />
arches below<br />
● very small circular flat-topped MG<br />
mounted turret<br />
Armament:<br />
● 14.5mm machine gun<br />
Decoys:<br />
● smoke grenades<br />
RECOGNITION GUIDE 7.30<br />
Game notes:<br />
● radar symbol:<br />
● ground radar priority: high<br />
● surface-to-air ceiling 1,000m<br />
● surface-to-air range 2,000m<br />
● armoured<br />
● night vision equipment<br />
Game notes:<br />
● radar symbol:<br />
● ground radar priority: medium<br />
● surface-to-air ceiling 1,000m<br />
● surface-to-air range 2,000m<br />
● armoured<br />
● night vision equipment
7.31<br />
RECOGNITION GUIDE<br />
RUSSIAN ARMOURED VEHICLES<br />
Type: Scout car<br />
BRDM-2<br />
Recognition features:<br />
● high 4-wheeled chassis<br />
● angular small and narrow hull, sharp leading<br />
edge and sloping underside to front, sloping<br />
upper sides with curved wheel arches below,<br />
flattened rear end<br />
● very small circular flat-topped MG<br />
mounted turret<br />
Armament:<br />
● 14.5mm machine gun<br />
RUSSIAN SELF-PROPELLED ARTILLERY<br />
Type: Artillery (howitzer)<br />
2S19 (152mm)<br />
Recognition features:<br />
● tracked - 6 road wheels plus drive sprocket and<br />
idler on either side<br />
● long and low flat-sided hull with front and rear<br />
splashers curving down over track ends, front<br />
top-side of hull slopes down between side-skirts<br />
● very large high-sided box-shaped turret with<br />
hatch-mounted MG and distinctive rear-mounted<br />
SAM launcher tube<br />
● very long high calibre main gun extending well<br />
forward of hull front<br />
Armament:<br />
● 152mm howitzer<br />
● 12.7mm machine gun<br />
Decoys:<br />
● smoke grenades<br />
Game notes:<br />
● radar symbol:<br />
● ground radar priority: medium<br />
● surface-to-air ceiling 1,000m<br />
● surface-to-air range 2,000m<br />
● armoured<br />
● night vision equipment<br />
Game notes:<br />
● radar symbol:<br />
● ground radar priority: medium<br />
● surface-to-air ceiling 1,000m<br />
● surface-to-air range 2,000m<br />
● armoured<br />
● night vision equipment
RUSSIAN SELF-PROPELLED ARTILLERY<br />
Type: Multiple rocket systems<br />
BM-21 Grad MRS (122mm)<br />
Recognition features:<br />
● high 6-wheeled truck chassis - 2 wheels at<br />
front, 4 at rear<br />
● low wide radiator grille, smooth curved<br />
tapering bonnet and short upright cab with<br />
backward sloping windshield, vertical faced<br />
mud guards over front wheels with integral<br />
headlights, flatbed platform behind with<br />
launcher turret over rear axle<br />
● box-shaped grouped rocket tubes stowed<br />
on turret at rear, turned and pitched to<br />
firing position<br />
Armament:<br />
● 122mm rockets<br />
RUSSIAN AIR DEFENCE VEHICLES<br />
Type: SAM<br />
SA-13 Gopher<br />
Recognition features:<br />
● tracked - 6 road wheels plus drive sprocket<br />
and idler on either side, no side-skirts<br />
● long low-profile flat-topped hull with tapering<br />
cab sides and sloping top/underside to front,<br />
box-shaped side-mounted stowage lockers<br />
along upper sides, flattened rear end<br />
● centred circular turret mount for launcher arm<br />
with side-mounted box-section rocket<br />
launchers, stowed laid flat on hull top and<br />
pivoted on arm to firing position<br />
Armament:<br />
● SA-13 Gopher IR guided surface-to-air missiles<br />
RECOGNITION GUIDE 7.32<br />
Game notes:<br />
● radar symbol:<br />
● ground radar priority: low<br />
Game notes:<br />
● radar symbol:<br />
● ground radar priority: high<br />
● surface-to-air ceiling 3,000m<br />
● surface-to-air range 5,000m<br />
● armoured<br />
● night vision equipment<br />
● Flat Box passive radar
7.33<br />
RECOGNITION GUIDE<br />
RUSSIAN AIR DEFENCE VEHICLES<br />
Type: SAM/AAA<br />
SA-19 Grison<br />
Recognition features:<br />
● tracked - 6 road wheels plus drive sprocket and<br />
idler on each side, no side-skirts<br />
● box-section hull, downward sloping front,<br />
flattened and slightly inward sloping rear end<br />
● long and narrow rectangular main turret section<br />
over-hanging circular turret base at rear, frontal<br />
radome mounting, curved rectangular radar dish<br />
mounted on elevated section at turret rear top<br />
● twin-barreled cannon and quad SAM tubes<br />
mounted on either turret side<br />
Armament:<br />
● 4x30mm cannons<br />
● SA-19 Grison radio command guided<br />
surface-to-air missiles<br />
RUSSIAN TRANSPORT VEHICLES<br />
Type: Light 4x4 vehicle<br />
UAZ-469B<br />
Recognition features:<br />
● high 4-wheeled chassis,<br />
● small compact appearance, distinctive rounded<br />
bonnet, headlights and radiator grille,<br />
backward sloping windshield, canvas roof<br />
Game notes:<br />
● radar symbol:<br />
● ground radar priority: high<br />
● surface-to-air ceiling 4,000m<br />
● surface-to-air range 8,000m<br />
● armoured<br />
● night vision equipment<br />
● surveillance and tracking radar<br />
Game notes:<br />
● radar symbol:<br />
● ground radar priority: low
RUSSIAN TRANSPORT VEHICLES<br />
Type: Utility vehicle (truck)<br />
Ural-4320<br />
Recognition features:<br />
● high 6-wheeled truck chassis - 2 wheels in<br />
front, 4 at rear<br />
● low wide radiator grille, smooth curved tapering<br />
bonnet and short upright cab with backward<br />
sloping windshield, vertical faced mud guards<br />
over front wheels with integral headlights<br />
● high sided canvass covered cargo area to rear<br />
Type: Fuel tanker<br />
Ural-4320 Fuel Tanker<br />
Recognition features:<br />
● high 6-wheeled truck chassis - 2 wheels in<br />
front, 4 at rear<br />
● low wide radiator grille, smooth curved<br />
tapering bonnet and short upright cab<br />
with backward sloping windshield, vertical<br />
faced mud guards over front wheels with<br />
integral headlights<br />
● squat flat-sided curved-topped fuel tank<br />
at rear<br />
RECOGNITION GUIDE 7.34<br />
Game notes:<br />
● radar symbol:<br />
● ground radar priority: low<br />
Game notes:<br />
● radar symbol:<br />
● ground radar priority: low
7.35<br />
RECOGNITION GUIDE<br />
RUSSIAN WARSHIPS<br />
Type: Amphibious assault ship<br />
Kiev Class<br />
Recognition features:<br />
● slender hull with sharp raked bow profile and<br />
broad square front deck, angled square stern<br />
with stepped sunken aft deck sections<br />
● large cylindrical missile launch tubes on forward deck<br />
● angled flight deck overhangs port hull side<br />
● large angular multi-leveled starboard side<br />
superstructure, tall lattice mast with spherical<br />
radome aft of main radar dish, large angular<br />
funnel to rear, side-mounted radomes<br />
● numerous smaller radar sensors, missile<br />
launchers and gun turrets<br />
● stowed pilot boats in aft hull recesses<br />
Armament:<br />
● SA-N-4 Gecko radio command guided<br />
surface-to-air missiles<br />
● 30mm cannons ● 76mm gun<br />
Type: Frigate<br />
Krivak II Class<br />
Recognition features:<br />
● slender low-profile hull, raked bow with curved<br />
front deck, low flat sunken aft deck with broad<br />
curve to stern<br />
● large box-shaped missile launcher on forward<br />
deck with angular canted blast shields to fore<br />
● broad rectangular forward superstructure with<br />
large squat lattice mast and radar dishes atop<br />
● low aft superstructure with squat<br />
rectangular funnel<br />
● aft twin stepped gun turret arrangement<br />
Armament:<br />
● 100mm guns<br />
● SA-N-4 Gecko radio command guided<br />
surface-to-air missiles<br />
● SA-N-3 Goblet radio command<br />
guided surface-to-air missiles<br />
Game notes:<br />
● radar symbol:<br />
● ground radar priority: high<br />
● surface-to-air ceiling 5,000m<br />
● surface-to-air range 10,000m<br />
● air search radar<br />
Game notes:<br />
● radar symbol:<br />
● ground radar priority: high<br />
● surface-to-air ceiling 5,000m<br />
● surface-to-air range 10,000m<br />
● air search radar
RUSSIAN WARSHIPS<br />
Type: Hovercraft<br />
AIST<br />
Recognition features:<br />
● long and wide high-sided hull with curved<br />
upper edge and rounded overhanging bow<br />
section over loading ramp below, high-sided<br />
all-round inflatable skirt with enlarged curved<br />
bulge under bow door<br />
● twin forward-mounted gun turrets either<br />
side of bow<br />
● low and wide forward bridge section with<br />
squat lattice mast to rear, large low square<br />
structure amidships<br />
● aft mast-mounted twin pairs of face-to-face<br />
4-blade propeller sets forward of tall twin<br />
tail fins/rudders<br />
Armament:<br />
● 30mm cannons<br />
RECOGNITION GUIDE 7.36<br />
Game notes:<br />
● radar symbol:<br />
● ground radar priority: high<br />
● surface-to-air ceiling 1,000m<br />
● surface-to-air range 2,000m
7.37<br />
RECOGNITION GUIDE
8. APPENDICES
8.1<br />
APPENDICES<br />
Acronyms<br />
AAA Anti-Aircraft Artillery ("Triple A")<br />
AGM Air to Ground Missile<br />
AP Armour Piercing<br />
APC Armoured Personnel Carrier<br />
APU Auxiliary Power Unit<br />
ASE Air Survivability Equipment<br />
ATGM Anti-Tank Guided Missile<br />
CAP Combat Air Patrol<br />
CAS Close Air Support<br />
CP/G Co-Pilot/Gunner<br />
DTV Daylight TV<br />
DVO Direct View Optics<br />
ECM Electronic Countermeasures<br />
EO Electro-Optical<br />
FAC Forward Air Controller<br />
FARP Forward Arming And Refueling<br />
Point<br />
FFAR Folding Fin Aerial Rocket<br />
FLIR Forward Looking Infra-Red<br />
HE High Explosive<br />
HEAT High Explosive Anti-Tank<br />
HEDP High Explosive Dual Purpose<br />
HMS Helmet Mounted Sight<br />
HSI Horizontal Situation Indicator<br />
HUD Head Up Display<br />
IFV Infantry Fighting Vehicle<br />
IHADSS Integrated Helmet And Display<br />
Sighting System<br />
IR Infra-Red<br />
LLLTV Low Light Level TV<br />
LOAL Lock On After Launch<br />
LOBL Lock On Before Launch<br />
LOS Line Of Sight<br />
LZ Landing Zone<br />
MBT Main Battle Tank<br />
MFD Multi-Function Display<br />
MPSM Multi-Purpose Sub-Munitions<br />
MRLS Multiple Rocket Launch System<br />
NOE Nap Of the Earth<br />
NVG Night Vision Goggles<br />
PNVS Pilot Night Vision Sensor<br />
RWR Radar Warning Receiver<br />
SAM Surface to Air Missile<br />
SEAD Suppression of Enemy Air<br />
Defences<br />
TADS Target Acquisition and<br />
Designation System<br />
TOW Tube-Launched, Opticallytracked,<br />
Wire-guided<br />
TSD Tactical Situation Display<br />
TWD Threat Warning Display<br />
VSI Vertical Speed Indicator
Credits<br />
RAZORWORKS<br />
Design Team<br />
Kevin Bezant<br />
Todd Gibbs<br />
James Hobson<br />
Dave Lomas<br />
James Morris<br />
Dave Proctor<br />
Neil Roberts<br />
Matt Smith<br />
Voices<br />
Adam Longworth<br />
Monica Buferd<br />
Philip Bretherton<br />
Eric Meyers<br />
Music<br />
Alex Cable<br />
<strong>Manual</strong> Writing/Scenarios<br />
Nikolai Arturovich<br />
<strong>Manual</strong> Design<br />
Helen Morris<br />
Sound Effects<br />
Matinee Sound And Vision<br />
Mahendra Sampath<br />
<strong>Havoc</strong> Photographs<br />
Patrick Allen<br />
Beta Testers<br />
Richard 'Flexman' Hawley<br />
Steve 'Shodan' Harper<br />
Peter 'PeterSan' Jemmeson<br />
Roddy Kearey<br />
Frank Morissette<br />
Bernd Almstedt<br />
Nigel Doyle<br />
Mark Taylor<br />
Special thanks to<br />
Richard Huddy<br />
Tom Forsyth<br />
Peter Wilkinson<br />
Dave Cleland<br />
Flt.Lt. Matthew Alcock<br />
EMPIRE INTERACTIVE<br />
Development Manager<br />
Mark Havens<br />
Sales<br />
Adam Roberts<br />
Mark Scriven<br />
Volker Grünthaler<br />
Matt Castle<br />
Ezra Garside<br />
Marketing<br />
Alison Ryan<br />
Terry Shuttleworth<br />
Sevgi Kirik<br />
Paul Chapman<br />
PR<br />
Kate Johns<br />
Dawn Beasley<br />
Production<br />
Tony Bond<br />
Art Department<br />
Phil Goldfinch<br />
Clare Brown<br />
Gary Lucken<br />
Paul Flewitt<br />
Olga van Rosen<br />
Quality Assurance<br />
Darren Thompson<br />
Ben Moss<br />
Danny Rawles<br />
Alex Kyriacou<br />
Ben Jay<br />
Matthew Young<br />
Boyce Bailey<br />
Customer Services<br />
David Goodyear<br />
Customer Support<br />
Tristram Defries<br />
Stephen Wickes<br />
Clare O'Gorman<br />
APPENDICES 8.2
8.3<br />
NOTES
www.empireflight.com<br />
USG-APHAVCDRUK