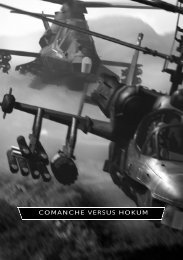
RAH-66 Comanche vs. Ka-52 Hokum - EECH Central
RAH-66 Comanche vs. Ka-52 Hokum - EECH Central
RAH-66 Comanche vs. Ka-52 Hokum - EECH Central

You also want an ePaper? Increase the reach of your titles
YUMPU automatically turns print PDFs into web optimized ePapers that Google loves.
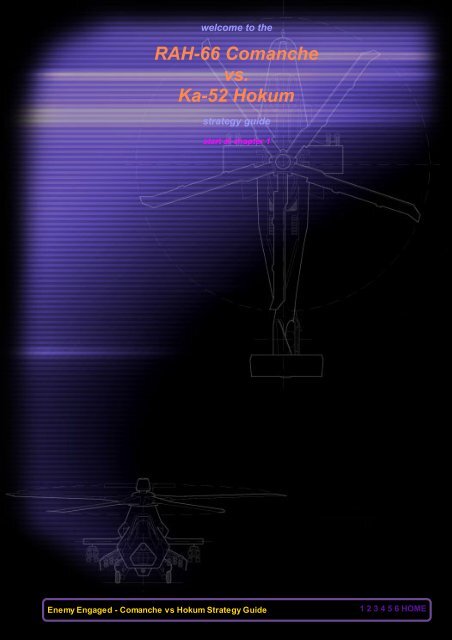
welcome to the<br />
<strong>RAH</strong>-<strong>66</strong> <strong>Comanche</strong><br />
<strong>vs</strong>.<br />
<strong>Ka</strong>-<strong>52</strong> <strong>Hokum</strong><br />
strategy guide<br />
start at chapter 1<br />
Enemy Engaged - <strong>Comanche</strong> <strong>vs</strong> <strong>Hokum</strong> Strategy Guide<br />
1 2 3 4 5 6 HOME
IN THIS CHAPTER<br />
1<br />
Introduction<br />
Gameplay Basics - Why Am I Here?<br />
Goldern Rules For Helicopter Combat Survival<br />
Joystick Control Configurations<br />
Real Apache Control Layout<br />
1.1 Introduction<br />
CHAPTER 1<br />
Like it's predecessor Apache Havoc, <strong>Comanche</strong> <strong>Hokum</strong> presents a live theatre of war populated by<br />
AI entities, each following their own set of orders and all interacting in complex and subtle ways. Understanding<br />
the nuances of the campaign is ultimately rewarding.<br />
This strategy guide does not assume familiarity with the previous Apache Havoc strategy guide, but<br />
does assume some knowledge of the basics of helicopter flight. If more basic help is required then<br />
study of the <strong>Comanche</strong> <strong>Hokum</strong> manual is a good place to begin.<br />
To get the best flight experience from a helicopter simulation it is highly recommended you use a joystick<br />
with a separate throttle controller and rudder pedals.<br />
This guide aims to provide insights into how the campaign operates, game mechanics, tactics, cheats<br />
and some information of how you can customise the simulation. Some of the information presented<br />
is duplicated in the Apache Havoc guide as the two simulations share basic elements. However<br />
since this guide is more recent, in the case of any discrepancies this guide should be considered<br />
overriding.<br />
Strategy Guide Updates<br />
Getting Started, Simulation Briefing<br />
Updates of this Strategy Guide may be found on the Razorworks web site at:<br />
http://www.razorworks.com/chguide (HTML)<br />
http://www.eechcentral.com/files/Manuals/EEAH strategy guide.pdf (PDF)<br />
1.2 Gameplay Basics - Why Am I Here?<br />
First a quick word about the world of <strong>Comanche</strong> <strong>Hokum</strong> and the entities that inhabit it. The mission<br />
and campaign system of <strong>Comanche</strong> <strong>Hokum</strong> is "reactive" - meaning that an action by one entity will<br />
often result in a reaction by another entity. Consequent actions by entities may in turn produce yet<br />
more actions. This fact is critical for the successful completion of campaign goals.<br />
Here is an example of this reactive intelligence: Should an attack helicopter engage a group of enemy<br />
tanks, those tanks will radio for assistance. A nearby base will generate a retaliation mission for<br />
any available aircraft at that base. Depending on what resources are available, the mission may be<br />
assigned to attack helicopters or fighters. Also, should helicopters come under fire from SAMs, a<br />
SEAD (suppression of enemy air defences) mission may generated, indeed you may be tasked to fly<br />
a SEAD mission for a computer controlled flight.<br />
Enemy Engaged - <strong>Comanche</strong> <strong>vs</strong> <strong>Hokum</strong> Strategy Guide<br />
1 2 3 4 5 6 HOME
It is very similar to its predecessor - Apache Havoc.<br />
You play the role of the pilot and to some extent the co-pilot in either the <strong>RAH</strong>-<strong>66</strong> <strong>Comanche</strong> or the<br />
<strong>Ka</strong>-<strong>52</strong> Havoc, and if you have the previous game installed you will also be able to fly the AH-64D<br />
Apache and MI-28 Havoc helicopters.<br />
1.3 Goldern Rules For Helicopter Combat Survival<br />
Basic rules for survival in helicopter combat:<br />
● NEVER, EVER forget your stand-off capability.<br />
● Never overfly dead targets. The one you missed will get you.<br />
● Keep low and slow when expecting enemy contact.<br />
● Leave the engagement area as soon as possible.<br />
Dead helicopters shouldn't have unused countermeasures or wing mounted ordnance. Use 'em or<br />
loose 'em. Chaff bundles are no good to you once you have been shot down.<br />
Once you initiate an attack at close range, carry it though and prosecute the enemy as *fast* as possible.<br />
Seconds really do count.<br />
1.4 Joystick Control Configurations<br />
The Enemy Engaged - <strong>Comanche</strong> <strong>vs</strong>. <strong>Hokum</strong> CD has a number of configurations for various kinds of<br />
joysticks and controllers. These are not installed to your hard disk and remain in the "JOYSTICK" folder<br />
on the CD.<br />
Special Keys for Programmable Joysticks<br />
Enemy Engaged - <strong>Comanche</strong> <strong>vs</strong>. <strong>Hokum</strong> and Apache Havoc sensor mode keys use the six gray edit<br />
cluster keys (Insert, Home, Page Up etc.), some programmable joysticks have difficulty handling these.<br />
Thrustmaster joysticks can use press and release RAW codes to handle these. But to circumvent<br />
this problem, duplicate sensor controls not marked on the keyboard overlay are available:<br />
● SHIFT 1 - Ground Radar<br />
● SHIFT 2 - Air Radar<br />
● SHIFT 3 - HMS<br />
● SHIFT 4 - FLIR<br />
● SHIFT 5 - DVO<br />
● SHIFT 6 - DTV<br />
In addition...<br />
● SHIFT 0 - Toggle Transparent Cockpit<br />
● ALT V - Snap to cockpit view 1<br />
● ALT B - Snap to cockpit view 2<br />
● ALT N - Snap to cockpit view 3<br />
Enemy Engaged - <strong>Comanche</strong> <strong>vs</strong> <strong>Hokum</strong> Strategy Guide<br />
1 2 3 4 5 6 HOME
Sticky Keys / Loss of Key Response<br />
If you seem to experience a loss of key control when using programmable joysticks - try increasing<br />
the rate at which the joystick sends it's key commands using it's software where applicable. Thrustmaster<br />
programs can specify this using the RATE command in the program file. The loss of keyboard<br />
response is due to the joystick button RELEASE code being quickly overwritten by a new key<br />
PRESS code. So the keyboard can think that a modifier key such as SHIFT or CTRL or ALT is still<br />
being held down. Pressing and releasing these keys on the keyboard will restore normal keyboard<br />
operation.<br />
For Thrustmaster joysticks, setting the RATE to 20 (20 microseconds) generates characters very<br />
quickly. The lower the number, the faster the setting.<br />
"I Prefer My Own Configuration - What Commands Should I Program?"<br />
Very much a matter of personal preference, given that most joysticks have some kind of HAT for<br />
view panning (as of version 1.1e the panning no longer snaps back to a target making it easier to<br />
use).<br />
Here are my list of favorites (in order of preference):<br />
● Weapon Ccle<br />
● Air and Ground Radar Modes / IHADSS mode<br />
● Flares (and or chaff)<br />
● Cyclic Trim and Clear Trim<br />
● CTRL and arrow key cockpit view stepping<br />
Well there are more but the above represents the basic flight and survival commands you will need.<br />
If you can program a key series on one button then a single button that releases both a FLARE and<br />
CHAFF bundle will help you survive a lot longer.<br />
Cyclic Trim - like in Apache Havoc - does have it's uses, it makes steady flying much easier. Trim<br />
the input several times to adjust for wind, roll or maintaining a hover helps lighten your stick workload.<br />
That is what it is there for - real pilots use it, you can too.<br />
Enemy Engaged - <strong>Comanche</strong> <strong>vs</strong> <strong>Hokum</strong> Strategy Guide<br />
1 2 3 4 5 6 HOME
For reference, here are the control positions of the real Apache AH-64A pilot controls.<br />
A number of joystick configurations are provided on the simulation CD.<br />
CAUTION<br />
Windshield wipers should not be operated when canopies<br />
are dry. Scratches may result.<br />
Enemy Engaged - <strong>Comanche</strong> <strong>vs</strong> <strong>Hokum</strong> Strategy Guide<br />
1 2 3 4 5 6 HOME
IN THIS CHAPTER<br />
2<br />
CHAPTER 2<br />
Campaigns<br />
Introduction - AH & CH Campaign Differences<br />
Campaign Objectives<br />
Capturing a Base<br />
Anatomy of an Airbase<br />
Recon Photos<br />
FARPs Forward Area Refuelling Points<br />
Base Efficiency, Damage & Repair<br />
Base Supply Levels<br />
2.1 Introduction - AH & CH Campaign Differences<br />
There are three campaigns supplied with Enemy Engaged <strong>Comanche</strong> verses <strong>Hokum</strong> and three more<br />
if Apache Havoc is installed.<br />
The new campaigns take place in smaller areas however the terrain mesh is more detailed allowing<br />
for more tactical masking opportunities. The entity AI and campaign flow logic is also improved. These<br />
improvements in logic and flow transfer to the older and much bigger Apache Havoc campaigns<br />
giving them a new lease of life.<br />
Each campaign has a number of very specific objectives : on the campaign map, the SIT-REP<br />
screen displays the status of these objectives. Each objective requires the destruction or capture of<br />
the indicated base or facility.<br />
Apache Havoc campaigns are different, these are mostly a war of attrition, requiring enemy force levels<br />
to be pounded below specific levels and sectors captured by flying into them. For more details<br />
on Apache Havoc campaigns see the Apache Havoc Strategy Guide. Or look on the StrategyGuide<br />
directory on the simulation CD.<br />
All campaigns have a finite number of vehicles and aircraft. As they are destroyed, replacement vehicles<br />
or aircraft are requested from the reserves. Reserves "appear" in the 3D game world at special<br />
airbase buildings. This is covered in more detail later.<br />
2.2 Campaign Objectives<br />
To achieve campaign victory you need to accomplish a number of primary objectives which are different<br />
each time you start a campaign. Usually you are required to capture a specific enemy base or<br />
airstrip.<br />
Enemy Engaged - <strong>Comanche</strong> <strong>vs</strong> <strong>Hokum</strong> Strategy Guide<br />
1 2 3 4 5 6 HOME
For example:<br />
figure 2-1: Campaign Objectives and Force Balance<br />
Clicking on an objective will switch to the map display so you can identify its location. On the campaign<br />
map, Objectives are marked by black border lines, see the following example.<br />
figure 2-2: Typical Objective Icon<br />
You won't find getting to some of the objectives easy. The large airbases are often heavily defended<br />
by surrounding military bases and deep inside enemy territory. Concentrate on nibbling away at perimeter<br />
defences, this clears the way for follow-up missions. Capturing surrounding FARPs can be beneficial<br />
as this can help establish a foothold from which to launch deeper probes into enemy territory.<br />
But avoid capturing non essential Military Bases, this can take valuable time and needlessly use up<br />
vital assets through combat losses which could be used on more pressing targets.<br />
Overall, priority should be given to eliminating air defences (SAMs and FARPs) and driving towards<br />
the most heavily defended objective as early as possible. The most basic campaign is the desert based<br />
"Sword In The Sand".<br />
Enemy Engaged - <strong>Comanche</strong> <strong>vs</strong> <strong>Hokum</strong> Strategy Guide<br />
1 2 3 4 5 6 HOME
figure 2-3: Sword In The Sand, Blue Force push<br />
This shows the main Blue Force thrust, a succession of FARPs are captured, closing toward the target<br />
airbase deep in enemy territory.<br />
2.3 Capturing a Base<br />
Capturing a base requires three things:<br />
Step 1<br />
The base is attacked and severely damaged. A successful strike mission (either planned or opportunity)<br />
will generate a follow-up strike mission or a BDA (battle damage assessment) mission.<br />
Step 2<br />
Secondly, a follow-up BDA (recon) mission must confirm target is inoperative.<br />
Step 3<br />
Finally, a "Troop Insertion" mission is created. Once the troops land in the base, the installation is<br />
captured.<br />
Large military airfields are sources of resupply and can bring a great deal of firepower down on any<br />
nearby FARPs you establish or capture.<br />
Once BDA reconnaissance of a damaged base has been completed (and it must be successful) the<br />
capture mission will be scheduled. Of course there must be the appropriate helicopter assets available<br />
for the Troop Insertion; Red force will use Hinds, Blue force require Blackhawks. A scheduled<br />
Troop Insertion will remain unassigned until assets have been allocated.<br />
Enemy Engaged - <strong>Comanche</strong> <strong>vs</strong> <strong>Hokum</strong> Strategy Guide<br />
1 2 3 4 5 6 HOME
figure 2-4: The O.O.B. bar will<br />
show waitingTroop Insertion and<br />
other missions.<br />
To see if any insertion missions have been scheduled, on the map screen click the O.O.B button<br />
(above the Mission/Group selector) and scroll down the list for Troop Insertion (click on it to view the<br />
dust-off and LZ points on the map) or you can click on the mission button right of the map and<br />
search for yourself.<br />
Not all Troop Insertion missions are successful, the difficulty of capture is determined by the base<br />
"efficiency" level. The more damage done to a base, the lower the efficiency. See section 2.6 below<br />
for more details.<br />
2.4 Anatomy of an Airbase<br />
Damaging or capturing enemy air bases are vital for a successful campaign outcome. Not only are<br />
airbases typically primary objectives, but they are also the source of replacement aircraft, supplies<br />
and ground vehicles.<br />
Begin the Engagement - Perimeter Defences<br />
When you attack a base, your priority should be the surrounding SAM defences. It is wise to set your<br />
radar priority filter to HIGH on approach. This will pick out the SAM "triangles", kill all of them first.<br />
You will hear search radar warning tones when you begin to attack so make sure you attack from a<br />
maskable position - a place you can duck down and hide from incoming missiles.<br />
Enemy Engaged - <strong>Comanche</strong> <strong>vs</strong> <strong>Hokum</strong> Strategy Guide<br />
1 2 3 4 5 6 HOME
Notes for engaging from a hover<br />
Use Hover Hold to help maintain location, if you have a throttle controller, you can still<br />
operate this to move up and down. Move it GENTLY as excessive downward motion<br />
may not be correctable and upward motion may give you too much altitude and cause<br />
you to panic and drop the throttle - again causing a crash.<br />
There is another version of Hover Hold called Stable Hover Hold, this overrides the<br />
throttle controller and maintains the altitude at moment it was engaged. Both version<br />
can take a little while for the flight computer to dampen out any motion. With EXPERT<br />
avionics they will only work when flying below 20 knots. Personally I prefer NOT to use<br />
the automatic flight assist modes but instead use the stick-trim (T and SHIFT T) to<br />
maintain a stable hover.<br />
Key Airbase Buildings - Interior Assault<br />
Once the perimeter air defence vehicles are destroyed proceed into the airbase perimeter.<br />
Airbases have special buildings called "generators". These special hangers serve to resupply the<br />
campaigns operational pool of aircraft when they get shot down. The campaigns resource pool is a<br />
finite number of specific aircraft types for that theatre. The maintenance sheds serve as the "portal"<br />
between the aircraft pool and the 3D world. Occasionally you may notice helicopters or fighters<br />
emerging from the doors of these hangers.<br />
● Vehicle Garage - spawns replacement land vehicles<br />
● Helicopter Hanger - replacement helicopters emerge from these<br />
● Generator Building - replacement fixed wing aircraft<br />
For such airfield busting missions I recommend the pilot arm their helicopter with as many rocket<br />
pods as they can fit. Rockets instead of air-to-ground guided missiles will do much more damage to<br />
an airfield. The smaller buildings can be damaged with just two standard Hydra rockets. Although<br />
hardened hangers may require two or three Hellfire or Vikhr ATGMs. Use your wingmen, order them<br />
to attack specific structures.<br />
PRIORITY TARGET - VEHICLE GARAGE<br />
Enemy Engaged - <strong>Comanche</strong> <strong>vs</strong> <strong>Hokum</strong> Strategy Guide<br />
1 2 3 4 5 6 HOME
If you can, locate and destroy the vehicle generator building as soon as possible. Once you have destroyed<br />
the airbases perimeter SAM vehicles or parked SAM vehicles, new SAM vehicles may emerge<br />
while you are nearby.<br />
Reserve forces emerging from the vehicle garage will park up outside before driving off to join frontline<br />
forces.<br />
PRIORITY TARGET - HELICOPTER HANGER<br />
Destroy this and you will stop replacement helicopters arriving at nearby FARPs and in turn help protect<br />
your ground forces. They are typically found near the helicopter pads. For location examples,<br />
please refer to the recon photographs below.<br />
PRIORITY TARGET - GENERATOR BUILDING / AIRCRAFT SERVICE HANGER<br />
These come in a variety of shapes but tend to be the larger buildings located near the runways or<br />
parking apron. They spawn replacement fighters and transport fixed wing aircraft from the reserve<br />
pool. Destroying these will hamper enemy air efforts.<br />
Enemy Engaged - <strong>Comanche</strong> <strong>vs</strong> <strong>Hokum</strong> Strategy Guide<br />
1 2 3 4 5 6 HOME
Recon Photographs - (Lebanese Airfields)<br />
As mentioned above, your priority targets are the vehicle respawn structures. These buildings are<br />
marked on the intelligence photos below.<br />
The airfields shown here are fairly typical. There are many other base layouts including dirt strips in<br />
the campaign areas. Only three are presented below. Dirt strips do not have any generator buildings.<br />
The "sector" is the map grid co-ordinate.<br />
Enemy Engaged - <strong>Comanche</strong> <strong>vs</strong> <strong>Hokum</strong> Strategy Guide<br />
1 2 3 4 5 6 HOME
Enemy Engaged - <strong>Comanche</strong> <strong>vs</strong> <strong>Hokum</strong> Strategy Guide<br />
1 2 3 4 5 6 HOME
(The recon photos are standard screen-shots, colour desaturated with labels added by hand.)<br />
2.5 FARPs Forward Area Refuelling Points<br />
FARPS are easy pickings, mostly consisting of soft vehicles, mules and external power units that<br />
can be destroyed with the cannon. Even better if you can catch them with aircraft on the ground.<br />
Although a single ATGM, Hellfire or Vikhr, directed at the fuel supply will take out about half the<br />
FARP. Locate a collection of small fuel tanks or a mule near a group of tents.<br />
2.6 Base Efficiency, Damage & Repair<br />
Efficiency<br />
Each structure at a base (structures such as tents, trucks, hangers, mules etc.) contributes a certain<br />
amount towards the "efficiency" of the base. Structures like control towers and hangars are more important<br />
than tent or sheds etc.<br />
When buildings are destroyed the efficiency of the base drops, and it requests a repair task. When<br />
the "engineers" arrive via the transport aircraft the base slowly starts repairing and the efficiency rises<br />
accordingly.<br />
If the efficiency falls below a certain threshold (which just so happens to be 33%) then the base is<br />
considered "Out Of Action". When this happens the rate at which missions from that base are assigned<br />
is significantly decreased so it becomes less useful to the war effort.<br />
The efficiency level also determines the outcome of troop insertion missions against a base. Not all<br />
troop insertion missions result in a successful capture. Basically, the lower the base efficiency the<br />
higher the probability of the base being captured. A fully repaired base will always manage to repel<br />
the invading forces, whereas an "Out Of Action" base will nearly always be captured. Troop Insertion<br />
missions are only generated against bases with low efficiency, but of course the base can repair<br />
itself quite a bit while the assault helicopters are en route.<br />
Damage & Repair<br />
Once a base (airbase or FARP) is damaged to the point where it is marked "Out Of Action", it will require<br />
special equipment to arrive by transport. Transports helicopters carry out these "Repair Missions".<br />
Once they have arrived, repairs will begin. The amount of time need to repair a base will vary,<br />
it depends on what has been damaged.<br />
Individual items (tents, trucks, mules) require a certain amount of time to repair. A tent or shed takes<br />
2 minutes, whereas a hanger or control tower takes 10 minutes. Repairs are done one at a time. A<br />
really badly damaged FARP may take 15 to 20 minutes to repair. A badly damaged airbase may<br />
take 1 or 2 hours.<br />
2.7 Base Supply Levels<br />
Whenever an aircraft lands at a base after a mission, fuel and ammo is removed from the base stores.<br />
When a base supply level drops below a certain value, it calls in a "Supply Mission".<br />
Enemy Engaged - <strong>Comanche</strong> <strong>vs</strong> <strong>Hokum</strong> Strategy Guide<br />
1 2 3 4 5 6 HOME
Large transport aircraft located at the bigger airbases takeoff and drop supplies by parachute onto<br />
the base. Supply drops may be either of fuel OR ammo, not both. A base may require two drops to<br />
fully restock.<br />
CAUTION<br />
Do not use APU 95% cold start switch when the ambient<br />
temperature is above 0° F C-18° C). Use of this switch will<br />
reduce the power takeoff (PTO) clutch life drastically, and<br />
could cause premature failure of the clutch duplex bearing/<br />
needle bearing as well as main transmission accessory<br />
gear case component failure.<br />
Enemy Engaged - <strong>Comanche</strong> <strong>vs</strong> <strong>Hokum</strong> Strategy Guide<br />
1 2 3 4 5 6 HOME
IN THIS CHAPTER<br />
Air To Air Combat - Helicopters<br />
Air To Air Combat - Fast Movers<br />
Infantry – MANPADS<br />
Dual Cockpit View Memory<br />
Padlock Waypoint – Multipurpose<br />
3.1 Air To Air Combat - Helicopters<br />
Success in helicopter air-to-air combat requires putting your nose (and hence weapon systems) onto<br />
the target while denying the enemy the same privilege. Helicopters are not very fast and don't have<br />
the speed to run away from fights once they have begun. Either you use available terrain to mask an<br />
escape - or you stand and fight.<br />
There are basic rules to keep in mind when engaging in air-to-air combat. Some of which are covered<br />
in this chapter.<br />
Remember<br />
CHAPTER 3<br />
Combat & Situational Awareness<br />
The best attack position is above and behind on the six-o'clock<br />
Ambush your foe wherever possible, the terrain of Enemy Engaged allows a pilot to exploit landscape<br />
features such as small depressions, dried up riverbeds, gullies and saddles. You can hide in such<br />
locations and wait for enemy helicopters to pass-by. Once an enemy exposes their rear, unmask,<br />
lock on with the helmet mounted sight (HMS), close to within 0.5km from above and use the cannon.<br />
That is the ideal situation and terribly sneaky hence satisfying for a combat helo pilot.<br />
AI entities will not actively engage you if you are not perceive as a threat or their mission target. If<br />
they are on Combat Air Patrol or have been called in by other forces that perceive you as a threat<br />
force then expect some form of response.<br />
Usually firing at an enemy AI will alert them immediately to your intentions and respond if they are<br />
able to do so (they could be out of ammunition or fixated on another target).<br />
Often you can easily sneak up behind a flight of enemy helicopters and start blasting at near pointblank<br />
range.<br />
A Hellfire or Vikhr missile has enough explosive power to destroy two or three helicopters with one<br />
good hit. If your targets wingmen are close, they will be caught in the blast. Laser guided weapons<br />
work best, these are difficult to spoof.<br />
Enemy Engaged - <strong>Comanche</strong> <strong>vs</strong> <strong>Hokum</strong> Strategy Guide<br />
3<br />
1 2 3 4 5 6 HOME
Close In – Gunfights<br />
Most of the time computer AI aircraft engage with missiles and not the cannon, so the following section<br />
mostly applies to combat with human pilots.<br />
Helicopter cannons are mounted in such a way they shoot DOWN and have little positive travel in<br />
the vertical axis. An enemy will find it much much harder to aim the cannon on a target above them.<br />
In order to do so the pilot will be forced to raise the nose of the helicopter thus slowing the helicopter<br />
down (bleeding energy) and most likely gaining altitude risking exposure to surface to air threats. A<br />
helicopter doing this can become a sitting duck but it is often the best defence against single fighters<br />
which will be discussed later.<br />
In a close-in flight, helicopters with a turreted nose cannon have a clear advantage. The victor will be<br />
the first who can achieve a good gun track. A steady burst of 20 or 30mm cannon rounds at close<br />
range will bring down or severely cripple a helicopter.<br />
Ambush your foe wherever possible, the terrain of <strong>Comanche</strong> <strong>Hokum</strong> allows a pilot to exploit small<br />
depressions and gullies. You can hide in these locations and wait for enemy helicopters to pass-by.<br />
Once they expose their rear, unmask, lock on using the helmet mounted sight (HMS) close to within<br />
0.5km and use the cannon.<br />
The moment you open fire, your opponents will begin a tight turn to respond - but it should be already<br />
too late.<br />
Head-On Closure - "Crossing the Stream"<br />
In a head-on engagement, your opponent is located between your 10 to 2 o'clock position. If you<br />
within cannon range of 1.5km and are out in the open you should press the attack.<br />
To determine if an AI entity is engaging you, switch to "Player Target" view - look at the object<br />
text, if you see "Task Attacking" and the noes of the aircraft is facing away from the screen then<br />
that is a sure sign the AI is coming for you. This view always orients so that you are in the middle<br />
of the screen in the background and the target in front.<br />
All cannon fire is shot in bursts of varying duration depending on the shooter. It is aimed directly towards<br />
the target - thus if a target helicopter is flying directly away or towards incoming fire, from the<br />
shooters point of view the target is not moving. A non-moving target is very easy to hit.<br />
You can drastically reduce the Pk (probability of kill) by "crossing the stream", flying at or near perpendicular<br />
to the incoming fire. Speed is essential, that puts air between where you ARE and where<br />
you WERE. And incoming cannon shells are aimed at where you WERE.<br />
Verses the <strong>Hokum</strong> - "Cross & Close"<br />
Flying against the <strong>Ka</strong>-50/<strong>52</strong> presents another opportunity. The Cannon is mounted on the starboard<br />
side and has limited travel - the arc to the port side is blocked by the nose of the helicopter. Therefore<br />
approaches on this side of the helicopter are effectively masked forcing the <strong>Hokum</strong> pilot to pedal<br />
turn (something which the <strong>Ka</strong>-50/<strong>52</strong> can do rather rapidly) towards the attacker.<br />
But as the range and offset between the attacker and the <strong>Hokum</strong> decreases, the angle of turn required<br />
for the <strong>Hokum</strong> to bring guns to bare changes steeply forcing a faster turn. This has the same net<br />
effect as "Crossing the Steam".<br />
Crossing from the right to the left of the <strong>Hokum</strong> affords another advantage, a turreted cannon can return<br />
fire throughout the manoeuvre.<br />
Enemy Engaged - <strong>Comanche</strong> <strong>vs</strong> <strong>Hokum</strong> Strategy Guide<br />
1 2 3 4 5 6 HOME
3.2 Air To Air Combat - Fast Movers<br />
By far the most dangerous of air threats is the enemy fighter. Their high speed allows them to approach,<br />
engage and extend out of range of your air to air missile systems. Your helicopters air search<br />
radar can take several seconds to conduct a full 360-degree sweep. In that time, the enemy aircraft<br />
can cover a maximum of 2km before you even know it’s there.<br />
The best way to stay alive is simply avoid direct confrontation with enemy fighters, particularly air superiority<br />
fighters.<br />
A single attack helicopter against a single fighter is a winnable situation, engaging two fighters is<br />
pushing the odds, however ground attack fighters are much more vulnerable than air superiority or<br />
multi-role fighter aircraft. An engagement against more than two fighters without support from friendly<br />
units and you are seriously outgunned. Face facts - there are situations that should be avoided,<br />
getting into a furball against six Mig-29s and Su-33s is one of them.<br />
Avoid "Kill" or "Danger Zones"<br />
The most dangerous areas are near enemy airbases or "hot" areas of enemy activity. Examining<br />
trends can identify "Hot" areas, how often fighters are observed patrolling those areas. Killing zones<br />
around enemy airbases are particularly dangerous.<br />
When an engagement in this danger area has begun, it’s quite probable that additional air support is<br />
being readied at the nearby airbase. Given your proximity to the base you will have little time to "get<br />
out of Dodge" before reinforcements arrive, this is what makes the area so dangerous. In fact this<br />
zone can extend up to 32km from an enemy airbase (effective radio range).<br />
Enemy Engaged - <strong>Comanche</strong> <strong>vs</strong> <strong>Hokum</strong> Strategy Guide<br />
1 2 3 4 5 6 HOME
Defensive Positioning and Air Combat Manoeuvring<br />
While fighters are formidable opponents the well-flown attack helicopter is not defenceless. The helicopter<br />
has a major turning advantage.<br />
If the terrain allows the pilot should elect to deploy to cover, hiding in a terrain feature that masks the<br />
helicopter. From such a position it may be possible to call for help and slip away at NOE altitude.<br />
However when terrain does not provide enough cover you may have to resort to more aggressive<br />
Manoeuvring.<br />
A fighter requires that it position you on its nose for a missile or gunshot. The most dangerous place<br />
to be is within the 120 degree "funnel" extending out from the fighters’ nose. As the fighter approaches<br />
and closes to engage, the helicopter can turn into the fighter and dive, this closes the distance<br />
and manoeuvres you out of the "funnel". By turning into the fighter and diving, you force the fighter to<br />
increase its dive angle, the fighter pilot will have to break off earlier to escape from the manoeuvre.<br />
Once the fighter has passed by it will attempt to extend and turn for a second pass leaving the fighter<br />
vulnerable for a few seconds. The danger here is that the attack helicopter bleeds too much<br />
speed while turning to track the passing fighter. If this happens the helicopter becomes and easy target<br />
while it is sitting in the air.<br />
General rules are:<br />
● Turn into the fighter and dive.<br />
● Try and maintain high forward air speed<br />
● Shoot 'em in the ass, with cannon as they pass - if possible.<br />
3.3 Infantry – MANPADS<br />
Another threat you will have to deal with is the man portable air defence systems or MANPADS, namely<br />
infantry with SAMs. These are scattered all over, around factories, refineries, power-stations<br />
and in city streets. They tend to be located near landmarks, look out for small objects on the ground.<br />
Use your helmet mounted display to try and pick them up.<br />
Enemy Engaged - <strong>Comanche</strong> <strong>vs</strong> <strong>Hokum</strong> Strategy Guide<br />
1 2 3 4 5 6 HOME
Example MANPAD locations...<br />
If you are flying over city streets and hear your ASE warning or your wingman suddenly expire, then<br />
you know you've got trouble with some of these guys.<br />
3.4 Dual Cockpit View Memory<br />
This simulation allows you to occupy either crew position. While there is no control functionality advantage<br />
to be gained from occupying a specific seat, each position has independently configurable<br />
MFDs.<br />
The Moving Map display may be set to different ranges for the pilot and gunner.<br />
The greatest advantage the dual cockpit system has to offer is that each position remembers your<br />
view mode. So the rear seat may use a "padlock" view (such as padlock waypoint) while the front<br />
seat is for general use, simply hitting the ESC key will toggle between the two views. This also extends<br />
to F3 & F4 zoomed MFD views. You can use this "view memory" to quickly switch between<br />
forward and heads down.<br />
Enemy Engaged - <strong>Comanche</strong> <strong>vs</strong> <strong>Hokum</strong> Strategy Guide<br />
1 2 3 4 5 6 HOME
3.5 Padlock Waypoint – Multipurpose<br />
ESCORT Missions<br />
When escorting a flight, the "action" or "X" waypoint will always be the escorted flight. Use "Padlock<br />
Waypoint X" to quickly locate it.<br />
Landing<br />
After mission completion, the last waypoint will be your landing spot. Use "Padlock Waypoint" to find<br />
your landing matt / pad.<br />
WARNING !!!<br />
The pilot and CPG shall perform their armament safety<br />
check prior to entering the forward area refuelling point<br />
(FARP). Radio transmissions shall be limited to EMER-<br />
GENCIES ONLY until refuelling has been completed.<br />
Enemy Engaged - <strong>Comanche</strong> <strong>vs</strong> <strong>Hokum</strong> Strategy Guide<br />
1 2 3 4 5 6 HOME
IN THIS CHAPTER<br />
4<br />
CHAPTER 4<br />
Stealth, Sensors, Weapons & Countermeasures<br />
<strong>RAH</strong>-<strong>66</strong> <strong>Comanche</strong> LO (low observability)<br />
Simulating Stealth<br />
Radar / FCR Operation<br />
Radar Information Filters Part I - Threat Priority<br />
Radar Information Filters Part II - Air Radar ENEMY / IFF Filter<br />
Radar Line Of Sight<br />
Sweep Periods<br />
Optical Systems<br />
Advantages Over Radar Acquisition<br />
Helmet Mounted Sight / IHADSS<br />
FLIR, DTV, DVO, LLLTV, PERISCOPE<br />
Advanced Gunnery<br />
<strong>Comanche</strong> & Apache Specific Launch Modes<br />
Rapid Fire Missile Attack Mode (Hellfire, Vikhr and Attacka)<br />
Why should you want to perform such an attack?<br />
Target Persistence - Destroyed Targets can still appear on Radar<br />
Method<br />
Best targets for this attack mode are:<br />
Armour Protection<br />
Ballistic Weapon Attack Modes<br />
Hover Fire<br />
Running Fire with Rockets (or cannon)<br />
Diving Fire with Rockets<br />
Spoofing IR and Radar Guided Missiles<br />
Manual Countermeasure Launching<br />
Accuracy<br />
Ground clutter<br />
Exploit Lead Pursuit<br />
4.1 <strong>RAH</strong>-<strong>66</strong> <strong>Comanche</strong> LO (low observability)<br />
It's generally thought that the <strong>RAH</strong>-<strong>66</strong> is a stealth helicopter,<br />
invisible to radar; this is a common misconception. Stealth is<br />
not magic bullet or piece of hardware, it is really a set of specifications<br />
or "low-observable" concepts which together reduce<br />
the visibility of the helicopter.<br />
The <strong>Comanche</strong>'s visibility to enemy radar depends on how<br />
"clean" the helicopter is. With gear down, gun deployed and<br />
open weapon-bay, the <strong>Comanche</strong> is just as visible to enemy<br />
radar as any conventional helicopter.<br />
Most helicopters are naturally "stealthy" by their low flying<br />
nature and using the terrain to mask themselves.<br />
No hi-tech fuselage or radar absorbing material can match<br />
the stealth properties afforded by a large hill between a radar and an aircraft.<br />
Enemy Engaged - <strong>Comanche</strong> <strong>vs</strong> <strong>Hokum</strong> Strategy Guide<br />
1 2 3 4 5 6 HOME
The <strong>Comanche</strong>'s main mission role is reconnaissance. In the recon role, the <strong>Comanche</strong> flies in a<br />
clean (wingless) configuration which greatly reduces the amount of radar energy it reflects.<br />
The LO properties of a clean "buttoned up" <strong>Comanche</strong> allow it to get much closer to a target without<br />
being detected - but once the gunship goes "hot" then it becomes much more visible. You either<br />
have to keep quiet and then go for a surprise attack (shoot & scoot) or retreat to a stand-off position<br />
before arming and firing.<br />
The act of arming weapons (even the cannon) results in the weapon bay opening and thus potentially<br />
giving away your presence.<br />
Simulating Stealth<br />
To simulate the effects of stealth characteristics, a lo-observable platform is only visible to search radar's<br />
at closer ranges than other platforms. The net effect is that the scan ranges of other vehicles<br />
are reduced. i.e.. a vehicle with a 10Km scan range will detect the <strong>Comanche</strong> at 1.5Km<br />
The "stealth value" of the <strong>Comanche</strong> is based on its configuration. For each possible configuration<br />
there is a cumulative reduction of visibility:<br />
a) Stub wings attached no stealth<br />
b) Gear up -35% reduced visibility<br />
c) Bay doors shut -50% reduced visibility<br />
e) Radar On +10% increased visibility<br />
f) IR or ECM Jammer On +10% increased visibility<br />
Normal Visibility<br />
Gear Up<br />
Bay Doors Shut<br />
Detection Range Modifier<br />
%<br />
100<br />
-35<br />
-50<br />
15 (percent)<br />
Therefore if the <strong>Comanche</strong> is all tucked into bed, with no radar or jammer emissions, your radar signature<br />
will be reduced to a minimum of 15%. Therefore a Mi-28N Havoc with a scan range of 6km<br />
will only detect the <strong>Comanche</strong> at 900 meters. For a list of vehicle scan ranges, see Chapter 5.<br />
All aircraft have 100% radar sig except the <strong>Comanche</strong>.<br />
4.2 Radar / FCR Operation<br />
The radar systems modelled for both the Blue and Red Force helicopters are near identical in functionality.<br />
The only real difference being the maximum detection range.<br />
There are subtle methods of operating the radar which enable special forms of missile attack and<br />
can increase the crews awareness and survivability.<br />
Simplification of the radar systems were made for the Enemy Engaged series for reasons of accessibility<br />
and balancing the gameplay between the two opposing forces. The older Mi-28N Havoc does<br />
not have the luxury of shared electronic battlefield information displays such as the Tactical Situation<br />
Display modes of the Apache and <strong>Comanche</strong>.<br />
In multiplay, it is possible to share target information with human players, but this is not possible with<br />
computer AI controlled entities.<br />
Enemy Engaged - <strong>Comanche</strong> <strong>vs</strong> <strong>Hokum</strong> Strategy Guide<br />
1 2 3 4 5 6 HOME
Radar Information Filters Part I - Threat Priority<br />
Use the radar priority filter.<br />
The Longbow Fire Control radar system used in the Apache and <strong>Comanche</strong> (the <strong>Hokum</strong> and Havoc<br />
use similar systems) has the ability to reduce "operator overload" - the display can filter out certain<br />
object types. In real life operation, a reflected radar signal is digitally processed by a black box, due<br />
to the wavelength of the radar it can be processed in such a way as to derive basic structure information<br />
from the reflected energy. This feature is modelled to a small degree in Enemy Engaged.<br />
The radar can determine if the object is a wheeled or tracked vehicle. Also it can detect a "turret"<br />
structure such as those commonly found on tanks. Using this information, the avionics automatically<br />
classify detected objects and assign them a potential "threat priority" value.<br />
The radar symbol used in Enemy Engaged is the result of this information. Each detected object is<br />
assigned a LOW, MEDIUM or HIGH threat priority.<br />
● High threat priority is given to anti-aircraft vehicles such as mobile SAM launchers which are<br />
of immediate concern to the helicopter crew.<br />
● Medium is reserved for armoured vehicles such as tanks and personnel carriers.<br />
● Low is assigned to everything else, basic trucks, cars, well defined structures.<br />
Enemy Engaged permits the radar operator to set the threat priority level, this will only display those<br />
targets that fall within the selected classification.<br />
figure 4-1: The target filter set to display<br />
onlyHIGH category - SAMs vehicles.<br />
This feature is extremely invaluable when engaging armoured columns. When the targets are so closely<br />
grouped together presenting many targets in such a small area - it is desirable to eliminate the<br />
surface to air defences before they can engage you.<br />
By setting the threat filter to HIGH, only those SAMs in the armoured column will be displayed and<br />
targeted by the radar. Also, by targeting only medium threat objects, you can ensure you do not waste<br />
valuable missiles on non-priority targets.<br />
The priority filter reduces the time spent identifying and cycling through objects and can be used in<br />
conjunction with a high re-sweep rate to rapidly degrade enemy response at the beginning of an engagement.<br />
Radar priority settings have no effect in optical sensor modes.<br />
Enemy Engaged - <strong>Comanche</strong> <strong>vs</strong> <strong>Hokum</strong> Strategy Guide<br />
1 2 3 4 5 6 HOME
Radar Information Filters Part II - Air Radar ENEMY / IFF Filter<br />
This filter (only activated while the air radar is active) only displays enemy air contacts on the display.<br />
You could consider this as contacts which did not return an automatic response to a coded IFF<br />
(Identify Friend or Foe) interrogation signal. You may want to activate this as part of your startup routine.<br />
Radar Line Of Sight<br />
figure 4-2: The "Enemy" contact<br />
filter ofthe air radar.<br />
The LOS indicator in the "high action display" or HUD is very important when using the radar pre or<br />
post missile attack.<br />
When a missile hits and destroys a target, the radar will continue to display that target until it has<br />
been re-swept by the radar. And even then, there needs to be radar line of sight to the destroyed target<br />
before the system can remove it (this is assumed to be interaction between the radar system and<br />
co-pilot confirming destruction). Unlike many other simulations, dead targets are not magically removed.<br />
The operator must keep this in mind, otherwise serious "overkill" may result (Overkill: meaning<br />
target is attacked with more munitions than that required to destroy it).<br />
Apache LOAL Attack Consideration<br />
This makes LOAL missile attacks in the Longbow more difficult as it requires re-establishing visual<br />
contact of the engaged targets before destroyed targets can be "confirmed" killed and removed. This<br />
enforces a limited method of BDA (battle damage assessment).<br />
Sweep Periods<br />
The sweep period is another important operator consideration. There is the a reason why there is a<br />
sweep angle indicator in the HUD, it's not just eye candy, it provides a visual reference useful during<br />
rapid fire missile attacks.<br />
For example, spacing between laser or command guided missiles using the radar as the targeting<br />
systems needs to be longer than the sweep period. A destroyed target will remain targeted until it is<br />
re-swept by the radar.<br />
If the HUD displays the radar sweep indicator, this can be used as a "metronome" for missile release.<br />
Firing a missile each time it hits the left (or right) side will ensure that the target area is re-swept<br />
between missiles.<br />
Narrow the sweep for faster updates.<br />
Enemy Engaged - <strong>Comanche</strong> <strong>vs</strong> <strong>Hokum</strong> Strategy Guide<br />
1 2 3 4 5 6 HOME
figure 4-3: Narrow radar sweep<br />
for rapidtargeting updates during<br />
an attack.<br />
When attacking a road convoy, radar line of sight is another reason to narrow the sweep angle. Vehicles<br />
can HIDE behind other vehicles. A vehicle hit by a missile can be thrown several meters thus<br />
revealing another vehicle behind it. A rapid radar sweep will detect new targets much faster. Some<br />
ground vehicles have heavy calibre machine guns which can assault you as far out as 3 km.<br />
It's not the detected threats that will kill you, it's the undetected ones.<br />
In urban or built up areas in which there can be plenty of unwanted bridge or supply factory structures<br />
in the target list, use the radar range setting in conjunction with the sweep angle to "confine" your<br />
desired target area. The Figure below shows the ground radar being used such that the bridge structures<br />
on the right are not targeted by the scan volume.<br />
The need to use the sweep angle will vary from situation to situation. Many times it may not be required<br />
at all. But the capabilities should be kept in mind, especially with regard to the air radar and the<br />
long sweep period required for a 360 degree scan.<br />
When retreating from an area in which an enemy air response may arrive, it may be wise to set the<br />
air radar to sweep that rear quadrant. In the time it takes the air radar to sweep 360 degrees, a fighter<br />
can fly within weapons range, lock on and fire. Early detection will increase your reaction time<br />
and hence your survival.<br />
Also, it is possible to use a rapid fire laser or radio command guided missile attack against multiple<br />
air targets *only* in conjunction with a narrow scan volume. Only a 45 degree sweep angle will be<br />
fast enough to remove downed air targets after multiple missile release. More details on rapid fire<br />
missile attacks are covered later in this chapter.<br />
4.3 Optical Systems<br />
Lets take a look at the EO (electro optical) modes, their uses and differences.<br />
Advantages Over Radar Acquisition<br />
There are occasions where the ground radar does not have enough resolution or the correct angle<br />
on objects to detect them.<br />
In "noisy" places such as among wrecked vehicles or close to tree canopy, the radar may fail to pick<br />
up a potential threat. Optical sensors should be used to double check, by placing the helicopter into<br />
a hover and manually sweeping the EO sensor crosshairs around, any live objects can be picked up.<br />
Enemy Engaged - <strong>Comanche</strong> <strong>vs</strong> <strong>Hokum</strong> Strategy Guide<br />
1 2 3 4 5 6 HOME
Notes on coming to a Hover<br />
To quickly come to a hover, activate the autopilot and press SHIFT H.<br />
Once you sweep your sensor over a target and the designator box flickers, it has been entered into<br />
the target list and can by cycled though or locked up like any radar acquired target. At ranges of less<br />
than 5km, enough object detail is perceivable to enable manual target identification without having to<br />
wait for the CP/G to identify them.<br />
If your high action display indicates no LOS for a target in poor lighting conditions then smoke may<br />
be the culprit.<br />
Black smoke from burning wreckage and purple smoke grenades will hide objects from your EO sensors<br />
if it's thick enough.<br />
Helmet Mounted Sight / IHADSS<br />
This targeting mode is very much tied to your internal cockpit view position, it targets the closest object<br />
to the centre of your view automatically. Generally it's good for really dumb close range target<br />
strafing and picking off the small vehicles at enemy FARPS and airbases.<br />
Also, once a target is killed it is removed from the target list immediately. Should you have an awkward<br />
radar target that it says has no LOS, switching to the helmet mode and looking at it should<br />
clear it.<br />
All optical systems are effected by lighting and weather conditions. At dawn or dusk, using the<br />
HMS/IHADSS will be ineffective unless the night vision mode is activated.<br />
FLIR, DTV, DVO, LLLTV, PERISCOPE<br />
Most of these systems are near identical. Differences being the default magnification and ability to<br />
handle poor weather conditions. But they do offer an MFD view of whatever you are targeting, even<br />
when using the radar you can cycle through the MFD pages and bring up the EO display.<br />
The exception is the <strong>Hokum</strong>'s full-screen Periscope display. This is a direct-optics device and is not<br />
fitted with any night vision equipment.<br />
figure 4-4: Heads down MFD view<br />
clearly showsyour missiles as fast moving<br />
points. Very dramatic.<br />
figure 4-5: During attacks on airfields,<br />
use theFLIR views to locate important<br />
structures<br />
Enemy Engaged - <strong>Comanche</strong> <strong>vs</strong> <strong>Hokum</strong> Strategy Guide<br />
1 2 3 4 5 6 HOME
4.4 Advanced Gunnery<br />
Now we will use some of the techniques about radar line of sight and sweep rates and cover their<br />
use in various kinds of missile attack.<br />
<strong>Comanche</strong> & Apache Specific Launch Modes<br />
First it is important to cover some differences in Hellfire missile launch modes. The Havoc does not<br />
have this capability so the following notes about LOAL/LOBL launch modes do not apply.<br />
LOBL (pronounced: lo-ball)<br />
Lock On Before Launch. The default launch mode and should be the preferred launch mode. The<br />
Hellfire follows a direct trajectory and requires the target be in range, in the seekers field of view<br />
and be in line of sight. This is indicated by "VALID LOCK" in the head up display. The missiles<br />
maximum effective range is 8km.<br />
LOAL (pronounced: lo-al)<br />
Lock On After Launch. The missile does not require line-of-sight for release. This mode is used to<br />
fire a missile from a concealed position without exposing yourself to the target. The firing helicopter<br />
can remain hidden throughout the entire duration of the missiles flight. After launch, the missile<br />
performs a zoom-climb. This is to clear any obstacles such as hills or buildings in front of you.<br />
figure 4-6: Using LOAL to kill targets on the opposite side of a town.<br />
However, the climb during the missiles motor burn period reduces the energy to missile and reduces<br />
it's maximum effective range to around 5km. It gets worse. If the target is closer than 2.5 km,<br />
when the missile reaches the top of it's climb and noses down to hunt for it's target, the missile<br />
overshoot since it has too much forward velocity and too much altitude.<br />
The relative height difference between the helicopter and the target will alter the Hellfire's effective<br />
maximum AND minimum range.<br />
Because of this, LOAL launch mode should be reserved for situations where it is tactically prudent.<br />
Enemy Engaged - <strong>Comanche</strong> <strong>vs</strong> <strong>Hokum</strong> Strategy Guide<br />
1 2 3 4 5 6 HOME
While radar Hellfires are fire and forget, in Enemy Engaged it is possible to switch targets while<br />
the missile is still in the zoom climb phase. Once the missile noses over to begin its dive, you can<br />
no longer change its target. This is something you should watch out for.<br />
Rapid Fire Missile Attack Mode (Hellfire, Vikhr and Attacka)<br />
Rapid fire missile attack mode refers to a method of simultaneously guiding several missiles in flight.<br />
Each missile in-flight will track the same target. However as each target is hit, a new target is designated<br />
and all remaining missiles currently in-flight will change course towards it. It does require that<br />
there is enough spacing between missiles so they can steer towards their new targets.<br />
Designation of targets can be done manually, however it takes longer to steer and requires full concentration<br />
which can be difficult in a hover. Narrowing the radar scan volume and using the priority<br />
filtering will automate the process (assuming there is line-of-sight throughout the engagement).<br />
Should line-of-sight be lost, manual targeting will be required.<br />
Why should you want to perform such an attack?<br />
Several reasons:<br />
● Eliminates the time of flight for each missile<br />
● Greatly reduces enemy reaction time and response capability<br />
● Allows for earlier egress from your engagement position<br />
● Clustered vehicles are easy prey<br />
figure 4-7: Animation showing a Rapid Fire missile attack.<br />
Both the Apache and Havoc air to ground missile systems are capable of performing this type of attack<br />
profile. However this attack can not be performed using the Apache's LOAL mode when there is<br />
no line-of-sight. Radar guided Hellfire's can not be redesignated mid-flight in the LOAL mode but<br />
they can using the LOBL launch mode. Once a radar Hellfire has been fired, it can not be redirected<br />
to new targets unless fired in LOBL mode.<br />
The campaign AI in Enemy Engaged <strong>Comanche</strong> verses <strong>Hokum</strong> is reactive, so once you begin an attack,<br />
a retaliatory strike will be assigned to available enemy resources. So there may not be time to<br />
wait 11 seconds or so between each missile. Each situation is different, it is up to you the pilot in<br />
command to determine the best and safest strategy.<br />
Target Persistence - Destroyed Targets can still appear on Radar<br />
Unlike other simulations, when a target is destroyed and there is no direct line of sight, it will still<br />
remain on the target list until there has been visual confirmation of it's destruction - by re-establishing<br />
line of sight - when it is removed. In this situation, a radar guided Hellfire can be fired at a target that<br />
is unknowingly dead already. Result: waste of a good (and expensive) missile that could have been<br />
used against a more deserving target.<br />
Enemy Engaged - <strong>Comanche</strong> <strong>vs</strong> <strong>Hokum</strong> Strategy Guide<br />
1 2 3 4 5 6 HOME
While the radar guided missile Hellfire is the only choice against targets without direct line of sight to<br />
you, the laser Hellfire and the Attacka or Vikhr are best used in rapid attacks on large target clusters.<br />
Method<br />
1. Set target priority filter accordingly<br />
2. Adjust radar ground radar to rapidly sweep targeted vehicle group<br />
3. Launch missile<br />
4. Wait a few seconds or wait for the radar's return sweep<br />
5. Repeat from step 3 as required for the number of targets<br />
6. As each missile hits, the radar should re-sweep the destroyed target and remove it. (The missiles<br />
"Time Of Flight" indicator in the head up display will show the time until the next missile<br />
impact.)<br />
7. The next target should automatically be designated, (if not and "NO LOS" is displayed then<br />
select the next target manually).<br />
8. Wait until all missiles have impacted<br />
It becomes quite easy with practice.<br />
Best targets for this attack mode are:<br />
● Road Convoys<br />
● Parked vehicles at road junctions<br />
● Airbase SAMS using the HIGH priority filter<br />
Enemy Engaged - <strong>Comanche</strong> <strong>vs</strong> <strong>Hokum</strong> Strategy Guide<br />
1 2 3 4 5 6 HOME
Armour Protection<br />
Armoured vehicles, particularly main battle tanks have varying degrees of armour protection. The<br />
frontal surface of a tank is built to withstand enormous mind numbing amounts of kinetic energy.<br />
Tanks may survive a direct hit from your ATGMs if hit in the front quarter. All vehicles have damage<br />
modifier in each quadrant.<br />
To conserve missiles you should reposition and attack such that the missile strikes the side or rear<br />
armour.<br />
4.5 Ballistic Weapon Attack Modes<br />
There are three main attack methods in helicopter gunnery...<br />
● Hover Fire<br />
● Running Fire<br />
● Diving Fire<br />
These methods describe the motion of the helicopter during the attack. We will take a look at each<br />
one in turn.<br />
Hover Fire<br />
The technical definition of Hover fire is any engagement made below Transitional Lift (TL) speeds.<br />
Any attack made from a hovering position is considered as Hover Fire. In a hover, the aircraft is less<br />
stable and subject to effects which degrade hit probabilities, such as wind, and fired weapons causing<br />
aircraft movement. In Enemy Engaged <strong>Comanche</strong> verses <strong>Hokum</strong>, rockets and cannon shells in<br />
flight are not effected by wind or gravity effects.<br />
Here are some general pointers for Hover Fire.<br />
● Use hover hold or cyclic trim to maintain attitude or position.<br />
Enemy Engaged - <strong>Comanche</strong> <strong>vs</strong> <strong>Hokum</strong> Strategy Guide<br />
1 2 3 4 5 6 HOME
● If the threat and terrain conditions allow, drift with the wind, don't make things harder by fighting<br />
to maintain a position if you don't have to.<br />
● Adding collective will cause the aircraft to briefly yaw to the right, reducing it will cause the<br />
aircraft to turn left. This is something you can exploit for fine tuning your aim if rudder controls<br />
are too sensitive.<br />
● Hover Fire Rocket attacks in the Havoc is much more difficult since the Havoc's rocket pods<br />
are not elevated. Running or Diving Fire attacks are the norm.<br />
Running Fire with Rockets (or cannon)<br />
Forward airspeed adds stability to the helicopter thus making rocket attacks more accurate. Also, the<br />
forward velocity of the aircraft is added to the rockets forward velocity, thus extending its range.<br />
The procedure for a Running Fire attack is as follows:<br />
● Select an initial point (IP) about 8 to 10 kilometres from the target. The IP should be an identifiable<br />
terrain feature or waypoint added on the in-flight map. The IP is selected primarily as a<br />
function of the desired route to the target.<br />
● The helicopter departs the IP toward the target flying contour, using terrain to mask the approach.<br />
● Approximately 6 km from the target, the pilot starts a climb to achieve LOS with the target.<br />
Once the crew acquires the target, the pilot levels the aircraft.<br />
● At 5 km (Hydra rockets) or 1300 m (cannon) from the target, the pilot starts a shallow 3-to 5degree<br />
dive angle and the crew begins engaging the target.<br />
(Havoc crews can engage from 6 km if armed with S-13 rocket pods. S-8 rockets only have a<br />
range of 4 km. The Gsh 23mm cannon has a range of 2 km.)<br />
● At 3 km (rockets) or 1 km (cannon) from the target, the pilot begins his break and uses terrain<br />
to cover his departure from the target area.<br />
● The crew returns to re-attack on the target or returns to the IP and holds.<br />
The aircraft should NEVER overfly the target even if it appears all targets have been destroyed. At<br />
ranges of less than 3km the aircraft becomes vulnerable to return cannon fire.<br />
If playing with a wingman, you might consider multiple attacks by co-ordinating staggered running<br />
fire attacks with rockets. For maximum effect, crews should commence their running fire attacks from<br />
different locations and directions. This will confuse the enemy and reduce the chance of possibly hidden<br />
targets remaining undetected.<br />
All ships can continue to circle back to their IPs making repeat runs at the target until the engagement<br />
is broken off. Care should be taken to ensure that there is enough lateral spacing between<br />
ships down the axis of the attack to reduce possibility of friendly fire incidents.<br />
Diving Fire with Rockets<br />
Again, as with Running fire, the airspeed of the aircraft improves accuracy of a rocket attack. Also<br />
you get a better visual and scan coverage of the targets, the high angle will reveal contacts that<br />
otherwise would remain partially masked.<br />
The disadvantage of such an attack is the high airspeed - less time to line up the attack and retreating<br />
blade stall effects interfering with flight controls.<br />
Enemy Engaged - <strong>Comanche</strong> <strong>vs</strong> <strong>Hokum</strong> Strategy Guide<br />
1 2 3 4 5 6 HOME
● Use a careful cross-check because target fixation may cause the pilot to fly the aircraft into<br />
the ground. The pilot should complete the recovery from the dive no lower than 500 feet AGL.<br />
● The pilot must plan the dive recovery in time to avoid abrupt recovery manoeuvres. If an abrupt<br />
recovery is attempted at high airspeed, "mushing" may occur. When the pilot tries to recover<br />
from a dive, the high rate of descent and high power setting cause the controls of the<br />
helicopter to become less responsive. Mushing may prevent the pilot from recovering from<br />
the dive.<br />
The procedure for a Diving Fire attack is as follows:<br />
● Establish entry altitude 1,500 feet AGL (above ground level) minimum, ±100 feet.<br />
● Establish entry airspeed 100 KIAS (normal) or 50 KIAS (steep), ±10 KIAS. (KIAS = knots, indicated<br />
air speed)<br />
● Establish a 12- to 15-degree dive angle (normal) or a 30-degree dive angle (steep), +0 to -5<br />
degrees.<br />
● Maintain the aircraft in trim.<br />
● The crew begins engaging the target.<br />
● Recover to level flight before reaching computed Vne (velocity never exceed) or 500 feet<br />
AGL.<br />
● Correctly perform crew co-ordination actions.<br />
If there is some difficulty in recovering then kick hard right pedal (left pedal in the Havoc) and reduce<br />
collective to 30%. This should reduce power to the rotors, increase drag and increase the amount of<br />
cyclic authority. An unorthodox procedure true but it seems to work. Try to avoid rolling out until the<br />
nose is level.<br />
4.6 Spoofing IR and Radar Guided Missiles<br />
In an area where enemy contact is expected keep one eye on my ASE as advanced warning. Any<br />
with a connecting line means they've locked on to you and will most probably engage.<br />
When you get a launch warning the ASE or the Havoc’s TWD will indicate the type of inbound missile<br />
and the number of seconds before impact.<br />
While Apache Havoc has an option for automatic countermeasure launching, do not rely on this to<br />
save your hide. By all means leave auto countermeasures turned on, as this takes away the task of<br />
manually turning on the jammers. But you should get into the habit of dumping CM stores by hand.<br />
Your survival rate will greatly increase.<br />
Manual Countermeasure Launching<br />
Both flares and chaff have an effective duration of three seconds from launch. This means that a flare<br />
launched to spoof a missile that’s eight seconds away will burn out when the missile is five seconds<br />
away. You should also be aware that a spoofed missile can re-acquire you if the<br />
countermeasure it is chasing expires.<br />
Enemy Engaged - <strong>Comanche</strong> <strong>vs</strong> <strong>Hokum</strong> Strategy Guide<br />
1 2 3 4 5 6 HOME
I recommend the following:<br />
● Dump a flare or chaff bundle every two to three seconds.<br />
● When a missile is less than three seconds away and still inbound, launch doubles.<br />
● If the missile is one second away, keep hitting the dump key.<br />
● Jink away from the missile, should the missile detonate on your countermeasures while you<br />
are nearby, you will suffer damage from the proximity of the blast.<br />
Do NOT feel you have to conserve chaff or flares, you can't use them once you're<br />
dead. It really is a matter of use them or loose them.<br />
You will know when the missile has been spoofed as the "countdown" will vanish. In the Havoc the<br />
"countdown" is the light sequence as pictured in the manual. Get familiar with the symbology if you<br />
are not already.<br />
Accuracy<br />
Travelling perpendicular to a tracking gun or missile will increase the angle of error. This means a<br />
greater chance of it missing you since it requires more lead ahead on the part of the tracking gun or<br />
missile seeker. All guided missiles in this simulation compute intercept trajectories, the further away<br />
from the computed intercept point you are with each fraction of a second - the safer you are.<br />
Ground clutter<br />
Another trick you can use is hiding yourself in the ground clutter. At altitudes of less than 40 feet<br />
AGL, radars (such as mobile SAMs) have difficulty tracking you. This is the biggest weakness of remote<br />
SAM emplacements, if you are low enough you can approach until they are within cannon range.<br />
Exploit Lead Pursuit<br />
All guided missiles in the simulation follow a "lead pursuit" trajectory. A dangerous low-level tactic<br />
can be employed to exploit this. At low level, a rapid loss of altitude will make the missile nose into<br />
the ground as it plots an intercept point that is "below ground". This requires good timing and consideration<br />
for the "powered descent" effect. Positioning a hill between you and the incomming missile<br />
will cause it to dirt dive.<br />
WARNING<br />
Laser devices are potentially dangerous. Their rays can<br />
and will burn someone's eyes if they look directly at them.<br />
Users should not direct the beams at friendly positions or<br />
where they could reflect off shiny surfaces into friendly positions.<br />
Other soldiers must know where lasers are being<br />
used and take care not to look directly at the laser beam.<br />
Enemy Engaged - <strong>Comanche</strong> <strong>vs</strong> <strong>Hokum</strong> Strategy Guide<br />
1 2 3 4 5 6 HOME
IN THIS CHAPTER<br />
Helicopters and Fighter Aircraft<br />
Ground Vehicles<br />
Ships<br />
Surface To Air Missiles (SAMs)<br />
Air To Air Missiles (AIMs)<br />
Air To Ground Missiles (ATGMs)<br />
Unguided Rockets<br />
Ballistic Weapon Data<br />
5.1 Vehicle & Weapon Tables<br />
It is not necessary to understand or digest the tables in this chapter, they are provided for the curious<br />
and can help explain certain perceived behavior of entities within the campaign.<br />
Knowing that Black Hawk helicopters cruise at 85 knots may aid you when escorting them, or that<br />
the air radar detection range of the SA-19 is 8km and can't detect objects below 10m (approx.<br />
40ft). A study of the data can reveal weaknesses which you can exploit during combat.<br />
Vehicles / Entities<br />
CHAPTER 5<br />
Game Metrics, Vehicle Tables<br />
Cruise Speed/Altitude<br />
Speed is in knots, altitude in meters for normal cruising flight.<br />
Structure Points<br />
The amount of damage an object can take before it is destroyed.<br />
Scan Interval<br />
Time in seconds between all sensor sweeps.<br />
Air/Ground Threat<br />
The higher the value, the greater the perceived threat. Entities will engage their greatest perceived<br />
threat when attacked. Thus a helicopter engaged by a Black Hawk (Air Threat value of 0.8)<br />
will continue to retaliate against it until it is attacked by an ever greater threat such as an <strong>RAH</strong>-<strong>66</strong><br />
<strong>Comanche</strong> (Air Threat value of 1.0).<br />
Enemy Engaged - <strong>Comanche</strong> <strong>vs</strong> <strong>Hokum</strong> Strategy Guide<br />
5<br />
1 2 3 4 5 6 HOME
5.2 Table 1 - Helicopters and Fighter Aircraft<br />
Note: All ranges in Meters unless specified.<br />
Name<br />
Cruise<br />
Speed<br />
Cruise<br />
Alt<br />
Structure<br />
Points<br />
Recon Range<br />
Ground Scan Range<br />
Air Scan Range<br />
Scan Interval<br />
Air Threat<br />
Ground Threat<br />
AH-64D Longbow 110 40 600 5,000 5,000 5,000 10 1 1<br />
Mi-28 Havoc 110 40 600 5,000 5,000 5,000 10 1 1<br />
<strong>RAH</strong>-<strong>66</strong> <strong>Comanche</strong> 100 40 500 5,000 5,000 5,000 10 1 1<br />
<strong>Ka</strong>-<strong>52</strong> <strong>Hokum</strong> 90 40 650 5,000 5,000 5,000 10 1 1<br />
UH-60 Black Hawk 85 40 650 5,000 5,000 5,000 10 0.8 1<br />
Mi-24D Hind 80 40 650 5,000 5,000 5,000 10 0.8 1<br />
OH-58D Kiowa Warrior 120 15 600 5,000 4,500 3,000 10 1 1<br />
MV-22 Osprey 280 100 600 3,000 0 0 10 0 0<br />
AH-1T Sea Cobra 110 15 600 5,000 4,000 3,000 10 1 1<br />
AH-1W Super Cobra 110 15 600 5,000 4,000 3,000 10 1 1<br />
CH-53E Super Stallion 85 50 600 3,000 0 0 10 0 0<br />
CH-46E Sea Knight 70 40 750 3,000 0 0 10 0 0<br />
<strong>Ka</strong>-29 Helix B 75 40 750 5,000 5,000 0 10 0 1<br />
CH-3 Jolly Green Giant 70 40 800 3,000 0 0 10 0 0<br />
Mi-17 Hip 75 40 800 5,000 5,000 0 10 0 1<br />
CH-47D Chinook 70 100 800 3,000 0 0 10 0 0<br />
Mi-6 Hook 70 100 1,000 3,000 0 0 10 0 0<br />
A-10A Thunderbolt 300 700 850 6,000 5,000 5,000 10 0.8 1<br />
Su-25 Frogfoot 300 700 850 6,000 5,000 5,000 10 0.8 1<br />
F-16 Fighting Falcon 450 900 700 10,000 10,000 10,000 10 1 1<br />
MiG-29 Fulcrum 450 900 700 10,000 10,000 10,000 10 1 1<br />
AV-8B Harrier 350 800 700 6,000 5,000 5,000 10 0.8 1<br />
Yak-41 Freestyle 350 800 700 6,000 5,000 5,000 10 0.8 1<br />
F/A-18 Hornet 450 1,000 700 10,000 10,000 10,000 10 1 1<br />
Su-33 Flanker 450 1,000 700 10,000 10,000 10,000 10 1 1<br />
C-17 Globemaster III 240 700 850 3,000 0 0 10 0 0<br />
IL-76MD Candid-B 240 700 850 3,000 0 0 10 0 0<br />
C-130J Hercules II 260 700 850 3,000 0 0 10 0 0<br />
An-128B Cub 260 700 850 3,000 0 0 10 0 0<br />
Enemy Engaged - <strong>Comanche</strong> <strong>vs</strong> <strong>Hokum</strong> Strategy Guide<br />
1 2 3 4 5 6 HOME
5.3 Table 2 - Ground Vehicles<br />
Name Speed Type<br />
Structure<br />
Points<br />
Recon<br />
Range<br />
Ground Scan<br />
Range<br />
Air Scan<br />
Range<br />
Scan Interval<br />
Air Search<br />
Min<br />
Air Search<br />
Max<br />
Air Threat<br />
Ground Threat<br />
M1A2 Abrams 20 Tracked 1,500 2,000 4000 2,000 15 10 1,000 0.333 1<br />
T-80U 20 Tracked 1,350 2,000 4000 2,000 15 10 1,000 0.333 1<br />
M2A2 Bradley 20 Tracked 1,000 3,000 4000 4,000 15 10 2,000 0.<strong>66</strong>6 1<br />
BMP-2 20 Tracked 1,000 3,000 4000 4,000 15 10 2,000 0.<strong>66</strong>6 1<br />
BMP-3 20 Tracked 1,000 2,000 5000 2,000 15 10 2,000 0.<strong>66</strong>6 1<br />
M113A2 20 Tracked 800 2,000 0 2,000 15 10 1,000 0.333 0<br />
BTR-80 20 Wheeled 800 2,000 0 2,000 15 10 1,000 0.333 0<br />
M1025 HumVee 20 Wheeled 650 1,000 0 0 0 0 0 0 0<br />
BRDM-2 20 Wheeled 650 1,000 0 2,000 15 10 2,000 0.333 0<br />
M109A2 20 Tracked 600 2,000 0 2,000 15 10 1,000 0.333 0<br />
2S19 20 Tracked 600 1,000 0 2,000 15 10 1,000 0.333 0<br />
M270 MLRS 20 Tracked 700 2,000 0 0 0 0 0 0 0<br />
BM-21 Grad 20 Wheeled 700 2,000 0 0 0 0 0 0 0<br />
M163 Vulcan 20 Wheeled 600 2,000 0 2,000 15 10 1,000 0.<strong>66</strong>6 0<br />
SA-19 Grison 20 Tracked 600 6,000 0 8,000 15 10 4,000 1 0<br />
M1037 Avenger 20 Wheeled 600 4,000 0 5,000 15 10 3,000 1 0<br />
M48A1 Chaparral 20 Wheeled 600 4,000 0 5,000 15 10 3,000 1 0<br />
SA-13 Gopher 20 Wheeled 600 3,000 0 5,000 15 10 3,000 1 0<br />
M998 HumVee 20 Wheeled 350 1,000 0 0 0 0 0 0 0<br />
UAZ-469B 20 Wheeled 350 1,000 0 0 0 0 0 0 0<br />
M923A1 Big Foot 20 Wheeled 350 1,000 0 0 0 0 0 0 0<br />
Ural-4320 20 Wheeled 300 1,000 0 0 0 0 0 0 0<br />
M978 HEMTT 20 Wheeled 300 1,000 0 0 0 0 0 0 0<br />
Ural Fuel Tanker 20 Wheeled 300 1,000 0 0 0 0 0 0 0<br />
Infantry 0 Foot 20 1,000 0 5,000 15 5 3,000 1 0<br />
Note: Tanks and other armoured vehicles have between 6 to 8 smoke grenades.<br />
5.4 Table 3 – Ships<br />
Name<br />
Speed<br />
(knots)<br />
Structure<br />
Points<br />
Recon Range<br />
Air Scan Range<br />
Scan Interval<br />
Air Search<br />
Min<br />
Air Search<br />
Max<br />
Air Threat Ground Threat<br />
Tarawa Class 24 12,000 8,000 10,000 15 10 5,000 1 0<br />
Kiev Class 32 15,000 8,000 10,000 15 10 5,000 1 0<br />
Oliver Hazard Perry Class 29 8,000 6,000 10,000 15 10 5,000 1 0<br />
Krivak II Class 32 8,000 6,000 10,000 15 10 5,000 1 0<br />
Landing Craft Utility 8 1,000 1,000 0 0 0 0 0 0<br />
LCAC (air cushion) 8 1,000 1,000 0 0 0 0 0 0<br />
Aist Class 8 1,000 1,000 2,000 15 10 1,000 0.<strong>66</strong> 0<br />
Ammunition and Explosives<br />
Damage Soft/Hard<br />
Objects are categorized as either soft or hard targets. These values indicate the amount of damage<br />
they transfer to either soft or hard objects. For example, a Stinger will do 300 points of damage<br />
to a soft target such as a helicopter, but no damage to a hard target such as a city block.<br />
Guidance<br />
IR Passive Infra-red<br />
Lsr Active Laser<br />
R(s) Radar (semi-active)<br />
RC Radio Command<br />
Wg Wire Guided<br />
Enemy Engaged - <strong>Comanche</strong> <strong>vs</strong> <strong>Hokum</strong> Strategy Guide<br />
1 2 3 4 5 6 HOME
5.5 Table 4 - Surface To Air Missiles (SAMs)<br />
Name Damage Soft Damage Hard Guidance Seeker FOV Weight Min Range Max Range Velocity G Max Burn Time Cruise Time<br />
Chaparral 300 0 IR 120 0 500 5,000 850 15 5.437 3.004<br />
FIM-92A Stinger 300 0 IR 80 0 500 5,000 680 15 4.281 5.055<br />
SM-1MR Standard 300 0 R (s) 120 0 500 30,000 850 10 8.155 30.977<br />
Sea Sparrow 300 0 R (s) 120 0 500 55,000 850 10 8.155 60.389<br />
SA-7 Grail 300 0 IR 60 0 500 3,200 510 15 3.126 4.558<br />
SA-13 Gopher 400 0 IR 50 0 500 5,000 510 10 4.689 7.230<br />
SA-19 Grison SAM 450 0 RC 60 0 500 8,000 890 15 5.708 5.974<br />
SA-N-3 Goblet 350 0 RC 90 0 500 24,000 9<strong>52</strong> 10 9.195 20.371<br />
SA-N-4 Gecko 400 0 RC 90 0 500 12,000 850 10 8.155 9.800<br />
5.6 Table 5 - Air To Air Missiles (AIMs)<br />
Name Damage Soft Damage Hard Guidance Seeker FOV Weight Min Range Max Range Velocity G Max Burn Time Cruise Time<br />
AIM-92 Stinger 550 0 IR 80 13.6 500 5,000 680 15 4.281 5.055<br />
AIM-9M Sidewinder 1000 0 IR 80 0 500 18,000 850 15 5.437 18.298<br />
AIM-120 AMRAAM 1400 50 R (a) 90 0 500 65,000 1300 15 8.495 45.589<br />
Igla-V 550 0 IR 60 18.2 500 5,200 850 15 5.437 3.239<br />
AA-8A Aphid 1132 40 IR 60 0 500 10,000 1000 15 6.456 6.611<br />
AA-8B Aphid 0 0 R (s) 60 0 500 15,000 1000 15 6.456 11.611<br />
AA-10A Alamo 1220 40 R (s) 60 0 500 40,000 1500 15 9.854 21.575<br />
AA-10B Alamo 1250 40 IR 60 0 500 20,000 1500 15 9.854 8.242<br />
AA-11 Archer 1300 40 IR 60 0 500 30,000 850 15 5.437 32.416<br />
5.7 Table 6 - Air To Ground Missiles (ATGMs)<br />
Name Damage Soft Damage Hard Guidance Seeker FOV Weight Min Range Max Range Velocity G Max Burn Time Cruise Time<br />
AGM-114L Hellfire 2,000 2,000 R (a) 60 45 500 8,000 442 10 3.996 15.876<br />
AGM-114K Hellfire II 2,000 2,000 Lsr 60 45 500 8,000 442 10 3.996 15.876<br />
AGM-65D Maverick 3,000 3,000 IR 20 0 500 24,000 340 5 5.912 67.197<br />
AGM-65F Maverick 3,000 3,000 IR 20 0 50 24,000 340 5 5.912 67.197<br />
Ataka 2,000 2,000 RC 50 42.5 500 6,000 400 10 3.568 12.993<br />
Vikhr 2,500 2,500 Lsr 50 0 500 8,000 400 10 3.568 17.993<br />
AT-5 Spandrel 802 802 R (s) 15 0 100 4,000 300 5 5.097 10,360<br />
AT-6 Spiral 744 744 RC 40 0 500 7,000 340 10 2.956 18.893<br />
AT-10 Stabber 440 440 Lsr 20 0 100 5,000 300 5 5.097 13,694<br />
AT-11 Sniper 688 688 Lsr 20 0 100 4,000 300 5 5.097 10,360<br />
AS-10 <strong>Ka</strong>ren 1,000 1,000 IR 20 0 500 10,000 340 5 5.912 26.021<br />
AS-14 Kedge 6,354 6,354 Lsr 20 0 500 40,000 340 5 5.912 114.256<br />
M220 Tow 2B 1,017 1,017 Wg 30 0 100 3,750 300 5 5.097 9.<strong>52</strong>7<br />
5.8 Table 7 - Unguided Rockets<br />
Name Damage Soft Damage Hard Weight Min Range Max Range Velocity G Max Burn Time Cruise Time<br />
Hydra 70 M255 500 120 6 100 5,000 850 30 2.718 4.443<br />
Hydra 70 M261 600 400 6 100 5,000 850 30 2.718 4.443<br />
LAU-69/A 450 50 0 100 5,000 850 30 2.718 4.443<br />
S-5 200 30 0 100 3,000 700 30 2.209 3.103<br />
S-8 400 200 11.3 100 4,000 750 30 2.379 4.065<br />
S-13 600 400 68 100 6,000 800 30 2.548 6.146<br />
Enemy Engaged - <strong>Comanche</strong> <strong>vs</strong> <strong>Hokum</strong> Strategy Guide<br />
1 2 3 4 5 6 HOME
5.9 Table 8 - Ballistic Weapon Data<br />
Rate Of Fire/Burst Duration<br />
The rate of fire is the number of rounds capable of being fired per minute. The "Burst Duration" is the<br />
length of time this ammunition will be fired, typically 3 seconds.<br />
Therefore a weapon capable of 1,000 rounds per minute fired in a three second burst, will fire 50<br />
rounds of ammunition. Each impacting round will deliver the appropriate amount of hard or soft damage.<br />
Muzzle Velocity<br />
In meters per second.<br />
Name Damage Soft Damage Hard Weight Min Range Max Range Muzzle Velocity Rate Of Fire Burst Duration<br />
12.7mm Round 4 0 0 0 1,800 600 1,000 3<br />
M61A1 20mm Round 12 0 0 0 1,600 884 1,000 3<br />
M197 20mm Round 12 0 0 0 1,600 884 1,500 3<br />
GAU-12/U 25mm Round 15 3 0 0 1,600 1,051 1,650 3<br />
M242 25mm Round 16 6 0 0 3,500 1,000 1,000 3<br />
GAU-8/A 30mm Round 100 100 0 0 1,200 1,030 2,100 3<br />
M230 30mm Round 30 15 495 0 1,200 792 625 3<br />
M75 76mm Round* 450 450 0 2,571 4,000 198 1 0<br />
M256 120mm Round 634 634 0 0 4,000 247 1 0<br />
M284 155mm Round 1,610 1,610 0 0 30,000 542 1 0<br />
M270 227mm Rocket 8,000 8,000 0 15,801 31,600 556 1 0<br />
12.7mm Round 4 0 0 0 1,800 600 1,000 3<br />
9-A-624 12.7mm Round 5 0 0 0 1,500 600 4,000 3<br />
14.5mm Round 6 0 0 0 1,600 600 1,000 3<br />
GSh-23L 23mm Round 25 8 200 0 2,000 930 1,000 3<br />
GSh-301 30mm Round 40 25 0 0 1,600 800 1,000 3<br />
2A38M 30mm Round 25 10 0 0 2,500 1,200 1,000 3<br />
2A42 30mm Round 30 15 0 0 4,000 1,000 300 3<br />
2A42 30mm HE Round 30 15 1,000 0 2,000 1,000 300 3<br />
2A42 30mm AP Round 25 25 1,000 0 2,000 1,000 300 3<br />
2A72 30mm Round 30 15 0 0 2,000 800 1,000 3<br />
AO-17A 30mm Round 30 15 0 0 1,500 1,000 100 3<br />
ADMG-630 30mm Round 30 15 0 0 1,500 800 1,000 3<br />
76mm Round 450 450 0 0 4,000 198 1 0<br />
100mm Round 650 650 0 0 4,000 198 1 0<br />
2K23 100mm Round 650 650 0 0 4,000 198 1 0<br />
BM-21 122mm Rocket 1,400 1,400 0 5,209 30,000 542 1 0<br />
2A46M1 125mm Round 688 688 0 0 4,000 289 1 0<br />
2A65 1<strong>52</strong>mm Round 1,548 1,548 0 0 24,000 485 1 0<br />
Chaff 0 0 0 0 0 25 1 3<br />
Flare 0 0 0 0 0 25 1 3<br />
Smoke Granade 0 0 0 0 0 6 1 45<br />
<strong>Hokum</strong> Ejection Debris Damage<br />
All ejected elements from a <strong>Hokum</strong> ejection will do 550 points of soft damage.<br />
Enemy Engaged - <strong>Comanche</strong> <strong>vs</strong> <strong>Hokum</strong> Strategy Guide<br />
1 2 3 4 5 6 HOME
IN THIS CHAPTER<br />
Updates - Patches & Undocumented Features<br />
Command Line Parameters<br />
Command Line Examples<br />
Multiplayer<br />
Credit Where It's Due<br />
6.1 Updates - Patches & Undocumented Features<br />
All international patches and updates for Enemy Engaged <strong>Comanche</strong> verses <strong>Hokum</strong> can be downloaded<br />
from the Razorworks site at the following URL:<br />
http://www.razorworks.com/pages/patches_txt.htm<br />
At present no updates are available.<br />
1st Edition Manual Changes<br />
Key Changes<br />
ALT F1 Toggles the HUD resolution scaling<br />
SHIFT 0 Toggles transparent cockpit or toggles cockpit graphics in Apache / Havoc<br />
CTRL K Havoc HUD enlarge (was ALT K)<br />
Patches<br />
At present no patches are available.<br />
Skins<br />
It is possible to change the pilot & cp/g faces with your own.<br />
File format : 24bit uncompressed BMP only<br />
Hi Face is 128x128<br />
Lo Face is 32x32<br />
Neck is 32x32<br />
Skin is 8x8<br />
Skin File Locations<br />
CHAPTER 6<br />
Updates, User Modification & Multiplayer<br />
US Crew<br />
Razorworks\cohokum\graphics\skins\USA\PILOT<br />
Razorworks\cohokum\graphics\skins\USA\CPG<br />
Russian Crew<br />
Razorworks\cohokum\graphics\skins\RUSSIAN\PILOT<br />
Enemy Engaged - <strong>Comanche</strong> <strong>vs</strong> <strong>Hokum</strong> Strategy Guide<br />
6<br />
1 2 3 4 5 6 HOME
Razorworks\cohokum\graphics\skins\RUSSIAN\CPG<br />
Backups are provided in case you need to revert to the originals.<br />
Facial Template<br />
If you want to match up the facial polygons with your artwork, use the template below.<br />
Flight Model Parameters<br />
It is possible to tinker with the flight model by adusting the values of the text based .DYN (or dynamics)<br />
files. To restore the default values just delete the file and a new one will be created when you<br />
fly that helicopter again. Each helicopter has its own dynamics data file.<br />
These files are located in the following folder:<br />
Razorworks\common\data<br />
6.2 Command Line Parameters<br />
Shortcuts<br />
Enemy Engaged <strong>Comanche</strong> verses <strong>Hokum</strong> is customisable to some degree by the user. Some flight<br />
model, visual and most communication elements can be altered by passing command line parameters<br />
when launching the game. This section includes a full list of some documented and undocumented<br />
ones (which can now be considered documented).<br />
Command Line parameters can be entered into a DOS box or program shortcut. Several Windows<br />
shortcuts to this simulation with different options included in the Target field (see figure 6-1 below)<br />
can be made and renamed to switch between different options.<br />
Enemy Engaged - <strong>Comanche</strong> <strong>vs</strong> <strong>Hokum</strong> Strategy Guide<br />
1 2 3 4 5 6 HOME
figure 6-1: Shortcut Properties - command lineswitches in Target box<br />
Environment Variable<br />
As an alternative to using command line or shortcuts options, you can specify the commands you<br />
want with the APACHE_HAVOC environment variable and SET command.<br />
For example:<br />
SET APACHE_HAVOC=/cgs:1 /cig:1 /cbar:1000<br />
For more information on using command lines and environment variables, please refer to your computers<br />
disk operating system manual or Windows95 user manual..<br />
Category – Communications<br />
Switch Meaning Description<br />
/ipa:n ip_address n= TCP/IP address to connect to. A HOST can leave out the value.<br />
/ccrs:n comms_connection_receive_size n = Initial guess of campaign data size. If campaign data is larger then this can slow things<br />
down (default = 200k)<br />
/cdrs:n comms_data_record_size similar to above…<br />
/cpbs:n comms_pack_buffer_size similar to above…<br />
/cgs:1 comms_guaranteed_send Force the comms to use DirectPlay guaranteed send instead of its own.<br />
n = 1 (turn on) n = 0 (turn off - default)<br />
/crls:n comms_resend_list_size n = Packet history list size, increase if client keeps getting kicked out by server (default =<br />
1000)<br />
/crl:n comms_rerequest_limit n = number of times a client can re-request the same packet. Increase this for poor connections<br />
(default = 10)<br />
/cpt:n comms_packet_timer n = time delay in seconds the comms will wait for a packet before re-requesting it. (default =<br />
5s)<br />
/crt:n comms_resend_timeout n = time comms will wait before assuming re-requested packets was lost<br />
(default = 2s)<br />
/mur:n max_update_rate n = network frame rate for a server, n/a for a client<br />
(default = 5fps for TCP/IP, 15fps for IPX)<br />
/cig:1 comms_interpolate_gunships program will interpolate a players helicopter position for smoother visuals<br />
n = 0 (off / default) n = 1 (on)<br />
/cvc:1 comms_validate_connection removes dead player husks when client crashes<br />
Enemy Engaged - <strong>Comanche</strong> <strong>vs</strong> <strong>Hokum</strong> Strategy Guide<br />
1 2 3 4 5 6 HOME
n = 0 (off / default) n = 1 (on)<br />
/cptl:n comms_packet_throttle_limit mainly for modems this one, governs the flow rate of packets<br />
(default = 10)<br />
/cto:n comms_time_out the amount of time to wait before removing dead player husks<br />
n = 0 (off / default) n = 1 (on)<br />
Category – Visual<br />
Switch Meaning Description<br />
/cbar:n city_block_approximation_range n = distance in meters that city blocks resolve from their simple form to complex form (default<br />
= 500 meters)<br />
/fs:0 full_screen Switch for turning off the default FULL SCREEN video mode.<br />
/mfr:n max_frame_rate n = Max visual frame rate, (defaults = 30)<br />
/32bit 32_bit Activates 32bit rendering if your video card supports it<br />
/nrt no_render_to_texture Turns off rendering to texture in case of visual problems with MFDs or TADS<br />
Category – Flight Dynamics<br />
Switch Meaning Description<br />
/drbs:n dynamics_retreating_blade_stall n = floating point scaling factor for RBS effect (default = 1.0)<br />
/drv:n dynamics_rudder_value n = scaling factor for drag on tail rotation (default = 1.0)<br />
/dra:n dynamics_rudder_acceleration n = scaling factor for tail rotation acceleration (default = 0.8)<br />
/drd:n dynamics_main_rotor_drag n = scaling factor for drag caused by main rotor (default = 1.0)<br />
/dtrd:n dynamics_tail_rotor_drag n = scaling factor for drag caused by tail in forward flight (default = 1.0)<br />
/dzd:n dynamics_cyclic_dead_zone n = percentage deadzone for the cyclic (default = 0.0)<br />
Category - Miscellaneous<br />
Switch Meaning Description<br />
/goto:1 planner_goto_button Activates "GOTO" teleport button on the campaign map.<br />
/vfm:1 vector_flight_model Activates viewer or "UFO" flight mode.<br />
/psr:n player_start_rank n = Start rank for new pilots<br />
/ns no_sound Bypass soundcard, useful for tracking hardware conflicts<br />
/pitod:n player_initial_tour_of_duty Tour Of Duty start timer value<br />
/3dreset 3d_reset Reset screen resolution to 640x480<br />
/dxtm directx_texture_management Should fix "unable to allocate hardware slot" error<br />
/mta:n max_time_acceleration The maximum multiplier allowed for time acceleration (default - 4)<br />
6.3 Command Line Examples<br />
Perhaps the most useful parameter for users with powerful machines is /cbar:. This extends<br />
the distance that city areas resolve from basic shapes into their more detailed versions. This<br />
goes some way to eliminate necessary "pop-up" of buildings.<br />
Increase City Popup Range<br />
cohokum.exe /cbar:1000<br />
The number is in meters. 1000 is 1km which is double the default value of 500.<br />
Activate the Teleport feature<br />
cohokum.exe /goto:1<br />
This enables a "GOTO" button on the campaign map. It could be considered a poor mans<br />
"skip" feature if the flying experience passes you by and you want to get to the action soonest.<br />
Enemy Engaged - <strong>Comanche</strong> <strong>vs</strong> <strong>Hokum</strong> Strategy Guide<br />
1 2 3 4 5 6 HOME
Run The Simulation in a Window<br />
cohokum.exe /fs:0<br />
Some 3D video-cards will run 3D applications in a desktop window. While this simulation<br />
is not designed to be fully compatible with windowed operation you may find it useful for<br />
running the game while monitoring other desktop applications, such as a contact manager<br />
or buddy-list program. To swap focus from the windowed game to the desktop, press either<br />
the ALT-TAB key or use the "Window" key then click on an empty area of the<br />
desktop.<br />
Connect To an Internet Game<br />
cohokum.exe /ipa:198.162.0.0<br />
6.4 Multiplayer<br />
Will insert the above IP address and set TCP/IP for DirectPlay. This can be used to configure<br />
"buddy" programs like ICQ to launch <strong>Comanche</strong>-<strong>Hokum</strong> as a Telephony program<br />
and connect to their games semi-automatically.<br />
Playing over the Internet or LAN with your friends is a truly great gaming experience. In Enemy Engaged<br />
<strong>Comanche</strong> verses <strong>Hokum</strong> you can what is called "hot-join" which means you can join a game<br />
that is already in progress.<br />
Good multiplayer performance requires a Host with a fast connection. ISDN or Cable modems can<br />
effectively host campaigns. Guest Players do not need particualy fast connections, a 28kbs modem<br />
can suffice, although PING times regardless of connection speed will effect the quality of play.<br />
Hosts with low speed connections such as modem should use play the mini-campaigns called "Skirmishes",<br />
these require less host bandwidth.<br />
The Network Model<br />
In the simulation, only the HOST computer can create objects, this is a permissible server model.<br />
CLIENTS "request" permission to fire missiles and the HOST grants that permission. In a campaign<br />
there can be anything up to 1,700 objects that need to be doing the same things on all connected<br />
computers.<br />
Because of this model, there is a short delay when a guest player presses the fire button or some<br />
other action, and the missile or some action taking place. That delay is typically the round trip time<br />
for a packet to travel to the HOST and back to the CLIENT.<br />
The faster the PING, the faster the response time. Quality of connection will also play a role. If a link<br />
is unreliable, lost packets need to be resent causing additional delays.<br />
When Connecting (0)...<br />
The number you see after the word "Connecting..." is the number of received packets. When joining<br />
a game, the campaign is transmitted to the client in chunks. Lager campaigns will require more data<br />
and longer wait times. "The Sword In The Sand" campaign may take around 350+ packets, while a<br />
Skirmish may only require 50+. This number also includes resent packets so the number may vary.<br />
Enemy Engaged - <strong>Comanche</strong> <strong>vs</strong> <strong>Hokum</strong> Strategy Guide<br />
1 2 3 4 5 6 HOME
While the campaigns world data is being transmitted it is also getting out of date - falling behind.<br />
Once the player has entered the campaign, the HOST begins a re-sync. It will send missed packets<br />
to the client. After a player has joined a game, it is advisable the player wait a short while (say 30 seconds)<br />
to allow for correct synchronisation.<br />
Don't forget to use the chat facility, TAB 4 1 is the key sequence to send a message to all players.<br />
Voice comms software should work with this simulation. Some software (such as ShadowFactor's<br />
Battlecom) has been tested and works ok.<br />
Modem Play Optimisation<br />
It is possible to host a campaign over a modem connection. It has been achieved between two 56k<br />
modems connected at 44k to the Internet. However every 56k modem is limited to a max 33k sending<br />
data rate, and as the server is the bottleneck, effectively there is no advantage for the HOST to<br />
connect faster than 33k speed.<br />
There are ways in which you can improve your connection:<br />
1. Turn off any compression in your dialup properties - <strong>Comanche</strong> <strong>Hokum</strong> performs compression<br />
itself, and its possible your modem is creating more lag by buffering up data before sending<br />
it out.<br />
2. Instead of connecting via the Internet, try a modem to modem connection. This has even less<br />
lag than the Internet version.<br />
3. Improve your framerate - if you're experiencing half a second of lag and you are the server,<br />
you could do with upping your frame rate ( decrease resolution, object detail, terrain detail<br />
etc. ). Technically in a MP game, the server shouldn't have any lag at all ( just like a single<br />
player game ).<br />
4. Try a different ISP. Doesn't always make a difference, but one of the things we believe is that<br />
Internet routers (things responsible for getting the data from the modem to the other guys<br />
modem) can drop packets - and drop more the busier they are. The faster your connection to<br />
the ISP, the more tolerant of dropped packets you become.<br />
Hey, be careful out there.<br />
6.5 Credit Where It's Due<br />
This strategy guide was designed and written by Richard "Flexman" Hawley with assistance from the<br />
jolly crew at Razorworks. Richard Hawley is the author of many helicopter sim utilities and editor of<br />
the CombatHelo section at SimHQ.com.<br />
Enemy Engaged - <strong>Comanche</strong> <strong>vs</strong> <strong>Hokum</strong> Strategy Guide<br />
1 2 3 4 5 6 HOME