K-68 Carburetor - Good Karma Productions
K-68 Carburetor - Good Karma Productions
K-68 Carburetor - Good Karma Productions
Create successful ePaper yourself
Turn your PDF publications into a flip-book with our unique Google optimized e-Paper software.
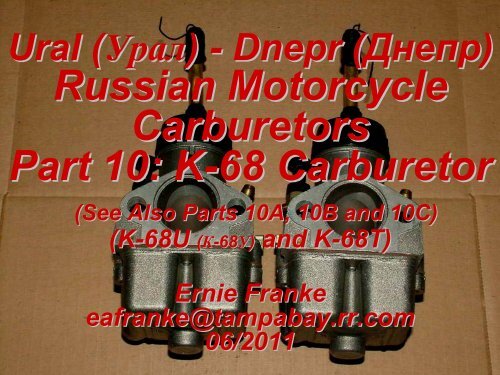
Ural (Урал(<br />
Урал) - Dnepr (Днепр(<br />
Днепр)<br />
Russian Motorcycle<br />
<strong>Carburetor</strong>s<br />
Part 10: K-<strong>68</strong> K<br />
<strong>Carburetor</strong><br />
(See Also Parts 10A, 10B and 10C)<br />
(K-<strong>68</strong>U<br />
<strong>68</strong>U (К-<strong>68</strong><br />
<strong>68</strong>У) and K-<strong>68</strong>T) K<br />
Ernie Franke<br />
eafranke@tampabay.rr.com<br />
06/2011
Right-Side<br />
K-<strong>68</strong> <strong>Carburetor</strong>s (www.cossackmotorcycles.com/ural750.html)<br />
•Common <strong>Carburetor</strong>s Found on 750cc and Late 650cc Urals<br />
–1994 to 2000’s<br />
•K-<strong>68</strong> Fits Any 650 cc Head<br />
–Except M-61 and M-62, where Two Bolts are Mounted Vertically<br />
–Need Simple Vertical -to- Horizontal Adapter Plate<br />
•K-<strong>68</strong>U (К-<strong>68</strong>У in Russian) for 650cc, K-<strong>68</strong>T for 750cc<br />
–K-<strong>68</strong>U's Main Jet: 190, K-<strong>68</strong>T's Main Jet: 220<br />
•K-<strong>68</strong>’s Are Side-Specific (Left or Right)<br />
–Puts Adjustments on the Outside<br />
–Can Bolt Them Backwards and Won't Affect Performance<br />
•Operation<br />
–Gives Better Results than Standard K-63 / K-65 / K-301 / K-302 Carbs<br />
–Similar to K-63 / K-65, with More-Robust Round-Slide Replacing Earlier<br />
Flat-Slide Throttle<br />
–Runs a Little Rich Most of the Time, So Economy Is Not Best<br />
–Requires Frequent Adjustment to Stay Perfectly Tuned<br />
•Still in Production in Russia, so Repair Kits Are Available<br />
Left-Side
<strong>Carburetor</strong> K-<strong>68</strong>K<br />
• Basic Systems and Devices:<br />
–System for Supplying and Maintaining Constant Level of Fuel in Float Chamber<br />
–Idle System with Adjustable Composition and Quantity of Combustible Mixture<br />
–Main Dosing System with Adjustable Air-Fuel Mixture<br />
–Start-up and Warming System<br />
–Devices for Correcting Position of Throttle Needle in Axial and Radial<br />
Directions<br />
–Device for Fastening the Throttle Cable Coaxially with the Throttle<br />
–Fitting and Channels of Ventilation System of Float Chamber<br />
• Specifications:<br />
–Diameter of Mixing Chamber: 31.5 mm<br />
–Diameter of Diffuser (Bore at Flange): 28 mm<br />
–Fuel Jet Capacity: 190 ml/min (K-<strong>68</strong>U) for 650cc, 220 ml/min (K-<strong>68</strong>T) for 750cc<br />
–Dimension: 77.5 X 81 X 189 mm<br />
–Weight: 0.55 kg
1. Throttle Cable<br />
2. Protective Cap<br />
3. Cable Guide<br />
4. Throttle Cover<br />
5. Throttle Spring<br />
6. O-Ring Seal<br />
7. Housing<br />
8. Slide Throttle<br />
9. Cable Catch<br />
10. Cable Stop<br />
11. Throttle Needle<br />
12. Needle Lock<br />
13. Spring Pre-load Needle<br />
14. Slide Ball<br />
15. Air Channel Main System<br />
16. Chamber Cover Gasket<br />
17. Cover of Float Chamber<br />
18. Sprayer<br />
19. Main Fuel Jet<br />
20. Idle Atomizing (Dosing) Tube<br />
21. Lock Washer<br />
22. Drain Hole<br />
23. Float Activator (Tickler)<br />
24. Idle Adjusting Screw<br />
25. Screw Spring<br />
26. Fuel Inlet Fitting<br />
27. Balancing Port<br />
28. Balance Channel of Float<br />
Chamber<br />
29. Idle Mixture Adjustment screw<br />
30. Screw Spring<br />
31. Mixing Chamber<br />
32. Transient Opening of Idle System<br />
33. Air channel of Idle System<br />
34. Idling Hole<br />
35. Removable Brass Fuel Valve Seat<br />
36. Fuel Valve Assembly<br />
37. Float Element Adjust<br />
38. Float<br />
39. Channel of Starter<br />
40. Float Axle<br />
41. Air Channel (Duct)<br />
42. Starter Plunger Assembly<br />
43. O-Ring Seal<br />
44. Jet (Nozzle)<br />
45. Needle of Corrector-Enrichenerr<br />
46. Dosing Hole<br />
47. Fuel Well (Pit)<br />
48. Fuel Channel (Duct) of Starter<br />
49. Starter Needle<br />
50. Plunger Spring<br />
51. Spring Guide<br />
52. Enrichener (a.k.a. choke or tickler)<br />
K-<strong>68</strong> Assembly Diagram
Features of K-<strong>68</strong> K<br />
Compared to Previous Versions (K-63 / K-65) K<br />
(oppozit.ru<br />
and afto.chat.<br />
.chat.ru/k<strong>68</strong>/k<strong>68</strong>.htm)<br />
• Basic Components (Housing, Throttle, Cover, Bowl) Made of Cast Aluminum Alloy<br />
–<strong>Carburetor</strong> Weighs Only 0.55 kg (Half the Weight of Previous Carbs)<br />
• Surface Contacts/Throttle Shaft Carefully Processed and Wear-Resistant Coating Applied<br />
• Throttle Spring (5): Rests on Lower Wall of Throttle with Increased Length/Number of Turns<br />
• Increased Air Velocity and Smoother Speed Control in Diffuser<br />
–Adopted Oval Shape, Elongated in Direction of Movement of Throttle<br />
• Dispensing (Throttle) Needle (11): Half Shorter and Attached to Lower Wall of Throttle<br />
Valve and Further Tightened in Direction of the Engine<br />
• Special Spring (13) with Slide Ball (14): Provides for Correction of Its Position in<br />
Increments of 0.8 mm.<br />
• Upgraded Fuel Valve Assembly (36) and Removable Brass Seat (35): Increased Reliability<br />
and Improved Maintainability<br />
• Idle Adjusting Screw (24): Positioned Horizontally and Rests on Inclined Plane (8) at<br />
Bottom of Throttle<br />
–Allows More Precise and Smooth Adjustment of Idling Speed<br />
• <strong>Carburetor</strong> Equipped with Balancing System: Consisting of Set of Channels (ducts)<br />
Connecting Float Chamber with the Atmosphere<br />
–Ensures the Chamber (at the entrance to the metering system) Constant, which Is Close<br />
to Atmospheric Pressure<br />
• Balancer System: Equipped with Fitting that Allows Drainage Hose of Surplus Fuel (for<br />
example when using quencher) to a Backup Capacity, and Not on the Ground<br />
• Float Chamber with All the “filling", Except for Fuel Valve, Remained Unchanged<br />
• Unchanged Dresser (start) Device<br />
• Adjusting <strong>Carburetor</strong> on Engine Similar to Regulation of K-65<br />
• Tests Showed K-<strong>68</strong> Is More Economical by 15-20% and Durable than Predecessors<br />
The model K-<strong>68</strong> has an advanced design and give better result than the<br />
K-65 or K301-302. It has a ellipse-shape throat, cylindrical throttle, central<br />
float chamber, and protective electro-plating of parts. All the main<br />
parts of the carburetor (body, throttle, float chamber) are aluminum alloy.
Round-Slide<br />
vs. Flat-Slide vs. Butterfly Throttle Valves<br />
•Round-Slide Throttle Valve<br />
–K-37, PZ-28, K-38<br />
–Kaptex VDC-RAM<br />
–K-<strong>68</strong><br />
–Mikuni VM-28<br />
–Jikov 2928<br />
•Flat-Slide Throttle Valve<br />
–K-301 / K-302<br />
–K-62 / K-63 / K-65<br />
K-<strong>68</strong><br />
•Butterfly Throttle Valve<br />
–Keihin CVK32<br />
The K-<strong>68</strong> has a durable round-slide throttle, much better than<br />
the fragile, U-shaped flat-slide throttle of the K-62/K-63/K-65.
Flange-Mount<br />
vs. Spigot-Mount<br />
•Flange-Mount<br />
–Bolts Directly on Cylinder Head or Adapter<br />
–K-37, PZ-28, K-38,<br />
–K-301 / K-302<br />
–K-62 / K-63 / K-65 / K-<strong>68</strong><br />
–Kaptex VDC-RAM<br />
Gasket<br />
K-<strong>68</strong>U on 750cc with<br />
Adapter Plate<br />
•Spigot-Mount<br />
–Rubber Compliant Mount to Cylinder Head<br />
–Mikuni VM-28<br />
–Jikov 2928CE<br />
–Keihin CVK32<br />
Another term describing carburetors is<br />
flange-mount or spigot-mount.
Flange-Mount:<br />
Vertical vs. Horizontal<br />
• Vertical Mounting Holes (MT-9's, MT-10's)<br />
– K-37, PZ-28, K-38, K-301, K-302<br />
• Horizontal Mounting Holes (MT-11’s, MT-16’s)<br />
– K-62, K-63, K-65, Kaptex VDC-RAM, K-<strong>68</strong><br />
K-<strong>68</strong><br />
• Transition from Vertical-to-Horizontal<br />
– Used to Transition from Older K-37/38 and K-301/302 Carbs to<br />
Modern K-62 / K-65 / K-<strong>68</strong> Carbs<br />
– Adapter Plates Readily Available<br />
An adapter plate is needed to upgrade older motorcycles<br />
to the modern horizontal pattern for the K-63 / K-65 / K-<strong>68</strong> type carbs.
<strong>Carburetor</strong> Adapter from Vertical (K-301/K-302) to a<br />
Horizontal Type of Installation (K-63/K-65/K-<strong>68</strong>)<br />
53±0.15 mm<br />
53±0.15 mm<br />
10 mm<br />
A simple conversion kit is needed to adapt from vertical (K-301/K<br />
301/K-302) 302)<br />
to a horizontal type of installation (K-63/K<br />
63/K-65/ 65/K-<strong>68</strong>).
K-<strong>68</strong>: <strong>Carburetor</strong> Adjustment<br />
(Anton Tkachenko, , March-VOYAGE (Moto(<br />
05/2K p. 70)<br />
• Start By Checking Fuel Level in Float Chamber<br />
–Once Adjusted, Level in Chamber Unlikely Varies Over Time<br />
• Check Whether Fuel Valve Closed, and Disconnect Hose from<br />
Carb Gasoline Line<br />
• Unscrew Two Nuts and Remove Carb from Cylinder Head<br />
–Do Not Detach from Throttle Cable<br />
–Remove Float Chamber<br />
–Beware of Petrol!<br />
–Pour Fuel in a Can, together with Accumulated Dirt<br />
• If Necessary, Clean Chamber and Blow Air<br />
• Turn <strong>Carburetor</strong> Upside Down<br />
• Mold Line on the Float Should Be Located Strictly Parallel to<br />
Plane of Connector Float Chamber about 13 mm Above<br />
• If Necessary to Restore Parallelism, Bend Float Support<br />
• Re-Assemble <strong>Carburetor</strong> and Install in Place<br />
• Repeat All Operations on <strong>Carburetor</strong> of Other Cylinder<br />
Mold Line<br />
of Float<br />
It's been said that a bad carburetor is usually a bad distributor in disguise.<br />
One must understand which part of the carb is responsible<br />
at different throttle settings.
If you need to find the area<br />
of operation which is<br />
giving you trouble;<br />
tape beside the throttle,<br />
mark the hand grip, and<br />
mark the tape appropriate<br />
to the amount of throttle<br />
opening (0 1/8 1/4...etc.)<br />
Next go through all the<br />
other systems -<br />
Compression, Valves,<br />
Ignition, Air filter, etc.
K-<strong>68</strong><br />
Carbs<br />
Left-Side<br />
(output flange)<br />
Left-Side<br />
(air intake)<br />
Right-Side<br />
Left-Side<br />
Left-Side<br />
Right-Side<br />
(www.oldtimergarage.eu)<br />
(cgi.ebay.com)<br />
Left-Side<br />
Right-Side<br />
Left-Side<br />
Right-Side<br />
Right-Side<br />
Right-Side<br />
K-<strong>68</strong>s are side-specific specific (left or right),<br />
always putting the adjustments on the outside.
Carb Flange Modification for Balancing (sovietsteeds<br />
•2000 Ural Patrol 650cc with Pekar K-<strong>68</strong> Carbs<br />
•Mod to Carb before Installation on the Bike<br />
•Gives a Vacuum Port for a Twinmax Balancing Meter<br />
•Hook Both Carbs Together for a Smother Ride<br />
•Used Big, Wide Papermate Ink-Pen Filler for the Stem<br />
•Preparation of Tubing<br />
•Cut the Ink Pen Filler<br />
•Place It on Drill Press<br />
•Put a Sop Rag Around It<br />
•Turn on Drill to Spin Out All the Ink<br />
•Drill Out the Flange and Install Vacuum Port<br />
sovietsteeds.com)<br />
Added Vacuum Port<br />
for Balancing Carbs
Statically Synchronizing K-<strong>68</strong>'s K <strong>68</strong>'s<br />
(Drill-Bit Method from Scooterbob, , Reprinted from Russian Iron Site)<br />
• One of the drawbacks with dual carb setups is the need to properly adjust them<br />
so they feed equal amounts of fuel/air mixture to each cylinder. If one carb is set<br />
differently from the other, the bike will be hard to start, won't idle properly and<br />
suffer from poor performance and fuel economy.<br />
• Before Any Carb Tweaking;<br />
–Ignition Setup Is Correct<br />
–Fresh Fuel in Gas Tank<br />
–Carbs are Clean<br />
–Engine Is Cold, to Get More Accurate Setting<br />
• Remove Air Tubes Off Carbs to Access the Throttle Slide-Valves<br />
• Loosen Throttle Cable Adjusters on Tops of Both Carbs and Screw them all the<br />
way in (maximum free play)<br />
• Using Left-Side Carb as Starting Point<br />
• Gently lift Slide-Valve and insert Plain End of 1/4" Drill-Bit Underneath it and<br />
Centered at Bottom of Carb Mouth<br />
–Make Sure Bit Held as Parallel to Bore as Possible while Gently Letting Slide-<br />
Valve Back Down Resting on Drill-Bit<br />
• Slowly Adjust Throttle Stop-Screw in Clockwise while gently tugging Drill-Bit<br />
until It Slides Out with Slightest Drag, Similar to Feeler Gauge to adjust valve<br />
clearances<br />
• Repeat Procedure on Right-Side Carb<br />
–This sets both carb slides at the same position, which also sets up the proper<br />
idle speed<br />
–Take your time here - it is essential to your sanity that they are as close to<br />
each other in the "feel" of the drill bit gauge as possible.
Statically Synchronizing K-<strong>68</strong>'s K <strong>68</strong>'s (cont.)<br />
(Drill-Bit Method from Scooterbob, , Reprinted from Russian Iron Site)<br />
• Adjust the majority of the slack out of the cables<br />
–Being careful to leave just a bit of looseness so as not to lift the slides off their<br />
stop screws<br />
• Twist Throttle Open Enough to Insert Plain End of 3/8" Drill-Bit under Left Carb<br />
Slide-Valve<br />
• Gently Roll-Off Throttle until Slide-Valve Contacts Drill-Bit<br />
• Wrap Electrical Tape around Throttle Grip and Handlebar to Hold It Steady<br />
(throttle lock)<br />
• gently and slowly twist Throttle while tugging on the drill bit until it slides out<br />
with Slight drag<br />
• The throttle should stay in place from the tape, so carefully re-insert the drill bit<br />
to make sure<br />
• Adjust and re-tape the throttle as necessary until you get a "feeler gauge" sliding<br />
fit on the drill bit without twisting the throttle.<br />
• Remove the slack from the left side throttle cable and lock the adjuster<br />
• Re-check the fit of the drill bit<br />
• If everything is okay, move to the right side carb and lift the slide place the 3/8"<br />
bit underneath. Slowly adjust the slack out of the right side throttle cable until it<br />
lifts the slide enough to get that feeler gauge fit. Lock the right side throttle cable<br />
adjuster.<br />
• Take the clamp off the throttle handle and check for smooth operation. Now that<br />
the idle stops and the cable pulls are synched, you can adjust the idle mixture<br />
screws. Screw both of them in till they lightly seat and then back them out 1 1/2<br />
turns.
Statically Synchronizing K-<strong>68</strong>'s K <strong>68</strong>'s (cont.)<br />
(Drill-Bit Method from Scooterbob, , Reprinted from Russian Iron Site)<br />
• Re-install Air Tubes and Start Motorcycle<br />
• Back Each Mixture Screw Out ¼-Turn at a Time until Engine Speed Drops Off<br />
• Repeat Same Small Adjustments to Each Carb<br />
–DO NOT twiddle one without the other or you will lose your "coarse<br />
adjustment" and have to start all over again.<br />
–Take your time here and turn the screws slowly to give the engine time to react<br />
–When the engines slows and changes pitch, go back in 1/4 turn, or until the<br />
engine speed picks up a bit<br />
–Then go an additional 1/8 turn in.<br />
• If the engine is idling too fast, turn each idle stop screw counter-clockwise a<br />
small and equal amount until the speed suits you<br />
–Turn Clockwise If Idle Is Too Slow<br />
–Engine should now be warm so a 500-700rpm idle should be good<br />
–If the engine is getting hot, place a couple of box fans in front of the cylinders<br />
and turn them on high to help dissipate the heat while you continue with the<br />
procedure.<br />
• Slowly open the throttle off idle and see that it doesn't go "dut-dut-dut-dut-dut"<br />
on one cylinder as it accelerates<br />
–If it does, you'll need to re-synch the cables<br />
–Pull each cable out of it's cup in the cable adjuster a tiny amount until you<br />
locate the side that starts running better (easy to hear if you have an exhaust<br />
system without a crossover pipe)<br />
–Then adjust the cable on that side only until the uneven acceleration is cured<br />
• Take Bike Out for Short Run to Check Performance<br />
–If all goes well, pat yourself on the back for a job well done!<br />
• Be sure to check your plugs after a short ride<br />
–They will tell you volumes, and maybe prevent that holed piston
Setting K-<strong>68</strong> Carbs (gspell<strong>68</strong>.multiply.com)<br />
• Instructions based on revising the generic K-301/K-302/K-37. The same procedure as setting K-301-K-<br />
302 except... that it is now VERTICAL (mixture) and HORIZONTAL (slide lift) adjustments.<br />
Tested on my personal bike and it works great.<br />
1. Warm up the engine (make sure both sides get hot because many times bikes are only running off of<br />
one cylinder). If installed, disconnect the supercharger hose and plug up the carb holes or as my lazy<br />
arse would do, pinch off the tube with vise-grips so that absolutely ZERO air passes from one side to the<br />
other. Then, kill or ground out one cylinder; we'll set the carb on the other cylinder.<br />
2. Loosen the carb neck screws so that there is slack between the end<br />
of the cable casing and the carb neck.<br />
3. Note that it is now VERTICAL (mixture) and HORIZONTAL (slide lift) adjustments.<br />
4. Screw the VERTICAL screw 1.5 turns out from a softly seated, fully in position (if already idling at all,<br />
skip this step).<br />
5. Set the HORIZONTAL screw for minimum steady operation.<br />
6. Adjust the VERTICAL screw for maximum engine speed.<br />
7. Set the HORIZONTAL screw for minimum steady operation again by backing it out.<br />
8. N/A.<br />
9. Repeat for the other side.<br />
10. Note differences in engine speeds when operating on single cylinders. Plug up both cylinders HT<br />
cables. Adjust the HORIZONTAL screws equally in 1/8 turns for final low speed idle operation.<br />
11. N/A.<br />
12. Put it on the center stand (or jack up the drive wheels on an MT-16)<br />
13. Fire it up,<br />
14. Put it in 4th gear (might wanna chock it),<br />
15. Rev it up to 30-40khp,<br />
16. Clamp/hold the throttle in place, AND DO NOT CHANGE UNTIL THE PROCEDURE IS OVER<br />
17. Disconnect (or ground) one cylinder wire,<br />
18. Note exactly what the speedometer settles down to after 10 seconds<br />
19. Now quickly re-connect that side disconnect the other (don't move the throttle even though it'll rev<br />
up some)<br />
20. Adjust the carb cable ferrule on the running side to match the exact speed you noted while the first<br />
side was running<br />
21. Now let off the throttle and reconnect your supercharger
K-<strong>68</strong> Mixing Chamber (Antoni<br />
Font at Russian Iron Board)<br />
K-<strong>68</strong> Float Chamber (Antoni<br />
Font at Russian Iron Board)<br />
Main Jet<br />
Main Jet<br />
Idle Jet<br />
Starter Jet
K-<strong>68</strong> Floats and Needles (Antoni<br />
Font at Russian Iron Board)<br />
Jet needle has 5<br />
positions of<br />
adjustment via the<br />
C-clip. Factory<br />
setting is the middle<br />
position. Lower the<br />
C-clip enriches the<br />
mixture...raising the<br />
clip leans it.<br />
Floats<br />
are notorious for<br />
having holes or<br />
cracking<br />
Float Needle Valve
K-<strong>68</strong> Throttle, Floats and Ticklers (Antoni<br />
Font at Russian Iron Board)<br />
Slide Throttle Spring<br />
Round-Slide Throttle<br />
Tickler used to<br />
prime the carbs for<br />
starting under<br />
Normal conditions<br />
Starter “Tickler”<br />
The K-<strong>68</strong> has a durable round-slide throttle, much better than<br />
the fragile, U-shaped flat-slide throttle of the K-62/K-63/K-65.
Typical Sale of Pair CarbsC<br />
K-<strong>68</strong>Y L/R (www.<br />
• One-Barrel <strong>Carburetor</strong><br />
with Horizontal Stream of<br />
air-fuel mixture<br />
• Ellipse-Shaped Throat<br />
• Cylindrical Throttle Valve<br />
• Central Float Chamber<br />
• Protective Electro-Plating<br />
of Parts<br />
• All Main Parts of Carb<br />
(body, throttle, float<br />
chamber) Made of<br />
Aluminum Alloy<br />
• 100% Brand NEW<br />
• Made by PEKAR (Russia)<br />
www.russiangarage.com)
Typical K-<strong>68</strong> K<br />
Carb Repair Kits Available (www.f2motorcycles.ltd.<br />
•Kit of Parts to Overhaul the K-<strong>68</strong> <strong>Carburetor</strong>s<br />
•K-<strong>68</strong> <strong>Carburetor</strong>s Are Left- and Right-Handed<br />
–Typical Kits Supplied Only in Pairs<br />
•Includes:<br />
–Float with Axle<br />
–Two Jets: Idle and Main<br />
–Valve Needle<br />
–Idling tube<br />
–Idling Adjusting Screw<br />
–Two Gaskets<br />
–Throttle Needle<br />
–Throttle<br />
(www.f2motorcycles.ltd.uk)<br />
K-<strong>68</strong>Y (right-01)<br />
K-<strong>68</strong>Y (left-02)<br />
f2motorcycles
K-<strong>68</strong> Heat Shields (www.<br />
(www.russianiron.com)<br />
•Mark Concerned that K-<strong>68</strong>’s on His Dalesman 650 Tend to Get Warm<br />
•Bought a Sheet of 3/16" thick Tufnol (British laminated phenolic resin<br />
and woven cotton or linen fabric)<br />
•Made Insulating Spacers that Fit the Carbs and Inlets, with Correct Stud-<br />
Spacing (57mm)<br />
•Extended Spacers Downwards to Give Float Bowls a Bit of Coverage<br />
•Cut Out Pattern from Hardboard to Try for Size, then Transfer to Tufnol<br />
Sheet, Making a Left- & Right-Handed Pair<br />
•Band-Saw and Drill-Press Helpful<br />
•Shape Is Fairly Simple<br />
–Little Scallop from One Edge to Clear Part of Cylinder Head Casting<br />
•After Test Run and Letting It Idle Showed Carbs to Be Definitely Cooler<br />
to the Touch
Heat Shield for K-63 K<br />
/ K-65 K<br />
/ K-<strong>68</strong>K<br />
•Product No.: S119-SB<br />
•Price: 7.49 EUR (2011)<br />
•Protects <strong>Carburetor</strong> Against Cylinder Heat<br />
•Suitable for Both Sides<br />
–Has to Be Bent around <strong>Carburetor</strong><br />
–Gap Around <strong>Carburetor</strong> Should Be 5mm or More<br />
•Gasket: Use S115 in Front and Behind the Shield<br />
–<strong>Carburetor</strong> Gasket 3mm Original Design<br />
–Contains Asbestos, Best Insulating against Engine Heat<br />
–If Necessary Use Longer Stud Bolts<br />
–Price: 1.5 EUR (2011) Each<br />
•Surface Treatment: Use S1501 Black Exhaust Paint<br />
–Varnish for Exhaust Tubes<br />
–Made by MAKRA<br />
–<strong>Good</strong> Covering, up to 650°C<br />
–400 ml<br />
–Price: 7.0 EUR (2011)<br />
<strong>68</strong> (www.ural<br />
ural-zentrale.de)
Stainless-Steel Steel Cover for K-<strong>68</strong> K<br />
<strong>Carburetor</strong><br />
(www.ural-zentrale.de)<br />
Product No.: S113-K<br />
Price: 10 EUR<br />
One complaint against the K-<strong>68</strong> is the fragility of the plastic cap.<br />
You can grip it with pliers or step on it.
Chinese Variety on the K-<strong>68</strong> K<br />
Theme<br />
(www. www.henriksson.ee)<br />
00.82


