SELO-BFE - SECU Sicherheitsprodukte GmbH
SELO-BFE - SECU Sicherheitsprodukte GmbH
SELO-BFE - SECU Sicherheitsprodukte GmbH

Create successful ePaper yourself
Turn your PDF publications into a flip-book with our unique Google optimized e-Paper software.
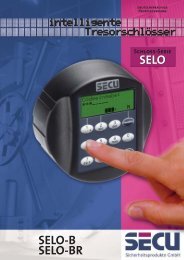
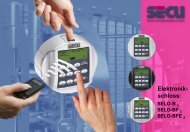
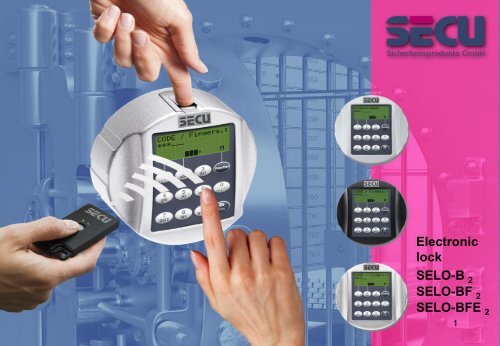
Electronic<br />
lock<br />
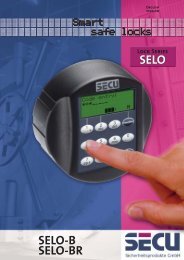
<strong>SELO</strong>-B 2<br />
<strong>SELO</strong>-BF 2<br />
<strong>SELO</strong>-<strong>BFE</strong> 2<br />
1
1. Generally<br />
Thank you for deciding for a safe with the <strong>SECU</strong><br />
<strong>Sicherheitsprodukte</strong> <strong>SELO</strong>-B 2 , <strong>SELO</strong>-BF 2 or <strong>SELO</strong>-<strong>BFE</strong> 2 . You<br />
have acquired a product meeting extremely high security<br />
requirements and developed and manufactured using the latest<br />
technical potential.<br />
Please read the entire User Manual before programming and store<br />
it at a safe place for future reference.<br />
The electronics is available in a version with a fingerscan unit<br />
<strong>SELO</strong>-BF 2 / <strong>SELO</strong>-<strong>BFE</strong> 2 and in another version without the<br />
fingerscan unit <strong>SELO</strong>-B 2 .<br />
The present user manual applies to both versions, however, the<br />
menu structure is able to detect automatically the appropriate<br />
version and thus only the menu items intended<br />
for it are active. The items relevant only for the electronics with a<br />
fingerscan unit are marked with *.<br />
Generally, you can open the safe in three possible ways:<br />
• with a code (<strong>SELO</strong>-B 2 , <strong>SELO</strong>-BF 2 and <strong>SELO</strong>-<strong>BFE</strong> 2 )<br />
• with an E-Key (<strong>SELO</strong>-B 2 , <strong>SELO</strong>-BF 2 and <strong>SELO</strong>-<strong>BFE</strong> 2, ident<br />
medium E-Key not included in the delivery)<br />
• with your fingerprint (<strong>SELO</strong>-BF 2 and <strong>SELO</strong>-<strong>BFE</strong> 2 )*<br />
The administrator code when delivered from the factory is<br />
123456. This code must be changed. Additional 9 users with a<br />
code to be entered by the keyboard can be defined. Such code<br />
has always six digits, similarly to administrator’s code.<br />
Additionally, up to 250 E-Keys for contactless opening can be<br />
stored.<br />
In case you posses a safe with a fingerscan unit, up to 20 users<br />
with fingerscan can be additionally stored. Users with fingerscan<br />
are identified in the user list of the lock as<br />
USER xxx_FP.<br />
The <strong>SELO</strong>-BF 2 electronics is the first safe electronics, for which<br />
the opening based on fingerscan is certified.<br />
At least two opening codes shall be entered to open the safe using<br />
fingerprint (<strong>SELO</strong>-BF 2 and <strong>SELO</strong>-<strong>BFE</strong> 2 ). Another opening code<br />
must be entered in addition to fingerscan. This can be either<br />
another Fingerscan (<strong>SELO</strong>-BF 2 only), but also a pin code or an<br />
additional E-Key.<br />
All the fingerscans are stored in the system with a value of 6/12<br />
(corresponding to a half value). In order to acquire the<br />
authorization to open, a value of at least 1 must be achieved. A pin<br />
code with a value of at least ½ must be therefore entered for the<br />
opening, a value of 1 can be also achieved with an additional<br />
fingerscan.<br />
Attention: The values can be adjusted only using additional software. When<br />
the programming is made on the safe faceplate, the pin code and the E-Key<br />
are automatically assigned the value of 1, the fingerscan receives the value of<br />
½.<br />
Attention: For security reasons as related to programming using the software,<br />
it is not allowed to communicate all the opening codes to a single user in case<br />
three opening codes are used (value A fingerscan is ½, value B 1/3, value C<br />
1/3).<br />
Example:<br />
User A has defined his finger in the system as opening code (its value is ½).<br />
This user can be still authorized in the system with an additional opening code<br />
with a value of 1/3. A user B now needs an additional opening code with a<br />
value of at least 1/3. If a code and/or an E-Key should be additionally<br />
assigned to a user with fingerscan, it is to be created separately. Inversely,<br />
the fingerscan should be assigned separately to a user with a code and/or an<br />
E-Key*.<br />
To enable the use of additional functions such as time switching or calendar<br />
functions, you need additional software. Then you will be able to use the<br />
overall user administration.<br />
Attention: Should the user data in the safe electronics be administered using<br />
the software, the data must be stored on a removable data carrier. Their<br />
saving in a computer is not admissible, is identified by the system and not<br />
allowed. The removable data carrier should be stored at a safe place (e.g. a<br />
safe) after the programming.<br />
In order to enhance the protection against intrusion, the following points<br />
should be observed:<br />
For locking systems with material code carriers, e.g. an E-Key:<br />
• The code carrier should be consistently stored safely, so that it<br />
is accessible only to the authorized persons.<br />
• In case of a loss of the code carrier, the lock should be<br />
immediately replaced or converted to a new combination by<br />
changing the coding, and/or the code of the lost code carrier<br />
should be blocked/deleted.<br />
For locking systems requiring a code:<br />
• No personal data (e.g. dates of birth) or other data, for which a<br />
link can be derived to the code owner, should be used for<br />
coding.<br />
• If the code is stored in writing, such document should be<br />
• consistently stored safely, so that it is accessible only to the<br />
authorized persons.<br />
Made in Germany<br />
www.secu-gmbh.de<br />
<strong>SELO</strong>-B 2<br />
<strong>SELO</strong>-BF 2<br />
<strong>SELO</strong>-<strong>BFE</strong> 2<br />
2
• Attention: Any changes of the administrator code and of the user<br />
codes shall be made with the safe door opened!<br />
• When the locking system has been reset to another code, this<br />
new code should be repeatedly used with the safe door opened.<br />
1.1 Description of basic functions<br />
You can program your lock based on the following description.<br />
You can see the programming instructions on the display. To program the<br />
lock (enter into the menu), please press the “Function” key, when the symbol<br />
“M” is displayed. You can move within the menu using the keys “1” scroll up<br />
(symbol on display) and “2” scroll down (symbol on display). When the<br />
symbol “
1.3 Detailed description of selected basic functions<br />
1. Opening the safe using the factory code<br />
• Press the On/Enter key<br />
• The Code/Fingers** indication is displayed (**in case you possess<br />
electronics without fingerscan, Code is displayed instead.<br />
• Enter the factory set code 123456<br />
• The instruction Please turn knob is displayed<br />
Attention: The message Please turn knob implies the action with the knob of<br />
the locking unit, for which the opening code has been entered.<br />
2. Changing the administrator code<br />
• Press the On/Enter key<br />
• The indication of Code/Fingers* is displayed<br />
• Press the Function key<br />
• The Change code menu is displayed<br />
• Press the On/Enter key<br />
• The indication of Administrator is displayed<br />
• Press the On/Enter key<br />
• The indication of the Old code is displayed<br />
• Enter the factory set code 123456<br />
• Press the On/Enter key<br />
• The indication of the New code is displayed<br />
• Enter the new code<br />
• Press the On/Enter key<br />
• The indication of Repeat code is displayed<br />
• Enter the new code<br />
• Press the On/Enter key<br />
• The indication of Code successfully changed is displayed<br />
3. Creating a user with a code:<br />
• Press the On/Enter key<br />
• The indication of Code/Fingers** is displayed<br />
• Press the Function key<br />
• The Change code menu is displayed<br />
• By pressing the key 2 reach the Administrator menu<br />
• Press the On/Enter key<br />
• Admin setup Create user is displayed<br />
• Press the On/Enter key<br />
• Create code is displayed<br />
• Press the On/Enter key<br />
• At this point you are asked to enter the admin. code (factory setting<br />
123456)<br />
• The indication of User 00x is displayed<br />
• Please enter the user code and confirm it with ENTER<br />
• Press the On/Enter key<br />
• FS combination to be confirmed with ENTER*** is displayed<br />
• Press the On/Enter key and accordingly the Function key<br />
• After confirmation, Save with the On key is displayed.<br />
***If a user with a value of 1 (right to open alone) should be created, the<br />
message FS combination to be confirmed with ENTER must be<br />
followed by pressing the Function key. If the user should be assigned<br />
access in combination with a fingerscan only, this inquiry is to be<br />
confirmed with ENTER.<br />
4. Creating a user with an E-Key:<br />
• Press the On/Enter key<br />
• The indication of Code/Fingers** is displayed<br />
• Press the Function key<br />
• The Change code menu is displayed<br />
• By pressing the key 2 reach the Administrator menu<br />
• Press the On/Enter key<br />
• Admin setup Create user is displayed<br />
• Press the On/Enter key<br />
• Create E-Key is displayed<br />
• Press the On/Enter key<br />
• At this point you are asked to enter the admin. code (factory setting<br />
123456)<br />
• FS combination to be confirmed with ENTER*** is displayed<br />
• Press the On/Enter key and accordingly the Function key<br />
• User 00x Store E-Key using ENTER is displayed<br />
• Press the On/Enter key<br />
• E-Key in Prog mode, continue with Enter is displayed<br />
• Press the On/Enter key<br />
• After confirmation, Save with the On key is displayed.<br />
***If a user with a value of 1 (right to open alone) should be created, the<br />
message FS combination to be confirmed with ENTER must be<br />
followed by pressing the Function key. If the user should be assigned<br />
access in combination with a fingerscan only, this inquiry is to be<br />
confirmed with ENTER.<br />
5. Storing a user with fingerprint*:<br />
• Press the On/Enter key<br />
• The indication of Code/Fingers** is displayed<br />
• Press the Function key<br />
• The Change code menu is displayed<br />
• By pressing the key 2 reach the Administrator menu<br />
• Press the On/Enter key<br />
• Admin setup Create user is displayed<br />
• Press the On/Enter key<br />
• By pressing the key 2 reach the Create fingerscan menu<br />
• Press the On/Enter key<br />
• At this point you are asked to enter the admin. code (factory setting<br />
123456)<br />
• The indication of Create fingerscan is displayed<br />
• The indication of Store finger is displayed<br />
• This procedure is repeated several times<br />
• After a successful entry the indication User xxx successfully created<br />
is displayed<br />
Made in Germany<br />
www.secu-gmbh.de<br />
<strong>SELO</strong>-B 2<br />
<strong>SELO</strong>-BF 2<br />
<strong>SELO</strong>-<strong>BFE</strong> 2<br />
4
Attention: When saving a fingerprint it is important that the finger is laid<br />
evenly and in a straight position over the sensor. Follow the instructions on the<br />
display. The finger is saved only when it can be read in an optimum quality.<br />
6. Opening with fingerprint*:<br />
• Press the On/Enter key<br />
• The indication of Code/Fingerp is displayed<br />
• Move the saved finger over the sensor<br />
• Value not achieved is displayed<br />
• The Code/Fingers indication is displayed<br />
• At this point, enter an additional opening code (not Fingerprint with<br />
electronic <strong>SELO</strong>-<strong>BFE</strong> 2 ).<br />
• The instruction Please turn knob is displayed<br />
In case following message is displayed: Value not achieved , an additional<br />
opening code shall be entered. (When the programming is made using the<br />
software only. When programming using the safe electronics, the indication<br />
Please use rotating knob is displayed already when the second opening code<br />
has been entered.)<br />
7. Deleting a finger*:<br />
• Press the On/Enter key<br />
• The indication of Code/Fingers** is displayed<br />
• Press the Function key<br />
• The Change code menu is displayed<br />
• By pressing the key 2 reach the Administrator menu<br />
• Press the On/Enter key<br />
• Admin setup Create user is displayed<br />
• By pressing the key 2 reach the Admin. setup Delete menu<br />
• Press the On/Enter key<br />
• Delete user is displayed<br />
• Press the On/Enter key<br />
• At this point you are asked to enter the admin. code (factory setting<br />
123456)<br />
• Now you have to select the appropriate user by pressing the keys 1<br />
or 2<br />
• Press the On/Enter key<br />
• The indication of Delete data to be confirmed with the On key is<br />
displayed.<br />
• Press the On/Enter key<br />
• The indication of Data record deleted is displayed<br />
1.4 Error messages*<br />
The following error messages are indicated when a finger is being saved or<br />
the safe opened:<br />
Error message<br />
too fast! please repeat<br />
too aslant! please repeat<br />
too short! please repeat<br />
place to the center and repeat!<br />
Elimination of causes<br />
Move the finger more slowly<br />
over the sensor<br />
Move the finger straight over<br />
the sensor be read<br />
Move the finger over the<br />
sensor in a way allowing more<br />
surface area to<br />
Place your finger centrally<br />
over the sensor<br />
Made in Germany<br />
www.secu-gmbh.de<br />
Additional users can be deleted using the On/Enter key. By pressing the<br />
Function key, you can reach higher menu levels up to the code entry.<br />
<strong>SELO</strong>-B 2<br />
<strong>SELO</strong>-BF 2<br />
<strong>SELO</strong>-<strong>BFE</strong> 2<br />
5
1.5 Menu structure<br />
Made in Germany<br />
www.secu-gmbh.de<br />
<strong>SELO</strong>-B 2<br />
<strong>SELO</strong>-BF 2<br />
<strong>SELO</strong>-<strong>BFE</strong> 2<br />
6
1.6 REPLACING THE BATTERIES<br />
As soon as the symbol depicting the battery condition indicates<br />
„almost empty“, the operator is also warned Please replace<br />
batteries! each time the lock is operated. We recommend<br />
you heed the advice and change the batteries! The lock can<br />
only be unblocked a further, approximately, 50 times.<br />
Please note that none of the number codes can be changed<br />
until a set of fresh batteries has been fitted. To change the<br />
batteries, lift off the cover of the battery compartment with<br />
the tip of a screwdriver. Fit three leak-proof, type Mignon<br />
LR6, AA, alkaline batteries, paying attention to the correct<br />
polarity. Dispose of the old batteries in accordance with<br />
anti-pollution legislation!<br />
Made in Germany<br />
www.secu-gmbh.de<br />
<strong>SELO</strong>-B 2<br />
<strong>SELO</strong>-BF 2<br />
<strong>SELO</strong>-<strong>BFE</strong> 2<br />
7
Made in Germany<br />
www.secu-gmbh.de<br />
<strong>SECU</strong> <strong>Sicherheitsprodukte</strong> <strong>GmbH</strong><br />
Wormgermühle<br />
D – 58540 Meinerzhagen<br />
Germany<br />
www.secu-gmbh.de<br />
mail@secu-gmbh.de<br />
Irrtum und Änderungen vorbehalten<br />
Omissions and changes reserved<br />
Sous réserve de fautes d‘erreurs et de modifications<br />
BA <strong>SELO</strong>-B 2 , <strong>SELO</strong>-BF 2 and <strong>SELO</strong>-<strong>BFE</strong> 2 MD 07/2011<br />
©<strong>SECU</strong> <strong>Sicherheitsprodukte</strong> <strong>GmbH</strong><br />
<strong>SELO</strong>-B 2<br />
<strong>SELO</strong>-BF 2<br />
<strong>SELO</strong>-<strong>BFE</strong> 2<br />
8