Unison Paradigm Portable Touchscreen Setup Guide - ETC
Unison Paradigm Portable Touchscreen Setup Guide - ETC
Unison Paradigm Portable Touchscreen Setup Guide - ETC

You also want an ePaper? Increase the reach of your titles
YUMPU automatically turns print PDFs into web optimized ePapers that Google loves.
<strong>Portable</strong> <strong>Touchscreen</strong> <strong>Setup</strong> <strong>Guide</strong><br />
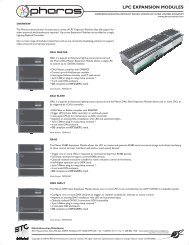
Overview<br />
The <strong>Paradigm</strong> <strong>Portable</strong> <strong>Touchscreen</strong> uses a high-resolution, 7” wide-screen, color liquid-crystal display<br />
that is bright and easy to read, with controllable back lights. The station is touch-sensitive and provides<br />
visual as well as optional feedback that tells you when your commands are fully registered.<br />
Each control on the display is designed to your specifications using ControlDesigner software.<br />
Additional features include:<br />
• A “Ready-When-You-Are” built-in proximity and ambient light sensor.<br />
• <strong>Portable</strong> LinkConnect, using Echelon ® LonTalk protocol with LinkPower, the topology-free system gives<br />
you the freedom to connect the LCD where you need it, and provide unique controls for each connection<br />
point to the system.<br />
• USBConnect support, a USB flash drive connection for configuration and theme upload and download.<br />
• Quickload, SD media support (2GB or smaller) for upload and backup of the configuration and theme.<br />
• Supports standard or custom graphical control pages.<br />
Corporate Headquarters 3031 Pleasant View Road, P.O. Box 620979, Middleton, Wisconsin 53562-0979 USA Tel +608 831 4116 Fax +608 836 1736<br />
London, UK Unit 26-28, Victoria Industrial Estate, Victoria Road, London W3 6UU, UK Tel +44 (0)20 8896 1000 Fax +44 (0)20 8896 2000<br />
Rome, IT Via Ennio Quirino Visconti, 11, 00193 Rome, Italy Tel +39 (06) 32 111 683 Fax +44 (0) 20 8752 8486<br />
Holzkirchen, DE Ohmstrasse 3, 83607 Holzkirchen, Germany Tel +49 (80 24) 47 00-0 Fax +49 (80 24) 47 00-3 00<br />
Hong Kong Rm 1801, 18/F, Tower 1 Phase 1, Enterprise Square, 9 Sheung Yuet Road, Kowloon Bay, Kowloon, Hong Kong Tel +852 2799 1220 Fax +852 2799 9325<br />
Service: (Americas) service@etcconnect.com (UK) service@etceurope.com (DE) techserv-hoki@etcconnect.com (Asia) service@etcasia.com<br />
Web: www.etcconnect.com Copyright © 2009 <strong>ETC</strong>. All Rights Reserved. Product information and specifications subject to change.<br />
7184M2130 Rev A Released 2009-06 Page 1 of 2<br />
Connect <strong>Paradigm</strong> <strong>Portable</strong> <strong>Touchscreen</strong><br />
Step 1: Swing the cover completely around the unit to create a tabletop stand. The angle of the stand provides for easy viewing<br />
of the LCD.<br />
Step 2: Connect to the receptacle station (UH1RS).<br />
NOTE: Startup takes a minimum of 20 seconds depending on the configuration.<br />
Step 3: The <strong>Touchscreen</strong> opens the internally stored configuration and theme according to the receptacle station it is connected<br />
to. Utilize the controls on the display to access the lighting system.<br />
NOTE: For configuration or theme upload and download, see page 2 of this document.<br />
Cleaning the Display<br />
Use a dry micro fibre or lint-free cloth to clean the LCD. Do not use any chemical or water-base solutions.
Bind the <strong>Portable</strong> <strong>Touchscreen</strong><br />
Before binding your <strong>Portable</strong> <strong>Touchscreen</strong>, please confirm the installation meets the following requirements:<br />
• Both the receptacle station (UH1RS) and the <strong>Portable</strong> <strong>Touchscreen</strong> (P-LCD-P) have been added to the configured<br />
space in LightDesigner.<br />
• The <strong>Portable</strong> <strong>Touchscreen</strong> must be enabled for use with the specific receptacle station (UH1RS). This is set in the<br />
“<strong>Portable</strong>” property of the LightDesigner Property Editor for the <strong>Touchscreen</strong>. You can enable a <strong>Portable</strong> <strong>Touchscreen</strong><br />
to more than one receptacle station in a configuration. The displayed configuration and theme may be different for<br />
each configured <strong>Touchscreen</strong> and receptacle station connector depending on the assignments in the configured<br />
space.<br />
• The receptacle station’s physical ID (found on a label on the front of the UH1RS station) must be associated to the<br />
configured receptacle station in LightDesigner. This ID should be manually entered into the “Connector ROM” property<br />
in the LightDesigner Property Editor for that station. This is the recommended approach as it avoids manual binding at<br />
the <strong>Paradigm</strong> processor.<br />
• The LightDesigner configuration has been uploaded to the <strong>Paradigm</strong> ACP(s). Reference the LightDesigner online help<br />
system for details on uploading a configuration.<br />
Step 1: Physically connect the <strong>Portable</strong> <strong>Touchscreen</strong> to the receptacle station (UH1RS).<br />
NOTE: Startup takes a minimum of 20 seconds depending on the configuration. If the receptacle station‘s<br />
physical ID is associated in the <strong>Paradigm</strong> configuration, the <strong>Portable</strong> LCD will automatically bind<br />
at startup. If you receive a “No Response from Server” message, proceed to Step 2.<br />
Step 2: At the <strong>Paradigm</strong> processor facepanel, press enter to access the menu.<br />
Step 3: Navigate to the Arch <strong>Setup</strong> > LonWorks Connections menu and bind the <strong>Touchscreen</strong> station using the<br />
“Connect Device” option. Reference the <strong>Paradigm</strong> ACP Configuration Manual for complete details on<br />
connecting a device.<br />
Configuration and Theme Files<br />
Exporting Files from LightDesigner<br />
Step 1: From the LightDesigner configuration, select (File) “Export <strong>Portable</strong> LCD Files”. The “Export <strong>Portable</strong> LCD<br />
Files” dialog displays.<br />
Step 2: Select which <strong>Portable</strong> LCD files will be exported from the selection and click [OK]. The “Browse For Folder”<br />
dialog displays for selection of a location the files will be exported to, such as a removable USB device. Two file<br />
types will be exported, the configuration file saves with a “.lcdconf” extension and the theme saves with an<br />
“.lcdtheme” extension.<br />
NOTE: It is best to store the configuration and theme files to removable media for loading to the<br />
<strong>Touchscreen</strong>.<br />
Page 2 of 2<br />
Loading Files onto the <strong>Touchscreen</strong><br />
NOTE: If the <strong>Portable</strong> <strong>Touchscreen</strong> is already bound to the <strong>Paradigm</strong> processor, it will automatically begin<br />
retrieving its LCD configuration file when powered. Press the [Cancel] button to stop the transfer<br />
and manually load the configuration files instead.<br />
I/O Indicators<br />
Reset Mode Aux Act Svc Svc Data<br />
Status<br />
LON<br />
• Reset pin - when pressed, resets the <strong>Portable</strong> LCD software<br />
Reset Mode Aux Act Svc Svc Data<br />
Status<br />
• Mode pin - press once for <strong>Setup</strong> menu. Press and hold for 4 seconds to calibrate the <strong>Touchscreen</strong>.<br />
• Aux LED - indicates the <strong>Touchscreen</strong> is powered (Aux 24 Vdc)<br />
• Act LED - application activity is detected<br />
• Svc pin- when pressed, sends the stations Neuron ID to the connected processor<br />
• Svc LED- service pin indicator<br />
• Data LED - indicates LON network activity<br />
Step 1: Open the I/O access door to reveal the access points for removable media (USB and SD) and the Status and<br />
LON LEDs.<br />
Step 2: Insert removable media into the appropriate port.<br />
Step 3: Press the “Mode” pin to initiate the “<strong>Setup</strong>” menu.<br />
Step 4: Press the [<strong>Setup</strong>] button located on the top left corner of the display.<br />
Step 5: Press [Files] button. A keypad displays for passcode entry.<br />
Step 6: Enter passcode 4116 to access the Files menu.<br />
NOTE: Standard <strong>ETC</strong> provided themes used in your configuration do not need to be manually uploaded to<br />
the LCD. These themes are loaded for you at the factory and will display beneath the “Themes”<br />
directory.<br />
Step 7: Press the [Config] button to load the configuration file(s) to the <strong>Touchscreen</strong> or press [Theme] to load the theme<br />
file(s) to the <strong>Touchscreen</strong>.<br />
Step 8: Press [Load From] and choose the removable media source the configuration files will be loaded from, then<br />
press [OK].<br />
Step 9: Select the specific file (or select multiple files) from the list that you would like to load onto the <strong>Touchscreen</strong>.<br />
NOTE: It is possible to retrieve configuration files from the <strong>Paradigm</strong> ACP on the <strong>Touchscreen</strong>, however<br />
<strong>ETC</strong> recommends using removable media to load configurations and themes on portable<br />
<strong>Touchscreen</strong>s to reduce commissioning time. If an automatic configuration file transfer begins,<br />
press the [Cancel] button to stop the transfer and manually upload the configuration.<br />
LON