lifebook a531 lifebook ah531
lifebook a531 lifebook ah531
lifebook a531 lifebook ah531

Create successful ePaper yourself
Turn your PDF publications into a flip-book with our unique Google optimized e-Paper software.
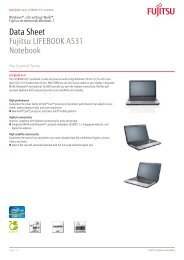
Operating Manual<br />
LIFEBOOK A531<br />
LIFEBOOK AH531<br />
System
Congratulations, you have decided to buy an<br />
innovative Fujitsu product.<br />
The latest information about our products, useful tips, updates etc. is available<br />
from our website: "http://ts.fujitsu.com"<br />
For automatic driver updates, go to: "http://support.ts.fujitsu.com/com/support/index.html"<br />
Should you have any technical questions, please contact:<br />
• our Hotline/Service Desk (see Service Desk list or visit:<br />
"http://ts.fujitsu.com/support/servicedesk.html")<br />
• Your sales partner<br />
• Your sales office<br />
We hope you really enjoy using your new Fujitsu system.
Copyright<br />
Fujitsu Technology Solutions 02/2011<br />
Published by<br />
Fujitsu Technology Solutions GmbH<br />
Mies-van-der-Rohe-Straße 8 (Mies-van-der-Rohe Street No. 8)<br />
80807 Munich, Germany<br />
Contact<br />
http://ts.fujitsu.com/support<br />
All rights reserved, including intellectual property rights. Subject to technical alterations. Delivery subject to availability.<br />
No warranty is offered or liability accepted in regard of the completeness, correctness, or current applicability of any<br />
data or illustrations. Brand names may be protected trademarks of the respective manufacturer and/or protected<br />
by copyright. Use of these by third parties for their own purposes may constitute an infringement of the holders’<br />
rights. Further information can be found at "http://ts.fujitsu.com/terms_of_use.html"<br />
Order No. Fujitsu Technology Solutions GmbH: A26391-K330-Z320-1-7619, edition 1
LIFEBOOK A531<br />
LIFEBOOK AH531<br />
Operating Manual<br />
Innovative technology 7<br />
Ports and controls 9<br />
Important notes 12<br />
First-time setup of your device 16<br />
Working with the notebook 19<br />
Security functions 44<br />
Connecting external devices 48<br />
Removing and installing components<br />
during servicing 52<br />
Settings in BIOS Setup Utility 60<br />
Troubleshooting and tips 62<br />
Technical data 70<br />
Manufacturer’s notes 72<br />
Index 79
Microsoft, MS, Windows XP and Windows 7 are registered trademarks of the Microsoft Corporation.<br />
Adobe Reader is a trademark of Adobe Systems Incorporated.<br />
MultiMediaCard is a registered trademark of Infineon Technologies AG<br />
Sony and Memory Stick are registered trademarks of Sony Electronics, Inc.<br />
All other trademarks referenced are trademarks or registered trademarks of their<br />
respective owners, whose protected rights are acknowledged.<br />
Copyright © Fujitsu Technology Solutions GmbH 2011<br />
All rights reserved, including rights of translation, reproduction by printing, copying<br />
or similar methods, in part or in whole.<br />
In the event of violations, perpetrators will be liable to prosecution for damages.<br />
All rights reserved, including rights created by patent grant or registration of a utility model or design.<br />
Subject to availability and technical modifications.
Contents<br />
Contents<br />
Innovativetechnology ................................................................. 7<br />
Furtherinformation ...................................................................... 7<br />
Notational conventions .................................................................. 8<br />
Portsandcontrols ..................................................................... 9<br />
Importantnotes ........................................................................ 12<br />
Safetynotes ............................................................................ 12<br />
Additional safety notes for devices with radio components . . . . . ............................. 13<br />
Energysaving .......................................................................... 13<br />
Energy saving under Windows ....................................................... 13<br />
Travellingwithyournotebook ............................................................ 14<br />
Beforeyoutravel ................................................................... 14<br />
Notebook:transporting ............................................................... 14<br />
Cleaningthenotebook .................................................................. 15<br />
First-time setup ofyourdevice ......................................................... 16<br />
Unpacking and checkingthedevice ...................................................... 16<br />
Selectingalocation ..................................................................... 17<br />
Mains adapter connecting ............................................................... 17<br />
Switchingonthedevice for the firsttime .................................................. 18<br />
Workingwiththenotebook ............................................................ 19<br />
Statusindicators ........................................................................ 19<br />
Switching on the notebook . . . . ........................................................... 21<br />
Notebook: switching off .................................................................. 21<br />
Keyboard ............................................................................... 22<br />
Virtualnumerickeypad .............................................................. 24<br />
Separate numeric keypad (device-dependent) . ........................................ 25<br />
Keycombinations ................................................................... 25<br />
Country and keyboard settings ....................................................... 27<br />
Touchpadandtouchpadbuttons .......................................................... 27<br />
Movingthepointer .................................................................. 27<br />
Selectinganitem .................................................................... 28<br />
Executing commands . . . . . ........................................................... 28<br />
Draggingitems ...................................................................... 28<br />
SwitchingtheTouchpadonandoff .................................................... 28<br />
LCDscreen ............................................................................ 29<br />
Webcam ............................................................................... 30<br />
Rechargeablebattery ................................................................... 30<br />
Charging,caringforandmaintainingthebattery ....................................... 31<br />
Removingandinstallingthebattery ................................................... 31<br />
Opticaldrive ............................................................................ 33<br />
Handlingdatacarriers ............................................................... 33<br />
CD/DVDindicator ................................................................... 34<br />
Insertingorremovingadatacarrier ................................................... 34<br />
Manual removal (emergency removal) . . . . ............................................ 35<br />
Usingthepower-managementfeatures ................................................... 36<br />
Memorycards .......................................................................... 37<br />
Supported formats .................................................................. 37<br />
Insertingthememorycard ........................................................... 37<br />
Removingthememorycard .......................................................... 38<br />
Fujitsu Technology Solutions 3
Contents<br />
ExpressCards .......................................................................... 39<br />
Insertingthecard ................................................................... 39<br />
Removingthecard .................................................................. 40<br />
Loudspeakers and microphones . . ........................................................ 40<br />
SIM card (devices with UMTS module) . . . ................................................. 41<br />
InsertingtheSIMcard ............................................................... 41<br />
RemovingtheSIMcard .............................................................. 41<br />
WirelessLAN/Bluetooth/UMTS ........................................................ 42<br />
Switching the wireless components on and off ......................................... 42<br />
SettingupWLANaccess ............................................................ 42<br />
AccessviaUMTS ................................................................... 42<br />
EthernetandLAN ....................................................................... 43<br />
Securityfunctions ..................................................................... 44<br />
UseKensingtonLock .................................................................... 44<br />
ConfiguringpasswordprotectioninBIOSSetupUtility ...................................... 45<br />
Protecting BIOS Setup Utility (supervisor and user password) . .......................... 45<br />
Password protection for booting of the operating system . .............................. 46<br />
Passwordprotectionfortheharddisk ................................................. 47<br />
Connectingexternaldevices ........................................................... 48<br />
Connecting an external monitor . . ........................................................ 49<br />
HDMIport .......................................................................... 49<br />
Connecting USB devices ................................................................ 50<br />
HowtoremoveUSBdevicescorrectly ................................................ 50<br />
Connecting external audio devices . . . . . . ................................................. 51<br />
Microphone port/Line In . . ............................................................ 51<br />
Headphone port . . . . . ................................................................ 51<br />
Removing and installing components during servicing . . . .............................. 52<br />
Notes on installing and removing boards and components .................................. 52<br />
Preparing to remove components ........................................................ 53<br />
Installingandremovingmemoryexpansion ................................................ 53<br />
Removingthecover ................................................................. 54<br />
Removing memory modules . . ........................................................ 54<br />
Installingamemorymodule .......................................................... 55<br />
Securingthecover .................................................................. 55<br />
Removingandinstallingtheharddisk .................................................... 56<br />
Removingacover ................................................................... 56<br />
Removingaharddisk ............................................................... 57<br />
Installingaharddisk ................................................................. 58<br />
Attachingthecover .................................................................. 59<br />
Finishing component removal ............................................................ 59<br />
Settings in BIOS Setup Utility . . ........................................................ 60<br />
StartingtheBIOSSetupUtility ........................................................... 60<br />
OperatingBIOSSetupUtility ............................................................. 60<br />
ExitingBIOSSetupUtility ................................................................ 61<br />
Exit Saving Changes - save changes and exit BIOS Setup Utility . . . . ................... 61<br />
Exit Discarding Changes – Discard changes and exit BIOS Setup Utility . . ............... 61<br />
Load Setup Defaults – Copy Standard Entries ......................................... 61<br />
Discard Changes – Discard changes without exiting the BIOS Setup Utility ............... 61<br />
Save Changes - save changes without exiting the BIOS Setup Utility . ................... 61<br />
Save Changes and Power Off . . . . . . ................................................. 61<br />
4 Fujitsu Technology Solutions
Contents<br />
Troubleshootingandtips .............................................................. 62<br />
Helpifproblemsoccur ................................................................... 63<br />
Restoring the hard disk contents under Windows . . ........................................ 63<br />
The notebook’s date or time is incorrect ................................................... 64<br />
Whencertaincharactersareenteredonthekeyboard,onlynumeralsarewritten ............. 64<br />
The notebook’s LCD screen remains blank . . . . ............................................ 64<br />
The LCD screen is difficulttoread ........................................................ 64<br />
Theexternalmonitorremainsblank ...................................................... 65<br />
Theexternalmonitorisblankortheimageisunstable ..................................... 65<br />
The notebook cannot be started . . . ....................................................... 66<br />
The notebook stops working . . ........................................................... 66<br />
The printer does not print . . . . . ........................................................... 67<br />
The radio connection to a network does not work . . ........................................ 67<br />
Acousticwarnings ....................................................................... 67<br />
Errormessagesonthescreen ........................................................... 68<br />
Technicaldata ......................................................................... 70<br />
LIFEBOOK ............................................................................. 70<br />
Rechargeablebattery ................................................................... 70<br />
Mains adapter 80 W . . . .................................................................. 70<br />
Poweradapter,65W .................................................................... 71<br />
Manufacturer’snotes .................................................................. 72<br />
EnergyStar ............................................................................ 72<br />
Disposalandrecycling .................................................................. 72<br />
DeclarationsofConformity ............................................................... 72<br />
CEmarking ............................................................................ 73<br />
Regulatory notices ...................................................................... 73<br />
Regulatory information for notebooks without radio device . ............................. 73<br />
DOC(IndustryCANADA)notices ..................................................... 75<br />
FCC regulatory information for notebooks with radio device ............................. 77<br />
Index .................................................................................. 79<br />
Fujitsu Technology Solutions 5
Contents<br />
6 Fujitsu Technology Solutions
Innovative technology<br />
Innovative technology<br />
... and ergonomic design make your device a reliable and convenient companion.<br />
The device boots very quickly, is ready for immediate use and offers a particularly<br />
long operating time because of its high capacity battery.<br />
With the user-friendly "BIOS Setup Utility" you can control your notebook’s hardware and better<br />
protect your system against unauthorised access by using the powerful password properties.<br />
Information on the connections and user components of your notebook<br />
canbefoundin"Ports and controls", Page 9.<br />
Further information<br />
The Windows drivers for your device can be found on our Internet site.<br />
The factory installation of your device does not support any other operating<br />
system. Fujitsu Technology Solutions accepts no liability whatsoever<br />
if any other operating system is used.<br />
Software oriented components of these instructions refer to Microsoft products,<br />
if they come within the scope of the delivery.<br />
If you install other software products, pay attention to the operating<br />
instructions of the manufacturer.<br />
Fujitsu Technology Solutions 7
Innovative technology<br />
Notational conventions<br />
Pay particular attention to text marked with this symbol. Failure to observe<br />
these warnings could pose a risk to health, damage the device or lead<br />
to loss of data. The warranty will be invalidated if the device becomes<br />
defective through failure to observe these warnings.<br />
Indicates important information for the proper use of the device.<br />
► Indicates an activity that must be performed<br />
�<br />
Indicates a result<br />
This font indicates data entered using the keyboard in a program dialogue or at<br />
the command line, e.g. your password (Name123) or a command used to<br />
start a program (start.exe)<br />
This font indicates information that is displayed on the screen by a program, e.g.:<br />
Installation is complete.<br />
This font indicates<br />
• terms and texts used in a software interface, e.g.: Click on Save<br />
• names of programs or files, e.g. Windows or setup.exe.<br />
"This font" indicates<br />
• cross-references to another section, e.g. "Safety information"<br />
• cross-references to an external source, e.g. a web address: For more<br />
information, go to "http://ts.fujitsu.com"<br />
• Names of CDs, DVDs and titles or designations for other materials,<br />
e.g.: "CD/DVD Drivers & Utilities" or "Safety/Regulations" manual<br />
Key indicates a key on the keyboard, e.g: F10<br />
This font indicates terms and texts that are emphasised or highlighted, e.g.: Do<br />
not switch off the device<br />
8 Fujitsu Technology Solutions
Ports and controls<br />
Ports and controls<br />
This chapter presents the individual hardware components of your device. It gives an<br />
overview of the indicators and connections of the device. Please familiarise yourself with<br />
these components before you start to work with the device.<br />
Front<br />
9<br />
8<br />
7<br />
6<br />
5<br />
3<br />
4<br />
1 = WebCam<br />
2 = ON/OFF switch<br />
3 = Loudspeakers<br />
4 = Touchpad<br />
5 = Memory card slot<br />
1<br />
6 = Touchpad buttons<br />
7 = Microphone jack<br />
8 = Headphone port<br />
9 = Status indicators<br />
Fujitsu Technology Solutions 9<br />
2<br />
3
Ports and controls<br />
Left panel<br />
1 = VGA monitor port<br />
2 = LAN port<br />
3 = HDMI port<br />
Right-hand side<br />
1 = USB port<br />
2 = Kensington Lock<br />
3 = Optical drive<br />
1 2 3 4 5 6<br />
4 = ExpressCard slot<br />
5 = USB port<br />
6 = USB port with charging function<br />
1 2 3 4<br />
5<br />
4 = Eject button for optical drive<br />
5 = DC input connector (DC IN)<br />
10 Fujitsu Technology Solutions
Underside<br />
1 = Memory service compartment<br />
2 = Hard disk service compartment<br />
3 = Battery release<br />
5<br />
1 2<br />
4<br />
3<br />
Ports and controls<br />
4 = Battery compartment with SIM card<br />
slot under battery (optional)<br />
5 = Battery release<br />
Fujitsu Technology Solutions 11
Important notes<br />
Important notes<br />
Importantnotes<br />
Notes<br />
This chapter contains essential safety information which must be followed<br />
when working with your notebook. Other notes also provide useful information<br />
which will help you with your notebook.<br />
Safety notes<br />
Safetynotes<br />
Notes<br />
Please follow the safety notes provided in the "Safety/Regulations" manual<br />
as well as the safety notes given below.<br />
Please pay special attention to the sections in the manual marked<br />
with the symbol on the left.<br />
When connecting and disconnecting cables, observe the relevant<br />
notes in this operating manual.<br />
Read the information on the ambient conditions in the "Technical data",<br />
Page 70 and "First-time setup of your device", Page 16 before preparing your<br />
notebook for use and switching it on for the first time.<br />
When cleaning the device, please observe the relevant notes in the<br />
section "Cleaning the notebook", Page 15.<br />
Pay attention to the additional safety notes for devices with radio components<br />
provided in the "Safety/Regulations" manual.<br />
Please refer to the notes in the chapter "Removing and installing<br />
components during servicing", Page 52.<br />
This notebook complies with the relevant safety regulations for data processing<br />
equipment. If you have questions about using your notebook in a particular area,<br />
please contact your sales outlet or our Hotline/Service Desk.<br />
12 Fujitsu Technology Solutions
Additional safety notes for devices with<br />
radio components<br />
Important notes<br />
Radiocomponent:<br />
WirelessLAN:<br />
Bluetooth,safetynotes<br />
If a radio component (Wireless LAN, Bluetooth, UMTS) is integrated in your notebook, you<br />
must be sure to observe the following safety notes when using your notebook:<br />
• Switch off the radio components when you are in an aircraft or driving in a car.<br />
• Switch off the radio components when you are in a hospital, an operating room or near a medical<br />
electronics system. The transmitted radio waves can impair the operation of medical devices.<br />
• Switch off the radio components when you let the device get near flammable<br />
gases or into hazardous environments (e.g. petrol station, paintshops), as the<br />
transmitted radio waves can cause an explosion or a fire.<br />
For information on how to switch radio components on and off, see chapter<br />
"Switching the wireless components on and off", Page 42.<br />
Energy saving<br />
Notes Energy Energysaving<br />
Switch the notebook off when it is not in use. Switch off external, connected devices if you<br />
are not using them. If you use the energy saving functions, the notebook uses less energy.<br />
Youwillthenbeable to work for longer before having to recharge the battery.<br />
Energy efficiency is increased and the environmental impact is reduced.<br />
You save money while protecting the environment.<br />
Energy saving under Windows<br />
► Make use of the power management features (see "Using the power-management features",<br />
Page 36).<br />
Fujitsu Technology Solutions 13
Important notes<br />
Travelling with your notebook<br />
Mobile Notes Transportation<br />
Notebook operation<br />
Please observe the points listed below when travelling with your notebook.<br />
Before you travel<br />
► Back up important data stored on your hard disk.<br />
Notebook Travel,notebook<br />
► Switch off the radio component for data security reasons. With data traffic via a wireless<br />
connection, it is also possible for unauthorised third parties to receive data.<br />
Information on activating data encryption is provided in the documentation<br />
for your radio component.<br />
► If you wish to use your notebook during a flight, first check with the flight<br />
attendants if it is OK to do so.<br />
When travelling in other countries<br />
► If you are travelling abroad, check that the mains adapter can be operated with the<br />
local mains voltage. If this is not the case, obtain the appropriate mains adapter for<br />
your notebook. Do not use any other voltage converter!<br />
► Check whether the local mains voltage and the power cable are compatible. If this is<br />
not the case, buy a power cable that matches the local conditions.<br />
► Enquire with the corresponding government office of the country you will be<br />
travelling in as to whether you may operate the radio component integrated in<br />
your notebook there (see also "CE marking", Page 73).<br />
Notebook: transporting<br />
Protect the notebook from severe shocks and extreme temperatures<br />
(e.g. direct sunlight in a car).<br />
► If your device has an optical drive, remove all data media (e.g. CD, DVD) from the drives.<br />
Transportation<br />
Notebook<br />
► Switch the notebook off.<br />
► Unplug the mains adapter and all external devices from the power socket.<br />
► Disconnect the mains adapter cable and the data cables for all external devices.<br />
► Close the LCD screen.<br />
► To protect against damaging jolts and bumps, use a notebook carrying<br />
case to transport your notebook.<br />
14 Fujitsu Technology Solutions
Cleaning the notebook<br />
Do not clean any interior parts yourself; leave this job to a service technician.<br />
Only use cleaning products designed for computers. Normal household<br />
cleaners and polishes can damage the markings on the keyboard and the<br />
device, the paintwork or the notebook itself.<br />
Ensure that no liquid enters the notebook.<br />
The LCD screen very sensitive to scratches. Only clean the display<br />
surface with a very soft, slightly damp cloth.<br />
Important notes<br />
► Switch the notebook off.<br />
Cleaning Notes Notebook Keyboard Touchpad LCDscreen<br />
CrystalViewdisplay<br />
► In order to prevent accidentially switching the device on, remove the power cable from the mains<br />
adaptor and remove the battery (see "Removing and installing the battery", Page 31).<br />
� The surface can be cleaned with a dry cloth. If particularly dirty, use a cloth which has<br />
been moistened in mild domestic detergent and then carefully wrung out.<br />
To clean the keyboard and the touchpad, if available, you can use disinfectant wipes.<br />
Ensure that no liquid enters the device.<br />
Fujitsu Technology Solutions 15
First-time setup of your device<br />
First-time setup of your device<br />
First-timesetup<br />
Gettingstarted<br />
Please read the chapter "Important notes", Page 12.<br />
If your device is equipped with a Windows operating system, the necessary<br />
hardware drivers and supplied software are already pre-installed.<br />
Before you switch on the device for the first time, connect it to the mains voltage<br />
using the mains adapter, see "Mains adapter connecting", Page 17. Themains<br />
adapter must be connected during the entire installation process.<br />
A system test is performed when your device is first switched on. Various messages<br />
can appear. The display may remain dark for a short time or may flicker.<br />
Please follow the instructions on the screen.<br />
NEVER switch off your device during the first-time setup process.<br />
On delivery, the battery can be found in the battery compartment or in the accessories kit.<br />
The battery must be charged if you want to operate your device using the battery.<br />
When used on the move, the built-in battery provides the device with the necessary power. You<br />
can increase the operating time by using the available energy-saving functions.<br />
For instructions on how to connect external devices (e.g. mouse, printer) to your<br />
device, please refer to the operating manual for your device.<br />
Unpacking and checking the device<br />
Should you discover any damage that occurred during transportation,<br />
notify your local sales outlet immediately!<br />
► Unpack all the individual parts.<br />
Packaging Transport<br />
► Check your device for any visible damage which may have occurred during transportation.<br />
You may need the packaging in the future, if you need to transport your device.<br />
16 Fujitsu Technology Solutions
Selecting a location<br />
Selectingalocation<br />
Device Mainsadapter<br />
First-time setup of your device<br />
Select a suitable location for the device before setting it up. Follow<br />
the instructions below when doing so:<br />
• Never place the device or the mains adapter on a heat-sensitive surface.<br />
The surface could be damaged as a result.<br />
• Never place the device on a soft surface (e.g. carpeting, upholstered furniture,<br />
bed). This can block the air vents and cause overheating and damage.<br />
• The underside of the device heats up during normal operation. Prolonged contact<br />
with the skin may become unpleasant or even result in burns.<br />
• Place the device on a stable, flat, non-slippery surface. Please note that the<br />
rubber feet of the device may mark certain types of delicate surfaces.<br />
• Keep other objects at least 100 mm away from the device and its<br />
mains adapter to ensure adequate ventilation.<br />
• Never cover the ventilation slots of the device.<br />
• Do not expose the device to extreme environmental conditions. Protect<br />
the device from dust, humidity, and heat.<br />
Mains adapter connecting<br />
Preparingforoperation<br />
Mainsadapter<br />
1<br />
Observe the safety notes in the enclosed "Safety/Regulations" manual.<br />
The supplied power cable conforms to the requirements of the country in<br />
which you purchased your device. Make sure that the power cable is approved<br />
for use in the country in which you intend to use it.<br />
3<br />
2<br />
► Connect the power cable (1) to the<br />
mains adapter.<br />
► Plug the mains cable (2) into a mains outlet.<br />
► Connect the mains adapter cable (3) to<br />
the DC jack (DC IN) of the device.<br />
Fujitsu Technology Solutions 17
First-time setup of your device<br />
Switching on the device for the first time<br />
Switchingonforthefirsttime<br />
When you switch on the device for the first time, the supplied software is<br />
installed and configured. Because this procedure must not be interrupted,<br />
you should set aside enough time for it to be fully completed and connect<br />
the device to the mains using the mains adapter.<br />
During the installation process, DO NOT restart the device unless<br />
you are requested to do so!<br />
To make it easier to use your device for the first time, the operating system<br />
is pre-installed on the hard disk.<br />
► During installation, follow the instructions on screen.<br />
► Switch on your device.<br />
If a Windows operating system is installed on your device, you will find more<br />
information on the system and drivers, help programmes, updates, manuals etc.<br />
on the device or on the Internet at "http://ts.fujitsu.com/support".<br />
18 Fujitsu Technology Solutions
Working with the notebook<br />
Working with the notebook<br />
Notebook,operation<br />
Notebook<br />
This chapter describes the basics for operating your notebook. Please read the chapter<br />
entitled "Connecting external devices", Page 48 for instructions on how to connect<br />
devices such as a mouse and a printer to the notebook.<br />
Please refer to the notes in "Important notes", Page 12.<br />
Status indicators<br />
Statusindicators<br />
The status indicators provide information about the status of the power supply,<br />
the drives and the keyboard functions.<br />
Fujitsu Technology Solutions 19
Working with the notebook<br />
Status indicators Description<br />
Wireless components indicator<br />
• The indicator is lit: The wireless components are switched on.<br />
• The indicator is not lit: The wireless components are switched off.<br />
Power-on indicator/Standby<br />
Standbyindicator<br />
Powerindicator<br />
• The indicator is lit: The notebook is switched on.<br />
• The indicator flashes: The notebook is in standby mode.<br />
• The indicator is not lit: The notebook is switched off.<br />
Battery charging indicator/power connector<br />
The state of charge of the battery is shown by the battery indicator.<br />
With mains adapter connected:<br />
• The indicator lights up blue: The battery is fully charged.<br />
• The indicator lights up orange: The battery is charging.<br />
• Indicator flashes purple: a fault has occurred. The battery cannot be<br />
recharged.<br />
• The indicator is off: The system is in battery mode and the mains<br />
Batterystatusindicator<br />
Batterysymbol<br />
Batteryindicator<br />
adapter is not connected or the battery is not installed.<br />
Drive indicator<br />
Drive Indicator<br />
The indicator is lit: One of the drives (e.g. hard disk, CD/DVD) is being<br />
accessed.<br />
Num Lock indicator<br />
Indicator NumLock<br />
The indicator is lit: The Num key has been pressed. The virtual numerical<br />
keypad is activated. You can output the characters indicated on the upper<br />
right of the keys.<br />
Caps Lock indicator<br />
Indicator CapsLock<br />
The indicator is lit: The Caps Lock key has been pressed. All the characters<br />
you type will appear in upper case. In the case of overlay keys, the<br />
character printed on the upper left of the key will appear when that key<br />
is pressed.<br />
20 Fujitsu Technology Solutions
Switching on the notebook<br />
� The power-on indicator is lit.<br />
Notebook: switching off<br />
► Open the LCD screen.<br />
Switchingon<br />
Working with the notebook<br />
► Press the ON/OFF switch for about one<br />
second to switch the notebook on.<br />
Back up your data and close all applications before you switch off your<br />
device. Otherwise data might be lost.<br />
► Shut down the operating system properly<br />
(e. g. from the Windows Start menu, by<br />
clicking on Start – Shut Down – OK).<br />
Notebook<br />
► If the notebook is not switched off<br />
automatically, press the ON/OFF switch<br />
for approx. five seconds.<br />
► Close the LCD screen.<br />
Fujitsu Technology Solutions 21
Working with the notebook<br />
Keyboard<br />
Keyboard Numerickeypad<br />
Buttons<br />
The keyboard of your notebook is subject to continuous wear through normal<br />
use. The key markings are especially prone to wear. The key markings are<br />
liable to wear away over the life of the notebook.<br />
The keyboard has been designed to provide all the functions of an enhanced keyboard.<br />
Some enhanced keyboard functions are mapped with key combinations.<br />
The following description of keys refers to Windows. Additional functions supported by the keys<br />
are described in the relevant manuals supplied with your application programs.<br />
The figure below shows how to access the different characters on keys with overlaid functions.<br />
The example applies when the Caps Lock key has not been activated.<br />
The illustrations shown below may differ from your actual device.<br />
+<br />
=<br />
0 }<br />
=<br />
0 }<br />
=<br />
0<br />
Num<br />
}<br />
=<br />
0 }<br />
Alt Gr<br />
+<br />
=<br />
0 }<br />
22 Fujitsu Technology Solutions
Key Description<br />
Working with the notebook<br />
Backspace key<br />
The Backspace key deletes the character to the left of the cursor.<br />
Backspace<br />
Tab key<br />
The Tab key moves the cursor to the next tab stop.<br />
Tabkey<br />
Enter key (return)<br />
The Enter key terminates a command line. The command you have entered<br />
is executed when you press thiskey.<br />
Enterkey Return Enter Linefeed<br />
Caps Lock key<br />
The Caps Lock key activates the Caps Lock mode, and the corresponding<br />
icon is displayed in the Windows information area. In Caps Lock mode, all<br />
of the characters you type appear in upper case. In the case of overlay<br />
keys, the character printed on the upper left of the key will appear when<br />
that key is pressed. To cancel the Caps Lock function, simply press the<br />
Caps Lock key again.<br />
Shiftkey CapsLock<br />
Shift key<br />
The Shift key causes uppercase characters to appear. In the case of overlay<br />
keys, the character printed on the upper left of the key appears when that<br />
keyispressed.<br />
Shiftkey Shift<br />
Fn button<br />
The Fn key enables the special functions indicated on overlay keys (see<br />
"Key combinations", Page 25).<br />
Fnkey<br />
Cursor keys<br />
The cursor keys move the cursor in the direction of the arrow, i.e. up, down,<br />
left, or right.<br />
Cursorkeys<br />
Cursorcontrolkeys<br />
Start key<br />
The Start key opens the Windows Start menu.<br />
Startkey<br />
Menu key<br />
The Menu key invokes the menu for the marked item.<br />
Fujitsu Technology Solutions 23
Working with the notebook<br />
Virtual numeric keypad<br />
Numerickeypad<br />
Virtualnumerickeypad<br />
NumLock<br />
To provide the convenience of a numeric keypad, your keyboard is equipped with a virtual<br />
numeric keypad. The special keys of the virtual numeric keypad are recognisable by the numbers<br />
and symbols printed in the upper right corner of each key. If you have switched on the virtual<br />
numeric keypad, you can output the characters shown on the upper right of the keys.<br />
The keyboard layout shown below may differ from your actual device.<br />
1 = Valid characters when the Num<br />
key is not activated<br />
2 = Valid characters when the Num<br />
is activated<br />
Further information about the status indicators can be found in chapter "Status indicators", Page 19.<br />
24 Fujitsu Technology Solutions
Separate numeric keypad (device-dependent)<br />
Numerickeypad<br />
Separatenumerickeypad<br />
NumLock<br />
The keyboard of your notebook has a separate number block on the far right,<br />
depending on the device version.<br />
Key combinations<br />
Working with the notebook<br />
Keycombinations<br />
The following description of key combinations applies to Windows operating systems. Some of the<br />
following key combinations may not function in other operating systems or with certain device drivers.<br />
Other key combinations are described in the relevant manuals supplied<br />
with your application programs.<br />
Key combinations are entered as follows:<br />
► Press the first key in the combination and keep it pressed.<br />
► While holding the first key down, press the other key or keys in the combination.<br />
Combination Description<br />
Switching the loudspeakers on and off<br />
This key combination switches your notebook’s loudspeakers off<br />
and on.<br />
Fn+F3 Loudspeakers<br />
Switching the touchpad and touchpad buttons on/off<br />
This key combination switches the touchpad and the touchpad<br />
buttons on or off.<br />
Fn+F4 Touchpad Touchpadbuttons<br />
Touchpad<br />
Switching the wireless components on / off<br />
This key combination switches the wireless components off or on.<br />
Fn+F5 Wirelesscomponents<br />
Wirelesscomponents<br />
Fujitsu Technology Solutions 25
Working with the notebook<br />
Combination Description<br />
Ctrl + Alt + Del<br />
Decrease screen brightness<br />
This key combination decreases the brightness of the screen.<br />
Fn+F6 LCDscreen<br />
Screenbrightness<br />
Increase screen brightness<br />
This key combination increases the brightness of the screen.<br />
Fn+F7 Screenbrightness<br />
Decrease volume<br />
This key combination reduces the volume of the internal<br />
loudspeakers.<br />
Fn+F8 Volume<br />
Increase volume<br />
This key combination increases the volume of the internal<br />
loudspeakers.<br />
Fn+F9 Volume<br />
Toggle output screen<br />
Use this key combination to select which screen(s) is/are used for<br />
display if an external monitor is connected.<br />
Screen output is possible:<br />
• only on the notebook’s LCD screen<br />
• on the LCD screen of the notebook and the external monitor<br />
at the same time<br />
• only on the external monitor<br />
This setting is useful if you would like a high resolution and a<br />
Fn+F10 Toggleoutputscreen<br />
high refresh rate on an external monitor.<br />
Power management functions<br />
Use this key combination to activate the power management<br />
functions (see chapter "Using the power-management features",<br />
Page 36).<br />
Switch between open applications<br />
Use this key combination to switch between several open<br />
applications.<br />
Alt+Tab<br />
Windows security/Task-Manager<br />
This key combination opens the Windows security/Task-Manager<br />
window.<br />
Ctrl+Alt+Del<br />
Back tab<br />
This key combination moves the cursor back to the previous tab<br />
stop.<br />
Shift+Tab Backtab<br />
26 Fujitsu Technology Solutions
Key combinations using the Windows keys are detailed in the manual<br />
for your operating system.<br />
Country and keyboard settings<br />
Working with the notebook<br />
If you want to change the country and keyboard settings, proceed as follows:<br />
► Enter the settings by clicking Start – (Settings) – Control Panel – Time, Regional and Language Options.<br />
Touchpad and touchpad buttons<br />
Keep the touchpad clean. Protect it from dirt, liquids and grease.<br />
Touchpad<br />
Do not use the touchpad ifyourfingers are dirty.<br />
Do not rest heavy objects (e.g. books) on the touchpad or the touchpad buttons.<br />
1<br />
2<br />
1 = Touchpad<br />
2 = Touchpad buttons<br />
The touchpad enables you to move the mouse pointer on the screen.<br />
The touchpad buttons allow you to select and execute commands. They correspond<br />
to the buttons on a conventional mouse.<br />
You can use a key combination to disable the touchpad, to avoid accidentally moving<br />
the pointer on the screen (see also "Key combinations", Page 25).<br />
Moving the pointer<br />
► Move your finger on the touchpad.<br />
Touchpad<br />
� The pointer will move.<br />
Fujitsu Technology Solutions 27
Working with the notebook<br />
Selecting an item<br />
► Move the pointer to the item you wish to select.<br />
Touchpad<br />
► Tap the touchpad once or press the left button once.<br />
� The item is selected.<br />
Executing commands<br />
► Move the pointer to the field you wish to select.<br />
Touchpad<br />
► Tap the touchpad twice or press the left button twice.<br />
� The command is executed.<br />
Dragging items<br />
► Select the desired item.<br />
Touchpad<br />
► Press and hold the left button and drag the item to the desired position<br />
with the finger on the touchpad.<br />
� The item will be moved.<br />
Switching the Touchpad on and off<br />
You can switch the Touchpad on and off using a key combination,<br />
see "Key combinations", Page 25.<br />
28 Fujitsu Technology Solutions
LCD screen<br />
Working with the notebook<br />
LCDscreen<br />
Notes<br />
High-quality TFT displays are installed in notebooks from Fujitsu Technology Solutions GmbH. For<br />
technical reasons, TFT monitors are manufactured for a specific resolution. An optimal, clear<br />
picture can only be ensured with the correct resolution intended for the relevant TFT monitor. A<br />
monitor resolution which differs from the specification can result in an unclear picture.<br />
The screen resolution of the LCD monitor of your notebook is optimally set at the factory.<br />
The standard of production techniques today cannot guarantee an absolutely fault-free screen<br />
display. A few isolated constant lit or unlit pixels (picture elements) may be present. The maximum<br />
permitted number of pixels faults is stipulated in the international standard ISO 9241-3 (Class II).<br />
Example:<br />
A monitor with a resolution of 1280 x 800 has 1280 x 800 = 1024000 pixels. Each pixel consists of<br />
three subpixels (red, green and blue), so there are almost 3 million subpixels in total. According to<br />
ISO 9241-3 (class II), a maximum of 2 light and 2 dark pixels and an additional 5 light or 10 dark<br />
subpixels or a corresponding mix may be defective (1 light subpixel counts as 2 dark subpixels).<br />
Pixel A pixel consists of 3 subpixels, normally red, green and<br />
blue. A pixel is the smallest element that can be generated<br />
by complete functionality of the display.<br />
Subpixel A subpixel is a separately addressable internal structure<br />
within a pixel that enhances the pixel function.<br />
Cluster A cluster contains two or more defective pixels or<br />
subpixels in a 5 x 5 pixel block.<br />
Background lighting<br />
TFT monitors are operated with background lighting. The luminosity of the background<br />
lighting can decrease during the period of use of the notebook. However, you can<br />
set the brightness of your monitor individually.<br />
Synchronising the display on the LCD screen and an external monitor<br />
For more information, please refer to the chapter "Key combinations", Page 25<br />
under "Display output, switch between".<br />
Fujitsu Technology Solutions 29
Working with the notebook<br />
Webcam<br />
Webcam<br />
Depending on the software used, you can use your Webcam to take pictures,<br />
record video clips or take part in web chats.<br />
• The picture quality depends on the lighting conditions and the software being used.<br />
• You can only operate the webcam with a particular application (e.g. an Internet telephony<br />
program or a video conferencing program which supports a webcam).<br />
• When using the webcam the notebook support must not wobble.<br />
• The webcam automatically adjusts itself to the current light level. For this reason<br />
the LCD screen may flicker while the light level is adjusted.<br />
Further information on using the webcam and on the additional settings<br />
which are possible for your webcam can be found in the help function<br />
of the program which uses the webcam.<br />
If you wish to carry out a function test with your webcam, you can use the<br />
corresponding test software available at "http://ts.fujitsu.com/support/".<br />
Rechargeable battery<br />
Rechargeablebattery<br />
Battery Life,battery<br />
Rechargeablebattery<br />
When not plugged into a mains socket, the notebook runs on its built-in battery. You<br />
can increase the life of the battery by caring for the battery properly. The average<br />
battery life is around 500 charge/discharge cycles.<br />
You can extend the battery life by taking advantage of the available energy saving functions.<br />
30 Fujitsu Technology Solutions
Charging, caring for and maintaining the battery<br />
Working with the notebook<br />
Battery<br />
The notebook battery can only be charged, when the ambient temperature<br />
is between 5°C and max. 35°C.<br />
You can charge the battery by connecting the notebook to the mains adapter<br />
(see "Mains adapter connecting", Page 17).<br />
If the battery is running low you will hear a warning alarm. If you do not connect the mains adapter<br />
within five minutes of the warning alarm described above, your notebook will automatically switch off.<br />
monitoring the battery charging level<br />
Battery Batterystatusmeter<br />
Windows also has a "Battery status meter" in the taskbar for monitoring the battery capacity. When<br />
you place the mouse pointer on the battery symbol, the system displays the battery status.<br />
Battery storage<br />
Battery Self-discharge,battery<br />
Chargingcapacity,battery<br />
Keep the battery pack between 0°C and +30°C. The lower the temperature at which<br />
the batteries are stored, the lower the rate of self-discharge.<br />
If you will be storing batteries for a longer period (longer than two months),<br />
the battery charge level should be approx. 30 %. To prevent exhaustive<br />
discharge which would permanently damage the battery, check the level<br />
of charge of the battery at regular intervals.<br />
To be able to make use of the optimal charging capacity of the batteries, the battery<br />
should be completely discharged and then fully recharged.<br />
If you do not use the batteries for long periods, remove them from the<br />
notebook. Never store the batteries in the device.<br />
Removing and installing the battery<br />
Only use rechargeable batteries approved by Fujitsu Technology<br />
Solutions for your notebook.<br />
Never use force when fitting or removing a battery.<br />
Make sure that no foreign bodies get into the battery connections.<br />
Never store a battery for longer periods in the discharged state. This<br />
can make it impossible to recharge.<br />
Fujitsu Technology Solutions 31
Working with the notebook<br />
Removing the battery<br />
► Prepare for removal, see chapter "Preparing to remove components", Page 53.<br />
► Slide the release button in the direction of the arrow (1) and hold it in place.<br />
► Slide the release button in direction of the arrow (2).<br />
► Remove the battery from the battery compartment (3).<br />
2<br />
32 Fujitsu Technology Solutions<br />
3<br />
1<br />
1
Inserting battery<br />
2<br />
► Position the battery at the edge.<br />
► Insert the battery into the battery compartment until it engages positively (1).<br />
► Slide the release button in the direction of the arrow (2).<br />
► Complete the removal, see chapter "Finishing component removal", Page 59.<br />
Optical drive<br />
Opticaldrive<br />
1<br />
1<br />
Working with the notebook<br />
This product contains a light emitting diode, classified in accordance with IEC<br />
8251:1993: LASER CLASS 1, and must therefore not be opened.<br />
Handling data carriers<br />
Handling<br />
Observe the following guidelines when handling data carriers:<br />
• Avoid touching the surface of a data carrier. Only handle data carriers by their edges.<br />
• Always store data carriers in their cases. This will protect the data carrier against<br />
being covered in dust, scratched or damaged in any other way.<br />
• Protect your data carriers against dust, mechanical vibrations and direct sunlight.<br />
• Avoid storing a data carrier in areas subject to high temperatures or humidity.<br />
You may use both 8-cm and 12-cm data carriers in the optical drive.<br />
When using a data carrier of lesser quality, vibrations and reading errors may occur.<br />
Fujitsu Technology Solutions 33
Working with the notebook<br />
CD/DVD indicator<br />
CD/DVDindicator<br />
The CD/DVD indicator flashes when a data carrier is inserted. The indicator goes out when<br />
the drive is ready for reading. The indicator lights up when the drive is being accessed.<br />
You may only remove the data carrier when the indicator is unlit.<br />
If the CD/DVD indicator does not go out after a data carrier has been inserted, but<br />
instead continues to flash, this means that the drive cannot access the data carrier.<br />
Either the data carrier is damaged or dirty or you are using a data<br />
carrier that the drive cannot read.<br />
Inserting or removing a data carrier<br />
Inserting Removing<br />
The notebook must be switched on.<br />
2<br />
1<br />
► Push the insert/eject button (1).<br />
� The drive tray will open.<br />
► Gently pull the drive tray (2) completely out.<br />
► Place the data carrier in the drive tray with<br />
the printed side facing upwards.<br />
or<br />
► Remove a data carrier that has<br />
been inserted.<br />
► Push in the drive tray until you<br />
feel it lock into place.<br />
34 Fujitsu Technology Solutions
Manual removal (emergency removal)<br />
Working with the notebook<br />
CD/DVD: Manualremovalofdatacarrier<br />
Emergencyremovalofdatacarrier<br />
In the event of a power failure or damage to the drive, you can remove the data carrier manually.<br />
2<br />
1<br />
► Switch your notebook off.<br />
► Push a pen or a piece of wire (such as a<br />
paperclip) firmly into the opening (1).<br />
� The drive tray is ejected. You can now pull<br />
the drive tray (2) out of the drive.<br />
Fujitsu Technology Solutions 35
Working with the notebook<br />
Using the power-management features<br />
Power Battery<br />
The notebook uses less power when the available power-management features are used. You<br />
will then be able to work longer when using the battery before having to recharge it.<br />
Power efficiency is increased and environmental pollution reduced. By<br />
choosing the best power options, you can make significant savings and<br />
at the same time help protect the environment.<br />
When you close the LCD screen, depending on the setting in Windows, the<br />
notebook automatically enters a power saving mode.<br />
We recommend the following settings:<br />
Function On external power On battery power<br />
Turn off monitor After 10 minutes After 5 minutes<br />
Turn off hard disk(s) After 15 minutes After 10 minutes<br />
Energy saving (S3) After 20 minutes After 15 minutes<br />
Hibernate mode (S4) After 1 hour After 30 minutes<br />
► Select the power management functions in your Control Panel.<br />
► Select the Screen Saver in your Control Panel.<br />
or<br />
► Right-click on the desktop. Switch on the screen saver by clicking Personalization –<br />
Change screen saver.<br />
If you need further information about an option, you can get help with most<br />
settings by pressing F1 to open the Microsoft Help.<br />
When the notebook is in power-saving mode, the following must be remembered:<br />
During power saving mode, open files are held in the main memory<br />
orinaswapfile on the hard disk.<br />
Never turn off your notebook while it is in a power saving mode. If the built-in battery is<br />
nearly empty, close the open files and do not go into power saving mode.<br />
If you do not intend to use your notebook for a long period of time:<br />
► Exit power saving mode if necessary via the mouse or keyboard or by switching on the<br />
notebook.<br />
► Close all opened programs and completely shut down the notebook.<br />
36 Fujitsu Technology Solutions
Memory cards<br />
Slot<br />
Your notebook is equipped with an integrated memory card reader.<br />
Working with the notebook<br />
Observe the manufacturer’s instructions when handling the memory cards.<br />
Memorycard<br />
Supported formats<br />
Your notebook supports the following formats:<br />
• SDHC<br />
• SDXC<br />
• Memory Stick / Memory Stick pro (Sony®)<br />
Inserting the memory card<br />
► Carefully slide the memory card into the<br />
slot. The label should be facing upward. Do<br />
not apply excessive force, as otherwise the<br />
delicate contact surfaces could be damaged.<br />
Memorycard<br />
� Depending on the particular type<br />
used, the memory card may protrude<br />
slightly from the slot.<br />
Fujitsu Technology Solutions 37
Working with the notebook<br />
Removing the memory card<br />
Memorycard<br />
In order to protect your data, always follow the correct procedure<br />
for removing the card outlined below.<br />
You can stop the memory card via the corresponding icon in the task bar:<br />
► Left-click on the icon.<br />
► Select the card you want to stop and remove.<br />
► Press the Enter key.<br />
� Wait for the dialogue box which tells you that it is now safe to remove the memory card.<br />
► Pull the memory card out of the slot.<br />
38 Fujitsu Technology Solutions
ExpressCards<br />
Slot ExpressCard<br />
An ExpressCard slot enables operation of an ExpressCard/34 or ExpressCard/54.<br />
Working with the notebook<br />
Consult the documentation supplied by the ExpressCard’s manufacturer<br />
and follow the instructions provided.<br />
Never use force when installing or removing an ExpressCard.<br />
Make sure that no foreign objects enter the ExpressCard slot.<br />
Inserting the card<br />
Keep the placeholder for the slot in a safe place. When you remove the card again, you<br />
must reinstall the place holder. This prevents foreign objects from getting into the slot.<br />
2<br />
1<br />
► Press the edge of the placeholder (1)<br />
to make the card placeholder protrude<br />
from the notebook’s case.<br />
► Pullthecardplaceholder out of the slot (2).<br />
► Insert the card into the slot guide with<br />
the connection contacts first.<br />
► Gently push the card into the slot until you<br />
feel it click into place. Do not use any force.<br />
Depending on the particular type used, the<br />
card may protrude slightly from the slot.<br />
Please see the documentation relating to the card for driver installation instructions.<br />
Fujitsu Technology Solutions 39
Working with the notebook<br />
Removing the card<br />
Always remove the card according to the rules described below, to<br />
ensure that none of your data is lost.<br />
You can stop the ExpressCard using the corresponding symbol in the task bar:<br />
► Click on the symbol for safe removal of hardware with the left mouse button.<br />
► Select the ExpressCard you want to stop and remove.<br />
► Press the Enter key.<br />
� Wait for the dialogue box which tells you that it is now safe to remove the ExpressCard.<br />
► Press the edge of the card (1) so that the<br />
card protrudes a little from the notebook.<br />
► Pull the card out of the slot (2).<br />
2<br />
2<br />
Loudspeakers and microphones<br />
1<br />
► Insert the card placeholder into the<br />
slot guide.<br />
► Gently slide the card placeholder into the<br />
slot until you feel it click into place.<br />
Volumecontrol<br />
Microphone<br />
Bassloudspeaker(subwoofer)<br />
Loudspeakers<br />
Information on the exact position of the speakers and microphone can be<br />
found in "Ports and controls", Page 9.<br />
Please refer to chapter "Key combinations", Page 25 for information on setting the volume<br />
and also enabling/disabling the loudspeakers using key combinations.<br />
If you attach an external microphone, the built-in microphone is disabled.<br />
When you connect headphones or external speakers, the built-in speakers are disabled.<br />
Information on connecting headphones and a microphone can be found<br />
in "Connecting external devices", Page 48.<br />
40 Fujitsu Technology Solutions
SIM card (devices with UMTS module)<br />
Working with the notebook<br />
A SIM Card (Subscriber Identity Module) is a chip card which is inserted in a mobile telephone or<br />
notebook to enable access to a mobile radio network in conjunction with an installed UMTS module.<br />
Follow the instructions supplied by the provider of the SIM card.<br />
The SIM card slot is located in the battery compartment and can only<br />
be accessed when the battery is removed.<br />
Inserting the SIM card<br />
► Prepare for installation of the SIM card, see chapter "Preparing to remove components", Page 53.<br />
► Slide the SIM card into the slot (1)<br />
until it is felt to engage, as shown in<br />
the battery compartment.<br />
1<br />
► Complete the installation, see chapter "Finishing component removal", Page 59.<br />
Removing the SIM card<br />
► Prepare for removal of the SIM card, see chapter "Preparing to remove components", Page 53.<br />
► Press on the edge of the SIM card so that<br />
it jumps up slightly out of the slot.<br />
► Pull the SIM card out of the slot in the<br />
direction of the arrow (1).<br />
1<br />
► Complete the removal, see chapter "Finishing component removal", Page 59.<br />
Fujitsu Technology Solutions 41
Working with the notebook<br />
Wireless LAN / Bluetooth / UMTS<br />
The installation of radio components not approved by Fujitsu Technology Solutions<br />
will invalidate the certifications issued for this device.<br />
Switching the wireless components on and off<br />
► Press the key combination Fn + F5 to start the WirelessSelector.<br />
�<br />
WirelessLAN<br />
Bluetooth<br />
The wireless component indicator will illuminate when one or more wireless<br />
components are switched on.<br />
The Bluetooth and UMTS modules and the wireless LAN transmission unit (antenna)<br />
will also be switched off when you switch off the wireless components.<br />
Pay attention to the additional safety notes for devices with wireless<br />
components provided in the "Safety" manual.<br />
Details on using a Wireless LAN can be found in the online help system<br />
included in the Wireless LAN software.<br />
You can obtain more information on UMTS from your service provider.<br />
Setting up WLAN access<br />
• Requirement: A WLAN must be available and you must have the<br />
corresponding access information.<br />
Information on configuring the WLAN access can be found in the<br />
documentation for your operating system.<br />
Access via UMTS<br />
If you have ordered an integrated UMTS module with your system, you can enjoy the<br />
best reception and maximum energy efficiency, without any disruptive cables or aerials.<br />
The optional UMTS module is ready for use immediately.<br />
If you have not ordered a UMTS module, you can purchase the accessories for UMTS reception<br />
from specialised dealers or from your Fujitsu Technology Solutions dealer.<br />
You will find information on establishing the connection with the UMTS network<br />
in the documentation for the hardware used.<br />
Your device can connect with the Internet via UMTS. To do this, use one of<br />
the following types of connection:<br />
• an integrated UMTS module (depending on your model variant)<br />
• a USB dongle (a USB stick with your mobile phone provider’s SIM card)<br />
• a UMTS ExpressCard (to be inserted in the ExpressCard slot of your device)<br />
• a mobile end-device (e.g. mobile phone with Bluetooth or cable connection)<br />
42 Fujitsu Technology Solutions
Ethernet and LAN<br />
Working with the notebook<br />
EthernetLAN<br />
The internal network module of your notebook supports Ethernet LAN. You can use it to<br />
establish a connection to a local network (LAN = Local Area Network).<br />
1<br />
2<br />
► Connect the network cable to the LAN<br />
port of the notebook (1).<br />
► Connect the network cable to your<br />
network connection (2).<br />
Your network administrator can help you to configure and use the LAN connections.<br />
The network cable is not included in the delivery scope. This type of<br />
cable can be obtained from a specialist dealer.<br />
Fujitsu Technology Solutions 43
Security functions<br />
Security functions<br />
Securityfunctions<br />
Your notebook has several security features that you can use to secure your<br />
system from unauthorised access.<br />
This chapter explains how to use each function, and what the benefits are.<br />
Please remember that in some cases, for example, forgetting your password,<br />
you may be locked out and unable to access your data. Therefore,<br />
please note the following information:<br />
• Make regular backups to external data carriers such as external hard<br />
drives, CDs, DVDs or Blu-ray Discs.<br />
• Some security functions need you to choose passwords. Make a note<br />
of the passwords and keep them in a safe place.<br />
If you forget your passwords you will need to contact the our Service<br />
Desk. Deletion or resetting of passwords is not covered by your warranty<br />
and a charge will be made for assistance.<br />
Use Kensington Lock<br />
Your device comes with a Kensington Lock device for the Kensington MicroSaver. With<br />
the Kensington MicroSaver, a sturdy steel cable, you can help protect your notebook from<br />
theft. The Kensington MicroSaver is available as an accessory.<br />
► Fit the Kensington MicroSaver on the<br />
device on your notebook.<br />
K<br />
44 Fujitsu Technology Solutions<br />
Kensington UsingaKensingtonLock<br />
Mechanicalbackup<br />
Anti-theftprotection MicroSaver
Security functions<br />
Configuring password protection in BIOS Setup Utility<br />
Before using the various options for password protection in the BIOS Setup utility<br />
to increase data security, please observe the following:<br />
Make a note of the passwords and keep them in a safe place. If you forget your<br />
supervisor password you will not be able to access your notebook. Passwords are<br />
not covered by your warranty and a charge will be made for assistance.<br />
Password protection<br />
Your password can be up to eight characters long and contain letters and numbers.<br />
No distinction is made between uppercase and lowercase.<br />
Protecting BIOS Setup Utility (supervisor and user password)<br />
If you have opened these operating instructions on the screen, we recommend that<br />
you print out the following instructions. Because you cannot call the instructions<br />
onto the screen while you are setting up the password.<br />
BIOSSetupUtility<br />
You prevent unauthorised use of the BIOS Setup Utility with both the supervisor and the user<br />
password. The supervisor password gives you access to all functions of the BIOS Setup<br />
Utility, while the user password only provides some of the functions. You can only set a<br />
user password if a supervisor password has already been assigned.<br />
Please refer to the "Settings in BIOS Setup Utility", Page 60 section for a<br />
description of how to call up and operate the BIOS Setup Utility.<br />
Setting supervisor and user password<br />
► Start the BIOS Setup Utility and go to the Security menu.<br />
► Select the Set Supervisor Password field and press the Enter key.<br />
� With Enter new Password: you are asked to enter a password.<br />
► Enter the password and press the Enter key.<br />
� Confirm new Password requires you to confirm the password.<br />
► Enter the password again and press the Enter key.<br />
� Changes have been saved is a confirmation that the new password has been saved.<br />
► To set the user password, select Set User Password and proceed exactly as<br />
when configuring the supervisor password.<br />
� If you do not want to change any other settings, you can exit BIOS Setup Utility.<br />
► In the Exit menu, select the option Save Changes & Exit.<br />
► Select Yes and press the Enter key.<br />
Password Supervisorpassword<br />
Userpassword<br />
� The notebook will be rebooted and the new password will come into effect. It will now be<br />
necessary to first enter your supervisor or user password in order to open the BIOS Setup Utility.<br />
Please note that the user password only provides access to a few of the BIOS settings.<br />
Fujitsu Technology Solutions 45
Security functions<br />
Changing the supervisor or user password<br />
You can only change the supervisor password when you have logged into the<br />
BIOS Setup Utility with the supervisor password.<br />
Password Supervisorpassword<br />
Userpassword<br />
► Call the BIOS Setup Utility andgototheSecurity menu.<br />
► When changing the password, proceed exactly as for password assignment.<br />
Removing passwords<br />
To remove a password (without setting a new password) perform the following steps:<br />
Password Supervisorpassword<br />
Userpassword<br />
► Start the BIOS Setup Utility and go to the Security menu.<br />
► Highlight the Set Supervisor Password or Set User Password field and press the Enter key.<br />
� You will be requested to enter the current password by the Enter Current Password prompt.<br />
You will be requested to enter a new password by the Enter New Password prompt.<br />
► Press the Enter key twice.<br />
► In the Exit menu, select the option Save Changes & Exit.<br />
► Select Yes and press the Enter key.<br />
� The notebook will now reboot with the password removed.<br />
Removing the supervisor password simultaneously deactivates the user password.<br />
Password protection for booting of the operating system<br />
With the supervisor password you have set in the BIOS Setup Utility (see<br />
section "Setting supervisor and user password", Page 45), you can also<br />
prevent booting of the operating system.<br />
Operating system<br />
Activating system protection<br />
► Start the BIOS Setup Utility and go to the Security menu.<br />
Operatingsystem<br />
► Select the Password on Boot option and press the Enter key.<br />
► Select the desired option (Disabled, First Boot or Every Boot) and press the Enter key<br />
► Select the Save Changes & Exit option under Exit.<br />
� The notebook will reboot. You will be prompted to enter your password (the supervisor password).<br />
Deactivating system protection<br />
► Start the BIOS Setup Utility and go to the Security menu.<br />
Operatingsystem<br />
► Select the Password on Boot option and press the Enter key.<br />
► Select the Disabled option and press the Enter key.<br />
� If you do not want to change any other settings, you can exit BIOS Setup Utility.<br />
► Select the Save Changes & Exit option under Exit.<br />
� The notebook will reboot. The system is no longer password-protected.<br />
46 Fujitsu Technology Solutions
Password protection for the hard disk<br />
Passwordprotection:<br />
Security functions<br />
The had disk password prevents unauthorised access to the hard disk drives<br />
and is checked internally each time the system is booted. The condition for this<br />
is that you have assigned at least the supervisor password.<br />
Activating hard disk protection<br />
► Call up the BIOS Setup and select the Security menu.<br />
� If you have not assigned BIOS passwords yet, define the supervisor and the user<br />
password now, if desired (see "Security functions", Page 44).<br />
► Mark the Hard Disk Security field and press the Enter key.<br />
► In the Drive0 area mark the Set Master Password field and press the Enter key.<br />
� Enter new Password then appears and you are asked to enter a password.<br />
► Enter the password and press the Enter key.<br />
� Confirm new Password requires you to confirm the password.<br />
► Enter the password again and press the Enter key.<br />
� Setup Notice: Changes have been saved is displayed to confirm that the<br />
new password has been saved.<br />
► To assign the password for the second hard disk (Drive1), go to the Drive1 area and<br />
select the field Set Master Password, then proceed in exactly the same way as for<br />
setting up the password for the first hard disk (Drive0).<br />
� The field Password Entry on Boot is set to Enabled by default. You can exit the BIOS<br />
Setup once you have finished changing the settings.<br />
► From the Exit menu, choose the option Exit Saving Changes.<br />
► Press the Enter key and select Yes.<br />
� The notebook reboots and your hard disk is now protected with a password. The system<br />
will ask you to enter the password when the notebook is restarted again.<br />
Deactivating hard disk protection<br />
To cancel a password without setting a new one, proceed as follows:<br />
► Call up the BIOS Setup and select the Security menu.<br />
► Mark the Hard Disk Security field and press the Enter key.<br />
► In the Drive0 area mark the Set Master Password field and press the Enter key.<br />
� You will be initially requested to enter the old password by the Enter current Password prompt.<br />
You will then be requested to enter a new password by the Enter new Password prompt.<br />
► After entering the password, press the Enter key three times.<br />
► From the Exit menu, choose the option Exit Saving Changes.<br />
► Press the Enter key and select Yes.<br />
� The notebook reboots, and password protection for the hard disk is cancelled.<br />
► To cancel the password for the second hard disk (Drive1), go to the Drive1 area<br />
and select the field Set Master Password, then proceed in exactly the same way as<br />
for cancelling the password for the first hard disk (Drive0).<br />
Fujitsu Technology Solutions 47
Connecting external devices<br />
Connecting external devices<br />
Always refer to the safety information provided in "Important notes", Page 12 before<br />
connecting or disconnecting any devices to or from your notebook.<br />
Always read the documentation supplied with the device you wish to connect.<br />
Never connect or disconnect cables during a thunderstorm.<br />
Never pull at a cable when disconnecting it. Always grasp the plug.<br />
Follow the steps below in order, when connecting or disconnecting<br />
devices to your notebook:<br />
With some devices such as USB devices, it is not necessary to switch off<br />
the notebook and the device before connecting/disconnecting. For more<br />
information about whether or not devices need to be switched off, please refer<br />
to the documentation supplied with the external device.<br />
Some of the external devices require special drivers (see the operating<br />
system and external device documentation).<br />
Connecting devices to the notebook<br />
1. Turn off your notebook and all external devices.<br />
2. Unplug your notebook and all devices from the mains sockets.<br />
3. Connect the cables for your external devices following the instructions.<br />
4. Plug all power cables into the mains sockets.<br />
Devices Peripheraldevices<br />
Disconnecting devices from the notebook<br />
1. Turn off your notebook and all external devices.<br />
2. Unplug your notebook and all devices from the mains sockets.<br />
3. Disconnect the cables for your external devices following the instructions.<br />
Devices Peripheraldevices<br />
48 Fujitsu Technology Solutions
Connecting an external monitor<br />
Connecting external devices<br />
You can connect an external monitor to the analogue VGA monitor connection of the<br />
notebook. Screen output is limited to a maximum of two screens at any one time (see<br />
"Key combinations", Page 25, section "Toggle output screen").<br />
Monitor VGAconnectionsocket<br />
Screenport<br />
Monitorport<br />
Analogue VGA monitor connection socket<br />
► Switch off the notebook and the external monitor.<br />
► Connect the data cable of the external monitor to the monitor port of the notebook.<br />
► First switch on the external monitor and then the notebook.<br />
HDMI port<br />
You can also use a key combination to switch back and forth between the external<br />
monitor and the notebook’s LCD screen, see chapter "Key combinations", Page 25.<br />
You can display the same picture on the external monitor and the<br />
notebook LCD screen simultaneously.<br />
HDMIport<br />
The HDMI port on your notebook can be used to connect an external amplifier,<br />
LCD TV or a plasma TV with an HDMI connection.<br />
► Connect the data cable to the<br />
external device.<br />
► Connect the data cable to the HDMI<br />
port of the notebook.<br />
Fujitsu Technology Solutions 49
Connecting external devices<br />
Connecting USB devices<br />
USBports<br />
On the USB ports, you can connect external devices that also have a USB port<br />
(e.g. a DVD drive, a printer, a scanner or a modem).<br />
USB devices are hot-pluggable. This means you can connect and disconnect<br />
devices while your operating system is running.<br />
USB 1.x has a maximum data transfer rate of 12 Mbit/s.<br />
USB 2.x has a data transfer rate of up to 480 Mbit/s.<br />
Additional information can be found in the documentation for the USB devices.<br />
► Connect the data cable to the<br />
external device.<br />
► Connect the data cable to a USB<br />
port of the notebook.<br />
Device drivers<br />
USB devices will be automatically recognised and installed by your operating system.<br />
How to remove USB devices correctly<br />
Always correctly remove the device according to the rules described below,<br />
to ensure that none of your data is lost.<br />
► Left click on the icon to safely remove hardware, located in the taskbar.<br />
► Select the device which you want to shut down and remove.<br />
► Press the Enter key.<br />
� Wait for the dialogue box which tells you that it is now safe to remove the device.<br />
50 Fujitsu Technology Solutions
Connecting external audio devices<br />
Microphone port/Line In<br />
Connecting external devices<br />
Audiodevices,connecting<br />
Audioports Microphone,connecting<br />
The microphone port/Line In allows you to connect an external microphone, a MiniDisc<br />
player, MP3 player, CD player or a tape deck to your notebook.<br />
► Connect the audio cable to the<br />
external device.<br />
► Connect the audio cable to the microphone<br />
port/Line In of the notebook.<br />
Headphone port<br />
Connectingaudio Audioports Connectingheadphones devices<br />
You can connect headphones or external loudspeakers to your notebook via the headphone port.<br />
► Connect the audio cable to the<br />
external device.<br />
► Connect the audio cable to the headphone<br />
port of the notebook.<br />
� The internal loudspeakers are disabled.<br />
If you purchase a cable from a retailer, please note the following information:<br />
The headphone port on your notebook is a "3.5 mm jack socket".<br />
If you want to connect headphones or a speaker you will need a "3.5 mm jack plug".<br />
Fujitsu Technology Solutions 51
Removing and installing components during servicing<br />
Removing and installing components<br />
during servicing<br />
Only qualified technicians should repair your notebook. Unauthorised<br />
opening or incorrect repair may greatly endanger the user (electric shock,<br />
fire risk) and will invalidate your warranty.<br />
Servicing<br />
Components<br />
After consulting the Hotline/Service Desk, you may remove and install the<br />
components described in this chapter yourself.<br />
If you remove and install components without consulting the Hotline/Service<br />
Desk, then the warranty of your notebook will be voided.<br />
Notes on installing and removing boards<br />
and components<br />
• Switch the notebook off and pull the power plug out of the mains socket.<br />
• Always remove the battery.<br />
• Take care when you use the locking mechanisms on the battery and any other component.<br />
• Never use sharp objects such as screwdrivers, scissors or knives as leverage to remove covers.<br />
Notes Board ESD<br />
Boards with electrostatic sensitive devices (ESD) are marked with the label<br />
shown.<br />
When handling boards fitted with ESDs, you must always observe the following<br />
points:<br />
• You must always discharge static build up (e.g. by touching a grounded<br />
object) before working.<br />
• The equipment and tools you use must be free of static charges.<br />
• Remove the power plug from the mains supply before inserting or removing<br />
boards containing ESDs.<br />
• Always hold boards with ESDs by their edges.<br />
• Never touch pins or conductors on boards fitted with ESDs.<br />
52 Fujitsu Technology Solutions
Preparing to remove components<br />
Removing and installing components during servicing<br />
If you are going to remove or change system components, prepare for the removal as follows:<br />
Please observe the safety information in chapter "Important notes", Page 12.<br />
Remove the power plug from the mains outlet !<br />
► Switch the device off.<br />
The device must not be in energy-saving mode !<br />
► Close the LCD screen.<br />
► Remove all the cables from the device.<br />
► Turn the device over and place it on a stable, flat and clean surface. If necessary, lay an<br />
anti-slip cloth on this surface to prevent the device from being scratched.<br />
► Remove the battery (see "Removing the battery", Page 32).<br />
Installing and removing memory expansion<br />
Memorymodule<br />
Mainmemory<br />
Removingmemory<br />
Systemexpansion<br />
Systemexpansion<br />
If you are asked by the Hotline/Service Desk to remove and install the memory<br />
expansion yourself, proceed as follows:<br />
Please observe the safety information in chapter "Important notes", Page 12.<br />
When installing/removing memory modules, the battery must be removed from<br />
the notebook and the notebook must not be connected to the power supply,<br />
see "Preparing to remove components", Page 53.<br />
Only use memory expansion modules that have been approved for your<br />
notebook (see "Technical data", Page 70).<br />
Never use force when installing or removing a memory extension.<br />
Make sure that foreign objects do not fall into the memory extension compartment.<br />
You must open the service compartment to remove or install a memory module. On some devices,<br />
opening the compartment may expose other components. These components should be removed<br />
and replaced only by authorised specialists. Therefore, be sure to observe the following:<br />
Individual components can become very hot during operation. Therefore, we<br />
recommend that you wait one hour after switching off the notebook before removing<br />
or installing memory modules. Otherwise, there is a risk of suffering burns!<br />
As some components are exposed that are sensitive to static electricity, please take<br />
note of chapter "Notes on installing and removing boards and components", Page 52.<br />
Fujitsu Technology Solutions 53
Removing and installing components during servicing<br />
Removing the cover<br />
► Remove the screws (1).<br />
► Lift the cover off the notebook (2).<br />
Removing memory modules<br />
1<br />
3<br />
2<br />
1<br />
1<br />
1<br />
1<br />
1<br />
1<br />
2<br />
► Carefully push the two mounting<br />
clips outwards (1).<br />
Memoryexpansion<br />
Memorymodule<br />
� The memory module snaps upwards (2).<br />
► Pull the memory module out of its slot<br />
in the direction of the arrow (3).<br />
54 Fujitsu Technology Solutions<br />
1
Installing a memory module<br />
Securing the cover<br />
1<br />
2<br />
a<br />
2<br />
Removing and installing components during servicing<br />
► Insert the memory module with the contacts<br />
and the recess (a) facing the slot (1).<br />
Memoryexpansion<br />
Memorymodule<br />
► Carefully push the memory module<br />
downwards until you feel it click<br />
into place (2).<br />
► Place the cover into its installation position in the direction of the arrow (1).<br />
► Secure the cover with the screws (2).<br />
2<br />
2<br />
Fujitsu Technology Solutions 55<br />
2<br />
1<br />
2<br />
2
Removing and installing components during servicing<br />
Removing and installing the hard disk<br />
Removing a cover<br />
► Remove the battery (see Chapter "Removing the battery", Page 32).<br />
► Remove the screws (1).<br />
1<br />
2<br />
1<br />
Keep the screws in a safe place. If you are removing more than one component at<br />
the same time, store the screws for the individual components separately from each<br />
other. If you install the wrong screws, components may be damaged.<br />
► Lift the cover off the notebook (2).<br />
56 Fujitsu Technology Solutions
Removing a hard disk<br />
Removing and installing components during servicing<br />
► Use the pulling aid to pull the hard disk in the direction of the arrow (1) until the contacts disengage.<br />
► Remove the hard disk from the hard disk compartment (2).<br />
Fujitsu Technology Solutions 57<br />
2<br />
1
Removing and installing components during servicing<br />
Installing a hard disk<br />
If you are installing more than one component at the same time, keep the screws for<br />
the individual components separately from each other and make sure that you use the<br />
correct screws. If you install the wrong screws, components may be damaged.<br />
► Place the hard disk into the hard disk compartment (1).<br />
► Push the hard disk in the direction of the arrow (2) until the contacts engage.<br />
► Fasten the screws (3).<br />
58 Fujitsu Technology Solutions<br />
1<br />
2
Attaching the cover<br />
► Place the cover in the correct mounting position (1).<br />
2<br />
Removing and installing components during servicing<br />
1<br />
2<br />
If you remove more than one component at the same time, keep the screws for the<br />
individual components separately from each other and make sure that you use the<br />
correct screws. If you install the wrong screws, components may be damaged.<br />
► Tighten the screws (2).<br />
► Insert the battery (see Chapter "Inserting battery", Page 33).<br />
Finishing component removal<br />
After you have removed or changed the system components as you required, please<br />
prepare your device for operation again as follows:<br />
► Install the battery again (see "Inserting battery", Page 33).<br />
► Turn the notebook the right way up again and place it on a flat surface.<br />
► Reconnect the cables that you disconnected before.<br />
Fujitsu Technology Solutions 59
Settings in BIOS Setup Utility<br />
Settings in BIOS Setup Utility<br />
Hardwareconfiguration<br />
BIOSSetupUtility<br />
Systemsettings,BIOSSetupUtility<br />
Configuration,BIOSSetupUtility<br />
Setup Systemconfiguration<br />
The BIOS Setup Utility allows you to set the system functions and the hardware<br />
configuration for the notebook.<br />
When it is delivered, the notebook is set to factory default settings. You can<br />
change these settings in BIOS Setup Utility. Any changes you make take effect as<br />
soon as you save and exit the BIOS Setup Utility.<br />
The BIOS Setup Utility program contains the following menus:<br />
About Displays information relating to the BIOS, processor and notebook<br />
System Advanced system settings<br />
Advanced Configuration of various hardware components, such as mouse, keyboard,<br />
processor<br />
Security Password settings and security functions<br />
Boot Configuration of the start-up sequence<br />
Exit Exits the BIOS Setup Utility<br />
Starting the BIOS Setup Utility<br />
► Reboot the notebook (switch off/on or reboot the operating system).<br />
BIOSSetupUtility<br />
� The following or a similar display appears on the screen at start-up:<br />
BIOS Setup Boot Menu<br />
► Press the function key F2 .<br />
► If a password has been assigned, enter the password and press the Enter key.<br />
If you have forgotten the password, contact your system administrator<br />
or contact our customer service centre.<br />
The BIOS Setup Utility starts.<br />
Operating BIOS Setup Utility<br />
BIOSSetupUtility<br />
Press the F1 key to display help on the operation of BIOS Setup Utility. The description<br />
of the individual settings is shown in the right-hand window of the BIOS Setup Utility.<br />
With the F9 key you can load the default settings of the BIOS Setup Utility.<br />
► Use the cursor keys ← or → to select the menu you wish to access to make changes.<br />
� The menu is displayed on the screen.<br />
► Select the option you want to change with the cursor keys ↑ or ↓ .<br />
► Press the Enter key.<br />
► Press the ESC key to exit the selected menu.<br />
► For future reference, make a note of the changes you have made (for example, in this manual).<br />
60 Fujitsu Technology Solutions
Exiting BIOS Setup Utility<br />
Settings in BIOS Setup Utility<br />
BIOSSetupUtility<br />
You need to select the desired option in the Exit menu and activate it by pressing the Enter key:<br />
Exit Saving Changes - save changes and exit BIOS Setup Utility<br />
► To save the current menu settings and exit the BIOS Setup Utility,selectExit Saving Changes and Yes.<br />
� The notebook is rebooted and the new settings come into effect.<br />
Exit Discarding Changes – Discard changes and<br />
exit BIOS Setup Utility<br />
► To discard the changes, select Exit Discarding Changes and Yes.<br />
� The settings in place when BIOS Setup Utility was called remain effective. BIOS<br />
Setup Utility is terminated and the notebook is rebooted.<br />
Load Setup Defaults – Copy Standard Entries<br />
► To copy the standard entries for all menus of the BIOS Setup Utility,<br />
choose Load Setup Defaults and Yes.<br />
Discard Changes – Discard changes without exiting<br />
the BIOS Setup Utility<br />
► To discard the changes you have made, select Discard Changes and Yes.<br />
� ThesettingsinplacewhenBIOSSetup Utility was called remain effective.<br />
You can now make additional settings in the BIOS Setup Utility.<br />
► If you want to exitBIOS Setup Utilitywith these settings, select Exit Saving Changes and Yes.<br />
Save Changes - save changes without exiting<br />
the BIOS Setup Utility<br />
► To save the changes, select Save Changes and Yes.<br />
� The changes are saved. You can now make additional settings in the BIOS Setup Utility.<br />
► If you want to exit BIOS Setup Utility with these settings, choose Exit Saving Changes and Yes.<br />
Save Changes and Power Off<br />
► To save the changes and switch off your device, select Save Changes and Power Off and Yes.<br />
� The changes are saved. Your device is shut down.<br />
Fujitsu Technology Solutions 61
Troubleshooting and tips<br />
Troubleshooting and tips<br />
Troubleshooting<br />
Tips Fault Troubleshooting<br />
Follow the safety notes in the "Safety/Regulations" manual when<br />
connecting or disconnecting cables.<br />
If a fault occurs, try to correct it as described. If you fail to correct the problem, proceed as follows:<br />
► Make a note of the steps and the circumstances that led to the fault. Also<br />
make a note of any error messages displayed.<br />
► Switch the notebook off.<br />
► Please contact the Hotline/Service Desk.<br />
You can find the telephone numbers in the service desk list. Please have<br />
the following information ready when you call:<br />
• The model name and serial number of the notebook. The serial number is<br />
located on a sticker on the underside of the notebook.<br />
• Notes of any messages that appear on the screen and information on acoustic signals.<br />
• Any changes you have made to the hardware or software since<br />
receiving the notebook.<br />
• Any changes you have made to the BIOS Setup settings since receiving the notebook.<br />
• Your system configuration and all peripheral devices connected to your system.<br />
• Your sales contract.<br />
Our notebooks have been designed primarily with mobile applications in mind. This<br />
means that considerable effort has been made to optimise components and equipment<br />
in terms of weight, space and energy requirements. Depending on the particular<br />
configuration you have purchased, it is possible that functionality may be slightly reduced<br />
compared to a desktop PC if you are running processor-intensive gaming software, e.g.<br />
games with intensive 3D graphics. Updating your hardware with drivers which have not<br />
been approved by Fujitsu Technology Solutions may result in performance losses, data<br />
losses or malfunction of the equipment. A list of approved drivers and current BIOS<br />
versions can be downloaded from: "http://ts.fujitsu.com/support/downloads.html"<br />
62 Fujitsu Technology Solutions
Help if problems occur<br />
Should you at any time have a problem with your computer that you can’t solve<br />
yourself, in many cases you can quickly solve it by using the SystemDiagnostics<br />
program which is pre-installed on your computer.<br />
Troubleshooting and tips<br />
The SystemDiagnostics program is already installed on devices which were<br />
delivered with a Windows operating system.<br />
► To start the SystemDiagnostics program, click on Startsymbol - Program - Fujitsu - SystemDiagnostics.<br />
► If a problem is found during a test run, the SystemDiagnostics program outputs<br />
a code (e.g. DIFS-Code YXXX123456789123).<br />
► Make a note of the output DIFS code and the identity number of your device. The identity<br />
number can be found on the type rating plate on the back of the casing.<br />
► For further clarification of the problem, contact the Service Desk for your country (see the Service<br />
Desk list or visit the Internet at "http://ts.fujitsu.com/support/servicedesk.html"). When you do<br />
this, please have ready the identity number and serial number of your system and the DIFS code.<br />
Restoring the hard disk contents under Windows<br />
Harddisk: Operatingsystem,restoring<br />
You can use the "Windows Recovery CD" (optionally available) and the "Drivers & Utilities<br />
CD/DVD" to reinstall the operating system.<br />
The instructions are provided on the case of the Recovery CD.<br />
During the reinstall process your personal files and any installed programs<br />
will be deleted. We advise you to backup your files to an external hard<br />
drive, or CD / DVD disk before you start.<br />
► Switch the notebook on.<br />
� The following display briefly appears on the screen during start-up:<br />
Diagnostic screen Boot Menu BIOS Setup<br />
► When this message appears, press the function key F12 .<br />
► Insert the "Windows Recovery CD" into the optical drive.<br />
► Select CD-ROM and press the Enter key.<br />
► Follow the instructions on the screen.<br />
After the installation you must install all the drivers again. Some installed hardware<br />
components will not be correctly supported until this has been done.<br />
► Insert the "Drivers & Utilities" CD/DVD into the optical drive. The CD starts automatically.<br />
► Click on the Desk Update button.<br />
► Select Automatic driver installation (Express) and click on Start installation.<br />
► Follow the instructions on the screen.<br />
► Restart your notebook when the driver installation is completed.<br />
Fujitsu Technology Solutions 63
Troubleshooting and tips<br />
The notebook’s date or time is incorrect<br />
Cause Troubleshooting<br />
Summertime<br />
Time,daylightsavings<br />
Timenotcorrect<br />
Incorrectdate/time<br />
Dateisincorrect<br />
Bufferbattery,load<br />
Time and date are incorrect. ► With the BIOS-Setup-Utility, you can set the<br />
date and time in the main menu.<br />
If the time and date are still set incorrectly after<br />
switching on the notebook.<br />
► Please contact your sales outlet or our<br />
Hotline/Service Desk.<br />
When certain characters are entered on the<br />
keyboard, only numerals are written<br />
Abeepsoundseverysecond<br />
Cause Troubleshooting<br />
The virtual numeric keypad of your device is<br />
activated, see "Virtual numeric keypad", Page 24<br />
► Press the Num key.<br />
The notebook’s LCD screen remains blank<br />
LCDscreen<br />
LCDscreenistoodark<br />
Cause Troubleshooting<br />
Monitor is switched off. ► Pressakeyortouchthe touchpad.<br />
External monitor or television set connected. ► Press the key combination to switch the<br />
screen output, see "Key combinations",<br />
Page 25.<br />
The LCD screen is difficult to read<br />
LCDscreen<br />
Cause Troubleshooting<br />
Reflected glare ► Turn the notebook or alter the tilt of the LCD<br />
screen.<br />
► Increase the brightness of the screen.<br />
64 Fujitsu Technology Solutions
The external monitor remains blank<br />
Monitor<br />
Cause Troubleshooting<br />
Troubleshooting and tips<br />
Monitor is switched off. ► Switch the external monitor on.<br />
Power saving has been activated (monitor is<br />
blank).<br />
► Press any key to continue.<br />
Brightness is set to dark. ► Adjust the brightness of the monitor.<br />
Screen output is set to the notebook’s LCD<br />
screen<br />
The external monitor’s power cable or data<br />
cable is not connected properly.<br />
► Press the key combination to switch the<br />
screen output, see "Key combinations",<br />
Page 25.<br />
► Switch off the external monitor and the<br />
notebook.<br />
► Check whether the power cable is plugged<br />
properly into the external monitor and into<br />
the power socket.<br />
► Check whether the data cable is properly<br />
connected to the notebook and the external<br />
monitor (if it is plugged in with a connector).<br />
► Switch on the external monitor and the<br />
notebook.<br />
The external monitor is blank or the image is unstable<br />
Screen Monitor<br />
Cause Troubleshooting<br />
The wrong external monitor has been selected<br />
or the wrong screen resolution has been set for<br />
the application program.<br />
► Terminate the application program in<br />
Windows by pressing Alt + F4 .Ifthe<br />
fault persists after closing the program, use<br />
the key combination for switching the screen<br />
output (see "Key combinations", Page 25) to<br />
switch over to the notebook’s LCD screen.<br />
Change the following setting:<br />
► Set the screen resolution: Set the screen<br />
resolution as described in the documentation<br />
for your operating system.<br />
► Select monitor: Select monitor 1 or 2 as<br />
described in the documentation for your<br />
operating system.<br />
Fujitsu Technology Solutions 65
Troubleshooting and tips<br />
The notebook cannot be started<br />
Notebook<br />
Cause Troubleshooting<br />
The battery is not installed correctly. ► Check whether the battery is installed<br />
correctly in its compartment.<br />
► Switch the notebook on.<br />
The battery is dead. ► Charge the battery.<br />
or<br />
► Insert a charged battery.<br />
or<br />
► Connect the mains adapter to the<br />
notebook.<br />
The power adapter is not connected correctly. ► Check whether the mains adapter is<br />
connected correctly to the notebook.<br />
► Switch the notebook on.<br />
The notebook stops working<br />
Notebook Energysavingmode<br />
Cause Troubleshooting<br />
Notebook is in energy saving mode. ► Leave energy saving mode.<br />
An application programme has caused the<br />
malfunction.<br />
The battery is dead. ► Charge the battery.<br />
► Close the application program or restart<br />
the notebook (by restarting the operating<br />
system or switching the device off and back<br />
on again).<br />
or<br />
or<br />
► Insert a charged battery.<br />
► Connect the mains adapter to the<br />
notebook.<br />
66 Fujitsu Technology Solutions
The printer does not print<br />
Printerdoesnotprint<br />
Cause Troubleshooting<br />
Troubleshooting and tips<br />
The printer is not switched on. ► Make sure that the printer is switched<br />
on and ready for operation (refer to the<br />
documentation supplied with the printer).<br />
The printer is not connected correctly. ► Check that the data cable connecting<br />
the notebook to the printer is properly<br />
connected.<br />
The printer driver is faulty or not correctly<br />
installed, or it is the wrong printer driver.<br />
► Check that the data cable connecting<br />
the notebook to the printer is properly<br />
connected.<br />
► Check whether the correct printer driver is<br />
loaded (refer to the printer documentation).<br />
The radio connection to a network does not work<br />
Theradioconnectiontoanetworkdoesnotwork<br />
Cause Troubleshooting<br />
The wireless component is disabled. ► Switch the radio component on (see<br />
"Switching the wireless components on and<br />
off", Page 42).<br />
The wireless component is enabled. Despite<br />
this, the wireless connection to a network does<br />
not work.<br />
Acoustic warnings<br />
Acousticerrormessages<br />
Errors<br />
Cause Troubleshooting<br />
A beep sounds every few seconds.<br />
The battery is almost flat.<br />
► Check whether the radio connection is<br />
switched on via the software.<br />
► Further information on using the radio<br />
component can be found in the help files.<br />
► Charge the battery.<br />
Fujitsu Technology Solutions 67
Troubleshooting and tips<br />
Error messages on the screen<br />
Errormessagesonthescreen<br />
Errormessage:<br />
This section describes the error messages generated by the BIOS Setup. Error messages displayed<br />
by the operating system or programmes are described in the relevant documentation.<br />
If the error message appears repeatedly, despite troubleshooting measures, please<br />
contact the place of purchase or our customer service centre.<br />
Error message/cause Resolution<br />
CMOS battery bad<br />
► Contact your sales outlet or our customer<br />
If the error message occurs repeatedly, the<br />
buffer battery in the notebook is flat.<br />
service centre.<br />
System CMOS checksum bad - default configuration ► Switch the notebook off.<br />
used<br />
► Switch the notebook on.<br />
The system configuration information is ► Press the function key F2 to access the<br />
incorrect.<br />
BIOS Setup.<br />
► In the BIOS Setup, select the Exit menu.<br />
► Select the entry Load Setup Defaults.<br />
► Select OK and press the Enter key.<br />
Extended memory failed at offset: xxxx Failing Bits: ► Check whether the additional memory<br />
zzzz zzzz<br />
When testing the extended memory an error has<br />
resulted at the address xxxx.<br />
module has been inserted correctly.<br />
Failure Fixed Disk n<br />
► Start the BIOS Setup (Primary Master<br />
The settings of the hard disk drive are incorrect.<br />
submenu) and select the correct settings.<br />
Keyboard controller error ► Switch the notebook off with the ON/OFF<br />
switch.<br />
► Wait 3 - 5 seconds and switch on the<br />
notebook again.<br />
Keyboard error If you are using an external keyboard:<br />
► Check the connection and reboot the<br />
notebook.<br />
nn Stuck key ► Make sure that no key is pressed.<br />
Operating system not found ► Check in the BIOS Setup whether your hard<br />
disk has been set correctly.<br />
► Make sure that the operating system is<br />
installed on the corresponding drive.<br />
Press to resume, to SETUP<br />
This error message appears if an error occurs<br />
during the self-test before starting the operating<br />
system.<br />
► Press the F1 function key to start the<br />
operating system.<br />
► Press the function key F2 to access the<br />
BIOS Setup.<br />
68 Fujitsu Technology Solutions
Error message/cause Resolution<br />
Previous boot incomplete - Default configuration<br />
used Due to an error during the previous system<br />
boot, default values were used for certain<br />
settings. Check the settings in the BIOS Setup.<br />
Troubleshooting and tips<br />
► Press the F1 function key when prompted<br />
to do so.<br />
Real time clock error ► Contact your sales outlet or our customer<br />
service centre.<br />
nnnnK Shadow RAM failed at offset: xxxx Failing<br />
Bits: zzzz<br />
► Contact your sales outlet or our customer<br />
service centre.<br />
System battery is dead - Replace and run SETUP ► Contact your sales outlet or our customer<br />
service centre.<br />
System cache error - Cache disabled ► Contact your sales outlet or our customer<br />
service centre.<br />
System timer error ► Contact your sales outlet or our customer<br />
service centre.<br />
Fujitsu Technology Solutions 69
Technical data<br />
Technical data<br />
Technicaldata<br />
LIFEBOOK<br />
Technicaldata<br />
Ambient conditions<br />
Environment class 3K2 DIN IEC 721<br />
Mechanical class 7M2 DIN IEC 721<br />
Temperature:<br />
Operation 5 °C ... 35 °C<br />
Transportation -15 °C ... 60 °C<br />
Dimensions<br />
Width x depth x height (front/back) 378 mm x 252 mm x 29.2 mm/35.7 mm (excl.<br />
rubber feet) or 38.8 mm (incl. rubber feet)<br />
Weight (including 6-cell rechargeable battery) Approx. 2.5 kg<br />
The data sheet for the device provides further technical data. You will find the data<br />
sheet on your device or on the Internet at "http://ts.fujitsu.com/support".<br />
Rechargeable battery<br />
You can find information on the batteries used in your device on the<br />
Internet at "http://ts.fujitsu.com/support".<br />
Rated voltage 10.8 V<br />
6-cell rechargeable battery<br />
Rated capacity 4400 mAh (48 Wh)<br />
Mains adapter 80 W<br />
Technicaldata<br />
Primary<br />
Rated voltage 100 V to 240 V (automatic)<br />
Rated frequency 50 Hz to 60 Hz (automatic)<br />
Secondary<br />
Rated voltage 19 V<br />
Max. rated current 4.22 A<br />
An additional mains adapter or power cable can be ordered at any time.<br />
70 Fujitsu Technology Solutions
Power adapter, 65 W<br />
Technicaldata<br />
Primary<br />
Rated voltage 100 V to 240 V (automatic)<br />
Rated frequency 50 Hz to 60 Hz (automatic)<br />
Secondary<br />
Rated voltage 20 V<br />
Max. rated current 3.25 A<br />
An additional mains adapter or power cable can be ordered at any time.<br />
Technical data<br />
Fujitsu Technology Solutions 71
Manufacturer’s notes<br />
Manufacturer’s notes<br />
Energy Star<br />
Products which are Energy Star certificated and labelled always meet the full<br />
requirements of the standard when shipped. Please note that installation of<br />
after-market hardware and software, changes to the BIOS or to the power<br />
options may affect power consumption. The properties guaranteed by the<br />
Energy Star label can then no longer be guaranteed.<br />
Disposal and recycling<br />
Devices which are certified according to the Energy Star environmental<br />
mark help to save money and reduce the emission of greenhouse gases.<br />
Power Management settings on delivery:<br />
• Monitor switched off after < 15 minutes of inactivity<br />
• Automatic activation of energy saving mode (ACPI S3): < 30 minutes<br />
of inactivity<br />
Detailed information about the requirements of the "Energy Star"<br />
environmental mark and the products which satisfy these requirements<br />
can be found on the Internet at "https://www.energystar.gov/".<br />
Notes<br />
Information about this subject can be found on your notebook or on our Internet pages.<br />
Declarations of Conformity<br />
Declarationofconformity<br />
The "Declarations of Conformity" for the device can be found at our Internet<br />
address under: "http://ts.fujitsu.com/ce".<br />
Fujitsu Technology Solutions hereby declares that your device is in compliance with the<br />
essential requirements and other relevant provisions of Directive 1999/5/EC.<br />
72 Fujitsu Technology Solutions
CE marking<br />
CEmarking<br />
Regulatory notices<br />
Manufacturer’s notes<br />
CE marking for devices with radio component<br />
This equipment complies with the requirements of Directive 1999/5/EC of the<br />
European Parliament and Commission from 9 March, 1999 governing Radio<br />
and Telecommunications Equipment and mutual recognition of conformity.<br />
This equipment can be used in the following countries:<br />
Belgium Bulgaria Denmark Germany<br />
Estonia Finland France Greece<br />
UK Ireland Iceland Italy<br />
Latvia Liechtenstein Lithuania Luxembourg<br />
Malta The<br />
Netherlands<br />
Norway Austria<br />
Poland Portugal Rumania Sweden<br />
Switzerland Slovakia Slovenia Spain<br />
Czech Republic Hungary Cyprus<br />
Contact the corresponding government office in the respective country for<br />
current information on possible operating restrictions. If your country is<br />
not included in the list, then please contact the corresponding supervisory<br />
authority as to whether the use of this product is permitted in your country.<br />
If there is no FCC logo and also no FCC ID on the device then this device is<br />
not approved by the Federal Communications Commission (FCC) of the USA.<br />
Although it is not explicitly forbidden to travel in the US trading area carrying this<br />
device, to avoid trouble at customs clearance, Fujitsu Technology Solutions GmbH<br />
recommends not to bring this device into the US trading area.<br />
Regulatory information for notebooks without radio device<br />
Regulatoryinformation<br />
NOTICE:<br />
Changes or modifications not expressly approved by Fujitsu Technology Solutions<br />
could void this user’s authority to operate the equipment.<br />
Notice to Users of Radios and Television<br />
These limits are designed to provide reasonable protection against harmful interference in a<br />
residential installation. This equipment generates, uses, and can radiate radio frequency energy<br />
and, if not installed and used in accordance with the instructions, may cause harmful interference<br />
to radio communications. However, there is no guarantee that interference will not occur in a<br />
particular installation. If this equipment does cause harmful interference to radio or television<br />
reception, which can be determined by turning the equipment off and on, the user is encouraged<br />
to try to correct the interference by one or more of the following measures:<br />
• Reorient or relocate the receiving antenna.<br />
• Increase the separation between the equipment and receiver.<br />
Fujitsu Technology Solutions 73
Manufacturer’s notes<br />
• Connect the equipment into an outlet that is on a different circuit than the receiver.<br />
• Consult the dealer or an experienced radio/TV technician for help.<br />
Notice to Users of the US Telephone Network<br />
Your notebook may be supplied with an internal modem which complies with Part 68 of the<br />
FCC rules. On this notebook is a label that contains the FCC Registration Number and the<br />
Ringer Equivalence Number (REN) for this equipment among other information. If requested,<br />
the user must provide their telephone company with the following information:<br />
1. The telephone number to which the notebook is connected.<br />
2. The Ringer Equivalence Number (REN) for this equipment.<br />
3. The equipment requires a standard modular jack type USOC RJ-11C<br />
which is FCC Part 68 compliant.<br />
4. The FCC Registration Number.<br />
This equipment is designed to be connected to the telephone network or premises wiring using<br />
a standard modular jack type USOC RJ-11C which is FCC Part 68 compliant and a line cord<br />
between the modem and the telephone network with a minimum of 26AWG.<br />
The REN is used to determine the number of devices that you may connect to your telephone<br />
line and still have all of those devices ring when your number is called. Too many devices<br />
on one line may result in failure to ring in response to an incoming call. In most, but not all,<br />
areas the sum of the RENs of all of the devices should not exceed five (5). To be certain<br />
of the number of devices you may connect to your line, as determined by the RENs, contact<br />
your local telephone company. If this equipment causes harm to the telephone network, your<br />
telephone company may discontinue your service temporarily. If possible, they will notify you<br />
in advance. If advance notice is not practical they will notify you as soon as possible. You<br />
will also be advised of your right to file a complaint with the FCC.<br />
This fax modem also complies with fax branding requirements per FCC Part 68.<br />
Your telephone company will probably ask you to disconnect this equipment from the telephone<br />
network until the problem is corrected and you are sure that the equipment is not malfunctioning.<br />
This equipment may not be used on coin-operated telephones provided by your telephone<br />
company. Connection to party lines is subject to state tariffs. Contact your state’s public utility<br />
commission, public service commission or corporation commission for more information.<br />
This equipment includes automatic dialing capability. When programming and/or<br />
making test calls to emergency numbers:<br />
• Remain on the line and briefly explain to the dispatcher the reason for the call.<br />
• Perform such activities in off-peak hours, such as early morning or late evening.<br />
FCC rules prohibit the use of non-hearing aid compatible telephones in the<br />
following locations or applications:<br />
• All public or semi-public coin-operated or credit card telephones.<br />
• Elevators, highways, tunnels (automobile, subway, railroad or pedestrian) where a<br />
person with impaired hearing might be isolated in an emergency.<br />
• Places where telephones are specifically installed to alert emergency authorities<br />
such as fire, police or medical assistance personnel.<br />
• Hospital rooms, residential health care facilities, convalescent homes and prisons.<br />
• Hotel, motel or apartment lobbies.<br />
• Stores where telephones are used by patrons to order merchandise.<br />
74 Fujitsu Technology Solutions
Manufacturer’s notes<br />
• Public transportation terminals where telephones are used to call taxis or<br />
to reserve lodging or rental cars.<br />
• In hotel and motel rooms as at least ten percent of the rooms must contain hearing<br />
aid-compatible telephones or jacks for plug-in hearing aid compatible telephones which<br />
will be provided to hearing impaired customers on request.<br />
DOC (Industry CANADA) notices<br />
DOC(INDUSTRYCANADA)NOTICES<br />
Notice to Users of Radios and Television<br />
This Class B digital apparatus meets all requirements of Canadian Interference-Causing Equipment<br />
Regulations.<br />
CET appareil numérique de la class B respecte toutes les exigence du Réglement<br />
sur le matérial brouilleur du Canada.<br />
Notice to Users of the Canadian Telephone Network<br />
NOTICE:<br />
This equipment meets the applicable Industry Canada Terminal Equipment Technical<br />
Specifications. This is confirmed by the registration number. The abbreviation, IC, before<br />
the registration number signifies that registration was performed based on a Declaration of<br />
Conformity indicating that Industry Canada technical specifications were met. It does not<br />
imply that Industry Canada approved the equipment. Before connecting this equipment to<br />
a telephone line the user should ensure that it is permissible to connect this equipment to<br />
the local telecommunication facilities. The user should be aware that compliance with the<br />
certification standards does not prevent service degradation in some situations.<br />
Repairs to telecommunication equipment should be made by a Canadian authorised<br />
maintenance facility. Any repairs or alterations not expressly approved by Fujitsu or<br />
any equipment failures may give the telecommunication company cause to request the<br />
user to disconnect the equipment from the telephone line.<br />
NOTICE:<br />
The Ringer Equivalence Number (REN) for this terminal equipment is 0.0. The REN assigned<br />
to each terminal equipment provides an indication of the maximum number of terminals<br />
allowed to be connected to a telephone interface. The termination on an interface may<br />
consist of any combination of devices subject only to the requirement that the sum of the<br />
Ringer Equivalence Numbers of all the devices does not exceed five.<br />
CAUTION:<br />
For safety, users should ensure that the electrical ground of the power utility, the<br />
telephone lines and the metallic water pipes are connected together. Users should NOT<br />
attempt to make such connections themselves but should contact the appropriate electric<br />
inspection authority or electrician. This may be particularly important in rural areas.<br />
Avis Aux Utilisateurs Du Réseau Téléphonique Canadien<br />
AVIS : Le présent matériel est conforme aux spécifications techniques d’Industrie Canada<br />
applicables au matériel terminal. Cette conformité est confirmée par le numéro d’enregistrement.<br />
Le sigle IC, placé devant le numéro d’enregistrement, signifie que l’enregistrement s’est effectué<br />
conformément à une déclaration de conformité et indique que les spécifications techniques<br />
d’Industrie Canada ont été respectées. Il n’implique pas qu’Industrie Canada a approuvé le matériel.<br />
Fujitsu Technology Solutions 75
Manufacturer’s notes<br />
Avant de connecter cet équipement à une ligne téléphonique, l’utilisateur doit vérifier<br />
s’il est permis de connecter cet équipement aux installations de télécommunications<br />
locales. L’utilisateur est averti que même la conformité aux normes de certification ne<br />
peut dans certains cas empêcher la dégradation du service.<br />
Les réparations de l’équipement de télécommunications doivent être effectuées par un service de<br />
maintenance agréé au Canada. Toute réparation ou modification, qui n’est pas expressément<br />
approuvée par Fujitsu, ou toute défaillance de l’équipement peut entraîner la compagnie de<br />
télécommunications à exiger que l’utilisateur déconnecte l’équipement de la ligne téléphonique.<br />
AVIS : L’indice d’équivalence de la sonnerie (IES) du présent matériel est de 0.0. L’IES<br />
assigné à chaque dispositif terminal indique le nombre maximal de terminaux qui peuvent<br />
être raccordés à une interface téléphonique. La terminaison d’une interface peut consister<br />
en une combinaison quelconque de dispositifs, à la seule condition que la somme d’indices<br />
d’équivalence de la sonnerie de tous les dispositifs n’excède pas 5.<br />
AVERTISSEMENT:<br />
Pour assurer la sécurité, les utilisateurs doivent vérifier que la prise de terre du service<br />
d’électricité, les lignes télphoniques et les conduites d’eau métalliques sont connectées<br />
ensemble. Les utilisateurs NE doivent PAS tenter d’établir ces connexions eux-mêmes,<br />
mais doivent contacter les services d’inspection d’installations électriques appropriés<br />
ou un électricien. Ceci peut être particulièrement important en régions rurales.<br />
UL Notice<br />
This unit requires an AC adapter to operate. Only use a UL Listed Class 2 adapter.<br />
The correct output rating is indicated on the AC adapter label. Refer to the illustration<br />
below for the correct AC Adapter output polarity:<br />
CAUTION:<br />
To reduce the risk of fire, use only 26AWG or larger telecommunications line cord.<br />
For Authorized Repair Technicians Only<br />
CAUTION:<br />
For continued protection against risk of fire, replace only with the<br />
same type and rating fuse.<br />
WARNING:<br />
Danger of explosion if Lithium (CMOS) battery is incorrectly replaced. Replace only<br />
with the same or equivalent type recommended by the manufacturer.<br />
Dispose of used batteries according to the manufacturer’s instructions.<br />
76 Fujitsu Technology Solutions
Manufacturer’s notes<br />
FCC regulatory information for notebooks with radio device<br />
Regulatoryinformation<br />
Federal Communications Commission statement<br />
This device complies with Part 15 of FCC Rules. Operation is subject to the following<br />
two conditions: (1) this device may not cause interference, and<br />
(2) this device must accept any interference, including interference that may<br />
cause undesired operation of this device.<br />
FCC Interference Statement<br />
This equipment has been tested and found to comply with the limits for a Class B digital<br />
device, pursuant to Part 15 of the FCC Rules. These limits are designed to provide reasonable<br />
protection against harmful interference in a residential installation. This equipment generates,<br />
uses, and can radiate radio frequency energy. If not installed and used in accordance with<br />
the instructions, it may cause harmful interference to radio communications.<br />
However, there is no guarantee that interference will not occur in a particular installation.<br />
If this equipment does cause harmful interference to radio or television reception, which<br />
can be determined by turning the equipment off and on, the user is encouraged to try to<br />
correct the interference by one or more of the following measures:<br />
1. Reorient or relocate the receiving antenna.<br />
2. Increase the distance between the equipment and the receiver.<br />
3. Connect the equipment to an outlet on a circuit different from the one the receiver is connected to.<br />
4. Consult the dealer or an experienced radio/TV technician for help.<br />
Please note the following regulatory information related to the optional radio device.<br />
FCC Radio Frequency Exposure statement<br />
This radio device has been evaluated under FCC Bulletin OET 65C and found compliant with the<br />
requirements as set forth in CFR 47 Sections 2.1091, 2.1093, and 15.247 (b) (4) addressing RF<br />
Exposure from radio frequency devices. The radiated output power of this radio device is far below<br />
the FCC radio frequency exposure limits. Nevertheless, this device shall be used in such a manner<br />
that the potential for human contact during normal operation is minimized. When using this device, a<br />
certain separation distance between antenna and nearby persons must be maintained to ensure RF<br />
exposure compliance. In order to comply with RF exposure limits established in the ANSI C95.1<br />
standards, the distance between the antennas and the user should not be less than 20 cm (8 inches).<br />
Regulatory Notes and Statements<br />
Radio device, health and authorisation for use<br />
Radio-frequency electromagnetic energy is emitted from the wireless devices. The energy levels<br />
of these emissions, however, are far much less than the electromagnetic energy emissions from<br />
wireless devices such as mobile phones. Radio devices are safe for use by consumers because<br />
they operate within the guidelines found in radio frequency safety standards and recommendations.<br />
The use of the radio devices may be restricted in some situations or environments, such as:<br />
• on board an airplane, or<br />
• in an explosive environment, or<br />
• in situations where the interference risk to other devices or services is<br />
perceived or identified as harmful.<br />
In cases in which the policy regarding use of radio devices in specific environments is not<br />
clear (e.g., airports, hospitals, chemical/oil/gas industrial plants, private buildings), obtain<br />
authorization to use these devices prior to operating the equipment.<br />
Fujitsu Technology Solutions 77
Manufacturer’s notes<br />
Regulatory Information/Disclaimers<br />
Installation and use of this radio device must be in strict accordance with the instructions included<br />
in the user documentation provided with the product. Any changes or modifications made to this<br />
device that are not expressly approved by the manufacturer may void the user’s authority to operate<br />
the equipment. The manufacturer is not responsible for any radio or television interference caused<br />
by unauthorized modification of this device, or the substitution or attachment of connecting cables<br />
and equipment other than those specified by the manufacturer. It is the responsibility of the user<br />
to correct any interference caused by such unauthorized modification, substitution or attachment.<br />
The manufacturer and its authorized resellers or distributors will assume no liability for any damage<br />
or violation of government regulations arising from failure to comply with these guidelines.<br />
Export restrictions<br />
This product or software contains encryption code which may not be exported or<br />
transferred from the US or Canada without an approved US Department of Commerce<br />
export license. This device complies with Part 15 of FCC Rules, as well as ICES 003 B<br />
/ NMB 003 B. Operation is subject to the following two conditions:<br />
(1) this device may not cause harmful interference, and<br />
(2) this device must accept any interference received, including interference<br />
that may cause undesirable operation.<br />
Modifications not expressly authorised by Fujitsu Technology Solutions may<br />
invalidate the user’s right to operate this equipment.<br />
78 Fujitsu Technology Solutions
Index<br />
A<br />
A beep sounds every second 64<br />
Acoustic error messages 67<br />
Alt+Tab 26<br />
Anti-theft protection 44<br />
Audio devices, connecting 51<br />
Audio ports 51<br />
B<br />
Back tab 26<br />
Backspace 23<br />
Bass loudspeaker (subwoofer) 40<br />
Battery<br />
battery life 30<br />
caring for and maintaining 31<br />
charge level 31, 36<br />
charging 31<br />
self-discharge 31<br />
storage 31<br />
Battery indicator 20<br />
Battery status indicator<br />
see Battery indicator 20<br />
Battery status meter 31<br />
Battery symbol<br />
see Battery indicator 20<br />
BIOS Setup Utility<br />
calling 60<br />
exiting 61<br />
operating 60<br />
protecting with password 45<br />
settings 60<br />
Bluetooth<br />
Switching the module off 42<br />
Switching the module on 42<br />
Bluetooth, safety notes 13<br />
Board 52<br />
Buffer battery, load 64<br />
Buttons 22<br />
C<br />
Caps Lock 23<br />
indicator 20<br />
CD/DVD indicator 34<br />
CD/DVD:<br />
manual emergency removal 35<br />
CE marking 73<br />
Charging capacity, battery 31<br />
Cleaning 15<br />
Components<br />
installing / removing 52<br />
Configuration, BIOS Setup Utility 60<br />
Connecting audio devices 51<br />
Connecting headphones 51<br />
Crystal View display<br />
cleaning 15<br />
Ctrl+Alt+Del 26<br />
Cursor control keys 23<br />
Cursor keys 23<br />
D<br />
Date is incorrect 64<br />
Declaration of conformity 72<br />
Device<br />
setting up 17<br />
Devices<br />
connecting 48<br />
disconnecting 48<br />
DOC (INDUSTRY CANADA) NOTICES 75<br />
Drive<br />
indicator 20<br />
E<br />
Emergency removal of data carrier 35<br />
Energy<br />
energy saving 13<br />
Energy saving 13<br />
Energy saving mode<br />
leaving 66<br />
Enter 23<br />
Enter key 23<br />
Error message:<br />
on the screen 68<br />
Error messages on the screen 68<br />
Errors<br />
Acoustic warnings 67<br />
ESD 52<br />
Ethernet LAN 43<br />
ExpressCard 39<br />
F<br />
Fault<br />
correction 62<br />
First-time setup 16<br />
Fn key 23<br />
Fn+F10 26<br />
Fn+F3 25<br />
Fn+F4 25<br />
Fn+F5 25<br />
Fn+F6 26<br />
Index<br />
Fujitsu Technology Solutions 79
Index<br />
Fn+F7 26<br />
Fn+F8 26<br />
Fn+F9 26<br />
G<br />
Getting started 16<br />
H<br />
Handling<br />
data carriers 33<br />
Hard disk:<br />
restoring the contents 63<br />
Hardware configuration 60<br />
HDMI port 49<br />
I<br />
Important notes 12<br />
Incorrect date/time 64<br />
Indicator<br />
Caps Lock 20<br />
drive 20<br />
Num Lock 20<br />
Inserting<br />
a data carrier 34<br />
K<br />
Kensington MicroSaver 44<br />
Key combinations 25<br />
Keyboard 22<br />
cleaning 15<br />
L<br />
LCD screen<br />
cleaning 15<br />
decrease brightness 26<br />
difficult to read 64<br />
notes 29<br />
reflected glare 64<br />
remains blank 64<br />
LCD screen is too dark 64<br />
Life, battery 30<br />
Line feed 23<br />
Loudspeakers 40<br />
switch off 25<br />
switch on 25<br />
M<br />
Main memory<br />
see Adding memory 53<br />
Mains adapter<br />
connecting 17<br />
setting up 17<br />
Manual removal of data carrier 35<br />
Mechanical backup 44<br />
Memory card<br />
handling 37<br />
inserting 37<br />
removing 38<br />
Memory expansion<br />
installing 55<br />
removing 54<br />
Memory module<br />
important notes 53<br />
installing 55<br />
removing 54<br />
Microphone 40<br />
Microphone, connecting 51<br />
Mobile operation 14<br />
Monitor<br />
connecting 49<br />
drifting display 65<br />
remains blank 65<br />
Monitor port<br />
see VGA connection socket 49<br />
N<br />
Notebook<br />
before you travel 14<br />
cannot be started 66<br />
cleaning 15<br />
stops working 66<br />
switching off 21<br />
transporting 14<br />
using 19<br />
Notebook, operation 19<br />
Notes 12<br />
boards 52<br />
cleaning 15<br />
disposal / recycling 72<br />
energy saving 13<br />
LCD screen 29<br />
Safety 12<br />
transport 14<br />
Num Lock<br />
indicator 20, 24–25<br />
Numeric keypad 22<br />
see Separate numeric keypad 25<br />
see Virtual numeric keypad 24<br />
80 Fujitsu Technology Solutions
O<br />
Operating system<br />
activating system protection 46<br />
cancel system protection 46<br />
protecting with password 46<br />
Operating system, restoring 63<br />
Optical drive 33<br />
P<br />
Packaging 16<br />
Password<br />
changing 46<br />
entering 45<br />
removing 46<br />
Password protection 45<br />
Password protection:<br />
hard disk 47<br />
Peripheral devices<br />
connecting 48<br />
disconnecting 48<br />
Power<br />
power consumption 36<br />
power-management features 36<br />
Power indicator 20<br />
Preparing for operation 17<br />
Printer does not print 67<br />
R<br />
Radio component:<br />
safety notes 13<br />
Rechargeable battery 30<br />
see Battery 30<br />
Regulatory information<br />
notebooks with radio device 77<br />
Notebooks without radio device 73<br />
Removing<br />
a data carrier 34<br />
Removing memory<br />
see Adding memory 53<br />
Return 23<br />
S<br />
Safety notes 12<br />
Screen<br />
no screen display 65<br />
Screen brightness<br />
decrease 26<br />
increase 26<br />
Screen port<br />
see VGA connection socket 49<br />
Security functions 44<br />
Selecting a location 17<br />
Self-discharge, battery 31<br />
Separate numeric keypad 25<br />
Servicing 52<br />
Setup<br />
see BIOS Setup Utility 60<br />
Shift 23<br />
Shift key 23<br />
Shift+Tab 26<br />
Slot<br />
ExpressCard 39<br />
Memory cards 37<br />
Standby indicator 20<br />
Start key 23<br />
Status indicators 19<br />
Summer time 64<br />
Supervisor password<br />
changing 46<br />
entering 45<br />
removing 46<br />
Switching on<br />
the notebook 21<br />
Switchingonforthefirst time 18<br />
System configuration 60<br />
System expansion 53<br />
see Adding memory 53<br />
System settings, BIOS Setup Utility 60<br />
T<br />
Tab key 23<br />
Technical data 70<br />
Mains adapter 70–71<br />
notebook 70<br />
The radio connection to a network does<br />
not work 67<br />
Time not correct 64<br />
Time, daylight savings 64<br />
Tips 62<br />
Toggle output screen 26<br />
Touchpad 25, 27<br />
buttons 27<br />
cleaning 15<br />
dragging items 28<br />
executing commands 28<br />
moving the pointer 27<br />
selectinganitem 28<br />
switch off 25<br />
Touchpad buttons 25<br />
Transport<br />
Transport damage 16<br />
Transportation 14<br />
Travel, notebook 14<br />
Troubleshooting 62<br />
Index<br />
Fujitsu Technology Solutions 81
Index<br />
U<br />
USB ports 50<br />
User password<br />
changing 46<br />
entering 45<br />
removing 46<br />
Using a Kensington Lock 44<br />
V<br />
VGA connection socket 49<br />
Virtual numeric keypad 24<br />
Volume<br />
decrease 26<br />
increase 26<br />
Volume control 40<br />
W<br />
Webcam 30<br />
Wireless components<br />
switch off 25<br />
switch on 25<br />
Wireless LAN<br />
Switching the module off 42<br />
Switching the module on 42<br />
Wireless LAN:<br />
safety notes 13<br />
82 Fujitsu Technology Solutions