Introduction to splinting - LAFP
Introduction to splinting - LAFP
Introduction to splinting - LAFP

Create successful ePaper yourself
Turn your PDF publications into a flip-book with our unique Google optimized e-Paper software.
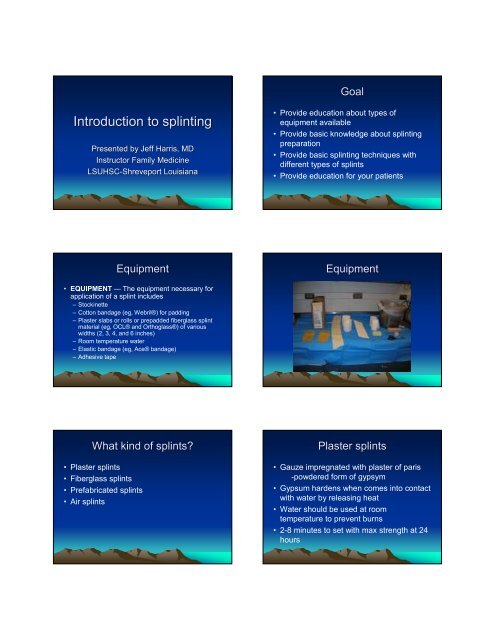
Goal<br />
<strong>Introduction</strong> <strong>to</strong> <strong>splinting</strong><br />
Presented by Jeff Harris, MD<br />
Instruc<strong>to</strong>r Family Medicine<br />
LSUHSC-Shreveport Shreveport Louisiana<br />
• Provide education about types of<br />
equipment available<br />
• Provide basic knowledge about <strong>splinting</strong><br />
preparation<br />
• Provide basic <strong>splinting</strong> techniques with<br />
different types of splints<br />
• Provide education for your patients<br />
Equipment<br />
Equipment<br />
• EQUIPMENT — The equipment necessary for<br />
application of a splint includes<br />
– S<strong>to</strong>ckinette<br />
– Cot<strong>to</strong>n bandage (eg, Webril®) for padding<br />
– Plaster slabs or rolls or prepadded fiberglass splint<br />
material (eg, OCL® and Orthoglass®) of various<br />
widths (2, 3, 4, and 6 inches)<br />
– Room temperature water<br />
– Elastic bandage (eg, Ace® bandage)<br />
– Adhesive tape<br />
What kind of splints<br />
• Plaster splints<br />
• Fiberglass splints<br />
• Prefabricated splints<br />
• Air splints<br />
Plaster splints<br />
• Gauze impregnated with plaster of paris<br />
-powdered form of gypsym<br />
• Gypsum hardens when comes in<strong>to</strong> contact<br />
with water by releasing heat<br />
• Water should be used at room<br />
temperature <strong>to</strong> prevent burns<br />
• 2-8 minutes <strong>to</strong> set with max strength at 24<br />
hours
Plaster Splints<br />
Plaster splints<br />
• Easier <strong>to</strong> mold<br />
• Less expensive<br />
Advantage<br />
Disadvantage<br />
• More difficult <strong>to</strong> apply<br />
• Gets soggy when getting wet<br />
Fiberglass Splints<br />
Advantage<br />
• Easier <strong>to</strong> apply<br />
• Set more quickly<br />
• Lighter<br />
• Water resistant
Disadvantage<br />
• More expensive<br />
• More difficult <strong>to</strong> mold<br />
Prefabricated splints<br />
• Plastic shells lined<br />
with air cells, foam,<br />
or gel components<br />
• Same advantages<br />
and disadvantages<br />
as fiber glass<br />
splints<br />
• Provide less support than<br />
plaster and fiberglass<br />
splints<br />
• Used for ankle sprains<br />
rather than fractures or<br />
dislocations<br />
• Used <strong>to</strong> prevent<br />
eversion/inversion while<br />
permitting free flexion and<br />
extension of ankle<br />
Air splints<br />
Basic principles <strong>to</strong> keep in mind<br />
• Providers should<br />
obtain emergent<br />
orthopedic<br />
evaluation for:<br />
– Open,<br />
angulated, or<br />
displaced<br />
fractures<br />
Basic principles <strong>to</strong> keep in mind<br />
– Dislocations that<br />
cannot be<br />
reduced<br />
Basic principles <strong>to</strong> keep in mind<br />
• Any injury that causes<br />
or could potentially<br />
cause Neurovascular<br />
compromise
Basic principles <strong>to</strong> keep in mind<br />
• -Joints above and<br />
below the fracture<br />
site should be<br />
immobolized<br />
Be aware of alarming signs<br />
• 1) Impaired sensation<br />
• 2) Excessive swelling<br />
• 3) Circula<strong>to</strong>ry Insuffiency<br />
Preparing <strong>to</strong> place a splint<br />
• Expose the injured extremity completely<br />
before <strong>splinting</strong><br />
Preparing <strong>to</strong> place a splint<br />
• Choose the appropriate size and shape of<br />
splint <strong>to</strong> be used<br />
– Goal is <strong>to</strong> cover ½ circumference of the<br />
extremity without overlap<br />
• Clean, repair, and dress all open wounds<br />
before applying any splint<br />
• Check for neurovascular compromise<br />
Preparing <strong>to</strong> place a splint<br />
• Prevent stiffness and<br />
loss of function by:<br />
– Preparing extremities<br />
<strong>to</strong> be Splinted in their<br />
position of function<br />
– Preparing extremities<br />
<strong>to</strong> be Splinted against<br />
gravity<br />
Minimize swelling<br />
• Rest, Ice, and Elevate<br />
• Ice-apply <strong>to</strong> area where there is no plaster<br />
for no more than 15-20 minutes at a time<br />
– Longer may numb the extremity<br />
– shorter may not affect swelling<br />
– May use an ice bag with a wet rag or a bag of<br />
frozen peas
Follow up<br />
• Instruct patient <strong>to</strong> return if numbness,<br />
tingling, or increased pain should occur<br />
• Re-evaluate in 48 hours for neurovascular<br />
compromise<br />
– 5 P’s-pain, pallor, paresthesia, pulselessness,<br />
and paralysis<br />
• Orthopedic evaluation in 7-10 days for<br />
possibility of casting<br />
– allow time for swelling <strong>to</strong> subside<br />
Complications of <strong>splinting</strong><br />
• Rarely occur if applied correctly<br />
• Most common are sores, abrasions, and<br />
secondary infections from loose or ill-fitting<br />
splints<br />
• Less common-neurovascular compromise<br />
from tight fitting splints, contact dermatitis,<br />
and thermal burns from heating of plaster<br />
Splint application<br />
• Varies depending of site of injury<br />
• Most basic splints include a:<br />
– Layer of s<strong>to</strong>ckinette<br />
– Cast padding<br />
– Plaster of paris or fiberglass<br />
– Cast padding<br />
– Ace wrap<br />
– Tape<br />
Splint application<br />
• 1) Measure the<br />
s<strong>to</strong>ckinette and cut<br />
<strong>to</strong> fit an area above<br />
and below the<br />
joints being<br />
splinted<br />
Splint application<br />
• 2) Apply cot<strong>to</strong>n<br />
cast padding <strong>to</strong> the<br />
extremity<br />
– one layer is<br />
sufficient except at<br />
bony prominences,<br />
heels, elbows, and<br />
fracture sites<br />
• Allow 3-4 layers at<br />
both ends <strong>to</strong><br />
prevent irritation<br />
Splint application<br />
• 3) Use 8-15 layers<br />
of plaster<br />
depending on the<br />
extremity <strong>to</strong> be<br />
splinted<br />
• 4) Shape the<br />
plaster by tearing<br />
the pattern you feel<br />
would be of most<br />
benefit
Splint application<br />
• 5) Submerge the<br />
plaster in room<br />
temperature water<br />
until it is<br />
completely soaked<br />
• 6) Squeeze out all<br />
the water then milk<br />
out what is<br />
remaining<br />
Splint application<br />
• 7) Place the splint<br />
<strong>to</strong> affected area<br />
and fold the edges<br />
back<br />
Splint application<br />
• 8) Wrap another<br />
layer of cast<br />
padding <strong>to</strong> cover<br />
the exposed splint<br />
<strong>to</strong> prevent the ACE<br />
wrap from sticking<br />
• 9) Allow 5-10<br />
minutes for<br />
hardening of the<br />
plaster<br />
Splint application<br />
– At this time,<br />
molding of the<br />
splint should be<br />
accomplished<br />
Splint application<br />
• 10) Place an Ace<br />
wrap loosely and<br />
secure it with tape<br />
– Safety pin could<br />
cause injury<br />
• 11) Allow 24 hours<br />
for full<br />
crystillization of<br />
plaster<br />
Fiberglass splints<br />
• Applied the same as above<br />
• Allow yourself less time because it will set<br />
much faster
Types of splints<br />
• Upper extremity splints<br />
• Figure of eight<br />
• Sling and swathe<br />
• Sugar <strong>to</strong>ng-proximal and distal<br />
• Long arm posterior splint<br />
• Ulnar gutter<br />
• Thumb spica<br />
• Finger splints<br />
• Use:<br />
– Clavicle fractures<br />
Figure of eight<br />
• Most figure of eight<br />
splints are<br />
prefabricated and<br />
application is simple.<br />
• Read the product<br />
information insert<br />
before applying the<br />
splint about the<br />
correct application<br />
process.<br />
Figure of eight<br />
• Apply with patient<br />
standing and hands<br />
on iliac crest.<br />
Shoulders should be<br />
abducted<br />
Figure of eight<br />
Sling and Swathe<br />
• Use:<br />
– Shoulder and humeral<br />
injuries<br />
• Slings supports<br />
weight of shoulder<br />
• Swathe holds arm<br />
against chest <strong>to</strong><br />
prevent shoulder<br />
rotation<br />
Sling and Swathe<br />
• Apply the sling and swath<br />
with the patient standing.<br />
• Place the injured arm in<br />
the sling with the elbow at<br />
90 degrees of flexion.<br />
• Next place the strap that<br />
is attached <strong>to</strong> the sling<br />
over the patient head so<br />
that the weight of the arm<br />
is supported
Sling and Swathe<br />
• Apply the swath.<br />
– This can be anything from<br />
an ACE wrap <strong>to</strong> a<br />
prefabricated swath. This is<br />
designed <strong>to</strong> hold the<br />
patients affected arm that<br />
is in the sling against the<br />
body.<br />
• The swath should wrap<br />
around the front and back<br />
of the sling keeping the<br />
affected extremity against<br />
the mid-abdomen<br />
• Use:<br />
– Humeral shaft,<br />
forearm, and wrist<br />
fractures<br />
• 2 Types:<br />
– 1) Proximal sugar <strong>to</strong>ng<br />
– 2) Distal sugar <strong>to</strong>ng<br />
Sugar <strong>to</strong>ng<br />
Proximal Sugar Tong<br />
Proximal Sugar Tong<br />
1) Proximal sugar <strong>to</strong>ng<br />
– Used for humeral<br />
fractures<br />
– Applied from the<br />
axilla around the<br />
elbow and up the<br />
arm <strong>to</strong> lateral<br />
shoulder<br />
Distal Sugar Tong<br />
2) Distal sugar <strong>to</strong>ng<br />
– Wrist and distal<br />
forearm fractures<br />
– Extends from MCP<br />
joints on dorsum of<br />
hand, tracks along the<br />
forearm, wraps around<br />
back of elbow <strong>to</strong> volar<br />
surface of the arm,<br />
and extends down <strong>to</strong><br />
midpalmer crease<br />
– Immobolizes wrist,<br />
forearm, and elbow<br />
Long arm posterior splint<br />
• Use:<br />
– Forearm and elbow injuries<br />
– Olecranon and radial head<br />
fractures<br />
• Not recommended for<br />
unstable fractures<br />
• Applied from palmer<br />
crease, wrapping around<br />
lateral metacarpals,<br />
extending up <strong>to</strong> posterior<br />
arm with elbow flexed at<br />
90 degrees
Long arm posterior splint<br />
Volar splint<br />
• Use:<br />
– Distal forearm and<br />
wrist fractures<br />
• Applied from volar<br />
palmer crease <strong>to</strong> 2/3<br />
forearm<br />
• Allows elbow and<br />
finger ROM<br />
Volar Splint<br />
Ulnar gutter splint<br />
• Use:<br />
– Phalangeal and<br />
metacarpal<br />
fractures<br />
• Most common use-Boxer<br />
fractures<br />
• 5 th MCP fracture<br />
Ulnar gutter splint<br />
• Extends from DIP<br />
joint <strong>to</strong> the proximal<br />
2/3 of the forearm<br />
• Should immobilize the<br />
ring and little finger<br />
• MCP should be in 70<br />
degrees of flexion,<br />
PIP should be in 30<br />
degrees of flexion,<br />
and DIP in no more<br />
than 10 degrees of<br />
flexion<br />
Thumb spica splint<br />
• Use:<br />
– Scaphoid fractures,<br />
thumb phalynx<br />
fractures or<br />
dislocations<br />
• Most Common use:<br />
– 1) Gamekeepers<br />
thumb or skiers thumb<br />
• ulnar collateral<br />
ligament<br />
– 2) Dequiervans<br />
tenosynovitis
Thumb spica splint<br />
• Extends from DIP<br />
joint of thumb,<br />
encorporates the<br />
thumb, and extends<br />
up 2/3 of the proximal<br />
lateral forearm<br />
Lower extremity splints<br />
• Knee splint<br />
• Posterior leg splint<br />
• Stirrup splint<br />
• Budding taping<br />
• Use:<br />
– Knee injuries and<br />
proximal Tib/fib<br />
fractures<br />
Knee splint<br />
• Place knee in full<br />
extension<br />
• The plaster is<br />
placed from the<br />
posterior but<strong>to</strong>cks<br />
<strong>to</strong> 3 inches above<br />
level of bilateral<br />
malleoli<br />
Knee splint<br />
Posterior leg splint<br />
• Use:<br />
– Distal leg, ankle,<br />
tarsal/metatarsal<br />
fractures<br />
– Ankle dislocations<br />
– Severe sprains<br />
Posterior leg splint<br />
Placed from<br />
metatarsal heads<br />
on plantar surface<br />
foot, extends up<br />
back of leg <strong>to</strong> level<br />
of fibular neck
Posterior leg splint<br />
• If ankle fracture is<br />
unstable<br />
– Use posterior leg<br />
splint with a stirrup<br />
splint<br />
• No weight bearing<br />
• Use:<br />
– Unstable ankle<br />
fracture<br />
• Prevents eversion and<br />
inversion of the ankle<br />
• Most commonly used in<br />
combination with<br />
posterior leg splint<br />
Stirrup splint<br />
The splint should be<br />
long enough <strong>to</strong><br />
involve the leg from<br />
below the medial side<br />
of knee, wrap around<br />
the under surface of<br />
the heel, and back up<br />
<strong>to</strong> the lateral side of<br />
the same knee.<br />
Stirrup splint<br />
Posterior leg splint with Stirrup<br />
splint<br />
• Use:<br />
– Phalangeal fractures<br />
of the <strong>to</strong>es<br />
• Small piece of<br />
wadding placed<br />
between <strong>to</strong>es <strong>to</strong><br />
prevent maceration<br />
• Fractured <strong>to</strong>e secured<br />
<strong>to</strong> adjacent <strong>to</strong>e with<br />
tape<br />
Buddy taping<br />
• Use a small piece of<br />
wadding and place<br />
between the injured<br />
<strong>to</strong>e and an adjacent<br />
<strong>to</strong>e <strong>to</strong> prevent<br />
maceration<br />
• The fractured <strong>to</strong>e is<br />
secured <strong>to</strong> the<br />
adjacent <strong>to</strong>e with a<br />
piece of tape<br />
Budding taping
Summary<br />
• Splinting plays a major role in the<br />
management of musculoskeletal injuries,<br />
particularly those involving extremity<br />
fractures and joint dislocations. Splinting<br />
may be the definitive treatment or a<br />
temporizing measure until the time of<br />
reevaluation and/or casting.<br />
Summary<br />
• Immobilization of the extremity through <strong>splinting</strong><br />
decreases pain and bleeding and prevents<br />
further soft tissue, vascular, or neurologic<br />
compromise . Splinting should be performed<br />
immediately after the injury and <strong>splinting</strong> or<br />
casting should be maintained until the injury has<br />
healed completely. Compared <strong>to</strong> casts, splints<br />
permit swelling and may prevent neurovascular<br />
compromise. Thus, use of splints should<br />
continue until swelling is no longer a concern.<br />
Splinting education-Handout<br />
• What is a splint<br />
• A splint is a rigid support with padding made<br />
from metal, plaster, or plastic. It is used <strong>to</strong><br />
support, protect, or immobilize an injured or<br />
inflamed part of the body. The splint is secured<br />
in place with an elastic bandage or an ACE<br />
wrap. The purpose of the splint is <strong>to</strong> prevent<br />
movement of the injured extremity which helps<br />
prevent further injury, and <strong>to</strong> minimize pain.<br />
• How do I minimize pain<br />
• Apply ice <strong>to</strong> injured extremity for 15-20 minutes of each<br />
hour for 1-2 days. May use ice in zip lock bags or bags<br />
of frozen peas.<br />
• Give acetaminophen (Tylenol) or ibuprofen (Advil) as<br />
directed on the box when needed for at least the first 2<br />
days. Use prescription pain meds as instructed by your<br />
provider.<br />
• If the injury involves an arm, it should be placed in sling<br />
and kept at or above the level of the heart for 24 hours <strong>to</strong><br />
limit swelling.<br />
• If the injury involves a leg, it should be placed on pillows<br />
while lying or sitting, and the patient should rest for 24<br />
hours <strong>to</strong> limit swelling<br />
• How do I take care of the splint<br />
• Do not get the splint wet. Use plastic bags<br />
<strong>to</strong> cover the splint while bathing.<br />
• Do not walk on the splint.<br />
• Do not stick anything down the splint such<br />
as a coat hanger <strong>to</strong> scratch or itch. This<br />
may lead <strong>to</strong> injury and infection<br />
• How do I know if the splint is <strong>to</strong>o tight<br />
• If you feels numbness, tingling, or<br />
increased pain, call your doc<strong>to</strong>r<br />
immediately.<br />
• If the fingers or <strong>to</strong>es start turning blue, call<br />
your doc<strong>to</strong>r immediately.<br />
• If the fingers or <strong>to</strong>es become swollen, call<br />
your doc<strong>to</strong>r immediatly
• When do I come back <strong>to</strong> the Doc<strong>to</strong>r<br />
• This is usually within a few days. Consult<br />
with your doc<strong>to</strong>r and make a follow up<br />
appointment. Some injuries may require<br />
casting after the swelling goes down<br />
• What danger signs should I look for<br />
• Numbness, tingling, increased pain,<br />
change in coloration of fingers or <strong>to</strong>es, or<br />
swelling in fingers or <strong>to</strong>es.<br />
• If these symp<strong>to</strong>ms occur, you should call<br />
your doc<strong>to</strong>r immediately<br />
THE END<br />
Hit the slopes