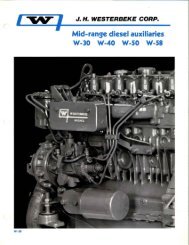
service manual 55a four marine diesel engine - Westerbeke
service manual 55a four marine diesel engine - Westerbeke
service manual 55a four marine diesel engine - Westerbeke

Create successful ePaper yourself
Turn your PDF publications into a flip-book with our unique Google optimized e-Paper software.
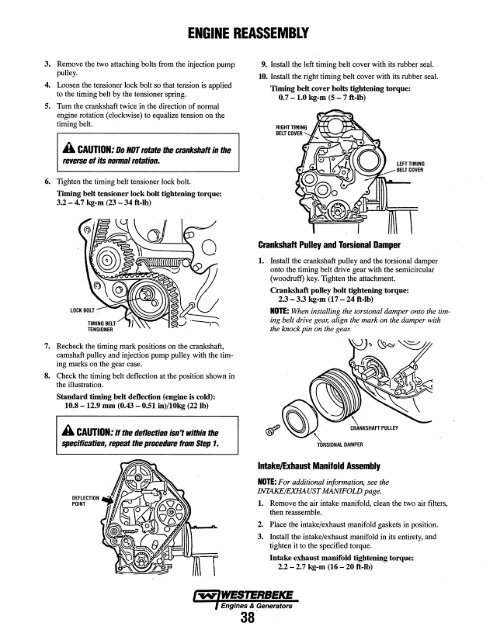
ENGINE REASSEMBLY<br />
3. Remove the two attaching bolts from the injection pump<br />
pulley.<br />
4. Loosen the tensioner lock bolt so that tension is applied<br />
to the timing belt by the tensioner spring.<br />
5. Tum the crankshaft twice in the direction of normal<br />
<strong>engine</strong> rotation (clockwise) to equalize tension on the<br />
timing belt.<br />
9. Install the left timing belt cover with its rubber seal.<br />
10. Install the right timing belt cover with its rubber seal.<br />
TIming belt cover bolts tightening torque:<br />
0.7 -1.0 kg-m (5 -7 ft-Ib)<br />
A CAUTION: Do NOT rotate the crankshaft in the<br />
reverse of its nonnal rotation.<br />
6. Tighten the timing belt tensioner lock bolt.<br />
TIming belt tensioner lock bolt tightening torque:<br />
3.2 - 4.7 kg-m (23 - 34 ft-Ib)<br />
Crankshaft Pulley and Torsional Damper<br />
1. Install the crankshaft pulley and the torsional damper<br />
onto the timing belt drive gear with the semicircular<br />
(woodruff) key. Tighten the attachment.<br />
Crankshaft pulley bolt tightening torque:<br />
2.3 - 3.3 kg-m (17 - 24 ft-Ib)<br />
NOTE: When installing the torsional damper onto the timing<br />
belt drive gear, align the mark on the damper with<br />
the knock pin on the gear.<br />
7. Recheck the timing mark positions on the crankshaft,<br />
camshaft pulley and injection pump pulley with the timing<br />
marks on the gear case.<br />
8. Check the timing belt deflection at the position shown in<br />
the illustration.<br />
Standard timing belt deflection (<strong>engine</strong> is cold):<br />
10.8 -12.9 mm (0.43 - 0.51 in)/10kg (22 Ib)<br />
A CAUTION: If the deflection isn't within the<br />
specification, repeat the procedure from Step 1.<br />
CRANKSHAFT PULLEY<br />
Intake/Exhaust Manifold Assembly<br />
NOTE: For additional information, see the<br />
INTAKE/EXHAUST MANIFOW page.<br />
1. Remove the air intake manifold, clean the two air filters,<br />
then reassemble.<br />
2. Place the intake/exhaust manifold gaskets in position.<br />
3. Install the intake/exhaust manifold in its entirety, and<br />
tighten it to the specified torque.<br />
Intake exhaust manifold tightening torque:<br />
2.2 - 2.7 kg-m (16 - 20 ft-Ib)<br />
Engines & Generators<br />
3S'