
You also want an ePaper? Increase the reach of your titles
YUMPU automatically turns print PDFs into web optimized ePapers that Google loves.
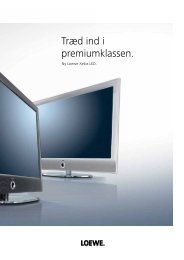
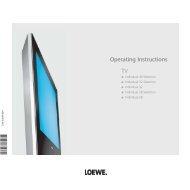
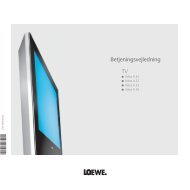
<strong>Operating</strong> <strong>instructions</strong><br />
<strong>TV</strong><br />
Individual Edition<br />
233–32892.020
Contents<br />
Remote control - <strong>TV</strong> functions 3<br />
Control unit 4<br />
Connections to rear panel 5<br />
Welcome 6<br />
Integrated features 6<br />
Scope of delivery 6<br />
Transporting 6<br />
Installation options 6<br />
Note on the LCD screen 7<br />
Cleaning 7<br />
Disposal 7<br />
Remove the protective foils 7<br />
For your safety 8<br />
First installation 9<br />
Remote control 9<br />
Connection 9<br />
Handling the fabric hose 10<br />
Use of the binders 10<br />
Using the common interface module 10<br />
Switching on 10<br />
Automatic programming 11<br />
Directing DVB-T antenna 12<br />
Daily operation 12<br />
Switching on/off 12<br />
Changing stations 13<br />
Basics about the menu operation 14<br />
For the info system ... 15<br />
For the index ... 16<br />
Setting the sound 17<br />
Picture settings 17<br />
Direct control on <strong>TV</strong> set 17<br />
<strong>Operating</strong> modes – <strong>TV</strong> 18<br />
How the coloured keys work in <strong>TV</strong> mode 18<br />
Show status display 18<br />
Calling the index 18<br />
Call additional functions 19<br />
Call timer overview 19<br />
Select picture format 19<br />
Move picture up/down 19<br />
<strong>TV</strong> menu 19<br />
DVB subtitles 20<br />
Removing the CI module 21<br />
Inserting a new CI module 21<br />
Installing new DVB software 21<br />
Image+ 22<br />
<strong>Operating</strong> modes – PIP 23<br />
Selecting the station of the PIP picture 23<br />
Interchanging PIP picture/<strong>TV</strong> picture 23<br />
Functions in the PIP menu 24<br />
- 2<br />
Setting the PIP type 24<br />
<strong>Operating</strong> modes – EPG 25<br />
Using the EPG 25<br />
Selecting providers and stations 26<br />
Data capture 26<br />
<strong>Operating</strong> modes – Teletext 27<br />
Page selection with the coloured keys 27<br />
Displaying teletext pages 27<br />
Programme timer recordings 28<br />
<strong>Operating</strong> modes – Digital Recorder 29<br />
About the Digital Recorder system 29<br />
Settings for the Digital Recorder 31<br />
Switching Digital Recorder continuous operation on/off 31<br />
Setting recording capacity/quality 31<br />
<strong>TV</strong> viewing with time shift 33<br />
Interruption 33<br />
Switching to the live picture 33<br />
Fast forward and rewind 34<br />
Highlight function 34<br />
Archive recording 36<br />
Immediate recording 36<br />
Timer recording 37<br />
The Delete Manager 39<br />
Archive playback 40<br />
Call the DR archive 40<br />
Setting bookmarks 40<br />
Playing highlights 41<br />
Slow motion 42<br />
Hiding sections of the recording 43<br />
Deleting bookmarks 43<br />
Copying recordings from the archive 44<br />
Locking/unlocking a movie (parental lock) 45<br />
<strong>Operating</strong> modes – Radio 47<br />
<strong>Operating</strong> additional equipment 48<br />
Login and connect equipment 48<br />
Assignment of digital audio inputs and outputs 50<br />
HDMI (DVI) connection 53<br />
VGA/XGA connection 53<br />
Component video connection 54<br />
<strong>Operating</strong> other <strong>Loewe</strong> devices with the RC3 remote control 55<br />
Rotating the <strong>TV</strong> set 57<br />
What to do, if ... 58<br />
Technical data 60<br />
General data 60<br />
Electrical data 61<br />
Accessories 62<br />
Service 63<br />
Codelist RC3 / Lista de códigos RC3 64
Remote control - <strong>TV</strong> functions<br />
Control LED for programming<br />
the remote LED<br />
DVD<br />
<strong>TV</strong><br />
STB<br />
Change-over switch for operating of<br />
<strong>TV</strong>, VCR, DVD recorder/player or Set Top Box<br />
Sound off/on<br />
Call timer list<br />
VCR<br />
-Set<br />
-List<br />
Switch on/off<br />
- on standby<br />
Picture menu on/off<br />
Sound menu on/off<br />
Menu "Additional functions" on/off<br />
Set picture format<br />
REC-MENU<br />
abc<br />
RADIO<br />
def<br />
Radio on/off (1<br />
Select station directly<br />
/in the menu: enter numbers or letters<br />
ghi jkl mno<br />
Electronic Programme Guide<br />
(EPG) on/off<br />
Show/hide menu<br />
Teletext on/off<br />
V–/V+ Volume down/up<br />
for PIP: Position of the PIP picture<br />
/ in the menu: select/set<br />
Red button:<br />
Call the DR archive<br />
Green button:<br />
Standard settings for picture/sound<br />
Jump back/Rewind/Replay<br />
Immediate recording<br />
Freeze picture/Pause<br />
(Start viewing with time shift)<br />
DISC-M<br />
C-SET<br />
pqrs tuv wxyz<br />
DVD-AV<br />
EPG AV PIP<br />
P+<br />
V– OK V+<br />
P–<br />
SV<br />
TITLE<br />
CARD<br />
Call AV selection<br />
PIP on/off (picture in picture)<br />
Status display on/off<br />
/in the menu: hide menu<br />
Open index<br />
/in the menu: info texts on/off<br />
P+/P– Select station up/down<br />
Station list on<br />
/in the menu: confirm/call<br />
Blue button: programme info<br />
off/on<br />
Yellow button: previous station<br />
Jump forward/Fast forward<br />
Playback/Set bookmark/Play highlights<br />
Stop (live picture)<br />
(1<br />
Radio only for DVB reception<br />
if broadcast by the station<br />
3 -
Control unit<br />
I N D I V I D U A L<br />
- 4<br />
Display:<br />
standby =<br />
operation =<br />
operation without screen display =<br />
(radio mode, EPG data capture or timer recording)<br />
Switch <strong>TV</strong> set on/off<br />
to standby<br />
Station down,<br />
in the menu: left <br />
Radio on/off (1 (back to <strong>TV</strong> mode),<br />
switching on the radio from standby<br />
in the menu: down <br />
(1<br />
Radio only for DVB reception, provided the station broadcasts this.<br />
Otherwise, switch over to an audio input.<br />
Call the menu,<br />
in the menu: up <br />
DR+<br />
The mains switch is located<br />
in the middle of the rear side<br />
of the set.<br />
Station up,<br />
in the menu: right <br />
Display DR+ :<br />
DR+ = Digital Recorder integrated, but not active<br />
(no recording, no play)<br />
DR+ = Digital Recorder active<br />
(timeshift or archive playback)<br />
DR+ = Digital Recorder active<br />
(archive recording)
89374.003<br />
b b<br />
Connections to rear panel<br />
Common Interface<br />
Headphone connection<br />
S-VHS connection (AVS)<br />
(i.e. for camcorders)<br />
Video input (AVS)<br />
Audio input right<br />
Audio input left<br />
ANT -S AT<br />
AUDI O I N<br />
AUDIO OUT<br />
13/18 V /350 mA<br />
C L R L R<br />
SD/HD-COMPONENT IN AUDI OD IGIT AL<br />
HD<strong>TV</strong>/P C I N<br />
ANT -<strong>TV</strong><br />
AV 1<br />
AV 2<br />
5 V /80 mA ( RGB / Y UV )<br />
C/ P C/ rP<br />
r Y IN OUT HDMI ( DVI ) VGA/XG A<br />
220-240V~<br />
50/60 Hz<br />
SE RV IC E<br />
Antenna/cable PIP tuner<br />
or satellite antenna<br />
(Sat tuner 1) (1<br />
Satellite antenna<br />
(Sat tuner 2) (2<br />
Center Audio input (analogue)<br />
Audio input left/right (analogue)<br />
Audio output left/right (analogue)<br />
Rotating stand control<br />
Antenna/cable<br />
analogue/digital<br />
(tuner 1)<br />
Euro-AVsocket<br />
1<br />
Antenna output PIP tuner<br />
connect to tuner 1<br />
Euro-AVsocket<br />
2<br />
Component<br />
video inputs<br />
(Cb/Pb–Cr/Pr–Y)<br />
Socket for<br />
power cable<br />
Service socket<br />
VGA/XGA input<br />
HDMI (DVI) input<br />
Digital audio output<br />
Digital audio input<br />
(1<br />
Digital satellite tuner can be retrofi tted.<br />
(2<br />
Digital twin satellite tuner can be retrofi tted.<br />
5 -
Welcome<br />
Thank you!<br />
At <strong>Loewe</strong>, we combine the highest standards of technology, design and user<br />
friendliness. This applies equally for <strong>TV</strong>, video and accessories.<br />
Your new Individual Edition <strong>TV</strong> set from the limited special edition “crystallized<br />
with Swarovski” is ideally equipped for the <strong>TV</strong> standard of the future “HD<strong>TV</strong>”<br />
(High Defi nition Television). With its high-resolution screen and the future-proof<br />
digital interfaces HDMI, you have the option to view HD content with excellent<br />
picture quality. It therefore carries the European quality mark ”HD ready”.<br />
Digital <strong>TV</strong> is steadily spreading via terrestrial reception, in the cable network<br />
and via satellite. <strong>Loewe</strong> supplies sets equipped with DVB-T and DVB-C. A digital<br />
satellite tuner (DVB-S) can be retrofi tted. The DVB integrated within the <strong>TV</strong> set is<br />
operated via the <strong>TV</strong> set menus using the remote control.<br />
We have designed this <strong>TV</strong> set so that it is easy to operate by using menus.<br />
Information about settings in menus is shown automatically; this enables you to<br />
understand the context quickly.<br />
You will fi nd the answers to many of your technical queries in the index of your<br />
<strong>TV</strong>. If you want to operate the <strong>TV</strong>, you can access functions directly from the index.<br />
This saves you from having to read through detailed operating <strong>instructions</strong><br />
and is the reason why this operating manual only explains the most important<br />
operating steps.<br />
Integrated features<br />
The maximum equipment is described in these operating <strong>instructions</strong>. Menu contents<br />
may differ from the ones shown, depending on how your <strong>TV</strong> is equipped.<br />
You can display how your set is equipped in the “Integrated features“ index<br />
(press the INFO button in the <strong>TV</strong> mode if no menu is displayed; the “Integrated<br />
features“ menu item is also displayed in the index before the initial letter A).<br />
Transporting<br />
Only transport the unit in an upright position. Hold the set by the top and bottom<br />
edges of the housing. The LCD screen is made of glass and/or plastic and<br />
may break if not handled carefully. Should the LCD screen become damaged<br />
or should the liquid crystal begin to leak, then it is imperative you wear rubber<br />
gloves when removing the set. Should the liquid come in contact with your skin,<br />
thoroughly rinse with water immediately.<br />
Installation options<br />
As a motorized rotating desktop unit<br />
Use the stand included in delivery.<br />
As a wall-mounted unit<br />
• Wall Holder WM54, <strong>Loewe</strong> order no. 65498A00.<br />
As a free-standing unit<br />
• Screen Floor Stand, <strong>Loewe</strong> order no. 65496B00.<br />
• Screen Paravent, <strong>Loewe</strong> order no. 65494B00.<br />
As an individual mounting solution<br />
• Screen Lift, <strong>Loewe</strong> order no. 65486B00.<br />
• Screen Ceiling Mount, <strong>Loewe</strong> order no. 65492B00.<br />
Scope of delivery<br />
• LCD-TFT <strong>TV</strong> set<br />
• Mains Cable<br />
• RC3 remote control with 2 batteries<br />
• Motorized rotating table stand mounted<br />
• Marketing and service card<br />
• Fabric hose<br />
• 3 binders<br />
• Screen cleaner set<br />
• These operating <strong>instructions</strong><br />
- 6
Welcome<br />
Note on the LCD screen<br />
The <strong>TV</strong> set with an LCD screen you have purchased meets the highest quality<br />
requirements and has been tested for pixel errors. Despite the utmost caution<br />
in production of the displays, it cannot be totally ruled out that some of the<br />
pixels might be defective for technological reasons. Please understand that such<br />
effects cannot be considered a unit defect as defi ned by the warranty as long as<br />
they are within the limits specifi ed by the standard.<br />
Remove the protective foils<br />
Pull the protective foils slowly and carefully off the inlays (see fi g.).<br />
Cleaning<br />
Use only a soft, clean, damp cloth to clean the <strong>TV</strong> set, the screen and remote<br />
control (do not use any caustic or abrasive cleaning agents).<br />
Use the cleaning cloth and cleaning agent included for this purpose.<br />
Note: The front screen may only be removed by a specialist dealer even in case<br />
of dirt on the inside.<br />
Disposal<br />
Packing and box<br />
You have chosen a long lasting technical product of very high quality. We have<br />
paid a fee to authorised recyclers who will collect the packing from your dealer<br />
for disposal, pursuant to domestic regulations. Nevertheless, we recommend<br />
you to keep the original box and packing material for optimum protection if you<br />
have to transport the set.<br />
The set<br />
Attention: The EU directive 2002/96/EC regulates the proper<br />
way to recycle, handle and utilise used electronic devices.<br />
Hence, all used electronic devices are to be disposed of<br />
separately. Please do not dispose of this set in the normal<br />
household rubbish.<br />
You may return your used set free of charge at designated<br />
recycling centres or at your specialist dealer whenever you purchase a new,<br />
comparable set. You can fi nd out more about recycling (also for countries outside<br />
the EU) from your local government.<br />
7 -
For your safety<br />
For your safety and to avoid unnecessary damage to your <strong>TV</strong> set, please<br />
read and observe the following safety <strong>instructions</strong>:<br />
• This <strong>TV</strong> set is designed exclusively for reception and reproduction of video<br />
and audio signals.<br />
• This equipment is designed for domestic and<br />
offi ce environments and must not be used<br />
in rooms with high humidity (e.g. bathroom,<br />
sauna) or high concentrations of dust (e.g.<br />
workshops). If the equipment<br />
is used in the open air, ensure<br />
that it is protected against<br />
moisture (rain, drips, splashes,<br />
sprayed water or dew). Do not<br />
place any containers fi lled with<br />
liquids or lit candles on top of<br />
the <strong>TV</strong>.<br />
High levels of moisture and<br />
concentrations of dust cause<br />
leakage currents in the equipment, which can lead to danger of electric<br />
shock or fi re.<br />
The manufacturer‘s warranty is only valid for use in the specifi ed permissible<br />
environment.<br />
• If you have moved the <strong>TV</strong> set out of the cold into a warm environment, leave<br />
it standing for about an<br />
hour since condensation<br />
may form.<br />
• This equipment must<br />
only be connected to<br />
a mains power supply<br />
which has the same<br />
voltage and frequency as<br />
that specifi ed on the rating<br />
plate; use the power<br />
cable provided. Incorrect<br />
voltages can damage the<br />
equipment.<br />
10 cm<br />
10 cm 10 cm<br />
• Like all electronic equipment, your <strong>TV</strong> needs air for cooling. Obstruction<br />
of the air circulation can cause fi res. Therefore the air vents on the back<br />
must always be kept free. Please do not place newspapers or cloths on/over<br />
the <strong>TV</strong>.<br />
.<br />
If the <strong>TV</strong> is placed in a cabinet or on a shelf, leave at least 10 cm at the sides<br />
and 10 cm at the top to ensure suffi cient air circulation.<br />
Position the set so that it is not exposed to direct sunlight and additional<br />
heating from radiators.<br />
• Prevent any metal parts, needles, paper clips, liquids, wax or the like from<br />
getting into the <strong>TV</strong> set through the air venting slits in the rear panel. This<br />
can lead to short-circuits and possibly to fi re. If something should get into<br />
the inside of the <strong>TV</strong> set, pull out the plug immediately and notify customer<br />
service.<br />
• Never remove the back of the <strong>TV</strong> set yourself. Repair and servicing of your<br />
<strong>TV</strong> set should only be carried out by authorised <strong>TV</strong> technicians.<br />
• Place the <strong>TV</strong> set on a level, fi rm base. The set should not protrude at the<br />
front when installing in cabinets or shelves.<br />
Only use original accessories if possible, e.g. <strong>Loewe</strong> wall holders and stands.<br />
Never let children handle the <strong>TV</strong> unattended.<br />
Do not allow children to play in the immediate vicinity of the <strong>TV</strong>, they could<br />
knock, shift or pull it over and injure someone.<br />
Never leave the <strong>TV</strong> on unsupervised.<br />
• Do not install the <strong>TV</strong> where there may be vibrations. Vibrations can lead to<br />
material stress.<br />
• Pull out the power and antenna cables during thunderstorms. Surge voltages<br />
caused by lightning strikes can damage the <strong>TV</strong> through the antenna<br />
system and the mains. Also remove the antenna and mains plugs in long<br />
periods of absence.<br />
• The mains plug of the <strong>TV</strong> set must be easily accessible so that the set can be<br />
disconnected at any time.<br />
• Lay the mains cable in such a way that it will not be damaged. The power<br />
cable may not be kinked or laid over sharp edges, not stood on and not exposed<br />
to chemicals, the latter also applies to the device as a whole. A mains<br />
cable with damaged insulation can lead to electric shocks and is a fi re risk.<br />
• When removing the mains plug, pull the plug housing and not the cable.<br />
The wires in the plug could be damaged and cause a short circuit the next<br />
time it is plugged in.<br />
The rating plate is located on the rear panel next to the connections.<br />
- 8
First installation<br />
Remote control<br />
Batteries<br />
To insert or change the batteries, press on the arrow. Slide the battery compartment<br />
cover downwards and remove it. Insert LR 03 alkaline-manganese<br />
batteries (AAA) and ensure that the + and - ends are positioned correctly.<br />
+<br />
Connection<br />
Power mains<br />
Remove the cover for the connections.<br />
Connect the <strong>TV</strong> set to a 220-240V/50- 60 hertz power outlet. Plug the small<br />
plug of the mains cable into the mains socket on the rear of the <strong>TV</strong> set; plug the<br />
large mains plug into a mains socket.<br />
Antennas<br />
Plug the antenna plug of your antenna/cable system or the room antenna for<br />
DVB-T into the ANT-<strong>TV</strong> socket (Tuner 1).<br />
+<br />
Then push the cover back on from the bottom.<br />
Note on disposing batteries<br />
The batteries provided contain no harmful materials such as<br />
cadmium, lead or mercury.<br />
Regulations concerning used batteries stipulate that batteries<br />
may no longer be thrown out with the household rubbish.<br />
Deposit any used batteries free of charge into the designated<br />
collection containers set up at commercial businesses.<br />
Setting up the remote control for operating the <strong>TV</strong><br />
ANT-<strong>TV</strong> ANT-SAT *<br />
220-240V~<br />
50/60 Hz<br />
DVD<br />
<strong>TV</strong><br />
STB<br />
VCR<br />
Set the rotary switch to “<strong>TV</strong>“<br />
How to operate other equipment is described as of page 55.<br />
If the reception conditions are good, then a room antenna may be used for<br />
DVB-T. Passive and active room antennas are available on the market. The power<br />
is supplied for an active antenna via the antenna connection. For automatic<br />
programming or in "<strong>TV</strong> Menu – Connections – Antenna DVB – Antenna DVB-T,"<br />
the distribution voltage (5 volts) is to be set correspondingly.<br />
It may be practical to use a nondirectional antenna. If the location is outside the<br />
normal transmitting range, then a unidirectional antenna may also be used to<br />
improve the reception quality.<br />
You can fi nd out more on the digital stations that can be received in your area<br />
at your specialist dealer.<br />
<strong>TV</strong><br />
R<br />
9 -
First installation<br />
Plug the antenna into the antenna input of the PIP tuner and connect the PIP<br />
tuner output with the ANT-<strong>TV</strong> socket (Tuner 1). See illustration on page 5.<br />
If a Digital Satellite Tuner 1 has been retrofi tted, connect your satellite antenna<br />
system to the ANT-SAT socket.<br />
If a Digital Satellite Tuner 2 has been retrofi tted, then connect one antenna<br />
cable each, for example from the antenna switch or from the twin LNC, to both<br />
SAT sockets.<br />
Handling the fabric hose<br />
Use the fabric hose included to<br />
lay the mains cables, antenna<br />
cables or cables from other electronic<br />
components systematically;<br />
then lead the hose with<br />
the cables to the connection<br />
boxes. This provides you with<br />
an elegant solution when laying<br />
cables.<br />
The diameter of the fabric hose<br />
increases when you push it together lengthwise (see illustration). This makes it<br />
easier for you to push through cables with plugs.<br />
Use of the binders<br />
The enclosed binders are<br />
intended to bind the connecting<br />
cables together and fi x the<br />
cables to the mount of the table<br />
stand (see fi gure).<br />
By pressing on the closure of<br />
the binder, it can be opened<br />
again.<br />
Using the common interface module<br />
In order to be able to receive encrypted digital stations, the common interface<br />
module (CI module) and the smartcard both have to be inserted into the corresponding<br />
slot of your <strong>TV</strong> set. You can purchase the CI module and smartcard at<br />
your specialist dealer. You can fi nd the slot on the back of your <strong>TV</strong> set, see the<br />
illustration on page 5.<br />
1. Make sure the <strong>TV</strong> set is switched off with the mains switch on the set.<br />
2. First push the smartcard into the CI module as far as it will go. Insert it so<br />
that the side with the golden<br />
contact chip faces the side of<br />
the module printed with the<br />
supplier‘s brand logo. Printed<br />
arrows indicate how to<br />
insert the card. Also follow<br />
the installation <strong>instructions</strong><br />
included with the smartcard.<br />
3. Slide the CI module (1 carefully into the slot with<br />
the contact side facing the front. The logo on the<br />
common interface module should be visible.<br />
Eject button<br />
Make sure the module is not twisted in the process.<br />
Do not use force.<br />
When the module locks, the eject button is pressed<br />
outwards.<br />
(1<br />
The CI module and the smartcard are not included in<br />
the scope of delivery of this set; you can usually obtain<br />
them at your specialist dealer.<br />
Switching on<br />
Contact side<br />
CI module<br />
Press the mains switch, the red indicator on the set now lights<br />
up (standby mode).<br />
COMMON INTERFACE<br />
Replace the connection cover on the <strong>TV</strong> set.<br />
<br />
Switch on the set using the switch integrated in the indicator.<br />
The green indicator on the set now lights up (for further<br />
operating options see page 12).<br />
- 10
First installation<br />
Automatic programming<br />
Automatic programming of the <strong>TV</strong> set is started the fi rst time you switch it on.<br />
Follow the menus.<br />
By pressing in one of the arrow directions, you can choose the<br />
OK<br />
settings ...<br />
... and confi rm your settings by pressing OK. You then go to<br />
OK<br />
the next menu.<br />
Back to the previous menu.<br />
1. First you have to select the menu language.<br />
2. By pressing the OK button, you can call the menu “Connect antenna<br />
cables(s)". If you want to receive digital stations via satellite, then choose<br />
“DVB-S“ - confi rm using the yellow<br />
coloured key. If you also want to<br />
receive digital terrestrial stations<br />
(DVB-T), then select “DVB-T“. Also<br />
select “Antenna/cable (analogue)"<br />
- this way the standard analogue<br />
stations can also be searched for<br />
and saved. If you can receive digital<br />
Initial installation<br />
Connect antenna cable(s)<br />
Antenna cable(s) for:<br />
Antenna/cable (analogue)<br />
DVB-T<br />
DVB-C<br />
DVB-S<br />
OK Proceed<br />
to antenna socket(s):<br />
ANT <strong>TV</strong><br />
ANT <strong>TV</strong><br />
ANT <strong>TV</strong><br />
ANT SAT<br />
Connect/disconnect<br />
Back<br />
stations from the cable network, then select “DVB-C“ using the yellow<br />
coloured key.<br />
3. For the country-specifi c station sorting and for presettings for DVB-T and<br />
DVB-C, enter the location at which the <strong>TV</strong> set is operated.<br />
4. If you have selected “DVB-T“, you then reach the menu “Antenna DVB-T“. If<br />
you use an active antenna, then select “yes (5V)”.<br />
5. If you have selected „DVB-C“, you generally leave the symbol rates and<br />
modulation types unchanged.<br />
If other symbol rates are used in your cable network for broadcasting,<br />
enter the values with the numeric buttons of the remote control. If only one<br />
symbol rate is used, enter the same value for both symbol rates. If other modulation<br />
types are used for broadcasting in your cable network, select them<br />
in the menu. If only one modulation is used, select „none“ for modulation<br />
type 2.<br />
If necessary, ask your specialist dealer about the necessary settings for your<br />
cable network.<br />
6. In the “Select satellite installation“ menu, make the selection that corresponds<br />
to your satellite antenna installation.<br />
Note: If you have any questions on how your satellite antenna installation<br />
is confi gured and on the antenna settings, consult your antenna installer or<br />
your specialist dealer.<br />
7. Select the satellite the antenna is directed at, such as ASTRA1.<br />
If you only receive one satellite ...<br />
8. In the following menu, specify whether the station search should take place<br />
in the high and low band (“Yes“) or only in the low band (“No“).<br />
Note: For most satellites, a station search is required in both bands.<br />
9. For the low band and high band, the standard frequencies 9750 MHz (9.75<br />
GHz) and 10600 MHz (10.6 GHz) are preset.<br />
If your satellite antenna is equipped with an LNC (LNB) with a divergent<br />
oscillator frequency, specify the corresponding frequency for low and high<br />
band respectively. Note: The correct display of the received frequencies in<br />
the “<strong>TV</strong> menu – Settings – Stations – Manual adjustment“ depends upon<br />
this setting.<br />
10. You should receive a picture with sound with the settings previously made<br />
(only for ASTRA 1 and HOTBIRD). Then press OK.<br />
11. In the “Pre-programming“ menu, select the factory-set pre-programming to<br />
programme the satellite stations quickly.<br />
To ensure all stations that can be currently received are searched for and<br />
saved, select “No“ at this point.<br />
Symbol rates: The standard symbol rates 22000 and 27500 are preset. If you<br />
would like to receive stations with different symbol rates, specify the corresponding<br />
values here using the numeric buttons on your remote control.<br />
12. Press OK to obtain an overview of the settings with which the automatic<br />
programming is to take place.<br />
13. Press the OK button again and the station search will start. The <strong>TV</strong> set searches<br />
for, sorts and saves all the <strong>TV</strong> stations that can be received, according<br />
to your settings and the antennas connected.<br />
14. When the <strong>TV</strong> stations are saved, you will receive a corresponding message.<br />
15. Press the OK button and the set then searches for the radio stations.<br />
16. The <strong>TV</strong> set searches for, saves and sorts all radio stations which can be<br />
received with your antenna system.<br />
17. Then log on your video equipment, decoder and audio system using the<br />
connection wizard and connect these to the <strong>TV</strong> according to the connection<br />
diagram displayed. If you want to connect other equipment later, you can<br />
fi nd information as of page 48.<br />
You can repeat the initial installation at any time, e.g. after moving house. Call<br />
the index using the INFO button (in the <strong>TV</strong> mode, if no menu is opened). Select<br />
the index item “Repeat initial installation“ (you will fi nd this listed separately<br />
before the letter A). Press OK to start the initial installation.<br />
Station sorting<br />
You can change the station sorting that was carried out automatically later at<br />
any time, see “<strong>TV</strong> menu – Settings – Stations – Change stations“.<br />
11 -
First installation<br />
Directing DVB-T antenna<br />
If you use a room antenna to receive one or more DVB-T stations that have<br />
picture and sound interference, then you should change the location of where<br />
the antenna is set up.<br />
To help you direct your antenna or to help you determine the most suitable<br />
location to set up the antenna, your <strong>TV</strong> set has a display for the signal quality<br />
C/N and the signal strength Level.<br />
Consult your specialist dealer to fi nd out which channels and frequency bands<br />
(VHF or UHF) are used to broadcast the digital <strong>TV</strong> stations in your area.<br />
On any one channel, several digital stations are broadcast.<br />
Select a <strong>TV</strong> channel<br />
1. Call the “<strong>TV</strong> menu“ via the MENU button.<br />
2. Use to select “Settings“, then use to select the menu line underneath.<br />
3. Select “Stations“, then use to select the menu line underneath.<br />
4. Select “Manual adjustment“ and call the menu using OK<br />
Manual adjustment<br />
Signal source<br />
Channel<br />
Frequency<br />
Name<br />
Bandwidth<br />
C/N 96<br />
<strong>TV</strong> menu<br />
Settings<br />
Stations<br />
Parental lock<br />
Manual adjustment ...<br />
DVB-T<br />
E 05<br />
177.50 MHz<br />
Test<br />
7 MHz<br />
Level 99<br />
Timer functions<br />
DVB-C Antenna/cable (analogue)<br />
5. For digital stations, select “Signal source – DVB-T“.<br />
6. Use the numerical buttons to specify the corresponding channel number.<br />
Depending on the channel selected and country, the system automatically<br />
sets the corresponding bandwidth of 7 or 8 MHz. You should only change<br />
the bandwidth under special circumstances - if the channel raster in your<br />
area is different from the standard.<br />
When you receive a digital station, the system displays the signal quality<br />
C/N via a bar/numeric value and the signal strength via Level. The<br />
antenna‘s direction or position is best when the largest values possible are<br />
displayed (long bar) for the signal quality and signal strength.<br />
7. Direct the antenna so that the largest numerical value/bar size is reached.<br />
8. If no signal is found in the channel set, you can start the frequency search<br />
run by pressing the blue button within the band selected (VHF or UHF).<br />
9. Check the other channels one after another on which digital stations are<br />
broadcast terrestrially in your area.<br />
For the weakest station, direct the antenna so that the maximum numerical<br />
value/bar size is achieved.<br />
10. After you position or direct the antenna, we recommend to search for all the<br />
stations using the “Search wizard“ (<strong>TV</strong> menu – Settings – Stations – Search<br />
wizard).<br />
END<br />
INFO<br />
END<br />
Language<br />
Daily operation<br />
Switching on/off<br />
Your <strong>TV</strong> is equipped with an eco-standby power supply unit. On standby, the power<br />
consumption drops to low power. If you want to save even more electricity,<br />
switch the set off with the mains switch. However, please bear in mind that EPG<br />
data (electronic programme guide) will be lost and programmed timer recordings<br />
will not be performed by the <strong>TV</strong>.<br />
Switching off<br />
If the <strong>TV</strong> set is switched on, you can switch it to standby using<br />
the blue ON/OFF button on the remote control or by using the<br />
indicator fi eld on the set. The red lamp on the <strong>TV</strong> set lights up.<br />
If the orange indicator lights up, a timer recording is being<br />
made, EPG data is being captured or radio operation without<br />
screen display is active.<br />
Switching on the <strong>TV</strong> set<br />
From standby, it is best to switch the set back on using the<br />
blue On/Off button or by using the numeric buttons of the<br />
remote control (0 – 99).<br />
Or use the switch integrated in the indicator on the set.<br />
The green indicator on the <strong>TV</strong> set lights up.<br />
<br />
<br />
OK<br />
RADIO<br />
<br />
Or switch on the <strong>TV</strong> set with OK, you can then see the station<br />
list and select a station.<br />
Switch on the radio<br />
With the RADIO button on the remote control<br />
or:<br />
Switch on radio using R on the control ring of the <strong>TV</strong> set.<br />
If you switch off the <strong>TV</strong> set using the mains switch on the set, the indicator no<br />
longer lights up.<br />
If the <strong>TV</strong> set is switched off via the mains switch, you have to switch it into the<br />
standby mode fi rst via the mains switch and then switch it on using one of the<br />
above mentioned methods.<br />
- 12
Daily operation<br />
Changing stations<br />
... with the P+/P- buttons on the remote control<br />
P+<br />
V- OK V+<br />
P–<br />
Stations up/down<br />
When changing, the station display is visible for a few seconds.<br />
If additional languages are broadcast with DVB stations, then the set displays<br />
the language/sound selection under the station display. Call the language/sound<br />
selection by using the green coloured key and select using .<br />
... with the numeric buttons of the remote control<br />
The set has a dynamic memory with 1680 station memory locations. If up to 9<br />
stations are stored, you only need to enter one digit; up to 99 stations, two digits<br />
are needed; up to 999 stations, three digits are needed (refer to the station<br />
list to see how many stations have been stored).<br />
pqrs<br />
long<br />
<br />
abc pqrs<br />
short short long<br />
abc pqrs tuv<br />
all short<br />
41 ZDF Eifellandschaft 21:00 – 21:45<br />
Language/sound selection<br />
1 digit stations<br />
Press buttons 0 -9 for one second, and the station<br />
changes instantly.<br />
Or press button 0 – 9 briefl y, the station then changes<br />
after 2 seconds (the station changes immediately when<br />
only 9 stations are saved).<br />
2- and 3-digit stations<br />
After briefl y pressing the fi rst numeric button(s), keep the<br />
last numeric button pressed for one second, the station<br />
then changes immediately.<br />
Or press all numeric buttons briefl y, the station then<br />
changes after 2 seconds (the station changes immediately<br />
if up to 99 or 999 stations are saved).<br />
4 digit stations<br />
Press the four numeric buttons briefl y, the station then<br />
changes immediately.<br />
... via the station list<br />
OK<br />
OK<br />
AV<br />
...<br />
wxyz<br />
OK<br />
Use OK to call the station list.<br />
Select the station (if possible, the selected station will be<br />
displayed as a small picture)<br />
or ...<br />
... select with numeric buttons<br />
Station list<br />
COMP. IN<br />
6 3SAT<br />
HDMI/DVI<br />
7 S–RTL<br />
VGA<br />
8 N–<strong>TV</strong><br />
AVS<br />
9 DSF<br />
DVD<br />
10 TM3<br />
VCR<br />
11 PRO7<br />
0 VIDEO<br />
12 RTL 2<br />
1 ARD<br />
13 WDR 3<br />
OK<br />
2 ZDF<br />
14 BR<br />
3 SAT.1<br />
15 HR<br />
4 RTL<br />
16 MDR 3<br />
5 VOX<br />
17 N 3<br />
21:00 - 21:45 Eifellandschaft<br />
Switch to ...<br />
Scan stations<br />
OK<br />
0 ... 9 Select station Change stations<br />
Change sorting<br />
Numerical<br />
call selected station<br />
Blue coloured key: sort alphabetically/according to bouquets/<br />
numerically<br />
Station list<br />
COMP. IN<br />
HDMI/DVI<br />
VGA<br />
AVS<br />
DVD<br />
VCR<br />
For an alphabetical display: Enter letters with the numeric button (like on a<br />
mobile phone keypad), select with and call with OK.<br />
For bouquet display (sorting according to broadcasting chains, only for DVB<br />
stations): Enter bouquet number, select with and call with OK.<br />
Digital DVB-T stations are indicated by T , DVB-C stations by C and DVB-S<br />
stations by S . Encrypted stations are additionally indicated by .<br />
Ask your specialist dealer about decoders or the use of a CI module and a<br />
smartcard for the reception of encrypted stations.<br />
ARD<br />
OK<br />
END<br />
Alphabetical<br />
CNN INT.<br />
CAM<br />
DELUXE<br />
DSF<br />
EUROSPRT<br />
HOT<br />
HR<br />
BR-ALPHA<br />
BR3<br />
KIKA<br />
21:00 - 21:45 Eifellandschaft<br />
OK Switch to ...<br />
Scan stations<br />
a ... z Select letter Change stations<br />
Change sorting<br />
END<br />
13 -
Daily operation<br />
Basics about the menu operation<br />
Menus are called via the MENU button or via the button for special menus and<br />
can be hidden by using these buttons or by using the END button. The menu is<br />
displayed in the bottom section of the screen. At the top, you can see additional<br />
information for the menu point selected. In the menus, navigate by using the<br />
cursor. You can make settings by using . When you exit the<br />
menu, the settings are adopted.<br />
Example of the menu operation<br />
We shall demonstrate how to navigate with the menus using the <strong>TV</strong> menu as an<br />
example. You can see which buttons you can use in the dark blue fi eld on your<br />
<strong>TV</strong> set.<br />
MENU Open <strong>TV</strong> menu (in <strong>TV</strong> mode).<br />
OK<br />
OK<br />
OK<br />
OK<br />
Select the function in the <strong>TV</strong> menu, e.g. “Sound“ (for sound<br />
settings). Use to move the menu points displayed on the<br />
right into the dark blue fi eld; use to move the menu points<br />
displayed on the left.<br />
Picture<br />
<strong>TV</strong> menu<br />
Sound<br />
Recording<br />
Treble ...<br />
Connections<br />
Settings<br />
Select the sound function below with or OK; you will then<br />
see a list of the sound settings.<br />
<strong>TV</strong> menu<br />
Sound<br />
Treble<br />
4<br />
Bass<br />
more ...<br />
In the sound settings, also select the function with , e.g.<br />
“Bass“ (for increasing or reducing the bass tones).<br />
Treble<br />
Picture<br />
Here you can adjust among other things: Contrast, colour, brightness,<br />
picture adjustment, sharpness, picture format.<br />
<strong>TV</strong> menu<br />
Picture<br />
Sound<br />
Picture adjustment ...<br />
<strong>TV</strong> menu<br />
Sound<br />
Bass<br />
6<br />
more ...<br />
Recording<br />
Connections<br />
To set the bass tones, use or OK to select the setting bar<br />
underneath.<br />
INFO<br />
INFO<br />
INFO<br />
INFO<br />
END<br />
Settings<br />
END<br />
END<br />
END<br />
OK<br />
OK<br />
OK<br />
OK<br />
OK<br />
OK<br />
<strong>TV</strong> menu<br />
Sound<br />
Bass<br />
6<br />
Set the bass tones by using .<br />
If you want to make other sound settings, move up with <br />
to “Bass“ and select with , e.g. “more...". You can also<br />
move up further to “Sound“ by using and select other<br />
settings in the <strong>TV</strong> menu (such as, picture settings).<br />
Bass<br />
<strong>TV</strong> menu<br />
Sound<br />
more ...<br />
OK<br />
Use OK to call additional sound settings.<br />
Bass<br />
<strong>TV</strong> menu<br />
Sound<br />
Loudspeaker sound Headphone volume<br />
Stereo ...<br />
Select the sound setting using , e.g. “Auto volume“ and ...<br />
sound<br />
... use to select the auto volume option.<br />
Use to select “on“ and activate the auto volume.<br />
off<br />
<strong>TV</strong> menu<br />
Sound<br />
Auto volume<br />
AV audio signal<br />
off ...<br />
<strong>TV</strong> menu<br />
Sound<br />
Auto volume<br />
off<br />
<strong>TV</strong> menu<br />
Sound<br />
Auto volume<br />
on<br />
END Press the END button to hide the menu.<br />
Apart from the <strong>TV</strong> menu shown here, other menus can be opened in <strong>TV</strong> mode<br />
as follows:<br />
Call the Sound menu directly.<br />
Call the Picture menu directly.<br />
Quick calls for Image+, teletext subtitles, personal text pages,<br />
headphone volume, scan stations and to move the picture up<br />
and down.<br />
Green coloured key: Call standard settings for picture and<br />
sound.<br />
Using the volume control, you can also open other sound<br />
P+<br />
settings, such as Sound via, Sound adjustment, Sound effects<br />
V– OK V+ and Loudness.<br />
The key or OK must be pressed for the duration of the<br />
P-<br />
volume display for this.<br />
on<br />
INFO<br />
INFO<br />
Treble<br />
END<br />
END<br />
INFO END<br />
Headphone sound Auto vo<br />
Maximum volume<br />
INFO END<br />
Balance<br />
INFO<br />
INFO<br />
END<br />
END<br />
- 14
Daily operation<br />
For the info system ...<br />
For each menu point, an info text is displayed at the top of the picture to help<br />
you with the setting. This saves you from having to refer back to the operating<br />
<strong>instructions</strong>. We shall demonstrate this using the station search option as an<br />
example:<br />
OK<br />
Use to select the line below, for example “Search wizard“.<br />
Search wizard<br />
Use this menu to search for stations automatically once certain settings<br />
have been made.<br />
If you want to search for stations with other than the displayed<br />
settings, select the "Change settings" menu.<br />
MENU<br />
OK<br />
Call the <strong>TV</strong> menu.<br />
Select “Settings“.<br />
Settings<br />
Here, you can search for the stations automatically or manually as well<br />
as set the menu language, timer functions, parental lock, on-screen<br />
displays, etc.<br />
<strong>TV</strong> menu<br />
Settings<br />
Stations<br />
Search wizard Manual adjustment Change stations<br />
INFO<br />
END<br />
The info text explains how you are to proceed.<br />
<strong>TV</strong> menu<br />
INFO END<br />
ections Settings<br />
Picture Sound Recording Conne<br />
Stations ...<br />
In this example, you can see the options available after “Settings“.<br />
Upon delivery, the <strong>TV</strong> set is confi gured so that the info texts are always displayed<br />
(Automatic info “yes“). In this case, you can hide the info texts by using the<br />
INFO button.<br />
You can also confi gure the <strong>TV</strong> set so that you call the info texts when needed by<br />
using the INFO button (Automatic info “no“). You can fi nd the setting to switch<br />
the automatic info option on or off via “<strong>TV</strong> menu under Settings – Miscellaneous<br />
– On-screen displays – Automatic info – yes/no“.<br />
OK<br />
If you want to search for new stations, for example, use to<br />
select “Stations“ in the line below.<br />
Stations<br />
The menu contains the automatic station search and the manual station<br />
setting. You can re-sort stations, enter and change station names and<br />
delete stations.<br />
<strong>TV</strong> menu<br />
INFO END<br />
Settings<br />
Stations Parental lock Timer functions Language Mi<br />
Search wizard ...<br />
The info text indicates which settings you can make in “Stations“.<br />
15 -
Daily operation<br />
For the index ...<br />
Using the index, you can access many operational functions directly. You can<br />
also fi nd a great deal of information on technical terms about television. Before<br />
the alphabetical sorting, you can fi nd the menu language option, the list of<br />
features integrated into the <strong>TV</strong> set and the repeat initial installation option.<br />
For example, you want to have the <strong>TV</strong> set switch off automatically:<br />
Select the index item “Switch off“ – “Automatic“.<br />
You can set your <strong>TV</strong> set to switch off to stand-by mode once or every<br />
day at a given time.<br />
INFO<br />
Call the index in the <strong>TV</strong> mode (without any other on-screen<br />
displays).<br />
You can select your language for operating the <strong>TV</strong> set.<br />
Index<br />
Switch off<br />
Automatic<br />
Manual<br />
Symbol rate*<br />
Teletext<br />
Activate<br />
Character set<br />
FLOF<br />
OK Activate<br />
Previous/next letter<br />
P+<br />
a ... z Select letter P– Page /<br />
OK<br />
END<br />
Index<br />
Language<br />
Integrated features<br />
Repeat initial installation<br />
*<br />
Access code<br />
Active window (PIP)<br />
Automatic channel programming (ACP)<br />
AV (Audio/Video)<br />
OK Activate<br />
Previous/next letter<br />
P+<br />
a ... z Select letter P– Page /<br />
Info on the index item selected is visible at the top of the picture. If the OK<br />
symbol is displayed in the line selected, you can use the OK button to access<br />
the menu directly and carry out settings or selections.<br />
This is how to select the index item:<br />
abc<br />
...<br />
wxyz<br />
OK<br />
Enter the fi rst letter using the numeric buttons on the remote<br />
control (like on a mobile phone keypad);<br />
or<br />
use to go to the previous/next letter,<br />
or<br />
OK<br />
END<br />
OK<br />
Use the OK button to call “Switch off“ – “Automatic“.<br />
Switch off today only<br />
If you want your <strong>TV</strong> set to switch off once automatically (to stand-by<br />
mode) select "yes" and enter the time.<br />
<strong>TV</strong> menu<br />
Settings<br />
INFO END<br />
Timer functions<br />
Switch off today only Switch off daily One-time reminder Wake<br />
no ...<br />
The corresponding menu “Timer functions“ is displayed (in the <strong>TV</strong> menu – Settings).<br />
You can now choose between “Switch off today only“ and “Switch off<br />
daily“ and enter the time.<br />
P+<br />
V- OK V+<br />
use P+/P– to scroll up or down through the pages<br />
P–<br />
OK<br />
and use to go from line to line.<br />
- 16
Daily operation<br />
Setting the sound<br />
Volume and other frequently used sound settings<br />
P+<br />
V– OK V+<br />
P-<br />
OK<br />
OK<br />
OK<br />
Setting the volume<br />
by using or OK, you can call other sound settings ...<br />
and select using ...<br />
use for the related selection/setting ...<br />
OK ... and use to make the selection/setting there.<br />
Sound adjustment allows you to adjust the sound characteristics to the station‘s<br />
sound. The Sound effects settings allow you to expand a Dolby Pro Logic Signal<br />
to a virtual surround signal by using “Dolby Virtual“; by using “Panorama“, you<br />
can enhance the foundation of the stereo sound virtually for the loudspeakers.<br />
Sound off/on<br />
Other sound settings:<br />
OK<br />
OK<br />
<br />
Volume<br />
Volume ...<br />
24<br />
Volume Sound adjustment Sound effects Loudness<br />
24<br />
Sound adjustment Sound effects Loudness<br />
V<br />
normal<br />
Sound adjustment<br />
normal Pop<br />
Sound off;<br />
Sound on: Press button again or adjust volume.<br />
Sound off<br />
Sound on<br />
Call the Sound menu<br />
Sound<br />
Treble<br />
4<br />
Classic<br />
use to select the sound function to be set and use for<br />
the related selection ...<br />
Sound<br />
Bass<br />
6<br />
and use to select/set.<br />
Speech<br />
more ...<br />
Sound settings: Treble and bass. Different menu items are displayed depending<br />
on the connected audio device (AURO, hi-fi amplifi er). Under “more ..." you<br />
will fi nd the sound selection for loudspeakers and headphones, auto volume,<br />
headphone volume, AV audio signal, maximum volume and balance.<br />
Bass<br />
INFO<br />
INFO<br />
END<br />
END<br />
no<br />
Picture settings<br />
Open the Picture menu<br />
Picture<br />
Picture adjustment Contrast<br />
normal ...<br />
use to select the picture function to be set and use<br />
for the related selection ...<br />
OK<br />
... and use to set/select.<br />
Picture settings: Picture adjustment, Contrast, Colour, Sharpness. Under<br />
“more ...", you can fi nd settings for Brightness, Image+, Picture format, Move<br />
picture up/down, Auto format and Film quality improvement DMM.<br />
Direct control on <strong>TV</strong> set<br />
On page 4, you can fi nd illustrations of the control unit located on the set.<br />
Switching station on the <strong>TV</strong> set<br />
<br />
OK<br />
<br />
Picture<br />
Colour<br />
6<br />
Station up: with + on the control ring<br />
Station down: with – on the control ring<br />
Switching the radio on/off or switching over to the radio<br />
Press R to switch the radio on or off.<br />
Additional functions via the menu<br />
Colour<br />
In the radio or <strong>TV</strong> operating modes, you can make settings for Volume,<br />
Brightness, Contrast, Picture format and Stations. “Service” is intended for the<br />
customer service department.<br />
use M to call the menu<br />
g mode<br />
Direct control on <strong>TV</strong> set<br />
Volume<br />
24<br />
use – or + to select the function to be set<br />
use R for the related setting/selection<br />
Sharpness<br />
INFO<br />
more ...<br />
Direct control on <strong>TV</strong> set<br />
<strong>Operating</strong> mode Volume Brightness Contrast Picture fo<br />
<strong>TV</strong><br />
Direct control on <strong>TV</strong> set<br />
Volume<br />
18<br />
use – or + to set/select.<br />
Use M to move one level up; you can use – or + to select<br />
other functions.<br />
INFO<br />
END<br />
END<br />
Brightness Contrast Picture format Stat<br />
17 -
<strong>Operating</strong> modes – <strong>TV</strong><br />
<strong>TV</strong><br />
In initial installation and daily operation, the <strong>TV</strong> set is in <strong>TV</strong> mode. This is also<br />
the case when none of the other modes of operation, such as EPG, Teletext, PIP<br />
or Radio, have been selected.<br />
Each of these operating modes has a separate menu with separate functions for<br />
the coloured keys. Call the menu via the MENU button.<br />
How the coloured keys work in <strong>TV</strong> mode<br />
Red: Call the DR archive (Digital Recorder).<br />
Green: Call personal settings/factory settings for picture and<br />
sound, save picture and sound settings as personal settings.<br />
Standard settings pict./sound<br />
Call up personal settings<br />
OK Activate<br />
Yellow: call last station viewed. You can switch back and forth<br />
quickly between two stations using this button.<br />
Blue: call programme info.<br />
1 ARD Eifelland 14:30 - 15:15<br />
OK<br />
Call up factory settings<br />
INFO<br />
END<br />
Store as per<br />
For the status display, the DVB station providers may offer additional selection<br />
options for each station. Thus, the corresponding colour key or the TEXT button<br />
is displayed:<br />
TEXT<br />
Red: channel selection for multi-channel providers.<br />
Green: language/sound selection.<br />
Yellow: time selection.<br />
Blue: protection of minors.<br />
DVB subtitles.<br />
If you press one of the coloured keys during the status display or you press the<br />
TEXT button, the related selection menu is displayed.<br />
The status display subtitles refer only to the “DVB subtitles“ and are not provided<br />
by all stations. The options you see depend on the particular station (many<br />
stations broadcast subtitles via teletext).<br />
The status display is displayed automatically when a new programme begins<br />
with options different to the previous one.<br />
Notes:<br />
• In the sound mode, Mono! means that you have switched manually from<br />
stereo to mono, for example.<br />
• The selection menus are only available as long as the status display is<br />
displayed. You can call them again at any time by pressing the END button<br />
on your remote control.<br />
Calling the index<br />
INFO<br />
Calling the index<br />
END<br />
Programme info 14:43<br />
Detailed info OK Detailed info (teletext) Programme preview (t<br />
You can select your language for operating the <strong>TV</strong> set.<br />
Show status display<br />
END<br />
Show/hide status<br />
1 ARD Eifellandschaft 14:30 - 15:15 Stereo<br />
14:42 Alarm time 20:00 Sleep timer 23:00<br />
Language/sound selection<br />
In the line above, you can see the name of the station and the sound mode. Displayed<br />
below are additional options (Time, Sound mode, Alarm time and Sleep<br />
timer) that can be selected in the “<strong>TV</strong> menu – Settings – Miscellaneous – Onscreen<br />
displays“.<br />
Index<br />
Language<br />
Integrated features<br />
Repeat initial installation<br />
*<br />
Access code<br />
Active window (PIP)<br />
Automatic channel programming (ACP)<br />
AV (Audio/Video)<br />
a<br />
OK Activate<br />
Previous/next letter<br />
P+<br />
... z Select letter P– Page /<br />
You can fi nd more information on the index on page 16.<br />
OK<br />
END<br />
- 18
<strong>Operating</strong> modes – <strong>TV</strong><br />
Call additional functions<br />
Call timer overview<br />
Select picture format<br />
Select additional functions such as Image+, Teletext subtitles,<br />
Personal teletext pages, Headphone volume,<br />
Scan stations and to move the picture up and down.<br />
If timer recordings have been programmed, you will see when<br />
which station is recorded here.<br />
The <strong>TV</strong> set sets the best picture format automatically when<br />
Auto format is switched on. If you want to set a different<br />
format, press this button until the desired format is selected or<br />
select the format with .<br />
You can switch the panorama picture over to distortion-free representation on<br />
your <strong>TV</strong> set. Dark margins are then visible on the left and right of the picture.<br />
Switching over: Keep the M button on the set pressed, at the same time press<br />
the ”Picture format” button on the remote control briefl y.<br />
Resetting: Press the same button combination again.<br />
Move picture up/down<br />
OK<br />
INFO END<br />
Additional functions<br />
Image+ Teletext subtitles Personal teletext pages<br />
off ...<br />
Timer list Fri 12.09./14:12<br />
12.09. 18:00-18:30 3SAT Die Köchin, die Putzfrau und d<br />
TEXT Detail New recording Change<br />
Delete<br />
Picture format<br />
16:9<br />
4:3<br />
Panorama<br />
Cinema<br />
Zoom<br />
To make picture subtitles visible, you can useto move<br />
the picture up or down with the picture formats “Panorama“,<br />
“Cinema“ and “Zoom“.<br />
END<br />
INFO<br />
<strong>TV</strong> menu<br />
MENU<br />
Call up the <strong>TV</strong> menu<br />
<strong>TV</strong> menu<br />
Picture<br />
Sound<br />
Picture adjustment ...<br />
Recording<br />
Connections<br />
INFO END<br />
Settings<br />
You will fi nd a description of the picture and sound settings on page 17. The <strong>TV</strong><br />
menu offers other options for recording, connections and settings of the <strong>TV</strong> set.<br />
For a recorder that is logged in, you can find the following<br />
menus in the “Recording“:<br />
Recording wizard - to programme new timer recordings<br />
• Via EPG • Via teletext • Manual<br />
You will fi nd further information about timer recording on page 49.<br />
Timer list<br />
Here you will fi nd a list of programmes programmed for recording. You can<br />
change the recording data or delete programmed recordings and programme<br />
new recordings.<br />
Pre-record time and Post record time<br />
For recordings without VPS/PDC, set a lead and lag time here so that the programme<br />
is fully recorded despite any slight differences in the time.<br />
Under “Connections“ you will find the following functions:<br />
New devices/modifi cations (connection wizard)<br />
The connection wizard helps you connect and log in additional equipment such<br />
as video recorders, DVD players/recorders, camcorders/digital cameras, pay <strong>TV</strong><br />
decoders, equipment with component signals and digital HDMI/DVI signals.<br />
Antenna DVB<br />
• Antenna DVB-T • Antenna DVB-S (1<br />
You can fi nd more information on pages 11 and 12.<br />
Digital Link Plus<br />
Transmission of the station data from the <strong>TV</strong> set to the video/DVD recorder if a<br />
recorder with Digital Link Plus is connected.<br />
Miscellaneous (connections)<br />
• Set AV norm for the connections manually (if it is not recognised automatically).<br />
• “Assign audio digital signals“ to one of the AV sockets.<br />
• “Allow switching voltage“ to display the signals of the connected device<br />
immediately on the screen via Euro AV during playback.<br />
• RGB insertions at AV2 to play back RGB signals at all station storage locations.<br />
• Select decoder stations and set sound encoding.<br />
(1<br />
only for sets with DVB-S<br />
19 -
<strong>Operating</strong> modes – <strong>TV</strong><br />
Under “Settings“ you will find the following functions:<br />
Stations<br />
Here you can search for and store new stations automatically or manually.<br />
With “Change stations“, you can rearrange and delete the stations and change<br />
station names.<br />
• Search wizard • Manual adjustment • Change stations<br />
Parental lock<br />
You can lock the <strong>TV</strong> “immediately“, “daily“ for a certain period of time or “agerelated“<br />
for DVB programmes with age restrictions.<br />
Here, you determine the PIN to enter if you want to watch locked programmes.<br />
Timer functions<br />
You can have your <strong>TV</strong> switch off at pre-programmed times or wake you/remind<br />
you with radio or <strong>TV</strong>. If you are not present at the time, a safety prompt makes<br />
sure the <strong>TV</strong> switches off again after 5 minutes.<br />
• Switch off today only • Switch off daily • One-time reminder<br />
• Wake up Mon-Fri • Wake up Sat • Wake up Sun • Wake up with<br />
• Wake up signal volume<br />
Language<br />
If “your“ menu language is not set, you have to select the “Language“ menu in<br />
a language that you do not understand. Therefore here is a simple way to set<br />
the right menu language:<br />
1. Press the INFO button (index), select the fi rst listing (this is above A).<br />
2. Call the language selection by pressing the OK button.<br />
3. Now select the desired language and confi rm it by pressing the OK key.<br />
4. Hide the menu again with the END button.<br />
Miscellaneous (settings)<br />
On-screen displays<br />
You can set the duration and position of the station and status display, defi ne<br />
the content of the status display and switch the automatic info texts on or off:<br />
• On-screen display time • On-screen display position • Programme title<br />
• Sound mode • Time • Alarm time • Sleep timer • Automatic info<br />
Time and date<br />
If you receive teletext, the set registers the time and date. These are required for<br />
timer recordings, timer functions and EPG. If you do not receive teletext, then<br />
you have to enter the date and time; you should not switch off the set using the<br />
mains switch since the settings will then be lost.<br />
DVB software<br />
Update of DVB software via satellite (1 .<br />
DVB subtitles<br />
• Subtitles off • Subtitles for the Hearing Impaired<br />
• Subtitles as translation for foreign language programmes<br />
DVB character set<br />
• Western European • Polish • Standard.<br />
Rotate <strong>TV</strong><br />
Individual Edition sets are equipped with a Motor Unit at the factory. You can<br />
fi nd out more on page 57.<br />
DVB subtitles<br />
If the station provides DVB subtitles, then you can have the <strong>TV</strong> display them<br />
permanently or suppress their display. You can also select between subtitles “for<br />
translation“ or “for the Hearing Impaired“.<br />
1. Call the “<strong>TV</strong> menu“ via the MENU button.<br />
2. Select the “Settings“ line and confi rm using OK.<br />
3. Select the “Miscellaneous“ line and confi rm using OK.<br />
4. Select the “DVB subtitles“ line and confi rm using OK.<br />
Note: If you have selected “Subtitles off“, then the set generates an on-screen<br />
display when subtitles are available.<br />
By using the END button, you can open the status display and you can display<br />
the subtitles again by using the TEXT button.<br />
• Call the status display by pressing the END button, if it is not yet displayed.<br />
• When the status display is visible, press the TEXT button.<br />
Select the desired language and confi rm using OK. The presetting changes<br />
for the current programme.<br />
• Which subtitle languages can be selected depends on the provider.<br />
• The automatic shortlist is determined by the menu language and the selection<br />
made in the “DVB subtitles” settings menu.<br />
• By pressing the END button, you can hide the menu again.<br />
(1<br />
only for sets with DVB-S<br />
DVB subtitles<br />
Subtitles off<br />
for impaired hearing<br />
for translation<br />
OK<br />
END<br />
INFO<br />
- 20
<strong>Operating</strong> modes – <strong>TV</strong><br />
Removing the CI module<br />
1. Switch the <strong>TV</strong> set off with the mains switch.<br />
2. Remove the cover from the back of the set<br />
on the upper left.<br />
3. Press the eject button at the module slot;<br />
the module is unlocked.<br />
4. Remove the module from the set.<br />
Inserting a new CI module<br />
After you insert a new CI module and switch the <strong>TV</strong><br />
set on, the following dialogue is displayed:<br />
CI module<br />
COMMON INTERFACE<br />
Searching for new software<br />
If you want to carry out a manual search for new software, proceed as follows:<br />
1. Call the <strong>TV</strong> menu using the MENU button.<br />
2. Confi rm the “Settings” using OK.<br />
3. Confi rm the “Miscellaneous” using OK.<br />
4. Select “DVB software” and press OK.<br />
Update digital <strong>TV</strong> software<br />
Current version: V3.x.x<br />
You can search for a new software version with OK.<br />
Autom. station search<br />
Your <strong>TV</strong> set has detected a new CI module. This requires a station<br />
search for all new receivable stations.<br />
After you press the OK button, the system starts the wizard to carry out the<br />
automatic station search.<br />
Check the proposed search parameters and let the set search for new stations.<br />
Calling the CI module menu<br />
Here you can call up information on the inserted common interface module and<br />
the smartcard. To do this, use the MENU button to call the <strong>TV</strong> menu, select the<br />
line “Settings”, “Miscellaneous” and then the entry “CI module - xxx” (in place<br />
of “xxx” stands the name of the provider which is output by the smartcard. The<br />
content of this menu depends on the particular supplier of the CI module.<br />
Note: This menu is only available for digital stations.<br />
Installing new DVB software<br />
To ensure your DVB-S receiver is always performing at the state of the art,<br />
newly developed software versions are made available from time to time; these<br />
are broadcast via satellite and can be automatically installed on your set (only<br />
possible via ASTRA1).<br />
Software is recognised automatically<br />
The set can determine whether a new software version is available. This occurs at<br />
night when your EPG is automatically updated. For this, your <strong>TV</strong> set has to remain<br />
in the standby mode (do not switch off using the on/off button on the set).<br />
If a new software version has been found, the set will indicate this with an onscreen<br />
message the next time the set is switched on: You can decide whether or<br />
not you want to download the new software.<br />
Confi rm using OK, so that the new software can be loaded and installed via<br />
satellite. Continue as set out in the “Downloading software” section.<br />
5. If you start the search using OK, the set checks if there is a new software<br />
version available.<br />
6. If there is a new version available, the set generates an on-screen message.<br />
Update digital <strong>TV</strong> software<br />
Current version: V3.x.x<br />
New version: V3.1.0<br />
Downloading software<br />
1. If you press OK in the dialogue above, you can decide whether you want to<br />
download the new software immediately, when you switch off the set or not<br />
at all. We recommend you always carry out the update of the digital software.<br />
This is the only way to ensure your set is always up to date.<br />
2. If you do decide to update, the software is initialised on your set and you are<br />
informed of the status with a grey bar.<br />
Do not switch your set off during this time. This process may take up<br />
to one hour. You will be informed when the process is completed.<br />
3. After the software is updated, you will be asked to switch your <strong>TV</strong> set off and<br />
back on again using the on/standby switch.<br />
If the update was not carried out, you will be asked several times when you<br />
switch on the set whether you want to carry out this update.<br />
21 -
<strong>Operating</strong> modes – <strong>TV</strong><br />
Image+<br />
Image+ is a picture improvement specially developed by <strong>Loewe</strong>, which delivers<br />
a sharper, lifelike and colour-fast picture richer in detail and contrast.<br />
Image+ menu<br />
Call the menu “Additional functions“.<br />
INFO END<br />
Additional functions<br />
Image+ Teletext subtitles Personal teletext pages<br />
off ...<br />
Image+ demo mode<br />
In order to show the way Image+ works, a "Demo mode" is integrated.<br />
In "Demo mode", the current picture is divided into two parts. The left half of<br />
the picture is shown in “normal“ mode, the right half in the Image+ optimised<br />
mode.<br />
Image+ off<br />
Image+ on<br />
OK<br />
Use to move to the corresponding selection/setting ...<br />
on<br />
Additional functions<br />
Image+<br />
off<br />
Demo<br />
INFO<br />
END<br />
OK<br />
and use to select/set and use ...<br />
Additional functions<br />
Image+<br />
on<br />
OK Activate<br />
OK<br />
off<br />
Demo<br />
INFO<br />
END<br />
The demo mode can be closed by pressing on any button on the remote control.<br />
OK<br />
to activate.<br />
In the Image+ menu, the functions Image+ “on“, “off“ and “Demo“ can be set.<br />
The Image+ settings can also be opened via the “Picture“ menu.<br />
Open the Picture menu.<br />
OK<br />
Picture<br />
Picture adjustment Contrast<br />
normal ...<br />
INFO END<br />
Colour Sharpness more ...<br />
Use to go to “more...“ and select with OK.<br />
INFO END<br />
Picture<br />
ghtness Image+<br />
Picture format Move picture up/down Auto for<br />
on ...<br />
Select/set as described in the Image+ menu.<br />
The standard setting at delivery of the set is Image+ “on“.<br />
- 22
<strong>Operating</strong> modes – PIP<br />
Picture in picture (PIP)<br />
Your Individual Edition set is equipped with two <strong>TV</strong> cable tuners which enable<br />
picture in picture displays. But you can also use picture in picture with a retrofi<br />
tted digital satellite tuner or when playing back from a video recorder or DVD<br />
player (AV-PIP).<br />
The following PIP displays are possible: Main picture analog – PIP picture analog,<br />
Main picture digital – PIP picture analog, Main picture analog – PIP picture<br />
digital, Main picture digital – PIP picture digital.<br />
For “Split screen," the PIP picture is displayed on the right side of the screen.<br />
Both pictures share the screen in two equal halves. For the “Small PIP” setting,<br />
a small picture is displayed in the <strong>TV</strong> picture.<br />
The green bar/frame indicates that the control commands have an effect on the<br />
PIP picture. The white bar/frame means that the control commands have an<br />
effect on the main picture. Use the green coloured key to switch between the<br />
PIP picture and the main picture, for example to change stations.<br />
The frame or bar between the pictures is green for the time being.<br />
PIP<br />
Show/hide PIP picture<br />
PIP picture as freeze picture<br />
The bar/frame has to be green. If not, press the green coloured<br />
key.<br />
If you press the red coloured key, the PIP picture freezes. Press<br />
again - moving picture.<br />
Selecting the station of the PIP picture<br />
The bar/frame has to be green. If not, press the green coloured<br />
key. Then select the station as usual.<br />
Select the station of the <strong>TV</strong> picture (main picture)<br />
The bar/frame has to be white. If not, press the green<br />
coloured key. Then select the station as usual.<br />
PIP scan in the PIP picture<br />
The bar/frame has to be green. If not, press the green<br />
coloured key.<br />
Start scanning the stations using the blue coloured key. The<br />
bar/frame turns blue.<br />
The stations now change automatically. Stop scanning the stations by using the<br />
blue coloured key. The bar/frame turns green again.<br />
Interchanging PIP picture/<strong>TV</strong> picture<br />
41 ZDF Eifellandschaften 21:00 – 21:45<br />
The bar/frame has to be green. If not, press the green<br />
coloured key.<br />
Interchange the pictures by using the yellow coloured key.<br />
1 ARD Der Wilde Westen 21:15 – 22:15<br />
1 ARD Der Wilde Westen 21:15 – 22:15<br />
41 ZDF Eifellandschaften 21:00 – 21:45<br />
23 -
<strong>Operating</strong> modes – PIP<br />
Functions in the PIP menu<br />
In the PIP menu, you can set the PIP type (small picture or split screen) and the<br />
position of the small picture.<br />
MENU<br />
Call the PIP menu (PIP must be active, green bar/frame).<br />
Position of the PIP picture<br />
OK<br />
Move the PIP picture with the arrow keys to a corner of the <strong>TV</strong><br />
picture. In this case, the frame around the PIP picture has to<br />
be green, and there should not be any other displays visible on<br />
the screen.<br />
mall PIP<br />
<strong>TV</strong> menu<br />
Settings<br />
PIP<br />
Type<br />
Split screen<br />
<br />
<br />
INFO<br />
END<br />
Sm<br />
Setting the PIP type<br />
You can have the PIP picture displayed as a small PIP or split screen.<br />
Switch to small PIP:<br />
Switch to split screen:<br />
You can have the PIP picture displayed on the right hand side of the screen.<br />
Both pictures share the screen in two equal halves. You will see a coloured<br />
vertical bar between the pictures.<br />
OK<br />
Select “Type” and then “Small PIP”.<br />
MENU<br />
Call the PIP menu (PIP must be active, green frame)<br />
OK<br />
Select “Type” and then “Split Screen”.<br />
<strong>TV</strong> menu<br />
Settings<br />
PIP<br />
Type<br />
Small PIP<br />
Split screen<br />
For the small PIP, you will see a coloured frame around the PIP picture.<br />
INFO<br />
END<br />
mall PIP<br />
<strong>TV</strong> menu<br />
Settings<br />
PIP<br />
Type<br />
Split screen<br />
<br />
<br />
INFO<br />
END<br />
Sm<br />
- 24
<strong>Operating</strong> modes – EPG<br />
EPG - Programme guide<br />
EPG is an electronic programme guide. With this system, you can easily fi nd the<br />
programmes that interest you (sorted according to day, time, station and topic).<br />
You can mark programmes and programme recordings.<br />
Depending on whether you are receiving analogue stations by cable/antenna or<br />
digital stations, you will have different programme guides.<br />
A wizard is activated the fi rst time you use EPG (not with DVB) which guides you<br />
through the necessary settings. Then run the data capture (see next page).<br />
Using the EPG<br />
EPG<br />
Switch EPG on/off<br />
24 Kabel 1<br />
Date<br />
Time<br />
Stations<br />
Topics<br />
EPG (Electronic Programme Guide) Fri 10.09./14:14<br />
Fri 10.09.<br />
now soon 14:00 15:00 16:00 17:0<br />
all<br />
all<br />
13:20-14:15 Kabel 1 Die Waltons<br />
OK<br />
13:30-14:15 H3 ARD-Buffet<br />
13:55-14:20 Kinderkan Blaubär & Blöd (37)<br />
14:00-14:15 ZDF heute - in Deutschland<br />
14:00-15:00 RTL Das Strafgericht<br />
14:00-15:00 Sat 1 Zwei bei Kallwass<br />
14:00-15:00 Pro7 Das Geständnis - Heute s...<br />
14:00-14:30 N3 DAS! ab 2<br />
14:00-14:20 WDR Die kleinen Strolche (10)<br />
Familienserie - Sturzflug<br />
TEXT Detail View Record<br />
OK<br />
Page / 0 ... 9 Select time Select date, ... , topics<br />
P+<br />
P–<br />
The programme guide menu is divided into two areas: at the top, you can<br />
make the settings for the programme list (date, ..., topics); on the bottom, the<br />
programme list is displayed. Use the blue coloured key to switch between the<br />
two areas to make your selections.<br />
All programmes currently running are listed initially in the programme list. With<br />
the buttons, select the programme you want to watch and switch over<br />
with the OK button.<br />
Brief information is shown below the programme list for some programmes. If<br />
more detailed information is available, you can call it using the TEXT button.<br />
Use P+/P– to scroll up or down through the pages of the programme guide. In<br />
the selection lines for date and time above, you will see the time change when<br />
scrolling; when you scroll further, the date also changes. When the “Time” line<br />
is selected, you can enter the time as of which the programmes are to be displayed;<br />
use the numeric buttons on your remote control to do this. Always enter<br />
four digits, such as 0900 for 9 a.m.<br />
If programmes are displayed which have not yet started, you can mark these<br />
with the OK button. The <strong>TV</strong> set then switches automatically to this station at the<br />
given time.<br />
END<br />
MENU<br />
When receiving digital terrestrial and digital satellite stations, you may fi nd that<br />
two identical EPG data are displayed in the “EPG (DVB)" menu for one station.<br />
If you call the EPG menu in the EPG mode by using the MENU button, then<br />
select “Station selection," you can select the duplicate station and deactivate it<br />
by using OK).<br />
You have direct access to the selection lines above to pre-select the day, the<br />
time, the station and the topic.<br />
Blue coloured key: Call Select date/time/stations/topics<br />
24 Kabel 1<br />
Date<br />
Time<br />
Stations<br />
Topics<br />
EPG (Electronic Programme Guide) Fri 10.09./14:14<br />
Sat 11.09. Sun 12.09. Mon 13.09.<br />
06:00<br />
all<br />
all<br />
06:00-06:20 ZDF Die Blobs<br />
06:00-06:30 RTL Wunderbare Jahre<br />
06:00-06:25 Kabel 1 Dennis<br />
06:00-06:25 N3 Extra en español (5)<br />
06:00-06:30 BR Goal. Speak English, Play Football<br />
06:00-06:30 WDR Lokalzeit Südwestfalen<br />
06:00-07:10 SuperRTL Infomercials<br />
06:00-07:10 Kinderkan Reif für die Dodo-Insel (25)<br />
14:00-14:20 9LIVE Reisetraum<br />
Comedyserie - Kandidaten mit gewissen Fehlern<br />
END<br />
Change to programme list MENU<br />
Use to select the menu line for the date, time, stations or topics. Use<br />
to select within the menu line.<br />
If, for example, you are looking for the next news, select today’s date, “Soon“<br />
under Time, “All“ under Stations and “News“ under Topics.<br />
Then you get a list of all news programmes in the programme list below.<br />
24 Kabel 1<br />
Date<br />
Time<br />
Stations<br />
Topics<br />
EPG (Electronic Programme Guide) Fri 10.09./14:14<br />
Fri 10.09.<br />
soon<br />
all<br />
News Show Hobby Sport Child Kn<br />
15:00-15:15 Das Erste Tagesschau um drei<br />
15:00-15:05 hr-fernse hessen aktuell<br />
15:00-15:15 ZDF heute - Sport<br />
16:00-16:05 SÜDWEST Baden-Württemberg Aktuell<br />
16:00-16:15 Das Erste Tagesschau um vier<br />
Nachrichten - News<br />
END<br />
Change to programme list MENU<br />
If you want to mark one of these news programmes, return to the programme<br />
list using the blue coloured key, select the desired news programme by using<br />
and mark this by using OK.<br />
25 -
<strong>Operating</strong> modes – EPG<br />
In front of the programme’s title, the system places an ✓ . This station is<br />
switched later to this programme when the set is switched on. If the <strong>TV</strong> is off,<br />
it switches on again automatically at the beginning of the marked programme<br />
if this has been set in the EPG menu. If you are out, a security prompt prevents<br />
the <strong>TV</strong> set staying on unattended.<br />
Before leaving the upper selection lines using the blue coloured key, select a<br />
specifi c line. If you have switched back to the programme list, you can change<br />
this menu line using without having to leave the programme list.<br />
Programming recording for recorders<br />
The programme marked using the buttons can be prepared for recording<br />
by pressing the red coloured key. In the following menu, confi rm the timer data<br />
or change them as required. Then a red dot is set in front of this programme in<br />
the EPG programme list as an identifi cation (if the timer data is being transferred<br />
to the recorder, no red dot is set). If you select this programme, you can<br />
delete it from the timer using the red coloured key (if the timer data has been<br />
transferred to a recorder, the timer has to be deleted there).<br />
EPG menu<br />
MENU<br />
Call EPG menu<br />
EPG menu<br />
Select provider<br />
You will fi nd the following settings in the EPG menu:<br />
• Select provider • Station selection • Timer list • Data capture<br />
• Switch on <strong>TV</strong> when marked<br />
Selecting providers and stations<br />
OK<br />
Station select<br />
Timer list<br />
INFO<br />
Data capture<br />
END<br />
Switc<br />
If you want to change the provider for analogue <strong>TV</strong> reception (the station which<br />
transmits EPG data) to have other stations evaluated, you can do this under<br />
“Select provider”.<br />
Select “Select provider” and call this menu using OK. If the station you want to<br />
switch to is not listed in the “Select provider” list, then use the yellow coloured<br />
key to start the automatic search for stations with EPG data. This takes a while.<br />
Or, if you know the station that transmits EPG data, press the blue coloured key<br />
to compile manually. Select the provider in the station list and adopt it by using<br />
OK and return to the provider selection using .<br />
Select the provider in “Select provider” and adopt it using OK. Then a station list<br />
search is performed. The stations offered by the provider are displayed in a list.<br />
If you want certain stations to be omitted from the programme guide, you can<br />
select and deactivate these via Station selection. Call the station selection by<br />
using the blue coloured key.<br />
First, all stations are marked with the ✓ symbol so that their data is displayed<br />
in the programme guide (precondition: provided EPG data is broadcast for the<br />
respective station). Stations indicated by E are analogue terrestrial/cable stations,<br />
stations indicated by T are DVB-T stations, stations indicated by C are<br />
DVB-C stations and stations indicated by S are DVB-S stations. These stations<br />
are available for evaluation in the programme guide.<br />
Select the stations you want to omit from the programme guide one after another<br />
and deactivate each one by using OK. The ✓ symbol is removed.<br />
Data capture<br />
After these settings or after each time the set is switched off using the mains<br />
switch, the data must fi rst be collected, before switching on the set.<br />
To do this, select the station you have defi ned as a provider and leave the <strong>TV</strong><br />
set switched on for about one hour or switch the set to the standby mode. After<br />
about two minutes in standby mode, the indicator on the set turns orange. The<br />
data acquisition begins and lasts about 1 hour. When data acquisition is terminated,<br />
the indicator turns red again. The data are also automatically captured<br />
between 2 a.m. and 5 a.m. when the <strong>TV</strong> is switched to standby.<br />
A prerequisite for data capture is that „Data capture“ is „on“ (for DVB + analogue)<br />
in the EPG menu.<br />
Note: If the <strong>TV</strong> set is switched off using the mains switch or the mains plug is<br />
pulled out, all EPG data are lost.<br />
If, for example, you cannot receive any analogue EPG providers or if you only<br />
use DVB, you should set the data capture to “on (only for DVB)".<br />
Switch on <strong>TV</strong> when marked<br />
You can have the <strong>TV</strong> switched on automatically from standby at the beginning<br />
of the marked programme. If you are not present at the time, a safety prompt<br />
makes sure the <strong>TV</strong> switches off again after 5 minutes.<br />
- 26
<strong>Operating</strong> modes – Teletext<br />
Teletext<br />
Teletext transmits information such as news, weather, sports, programme<br />
previews and subtitles.<br />
TEXT Teletext on/off<br />
Many stations use the TOP operating system, some use FLOF (e.g. CNN). Your<br />
<strong>TV</strong> supports both these systems. The pages are divided into topic groups and<br />
topics. After switching on the teletext, up to 3,000 pages are stored for fast<br />
access.<br />
Page selection with the coloured keys<br />
The coloured bars (in TOP) or the coloured writing (in FLOF) in the next to the<br />
last line show you which coloured keys you can use to scroll to topic groups and<br />
topics.<br />
Red: back to the previously seen page (not in FLOF)<br />
Green: on to the next page (not in FLOF)<br />
Yellow: to the next topic (only in TOP and FLOF)<br />
Blue: to the next topic group (only in TOP and FLOF)<br />
Other page selection options:<br />
OK<br />
OK<br />
Select one page number specifi ed on the page by using<br />
(Page Catching)<br />
call.<br />
100 100 ARD-Text 10.09.04 14:14:42<br />
ARD TEXT<br />
Teletext im Ersten<br />
Index<br />
> 101<br />
Bulmahn: Bildung statt Eigenheim . . . . . . . . 120<br />
Wird auch der Nahverkehr teurer . . . . . . . . 121<br />
Australien: Keine Zugeständnisse . . . . . . . . 122<br />
Tote bei Zugunglück in Schweden . . . . . . . . 532<br />
Tennis: Haas unterliegt Hewitt . . . . . . . . . . . . 204<br />
Formel 1: Schumacher erneut vorne . . . . . . . 213<br />
Tagesschau . . 110/112 Kultur. . . . . . . . . 500<br />
Wetter. . . . . . . . . . . 170 Gesellschaft . . . 530<br />
Sport. . . . . . . 200/600 Lotto/Toto . . 666<br />
<strong>TV</strong> Guide . . . 300/400 Wirtschaft. . . . . . 700<br />
–<br />
Internet: www.ard-text.de<br />
+ Inhalt tagesschau<br />
Page selection<br />
Formel 1: Schumacher erneut vorne . . . . . . . 213<br />
Tagesschau . . 110/112 Kultur. . . . . . . . . 500<br />
Wetter. . . . . . . . . . . 170 Gesellschaft . . . 530<br />
Sport. . . . . . . 200/600 Lotto/Toto . . 666<br />
<strong>TV</strong> Guide . . . 300/400 Wirtschaft. . . . . . 700<br />
Internet: www.ard-text.de<br />
– + Inhalt tagesschau<br />
Page selection OK View<br />
OK<br />
INFO<br />
OK<br />
abc pqrs<br />
In Multiple pages scroll using . You can see which<br />
multiples pages can be called in the bottom menu line.<br />
– +<br />
Call contents page 100<br />
Call the TOP table<br />
The TOP table is a general list of teletext. You can only call the<br />
table for stations that use the TOP operating system.<br />
Use to select the topic group.<br />
Select the topic column using .<br />
Select the topic with and display page with OK.<br />
Enter the page number directly<br />
Zeitplan Fußball<br />
1 2 3 4 5 6 7 8 9 10 11 12<br />
Bulmahn: Bildung statt Eigenheim . . . . . . . . 120<br />
Wird auch der Nahverkehr teurer . . . . . . . . 121<br />
TOP table<br />
Australien: Keine Zugeständnisse . . . . . . . . 122<br />
Tote bei Zugunglück in Schweden . . . . . . . . 532<br />
Übersicht<br />
Wetter<br />
tagesschau Tennis: Haas unterliegt Vorhersage Hewitt . . . . . . . . . . . . 204<br />
WetterFormel 1: Schumacher OK<br />
Städte erneut vorne . . . . . . . 213<br />
Sport 1<br />
Regional<br />
<strong>TV</strong> Guide Tagesschau . . 110/112 Reisen Kultur. . . . . . . . . 500<br />
ARD heute<br />
Wetter. . . . . . . . . . . int. 170Städte<br />
Gesellschaft . . . 530<br />
ARD morgen<br />
Sport. . . . . . . 200/600 Biowetter Lotto/Toto . . 666<br />
FS-Sendungen<br />
<strong>TV</strong> Guide . . . 300/400 Wirtschaft. . . . . . 700<br />
<strong>TV</strong> Guide 2<br />
Internet: www.ard-text.de<br />
more .–. . + Inhalt tagesschau<br />
View<br />
Seitenauswahl<br />
OK<br />
Displaying teletext pages<br />
AV Stop self-turning pages (HOLD)<br />
Zoom page: top part - bottom part - normal size (press button<br />
wxyz<br />
several times)<br />
PIP <strong>TV</strong> picture on/off (Split Text)<br />
END<br />
100 100 ARD-Text 10.09.04 14:14:42<br />
ARD TEXT<br />
Teletext im Ersten<br />
Index<br />
> 101<br />
Bulmahn: Bildung statt Eigenheim . . . . . . . . 120<br />
Wird auch der Nahverkehr teurer . . . . . . . . 121<br />
Australien: Keine Zugeständnisse . . . . . . . . 122<br />
Tote bei Zugunglück in Schweden . . . . . . . . 532<br />
Tennis: Haas unterliegt Hewitt . . . . . . . . . . . . 204<br />
Formel 1: Schumacher erneut vorne . . . . . . . 213<br />
Tagesschau . . 110/112 Kultur. . . . . . . . . 500<br />
Wetter. . . . . . . . . . . 170 Gesellschaft . . . 530<br />
Sport . . . . . . . 200/600 Lotto/Toto . . . . 666<br />
<strong>TV</strong> Guide . . . . 300/400 Wirtschaft . . . . 700<br />
–<br />
Internet: www.ard-text.de<br />
+ Inhalt tagesschau<br />
Page selection<br />
27 -
<strong>Operating</strong> modes – Teletext<br />
Programme timer recordings<br />
A video and/or DVD recorder must be connected and logged in in the connection<br />
wizard. Call the programme pages of the current station in teletext mode<br />
using the Direct recording button . Scroll to the teletext page in which<br />
the programme to be recorded is listed if necessary. Select the programme you<br />
want to record by with and confi rm with the OK button. For “Timer data,"<br />
select the VCR or DVD recorder and whether you want to record once or a series<br />
of times. Confi rm with OK.<br />
Teletext menu<br />
MENU<br />
Display teletext menu<br />
100 100 ARD-Text 10.09.04 14:14:42<br />
ARD TEXT<br />
Teletext im Ersten<br />
Index<br />
> 101<br />
Bulmahn: Bildung statt Eigenheim . . . . . . . . 120<br />
Wird auch der Nahverkehr teurer . . . . . . . . 121<br />
Australien: Keine Zugeständnisse . . . . . . . . 122<br />
Tote bei Zugunglück in Schweden . . . . . . . . 532<br />
Tennis: Haas unterliegt Hewitt . . . . . . . . . . . . 204<br />
Formel 1: Schumacher erneut vorne . . . . . . . 213<br />
cording<br />
Tagesschau . . 110/112 Kultur. . . . . . . . . 500<br />
Wetter. . . . . . . . . . . 170 Gesellschaft . . . 530<br />
Sport. . . . . . . 200/600 Lotto/Toto . . 666<br />
<strong>TV</strong> Guide . . . 300/400 Wirtschaft. . . . . . 700<br />
Menu<br />
Internet: www.ard-text.de<br />
Settings<br />
Inhalt tagesschau Newsflash<br />
Personal text pages ...<br />
INFO END<br />
Reveal<br />
Re<br />
Here you will fi nd functions such as<br />
• “Newsfl ash”, this is an on-screen display of the latest messages (e.g.<br />
page 111).<br />
• “Reveal” concealed information, e.g. VPS pages in the station preview<br />
pages.<br />
• Programme wizard for recording via teletext.<br />
In the settings, you will fi nd menus to defi ne the station preview pages, subtitle<br />
pages and personal text pages, and menus to set the character set selection as<br />
well as HiText graphics.<br />
- 28
Digital Recorder –<br />
About the Digital Recorder system<br />
Your <strong>Loewe</strong> <strong>TV</strong> set is equipped with a Digital Recorder that includes a hard disk.<br />
You can use this to record and playback picture and sound from <strong>TV</strong> programmes,<br />
like with a VCR or DVD recorder. However, the possibilities of the Digital<br />
Recorder are for more versatile than those of a VCR or DVD recorder:<br />
<strong>TV</strong> viewing with time shift<br />
The Digital Recorder always records the <strong>TV</strong> programme currently playing (if the<br />
continuous operation is switched on).<br />
• Time shift<br />
You can stop a <strong>TV</strong> programme at any time and continue playing it later with<br />
a time shift. The maximum time shift may be set to 2 hours. The recording<br />
starts again from the beginning and the old content is deleted every time<br />
you switch stations.<br />
• Fast navigation by jumping<br />
Jump backwards and forwards in the movie at the press of a button. The<br />
jump distance is adjustable.<br />
In addition, the special <strong>Loewe</strong> function ”Smart jump“ ensures that for each<br />
change in jump direction the jump distance is cut in half. This way you can<br />
feel your way quickly to a certain spot in the time shift playback.<br />
• Fast forward and rewind<br />
You can fast forward and rewind at three different speeds in the programme<br />
you are viewing with time shift.<br />
• Slow motion<br />
You can watch the programme you are viewing with a time shift at four<br />
different slow motion speeds.<br />
• Subsequent archive recording<br />
You can also decide to copy the whole <strong>TV</strong> programme into the Digital<br />
Recorder‘s archive at the end of a <strong>TV</strong> programme you have been watching<br />
with a time shift.<br />
• Setting bookmarks<br />
During a football match, for example, you can fl ag goals or exciting scenes.<br />
For this, the time-shift recording is converted into an archive recording. For<br />
later playback, you can play bookmarks as highlights. 30 seconds before<br />
and after the set bookmark are played.<br />
• Replay function<br />
For instance, if you see a football match as live picture, you can jump back<br />
40 seconds at the push of a button and watch the scene again. You see the<br />
live picture at the same time in a PIP picture.<br />
Digital Recorder archive<br />
You can record movies you want to watch later in the Digital Recorder‘s archive.<br />
The archive holds between 20 and 100 hours of movies, depending on the<br />
recording quality set.<br />
If EPG or teletext data are available, the Digital Recorder stores the title and<br />
additional information about each programme in the archive.<br />
You start playing your recordings from the archive.<br />
If bookmarks were set, these recordings are fl agged accordingly. You can then<br />
start playback so that the bookmarks are played as highlights.<br />
Select your favourite programme comfortably from the EPG or teletext for recording<br />
and watch the programmes later from the Digital Recorder‘s archive.<br />
An automatic delete manager always ensures there is suffi cient recording space<br />
for new movies.<br />
• Sort titles<br />
You can have the programmes displayed chronologically or in alphabetical<br />
order. This way you can quickly fi nd the movie you want to watch.<br />
• Edit titles<br />
You can change the title of a programme in the archive, if necessary.<br />
• Parental lock<br />
Protect archive recordings from unauthorised access by using the parental<br />
lock.<br />
• Delete protection<br />
Set the delete protection for a movie to prevent it from being deleted automatically<br />
by the Delete Manager.<br />
• Co py<br />
Set the delete protection for a movie to prevent it from being deleted automatically<br />
by the Delete Manager.<br />
29 -
Digital Recorder – About the Digital Recorder system<br />
Archive recording<br />
You can playback a recorded programme from the archive at the same time as<br />
recording a <strong>TV</strong> programme into the archive. You can also play the same programme<br />
you are currently recording with a time shift. During archive recording,<br />
you can also watch another programme.<br />
• Immediate recording<br />
Record interesting programmes straight into the archive with the record<br />
button. You can also transfer programmes you have watched with a time<br />
shift to the archive at the end of the programme without losing what you<br />
have already recorded.<br />
• Timer-controlled<br />
Select your favourite programme comfortably from the EPG or teletext for<br />
recording. The Digital Recorder records up to 50 timer recordings - even<br />
in your absence. Watch the programmes later from the Digital Recorder‘s<br />
archive.<br />
• Serial recording<br />
Use the serial recording tolerance setting to avoid recording a serial more<br />
than once when it is broadcast more than once a day. The serial is only recorded<br />
if it begins within a given time interval (start time + serial recording<br />
tolerance).<br />
• Time shift <strong>TV</strong> with archive recording<br />
If you have programmed recording and come home later, you can watch the<br />
movie with a time shift while the rest is still being recorded.<br />
• Bookmarks<br />
To fi nd interesting scenes in a movie later, you can manually set bookmarks.<br />
In addition, there also are automatically set bookmarks every time a broadcast<br />
is changed. You can jump to each of the bookmarks at the press of a<br />
button in succession.<br />
• Playing highlights<br />
For recordings with manually set bookmarks, you can limit the playback to<br />
the highlights. You then see the scenes 30 seconds before and after the set<br />
bookmarks. If there is more than one bookmark, the highlights are played<br />
one after the other.<br />
• Cut/Hide functions<br />
Cut out superfl uous sections before and after a recorded programme. Set<br />
hiding marks around uninteresting sections to watch a movie without interruptions<br />
or to archive it on VCR/DVD-R.<br />
Limitations during PIP operation<br />
If on the main screen you see the live picture and you open the PIP picture,<br />
generally the background recording for time-shift <strong>TV</strong> is ended and deleted.<br />
With archive recording and time shift <strong>TV</strong>, there may be limitations on the stations<br />
which you can select for the PIP picture.<br />
Archive playback<br />
All the recorded programmes can be selected in the archive and played. During<br />
archive playback, another programme can be recorded into the archive.<br />
• Fast forward and rewind<br />
Fast forward and rewind the movie at three different speeds.<br />
• Slow motion<br />
Watch the playback at four different slow motion speeds.<br />
• Fast navigation by jumping<br />
Jump backwards and forwards in the movie at the press of a button. The<br />
jump distance is adjustable.<br />
In addition, the special <strong>Loewe</strong> function ”Smart jump“ ensures that for each<br />
change in jump direction the jump distance is cut in half. This way you can<br />
feel your way quickly to a certain spot of the recording.<br />
- 30
Digital Recorder – Settings for the Digital Recorder<br />
You can use the Digital Recorder with the values set at the factory initially. In<br />
this case, please continue reading on page 33.<br />
However, you should change the settings later to adjust the Digital Recorder to<br />
meet your own requirements. In the process, you can determine the recording<br />
quality and the recording capacity of the hard disk for analogue <strong>TV</strong> signals, you<br />
can set the Digital Recorder continuous operation for viewing with a time shift,<br />
the maximum time shift, the jump distance, Smart jump and the serial recording<br />
tolerance.<br />
You can adjust the settings in the Digital Recorder menu, which is a sub-menu<br />
of the DR archive.<br />
Call the archive with the red coloured key.<br />
DR archive<br />
27.08. 3Sat AVO-Session Basel 2002<br />
28.08. ARD Fußball-WM Deutschland-Polen<br />
free capacity 49:42 hrs<br />
OK<br />
Setting recording capacity/quality<br />
For signals from analogue terrestrial/cable stations, set the recording quality to<br />
very high, high, medium or standard. Signals from DVB stations are recorded<br />
directly, and therefore always at high quality. In the list above, you can see the<br />
recording capacity still available for the Digital Recorder (call up with the INFO<br />
button if necessary). Select a higher quality if you intend to copy the programme<br />
to a VCR or DVD recorder.<br />
The factory default setting for the recording quality is ”high“.<br />
OK<br />
OK<br />
Mark the ”Recording quality“.<br />
For the setting, mark the menu line below.<br />
Recording quality<br />
To record analogue stations you can set the recording qualtity,<br />
which alters the recording capacity. The following applies if<br />
recordings are only made from analogue sources:<br />
Foe recording quality: remaining recording capacity:<br />
very high<br />
approx. 13:50 hrs.<br />
high<br />
approx. 21:50 hrs.<br />
medium<br />
approx. 32:50 hrs.<br />
standard<br />
approx. 65:40 hrs.<br />
21:30 - 22:00 Kultursendung<br />
MENU<br />
Detail OK View Edit/protect<br />
TEXT<br />
P+<br />
P– Page /<br />
Call the Digital Recorder menu with the MENU button.<br />
Switching Digital Recorder continuous operation on/off<br />
Recording takes place on a constant basis with the Digital Recorder continuous<br />
operation ”on“. You can then watch <strong>TV</strong> with a time shift at any time.<br />
Only archive recordings and archive playback are possible in the ”off“ mode.<br />
The factory default setting is the ”on“ mode.<br />
OK<br />
OK<br />
OK<br />
Digital Recorder menu<br />
DR continuous operation Recording quality<br />
on ...<br />
Mark ”Digital Recorder continuous operation“.<br />
For the setting, mark the menu line below.<br />
Digital Recorder menu<br />
DR continuous operation<br />
on<br />
Select ”on“ or ”off“.<br />
off<br />
Delete/copy<br />
Sort alphabetically<br />
INFO<br />
END<br />
INFO<br />
MENU<br />
END<br />
Maximum time shift<br />
INFO<br />
END<br />
In<br />
OK<br />
y high<br />
Select the recording quality.<br />
Setting maximum time shift<br />
Digital Recorder menu<br />
Recording quality<br />
high medium standard<br />
This time indicates the maximum possible time between the time shift picture<br />
and the live picture without losing any of the programme. It may be between 30<br />
minutes and 2 hours. The factory default setting is ”60 min“. You can trace the<br />
programme back for this time. If you stop the programme for longer than the<br />
set time, the <strong>TV</strong> set switched to the playback mode.<br />
OK<br />
OK<br />
OK<br />
Mark ”Maximum time shift“.<br />
For the setting, mark the menu line below.<br />
30 min<br />
Digital Recorder menu<br />
Maximum time shift<br />
60 min 90 min 120 min<br />
Select the time.<br />
INFO<br />
INFO<br />
END<br />
END<br />
very<br />
31 -
Digital Recorder – Settings for the Digital Recorder<br />
Inform about hidden sections<br />
For the archive playback, you can hide parts of the recording so that these parts<br />
are skipped when you play the recording later or copy it to a recorder. When you<br />
reach the start of a hidden section during playback, the system informs you of this<br />
and you can undo the hide setting. The factory default setting for this is ”yes“.<br />
Setting serial recording tolerance<br />
To avoid recording a serial episode more than once when it is shown several times<br />
a day, a tolerance time must be entered.<br />
The serial is then only recorded when it starts within the start time ± serial recording<br />
tolerance. A serial tolerance of ± 30 minutes is the factory default setting.<br />
OK<br />
Mark ”Inform about hidden sections“.<br />
OK<br />
Mark the ”Serial recording tolerance“ menu item.<br />
OK<br />
OK<br />
For the setting, mark the menu line below.<br />
no<br />
Select ”yes“ or ”no“.<br />
Setting the jump distance<br />
Digital Recorder menu<br />
Inform about hidden sections<br />
yes<br />
For viewing with a time shift and for the archive playback, you can set a jump<br />
distance (in minutes) to jump forwards or backwards comfortably in the movie<br />
with the drive buttons or . Or you can switch the jump distance off so that<br />
jumping is not possible (”no“). The factory default setting is 2 minutes jump<br />
distance.<br />
INFO<br />
END<br />
AV<br />
OK<br />
For the setting, mark the menu line below.<br />
Digital Recorder menu<br />
Serial recording tolerance<br />
+–30 min (0 – 60) 0 ... 9<br />
Enter the time with the numeric buttons on the remote control<br />
(always enter two digits for 01 to 60 minutes).<br />
Setting pre-record time and post record time<br />
You can set a pre-record and post record time for timer recordings made without<br />
VPS. This reduces the risk of parts of the programme not being recorded because<br />
it starts earlier and/or fi nishes later. There is no factory default setting for the prerecord<br />
time; the factory default setting for the post record time is 5 minutes.<br />
INFO<br />
END<br />
OK<br />
Mark ”Jump distance“.<br />
MENU<br />
Call the <strong>TV</strong> menu in the <strong>TV</strong> mode.<br />
OK<br />
For the setting, mark the menu line below.<br />
OK<br />
Mark the ”Recording“ menu item.<br />
AV<br />
Digital Recorder menu<br />
Jump distance<br />
yes, 02 min (0 – 15) 0 ... 9<br />
Enter the time with the numeric buttons on the remote control<br />
(always enter two digits for 01 to 15 minutes).<br />
Switching Smart jump off/on<br />
no<br />
By using an intelligent jump function, you can quickly and easily feel your way<br />
to a certain point in the recording (with a time shift or in the archive). After each<br />
change in direction when jumping, the jump distance is cut in half. Refer to the<br />
next page for more information on the application. The factory default setting<br />
has Smart jump switched on.<br />
INFO<br />
END<br />
OK<br />
AV<br />
OK<br />
Mark for the menu line below.<br />
Mark ”Pre-record time“ and ”Post record time“.<br />
<strong>TV</strong> menu<br />
Recording<br />
Pre-record time<br />
00 min (0 – 15) 0 ... 9<br />
Enter the time with the numeric buttons on the remote control<br />
(always enter two digits for 01 to 15 minutes, and for the post<br />
record time 01 to 60 minutes).<br />
INFO<br />
END<br />
OK<br />
Mark ”Smart jump“<br />
OK<br />
For the setting, mark the menu line below.<br />
no<br />
Digital Recorder menu<br />
Smart Jump<br />
yes<br />
INFO<br />
END<br />
OK<br />
Select ”yes“ or ”no“.<br />
- 32
Digital Recorder – <strong>TV</strong> viewing with time shift<br />
The Digital Recorder continuous operation is switched on as the factory default<br />
setting. The <strong>TV</strong> programme you are watching is recorded automatically.<br />
In DR continuous operation the DR+ display lights green. If the DR continuous<br />
operation is switched off, the DR+ display lights up white.<br />
Note: Programmes with copy protection (e.g. Macrovision) cannot be watched<br />
with a time shift for legal reasons.<br />
Interruption<br />
You want to interrupt a programme to answer a phone call, for<br />
example. Press the Pause button.<br />
10 3Sat 21:45 - 22:15 Eifellandschaft<br />
21:15 21:48 23:15<br />
DR archive<br />
END<br />
The <strong>TV</strong> picture freezes and the Digital Recorder display appears.<br />
Above, you can see the station number and name, and if EPG or teletext data<br />
are available the start and end of the current programme and its title.<br />
The time at which the time shifted recording begins is displayed in front of the<br />
bar. The time at which the time shift memory will be completely full is shown<br />
after the bar. The grey bar indicates how much of the available recording time<br />
has been used up. The time displayed inside the bar is the time at which the<br />
Pause button was pressed.<br />
Continue (Viewing with time shift)<br />
You want to carry on watching the programme at the end of the phone call.<br />
10 3Sat 21:45 - 22:15 Eifellandschaft<br />
21:15<br />
DR archive<br />
21:48 23:15<br />
Press the Pause button again or the Play button .<br />
10 3Sat 21:45 - 22:15 Eifellandschaft<br />
21:15 21:48 23:15<br />
Now you will see the <strong>TV</strong> programme with a time shift from exactly the point in<br />
time you fi rst pressed the Pause button. The Play symbol appears in place of the<br />
Pause symbol.<br />
Jumping<br />
If a jump distance has been set, you can quickly jump while viewing with a time<br />
shift by briefl y pressing the drive buttons in the jump distance set; this<br />
enables you to jump past uninteresting sections quickly.<br />
jump forwards ...<br />
Smart jump<br />
10 3Sat 21:45 - 22:15 Eifellandschaft<br />
21:15 21:50 23:15<br />
... or backwards<br />
10 3Sat 21:45 - 22:15 Eifellandschaft<br />
21:15 21:48 23:15<br />
The Smart jump function is included to enable fast and easy access to a certain<br />
place within the programme which has been recorded with a time shift.<br />
The factory default setting has Smart jump switched on.<br />
When Smart jump is switched on, the jump distance is cut in half after each<br />
change in the jump direction while jumping.<br />
The playback symbol is yellow when the Smart jump function is active.<br />
For instance, you are looking for the beginning of a programme.<br />
In this case, press the button several times to jump back (pre-set jump<br />
distance).<br />
If you have jumped past the beginning of the programme, jump in the opposite<br />
direction. Briefl y press the button .<br />
This jump in the opposite direction is only carried out for half the jump distance.<br />
Now jump forward using until you see the beginning of the programme.<br />
If you have jumped past the beginning of the programme, jump back using .<br />
In the process, the jump distance is cut in half again.<br />
By cutting the jump distance in half when changing the jump direction, you can<br />
feel your way up close to a particular section.<br />
The pre-set jump distance is used again if you jump more than three times in<br />
the same direction or if the Digital Recorder display disappears.<br />
Switching to the live picture<br />
Press the Stop button.<br />
You will then see the live picture of the programme.<br />
33 -
Digital Recorder – <strong>TV</strong> viewing with time shift<br />
Fast forward and rewind<br />
You can fast forward and rewind at three different speeds during time-shifted <strong>TV</strong><br />
viewing or archive playback. No sound is audible during winding.<br />
Press the Fast Forward or Rewind button a little longer.<br />
Increase speed: press again briefl y.<br />
The speed increases every time you press the button until<br />
eventually switching back to the initial speed.<br />
Playback begins automatically upon reaching the end of the recording. You are<br />
about 2 seconds behind the live picture or when rewinding at the beginning of<br />
the time-shifted recording.<br />
Slow motion forwards<br />
10 3Sat 21:45 - 22:15 Eifellandschaft<br />
21:15 21:44 23:15<br />
10 3Sat 21:45 - 22:15 Eifellandschaft<br />
21:15 21:48 23:15<br />
10 3Sat 21:45 - 22:15 Eifellandschaft<br />
21:15 21:56 23:15<br />
Press the Play button when you reach the point from which<br />
you want to continue watching.<br />
10 3Sat 21:45 - 22:15 Eifellandschaft<br />
21:15 21:56 23:15<br />
If Pause is active (freeze picture) you can play (forward only) at four slow-motion<br />
speeds. No sound is audible during slow motion.<br />
Press the Pause button.<br />
10 3Sat 21:45 - 22:15 Eifellandschaft<br />
21:15<br />
DR archive<br />
21:48 23:15<br />
Briefl y press the Fast Forward button.<br />
10 3Sat 21:45 - 22:15 Eifellandschaft<br />
21:15 21:49 23:15<br />
Increase speed:<br />
Press the Fast Forward button several times briefl y.<br />
The speed increases every time you press the button until eventually switching<br />
back to the initial speed.<br />
Highlight function<br />
For example, you want to fl ag interesting scenes and goals of sports programmes<br />
in order to watch them again when playing the recording.<br />
You can set bookmarks while your are watching the live picture or viewing with<br />
a time shift.<br />
Press the Play button little longer in order to set the<br />
bookmark.<br />
The time-shifted recording that is already active in the background is converted<br />
into an archive recording. Every time the Play buttonis pressed down again a<br />
little longer, a new bookmark is set.<br />
Note: If no programme info is available from teletext or EPG, the “Recording<br />
duration” menu appears after pressing the Play button for the fi rst time. Select<br />
the desired recording duration and confi rm using OK.<br />
Recordings that include manually set bookmarks can be played as highlights.<br />
The chapter ‘Archive playback’ describes how this works on page 41.<br />
Replay function<br />
10 3Sat 21:45 - 22:15 Eifellandschaft<br />
21:15 21:50 23:15<br />
10 3Sat 21:45 - 22:15 Eifellandschaft<br />
21:15 21:50 23:15<br />
For example, you would like to watch interesting scenes or goals in sports programmes<br />
again straight away. This is possible if you are viewing a live picture.<br />
Briefl y press the Rewind button to repeat the scenes.<br />
1 ARD 20:15 - 22:15 Fußball WM: Deutschland-Polen<br />
20:15 20:46 22:15<br />
The set jumps back 40 seconds into time-shift mode. The playback fl ag is yellow<br />
(Smart jump active). If the Smart jump took you back too far, you can jump<br />
forward 20 seconds with the Fast forward button .<br />
The live picture is displayed at the same time as small PIP. This PIP picture can<br />
be closed by pressing the PIP button without having to leave the time-shifted<br />
playback.<br />
Terminate the replay function with the Stop button. Now you see the live<br />
picture again.<br />
- 34
Digital Recorder – <strong>TV</strong> viewing with time shift<br />
Converting a time-shifted recording into an archive recording<br />
You can convert the programme you are currently recording with a time shift<br />
into an archive recording.<br />
Press the Record button.<br />
Recording duration (min.)<br />
current programme OK 30 60 90 120 240<br />
OK<br />
confirm<br />
If you want to transfer the current programme to the archive,<br />
OK<br />
mark ”current programme“ (only if EPG or teletext data are<br />
available) or mark one of the given times or mark ”“ and<br />
enter the recording duration with the numeric buttons on the<br />
OK<br />
remote control and confi rm with OK.<br />
If the beginning of the programme was recorded, it is adopted from the beginning,<br />
otherwise from the point in time you switched over to this station. This<br />
way you can also decide to transfer a recording to the archive at the end of the<br />
programme. The whole programme is still transferred to the archive, providing it<br />
was already recorded.<br />
You can also transfer a programme which has already fi nished to the archive.<br />
Just rewind to the programme you want to archive and start recording with<br />
”current programme”.<br />
The ”Timer data“ menu is displayed.<br />
Timer data<br />
22:00 SAT1 echt wahr!<br />
Recorder DR<br />
Station<br />
0049 SAT1<br />
Date 03.08.2005<br />
Recording time 22:00 until 22:45<br />
VPS<br />
no<br />
Recording type once only<br />
OK confirm<br />
Lock movie<br />
set delete protection<br />
If the DVB subtitles are switched on continuously (see page 36, chapter ”Recording<br />
with DVB subtitles“), you see the item ”DVB subtitles (yes/no)“ instead of<br />
the ”VPS“ menu item. Here, you can switch the DVB subtitles off for the current<br />
recording.<br />
Note: If you want to record a programme without DVB subtitles (”DVB subtitles“<br />
– ”no“), the time-shifted recording that has been running until now is stopped<br />
and deleted. The archive recording starts after you have confi rmed the timer<br />
data with OK.<br />
Check the other timer data, change them if necessary and then confi rm with OK.<br />
The DR+ display changes from green to red with the start of an archive<br />
recording.<br />
INFO<br />
END<br />
180 <br />
DVD-REC<br />
INFO<br />
END<br />
During the archive recording, the bar showing the recording progress is red and<br />
the ”REC” message is shown for a current archive recording.<br />
When the programme to be recorded is selected, press the<br />
Play button to show the Digital Recorder‘s display.<br />
10 3Sat 21:45 - 22:15 Eifellandschaft REC<br />
21:15 21:50 23:15<br />
You can switch over to a different station during an archive recording, providing<br />
your <strong>TV</strong> set has another tuner. The recording process is continued.<br />
To switch back to the station you are currently recording, press the play button .<br />
You can also switch off the <strong>TV</strong> set into the stand-by mode. The recording process<br />
is continued.<br />
Status display when recording with a time shift and for<br />
archive recording<br />
When you call the status display, the recording progress bar is displayed.<br />
END<br />
Press the END button to show the status display.<br />
Display with time shift:<br />
10 3Sat 21:45 - 22:15 Eifellandschaft<br />
21:15 21:48 23:15<br />
Time shift: 12:48 min<br />
22:01<br />
Display with live picture during an archive recording:<br />
10 3Sat 21:45 - 22:15 Eifellandschaft REC<br />
21:15 22:02 23:15<br />
Live picture<br />
22:02<br />
Display with time shift during an archive recording.<br />
10 3Sat 21:45 - 22:15 Eifellandschaft REC<br />
21:15 21:48 23:15<br />
Time shift: 12:48 min<br />
22:01<br />
For archive recording, the progress bar is red; otherwise it is grey.<br />
35 -
Digital Recorder –<br />
Archive recording<br />
Immediate recording<br />
You can start archive recording with the Record button, as described above. The<br />
system starts recording from the station you are currently watching.<br />
Start immediate recording<br />
Mark ”current programme“ (only if EPG or teletext data are<br />
OK<br />
available) or mark one of the given times or mark ”“ and<br />
enter the recording duration with the numeric buttons on the<br />
remote control and confi rm with OK. If the DR continuous<br />
OK<br />
operation is switched off, recording begins after pressing the<br />
OK key button (in this case there is no transfer of the beginning<br />
of the programme as described previously).<br />
The ”Timer data“ menu is displayed.<br />
If the DVB subtitles are switched on continuously (see chapter ”Recording with<br />
DVB subtitles“ on this page), you see the item ”DVB subtitles (yes/no)“ instead<br />
of the ”VPS“ menu item. Here, you can switch the DVB subtitles off for the<br />
current recording.<br />
Note: If you want to record a programme without DVB subtitles (”DVB subtitles“<br />
–”no“), the time-shifted recording that has been running until now is stopped<br />
and deleted. The archive recording starts after you have confi rmed the timer<br />
data with OK.<br />
Check the other timer data, change them if necessary and then confi rm with OK.<br />
The DR+ display lights red with the start of an archive recording.<br />
Note: Programmes with copy protection (e.g. Macrovision) cannot be watched<br />
with a time shift for legal reasons.<br />
Setting bookmarks during archive recording<br />
During immediate recording or a running timer recording, you can set bookmarks<br />
at interesting sections (press the Play button somewhat longer). You<br />
will see the message “Bookmark set!”. This enables you to fi nd this part of the<br />
recording quickly during playback. You can set up to 15 bookmarks.<br />
In addition, bookmarks are set at the beginning and the end of every broadcast<br />
automatically.<br />
Viewing with time shift during archive recording<br />
As laid out in the chapter ”<strong>TV</strong> viewing with time shift,“ you can interrupt the<br />
programme with the Pause button. The recording process is continued.<br />
You can end the interruption by pressing the Pause button or the Play button<br />
. You are now viewing the archive recording with a time shift.<br />
Jumping, fast forwarding and rewinding and slow motion all work as laid out for<br />
the time-shifted <strong>TV</strong> viewing. Back to the live picture – press the Stop button once.<br />
- 36<br />
Recording duration (min.)<br />
INFO<br />
current programme 30 60 90 120 240<br />
OK<br />
OK<br />
confirm<br />
END<br />
180 <br />
Watching other stations during archive recording<br />
After you have started the recording, you can switch to another station, providing<br />
your <strong>TV</strong> set has another tuner.<br />
The recording process is continued in the background.<br />
To switch back to the station you are currently recording, press the play button.<br />
If your <strong>TV</strong> set does not have another tuner, you cannot switch to another station.<br />
The station is blocked during recording.<br />
Viewing another movie from the archive during archive recording<br />
After you have started the recording, you can also watch a programme you have<br />
already recorded.<br />
To do this, call the DR archive with the red coloured key.<br />
Select the programme and start the playback with the OK button.<br />
The recording process is continued in the background.<br />
Switching off the <strong>TV</strong> set during recording<br />
You can switch off the <strong>TV</strong> set during recording. Of course, only into the stand-by<br />
mode, not with the mains switch. The indicator on the <strong>TV</strong> set lights orange. The<br />
recording process is continued in the stand-by mode.<br />
Stop recording early<br />
If you want to terminate an active archive recording ...<br />
Press the Stop button<br />
OK<br />
confi rm with the OK button.<br />
The recording process is ended. The material recorded up to now is saved on the<br />
hard disk and may be played back via the DR archive.<br />
You can also end a running recording by deleting the entry in the timer list. You<br />
can fi nd more information on this on page 39.<br />
Recording with DVB subtitles<br />
OK Stop recording END Continue recording<br />
Switch on the DVB subtitles. To fi nd this setting, go to <strong>TV</strong> menu - Settings<br />
- Miscellaneous - DVB subtitles. Select DVB subtitles ”for translation” or “for the<br />
Hearing Impaired” here.<br />
You cannot switch to another station during an archive recording.<br />
Subtitles of analogue Teletext cannot be recorded.<br />
When playing the recording, the subtitles cannot be hidden or the language<br />
selection changed.<br />
Note: Leave the DVB subtitles switched off if you usually do not use them or they<br />
are not broadcast. Only by doing this will you have the possibility to switch to<br />
another station during an archive recording.
Digital Recorder – Archive recording<br />
Timer recording<br />
As with a VCR, you can make timer recordings with the Digital Recorder. The<br />
Digital Recorder is of course much more comfortable to handle.<br />
You can programme the timer using the EPG, teletext or manually. You can<br />
programme up to 50 timer recordings.<br />
If you have programmed timer recordings, the <strong>TV</strong> set may only be switched off<br />
into the stand-by mode.<br />
Do not switch the <strong>TV</strong> set off with the mains switch and do not pull the mains<br />
plug from the power outlet. If you do, then the timer recording will not take<br />
place.<br />
If a timer recording is made in standby mode, the indicator on the <strong>TV</strong> set lights<br />
orange and the DR+ display lights red in addition.<br />
Programmed timers for the Digital Recorder are displayed in the timer list.<br />
Programming a timer recording with the EPG<br />
EPG<br />
OK<br />
Call EPG<br />
Mark the desired programme.<br />
16 SAT 1<br />
Date<br />
Time<br />
Channels<br />
Topics<br />
EPG (Electronic Programme Guide) Fri 10.09./20:48<br />
Fri 10.09.<br />
22:00 23:00 00:00 01:00 02:00 03:00<br />
all<br />
all<br />
22:00 VOX Zurück in die Vergangenheit<br />
22:00 ZDF WISO<br />
22:00 BR3 Immer weiter, immer höher und dann<br />
22:00 SAT1 echt wahr!<br />
OK<br />
22:00 RTL Gute Zeiten, schlechte Zeiten<br />
22:05 MDR Mach dich ran<br />
22:15 ARD Tagesschau<br />
22:15 HR3 Tagesschau<br />
22:15 NDR Tagesschau<br />
Familienserie - Sturzflug<br />
<br />
Call timer overview<br />
TEXT Detail Memorize Record<br />
OK<br />
Page / 0 ... 9 select time Date, ... , topics<br />
P+<br />
P–<br />
END<br />
MENU<br />
Timer overview Fri 24.08./14:12<br />
27.08. 23:45-00:45 3SAT AVO-Session Basel 2002<br />
Press the red coloured key to programme the programme as<br />
a timer recording. The Record dialogue box opens.<br />
New recording<br />
Change<br />
Delete<br />
Completed timer recordings of the Digital Recorder are shown in the DR archive.<br />
END<br />
INFO<br />
Timer data<br />
22:00 SAT1 echt wahr!<br />
Recorder DR<br />
Station<br />
0049 SAT1<br />
Date 03.08.2005<br />
Recording time 22:00 until 22:45<br />
VPS<br />
no<br />
Recording type once only<br />
OK confirm<br />
Lock movie<br />
set delete protection<br />
DVD-REC<br />
INFO<br />
END<br />
red coloured key: Call the DR archive.<br />
DR archive<br />
27.08. 3Sat AVO-Session Basel 2002<br />
28.08. ARD Fußball-WM Deutschland-Polen<br />
21:30 - 22:00 Kultursendung<br />
TEXT Detail OK View Edit/protect<br />
P+<br />
P–<br />
Page /<br />
free capacity 49:42 hrs<br />
Delete/copy<br />
Sort alphabetically<br />
OK<br />
END<br />
INFO<br />
MENU<br />
You can programme serial recordings in the menu line ”Recording type”. The<br />
timer then searches for the serial in the station set every day. Please see the<br />
<strong>instructions</strong> for setting the serial recording tolerance on page 32.<br />
You can lock the recording with the parental lock by pressing the green coloured<br />
key and with the yellow coloured key you can protect the recording from<br />
being deleted automatically.<br />
If the DVB subtitles are switched on continuously (see page 36, chapter ”Recording<br />
with DVB subtitles“), you see the item ”DVB Subtitles (yes/no)“ instead of<br />
the ”VPS“ menu item. Here, you can switch the DVB subtitles off for the current<br />
recording.<br />
Check the other timer data, change them if necessary and then confi rm with OK.<br />
A red dot is set in front of the title of the programme in the EPG.<br />
If a programme is already marked with a red dot, you can delete the programmed<br />
timer by pressing the red coloured key (the red dot disappears).<br />
37 -
Digital Recorder – Archive recording<br />
Programming a timer recording via analogue teletext<br />
Call the station on which you want to make a timer recording.<br />
TEXT<br />
OK<br />
OK<br />
Call the teletext.<br />
Press the Record button. The fi rst programme preview page is<br />
displayed.<br />
Select the programme page containing the programme you<br />
wish to record with the green coloured key.<br />
Select the time when the programme begins with the arrow<br />
buttons .<br />
301 301 3satText O3.O9.O3 22:12:42<br />
Programm<br />
Heute in 3sat<br />
Mittwoch, 03. September<br />
06.55 anders fernsehen<br />
07.00 Spanien - Sprache, Land<br />
und Leute (3/13)<br />
07.30 Türkei - Sprache, Land<br />
und Leute (16/26)<br />
08.00 Alpenpanorama<br />
09.00 Zeit im Bild<br />
09.05 Lyrik für alle<br />
09.15 da capo . . . . . . . . . . . . . . . 305<br />
10.15 Max Reger: Träume am Kamin<br />
10.50 Das Einsiedler Welttheater<br />
12.30 Lesen! . . . . . . . . . . . . . . . . 306<br />
– + <strong>TV</strong> Heute 2 Wetter Reise<br />
Select programme<br />
OK Record<br />
Press OK to programme the programme as a timer recording.<br />
Timer data<br />
09:15 3Sat da capo<br />
Recorder DR<br />
Station<br />
0010 3Sat<br />
Date 03.08.2005<br />
Recording time 09:15 until 10:15<br />
VPS<br />
yes<br />
Recording type once only<br />
OK<br />
confirm<br />
Lock movie<br />
set delete protection<br />
DVD-REC<br />
Check the timer data, change them if necessary and then confi rm with OK. You<br />
can lock the recording with the parental lock by pressing the green coloured<br />
key and with the yellow coloured key you can protect the recording from<br />
being deleted automatically.<br />
If the DVB subtitles are switched on continuously (see page 36, chapter ”Recording<br />
with DVB subtitles“), you see the item ”DVB Subtitles (yes/no)“ instead of<br />
the ”VPS“ menu item. Here, you can switch the DVB subtitles off for the current<br />
recording.<br />
Check the other timer data, change them if necessary and then confi rm with OK.<br />
INFO<br />
END<br />
Programming a timer recording manually<br />
OK<br />
OK<br />
OK<br />
OK<br />
Call the timer list.<br />
Timer overview Fri 02.08./22:12<br />
03.08. 09:15-10:15 3SAT da capo<br />
03.08. 22:00-22:45 SAT1 echt wahr!<br />
TEXT Detail New recording Change<br />
Delete<br />
Press the red coloured key to programme a new recording.<br />
Recording wizard<br />
Via EPG<br />
Select ”Manual” with the arrow buttons .<br />
(VPS)<br />
Start programming with OK.<br />
Recording wizard<br />
Please specify the station you want to record from.<br />
Manual<br />
Station selection<br />
COMP. IN<br />
HDMI/DVI<br />
VGA<br />
AVS<br />
AV2<br />
AV1<br />
0 VIDEO<br />
1 ARD<br />
2 ZDF<br />
3 SAT.1<br />
4 RTL<br />
5 VOX<br />
OK Proceed<br />
0 9<br />
Select the station to be recorded ...<br />
... and adopt with OK.<br />
OK<br />
OK<br />
Via teletext (VPS)<br />
6 3SAT<br />
7 S–RTL<br />
8 N–<strong>TV</strong><br />
9 DSF<br />
10 TM3<br />
11 PRO7<br />
12 RTL 2<br />
13 WDR 3<br />
14 BR<br />
15 HR<br />
16 MDR 3<br />
17 N 3<br />
Manual<br />
INFO END<br />
Recording wizard<br />
Manual OK<br />
Via EPG Via teletext<br />
... Select station Change sorting<br />
Numerical<br />
INFO<br />
END<br />
INFO<br />
END<br />
END<br />
- 38
Digital Recorder – Archive recording<br />
The ”Timer data” menu is displayed.<br />
Deleting programmed timer entries<br />
Use this function in the timer list if you want to delete recordings already programmed<br />
or end a running timer recording.<br />
Timer data<br />
✳✳:✳✳ ARD - - - -<br />
Recorder DR<br />
Station 0001 ARD<br />
Date 03.08.2005<br />
Recording time ✳✳:✳✳ until ✳✳:✳✳<br />
VPS<br />
no<br />
Recording type once only<br />
Lock movie<br />
OK confirm<br />
set delete protection<br />
DVD-REC<br />
INFO<br />
END<br />
OK<br />
Call timer list<br />
Mark the timer to be deleted<br />
Timer overview Fri 24.08./14:12<br />
27.08. 23:45-00:45 3SAT AVO-Session Basel 2002<br />
In the ”Recorder” menu line, select ”DR” for Digital Recorder with the arrow<br />
buttons . For ”VPS”, select whether or not VPS is to be used (if it is available).<br />
Enter the date and the recording time for the timer recording with the<br />
numeric buttons on the remote control. Select under recording type whether you<br />
want to make a recording once only, daily, Mon-Fri or weekly.<br />
You can lock the recording with the parental lock by pressing the green coloured<br />
key and with the yellow coloured key you can protect the recording from<br />
being deleted automatically.<br />
If the DVB subtitles are switched on continuously (see page 36, chapter ”Recording<br />
with DVB subtitles“), you see the item ”DVB Subtitles (yes/no)“ instead of<br />
the ”VPS“ menu item. Here, you can switch the DVB subtitles off for the current<br />
recording.<br />
Confi rm the timer data with OK.<br />
OK<br />
press the yellow coloured key to delete the timer data<br />
confi rm with OK.<br />
The letters of a timer currently active are red. In this case, the recording is<br />
stopped.<br />
The Delete Manager<br />
New recording<br />
OK Confirm delete<br />
Change<br />
Delete<br />
Abort delete<br />
END<br />
INFO<br />
END<br />
INFO<br />
The Delete Manager always makes sure there is enough memory space on the<br />
hard disk for new recordings..<br />
When the capacity of the hard disk is almost exhausted, the old recordings are<br />
deleted.<br />
Recordings which you have marked with a delete protection are not deleted by<br />
the Delete Manager. You can delete these recordings manually.<br />
Setting and cancelling delete protection, see page 44.<br />
To avoid loss of data, we recommend you to copy important recordings onto<br />
video tape or a writable DVD.<br />
Delete the recordings from the Digital Recorder after copying.<br />
<strong>Loewe</strong> is not liable for data loss on the Digital Recorder’s hard disk.<br />
39 -
Digital Recorder –<br />
Archive playback<br />
You can fi nd a directory of your recordings in the DR archive. You can start playback,<br />
delete or copy recordings and call the timer from this list. Via ”Edit/protect,”<br />
you can change the name of an archive entry and activate or deactivate a<br />
delete protection.<br />
Call the DR archive<br />
Call the DR archive (red coloured key).<br />
You can switch between alphabetical and chronological sorting with the blue<br />
coloured key.<br />
The bar (on the right in the overview) shows you how much of the recording has<br />
been watched. The bar is empty for recordings which have not been watched;<br />
recordings which have been watched entirely have a bar fi lled completely; partially<br />
watched recordings have a bar which is fi lled for the parts already watched.<br />
If other programme data are available from the EPG or teletext, these are shown<br />
below the archive list for the entry just marked. Other information about the<br />
recording can be called with the TEXT button, if this is offered.<br />
Playing from the archive<br />
DR archive<br />
27.08. 3Sat AVO-Session Basel 2002<br />
28.08. ARD Fußball-WM Deutschland-Polen<br />
21:30 - 22:00 Kultursendung<br />
Detail OK View Edit/protect<br />
TEXT<br />
P+<br />
P– Page /<br />
free capacity 49:42 hrs<br />
Delete/copy<br />
Sort alphabetically<br />
OK<br />
END<br />
INFO<br />
MENU<br />
Setting bookmarks<br />
While playing an archive recording, you can set bookmarks by pressing the Play<br />
button for a little longer. If the drive display does not appear, you will see<br />
the “Bookmark set!“ message. A small bookmark symbol is set above the bar for<br />
the playback. You can set up to 15 bookmarks.<br />
This makes these places easy to fi nd later.<br />
Set bookmark (press button for a little longer)<br />
Archive 03.08.<br />
Setting another bookmark<br />
Automatically set bookmarks are grey. Manually set bookmarks are blue.<br />
Hint: Set a bookmark at the end of an uninteresting passage to skip over it<br />
quickly or to hide that section later.<br />
Jumping to bookmarks<br />
00:00 00:05 00:59<br />
Bookmark Highlights Bookmark ➝<br />
➝<br />
Archive 03.08.<br />
Show the drive display during archive playback.<br />
Archive 03.08.<br />
00:00 00:01 00:59<br />
Bookmark Highlights Bookmark ➝<br />
➝<br />
Der Wilde Westen<br />
00:00 00:12 00:59<br />
Bookmark Highlights Bookmark ➝<br />
➝<br />
Der Wilde Westen<br />
Der Wilde Westen<br />
OK<br />
OK<br />
Select a recording with the arrow buttons.<br />
Press the OK button to start playback.<br />
Archive 03.08. Der Wilde Westen<br />
00:00 00:05 00:59<br />
Bookmark<br />
➝<br />
Bookmark ➝<br />
Bookmark forward (blue coloured key)<br />
Archive 03.08. Der Wilde Westen<br />
00:00 00:05 00:59<br />
Bookmark Highlights Bookmark ➝<br />
➝<br />
Bookmark backward (red coloured key)<br />
Playing highlights from the DR archive<br />
Recordings with manually set bookmarks are fl agged with<br />
You can use the highlight playback for these.<br />
OK<br />
Select a recording fl agged with .<br />
in front of the bar.<br />
Archive 03.08.<br />
00:00 00:00 00:59<br />
Bookmark Highlights Bookmark ➝<br />
➝<br />
Der Wilde Westen<br />
Additionally, a bookmark is set at the beginning and end of the broadcast automatically<br />
which you can jump to with the red and blue coloured keys.<br />
Press the Play button.<br />
You will fi nd further information on playing highlights on the following page.<br />
- 40
Digital Recorder – Archive playback<br />
Playing highlights<br />
If there are manually set bookmarks in the current playback, they can be played<br />
as highlights one after the other automatically. 30 seconds before and after the<br />
set bookmark are played.<br />
The highlights are numbered chronologically and displayed consecutively, i.e.<br />
the playback always starts with highlight 1 again. The playing of highlights can<br />
be terminated by pressing the Stop button.<br />
END<br />
oder<br />
Show the drive display.<br />
Press the Play button for “Highlights”.<br />
Start playing highlights. As long as this drive display is shown, you jump to the<br />
next highlight with the blue coloured key and to the previous highlight with<br />
the red coloured key. You can also jump to the next highlight by pressing the<br />
Play buttonagain. This function is also available if no drive display is shown.<br />
Pressing the Stop button ends playing the highlights.<br />
Jumping<br />
If a jump distance has been set, you can jump by briefl y pressing the drive<br />
buttons .<br />
jump forwards ...<br />
Smart jump<br />
Archive 28.08.<br />
00:00 00:01 00:59<br />
Bookmark Highlights Bookmark ➝<br />
➝<br />
Archive 03.08.<br />
00:00 00:25 00:59<br />
Bookmark Highlights Bookmark ➝<br />
... or backwards<br />
➝<br />
Archive 03.08.<br />
Der Wilde Westen<br />
00:00 00:23 00:59<br />
Bookmark Highlights Bookmark ➝<br />
➝<br />
Fußball-WM Deutschland-Polen<br />
Archive 28.08. Fußball-WM Deutschland-Polen Highlight 1<br />
00:00 00:09 00:59<br />
Highlight Highlights stop Highlight ➝<br />
➝<br />
Der Wilde Westen<br />
The Smart jump function is included to enable fast and easy access to a certain<br />
place within the recording which is currently being played. The factory default<br />
setting has Smart jump switched on.<br />
When Smart jump is switched on, the jump distance is cut in half after each<br />
change in the jump direction while jumping.<br />
The playback symbol is yellow when the Smart jump function is active.<br />
For instance, you are searching for the beginning of the section where a portion<br />
of the recording is to be hidden.<br />
In this case, for example, press the button several times to jump forward<br />
(pre-set jump distance).<br />
If you have jumped past the desired part of the recording, jump in the opposite<br />
direction. Briefl y press the button . This jump in the opposite direction is only<br />
carried out for half the jump distance. Now press to jump back out of the<br />
area that is to be hidden.<br />
If in the process you jump past the place where you want to start the hide<br />
process, then jump forward using . In the process, the jump distance is cut in<br />
half again.<br />
By cutting the jump distance in half when changing the jump direction, you can<br />
feel your way up close to a particular section.<br />
The pre-set jump distance is reinstated if you jump more than three times in the<br />
same direction or if the Digital Recorder display disappears.<br />
Fast forward and rewind<br />
You can fast forward and rewind at three different speeds during archive playback.<br />
No sound is audible during winding.<br />
Press the Fast Forward or Rewind button a little longer.<br />
Archive 03.08.<br />
Der Wilde Westen<br />
00:00 00:19 00:59<br />
Increase speed: press again briefl y.<br />
The speed increases every time you press the button until<br />
eventually switching back to the initial speed.<br />
Archive 03.08.<br />
Der Wilde Westen<br />
00:00 00:19 00:59<br />
Archive 03.08.<br />
Der Wilde Westen<br />
00:00 00:34 00:59<br />
Press the Play button when you reach the point from which<br />
you want to continue watching.<br />
Archive 03.08.<br />
Der Wilde Westen<br />
00:00 00:35 00:59<br />
Bookmark Highlights Bookmark ➝<br />
➝<br />
You will see a freeze picture when you reach the end of the recording. When rewinding<br />
reaches the beginning, the Digital Recorder switches to playback mode.<br />
41 -
Digital Recorder – Archive playback<br />
Pause (freeze picture)<br />
Slow motion<br />
Switch to freeze picture with the Pause button.<br />
Archive 03.08. Der Wilde Westen<br />
00:00 00:19 00:59<br />
DR archive<br />
Delete/hide<br />
To continue playback press the Play button or press the<br />
Pause button again.<br />
If Pause is active (freeze picture) you can play (forward only) at four slow-motion<br />
speeds. No sound is audible during slow motion.<br />
Press the Pause button.<br />
Archive 03.08. Der Wilde Westen<br />
00:00 00:19 00:59<br />
DR archive<br />
Delete/hide<br />
Briefl y press the Fast Forward button.<br />
Archive 03.08.<br />
Der Wilde Westen<br />
00:00 00:19 00:59<br />
Increase speed:<br />
Press the Fast Forward button several times briefl y.<br />
The speed increases every time you press the button until<br />
eventually switching back to the initial speed.<br />
Archive 03.08.<br />
Der Wilde Westen<br />
00:00 00:23 00:59<br />
Deleting parts of the recording<br />
You can delete parts of an archive-recording up to the beginning and up to the<br />
end.<br />
Press the Pause button during archive playback at the<br />
point from which you want to delete up to the beginning or<br />
end of the archive recording.<br />
OK<br />
Archive 03.08. Der Wilde Westen<br />
00:00 00:19 00:59<br />
DR archive<br />
Delete/hide<br />
Now press the yellow coloured key for ”Delete/hide”.<br />
Archive 03.08.<br />
Der Wilde Westen<br />
00:00 00:19 00:59<br />
Delete from here to start<br />
Set hiding start<br />
Delete from here to end<br />
Delete bookmark<br />
Delete from here to the beginning with the red coloured key,<br />
from here to the end with the green coloured key.<br />
Archive 03.08. Der Wilde Westen<br />
00:00 00:19 00:59<br />
OK Confirm delete<br />
Abort delete<br />
Confi rm deletion with the OK button or cancel it with the red<br />
coloured key.<br />
Archive 03.08.<br />
00:00 00:00 00:40<br />
DR archive<br />
Der Wilde Westen<br />
Delete/hide<br />
In our case, 19 minutes were deleted so that the remaining length of the recording<br />
is only 40 minutes.<br />
Archive 03.08.<br />
Der Wilde Westen<br />
00:00 00:32 00:59<br />
- 42
Digital Recorder – Archive playback<br />
Hiding sections of the recording<br />
You can hide sections of an archive recording. For future playback and when<br />
transferring to a DVD or video recorder, the hidden sections are skipped.<br />
During the archive playback, press the Pause button at the<br />
place you want to begin hiding.<br />
Archive 03.08. Der Wilde Westen<br />
00:00 00:19 00:59<br />
DR archive<br />
Delete/hide<br />
Now press the yellow coloured key for ”Delete/hide”.<br />
Archive 03.08.<br />
Der Wilde Westen<br />
00:00 00:19 00:59<br />
Delete from here to start<br />
Set hiding start<br />
Delete from here to end<br />
Delete bookmark<br />
Set the beginning of the hidden section with the yellow<br />
coloured key.<br />
Archive 03.08. Der Wilde Westen Hide<br />
00:00 00:19 00:59<br />
Set hiding end<br />
Cancel hiding<br />
Continue playing by pressing the Pause button or the Play<br />
button.<br />
Archive 03.08. Der Wilde Westen Hide<br />
00:00 00:24 00:59<br />
Set hiding end<br />
Cancel hiding<br />
Press the yellow coloured key when you want to end hiding.<br />
Deleting bookmarks<br />
You can delete all manually set bookmarks. Bookmarks that were set automatically<br />
at the beginning and the end of a broadcast cannot be deleted . Manually<br />
set bookmarks are blue, automatically set bookmarks are grey.<br />
During archive playback, press the Pause button.<br />
Archive 03.08. Der Wilde Westen<br />
00:00 00:19 00:59<br />
DR archive<br />
Delete/hide<br />
Now press the yellow coloured key for ”Delete/hide”.<br />
Archive 03.08.<br />
Der Wilde Westen<br />
00:00 00:19 00:59<br />
Delete from here to start<br />
Set hiding start<br />
Delete from here to end<br />
Delete bookmark<br />
Delete the manually set bookmarks with the blue coloured<br />
key.<br />
Continue playing by pressing the Pause button or the Play<br />
button.<br />
Archiv 03.08.<br />
00:00 00:24<br />
00:59<br />
Lesezeichen<br />
Der Wilde Westen<br />
➝<br />
Lesezeichen ➝<br />
Automatically set bookmarks are not deleted.<br />
Note: In addition, you have the option of deleting the bookmarks via ”DR archive<br />
– delete/copy“. See page 45.<br />
Archive 03.08.<br />
00:00 00:24 00:59<br />
Bookmark Highlights Bookmark ➝<br />
➝<br />
Der Wilde Westen<br />
You will see a line above the bar that indicates the hidden section of the recording.<br />
If you start playback again before the beginning of the hidden section, the hidden<br />
section is skipped. If ”yes” is set in the Digital Recorder settings for ”Inform<br />
about hidden sections,” you will see the message ”Hidden area was skipped!”.<br />
You can then show the hidden section again permanently by pressing the blue<br />
coloured key.<br />
43 -
Digital Recorder – Archive playback<br />
Copying recordings from the archive<br />
This is simple with a <strong>Loewe</strong> VCR or DVD recorder equipped with Digital Link<br />
or Digital Link Plus and with units from other manufacturers equipped with a<br />
similar system (according to protocol 50).<br />
Call the DR archive (red coloured key).<br />
DR archive<br />
free capacity 48:42 hrs<br />
19.08. 3Sat da capo<br />
27.08. 3Sat AVO-Session Basel 2002<br />
28.08. ARD Fußball-WM Deutschland-Polen<br />
03.09. ZDF echt wahr!<br />
OK<br />
Detail OK View Edit/protect<br />
TEXT<br />
P+<br />
P– Page /<br />
Delete/copy<br />
Sort alphabetically<br />
Press the yellow coloured key for ”Delete/copy”.<br />
DR archive<br />
free capacity 48:42 hrs<br />
Delete/copy<br />
19.08. 3Sat da capo<br />
27.08. 3Sat AVO-Session Basel 2002<br />
28.08. ARD Fußball-WM Deutschland-Polen<br />
03.09. ZDF echt wahr!<br />
OK<br />
END<br />
INFO<br />
MENU<br />
Deleting recordings from the archive<br />
Call the DR archive (red coloured key).<br />
DR archive<br />
free capacity 48:42 hrs<br />
19.08. 3Sat da capo<br />
27.08. 3Sat AVO-Session Basel 2002<br />
28.08. ARD Fußball-WM Deutschland-Polen<br />
03.09. ZDF echt wahr!<br />
OK<br />
Detail OK View Edit/protect<br />
TEXT<br />
P+<br />
P– Page /<br />
Delete/copy<br />
Sort alphabetically<br />
Press the yellow coloured key for ”Delete/copy”.<br />
DR archive<br />
free capacity 48:42 hrs<br />
Delete/copy<br />
19.08. 3Sat da capo<br />
27.08. 3Sat AVO-Session Basel 2002<br />
28.08. ARD Fußball-WM Deutschland-Polen<br />
03.09. ZDF echt wahr!<br />
OK<br />
TEXT Detail<br />
P+<br />
P– Page /<br />
OK<br />
Mark (several entries possible)<br />
Delete entry<br />
Copy entry<br />
END<br />
INFO<br />
MENU<br />
END<br />
INFO<br />
OK<br />
OK<br />
TEXT Detail<br />
P+<br />
P– Page /<br />
OK<br />
Select the recording to be copied.<br />
Confi rm with OK, select others if necessary and confi rm with<br />
OK. Titles to be copied are displayed in blue.<br />
Press the blue coloured key for ”Copy“.<br />
DR archive<br />
copy<br />
03.09. ZDF echt wahr!<br />
Recorder DVD-REC<br />
Station DR archive<br />
Date 03.08.2005<br />
Recording time 09:15<br />
VPS<br />
no<br />
Recording type once only<br />
Mark (several entries possible)<br />
Delete entry<br />
Copy entry<br />
OK<br />
VCR<br />
END<br />
INFO<br />
OK<br />
OK<br />
OK<br />
Select the recording to be deleted.<br />
Confi rm with OK,<br />
select others if necessary and confi rm with OK.<br />
Titles to be deleted are displayed in blue.<br />
Press the yellow coloured key for ”Delete entries”.<br />
To confi rm the deletion, press OK again.<br />
The recording is deleted.<br />
The DR archive is displayed again.<br />
DR archive<br />
free capacity 49:42 hrs<br />
19.08. 3Sat da capo<br />
27.08. 3Sat AVO-Session Basel 2002<br />
28.08. ARD Fußball-WM Deutschland-Polen<br />
OK<br />
Switch recorder to AUX!<br />
OK confirm<br />
INFO<br />
END<br />
Select the recorder in the Copy menu and change the recording<br />
date and time if necessary and confi rm with OK.<br />
OK<br />
The DR archive is displayed again. You will see a red dot in front of the bar for<br />
the programmed copying for which an entry is also made in the timer list.<br />
TEXT<br />
P+<br />
P–<br />
Detail View Edit/protect<br />
OK<br />
Page / Highlights Delete/copy<br />
alphabetisch ordnen<br />
The movie has been removed from the DR archive.<br />
END<br />
INFO<br />
MENU<br />
- 44
Digital Recorder – Archive playback<br />
Deleting bookmarks<br />
Call the DR archive (red coloured key).<br />
DR archive<br />
free capacity 48:42 hrs<br />
19.08. 3Sat da capo<br />
27.08. 3Sat AVO-Session Basel 2002<br />
28.08. ARD Fußball-WM Deutschland-Polen<br />
03.09. ZDF echt wahr!<br />
OK<br />
TEXT Detail OK View Edit/protect<br />
P+<br />
P–<br />
Page /<br />
Press the yellow coloured key for “Delete/copy”.<br />
Select the recording for which you want to delete the bookmarks.<br />
Recordings with manually set bookmarks are fl agged<br />
OK<br />
with in front of the bar.<br />
Confi rm with OK, select others if necessary and confi rm with<br />
OK<br />
OK. The selected titles are displayed in blue. If there are<br />
manually set bookmarks ...<br />
... press the green coloured key for “Delete bookmark”.<br />
All of the manually set bookmarks are deleted. Automatically set bookmarks are<br />
not deleted.<br />
Changing the title of a recording<br />
Call the DR archive (red coloured key).<br />
Delete/copy<br />
Sort alphabetically<br />
DR archive<br />
free capacity 48:42 hrs<br />
Delete/copy<br />
19.08. 3Sat da capo<br />
27.08. 3Sat AVO-Session Basel 2002<br />
28.08. ARD Fußball-WM Deutschland-Polen<br />
OK<br />
03.09. ZDF echt wahr!<br />
Detail<br />
Mark (several entries possible)<br />
TEXT<br />
OK<br />
P+<br />
P– Page / Delete bookmark Delete entry<br />
Copy entry<br />
DR archive<br />
free capacity 48:42 hrs<br />
19.08. 3Sat da capo<br />
27.08. 3Sat AVO-Session Basel 2002<br />
28.08. ARD Fußball-WM Deutschland-Polen<br />
03.09. ZDF echt wahr!<br />
OK<br />
END<br />
INFO<br />
MENU<br />
END<br />
INFO<br />
OK<br />
OK<br />
DR archive<br />
free capacity 48:42 hrs<br />
Edit/protect<br />
19.08. 3Sat da capo<br />
27.08. 3Sat AVO-Session Basel 2002<br />
28.08. ARD Fußball-WM Deutschland-Polen<br />
03.09. ZDF echt wahr!<br />
OK<br />
TEXT Detail OK Rename Parental lock<br />
P+<br />
P–<br />
Page /<br />
Select the title to be changed.<br />
Press the OK button for ”Rename“.<br />
Underneath the fi rst letter of the title, you will see a line which indicates the<br />
current input position for the letter. Enter the letters in sequence using the<br />
numeric buttons on the remote control (like on a mobile phone keypad).<br />
OK<br />
Conclude the entry with OK.<br />
Locking/unlocking a movie (parental lock)<br />
You can lock movies that your children are not permitted to view, for instance.<br />
Viewing is only possible if the secret code is entered.<br />
Call the DR archive (red coloured key).<br />
set delete protection<br />
DR archive<br />
free capacity 48:42 hrs<br />
19.08. 3Sat da capo<br />
27.08. 3Sat AVO-Session Basel 2002<br />
28.08. ARD Fußball-WM Deutschland-Polen<br />
03.09. ZDF echt wahr!<br />
OK<br />
TEXT Detail OK View Edit/protect<br />
P+<br />
P–<br />
Page /<br />
Delete/copy<br />
Sort alphabetically<br />
Press the green coloured key for "Edit/protect".<br />
DR archive<br />
free capacity 48:42 hrs<br />
Edit/protect<br />
19.08. 3Sat da capo<br />
27.08. 3Sat AVO-Session Basel 2002<br />
28.08. ARD Fußball-WM Deutschland-Polen<br />
03.09. ZDF echt wahr!<br />
OK<br />
END<br />
INFO<br />
END<br />
INFO<br />
MENU<br />
Detail OK View Edit/protect<br />
TEXT<br />
P+<br />
P– Page /<br />
Delete/copy<br />
Sort alphabetically<br />
Press the green coloured key for ”Edit/protect”.<br />
END<br />
INFO<br />
MENU<br />
TEXT Detail OK Rename Parental lock<br />
P+<br />
P–<br />
Page /<br />
set delete protection<br />
END<br />
INFO<br />
45 -
Digital Recorder – Archive playback<br />
OK<br />
pqrs wxyzabc<br />
tuv<br />
Mark the title that is to be locked or released.<br />
Press the green coloured key for ”Parental lock“. The system<br />
requests you to enter your secret code.<br />
Parental lock<br />
Access code<br />
✳✳✳✳ 0 ... 9<br />
Please enter PIN<br />
Enter your secret code with the numeric keys of the remote<br />
control.<br />
The DR archive opens again.<br />
Press the green coloured key for ”Lock movie“.<br />
Setting/cancelling delete protection<br />
To prevent important recordings being deleted automatically by the Delete<br />
Manager, you should set a delete protection. Cancel the delete protection again<br />
after copying to a video cassette or DVD.<br />
Call the DR archive (red coloured key).<br />
DR archive<br />
free capacity 48:42 hrs<br />
19.08. 3Sat da capo<br />
27.08. 3Sat AVO-Session Basel 2002<br />
28.08. ARD Fußball-WM Deutschland-Polen<br />
03.09. ZDF echt wahr!<br />
OK<br />
DR archive<br />
free capacity 48:42 hrs<br />
Edit/protect<br />
19.08. 3Sat da capo<br />
27.08. 3Sat AVO-Session Basel 2002<br />
28.08. ARD Fußball-WM Deutschland-Polen<br />
03.09. ZDF echt wahr!<br />
OK<br />
TEXT Detail OK View Edit/protect<br />
P+<br />
P–<br />
Page /<br />
Delete/copy<br />
Sort alphabetically<br />
Press the green coloured key for ”Edit/protect”.<br />
END<br />
INFO<br />
MENU<br />
TEXT Detail OK Rename Unlock movie<br />
P+<br />
P–<br />
Page /<br />
set delete protection<br />
END<br />
INFO<br />
DR archive<br />
free capacity 48:42 hrs<br />
Edit/protect<br />
19.08. 3Sat da capo<br />
27.08. 3Sat AVO-Session Basel 2002<br />
28.08. ARD Fußball-WM Deutschland-Polen<br />
03.09. ZDF echt wahr!<br />
OK<br />
You can mark additional titles and lock or release them respectively using the<br />
green coloured key. A lock symbol appears in front of the bar when the<br />
lock is activated.<br />
Viewing a locked movie<br />
Call the DR archive (red coloured key).<br />
DR archive<br />
free capacity 48:42 hrs<br />
19.08. 3Sat da capo<br />
27.08. 3Sat AVO-Session Basel 2002<br />
28.08. ARD Fußball-WM Deutschland-Polen<br />
03.09. ZDF ✳✳✳✳✳✳✳✳<br />
OK<br />
OK<br />
TEXT Detail OK Rename Parental lock<br />
P+<br />
P–<br />
Page /<br />
set delete protection<br />
Select the title for which you want to set/cancel a delete<br />
protection.<br />
Press the yellow coloured key for ”Set/cancel delete protection.”<br />
You can select other titles and set or cancel the delete protection with the yellow<br />
coloured key. The symbol appears in front of the bar when the delete<br />
protection is activated.<br />
END<br />
INFO<br />
OK<br />
TEXT Detail OK View Edit/protect<br />
P+<br />
P–<br />
Page /<br />
Mark the movie and press OK.<br />
Delete/copy<br />
Sort alphabetically<br />
END<br />
INFO<br />
MENU<br />
DR archive<br />
free capacity 48:42 hrs<br />
19.08. 3Sat da capo<br />
27.08. 3Sat AVO-Session Basel 2002<br />
28.08. ARD Fußball-WM Deutschland-Polen<br />
03.09. ZDF echt wahr!<br />
OK<br />
The system requests you to enter your secret code. After you enter your secret<br />
code, all the locked entries are legible in the DR archive and the desired movie<br />
may be started by pressing OK.<br />
TEXT Detail OK View Edit/protect<br />
P+<br />
P–<br />
Page /<br />
Delete/copy<br />
Sort alphabetically<br />
END<br />
INFO<br />
MENU<br />
- 46
<strong>Operating</strong> modes – Radio<br />
Radio<br />
Radio stations can only be received via DVB. If you do not have any DVB radio<br />
reception, you can play a sound signal from an external device using the <strong>TV</strong> set<br />
via the sound/AV inputs.<br />
RADIO<br />
<br />
Use the RADIO button on the remote control or the R on the<br />
control ring of the <strong>TV</strong> set to switch the radio on or off.<br />
Radio: 8 DLF Numerical<br />
AUDIO IN<br />
9 HR-INFO S<br />
AVS<br />
10 MDR INFO S<br />
AV2<br />
11 MDR FIGA S<br />
AV1<br />
12 NDR KULT S<br />
1 B5 AKTL S 13 SWR1 S<br />
2 BAYERN 1 S 14 SWR2 S<br />
3 BR4 KLSK S 15 WDR3 S<br />
4 SUNSHINE S 16 WDR5 S<br />
5 ROCK ANT S 17 OESTER 1 S<br />
6 ANTENNE S 18 MDR JUMP S<br />
7 DLR S 19 JAZZ RAD S<br />
8 DLF S 20 BLUSAT20 S<br />
OK<br />
18:00 - 18:10 Nachrichten<br />
OK Switch to ...<br />
0 ... 9 Select station<br />
Screen off/on<br />
Scan stations<br />
Previous station<br />
Change sorting<br />
END<br />
MENU<br />
EPG<br />
Radio menu<br />
MENU<br />
Call radio menu<br />
In the radio menu, as in <strong>TV</strong> mode, you can set the sound, search for radio stations<br />
and store them (automatically or manually), delete stations from the list,<br />
rearrange them or change names and set the switching off and alarm functions.<br />
EPG - Programme guide<br />
Radio menu<br />
Sound<br />
Stations<br />
Treble ...<br />
Timer functions<br />
For the DVB radio stations, you can also use the programme guide if the station<br />
currently active supplies data.<br />
EPG EPG- Call Programme guide<br />
INFO<br />
END<br />
You can see a station list of the radio stations. Digital DVB-T stations are indicated<br />
by T , DVB-C stations by C and DVB-S stations by S . Encrypted stations<br />
are additionally indicated by . Ask your specialist dealer about decoders or<br />
the use of a CI module and a smartcard for the reception of encrypted stations.<br />
When time and title are sent by the marked station these data are displayed at<br />
the bottom of the station list.<br />
When the station list is shown you can switch off the screen with the red coloured<br />
key. The LED indicator on the set changes from green to orange. You can<br />
switch the screen display back on by using the OK key, red or blue coloured<br />
keys, by using RADIO, MENU or END on the remote control or by using R on<br />
the control ring of the <strong>TV</strong> set.<br />
Station switching with dark screen: by using – or + on the control ring of the <strong>TV</strong><br />
set or by using the remote control P– and P+ or by using the numeric buttons.<br />
The sound menu can be called in the radio mode using the button.<br />
47 -
<strong>Operating</strong> additional equipment<br />
Login and connect equipment<br />
You have logged in and connected all connected equipment in the initial startup.<br />
If you want to connect other equipment or disconnect equipment, call the<br />
connection wizard.<br />
MENU Call up the <strong>TV</strong> menu<br />
OK<br />
OK<br />
OK<br />
OK<br />
Select “Connections”<br />
Select the submenu line<br />
Select “New devices/modifi cations” and ...<br />
Call with OK.<br />
State what equipment you want to connect. State whether a piece of audio<br />
equipment is to be connected (more details as of page 50). The connection wizard<br />
then shows you which sockets you should connect this equipment to. Then<br />
connect the equipment to these sockets according to the connection diagram.<br />
Connecting video/DVD recorders<br />
In addition to the connection via the Euro-AV sockets, you also have to connect<br />
the antenna (only for terrestrial antenna or cable systems) through the VCR/DVD<br />
recorder to the <strong>TV</strong> set. The antenna signal is then available to the video/DVD<br />
recorder and the <strong>TV</strong> set.<br />
Note: Use Euro-AV cables with right-angled plugs as shown.<br />
Search for and store the station of the video recorder (if no Euro-AV<br />
cable is available).<br />
Switch on the test station on the VCR or insert a recorded tape and start playback.<br />
In some video recorders the station must be switched on by activating the<br />
modulator.<br />
Then call the AV selection on the <strong>TV</strong> set with 0 AV. Select the menu item “VI-<br />
DEO” in the AV selection and call using OK.<br />
To prevent “normal” <strong>TV</strong> stations being found in the search, pull out the antenna<br />
plug from the antenna input of the VCR temporarily (the cable to the antenna<br />
system).<br />
If you cannot see the test station or playback from the cassette, the VCR is<br />
transmitting on a different channel. You then have to search for the station or<br />
set it manually.<br />
1. Call the <strong>TV</strong> menu with the MENU button.<br />
2. Select the “Settings” menu item with .<br />
3. Select the line below using and use to select “Stations”.<br />
4. Select the line below using and select “Manual adjustment” using <br />
and call this menu using OK.<br />
5. Enter channel “E30“ under the “Channel“ menu item (“Antenna/cable (analogue)“,<br />
select in this menu above if necessary).<br />
6. Start search with the blue coloured key.<br />
7. When the station has been found, change the name if needed, confi rm with<br />
OK and save with the red coloured key.<br />
8. A list of the stored stations is displayed.<br />
9. Select 0 (VIDEO) here and overwrite this station storage location using the<br />
red coloured key.<br />
10. Hide the menu again using the END button.<br />
Plug the antenna plug back in.<br />
If you now get interference because a <strong>TV</strong> station is transmitting on the same<br />
channel as the VCR station, you have to change the transmitting station on the<br />
VCR and search for the VCR station on the <strong>TV</strong> again.<br />
ANT<br />
AV1<br />
EURO AV2<br />
DECODER<br />
EURO AV1<br />
AUDIO/<br />
VIDEO<br />
ENTREE<br />
ANTENNE<br />
AUDIO<br />
SORTIE OUT AERIAL<br />
G L<br />
SORTIE<br />
ANTENNE<br />
D R<br />
RF OUT<br />
- 48
<strong>Operating</strong> additional equipment<br />
Video playback<br />
There are several ways to see the picture and hear the sound of the VCR, DVD<br />
player/recorder or camcorder on your <strong>TV</strong>:<br />
1. You can usually use the Euro-AV sockets on the <strong>TV</strong> set and on the VCR. For<br />
camcorders or digital cameras, use the AVS sockets on the right of the <strong>TV</strong><br />
set. DVD players/recorders and SetTopBoxes may have HDMI or component<br />
sockets for video and audio transmission. In this case, use the corresponding<br />
sockets on the <strong>TV</strong> set.<br />
When playing back from a video recorder using Euro-AV socket and Digital<br />
Link Plus (or a comparable system from another manufacturer), the picture<br />
from the VCR is shown at the current channel location.<br />
When playing back from another VCR, camcorder or digital camera, use<br />
the AV selection AV or the station list (OK) to select the AV socket/the<br />
device to which the VCR is connected.<br />
Video recorders transmit a switching voltage during playback, which the<br />
<strong>TV</strong> can evaluate (can be activated in the connection wizard or in the “<strong>TV</strong><br />
menu – Connections – Miscellaneous – Allow switching voltage” - set to<br />
“yes”). Then the picture of the video recorder is shown during playback at<br />
the current station location.<br />
2. You can use the antenna connection between the VCR and the <strong>TV</strong> without a<br />
Euro-AV socket. The sound is only transmitted in mono. Select the fi rst menu<br />
item, e.g. VIDEO, in the AV selection.<br />
Calling AV inputs in the AV selection:<br />
AV Call AV selection<br />
OK<br />
OK<br />
VIDEO<br />
Select AV device/socket (or VIDEO if the video recorder has<br />
been connected only via the antenna socket) and use ...<br />
to call.<br />
AV selection<br />
VCR<br />
HDMI/DVI<br />
Now you will see the playback from the connected AV device.<br />
OK<br />
COMP. IN<br />
Calling AV input via the station list<br />
Call the station list with the OK button in <strong>TV</strong> mode.<br />
In the numeric and alphabetical sorting, you will always fi nd the AV sockets at<br />
the top of the list.<br />
DVD<br />
AVS<br />
VGA<br />
Timer recording with video or DVD recorder<br />
You can programme timer recordings on the <strong>TV</strong> set. Programming can be done<br />
with the EPG programme guide, teletext or manually. Call the “Timer list” menu<br />
with the button and press the red coloured key for the “Recording<br />
wizard”. Select whether you want to programme the recording via EPG, teletext<br />
or manually. You also have the option to programme recordings directly from<br />
the EPG programme guide or teletext.<br />
Note: Copy-protected programmes are not output to the Euro-AV sockets for<br />
legal reasons.<br />
When you have connected the Euro-AV socket to a recorder which has Digital<br />
Link Plus or a comparable system from a different manufacturer, the timer data<br />
of analogue terrestrial stations are transmitted from the <strong>TV</strong> to the recorder. The<br />
recording quality SQ or EQ is transmitted for DVD recorders, in additional to<br />
the station, date and time. The recording is then controlled by the recorder and<br />
the recorder tuner is used for reception of the station. The recording data are<br />
not saved in the timer list of the <strong>TV</strong> set. You will only fi nd the timer data in the<br />
recorder.<br />
If you want to record from digital stations, the <strong>TV</strong> tuner is used and the recorder<br />
is controlled by the <strong>TV</strong> set. Then the station is locked during the timer recording.<br />
If you have connected a <strong>Loewe</strong> video recorder with Digital Link to the Euro-AV<br />
socket (without Digital Link Plus) and you are using the timer programming of<br />
the <strong>TV</strong>, the <strong>TV</strong> receiver is always used, for terrestrial stations as well. The <strong>TV</strong><br />
controls the recording.<br />
You have to set the recorder to the AV input (signal source) to which the <strong>TV</strong> set<br />
is connected.<br />
Then the station on the <strong>TV</strong> set is locked during the timer recording.<br />
Digital Link must be switched on on the recorder. Read the operating<br />
<strong>instructions</strong> of your <strong>Loewe</strong> recorder for more information.<br />
Use only Euro-AV cables, which are completely wired, otherwise Digital Link/Digital<br />
Link Plus will not work.<br />
Another advantage of Digital Link is that you can install the recorder in a concealed<br />
place (e.g. in a rack). You can control the recorder with the <strong>TV</strong> set.<br />
If you have a <strong>Loewe</strong> recorder with both systems, you can use all the advantages.<br />
The advantages of Digital Link Plus are used for the timer recording; the advantages<br />
of Digital Link for concealed installation of the recorder.<br />
49 -
MAINS<br />
DIGITAL AUDIO OUT<br />
PCM/MPEG2/AC3/DTS<br />
OPT OUT<br />
DIG OUT<br />
MULTICHANNEL AUDIO OUT<br />
LEFT CENTER LEFT<br />
REAR<br />
FRONT<br />
RIGHT<br />
REAR<br />
SUBW.<br />
RIGHT<br />
FRONT<br />
STEREO OUT<br />
VIDEO OUT<br />
R L (CVBS) (Y/C)<br />
AUDIO VIDEO OUT S-VIDEO OUT<br />
I<br />
AUX-I/O<br />
II<br />
TO <strong>TV</strong>-I/O<br />
FL<br />
SL<br />
PREOUT<br />
AUX1 IN AUX OUT AUX 2<br />
C FR<br />
L L<br />
DIGITAL<br />
IN<br />
DIGITAL<br />
OUT<br />
SUB<br />
SR<br />
R<br />
R<br />
<strong>Operating</strong> additional equipment<br />
Assignment of digital audio inputs and<br />
outputs<br />
Audio input “AUDIO DIGITAL IN”<br />
The <strong>TV</strong> set has a coaxial digital audio input “AUDIO DIGITAL IN” and a coaxial<br />
digital audio output “AUDIO DIGITAL OUT”. If you are using an external digital<br />
surround amplifi er for sound reproduction, you have to feed digital audio<br />
signals to the <strong>TV</strong>, e.g. from the DVD player.<br />
Audio output “AUDIO DIGITAL OUT“<br />
The digital audio signal is applied at the “AUDIO DIGITAL OUT” socket of the <strong>TV</strong>.<br />
For example, you can connect an external digital audio amplifi er or the <strong>Loewe</strong><br />
Auro system here.<br />
An analogue audio signal from the <strong>TV</strong> set or another sound source which is<br />
received at one of the Euro-AV sockets of the <strong>TV</strong> set is converted into a digital<br />
signal (PCM) and output at the “AUDIO DIGITAL OUT“ socket. Conversion from<br />
external analogue AV sources to PCM is not possible if the <strong>TV</strong>’s loudspeakers are<br />
used as a centre channel. In this case, connect your audio amplifi er additionally<br />
to the <strong>TV</strong> (AUDIO OUT L/R) with a cinch cable and switch the audio amplifi er to<br />
analogue audio input.<br />
The digital <strong>TV</strong> sound or the digital sound of a connected auxiliary device is only<br />
audible via an external digital audio amplifi er (e.g. <strong>Loewe</strong> Auro system).<br />
AV2<br />
AUDIO<br />
DIGITAL<br />
IN OUT<br />
DVD<br />
Surround Amplifier<br />
Connect the output socket of the DVD player (DIG OUT) to the <strong>TV</strong>‘s “AUDIO<br />
DIGITAL IN” socket with a cinch cable.<br />
In the connection wizard, specify that audio transmission is to be digital. Specify<br />
that the digital sound is to be assigned for example to the Euro-AV socket 2 to<br />
feed the digital sound to the digital audio output of the <strong>TV</strong> set and via this to<br />
the external audio amplifi er. Further information about this can be found on<br />
page 52.<br />
- 50
<strong>Operating</strong> additional equipment<br />
Connecting <strong>Loewe</strong> DVD Preceiver Auro<br />
2216 PS and Individual Sound loudspeaker<br />
system<br />
You can play audio signals from the <strong>TV</strong> or DVD player in cinema quality with<br />
these components. The Individual Sound system includes 5 speakers for the<br />
front, centre and surround reproduction in addition to the subwoofer illustrated<br />
below. The centre signal can be reproduced alternatively by the <strong>TV</strong> speakers.<br />
Connect the cubic socket on the DVD Preceiver to the “Master” cubic socket on<br />
the subwoofer. Use the cubic plug cable enclosed with the DVD Preceiver. Plug<br />
the white plug (without kink protection) into the cubic socket on the subwoofer.<br />
For <strong>TV</strong> as a centre loudspeaker, connect “AUDIO IN C” on the <strong>TV</strong> set to “PRE<br />
OUT C”on the DVD Preceiver using a cinch cable.<br />
Connect the digital audio output of the <strong>TV</strong> set “AUDIO DIGITAL OUT” to the<br />
“DIGITAL IN” input of the Preceiver using a cinch cable. Connect the <strong>TV</strong> socket<br />
“SERVICE“ to the <strong>TV</strong>-L-Link socket on the Preceiver using the L-Link cable (provided<br />
with the Preceiver). Switch on the <strong>TV</strong> set and the Preceiver. Via the L-Link,<br />
the <strong>TV</strong> recognises whether the Preceiver is connected.<br />
Select the “Tremo“ loudspeaker system in the DVD menu of the Preceiver, set<br />
the listener/speaker distances and adjust the speaker levels. Please consult the<br />
Preceiver manual.<br />
If you want to listen to the sound via the <strong>TV</strong> speakers temporarily, call the Sound<br />
menu, select “Sound via“ and then “<strong>TV</strong>“. If you want to listen to the sound via<br />
the <strong>Loewe</strong> Auro system, select “AURO“ under “Sound via“.<br />
only required for <strong>TV</strong> as centre loud speaker<br />
Audio cable cinch -> SCART<br />
(available in specialised trade)<br />
<strong>Loewe</strong> Flat-<strong>TV</strong><br />
AV2-SCART<br />
CENTER<br />
Surround speaker system<br />
COMPONENT IN<br />
DIGITAL OUT<br />
SERVICE<br />
<strong>Loewe</strong><br />
Individual Sound<br />
Digital audio <strong>TV</strong> -> Auro<br />
Component Video<br />
(available in specialised trade)<br />
Power OUT<br />
R<br />
Surr.<br />
L<br />
ON<br />
OFF<br />
R<br />
EURO-AV cable<br />
Front<br />
C<br />
L<br />
Bass Intensity<br />
<strong>Loewe</strong><br />
Auro<br />
PREOUT<br />
AUX1 IN AUX OUT AUX 2<br />
L C R L L<br />
SL LFE SR R R<br />
DIGITAL<br />
IN<br />
DIGITAL<br />
OUT<br />
12V / 15mA<br />
<strong>TV</strong><br />
EXT<br />
L-LINK<br />
TO <strong>TV</strong><br />
Y<br />
Pb<br />
Pr<br />
COMPONENT<br />
VIDEO OUT<br />
Min. Max.<br />
Center to<br />
Line IN Phase<br />
Sat <strong>TV</strong> Right Subw. Left 0 180<br />
Surr.<br />
Slave<br />
Front<br />
Right Center Left<br />
System connector<br />
Master<br />
230V~50/60Hz<br />
L<br />
SL<br />
C<br />
LFE<br />
SR<br />
R<br />
L-Link cable<br />
SR<br />
R<br />
C<br />
FLE<br />
L<br />
SL<br />
Six-pole cinch<br />
Cubic plug cable<br />
51 -
AUX1 IN AUX OUT AUX 2<br />
DIGITAL<br />
IN<br />
DIGITAL<br />
OUT<br />
R R<br />
AUX1 IN AUX OUT AUX 2<br />
DIGITAL<br />
IN<br />
DIGITAL<br />
OUT<br />
R R<br />
<strong>Operating</strong> additional equipment<br />
Connecting other audio amplifiers or active<br />
speakers<br />
In the connection wizard, select “HiFi/AV amplifier” under “Equipment selection:<br />
audio component”. The connection wizard allows confi guration of different<br />
audio amplifi ers (stereo amplifi ers, surround amplifi ers, analogue or digital) with<br />
different sound formats (Dolby Digital, dts, MPEG and Stereo/PCM). Refer to the<br />
operating <strong>instructions</strong> for the audio amplifi er to be connected.<br />
Select “Digital“ under “Audio transmission“ for digital audio amplifiers. Connect<br />
the digital audio output of the <strong>TV</strong> AUDIO DIGITAL OUT to the digital audio<br />
input of the digital amplifi er.<br />
Assign the digital audio input to the socket through which the corresponding<br />
picture is transmitted (e.g. AV2 if a DVD player is connected there). Then the<br />
digital sound is passed to the digital audio output of the <strong>TV</strong> set and fed to the<br />
external audio amplifi er via this.<br />
Specify which sound formats can be decoded with your digital amplifi er (Dolby<br />
Digital, MPEG, dts).<br />
Specify under “Type of amplifi er“ whether the digital amplifi er is a stereo or<br />
surround amplifi er.<br />
If it is a surround amplifi er, specify whether or not the <strong>TV</strong> loudspeakers are to be<br />
used as centre loudspeakers. Connect the centre output of the amplifi er to the<br />
centre output of the <strong>TV</strong> using a cinch cable, if necessary.<br />
Note: do not use the centre loudspeaker connection on the amplifi er; instead<br />
use the pre-amplifi er centre output.<br />
Select “Analogue“ for “Sound transmission“ for analogue audio amplifiers.<br />
The sound for the analogue amplifi er is transmitted via the AUDIO OUT L/R<br />
connections of the <strong>TV</strong> to the audio amplifi er. Connect the amplifi er with two<br />
cinch cables.<br />
Specify under “Type of amplifi er“ whether the analogue amplifi er is a stereo or<br />
surround amplifi er.<br />
If it is a surround amplifi er, also specify whether or not the <strong>TV</strong> speakers are to be<br />
used as centre loudspeakers. Connect the centre output of the amplifi er to the<br />
centre output of the <strong>TV</strong> using a cinch cable, if necessary.<br />
Note: do not use the centre loudspeaker connection on the amplifi er; instead<br />
use the pre-amplifi er centre output.<br />
AUDIO IN<br />
C<br />
L<br />
R<br />
AUDIO OUT<br />
FL<br />
PREOUT<br />
C FR<br />
L L<br />
SL<br />
SUB<br />
SR<br />
If you want to listen to the sound via the <strong>TV</strong> loudspeakers temporarily, call the<br />
Sound menu using the button, select “Sound via“ and then “<strong>TV</strong>“.<br />
AUDIO IN<br />
C<br />
OUT AUDIO DIGITAL<br />
When connecting active speakers, select “Active speakers” in the connection<br />
wizard under “Audio equipment selection”. The sound for the active speakers<br />
is transmitted via the AUDIO OUT L/R connections to the active speakers. Make<br />
connections to the active speakers using the cinch cables.<br />
Make the audio settings on the <strong>TV</strong> set when active speakers are connected.<br />
When using an external audio amplifi er, make the audio settings on the audio<br />
amplifi er.<br />
FL<br />
PREOUT<br />
C FR<br />
L L<br />
SL<br />
SUB<br />
SR<br />
- 52
<strong>Operating</strong> additional equipment<br />
HDMI (DVI) connection<br />
The HDMI connection (High Defi nition Multimedia Interface)<br />
allows digital picture and sound transmission via a connecting<br />
cable, e.g. from <strong>Loewe</strong> DVD Recorder Centros 2102/2172 HD.<br />
The digital picture and sound data are transmitted without data<br />
compression and therefore lose none of their quality. In the equipment connected,<br />
no analogue/digital conversion is necessary, which might also have lead to<br />
losses in quality.<br />
DVI signals can be also be reproduced by the HDMI connection using a<br />
DVI/HDMI adapter cable. This is possible because HDMI is based on DVI and is<br />
downwardly compatible. That means that the digital video signals are transmitted<br />
via HDMI - no audio signals are transmitted, though. In addition, both use<br />
the same copy protection method HDCP.<br />
Connect the set with an HDMI connection using an HDMI cable (type A, 19-pin)<br />
to the HDMI socket of the <strong>TV</strong> set. Log in the HDMI connection in the connection<br />
wizard (<strong>TV</strong> menu - Connections - New devices/modifi cations).<br />
Select the HDMI connection in the AV selection.<br />
AV Call AV selection<br />
VGA/XGA connection<br />
You can connect a PC or a Set Top Box (STB) and therefore use<br />
the <strong>TV</strong> screen as an output device.<br />
Connect the PC/STB to the VGA/XGA socket on the <strong>TV</strong> using a<br />
VGA cable.<br />
When connecting to a PC, fi rst set one of the following screen resolutions on<br />
your PC.<br />
800x600 60Hz (SVGA)<br />
1024x768 60Hz (XGA).<br />
When a Set Top Box is connected, set the following screen resolutions according<br />
to the options of the Set Top Box:<br />
SD<strong>TV</strong>: 720x576i (PAL), 720x480i (NTSC),<br />
720x576p, 720x480p.<br />
HD<strong>TV</strong>: 1280x720p, 1920x1080i.<br />
Select the VGA/XGA connection in the AV selection.<br />
AV Call AV selection<br />
OK<br />
AVS<br />
AV selection<br />
VGA<br />
Select VGA socket and use ...<br />
OK<br />
HDMI/DVI<br />
COMP. IN<br />
VIDEO<br />
VCR DVD<br />
VGA<br />
AV selection<br />
HDMI/DVI<br />
OK<br />
COMP. IN<br />
VIDEO<br />
VCR<br />
DVD<br />
AVS<br />
OK<br />
to call.<br />
OK<br />
Select HDMI/DVI socket and use ...<br />
Start the connected device.<br />
OK<br />
to call.<br />
Start playback on the device connected with HDMI connection.<br />
The set automatically recognises and sets the best possible format for the video.<br />
If transmission occurs via a DVI/HDMI adapter cable, then you can feed in the<br />
appropriate analogue audio via the audio input sockets AUDIO IN L/R on the <strong>TV</strong><br />
set. The sound is reproduced via the <strong>TV</strong> speakers.<br />
If you have connected a digital external audio amplifi er, you can select the<br />
digital audio signal in the connection wizard (<strong>TV</strong> menu - Connections - New<br />
devices/modifi cations) and assign it to the HDMI/DVI socket. You can make<br />
the other settings for the audio amplifi er as described for digital amplifi ers on<br />
page 52. The digital audio signal of the DVI audio source is fed in at the AUDIO<br />
DIGITAL IN socket on the <strong>TV</strong>. Feed the digital audio signal from the <strong>TV</strong> AUDIO<br />
DIGITAL OUT to the external amplifi er.<br />
Set geometry: as described for the VGA/XGA connection.<br />
Set geometry<br />
Call the <strong>TV</strong> menu using the MENU button, select “Geometry“ using and<br />
set:<br />
If the picture is not positioned correctly, you can move the picture horizontally<br />
and vertically here so that it fi lls the whole screen. You can also set the phase<br />
position so that the picture appears in the best possible quality.<br />
Setting colour standard<br />
Call the Picture menu using the button. Select “Colour standard“ using<br />
and make your selection.<br />
The colour standard for a connected PC is RGB.<br />
In Set Top Boxes, you usually set Ycc as a colour standard. Other formats such<br />
as Ypp or RGB can also be output. Please consult the operating <strong>instructions</strong> of<br />
the device connected.<br />
If the wrong standard is selected, you will recognise this by the wrong colours<br />
in the display.<br />
53 -
<strong>Operating</strong> additional equipment<br />
Sound from PC or Set Top Box<br />
Feed the analogue audio signal from the PC or the STB to the sockets AUDIO IN<br />
L/R on the <strong>TV</strong> via a cinch cable. The sound is reproduced via the <strong>TV</strong> speakers.<br />
If you have connected a digital external audio amplifi er, you can select the<br />
digital audio signal in the connection wizard (<strong>TV</strong> menu - Connections - New<br />
devices/modifi cations) and assign it to the VGA/XGA socket. You can make the<br />
other settings for the audio amplifi er as described for digital amplifi ers on page<br />
52. The digital audio signal of the Set Top Box is fed in at the AUDIO DIGITAL IN<br />
socket on the <strong>TV</strong>. Feed the digital audio signal from the <strong>TV</strong> AUDIO DIGITAL OUT<br />
to the amplifi er.<br />
Component video connection<br />
If you have a DVD player/recorder with Component OUT connections,<br />
you can connect it to the SD/HD-COMPONENT IN sockets<br />
of the <strong>TV</strong> instead of to the Euro-AV sockets. The connecting<br />
cable with three cinch plugs each transmits picture information.<br />
The playback is of a better quality than via the Euro-AV socket.<br />
You need another cinch cable for the analogue sound transmission. Connect the<br />
analogue audio outputs of the DVD player to the AUDIO IN L/R sockets on the<br />
<strong>TV</strong> set. The sound is reproduced via the <strong>TV</strong> speakers.<br />
If you want to use the digital sound of the DVD player with a digital audio<br />
amplifi er connected to the <strong>TV</strong>, make a connection between AUDIO DIG OUT of<br />
the DVD player and AUDIO DIGITAL IN of the <strong>TV</strong> set.<br />
Log in the component/device in the connection wizard:<br />
Assign the AUDIO DIG IN input here to the COMP. IN socket, provided a digital<br />
audio amplifi er is also connected. You can make the other settings for the audio<br />
amplifi er as described for digital amplifi ers on page 52.<br />
Set the signal at the component input in the connection wizard: Set to “Automatic“<br />
fi rst. If the signal is not reproduced when playback is started, consult<br />
the operating <strong>instructions</strong> of the DVD device connected to fi nd out what screen<br />
resolution is possible (SD<strong>TV</strong>, HD<strong>TV</strong> or ProScan).<br />
Select the component connection in the AV selection.<br />
AV Call AV selection<br />
DMI/DVI<br />
AV selection<br />
COMP. IN VIDEO VCR DVD AVS VGA<br />
OK<br />
HDMI/DV<br />
OK<br />
OK<br />
Select COMP. IN sockets and use ...<br />
to call.<br />
Start playback on the connected device.<br />
Set geometry and colour standard: as described for the VGA/XGA connection.<br />
- 54
<strong>Operating</strong> additional equipment<br />
<strong>Operating</strong> other <strong>Loewe</strong> devices with the RC3 remote control<br />
Using this remote control, you can operate additional devices from <strong>Loewe</strong>.<br />
<strong>TV</strong><br />
DVD STB<br />
Use the rotary switch to select VCR, <strong>TV</strong> or a Set Top Box.<br />
VCR<br />
The following are preset at the factory: <strong>Loewe</strong> VCRs, <strong>Loewe</strong> <strong>TV</strong><br />
sets and for STBs (Set Top Box) in Germany, the<br />
common d-box.<br />
Use the driver buttons in the <strong>TV</strong> and STB position for VCR,<br />
DVD or Digital Recorder.<br />
You can switch over the six drive buttons<br />
( , , , , , ), both for the <strong>TV</strong> and for<br />
the STB, to control a VCR or DVD player/recorder (the control of the integrated<br />
“Digital Recorder Plus” is preset at the factory):<br />
<strong>TV</strong><br />
DVD STB First set the switch to the main function <strong>TV</strong> or STB.<br />
VCR<br />
END<br />
DVD<br />
VCR<br />
wxyz<br />
tuv<br />
tuv<br />
<strong>TV</strong><br />
PIP<br />
EPG<br />
STB<br />
Then press the END and EPG buttons simultaneously for at<br />
least 5 seconds. The upper left indicator on the remote control<br />
will blink twice.<br />
Enter the the numbers 988 in sequence. The indicator will<br />
again blink two times.<br />
Now set the switch to the desired function for the drive<br />
buttons:<br />
to DVD, VCR or to <strong>TV</strong>, if the digital recorder is to be operated.<br />
Press the # PIP button to complete the setting. The indicator<br />
will blink two times.<br />
Setting the remote control to operate devices from other<br />
manufacturers<br />
You can switch over the remote control for other VCRs, DVD players and Set Top<br />
Boxes if the infrared code for the device type is listed in the code list or if it is<br />
included in the code memory of the RC3.<br />
Even if the manufacturer of the device is listed in the code list, it may not be<br />
possible to operate that device using the <strong>Loewe</strong> remote control.<br />
Setting the remote control using code entry<br />
Search for the code number for your device in the code list (see as of pages<br />
64-68). The list is arranged according to device type – DVD, VCR, STB – and<br />
alphabetically according to manufacturer. Next to the manufacturer’s name, you<br />
will fi nd one or more code numbers.<br />
DVD<br />
VCR<br />
END<br />
<strong>TV</strong><br />
AV<br />
jkl<br />
def<br />
wxyz<br />
STB<br />
EPG<br />
Use the rotary switch if you want to switch over a VCR, DVD<br />
device or a Set Top Box.<br />
Press the END and EPG buttons simultaneously for at least<br />
5 seconds. The upper left indicator on the remote control will<br />
blink twice.<br />
Enter the four numbers in sequence that you found in the code<br />
list (e.g. 0539 for <strong>Loewe</strong> DVD player).<br />
After each number you enter, the indicator will blink once, after the last number<br />
it will blink twice. If the number was incorrect, the indicator will remain lit<br />
longer. The code number was not accepted. If the code was accepted with two<br />
blinks, you can test the functions of the device you just programmed.<br />
If the device cannot be operated or can only be operated poorly, repeat the<br />
code entry with the next code from the list. If there are no other codes specifi ed<br />
for this manufacturer, try it using the code suggestions from the remote control.<br />
Setting the remote control using the suggestions from the<br />
remote control<br />
Switch the device on that you want to switch over to the remote control. Standby<br />
mode is not enough.<br />
<strong>TV</strong><br />
DVD STB Use the rotary switch if you want to switch over a VCR, DVD<br />
VCR<br />
device or a Set Top Box.<br />
END EPG<br />
Press the END and EPG buttons simultaneously for at least<br />
5 seconds. The upper left indicator on the remote control will<br />
blink twice.<br />
wxyz<br />
wxyz<br />
Enter the the numbers 991 in sequence. The indicator will<br />
blink once after each number entered.<br />
PIP Press the # PIP button to select the fi rst code.<br />
Point the remote control toward the device you want to switch over to the<br />
remote control. Observe that device.<br />
Now press the button (Play) or On/Off on the remote<br />
control.<br />
Wait a moment for the device to react. If the device does not<br />
PIP react, then that was not the right code. Press the # PIP button<br />
again to call the next code.<br />
Press the button (Play) or On/Off again.<br />
EPG If the device reacts, press the EPG button to adopt the<br />
code.<br />
55 -
<strong>Operating</strong> additional equipment<br />
Using the RC3 remote control to operate a DVD recorders or<br />
DVD player<br />
Using the RC3 remote control to operate a VCR<br />
<strong>TV</strong><br />
DVD STB<br />
DVD STB<br />
Set the rotary switch to “DVD”.<br />
Set the rotary switch to “VCR”.<br />
VCR<br />
VCR<br />
The infrared code and the functions are preset at the factory<br />
The infrared code and the functions for a <strong>Loewe</strong> VCR are<br />
for the <strong>Loewe</strong> DVD recorder Centros 21x2 HD.<br />
preset at the factory.<br />
In the DVD mode, it is possible to operate the <strong>Loewe</strong> DVD recorders Centros In VCR mode, the following VCRs can be operated: ViewVision 8106H, 8136H,<br />
1102, 1172, 2102HD, 2172HD, and the DVD players Xemix 6122DO, 8122DA 8176H, 6306H, 6336H, 6376H, 6396H, 4306H, 4376H, 2102M, 2302M, 4206,<br />
and 6222PS.<br />
4236, 4276.<br />
For other <strong>Loewe</strong> equipment than that listed, please use the original remote<br />
control.<br />
Functions for the <strong>Loewe</strong> DVD recorders (Centros 1102, 1172, 2102, 2172) Functions for <strong>Loewe</strong> VCR (VV 8106, 8136, 8176)<br />
<strong>TV</strong><br />
Change-over switch<br />
for operation of <strong>TV</strong>,<br />
VCR, DVD or Set Top Box<br />
Sound off/on<br />
Set marker / in menu:<br />
highlights title/chapter<br />
Select camera position<br />
Timer recording menu /<br />
timer recording list menu on<br />
DVD<br />
VCR<br />
-Set<br />
<strong>TV</strong><br />
STB<br />
-List<br />
REC-MENU<br />
RADIO<br />
abc def<br />
ghi jkl mno<br />
Switch DVD player<br />
on/off – in standby<br />
Marker search menu on<br />
Repeat<br />
Zoom<br />
in menu: enter digits /<br />
in stop mode (menu off):<br />
select programme (<strong>TV</strong>)<br />
Change-over switch<br />
for operating of <strong>TV</strong>, VCR,<br />
DVD or Set Top Box<br />
Sound off/on (mute)<br />
Display/close Timer list<br />
Display/close<br />
ShowView timer Menu<br />
Switch to Long Play<br />
/Standard Play<br />
DVD<br />
VCR<br />
-Set<br />
<strong>TV</strong><br />
STB<br />
-List<br />
REC-MENU<br />
RADIO<br />
abc def<br />
ghi jkl mno<br />
Switch recorder<br />
on/off – in standby<br />
Select picture and sound sour<br />
Select video and audio input<br />
Set time display to 0:00:00<br />
Select station directly<br />
/in menu: enter digits<br />
Call AV selection<br />
(AV1-AV4,DV,<strong>TV</strong>)<br />
Main menu on<br />
User interface of loaded DVD on<br />
/in menu: switch between<br />
original and playlist<br />
Status display (<strong>TV</strong>, DVD-RW)<br />
/in menu:<br />
cofirm the menu selection<br />
in menu: select / adjust<br />
ShowView menu on<br />
Insert a new chapter marker<br />
Press short during playback:<br />
Start of current chapter<br />
/previous chapter<br />
Press short during pause:<br />
slow motion back<br />
Press long during playback:<br />
search back<br />
Record<br />
Playback<br />
Pause /single frame<br />
DISC-M<br />
pqrs tuv wxyz<br />
DVD-AV<br />
C-SET<br />
EPG AV PIP<br />
P+<br />
V– OK V+<br />
P–<br />
SV<br />
TITLE<br />
CARD<br />
Picture in picture (PIP) on/off<br />
Close menu<br />
Info / menu bar on/off<br />
Next chapter /<br />
in stop mode (menu off):<br />
next programme<br />
V–/V+ volume quieter/louder<br />
Start of current<br />
chapter / previous chapter<br />
/in stop mode (menu off):<br />
previous programme<br />
Audio/Foto Card Reader<br />
operation on/off<br />
Enter a new title thumbnail /<br />
switch between photo and<br />
MP3/WMA operation<br />
Press short during playback:<br />
next chapter<br />
Press short during pause:<br />
slow motion forward<br />
Press long during playback:<br />
search forward<br />
Stop<br />
Call AV selection (<strong>TV</strong>)<br />
VCR menu on<br />
/in menu: back<br />
P+/P– Select station<br />
up/down<br />
Reverse play<br />
/in menu: select/set<br />
V–/V+ volume<br />
quieter/louder<br />
/<br />
at stop: Program up/down<br />
on playback: manual tracking<br />
in the menu: Select position<br />
Rewind<br />
/search backwards<br />
Start recording<br />
Pause (still frame)<br />
/frame-by-frame advance<br />
DISC-M<br />
C-SET<br />
pqrs tuv wxyz<br />
DVD-AV<br />
EPG AV PIP<br />
P+<br />
V- OK V+<br />
P-<br />
SV<br />
TITLE<br />
CARD<br />
Set picture format (<strong>TV</strong>)<br />
Status display on/off<br />
in the menu: Close menu<br />
Status display on/off<br />
on playback:<br />
Slow motion forward<br />
/in the menu: select/set<br />
or to the next menu<br />
Call up station list<br />
/in menu: call up/confirm<br />
Fast forward<br />
/search forwards<br />
Start playback<br />
Stop tape<br />
- 56
<strong>Operating</strong> additional equipment<br />
Rotating the <strong>TV</strong> set<br />
Individual Edition sets are equipped with a Motor Unit at the factory. You can<br />
adjust your <strong>TV</strong> set to suit your sitting position with the remote control.<br />
OK<br />
Rotate the <strong>TV</strong> set when no menu or PIP is being displayed.<br />
Note: Make sure there are no objects in the <strong>TV</strong>’s area of rotation that might<br />
obstruct the rotation or be knocked down due to the rotating motion.<br />
Setting the range of rotation (basic adjustment)<br />
Here you can determine the range of rotation maximum +/- 40 degrees) of the<br />
<strong>TV</strong> set by adjusting the maximum right and left stop.<br />
MENU Call up the <strong>TV</strong> menu.<br />
OK<br />
OK<br />
OK<br />
OK<br />
OK<br />
OK<br />
OK<br />
<strong>TV</strong> menu<br />
Picture<br />
Sound<br />
Picture adjustment ...<br />
Select “Settings” with .<br />
<strong>TV</strong> menu<br />
ections Settings<br />
Stations ...<br />
Select the menu line below with and select<br />
“Miscellaneous” with .<br />
Select the menu line below with and select<br />
“Rotate <strong>TV</strong>” with .<br />
Select the menu line below with and select<br />
“Basic adjustment” with ...<br />
... and confi rm with OK.<br />
Recording<br />
Picture<br />
Connections<br />
Sound<br />
Recording<br />
INFO END<br />
Settings<br />
Turn your <strong>TV</strong> with as far to the right as the location of the<br />
set allows. This will be the maximum right hand position in<br />
future.<br />
Confi rm with OK.<br />
INFO<br />
END<br />
Conne<br />
<strong>TV</strong> menu<br />
INFO END<br />
Settings<br />
nguage Miscellaneous<br />
Channels Parental lock Timer functions Lan<br />
On-screen displays ...<br />
osition<br />
<strong>TV</strong> menu<br />
Settings<br />
Miscellaneous<br />
Rotate <strong>TV</strong><br />
On-screen displays<br />
Activate switch-off position ...<br />
<strong>TV</strong> menu<br />
Settings<br />
Miscellaneous<br />
Rotate <strong>TV</strong><br />
Basic adjustment<br />
Rotate <strong>TV</strong><br />
Basic adjustment<br />
24<br />
OK Proceed<br />
INFO<br />
Time and date<br />
END<br />
OK Activate switch-off position Set switch<br />
END<br />
END<br />
D<br />
OK<br />
OK<br />
END<br />
Turn your <strong>TV</strong> with as far to the left as the location of the set<br />
allows. This will be the maximum left hand position in future.<br />
End the basic adjustment with OK.<br />
Close the menu.<br />
Setting the position of the <strong>TV</strong> set when switched off<br />
You can set the position the <strong>TV</strong> set is to assume once it is switched off (switchoff<br />
position must be activated for this):<br />
Call the menu item “Activate switch-off position” in the<br />
<strong>TV</strong> menu – Settings – Miscellaneous – Rotate <strong>TV</strong>.<br />
OK<br />
OK<br />
OK<br />
OK<br />
OK<br />
Move down with and select “yes” with .<br />
yes<br />
<strong>TV</strong> menu<br />
Settings<br />
Miscellaneous<br />
Rotate <strong>TV</strong><br />
Activate switch-off position<br />
no<br />
Move up with and select “Set switch-off position” with .<br />
osition<br />
Rotate <strong>TV</strong><br />
Basic adjustment<br />
-31<br />
OK End of basic adjustment<br />
<strong>TV</strong> menu<br />
Settings<br />
Miscellaneous<br />
Rotate <strong>TV</strong><br />
Activate switch-off position Set switch-off position<br />
no ...<br />
<strong>TV</strong> menu<br />
Settings<br />
Miscellaneous<br />
Rotate <strong>TV</strong><br />
Set switch-off position<br />
0<br />
use OK to go down and use the arrow buttons to set the<br />
desired switch-off position. The <strong>TV</strong> set rotates in the process.<br />
<strong>TV</strong> menu<br />
Settings<br />
Miscellaneous<br />
Rotate <strong>TV</strong><br />
Set switch-off position<br />
0<br />
OK Adopt<br />
use OK to save the position set.<br />
END Close the menu.<br />
If the <strong>TV</strong> set is switched off using the blue on/off button on the remote control<br />
or by using the indicator fi eld on the set, the set will rotate to the position<br />
defi ned.<br />
When it is switched back on, it returns to the position last set manually.<br />
OK<br />
Basic adjustment<br />
INFO END<br />
Basic adjustme<br />
INFO<br />
INFO<br />
INFO<br />
END<br />
END<br />
END<br />
Activate switch<br />
END<br />
57 -
What to do, if ...<br />
Problem Possible cause Remedy<br />
The “Recording” menu point is not displayed in the<br />
<strong>TV</strong> menu.<br />
“Connections” cannot be called in the <strong>TV</strong> menu<br />
(deactivated).<br />
The control of the <strong>Loewe</strong> video recorder and the<br />
timer do not work or do not work properly.<br />
General problems with connecting external equipment<br />
via an AV input.<br />
A decoder connection does not function or is faulty.<br />
No video or DVD recorder logged in.<br />
A time recording is in progress.<br />
a) The Digital Link function is not activated or not<br />
possible in the recorder.<br />
b) Euro-AV cable is not connected.<br />
c) Recorder is not logged in.<br />
a) The device is not logged in to the connection<br />
wizard or is connected differently than is shown<br />
in the connection diagram.<br />
b) The AV norm is set incorrectly.<br />
c) The AV signal is set incorrectly.<br />
a) The signal is not decoded because the wrong<br />
decoder stations are selected in the connection<br />
wizard.<br />
b) The sound is missing in decoder mode because<br />
the wrong decoder sound is assigned in the<br />
connection wizard.<br />
Log in the video or DVD recorder in the connection<br />
wizard and connect the device.<br />
Wait until the timer recording has ended or delete the<br />
timer.<br />
a) Activate Digital Link in the recorder (see operating<br />
<strong>instructions</strong> of the video recorder).<br />
b) Connect the Euro-AV cable.<br />
c) Log in recorder.<br />
a) In the connection wizard (<strong>TV</strong> menu – Connections<br />
– New devices/modifi cations), compare the<br />
connection diagram with the actual installation<br />
and connect as shown, if necessary.<br />
b) Set the norm correctly.<br />
c) Set the AV signal correctly.<br />
If “Automatic” is set for AV norm or AV signal, this<br />
can lead to errors for signals which do not conform<br />
to the norm. Then the norm and the signal are to be<br />
set according to the specifi cations in the operating<br />
<strong>instructions</strong> of the external device.<br />
a) Follow the <strong>instructions</strong> in the connection wizard<br />
again (<strong>TV</strong> menu – Connections – New devices/modifi<br />
cations) and select the corresponding decoder<br />
station.<br />
b) Follow the <strong>instructions</strong> in the connection wizard<br />
again and select the right audio source (decoder,<br />
<strong>TV</strong> or autom.), see <strong>instructions</strong> of the decoder.<br />
All menus appear in the wrong language. Menu language has been set incorrectly. Set your menu language:<br />
Press the INFO button in <strong>TV</strong> mode (index). Select the<br />
fi rst index item and call it by using OK. Then select<br />
the language and confi rm with OK.<br />
- 58
What to do, if ...<br />
Problem Possible cause Remedy<br />
Digital Link Plus does not function.<br />
a) Euro-AV cable is not fully wired (pin 10 not<br />
wired).<br />
b) Some recorders can only adopt stations during<br />
the initial installation of the <strong>TV</strong> set.<br />
c) All or some of the terrestrial and cable stations<br />
are stored on station storage locations ≥ 99.<br />
a) Replace the Euro-AV cable.<br />
b) Restore the recorder to the as-delivered state (see<br />
recorder’s operating <strong>instructions</strong>).<br />
c) Rearrange the terrestrial and cable stations so<br />
that they fall between 1 and 99.<br />
Various characters are displayed incorrectly in the<br />
teletext.<br />
The wrong character set is set in the teletext menu. Set the right character set: Teletext menu - Settings -<br />
Character set: standard or the appropriate character<br />
set.<br />
No sound via external digital audio amplifi er.<br />
Device on mounted motor unit does not rotate.<br />
a) The external digital audio amplifi er does not support<br />
the selected sound format (Dolby Digital,<br />
dts, MPEG).<br />
b) <strong>TV</strong> set and external digital audio amplifi er are<br />
not connected.<br />
Motor unit and connection for rotating stand control<br />
are not connected to each other.<br />
a) Set PCM stereo on the DVD player in the sound<br />
selection. For DVB stations, switch language/<br />
sound selection (green coloured key) to Stereo on<br />
the <strong>TV</strong> set in the status display (END).<br />
b) Connect Digital-Out from the <strong>TV</strong> set to a Digital-In<br />
of the external digital audio amplifi er and select<br />
the appropriate input to this.<br />
Use related cable to connect socket of motor unit<br />
to interface of rotating stand control (see assembly<br />
<strong>instructions</strong> for motor unit).<br />
Dirt on the inside of the front screen. --- The front screen may only be removed and cleaned by<br />
your dealer.<br />
59 -
Technical data<br />
General data<br />
Type<br />
Item no.<br />
Versions DR+ DVB-T/C CI<br />
Set dimensions without stand (ca. cm WxHxD)<br />
Dimensions with stand (ca. cm WxHxD)<br />
Set weight without stand (ca. kg)<br />
Set weight with stand (ca. kg)<br />
Display<br />
Picture diagonal (cm)/picture format<br />
Resolution<br />
Contrast ratio<br />
Individual Edition<br />
66435xxx<br />
•<br />
81,5x57,9x9,9<br />
81,5x62,8x32,0<br />
22,5<br />
28,0<br />
HD-LCD technology<br />
80/16:9<br />
1366x768<br />
800:1<br />
Angle of viewing horizontally/vertically 170°<br />
Power consumption (IEC 62087)<br />
in operation (watt)<br />
in standby (watt)<br />
100<br />
< 3<br />
Ambient temperature (Celsius) 5º – 35º<br />
Relative humidity (not condensing) 20 – 80%<br />
Barometric pressure<br />
800 – 1114 hPa (0 – 2000 m over NN)<br />
The code number 3001 cancels out a<br />
secret code and with it the child lock.<br />
Please keep in a<br />
✄<br />
safe place.<br />
- 60
Technical data<br />
Electrical data<br />
Chassis name L 2650<br />
Power supply<br />
220 V -240V/50- 60 Hz<br />
Tuner VHF/UHF/ cable<br />
Hyperband 8 MHz<br />
41 MHz to 860 MHz<br />
Station storage locations 1680<br />
<strong>TV</strong> standards<br />
B/G, I, L, D/K, M, N<br />
DVB-T, DVB-C, DVB-S (1<br />
Colour standard<br />
SECAM, PAL, NTSC,<br />
NTSC-V, PAL-V (60Hz)<br />
Sound standard<br />
Mono/Stereo/Dual-channel<br />
Nicam B/G, I, L,<br />
Virtual Dolby<br />
Rated audio power<br />
2 x 20 watt<br />
Analogue Teletext TOP/FLOF Level 2.5<br />
Page Memory 3000<br />
Connections<br />
Jack 3.5mm<br />
Headphones 32- 2000 ohm<br />
Mini-DIN (AVS) Video IN Y/C (S-VHS/Hi 8)<br />
CVBS (VHS/8 mm)<br />
Cinch (yellow) Video IN CVBS (VHS/8 mm)<br />
Cinch (white/red) Audio IN<br />
L/R<br />
IEC socket 75 Ohm/5 V/80 mA<br />
Antenna/cable/PIP/DVB-T/C<br />
F socket 75 Ohm 13/18 V/350 mA (1<br />
ANT-SAT<br />
EURO-AV 1 Video IN Y/C (S-VHS/Hi 8)<br />
CVBS (VHS/8 mm)<br />
Video OUT<br />
CVBS (VHS/8 mm)<br />
Y/C (S-VHS/Hi 8)<br />
Audio IN<br />
L/R<br />
Audio OUT<br />
L/R<br />
EURO-AV 2 Video IN Y/C (S-VHS/Hi 8)<br />
CVBS (VHS/8 mm)<br />
RGB, YUV<br />
Video OUT<br />
CVBS<br />
Y/C, (only with SVHS Link Plus)<br />
Audio IN<br />
L/R<br />
Audio OUT<br />
L/R<br />
Cinch Audio IN max. 2Vrms Centre<br />
2 x Cinch Audio IN L/R<br />
2 x Cinch Audio OUT (level adjustable in active loud speakers) L/R<br />
Cinch COMPONENT IN: Cb/Pb signal<br />
Cinch COMPONENT IN: Cr/Pr signal<br />
Cinch COMPONENT IN: Y signal<br />
Cinch Digital Audio IN (SPDIF) Digital audio<br />
Cinch Digital Audio OUT (SPDIF) Digital audio<br />
HDMI/DVI Digital Video/Audio IN type A 19pin Digital video and audio<br />
VGA/XGA VGA/XGA IN PC/STB video signal<br />
Mini-DIN SERVICE Service/L-Link<br />
Mini-DIN CONTROL Rotating stand control<br />
(1<br />
Digital Single-Sat tuners and digital Twin-Sat tuners can be retrofi tted.<br />
Dolby and the double ´D´ symbol are<br />
trademarks of Dolby Laboratories<br />
Printed in Germany<br />
TB/06/04/1.0<br />
Subject to modifi cations!<br />
© by <strong>Loewe</strong> Opta 2006<br />
61 -
Accessories<br />
Wall holders and stands<br />
Refer to the notes on the installations options on page 6.<br />
Digital Satellite Tuner<br />
You can have your <strong>TV</strong> set retrofi tted with the digital satellite tuner. By using<br />
this tuner, you can receive DVB-S stations.<br />
The digital satellite tuner is completely integrated in the <strong>TV</strong> set (physically and<br />
logically) and is operated by the remote control/menu control of the <strong>TV</strong>.<br />
The integrated PIP DVB-T/C tuner is exchanged for the digital sat tuner.<br />
<strong>Loewe</strong> order no. 89361.055<br />
Digital Twin Satellite tuner<br />
For <strong>TV</strong> set with the Digital Recorder+, you can have it retrofi tted with an integrated<br />
DVB-S twin sat tuner.<br />
The integrated PIP DVB-T/C tuner is exchanged for the DVB-S twin sat tuner.<br />
<strong>Loewe</strong> order no. 89443.080<br />
<strong>Loewe</strong> DVD players and recorders<br />
The DVD players and recorders from <strong>Loewe</strong> are characterised by form and<br />
colour, which match <strong>Loewe</strong> <strong>TV</strong> sets, adapted user guidance and technology. A<br />
combination of the two devices forms a system which offers many advantages.<br />
<strong>Loewe</strong> audio system Auro and the active speaker system<br />
Individual Sound<br />
The interplay of a <strong>Loewe</strong> <strong>TV</strong> with a <strong>Loewe</strong> audio system and a <strong>Loewe</strong> speaker<br />
system creates an excellently coordinated home cinema system. Advantages are<br />
high operating comfort, attractive design and adapted technology.<br />
Cube i Rack:<br />
The <strong>Loewe</strong> Cube i Rack is designed as an accessory rack to hold two peripheral<br />
units such as DVD players and/or DVD recorders as well as the subwoofer of the<br />
Individual Sound System.<br />
VESA adapter<br />
The VESA adapter offers you the possibility of also using your <strong>TV</strong> set for other<br />
VESA-compatible fastening devices.<br />
<strong>Loewe</strong> order no. 89688.B00<br />
Subject to delivery options.<br />
- 62
Service<br />
<strong>Loewe</strong> Austria GmbH<br />
Parkring 10<br />
A - 1010 Wien<br />
Tel +43 - 1/51 633 - 31 34<br />
Fax +43 - 1/51 633 - 30 32<br />
Email hannes.lechner@loewe.co.at<br />
Kjaerulff 1 A/S<br />
C.F. Tietgens Boulevard 19<br />
DK - 5220 Odense SØ<br />
Tel. +45 - 66 13 54 80<br />
Fax +45 - 66 13 54 10<br />
Email mail@kjaerulff1.com<br />
<strong>Loewe</strong> Italiana SRL<br />
Largo del Perlar, 12<br />
I - 37135 Verona (VR)<br />
Tel. +39 - 045 82 51 611<br />
Fax +39 - 045 82 51 622<br />
Email Edoardo.Bricchi@loewe.it<br />
Service Center <strong>Loewe</strong><br />
Petrovsky per., d. 5, str. 3 of. 17<br />
RUS - 107031 Moscow<br />
Tel. +7 - 95 - 928 33 58<br />
Fax +7 - 95 - 928 58 79<br />
Email loewerus@online.ru<br />
International Dynamics<br />
Australasia Pty Ltd.<br />
129 Palmer Street<br />
AUS - Richmond 3121, Victoria<br />
Tel. +61 - 3 - 94 29 08 22<br />
Fax +61 - 3 - 94 29 08 33<br />
Email mail@internationaldynamics.com.au<br />
Gaplasa S.A.<br />
Conde de Torroja, 25<br />
E - 28022 Madrid<br />
Tel. +34 - 917 48 29 60<br />
Fax +34 - 913 29 16 75<br />
Email loewe@maygap.com<br />
PL Trading (pz 2004) Ltd.<br />
27, Aliat Hanoar St.<br />
ISR - Givataiim 53401<br />
Tel. +972 - 3 - 57 27 155<br />
Fax +972 - 3 - 57 27 150<br />
Email zeev@loewe.co.il<br />
Kjaerulff 1 AB<br />
Ridbanegatan 4, Box 9076<br />
S - 200 39 Malmö<br />
Tel. +46 - 4 06 79 74 00<br />
Fax +46 - 4 06 79 74 01<br />
Email Sweden@kjaerulff1.com<br />
<strong>Loewe</strong> Opta Benelux NV/SA<br />
Uilenbaan 84<br />
B–2160 Antwerpen<br />
Tel. +32 - 3 - 2 70 99 30<br />
Fax +32 - 3 - 2 71 01 08<br />
Email ccc@loewe.be<br />
<strong>Loewe</strong> Opta France S.A.<br />
13 rue du Dépôt,<br />
Parc del l‘Europe, BP 10010<br />
F - 67014 Strasbourg Cédex<br />
Tel. +33 - 3- 88 79 72 50<br />
Fax +33 - 3- 88 79 72 59<br />
Email loewe.france@wanadoo.fr<br />
Mirage Holdings Ltd<br />
Flamingo Complex, Cannon Road<br />
M - Qormi<br />
Tel. +356 - 22 - 79 40 00<br />
Fax +356 - 21 - 44 59 83<br />
Email s.martinelli@fl amingo.com.mt<br />
Jadran Trgovsko Podjetje<br />
Partizanska cesta 69<br />
SL - 6210 Sezana<br />
Tel. +386 - 57 31 04 40<br />
Fax +386 - 57 31 04 42<br />
Email milos.zvanut@jadran.si<br />
Telion AG<br />
Rütistrasse 26<br />
CH - 8952 Schlieren<br />
Tel. +41 - 44 732 15 11<br />
Fax +41 - 44 730 15 02<br />
Email infocpe@telion.ch<br />
Kjaerulff 1 OY<br />
Artturinkatu 2<br />
FIN - 20200 Turku<br />
Tel. +358 - 2 284 1600<br />
Fax +358 - 2 284 1601<br />
Email Finland@kjaerulff1.com<br />
SOMARA S.A.<br />
377, Rue Mustapha El Maani<br />
MA - 20000 Casablanca<br />
Tel. +212 - 22 22 03 08<br />
Fax +212 - 22 26 00 06<br />
Email somara@wanadoopro.ma<br />
Enkay Elektronik Servis Müdürlügü<br />
Alemdag Cad: Site Yolu No.: 10<br />
Ümraniye/ Istanbul<br />
Tel. +90 - 216 634 44 44<br />
Fax +90 - 216 643 39 88<br />
Email mhatipog@enkaygroup.com<br />
HADJIKYRIAKOS & SONS LTD.<br />
Prodromou 121, P.O Box 21587<br />
CY - 1511 Nicosia, Cyprus<br />
Tel. +357 - 22 87 21 11<br />
Fax +357 - 22 66 33 91<br />
Email savvas@hadjikyriakos.com.cy<br />
LinnSight Ltd.<br />
PO Box 8465<br />
UK - KA 7 2YF Prestwick<br />
Tel. +44 - 12 92 - 47 15 57<br />
Fax +44 - 12 92 - 47 15 54<br />
Email helpline@linnsight.co.uk<br />
CableCom AS<br />
Østre Kullerød 5<br />
N - 3214 Sandefjord<br />
Tel. +47 - 33 48 33 48<br />
Fax +47 - 33 44 60 44<br />
Email roy@cablecom.no<br />
THE SOUNDLAB (PTY) LTD<br />
P.O. Box 31952, Kylami 1684<br />
Republic of South Africa<br />
Tel. +27 - 1 14 66 47 00<br />
Fax +27 - 1 14 66 42 85<br />
Email loewe@mad.co.za<br />
K+B EXPERT SPOL. S R.O.<br />
U Expertu 91<br />
CZ - 25069 Klicany u Prahy<br />
Tel: +42 - 2 72 12 21 11 (222)<br />
Fax: +42 - 2 72 12 21 99 (239)<br />
Email loewe@kbexpert.cz<br />
<strong>Loewe</strong> Opta GmbH,<br />
Customer Care Center<br />
Industriestraße 11<br />
D - 96317 Kronach<br />
Tel. +49 1801–22256393<br />
Fax +49 9261–99500<br />
Email ccc@loewe.de<br />
SIBA Engineering S.A.<br />
6, Kifi sou Av.,<br />
GR - 122 42 Aegaleo<br />
Tel. +30 - 210 - 5913793<br />
Fax +30 - 210 - 5317755<br />
Email service@siba.gr<br />
Basys Magyarorszagi KFT<br />
Epitok utja 2–4<br />
H - 2040 Budaörs<br />
Tel. +36 - 23 41 56 37 (121)<br />
Fax +36 - 23 41 51 82<br />
Email basys@mail.nasys.hu<br />
Vídeoacustica<br />
Comercio e Representacoes de<br />
Equipamentos Electronicos S.A.<br />
Estrada Circunvalacao,<br />
Quinta do Paizinho, Arm. 5<br />
P - 2795-632 Carnaxide<br />
Tel. +351 - 2 14 24 17 70<br />
Fax +351 - 2 14 18 80 93<br />
Email offi ce@videoacustica.pt<br />
DSV TRADING SA<br />
Plac Kaszubski 8<br />
PL - 81-350 Gdynia<br />
Tel. +48 - 58 - 6 61 28 00<br />
Fax +48 - 58 - 6 61 44 70<br />
Email market@dsv.com.pl<br />
© by <strong>Loewe</strong> Opta<br />
63
Codelist RC3 / Lista de códigos RC3<br />
<strong>Loewe</strong><br />
DVD-Player 0539<br />
DVD-Recorder Centros 11x2 0741<br />
DVD-Recorder Centros 21x2 1463<br />
STB 1127<br />
VCR 0866<br />
DVD<br />
3DLAB 0539<br />
A-Trend 0714<br />
Acoustic Solutions 0730<br />
AEG 0788 0770<br />
Aiwa 0641 0695<br />
Akai 0790 0788 0690 0716 0713 0705<br />
AKI 0718<br />
Akira 0699<br />
Alba 0717 0699 0713 0723 0695<br />
All-Tel 0790<br />
Amitech 0770<br />
Amstrad 0713<br />
Apex Digital 0672<br />
Audiosonic 0690<br />
AWA 0730<br />
Black Diamond 0713<br />
Blaupunkt 0717<br />
Blue Sky 0699 0695 0713 0672 0651<br />
Boman 0783<br />
Brain Wave 0770<br />
Brandt 0651 0551<br />
Bush 0699 0690 0689 0717<br />
0713 0818 0695 0831 0723<br />
C-Tech 0768<br />
Cambridge Audio 0696<br />
Cambridge Soundworks 0696<br />
CAT 0699<br />
Celestial 0672<br />
Centrex 0672 1004<br />
Centrum 0713<br />
cineULTRA 0699<br />
Classic 0730<br />
Clatronic 0788<br />
Clayton 0713<br />
Coby 0730<br />
Conia 0672<br />
Crown 0770 0651 0690<br />
Cybercom 0831<br />
CyberHome 0714 0816<br />
Cytron 0716 0651 0705<br />
Daewoo 0770 0705 0714<br />
Daewoo International 0699<br />
Dansai 0770 0783<br />
Dantax 0723<br />
DEC 0699 0818<br />
Decca 0770<br />
Denon 0490 0634<br />
Denver 0699 0788<br />
Denzel 0665<br />
Diamond 0651 0768 0723<br />
Digihome 0713<br />
digiRED 0717<br />
Digitrex 0672<br />
DiK 0831<br />
Dinamic 0788<br />
DiViDo 0705<br />
DK digital 0831<br />
DMTECH 0783 0790<br />
Dragon 0831<br />
Dual 0665 0651 0713 0730<br />
0783 0790 0831<br />
E-Boda 0723<br />
Eclipse 0723<br />
Electrohome 0770<br />
Elin 0770<br />
Elta 0690 0770 0788 0790<br />
Emerson 0591 0705<br />
Enzer 0665<br />
Ferguson 0651<br />
Finlux 0741 0770 0783<br />
Firstline 0651<br />
Funai 0695<br />
GE 0717<br />
Global Solutions 0768<br />
Global Sphere 0768<br />
Go Video 0783<br />
GoldStar 0591 0741<br />
Goodmans 0651 1004 0790 0690<br />
0783 0723 0818<br />
Graetz 0665<br />
Grandin 0716<br />
Grundig 0539 0695 0651 0775<br />
0705 0790 0713 0670 0723<br />
Grunkel 0770<br />
H&B 0818 0713<br />
Haaz 0768<br />
Hanseatic 0741<br />
HCM 0788<br />
HDT 0705<br />
HE 0730<br />
Henß 0713<br />
Hitachi 0664 0665 0573<br />
Hiteker 0672<br />
Home Electronics 0730<br />
Hyundai 0783<br />
Ingelen 0788<br />
ISP 0695<br />
Jeken 0699<br />
JMB 0695<br />
JVC 0623 0539 0503 1901 1940<br />
Karcher 0783<br />
Kendo 0699<br />
Kenwood 0534 0490 0737<br />
Kiiro 0718 0770<br />
Kingavon 0818<br />
Kiss 0665<br />
Koda 0818<br />
Koss 0651<br />
Lawson 0705 0716 0768<br />
Lecson 0696<br />
Lenco 0699 0651 0770 0818<br />
Lenoxx 0690<br />
Lexia 0699<br />
LG 0591 0741 1906<br />
Lifetec 0651<br />
Limit 0716 0768<br />
<strong>Loewe</strong> 0539 1922<br />
LogicLab 0768<br />
Logix 0705 0783<br />
Lumatron 0705<br />
Luxman 0573<br />
Luxor 1004<br />
Magnavox 0503 0818<br />
Magnex 0723<br />
Manhattan 0705<br />
Marantz 0539<br />
Mark 0713<br />
Matsui 0651 0695<br />
MBO 0690 0730<br />
MDS 0699<br />
Medion 0651 0783 0716 0831<br />
Memorex 0831<br />
Metz 0571 0713<br />
MiCO 0723<br />
Microboss 0718<br />
Micromaxx 0695<br />
Micromedia 0503 0539<br />
Micromega 0539<br />
Microsoft 0522<br />
Microstar 0831<br />
Minax 0713<br />
Minoka 0770<br />
Mitsubishi 0713<br />
Mizuda 0818<br />
Monyka 0665<br />
Mustek 0730<br />
Mx Onda 0651 0723<br />
NAD 0741<br />
Naiko 0770<br />
Neufunk 0665<br />
Nordmende 0831<br />
Omni 0690 0699<br />
Onkyo 0627 0503<br />
Optimus 0571<br />
Orava 0818<br />
Orion 0695<br />
Oritron 0651<br />
P&B 0818<br />
Pacifi c 0768 0790 0713 0831<br />
Palladium 0695<br />
Palsonic 0689 0672<br />
Panasonic 0490 1908<br />
Panda 0783<br />
Philips 0539 0646 0503 1914<br />
Phonotrend 0699<br />
Pioneer 0571 0631 1900 1902<br />
Pointer 0770<br />
Powerpoint 0718<br />
Proline 0651 0672 0790 1004<br />
Proscan 0522<br />
Prosonic 0699<br />
Provision 0699<br />
Radionette 0741<br />
Raite 0665<br />
Rank Arena 0718<br />
RCA 0522 0651<br />
REC 0689 0490<br />
Red Star 0770 0788<br />
Reoc 0768<br />
Revoy 0699<br />
Roadstar 0699 0690 0689 0713 0818<br />
Rotel 0623<br />
Rowa 1004<br />
Saba 0651<br />
Sabaki 0768<br />
Salora 0741<br />
Samsung 0573 0490<br />
Sansui 0695 0716 0768 0723 0770<br />
Sanyo 0670 0695 0790<br />
Scan 0705<br />
ScanMagic 0730<br />
Schaub Lorenz 0788 0770<br />
Schneider 0651 0783 0705 0790 0788<br />
Scientifi c Labs 0768<br />
Scott 0718 0651 0672<br />
SEG 0665 0713 0768<br />
Shanghai 0672<br />
Sharp 0630 0695<br />
Sherwood 0717 0741 0633<br />
Shinco 0717<br />
Silva 0788<br />
SilvaSchneider 0831<br />
Singer 0690 0716 0723<br />
Skymaster 0730 0768<br />
Slim Art 0770<br />
SM Electronic 0730 0768 0690<br />
Smart 0718 0705 0713<br />
Sonashi 0716<br />
Sony 0533 0573 1903 1904<br />
Soundmaster 0768<br />
Soundmax 0768<br />
Soundwave 0783<br />
Standard 0651 0768<br />
Starmedia 0818<br />
Sunwood 0788<br />
- 64
Codelist RC3 / Lista de códigos RC3<br />
Supervision 0730 0768<br />
SVA 0672<br />
Synn 0768<br />
Tandberg 0713<br />
Tatung 0770<br />
Teac 0717 0741 0571 0768 0591<br />
0790<br />
Technics 0490 1908<br />
Technika 0770<br />
Techwood 0713<br />
Tensai 0690 0651<br />
Tevion 0651 0768<br />
Theta Digital 0571<br />
Thomson 0551 0522<br />
Tokai 0665 0788<br />
Tokiwa 0705 0716<br />
Toshiba 0503<br />
Umax 0690<br />
United 0788 0730 0790<br />
Universum 0741 0713 0591<br />
Venturer 0790<br />
Vieta 0705<br />
Voxson 0730 0831<br />
Walkvision 0717<br />
Welkin 0831<br />
Wesder 0699<br />
Wharfedale 0696 0723<br />
Windy Sam 0573<br />
XBox 0522<br />
XLogic 0770 0768<br />
XMS 0788 0689<br />
Yamada 1004<br />
Yamaha 0490 0539 0646<br />
Yamakawa 0665 0710 0765<br />
Yelo 0718<br />
Yukai 0730<br />
Zenith 0503 0591 0741<br />
VCR<br />
Adyson 0072<br />
Aiwa 0307 0000 0209 0348 0352 0037<br />
0041<br />
Akai 0106 0315 0041 0352 0240<br />
Akashi 0072<br />
Akiba 0072<br />
Akura 0072 0041<br />
Alba 0278 0072 0209 0352 0000 0315<br />
0348 0081<br />
Allorgan 0240<br />
Allstar 0081<br />
Amstrad 0000 0278 0072<br />
Anitech 0072<br />
Ansonic 0000<br />
Aristona 0081<br />
ASA 0037 0081<br />
Asuka 0072 0037 0081 0000 0038<br />
Audiosonic 0278<br />
AVP 0352 0000<br />
AWA 0037 0278 0642 0043<br />
Baird 0106 0278 0104 0041 0000<br />
Basic Line 0278 0209 0072<br />
Bestar 0278<br />
Black Diamond 0642 0278<br />
Black Panther 0278<br />
Blaupunkt 1562 0226 0081<br />
Blue Sky 0037 0209 0348 0072<br />
0352 0278 0000<br />
Bondstec 0072<br />
Brandt 0041 0320<br />
Brandt Electronique 0041<br />
Brinkmann 0209 0348<br />
Bush 0072 0278 0315 0209 0352 0000<br />
0348 0081<br />
Carena 0209 0081<br />
Carrefour 0045<br />
Casio 0000<br />
Cathay 0278<br />
CGE 0041 0000<br />
Cimline 0072 0209<br />
Clatronic 0072 0000<br />
Combitech 0352<br />
Condor 0278<br />
Crown 0278 0072<br />
Cyrus 0081<br />
Daewoo 0278 0642 0209 0348 0352<br />
0045<br />
Dansai 0072 0278<br />
Daytron 0278<br />
de Graaf 0042 0081 0104 0048<br />
Decca 0000 0041 0081 0067 0348<br />
0209<br />
Deitron 0278<br />
Denko 0072<br />
Diamant 0037<br />
Domland 0209<br />
Dual 0041 0081 0278 0000<br />
Dumont 0000 0081 0104<br />
Elbe 0278 0038<br />
Elcatech 0072<br />
Elin 0240<br />
Elsay 0072<br />
Elta 0072 0278<br />
Emerson 0072 0045 0000<br />
ESC 0278 0240<br />
Etzuko 0072<br />
Fast 0897<br />
Ferguson 0041 0320 0000 0278<br />
Fidelity 0000 0072 0240<br />
Finlandia 0104 0081 0042 0000 0048<br />
0384<br />
Finlux 0000 0081 0104 0042<br />
Firstline 0072 0209 0348 0043 0037<br />
0045 0042 0278<br />
Fisher 0047 0104 0038<br />
Flint 0209<br />
Frontech 0072<br />
Fujitsu 0000<br />
Funai 0000<br />
Galaxi 0000<br />
Galaxis 0278<br />
GE 0320<br />
GEC 0081<br />
General Technic 0348<br />
Genexxa 0104<br />
Goldhand 0072<br />
GoldStar 0037 0000<br />
Goodmans 0000 0072 0240 0278<br />
0037 0081 0348 0209 0352 0642<br />
Graetz 0041 0104 0240<br />
Granada 0104 0048 0081 0240 0037<br />
0226 0042 0000<br />
Grandin 0072 0037 0000 0278 0209<br />
Grundig 0081 0347 0226 0320 0348<br />
0072<br />
Haaz 0348 0209<br />
Hanimex 0352<br />
Hanseatic 0037 0209 0278 0081 0038<br />
Harwood 0072<br />
HCM 0072<br />
Hinari 0072 0209 0352 0041 0278<br />
0240<br />
Hisawa 0209 0352<br />
Hischito 0045<br />
Hitachi 0042 0041 0000 0240 0081<br />
0104 0384<br />
Hornyphone 0081<br />
Hypson 0072 0209 0278 0352<br />
Imperial 0000 0240<br />
Ingersoll 0209 0240<br />
Inno Hit 0240 0278 0072<br />
Interbuy 0037 0072<br />
Interfunk 0081 0104<br />
Internal 0278<br />
International 0278 0037<br />
Intervision 0000 0278 0037 0209 0348<br />
Irradio 0072 0037 0081<br />
ITT 0106 0041 0384 0104 0240<br />
ITT Nokia 0048<br />
I<strong>TV</strong> 0278 0037<br />
JMB 0209 0352<br />
Joyce 0000<br />
JVC 0041 0067 0384<br />
Kaisui 0072<br />
Kambrook 0037<br />
Karcher 0278<br />
Kendo 0106 0209 0315 0348 0072<br />
0037<br />
Kenwood 0041 0038<br />
KIC 0000<br />
Kimari 0047<br />
Kneissel 0352 0209 0348 0037<br />
Kolster 0209 0348<br />
Korpel 0072<br />
Kuba 0047<br />
Kuba Electronic 0047<br />
Kuwa 0226<br />
Kyoto 0072<br />
Lenco 0278<br />
Leyco 0072<br />
LG 0037 0000 0278<br />
Lifetec 0209 0348<br />
<strong>Loewe</strong> 0081 1562 0226 0866 0037<br />
Logik 0240 0072 0106 0209<br />
Lumatron 0278<br />
Luxor 0106 0043 0072 0104 0047<br />
0048<br />
Magnavox 0081<br />
Manesth 0072 0045 0081 0209<br />
Marantz 0081 0038 0209<br />
Mark 0278<br />
Matsui 0209 0348 0037 0240 0352<br />
0000<br />
Mediator 0081<br />
Medion 0209 0348 0352<br />
Melectronic 0000 0037 0038<br />
Memorex 0104 0000 0037 0048 0047<br />
Memphis 0072<br />
Metz 1562 0347 0081 0226 0037<br />
Micormay 0348<br />
Micromaxx 0209<br />
Migros 0000<br />
Mitsubishi 0043 0067 0081<br />
Multitec 0037<br />
Multitech 0000 0072 0104<br />
Murphy 0000<br />
Myryad 0081<br />
NAD 0104<br />
National 1562 0226<br />
NEC 0041 0038 0067 0104 0037<br />
Neckermann 0041 0081<br />
Nesco 0072 0000 0352<br />
Neufunk 0209<br />
Nikkai 0072 0278<br />
Nokia 0104 0106 0315 0041 0278<br />
0240 0048 0042 0081<br />
Nordmende 0041 0384 0320 0067<br />
NU-TEC 0209 0348<br />
Oceanic 0000 0048 0106 0081 0104<br />
0041<br />
Okano 0315 0209 0348 0072 0278<br />
Orbit 0072<br />
Orion 0209 0352 0348<br />
Orson 0000<br />
Osaki 0000 0037 0072<br />
Osume 0072<br />
Otake 0209<br />
Otto Versand 0081<br />
65 -
Codelist RC3 / Lista de códigos RC3<br />
Palladium 0072 0315 0037 0041 0209<br />
0240 0348 0432<br />
Palsonic 0072 0000<br />
Panasonic 1562 0226<br />
Pathe Cinema 0043<br />
Pathe Marconi 0041<br />
Perdio 0000 0209<br />
Philco 0038 0072<br />
Philips 0081 0384<br />
Phoenix 0278<br />
Phonola 0081<br />
Pioneer 0067 0081 0042<br />
Portland 0278<br />
Prinz 0000<br />
Profi tronic 0081 0240<br />
Proline 0000 0320<br />
Prosco 0278<br />
Prosonic 0209 0278 0000<br />
Protech 0081<br />
Provision 0278<br />
Pye 0081<br />
Quasar 0278<br />
Quelle 0081<br />
Radialva 0037 0072 0081 0048<br />
Radiola 0081<br />
Rank 0041<br />
Reoc 0209 0348 0278<br />
Rex 0041 0384<br />
RFT 0072<br />
Roadstar 0240 0072 0037 0278<br />
Royal 0072<br />
Saba 0041 0320 0384 0278<br />
Saisho 0209 0348<br />
Salora 0043 0106 0104<br />
Samsung 0240 0432<br />
Sansui 0041 0067 0106 0072 0348<br />
Sanyo 0104 0047 0048 0067<br />
Saville 0352 0278 0240<br />
SBR 0081<br />
Scan Sonic 0240<br />
Schaub Lorenz 0041 0104 0000 0106<br />
0315<br />
Schneider 0072 0000 0037 0081 0278<br />
0240 0042 0897<br />
Seaway 0278<br />
SEG 0072 0240 0278 0642 0081<br />
SEI 0081<br />
Sei-Sinudyne 0081<br />
Seleco 0041 0384 0037<br />
Sentra 0072<br />
Setron 0072<br />
Sharp 0048 0037 0569<br />
Shintom 0072 0104<br />
Shivaki 0037<br />
Siemens 0037 0104 0081 0320 0347<br />
Siera 0081<br />
Silva 0037<br />
Silver 0278<br />
Singer 0045<br />
Sinudyne 0081 0209<br />
Smaragd 0348<br />
Sonitron 0047<br />
Sonneclair 0072<br />
Sonoko 0278<br />
Sonolor 0048<br />
Sontec 0037 0278<br />
Sony 0032 0106<br />
Soundwave 0037 0209 0348<br />
Ssangyong 0072<br />
Standard 0278<br />
Starlite 0037 0104<br />
Stern 0278<br />
Sunkai 0209 0348 0278<br />
Sunstar 0000<br />
Suntronic 0000<br />
Sunwood 0072<br />
Supra 0037 0240<br />
Symphonic 0000 0072<br />
T+A 0226<br />
Taisho 0209<br />
Tandberg 0278<br />
Tashiko 0000 0048 0240 0081 0037<br />
Tatung 0000 0041 0081 0048 0043<br />
0209 0348 0352<br />
Teac 0072 0041 0000 0278 0642<br />
0037 0081 0307<br />
TEC 0278 0072<br />
Tech Line 0072<br />
TechniSat 0348 0209<br />
Teleavia 0041<br />
Telefunken 0041 0320 0384 0278<br />
Teletech 0072 0278 0000<br />
Tenosal 0072<br />
Tensai 0000 0037 0072<br />
Tevion 0348 0209<br />
Thomson 0320 0041 0067 0384 0278<br />
Thorn 0041 0104 0037<br />
Thorn-Ferguson 0320<br />
Tokai 0072 0037 0041 0104<br />
Tokiwa 0072<br />
Topline 0348<br />
Toshiba 0045 0041 0384 0043 0081<br />
Towada 0072<br />
Tredex 0278<br />
Uher 0037 0240<br />
Ultravox 0278<br />
Unitech 0240<br />
United Quick Star 0278<br />
Universum 0000 0081 0240 0037<br />
0106 0348 0209 0104<br />
Victor 0067<br />
Watson 0081 0352 0278 0642<br />
Weltblick 0037<br />
Yamaha 0041<br />
Yamishi 0072 0278<br />
Yokan 0072<br />
Yoko 0037 0072 0240<br />
ZX 0209<br />
SAT /STB)<br />
@sat 1300<br />
ABsat 0668 0123 1323 0710<br />
ADB 0642<br />
Adcom 0200<br />
AGS 0668 0710<br />
Akai 0200<br />
Akena 0668<br />
Alba 0455 0713<br />
Allsat 0200 1017 1043<br />
Alltech 0713<br />
Alpha 0668 0200<br />
Altai 0396<br />
Amitronica 0713<br />
Ampere 0396 0132<br />
Amstrad 0847 0713 0742 0396 0132<br />
0882 0885 0863 0501 0795 1113<br />
Anglo 0713<br />
Ankaro 0713<br />
AntSat 1017 1083<br />
Apollo 0455<br />
Arcon 1205 1043 0834 0132 1075<br />
Armstrong 0200<br />
Asat 0200<br />
ASLF 0713<br />
AssCom 0853<br />
Astacom 0668 0710<br />
Aston 1129<br />
Astra 0607 0713<br />
Astro 0133 0173 0501 0658 0607<br />
1113 1099 1100 0200<br />
Athena 0668<br />
Atlanta 0871<br />
Aurora 0879<br />
Austar 0863 0642 0497 0879 1176<br />
Avalon 0396<br />
Axiel 0668 0710<br />
Axis 1111 0834<br />
Beko 0455<br />
Bentley Walker 1017<br />
Blaupunkt 0173<br />
Blue Sky 0713 0885<br />
Boca 0132 0713<br />
Boston 0132 0710 0668<br />
Broco 0713<br />
BskyB 0847 1175<br />
BT 0668 0710<br />
Bubu Sat 0713<br />
Cambridge 0501<br />
Canal Satellite 0853<br />
Canal+ 0853<br />
Cherokee 0123 0710 1323<br />
Chess 0157 0605 0713 1085<br />
CityCom 1176 0115 0607 0299<br />
Clemens Kamphus 0834 0396<br />
Cobra 0396<br />
Colombia 0668 0132<br />
Columbia 0132<br />
Columbus 0668<br />
Comag 0132<br />
Condor 0607<br />
Connexions 0396<br />
Conrad 0607 0573 0115 0501<br />
Conrad Electronic 0607 0713<br />
Cryptovision 0455 0795<br />
Cyrus 0200<br />
D-box 1127 1114 0723<br />
Daeryung 0396<br />
Daewoo 1296 0713<br />
Delfa 0863<br />
Deltasat 1075<br />
DGTEC 1242<br />
Digatron 1294<br />
Digenius 0299<br />
Digiality 0607<br />
Digipro 1105<br />
DigiQuest 0863<br />
Diskoverer 0605 0157<br />
Diskovery 0668 0710<br />
Diseqc 0710<br />
Distratel 0084 0885 1205<br />
Distrisat 0200<br />
DMT 1075<br />
DNT 0200 0396<br />
DREAM multimedia.<strong>TV</strong> 1237<br />
DStv 0642 0879<br />
Echostar 0610 1169 0871 0167 0853<br />
1086 1200 0454 0396 0713<br />
0668 0511 0453<br />
Einhell 0132 0713 0501<br />
Elap 0713 1129 0668 0710<br />
Elsat 0713<br />
Elta 0200<br />
Emme Esse 0871<br />
Engel 1017 0713<br />
EP Sat 0455<br />
Eurieult 0084 0885 0882<br />
Eurocrypt 0455<br />
Europa 0863 0607 0501 0200<br />
Europhon 0299 0607<br />
Eurosky 0607 0132 0299 0115<br />
0114 0501<br />
Eurostar 0607 0115<br />
Fenner 0668 0157 0605 0713<br />
Ferguson 0455<br />
- 66
Codelist RC3 / Lista de códigos RC3<br />
Fidelity 0501<br />
Finlandia 0455<br />
Finlux 0573 0455<br />
Flair Mate 0713<br />
Force 1101<br />
Fortec Star 1017 1083<br />
Foxtel 0879 0720 0455 0497<br />
0795 1176<br />
Fracarro 0871 0668<br />
Freecom 0501 0173<br />
Freesat 0882<br />
FTEmaximal 0713 0863<br />
Fuba 0396 0173 0573 0115 0299<br />
Fugionkyo 1105<br />
Galaxis 1111 1101 0834 0863 1176<br />
0853 0115 0879<br />
Garnet 1075<br />
GF 0834 1043<br />
GF Star 1043<br />
GOD Digital 0200<br />
Goldbox 0853<br />
Goldvision 1017<br />
Gooding 0571<br />
Goodmans 1284 0455<br />
Gradiente 0887<br />
Granada 0455<br />
Grandin 0084<br />
Grundig 0173 0847 1150 1291 1435<br />
0571 0750 0879 0885 0853 0501<br />
1297 1330<br />
Hanseatic 0605 1099 1100<br />
Hänsel & Gretel 0132 0607<br />
Hauppauge 1294<br />
HDT 1011<br />
Heliocom 0607<br />
Helium 0607<br />
Hirschmann 0396 0882 1113 1111<br />
0173 0573 1085 0299 0501<br />
0710 0607 0668<br />
Hitachi 0455<br />
HNE 0742 0132<br />
Houston 0668 0396<br />
Humax 1176 0863<br />
Huth 0132 0607 1017 1075<br />
Hyundai 1011 1159 1075<br />
ID Digital 1176 0863<br />
Imex 0084<br />
Ingelen 0396 0882<br />
International 0132<br />
Interstar 1105 1017<br />
Intervision 0628 0607<br />
Invideo 0871<br />
IRTE 0609<br />
Italtel 0871<br />
ITT Nokia 0573 0455 0723<br />
JOK 0710<br />
JVC 0571<br />
K-SAT 0713<br />
Kamm 0713<br />
Kaon 1300<br />
KaTelco 1111<br />
Kathrein 0658 0249 1057 0173<br />
1221 0200 0713 0668 0742<br />
0123 0115 1323 0710<br />
Kathrein Eurostar 0115<br />
Kiton 0114<br />
Klap 0668 0710<br />
Konig 0607<br />
Koscom 0834 1043<br />
Kreiling 0658 0249 0114<br />
Kreiselmeyer 0173<br />
Kyostar 0132<br />
L&S Electronic 1043<br />
Labgear 1296<br />
LaSAT 0607 0115 0132 0157 0299<br />
Lenco 0713 0115 0607<br />
Lenson 0501<br />
Lexus 0200<br />
LG 1075<br />
Lifesat 0605 0299 1043 0713<br />
Logix 1017 1075<br />
Lorenzen 0299 1294 0607 0742 0132<br />
Luxor 0573 0501<br />
M&B1 0605<br />
Manata 0710 0668 0713<br />
Manhattan 1083 0455 0710 0668<br />
0834 1017<br />
Marantz 0200<br />
Maspro 0750 0713 0173 0571<br />
Matsui 0571 0710 0173<br />
Max 0607<br />
MB 0605<br />
Mediabox 0853<br />
Mediacom 1206<br />
MediaSat 0501 0853<br />
Medion 0713 0299 1043<br />
Medison 0713<br />
Mega 0200<br />
Metronic 0713 1215 0084 0885 1205<br />
Metz 0173<br />
Micro 0607 0501 0713<br />
Micro electronic 0713<br />
Micro Technology 0713<br />
Micromaxx 0299<br />
Microtec 0713<br />
Minerva 0571<br />
Mitsubishi 0455<br />
Morgan’s 0200 0713 0132<br />
Motorola 0856<br />
Multichoice 0642 0879<br />
Multitec 0157<br />
Myryad 0200<br />
Mysat 0713<br />
Netgem 1322<br />
Neuhaus 0501 0713 0834 0607<br />
Neusat 0713 0834<br />
Nikko 0713 0723 0200<br />
Nokia 1023 1114 0751 1127 0723<br />
0853 0573 1223 0455 1723<br />
1310 1312<br />
Nordmende 0455<br />
Nova 0879<br />
Octal<strong>TV</strong> 1294<br />
Okano 0668<br />
OnDigital 0751 0329 0241 0867 0133<br />
Optex 0834<br />
Optus 0879 0853<br />
Orbitech 1099 1100 0200 0501 0157<br />
Origo 0497<br />
Ouralis 1205<br />
Oxford 0668<br />
Pace 0455 0847 0887 1175 0241<br />
0867 0123 1323 0791 0795<br />
0720 0497 0200 0853 0710 1423<br />
Packsat 0710<br />
Palcom 0299<br />
Palladium 0571 0501<br />
Palsat 0501<br />
Panasat 0879 0615<br />
Panasonic 0847 1104 0455 1320<br />
Panda 0455 0607 0173 0834<br />
Patriot 0668<br />
Philips 0200 1114 0853 0455 0750<br />
0710 0668 0571 0173 0133 1336<br />
Phonotrend 0863 1017 1200<br />
Pioneer 0329 0853 0352<br />
Planet 0871 0396<br />
Polytron 0396<br />
Praxis 0511<br />
Preisner 0132 0396 1101 1113<br />
Premiere 0853 1114 1127 0723 1111<br />
1176 1195 1100 0249 0658 1435<br />
Primacom 1111<br />
Profi le 0668 0710<br />
Promax 0455<br />
Prosat 0628<br />
Prosonic 0742<br />
Pye 0571<br />
Pyxis 0834<br />
Quadral 0628 0668 0710 1323<br />
Quelle 0607 0742 0115<br />
Radiola 0200<br />
Radix 0396 1113 0882<br />
RFT 0200<br />
Roadstar 0713<br />
Rover 0628 0713<br />
Saba 0710 0885 0115 0607<br />
Sabre 0455<br />
Sagem 0820 1114 1253<br />
Samsung 0863 1243 1343 0853 1206<br />
1017 1293 1292<br />
SAT 0501<br />
Sat Control 1300<br />
Sat Partner 0501<br />
Sat Team 0713<br />
Satcom 0605 0607<br />
Satec 0713 0834<br />
Satline 0628<br />
Satstation 1083<br />
Schneider 0710 0668 0157 1206<br />
Schwaiger 0605 0157 0607 0885<br />
1111 0132 1075<br />
SCS 0115 0299<br />
Seemann 0396<br />
SEG 0605 0742 0114 1087<br />
Seleco 0871<br />
Septimo 1205 0885<br />
Siemens 0173<br />
Skantin 0713<br />
Skinsat 0501<br />
SKR 0713<br />
Sky 0847 0856 0887 1014<br />
SKY+ 1175<br />
Skymaster 0713 0605 0157 1200<br />
1085 1075 0628<br />
Skymax 0200<br />
SkySat 0157 0605 0713<br />
SL 0132 0742<br />
SM Electronic 0157 0713 1200<br />
1075 1085<br />
Smart 0132 0299 1101 0882<br />
0396 1113 0115 0713<br />
Sony 0282 0847 0853 0455<br />
SR 0132<br />
Starland 0713<br />
Strong 0879 0853 1105 1159 1300<br />
Sunsat 0713<br />
Sunstar 0132<br />
Tantec 0455<br />
Tatung 0455<br />
Teac 1322<br />
Tecatel 1200<br />
TechniSat 0200 1099 1100 1195<br />
0501 1322<br />
Technosat 1206<br />
Technowelt 0607 0885<br />
Techsan 1017<br />
Techwood 0114<br />
Telasat 0605 0115 0607<br />
Teleciel 1043<br />
Telecom 0713<br />
Telefunken 0710<br />
Teleka 0396 0750 0501 0607 0834<br />
Telesat 0605 0607<br />
Telestar 0501 1099 1100 0114<br />
0200 0157<br />
Teletech 0114<br />
Televes 0455 0501 0132<br />
67 -
Codelist RC3 / Lista de códigos RC3<br />
Thomson 0455 0713 0853 0115 0607<br />
12910820 0668 0710 1046<br />
Thorn 0455<br />
Tokai 0200<br />
Tonna 0455 0668 0501 0713 0834<br />
Topfi eld 1206<br />
Toshiba 0455<br />
TPS 0820 1253<br />
Triasat 0501<br />
Triax 0501 0115 0200 0396 0713<br />
08530114 1296 1291 0132<br />
Turnsat 0713<br />
Twinner 0132 0713<br />
UEC 0879<br />
Uher 0157<br />
Unisat 0200<br />
Universum 0173 0571 0607 0299<br />
0115 0742 1087<br />
Van Hunen 0299<br />
Variosat 0173<br />
Ventana 0200<br />
Vestel 0742<br />
VH-Sat 0299<br />
Viasat 1323 1023 0820<br />
Visionic 1105<br />
Visiosat 0710 0713<br />
Wetekom 0157 0605 0501<br />
Wewa 0455<br />
Wisi 0173 0396 0299 0455 0501<br />
0607 0834<br />
Worldsat 0710 0114 0123 0668<br />
XCOM 0123 0668<br />
XSat 0668 0713 0123<br />
Xtreme 1300<br />
YES 0887<br />
Zehnder 1075 0742 0114 0115 0419<br />
Zenith 0856<br />
Zeta Technology 0200<br />
Zinwell 1176<br />
Cable Box (STB)<br />
Austar 0276<br />
BT 0003<br />
Canal Plus 0443<br />
Comcrypt 0443<br />
Decsat 0423<br />
Filmnet 0443<br />
France Telecom 0817<br />
General Instruments 0276<br />
Jerrold 0003 0276<br />
Kabelvision 0003<br />
Macab 0817<br />
Melita 0003<br />
MNet 0443<br />
Mr Zapp 0817<br />
Noos 0817<br />
NTL Cabletell 0276<br />
Ono 1068<br />
Optus 0276 1060<br />
Pace 1068 1060<br />
Philips 0817 0286<br />
PVP Stereo Visual 0003<br />
Sagem 0817<br />
Tele+1 0443<br />
Telepiu 0443<br />
Tudi 0286<br />
United Cable 0003<br />
Visiopass 0817<br />
- 68
69 -