Turbonetics 350Z Turbo Kit Installation Manual 15134-t.pdf
Turbonetics 350Z Turbo Kit Installation Manual 15134-t.pdf
Turbonetics 350Z Turbo Kit Installation Manual 15134-t.pdf

Create successful ePaper yourself
Turn your PDF publications into a flip-book with our unique Google optimized e-Paper software.
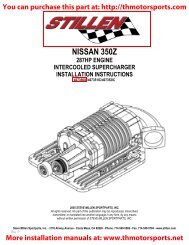
You can purchase this part at: http://thmotorsports.com<br />
INSTALLATION INSTRUCTIONS<br />
TURBOCHARGER SYSTEMS:<br />
2003 / 2004 Nissan <strong>350Z</strong><br />
VQ35 3.5L V6 Engine, <strong>Manual</strong> Transmission Only<br />
P/N <strong>15134</strong> (No Catalytic Converter)<br />
P/N 15136 (With Catalytic Converter)<br />
P/N 15138 (No Cat, Fuel or ECU Upgrade)<br />
<strong><strong>Turbo</strong>netics</strong>, Inc. * 2255 Agate Court * Simi Valley, CA * 805-581-0333 * <strong><strong>Turbo</strong>netics</strong>Inc.com<br />
More installation manuals at: www.thmotorsports.net
You can purchase this part at: http://thmotorsports.com<br />
READ THIS FIRST: Study these instructions completely before proceeding. Engine and/or turbocharger damage<br />
may occur if any component within these instructions is improperly installed. <strong><strong>Turbo</strong>netics</strong>, Inc or any of its<br />
distributors cannot be held responsible for damages as a result of negligent or improper installation. This<br />
complete turbocharger system can be installed using common tools and automotive procedures, but installer must<br />
have a thorough knowledge of automotive engine operation and feel comfortable working on the vehicle. If in<br />
doubt, contact <strong><strong>Turbo</strong>netics</strong>’ technical support staff at 805-581-0333, between the hours of 8:00AM and 5:00PM<br />
PST, Monday through Friday.<br />
Remove the turbocharger system from its carton and inspect for any obvious physical damage. All kit<br />
components are thoroughly inspected and carefully packaged prior to shipment from the factory. If any shipping<br />
damage is evident, contact your supplier and request that they process a claim with the shipper involved. Be sure<br />
to review the parts list on page 3 to verify that you have all necessary system components to proceed. If any<br />
components in the parts list are missing, contact <strong><strong>Turbo</strong>netics</strong>’ customer service staff.<br />
Although this turbocharger system has been designed to use many of the factory emissions controls (P/N 15136<br />
includes a replacement catalytic converter), it is not currently “smog” legal in California, and therefore<br />
recommended for “off road” use only. In other states, check local laws regarding aftermarket modification to<br />
emission controlled vehicles.<br />
This <strong><strong>Turbo</strong>netics</strong>’ turbocharger system is available in 3 combinations. P/N <strong>15134</strong> and 15136 are intended for the<br />
typical enthusiast, and include all necessary components and hardware to simply “bolt on” the turbo system and<br />
drive. Both of these systems are identical except for 1 exhaust tube (which does or doesn’t contain an<br />
aftermarket catalytic converter). P/N 15138 is intended for the “tuner” enthusiast who wants the freedom to<br />
choose his own fuel components and controls, and includes all the same components and hardware as P/N<br />
<strong>15134</strong>, except NO fuel injectors, fuel pump or ECU upgrade.<br />
The information contained in this publication was accurate and in effect at the time the publication was approved<br />
for printing and is subject to change without notice or liability. <strong><strong>Turbo</strong>netics</strong> reserves the right to revise the<br />
information presented herein or to discontinue the production of parts described at any time.<br />
SAFETY REQUIREMENTS: It is recommended to follow these precautions.<br />
• Always wear safety glasses & gloves.<br />
• Turn the ignition switch to the OFF position & disconnect the battery.<br />
• Always use properly rated jack stands when working under the vehicle.<br />
• Prevent unexpected vehicle movement by using wheel chocks and/or parking brake.<br />
• Operate the vehicle only in well ventilated areas.<br />
• Do not smoke or use flammable items near or around the vehicle’s fuel system.<br />
• Keep hands, clothing and other objects away from moving parts when engine is running.<br />
SUPPLIES: It is recommended to have the following items before beginning installation.<br />
• Nissan factory service manual, for your model year <strong>350Z</strong><br />
• A large table or bench, and plenty of adjacent available workspace<br />
• Standard selection of automotive tools, primarily metric sizes<br />
• An assortment of “zip ties” and/or thin-gauge steel wire<br />
• The ability to securely lift the vehicle at least a few feet off the ground<br />
• High temp. automotive RTV sealant<br />
• NPT thread sealant<br />
• Replacement engine oil, oil filter, and power steering fluid<br />
• 7/64” and 3/8” drill bits<br />
• Step drill, 1/8” – 9/16” range<br />
60130_revG_<strong>350Z</strong>_manual.doc Page 2 of 35<br />
More installation manuals at: www.thmotorsports.net
You can purchase this part at: http://thmotorsports.com<br />
TORQUE RECOMMENDATION: When removing and re-installing factory fasteners, refer to the Nissan service<br />
manual for torque values. When installing fasteners included in this kit, refer to the following chart:<br />
Fastener<br />
Size<br />
Torque<br />
(Pound-Feet)<br />
1/4" or 6mm 10 13<br />
5/16” or 8mm 19 25<br />
Torque<br />
(Newton-Meters)<br />
3/8” or 10mm 33 45<br />
NPT fittings 2-3 turns past finger tight<br />
TURBOCHARGER SYSTEM PARTS LIST:<br />
QTY P/N DESCRIPTION P/N <strong>15134</strong> P/N 15136 P/N 15138<br />
1 11096 <strong>Turbo</strong>charger, 60-1 / Stg.5 / Ball Bearing X X X<br />
1 5-312 Air to Air Intercooler, Spearco X X X<br />
1 10781 Wastegate, Evolution X X X<br />
1 10843 Blow-off Valve, Raptor X X X<br />
1 11097 Hardware <strong>Kit</strong>, Hoses / Clamps X X X<br />
1 11098 Hardware <strong>Kit</strong>, Nuts / Bolts / Fittings X X X<br />
1 11099 Hardware <strong>Kit</strong>, Gaskets / Misc. X X X<br />
1 11100 Hardware <strong>Kit</strong>, Fuel Components X X<br />
1 11103 ECU Return Box <strong>Kit</strong> X X<br />
1 21175 Tube, <strong>Turbo</strong>charger to Intercooler X X X<br />
1 21176 Tube, Intercooler to MAF Sensor – 1 X X X<br />
1 21177 Tube, Intercooler to MAF Sensor – 2 X X X<br />
1 21178 Tube, Intercooler to MAF Sensor – 3 X X X<br />
1 21179 Tube, MAF Sensor to Throttle Body X X X<br />
1 21180 Tube, Air filter to <strong>Turbo</strong>charger X X X<br />
1 21181 Tube, Exhaust, Crossover X X X<br />
1 21182 Tube, Exhaust, U-bend X X X<br />
1 21183 Tube, Exhaust, Y-pipe X X X<br />
1 21184 Tube, Exhaust, Turbine Hsg. Inlet X X X<br />
1 21185 Tube, Exhaust, Downpipe – 1 X X X<br />
1 21186 Tube, Exhaust, Downpipe – 2 X X X<br />
1 21200 Tube, Exhaust, Wastegate Discharge X X X<br />
1 21204 Tube, Exhaust, Downpipe – 3 (No Cat.) X X<br />
1 21201 Tube, Exhaust, Downpipe – 3 (With Cat.) X<br />
1 21213 Tube Assembly, Replacement A/C line X X X<br />
1 30223 Heat Shield, Tangential T4 housing X X X<br />
1 21205 Support Bracket, Downpipe - 3 X X X<br />
1 31080 Air Filter, AEM Dry-Flo, 3.0” Inlet X X X<br />
1 60130 Install Instructions X X X<br />
60130_revG_<strong>350Z</strong>_manual.doc Page 3 of 35<br />
More installation manuals at: www.thmotorsports.net
You can purchase this part at: http://thmotorsports.com<br />
QTY P/N DESCRIPTION QTY P/N DESCRIPTION<br />
HARDWARE KIT# 11097 (HOSES / CLAMPS) PARTS LIST:<br />
3 FT 10721 Oil Supply Hose, -3 Fittings<br />
3 30162-4 Silicone Hose Coupling, 3.0”<br />
2 30172-4 Silicone Hose Coupling, 2.5”<br />
2 30380-4 Silicone Hump Connect, 2.5”<br />
1 30444-4 Silicone 45’ Elbow, 2.5”<br />
6 FT 30542-BK Silicon Vacuum Hose, 5/32”<br />
10 30275-250 T-bolt Band Clamp, 2.5”<br />
6 30275-300 T-bolt Band Clamp, 3.0”<br />
3 31073 V-band Clamp<br />
2 30232 V-band Clamp<br />
4 30817 Hose Clamp, 5/8”<br />
7 FT 30827 Hose, Oil Drain, 5/8”<br />
HARDWARE KIT# 11098 (NUTS / BOLTS / FITTINGS) PARTS LIST:<br />
1 30133 Fitting, 3/8” NPT x 5/8” Hose,<br />
Straight<br />
2 30306 Fitting, 1/8” NPT x 5/32” Hose,<br />
Straight<br />
1 30307 Fitting, 1/8” NPT x 5/32” Hose,<br />
Elbow<br />
1 30544 Fitting, 1/8” NPT x -3, Straight<br />
1 30551 Fitting, 1/8” NPT x -3, Elbow<br />
1 30562 Fitting, 1/8” NPT, M x M x F<br />
1 30816 Fitting, 1/2" NPT x 5/8” Hose,45’<br />
2 30566 Hex Bolt, 1/4 -20 x 1/2" Lg.<br />
4 30567 Hex Bolt, 1/4 -20 x 3/4" Lg.<br />
2 30570 Hex Bolt, 5/16 -18 x 1.0" Lg.<br />
2 30739 Hex Bolt, M8-1.25 x 25mm Lg.<br />
2 30700 Hex Bolt, M8-1.25 x 20mm Lg.<br />
2 30248 Hex Bolt, 1/4-20 x 5/8” Lg.<br />
6 31003 Hex Bolt, M10-1.25 x 40mm Lg.<br />
4 31005 Hex Bolt, M10-1.50 x 20mm Lg.<br />
6 30589 Flat Washer, 5/16” or M8<br />
6 30804 Flat Washer, M10<br />
4 30591 Flat Washer, 1/4" or M6<br />
10 30593 Lock Washer, 5/16” or M8<br />
14 30805 Lock Washer, M10<br />
6 30596 Lock Washer, 1/4” or M6<br />
4 30578 Hex Nut, 1/4-20<br />
6 30653 Hex Nut, M8<br />
10 30803 Hex Nut, M10-1.25<br />
3 30806 Stud, M10-1.25 x 42mm Lg.<br />
4 30860 Stud, M8-1.25 x 30mm Lg.<br />
3 30862 Hex Plug for O2 Bung, M18-1.5<br />
1 31004 Socket Hd. Bolt, M10-1.25 x<br />
50mm Lg.<br />
HARDWARE KIT# 11099 (GASKETS / MISC.) PARTS LIST:<br />
2 20142 Gasket, W’gate Disch.,Evolution<br />
1 20259 Flange, Oil Drain, 1/2” NPT<br />
1 20732P Disch. Horn, Raptor<br />
1 21202 Support Bracket, <strong>Turbo</strong><br />
2 21203 Mounting Bracket, Intercooler<br />
1 30141 Gasket, Oil Drain, T3/T4<br />
1 30263 Gasket, Turbine Inlet, T3<br />
1 30468 O-ring, Flange, Raptor<br />
1 30808 Tap, 1/8” NPT<br />
1 30809 Tap, 3/8” NPT<br />
1 31006 Loop Strap, 1.0” dia., 1/4" hole<br />
7.5<br />
FT<br />
31007 Heat Shield Wrap, 1.5” Wide<br />
HARDWARE KIT# 11100 (FUEL COMP’TS) PARTS LIST:<br />
6 21210 Spacer, Fuel Injector<br />
6 21211 Adapter, Fuel Injector<br />
6 31001 Fuel Injector, Upgrade<br />
1 31002 Fuel Pump, Upgrade<br />
ECU RETURN BOX KIT# 11103 PARTS LIST:<br />
1 31009 ECU Return Box<br />
1 31011 Pair of Foam Inserts<br />
1 31038 Fedex Return Label<br />
1 31039 Serial No. Decal, White<br />
1 31043 Electronic Mat’l Decal, Red<br />
60130_revG_<strong>350Z</strong>_manual.doc Page 4 of 35<br />
More installation manuals at: www.thmotorsports.net
You can purchase this part at: http://thmotorsports.com<br />
P/N 11096 P/N 5-312 P/N 10781<br />
P/N 10843 P/N 11097 P/N 11098<br />
P/N 11099 P/N 11100 P/N 21175<br />
P/N 21176 P/N 21177 P/N 21178<br />
60130_revG_<strong>350Z</strong>_manual.doc Page 5 of 35<br />
More installation manuals at: www.thmotorsports.net
You can purchase this part at: http://thmotorsports.com<br />
P/N 21179 P/N 21180 P/N 21181<br />
P/N 21182 P/N 21183 P/N 21184<br />
P/N 21185 P/N 21186 P/N 21200<br />
P/N 21204 P/N 21201 P/N 21213<br />
60130_revG_<strong>350Z</strong>_manual.doc Page 6 of 35<br />
More installation manuals at: www.thmotorsports.net
You can purchase this part at: http://thmotorsports.com<br />
P/N 30223 P/N 21205 P/N 31080<br />
P/N 11103 P/N 60130<br />
60130_revG_<strong>350Z</strong>_manual.doc Page 7 of 35<br />
More installation manuals at: www.thmotorsports.net
You can purchase this part at: http://thmotorsports.com<br />
THIS PAGE LEFT BLANK INTENTIONALLY<br />
60130_revG_<strong>350Z</strong>_manual.doc Page 8 of 35<br />
More installation manuals at: www.thmotorsports.net
You can purchase this part at: http://thmotorsports.com<br />
PREREQUISITE STEPS: Before getting your hands dirty while under the hood, there are 2 prerequisite steps.<br />
See the following 2 sections for detailed instructions regarding A/C Tube Replacement and ECU Removal &<br />
Shipping.<br />
A/C TUBE REPLACEMENT: The first prerequisite step is to have a replacement air conditioning tube assembly<br />
(included in the kit) installed by a professional A/C technician. This is necessary because the turbocharger is<br />
located very close to this A/C tube in its factory location, so a replacement “shielded” tube assembly is supplied to<br />
move it away from the hot turbocharger. HAZARDOUS: Do not attempt to perform this step without proper<br />
training or equipment. Take your car to a local auto repair shop that is capable of discharging and recharging the<br />
A/C system on your car, and have them perform the following 8 steps. Don’t forget to bring the replacement part,<br />
P/N 21213 (FIGURE 1).<br />
1. Turn the ignition switch to the OFF position & disconnect the battery.<br />
2. Using factory recommended procedures, evacuate (discharge) the A/C system.<br />
3. Remove factory air filter box assembly (FIGURE 2), to provide easy access to the A/C tube being replaced.<br />
FIGURE 1 FIGURE 2<br />
4. Remove factory A/C tube, as shown in FIGURES 3 and 4. Tube routes from the A/C compressor (front,<br />
driver’s side of engine) on one end, towards the front-mount heat exchanger on the other end.<br />
FIGURE 3 FIGURE 4<br />
60130_revG_<strong>350Z</strong>_manual.doc Page 9 of 35<br />
More installation manuals at: www.thmotorsports.net
You can purchase this part at: http://thmotorsports.com<br />
5. Install replacement A/C tube assembly (P/N 21213) in same location. See FIGURE 5.<br />
FIGURE 5<br />
6. Using factory recommended procedures, re-fill (charge) the A/C system. Check for leaks.<br />
7. Re-install the factory air filter box assembly, and reconnect the battery.<br />
8. Start the car, turn on the A/C system & re-check for leaks.<br />
ECU REMOVAL & SHIPPING: Once the A/C tube is replaced and working properly, the 2nd prerequisite step is<br />
to remove the ECU (Engine Control Unit) from the car, and ship it to <strong><strong>Turbo</strong>netics</strong> to load the new engine<br />
management program, tuned specifically for your car with this turbo setup.<br />
NOTE 1: You’ll want to perform this step just before you are ready to start working on the car. When you receive<br />
your ECU back from <strong><strong>Turbo</strong>netics</strong>, it will be re-programmed for a turbocharged engine and therefore will no longer<br />
work properly with your naturally aspirated “stock” engine. The included ECU return box kit (P/N 11103) includes<br />
a pre-paid Fedex shipping label for express shipping, so you can expect to receive your ECU back in 2-3 days.<br />
NOTE 2: If, in the future, you choose to remove the turbocharger system (for example, before selling the car), it is<br />
possible to re-program your ECU back to naturally aspirated “stock” specs. At that time, contact <strong><strong>Turbo</strong>netics</strong>’<br />
customer service staff for details.<br />
9. Turn the ignition switch to the OFF position & disconnect the battery.<br />
10. Remove the ECU, located behind the passenger-side lower dashboard. Refer to the Nissan service manual<br />
for more detailed instructions, but listed below is a general guideline on how to do this:<br />
• Remove passenger-side cup holder, by releasing the retainer clip (that keeps the assembly from coming<br />
completely out of the dashboard) with a flat head screwdriver (SEE FIGURE 6).<br />
• Remove fasteners the hold the lower dashboard in place.<br />
• Locate the ECU and remove the electrical connectors & fasteners holding it in place (SEE FIGURE 7).<br />
60130_revG_<strong>350Z</strong>_manual.doc Page 10 of 35<br />
More installation manuals at: www.thmotorsports.net
You can purchase this part at: http://thmotorsports.com<br />
FIGURE 6 FIGURE 7<br />
11. Once removed from the car, attach the Serial No. decal (P/N 31039) to the ECU in the location pointed out in<br />
FIGURE 8, and fill out the information on the label with a permanent black pen or thin-tip marker. NOTE: All<br />
ECU’s received with incomplete or illegible decals will be returned or discarded, so please print<br />
clearly and completely!<br />
• First & Last Name (Who are you)<br />
• Mailing Address (Where should we ship your ECU back to you)<br />
• Phone Number (How can we contact you, if any problems arise)<br />
• Model Year / Manufacturer Name / Model Name (For example: 2003 Nissan <strong>350Z</strong> Touring)<br />
• Manufacture date of car (Located on driver side door jam; See FIGURE 9)<br />
• Transmission Type (<strong>Manual</strong> or Automatic)<br />
• V.I.N. number (Also located on driver side door jam; See FIGURE 9)<br />
FIGURE 8 FIGURE 9<br />
12. Package your ECU in the return box (P/N 31009), using the supplied foam packaging inserts (P/N 31011).<br />
Fill in your address on the Fedex return label (P/N 31038), and apply it to the outside of the box. Seal the box<br />
closed with the supplied Electronic Mat’l decal (P/N 31043).<br />
13. Logon to www.Fedex.com or www.Kinkos.com to find the nearest Fedex package drop-off location, and ship<br />
your ECU return box to <strong><strong>Turbo</strong>netics</strong>.<br />
60130_revG_<strong>350Z</strong>_manual.doc Page 11 of 35<br />
More installation manuals at: www.thmotorsports.net
You can purchase this part at: http://thmotorsports.com<br />
THIS PAGE LEFT BLANK INTENTIONALLY<br />
60130_revG_<strong>350Z</strong>_manual.doc Page 12 of 35<br />
More installation manuals at: www.thmotorsports.net
You can purchase this part at: http://thmotorsports.com<br />
TIME TO GET YOUR HANDS DIRTY: With the prerequisite steps done, and the car parked for a few days<br />
(without an ECU), its time to start working under the hood. The steps from this point forward will progress<br />
smoother if you are prepared with the supplies listed on page 2, and although not necessary, the ability to lift the<br />
vehicle more than a few feet (i.e. a hydraulic lift) will make installation a lot easier. NOTE: The following steps<br />
dictating removal of factory parts are purposely generic; refer to the Nissan factory service manual for more<br />
detailed instructions and torque specs for all fasteners.<br />
14. Remove the factory fuel pump assembly.<br />
A. Remove the plastic cover from inside the passenger side storage space (SEE FIGURE 10).<br />
B. Remove metal access cover and temporarily push off to the side (SEE FIGURE 11).<br />
FIGURE 10 FIGURE 11<br />
C. Remove 6 hex bolts, disconnect the electrical connection & fuel connection from the top of the pump<br />
assembly. NOTE: Now would be a good time to extinguish your cigarette & remove any other flammable<br />
items from the area.<br />
D. Carefully pull out the fuel pump assembly (SEE FIGURE 12), and cover the exposed gas tank.<br />
FIGURE 12 FIGURE 13<br />
15. Sit down at a large open table, and prepare to disassemble the fuel pump assembly, per the following steps:<br />
(You will need a small flathead screwdriver, needle nose pliers, 7/64 and 3/8” drill bits and metal / wire<br />
cutters)<br />
60130_revG_<strong>350Z</strong>_manual.doc Page 13 of 35<br />
More installation manuals at: www.thmotorsports.net
You can purchase this part at: http://thmotorsports.com<br />
A. Release the plastic clip that holds the 2 halves of the spring-loaded assembly together. Be careful not to<br />
stress or break any of the electrical wires. Set aside the coil springs. Unclip and release the electrical<br />
connector pointed out in FIGURE 13.<br />
B. Remove the plastic retainer clip (pointed out in FIGURE 14), black rubber damper, and fuel pump from<br />
the top half of the pump assembly.<br />
FIGURE 14 FIGURE 15<br />
C. Remove the filter bag by releasing the metal retaining ring from the bottom of the fuel pump (pointed out<br />
in FIGURE 16).<br />
D. Break off the small plastic tabs on the topside of the new fuel pump (P/N 31002) as shown in FIGURE 17.<br />
This is necessary because the new fuel pump is slightly taller than the factory pump, and these tabs keep<br />
it from installing properly.<br />
FIGURE 16 FIGURE 17<br />
E. Install the filter bag and metal retaining ring on the new fuel pump in the same location.<br />
F. Remove the rubber seal (pointed out in FIGURE 18) from the factory pump and install on the new pump<br />
in the same location.<br />
G. Install the new pump into the fuel pump assembly by reversing the previous few steps.<br />
H. Remove the factory fuel pressure regulator by removing the plastic retainer clip pointed out in FIGURE<br />
19, and prying the regulator out with a small flathead screwdriver.<br />
I. Carefully hold the regulator in a bench vice (or similar) and drill out the bottom orifice using a 7/64” drill<br />
bit, only until the drill breaks through the first thickness of sheetmetal (about 1/16” deep) SEE FIGURE<br />
20. This step is necessary because the orifice size restricts the flow capacity of the upgraded fuel pump.<br />
60130_revG_<strong>350Z</strong>_manual.doc Page 14 of 35<br />
More installation manuals at: www.thmotorsports.net
You can purchase this part at: http://thmotorsports.com<br />
Deburr the hole, and thoroughly clean out any remaining metal chips. NOTE: Take special care during<br />
this step, as this regulator is not available (as a replacement part) from your local Nissan dealership. If<br />
you destroy this part, the dealership will only sell you the whole pump assembly!<br />
FIGURE 18 FIGURE 19<br />
J. Remove & discard the yellow plastic fuel nozzle pointed out in FIGURE 21. Again, this step is necessary<br />
because the orifice size in this nozzle restricts the flow capacity of the upgraded fuel pump.<br />
K. Carefully hold the bottom half of the white plastic fuel pump housing in a bench vice (or similar) and drill<br />
(2) 3/8” diameter holes in the side of the housing, as shown in FIGURE 21. Location is not critical, as<br />
long as the holes are near the bottom edge of the housing.<br />
L. Re-assemble the fuel pump assembly by reversing the previous steps.<br />
FIGURE 20 FIGURE 21<br />
16. Re-install the factory fuel pump assembly into the car, by reversing step 14.<br />
17. Remove the strut tower brace.<br />
18. Remove factory air filter box assembly and intake tube (FIGURE 2).<br />
19. Remove plastic intake cover (with the Nissan logo).<br />
20. Remove top half of upper intake plenum (FIGURE 22).<br />
60130_revG_<strong>350Z</strong>_manual.doc Page 15 of 35<br />
More installation manuals at: www.thmotorsports.net
You can purchase this part at: http://thmotorsports.com<br />
21. Remove bottom half of upper intake plenum (FIGURE 23). NOTE: Once complete, plug the 6 intake runner<br />
holes with a shop rag, so that loose nut & bolts don’t fall into the engine… You don’t want to have to take the<br />
engine apart to retrieve lost parts!<br />
FIGURE 22 FIGURE 23<br />
22. Remove electrical connectors on all 6 fuel injectors, and push aside.<br />
23. Remove the bolts holding down the fuel rail.<br />
24. Pull up on each side of the fuel rail to pull the injectors out of the lower intake plenum (SEE FIGURE 24).<br />
25. Remove the metal retainer clips holding the fuel injectors to the fuel rail (pointed out in FIGURE 24), and pull<br />
the injectors out of the fuel rail. NOTE: There will be some residual fuel in the rail, so be prepared to get wet.<br />
FIGURE 24 FIGURE 25<br />
26. Sit down at a large open table, layout the 6 factory injectors and the 6 new injectors (P/N 31001) next to each<br />
other, and perform the following:<br />
A. Remove the o-ring seals from the bottom of the factory injectors, and slide them onto the bottom of the<br />
new injectors.<br />
B. Remove the o-ring seals and fuel-rail seals from the top of the new injectors.<br />
60130_revG_<strong>350Z</strong>_manual.doc Page 16 of 35<br />
More installation manuals at: www.thmotorsports.net
You can purchase this part at: http://thmotorsports.com<br />
C. Install the injector adapters (Round aluminum part w/ 2 diameters; P/N 21211) onto the top of the new<br />
injectors with the larger diameter facing down towards the body of the injector (pointed out in FIGURE<br />
25).<br />
D. Remove the o-ring seals from the top of the factory injectors, and slide them onto the top of the new<br />
injectors, over the adapters. The finished injectors should look like the one pointed out in FIGURE 25.<br />
27. With all o-ring seals transferred to the new injectors, you’re almost ready to install the new injectors back into<br />
the car. Install the round injector spacers (P/N 21210) into the injector holes in the lower intake plenum, so<br />
that the new injectors will sit on top of them (pointed out in FIGURE 26).<br />
28. Carefully install the new injectors into the fuel rail, facing the same direction as the factory injectors. You will<br />
not re-use the factory metal retainer clips.<br />
FIGURE 26 FIGURE 27<br />
29. Re-install and bolt down both fuel rails, taking care while pressing each injector down into the lower intake<br />
plenum, to make sure each injector is properly seated on the injector spacers. Re-connect the electrical<br />
connectors to the injectors.<br />
30. Remove the factory valve cover breather hose (pointed out in FIGURE 28).<br />
31. Cut a length of 5/8” I.D. rubber hose (P/N 30827) to 5-1/2 feet. Install this hose in place of the factory hose<br />
removed in the previous step, re-using factory hose clamps on both ends. Temporarily route the hose<br />
towards the front drivers side of the car until later in the instructions.<br />
32. Remove the driver’s side exhaust manifold heat shield (pointed out in FIGURE 29). This is easier to<br />
accomplish from the topside of the engine.<br />
60130_revG_<strong>350Z</strong>_manual.doc Page 17 of 35<br />
More installation manuals at: www.thmotorsports.net
You can purchase this part at: http://thmotorsports.com<br />
FIGURE 28 FIGURE 29<br />
33. Re-install both halves of the upper intake plenum, as well as any removed hoses, clamps or electrical<br />
connectors, reversing steps 20 & 21. Don’t re-install the plastic intake cover or strut tower brace at this time.<br />
34. Lift the front half of the car, and take all necessary safety precautions to secure the vehicle.<br />
35. Remove the plastic splashguard from under the front bumper cover, the plastic inner fenders (in front of the<br />
wheels), the front bumper cover, styrofoam bumper pad, aluminum front bumper, and any remaining plastic<br />
fascia pieces (SEE FIGURES 30-32). Although not necessary, it is convenient to remove the front wheels.<br />
FIGURE 30 FIGURE 31<br />
36. Relocate the power steering cooler to the passenger side inner fender well, per the following steps:<br />
A. Remove power steering cooler complete with mounting brackets from its mounting position, and<br />
disconnect the rubber hose connection (pointed out in FIGURE 31). NOTE: Be prepared with a drain pan<br />
to catch the used power steering fluid.<br />
60130_revG_<strong>350Z</strong>_manual.doc Page 18 of 35<br />
More installation manuals at: www.thmotorsports.net
You can purchase this part at: http://thmotorsports.com<br />
FIGURE 32 FIGURE 33<br />
B. Remove all metal tubing and rubber hoses, all the way back to the hose connection under the power<br />
steering fluid reservoir, in the passenger side inner fender well (circled in FIGURE 34).<br />
C. Remove both mounting brackets from the cooler, and re-mount the “left” bracket (pointed out in FIGURE<br />
33) to the “right” side of the cooler, rotated 180 degrees from its original orientation. Look closely at<br />
FIGURE 36 to see the orientation of the bracket (pointed out by the arrows).<br />
D. Mount the cooler (with rotated bracket) inside the passenger side fender well (as shown in FIGURE 35 &<br />
36) re-using the factory mounting hardware removed in step A. Re-use one of the factory tapped holes to<br />
fasten the bracket to the fender well sheet metal.<br />
E. Re-connect the rubber hoses (circled in FIGURE 34) to the cooler, using factory hose clamps. NOTE: It<br />
may be necessary to cut an inch or two off the length of one of the hoses; use best judgment.<br />
FIGURE 34 FIGURE 35<br />
60130_revG_<strong>350Z</strong>_manual.doc Page 19 of 35<br />
More installation manuals at: www.thmotorsports.net
You can purchase this part at: http://thmotorsports.com<br />
FIGURE 36 FIGURE 37<br />
37. Remove front sway bar mounting brackets (shown in FIGURE 37) connected to the frame rail, so that the<br />
sway bar dangles loosely under the car. This step is optional, but makes the next few steps easier.<br />
38. Drain the engine oil, and remove the oil pan.<br />
39. Using a center punch, mark and score the location of the oil drain. Hole should be centrally located between<br />
the cast ribs of the engine block as shown in FIGURE 38 & 39.<br />
40. Using a step drill or 1/8” drill bit, drill a pilot hole into the engine block. Increase drill bit sizes in small<br />
increments up to 9/16” hole. NOTE: Be careful not to push too hard when drilling, so as to avoid hitting any<br />
internal engine components when the drill bit breaks thru the casting (use of a step drill will help prevent this<br />
from happening).<br />
41. Carefully thread the hole using the supplied 3/8” NPT tap. The tap only needs to go into the casting far<br />
enough to create full threads (approx. 3/8”), no further. NOTE: It is recommended to hand turn the tap, to<br />
avoid cross threading. This is a critical process… you don’t want to cross thread the engine block!<br />
FIGURE 38 FIGURE 39<br />
42. Deburr hole and thoroughly clean out any metal chips from inside of engine block. Install the 3/8” NPT x 5/8”<br />
hose barb fitting (P/N 30133), using NPT thread sealant.<br />
60130_revG_<strong>350Z</strong>_manual.doc Page 20 of 35<br />
More installation manuals at: www.thmotorsports.net
You can purchase this part at: http://thmotorsports.com<br />
43. Scrape off the excess factory sealant. Apply a new bead of high temp. RTV sealant to the oil pan sealing<br />
surface, and re-install the oil pan.<br />
44. Remove the factory exhaust system (SEE FIGURE 38) from the 3-bolt manifold-to-CAT flange back to the 2-<br />
bolt flange (just before the first muffler).<br />
45. Cut a length of heat shield wrap (P/N 31007) to 5.0 feet. Wrap P/N 21184 (Exh. Tube Ass’y, Turb. Housing<br />
Inlet) as seen in FIGURE 41. The heat wrap is adhesive backed, so it should stay in place, but as an added<br />
measure you may want to secure the end with a zip tie or steel wire.<br />
FIGURE 40 FIGURE 41<br />
NOTE: During the next few steps, only loosely secure the new exhaust tubes in place. Once all exhaust<br />
tubes are loosely installed, go thru and tighten all the hardware & clamps.<br />
46. Loosen the left factory hex bolt and remove the right hex bolt holding the A/C compressor in place (pointed<br />
out in FIGURE 42). Install P/N 21184 (Exh. Tube Ass’y, Turb. Housing Inlet) tube into position as shown in<br />
FIGURE 43, using the A/C bolts to loosely secure it in place.<br />
FIGURE 42 FIGURE 43<br />
LEFT<br />
RIGHT<br />
47. Either before or after loosely installing the “Turb. Housing Inlet” tube, install the “<strong>Turbo</strong> Support Bracket” (P/N<br />
21202) circled in FIGURE 44, by loosening another of the A/C compressor bolts (on the driver’s side top), and<br />
sliding the slotted end of the bracket under the loosened A/C bolt. The end of the bracket with the hole<br />
should line up with one of the holes in the turbocharger inlet flange (SEE FIGURE 44).<br />
60130_revG_<strong>350Z</strong>_manual.doc Page 21 of 35<br />
More installation manuals at: www.thmotorsports.net
You can purchase this part at: http://thmotorsports.com<br />
FIGURE 44<br />
48. Install P/N 21183 (Exh. Tube Ass’y, Y-Pipe) into position shown in FIGURE 45, loosely securing it to the<br />
previous tube with v-band clamp P/N 31073.<br />
49. Remove factory O2 sensor near the 3-bolt flange on the driver’s side exhaust manifold, and install the O2<br />
sensor plug (P/N 30862) in its place. The (2) factory O2 sensors can be disconnected and set aside for now.<br />
They will be re-installed later in the instructions.<br />
50. Install P/N 21182 (Exh. Tube Ass’y, U-bend) into position shown in FIGURE 46, loosely securing it to the<br />
previous tube with v-band clamp P/N 31073. Attach & tighten the other end of the tube to the exhaust<br />
manifold, re-using one of the factory studs & nuts, and (2) M10 x 40mm hex bolts, lockwashers & nuts (Part<br />
Hardware <strong>Kit</strong># 11098). Attach & tighten the O2 sensor (removed in the previous step) into the boss in this “Ubend”<br />
tube, circled in FIGURE 46. Recommend using anti-seize lubricant on this connection.<br />
FIGURE45 FIGURE 46<br />
51. Install P/N 21186 (Exh. Tube Ass’y, Downpipe 2) into position shown in FIGURE 47, loosely holding it in<br />
position with steel wire, not fastened to anything. This is done now, because it is more difficult to install later<br />
in the instructions.<br />
52. Install P/N 21181 (Exh. Tube Ass’y, Crossover) into position shown in FIGURE 48, loosely securing it to the<br />
“Y-pipe” tube with v-band clamp P/N 31073. Attach & tighten the other end of the tube to the exhaust<br />
60130_revG_<strong>350Z</strong>_manual.doc Page 22 of 35<br />
More installation manuals at: www.thmotorsports.net
You can purchase this part at: http://thmotorsports.com<br />
manifold, re-using one of the factory studs & nuts, and (2) M10 x 40mm hex bolts, lockwashers & nuts (P/Ns<br />
31003, 30805, 30803).<br />
FIGURE 47 FIGURE 48<br />
53. Using the supplied M8-1.25 bolts (P/N 31076), lock washers (P/N 30593), and flat washers (P/N 30589),<br />
secure the Evolution wastegate to the new turbo inlet pipe (P/N 21184 rev.B). SEE FIGURE 34 & 35<br />
FIGURE 34 FIGURE 35<br />
54. Block off the original wastegate mounting flange on the turbo inlet pipe (P/N 21184 rev.B) with the supplied<br />
block off plate (P/N 20251). Make sure there is a gasket (P/N 20142) between the flanges. Secure the block<br />
off flange to the pipe using existing hardware. SEE FIGURE 34 & 35<br />
55. Mount the sway bar back onto the chassis and route the A/C line as shown in FIGURE 36.<br />
56. Bolt one side of the new supplied wastegate dump tube (P/N 21427) to the to discharge side of the wastegate<br />
and bolt the other side to the original wastegate dump tube (P/N 21200) using the supplied M8-1.25 bolts<br />
(P/N 31076), lock washers (P/N 30593), and flat washers (P/N 30589) making sure there is a gasket (P/N<br />
20142) in between each flange. SEE FIGURE 36, 37, 38<br />
60130_revG_<strong>350Z</strong>_manual.doc Page 23 of 35<br />
More installation manuals at: www.thmotorsports.net
You can purchase this part at: http://thmotorsports.com<br />
FIGURE 36 FIGURE 37<br />
FIGURE 38<br />
57. Lower the front half of the car.<br />
58. In order to provide clearance for the turbocharger, it is necessary to bend 2 of the aluminum A/C tubes out of<br />
the way. Bend the silver-colored tubing (pointed out in FIGURE 49) and light-yellow-colored tubing (behind it<br />
& closer to engine) towards the engine as far as possible, as seen in the picture.<br />
59. Remove dipstick and dipstick guide bracket (pointed out in FIGURE 50).<br />
60130_revG_<strong>350Z</strong>_manual.doc Page 24 of 35<br />
More installation manuals at: www.thmotorsports.net
You can purchase this part at: http://thmotorsports.com<br />
FIGURE 49 FIGURE 50<br />
PUSH HERE<br />
AND HERE<br />
HEAT WRAP<br />
60. In order to protect the A/C line from burning, it is critical to wrap the A/C hose pointed out in FIGURE 50 with<br />
heat shield wrap (P/N 31007) as shown in FIGURE 51. If you have extra heat wrap, you may want to doublewrap<br />
this hose. Secure the open end with a zip tie or steel wire.<br />
61. Install the loop strap (P/N 31006) around the A/C hose from the previous step, and secure it in the same<br />
place as the dipstick guide bracket, re-using the factory hex bolt. All this, to keep these parts shielded from<br />
the turbocharger heat.<br />
62. Install (2) M8 x 30mm studs into the wastegate flange on P/N 21185 (Exh. Tube Ass’y, Downpipe 1). Install<br />
this tube into position shown in FIGURE 52, loosely securing it to the “Downpipe 2” tube with v-band clamp<br />
P/N 30232. While in the car, connect P/N 21200 (Exh. Tube Ass’y, W’gate Disch.) to it. Attach & tighten the<br />
2 parts together at the wastegate flange with (1) wastegate gasket, and (2) M8 lockwashers & nuts (P/Ns<br />
20142, 30593, 30653). NOTE: It is not possible to bolt these 2 parts together beforehand, it must be done on<br />
the car. The W’gate tube has the same flange on both ends, so the correct orientation will have the end with<br />
the bellows facing the ground. This tube is pointed out in FIGURE 53.<br />
FIGURE 51 FIGURE 52<br />
63. Install (3) M10 x 42mm studs and (1) turbine inlet gasket (P/Ns 30806, 30263) onto the turbine inlet flange as<br />
circled in FIGURE 53.<br />
64. Place the turbocharger on a nearby open table, and install the following parts. Don’t forget to use NPT thread<br />
sealant on all NPT fittings, and remove all protective covers and tags from the turbocharger.<br />
60130_revG_<strong>350Z</strong>_manual.doc Page 25 of 35<br />
More installation manuals at: www.thmotorsports.net
You can purchase this part at: http://thmotorsports.com<br />
• (1) Oil drain gasket, and (1) Oil drain flange<br />
• (1) 1/2" x 5/8” hose barb 45-degree fitting (Orient the fitting as shown in FIGURE 54)<br />
• (2) M8 x 20mm hex bolts, lockwashers & nuts<br />
• (1) 1/8” NPT x 5/32” 90-degree hose fitting (installed into the port on the compressor housing discharge,<br />
facing the same direction as the compressor discharge)<br />
65. Cut a length of 5/8” I.D. rubber hose (P/N 30827) to 1-1/2 feet. Attach & tighten this hose to the oil drain<br />
fitting from the previous step, using (2) 5/8” hose clamps (P/N 30817), one clamp on each end of the hose.<br />
FIGURE 53 FIGURE 54<br />
66. Bend the aluminum A/C tubing (pointed out in FIGURE 55) approx. 90 degrees downward over the frame rail<br />
as shown in the picture, just enough to provide adequate clearance for the turbocharger oil drain fitting.<br />
Temporarily install the turbocharger to check clearance, and bend more as needed.<br />
67. Apply a bead of high temp. RTV sealant to the rectangular downpipe flange face, pointed out in FIGURE 55.<br />
FIGURE 55 FIGURE 56<br />
68. Attach & tighten the turbocharger to the turbine inlet flange, using (3) M10 flatwashers, lockwashers & nuts,<br />
and (1) M10 x 50mm socket head screw & flatwasher thru the 4 th hole. This 4 th fastener (pointed out in<br />
FIGURE 57) will go thru the turbine housing, turbine inlet flange & previously installed “turbo support bracket”.<br />
Tighten it using (1) M10 lockwasher & nut on the underside of the support bracket, and also tighten the<br />
60130_revG_<strong>350Z</strong>_manual.doc Page 26 of 35<br />
More installation manuals at: www.thmotorsports.net
You can purchase this part at: http://thmotorsports.com<br />
factory (A/C compressor) hex bolt holding the “turbo support bracket”. Temporarily route the 5/8” oil drain<br />
hose down towards the fitting attached to the engine block.<br />
69. Attach & tighten the “Downpipe 1” (pointed out in FIGURE 58) tube to the turbocharger turbine housing, using<br />
(4) M10-1.50 x 20mm hex bolts & lockwashers. Tighten the v-band clamp between the “Downpipe 1” and<br />
“Downpipe 2” tubes.<br />
FIGURE 57 FIGURE 58<br />
70. Install the 1/8” NPT x –3 90 degree oil fitting (P/N 30551) to the filter fitting atop the turbo center housing,<br />
using NPT thread sealant. Install the braided oil supply hose (P/N 10721) to that fitting, and temporarily route<br />
the hose down towards the bottom front of the engine.<br />
71. Lift the front half of the car, and take all necessary safety precautions to secure the vehicle.<br />
72. Install the third Downpipe (P/N 21201 or 21204, depending on which turbocharger system you purchased)<br />
using V-band clamp P/N 30232 to connect to the second downpipe, and (2) M10 x 40mm hex bolts,<br />
flatwashers, lockwashers & nuts to connect to the 2-bolt flange.<br />
73. Install P/N 21205 (Support Bracket, Downpipe 3), using the 2 factory transmission bolts pointed out in<br />
FIGURE 61 on one end, and (2) M8 x 25mm hex bolts, lockwashers & nuts to connect to the bracket on the<br />
downpipe on the other end. Use M8 flatwashers on both sides of the bracket, total of (4).<br />
74. Install (2) O2 sensor plugs (P/N 30862) into the welded bosses near the rear of the downpipe, pointed out in<br />
FIGURE 62. These bosses are for optional O2 sensors.<br />
60130_revG_<strong>350Z</strong>_manual.doc Page 27 of 35<br />
More installation manuals at: www.thmotorsports.net
You can purchase this part at: http://thmotorsports.com<br />
FIGURE 61 FIGURE 62<br />
NOTE: Now that all exhaust tubes are loosely installed, go thru and tighten all the hardware & clamps.<br />
75. Install the bottom half of the 5/8” oil drain hose to the oil drain fitting in the block, and secure with the attached<br />
hose clamp (pointed out in FIGURE 60). Cut the length of the hose to suit, so that no part of the hose is lower<br />
than the fitting in the block. Route the hose (downward from the turbocharger) away from hot exhaust pipes,<br />
and secure with zip ties. If any heat shield wrap is left over, use as needed.<br />
76. Install the bottom half of the braided oil supply hose to the engine (pictures of bottom front of engine), per the<br />
following steps: (Be sure to use NPT thread sealant on all NPT connections)<br />
A. Remove the electrical connector and the oil pressure sensor from the engine block (circled in FIGURE 63)<br />
B. Using the supplied 1/8” NPT tap (P/N 30808), carefully re-tap the vacated hole in the engine block<br />
C. Install the 1/8” NPT “Tee” fitting (P/N 30562) into the re-tapped hole (pointed out in FIGURE 64)<br />
D. Re-install the pressure sensor into the opposite end of the “Tee” fitting<br />
E. Install the 1/8” NPT x –3 straight oil fitting (P/N 30544) into the third leg of the “Tee” fitting<br />
F. Install the braided oil supply line into the oil fitting from the previous step (SEE FIGURE 64).<br />
FIGURE 63 FIGURE 64<br />
77. Install the mounting brackets (P/N 21203) to the intercooler end tanks, using (2) 1/4-20 x 1/2” hex bolts &<br />
lockwashers. Install the intercooler (P/N 5-312) assembly to the car using the factory bolts, as shown in<br />
FIGURE 65 & 66.<br />
60130_revG_<strong>350Z</strong>_manual.doc Page 28 of 35<br />
More installation manuals at: www.thmotorsports.net
You can purchase this part at: http://thmotorsports.com<br />
FIGURE 65 FIGURE 66<br />
78. In the driver’s side fender well, pull the factory wiring harness pointed out in FIGURE 67 away from the<br />
sheetmetal, to provide clearance for the intercooler tubing to fit under it. Install P/N 21175 (Tube Ass’y, <strong>Turbo</strong><br />
to I/C) from the turbocharger compressor discharge to the driver’s side intercooler inlet, using (1) 2-1/2” hump<br />
hose (P/N 30380-4) and (1) 2-1/2” coupling hose (P/N 30172-4) and (4) T-bolt clamps (P/N 30275-250), as<br />
seen in FIGURE 67 & 68. Use the coupling hose at the intercooler connection.<br />
79. Install P/N 21177 (Tube Ass’y, I/C to MAFS 2) by removing the 2 factory hex bolts pointed out in FIGURE 69<br />
& 70, and fastening the intercooler tube to the engine using these bolts. It may be convenient to install the<br />
45-degree hose coupling (P/N 30444-4) and (2) T-bolt clamps (P/N 30275-250) to the upper end of the tube<br />
before installing it on the car.<br />
FIGURE 67 FIGURE 68<br />
60130_revG_<strong>350Z</strong>_manual.doc Page 29 of 35<br />
More installation manuals at: www.thmotorsports.net
You can purchase this part at: http://thmotorsports.com<br />
FIGURE 69 FIGURE 70<br />
80. Install P/N 21176 (Tube Ass’y, I/C to MAFS 1) from the passenger side intercooler outlet to the tube from the<br />
previous step, using (1) 2-1/2” hump hose (P/N 30380-4) and (1) 2-1/2” coupling hose (P/N 30172-4) and (4)<br />
T-bolt clamps (P/N 30275-250), as seen in FIGURE 71. Use the coupling hose at the intercooler connection.<br />
FIGURE 71 FIGURE 72<br />
81. Modify P/N 30223 (turbo heat shield) as shown in FIGURE 72, using sheet metal cutters or heavy-duty<br />
scissors. Install the shield over the turbocharger turbine housing, and secure with steel wire.<br />
82. Install P/N 31080 (K&N air filter) to the P/N 21180 (Tube Ass’y, Filter to <strong>Turbo</strong>) tube, and then install that subassembly<br />
to the turbocharger compressor inlet, using (1) 3.0” hose coupling (P/N 30162-4) and (2) 3.0” T-bolt<br />
clamps (P/N 30275-300). The air filter will rest on top of the intercooler, as seen in FIGURE 73.<br />
83. Carefully route the 5/8” I.D. rubber hose (added in step# 31) along the engine bay inner fender, through the<br />
same hole that the first intercooler tube routes through, and connect to the 5/8” hose connection on the “filter<br />
to turbo” tube, re-using the factory hose clamps (pointed out in FIGURE 73). The hose can also be seen<br />
pointed out in FIGURE 77.<br />
60130_revG_<strong>350Z</strong>_manual.doc Page 30 of 35<br />
More installation manuals at: www.thmotorsports.net
You can purchase this part at: http://thmotorsports.com<br />
FIGURE 73<br />
84. Install P/N 21179 (Tube Ass’y, MAFS to T/B) tube to the factory throttle body, using (1) 3.0” hose coupling<br />
(P/N 30162-4) and (2) T-bolt clamps (P/N 30275-300), as shown in FIGURE 74.<br />
85. Pre-assemble P/N 21178 (Tube Ass’y, I/C to MAFS 3) tube with the factory mass air flow sensor (MAFS)<br />
housing, using (4) 1/4-20 x 3/4 hex bolts, flatwashers, lockwashers & nuts. Install a 3.0” hose coupling (P/N<br />
30162-4) and (2) T-bolt clamps (P/N 30275-300) to the opposite end of the MAFS housing (SEE FIGURE 75).<br />
FIGURE 74 FIGURE 75<br />
86. Loosen the factory bolt from the front side of engine, pointed out in FIGURE 76, and install the previous tube<br />
assembly using this bolt, and connecting to the 45-degree hose coupling from step# 76, and the tube in<br />
FIGURE 74. Reconnect the electrical connector to the MAFS housing (it may be necessary to cut a factory<br />
zip tie, to provide enough slack in the wire harness to reach the new MAFS housing location). Installed<br />
assembly can be seen in FIGURE 77.<br />
60130_revG_<strong>350Z</strong>_manual.doc Page 31 of 35<br />
More installation manuals at: www.thmotorsports.net
You can purchase this part at: http://thmotorsports.com<br />
FIGURE 76 FIGURE 77<br />
87. Install the polished discharge horn (P/N 20732P) into the discharge of the Raptor blow-off valve (P/N 10843)<br />
by simply pressing it into place. Mount the valve assembly to the swivel mount on the previous tube, using (1)<br />
O-ring (P/N 30468), and (2) 1/4-20 x 5/8” serrated head hex bolts. Orient the valve with the horn facing<br />
towards the front of the car and tighten the bolts.<br />
FIGURE 78 FIGURE 79<br />
88. Install (1) 1/8” NPT x 5/32” hose fitting into the bottom port of the wastegate, and (1) 1/8” NPT x 5/32” hose<br />
fitting into the top port of the blow-off valve, pointed out in FIGURE 78.<br />
89. Cut approx. 2.5 feet of 5/32” vacuum hose (P/N 30542-BK), and route the hose from the upper intake plenum<br />
(port shown in FIGURE 79) to the blow-off valve fitting. Cut approx. 2.5 feet of the same hose, and route it<br />
from the fitting on the wastegate to the fitting on the compressor housing (installed in step# 60). Loosely zip<br />
tie the hose as desired. NOTE: The operation of these turbocharger control devices rely on these hoses for<br />
pneumatic signals, so do NOT pinch or crimp the hose in any way.<br />
90. Re-install all factory hardware that can be re-installed: ECU, sway bar, intake cover, bodywork, etc.<br />
60130_revG_<strong>350Z</strong>_manual.doc Page 32 of 35<br />
More installation manuals at: www.thmotorsports.net
You can purchase this part at: http://thmotorsports.com<br />
FINAL CHECKLIST:<br />
• Review these instructions to make sure that all fasteners, clamps & electrical connections have been installed<br />
& torqued correctly.<br />
• Check that all hose routings are free of any kinks or near any hot or abrasive surfaces, that may cause wear<br />
over time. Adjust or reroute as necessary to provide adequate slack for engine movement.<br />
• Refill all fluids (oil & power steering) to factory recommended levels.<br />
• The use of synthetic oil (with the factory recommended oil weight) is strongly recommended, as it will prolong<br />
the life of the turbocharger. Regardless of factory recommended intervals, the addition of a turbocharger<br />
requires that the oil be changed every 3000 miles.<br />
• The use of premium octane unleaded fuel is required for proper engine performance and to reduce the<br />
possibility of internal engine damage from detonation.<br />
• Cycle the ignition to the “ON” position several times to pressurize the fuel system & check for any leaks.<br />
• Start the vehicle and check for any oil, power steering or air pressure leaks.<br />
• NOTE: It is normal for the vehicle to emit some amount of white smoke & a strange odor for an hour or two of<br />
operation, as the oils within the exhaust pipes burn off.<br />
TROUBLE SHOOTING GUIDE<br />
Car Won’t Start<br />
1. Check ECU harness to make sure its seated properly<br />
2. Check EVAP solenoid and ensure harness is connected (located at the back of the intake plenum)<br />
3. Check EVAP solenoid fuse (fuse is located in rear fuse panel behind battery)<br />
4. Check fuel pump fuse (fuse is located in rear fuse panel behind battery)<br />
5. Check for codes and troubleshoot per code<br />
Car goes into limp mode during acceleration<br />
1. Verify MAF is connected and wires are intact<br />
2. Check boost level. If over 8-9 PSI verify wastegate boost signal line is in correct port. (lower port furthest<br />
from logo) If so verify wastegate relocation pipe is installed<br />
3. Check for boost leak at or after MAF<br />
4. Verify throttle body is operating properly<br />
ECU throwing codes 1273, 1284, or any O2 related codes<br />
1. Verify O2 sensor connectors are installed properly.<br />
2. Verify O2 sensors are installed on proper corresponding connector<br />
3. Verify O2 sensors are installed properly<br />
4. Verify correct downpipe version is installed (has O2 extenders welded on)<br />
5. Swap O2 sensor position on downpipe<br />
60130_revG_<strong>350Z</strong>_manual.doc Page 33 of 35<br />
More installation manuals at: www.thmotorsports.net
You can purchase this part at: http://thmotorsports.com<br />
Car not building full boost<br />
1. Check for boost leaks<br />
2. Verify boost signal line is in proper position on blow off valve (upper most port closest to logo)<br />
3. Verify wastegate boost signal line is installed properly (lower port furthest from logo)<br />
4. Check for exhaust leaks<br />
Car running excessively rich<br />
1. Verify stock fuel pressure regulator has been modified per instructions<br />
2. Verify fuel pressure is correct (52-55 PSI)<br />
3. Verify BOV signal line is installed properly (uppermost port closest to logo)<br />
4. Check for boost leaks<br />
Car misfires<br />
1. Verify injector harness is installed correctly<br />
2. Verify coil pack connectors are installed correctly<br />
3. Verify spark plugs are not fouled<br />
4. Verify MAF sensor harness is installed correctly and wires are intact<br />
5. Verify MAF is installed properly and is functioning<br />
6. Verify there are no vacuum leaks post MAF<br />
Car detonating under boost<br />
1. Check boost pressure<br />
2. Check fuel pressure<br />
3. Verify injectors are installed properly<br />
4. Verify air fuel ratio on dyno<br />
Air conditioning not functioning<br />
1. Verify replacement AC line properly installed<br />
2. Verify AC system was properly recharged<br />
3. Verify no AC leaks<br />
Clutch pedal stays down after a track or full boost run<br />
1. Flush in high temp brake fluid in hydraulic clutch system<br />
2. Replace stock clutch line with stainless steel braided line and heat wrap line<br />
Car smoking when coming off boost<br />
1. Oil drain line not installed properly<br />
2. Oil drain not above oil level<br />
3. <strong>Turbo</strong> seal failed<br />
4. Verify oil pressure (15-20 PSI at idle 35-80 on load)<br />
60130_revG_<strong>350Z</strong>_manual.doc Page 34 of 35<br />
More installation manuals at: www.thmotorsports.net
You can purchase this part at: http://thmotorsports.com<br />
“NO FAULT / NO HASSLE” WARRANTY PROGRAM:<br />
TURBONETICS will repair or replace, at our expense, any new TURBONETICS / Spearco products that fail,<br />
including products used in racing or competition applications, for a period of one year from the original date of<br />
purchase. All turbocharger and cartridge assemblies have a factory installed inline oil filtration device. This filter<br />
device must remain in place if any warranty is to be considered under the No-Fault / No-Hassle program.<br />
Electrical components that fail due to misuse are not covered under the No-Fault / No-Hassle Warranty Program.<br />
Warranty is limited to TURBONETICS products and does not include progressive or subsequential damage and<br />
does not cover removal or installation labor or associated parts. No warranty is made for any other claims for<br />
special, indirect or consequential damages including but not limited to component removal or installation<br />
equipment downtime, prospective profits or other economic loss.<br />
Warranty will not be granted for recurring damage, malfunction, or failure due to improper installation, misuse,<br />
unauthorized repair or alterations, or externally induced physical damage.<br />
Warranty is non-transferable and must be processed via the original purchaser from TURBONETICS.<br />
Remanufactured units, performance upgraded units, and O.E.M. replacement units are covered by a 90-day<br />
warranty or the O.E. warranty period.<br />
TURBONETICS highly recommends that the installation of mechanical or electrical parts be performed by trained<br />
professionals. Improperly installed products may lead to unsafe and unreliable conditions.<br />
RETURN POLICY:<br />
Only unused and complete merchandise may be accepted for return subject to inspection and acceptance by<br />
TURBONETICS. No goods will be accepted without prior return authorization from TURBONETICS. Call for<br />
approval and RGA (Returned Goods Authorization) tracking number. No returns will be accepted without an RGA<br />
tracking number. No returns will be accepted after ninety (90) days from the original shipping date from<br />
TURBONETICS unless approved. All approved returns are subject to a 15% restocking charge – NO<br />
EXCEPTIONS. The original invoice must accompany the return. Accepted warehouse / distributor and open<br />
account returns will be issued credit only.<br />
RETURNED GOODS AUTHORIZATION TRACKING NUMBER:<br />
TURBONETICS will only accept product returns, repair orders / upgrades, and warranty requests that have been<br />
approved and are returned with a corresponding RGA (Returned Goods Authorization) tracking number.<br />
Contact TURBONETICS for approval and the RGA number. Write the RGA number clearly on the outside of the<br />
package and include it inside the package. This is very important in allowing us to properly identify and process<br />
your request. Failure to comply with this requirement will result in the delay of processing or the product being<br />
returned to you.<br />
60130_revG_<strong>350Z</strong>_manual.doc Page 35 of 35<br />
More installation manuals at: www.thmotorsports.net