

Installation & Setup User Guide - Best Access Systems
Installation & Setup User Guide - Best Access Systems
Installation & Setup User Guide - Best Access Systems

You also want an ePaper? Increase the reach of your titles
YUMPU automatically turns print PDFs into web optimized ePapers that Google loves.
<strong>Installation</strong> & <strong>Setup</strong> <strong>User</strong> <strong>Guide</strong><br />
Table of Contents<br />
Chapter 1: Before You Begin Installing B.A.S.I.S. ..................13<br />
System <strong>Setup</strong> Checklist ................................................................................ 13<br />
Configure B.A.S.I.S. ........................................................................................................ 13<br />
<strong>Installation</strong> Prerequisites ............................................................................... 16<br />
Upgrading to B.A.S.I.S. ET Third Edition .......................19<br />
Chapter 2: Upgrade Procedures ...............................................21<br />
B.A.S.I.S. Upgrade Checklist ........................................................................ 21<br />
Upgrading from B.A.S.I.S. 2000 or B.A.S.I.S. 2002 ...................................... 23<br />
Upgrading B.A.S.I.S. ....................................................................................................... 24<br />
Attach the Hardware Key (B.A.S.I.S. License Server Computer Only) ........................... 25<br />
Start the Communication Server ..................................................................................... 25<br />
Install the New License ................................................................................................... 25<br />
Upgrade Your B.A.S.I.S. SQL or Oracle Database ......................................................... 26<br />
Upgrade Your B.A.S.I.S. <strong>Access</strong> Database .................................................................... 30<br />
Maintaining and Removing B.A.S.I.S. ET Third Edition ................................ 34<br />
Removing B.A.S.I.S. ET Third Edition ........................................................... 38<br />
Upgrading from Versions of B.A.S.I.S. Before 5.5E ...................................... 38<br />
New <strong>Installation</strong>s ..............................................................39<br />
Chapter 3: Installing B.A.S.I.S. ET Third Edition ....................41<br />
<strong>Installation</strong> Procedures .................................................................................. 41<br />
revision 143 — 3
Table of Contents<br />
Install & Configure SQL Server or Oracle Server (Does Not Apply to SQL Server Desktop<br />
Engine <strong>User</strong>s) .............................................................................................................. 41<br />
Install the B.A.S.I.S. Software ......................................................................................... 42<br />
Attach the Hardware Key (B.A.S.I.S. License Server Computer Only) ........................... 47<br />
Start the Communication Server ..................................................................................... 51<br />
Install the New License ................................................................................................... 51<br />
Set Up Your B.A.S.I.S. Database .................................................................................... 51<br />
Install Acrobat Reader ..................................................................................................... 52<br />
Chapter 4: CCD/CCTV Video <strong>Setup</strong> ..........................................53<br />
Configuring Video Hardware & Software ...................................................... 53<br />
Step 1: Check to Make Sure You Have All the Required Video Hardware ..................... 53<br />
Step 2: Install the FlashPoint Video Capture Board ........................................................ 55<br />
Step 3: Install the FlashPoint VGA Display Adapter<br />
Driver ........................................................................................................................... 56<br />
Step 4: Verify That the VGA Display Settings are Correct .............................................. 56<br />
Step 5: Install FlashPoint Software ................................................................................. 58<br />
Step 6: Connect Your Video Camera(s) to Your FlashPoint 3D Board ........................... 58<br />
Step 7: Verify That Your Video Board and Drivers Are Working Properly ...................... 59<br />
Step 8: Video Software Settings ..................................................................................... 60<br />
CCP601 Manual Override Settings (Factory<br />
Default) ........................................................................................................................ 63<br />
CON-500 Camera Controller Programming Unit ........................................... 64<br />
Chapter 5: CCD/CCTV Video <strong>Setup</strong> for USB Devices .............65<br />
Configuring Video Hardware & Software ...................................................... 65<br />
Step 1: Check to Make Sure You Have All the Required Video Hardware ..................... 65<br />
Step 2: Install the F5U208 VideoBus II USB Cable (Windows XP) ................................. 66<br />
Step 2: Install the F5U208 VideoBus II USB Cable (Windows 2000) ............................. 70<br />
4 — revision 143
<strong>Installation</strong> & <strong>Setup</strong> <strong>User</strong> <strong>Guide</strong><br />
Step 3: Video Software Settings ..................................................................................... 72<br />
CCP601 Manual Override Settings (Factory<br />
Default) ........................................................................................................................ 76<br />
CON-500 Camera Controller Programming Unit ........................................... 77<br />
Chapter 6: Setting Up & Configuring a Capture Station ........79<br />
Environmental Considerations Affecting Flash & Camera Capture Quality .. 79<br />
Setting Up the B.A.S.I.S. Capture Dialog ...................................................... 79<br />
Capture Station <strong>Setup</strong> Specifications ............................................................ 80<br />
Recommended Badging Room Layout ......................................................... 81<br />
Final Adjustments for Fixed Diffused Lighting ............................................... 82<br />
Final Adjustments for Continuous Lighting .................................................... 83<br />
Basic Camera <strong>Setup</strong> (CAM-CCP-500K) ....................................................... 83<br />
CCP-500 (Back View) ................................................................................... 84<br />
Lighting <strong>Setup</strong> ............................................................................................... 85<br />
Basic Continuous Lighting <strong>Setup</strong> (EHK-K42U-A) ............................................................ 85<br />
Advanced <strong>Setup</strong> .............................................................................................................. 85<br />
Environmental Considerations and Factors Leading to Poor Lighting ............................ 86<br />
Chapter 7: Configuring Computers for TCP/IP .......................87<br />
Configuring TCP/IP in Windows 2000 ............................................................................. 87<br />
Chapter 8: Installing and Configuring WirelessOffice<br />
Messaging Software Version 5.0 ...........................................89<br />
WirelessOffice Messaging Software Overview ............................................. 89<br />
Manual E-mail/Paging ..................................................................................................... 89<br />
Automatic E-mail/Paging ................................................................................................. 89<br />
E-mail/Paging <strong>Setup</strong> Checklist ...................................................................... 91<br />
revision 143 — 5
Table of Contents<br />
E-Mail/Paging <strong>Setup</strong> Procedures .................................................................. 92<br />
Prerequisites ................................................................................................................... 92<br />
WirelessOffice Procedures .............................................................................................. 93<br />
B.A.S.I.S. Procedures ................................................................................................... 103<br />
Database Management <strong>Systems</strong> ......................................105<br />
Chapter 9: Installing Microsoft SQL Server ..........................107<br />
SQL Server Support Overview .................................................................... 107<br />
Hardware Requirements ............................................................................. 107<br />
Operating System Requirements ................................................................ 108<br />
Installing SQL Server 2000 (New <strong>Installation</strong>s) ........................................... 108<br />
Installing SQL Server 2000 ........................................................................................... 109<br />
Configuring SQL Server 2000 ....................................................................................... 116<br />
Run Query Analyzer ...................................................................................................... 123<br />
Chapter 10: Upgrading Microsoft SQL Server ......................125<br />
Upgrading from SQL Server 7.0 to SQL Server 2000 Standard Edition ..... 125<br />
Verifying the Database Upgrade ................................................................................... 131<br />
Chapter 11: Installing & Configuring Oracle 9i Server Software<br />
........................................................................................133<br />
Oracle 9i Server Software Configuration Overview ..................................... 133<br />
Oracle 9i Server Software <strong>Installation</strong> and Configuration ........................... 135<br />
Step 1: Install Oracle 9i Server Software ...................................................................... 135<br />
Step 2: Configure the BEST Database ......................................................................... 137<br />
Step 3: Run the Net Configuration Assistant ................................................................. 146<br />
Step 4: Verify the System is Working ............................................................................ 152<br />
6 — revision 143
<strong>Installation</strong> & <strong>Setup</strong> <strong>User</strong> <strong>Guide</strong><br />
Step 5: Install B.A.S.I.S. ET Third Edition ..................................................................... 154<br />
Step 6: Create the Lenel <strong>User</strong> ....................................................................................... 155<br />
Step 7: Run Database <strong>Setup</strong> ........................................................................................ 157<br />
Chapter 12: Configuring Oracle 9i Client Software ..............159<br />
Oracle 9i Client <strong>Installation</strong> and Configuration ............................................ 159<br />
Step 1: Install Oracle 9i ................................................................................................. 159<br />
Step 2: Install B.A.S.I.S. ET Third Edition Software ...................................................... 164<br />
Step 3: Run the Net Configuration Assistant ................................................................. 164<br />
Step 4: Verify the System is Working ............................................................................ 164<br />
Chapter 13: Database Backup and Restoration ....................165<br />
Dell Precision 330 ....................................................................................... 165<br />
Conduct a Random Database Backup for ACCESSCONTROL ................................... 166<br />
Conduct a Database Restore for ACCESSCONTROL ................................................. 167<br />
Change Scheduled Backup Intervals ............................................................................ 167<br />
Dell Precision 340 ....................................................................................... 169<br />
SQL Server 2000 Database Backup Procedures .......................................................... 170<br />
SQL Server 2000 Database Restore Procedures ......................................................... 189<br />
SQL Server Desktop Engine Database Backup Procedures ........................................ 192<br />
SQL Server Desktop Engine Database Restore Procedures ........................................ 194<br />
DB2 Database Backup and Restoration ..................................................... 195<br />
Back Up a DB2 Database ............................................................................................. 195<br />
Restore a DB2 Database .............................................................................................. 197<br />
Appendix .........................................................................199<br />
Appendix A: Installing DirectX ...............................................201<br />
revision 143 — 7
Table of Contents<br />
DirectX Version Overview ........................................................................... 201<br />
Installing DirectX Version 9.0 ........................................................................................ 201<br />
Appendix B: Accounts and Passwords .................................205<br />
Password Standards ................................................................................... 205<br />
Enable/Disable Strong Password Enforcement ............................................................ 206<br />
Change the Database Password ................................................................ 206<br />
Change the BEST Account Password .......................................................................... 208<br />
About Accounts ........................................................................................... 211<br />
Change the System Administrator Password for the Database .................. 211<br />
Step 1: Change the SYSTEM Account Password Using Database <strong>Setup</strong> .................... 212<br />
Step 2: Write Down and Inform Administrators of the Password Change ..................... 212<br />
Appendix C: The Database <strong>Setup</strong> Program ..........................213<br />
Database <strong>Setup</strong> Options Window ................................................................ 213<br />
Database <strong>Setup</strong> Procedures ....................................................................... 214<br />
How to Run the Database <strong>Setup</strong> Program .................................................................... 214<br />
View the <strong>Setup</strong> Log ....................................................................................................... 216<br />
View Configuration Information ..................................................................................... 217<br />
Change the Database or System Account Password ................................................... 217<br />
Appendix D: Manually Upgrade from <strong>Access</strong> to SQL Server<br />
Desktop Engine .....................................................................221<br />
Procedures .................................................................................................. 221<br />
Manually Upgrade from <strong>Access</strong> to SQL Server Desktop Engine Before Running Database<br />
<strong>Setup</strong> ..........................................................................................................................221<br />
Manually Upgrade from <strong>Access</strong> to SQL Server Desktop Engine After Running Database<br />
<strong>Setup</strong> ..........................................................................................................................224<br />
Appendix E: Transfer an SQL Server Desktop Engine Database<br />
8 — revision 143
<strong>Installation</strong> & <strong>Setup</strong> <strong>User</strong> <strong>Guide</strong><br />
........................................................................................229<br />
Back Up the SQL Server Desktop Engine Database .................................................... 229<br />
Insure Minimum Server Requirements are Met ............................................................ 229<br />
Install B.A.S.I.S. on the New Server ............................................................................. 229<br />
Stop the MSSQLSERVER Service ............................................................................... 229<br />
Copy Files from the Old Server to the New Server ....................................................... 230<br />
Restart the MSSQLSERVER Service ........................................................................... 230<br />
Change the Database Owner ........................................................................................ 231<br />
Verify the Database Transfer was Successful .............................................................. 233<br />
Appendix F: Database <strong>Installation</strong> Utility ..............................235<br />
Database <strong>Installation</strong> Utility Overview.......................................................... 235<br />
Database <strong>Installation</strong> Utility Window............................................................ 235<br />
Database <strong>Installation</strong> Utility Window Field Table ........................................ 236<br />
Database <strong>Installation</strong> Utility Procedures ..................................................... 237<br />
Attach an SQL Server Desktop Engine Database ........................................................ 237<br />
Appendix G: Change the Database Owner in SQL Server<br />
Desktop Engine .....................................................................241<br />
Appendix H: Configuring a Distributed ID/Mobile Badging<br />
System ....................................................................................243<br />
Configure the Server to be a Distributed ID Master .................................... 243<br />
Configure a Mobile Badging Station .............................................................................. 244<br />
Appendix I: The License Server .............................................249<br />
ACS.INI Settings Related to the License Server ......................................... 249<br />
License Server Procedures ......................................................................... 250<br />
Running the License Server from the Command Line .................................................. 250<br />
revision 143 — 9
Table of Contents<br />
Running the License Server in Windows ...................................................................... 250<br />
Determining if the License Server is Running ............................................................... 250<br />
Appendix J: CCD/CCTV Video <strong>Setup</strong> for Discontinued<br />
Hardware ................................................................................251<br />
Configuring Video Hardware and Software ................................................. 251<br />
Step 1: Check to Make Sure You Have All the Required Video Hardware ................... 251<br />
Step 2: Set Up the FlashPoint Board ............................................................................ 253<br />
Step 3: Install the FlashPoint Video Capture Board ...................................................... 253<br />
Step 4: Install the FlashPoint VGA Display Adapter<br />
Driver (Windows 2000) .............................................................................................. 253<br />
Step 5: Verify That the VGA Display Settings are<br />
Correct ....................................................................................................................... 255<br />
Step 6: Install FlashPoint software ................................................................................ 257<br />
Step 7: Connect Your Video Camera(s) to Your FlashPoint Board .............................. 258<br />
Step 8: Verify That Your Video Board and Drivers Are Working Properly .................... 258<br />
Step 9: Video Software Settings ................................................................................... 259<br />
Hitachi VK-C77U Camera dip switch settings ............................................................... 262<br />
EHK-283 (Enhance Lighting Kit) ................................................................................... 263<br />
Appendix K: The License Administration Application .........265<br />
License Administration Procedures ............................................................. 265<br />
Starting the License Administration Application ............................................................ 265<br />
Logging into the License Administration Application ..................................................... 266<br />
Viewing an Installed License ......................................................................................... 267<br />
Deleting an Installed License ........................................................................................ 267<br />
Installing a New License ............................................................................................... 268<br />
Viewing the License Server Log .................................................................................... 270<br />
Changing Administrator Properties for the License Administration Application ............ 271<br />
10 — revision 143
<strong>Installation</strong> & <strong>Setup</strong> <strong>User</strong> <strong>Guide</strong><br />
Logging Out of the License Administration Application ................................................. 271<br />
Appendix L: Room Layout & Lighting <strong>Setup</strong> for a Capture<br />
Station with Discontinued Video Capture<br />
Hardware ................................................................................273<br />
Environmental Considerations Affecting Flash & Camera Capture Quality 273<br />
Capture Station <strong>Setup</strong> Specifications .......................................................... 273<br />
Basic Camera <strong>Setup</strong> (VK-C77U) ................................................................. 273<br />
Lighting <strong>Setup</strong> ............................................................................................. 274<br />
Basic Flash <strong>Setup</strong> (EHK-283) ....................................................................................... 274<br />
Advanced <strong>Setup</strong> ............................................................................................................ 275<br />
Environmental Considerations and Factors Leading to Poor Lighting .......................... 275<br />
Appendix M: Windows Terminal Services/Citrix MetaFrame<br />
........................................................................................277<br />
Windows Terminal Services/Citrix Overview ............................................... 277<br />
General Issues ............................................................................................ 278<br />
Implications ................................................................................................. 278<br />
Procedures .................................................................................................. 279<br />
Step 1: Installing Required Applications ........................................................................ 279<br />
Step 2: Installing Citrix MetaFrame on the Server ........................................................ 279<br />
Step 3: Installing Feature Release 1 (Service Pack 2) .................................................. 280<br />
Step 4: Configuring the Citrix Web Server .................................................................... 280<br />
Creating the Virtual IIS Directory ................................................................................... 281<br />
Installing the Java Client ............................................................................................... 282<br />
Installing Citrix NFuse Web Extensions ........................................................................ 283<br />
Installing the NFuse Web Site Wizard ........................................................................... 286<br />
Running the Citrix Web Site Wizard .............................................................................. 288<br />
revision 143 — 11
Table of Contents<br />
Edit the Appembed.htm and Template.ica File ............................................................. 292<br />
Step 5: Installing B.A.S.I.S. on the Server .................................................................... 293<br />
Step 6: Publishing B.A.S.I.S. as a Web Application ...................................................... 294<br />
Is it Working ................................................................................................................ 297<br />
Installing B.A.S.I.S. Via a Terminal Services Client<br />
Window ...................................................................................................................... 298<br />
Appendix N: Encryption ..........................................................299<br />
Encryption Overview ................................................................................... 299<br />
Setting Up Encryption for Use with B.A.S.I.S. ............................................. 302<br />
Step 1: Initial Hardware Configuration .......................................................................... 302<br />
Step 2: Configuring the SafeNet/Speed Box ................................................................. 302<br />
Step 3: Installing SafeNet/Soft-PK on the Server and<br />
Client .......................................................................................................................... 306<br />
Step 4: Configuring SafeNet/Soft-PK Peer-to-Peer Encryption on the Server .............. 309<br />
Step 5: Configuring SafeNet/Soft-PK Peer-to-Peer Encryption on the Workstation ..... 312<br />
Step 6: Configuring SafeNet/Soft-PK Peer-to-Panel Encryption on the Workstation .... 315<br />
Appendix O: Ports Used by B.A.S.I.S. ...................................319<br />
Recorded Digital Video Ports ...................................................................... 321<br />
Index ...............................................................................................323<br />
12 — revision 143
<strong>Installation</strong> & <strong>Setup</strong> <strong>User</strong> <strong>Guide</strong><br />
Chapter 1:<br />
Before You Begin Installing B.A.S.I.S.<br />
System <strong>Setup</strong> Checklist<br />
Specific hardware, operating system, database system, and web browser<br />
requirements must be met prior to the B.A.S.I.S. ® installation. Please refer to the<br />
release notes for those requirements. The release notes are located on the root of<br />
the B.A.S.I.S. ET Third Edition CD in a file named B.A.S.I.S. ET Release<br />
Notes.rtf.<br />
Configure B.A.S.I.S.<br />
The following process outline represents a typical 3-station network<br />
configuration. Your installation may differ from this, depending upon the size of<br />
your network and the functions performed on each individual station.<br />
revision 143 — 13
1: Before You Begin Installing B.A.S.I.S.<br />
<strong>Access</strong> Control Server/Configuration & Monitoring<br />
Station<br />
1. Install Microsoft Windows Server software.<br />
2. Determine whether your database will use Microsoft SQL Server, Oracle, or<br />
the default (SQL Server Desktop Engine) database layout.<br />
3. Configure the computer for TCP/IP. For more information, refer to Chapter<br />
7: Configuring Computers for TCP/IP on page 87.<br />
4. Oracle Server users ONLY: Install Oracle 9i Server software. For more<br />
information, refer to Chapter 11: Installing & Configuring Oracle 9i Server<br />
Software on page 133. Also, please refer to your Oracle user documentation.<br />
5. SQL Server users ONLY: Install Microsoft SQL Server software. For more<br />
information, refer to Chapter 9: Installing Microsoft SQL Server on page<br />
107.<br />
6. Install the B.A.S.I.S. ET Third Edition software. For more information, refer<br />
to Chapter 3: Installing B.A.S.I.S. ET Third Edition on page 41.<br />
• Select the Server <strong>Installation</strong> choice.<br />
• Choose the access control applications.<br />
• SQL Server users ONLY: choose the MS-SQL Database option.<br />
• Oracle users ONLY: choose the Oracle option.<br />
7. Attach the Hardware Key.<br />
8. Install the software license. For more information, refer to Appendix K: The<br />
License Administration Application on page 265.<br />
9. Run Database <strong>Setup</strong>. For more information, refer to Appendix C: The<br />
Database <strong>Setup</strong> Program on page 213.<br />
10. Using the System Administration software, define your access control<br />
system hardware and monitoring environment. For more information please<br />
refer to the System Administration and Alarm Monitoring <strong>User</strong> <strong>Guide</strong>s.<br />
11. If you’ve purchased the Mobile Badging option: Configure the server to<br />
be a Distributed ID Master Server. For more information, refer to Appendix<br />
H: Configuring a Distributed ID/Mobile Badging System on page 243.<br />
14 — revision 143
<strong>Installation</strong> & <strong>Setup</strong> <strong>User</strong> <strong>Guide</strong><br />
Alarm Monitoring Station<br />
1. Install Windows Workstation software.<br />
2. Configure the computer for TCP/IP. For more information, refer to Chapter<br />
7: Configuring Computers for TCP/IP on page 87.<br />
3. Oracle users ONLY: Install and Configure Oracle 9i client software. For<br />
more information, refer to Chapter 12: Configuring Oracle 9i Client<br />
Software on page 159.<br />
4. Install the B.A.S.I.S. ET Third Edition software. For more information, refer<br />
to Chapter 3: Installing B.A.S.I.S. ET Third Edition on page 41.<br />
• Select the Client <strong>Installation</strong> choice.<br />
• Choose the Alarm Monitoring application.<br />
5. Attach the Hardware Key.<br />
6. Start the Communication Server.<br />
ID Badging Station<br />
Note:<br />
If you have purchased the optional Mobile Badging application, you must<br />
configure Mobile Badging Stations. For more information, refer to<br />
Appendix H: Configuring a Distributed ID/Mobile Badging System on page<br />
243.<br />
1. Install Windows Workstation software.<br />
2. Install an Integral Technologies FlashPoint video capture board in the<br />
computer. For more information, refer to Chapter 4: CCD/CCTV Video<br />
<strong>Setup</strong> on page 53. Also refer to the FlashPoint user guide.<br />
3. Perform video capture setup. For more information, refer to Chapter 6:<br />
Setting Up & Configuring a Capture Station on page 79.<br />
4. Configure the workstation for TCP/IP. For more information, refer to<br />
Chapter 7: Configuring Computers for TCP/IP on page 87.<br />
5. Oracle users ONLY: Install and Configure Oracle 9i client software. For<br />
more information, refer to Chapter 12: Configuring Oracle 9i Client<br />
Software on page 159.<br />
6. Install the B.A.S.I.S. ET Third Edition software. For more information, refer<br />
to Chapter 3: Installing B.A.S.I.S. ET Third Edition on page 41.<br />
• Select the Client <strong>Installation</strong> choice.<br />
• Choose the ID CredentialCenter application.<br />
7. Attach the Hardware Key.<br />
8. Add cardholder records to the database. For more information please refer to<br />
the ID CredentialCenter <strong>User</strong> <strong>Guide</strong>.<br />
revision 143 — 15
1: Before You Begin Installing B.A.S.I.S.<br />
<strong>Installation</strong> Prerequisites<br />
The following are required components that must be installed prior to installing<br />
B.A.S.I.S. ET Third Edition:<br />
• DirectX 9.0.<br />
• Windows 2000 Service Pack 4 or later, if running Windows 2000.<br />
• Windows XP Service Pack 1a or later, if running Windows XP.<br />
• Adobe Acrobat Reader 6.0 (not required to install B.A.S.I.S., but needed to<br />
open the documentation).<br />
These components have been included for your convenience on Disc 2, which<br />
accompanies the B.A.S.I.S. ET Third Edition Disc CD-ROM. To determine<br />
whether your system has these components installed or install any of these<br />
components:<br />
1. Insert the B.A.S.I.S. ET Third Edition Disc 2 CD-ROM into the CD-ROM<br />
drive on the computer where B.A.S.I.S. ET Third Edition will be installed.<br />
2. If autorun is enabled, your computer will automatically be checked to<br />
determine whether it has all required third party applications installed.<br />
Note:<br />
If autorun is not enabled, click the Run... popup menu choice. In the Run<br />
window, select setup.exe from the CD-ROM drive. Alternatively, you can<br />
run <strong>Setup</strong> from Explorer.<br />
• If all requirements are met, the following message is displayed. Click<br />
the [OK] button and proceed to step 5.<br />
• If there is a requirement that has not been met, the Third Party<br />
Components - Wizard window is displayed.<br />
3. In the Third Party Components - Wizard window, all components with<br />
grayed out buttons are already installed on the system. In the illustration that<br />
16 — revision 143
<strong>Installation</strong> & <strong>Setup</strong> <strong>User</strong> <strong>Guide</strong><br />
follows, Windows 2000 Service Pack 4, Windows XP Service Pack 1a, and<br />
Acrobat Reader 6.0 have already been installed.<br />
a. If the [DirectX 9.0] button is not grayed out, click the button and install<br />
DirectX 9.0. For more information, refer to Appendix A: Installing<br />
DirectX on page 201.<br />
b. If the [Win2K Service Pack 4] button is not grayed out and you are<br />
using Windows 2000, click the button and install Windows 2000<br />
Service Pack 4.<br />
c. If the [WinXP Service Pack 1a] button is not grayed out and you are<br />
using Windows XP, click the button and install Windows XP Service<br />
Pack 1a.<br />
Warning<br />
If you have the full version of Adobe Acrobat installed, do not install the Acrobat 6.0<br />
reader. The installation of the reader will cause the full version of Acrobat to run<br />
improperly.<br />
d. If the [Acrobat Reader 6.0] button is not grayed out and you do not have<br />
another version of Acrobat or Acrobat Reader installed, click the button<br />
to install Acrobat Reader 6.0.<br />
4. After all required components are installed, click [Next >].<br />
5. The Third Party Wizard Completed window is displayed. Click [Exit].<br />
revision 143 — 17
1: Before You Begin Installing B.A.S.I.S.<br />
18 — revision 143
Upgrading to<br />
B.A.S.I.S. ET Third<br />
Edition
<strong>Installation</strong> & <strong>Setup</strong> <strong>User</strong> <strong>Guide</strong><br />
Chapter 2:<br />
Upgrade Procedures<br />
B.A.S.I.S. Upgrade Checklist<br />
1. The B.A.S.I.S. database must be backed up. It is CRITICAL that you have<br />
an up-to-date backup of the database before you begin the upgrade process.<br />
For more information, refer to Chapter 13: Database Backup and Restoration<br />
on page 165.<br />
2. All workstations must be upgraded to Windows 2000 Service Pack 4 or later.<br />
Workstations are any computers where B.A.S.I.S. software is installed,<br />
including the Database Server computer, Archive Server computers, License<br />
Server computers, Communication Server computers, etc.<br />
3. If using SQL Server, you must upgrade to SQL Server 2000 (Service Pack<br />
3a is also highly recommended). If using Oracle, you must upgrade to 9.2<br />
(9i).<br />
4. DirectX 9.0 must be installed on all client computers. The installation will<br />
notify you if you do not have DirectX 9.0 installed on the machine. Windows<br />
XP comes with DirectX 8.1. Both Windows 2000 and Windows XP users<br />
must upgrade to 9.0, which is located on Disc 2 of the B.A.S.I.S. installation<br />
disk set. For more information, refer to Appendix A: Installing DirectX on<br />
page 201.<br />
5. The latest approved drivers (compatible with Windows 2000) are required<br />
for any video capture devices and printers you have installed on<br />
workstations.<br />
6. B.A.S.I.S. services should be shut down on all computers. These services<br />
must not be restarted until the upgrade is complete. For those services that<br />
revision 143 — 21
2: Upgrade Procedures<br />
are configured for automatic start up, temporarily change them to manual<br />
start up. The following services should be shut down:<br />
• LS Communication Server<br />
• LS DataExchange Server<br />
• LS Global Output Server<br />
• LS License Server<br />
• LS Linkage Server<br />
• LS Login Driver<br />
• LS OpenIT Service<br />
• LS Replicator<br />
• LS Video Archive Server<br />
7. Be sure all B.A.S.I.S. applications are closed on all workstations. <strong>User</strong>s<br />
should not run any B.A.S.I.S. applications during the installation process.<br />
8. If there is new firmware for the Lenel Digital Video recorders, upgrade this<br />
firmware first.<br />
9. Upgrade the B.A.S.I.S. Database Server before upgrading any client<br />
computers.<br />
10. After installing the latest B.A.S.I.S. software on the database server, upgrade<br />
the computer that is hosting the LS License Server service.<br />
11. Restart the LS License Server service and change it from manual to<br />
automatic start up.<br />
12. For an upgrade between major release versions of B.A.S.I.S., a new license<br />
will be required. Be sure to install your new license using License<br />
Administration. Otherwise, you will not be able to run Database <strong>Setup</strong>.<br />
13. Upgrade the B.A.S.I.S. database by running the Database <strong>Setup</strong> application.<br />
14. All B.A.S.I.S. Client Computers can be upgraded next. This includes all<br />
Archive Servers. Software must not be restarted on a client computer until it<br />
has been upgraded.<br />
As client computers are upgraded, B.A.S.I.S. software (including BEST<br />
Services) can be restarted. It is not necessary to wait until ALL clients are<br />
upgraded to restart software on a client computer that has been upgraded.<br />
15. If you have not already done so, restart all BEST Services. Remember to<br />
change the appropriate services from manual to automatic start up.<br />
16. If the new release contains updated BEST controller firmware, this can be<br />
downloaded to the BEST controllers. It is not necessary to do this<br />
immediately, but it should be done as soon as it is convenient. New features<br />
will not be available until the firmware is updated. Sites with a large number<br />
of controllers may find it useful to schedule firmware downloads via the<br />
Scheduler application.<br />
17. If the new release contains updated BEST interface gateway firmware, this<br />
can be downloaded to the interface gateways. It is not necessary to do this<br />
immediately, but it should be done as soon as it is convenient.<br />
22 — revision 143
<strong>Installation</strong> & <strong>Setup</strong> <strong>User</strong> <strong>Guide</strong><br />
Upgrading from B.A.S.I.S. 2000 or B.A.S.I.S. 2002<br />
Warning<br />
Before beginning the upgrade process, make sure that you have an up-to-date backup of<br />
the B.A.S.I.S. database. For more information, refer to Chapter 13: Database Backup<br />
and Restoration on page 165.<br />
The following instructions apply to upgrading from B.A.S.I.S. 2000 or B.A.S.I.S.<br />
2002. Your upgrade procedure may vary slightly depending on what build of<br />
B.A.S.I.S. you have installed.<br />
Notes: In order to run B.A.S.I.S. ET Third Edition, Windows 2000 Service Pack 4<br />
or later is required!<br />
The cardholder, visitor and asset forms have been expanded and improved to<br />
accommodate simplified localization, improved readability and expanded<br />
contents on each tab. If you have a custom form, you may need to make<br />
some cosmetic adjustments to your forms using FormsDesigner after<br />
upgrading to take advantage of the new expansion. Note that the horizontal<br />
revision 143 — 23
2: Upgrade Procedures<br />
divider bar can now be slightly lowered in FormsDesigner to make more<br />
room for controls that are viewable on all pages.<br />
Upgrading B.A.S.I.S.<br />
1. <strong>User</strong>s upgrading from <strong>Access</strong> to SQL Server Desktop Engine: Make sure<br />
that you can successfully log into the current B.A.S.I.S. 2000 system and<br />
that the database being used is the database that you want to upgrade.<br />
2. Insert the B.A.S.I.S. ET Third Edition CD-ROM into a CD-ROM drive on a<br />
computer running the Windows operating system.<br />
3. Click the Windows Start button on the taskbar. Click the Run... popup menu<br />
choice. In the Run window, select setup.exe from the CD-ROM drive.<br />
Alternatively, you can run <strong>Setup</strong> from Explorer.<br />
4. Click the “Install B.A.S.I.S. ET” link.<br />
5. When prompted, read the Software License Agreement. If you agree to its<br />
terms:<br />
a. Select the I accept the license agreement radio button.<br />
b. Click [Next >].<br />
6. Click [Install].<br />
7. After Windows configures B.A.S.I.S., B.A.S.I.S. will be upgraded, and the<br />
24 — revision 143
<strong>Installation</strong> & <strong>Setup</strong> <strong>User</strong> <strong>Guide</strong><br />
status and progress bar will be updated as the upgrade progresses.<br />
8. Depending on the components that were installed, you may need to reboot<br />
the computer. If you are prompted to do so, reboot the computer.<br />
Attach the Hardware Key (B.A.S.I.S. License Server<br />
Computer Only)<br />
B.A.S.I.S. software is protected by a hardware security key. There are two types<br />
of hardware security keys available for use with B.A.S.I.S.: parallel port and<br />
USB. You may request either. Please remember to physically attach the hardware<br />
key (“dongle” adapter) directly to the respective port on the computer that has<br />
License Server installed in order for the software to run properly.<br />
A hardware dongle is only needed on the server running License Server. Each<br />
client computer running B.A.S.I.S. ET Third Edition uses a software license<br />
instead of a hardware dongle.<br />
Start the Communication Server<br />
If you will be performing downloads to a PDA, the Communication Server must<br />
be started. To run the Communication Server as an application:<br />
1. Click the Start button, then select Programs > B.A.S.I.S. ET ><br />
Communication Server.<br />
2. The Communication Server will start. An icon will appear in the system tray,<br />
and the Lnlcomsrvr.exe process will be listed in the Task Manager on the<br />
Processes tab.<br />
Install the New License<br />
Install your new license using the License Administration application. For more<br />
information, refer to Appendix K: The License Administration Application on<br />
page 265.<br />
revision 143 — 25
2: Upgrade Procedures<br />
Upgrade Your B.A.S.I.S. SQL or Oracle Database<br />
After B.A.S.I.S. and the database software have been installed and configured,<br />
you must then install the access control-related reports, tables, triggers, and<br />
default data. These instructions are for upgrading a B.A.S.I.S. SQL or Oracle<br />
database. If you are upgrading an <strong>Access</strong> database, refer to Upgrade Your<br />
B.A.S.I.S. <strong>Access</strong> Database on page 30.<br />
1. Click the Windows Start button, then select Programs > B.A.S.I.S. ET ><br />
Database <strong>Setup</strong>.<br />
2. The Welcome window will be displayed. Click [Continue].<br />
3. Type in your B.A.S.I.S. database password. Initially, the password is<br />
MULTIMEDIA. (The password is case-insensitive for SQL and Oracle, but<br />
it is case-sensitive when upgrading from <strong>Access</strong> to SQL Server Desktop<br />
Engine.)<br />
Important:<br />
It is strongly recommended that you change this password once you are set<br />
up.<br />
Click [OK].<br />
4. If the password security feature is enabled, the database password will be<br />
analyzed.<br />
Note:<br />
This password security feature is enabled by default. To disable it, select the<br />
option on the General System Options form in the System Options folder.<br />
26 — revision 143
<strong>Installation</strong> & <strong>Setup</strong> <strong>User</strong> <strong>Guide</strong><br />
This is displayed by selecting Administration > System Options in System<br />
Administration or ID CredentialCenter.<br />
The following rules apply to the B.A.S.I.S. database password:<br />
a. Passwords cannot be blank.<br />
b. Passwords cannot be the same as the user name.<br />
c. Passwords cannot be one of the following keywords:<br />
1) MULTIMEDIA<br />
2) PROKUPETS<br />
3) PROKUPET<br />
4) BEST<br />
5) BASIS<br />
6) PASSWORD<br />
d. The following Oracle database account user name and password pairs<br />
are not allowed:<br />
1) SYSTEM, MANAGER<br />
2) INTERNAL, ORACLE<br />
revision 143 — 27
2: Upgrade Procedures<br />
3) SYS, CHANGE_ON_INSTALL<br />
5. If the password is considered weak, the Database Server Account Passwords<br />
window is displayed, as shown:<br />
6. If you do not wish to change the password at this time, click [Continue] and<br />
proceed to step 7. If you wish to change the password for a database server<br />
account now, select the account from the list, then click [Change Password].<br />
The note in this message<br />
will only appear if the<br />
Login Driver and the<br />
database server are<br />
running on different<br />
machines.<br />
a. The Change Password window is displayed. In the Old password field,<br />
type your current password. For security reasons, your password is not<br />
displayed as you type it.<br />
The checkbox in this<br />
illustration is only<br />
displayed when the<br />
Login Driver and the<br />
database server are<br />
running on two different<br />
machines.<br />
b. In the New password field, type the new password.<br />
28 — revision 143
<strong>Installation</strong> & <strong>Setup</strong> <strong>User</strong> <strong>Guide</strong><br />
c. In the Confirm password field, type the new password again. Because<br />
the password can’t be seen while you type, this gives you an extra<br />
assurance that you typed it correctly.<br />
d. When the password is changed, it must be changed on the Login Driver<br />
and on the database server. If the Login Driver and the database server<br />
are running on the same machine, proceed to step e.<br />
If the Login Driver and the database server are not running on the same<br />
machine, the When I change this password on the Login Driver, do<br />
not change the password on the database server. I will change the<br />
password manually on the database server. checkbox appears in the<br />
Change Password window.<br />
• If the checkbox is not selected (default), the password will be<br />
changed in both places. However, the password is sent as plain text<br />
over the network. This is the only case where the password is<br />
passed across the network in plain text when changing the<br />
password.<br />
Note:<br />
A connection to the Login Driver is required to connect successfully to the<br />
database. The Login Driver can be run on either the database server or the<br />
license server.<br />
• If the checkbox is selected, the password in the Login Driver will<br />
be changed, but you will need to change the password manually on<br />
the database server. For more information, refer to Change the<br />
BEST Account Password on page 208.<br />
e. Click [OK] to save the new password.<br />
f. Click [Continue].<br />
7. The Existing Database Detected window is displayed. Click [Continue].<br />
revision 143 — 29
2: Upgrade Procedures<br />
Note:<br />
In B.A.S.I.S. ET Third Edition, Microsoft <strong>Access</strong> is not supported. If you<br />
were using an <strong>Access</strong> database prior to this upgrade, your database will be<br />
switched to a SQL Server Desktop Engine database.<br />
8. In the Database <strong>Setup</strong> Options window:<br />
a. Select the Upgrade from previous build (same release), or install<br />
system reports radio button.<br />
b. Click [Continue].<br />
9. Click [Exit] upon successful completion.<br />
Note:<br />
If you changed the database password, remember to manually change the<br />
password on the database server if you selected the When I change this<br />
password on the Login Driver, do not change the password on the<br />
database server. I will change the password manually on the database<br />
server. checkbox. For more information, refer to Change the BEST Account<br />
Password on page 208.<br />
Upgrade Your B.A.S.I.S. <strong>Access</strong> Database<br />
After B.A.S.I.S. and the database software have been installed and configured,<br />
you must then install the access control-related reports, tables, triggers, and<br />
default data. These instructions are for upgrading an <strong>Access</strong> database to SQL<br />
Server Desktop Engine after an upgrade.<br />
• If you have upgraded your operating system or installed a new operating<br />
system and you cannot log into B.A.S.I.S. 2000 before upgrading to<br />
B.A.S.I.S. ET Third Edition, refer to Appendix D: Manually Upgrade from<br />
<strong>Access</strong> to SQL Server Desktop Engine.<br />
30 — revision 143
<strong>Installation</strong> & <strong>Setup</strong> <strong>User</strong> <strong>Guide</strong><br />
• If you are upgrading a B.A.S.I.S. SQL or Oracle database, refer to Upgrade<br />
Your B.A.S.I.S. SQL or Oracle Database on page 26.<br />
1. Click the Windows Start button, then select Programs > B.A.S.I.S. ET ><br />
Database <strong>Setup</strong>.<br />
2. The Welcome window is displayed. Click [Continue].<br />
Important:<br />
You will need to type in your password to continue. Initially, the password is<br />
MULTIMEDIA. (The password is case-insensitive for SQL and Oracle, but<br />
it is case-sensitive when upgrading from <strong>Access</strong> to SQL Server Desktop<br />
revision 143 — 31
2: Upgrade Procedures<br />
Engine.) It is strongly recommended that you change this password once you<br />
are set up.<br />
Click [OK].<br />
3. Click [Continue].<br />
4. In B.A.S.I.S. ET Third Edition, Microsoft <strong>Access</strong> is not supported. If you<br />
were using an <strong>Access</strong> database prior to this upgrade, your database will be<br />
32 — revision 143
<strong>Installation</strong> & <strong>Setup</strong> <strong>User</strong> <strong>Guide</strong><br />
converted to a SQL Server Desktop Engine database.<br />
Click [OK].<br />
5. In the Database <strong>Setup</strong> Options window:<br />
a. Select the Upgrade from prior release radio button.<br />
b. Click [Continue].<br />
6. Upon successful completion, click [Continue] if you wish to view the setup<br />
log. Otherwise, click [Exit].<br />
revision 143 — 33
2: Upgrade Procedures<br />
Maintaining and Removing B.A.S.I.S. ET Third Edition<br />
Note:<br />
B.A.S.I.S. can be removed more quickly by following the Removing<br />
B.A.S.I.S. ET Third Edition procedure on page 38 instead.<br />
1. To modify, repair, or remove your existing B.A.S.I.S. ET Third Edition<br />
installation, insert the B.A.S.I.S. ET Third Edition CD-ROM into a CD-<br />
ROM drive on a computer that has the same build of B.A.S.I.S. ET Third<br />
Edition installed.<br />
• If autorun is enabled, the <strong>Installation</strong> & Configuration window will<br />
automatically be opened.<br />
• If the <strong>Installation</strong> & Configuration window does not automatically<br />
appear, click the Windows Start. Click the Run... popup menu choice.<br />
In the Run window, select setup.exe from the CD-ROM drive.<br />
Alternatively, you can run <strong>Setup</strong> from Explorer.<br />
2. The Maintenance Wizard opens. Click [Next >].<br />
3. The Maintenance Type window opens. Click one of the following radio<br />
buttons:<br />
• Modify – to add or remove programs from the existing build. Select if<br />
you want to install components that were previously left uninstalled or<br />
remove components that are no longer needed.<br />
• Repair – to automatically attempt to repair shortcuts, deleted files, etc.,<br />
that were deleted by the user.<br />
• Remove – to remove B.A.S.I.S. ET Third Edition and all of its<br />
components from the hard drive.<br />
If you chose the Modify or Repair option, click [Next>] to continue. If you<br />
chose the Remove option, the [Next >] button is replaced by a [Remove >]<br />
34 — revision 143
<strong>Installation</strong> & <strong>Setup</strong> <strong>User</strong> <strong>Guide</strong><br />
button. Click [Remove >] to remove B.A.S.I.S. ET Third Edition from your<br />
computer.<br />
4. What happens next depends on what option you chose.<br />
• If you chose the Repair option, click [Install] to repair the program.<br />
• If you chose the Modify option, the Custom <strong>Setup</strong> window is displayed.<br />
Select the B.A.S.I.S. features you wish to have installed or those you<br />
want to remove.<br />
a. Click the name of a feature on the left to display its description on<br />
the right. Below the Feature Description the disk space<br />
requirements of the selected B.A.S.I.S. feature are displayed.<br />
revision 143 — 35
2: Upgrade Procedures<br />
b. Click the icon to the left of a feature to display a popup menu of<br />
installation choices for that feature, as shown.<br />
c. Click [Next >] to continue.<br />
36 — revision 143
<strong>Installation</strong> & <strong>Setup</strong> <strong>User</strong> <strong>Guide</strong><br />
d. The Ready to Modify the Program window is displayed. Click<br />
[Install].<br />
5. A status meter will indicate the progress of the installation or removal.<br />
6. Click [Finish].<br />
7. Reboot the computer if you are prompted to do so.<br />
revision 143 — 37
2: Upgrade Procedures<br />
Removing B.A.S.I.S. ET Third Edition<br />
There are two ways to remove the B.A.S.I.S. software. The quick way is detailed<br />
below. B.A.S.I.S. can also be removed by following the Maintaining and<br />
Removing B.A.S.I.S. ET Third Edition procedure on page 34, but the process is<br />
more involved.<br />
1. In the Control Panel:<br />
a. Double-click “Add or Remove Programs”.<br />
b. In the Currently installed programs listing, select “B.A.S.I.S. ET Third<br />
Edition”.<br />
c. Click [Remove].<br />
2. The following message is displayed:<br />
3. Click [Yes].<br />
Upgrading from Versions of B.A.S.I.S. Before 5.5E<br />
If you have B.A.S.I.S. version 5.5E or earlier, contact your B.A.S.I.S. Authorized<br />
Value Added Reseller for information about upgrading to B.A.S.I.S. ET Third<br />
Edition.<br />
38 — revision 143
New <strong>Installation</strong>s
<strong>Installation</strong> & <strong>Setup</strong> <strong>User</strong> <strong>Guide</strong><br />
Chapter 3:<br />
Installing B.A.S.I.S. ET Third Edition<br />
<strong>Installation</strong> Procedures<br />
Before installing B.A.S.I.S., the following must be installed:<br />
• DirectX 9.0.<br />
• Windows 2000 Service Pack 4 or later, if running Windows 2000.<br />
• Windows XP Service Pack 1a or later, if running Windows XP.<br />
If any of these are not installed, a message will indicate what needs to be<br />
installed, and the B.A.S.I.S. installation will be terminated. To install DirectX 9.0<br />
or a required Windows service pack, refer to <strong>Installation</strong> Prerequisites on page<br />
16.<br />
The general steps for setting up B.A.S.I.S. include:<br />
1. Install and configure SQL Server or Oracle Server. If you are using SQL<br />
Server Desktop Engine, you can skip this step. For more information, refer<br />
to Install & Configure SQL Server or Oracle Server (Does Not Apply to<br />
SQL Server Desktop Engine <strong>User</strong>s) on page 41.<br />
2. Install the B.A.S.I.S. software. For more information, refer to Install the<br />
B.A.S.I.S. Software on page 42.<br />
3. Attach the hardware key (dongle) to the License Server computer. For more<br />
information, refer to Attach the Hardware Key (B.A.S.I.S. License Server<br />
Computer Only) on page 47.<br />
4. Install the new B.A.S.I.S. license. For more information, refer to Install the<br />
New License on page 51.<br />
5. Set up your B.A.S.I.S. database. For more information, refer to Set Up Your<br />
B.A.S.I.S. Database on page 51.<br />
6. (Optional) Install Adobe Acrobat Reader. For more information, refer to<br />
Install Acrobat Reader on page 52.<br />
Install & Configure SQL Server or Oracle Server (Does<br />
Not Apply to SQL Server Desktop Engine <strong>User</strong>s)<br />
If you will use an SQL or Oracle database with B.A.S.I.S., you must first install<br />
and configure either the SQL Server software or the Oracle Server software.<br />
• SQL Server users: For more information, refer to Chapter 9: Installing<br />
Microsoft SQL Server on page 107.<br />
• Oracle users: For more information, refer to Chapter 11: Installing &<br />
Configuring Oracle 9i Server Software on page 133.<br />
revision 143 — 41
3: Installing B.A.S.I.S. ET Third Edition<br />
Install the B.A.S.I.S. Software<br />
1. Insert the B.A.S.I.S. ET Third Edition CD-ROM into a CD-ROM drive on a<br />
computer running the Windows operating system.<br />
2. Click the Windows Start button. Click the Run... popup menu choice. In the<br />
Run window, select setup.exe from the CD-ROM drive. Alternatively, you<br />
can run <strong>Setup</strong> from Explorer.<br />
3. Click the “Install B.A.S.I.S. ET” link.<br />
4. When prompted, read the Software License Agreement. If you agree to its<br />
terms:<br />
a. Select the I accept the license agreement radio button.<br />
b. Click [Server > ] or [Client > ], depending on the computer on which<br />
you are installing.<br />
5. Next, you will be prompted to enter the system type information.<br />
If you would like to install all the features, select the Complete System<br />
radio button.<br />
If you would like to include or exclude certain features, select the Custom<br />
System radio button. If you select this option, a window will appear,<br />
allowing you to select your features.<br />
6. Choose your database type that your access control system will use. Choices<br />
include SQL Server, SQL Server Desktop Engine, Demo Database (SQL<br />
Desktop Engine), Oracle, or IBM DB2.<br />
42 — revision 143
<strong>Installation</strong> & <strong>Setup</strong> <strong>User</strong> <strong>Guide</strong><br />
7. Click [Next >].<br />
8. If you selected any database type other than IBM DB2, skip ahead to step 9.<br />
If you selected IBM DB2, the following information message is displayed<br />
over top of the ODBC Data Source windows:<br />
a. Click [OK]. If you need to, move the System Location Information<br />
Information window out of the way so that you can see the ODBC Data<br />
Source windows.<br />
b. In the ODBC IBM DB2 Driver - Add window, verify that the Data<br />
source name is “Lenel” and the Database alias is “ACCTL”. As long as<br />
it is, click [Cancel].<br />
c. In the ODBC Data Source Administrator window, the “Lenel” system<br />
data source name should be listed, as shown. Click [OK].<br />
9. In the System Location Information window:<br />
• Either accept the default installation directory or click [Browse…] and<br />
specify a different destination folder.<br />
• Accept the default location of the License Server or click [Browse…]<br />
revision 143 — 43
3: Installing B.A.S.I.S. ET Third Edition<br />
and specify a different location.<br />
• In the Port field, enter the number of the port to be used for access<br />
control system communication. It is recommended that you accept the<br />
default value of 8189.<br />
Note:<br />
If you accept the default port setting of 8189, it is written into the ACS.INI<br />
file. If you want to enter a port setting other than 8189, it is written into both<br />
the ACS.INI file AND the<br />
…B.A.S.I.S.\LicenseServerConfig\Server.Properties file. This file will<br />
only be created during the install if the port setting is changed. If you want to<br />
change the port setting in the ACS.INI file after the installation (either to a<br />
new setting or back to 8189), then you must also change it in the<br />
Server.Properties file.<br />
• In the Choose the location of your [SQL/Oracle/SQL Server<br />
Desktop Engine] Database section, accept the default location or click<br />
[Browse…] and specify a different location.<br />
• If you selected the Complete System radio button in the previous<br />
window, click [Install], and the B.A.S.I.S. installation will begin.<br />
Proceed to step 14 on page 46. If you selected the Custom System radio<br />
button, the [Install] button is replaced by a [Next >] button. Click [Next<br />
>].<br />
10. The Custom <strong>Setup</strong> window will be displayed. Select the access control<br />
system features you wish to have installed.<br />
44 — revision 143
<strong>Installation</strong> & <strong>Setup</strong> <strong>User</strong> <strong>Guide</strong><br />
Notes:<br />
Click the name of a feature on the left to display its description on the right.<br />
Below the Feature Description the disk space requirements of the selected<br />
feature are displayed.<br />
11. Click the icon to the left of a feature to display a popup menu of installation<br />
choices for that feature, as illustrated.<br />
Click [Next].<br />
12. Click [Install] to begin the installation.<br />
revision 143 — 45
3: Installing B.A.S.I.S. ET Third Edition<br />
13. A check is performed behind-the-scenes to determine if a language pack is<br />
installed. If an old language pack is installed, the following message is<br />
displayed:<br />
• If you wish to cancel the installation and remove the language pack by<br />
yourself, click [Cancel].<br />
• If you wish to remove the language pack and continue the installation,<br />
click [Remove & Continue].<br />
14. After Windows configures B.A.S.I.S., the status and progress bar will be<br />
updated.<br />
15. Click [Finish].<br />
16. Depending on the components that you chose to install, you may need to<br />
reboot the computer. If you are prompted to do so, reboot the computer.<br />
46 — revision 143
<strong>Installation</strong> & <strong>Setup</strong> <strong>User</strong> <strong>Guide</strong><br />
Attach the Hardware Key (B.A.S.I.S. License Server<br />
Computer Only)<br />
B.A.S.I.S. software is protected by a hardware security key. There are two types<br />
of hardware security keys available for use with B.A.S.I.S.: parallel port and<br />
USB. You may request either. Please remember to physically attach the hardware<br />
key (“dongle” adapter) directly to the respective port on the computer that has<br />
License Server installed in order for the software to run properly.<br />
A hardware key is only needed on the server running License Server. Each client<br />
computer running B.A.S.I.S. ET Third Edition uses a software license instead of<br />
a hardware key.<br />
Configuring a Parallel Port Hardware Key<br />
If you are using a hardware key that attaches to the parallel port, no special<br />
configuration is needed for the hardware key; simply attach the hardware key to<br />
the parallel port.<br />
Configuring a USB Hardware Key<br />
If you are using a hardware key that attached to the parallel port, then you must<br />
install a driver in order for Windows to recognize the device.<br />
Important:<br />
You must install the driver for the hardware key BEFORE attaching the<br />
hardware key to the PC.<br />
revision 143 — 47
3: Installing B.A.S.I.S. ET Third Edition<br />
To configure a USB hardware key:<br />
1. Install the Rainbow USB hardware key driver by doing the following:<br />
a. Navigate to the Rainbow directory on Disc 2 of the B.A.S.I.S.<br />
<strong>Installation</strong> disk set, and then double-click the RainbowSSD5.2.exe<br />
file.<br />
b. The InstallShield Wizard starts. Click [Next].<br />
c. The wizard continues, and the License Agreement window opens.<br />
Select the I accept the terms in the license agreement radio button,<br />
and then click [Next].<br />
48 — revision 143
<strong>Installation</strong> & <strong>Setup</strong> <strong>User</strong> <strong>Guide</strong><br />
d. The wizard continues, and the <strong>Setup</strong> Type window opens. Select the<br />
Custom radio button, and then click [Next].<br />
e. On the custom screen make sure that only the USB driver is selected for<br />
installation. Click [Next].<br />
f. A message warning that you must not have the hardware key attached to<br />
the PC displays. Make sure that the hardware key is not attached to the<br />
PC, and then click [Install].<br />
g. The wizard completes. Click [Finish] to exit the wizard.<br />
revision 143 — 49
3: Installing B.A.S.I.S. ET Third Edition<br />
2. Install the USB hardware key by doing the following:<br />
a. Attach the USB hardware key to any available USB port.<br />
b. The Found New Hardware wizard starts. Click [Next].<br />
c. The hardware is detected, and the Found New Hardware wizard<br />
completes. Click [Finish]. The hardware key is now configured and<br />
ready to be used.<br />
3. Depending on your configuration, you may need to restart your PC so that<br />
License Administration recognizes the hardware key. Otherwise, you may<br />
receive an error in License Administration saying that the necessary<br />
hardware device was not found.<br />
50 — revision 143
<strong>Installation</strong> & <strong>Setup</strong> <strong>User</strong> <strong>Guide</strong><br />
You are now ready to install the software license!<br />
Start the Communication Server<br />
If you will be performing downloads to a PDA, the Communication Server must<br />
be started. To run the Communication Server as an application:<br />
1. Click the Start button, then select Programs > B.A.S.I.S. ET ><br />
Communication Server.<br />
2. The Communication Server will start. An icon will appear in the system tray,<br />
and the Lnlcomsrvr.exe process will be listed in the Task Manager on the<br />
Processes tab.<br />
Install the New License<br />
Install your new license using the License Administration application. For more<br />
information, refer to Appendix K: The License Administration Application on<br />
page 265.<br />
Set Up Your B.A.S.I.S. Database<br />
After B.A.S.I.S. and the database software have been installed and configured,<br />
you must then install the access control-related reports, tables, triggers, and<br />
default data. For more information, refer to Appendix C: The Database <strong>Setup</strong><br />
Program on page 213.<br />
1. Click the Windows Start button, then select Programs > B.A.S.I.S. ET ><br />
Database <strong>Setup</strong>.<br />
2. The Welcome window will be displayed. Click [Continue].<br />
3. You will need to type in your password to continue. Initially, the password is<br />
MULTIMEDIA. (The password is case-insensitive for SQL and Oracle, but<br />
revision 143 — 51
3: Installing B.A.S.I.S. ET Third Edition<br />
it is case-sensitive when upgrading from <strong>Access</strong> to SQL Server Desktop<br />
Engine.)<br />
Important:<br />
It is strongly recommended that you change this password once you are set<br />
up. For more information, refer to Change the Database Password on page<br />
206.<br />
Click [OK].<br />
4. In the Database <strong>Setup</strong> Options window:<br />
a. Select the Create new database option if you don’t already have a<br />
database. This option will install the access control-related reports,<br />
tables, triggers, and default data.<br />
b. Click [Continue].<br />
5. Click [Exit] upon successful completion. You can now proceed to the<br />
System Administration or ID CredentialCenter application to configure your<br />
software for your organization’s needs.<br />
Install Acrobat Reader<br />
Warning<br />
If you have the full version of Adobe Acrobat installed, do not install the Acrobat 6.0<br />
reader. The installation of the reader will cause the full version of Acrobat to run<br />
improperly.<br />
Adobe Acrobat Reader is required to view the B.A.S.I.S. user manuals. If you do<br />
not already have Adobe Acrobat Reader version 6.0 installed, install it. The<br />
Acrobat installation file can be found on the B.A.S.I.S. Disc 2 CD. Navigate to<br />
the Adobe Acrobat Reader 6.0 folder on Disc 2 of the B.A.S.I.S. CD set and<br />
double-click on the AcroReader60_enu_full.exe file to begin the installation.<br />
52 — revision 143
<strong>Installation</strong> & <strong>Setup</strong> <strong>User</strong> <strong>Guide</strong><br />
Chapter 4:<br />
CCD/CCTV Video <strong>Setup</strong><br />
Configuring Video Hardware & Software<br />
This procedure will verify that your system video capture board and required<br />
Windows drivers are configured properly for live video capture/CCTV video<br />
with one of the following Integral Technologies video capture boards:<br />
• FlashPoint 3Dx Lite PCI<br />
• FlashPoint 3Dx Pro PCI<br />
• FlashPoint 3D Plus PCI 8 MB<br />
• FlashPoint 3D Pro PCI<br />
Those with other capture boards should refer to Appendix J: CCD/CCTV Video<br />
<strong>Setup</strong> for Discontinued Hardware. Be sure to perform Step 1: Check to Make<br />
Sure You Have All the Required Video Hardware through Step 3: Install the<br />
FlashPoint VGA Display Adapter Driver before you install any Integral<br />
Technologies FlashPoint software. The latest FlashPoint 3Dx software is<br />
available for download from Integral’s web site: http://www.integraltech.com/<br />
support.html. The most current version is 2.03, which is what the 3Dx systems<br />
ship with.<br />
The FlashPoint <strong>User</strong>’s Manual and accompanying <strong>Setup</strong> software diskettes are<br />
required for the procedures outlined in this chapter. (The FlashPoint <strong>User</strong>’s<br />
Manual referenced in this user guide is the September 2001 version.) You may<br />
also need your Windows 2000/Windows XP CD or a FlashPoint Display Drivers<br />
diskette from Integral Technologies.<br />
Step 1: Check to Make Sure You Have All the Required<br />
Video Hardware<br />
Refer to the “FlashPoint Cables” chapter of the FlashPoint <strong>User</strong>’s Manual for the<br />
video input cable requirements of your board.<br />
If you’re setting up a capture station you need the following hardware:<br />
revision 143 — 53
4: CCD/CCTV Video <strong>Setup</strong><br />
Hardware included with different image capture packages<br />
CCP601 Digital Zoom<br />
1/4 inch color CCD camera<br />
with autofocus/Iris 32X zoom lens<br />
450 lines<br />
S-Video camera with built-in<br />
16X AF lens<br />
Fixed diffused light with tilt head<br />
Camera and light 110 VAC power supplies<br />
Camera and light 220 VAC power supplies<br />
S-Video Cable 12-foot length<br />
Image capture card<br />
USB adapter kit<br />
Tripod with pan tilt mounts<br />
Tripod with pan tilt mounts with<br />
European plugs and cables<br />
CAM-CCP500K X X X X X X X X X<br />
CAM-CCP500K-EU X X X X X X X X X<br />
CAM-500K-USB X X X X X X X X X<br />
CAM-500K-USB-EU X X X X X X X X X<br />
Note:<br />
This chapter is for configuring the CAM-CCP500K and CAM-CCP500K-<br />
EU. To configure the CAM-500K-USB or the CAM-500K-USB-EU, please<br />
refer to Chapter 5: CCD/CCTV Video <strong>Setup</strong> for USB Devices on page 65.<br />
• Replacement fixed diffused light with power supply.<br />
• DPS060200-P5: Replacement camera power supply for CAM-CCP-500K.<br />
• EHK-K42U-A Professional Continuous Lighting Kit: Two 600-watt<br />
quartz lights, two bounce back white umbrellas, two stands, mounting<br />
brackets and carrying case.<br />
If you’re setting up a CCTV video station you need the following hardware:<br />
• CCD Video camera: The camera must output video in one of the following<br />
formats:<br />
– RGB: The FlashPoint Lite 3D and FlashPoint 3D Plus do not support<br />
this format.<br />
– NTSC S-Video<br />
– NTSC Composite<br />
– PAL S-Video<br />
– PAL Composite<br />
• Video cable(s) and possible CCTV switcher: The cable(s) needed depend<br />
on the model of FlashPoint board you have, the number of CCTV cameras<br />
the computer is supposed to connect to and the video format being used. The<br />
54 — revision 143
<strong>Installation</strong> & <strong>Setup</strong> <strong>User</strong> <strong>Guide</strong><br />
most common cable is # HOC-3610, expanded cable [RGBS (DB-9)]<br />
composite, S-Video, photo coupler.<br />
Note:<br />
Although FlashPoint boards have multiple video inputs (the number depends<br />
on the model of FlashPoint board), Alarm Monitoring stations are<br />
configured to use only one FlashPoint video input at a time. Therefore, if a<br />
monitoring station is to use multiple CCTV video cameras, the FlashPoint<br />
board must be connected to a CCTV switcher (instead of directly to the<br />
cameras), a cable must be run from the switcher to each CCTV video camera<br />
and each camera must be output video in the same format.<br />
Step 2: Install the FlashPoint Video Capture Board<br />
Install the FlashPoint board into the computer as directed in your Integral<br />
Technologies FlashPoint <strong>User</strong>’s Manual. You will need to install the FlashPoint<br />
card into PCI slot 1. Make sure your computer boots properly when you are done.<br />
If you installed the FlashPoint video capture board on the Dell Optiplex GX260,<br />
you must disable the onboard Intel 82845G/GL Graphics Controller. To do this:<br />
1. Start the computer up in VGA mode.<br />
2. Delete the following drivers:<br />
• C:\\WINNT\system32\drivers\a302.sys<br />
• C:\\WINNT\system32\drivers\a303.sys<br />
• C:\\WINNT\system32\drivers\a304.sys<br />
• C:\\WINNT\system32\drivers\a305.sys<br />
• C:\\WINNT\system32\drivers\a306.sys<br />
• C:\\WINNT\system32\drivers\a307.sys<br />
• C:\\WINNT\system32\drivers\a308.sys<br />
• C:\\WINNT\system32\drivers\a309.sys<br />
• C:\\WINNT\system32\drivers\ialmkchw.sys<br />
• C:\\WINNT\system32\drivers\ialmnt.sys<br />
• C:\\WINNT\system32\drivers\ialmsbw.sys<br />
• C:\\WINNT\system32\drivers\vch.sys<br />
• C:\\WINNT\system32\drivers\wa301a.sys<br />
• C:\\WINNT\system32\drivers\wa301b.sys<br />
• C:\\WINNT\system32\drivers\wa310a.sys<br />
• C:\\WINNT\system32\drivers\wa310b.sys<br />
3. Restart the computer.<br />
4. In the Device Manager, disable the Intel 82845G/GL Graphics Controller.<br />
revision 143 — 55
4: CCD/CCTV Video <strong>Setup</strong><br />
Step 3: Install the FlashPoint VGA Display Adapter<br />
Driver<br />
For FlashPoint 3D and 3Dx boards, refer to Chapter 2 of the FlashPoint 3D<br />
<strong>Installation</strong> <strong>Guide</strong>. Those with all other models, refer to Appendix J: CCD/CCTV<br />
Video <strong>Setup</strong> for Discontinued Hardware.<br />
If you are using the FlashPoint 3Dx Lite PCI [ # HO-3280 with Dell OptiPlex<br />
GX400 (config. 6) or Dell Precision 340 (config. 1 and config. 3)], you may use<br />
the following procedure to install the device driver.<br />
1. When the operating system has finished booting, you will see the “Found<br />
New Hardware Wizard.” Choose [Next >] when prompted to begin the<br />
driver installation.<br />
2. Choose the option for “Display a list of known drivers for this device” and<br />
choose [Next >] to continue.<br />
3. Select “Display Adapter” from the hardware list and choose [Next >] to<br />
continue.<br />
4. Select the “Have Disk” option and browse to the location of the device<br />
drivers (the driver will be found in the BETA directory of the flashpoint<br />
driver disk). Once the driver file is found, select OK to continue.<br />
5. In the driver window, choose the driver that is labeled “S3 Inc. Savage/IX<br />
Display Driver Version xx.xxx.xx” and choose [Next >] to continue.<br />
6. Choose [Yes] when the “Update Driver Warning” appears (the warning is<br />
telling the user that this driver has not been evaluated by Microsoft and may<br />
not work correctly with your hardware device).<br />
7. Choose [Next >] to agree to the driver install (the driver and all related files<br />
will be loaded onto the PC).<br />
8. Choose [Finish] to complete the driver installation.<br />
Note:<br />
You do not need to reboot the machine at this point. The machine will be<br />
rebooted after the display settings are configured (see Step 4: Verify That the<br />
VGA Display Settings are Correct on page 56).<br />
Step 4: Verify That the VGA Display Settings are Correct<br />
To perform the following steps you MUST know the model of FlashPoint board<br />
you have and how much VGA frame buffer memory it has. The FlashPoint 3Dx<br />
56 — revision 143
<strong>Installation</strong> & <strong>Setup</strong> <strong>User</strong> <strong>Guide</strong><br />
Lite PCI and the FlashPoint 3Dx Pro PCI both have 8 MB; older boards may<br />
have between 1 MB and 8 MB.<br />
1. Start the Windows Control Panel. Double-click on the Display program icon.<br />
The Display Properties folder will appear. You may also select Start ><br />
Settings > Control Panel > Display.<br />
2. Click on the Settings tab to switch to the Settings form.<br />
3. Take note of the following before proceeding:<br />
• FlashPoint 3D/3Dx Lite supports video capture in all VGA models with<br />
≥ 256 colors, except for the following:<br />
– 16.7 million color models with desktops that are > 1152 x 864<br />
pixels<br />
– 65536 color models with desktops that are > 1152 x 864 pixels<br />
– 256 color models with desktops that are < 800 x 600 pixels or 1152<br />
x 864 pixels<br />
• Savage 3D VGA display driver does not allow you to select a 16-color<br />
VGA mode.<br />
• The quality of live video is poor when the VGA mode is 256 colors<br />
(because the 16.7 million color video frames are displayed on the screen<br />
via ordered dithering) so be sure to always use either 65536 color or<br />
16.7 million color VGA modes.<br />
• A desktop area of at least 800 x 600 pixels is required.<br />
• Captured video quality is the same for all VGA modes (16.7 million<br />
colors).<br />
4. Change the “Screen Area” setting to 800 x 600.<br />
5. Change the “Colors” setting to True Color (32-bit).<br />
6. Select “Small Fonts” in the Font Size field. B.A.S.I.S. does not support<br />
large fonts. B.A.S.I.S. dialog text fields and controls do not line up correctly<br />
when “Large Fonts” is selected<br />
7. Click [Close] or [OK].<br />
8. If you made any changes to the form:<br />
• You may be prompted to restart your computer. If so, select [Yes]<br />
Windows will start up with the newly selected Windows color palette,<br />
desktop area and refresh frequency.<br />
• If you are not prompted to restart your computer, Windows will adjust<br />
the display to have the newly selected Windows color palette, desktop<br />
area and refresh frequency. (You may be asked if the new settings look<br />
okay and if you want to keep the new settings.)<br />
9. You will now need to reboot the machine to complete the driver installation.<br />
revision 143 — 57
4: CCD/CCTV Video <strong>Setup</strong><br />
Step 5: Install FlashPoint Software<br />
1. If you have not already done so, run setup.exe from the first FlashPoint<br />
setup disk. In the Select Components dialog, select only the FlashPoint<br />
FPG3D Capture Application.<br />
2. Reboot your computer if prompted to do so.<br />
Step 6: Connect Your Video Camera(s) to Your<br />
FlashPoint 3D Board<br />
The FlashPoint board connections diagram that follows applies only to the Lite<br />
version of Flashpoint 3D. Connect your camera(s) to your FlashPoint 3D Lite<br />
board using the cable(s) identified in Step 1: Check to Make Sure You Have All<br />
the Required Video Hardware on page 53. Refer to your FlashPoint <strong>User</strong>’s<br />
Manual and camera user guide for assistance.<br />
Notes:<br />
The board must be installed into Slot # 1 or it will not work!<br />
Be sure to also connect your SVGA monitor to the FlashPoint 3D board,<br />
NOT to the on-board video port!<br />
58 — revision 143
<strong>Installation</strong> & <strong>Setup</strong> <strong>User</strong> <strong>Guide</strong><br />
Step 7: Verify That Your Video Board and Drivers Are<br />
Working Properly<br />
This can be done easily and quickly using the FPG3D32 application which ships<br />
with your FlashPoint board. Note that if FPG3D32 is unable to display video,<br />
neither will B.A.S.I.S.; i.e., the FPG3D32 application can be used for testing<br />
your video hardware and driver setup like the Windows test print feature can be<br />
used to test your printer hardware and driver setup.<br />
1. Terminate any currently running B.A.S.I.S. application.<br />
Warning<br />
The FlashPoint capture driver allows more than one of the following<br />
FlashPoint video windows to be open, with unpredictable side effects. This<br />
means you can use only one of the following at a time:<br />
• FPG3D32 application.<br />
• Video Verification feature.<br />
• Multimedia Capture module with the Video Capture Source selected.<br />
2. Power your camera on. It should always be powered with a power pack.<br />
3. Launch the FPG3D32 application by clicking the Windows Start button, then<br />
selecting Programs > FlashPoint 3D > FPG3D32.<br />
4. Make sure you see a live video image which fills the FPG3D32 window and<br />
that the image is in full color if using a color camera or in gray scale if you<br />
are using a black and white camera. Do the following if this is not the case:<br />
• Select “<strong>Setup</strong>” and then “Video...” from the main menu. The Video<br />
<strong>Setup</strong> window will appear off to the side.<br />
• Select the video input standard and type as per your camera and video<br />
cabling. Note that the FPG3D32 application provides no way to specify<br />
the video source (input connector #) because the application assumes<br />
you are using the first video input which supports the specified input<br />
format. (Consult the cable wiring diagrams located in Appendix B of<br />
your FlashPoint 3D <strong>User</strong>’s Manual.)<br />
• Consult the CCP601 manual override settings portion of the Default<br />
Camera Settings section in this chapter. For more information, refer to<br />
CCP601 Manual Override Settings (Factory Default) on page 63.<br />
• If you see just black or discolored video make sure the color<br />
adjustments have reasonable settings. If you are unsure which<br />
adjustments to use press the Video <strong>Setup</strong> window’s [Reset] button and<br />
then re-select the video input standard and format again.<br />
• If you still see just black or discolored video consult the Default Camera<br />
Settings section at the end of this chapter. Your camera’s white point<br />
balance and/or iris level may not be set correctly. For more information,<br />
refer to CCP601 Manual Override Settings (Factory Default) on page<br />
63.<br />
revision 143 — 59
4: CCD/CCTV Video <strong>Setup</strong><br />
Step 8: Video Software Settings<br />
Video Software Settings for a CCTV Station<br />
• Video Source, Input Standard and Input Format. Video Verification<br />
uses the video source, input standard and input format configured on the<br />
Workstations form of ID CredentialCenter’s/System Administration’s<br />
Workstations folder. Consult the ID CredentialCenter/System<br />
Administration <strong>User</strong> <strong>Guide</strong> on how to make those adjustments in the<br />
Workstations folder.<br />
• Video Colors and Video Sync Mode. Video Verification displays live<br />
video using the color adjustments and sync mode configured in the<br />
FPG3D32 application which shipped with your FlashPoint board. Consult<br />
your FlashPoint <strong>User</strong>’s Manual on how to make those adjustments. (The<br />
sync mode option is configured in the FPG3D32 application’s Advanced<br />
Configuration window. When enabled it causes unstable video coming from<br />
a VCR to stop jumping up and down and settle down into a stable picture,<br />
though there will be a narrow strip of static across the bottom.)<br />
Video Software Settings for a Capture Station<br />
The Multimedia Capture window has its own set of Video Source, Input<br />
Standard, Input Format, Color and Sync Mode settings completely separate from<br />
the FPG3D32 application. To adjust the Multimedia Capture settings, refer to<br />
Chapter 6: Setting Up & Configuring a Capture Station. More information is<br />
available in the BadgeDesigner <strong>User</strong> <strong>Guide</strong>, the ID CredentialCenter <strong>User</strong> <strong>Guide</strong><br />
and the System Administration <strong>User</strong> <strong>Guide</strong>.<br />
• Default Camera Settings. The following settings are for a normal office<br />
environment. They may need to be changed based on several variables in the<br />
capture environment (distance, lighting, backgrounds, wall color, etc.).<br />
Consult your camera user guide for information about manual overrides to<br />
the CCP601 camera. For most applications, the camera comes preset from<br />
the factory. If you want to change the factory settings, you can purchase the<br />
CON-500 CCP Camera Controller Programming Unit from BEST.<br />
It is recommended that you use the EHK-K42U-A (Professional Continuous<br />
Lighting Kit) if you want the best quality capture lighting. For more<br />
information, refer to Chapter 6: Setting Up & Configuring a Capture Station<br />
on page 79.<br />
• Multimedia Capture Settings. In the Multimedia Capture module of the ID<br />
CredentialCenter, System Administration and BadgeDesigner applications,<br />
the following settings are made at the factory. If you have not pressed the<br />
save user defaults button, the following settings default to values suitable for<br />
the CCP601 camera.<br />
60 — revision 143
<strong>Installation</strong> & <strong>Setup</strong> <strong>User</strong> <strong>Guide</strong><br />
FlashPoint/MCI Video Settings Form<br />
Section/Field<br />
Video Board<br />
Input Format<br />
Input Standard<br />
Value<br />
FlashPoint<br />
S Video<br />
NTSC<br />
Video Source 1<br />
Alternate Sync Mode<br />
High Resolution Capture<br />
Flash Type<br />
Flash Field Delay<br />
unchecked<br />
checked<br />
None<br />
N/A<br />
The video board name to use for the FlashPoint 3D/3Dx is just “FlashPoint.” (The<br />
capture dialog auto-detects which type of FlashPoint board you have installed.)<br />
FlashPoint/MCI Video I/O Settings Form<br />
Field<br />
Value<br />
Flash Brightness 539<br />
Flash Contrast 555<br />
Live Brightness 539<br />
Live Contrast 555<br />
Hue 0<br />
Red<br />
Green<br />
Blue<br />
N/A<br />
N/A<br />
N/A<br />
Saturation 507<br />
Sharpness 0<br />
Gain<br />
Gamma<br />
Offset<br />
Video Output Settings<br />
N/A<br />
N/A<br />
N/A<br />
N/A to FlashPoint boards<br />
If your situation requires that you configure these settings yourself, you must<br />
click [Save <strong>User</strong> Defaults] to save the settings. Note that BadgeDesigner has its<br />
own set of Multimedia Capture module settings apart from the set shared by ID<br />
CredentialCenter and System Administration.<br />
revision 143 — 61
4: CCD/CCTV Video <strong>Setup</strong><br />
• Chromakey form. Preset to 30% tolerance<br />
• Effects Gallery form. New installations default to having the following six<br />
image processing profiles:<br />
Effects Gallery Form<br />
Profile name<br />
Adjustment<br />
Increase Hue +7%<br />
Decrease Hue -7%<br />
Increase Saturation +7%<br />
Decrease Saturation -7%<br />
Increase Contrast +7%<br />
Decrease Contrast -7%<br />
General Settings Form<br />
Field<br />
Show Settings by default<br />
Default Capture Source<br />
Default Processing Profile<br />
Value<br />
checked<br />
Video Capture<br />
none<br />
Compression Amount 10%<br />
Enabled<br />
Sizable<br />
Maintain Aspect<br />
Units<br />
checked<br />
checked<br />
checked<br />
Inches<br />
Left 0.467”<br />
Top 0.0<br />
Width 1.2”*<br />
Height 1.6”*<br />
Note:<br />
* To take advantage of the B.A.S.I.S. software’s new high resolution capture<br />
capability, the crop window should be sized to be at least 1” wide and 1.5”<br />
tall.<br />
• For instructions on how to automatically load these defaults without having<br />
to type them in, refer to Chapter 6: Setting Up & Configuring a Capture<br />
Station.<br />
62 — revision 143
<strong>Installation</strong> & <strong>Setup</strong> <strong>User</strong> <strong>Guide</strong><br />
CCP601 Manual Override Settings (Factory<br />
Default)<br />
Menu 1:<br />
• Initial Set Off<br />
• Back Light On<br />
• Color On<br />
• Negative Off<br />
• Focus Auto/Mnl<br />
• Flickerless Off<br />
• WBC Mode Auto<br />
Menu 2:<br />
• Camera ID Off<br />
• Sharpness 11<br />
• Brightness 48<br />
• AE Mode Manual<br />
• Shutter Normal<br />
• Iris 199<br />
• AGC 60<br />
If you want to change the factory settings, you can purchase the CON-500<br />
Camera Controller Programming Unit from BEST.<br />
revision 143 — 63
4: CCD/CCTV Video <strong>Setup</strong><br />
CON-500 Camera Controller Programming Unit<br />
TELE<br />
NEAR<br />
WIDE<br />
FAR<br />
ON/OFF<br />
MENU<br />
64 — revision 143
<strong>Installation</strong> & <strong>Setup</strong> <strong>User</strong> <strong>Guide</strong><br />
Chapter 5:<br />
CCD/CCTV Video <strong>Setup</strong> for USB<br />
Devices<br />
Live video capture can be supported via the USB port instead of a video card.<br />
The Belkin USB VideoBus II (VideoBus) will accept any NTSC composite<br />
video input and convert it into PC-compatible digital video and image formats. It<br />
connects directly to the USB port. There is no need to open the computer to<br />
install or configure cards. No power supply is needed - VideoBus is powered by<br />
the USB connection.<br />
Configuring Video Hardware & Software<br />
Step 1: Check to Make Sure You Have All the Required<br />
Video Hardware<br />
This step lists the hardware required to set up a capture station or set up a CCTV<br />
video station. Refer to the appropriate list.<br />
If you’re setting up a capture station you need the following hardware:<br />
• CAM-CCP-500KUSB Windows 2000 Image Capture Kit: CCP601<br />
Digital Zoom (a 1/4-inch color CCD camera with auto focus/iris 32X zoom<br />
lens, 450 lines, S-Video camera with built-in 16X AF lens, fixed diffused<br />
light with tilt head, 110 VAC camera and light power supplies, 12-foot S-<br />
Video cable, tripod with pan tilt mounts, USB adapter kit).<br />
Note:<br />
The CAM-500KUSB-EU Image Capture Kit contains everything listed<br />
above, except that it contains European cables and the tripod has European<br />
threads.<br />
• Replacement fixed diffused light with power supply.<br />
• DPS060200-P5: Replacement camera power supply for CAM-CCP-<br />
500KUSB.<br />
• EHK-K42U-A Professional Continuous Lighting Kit: Two 600-watt<br />
quartz lights, two bounce back white umbrellas, two stands, mounting<br />
brackets and carrying case.<br />
If you’re setting up a CCTV video station you need the following hardware:<br />
• CCD Video camera: The camera must output video in one of the following<br />
formats:<br />
– RGB<br />
– NTSC S-Video<br />
– NTSC Composite<br />
– PAL S-Video<br />
– PAL Composite<br />
revision 143 — 65
5: CCD/CCTV Video <strong>Setup</strong> for USB Devices<br />
• Video cable(s) and possible CCTV switcher: The cable(s) needed depend<br />
on the number of CCTV cameras the computer is supposed to connect to and<br />
the video format being used. The most common cable is # HOC-3610,<br />
expanded cable [RGBS (DB-9)] composite, S-Video, photo coupler.<br />
Step 2: Install the F5U208 VideoBus II USB Cable<br />
(Windows XP)<br />
Notes: This procedure is for installing on Windows XP only. For Windows 2000<br />
installation procedures, please refer to Step 2: Install the F5U208 VideoBus<br />
II USB Cable (Windows 2000) on page 70.<br />
Do NOT use the USB VideoBus II <strong>Installation</strong> CD. Instead, use the drivers<br />
on Disc 2 of the B.A.S.I.S. <strong>Installation</strong> Disk Set. The Windows XP drivers<br />
are located in the Belkin F5U208 USB Drivers\Windows XP directory.<br />
If you ever need to uninstall the Belkin VideoBus II, please refer Belkin’s<br />
instructions. The instruction file is named F5U208WinXP<strong>Installation</strong>.htm,<br />
66 — revision 143
<strong>Installation</strong> & <strong>Setup</strong> <strong>User</strong> <strong>Guide</strong><br />
and it is also located in the Belkin F5U208 USB Drivers\Windows XP<br />
directory on Disc 2 of the B.A.S.I.S. <strong>Installation</strong> Disk Set.<br />
1. CLOSE ALL WINDOWS PROGRAMS before installing the VideoBus<br />
software. The installation will not work correctly if any other Windows<br />
programs are open during the installation.<br />
2. Connect the camera and CCTV switcher (if necessary) to the Belkin USB<br />
VideoBus II.<br />
3. Connect the Belkin USB VideoBus II to a free USB port on your computer,<br />
and then connect the camera to a power source.<br />
4. The hardware wizard will recognize the device, and the Welcome to the<br />
Found New Hardware Wizard window opens.<br />
a. Select the Install from a list or specific location (Advanced) radio<br />
button.<br />
b. Click [Next].<br />
5. The Please choose your search and installation options window is<br />
displayed.<br />
a. Verify that the Search for the best driver in these locations radio<br />
button is selected.<br />
b. Insert Disc 2 of the B.A.S.I.S. <strong>Installation</strong> Disk Set into the CD-ROM.<br />
(Depending on how your system is configured, the setup application for<br />
revision 143 — 67
5: CCD/CCTV Video <strong>Setup</strong> for USB Devices<br />
Disc 2 may run and open the Third Party Components Wizard. If this<br />
happens, close the wizard.)<br />
c. Click [Browse], navigate to the D:\Belkin F5U208 USB<br />
Drivers\Windows XP directory, where D:\ is your CD-ROM drive, and<br />
then click [OK].<br />
d. Click [Next].<br />
6. A warning stating that the Belkin USB VideoBus II, Video has not passed<br />
Windows Logo testing. Click [Continue Anyway].<br />
7. The Please wait while the wizard installs the software window is displayed.<br />
8. The Completing the Found New Hardware Wizard window is displayed.<br />
Click [Finish].<br />
68 — revision 143
<strong>Installation</strong> & <strong>Setup</strong> <strong>User</strong> <strong>Guide</strong><br />
9. The installation process will automatically restart because there are two<br />
components (audio and video) that must be installed. Repeat steps 4-8, and<br />
then proceed to step 10.<br />
10. <strong>Installation</strong> of the Belkin VideoBus II is now complete.<br />
11. To insure that your installation was successful and complete:<br />
a. Click the Windows Start button, then right-click on My Computer and<br />
select Properties from the right-click menu.<br />
b. Click the Hardware tab.<br />
c. Click [Device Manager].<br />
d. If you expand “Imaging devices”, “Belkin USB VideoBus II, Video”<br />
should now be listed. If you expand “Sound, video and game<br />
controllers”, “Belkin USB VideoBus II, Audio” should be listed.<br />
revision 143 — 69
5: CCD/CCTV Video <strong>Setup</strong> for USB Devices<br />
Step 2: Install the F5U208 VideoBus II USB Cable<br />
(Windows 2000)<br />
Notes:<br />
This procedure is installing on Windows 2000 only. For Windows XP<br />
installation procedures, please refer to Step 2: Install the F5U208 VideoBus<br />
II USB Cable (Windows XP) on page 66.<br />
Do NOT use the USB VideoBus II <strong>Installation</strong> CD. Instead, use the drivers<br />
on Disc 2 of the B.A.S.I.S. <strong>Installation</strong> Disk Set. The Windows 2000 drivers<br />
are located in the D:\Belkin F5U208 USB Drivers\Windows 2000<br />
directory, where D:\ is your CD-ROM drive.<br />
1. CLOSE ALL WINDOWS PROGRAMS before installing the VideoBus<br />
software. The installation will not work correctly if any other Windows<br />
programs are open during the installation.<br />
2. Connect the camera and CCTV switcher (if necessary) to the Belkin USB<br />
VideoBus II.<br />
3. Connect the Belkin USB VideoBus II to a free USB port on your computer,<br />
and then connect the camera to a power source.<br />
4. The hardware wizard will recognize the device, and the Welcome to the<br />
Found New Hardware Wizard window opens. Click [Next].<br />
5. Verify the Search for a suitable driver for my device (recommended)<br />
radio button is selected and click [Next].<br />
70 — revision 143
<strong>Installation</strong> & <strong>Setup</strong> <strong>User</strong> <strong>Guide</strong><br />
6. Insert Disc 2 of the B.A.S.I.S. <strong>Installation</strong> Disk Set into the CD-ROM.<br />
(Depending on how your system is configured, the setup application for Disc<br />
2 may run and open the Third Party Components Wizard. If this happens,<br />
close the wizard.) Select the CD-ROM drive checkbox and click [Next].<br />
7. The Driver Files Search Results window will display. Click [Next].<br />
8. After clicking [Next], the computer will display a dialog box stating that<br />
there is no digital signature found. Click [Yes] to continue with the<br />
installation.<br />
revision 143 — 71
5: CCD/CCTV Video <strong>Setup</strong> for USB Devices<br />
9. Windows will finish installing software for the device. Click [Finish].<br />
10. The installation process will automatically restart because there are two<br />
components (audio and video) that must be installed. Repeat step 4 through<br />
9.<br />
Step 3: Video Software Settings<br />
Video Software Settings for a CCTV Station<br />
• Video Source, Input Standard and Input Format. Video Verification uses<br />
the video source, input standard and input format configured in the<br />
Workstations form of ID CredentialCenter’s/System Administration’s<br />
Workstations folder. Consult the ID CredentialCenter/System<br />
Administration <strong>User</strong> <strong>Guide</strong> on how to make those adjustments in the<br />
Workstations folder.<br />
• Video Colors and Video Sync Mode. Video Verification displays live<br />
video using the color adjustments and sync mode configured in the<br />
FPG3D32 application which shipped with your FlashPoint board. Consult<br />
your FlashPoint <strong>User</strong>’s Manual on how to make those adjustments. (The<br />
sync mode option is configured in the FPG3D32 application’s Advanced<br />
Configuration window. When enabled it causes unstable video coming from<br />
a VCR to stop jumping up and down and settle down into a stable picture,<br />
though there will be a narrow strip of static across the bottom.)<br />
72 — revision 143
<strong>Installation</strong> & <strong>Setup</strong> <strong>User</strong> <strong>Guide</strong><br />
Video Software Settings for a Capture Station<br />
The Multimedia Capture window has its own set of Video Source, Input<br />
Standard, Input Format, Color and Sync Mode settings completely separate from<br />
the FPG3D32 application. To adjust the Multimedia Capture settings, refer to<br />
Chapter 6: Setting Up & Configuring a Capture Station. More information is<br />
available in the BadgeDesigner <strong>User</strong> <strong>Guide</strong>, the ID CredentialCenter <strong>User</strong> <strong>Guide</strong><br />
and the System Administration <strong>User</strong> <strong>Guide</strong>.<br />
• Default Camera Settings. The following settings are for a normal office<br />
environment. They may need to be changed based on several variables in the<br />
capture environment (distance, lighting, backgrounds, wall color, etc.).<br />
Consult your camera user guide for information about manual overrides to<br />
the CCP601camera. For most applications, the camera comes preset from<br />
the factory. If you want to change the factory settings, you can purchase the<br />
CON-500 CCP Camera Controller Programming Unit from BEST.<br />
It is recommended that you use the EHK-K42U-A (Professional Continuous<br />
Lighting Kit) if you want the best quality capture lighting. For more<br />
information, refer to Chapter 6: Setting Up & Configuring a Capture Station<br />
on page 79.<br />
• Multimedia Capture Settings. In the Multimedia Capture module of the ID<br />
CredentialCenter, System Administration and BadgeDesigner applications,<br />
the following settings are made at the factory. If you have not pressed the<br />
save user defaults button, the following settings default to values suitable for<br />
the CCP601camera.<br />
revision 143 — 73
5: CCD/CCTV Video <strong>Setup</strong> for USB Devices<br />
FlashPoint/MCI Video Settings Form<br />
Section/Field<br />
Video Board<br />
Input Format<br />
Input Standard<br />
Value<br />
FlashPoint<br />
S Video<br />
NTSC<br />
Video Source 1<br />
Alternate Sync Mode<br />
High Resolution Capture<br />
Flash Type<br />
Flash Field Delay<br />
unchecked<br />
checked<br />
None<br />
N/A<br />
The video board name to use for the FlashPoint 3D/3Dx is just “FlashPoint.” (The<br />
capture dialog auto-detects which type of FlashPoint board you have installed.)<br />
FlashPoint/MCI Video I/O Settings Form<br />
Field<br />
Value<br />
Flash Brightness 539<br />
Flash Contrast 555<br />
Live Brightness 539<br />
Live Contrast 555<br />
Hue 0<br />
Red<br />
Green<br />
Blue<br />
N/A<br />
N/A<br />
N/A<br />
Saturation 507<br />
Sharpness 0<br />
Gain<br />
Gamma<br />
Offset<br />
Video Output Settings<br />
N/A<br />
N/A<br />
N/A<br />
N/A to FlashPoint boards<br />
If your situation requires that you configure these settings yourself, you must<br />
click on the [Save Defaults] push button to save the settings. Note that<br />
BadgeDesigner has its own set of Multimedia Capture module settings apart from<br />
the set shared by ID CredentialCenter and System Administration.<br />
74 — revision 143
<strong>Installation</strong> & <strong>Setup</strong> <strong>User</strong> <strong>Guide</strong><br />
• Chromakey form. Preset to 30% tolerance<br />
• Effects Gallery form. New installations default to having the following six<br />
image processing profiles:<br />
Effects Gallery Form<br />
Profile name<br />
Adjustment<br />
Increase Hue +7%<br />
Decrease Hue -7%<br />
Increase Saturation +7%<br />
Decrease Saturation -7%<br />
Increase Contrast +7%<br />
Decrease Contrast -7%<br />
General Settings Form<br />
Field<br />
Show Settings by Default<br />
Default Capture Source<br />
Default Processing Profile<br />
Value<br />
checked<br />
Video Capture<br />
none<br />
Compression Amount 10%<br />
Crop Window<br />
Enabled<br />
Sizable<br />
Maintain Aspect<br />
Units<br />
checked<br />
checked<br />
checked<br />
Inches<br />
Left 0.467”<br />
Top 0.0<br />
Width 1.2”*<br />
Height 1.6”*<br />
Note:<br />
* To take advantage of the B.A.S.I.S. software’s new high resolution capture<br />
capability, the crop window should be sized to be at least 1” wide and 1.5”<br />
tall.<br />
• For instructions on how to automatically load these defaults without having<br />
to type them in, refer to Chapter 6: Setting Up & Configuring a Capture<br />
Station.<br />
revision 143 — 75
5: CCD/CCTV Video <strong>Setup</strong> for USB Devices<br />
CCP601 Manual Override Settings (Factory<br />
Default)<br />
Menu 1:<br />
• Initial Set Off<br />
• Back Light On<br />
• Color On<br />
• Negative Off<br />
• Focus Auto/Mnl<br />
• Flickerless Off<br />
• WBC Mode Indoor<br />
Menu 2:<br />
• Camera ID Off<br />
• Sharpness 11<br />
• Brightness 48<br />
• AE Mode Manual<br />
• Shutter Normal<br />
• Iris 199<br />
• AGC 60<br />
If you want to change the factory settings, you can purchase the CON-500<br />
Camera Controller Programming Unit from BEST.<br />
76 — revision 143
<strong>Installation</strong> & <strong>Setup</strong> <strong>User</strong> <strong>Guide</strong><br />
CON-500 Camera Controller Programming Unit<br />
TELE<br />
NEAR<br />
WIDE<br />
FAR<br />
ON/OFF<br />
MENU<br />
revision 143 — 77
5: CCD/CCTV Video <strong>Setup</strong> for USB Devices<br />
78 — revision 143
<strong>Installation</strong> & <strong>Setup</strong> <strong>User</strong> <strong>Guide</strong><br />
Chapter 6:<br />
Setting Up & Configuring a Capture<br />
Station<br />
Environmental Considerations Affecting Flash & Camera<br />
Capture Quality<br />
There are several factors to consider when selecting your capture station<br />
environment. Lighting is the most important factor and the most difficult to<br />
provide setup instructions for, because every site’s capture environment is<br />
unique. B.A.S.I.S. ships with the optimal hardware setting defaults already set.<br />
The important items to consider when setting up the capture environment are the<br />
flash and camera settings based on environmental considerations.<br />
Setting Up the B.A.S.I.S. Capture Dialog<br />
You will initially need to set up the B.A.S.I.S. capture dialog with factory default<br />
settings that are appropriate for your capture hardware. Once that is done, you<br />
can make minor adjustments to accommodate your specific capture devices and<br />
capture environments.<br />
1. Launch the application you’ll be using to capture photos/signatures/badge<br />
layout graphics.<br />
2. Launch the capture dialog from within that application by selecting the<br />
[Capture] button on a form that accesses the Multimedia Capture module.<br />
3. Repeat the following procedure for each outer capture form:<br />
a. If configuring cardholder photo capture, select the Photo tab. If<br />
configuring cardholder signature capture, select the Signature tab. If you<br />
are using the BadgeDesigner application, you only have the Graphic tab.<br />
b. Configuring the capture dialog with settings that are appropriate for<br />
your capture hardware is easily done via the factory defaults profile<br />
procedure. Use the following procedure to configure capture from<br />
sources other than the File Import capture source:<br />
1) Click [Load Factory Defaults]. The “Load Factory Defaults” dialog<br />
will open.<br />
2) Select the factory defaults profile that most closely matched your<br />
capture device. The default capture source (configured on the<br />
General Settings form) will be automatically set to the capture<br />
source associated with that device. The crop window (configured<br />
on the General Settings form) will be automatically set to a size<br />
appropriate for the profile you select.<br />
revision 143 — 79
6: Setting Up & Configuring a Capture Station<br />
3) Click [OK].<br />
c. If you want to capture images with the “File Import” capture source:<br />
1) From the capture source drop-down list, select File Import.<br />
2) Click on the File I/O Settings tab.<br />
3) Set the file import directory to the directory where you store all of<br />
your photo files.<br />
4) Click [Save <strong>User</strong> Defaults].<br />
d. If you want to capture images with the “Video Capture” capture source<br />
but you have the following discontinued hardware, refer to Appendix J:<br />
CCD/CCTV Video <strong>Setup</strong> for Discontinued Hardware:<br />
– CAM-77U CCD Image Capture Kit: Hitachi VKC-77U Camera,<br />
auto iris lens, power supply, S-Video cable, Integral FlashPoint Lite<br />
128 image capture card, Tripod with pan tilt mounts. (Replaced by<br />
CAM-CCP-500K.)<br />
– EHK-283 Enhanced Lighting Kit: Vivitar automatic flash unit,<br />
VP-1 flash manual override (adjustment sensor), flash sync cable<br />
(#HOC-3653), flash softbox, flash mount, flash/camera bracket,<br />
flash power supply.<br />
(Replaced by existing EHK-K42U-A Professional Continuous Lighting<br />
Kit.)<br />
e. If you want to capture images with USB camera, configure the<br />
multimedia capture module for the following settings instead of loading<br />
the default settings:<br />
1) From the capture source drop-down list, select WDM Video.<br />
2) Click the WDM Video Settings Device tab.<br />
3) Select USB Video Bus II, Video from the Device drop-down box.<br />
4) Click [Video Input].<br />
5) The Video Input Properties window displays.<br />
6) Select 1:VideoSVideo In from the Input drop-down menu.<br />
Capture Station <strong>Setup</strong> Specifications<br />
For every capture station the equipment should be setup as close as possible to<br />
the following specifications:<br />
The backdrop should be approximately 1.5 feet behind the subject. The camera<br />
and flash apparatus should be at least 4.5 feet in front of the subject at an average<br />
height (the height should be adjustable for obvious reasons). The capture area<br />
requires approximately 10 to 12 feet of floor space with appropriate width.<br />
80 — revision 143
<strong>Installation</strong> & <strong>Setup</strong> <strong>User</strong> <strong>Guide</strong><br />
Recommended Badging Room Layout<br />
Entrance<br />
Badge<br />
Printer<br />
Bounce Back Umbrella<br />
Backdrop<br />
10<br />
ft.<br />
Camera<br />
4.5 ft.<br />
1.5 ft.<br />
Subject<br />
Badging<br />
Workstation<br />
Bounce Back Umbrella<br />
Exit<br />
12<br />
ft.<br />
revision 143 — 81
6: Setting Up & Configuring a Capture Station<br />
Final Adjustments for Fixed Diffused Lighting<br />
BACKDROP<br />
FIXED DIFFUSED LIGHT<br />
CAMERA<br />
4.5 FEET<br />
TRIPOD<br />
Distance Variable<br />
(1.5 feet recommended)<br />
TABLE<br />
82 — revision 143
<strong>Installation</strong> & <strong>Setup</strong> <strong>User</strong> <strong>Guide</strong><br />
Final Adjustments for Continuous Lighting<br />
BACKDROP<br />
BOUNCE BACK UMBRELLA<br />
LIGHT<br />
Distance Variable<br />
CAMERA<br />
(1.5 feet recommended)<br />
TRIPOD<br />
4.5 FEET<br />
TABLE<br />
STAND<br />
Basic Camera <strong>Setup</strong> (CAM-CCP-500K)<br />
<strong>Setup</strong> the DSP32X manual override settings. If you want to change the factory<br />
settings, you can purchase the CON-500 CCP Camera Controller Programming<br />
Unit from BEST (see CON-500 Camera Controller Programming Unit on page<br />
64 for a diagram of the CON-500).<br />
Menu 1: Menu 2:<br />
Initial Set Off Camera ID Off<br />
Back Light Off Sharpness 11<br />
Color On Brightness 48<br />
Negative Off AE Mode Manual<br />
Focus Auto/Man Shutter Normal<br />
Flickerless Off Irish Adjust 199<br />
WBC Mode Indoor AGC Adjust 60<br />
revision 143 — 83
6: Setting Up & Configuring a Capture Station<br />
CCP-500 (Back View)<br />
1. Tele Button – (Telephoto) Press this button to zoom in.<br />
TELE<br />
PUSH<br />
AUTO<br />
WIDE<br />
S VIDEO<br />
OUT<br />
BLC<br />
SHUTTER<br />
CONTROL<br />
POWER IN<br />
Class 2 Only<br />
VIDEO<br />
OUT<br />
2. Push Auto Button – (Auto Focus) Press and hold this button to activate the<br />
auto focus function.<br />
3. Wide Button – (Wide Angle) Press this button to zoom out.<br />
4. BLC – (Back Light Compensation) If you press this button while viewing a<br />
backlight subject, the camera will adjust itself to the high contrast lighting.<br />
• BLC mode is switched between ON and OFF by pressing this button.<br />
• If you hold the button down for more than 2 seconds and then release,<br />
the BLC will change to AUTO BLC mode.<br />
5. Shutter Speed Button – Use to select the shutter speed.<br />
6. Power In and Control – Insert the DC power cable here to connect the<br />
camera to the DC power source (DC 12V). You can control the Zoom and<br />
Focus Lens to use Controller.<br />
7. Video Out terminal - Connect this terminal to the video input terminal or an<br />
external input, such as a monitor, TV or VCR.<br />
8. S-Video Out terminal – This is an output terminal for separate Y/C video<br />
signals.<br />
The CAM-CCP-500K camera zooms to X32, but the recommended zoom area<br />
should be less than X16. This is because the zoom past X16 is digital and the<br />
84 — revision 143
<strong>Installation</strong> & <strong>Setup</strong> <strong>User</strong> <strong>Guide</strong><br />
picture captured becomes rough (pixilated). The subject should be within X1 to<br />
X12 zoom for optimal results. The subject should nominally fill the pre-sized<br />
crop window if adjusted properly. Always leave on “Maintain Aspect Ratio”<br />
To adjust the zoom, set the selector switch to zoom (all the way to the right).<br />
Adjust the camera apparatus for the center of the subject. With the arrows located<br />
to the bottom left of the rear of the camera, zoom in all the way and then zoom<br />
back to determine the approximate center point of the zoom (remember: you do<br />
not want to zoom past X12, the halfway point). Then, zoom into the subject until<br />
the desired capture frame is attained. The arrows located at the bottom of the<br />
camera can be use in one of two manors. If you push and hold the arrow, it will<br />
zoom all the way in or out. If you push the arrow button momentarily, it will<br />
move in and out incrementally.<br />
Note:<br />
Optimally the subject should fill the pre-sized crop window, so no additional<br />
cropping adjustments need be made.<br />
Why manual white balance With light or gray colors the Auto White Balance<br />
adjusts incorrectly. That is why the CAM-CCP-500K should be setup for Manual<br />
White Balance. It is necessary to White balance the camera to obtain a default<br />
white balance setting and is maintained for consistent picture quality.<br />
Lighting <strong>Setup</strong><br />
Basic Continuous Lighting <strong>Setup</strong> (EHK-K42U-A)<br />
The EHK-K42U-A kit is designed to help eliminate shadows that may appear<br />
behind the subject that you are capturing, or under the subject’s chin (known as<br />
bearding). Most capture environments have adequate light to capture a subject<br />
with the CAM-CCP-500K capture kit, but to enhance the colors (more real life),<br />
and to eliminate shadows, the capture kit is necessary.<br />
Advanced <strong>Setup</strong><br />
After the capture station has been setup, some testing must be performed to<br />
determine the optimal illumination settings for image capture. You may have to<br />
adjust the lights, drapes, or other elements in the capture environment.<br />
With a test subject, view the live image on the screen with all the room lights on.<br />
Set the selector switch on the back of the camera to iris (all the way to the left).<br />
With the arrows on back of the camera adjust the iris all the way down, the live<br />
image on the screen should become dark if not black. The arrows located at the<br />
bottom of the camera can be use in one of two manners. If you push and hold the<br />
arrow, it will zoom all the way in or out. If you push the arrow button<br />
momentarily, it will move in and out incrementally. While viewing the screen,<br />
increase the iris until the subject is visible. Increase the iris a little more, until the<br />
screen image is about the same brightness as the real view of the subject. Take a<br />
revision 143 — 85
6: Setting Up & Configuring a Capture Station<br />
test picture. Label this “test 1, all lights”. From here we will adjust the room<br />
environments lighting and make minor adjustments to the iris if needed while<br />
continuing to save the sample captures at (test 2, test 3 etc.).<br />
Steps to improving capture quality:<br />
1. Turn on all the lights in the room.<br />
2. Open the Capture dialog and center on a test subject with the camera.<br />
3. Adjust the iris all the way down, and then adjust it until the screen image is<br />
about the same brightness as the real viewable image.<br />
4. Set the White Balance. (Set the selector switch on the back of the camera to<br />
WB. Hold a white piece of paper in front of the camera so there is only white<br />
showing on the screen. Using the arrows on the back of the camera adjust the<br />
white balance until the image in the capture window is white.)<br />
5. Take a test picture. Save this as a cardholder labeled “Test1: all lights”.<br />
6. Turn off all the lights.<br />
7. Take another picture. Save this as a cardholder labeled “Test2: no lights”.<br />
8. Continue testing until a desired lighting quality is captured on the screen. Be<br />
sure to label each test with a number and a description of what you did.<br />
Adjust your environments based on the environmental considerations below.<br />
Continue to take pictures, save them, and use them as references until the best<br />
conditions are determined.<br />
Environmental Considerations and Factors Leading to<br />
Poor Lighting<br />
Environmental factors to consider when setting up a capture station include:<br />
• Is there a different amount of sunlight entering the area through out the day<br />
• Is the station next to a window or under a skylight<br />
• Are the wall colors dark or light or bright colors If they are light they will<br />
reflect more light or change your white balance setup.<br />
• Is the ceiling low or cathedral like The lower the ceiling the more light will<br />
reflect.<br />
• What types of lights are used in the room Incandescent or florescent (cool<br />
white or colored) or direct spots<br />
• Is there any direct lighting of the subject Is the room evenly illuminated<br />
Direct lighting will over expose the subject.<br />
• What is the color of reflective shields around the lights For example, gold<br />
reflective surface shields illuminate the subject in yellow highlights.<br />
This is just a partial list of possible factors leading to poor image lighting quality.<br />
There may be other features of your site that will affect the image capture that<br />
may need to be considered.<br />
86 — revision 143
<strong>Installation</strong> & <strong>Setup</strong> <strong>User</strong> <strong>Guide</strong><br />
Chapter 7:<br />
Configuring Computers for TCP/IP<br />
At a Windows 2000 or Windows XP installation, each B.A.S.I.S. computer must<br />
be configured for the TCP/IP network protocol prior to installation of the<br />
B.A.S.I.S. software. Even on a computer that is not connected to a network, a<br />
network board must be installed and the TCP/IP protocol must be configured.<br />
Each computer must be given a fixed TCP/IP address. B.A.S.I.S. requires the<br />
TCP/IP protocol on all its workstations.<br />
Configuring TCP/IP in Windows 2000<br />
1. Click the Windows Start button, then select Settings > Control Panel.<br />
2. Select Network and Dialup Connections.<br />
3. Select Local Area Connection.<br />
4. The Local Area Connection Status window opens. Click [Properties].<br />
5. If an “Internet Protocol (TCP/IP)” entry is not listed, perform the following<br />
steps to add it:<br />
a. Click [Install...].<br />
b. In the Select Network Component Type window, choose “Protocol.”<br />
Click [Add…].<br />
c. In the Select Network Protocol window, choose “Internet Protocol<br />
(TCP/IP).”<br />
d. Click [Have Disk...] and type the location (drive and directory) of the<br />
protocol file. You may also be prompted to insert the Windows 2000<br />
installation CD-ROM. Click [OK].<br />
6. If a “Computer Browser” entry is not listed, perform the following steps to<br />
add it:<br />
a. Click [Install...].<br />
b. In the Select Network Component Type window, choose “Service.”<br />
Click [Add…].<br />
c. In the Select Network Service window, choose “Computer Browser.”<br />
d. Click [Have Disk...] and type the drive and directory of the location of<br />
the browser file. You may also be prompted to insert the Windows 2000<br />
installation CD-ROM. Click [OK].<br />
7. In the Control Panel, open System. Click the Network Identification tab.<br />
8. The form indicates the full computer name as it appears across the network,<br />
the domain, and the name of the workgroup of which this computer is a<br />
member. Click [Properties] if you wish to change any of these values.<br />
revision 143 — 87
7: Configuring Computers for TCP/IP<br />
88 — revision 143
<strong>Installation</strong> & <strong>Setup</strong> <strong>User</strong> <strong>Guide</strong><br />
Chapter 8:<br />
Installing and Configuring<br />
WirelessOffice Messaging Software<br />
Version 5.0<br />
WirelessOffice Messaging Software Overview<br />
WirelessOffice Messaging Software was formerly named Motorola Air<br />
Apparent. Using WirelessOffice, an e-mail and/or page can be sent for an alarm<br />
from the B.A.S.I.S. software. Manual or automatic e-mail/paging can be used.<br />
Manual E-mail/Paging<br />
Manual e-mail/paging consists of right-clicking on an alarm in Alarm Monitoring<br />
and sending a message via the “Send E-Mail” or “Send Page” menu option. The<br />
process that occurs for the message to be sent is as follows:<br />
1. An alarm is displayed on the Alarm Monitoring screen.<br />
2. The alarm is right-clicked on, and the “Send E-Mail” or “Send Page” menu<br />
option is selected.<br />
3. One or more recipients must be selected.<br />
4. That message is sent to the LS Global Output Server service, which then<br />
sends it to a temporary directory.<br />
The temporary directory is specified in the following places:<br />
• For WirelessOffice, in File Messenger on the Directories tab. For more<br />
information, refer to Configure File Messenger on page 99.<br />
• For B.A.S.I.S., in the Spooler Directory field on the Paging Devices<br />
form. For more information please refer to “Add a Paging Device” in<br />
the Global Output Devices Folder chapter in the System Administration<br />
<strong>User</strong> <strong>Guide</strong>.<br />
5. The File Messenger service checks the temporary directory and retrieves the<br />
message.<br />
6. The File Messenger service sends the message to the WirelessOffice Server<br />
service.<br />
7. The WirelessOffice Server service uses the modem to send the message to<br />
the e-mail/paging service specified.<br />
Automatic E-mail/Paging<br />
In automatic e-mail/paging, an alarm definition is associated with a specified e-<br />
mail/page address, and a message is sent automatically sent to that address when<br />
revision 143 — 89
8: Installing and Configuring WirelessOffice Messaging Software Version 5.0<br />
the alarm type specified in the alarm definition is generated. The process that<br />
occurs for the message to be sent is as follows:<br />
1. The LS Communication Server service monitors for alarms. When an alarm<br />
is received, it sends the alarm to the Alarm Monitoring screen and to the<br />
Linkage Server.<br />
2. The LS Linkage Server service sends the message to the LS Global Output<br />
Server service.<br />
3. The LS Global Output Server service sends the message to the temporary<br />
directory.<br />
The temporary directory is specified in the following places:<br />
• For WirelessOffice, in File Messenger on the Directories tab. For more<br />
information, refer to Configure File Messenger on page 99.<br />
• For B.A.S.I.S., in the Spooler Directory field on the Paging Devices<br />
form. For more information please refer to “Add a Paging Device” in<br />
the Global Output Devices Folder chapter in the System Administration<br />
<strong>User</strong> <strong>Guide</strong>.<br />
4. The File Messenger service checks the temporary directory and retrieves the<br />
message.<br />
5. The File Messenger service sends the message to the WirelessOffice Server<br />
service.<br />
6. The WirelessOffice Server service uses the modem to send the message to<br />
the e-mail/paging service specified.<br />
The following illustration shows the manual and automatic e-mail and paging<br />
processes.<br />
90 — revision 143
<strong>Installation</strong> & <strong>Setup</strong> <strong>User</strong> <strong>Guide</strong><br />
E-mail/Paging <strong>Setup</strong> Checklist<br />
The following steps are necessary to install and configure WirelessOffice<br />
Messaging Software for use with B.A.S.I.S.:<br />
1. Install B.A.S.I.S. ET Third Edition. For more information, refer to Chapter<br />
3: Installing B.A.S.I.S. ET Third Edition on page 41.<br />
2. Run Database <strong>Setup</strong>. For more information, refer to Appendix C: The<br />
Database <strong>Setup</strong> Program on page 213.<br />
3. Install WirelessOffice. For more information, refer to Install WirelessOffice<br />
Messaging Software on page 93.<br />
4. Configure WirelessOffice for use with the B.A.S.I.S. software.<br />
• Configure the modem. For more information, refer to Configure the<br />
Modem on page 98.<br />
• Configure the carrier that will be used. For more information, refer to<br />
Configure the Carrier on page 99.<br />
• Test connectivity. For more information, refer to step 9 on page 101.<br />
• Verify that the “File Messenger” and “WirelessOffice Server” services<br />
are started and automatic. For more information, refer to step 7 on page<br />
101.<br />
5. In System Administration, configure B.A.S.I.S. for use with WirelessOffice.<br />
• Set up a paging device or devices. For more information please refer to<br />
“Add a Paging Device” in the Global Output Devices Folder chapter in<br />
the System Administration <strong>User</strong> <strong>Guide</strong>.<br />
• Create a recipient. For more information please refer to “Add a<br />
Recipient” in the Global Output Devices Folder chapter in the System<br />
Administration <strong>User</strong> <strong>Guide</strong>.<br />
6. Set up manual paging, and then verify that the “LS Global Output Server”<br />
service is started and automatic. For more information, refer to Set Up<br />
Manual Paging on page 103.<br />
7. (Optional) Set up automatic paging. For more information, refer to Set Up<br />
Automatic Paging on page 103. If automatic paging is not set up, manual<br />
paging can still be done.<br />
8. Verify that the “LS Linkage Server” service is started and automatic. For<br />
more information, refer to Set Up Automatic Paging on page 103.<br />
revision 143 — 91
8: Installing and Configuring WirelessOffice Messaging Software Version 5.0<br />
E-mail and Paging Process Flow<br />
Alarm Monitoring<br />
screen<br />
B.A.S.I.S.<br />
Manual<br />
paging:<br />
Right-click<br />
on an alarm<br />
LS Global Output<br />
Server service<br />
Only if automatic<br />
paging is in use<br />
Hardware<br />
LS Communication<br />
Server service<br />
Only if<br />
automatic<br />
paging<br />
is in use<br />
LS Linkage Server<br />
service<br />
Temporary<br />
directory<br />
WirelessOffice Messaging Software<br />
E-mail/paging<br />
service<br />
Modem<br />
WirelessOffice Server<br />
service<br />
File Messenger<br />
(formerly FilePage)<br />
service<br />
E-Mail/Paging <strong>Setup</strong> Procedures<br />
Prerequisites<br />
Install B.A.S.I.S. ET Third Edition<br />
Install B.A.S.I.S. ET Third Edition. For more information, refer to Chapter 3:<br />
Installing B.A.S.I.S. ET Third Edition on page 41.<br />
Run Database <strong>Setup</strong><br />
Run Database <strong>Setup</strong>. For more information, refer to Appendix C: The Database<br />
<strong>Setup</strong> Program on page 213.<br />
92 — revision 143
<strong>Installation</strong> & <strong>Setup</strong> <strong>User</strong> <strong>Guide</strong><br />
WirelessOffice Procedures<br />
Install WirelessOffice Messaging Software<br />
1. Insert the WirelessOffice Messaging Software Version 5.0 CD-ROM into<br />
your CD-ROM drive.<br />
• If AutoPlay is enabled, this will launch the Autorun program.<br />
• If AutoPlay is not enabled, click the Windows Start, then select Run…<br />
In the Open field of the Run window, type D:\<strong>Setup</strong>.exe, where D:\<br />
is the letter of your CD-ROM drive. Click [OK].<br />
2. The Welcome window will be displayed. Click [Next >].<br />
3. The Software License Agreement window will be displayed. Click [Yes] if<br />
you agree to the terms of the license.<br />
4. The <strong>User</strong> and Company Information window will be displayed.<br />
a. In the Name field, type your name.<br />
b. In the Company field, type the name of your company.<br />
c. Click [Next >].<br />
revision 143 — 93
8: Installing and Configuring WirelessOffice Messaging Software Version 5.0<br />
If you click [Back], be<br />
aware that the default<br />
settings for that window<br />
will be selected and you<br />
will have to choose the<br />
settings you wish to use<br />
again.<br />
5. The Enter Destination window will be displayed.<br />
• By default, WirelessOffice is installed to C:\Program Files\Emergin<br />
WirelessOffice.<br />
• Click [Next >].<br />
6. The Enter Authorization Code window will be displayed.<br />
a. In the Authorization Code field, enter your authorization code, which<br />
is found inside the CD jewel case.<br />
b. Click [Next >].<br />
7. The Select WirelessOffice Components window will be displayed.<br />
a. Select the following components. Only the components listed should be<br />
selected - if others are selected, deselect them before proceeding.<br />
– WirelessOffice Administrator<br />
94 — revision 143
<strong>Installation</strong> & <strong>Setup</strong> <strong>User</strong> <strong>Guide</strong><br />
– WirelessOffice Server<br />
b. Click [Next >].<br />
8. The Select WirelessOffice Add-Ons window will be displayed.<br />
a. Only the File Messenger component should be selected. If if others are<br />
selected, deselect them before proceeding.<br />
b. Click [Next >].<br />
9. The Select WirelessOffice Tools window will be displayed.<br />
a. Select the System Administrator Manual component.<br />
b. Click [Next >].<br />
revision 143 — 95
8: Installing and Configuring WirelessOffice Messaging Software Version 5.0<br />
10. The Select Program Folder window will be displayed. Click [Next >] to<br />
accept the default folders.<br />
11. The Start Copying Files window will be displayed. Verify that the settings<br />
are correct, then click [Next >].<br />
12. A progress indicator will be displayed, and the system will copy files onto<br />
your computer.<br />
13. The <strong>Setup</strong> Desktop Shortcuts window will be displayed. Select the Create<br />
desktop shortcut for WirelessOffice Administrator checkbox if you wish<br />
to have a shortcut created. Click [Next >].<br />
14. The <strong>Setup</strong> Complete window will be displayed. Select the View<br />
96 — revision 143
<strong>Installation</strong> & <strong>Setup</strong> <strong>User</strong> <strong>Guide</strong><br />
WirelessOffice Release Notes checkbox if you wish to automatically view<br />
the release notes after the installation finishes.<br />
15. Click [Finish].<br />
16. The program folder will appear on the desktop, and will contain the<br />
WirelessOffice shortcut icons.<br />
revision 143 — 97
8: Installing and Configuring WirelessOffice Messaging Software Version 5.0<br />
Configure the Modem<br />
Important:<br />
The modem must already be added to your computer via the Windows<br />
Control Panel before it can be used by WirelessOffice.<br />
1. In the program folder, double-click on WirelessOffice Administrator.<br />
2. From the Tools menu, select Server Configuration.<br />
3. The Server Configuration Wizard window will open. Click the Modems<br />
tab.<br />
4. Make sure that the modem is available, and then click [Add].<br />
5. The Modem Wizard - Step One window opens. Select the modem, and then<br />
click [Finish].<br />
6. The modem will now be listed on the Modems tab. Click [OK] to close the<br />
Server Configuration window.<br />
98 — revision 143
<strong>Installation</strong> & <strong>Setup</strong> <strong>User</strong> <strong>Guide</strong><br />
Configure the Carrier<br />
The carrier is the paging service that transmits messages to subscribers. To<br />
configure the carrier:<br />
1. In the main application window of WirelessOffice Administrator, click the<br />
Carriers tab.<br />
2. WirelessOffice lists a number of carriers (paging services) that it supports in<br />
the Carriers pane.<br />
• If the carrier you wish to use is in that list, you do not need to do<br />
anything more on the Carriers tab.<br />
• If the carrier you wish to use is not listed, you must add it. To do this,<br />
right-click in the open area of the Carriers tab and select “New<br />
Carrier…”. (Please refer to “Defining a New Carrier” on page 32 in the<br />
WirelessOffice Messaging Software System Administrator’s manual for<br />
complete instructions.)<br />
3. Make note of the exact name of the carrier, which is listed in the Name<br />
column of the Carriers pane. You will need this later to add a recipient in<br />
the B.A.S.I.S. software. For more information please refer to “Add a<br />
Recipient” in the Global Output Devices Folder chapter in the System<br />
Administration <strong>User</strong> <strong>Guide</strong>.<br />
Configure File Messenger<br />
File Messenger, formerly named FilePage, is a WirelessOffice client that<br />
provides a simple interface to the WirelessOffice server. Using the File<br />
Messenger service, B.A.S.I.S. can send pages through the WirelessOffice server<br />
by writing message files to a shared temporary directory that File Messenger can<br />
access. File Messenger checks the temporary directory that B.A.S.I.S. puts<br />
messages in. If a message is in the directory, it sends it to WirelessOffice server<br />
revision 143 — 99
8: Installing and Configuring WirelessOffice Messaging Software Version 5.0<br />
and then deletes it from the shared temporary directory. To configure File<br />
Messenger:<br />
1. Close the WirelessOffice Administrator window.<br />
2. In the program folder, double-click on File Messenger. The File Messenger<br />
window will open, and the Directories tab will be displayed.<br />
3. The Directory is the location of the temporary directory that File Messenger<br />
will check for message files. This is the same directory that B.A.S.I.S. will<br />
send messages to. The default Directory entry that is listed specifies an<br />
Extension of TXT. This entry must be removed. To do this:<br />
a. Click on the default Directory entry to highlight it.<br />
b. Click [Remove].<br />
c. Click [Yes] to confirm the removal.<br />
4. Add a new directory with an extension of REQ. To do this:<br />
a. Click [Add…]. The following window will be displayed:<br />
b. Select the directory that File Messenger will check for files. The<br />
Extension specified must be REQ.<br />
Note:<br />
If you configure automatic e-mail/paging, this same directory must be<br />
specified in the Spooler Directory field on the Paging Devices form in<br />
System Administration. For more information please refer to “Add a Paging<br />
100 — revision 143
<strong>Installation</strong> & <strong>Setup</strong> <strong>User</strong> <strong>Guide</strong><br />
Device” in the Global Output Devices Folder chapter in the System<br />
Administration <strong>User</strong> <strong>Guide</strong>.<br />
c. Click [OK].<br />
5. The Directory listed should now have an extension of REQ, as shown<br />
below.<br />
6. Click the Service tab.<br />
7. Stop the service by clicking the button, if it isn’t already stopped.<br />
8. Restart the service by clicking the button.<br />
9. Click on the WirelessOffice tab.<br />
a. In the <strong>User</strong> Name field enter a valid user name for WirelessOffice. The<br />
first time you login, use Administrator.<br />
b. In the Password field, enter a valid password for WirelessOffice. In the<br />
Primary Server field, enter the name or IP address of the server. The<br />
Primary Server specified here must also be specified later in the<br />
revision 143 — 101
8: Installing and Configuring WirelessOffice Messaging Software Version 5.0<br />
Linkage Server Host section on the System Options form in System<br />
Administration. For more information, refer to step 7 on page 104.<br />
10. Click [Test Connectivity…].<br />
11. If all goes well, the Last Connect Attempt and Last Login Attempt will be<br />
updated to ‘OK’. Your window should look like the following:<br />
Note:<br />
If the test for connectivity fails, it is possible that name resolution is not<br />
setup on your network. Try specifying the IP Address of the server instead of<br />
the name in the Server field on the WirelessOffice tab.<br />
12. Verify that the “File Messenger” and “WirelessOffice Server” services have<br />
a Status of “Started” and a Startup value of “Automatic”. To do this:<br />
a. Click the Windows Start button, then select Settings > Control Panel.<br />
b. Open the Administrative Tools folder and double-click on the Services<br />
icon, and the Services window (shown) will be displayed.<br />
c. Scroll through the Name column. The “File Messenger” and<br />
“WirelessOffice Server” services should have a Status of “Started” and<br />
a Startup Type value of “Automatic”. If they do not:<br />
– To change the Startup value to “Automatic”, select the service that<br />
needs to be changed, right-click on the service and select<br />
102 — revision 143
<strong>Installation</strong> & <strong>Setup</strong> <strong>User</strong> <strong>Guide</strong><br />
B.A.S.I.S. Procedures<br />
Properties from the pop-up menu. Under the General tab, select<br />
Automatic from the Startup Type drop-down list, and click [OK].<br />
– To change the Status to “Started”, select the service that needs to be<br />
changed, then click the [Start Service] button in the Services<br />
window.<br />
Set Up Manual Paging<br />
1. Open System Administration. To do this, click the Windows Start button,<br />
then select Programs > B.A.S.I.S. ET > System Administration.<br />
2. In System Administration, set up a paging device or devices. (To display the<br />
Paging Devices form, select Global Output Devices… from the<br />
Administration menu, then click on the Paging Devices tab. For more<br />
information please refer to “Add a Paging Device” in the Global Output<br />
Devices Folder chapter in the System Administration <strong>User</strong> <strong>Guide</strong>.)<br />
3. In System Administration, create a recipient. (To display the Recipients<br />
form, select Global Output Devices… from the Administration menu,<br />
then click on the Recipients tab. For more information please refer to “Add a<br />
Recipient” in the Global Output Devices Folder chapter in the System<br />
Administration <strong>User</strong> <strong>Guide</strong>.)<br />
4. Confirm that the “LS Global Output Server” service has a Status of<br />
“Started” and a Startup Type value of “Automatic”. To do this:<br />
a. Click the Windows Start button, then select Settings > Control Panel.<br />
b. Double-click the Administrative Tools icon.<br />
c. Double-click the Services icon.<br />
d. Scroll through the Name column. The “LS Global Output Server”<br />
service should have a Status of “Started” and a Startup value of<br />
“Automatic”. If it does not:<br />
– To change the Startup value to “Automatic” select the “LS Global<br />
Output Server” service, right-click on the service and select<br />
Properties from the pop-up menu. Under the General tab, select<br />
“Automatic” from the Startup Type drop-down list, and click<br />
[OK].<br />
– To change the Status to “Started” select the “LS Global Output<br />
Server” service, then click the [Start Service] button in the Services<br />
window.<br />
Set Up Automatic Paging<br />
1. Before setting up automatic paging, set up manual paging. (For more<br />
information, refer to Set Up Manual Paging on page 103.) This will insure<br />
that the paging devices and recipients that are needed for automatic paging<br />
get set up.<br />
2. In System Administration, create a custom alarm definition. (To display the<br />
Alarm Definitions form, select Alarms… from the Monitoring menu, then<br />
click on the Alarm Definitions tab. For more information please refer to<br />
revision 143 — 103
8: Installing and Configuring WirelessOffice Messaging Software Version 5.0<br />
“Add a Custom Alarm” in the Alarm Configuration Folder chapter in the<br />
System Administration <strong>User</strong> <strong>Guide</strong>.)<br />
3. Click the Messages tab.<br />
4. Add an automatic page message. For more information please refer to “Add<br />
an Automatic Page Message” in the <strong>Installation</strong> & <strong>Setup</strong> <strong>User</strong> <strong>Guide</strong>.<br />
5. Select System Options from the Administration menu.<br />
6. Click [Modify].<br />
7. In the Workstation field in the Linkage Server Host section, specify the<br />
name of the computer that the “LS Linkage Server” service will run on.<br />
• If the wrong server is selected in the Workstation field, the “LS<br />
Linkage Server” service will not be able to be started.<br />
• The Workstation must be the same computer that was specified in File<br />
Messenger in the Primary Server field on the WirelessOffice tab.<br />
8. Click [OK].<br />
9. Confirm that the “LS Linkage Server” service has a Status of “Started” and<br />
a Startup value of “Automatic”. To do this:<br />
a. Click the Windows Start button, then select Settings > Control Panel ><br />
Administrative Tools.<br />
b. Double-click on the Services icon.<br />
c. Scroll through the Service column. The “LS Linkage Server” service<br />
should have a Status of “Started” and a Startup value of “Automatic”.<br />
If it does not:<br />
– To change the Startup value to “Automatic”, select the “LS<br />
Linkage Server” service, right-click on the service and select<br />
Properties from the pop-up menu. Under the General tab, select<br />
“Automatic” from the Startup Type drop-down list, and click<br />
[OK].<br />
– To change the Status to “Started”, click the [Start Service] button in<br />
the Services window.<br />
Note:<br />
If the “LS Linkage Server” service fails to start, the wrong server was<br />
selected as the Linkage Server Host. To fix this, repeat steps 4-7, selecting<br />
the Workstation that the “LS Linkage Server” service will run on in step 7.<br />
104 — revision 143
Database<br />
Management<br />
<strong>Systems</strong>
<strong>Installation</strong> & <strong>Setup</strong> <strong>User</strong> <strong>Guide</strong><br />
Chapter 9:<br />
Installing Microsoft SQL Server<br />
SQL Server Support Overview<br />
B.A.S.I.S. ET Third Edition supports Microsoft SQL Server 2000 (version 8.x).<br />
There are three different editions of SQL Server 2000: Enterprise edition,<br />
Standard edition, and Personal edition. BEST supports the all three editions,<br />
but only distributes the Standard edition or Personal edition, depending on<br />
the operating system you use. SQL Server 2000 Service Pack 3a should also be<br />
installed. Before you attempt to install SQL Server, make sure that your system<br />
meets the following hardware and operating system requirements.<br />
Hardware Requirements<br />
The following table shows the hardware requirements that must be met by the<br />
computer that SQL Server will be installed on. Note that more memory may be<br />
required depending on the operating system requirements. Actual hard disk<br />
requirements depend on the applications and features that you choose to install.<br />
revision 143 — 107
9: Installing Microsoft SQL Server<br />
Operating System Requirements<br />
Hardware<br />
Computer<br />
Minimum requirements<br />
Intel® or compatible<br />
Pentium 166 MHz or higher.<br />
Memory (RAM)<br />
Enterprise Edition: 64 MB minimum, 128 MB or more recommended<br />
Standard Edition: 64 MB minimum<br />
Personal Edition: 64 MB minimum on Windows 2000, 32 MB minimum on all other operating<br />
systems<br />
Developer Edition: 64 MB minimum<br />
Desktop Engine: 64 MB minimum on Windows 2000, 32 MB minimum on all other operating<br />
systems<br />
Hard disk space<br />
SQL Server database components: 95 to 270 MB, 250 MB typical<br />
Analysis Services: 50 MB minimum, 130 MB typical<br />
English Query: 80 MB<br />
Desktop Engine only: 44 MB<br />
There are different operating system installation requirements for each edition.<br />
They are:<br />
SQL Server edition<br />
Operating system requirement<br />
Enterprise Edition Microsoft Windows 2000 Server, Windows 2000 Advanced Server, and Windows 2000<br />
Data Center Server. Note that Microsoft Windows 2000 Server (any version) is required<br />
for some SQL Server 2000 features.<br />
Standard Edition Microsoft Windows 2000 Server, Windows 2000 Advanced Server, and Windows 2000<br />
Data Center Server.<br />
Personal Edition<br />
Microsoft Windows Me, Windows 2000 Professional, Windows 2000 Server, and all the<br />
more advanced Windows operating systems.<br />
Installing SQL Server 2000 (New <strong>Installation</strong>s)<br />
The installation for SQL Server 2000 Standard and Personal editions are very<br />
similar. The instructions that follow are for the Standard edition, with differences<br />
between the Personal edition installation noted. The Standard edition and the<br />
Personal edition are located on different CD-ROMs. Use the Standard edition<br />
CD-ROM to install Standard edition, and the Personal edition CD-ROM to install<br />
Personal edition.<br />
108 — revision 143
<strong>Installation</strong> & <strong>Setup</strong> <strong>User</strong> <strong>Guide</strong><br />
Installing SQL Server 2000<br />
1. Insert the SQL Server 2000 CD-ROM into a CD-ROM drive on a computer<br />
running the Windows operating system.<br />
• If autorun is enabled, the Microsoft SQL Server 2000 splashscreen is<br />
automatically opened.<br />
• If the Microsoft SQL Server 2000 splashscreen does not automatically<br />
appear, click the Windows Start button, then select Run... In the Run<br />
window, select autorun.exe from the CD-ROM drive. Alternatively,<br />
revision 143 — 109
9: Installing Microsoft SQL Server<br />
you can run autorun.exe from Explorer. The Microsoft SQL Server<br />
2000 splashscreen is displayed.<br />
2. Click SQL Server 2000 Components.<br />
Personal edition users: The Personal Edition splashscreen will be displayed<br />
instead. It is functionally the same.<br />
3. Click Install Database Server.<br />
Personal edition users: The Personal Edition Install Components window<br />
will be displayed instead. It is functionally the same.<br />
4. In the Welcome window click [Next >].<br />
110 — revision 143
<strong>Installation</strong> & <strong>Setup</strong> <strong>User</strong> <strong>Guide</strong><br />
5. In the Computer Name window click [Next >].<br />
6. In the <strong>Installation</strong> Selection window:<br />
• Select the Create a new instance of SQL Server, or install Client<br />
Tools radio button<br />
• Click [Next >].<br />
7. In the <strong>User</strong> Information window:<br />
• Type your Name and Company.<br />
• Click [Next >].<br />
revision 143 — 111
9: Installing Microsoft SQL Server<br />
8. In the Software License Agreement window, click [Yes] to agree to the<br />
license.<br />
9. In the CD Key window:<br />
• Type the CD key.<br />
• Click [Next >].<br />
10. In the <strong>Installation</strong> Definition window, accept the defaults and click [Next >].<br />
112 — revision 143
<strong>Installation</strong> & <strong>Setup</strong> <strong>User</strong> <strong>Guide</strong><br />
11. In the Instance Name window click [Next >].<br />
12. In the <strong>Setup</strong> Type window, accept the defaults and click [Next >].<br />
13. In the Services Accounts window:<br />
• Select the Use the Local System account radio button.<br />
• Click [Next >].<br />
revision 143 — 113
9: Installing Microsoft SQL Server<br />
14. In the Authentication Mode window:<br />
• Select the Mixed Mode (Windows Authentication and SQL Server<br />
Authentication) radio button.<br />
• Select the Blank Password (not recommended) checkbox.<br />
• Click [Next >].<br />
15. In the Start Copying Files window, click [Next >].<br />
16. In the Choose Licensing Mode window:<br />
• Select the Per Seat for radio button.<br />
• Enter the number of devices.<br />
114 — revision 143
<strong>Installation</strong> & <strong>Setup</strong> <strong>User</strong> <strong>Guide</strong><br />
Note:<br />
BEST’s standard offering of SQL Server is Per Seat. Microsoft offers<br />
licensing on a Per Processor basis, which may be more cost effective<br />
depending on the potential size of your system. Please contact your BEST<br />
system vendor if you have questions regarding which licensing method best<br />
suits your needs.<br />
• Click [Continue].<br />
Personal edition users: This screen will not be displayed.<br />
17. In the <strong>Setup</strong> Complete window, click [Finish].<br />
• Personal edition users: This screen will look a little different.<br />
18. Reboot the computer, even if you are not prompted to do so. This completes<br />
the installation of SQL Server 2000. You can now go on to configure SQL<br />
Server 2000.<br />
revision 143 — 115
9: Installing Microsoft SQL Server<br />
Configuring SQL Server 2000<br />
Create the Database<br />
1. Click the Windows Start button, then select Programs > Microsoft SQL<br />
Server > Enterprise Manager. This launches the SQL Server Enterprise<br />
Manager.<br />
2. In the left pane, expand the entries and select the name of your SQL server.<br />
3. Select the Tools > Wizards… menu option. In the Select Wizards window:<br />
• Expand the Database entry.<br />
• Select the Create Database Wizard.<br />
• Click [OK].<br />
4. The Create Database Wizard will begin. Click [Next >].<br />
5. In the Name the Database and Specify its Location window:<br />
• In the Database Name field, type ACCESSCONTROL (this is caseinsensitive).<br />
• Accept the default file locations, or change them as you wish.<br />
• Click [Next >].<br />
6. In the Name the Database Files window:<br />
• Set the Initial Size (MB) to 50.<br />
116 — revision 143
<strong>Installation</strong> & <strong>Setup</strong> <strong>User</strong> <strong>Guide</strong><br />
• Click [Next >].<br />
7. In the Define the Database File Growth window, accept the default values<br />
and click [Next >].<br />
8. In the Name the Transaction Log Files window:<br />
• We recommend that you set Initial size (MB) value to 10.<br />
This value can always be changed later.<br />
• Accept the default log file name.<br />
• Click [Next >].<br />
9. In the Define the Transaction Log File Growth window, accept the default<br />
revision 143 — 117
9: Installing Microsoft SQL Server<br />
values and click [Next >].<br />
10. Click [Finish] when prompted.<br />
11. Click [OK] when you see the message “The database was successfully<br />
created.”<br />
12. If you are asked to create a maintenance plan for the database, click [No].<br />
13. You will be returned to the SQL Server Enterprise Manager.<br />
• In the left side of the window, expand your SQL Server’s entry in the<br />
tree.<br />
• Right-click the ACCESSCONTROL entry listed under “Databases” in<br />
the tree and select Properties from the displayed popup menu.<br />
• The ACCESSCONTROL Properties folder is displayed.<br />
• Click the Options tab to switch to the Options form. Select only the<br />
options shown in the screenshot that follows:<br />
118 — revision 143
<strong>Installation</strong> & <strong>Setup</strong> <strong>User</strong> <strong>Guide</strong><br />
Use the following table as a guide to completing this form:<br />
Checkboxes<br />
Restrict access<br />
Setting<br />
Must be Deselected for B.A.S.I.S. to work correctly.<br />
Read only<br />
Recursive triggers<br />
Auto update statistics<br />
Auto shrink<br />
Selection Recommended for B.A.S.I.S. to work most efficiently and without<br />
incident. Unless you are a database administrator onsite, and fully<br />
understand the ramifications of these options, we strongly urge you to<br />
follow our recommendation and select these options.<br />
Auto create statistics<br />
ANSI NULL Default<br />
Torn page detection<br />
Auto close<br />
Deselection Recommended for B.A.S.I.S. to work most efficiently and<br />
without incident. Unless you are a database administrator onsite, and fully<br />
understand the ramifications of the options, we strongly urge you to follow<br />
our recommendation and deselect these options<br />
Use quoted identifiers<br />
• Click [OK] to close the ACCESSCONTROL Properties folder.<br />
revision 143 — 119
9: Installing Microsoft SQL Server<br />
Create a Login<br />
1. In the SQL Server Enterprise Manager, highlight the ACCESSCONTROL<br />
database in the left pane.<br />
2. Select the Tools > Wizards… menu option. In the Select Wizards window:<br />
• Expand the Database entry.<br />
• Select the Create Login Wizard.<br />
• Click [OK].<br />
3. The Create Login Wizard opens. Click [Next >].<br />
4. In the Select Authentication Mode for This Login window:<br />
• Select the SQL Server login information that was assigned to me by<br />
the system administrator. (SQL Server authentication) radio button.<br />
• Click [Next >].<br />
5. In the Authentication with SQL Server window:<br />
• For Login ID, type LENEL<br />
• For Password, type MULTIMEDIA<br />
• For Confirm Password, type MULTIMEDIA<br />
120 — revision 143
<strong>Installation</strong> & <strong>Setup</strong> <strong>User</strong> <strong>Guide</strong><br />
Note:<br />
These are all case-insensitive.<br />
• Click [Next >].<br />
6. In the Grant <strong>Access</strong> to Security Roles window:<br />
• We recommend that you select (check):<br />
– Server Administrators<br />
– Database Creators<br />
• Click [Next >].<br />
7. In Grant <strong>Access</strong> to Databases window:<br />
• Select the following databases:<br />
– master<br />
revision 143 — 121
9: Installing Microsoft SQL Server<br />
– tempdb<br />
• Click [Next >].<br />
8. Click [Finish].<br />
9. Click [OK] when you see the message “The login was successfully created.”<br />
122 — revision 143
<strong>Installation</strong> & <strong>Setup</strong> <strong>User</strong> <strong>Guide</strong><br />
Run Query Analyzer<br />
1. In the left pane, highlight the ACCESSCONTROL database.<br />
2. Select the Tools > SQL Query Analyzer menu option. The SQL Query<br />
Analyzer window is displayed.<br />
a. Select the “ACCESSCONTROL” entry from the database drop-down<br />
list.<br />
b. In the text window, type sp_changedbowner lenel<br />
c. Press to execute the command you typed.<br />
d. The message “Database owner changed” is displayed in the Results tab<br />
window.<br />
e. In the text window, type sp_dboption<br />
<strong>Access</strong>Control,”Trunc. Log on ChkPt.”,true<br />
f. Press to execute the command you typed.<br />
g. The message “The command(s) completed successfully” is displayed in<br />
the Results tab window.<br />
3. Click the close (“X”) button to close the Query folder, then click [No] when<br />
prompted if you want to save the changes.<br />
revision 143 — 123
9: Installing Microsoft SQL Server<br />
124 — revision 143
<strong>Installation</strong> & <strong>Setup</strong> <strong>User</strong> <strong>Guide</strong><br />
Chapter 10: Upgrading Microsoft SQL Server<br />
Upgrading from SQL Server 7.0 to SQL Server 2000<br />
Standard Edition<br />
Important:<br />
Before going through this process, be sure to back up your database!<br />
When performing an upgrade, there should be nothing connected, i.e. no clients<br />
logged on. There can be no software connections to the database when the<br />
upgrade is performed, so any B.A.S.I.S. LS services including the LS<br />
Communication Server must be stopped. Since SQL 7.0 is already installed, you<br />
will only need to run the upgrade wizard.<br />
1. Insert the SQL Server 2000 CD-ROM into a CD-ROM drive on a computer<br />
running the Windows operating system.<br />
• If autorun is enabled, the Microsoft SQL Server 2000 splashscreen is<br />
automatically opened.<br />
• If the Microsoft SQL Server 2000 splashscreen does not automatically<br />
appear, click the Windows Start button, then select Run... In the Run<br />
window, select autorun.exe from the CD-ROM drive. Alternatively,<br />
revision 143 — 125
10: Upgrading Microsoft SQL Server<br />
you can run autorun.exe from Explorer. The Microsoft SQL Server 2000<br />
splashscreen is displayed.<br />
2. Click SQL Server 2000 Components.<br />
3. Click Install Database Server.<br />
4. In the Welcome window click [Next >].<br />
5. In the Computer Name window click [Next >].<br />
126 — revision 143
<strong>Installation</strong> & <strong>Setup</strong> <strong>User</strong> <strong>Guide</strong><br />
6. In the <strong>Installation</strong> Selection window:<br />
• Select the Upgrade, remove, or add components to an existing<br />
instance of SQL Server radio button.<br />
• Click [Next >].<br />
7. In the CD Key window:<br />
• Type the CD key.<br />
• Click [Next >].<br />
8. In the Instance Name window click [Next >].<br />
revision 143 — 127
10: Upgrading Microsoft SQL Server<br />
9. In the Existing <strong>Installation</strong> window:<br />
• Select the Upgrade your existing installation radio button.<br />
• Click [Next >].<br />
10. In the Upgrade window:<br />
• Select the Yes, upgrade my SQL Server Tools and data radio button.<br />
• Click [Next >].<br />
11. In the Connect to Server window:<br />
• Select the The SQL Server system administrator login information<br />
(SQL Server authentication) radio button.<br />
128 — revision 143
<strong>Installation</strong> & <strong>Setup</strong> <strong>User</strong> <strong>Guide</strong><br />
• Enter SQL Server’s sa password.<br />
• Click [Next >].<br />
12. After the password is validated and information for the upgrade is retrieved,<br />
the Start Copying Files window is displayed. Click [Next >].<br />
13. In the Choose Licensing Mode window:<br />
• Select the Per Seat for radio button.<br />
• Enter the number of devices.<br />
Note:<br />
The standard offering of SQL Server by BEST is Per Seat. Microsoft offers<br />
licensing on a Per Processor basis, which may be more cost effective<br />
depending on the potential size of your system. Please contact your BEST<br />
revision 143 — 129
10: Upgrading Microsoft SQL Server<br />
system vendor if you have questions regarding which licensing method best<br />
suits your needs.<br />
• Click [Continue].<br />
14. Files will begin to be installed. If any read only files are detected, an error<br />
message is displayed similar to the illustration. Click [Yes].<br />
15. The <strong>Setup</strong> Complete window is displayed.<br />
• Select the Yes, I want to restart my computer now. radio button.<br />
• Click [Finish].<br />
130 — revision 143
<strong>Installation</strong> & <strong>Setup</strong> <strong>User</strong> <strong>Guide</strong><br />
Verifying the Database Upgrade<br />
After the upgrade is complete, you should verify that the database upgraded to<br />
SQL 2000 (version 8). To do this:<br />
1. Click the Windows Start button, then select Programs > Microsoft SQL<br />
Server > Query Analyzer.<br />
2. In the Connect to SQL Server window:<br />
• Click the […] button and select your local SQL server.<br />
• Select the Start SQL Server if it is stopped checkbox.<br />
• Select the SQL Server authentication radio button and enter your SQL<br />
Server sa account’s Login name and Password.<br />
• Click [OK].<br />
3. In the SQL Query Analyzer window:<br />
• In the Query pane, type the following:<br />
sp_dbcmptlevel DBName<br />
(Substitute the name of your database for DBName)<br />
• Click to execute the query.<br />
• The message that should be displayed is “The current compatibility<br />
level is 80.” If any other number is displayed, the database upgrade was<br />
not successful.<br />
revision 143 — 131
10: Upgrading Microsoft SQL Server<br />
132 — revision 143
<strong>Installation</strong> & <strong>Setup</strong> <strong>User</strong> <strong>Guide</strong><br />
Chapter 11: Installing & Configuring Oracle 9i<br />
Server Software<br />
The following overview and instructions are for a standard, default Oracle 9i<br />
Server installation. If your Oracle installation includes any customization or nondefault<br />
selections, your procedures will differ from those provided in this chapter.<br />
Please make adjustments accordingly. The illustrations shown are for installing<br />
Oracle 9i Server on Windows 2000 with Service Pack 4. If you are installing a<br />
different version of Oracle or are installing Oracle on Windows XP Professional,<br />
your windows may be different.<br />
Note:<br />
As a general warning, when installing and configuring Oracle 9i do not close<br />
any Oracle windows while a program is running. Doing so can result in<br />
configuration errors and loss of data. Instead, utilize the Oracle close or<br />
cancel buttons.<br />
Oracle 9i Server Software Configuration Overview<br />
The following steps are necessary to install and configure Oracle Server for use<br />
with B.A.S.I.S.:<br />
1. Install Oracle 9i (For more information, refer to Step 1: Install Oracle 9i<br />
Server Software on page 135.)<br />
Key points:<br />
a. Install Oracle 9i Server from the Oracle 9i Server CD-ROM.<br />
b. Use the default Oracle Home location.<br />
c. Allow Oracle to make the path modifications in the registry.<br />
d. Select the “Enterprise Edition (1.76GB)” installation type.<br />
e. Select “Software Only” for the type of database to install.<br />
2. Configure the BEST database. (For more information, refer to Step 2:<br />
Configure the BEST Database on page 137.)<br />
• In Oracle Database Configuration Assistant select “Create a database.”<br />
• Select the “New Database” template.<br />
• Specify the Global Database Name.<br />
• Select dedicated server mode.<br />
• Deselect every database feature including the additional database<br />
configuration features.<br />
• On the Memory tab, select “Custom” and use the default values for<br />
shared pool, buffer cache, and java pool.<br />
• Rename the database storage files and expand their sizes to match the<br />
table below.<br />
revision 143 — 133
11: Installing & Configuring Oracle 9i Server Software<br />
Notes:<br />
To change the database size, double-click the size field, enter the number of<br />
M Bytes, and click [OK].<br />
You can specify other names in the Name field. If you do, you must set the<br />
defDataSpace variable in the Lenel<strong>User</strong>.ora file to the new Name. (For<br />
more information, refer to Step 6: Create the Lenel <strong>User</strong> on page 155.)<br />
Old Tablespace names<br />
New Tablespace<br />
names<br />
Size (MB)<br />
USERS LENEL_DATA 50<br />
INDX LENEL_INDEX 10<br />
TEMP LENEL_TEMP 50<br />
SYSTEM SYSTEM 50<br />
TOOLS TOOLS 10<br />
UNDOTBS UNDOTBS 50<br />
3. Run the Net Configuration Assistant. (For more information, refer to Step 3:<br />
Run the Net Configuration Assistant on page 146.) Type LENEL as the New<br />
Service Name.<br />
Note:<br />
The Service Name is not case-sensitive.<br />
4. Verify that the system works. (For more information, refer to Step 4: Verify<br />
the System is Working on page 152.)<br />
5. Install B.A.S.I.S. ET Third Edition. (For more information, refer to Step 5:<br />
Install B.A.S.I.S. ET Third Edition on page 154.) DO NOT RUN<br />
DATABASE SETUP YET!<br />
6. Create the Lenel user by running the Lenel<strong>User</strong>.ora script, located in<br />
C:\Program Files\B.A.S.I.S.\DB<strong>Setup</strong>\New. (For more information, refer<br />
to Step 6: Create the Lenel <strong>User</strong> on page 155.)<br />
a. In SQL Worksheet, log in using the SYSTEM account.<br />
Note:<br />
You must be logged in as SYSTEM to run the script.<br />
b. Load the Lenel<strong>User</strong>.ora script into SQL Worksheet and run it.<br />
Note:<br />
Remember that if you changed the name of the LENEL_DATA and/or<br />
LENEL_TEMP data spaces, you must change the defDataSpace and<br />
134 — revision 143
<strong>Installation</strong> & <strong>Setup</strong> <strong>User</strong> <strong>Guide</strong><br />
defTempSpace variables in the Lenel<strong>User</strong>.ora script to the appropriate<br />
tablespace names before running the script.<br />
7. Run Database <strong>Setup</strong>. (For more information, refer to Appendix C: The<br />
Database <strong>Setup</strong> Program on page 213.)<br />
Oracle 9i Server Software <strong>Installation</strong> and Configuration<br />
Step 1: Install Oracle 9i Server Software<br />
1. Insert the Oracle 9i Server CD-ROM in your CD-ROM drive to launch the<br />
Autorun program. Click [Install/Deinstall Products].<br />
2. The Welcome window is displayed. Click [Next].<br />
3. The File Locations window is displayed.<br />
a. Use the default settings or specify a different destination file name and<br />
location.<br />
b. Click [Next].<br />
Note:<br />
Source is the location of your source files (on your CD-ROM drive).<br />
Destination is the location where you want to install the source files.<br />
4. The Available Products window is displayed.<br />
a. Verify that the Oracle9i Database 9.0.1.1.1 radio button is selected.<br />
b. Click [Next].<br />
revision 143 — 135
11: Installing & Configuring Oracle 9i Server Software<br />
Note:<br />
Select Oracle9i 9.0.1.1.1 if you will be accessing the database from a<br />
different PC. Select Oracle9i Management and Integration 9.0.1.0.1 only<br />
if you want to back up the database.<br />
5. The <strong>Installation</strong> Types window is displayed.<br />
a. Verify the Enterprise Edition (1.76 GB) radio button is selected.<br />
b. Click [Next].<br />
6. The Database Configuration window is displayed.<br />
a. Select the Software Only radio button.<br />
b. Click [Next].<br />
Note:<br />
By selecting the Software Only option, the Oracle Configuration assistant<br />
must be manually started after installation is complete.<br />
7. The Summary window is displayed.<br />
a. Review the space requirements to make sure you have enough available<br />
disk space (1.50 GB) on the drive you will install Oracle on.<br />
b. Click [Install].<br />
Note:<br />
The installation process takes about 30 minutes. You will be prompted to<br />
insert Oracle9i disk2 and disk3 into the disk drive during the installation<br />
process.<br />
8. The End of <strong>Installation</strong> window is displayed. Click [Exit].<br />
9. A message box is displayed. Click [Yes] to exit.<br />
136 — revision 143
<strong>Installation</strong> & <strong>Setup</strong> <strong>User</strong> <strong>Guide</strong><br />
Step 2: Configure the BEST Database<br />
Use this procedure only after you install Oracle 9i.<br />
1. Click the Windows Start button, then select Programs > Oracle -<br />
OraHome92 > Configuration and Migration Tools > Database<br />
Configuration Assistant. This launches the Oracle Database Configuration<br />
Assistant.<br />
2. The Welcome window is displayed. Click [Next].<br />
3. The Operations window is displayed.<br />
a. Verify the Create a database radio button is selected.<br />
b. Click [Next].<br />
Note:<br />
The Change database configuration and Delete a database options are<br />
enabled only if you have an existing database.<br />
4. The Database Templates window is displayed.<br />
a. Select the New Database radio button.<br />
b. Click [Next].<br />
revision 143 — 137
11: Installing & Configuring Oracle 9i Server Software<br />
Note:<br />
Selecting a template that does not include datafiles gives you full control to<br />
specify and change every database parameter.<br />
5. Specify a Global Database Name.<br />
a. Type LENEL in the Global Database Name field.<br />
Note:<br />
The Global Database Name is not case-sensitive.<br />
b. Click [Next].<br />
138 — revision 143
<strong>Installation</strong> & <strong>Setup</strong> <strong>User</strong> <strong>Guide</strong><br />
Note:<br />
The Oracle System Identifier (SID) automatically populates.<br />
6. The Oracle Database Assistant continues. Deselect every checkbox.<br />
7. Click [Yes] each time you are prompted to delete the tablespace associated<br />
with a database feature you deselected.<br />
8. Click [Additional database configurations].<br />
9. The Additional database configurations window is displayed. Deselect both<br />
checkboxes.<br />
revision 143 — 139
11: Installing & Configuring Oracle 9i Server Software<br />
10. Confirm that you want to delete the tablespace.<br />
a. Click [Yes].<br />
b. Click [OK].<br />
11. The Oracle Database Assistant continues. Click [Next].<br />
12. The Database Connection Options window is displayed.<br />
a. Verify the Dedicated Server Mode radio button is selected.<br />
b. Click [Next].<br />
13. The <strong>Installation</strong> Parameters window is displayed.<br />
a. Verify the Custom radio button is selected.<br />
b. Verify the MB values match the table below.<br />
Custom<br />
parameters<br />
MB<br />
Shared Pool 36<br />
Buffer Cache 30<br />
Java Pool 30<br />
140 — revision 143
<strong>Installation</strong> & <strong>Setup</strong> <strong>User</strong> <strong>Guide</strong><br />
Note:<br />
The table displays the minimum MB values. Higher values may be entered.<br />
c. Click [Next].<br />
14. The Database Storage window is displayed.<br />
a. Expand the tablespace tree.<br />
b. Highlight any tablespace name.<br />
15. Rename the tablespaces and specify a reasonable size for holding the<br />
B.A.S.I.S. information.<br />
a. Enter the new tablespace name in the Name field.<br />
b. Double-click the Size field.<br />
The following table suggests appropriate tablespace names and minimum<br />
sizes.<br />
Old Tablespace<br />
names<br />
New<br />
Tablespace<br />
names<br />
New size (MB)<br />
USERS LENEL_DATA 50<br />
revision 143 — 141
11: Installing & Configuring Oracle 9i Server Software<br />
Old Tablespace<br />
names<br />
New<br />
Tablespace<br />
names<br />
New size (MB)<br />
INDX LENEL_INDEX 50<br />
TEMP LENEL_TEMP 50<br />
SYSTEM SYSTEM 50<br />
TOOLS TOOLS 10<br />
UNDOTBS UNDOTBS 50<br />
Note:<br />
You can specify other names in the Name field. If you do, you must set the<br />
defDataSpace variable in the Lenel<strong>User</strong>.ora file to the new Name. (For<br />
more information, refer to Step 6: Create the Lenel <strong>User</strong> on page 155.)<br />
142 — revision 143
<strong>Installation</strong> & <strong>Setup</strong> <strong>User</strong> <strong>Guide</strong><br />
16. When you double-click the Size field, the Edit Datafile window is displayed.<br />
To continue changing the tablespace size:<br />
a. Enter the new size.<br />
b. Click [OK].<br />
17. The Create Options window is displayed.<br />
a. Verify the Create Database checkbox is selected.<br />
b. Click [Finish].<br />
revision 143 — 143
11: Installing & Configuring Oracle 9i Server Software<br />
18. The Summary window is displayed. Click [OK].<br />
19. The Database Configuration Assistant window is displayed.<br />
144 — revision 143
<strong>Installation</strong> & <strong>Setup</strong> <strong>User</strong> <strong>Guide</strong><br />
a. In the SYS Password field, type a new password.<br />
b. In the Confirm SYS Password field, type the password again.<br />
c. In the SYSTEM Password field, type a new password.<br />
d. In the Confirm SYSTEM Password field, type the password again.<br />
e. Click [Exit], and the database will be created.<br />
revision 143 — 145
11: Installing & Configuring Oracle 9i Server Software<br />
Step 3: Run the Net Configuration Assistant<br />
1. Click the Start button, then select Programs > Oracle - OraHome92 ><br />
Configuration and Migration Tools > Net Configuration Assistant. This<br />
launches the Net Configuration Assistant.<br />
2. The Net Configuration Assistant Welcome window is displayed.<br />
a. Verify the Listener configuration radio button is selected.<br />
b. Click [Next].<br />
3. Add an Oracle Net listener.<br />
a. Select the Add radio button.<br />
b. Click [Next].<br />
4. The Listener Name window is displayed.<br />
a. Verify the Listener name is “LISTENER.”<br />
b. Click [Next].<br />
146 — revision 143
<strong>Installation</strong> & <strong>Setup</strong> <strong>User</strong> <strong>Guide</strong><br />
5. The Select Protocols window is displayed.<br />
a. Verify TCP is a selected protocol.<br />
b. Click [Next].<br />
6. The TCP/IP Protocol window is displayed.<br />
a. Select the Use the standard port number of 1521 radio option.<br />
b. Click [Next].<br />
7. The More Listeners window is displayed.<br />
a. Verify the No radio button is selected.<br />
revision 143 — 147
11: Installing & Configuring Oracle 9i Server Software<br />
b. Click [Next].<br />
8. The Net Configuration Assistant Welcome window is displayed.<br />
a. Select the Naming Methods configuration radio button.<br />
b. Click [Next].<br />
9. The Select Naming Methods window is displayed.<br />
a. In the Available Naming Methods drop-down list select “Local.”<br />
b. Click the right arrow button .<br />
c. Click [Next].<br />
148 — revision 143
<strong>Installation</strong> & <strong>Setup</strong> <strong>User</strong> <strong>Guide</strong><br />
10. The Naming Methods Configuration Done window is displayed. Click<br />
[Next].<br />
11. The Net Configuration Assistant Welcome window is displayed.<br />
a. Select the Local Net Service Name configuration radio button.<br />
b. Click [Next].<br />
12. The Net Service Name Configuration window is displayed.<br />
a. Select the Add radio button.<br />
b. Click [Next].<br />
revision 143 — 149
11: Installing & Configuring Oracle 9i Server Software<br />
13. The Database Version window is displayed.<br />
a. Select the Oracle8i or later database or service radio button.<br />
b. Click [Next].<br />
14. Identify the service name for the database.<br />
a. Type LENEL in the Service Name field.<br />
b. Click [Next].<br />
150 — revision 143
<strong>Installation</strong> & <strong>Setup</strong> <strong>User</strong> <strong>Guide</strong><br />
Note:<br />
The Service Name is not case-sensitive.<br />
15. The Select Protocols window is displayed.<br />
a. Verify TCP is highlighted.<br />
b. Click [Next].<br />
16. The TCP/IP Protocol window is displayed.<br />
a. Enter the host name in the Host name field.<br />
b. Select the Use the standard port number of 1521 radio button.<br />
c. Click [Next].<br />
Note:<br />
The host name is not case-sensitive.<br />
revision 143 — 151
11: Installing & Configuring Oracle 9i Server Software<br />
Step 4: Verify the System is Working<br />
1. The Test window is displayed.<br />
a. Select the Yes, perform a test radio button.<br />
b. Click [Next].<br />
152 — revision 143
<strong>Installation</strong> & <strong>Setup</strong> <strong>User</strong> <strong>Guide</strong><br />
Note:<br />
It is strongly suggested to perform a connection test.<br />
2. Click [Change Login].<br />
3. The Change Login window is displayed.<br />
a. In the <strong>User</strong>name field, type the SYSTEM username. (This is the same<br />
username that you set the password for in step c on page 145.)<br />
b. In the Password field, type the SYSTEM password that you entered in<br />
step d on page 145.<br />
c. Click [OK].<br />
4. After successfully testing the service click [Next].<br />
5. The Net Service Name window is displayed.<br />
a. Verify the Net Service Name is “LENEL.”<br />
b. Click [Next].<br />
revision 143 — 153
11: Installing & Configuring Oracle 9i Server Software<br />
6. The Net Service Name Configuration wizard continues.<br />
a. Select the No radio button.<br />
b. Click [Next].<br />
c. Click [Next].<br />
d. Click [Finish].<br />
Step 5: Install B.A.S.I.S. ET Third Edition<br />
Install the B.A.S.I.S. ET Third Edition software next. The installation program<br />
installs the Microsoft ODBC for Oracle. DO NOT RUN DATABASE SETUP<br />
YET!<br />
154 — revision 143
<strong>Installation</strong> & <strong>Setup</strong> <strong>User</strong> <strong>Guide</strong><br />
Step 6: Create the Lenel <strong>User</strong><br />
1. Click the Windows Start button, then select Programs > Oracle -<br />
OraHome92 > Database Administrator > SQLPlus Worksheet.<br />
2. Log in using the system account.<br />
Important:<br />
You must be logged in as SYSTEM to run the script!<br />
a. In the <strong>User</strong>name field, type the SYSTEM username. (This is the same<br />
username that you set the password for in step c on page 145.)<br />
b. In the Password field, type the SYSTEM password that you entered in<br />
step d on page 145.<br />
c. Verify “Normal” is selected for Connect As.<br />
d. Click [OK].<br />
3. Verify Oracle connects properly. You should see “Connected” in the display<br />
box, as shown.<br />
4. Run the script.<br />
revision 143 — 155
11: Installing & Configuring Oracle 9i Server Software<br />
Note:<br />
Remember that if you changed the name of the LENEL_DATA and/or<br />
LENEL_TEMP data spaces, you must change the defDataSpace and<br />
defTempSpace variables in the Lenel<strong>User</strong>.ora script to the appropriate<br />
tablespace names before running the script.<br />
a. Select the File > Open menu option. The script loads into Oracle<br />
SQLPlus Worksheet.<br />
b. Navigate to C:\ Program Files\B.A.S.I.S.\DB<strong>Setup</strong>\New.<br />
c. Select Lenel<strong>User</strong>.ora.<br />
Note:<br />
If the file is not displayed, type “*.ora” in the Filename field and click<br />
[Open].<br />
d. Click [Open]. Click the button to run the script.<br />
5. Verify there were no errors. You should see the following text:<br />
“<strong>User</strong> created.”<br />
156 — revision 143
<strong>Installation</strong> & <strong>Setup</strong> <strong>User</strong> <strong>Guide</strong><br />
“Grant succeeded.”<br />
“Commit complete.”<br />
Step 7: Run Database <strong>Setup</strong><br />
After you install B.A.S.I.S. ET Third Edition and you create the default Lenel<br />
user you must run Database <strong>Setup</strong>. (For more information, refer to Appendix C:<br />
The Database <strong>Setup</strong> Program on page 213.)<br />
revision 143 — 157
11: Installing & Configuring Oracle 9i Server Software<br />
158 — revision 143
<strong>Installation</strong> & <strong>Setup</strong> <strong>User</strong> <strong>Guide</strong><br />
Chapter 12: Configuring Oracle 9i Client Software<br />
Oracle 9i Client <strong>Installation</strong> and Configuration<br />
Step 1: Install Oracle 9i<br />
Note:<br />
Microsoft MDAC 2.5 or newer must be installed on the server and the client.<br />
If it is not, the B.A.S.I.S. client will not be able to successfully login to the<br />
Oracle database. For systems with MDAC installed, the B.A.S.I.S.<br />
installation will not modify MDAC. For systems without MDAC installed,<br />
B.A.S.I.S. will install MDAC. Refer to the B.A.S.I.S. ET release notes.rtf<br />
file on the root of the B.A.S.I.S. ET Third Edition CD to determine which<br />
version of MDAC is installed with the version of B.A.S.I.S. you are<br />
installing.<br />
1. Insert the Oracle 9i Server CD-ROM in your CD-ROM drive. This will<br />
launch the Autorun program.<br />
2. Click [Install/Deinstall Products].<br />
3. Click [Next].<br />
4. Use the default settings or specify a different destination file name and<br />
location. Click [Next].<br />
revision 143 — 159
12: Configuring Oracle 9i Client Software<br />
Note:<br />
Source is the location of your source files (on your Compact Disk drive).<br />
Destination is where you want to install the source files.<br />
5. The Available Products window is displayed.<br />
a. Select the Oracle9i Client 9.0.1.1.1 radio button.<br />
b. Click [Next].<br />
6. The <strong>Installation</strong> Types window is displayed.<br />
a. Select the Runtime (486MB) radio button.<br />
b. Click [Next].<br />
160 — revision 143
<strong>Installation</strong> & <strong>Setup</strong> <strong>User</strong> <strong>Guide</strong><br />
7. Review the summary and click [Install].<br />
revision 143 — 161
12: Configuring Oracle 9i Client Software<br />
Note:<br />
The installation process takes several minutes. You will be prompted to<br />
insert Oracle9i disk2 into the disk drive during the installation process.<br />
8. After the installation is complete, click [Next].<br />
9. The Net Configuration Assistant Welcome window is displayed.<br />
a. Select the No, I will create net service names myself. The Assistant<br />
will help me create one now. radio button.<br />
b. Click [Next].<br />
10. Verify the Oracle8i or later database or service radio button is selected.<br />
Click [Next].<br />
11. In the Service Name field, enter the name of the service running on the<br />
Oracle server and click [Next].<br />
12. Verify that TCP is highlighted.<br />
13. Click [Next].<br />
14. In the Host name field, type the name of the computer that Oracle is<br />
installed on, and then click [Next].<br />
162 — revision 143
<strong>Installation</strong> & <strong>Setup</strong> <strong>User</strong> <strong>Guide</strong><br />
15. Select the Yes, perform a test radio button.<br />
16. Click [Next].<br />
17. The [Change Login] button window is displayed.<br />
a. Click [Change Login].<br />
b. In the <strong>User</strong>name field, type SYSTEM.<br />
c. In the Password field, type MANAGER.<br />
d. Click [OK].<br />
18. After successfully testing the service, click [Next].<br />
revision 143 — 163
12: Configuring Oracle 9i Client Software<br />
19. Verify the Net Service Name is “LENEL”, and then click [Next].<br />
20. Select the No radio button, and click [Next].<br />
21. Click [Finish].<br />
22. The original installation window displays a completed message. Click<br />
[Exit].<br />
23. Click [Yes] to really exit.<br />
Step 2: Install B.A.S.I.S. ET Third Edition Software<br />
Be sure to install the B.A.S.I.S. ET Third Edition software next. The installation<br />
program installs the Microsoft ODBC for Oracle.<br />
Step 3: Run the Net Configuration Assistant<br />
Follow the same steps in the Installing & Configuring Oracle 9i Server Software<br />
chapter, with the following exceptions:<br />
• Reconfigure the Oracle Listener (step 3) instead of Add a Oracle Net<br />
Listener<br />
• Select Host Name when configuring the Naming methods (step 9)<br />
• Reconfigure the Local Net Service Name (step 12) instead of Add a Local<br />
Net Service<br />
Step 4: Verify the System is Working<br />
Follow the same steps in the Installing & Configuring Oracle 9i Server Software<br />
chapter, except use “Lenel” as the <strong>User</strong>name and “Multimedia” as the<br />
Password.<br />
o<br />
164 — revision 143
<strong>Installation</strong> & <strong>Setup</strong> <strong>User</strong> <strong>Guide</strong><br />
Chapter 13: Database Backup and Restoration<br />
There is a new method for conducting scheduled backups and restores on the<br />
Dell Precision 330 and 340 Workstation platforms. The change only affects<br />
customers using these machines with Windows 2000 and the Microsoft SQL<br />
Server 2000 or SQL Server Desktop Engine database.<br />
Dell Precision 330<br />
The database backup and restore procedures are done using SQL Server Agent<br />
tasks. There are two tasks that are configured at BEST. The “BackUp<br />
<strong>Access</strong>Control” task is used for both scheduling backups and conducting<br />
random database backups. By default, the task is setup to run full database<br />
backup every Sunday at 12:00 am. The scheduling options can be customized for<br />
specific customer needs. Once the task is scheduled, it will run automatically at<br />
the designated time as long as the SQL Server Agent service is running. If the<br />
service is not running, the task will not be completed. The “Restore<br />
<strong>Access</strong>Control” task allows the user the ability to restore a previous backup set<br />
of their database. Below are the two tasks that are configured at BEST.<br />
revision 143 — 165
13: Database Backup and Restoration<br />
Conduct a Random Database Backup for<br />
ACCESSCONTROL<br />
Note:<br />
These procedures apply to Dell Precision 330 Workstation platforms.<br />
Before conducting the backup, make sure that there is a tape in the drive that is<br />
labeled and is of a supported media format for the drive that you are using.<br />
1. Open SQL Enterprise Manager and navigate to the section that contains the<br />
SQL Server Agent Tasks.<br />
2. Once you are in the section, right click on the BackUp <strong>Access</strong>Control task<br />
and select Start Job. The backup will run and you will be able to monitor<br />
the status in the Enterprise Manager window.<br />
Once the backup procedure has begun, it will automatically format and<br />
overwrite any data that is currently on the tape. If you do not want to lose the<br />
data that is on your tape, it is important that you insert a new tape.<br />
166 — revision 143
<strong>Installation</strong> & <strong>Setup</strong> <strong>User</strong> <strong>Guide</strong><br />
Conduct a Database Restore for ACCESSCONTROL<br />
Note:<br />
These procedures apply to Dell Precision 330 Workstation platforms. Before<br />
conducting the restore, make sure that the tape contains the correct backup<br />
set that you are trying to restore. If it is not, you may experience data losses.<br />
1. Open SQL Enterprise Manager and navigate to the section that contains the<br />
SQL Server Agent Tasks.<br />
2. Once you are in the section, right click on the Restore <strong>Access</strong>Control task<br />
and select Start Job. The restore will run and you will be able to monitor the<br />
status in the Enterprise Manager window.<br />
The database will be restored over the current ACCESSCONTROL database<br />
to whatever state it was in at the time of the backup set.<br />
Change Scheduled Backup Intervals<br />
Note:<br />
These procedures apply to Dell Precision 330 Workstation platforms.<br />
revision 143 — 167
13: Database Backup and Restoration<br />
The BackUp <strong>Access</strong>Control task is enabled for scheduling. The user has the<br />
option to change the scheduling of the backups to better suit their specific needs.<br />
Follow the steps below to configure the scheduling for specific customer needs.<br />
1. Open SQL Enterprise Manager and navigate to the section that contains the<br />
SQL Server Agent Tasks.<br />
2. Once you are in the section, right click on the BackUp <strong>Access</strong>Control task<br />
and select Properties.<br />
3. In the properties screen select the section that says ‘Schedules.’<br />
4. Click [Edit] and then click [Change]. You can now customize the scheduled<br />
backups to whatever intervals that you need.<br />
168 — revision 143
<strong>Installation</strong> & <strong>Setup</strong> <strong>User</strong> <strong>Guide</strong><br />
Once you have made the necessary changes to the schedule, you can click<br />
[OK] to apply the changes, and then close out all the windows.<br />
Dell Precision 340<br />
Dell Precision 340 systems can use either a Microsoft SQL Server 2000 database<br />
or an SQL Server Desktop Engine database. This section includes the following:<br />
• SQL Server 2000 Database Backup Procedures, which begin on page 170.<br />
• SQL Server 2000 Database Restore Procedures, which begin on page 189.<br />
• SQL Server Desktop Engine Database Backup Procedures, which begin on<br />
page 192.<br />
• SQL Server Desktop Engine Database Restore Procedures, which begin on<br />
page 194.<br />
The following table summarizes which utilities are used for the different stages<br />
of the backup and restore process for each database.<br />
Backup<br />
Restore<br />
Database Database to file File to tape Tape to file File to database<br />
Microsoft SQL<br />
Server<br />
SQL Server<br />
Desktop Engine<br />
SQL Enterprise<br />
Manager<br />
B.A.S.I.S. Database<br />
Backup utility<br />
Windows Backup Windows Backup SQL Enterprise<br />
Manager<br />
Windows Backup Windows Backup B.A.S.I.S. Database<br />
Backup utility<br />
revision 143 — 169
13: Database Backup and Restoration<br />
SQL Server 2000 Database Backup Procedures<br />
The information below outlines the steps required to conduct database backups of<br />
the BEST ACCESSCONTROL database using a Dell Precision 340, Windows<br />
2000 Operating System, with a Microsoft SQL Server 2000 database.<br />
1. Install the drivers for the tape backup device. For more information, refer to<br />
Install the Drivers for the Tape Backup Device on page 170.<br />
2. Create a database backup folder in Windows Explorer. For more<br />
information, refer to Create a Database Backup Folder on page 175.<br />
3. Configure Microsoft SQL Server to automatically backup the database to a<br />
file. For more information, refer to Configure Microsoft SQL Server for<br />
Automatic Database Backup to File on page 175.<br />
4. Verify that the backup is set up correctly. For more information, refer to<br />
Verify that the Backup (to File) is Set Up Correctly on page 180.<br />
5. Using the Windows Backup utility, manually back up the database to a tape.<br />
For more information, refer to Manually Back Up the Database to Tape on<br />
page 181.<br />
6. Configure Windows Backup to automatically backup the database to a tape<br />
drive. For more information, refer to Configure Automatic Database File<br />
Backup to Tape Drive on page 183.<br />
7. Verify that the backup is set up correctly. For more information, refer to<br />
Verify that the Backup (to Tape) is Set Up Correctly on page 187.<br />
Install the Drivers for the Tape Backup Device<br />
Note:<br />
These procedures apply to Dell Precision 340 Workstation platforms with<br />
Microsoft SQL Server 2000 or SQL Server Desktop Engine.<br />
1. When you first power the computer on after you install the tape drive, the<br />
Found New Wizard may open. If it does, just click [Cancel].<br />
2. Right-click on My Computer, select Manage, and then click on “Device<br />
Manager” in the left pane. In the right pane, notice that “Seagate<br />
170 — revision 143
<strong>Installation</strong> & <strong>Setup</strong> <strong>User</strong> <strong>Guide</strong><br />
STT3401A” is listed beneath “Other devices”, and it has a question mark<br />
beside it.<br />
3. Place the IBM Tape Drive <strong>User</strong> <strong>Guide</strong>s CD in the CD-ROM drive.<br />
4. An error message with several windows behind it will be displayed. Close<br />
the error and those windows by clicking the “X” in the upper right-hand<br />
revision 143 — 171
13: Database Backup and Restoration<br />
corner of each of the windows. Only the Device Manager window should<br />
remain open.<br />
5. In the right pane, expand the “Other devices” folder. Right-click on the<br />
Seagate STT3401A device, and then select Properties.<br />
6. Click the Driver tab.<br />
7. Click [Update driver].<br />
8. The Upgrade Device Driver Wizard opens. Click [Next].<br />
9. The Install Hardware Device Drivers window opens. Verify that the Search<br />
for a suitable driver for my device radio button is selected, then click<br />
[Next].<br />
172 — revision 143
<strong>Installation</strong> & <strong>Setup</strong> <strong>User</strong> <strong>Guide</strong><br />
10. The Locate Driver Files window opens. Accept the defaults and click [Next].<br />
11. The file on the CD will be located. Click [Next].<br />
12. The Insert Disk window is displayed. Since you already inserted the disk,<br />
just click [OK].<br />
revision 143 — 173
13: Database Backup and Restoration<br />
13. The Files Needed window opens.<br />
a. Click [Browse] and browse to the \device<br />
driver\TR7\Win2K\stidexp.sys file on the CD, and then click [Open].<br />
b. Click [OK].<br />
14. The Upgrade Device Driver Wizard opens. Click [Finish].<br />
15. Click [Close] to close the Seagate STT3401A Properties window.<br />
16. The window will refresh, and the Seagate STT3401A appears below “Tape<br />
drives” in the tree, as shown.<br />
174 — revision 143
<strong>Installation</strong> & <strong>Setup</strong> <strong>User</strong> <strong>Guide</strong><br />
Create a Database Backup Folder<br />
Note:<br />
These procedures apply to Dell Precision 340 Workstation platforms with<br />
Microsoft SQL Server 2000 or SQL Server Desktop Engine.<br />
1. Open Windows Explorer and navigate to the C:\Program Files\B.A.S.I.S.<br />
folder.<br />
2. From the File menu, select New > Folder. Enter the folder name (e.g.<br />
database_backup).<br />
3. Close Windows Explorer.<br />
Configure Microsoft SQL Server for Automatic Database<br />
Backup to File<br />
1. Click the Windows Start button, then select Programs > Microsoft SQL<br />
Server > Enterprise Manager.<br />
2. The SQL Server Enterprise Manager window displays. Navigate to the<br />
<strong>Access</strong>control database. (In the Tree tab (left side of screen) expand<br />
revision 143 — 175
13: Database Backup and Restoration<br />
Microsoft SQL Servers, SQL Server Group, ACCESSCT- SERVER and<br />
Databases.)<br />
3. Right-click on the accesscontrol database and select All Tasks > Backup<br />
Database.<br />
4. The SQL Server Backup window displays. Click [Add].<br />
5. The Select Backup Device Destination window displays.<br />
176 — revision 143
<strong>Installation</strong> & <strong>Setup</strong> <strong>User</strong> <strong>Guide</strong><br />
a. Verify the File name radio button is selected and click the [...] button.<br />
b. The Backup Device Location window displays. Navigate to<br />
C:\Program Files\B.A.S.I.S.\database_backup.<br />
Note:<br />
This is the directory you created in the Create a Database Backup Folder<br />
procedures on page 175.<br />
c. Enter the name of database file that will be created when the database is<br />
automatically backed-up to a file (accesscontrol_backup).<br />
d. Click [OK].<br />
e. Click [OK] to accept the desired filename and location.<br />
6. In the SQL Server Backup window, select the Overwrite existing media<br />
radio button.<br />
revision 143 — 177
13: Database Backup and Restoration<br />
7. Select the Schedule checkbox and click the [...] button.<br />
8. The Edit Schedule window displays. Verify the Recurring radio button is<br />
selected.<br />
9. Click [Change].<br />
10. The Edit Recurring Job Schedule window displays. In the Occurs section,<br />
select the Daily radio button.<br />
11. In the Daily frequency section, select the Occurs once at radio button and<br />
178 — revision 143
<strong>Installation</strong> & <strong>Setup</strong> <strong>User</strong> <strong>Guide</strong><br />
enter the desired time (1:00:00 AM).<br />
12. Click [OK].<br />
13. Click [OK] two more times to accept the schedule changes and exit the<br />
application.<br />
revision 143 — 179
13: Database Backup and Restoration<br />
Verify that the Backup (to File) is Set Up Correctly<br />
Note:<br />
These procedures apply to Dell Precision 340 Workstation platforms with a<br />
Microsoft SQL Server 2000 database ONLY (not the SQL Server Desktop<br />
Engine database).<br />
1. Open SQL Server Enterprise Manager, if it isn’t already.<br />
2. Right-click on “accesscontrol”, and then select All Tasks > Backup<br />
Database.<br />
3. The SQL Server Backup window opens. Click [OK].<br />
4. The backup runs, and then the following message is displayed:<br />
180 — revision 143
<strong>Installation</strong> & <strong>Setup</strong> <strong>User</strong> <strong>Guide</strong><br />
5. Click [OK], and then exit out of SQL Server Enterprise Manager.<br />
Manually Back Up the Database to Tape<br />
Note:<br />
These procedures apply to Dell Precision 340 Workstation platforms with<br />
Microsoft SQL Server 2000 or SQL Server Desktop Engine.<br />
revision 143 — 181
13: Database Backup and Restoration<br />
Before conducting the backup, make sure that there is a tape in the drive that is<br />
labeled and is of a supported media format for the drive that you are using.<br />
1. Start the Windows Backup software. To do this, click the Start button, and<br />
then navigate to Programs > <strong>Access</strong>ories > System Tools > Backup.<br />
2. Click the Backup tab.<br />
3. Navigate to the file that you wish to back up. In most cases, this will the<br />
accesscontrol_backup file that is in the C:\Program<br />
Files\B.A.S.I.S.\database_backup directory.<br />
4. Select “<strong>Access</strong>control Backup” in the Backup media or file name dropdown<br />
list.<br />
5. Select “Travan” in the Backup destination drop-down list.<br />
6. Click [Start Backup].<br />
7. The Backup Job Information window opens.<br />
a. In the Backup description field, type <strong>Access</strong>control Backup.<br />
b. In the If the media is overwritten, use the label to identify the media<br />
field, type <strong>Access</strong>control Backup.<br />
c. Click [Start Backup].<br />
182 — revision 143
<strong>Installation</strong> & <strong>Setup</strong> <strong>User</strong> <strong>Guide</strong><br />
8. The backup will run. The Backup Progress window displays, and the backup<br />
is complete.<br />
Configure Automatic Database File Backup to Tape Drive<br />
Notes:<br />
These procedures apply to Dell Precision 340 Workstation platforms with<br />
Microsoft SQL Server 2000 or SQL Server Desktop Engine.<br />
If SQL Server Desktop Engine is used, then the database must be manually<br />
backed up to file before the time that the Windows Backup utility is<br />
scheduled to automatically back the database file up to the tape drive. For<br />
revision 143 — 183
13: Database Backup and Restoration<br />
more information, refer to Manually Back Up an SQL Server Desktop<br />
Engine Database to a File on page 193.<br />
Before conducting the backup, make sure that there is a tape in the drive that is<br />
labeled and is of a supported media format for the drive that you are using.<br />
1. Start the Windows Backup software. To do this, click the Start button, and<br />
then navigate to Programs > <strong>Access</strong>ories > System Tools > Backup.<br />
2. Click the Backup tab.<br />
3. Navigate to the file that you wish to back up. In most cases, this will the<br />
accesscontrol_backup file that is in the C:\Program<br />
Files\B.A.S.I.S.\database_backup directory.<br />
4. In the Backup media or file name drop-down list, select “<strong>Access</strong>control<br />
Backup”.<br />
5. Select “Travan” in the Backup destination drop-down list.<br />
a. Click [Start Backup].<br />
b. The Backup Job Information window opens.<br />
c. In the Backup description field, type <strong>Access</strong>control Backup.<br />
d. In the If the media is overwritten, use the label to identify the media<br />
field, type <strong>Access</strong>control Backup.<br />
e. Click [Schedule].<br />
184 — revision 143
<strong>Installation</strong> & <strong>Setup</strong> <strong>User</strong> <strong>Guide</strong><br />
6. A message is displayed. Click [Yes] to save the backup selections now.<br />
7. The Save Selections window opens.<br />
a. Specify a name and location for the backup. The recommended<br />
filename is “<strong>Access</strong>Control.bks”, and that file can be saved in the C:\<br />
root directory.<br />
b. Click [Save].<br />
8. The Set Account Information window opens.<br />
a. In the Password field, type admin.<br />
b. In the Confirm password field, retype the password.<br />
c. Click [OK].<br />
revision 143 — 185
13: Database Backup and Restoration<br />
9. The Scheduled Job Options window opens.<br />
a. In the Job name field, type <strong>Access</strong>Control or any other name you<br />
would like to use.<br />
b. Click [Properties].<br />
10. The Properties are displayed in the Schedule Job window.<br />
a. In the Schedule task drop-down list, select “Daily”.<br />
b. In the Start time field, select a time that is 30 minutes later than the<br />
time that the SQL backup job is set to start. For example, if the SQL<br />
186 — revision 143
<strong>Installation</strong> & <strong>Setup</strong> <strong>User</strong> <strong>Guide</strong><br />
backup job is set to start at 1:00 am, then the start time should be 1:30<br />
am.<br />
c. Verify that “1” is selected in the Schedule Task Daily section.<br />
d. Click [OK].<br />
11. In the Schedule Job window, click [OK].<br />
12. Click the Schedule Jobs tab and verify that the calendar is full of scheduled<br />
jobs.<br />
Verify that the Backup (to Tape) is Set Up Correctly<br />
Note:<br />
These procedures apply to Dell Precision 340 Workstation platforms with<br />
Microsoft SQL Server 2000.<br />
revision 143 — 187
13: Database Backup and Restoration<br />
After the backup schedule has been set up, you can run your backup immediately<br />
test to make sure that your backup is set up correctly, rather than waiting until the<br />
first scheduled backup.<br />
1. Open the Windows Control Panel, and then double-click “Scheduled Tasks”.<br />
2. Right-click on the <strong>Access</strong>control task, and then select Run.<br />
3. After a short delay, the backup runs.<br />
4. To verify that the backup ran:<br />
a. Start the Windows Backup software. To do this, click the Start button,<br />
and then navigate to Programs > <strong>Access</strong>ories > System Tools > Back<br />
up.<br />
b. Click the Restore tab.<br />
c. The backup is listed, as shown.<br />
188 — revision 143
<strong>Installation</strong> & <strong>Setup</strong> <strong>User</strong> <strong>Guide</strong><br />
SQL Server 2000 Database Restore Procedures<br />
To restore a SQL Server 2000 database:<br />
1. Restore the database in the tape drive to a file by running the Windows<br />
Backup software. For more information, refer to Restore the Database on a<br />
Tape to a File on page 189.<br />
2. Restore the file to the database via the SQL Enterprise Manager. For more<br />
information, refer to Restore File to Microsoft SQL Server 2000 Database on<br />
page 190.<br />
Restore the Database on a Tape to a File<br />
Note:<br />
These procedures apply to Dell Precision 340 Workstation platforms with a<br />
Microsoft SQL Server 2000 database or an SQL Server Desktop Engine<br />
database.<br />
1. Insert the tape that contains the database that you wish to restore into the<br />
tape drive.<br />
2. Start the Windows Backup software. To do this, click the Start button, and<br />
then navigate to Programs > <strong>Access</strong>ories > System Tools > Backup.<br />
3. Click the Restore and Manage Media tab.<br />
4. Select “Travan”, and then navigate to the database that you wish to restore.<br />
5. Click [Start Restore].<br />
revision 143 — 189
13: Database Backup and Restoration<br />
Restore File to Microsoft SQL Server 2000 Database<br />
Note:<br />
These procedures apply to Dell Precision 340 Workstation platforms with a<br />
Microsoft SQL Server 2000 database.<br />
1. Click the Windows Start button, then select Programs > Microsoft SQL<br />
Server > Enterprise Manager.<br />
2. The SQL Server Enterprise Manager window displays. Navigate to<br />
<strong>Access</strong>control database.<br />
3. In the Tree tab (left side of screen) expand Microsoft SQL Servers, SQL<br />
Server Group, ACCESSCT- SERVER, and Databases.<br />
4. Right-click on the accesscontrol database and select All Tasks > Restore<br />
Database.<br />
5. The Restore database window displays. Click the General Tab.<br />
190 — revision 143
<strong>Installation</strong> & <strong>Setup</strong> <strong>User</strong> <strong>Guide</strong><br />
6. Select the From device radio button. Click [Select Devices].<br />
7. The Choose Restore Devices window displays. Verify the Disk radio button<br />
is selected.<br />
8. Click [Add].<br />
9. The Choose Restore Destination window displays. Verify the File name<br />
radio button is selected.<br />
10. Click the [...] button.<br />
11. The Backup Device Location window displays. Enter the filename and click<br />
[OK].<br />
12. Click [OK] twice to accept the restore destination settings.<br />
13. In the Restore database window, click the Options tab.<br />
revision 143 — 191
13: Database Backup and Restoration<br />
14. Select the Force restore over existing database checkbox.<br />
15. Click [OK].<br />
SQL Server Desktop Engine Database Backup<br />
Procedures<br />
The information below outlines the steps required to conduct database backups of<br />
the BEST ACCESSCONTROL database using a Dell Precision 340, Windows<br />
2000 Operating System, with an SQL Server Desktop Engine database.<br />
While there is an option in the B.A.S.I.S. Backup utility to back up the database<br />
directly to tape, it will not work because the B.A.S.I.S. Backup utility does not<br />
recognize the tape drive that is in the Dell Precision 340. Instead, you must use<br />
the B.A.S.I.S. Backup utility to back up the database to a file, and then use the<br />
Windows Backup utility to back up the file to the tape. The process that must be<br />
followed to back up a file to tape is:<br />
1. Install the drivers for the tape backup device, exactly as you would on an<br />
SQL Server 2000 system. For more information, refer to Install the Drivers<br />
for the Tape Backup Device on page 170.<br />
2. Create a database backup folder in Windows Explorer. For more<br />
information, refer to Create a Database Backup Folder on page 175.<br />
3. Run the B.A.S.I.S. Backup utility to manually back up the database to a file.<br />
For more information, refer to Manually Back Up an SQL Server Desktop<br />
Engine Database to a File on page 193.<br />
4. Using the Windows Backup utility, manually back up the file to a tape. For<br />
more information, refer to Manually Back Up the Database to Tape on page<br />
181.<br />
5. Configure Windows Backup to automatically backup the file to a tape drive.<br />
For more information, refer to Configure Automatic Database File Backup<br />
to Tape Drive on page 183.<br />
192 — revision 143
<strong>Installation</strong> & <strong>Setup</strong> <strong>User</strong> <strong>Guide</strong><br />
Manually Back Up an SQL Server Desktop Engine<br />
Database to a File<br />
Notes:<br />
These procedures apply to Dell Precision 340 Workstation platforms with an<br />
SQL Server Desktop Engine database ONLY (not the Microsoft SQL Server<br />
2000 database). You cannot configure the B.A.S.I.S. Backup utility to<br />
automatically back the database up to a file. This procedure must be done<br />
manually.<br />
If Windows Backup is configured to automatically back the database up to a<br />
tape drive, then this manual back up of the SQL Server Desktop Engine<br />
database to file must be performed prior to the time that Windows Backup is<br />
scheduled to back the file up to tape.<br />
Before conducting the backup, make sure that there is a tape in the drive that is<br />
labeled and is of a supported media format for the drive that you are using.<br />
1. Click the Windows Start button, then select Programs > B.A.S.I.S. ET ><br />
Database Backup.<br />
2. The Database Backup window displays. Click [Connect] and connect to the<br />
<strong>Access</strong>Control database.<br />
3. Verify the Backup radio button is selected in the Database operation section.<br />
4. Select the File radio button in the To/From section and then select the tape<br />
drive device in the drop-down list. Click [Browse] and navigate to<br />
C:\Program Files\B.A.S.I.S.\database_backup.<br />
5. Name this file <strong>Access</strong>Control Backup. Click [Save].<br />
6. Verify the Overwrite backup set radio button is selected and click [Run].<br />
7. Click [OK] after the database is successfully backed up.<br />
8. Exit the Database Backup application.<br />
revision 143 — 193
13: Database Backup and Restoration<br />
SQL Server Desktop Engine Database Restore<br />
Procedures<br />
To restore an SQL Server Desktop Engine database:<br />
1. Restore the database in the tape drive to a file by running the Windows<br />
Backup software. For more information, refer to Restore the Database on a<br />
Tape to a File on page 189.<br />
2. Restore the file to the database via the B.A.S.I.S. Database Backup utility.<br />
For more information, refer to Restore the File to the Database on page 194.<br />
Restore the File to the Database<br />
Note:<br />
These procedures apply to Dell Precision 340 Workstation platforms with an<br />
SQL Server Desktop Engine database.<br />
1. Click the Windows Start button, then select Programs > B.A.S.I.S. ><br />
Database Backup.<br />
2. The Database Backup window displays. Click [Connect] and connect to the<br />
<strong>Access</strong>Control database.<br />
3. Select the Restore radio button in the Database operation section.<br />
4. Select the File radio button in the To/From section and then browse for the<br />
file to restore.<br />
5. Click [Run].<br />
6. Click [OK] when the restoration is complete.<br />
7. Exit the Database Backup application.<br />
194 — revision 143
<strong>Installation</strong> & <strong>Setup</strong> <strong>User</strong> <strong>Guide</strong><br />
DB2 Database Backup and Restoration<br />
Back Up a DB2 Database<br />
1. Open DB2 Control Center by clicking Start > Programs > IBM DB2 ><br />
General Administration Tools > Control Center.<br />
2. Click on the System in the tree in the right pane that contains the database<br />
you wish to back up. You will be prompted to log in. Enter a username and<br />
password for the database, and then click [OK].<br />
3. Expand the tree in the right pane until the database you wish to back up is<br />
shown. If you set up your database as directed in the Database Backup and<br />
Restoration chapter, your database would be “ACCTRL”.<br />
4. Right-click on the database and select Backup.<br />
5. The Backup Wizard Opens, and the Step 1: Introduction window opens.<br />
Click [Next].<br />
6. The Backup Wizard proceeds, and the Step 2: Image window opens.<br />
a. In the Media Type drop-down listbox, select the type of media the<br />
backup will be saved to. The window changes depending on the option<br />
selected.<br />
b. If you are backing up to a tape or to a file system, click [Add]. If you are<br />
using another backup method, please refer to the DB2 documentation.<br />
c. The Path Browser window opens. Specify a path where the backup<br />
should be saved, and then click [OK].<br />
revision 143 — 195
13: Database Backup and Restoration<br />
Note:<br />
If you specified a directory that does not exist, you must create it before you<br />
run the backup, or the backup will fail.<br />
7. The Step 2: Image window should look something like this. Click [Next].<br />
8. The Backup Wizard proceeds, and the Step 3: Options window opens. Select<br />
the backup options you would like to use, then click [Next].<br />
9. The Backup Wizard proceeds, and the Step 4: Performance window opens.<br />
Select the performance options you would like to use, then click [Next].<br />
10. The Backup Wizard proceeds, and the Step 5: Schedule window opens.<br />
Select the schedule options you would like to use; you can either run the<br />
backup now or set up a schedule. Click [Next].<br />
11. The Backup Wizard proceeds, and the Step 6: Summary window opens.<br />
196 — revision 143
<strong>Installation</strong> & <strong>Setup</strong> <strong>User</strong> <strong>Guide</strong><br />
Verify the backup options that will be used are correct, and then click [OK].<br />
12. A message is displayed indicating the commands attempted and the results.<br />
Make sure that the results say that the commands executed successfully, and<br />
then click [Close].<br />
Restore a DB2 Database<br />
1. Open DB2 Control Center by clicking Start > Programs > IBM DB2 ><br />
General Administration Tools > Control Center.<br />
2. Click on the System in the tree in the right pane that contains the database<br />
you wish to restore. You will be prompted to log in. Enter a username and<br />
password for the database, and then click [OK].<br />
3. Expand the tree in the right pane until the database you wish to restore is<br />
shown. If you set up your database as directed in the Database Backup and<br />
Restoration chapter, your database would be “ACCTRL”.<br />
4. Right-click on the database and select Restore.<br />
5. The Restore Database Wizard opens, and the Step 1: Introduction window<br />
opens. Select the database restore alternative you wish to use, and then click<br />
[Next].<br />
6. The options available in the Restore Database Wizard will change depending<br />
on the restore alternative you selected. Please refer to the DB2<br />
documentation for more information about each alternative and continue<br />
through the Restore Data Wizard.<br />
revision 143 — 197
13: Database Backup and Restoration<br />
198 — revision 143
Appendix
<strong>Installation</strong> & <strong>Setup</strong> <strong>User</strong> <strong>Guide</strong><br />
Appendix A:<br />
Installing DirectX<br />
DirectX Version Overview<br />
DirectX 9.0 is required to be installed prior to upgrading or installing B.A.S.I.S.<br />
ET Third Edition. If DirectX 9.0 is not installed, an error message similar to the<br />
following will be displayed when you attempt to upgrade or install B.A.S.I.S.:<br />
Installing DirectX Version 9.0<br />
DirectX version 9.0 has been included for your convenience on Disc 2 which<br />
accompanies the B.A.S.I.S. CD. To install DirectX version 9.0:<br />
1. Insert Disc 2 into the CD-ROM.<br />
2. Use Windows Explorer to navigate to the Microsoft DirectX 9.0 folder on<br />
the CD-ROM drive.<br />
3. Inside the Microsoft DirectX 9.0 folder, double-click the dxsetup.exe file.<br />
revision 143 — 201
A: Installing DirectX<br />
Note:<br />
DirectX 9.0 can also be installed using the Third Party Components Wizard<br />
which is available on the B.A.S.I.S. ET Third Edition Disc 2 CD-ROM. For<br />
more information, please refer to <strong>Installation</strong> Prerequisites on page 16.<br />
4. Read the license agreement. If you agree to the terms, select the I accept the<br />
agreement radio button and click [Next].<br />
5. The DirectX <strong>Setup</strong> window opens. Click [Next].<br />
6. The Progress window opens.<br />
202 — revision 143
<strong>Installation</strong> & <strong>Setup</strong> <strong>User</strong> <strong>Guide</strong><br />
7. Click [Finish] to restart the computer when prompted. This completes the<br />
installation of DirectX version 9.0.<br />
revision 143 — 203
A: Installing DirectX<br />
204 — revision 143
<strong>Installation</strong> & <strong>Setup</strong> <strong>User</strong> <strong>Guide</strong><br />
Appendix B:<br />
Accounts and Passwords<br />
B.A.S.I.S. ET Third Edition includes strong password enforcement, which<br />
checks the user’s password against the B.A.S.I.S. password standards. This<br />
functionality is designed to enhance password security as well as encourage users<br />
to implement single sign-on. If single sign-on is used (automatic or manual)<br />
B.A.S.I.S. does not enforce password standards.<br />
Note:<br />
The strong password enforcement feature in B.A.S.I.S. also checks the<br />
BEST database user’s password when logging into applications. Database<br />
user passwords apply to SQL Server Desktop Engine, SQL, and Oracle. For<br />
information on changing your database password refer to Change the<br />
Database Password on page 206.<br />
The following table summarizes the B.A.S.I.S. default accounts and passwords:<br />
B.A.S.I.S. Default Accounts and Passwords<br />
Description <strong>User</strong> name Password How to change the<br />
password<br />
Default system<br />
administrator account.<br />
This is the account that is<br />
used initially to log into<br />
the main B.A.S.I.S.<br />
applications, such as<br />
System Administration.<br />
B.A.S.I.S. database. This<br />
is the actual B.A.S.I.S.<br />
SQL Server Desktop<br />
Engine, SQL, or Oracle<br />
database.<br />
License Administration<br />
account. This is the<br />
account that is used<br />
initially to log into the<br />
License Administration<br />
application.<br />
SA SA For more information,<br />
refer to About Accounts<br />
on page 211.<br />
LENEL MULTIMEDIA For more information,<br />
refer to Change the<br />
Database Password on<br />
page 206.<br />
ADMIN ADMIN For more information,<br />
refer to Changing<br />
Administrator<br />
Properties for the<br />
License Administration<br />
Application on page 271.<br />
Password Standards<br />
When creating a strong password keep the following guidelines in mind:<br />
• Passwords cannot be blank<br />
• Passwords cannot be the same as the user name (e.g. SA, SA)<br />
revision 143 — 205
B: Accounts and Passwords<br />
• Passwords cannot be BEST keywords (e.g. MULTIMEDIA, PROKUPETS,<br />
PROKUPET, BEST, BASIS, PASSWORD)<br />
• Although not required, your password should contain numbers, letters, and<br />
symbols. Spaces are also acceptable. (e.g. august 18, 1967)<br />
• B.A.S.I.S. passwords are not case-sensitive.<br />
• Database passwords conform to the rules of the specific database being used;<br />
passwords in SQL Server and Oracle are case insensitive.<br />
• The maximum value for a strong password is 127 characters. The minimum<br />
value is 1.<br />
Notes:<br />
For Oracle databases the following account usernames and passwords are<br />
not allowed to be used together:<br />
System and Manager<br />
Internal and Oracle<br />
Sys and Change_On_Install<br />
Enable/Disable Strong Password Enforcement<br />
Strong password enforcement is enabled/disabled in System Administration or<br />
ID CredentialCenter. When you install B.A.S.I.S., by default strong password<br />
enforcement is enabled. When you upgrade, by default strong password<br />
enforcement is disabled. To manually enable or disable strong password<br />
enforcement:<br />
1. Select System Options from the Administration menu.<br />
2. Select the General System Options tab.<br />
3. Click [Modify].<br />
4. Select or deselect the Enforce strong passwords checkbox.<br />
Note:<br />
If you disable the option to enforce strong passwords, you will continue to<br />
receive a message stating your password is weak every time you log into an<br />
application until you change your B.A.S.I.S. password to meet the password<br />
standards.<br />
Change the Database Password<br />
In addition to user accounts and passwords, your B.A.S.I.S. system has a<br />
database password. During installation, this password is set to MULTIMEDIA.<br />
When you log on, the application checks your database program (SQL Server,<br />
Oracle, or SQL Server Desktop Engine) for this password before allowing you to<br />
use the database. This is done “behind the scenes.”<br />
206 — revision 143
<strong>Installation</strong> & <strong>Setup</strong> <strong>User</strong> <strong>Guide</strong><br />
It is highly recommended that this password be changed. Although all the<br />
machines in an Enterprise or Distributed ID system start out using the same<br />
database password (MULTIMEDIA), the database password does not need to be<br />
the same on all machines. How the database password is changed depends<br />
whether the Login Driver is running on the same computer that the database is<br />
on, and what options you choose to use. The SQL Server Desktop Engine,<br />
Oracle, or SQL password and the password in the Login Driver must be the same<br />
or you will not be able to log into any B.A.S.I.S. applications. SQL Server<br />
Desktop Engine, Oracle, and SQL passwords case-insensitive, but the password<br />
in the Login Driver is case-sensitive.<br />
• If the Login Driver and the database are on the same computer, all you need<br />
to do is change the Lenel account password using Database <strong>Setup</strong>. Database<br />
<strong>Setup</strong> will change automatically change the password in the database<br />
program and in the Login Driver.<br />
• If the Login Driver and the database are on different computers, you have<br />
two options: (For more information, please refer to step d on page 210.)<br />
– Change the database password, and change the password in the Login<br />
Driver manually later<br />
– Change the database password in the Login Driver as well. If you<br />
choose this option, be aware that the password will be sent over the<br />
network as plain text.<br />
revision 143 — 207
B: Accounts and Passwords<br />
Change the BEST Account Password<br />
1. To change the Lenel account password using the Database <strong>Setup</strong><br />
application:<br />
a. Click the Windows Start button, then select Programs ><br />
B.A.S.I.S. ET > Database <strong>Setup</strong>.<br />
b. The Welcome to the Database <strong>Setup</strong> window opens. Click [Continue].<br />
c. In the SQL Server or Oracle Login window, type the password for the<br />
database, then click [OK]. By default the login ID is “LENEL” and the<br />
password is “MULTIMEDIA”.<br />
d. Proceed to step 3.<br />
2. To change the Lenel account password using the Login Driver:<br />
a. In the Control panel, stop the LS Login Driver service.<br />
b. Click the Windows Start button, then select Programs ><br />
B.A.S.I.S. ET > Login Driver.<br />
c. The icon appears in the system tray. Right-click the icon, then select<br />
Open.<br />
d. The Login Driver window opens. From the Edit menu, select Change<br />
Password.<br />
e. Proceed to step 3.<br />
3. If the password is considered weak, the Database Server Account Passwords<br />
window is displayed, as shown below. Refer to Password Standards on page<br />
205 to determine a secure password.<br />
208 — revision 143
<strong>Installation</strong> & <strong>Setup</strong> <strong>User</strong> <strong>Guide</strong><br />
4. Click [Continue]. If you wish to change the password for a database server<br />
account now, i.e., “LENEL”, select the account from the list, then click<br />
[Change Password].<br />
The note in this message<br />
will only appear if the<br />
Login Driver and the<br />
database server are<br />
running on different<br />
machines.<br />
a. The Change Password window is displayed. In the Old password field,<br />
type your current password. For security reasons, your password is not<br />
displayed as you type it.<br />
revision 143 — 209
B: Accounts and Passwords<br />
Note:<br />
The checkbox in this illustration is only displayed when the Login Driver<br />
and the database server are running on two different machines.<br />
b. In the New password field, type the new password.<br />
c. In the Confirm password field, type the new password again. Because<br />
the password can’t be seen while you type, this gives you an extra<br />
assurance that you typed it correctly.<br />
d. When the password is changed, it must be changed in the Login Driver<br />
and on the database server. If the Login Driver and the database server<br />
are running on the same machine, proceed to step e.<br />
If the Login Driver and the database server are not running on the same<br />
machine, the When I change this password on the Login Driver, do<br />
not change the password on the database server. I will change the<br />
password manually on the database server. checkbox appears in the<br />
Change Password window. (If they are on the same machine, this<br />
checkbox does not appear.)<br />
• If the checkbox is not selected (default), the password will be<br />
changed in both places. However, the password is sent as plain text<br />
over the network. This is the only case where the password is<br />
passed across the network in plain text when changing the<br />
password.<br />
Note:<br />
A connection to the Login Driver is required to connect successfully to the<br />
database. The Login Driver can be run on either the database server or the<br />
license server.<br />
• If the checkbox is selected, the password in the Login Driver will<br />
be changed, but you will need to change the password manually on<br />
210 — revision 143
<strong>Installation</strong> & <strong>Setup</strong> <strong>User</strong> <strong>Guide</strong><br />
the database server. For more information, refer to Change the<br />
BEST Account Password on page 208.<br />
e. Click [OK] to save the new password.<br />
5. If you were changing the password using Database <strong>Setup</strong>, you are finished.<br />
If you were changing the password in the Login Driver:<br />
a. From the File menu, select Exit.<br />
b. Restart the LS Login Driver service.<br />
About Accounts<br />
The System Administrator should create a unique account for each user of the<br />
applications. The System Administrator can also, for each user, create a list of<br />
permissions, which specifies precisely which screens, fields, and buttons the user<br />
can access.<br />
During initial installation of the application, default accounts are created. These<br />
include:<br />
<strong>User</strong> name Password Type<br />
sa sa system account<br />
admin<br />
user<br />
badge<br />
sample<br />
sample<br />
sample<br />
These are provided as samples. You may change the passwords and use the<br />
accounts, or remove them. The exception to this is the system account, SA. By<br />
definition this account has permission to do anything in the system. A user with<br />
system access has unlimited access to the application. You cannot delete or<br />
change the system account except to modify the password, which you are<br />
strongly encouraged to do as soon as possible to discourage unauthorized use.<br />
The first time you log into B.A.S.I.S. to configure the application, you should log<br />
in as SA and your password should be SA.<br />
Change the System Administrator Password for the<br />
Database<br />
It is very important that you have a secure password for your database<br />
administrator account. For SQL Server Desktop Engine and SQL Server<br />
databases, this account is “SA.” Oracle has several default administrator<br />
accounts, including INTERNAL, SYS, and SYSTEM. These passwords must be<br />
revision 143 — 211
B: Accounts and Passwords<br />
changed to a secure password if strong password enforcement is enabled. Two<br />
steps are required to change the system administration password:<br />
1. Change the system account password in the database using Database <strong>Setup</strong>.<br />
2. Write down and inform administrators of the password change.<br />
Step 1: Change the SYSTEM Account Password Using<br />
Database <strong>Setup</strong><br />
To change the SYSTEM account password using Database <strong>Setup</strong>, follow the<br />
same instructions listed in Change the BEST Account Password on page 208,<br />
with the following exception: in step 4 on page 209, select the system account<br />
from the list (“SA” by default), then click [Change Password].<br />
Step 2: Write Down and Inform Administrators of the<br />
Password Change<br />
1. It is essential that you do NOT lose this password. If you do not have the<br />
system administration password, you can potentially lose your entire<br />
database since no one may gain access to the information.<br />
2. Write down the password and store in a secure place that won’t get lost<br />
3. Inform other system administrators of the password.<br />
4. BE SURE to inform the customer that you have changed the system<br />
password.<br />
5. Explain the importance of the password to the customer and recommend<br />
they keep it secure and not allow it to be “common knowledge.”<br />
212 — revision 143
<strong>Installation</strong> & <strong>Setup</strong> <strong>User</strong> <strong>Guide</strong><br />
Appendix C:<br />
The Database <strong>Setup</strong> Program<br />
The Database <strong>Setup</strong> program performs database-related functions and needs to be<br />
run to create any database.<br />
Database <strong>Setup</strong> Options Window<br />
Database <strong>Setup</strong> Options Window<br />
.<br />
This radio button:<br />
Create new database<br />
Upgrade from prior release<br />
Upgrade from previous build (same<br />
release), or install system reports<br />
View setup log<br />
Continue from a previously failed<br />
database setup<br />
Does this:<br />
Select this radio button if you have installed the B.A.S.I.S.<br />
application for the first time. After the B.A.S.I.S. and database<br />
software have been installed and configured, this option installs the<br />
access control-related reports, tables, triggers, and default data. For<br />
more information, refer to Chapter 3: Installing B.A.S.I.S. ET Third<br />
Edition on page 41.<br />
Select this radio button if B.A.S.I.S. 2000 or B.A.S.I.S. 2002 is<br />
installed on your computer and you wish to upgrade to B.A.S.I.S. ET<br />
Third Edition. For more information, refer to Chapter 2: Upgrade<br />
Procedures on page 21.<br />
Select this radio button if you are upgrading from one build of<br />
B.A.S.I.S. ET Third Edition to a newer build of ET Third Edition.<br />
For more information, refer to Chapter 2: Upgrade Procedures on<br />
page 21.<br />
Select this radio button to open Windows Notepad and display the<br />
contents of the Database <strong>Setup</strong> log file, which is updated whenever<br />
you run Database <strong>Setup</strong>.<br />
If you previously ran the Database <strong>Setup</strong> program but the process<br />
didn’t complete because you clicked the [Stop Program] button, you<br />
can pick up where you left off by running Database <strong>Setup</strong> again with<br />
this radio button selected.<br />
revision 143 — 213
C: The Database <strong>Setup</strong> Program<br />
Database <strong>Setup</strong> Options Window (Continued)<br />
This radio button:<br />
Purge transaction tables (without<br />
backup)<br />
Does this:<br />
If you previously ran the Database <strong>Setup</strong> program and a message was<br />
displayed indicating that the process can’t be completed, you need to<br />
either truncate your tables or expand your database. If you are in this<br />
situation and you don’t have enough room on your hard disk to<br />
expand the database, you have no choice but to truncate your<br />
database tables.<br />
This radio button does just that. It purges those tables that contain<br />
transactions; specifically the ACCTRANS,<br />
ACCTRANS_RESTORED, ACISLOG, ALARMSACK,<br />
ALARMSACK_RESTORED, and EVENTS tables. It does NOT do<br />
a backup first!<br />
[Configuration]<br />
Clicking on this push button displays a summary of useful database<br />
information pertaining to your ODBC data sources, B.A.S.I.S.<br />
version, installation directory, and available space on the drive that<br />
contains the database.<br />
Database <strong>Setup</strong> Procedures<br />
How to Run the Database <strong>Setup</strong> Program<br />
1. Click the Windows Start button, then select Programs > B.A.S.I.S. ET ><br />
Database <strong>Setup</strong>.<br />
2. If this is a new installation, proceed to step 3. If this is an upgrade, then the<br />
existing database should be detected. Verify that ODBC data source and the<br />
214 — revision 143
<strong>Installation</strong> & <strong>Setup</strong> <strong>User</strong> <strong>Guide</strong><br />
database engine listed is for the database you wish to upgrade, and then click<br />
[Continue].<br />
3. The Database <strong>Setup</strong> Options window opens.<br />
4. Select the radio button for the action you would like to perform.<br />
5. Click [Continue] to initiate the corresponding action.<br />
6. Database <strong>Setup</strong> will proceed differently depending on whether this is a new<br />
installation of B.A.S.I.S. or an upgrade. See the upgrade procedures or the<br />
B.A.S.I.S. installation procedure for specific instructions.<br />
revision 143 — 215
C: The Database <strong>Setup</strong> Program<br />
View the <strong>Setup</strong> Log<br />
1. In the Database <strong>Setup</strong> Options window, select the View setup log radio<br />
button.<br />
2. Click [Continue].<br />
3. Windows Notepad will open and display the contents of the Database <strong>Setup</strong><br />
log file, which is updated whenever you run Database <strong>Setup</strong>.<br />
216 — revision 143
<strong>Installation</strong> & <strong>Setup</strong> <strong>User</strong> <strong>Guide</strong><br />
View Configuration Information<br />
1. In the Database <strong>Setup</strong> Options window, click [Configuration].<br />
2. A summary of useful database information pertaining to your ODBC data<br />
sources, B.A.S.I.S. version, installation directory, and available space on the<br />
drive that contains the database is displayed, as shown.<br />
Change the Database or System Account Password<br />
Note:<br />
This password security feature is enabled by default for new installations. To<br />
disable it, select the option on the General System Options form in the<br />
System Options folder. This is displayed by selecting Administration ><br />
System Options in System Administration or ID CredentialCenter.<br />
1. Click the Windows Start button, then select Programs > B.A.S.I.S. ET ><br />
Database <strong>Setup</strong>.<br />
2. The Welcome to the Database <strong>Setup</strong> window opens. Click [Continue].<br />
3. In the SQL Server Login window, type the password for the database, then<br />
click [OK]. By default the login ID is “LENEL” and the password is<br />
“MULTIMEDIA”.<br />
4. The following rules apply to the B.A.S.I.S. database password:<br />
a. Passwords cannot be blank.<br />
b. Passwords cannot be the same as the user name.<br />
c. Passwords cannot be any of the following keywords: MULTIMEDIA,<br />
PROKUPETS, PROKUPET, BEST, BASIS, PASSWORD.<br />
d. The following Oracle database account user name and password pairs<br />
are not allowed:<br />
revision 143 — 217
C: The Database <strong>Setup</strong> Program<br />
1) SYSTEM, MANAGER<br />
2) INTERNAL, ORACLE<br />
218 — revision 143
<strong>Installation</strong> & <strong>Setup</strong> <strong>User</strong> <strong>Guide</strong><br />
3) SYS, CHANGE_ON_INSTALL<br />
5. If the password is considered weak, the Database Server Account Passwords<br />
window is displayed, as shown:<br />
6. If you wish to change the password for a database server account now, i.e.,<br />
“LENEL”, select the account from the list, then click [Change Password].<br />
The note in this message<br />
will only appear if the<br />
Login Driver and the<br />
database server are<br />
running on different<br />
machines.<br />
a. The Change Password window is displayed. In the Old password field,<br />
type your current password. For security reasons, your password is not<br />
displayed as you type it.<br />
The checkbox in this<br />
illustration is only<br />
displayed when the<br />
Login Driver and the<br />
database server are<br />
running on two different<br />
machines.<br />
revision 143 — 219
C: The Database <strong>Setup</strong> Program<br />
b. In the New password field, type the new password.<br />
c. In the Confirm password field, type the new password again. Because<br />
the password can’t be seen while you type, this gives you an extra<br />
assurance that you typed it correctly.<br />
d. When the password is changed, it must be changed on the Login Driver<br />
and on the database server. If the Login Driver and the database server<br />
are running on the same machine, proceed to step e.<br />
If the Login Driver and the database server are not running on the same<br />
machine, the When I change this password on the Login Driver, do<br />
not change the password on the database server. I will change the<br />
password manually on the database server. checkbox appears in the<br />
Change Password window.<br />
• If the checkbox is not selected (default), the password will be<br />
changed in both places. However, the password is sent as plain text<br />
over the network. This is the only case where the password is<br />
passed across the network in plain text when changing the<br />
password.<br />
Note:<br />
A connection to the Login Driver is required to connect successfully to the<br />
database. The Login Driver can be run on either the database server or the<br />
license server.<br />
• If the checkbox is selected, the password in the Login Driver will<br />
be changed, but you will need to change the password manually on<br />
the database server. For more information, refer to Change the<br />
BEST Account Password on page 208.<br />
e. Click [OK] to save the new password.<br />
220 — revision 143
<strong>Installation</strong> & <strong>Setup</strong> <strong>User</strong> <strong>Guide</strong><br />
Appendix D:<br />
Manually Upgrade from <strong>Access</strong> to SQL Server<br />
Desktop Engine<br />
If you can successfully log into your B.A.S.I.S. 2000 installation and it is on a<br />
computer with the Windows 2000 Service Pack 4 operating system or newer,<br />
then your <strong>Access</strong> database will automatically be upgraded to SQL Server<br />
Desktop Engine during the standard upgrade to B.A.S.I.S. ET Third Edition. If<br />
you have upgraded your operating system or installed a new operating system<br />
and you cannot log into B.A.S.I.S. 2000, you will need to manually upgrade your<br />
B.A.S.I.S. <strong>Access</strong> database to SQL Server Desktop Engine when you upgrade to<br />
B.A.S.I.S. ET Third Edition.<br />
Procedures<br />
Manually Upgrade from <strong>Access</strong> to SQL Server Desktop<br />
Engine Before Running Database <strong>Setup</strong><br />
Use this procedure to manually upgrade your <strong>Access</strong> database to SQL Server<br />
Desktop Engine if:<br />
• The Windows 2000 Service Pack 4 operating system (or newer) is installed.<br />
Refer to the release notes for specific operating systems that are supported.<br />
• B.A.S.I.S. ET Third Edition has not been installed yet, and Database <strong>Setup</strong><br />
has NOT been run for B.A.S.I.S. ET Third Edition yet.<br />
revision 143 — 221
D: Manually Upgrade from <strong>Access</strong> to SQL Server Desktop Engine<br />
• The <strong>Access</strong> database you wish to upgrade has been copied to the computer<br />
that B.A.S.I.S. ET Third Edition will be installed on.<br />
1. Before installing B.A.S.I.S., click the Windows Start button, then select<br />
Settings > Control Panel > Administrative Tools > Data Sources<br />
(ODBC). Click the System DSN tab.<br />
2. In the System Data Sources listing window, verify that there is a DSN named<br />
“Lenel” with an “SQL Server” driver listed, as shown.<br />
3. In the System Data Sources listing window, look to see if there is a DSN<br />
named “LNLPRE59MDB.” If there is not, you must create one by doing the<br />
following:<br />
a. Click [Add].<br />
b. The Create New Data Source window is displayed. Select the<br />
“Microsoft <strong>Access</strong> Driver (*.mdb)” option, then click [Finish].<br />
c. The ODBC Microsoft <strong>Access</strong> <strong>Setup</strong> window is displayed. In the Data<br />
Source Name field, type LNLPRE59MDB, as shown.<br />
222 — revision 143
<strong>Installation</strong> & <strong>Setup</strong> <strong>User</strong> <strong>Guide</strong><br />
d. In the Description field, type a descriptive name for the database.<br />
e. Click [Select].<br />
f. The Select Database window is displayed. Navigate to the <strong>Access</strong><br />
database you want to upgrade, then click [OK].<br />
g. The ODBC Microsoft <strong>Access</strong> <strong>Setup</strong> window should look similar to the<br />
following:<br />
h. Click [OK].<br />
4. On the ODBC Data Source Administrator window, click [OK].<br />
5. Install B.A.S.I.S. ET Third Edition. When prompted, choose Server/SQL<br />
Server Desktop Engine.<br />
6. Open the ACS.INI file and add the following new line at the end of the<br />
[Database] section:<br />
<strong>Access</strong>DSN=“LNLPRE59MDB”<br />
The ACS.INI Database section should look like this:<br />
[Database]<br />
Connect=“ODBC;DSN=Lenel”<br />
revision 143 — 223
D: Manually Upgrade from <strong>Access</strong> to SQL Server Desktop Engine<br />
DataSourceType=0<br />
<strong>Access</strong>DSN=“LNLPRE59MDB”<br />
7. Run the Database <strong>Setup</strong> program and follow the instructions which will<br />
finish the upgrade from the <strong>Access</strong> database to the Microsoft SQL Server<br />
Desktop Engine. For more information, refer to Upgrade Your B.A.S.I.S.<br />
<strong>Access</strong> Database on page 30.<br />
Manually Upgrade from <strong>Access</strong> to SQL Server Desktop<br />
Engine After Running Database <strong>Setup</strong><br />
Use this procedure to manually upgrade your <strong>Access</strong> database to SQL Server<br />
Desktop Engine if:<br />
• B.A.S.I.S. ET Third Edition has already been installed on a computer that is<br />
running the Windows 2000 Service Pack 4 operating system (or newer).<br />
Refer to the release notes for specific operating systems that are supported.<br />
• Database <strong>Setup</strong> HAS been run for B.A.S.I.S. ET Third Edition.<br />
224 — revision 143
<strong>Installation</strong> & <strong>Setup</strong> <strong>User</strong> <strong>Guide</strong><br />
• The <strong>Access</strong> database you wish to upgrade has been copied to the computer<br />
that B.A.S.I.S. ET Third Edition is installed on.<br />
1. Click the Windows Start button, then select Settings > Control Panel ><br />
Administrative Tools > Data Sources (ODBC). Click the System DSN tab.<br />
2. In the System Data Sources listing window, verify that there is a DSN named<br />
“Lenel” with an “SQL Server” driver listed, as shown.<br />
3. In the System Data Sources listing window, look to see if there is a DSN<br />
named “LNLPRE59MDB.” If there is not, you must create one by doing the<br />
following:<br />
a. Click [Add].<br />
b. The Create New Data Source window is displayed. Select the<br />
“Microsoft <strong>Access</strong> Driver (*.mdb)” option, then click [Finish].<br />
c. The ODBC Microsoft <strong>Access</strong> <strong>Setup</strong> window is displayed. In the Data<br />
Source Name field, type LNLPRE59MDB, as shown.<br />
revision 143 — 225
D: Manually Upgrade from <strong>Access</strong> to SQL Server Desktop Engine<br />
d. In the Description field, type a descriptive name for the database.<br />
e. Click [Select].<br />
f. The Select Database window is displayed. Navigate to the <strong>Access</strong><br />
database you want to upgrade, then click [OK].<br />
g. The ODBC Microsoft <strong>Access</strong> <strong>Setup</strong> window should look similar to the<br />
following:<br />
h. Click [OK].<br />
4. On the ODBC Data Source Administrator window, click [OK].<br />
5. Open the ACS.INI file and add the following new line at the end of the<br />
[Database] section:<br />
<strong>Access</strong>DSN=“LNLPRE59MDB”<br />
The ACS.INI Database section should look like this:<br />
[Database]<br />
Connect=“ODBC;DSN=Lenel”<br />
DataSourceType=0<br />
226 — revision 143
<strong>Installation</strong> & <strong>Setup</strong> <strong>User</strong> <strong>Guide</strong><br />
<strong>Access</strong>DSN=“LNLPRE59MDB”<br />
6. Run the Database <strong>Installation</strong> Utility and attach the<br />
<strong>Access</strong>Control_Data.mdf file. For specific instructions, follow the Attach<br />
an SQL Server Desktop Engine Database procedure on page 237.<br />
7. Run the Database <strong>Setup</strong> program, which will finish the upgrade from the<br />
<strong>Access</strong> database to the Microsoft SQL Server Desktop Engine. For more<br />
information, refer to Upgrade Your B.A.S.I.S. <strong>Access</strong> Database on page 30.<br />
revision 143 — 227
D: Manually Upgrade from <strong>Access</strong> to SQL Server Desktop Engine<br />
228 — revision 143
<strong>Installation</strong> & <strong>Setup</strong> <strong>User</strong> <strong>Guide</strong><br />
Appendix E:<br />
Transfer an SQL Server Desktop Engine<br />
Database<br />
You may wish to transfer an SQL Server Desktop Engine database for any<br />
number of reasons, although the most common reason is to upgrade to a new<br />
server machine. To transfer an SQL Server Desktop Engine database to a new<br />
server, complete the following procedures in the order listed:<br />
• Back Up the SQL Server Desktop Engine Database on page 229<br />
• Insure Minimum Server Requirements are Met on page 229<br />
• Install B.A.S.I.S. on the New Server on page 229<br />
• Stop the MSSQLSERVER Service on page 229<br />
• Copy Files from the Old Server to the New Server on page 230<br />
• Restart the MSSQLSERVER Service on page 230<br />
• Change the Database Owner on page 231<br />
• Verify the Database Transfer was Successful on page 233<br />
Back Up the SQL Server Desktop Engine Database<br />
Make sure that you have an up-to-date database backup in a safe location. For<br />
more information, refer to SQL Server Desktop Engine Database Backup<br />
Procedures on page 192.<br />
Insure Minimum Server Requirements are Met<br />
Make sure that the new server meets the specifications that are listed in the<br />
current BEST price book. Although the server MUST meet the minimum<br />
specifications listed, your system will perform much better if the server also<br />
meets the recommended specifications.<br />
Install B.A.S.I.S. on the New Server<br />
Install B.A.S.I.S. on the new server. Be sure to select the SQL Server Desktop<br />
Engine option when you are prompted to select a database system. For more<br />
information, refer to Chapter 3: Installing B.A.S.I.S. ET Third Edition on page<br />
41.<br />
Stop the MSSQLSERVER Service<br />
Note:<br />
This procedure describes stopping the MSSQLSERVER service on a<br />
Windows XP machine. This process can also be done on a Windows 2000<br />
machine, but the menu options may differ slightly.<br />
revision 143 — 229
E: Transfer an SQL Server Desktop Engine Database<br />
The MSSQLSERVER service must be stopped on both the old server and the<br />
new server before proceeding. To do this:<br />
1. On the old server, click Start and navigate to the All Programs > Control<br />
Panel.<br />
2. Double-click “Administrative Tools.”<br />
3. Double-click “Services.”<br />
4. In the Services window, right-click on MSSQLSERVER and select Stop.<br />
5. Repeat steps 1–4 on the new server as well.<br />
Copy Files from the Old Server to the New Server<br />
Copy the <strong>Access</strong>Control_data.mdf and <strong>Access</strong>Control_log.ldf files on the old<br />
server to the new server, making sure to replace the files that exist on the new<br />
server. These files are located on the old server in C:\Program Files\Microsoft<br />
SQL Server\MSSQL\Data, and must be copied into the same location on the<br />
new server.<br />
Restart the MSSQLSERVER Service<br />
Note:<br />
This procedure describes stopping the MSSQLSERVER service on a<br />
Windows XP machine. This process can also be done on a Windows 2000<br />
machine, but the menu option names may differ slightly.<br />
1. On the new server, click Start and navigate to the All Programs > Control<br />
Panel.<br />
2. Double-click “Administrative Tools.”<br />
3. Double-click “Services.”<br />
4. In the Services window, right-click on MSSQLSERVER and select Start.<br />
230 — revision 143
<strong>Installation</strong> & <strong>Setup</strong> <strong>User</strong> <strong>Guide</strong><br />
Change the Database Owner<br />
SQL Server Desktop Engine does not provide an interface for accessing the<br />
database engine. Therefore, you must follow this procedure to be able to log into<br />
the database directly using the ODBC connection created for B.A.S.I.S. so that<br />
you can run the DBOwner.sql query.<br />
1. On the taskbar, click the Start button, and then click Run.<br />
2. Click [Browse], navigate to the B.A.S.I.S. installation directory, and then<br />
click on the ACCESSDB.exe application. The path to the application will<br />
then be listed in the Open field. Click [OK].<br />
3. The <strong>Access</strong>DB application opens. From the Management menu, select<br />
Data Source > Connect.<br />
revision 143 — 231
E: Transfer an SQL Server Desktop Engine Database<br />
4. Click the Machine Data Source tab, select the “Lenel” Data Source Name,<br />
and then click [OK].<br />
5. The SQL Server Login window opens.<br />
a. In the Login ID field, type SA.<br />
b. Leave the Password field blank and click [OK]. The SQL Server Login<br />
window will close, leaving just the main window open.<br />
6. Execute the “sp_changedbowner” commands using either of the following<br />
methods:<br />
a. From the SQL menu, select SQL File. The Enter Script window opens.<br />
1) Insert Disc 2 of the B.A.S.I.S. <strong>Installation</strong> disk set into the CD-<br />
ROM.<br />
2) On the Enter Script window, click [Browse] and navigate to the<br />
DBOwner.sql file in the Lenel Database Files directory on the<br />
CD-ROM.<br />
3) Select the file, and then click [Open]. The path to the DBOwner.sql<br />
file will be displayed in the Enter Script window.<br />
232 — revision 143
<strong>Installation</strong> & <strong>Setup</strong> <strong>User</strong> <strong>Guide</strong><br />
4) On the Enter Script window, click [OK]. If no error message is<br />
displayed, then the database owner was successfully changed.<br />
b. From the SQL menu, select Statement. The Enter SQL Statement<br />
window opens.<br />
1) Type the following: sp_changedbowner sa<br />
2) Click [OK]. If the command gets highlighted in blue, then it<br />
completed without error, and you are ready to enter the next<br />
command.<br />
3) Type the following: sp_changedbowner lenel<br />
4) Click [OK]. As long as the command gets highlighted blue, the<br />
database owner has been successfully changed.<br />
Verify the Database Transfer was Successful<br />
Log into System Administration and verify that the database is indeed your old<br />
database.<br />
revision 143 — 233
E: Transfer an SQL Server Desktop Engine Database<br />
234 — revision 143
<strong>Installation</strong> & <strong>Setup</strong> <strong>User</strong> <strong>Guide</strong><br />
Appendix F:<br />
Database <strong>Installation</strong> Utility<br />
Database <strong>Installation</strong> Utility Overview<br />
The Database <strong>Installation</strong> Utility is used to attach an SQL Server Desktop<br />
Engine/SQL Server database for use with the B.A.S.I.S. software. The Database<br />
<strong>Installation</strong> Utility copies the existing database data files (MDF and LDF),<br />
attaches the database, and updates the Lenel Data Source Name (DSN) to point to<br />
the correct database. It does not create the tables in a new database - Database<br />
<strong>Setup</strong> must be run.<br />
The Database <strong>Installation</strong> Utility is run automatically at the end of the B.A.S.I.S.<br />
installation when either a new SQL Server Desktop Engine database or a demo<br />
database has been selected. It is also installed on the local machine in the<br />
B.A.S.I.S. installation directory so that it can be run manually after the<br />
installation has completed.<br />
Database <strong>Installation</strong> Utility Window<br />
revision 143 — 235
F: Database <strong>Installation</strong> Utility<br />
Database <strong>Installation</strong> Utility Window Field Table<br />
Form Element Type Comment<br />
Path to database files Text The source data file (MDF) name. When the Database <strong>Installation</strong><br />
Utility is run automatically during the B.A.S.I.S. installation, the Path<br />
to database files and the Database name are determined based on the<br />
choice of the SQL Server Desktop Engine or Demo database.<br />
• The default empty SQL Server Desktop Engine database is<br />
<strong>Access</strong>Control_Data.mdf.<br />
• The B.A.S.I.S. demo database is<br />
<strong>Access</strong>ControlDemo_Data.mdf.<br />
Browse Push button Click to select the Path to database files.<br />
Database name Text The name of the database that will be used with the B.A.S.I.S. software.<br />
When the Database <strong>Installation</strong> Utility is run automatically during the<br />
B.A.S.I.S. installation, the Database name and the Path to database<br />
files are determined based on the choice of the SQL Server Desktop<br />
Engine or Demo database.<br />
Path to copy<br />
database files to<br />
Text<br />
The destination directory. The destination directory will always default<br />
to the SQL Server Desktop Engine/SQL Server default data directory,<br />
as configured in SQL Server Desktop Engine/SQL Server and stored in<br />
the registry.<br />
Browse Push button Click to select the Path to copy database files to.<br />
Connect Push button When the Database <strong>Installation</strong> Utility opens, it attempts to connect to<br />
the database for the DSN that is currently specified in the [Database]<br />
section in the ACS.INI file. For example, if the following is specified<br />
in the [Database] section:<br />
Connect=“ODBC;DSN=Lenel”<br />
then the Database <strong>Installation</strong> Utility will attempt to connect to the<br />
database associated with the Lenel DSN.<br />
• If the database connection succeeds, the [Connect] button is<br />
grayed out.<br />
• If the database connection fails, an error message that says, “The<br />
DSN selected in your ACS.INI is invalid. Please check your<br />
ODBC configuration.” is displayed and the [Connect] button is<br />
enabled. If this message is displayed, open the ACS.INI file and<br />
specify the correct DSN, save and close the ACS.INI file, and<br />
click the [Connect] button. If the connection is successful, the<br />
[Connect] button will become grayed out.<br />
OK Push button Created or attaches the specified database.<br />
Close Push button Closes the Database <strong>Installation</strong> Utility without performing any<br />
function.<br />
236 — revision 143
<strong>Installation</strong> & <strong>Setup</strong> <strong>User</strong> <strong>Guide</strong><br />
Database <strong>Installation</strong> Utility Procedures<br />
Attach an SQL Server Desktop Engine Database<br />
Run the Database <strong>Installation</strong> Utility by doing the following:<br />
1. In Windows Explorer, navigate to the B.A.S.I.S. installation directory<br />
(C:\Program Files\B.A.S.I.S. by default), and then double-click on the<br />
Database<strong>Installation</strong>Utility.exe file to run it.<br />
2. The Database <strong>Installation</strong> Utility window is displayed. When the Database<br />
<strong>Installation</strong> Utility opens, it attempts to connect to the database for the DSN<br />
that is currently specified in the [Database] section in the ACS.INI file. For<br />
example, if the following is specified in the [Database] section:<br />
Connect=“ODBC;DSN=Lenel”<br />
then the Database <strong>Installation</strong> Utility will attempt to connect to the database<br />
associated with the Lenel DSN.<br />
• If the database connection succeeds, the [Connect] button is grayed out.<br />
Proceed to step 3.<br />
• If the database connection fails, an error message that says, “The DSN<br />
selected in your ACS.INI is invalid. Please check your ODBC<br />
configuration.” is displayed and the [Connect] button is enabled. If this<br />
message is displayed, open the ACS.INI file and specify the correct<br />
DSN, save and close the ACS.INI file, and click the [Connect] button.<br />
revision 143 — 237
F: Database <strong>Installation</strong> Utility<br />
If the connection is successful, the [Connect] button will become grayed<br />
out. Proceed to step 3.<br />
3. Click [Browse...] to choose the path to the database files.<br />
4. The Open window is displayed. Navigate to the DB<strong>Setup</strong> folder in the<br />
B.A.S.I.S. installation directory, select the MDF file that you wish to attach,<br />
and then click [Open]. MDF files you may wish to attach include:<br />
• The default empty SQL Server Desktop Engine database<br />
<strong>Access</strong>Control_Data.mdf.<br />
• The B.A.S.I.S. demo database <strong>Access</strong>ControlDemo_Data.mdf.<br />
5. In the Database name field, type <strong>Access</strong>Control or any other name you<br />
wish to use, as shown.<br />
6. The recommended path is the default path specified in the Path to copy<br />
database files to field. This default path is where the files would be stored if<br />
238 — revision 143
<strong>Installation</strong> & <strong>Setup</strong> <strong>User</strong> <strong>Guide</strong><br />
you were using the SQL Server user interface (which does not come with<br />
SQL Server Desktop Engine) to create a database.<br />
• If you do not change the default setting in the Path to copy database<br />
files to field and a database with the name you specified already exists,<br />
the database will be overwritten.<br />
• If you do change the default setting, a new database will be created in<br />
that location.<br />
7. Click [OK].<br />
8. If you did not change the default setting, the following message is displayed.<br />
Click [Yes].<br />
9. The DSN is updated to point to the database, and a message is displayed that<br />
indicates that the database was successfully installed. Click [OK].<br />
10. On the Database <strong>Installation</strong> Utility window, click [Close].<br />
Important:<br />
After attaching a database, you must run Database <strong>Setup</strong> to create the tables<br />
in the database.<br />
revision 143 — 239
F: Database <strong>Installation</strong> Utility<br />
240 — revision 143
<strong>Installation</strong> & <strong>Setup</strong> <strong>User</strong> <strong>Guide</strong><br />
Appendix G:<br />
Change the Database Owner in SQL Server<br />
Desktop Engine<br />
Since SQL Server Desktop Engine doesn’t provide an interface for accessing the<br />
database engine, use the following procedure to log into the database directly<br />
using the ODBC connection created for B.A.S.I.S.:<br />
1. From the Start menu, select Control Panel > Administrative Tools ><br />
ODBC Data Sources.<br />
a. On the System DSN tab, click [Add…]. Choose “SQL Server” for the<br />
driver.<br />
b. For the ODBC Name, type Master. Choose your database server.<br />
(Description is not needed.) Click [Next].<br />
c. Select the With SQL Server authentication using a login ID and<br />
password entered by user. radio button. For the Login ID, enter “SA”.<br />
Leave the Password field blank. Click [Next].<br />
d. Change the default database to <strong>Access</strong>Control. Click [Next].<br />
e. Click [Finish].<br />
2. From the Start menu, select Run. Click [Browse…]. Browse to the<br />
B.A.S.I.S. folder and select the ‘ACCESSDB.exe’ application. Click [Open]<br />
and then [OK] to run this application.<br />
3. From the Management menu, select Datasource > Connect.<br />
a. On the Machine DataSource tab, select “Lenel”. Click [OK].<br />
b. You will be prompted for the database login ID and password. For the<br />
Login ID, enter “SA”. Leave the Password field blank. Click [OK].<br />
c. The screen will return to the main window.<br />
d. From the SQL menu, select Statement. Enter the following statement in<br />
the text box:<br />
sp_changedbowner lenel<br />
Click [Enter] when you are ready to execute the statement.<br />
e. If the command returns highlighted, then it completed without error.<br />
4. Log into a B.A.S.I.S. application and verify that the change was successful.<br />
revision 143 — 241
G: Change the Database Owner in SQL Server Desktop Engine<br />
242 — revision 143
<strong>Installation</strong> & <strong>Setup</strong> <strong>User</strong> <strong>Guide</strong><br />
Appendix H:<br />
Configuring a Distributed ID/Mobile Badging<br />
System<br />
Configure the Server to be a Distributed ID Master<br />
To configure the main server to be a Distributed ID Master Server:<br />
1. Follow the steps listed in the <strong>Access</strong> Control Server/Configuration &<br />
Monitoring Station on page 14 in this user guide. This will ensure that the<br />
required software is installed and that the database is set up.<br />
2. Start and log into Replication Administration on the Distributed ID Master<br />
Server.<br />
3. When you log into Replication Administration for the first time, it will detect<br />
that you have a standard database. The following message is displayed.<br />
Click [Yes].<br />
4. The Distributed ID Settings form is displayed. In the This System’s<br />
Distributed ID Setting drop-down list, select “Distributed ID Master<br />
Server.”<br />
5. Click [OK].<br />
6. The following message is displayed. Click [Yes].<br />
7. The recommended naming scheme for new databases is “Lenel.” If the name of the database you are configuring follows this<br />
naming scheme, no warning message is displayed and you can skip ahead to<br />
step 8. If the database you are configuring is not named according to this<br />
naming scheme and you wish to proceed using the current database name,<br />
revision 143 — 243
H: Configuring a Distributed ID/Mobile Badging System<br />
click [Yes]. Otherwise, click [No] and create a new database that follows the<br />
recommended naming scheme.<br />
8. If your database does not contain any data, skip ahead to step 9. If the<br />
following message is displayed, then your database already has data in it.<br />
Click [Yes] to remove all existing data.<br />
9. The following message is displayed. Click [OK].<br />
The second step is to configure the Distributed ID Mobile Badging Station:<br />
Configure a Mobile Badging Station<br />
1. Run the B.A.S.I.S. setup on the mobile badging station. Choose a “Server<br />
installation”. When selecting components, check only the following options:<br />
• Core Program Files<br />
• ID CredentialCenter<br />
• Replicator<br />
• Online Manuals (optional)<br />
2. After the installation is complete and the computer has been rebooted, open<br />
the ID CredentialCenter program. Configuring a mobile badging station<br />
244 — revision 143
<strong>Installation</strong> & <strong>Setup</strong> <strong>User</strong> <strong>Guide</strong><br />
requires that no cardholder data exists, so you must delete the default record<br />
in the database. To do this:<br />
a. Select the Cardholders option from the Administration menu.<br />
b. Click [Search], then [OK]. There should be only one sample record<br />
for Lisa Lake. If this is not true, something is wrong with your<br />
installation!<br />
c. Click [Delete], then [OK].<br />
3. Start and log into Replication Administration on the Distributed ID Mobile<br />
Station.<br />
4. When you log into Replication Administration for the first time, it will detect<br />
that you have a standard database. The following message is displayed.<br />
Click [Yes].<br />
5. The System Settings form is displayed.<br />
a. Create a new ODBC DSN that points to the Distributed ID Master<br />
server:<br />
1) Click [Create New ODBC Data Source…].<br />
2) For ODBC Data Source Name, type a name for the DSN. The<br />
recommended name is LenelMaster.<br />
revision 143 — 245
H: Configuring a Distributed ID/Mobile Badging System<br />
3) Select the correct Database Type for the master database server. If<br />
it’s SQL Server, type the computer name of the server, or click<br />
[Browse] to select a server.<br />
4) Click [OK].<br />
b. In the This System’s Distributed ID Setting drop-down list, select<br />
“Distributed ID/Mobile Station.”<br />
c. Specify the Master server workstation name.<br />
d. Select the ODBC Data Source to master server.<br />
e. Specify the Workstation name where the Login Driver is running.<br />
f. Specify the Workstation name where Replicator is running.<br />
g. In the Virtual server name configuration section, select whether the<br />
station uses a virtual server name (also known as the failover name).<br />
This setting only pertains to systems using Legato.<br />
• By default the This server uses a virtual server name checkbox is<br />
deselected, which indicates that the station name specified is the<br />
actual machine name of the station.<br />
• If you specified a failover name for the station in Legato, then you<br />
will need to select the This server uses a virtual server name<br />
checkbox and enter the failover name used to identify the station in<br />
the Legato system rather than the actual machine name.<br />
Note:<br />
You can modify this value after the station has been created by doubleclicking<br />
“Enterprise Server Configuration” beneath the station in the System<br />
Tree.<br />
h. It is also recommended you set the Database selection for this<br />
workstation’s login to “Allow <strong>User</strong> to Select”.<br />
i. Click [OK].<br />
6. The following message is displayed. Click [Yes].<br />
7. The recommended naming scheme for new databases is “Lenel.” If the name of the database you are configuring follows this<br />
naming scheme, no warning message is displayed and you can skip ahead to<br />
step 8. If the database you are configuring is not named according to this<br />
naming scheme and you wish to proceed using the current database name,<br />
246 — revision 143
<strong>Installation</strong> & <strong>Setup</strong> <strong>User</strong> <strong>Guide</strong><br />
click [Yes]. Otherwise, click [No] and create a new database that follows the<br />
recommended naming scheme.<br />
8. If your database does not contain any data, skip ahead to step 9. If the<br />
following message is displayed, then your database already has data in it.<br />
Click [Yes] to remove all existing data.<br />
9. The Pre-Allocated ID Ranges form is displayed. This allows you to adjust<br />
the amount of pre-allocated IDs for each record type that you wish to “grab”<br />
for the region initially. You can also adjust the “Low Water Mark”, which is<br />
the amount of remaining IDs below which new IDs will automatically be<br />
“grabbed” again. There is normally no need to change these default settings;<br />
however you may wish to adjust the number of Cardholder and Badge IDs<br />
you wish to allocate depending on how many new Cardholders/Badges you<br />
revision 143 — 247
H: Configuring a Distributed ID/Mobile Badging System<br />
expect to be added at the region over time. New pre-allocated IDs may be<br />
obtained at ANY time after the region is configured.<br />
10. Click [Allocate New IDs Now] when you are ready to continue.<br />
11. The following message is displayed. Click [OK].<br />
Your computer is now configured to perform mobile badging. However, if you<br />
want to download all existing cardholder information from the Distributed ID<br />
Master Server, you must do so by using the Replicator application and<br />
performing a Full Download of the cardholder records. Once you run a Full<br />
Download of cardholder records for the first time, you can then do Incremental<br />
Downloads as needed, to download only changes that have occurred since your<br />
last Full Download. For more information please refer to the Replicator <strong>User</strong><br />
<strong>Guide</strong>.<br />
248 — revision 143
<strong>Installation</strong> & <strong>Setup</strong> <strong>User</strong> <strong>Guide</strong><br />
Appendix I:<br />
The License Server<br />
The License Server has two main functions: it eliminates the hardware dongle on<br />
all client computers and it allows for concurrent licensing of the B.A.S.I.S.<br />
software. The License Server is installed only on the server, not on client<br />
machines.<br />
A hardware dongle is only needed on the server. Each client computer running<br />
B.A.S.I.S. uses a software license instead of a hardware dongle.<br />
Concurrent licensing allows you more flexibility of where B.A.S.I.S.<br />
applications are run. Each B.A.S.I.S. application has a separate concurrent<br />
license count. The software license is based on the number of computers you<br />
wish to run each separate B.A.S.I.S. application at the same time. For example, a<br />
ten-user concurrent license for Alarm Monitoring will allow Alarm Monitoring<br />
to run on ten computers at the same time, although Alarm Monitoring may be<br />
installed on more than ten computers.<br />
Important:<br />
The License Server must be run under an administrator account. It MUST be<br />
running whenever any B.A.S.I.S. applications are running, as well as when<br />
you wish to use the License Administration web application. If the License<br />
Server is not running, B.A.S.I.S. applications and the License<br />
Administration application will not run.<br />
There are two ways that the License Server can be run on a server running<br />
Windows: as a regular application, or as a Windows service.<br />
• The License Server is installed as a service by default when the B.A.S.I.S.<br />
applications are installed on a server running Windows. The License Server<br />
will automatically be started when the server is running.<br />
• The License Server can also be run as a regular application. This means that<br />
the License Server must be started on the server manually, as you would any<br />
other application.<br />
ACS.INI Settings Related to the License Server<br />
Entries for the Host and Port are automatically entered into the ACS.INI file<br />
when B.A.S.I.S. is installed. Normally, you should not have to open the ACS.INI<br />
file to adjust these settings. However, if you change the computer that the<br />
License Server is running on, you may need to change the Host and/or Port<br />
settings. The settings are as follows:<br />
• Host: this should be set to the name of the machine running the License<br />
Server<br />
• Port: this should be set to the number of the port the License Server is<br />
listening on -- use 8189, which is the default value. If you accepted the<br />
default, it was written into the ACS.INI file. If you entered a different<br />
revision 143 — 249
I: The License Server<br />
setting, it was written into both the ACS.INI file AND the<br />
…B.A.S.I.S.\LicenceServerConfig\Server.Properties file. This file is only<br />
created during the install if the port setting was changed. If you want to<br />
change the port setting in the ACS.INI file after the installation (either to a<br />
new setting or back to 8189), then you must also change it in the<br />
Server.Properties file.<br />
License Server Procedures<br />
Running the License Server from the Command Line<br />
1. Click the Windows Start button, then select Command Prompt.<br />
2. Change to the directory that contains the License Server executable. This is<br />
the directory where you installed B.A.S.I.S., which is C:\Program<br />
Files\B.A.S.I.S. by default.<br />
3. Run the command LicenseServer -interactive. This will start the License<br />
Server.<br />
4. To stop the License Server, press CTRL-C.<br />
Running the License Server in Windows<br />
1. Click the Windows Start button, then select Programs > B.A.S.I.S. ET ><br />
License Server.<br />
2. The License Server will start. There is no visual indication that the License<br />
Server is running, but the LicenseServer.exe process will be listed in the<br />
Task Manager on the Processes tab.<br />
Determining if the License Server is Running<br />
1. In Windows, hold down , , consecutively, so that they<br />
are all pressed at the same time.<br />
2. The Windows Security window will open. Click [Task Manager…].<br />
3. The Windows Task Manager window will open.<br />
4. Click the Processes tab.<br />
5. If the LicenseServer.exe process is listed in the window, then the License<br />
Server is running. If LicenseServer.exe is not listed, then it is not running.<br />
250 — revision 143
<strong>Installation</strong> & <strong>Setup</strong> <strong>User</strong> <strong>Guide</strong><br />
Appendix J:<br />
CCD/CCTV Video <strong>Setup</strong> for Discontinued<br />
Hardware<br />
Configuring Video Hardware and Software<br />
This procedure will verify that your system video capture board and required<br />
Windows drivers are configured properly for live video capture/CCTV video<br />
with one of the following Integral Technologies video capture boards: FlashPoint<br />
ISA, FlashPoint PCI, FlashPoint Lite PCI, FlashPoint 128 and FlashPoint Lite<br />
128. Those with FlashPoint 3D Lite or FlashPoint 3D Plus should refer to<br />
Chapter 4: CCD/CCTV Video <strong>Setup</strong>. Those with other capture boards should<br />
contact your BEST customer service representative before proceeding. Be sure to<br />
perform Step 1: Check to Make Sure You Have All the Required Video<br />
Hardware through Step 3: Install the FlashPoint Video Capture Board before you<br />
install any Integral Technologies FlashPoint software.<br />
The latest setup software for all of the discontinued Integral Technologies<br />
FlashPoint board models (FlashPoint ISA, FlashPoint PCI, Flashpoint Lite PCI,<br />
FlashPoint 128, FlashPoint Lite 128) is version 3.4. The FlashPoint software is<br />
available for download from Integral’s web site: http://www.integraltech.com/<br />
support/dload.html. However, to ensure proper functioning with B.A.S.I.S., users<br />
should contact BEST first if they want to use a version later than 3.4.<br />
The FlashPoint <strong>User</strong>’s Manual and accompanying <strong>Setup</strong> software diskettes are<br />
required for the procedures outlined in this chapter. You may also need your<br />
Windows 2000 CD or a FlashPoint Display Drivers diskette from Integral<br />
Technologies.<br />
Step 1: Check to Make Sure You Have All the Required<br />
Video Hardware<br />
Those with a FlashPoint 3D Lite or FlashPoint 3D Plus video capture board,<br />
refer to Chapter 4: CCD/CCTV Video <strong>Setup</strong>.<br />
You will need a FlashPoint video capture board. Refer to the “FlashPoint Cables”<br />
chapter of the FlashPoint <strong>User</strong>’s Manual for the video input cable requirements<br />
of your board.<br />
Find out which model of FlashPoint board you have and how much VGA frame<br />
buffer memory (RAM) it has. It is essential to know these two things for the<br />
steps that follow.<br />
If you’re setting up a capture station you need the following hardware:<br />
• Hitachi VKC-77U camera and power pack (CAM-77U): (Has been<br />
replaced by CAM-CCP-500K.)<br />
revision 143 — 251
J: CCD/CCTV Video <strong>Setup</strong> for Discontinued Hardware<br />
Note:<br />
You should use a power pack to power the camera even if you are using a<br />
FlashPoint ISA, FlashPoint PCI or FlashPoint 128.<br />
• LNL-VKPW77A (Has been replaced by DPS060200-P5.)<br />
• S-Video cable (# HOC-3652): Each end terminates in a 4-pin connector.<br />
One connector plugs into your FlashPoint board. The other connector plugs<br />
into your camera. A different cable is needed (as per the “FlashPoint Cables”<br />
chapter of the FlashPoint <strong>User</strong>’s Manual) if you are using a FlashPoint board<br />
other than a FlashPoint Lite PCI or a FlashPoint Lite 128. A different cable<br />
may be needed (as per your camera user guide) if you are using a camera<br />
other than the Hitachi VKC-77U.<br />
• EHK-283 flash kit (Optional): (Has been replaced by EHK-K42U-A.) This<br />
may not be needed for all applications. The EHK-283 kit is designed to help<br />
eliminate shadows that may appear behind the subject that you are capturing,<br />
or under the subjects chin (known as bearding). It is intended for abnormally<br />
dark environments or conditions in which the lighting is constantly<br />
changing. Most capture environments have adequate light to capture a<br />
subject with the VKC-77U capture kit, but to enhance the colors (more real<br />
life), and to eliminate shadows, the flash kit is necessary. The flash kit<br />
includes the following hardware:<br />
– Vivitar 283 flash unit<br />
– VP-1 Manual Flash Adjustment Sensor: This replaces the Auto<br />
Tyristor which ships attached to the front of the Vivatar 283 flash unit.<br />
• Flash Sync cable (# HOC-3653): This cable is required for your FlashPoint<br />
board to fire your Vivitar 283 flash unit. One end terminates in a straight<br />
connector, which plugs into your FlashPoint board. The other end terminates<br />
in a right-angled connector, which attaches to an adapter cable that plugs<br />
into your flash unit. (The adapter cable ships with your Vivitar 283 flash<br />
device.)<br />
If you’re setting up a CCTV video station you need the following hardware:<br />
• CCD Video camera: The camera must output video in one of the following<br />
formats:<br />
– RGB: The FlashPoint Lite PCI and FlashPoint Lite 128 do not support<br />
this format.<br />
– NTSC S-Video<br />
– NTSC Composite<br />
– PAL S-Video<br />
– PAL Composite<br />
• Video cable(s) and possible CCTV switcher: The cable(s) needed depend<br />
on the model of FlashPoint board you have, the number of CCTV cameras<br />
the computer is supposed to connect to and the video format being used.<br />
Note:<br />
Although FlashPoint boards have multiple video inputs (the number<br />
depending on the model of FlashPoint board), Alarm Monitoring stations are<br />
configured to use only one FlashPoint video input at a time. Therefore, if a<br />
monitoring station is to use multiple CCTV video cameras, the FlashPoint<br />
board must be connected to a CCTV switcher (instead of directly to the<br />
252 — revision 143
<strong>Installation</strong> & <strong>Setup</strong> <strong>User</strong> <strong>Guide</strong><br />
cameras), a cable must be run from the switcher to each CCTV video camera<br />
and each camera must be output video in the same format.<br />
Step 2: Set Up the FlashPoint Board<br />
If you’re using a FlashPoint ISA or FlashPoint PCI board and are setting up a<br />
capture station with flash, verify that the flash jumpers on the FlashPoint board<br />
are set to use the Universal flash sync setting, as directed in Appendix A of your<br />
Integral Technologies FlashPoint <strong>User</strong>’s Manual.<br />
Step 3: Install the FlashPoint Video Capture Board<br />
Install the FlashPoint board into the computer as directed in your Integral<br />
Technologies FlashPoint <strong>User</strong>’s Manual. Make sure your computer boots<br />
properly when you are done. In the event of a problem, first consult the<br />
Troubleshooting chapter of the FlashPoint <strong>User</strong>’s Manual before contacting your<br />
BEST customer service representative.<br />
Step 4: Install the FlashPoint VGA Display Adapter<br />
Driver (Windows 2000)<br />
Shut down all currently running applications and make sure you have the correct<br />
Windows VGA display adapter driver installed:<br />
1. Start the Windows Control Panel.<br />
2. Double-click the Display program icon. The Display Properties folder will<br />
appear.<br />
3. Click the Settings tab to switch to the Settings form.<br />
4. Click [Display Type...]. The Display Type window will appear.<br />
5. If your FlashPoint board is a FlashPoint ISA, FlashPoint Lite PCI or<br />
FlashPoint PCI board, verify that the Adapter Type field indicates either<br />
“Tseng Labs ET4000 W/32” or “Integral Technologies FlashPoint”. If your<br />
FlashPoint board is a FlashPoint Lite 128 or a FlashPoint 128 board, verify<br />
revision 143 — 253
J: CCD/CCTV Video <strong>Setup</strong> for Discontinued Hardware<br />
that the Adapter Type field indicates “Integral Technologies FlashPoint<br />
128”.<br />
6. If the Adapter Type field indicates the correct entry for your FlashPoint<br />
board and you have a FlashPoint Display Drivers diskette that has a version<br />
number newer than what is shown in the Adapter Type field go to step 8.<br />
7. If the Adapter Type field indicates the correct entry for your FlashPoint<br />
board, click [Cancel] then go to Step 5: Verify That the VGA Display<br />
Settings are Correct on page 255.<br />
8. Click [Change...] located to the right of the Adapter Type field. The Change<br />
Display window will be displayed.<br />
9. Do the following if you are using a FlashPoint 128 or FlashPoint Lite 128<br />
board. (You must have a FlashPoint Display Drivers diskette):<br />
• Click [Have Disk...]. The Install from Disk window will appear.<br />
• Insert the FlashPoint Display Drivers diskette into your floppy drive.<br />
• Click [Browse...]. The Open window will appear.<br />
• Navigate into (double-click on) the “winnt40” directory on the driver<br />
diskette.<br />
• Click [Open]. This will return you to the Install from Disk window.<br />
• Click [OK]. A second Change Display window will appear.<br />
• Select “Integral Technologies FlashPoint 128” in the “Display” list.<br />
• Click [OK].<br />
• If a message pertaining to third party drivers appears, just click [Yes] to<br />
proceed.<br />
10. Do the following if you are not using a FlashPoint 128 or FlashPoint Lite<br />
128 board and you have a FlashPoint Display Drivers diskette:<br />
• Click [Have Disk...]. The Install from Disk window will appear.<br />
• Insert the FlashPoint Display Drivers diskette into your floppy drive.<br />
• Click [Browse...]. The Open window will appear.<br />
• Navigate into the “winnt40” directory on the driver diskette.<br />
• Click [Open]. This will return you to the Install from Disk window.<br />
• Click [OK]. A second Change Display window will appear.<br />
• Select “Integral Technologies FlashPoint” in the “Display” list.<br />
• Click [OK].<br />
• If an informational window about third party drivers appears, just click<br />
[Yes] to proceed.<br />
11. Do the following if you are not using a FlashPoint 128 or FlashPoint Lite<br />
128 board and you don’t have a FlashPoint Display Drivers diskette. (You<br />
can use the ET4000 VGA display driver):<br />
• The Change Display window will contain a “Manufacturers” list and a<br />
“Models” list. Select “Tseng Labs” in the Manufacturers list.<br />
• In the Display list of Models list select “Tseng Labs W/32i Compatible<br />
Graphics Adapter” if your FlashPoint board is an ISA board otherwise<br />
select “Tseng Labs W/32p Compatible Graphics Adapter”.<br />
• Click [OK]. A Files Needed window will appear.<br />
254 — revision 143
<strong>Installation</strong> & <strong>Setup</strong> <strong>User</strong> <strong>Guide</strong><br />
• Make sure “Copy Files From” specifies the path to the i386 directory<br />
points on your CD-ROM drive. (For example, if your CD-ROM drive is<br />
drive D:, make sure it specifies D:\i386.)<br />
• If your Windows 2000 CD-ROM is not already in your CD-ROM drive:<br />
insert it, wait for the Windows 2000 CD-ROM window to appear and<br />
then exit the Windows 2000 CD-ROM window by clicking on the X<br />
system menu icon in the upper right hand corner of the window.<br />
• In the Files Needed window click [OK] to install the driver.<br />
12. Windows will copy driver files to your computer and the Installing Driver<br />
window will appear telling you the driver was successfully installed. Click<br />
[OK]. You will return to the Display Type window.<br />
13. Note that the Adapter Type field in the Display Type window may still<br />
indicate the previously selected adapter. Don’t worry. This will be updated<br />
the next time you start Windows. Click [Close]. This will return you to the<br />
Settings form of the Display Settings window.<br />
14. Click [Close]. The System Settings Change window will appear asking you<br />
if you want to restart your computer.<br />
15. Make sure there is no floppy disk in your diskette drive.<br />
16. Click [Yes] to restart your computer.<br />
17. Windows may display an Invalid Display Settings window when it starts. If<br />
so, just press [OK]. (The VGA display settings will be fixed in step Step 5:<br />
Verify That the VGA Display Settings are Correct on page 255.)<br />
Step 5: Verify That the VGA Display Settings are<br />
Correct<br />
To perform the following steps you MUST know the model of FlashPoint board<br />
you have and how much VGA frame buffer memory (1 MB, 2MB or 4MB) it<br />
has.<br />
1. Start the Windows Control Panel.<br />
2. Double-click the Display program icon. The Display Properties folder will<br />
appear.<br />
3. Click the Settings tab to switch to the Settings form.<br />
4. Take note of the following before proceeding:<br />
• B.A.S.I.S. does not support video capture in VGA display modes which<br />
256 or 16 Windows color palettes. This is because FlashPoint boards do<br />
not support video capture when the Windows color palette is set to 16<br />
colors and do not support color video capture when the Windows color<br />
palette is set to 256 colors.<br />
• The greater the number of colors (color bits) contained in the Windows<br />
color palette, the more color information will be saved to the database,<br />
and the better will be the quality of captured photos. The best quality is<br />
achieved with a true color Windows color palette (also known as 24 bit,<br />
16777216 colors or 16.7 million colors).<br />
• However, the model of FlashPoint board you have and the amount of<br />
VGA frame buffer memory it has (1MB, 2MB or 4MB) determines the<br />
revision 143 — 255
J: CCD/CCTV Video <strong>Setup</strong> for Discontinued Hardware<br />
maximum desktop area size for a particular Window color palette size.<br />
For example, if your FlashPoint board contains less than 2 MB of<br />
memory and you choose a true color Windows palette, your desktop<br />
area will be limited to 640 by 480 pixels. This means that any larger<br />
value in the Desktop Area slider field will be automatically revised<br />
downward to “640 by 480 pixels”<br />
• Those with 2MB FlashPoint ISA boards should note that the extra 1MB<br />
is for increased performance and does not offer you any additional VGA<br />
modes over the 1MB FlashPoint ISA board.<br />
• The B.A.S.I.S. software’s user interface was designed to fit within a 800<br />
by 600 pixel desktop area, so a desktop area of at least 800 by 600 pixels<br />
is highly recommended, especially for CCTV video stations.<br />
• A 1280x1024 desktop should not be used. It does not have square pixels<br />
(a width:height ratio of 4:3). Its 5:4 ratio causes video, photos and<br />
layout graphics to appear to be squashed vertically.<br />
• Beware that some VGA Windows color palette – desktop area<br />
combinations can be selected but actually require the higher amount of<br />
VGA RAM available for the model of FlashPoint board you have. For<br />
example, those with a 2MB FlashPoint Lite 128 board can select a VGA<br />
mode of 1024 by 768 with a true color Windows palette (a valid<br />
combination for 4MB FlashPoint Lite 128 boards) but will find that the<br />
Windows color palette is really limited to 65536 colors when a 1024 by<br />
768 desktop is selected.<br />
5. Those setting up a capture station: Using the table that follows, set the<br />
Desktop area and then the Windows color palette based on the model of<br />
FlashPoint board you have and the amount of VGA frame buffer memory<br />
(VGA RAM) it has. The table favors a true color (i.e. 16.7 million colors or<br />
24-bit) Windows color palette over a larger desktop area to achieve the<br />
highest quality for your photos. (More advanced Windows users can choose<br />
other settings as long as they use the guidelines listed in step 4.)<br />
Model(s)<br />
VGA<br />
RAM<br />
Desktop<br />
area<br />
Windows 98<br />
color palette<br />
Windows<br />
2000 color<br />
palette<br />
Captures image<br />
quality<br />
FlashPoint Lite 128,<br />
FlashPoint 128<br />
4MB<br />
1024 by<br />
768<br />
True Color (24<br />
bit)<br />
16777216<br />
Colors<br />
<strong>Best</strong><br />
FlashPoint Lite 128,<br />
FlashPoint 128,<br />
FlashPoint Lite PCI,<br />
FlashPoint PCI<br />
2MB 800 by 600 True Color (24<br />
bit)<br />
16777216<br />
Colors<br />
<strong>Best</strong><br />
FlashPoint ISA<br />
1MB or<br />
2MB<br />
640 by 480 True Color (24<br />
bit)<br />
16777216<br />
Colors<br />
<strong>Best</strong><br />
FlashPoint ISA<br />
1MB or<br />
2MB<br />
800 by 600 High Color (16<br />
bit) (actually 15<br />
bit, see step 5d)<br />
65536 Colors Good under 2000,<br />
Marginal under 98<br />
256 — revision 143
<strong>Installation</strong> & <strong>Setup</strong> <strong>User</strong> <strong>Guide</strong><br />
2MB FlashPoint ISA users should note that the extra 1MB is for increased<br />
performance and does not offer you any additional VGA modes over the 1MB<br />
FlashPoint ISA board.<br />
6. Those setting up a CCTV video station. Using the table that follows, set the<br />
Desktop area and then the Windows color palette based on the model of<br />
FlashPoint board you have and the amount of VGA frame buffer memory<br />
(VGA RAM) it has. The table favors a larger desktop size over a true color<br />
Windows color palette to allow room to display other windows along side<br />
the Video Verification window within Alarm Monitoring. Video Verification<br />
video is for live display only so its quality is not as important as it is for a<br />
capture station. (More advanced Windows users can choose other settings as<br />
long as they use the guidelines listed in step 4.)<br />
Model(s)<br />
VGA<br />
RAM<br />
Desktop<br />
area<br />
Windows 98<br />
color palette<br />
Windows 2000 color palette<br />
FlashPoint Lite 128,<br />
FlashPoint 128<br />
FlashPoint Lite 128,<br />
FlashPoint 128,<br />
FlashPoint Lite PCI,<br />
FlashPoint PCI<br />
4MB 1024 by 768 True Color (24 bit) 16777216 Colors<br />
2MB 1024 by 768 High Color (16 bit) 65536 Colors<br />
FlashPoint ISA<br />
1MB or<br />
2MB<br />
800 by 600 High Color (16 bit)<br />
(actually 15 bit,<br />
see step 5d)<br />
65536 Colors<br />
7. Select “Small Fonts” in the Font Size field. B.A.S.I.S. does not support<br />
large fonts. B.A.S.I.S. dialog text fields and controls do not line up correctly<br />
when “Large Fonts” is selected<br />
8. Click [Close] or [OK].<br />
9. If you made any changes to the form:<br />
• You may be prompted to restart your computer. If so, select [Yes]<br />
Windows will start up with the newly selected Windows color palette,<br />
desktop area and refresh frequency.<br />
• If you are not prompted to restart your computer, Windows will adjust<br />
the display to have the newly selected Windows color palette, desktop<br />
area and refresh frequency. (You may be asked if the new settings look<br />
okay and if you want to keep the new settings.)<br />
Step 6: Install FlashPoint software<br />
1. If you have not already done so, run the FlashPoint software setup program<br />
(setup.exe on disk 1 of the FlashPoint <strong>Setup</strong> software diskettes). In the setup<br />
program’s list of things to install, select only the FlashPoint FPG capture<br />
application software (deselect everything else). It is not necessary to install<br />
the FlashPoint Overlay MCI driver, Video for Windows driver, ImagePro<br />
driver, and DOS software<br />
2. Reboot your computer if prompted to do so.<br />
revision 143 — 257
J: CCD/CCTV Video <strong>Setup</strong> for Discontinued Hardware<br />
Step 7: Connect Your Video Camera(s) to Your<br />
FlashPoint Board<br />
Connect your camera(s) to your FlashPoint board using the cable(s) identified in<br />
Step 1: Check to Make Sure You Have All the Required Video Hardware on<br />
page 251. Refer your FlashPoint <strong>User</strong>’s Manual and camera user guide for<br />
assistance.<br />
Notes:<br />
The board must be installed into slot # 1 or it will not work!<br />
Be sure to also connect your SVGA monitor to the FlashPoint board, NOT to<br />
the on-board video port!<br />
Step 8: Verify That Your Video Board and Drivers Are<br />
Working Properly<br />
This can be done easily and quickly using the FPG32 application which ships<br />
with your FlashPoint board. Note that if FPG32 is unable to display video,<br />
neither will B.A.S.I.S.; i.e., the FPG32 application can be used for testing your<br />
258 — revision 143
<strong>Installation</strong> & <strong>Setup</strong> <strong>User</strong> <strong>Guide</strong><br />
video hardware and driver setup like the Windows test print feature can be used<br />
to test your printer hardware and driver setup.<br />
1. Terminate any currently running B.A.S.I.S. application.<br />
Warning<br />
The FlashPoint capture driver allows only one window of FlashPoint video<br />
to be open at any given time. This means you can use only one of the<br />
following at a time:<br />
• FPG32 application. An error is reported and application will not<br />
launch if FlashPoint video is already in use.<br />
• Video Verification feature. The live video window will be blank if<br />
FlashPoint video is already in use.<br />
• Multimedia Capture module with the Video Capture Source<br />
selected. The live video display area will be blank if FlashPoint video is<br />
already in use.<br />
2. Power your camera on. Hitachi VKC-77U cameras should be powered with<br />
a power pack, even if your FlashPoint board is not one of the Lite boards.<br />
3. Launch the FPG32 application by clicking the Windows Start button, then<br />
selecting Programs > FlashPoint > FPG32.<br />
4. Make sure you see a live video image which fills the FPG32 window and<br />
that the image is in full color if using a color camera or in gray scale if you<br />
are using a black and white camera. Do the following if this is not the case:<br />
• Select “<strong>Setup</strong>” and then “Video...” from the main menu. The Video<br />
<strong>Setup</strong> window will appear off to the side.<br />
• Select the video input standard and type as per your camera and video<br />
cabling. Those with a Hitachi VKC-77U camera should select NTSC<br />
and S-Video. Note that the FPG32 application provides no way to<br />
specify the video source (input connector #) because the application<br />
assumes you are using the first video input which supports the specified<br />
input format. (Consult the cable wiring diagrams located in Appendix A<br />
of your FlashPoint <strong>User</strong>’s Manual.)<br />
• If you see just black or discolored video make sure the color<br />
adjustments have reasonable settings. If you are unsure which<br />
adjustments to use press the Video <strong>Setup</strong> window’s [Reset] button and<br />
then re-select the video input standard and format again.<br />
• If you still see just black or discolored video, your camera’s white point<br />
balance and/or iris level may not be set correctly. For more information,<br />
refer to Hitachi VK-C77U Camera dip switch settings on page 262.<br />
• If you still see just black or discolored video consult the<br />
Troubleshooting chapter of your FlashPoint <strong>User</strong>’s Manual.<br />
Step 9: Video Software Settings<br />
Video Software Settings for a CCTV Station<br />
• Video Source, Input Standard and Input Format. Video Verification uses<br />
the video source, input standard and input format configured in the Workstations<br />
form of ID CredentialCenter’s/System Administration’s Workstations folder.<br />
revision 143 — 259
J: CCD/CCTV Video <strong>Setup</strong> for Discontinued Hardware<br />
Consult the ID CredentialCenter/System Administration <strong>User</strong> <strong>Guide</strong> on how to<br />
make those adjustments in the Workstations folder.<br />
• Video Colors and Video Sync Mode. Video Verification displays live<br />
video using the color adjustments and sync mode configured in the FPG32<br />
application which shipped with your FlashPoint board. Consult your FlashPoint<br />
<strong>User</strong>’s Manual on how to make those adjustments. (The sync mode option is<br />
configured in the FPG32 application’s Advanced Configuration window. When<br />
enabled it causes unstable video coming from a VCR to stop jumping up and<br />
down and settle down into a stable picture, though there will be a narrow strip of<br />
static across the bottom.)<br />
Video Software Settings for a Capture Station<br />
The Multimedia Capture window has its own set of Video Source, Input<br />
Standard, Input Format, Color and Sync Mode settings completely separate from<br />
the FPG32 application. To adjust the Multimedia Capture settings, refer to<br />
Chapter 6: Setting Up & Configuring a Capture Station. More information is<br />
available in the BadgeDesigner <strong>User</strong> <strong>Guide</strong>, the ID CredentialCenter <strong>User</strong> <strong>Guide</strong><br />
and the System Administration <strong>User</strong> <strong>Guide</strong>.<br />
• Default Camera Settings. The following settings are for a normal office<br />
environment. They may need to be changed based on several variables in the<br />
capture environment (distance, lighting, backgrounds, wall color, etc.).<br />
Consult your camera user guide for information about manual overrides to the<br />
Hitachi VK-C77U camera. Most standard office environments will not need to<br />
use the manual adjustments or the Enhance Flash Lighting kit (EHK-283). The<br />
Enhance Flash Lighting kit is intended for abnormally dark environments or<br />
conditions in which the lighting is constantly changing.<br />
• Multimedia Capture Settings. In the Multimedia Capture module of the ID<br />
CredentialCenter, System Administration and BadgeDesigner applications, the<br />
following settings are made at the factory. If you have purchased a turnkey<br />
B.A.S.I.S. system, these settings will have been configured for you. If you have<br />
not pressed the save user defaults button, the following settings default to values<br />
suitable for the Saerim camera (For more information, refer to Chapter 4: CCD/<br />
CCTV Video <strong>Setup</strong> on page 53.) Those with a Hitachi camera must change them<br />
to the values listed is the table that follows.<br />
260 — revision 143
<strong>Installation</strong> & <strong>Setup</strong> <strong>User</strong> <strong>Guide</strong><br />
Video Settings Form:<br />
Section/Field<br />
Value<br />
Video<br />
Video Board<br />
Input Format<br />
Input Standard<br />
FlashPoint<br />
S Video<br />
NTSC<br />
Video Source 1<br />
Alternate Sync Mode<br />
High Resolution Capture<br />
unchecked<br />
unchecked<br />
Flash<br />
Flash Type<br />
Universal<br />
Flash Field Delay 2<br />
Video I/O Settings Form:<br />
(Video Input settings)<br />
Field<br />
Value<br />
Flash Brightness 750<br />
Flash Contrast 700<br />
Live Brightness 750<br />
Live Contrast 700<br />
Hue 10<br />
Red 500<br />
Green 500<br />
Blue 500<br />
Saturation 530<br />
Sharpness 500<br />
Gain 500<br />
Gamma 500<br />
Offset 500<br />
• Chromakey Form. Preset to 30% tolerance<br />
• Effects Gallery Form. New installations default to having the following six<br />
image processing profiles:<br />
revision 143 — 261
J: CCD/CCTV Video <strong>Setup</strong> for Discontinued Hardware<br />
Profile name<br />
Adjustment<br />
Increase Hue +7%<br />
Decrease Hue -7%<br />
Increase Saturation +7%<br />
Decrease Saturation -7%<br />
Increase Contrast +7%<br />
Decrease Contrast -7%<br />
General Settings Form<br />
Field<br />
Show Settings by Default<br />
Default Capture Source<br />
Default Processing Profile<br />
Value<br />
checked<br />
Video Capture<br />
none<br />
Compression Amount 10%<br />
Crop Window<br />
Enabled<br />
Sizable<br />
Maintain Aspect<br />
Units<br />
checked<br />
checked<br />
checked<br />
Inches<br />
Left 0.233”<br />
Top 0.0”<br />
Width 0.6”<br />
Height 0.8”<br />
If your situation requires that you configure these settings yourself, you must<br />
click on the [Save Defaults] push button to save the settings. Note that<br />
BadgeDesigner has its own set of Multimedia Capture module settings apart<br />
from the set shared by ID CredentialCenter and System Administration.<br />
Hitachi VK-C77U Camera dip switch settings<br />
The following settings are denoted if you are facing the rear of the camera.<br />
• POS/NEG - Always to the Left (Positive and Negative images)<br />
• AGC/OFF - Always to the Left (Automatic Gain Control)<br />
262 — revision 143
<strong>Installation</strong> & <strong>Setup</strong> <strong>User</strong> <strong>Guide</strong><br />
• AWB/MWB - Always to the Right (Automatic White Balance/Manual<br />
White Balance)<br />
• R/B - Always to Left (Red - Green - Blue manual adjustments)<br />
• AF/OFF - Always to Left (Automatic Focus)<br />
When setting up the environment, minor adjustments will need to be made to the<br />
Zoom and Iris. Once the adjustments have been made, move the switch back to<br />
the zoom position.<br />
• Making adjustments to the zoom will bring the subject closer or further<br />
away. Optimally you want your subject to fill the pre-sized crop window, so<br />
that no additional crop adjustments will need to be made.<br />
• Making Iris adjustments should be made initially for the environment in<br />
which the camera is set up. It should not need further adjustment.<br />
EHK-283 (Enhance Lighting Kit)<br />
If you are using the enhance lighting kit, angle the flash at 45 degrees downward<br />
towards the subject to avoid flash wash-out. Additional Iris adjustments may be<br />
necessary when installing the kit. For more detailed instructions on how to<br />
configure capture with flash, refer to Chapter 6: Setting Up & Configuring a<br />
Capture Station.<br />
Note:<br />
Wait 10 to 15 seconds between capture flashes so that the flash recharges.<br />
revision 143 — 263
J: CCD/CCTV Video <strong>Setup</strong> for Discontinued Hardware<br />
264 — revision 143
<strong>Installation</strong> & <strong>Setup</strong> <strong>User</strong> <strong>Guide</strong><br />
Appendix K:<br />
The License Administration Application<br />
The License Administration web application is used to install new licenses, view<br />
installed licenses, and view the License Server log.<br />
The License Administration application requires a browser to run. Web browsers<br />
that are supported are Microsoft Internet Explorer and Netscape Navigator. Refer<br />
to the B.A.S.I.S. ET release notes.rtf file on the root of the B.A.S.I.S. ET Third<br />
Edition CD for which specific versions are supported. The License<br />
Administration application is accessed through your web browser: simply point<br />
your browser to http://LICENSESERVERHOST:9999, where<br />
LICENSESERVERHOST is replaced with the name of the machine the License<br />
Server is running on. 9999 is the default port the License Server listens on for<br />
administration tasks, and should be left as is unless you have modified the<br />
configuration of your License Server to listen on another port.<br />
The username/password combination that the License Administration application<br />
uses is separate from the username/password combinations that the other<br />
B.A.S.I.S. applications use. There is only one valid username/password, which is<br />
admin/admin by default. For security reasons, you should change the username/<br />
password combination after you have initially logged into the License<br />
Administration application.<br />
Important:<br />
The License Server MUST be running whenever you wish to use the License<br />
Administration web application. If the License Server is not running, the<br />
License Administration web application will not run.<br />
Note:<br />
In order to use the License Administration application, “cookie” support<br />
must be enabled in the browser.<br />
License Administration Procedures<br />
Starting the License Administration Application<br />
1. Make sure that the License Server is running. (For more information, refer to<br />
Determining if the License Server is Running on page 250.)<br />
2. Click the Windows Start button, then select Programs > B.A.S.I.S. ET ><br />
License Administration.<br />
3. If your browser has JavaScript support enabled, a new window will open<br />
with the License Administration application in it.<br />
Otherwise, follow the directions in the browser’s window and click the<br />
hyperlink to continue. The License Administration application will then<br />
open in the same browser window.<br />
revision 143 — 265
K: The License Administration Application<br />
Note:<br />
The URL for License Administration is:<br />
http://LICENSESERVERHOST:9999/<br />
Replace LICENSESERVERHOST with the name of the machine the License<br />
Server is running on. For example, if the machine running the License<br />
Server is named alpha, the License Administration URLwill be:<br />
http://alpha:9999/<br />
Logging into the License Administration Application<br />
1. Start the License Administration application. (For more information, refer to<br />
Starting the License Administration Application on page 265.)<br />
2. In the <strong>User</strong>name field, type a valid username. When logging in for the first<br />
time, the <strong>User</strong>name is admin.<br />
3. In the Password field, type a valid password that corresponds to the<br />
username entered. When logging in for the first time, the password is admin.<br />
4. Click [Log In]. The License Administration options will be displayed.<br />
Note:<br />
After logging in for the first time, you are strongly encouraged to modify the<br />
default username and password as soon as possible to discourage<br />
unauthorized use.<br />
5. The first time you login, the following is displayed:<br />
6. You are strongly encouraged to change the password. Click the “Change<br />
Your Password” hyperlink.<br />
7. The Administrator Properties page is displayed. You can change the user<br />
name, password, or both. This user name and password is only used for the<br />
License Administration application.<br />
a. To change the user name, enter a new value in the <strong>User</strong>name field.<br />
b. To change the password, enter a new value in the Password field.<br />
c. If you are changing the password, you must reenter the password in the<br />
Confirm Password field.<br />
d. Click [Update]. A message will be displayed that indicates whether the<br />
administrator properties were successfully updated.<br />
266 — revision 143
<strong>Installation</strong> & <strong>Setup</strong> <strong>User</strong> <strong>Guide</strong><br />
Viewing an Installed License<br />
1. Start the License Administration application. (For more information, refer to<br />
License Administration Procedures on page 265.)<br />
2. Log into the License Administration application. (For more information,<br />
refer to Logging into the License Administration Application on page 266.)<br />
3. In the Installed Licenses drop-down listbox, select the license you wish to<br />
view.<br />
4. Click [View]. The license will be displayed in the right half of the window.<br />
Deleting an Installed License<br />
1. Start the License Administration application. (For more information, refer to<br />
License Administration Procedures on page 265.)<br />
2. Log into the License Administration application. (For more information,<br />
refer to Logging into the License Administration Application on page 266.)<br />
3. In the Installed Licenses drop-down listbox, select the license you wish to<br />
view.<br />
4. Click [Delete…].<br />
5. A delete confirmation message will be displayed. Click [Yes, Delete] to<br />
delete the selected license, or click [No, Cancel] to cancel the deletion.<br />
6. The license will be deleted and removed from the Installed Licenses dropdown<br />
listbox. This removes the license from the License Administration<br />
application. Note that if the license file is saved in another location, it is not<br />
deleted from that location. This means that the license could be reinstalled<br />
from the license file.<br />
revision 143 — 267
K: The License Administration Application<br />
Installing a New License<br />
1. Obtain a new license file from BEST. License files have the extension (.lic).<br />
Be sure that you know where the license file is saved, as you will need to<br />
know the location to successfully install the license.<br />
2. Make sure that the License Server is running. (For more information, refer to<br />
Determining if the License Server is Running on page 250.)<br />
3. Start the License Administration application. (For more information, refer to<br />
Starting the License Administration Application on page 265.)<br />
4. Log into the License Administration application. (For more information,<br />
refer to Logging into the License Administration Application on page 266.)<br />
5. Click the Install New License… hyperlink.<br />
6. In the License file field, enter the name and location of the file containing<br />
the license that you want to install. You can use [Browse…] to locate the<br />
file.<br />
7. Click [Next].<br />
8. View the license and make sure that the license is the correct license.<br />
268 — revision 143
<strong>Installation</strong> & <strong>Setup</strong> <strong>User</strong> <strong>Guide</strong><br />
9. Scroll down to the bottom of the window and click [Next].<br />
If the license is not the correct license, click [Back] to go back and choose<br />
another license file.<br />
10. Read the terms of the license agreement.<br />
11. Select the Yes radio button if you agree with the terms of the license.<br />
12. Click [Finish].<br />
13. The license will be installed. The entry that is displayed in the Installed<br />
Licenses drop-down listbox indicates the name of the product that the<br />
license controls, and will be updated to include the new license.<br />
revision 143 — 269
K: The License Administration Application<br />
Viewing the License Server Log<br />
1. Start the License Administration application. (For more information, refer to<br />
Starting the License Administration Application on page 265.)<br />
2. Log into the License Administration application. (For more information,<br />
refer to Logging into the License Administration Application on page 266.)<br />
3. Click the View Log hyperlink. The License Server log will be displayed in<br />
the right half of the window.<br />
• Click a column heading to sort the log entries according to that criterion.<br />
Note that the column heading that is being used as the search criterion is<br />
displayed in brackets. For example, if the log is sorted by Time, the<br />
column heading will be listed as [Time].<br />
• Click again on the same column heading to sort the log entries<br />
according to that same criterion, only in the reverse order.<br />
270 — revision 143
<strong>Installation</strong> & <strong>Setup</strong> <strong>User</strong> <strong>Guide</strong><br />
Changing Administrator Properties for the License<br />
Administration Application<br />
1. Start the License Administration application. (For more information, refer to<br />
Starting the License Administration Application on page 265.)<br />
2. Log into the License Administration application. (For more information,<br />
refer to Logging into the License Administration Application on page 266.)<br />
3. Click the Administrator Properties… hyperlink. The administrator<br />
properties will be displayed in the right half of the window.<br />
4. You can change the user name, password, or both.<br />
a. To change the user name, enter a new value in the <strong>User</strong>name field.<br />
b. To change the password, enter a new value in the Password field.<br />
c. If you are changing the password, you must reenter the password in the<br />
Confirm Password field.<br />
d. Click [Update]. A message will be displayed that indicates whether the<br />
administrator properties were successfully updated.<br />
Logging Out of the License Administration Application<br />
1. While logged into the License Administration application, click the Log Out<br />
hyperlink.<br />
2. You will be logged out of the License Administration application, and the<br />
License Administration login screen will be displayed again.<br />
revision 143 — 271
K: The License Administration Application<br />
272 — revision 143
<strong>Installation</strong> & <strong>Setup</strong> <strong>User</strong> <strong>Guide</strong><br />
Appendix L:<br />
Room Layout & Lighting <strong>Setup</strong> for a Capture<br />
Station with Discontinued Video Capture<br />
Hardware<br />
Environmental Considerations Affecting Flash & Camera<br />
Capture Quality<br />
There are several factors to consider when selecting your capture station<br />
environment. Lighting is the most important factor and the most difficult to<br />
provide setup instructions for, because every site’s capture environment is<br />
unique. B.A.S.I.S. ships with the optimal hardware setting defaults already set.<br />
The important items to consider when setting up the capture environment are the<br />
flash and camera settings based on environmental considerations.<br />
Capture Station <strong>Setup</strong> Specifications<br />
For every capture station the equipment should be setup as close as possible to<br />
the following specifications:<br />
The backdrop should be approximately 1.5 feet behind the subject. The camera<br />
and flash apparatus should be at least 4.5 feet in front of the subject at an average<br />
height (the height should be adjustable for obvious reasons). The capture area<br />
requires approximately 10 to 12 feet of floor space with appropriate width.<br />
Basic Camera <strong>Setup</strong> (VK-C77U)<br />
<strong>Setup</strong> the camera dip switches as follows:<br />
POS MWB White Balance<br />
R
L: Room Layout & Lighting <strong>Setup</strong> for a Capture Station with Discontinued Video Capture Hardware<br />
The VK-C77U camera zooms to X24, but the recommended zoom area should be<br />
less than X12. This is because the zoom past X12 is digital and the picture<br />
captured becomes rough (pixilated). The subject should be within X1 to X12<br />
zoom for optimal results. The subject should nominally fill the pre-sized crop<br />
window if adjusted properly. Always leave on “Maintain Aspect Ratio”<br />
To adjust the zoom, set the selector switch to zoom (all the way to the right).<br />
Adjust the camera apparatus for the center of the subject. With the arrows located<br />
to the bottom left of the rear of the camera, zoom in all the way and then zoom<br />
back to determine the approximate center point of the zoom (remember: you do<br />
not want to zoom past X12, the halfway point). Then, zoom into the subject until<br />
the desired capture frame is attained. The arrows located at the bottom of the<br />
camera can be use in one of two manors. If you push and hold the arrow, it will<br />
zoom all the way in or out. If you push the arrow button momentarily, it will<br />
move in and out incrementally.<br />
Note:<br />
Optimally the subject should fill the pre-sized crop window, so no additional<br />
cropping adjustments need be made.<br />
Why manual white balance With light or gray colors the Auto White Balance<br />
adjusts incorrectly. That is why the VK-C77U should be setup for Manual White<br />
Balance. It is necessary to White balance the camera to obtain a default white<br />
balance setting and is maintained for consistent picture quality.<br />
Lighting <strong>Setup</strong><br />
Basic Flash <strong>Setup</strong> (EHK-283)<br />
The EHK-283 flash kit may not be needed for all applications. The EHK-283 kit<br />
is designed to help eliminate shadows that may appear behind the subject that<br />
you are capturing, or under the subject’s chin (known as bearding). Most capture<br />
environments have adequate light to capture a subject with the VK-C77U capture<br />
kit, but to enhance the colors (more real life), and to eliminate shadows, the<br />
capture kit is necessary.<br />
This is the setup for the Enhanced Lighting Kit. Now provided with the<br />
Enhanced Lighting Kit is a VP-1 Manual Flash Adjustment Sensor. Replace the<br />
Auto Tyristor currently on the front of the 283 Flash with the VP-1 (this may<br />
have already been done at the factory). Install the flash on the provided camera<br />
mount.<br />
Angle the flash head up at 45 degrees. Adjust the manual sensor (VP-1) to 1/32<br />
power (Almost no Flash output), the opposite of the full power setting (Full Flash<br />
Output). The flash is set up.<br />
274 — revision 143
<strong>Installation</strong> & <strong>Setup</strong> <strong>User</strong> <strong>Guide</strong><br />
Advanced <strong>Setup</strong><br />
After the capture station has been setup, some testing must be performed to<br />
determine the optimal illumination settings for image capture. You may have to<br />
adjust the lights, drapes, or other elements in the capture environment.<br />
With a test subject, view the live image on the screen with all the room lights on.<br />
Set the selector switch on the back of the camera to iris (all the way to the left).<br />
With the arrows on back of the camera adjust the iris all the way down, the live<br />
image on the screen should become dark if not black. The arrows located at the<br />
bottom of the camera can be use in one of two manners. If you push and hold the<br />
arrow, it will zoom all the way in or out. If you push the arrow button<br />
momentarily, it will move in and out incrementally. While viewing the screen,<br />
increase the iris until the subject is visible. Increase the iris a little more, until the<br />
screen image is about the same brightness as the real view of the subject. Take a<br />
test picture. Label this “test 1, all lights”. From here we will adjust the room<br />
environments lighting and make minor adjustments to the iris if needed while<br />
continuing to save the sample captures at (test 2, test 3 etc.).<br />
Steps to improving capture quality:<br />
1. Turn on all the lights in the room.<br />
2. Open the Capture dialog and center on a test subject with the camera.<br />
3. Adjust the iris all the way down, then adjust it until the screen image is about<br />
the same brightness as the real viewable image.<br />
4. Set the White Balance. (Set the selector switch on the back of the camera to<br />
WB. Hold a white piece of paper in front of the camera so there is only white<br />
showing on the screen. Using the arrows on the back of the camera adjust the<br />
white balance until the image in the capture window is white.)<br />
5. Take a test picture. Save this as a cardholder labeled “Test1: all lights”.<br />
6. Turn off all the lights.<br />
7. Take another picture. Save this as a cardholder labeled “Test2: no lights”.<br />
8. Continue testing until a desired lighting quality is captured on the screen. Be<br />
sure to label each test with a number and a description of what you did.<br />
Adjust your environments based on the environmental considerations below.<br />
Continue to take pictures, save them, and use them as references until the best<br />
conditions are determined.<br />
Environmental Considerations and Factors Leading to<br />
Poor Lighting<br />
Environmental factors to consider when setting up a capture station include:<br />
• Is there a different amount of sunlight entering the area through out the day<br />
• Is the station next to a window or under a skylight<br />
• Are the wall colors dark or light or bright colors If they are light they will<br />
reflect more light or change your white balance setup.<br />
revision 143 — 275
L: Room Layout & Lighting <strong>Setup</strong> for a Capture Station with Discontinued Video Capture Hardware<br />
• Is the ceiling low or cathedral like The lower the ceiling the more light will<br />
reflect.<br />
• What types of lights are used in the room Incandescent or florescent (cool<br />
white or colored) or direct spots<br />
• Is there any direct lighting of the subject Is the room evenly illuminated<br />
Direct lighting will over expose the subject.<br />
• What is the color of reflective shields around the lights I.e. - gold reflective<br />
surface shields illuminate subject in yellow highlights.<br />
This is just a partial list of possible factors leading to poor image lighting quality.<br />
There may be other features of your site that will affect the image capture that<br />
may need to be considered.<br />
276 — revision 143
<strong>Installation</strong> & <strong>Setup</strong> <strong>User</strong> <strong>Guide</strong><br />
Appendix M:<br />
Windows Terminal Services/Citrix MetaFrame<br />
Important: To use B.A.S.I.S. Internet, you must have purchased the optional Citrix ®<br />
MetaFrame application. Please refer to the Citrix ® MetaFrame<br />
Administrator’s <strong>Guide</strong> to Installing, Setting Up, and Using this Software.<br />
Windows Terminal Services/Citrix Overview<br />
B.A.S.I.S. ET Third Edition provides support in conjunction with Citrix<br />
MetaFrame 1.8 for Windows 2000 Servers, Terminal Server Edition for<br />
complete access to configure and operate your B.A.S.I.S. system through a<br />
simple web browser interface. (Refer to the B.A.S.I.S. ET release notes.rtf for<br />
specific supported configurations.)<br />
B.A.S.I.S. Internet allows for the installation of web server software and, once<br />
the server is configured, unlimited clients (based on licensing connections) can<br />
attach to the server and run any of the B.A.S.I.S. applications. Virtually any<br />
desktop operating system that supports a web browser can run B.A.S.I.S.<br />
Internet. This includes Windows 98, Windows NT, Windows 2000, Windows<br />
XP, Windows ME, Macintosh, Unix, Solaris and Linux. B.A.S.I.S. Internet also<br />
supports mobile computing environments such as Windows CE.<br />
The basic procedure to set up the server that is used in the B.A.S.I.S. thin client<br />
architecture is:<br />
1. Install and configure Windows on the server, along with Windows Terminal<br />
Services, and Microsoft Internet Information Services (IIS). Windows<br />
Terminal Services must be configured for Application Mode with Windows<br />
2000 permissions.<br />
2. Install Citrix MetaFrame on the server.<br />
3. Install Feature Release 1 (Service Pack 2) on the server.<br />
4. Configure the Citrix web server.<br />
a. Create the virtual IIS directory.<br />
b. Install the Java client.<br />
c. Install Citrix NFuse web extensions on the server.<br />
d. Install the NFuse Web Site Wizard.<br />
e. Run the Citrix Web Site Wizard.<br />
f. Edit the appembed.htm file.<br />
5. Install B.A.S.I.S. on the server.<br />
6. Publish B.A.S.I.S. as a web application.<br />
revision 143 — 277
M: Windows Terminal Services/Citrix MetaFrame<br />
General Issues<br />
• Color Depth. The color depth that Terminal Server and Citrix MetaFrame<br />
client machines use can be configured. A setting greater than 256 colors<br />
should be used so that the B.A.S.I.S. applications and online help will be<br />
displayed correctly.<br />
Note that Terminal Server can be run without Citrix MetaFrame. Terminal<br />
Server alone cannot display more than 256 colors. When Terminal Server is<br />
run in combination with Citrix MetaFrame 1.8 Feature Release 1 (Service<br />
Pack 2) and Citrix NFuse, color depth greater than 256 colors can be<br />
displayed.<br />
• Install B.A.S.I.S. on Terminal Services machine via Add/Remove<br />
Programs. <strong>Installation</strong> programs cannot be run directly on a Terminal<br />
Services machine. Instead, they must be run via Add/Remove Programs in<br />
the Windows operating system. When the B.A.S.I.S. installation application<br />
is run from Add/Remove Programs, there may be a delay before the<br />
installation begins. The Add/Remove Programs wizard will display a<br />
message that says, “Click Next after installation”. Wait for the B.A.S.I.S.<br />
installation window to open - do not click the [Next] button in the Add/<br />
Remove Programs wizard until the B.A.S.I.S. installation has finished.<br />
Implications<br />
• <strong>User</strong> preferences saved to LOCAL_USER in the Windows registry<br />
separate for each user. In a normal Windows environment, all Windows<br />
users share the same registry setting. This differs from a Terminal Server<br />
Windows environment, where settings in the LOCAL_USER registry entry<br />
are stored separately for every Windows user.<br />
B.A.S.I.S. saves user preferences to LOCAL_USER in the Windows<br />
registry. In a Terminal Server Windows environment, there are separate<br />
sections in LOCAL_USER for each B.A.S.I.S. user id. For example:<br />
– In a normal Windows environment when SA logs on from two different<br />
Windows accounts, the saved preferences will be common/shared.<br />
– In a Terminal Server environment when SA logs on from two different<br />
Windows accounts, two sets of preferences for SA would be stored<br />
because the registry settings are separate for every Windows user.<br />
• ACS.INI is copied to the user’s home directory when using Terminal<br />
Server. Whenever an .INI file is opened by an application, if a copy of it<br />
does not already exist in the Windows subdirectory of the user’s home<br />
directory, one gets copied from the Windows directory (i.e. C:\winnt in<br />
Windows 2000 or C:\Windows in Windows XP) and placed there. From that<br />
point on, the .INI file from the Windows directory is no longer used. Instead,<br />
278 — revision 143
<strong>Installation</strong> & <strong>Setup</strong> <strong>User</strong> <strong>Guide</strong><br />
the copy from the user’s home directory is used. This means that you could<br />
end up with multiple copies of the ACS.INI file.<br />
Note that all copies might not exist on the Server. If a user’s home directory<br />
is mounted from a public server, the ACS.INI file will exist there. This is<br />
true even when you log directly into the Server.<br />
• Multiple monitoring instances will attempt to write to the activity<br />
printer and CCTV in Windows Terminal Server environment. If<br />
multiple instances of Alarm Monitoring are started on the same Windows<br />
2000 Server machine and Monitoring on that Server machine is configured<br />
to have an activity printer and/or CCTV device, then all instances of Alarm<br />
Monitoring will attempt to write to that activity printer and CCTV device.<br />
The first Alarm Monitoring instance will get access to the needed ports, and<br />
subsequent instances that startup will get errors trying to open the ports.<br />
Procedures<br />
Step 1: Installing Required Applications<br />
1. Install and configure Windows 2000 with Terminal Services on the server.<br />
Configure Windows Terminal Services for Application Mode with Windows<br />
2000 permissions.<br />
2. Configure all network protocols (TCP/IP, IPX, SPX, NetBIOS) that will be<br />
used for ICA/ALE connections in Windows.<br />
Step 2: Installing Citrix MetaFrame on the Server<br />
To install Citrix MetaFrame, refer to the “<strong>Installation</strong>” section of the Citrix<br />
MetaFrame Administrator’s <strong>Guide</strong>.<br />
revision 143 — 279
M: Windows Terminal Services/Citrix MetaFrame<br />
Step 3: Installing Feature Release 1 (Service Pack 2)<br />
When installing Feature Release 1, you must enable XML configured to an open<br />
HTTP port. To do this:<br />
1. Obtain Feature Release 1 (Service Pack 2).<br />
2. Run the installation for Feature Release 1. Use all default settings until you<br />
reach the following message:<br />
3. Click [Yes] to enable and configure the Citrix XML Service.<br />
4. Enter the number of the open HTTP port you wish to use in the TCP/IP<br />
field.<br />
5. Click [Next >] and use the default settings for the remainder of the<br />
installation.<br />
Step 4: Configuring the Citrix Web Server<br />
To configure the Citrix web server:<br />
1. Create the virtual IIS directory.<br />
2. Install the Java client.<br />
3. Install Citrix NFuse web extensions on the server.<br />
4. Install the NFuse Web Site Wizard.<br />
5. Run the Citrix Web Site Wizard.<br />
6. Edit the appembed.htm file.<br />
280 — revision 143
<strong>Installation</strong> & <strong>Setup</strong> <strong>User</strong> <strong>Guide</strong><br />
Creating the Virtual IIS Directory<br />
Note:<br />
All references to C in this procedure refer to the drive that your operating<br />
system is installed on.<br />
1. Make sure that Windows Terminal Services, Citrix MetaFrame, B.A.S.I.S.,<br />
Java Virtual Machine, and Microsoft Internet Information Services (IIS) are<br />
installed on the server.<br />
2. Create a directory named C:\InetPub\Citrix.<br />
3. Click the Windows Start button, then select Programs > Administrative<br />
Tools > Internet Services Manager.<br />
4. Expand your server name and highlight Default Web Site.<br />
5. From the Action menu, select New >Virtual Directory. A wizard will start.<br />
Use the default settings, with the following exceptions:<br />
• For Alias type Citrix.<br />
• For Directory, browse and select C:\InetPub\Citrix.<br />
• For access permissions, select Read, Run scripts, and Browse.<br />
revision 143 — 281
M: Windows Terminal Services/Citrix MetaFrame<br />
Installing the Java Client<br />
1. Click the Windows Start button, then select Programs > <strong>Access</strong>ories ><br />
Command Prompt.<br />
2. At the drive prompt, type<br />
md c:\inetpub\wwwroot\nfuseclients\en\icajava\ie<br />
and press .<br />
3. Exit the command prompt.<br />
4. Copy setup.class (Java JDK client) to the newly created directory.<br />
5. From the command prompt in the<br />
C:\inetpub\wwwroot\nfuseclients\en\icajava\ie directory, run the Java<br />
virtual machine executable to extract setup.class (i.e. jview.exe setup.class).<br />
(The actual command may vary depending on what Java virtual machine you<br />
have installed.)<br />
6. When the Java virtual machine executes, a wizard will be displayed. Use the<br />
default settings. On the “Choose Destination Directory” window of the<br />
wizard, select the C:\inetpub\wwwroot\nfuseclients\en\icajava\ie<br />
directory.<br />
282 — revision 143
<strong>Installation</strong> & <strong>Setup</strong> <strong>User</strong> <strong>Guide</strong><br />
Installing Citrix NFuse Web Extensions<br />
1. From the Citrix NFuse CD, run NFuseWebExt-IIS.exe.<br />
2. On the Welcome window, click [Next >].<br />
3. When prompted to stop IIS, click [Yes].<br />
4. In the Software License Agreement window, click [Yes] to accept the terms<br />
of the license.<br />
5. On the Choose Destination Location window, use the default Destination<br />
Folder and click [Next].<br />
6. On the <strong>Setup</strong> Type window, use the default setting and click [Next >].<br />
revision 143 — 283
M: Windows Terminal Services/Citrix MetaFrame<br />
7. On the Connecting to a Citrix Server window:<br />
a. In the Name field, enter your Citrix server name.<br />
b. In the Port field, specify the port you entered for the XML service<br />
during the Feature Release 1 installation.<br />
c. Click [Next >].<br />
8. Verify that the Destination Folder is correct and click [Next >].<br />
9. When asked to copy clients, click [No].<br />
10. On the Start Copying Files window, click [Next >].<br />
284 — revision 143
<strong>Installation</strong> & <strong>Setup</strong> <strong>User</strong> <strong>Guide</strong><br />
11. On the <strong>Setup</strong> Complete window, click [Finish].<br />
revision 143 — 285
M: Windows Terminal Services/Citrix MetaFrame<br />
Installing the NFuse Web Site Wizard<br />
1. On the NFuse CD, run NFuseWizard.exe.<br />
2. On the Welcome window, click [Next >].<br />
3. In the Software License Agreement window, click [Yes].<br />
4. In the Choose Destination Location window, use the default Destination<br />
Folder and click [Next >].<br />
5. In the Select Program Folder window, use the default settings and click<br />
[Next >].<br />
286 — revision 143
<strong>Installation</strong> & <strong>Setup</strong> <strong>User</strong> <strong>Guide</strong><br />
6. In the Start Copying Files window, click [Next >].<br />
7. In the <strong>Setup</strong> Complete window, click [Finish].<br />
revision 143 — 287
M: Windows Terminal Services/Citrix MetaFrame<br />
Running the Citrix Web Site Wizard<br />
1. Click the Windows Start button, then select Programs > Citrix > NFuse ><br />
Web Site Wizard.<br />
2. On Page 1 of the Citrix Web Site Wizard, click [Next >].<br />
3. On Page 2 of the Citrix Web Site Wizard, click [Next >].<br />
4. On Page 3 of the Citrix Web Site Wizard, select the Web Site Scheme you<br />
wish to use and click [Next >].<br />
288 — revision 143
<strong>Installation</strong> & <strong>Setup</strong> <strong>User</strong> <strong>Guide</strong><br />
5. On Page 4 of the Citrix Web Site Wizard, use the default settings and click<br />
[Next >].<br />
6. On Page 5 of the Citrix Web Site Wizard:<br />
• Select the Embedded in a Web Page option.<br />
• Select the Java Applet option.<br />
• Deselect the Enable Ticketing checkbox.<br />
• Click [Next >].<br />
revision 143 — 289
M: Windows Terminal Services/Citrix MetaFrame<br />
7. At the wizard warning, click [OK].<br />
8. On Page 6 of the Citrix Web Site Wizard:<br />
• Select the Show Details option in addition the default settings that are<br />
selected.<br />
• Click [Next >].<br />
9. On Page 7 of the Citrix Web Site Wizard, use the default settings and click<br />
[Next >].<br />
290 — revision 143
<strong>Installation</strong> & <strong>Setup</strong> <strong>User</strong> <strong>Guide</strong><br />
10. On Page 8 of the Citrix Web Site Wizard:<br />
• Click [Browse…] and navigate to the C:\Inetpub\Citrix directory.<br />
• Click [OK]<br />
• Click [Finish].<br />
revision 143 — 291
M: Windows Terminal Services/Citrix MetaFrame<br />
Edit the Appembed.htm and Template.ica File<br />
1. Click the Windows Start button, then select Programs > <strong>Access</strong>ories ><br />
Notepad.<br />
2. Select the File > Open menu option.<br />
3. Navigate to the appembed.htm file in C:\Inetpub\Citrix and open it.<br />
4. Change the following values:<br />
• Set width to 1024.<br />
• Set height to 768.<br />
• Set the usehostname value to on.<br />
292 — revision 143
<strong>Installation</strong> & <strong>Setup</strong> <strong>User</strong> <strong>Guide</strong><br />
5. Save the file.<br />
6. Navigate to the template.ica file in C:\Inetpub\Citrix and open it.<br />
7. Comment out the ClientName with a semicolon (;) as shown.<br />
8. Save the file and exit Notepad.<br />
Step 5: Installing B.A.S.I.S. on the Server<br />
For more information, refer to Chapter 3: Installing B.A.S.I.S. ET Third Edition<br />
on page 41.<br />
revision 143 — 293
M: Windows Terminal Services/Citrix MetaFrame<br />
Step 6: Publishing B.A.S.I.S. as a Web Application<br />
Note:<br />
All references to C in this procedure refer to the drive that your operating<br />
system is installed on. Each B.A.S.I.S. application must be published<br />
separately.<br />
1. Click the Windows Start button, then select Programs > MetaFrame Tools<br />
> Published Application Manager.<br />
2. Click the “New Published Application” toolbar button.<br />
3. On the Enter Application Name window:<br />
• In the Application Name field, type the name of the B.A.S.I.S.<br />
application you are publishing.<br />
• In the Detailed Description field, type a description for the B.A.S.I.S.<br />
application you are publishing.<br />
• Click [Next >].<br />
4. On the Choose Application Type window, make sure the Explicit radio<br />
button is selected and click [Next >].<br />
5. On the Define the Application window:<br />
294 — revision 143
<strong>Installation</strong> & <strong>Setup</strong> <strong>User</strong> <strong>Guide</strong><br />
a. Click [Browse..].<br />
b. Navigate to the B.A.S.I.S. installation directory.<br />
c. Double-click or click [Open] to select the file.<br />
d. Click [Next >].<br />
6. On the Specify Window Properties window, accept the default settings and<br />
click [Next >].<br />
7. On the Specify Neighborhood Client Settings window:<br />
• In the Window Size dropdown listbox, select “1024x768.”<br />
• In the Window Colors dropdown listbox, select “High Color (16 bit).”<br />
• Click [Next >].<br />
revision 143 — 295
M: Windows Terminal Services/Citrix MetaFrame<br />
8. In the Specify Neighborhood Administration Features window, use the<br />
default settings and click [Next >].<br />
9. In the Configure Accounts window:<br />
a. From the Available list, select the user group you want to be able to run<br />
the application you are publishing.<br />
b. Click [Add].<br />
c. Repeat steps a and b for each desired user group.<br />
d. Click [Next >].<br />
296 — revision 143
<strong>Installation</strong> & <strong>Setup</strong> <strong>User</strong> <strong>Guide</strong><br />
10. On the Add the Application to Citrix Servers window, use the default<br />
settings and click [Next >].<br />
11. On the Finish Adding the Application window, click [Finish].<br />
Is it Working<br />
12. Repeat steps 1 through 11 for each B.A.S.I.S. application you want to<br />
publish.<br />
This web server virtual directory should now be able to be accessed through the<br />
local area intranet by typing “http://server-name/virtual-directory-name/” in<br />
your web browser address bar. If you followed the instructions above, the virtualdirectory-name<br />
is “Citrix”.<br />
revision 143 — 297
M: Windows Terminal Services/Citrix MetaFrame<br />
Installing B.A.S.I.S. Via a Terminal Services Client<br />
Window<br />
B.A.S.I.S. can be installed via a Terminal Services client window. To do this:<br />
1. Share the CD-ROM drive.<br />
2. Map the local CD-ROM drive on the server.<br />
3. From inside Add/Remove Programs, select the B.A.S.I.S. installation<br />
program, which is setup.exe on the root of the B.A.S.I.S. CD.<br />
4. There may be a delay before the B.A.S.I.S. installation begins. The Add/<br />
Remove Programs wizard will display a message that says, “Click Next after<br />
installation”. Wait for the B.A.S.I.S. installation window to open - do not<br />
click the [Next] button in the Add/Remove Programs wizard until the<br />
B.A.S.I.S. installation has finished.<br />
298 — revision 143
<strong>Installation</strong> & <strong>Setup</strong> <strong>User</strong> <strong>Guide</strong><br />
Appendix N:<br />
Encryption<br />
Encryption Overview<br />
Encryption is the translation of data into secret code. The purpose of encryption<br />
is to achieve data security. Data sent to and from the B.A.S.I.S. database can be<br />
encrypted using either of two methods:<br />
• Windows Internet Protocol Security (IPSec), a part of Microsoft Windows<br />
2000 Server/Professional<br />
• IRE SafeNet/Speed<br />
Windows 2000 IP Security is based on IPSec (Internet Protocol Security), a set of<br />
protocols being developed by the IETF (Internet Engineering Task Force) to<br />
support application-transparent exchange of packets at the IP layer. IPSec<br />
supports two encryption modes: transport and tunnel. Using IPSec transport<br />
mode, end-to-end security from client-to-server, server-to-server, and client-toclient<br />
can be accomplished. Using L2TP (Layer Two Tunneling Protocol)<br />
secured by IPSec, secure remote access from client-to-gateway over the Internet<br />
can be accomplished. Refer to the IPSec end-to-end walkthrough document in the<br />
Windows 2000 Resource Kit to set up Windows 2000 IP Security for use with<br />
the B.A.S.I.S. system.<br />
IRE SafeNet/Speed is a hardware device that encrypts data passing from one<br />
network to another. SafeNet/Speed automatically encrypts user data with the<br />
Triple-Data Encryption Standard (Triple-DES) for public key encryption.<br />
The encryption that occurs with the B.A.S.I.S. system can be broken down into<br />
two main segments: peer-to-peer and peer-to-panel. Peer-to-peer encryption<br />
occurs between the workstation that is within the secured area and the server that<br />
is outside the secured area. Peer-to-panel encryption occurs between the<br />
workstation within the secured area and the panel via the IRE SafeNet/Speed<br />
box.<br />
A key is a number or set of characters that an algorithm uses to encrypt or decrypt<br />
data. The peer-to-peer and peer-to-panel encryption segments use different keys.<br />
In this document, the key that peer-to-panel encryption uses is referred to as key<br />
A, and the key that peer-to-peer encryption uses is referred to as key B. Key A is<br />
only used within the secured area, while key B is used when encrypted data is<br />
sent between the workstation in the secured area and the server that is outside the<br />
secured area.<br />
revision 143 — 299
N: Encryption<br />
The steps to configure encryption for use with B.A.S.I.S. are:<br />
1. <strong>Setup</strong> and configure the hardware<br />
2. Configure the SafeNet/Speed box<br />
3. Install SafeNet/Soft-PK on the server and client<br />
4. Configure SafeNet/Soft-PK peer-to-peer encryption on the server<br />
5. Configure SafeNet/Soft-PK peer-to-peer encryption on the workstation<br />
6. Configure SafeNet/Soft-PK peer-to-panel encryption on the workstation<br />
The following diagram illustrates the hardware set up needed to use encryption<br />
with B.A.S.I.S.:<br />
300 — revision 143
<strong>Installation</strong> & <strong>Setup</strong> <strong>User</strong> <strong>Guide</strong><br />
The following diagram illustrates how ID information is sent from the panel to<br />
the server when encryption is being used with B.A.S.I.S.:<br />
The numbers below correlate to the numbers in the diagram above, which<br />
describes the path taken when a card is swiped.<br />
1. ID information from the card swiped at the panel goes to the LANtronix<br />
box, where it is encrypted using key A.<br />
2. Encrypted ID information is sent from the LANtronix box to the Secure<br />
Port on the IRE SafeNet/Speed box.<br />
3. Encrypted ID information is sent from the Unsecure port on the IRE<br />
SafeNet/Speed box to the network, without communicating to an enddecryption<br />
device.<br />
4. Encrypted ID information is sent from the network to the workstation that<br />
is in the secured area.<br />
5. At the workstation, the ID information that was encrypted using key A is<br />
decrypted, then encrypted using key B and sent to the network.<br />
6. Encrypted ID information is sent from the network to the server, where it is<br />
decrypted using key B and stored in the database.<br />
revision 143 — 301
N: Encryption<br />
In the previous diagram, peer-to-panel encryption occurs between 1 through 4<br />
and peer-to-peer encryption occurs between 5 and 6.<br />
Setting Up Encryption for Use with B.A.S.I.S.<br />
Step 1: Initial Hardware Configuration<br />
1. Connect the server and workstation to the network.<br />
2. Create a static IP address for the workstation accessing the panel. The static<br />
IP address should be outside the designated range of other workstation IP<br />
addresses. To add a static IP address on a Windows 2000 machine:<br />
a. Right-click on the My Network Places icon and select ‘Properties’<br />
from the menu.<br />
b. Right-click ‘Local Area Connection’ and select ‘Properties’ from the<br />
menu.<br />
c. Highlight ‘Internet Protocol (TCP/IP)’.<br />
d. Click [Properties].<br />
e. Select the Use the following IP address option and enter the IP<br />
Address, subnet mask, and default gateway.<br />
f. In Use the following DNS Server address, enter the preferred DNS<br />
server and alternate DNS server.<br />
g. Click [OK].<br />
h. Click [OK].<br />
3. Install B.A.S.I.S. on the server and workstation.<br />
4. Connect the panel to the LANtronix box. (For more information please refer<br />
to the Hardware <strong>User</strong> <strong>Guide</strong>.)<br />
5. Connect the SafeNet/Speed box to the workstation by doing the following:<br />
a. Connect the RJ-12 end of the C-18 cable into the port labeled CONFIG<br />
on the SafeNet/Speed box.<br />
b. Connect the serial end of the C-18 cable into a COM port on the<br />
workstation.<br />
c. Connect the power source to the SafeNet/Speed box.<br />
6. Connect a crossover cable between the LANtronix box and the port labeled<br />
SECURE on the SafeNet/Speed box.<br />
7. Connect an ethernet cable between the network and the port labeled<br />
UNSECURE on the SafeNet/Speed box.<br />
Step 2: Configuring the SafeNet/Speed Box<br />
To configure the SafeNet/Speed box, you must communicate with the SafeNet/<br />
Speed box using a terminal emulation program (such as HyperTerminal) with the<br />
following settings:<br />
302 — revision 143
<strong>Installation</strong> & <strong>Setup</strong> <strong>User</strong> <strong>Guide</strong><br />
• Direct connection to the COM port<br />
• 38400 bits per second (bps)<br />
• 8 data bits<br />
• NO parity<br />
• 1 stop bit<br />
• NO flow control<br />
To do this using HyperTerminal:<br />
1. Click the Windows Start button, then select Programs > <strong>Access</strong>ories ><br />
Communications > HyperTerminal.<br />
2. Type SafeNet Speed as the Name of the connection.<br />
3. Select an icon to represent the connection, then click [OK].<br />
4. In the Connect Using dropdown listbox, select the COM port of the<br />
workstation that the SafeNet Speed box is connected to, then click [OK].<br />
• In the Bits per second field, select ‘38400’.<br />
• In the Data bits field, select ‘8’.<br />
• In the Parity field, select ‘None’.<br />
• In the Stop bits field, select ‘1’.<br />
• In the Flow Control field, select ‘None’.<br />
5. Close HyperTerminal.<br />
• When prompted, click [Yes] to disconnect the session.<br />
• When prompted, click [Yes] to save the session.<br />
6. Reopen the session by clicking the Windows Start button, then selecting<br />
Programs > <strong>Access</strong>ories > Communications > HyperTerminal > SafeNet<br />
Speed session.<br />
7. Press , and information will appear in the window.<br />
8. Press and then press to enter the Configuration menu.<br />
9. Type IRE as the initial password and press .<br />
10. Press to create a new password.<br />
11. Enter the new password and press .<br />
12. Enter the new password again and press .<br />
13. For each item, enter the following value if not already selected:<br />
Item<br />
Encryptor operating mode<br />
Encryptor type<br />
IP processing mode<br />
Non-IP processing mode<br />
Level 2 bridging<br />
Value<br />
Public Key<br />
Host encryptor<br />
FILTER<br />
BYPASS<br />
DISABLED<br />
revision 143 — 303
N: Encryption<br />
Item<br />
Value<br />
MID window size 64<br />
IP address tunneling<br />
NOT REQUIRED<br />
14. Press and then press to enter the Network configuration menu.<br />
15. For each item, enter the following value if not already selected:<br />
Item<br />
Local encryptor IP address<br />
Local host IP address<br />
Router IP address<br />
Subnet mask<br />
Value<br />
Your SafeNet/Speed user-defined IP address<br />
Your LANtronix box user-defined IP address<br />
Your Host computer user-defined IP address<br />
Your Host network user-defined subnet mask<br />
16. Press to exit the Network configuration menu.<br />
17. Press to enter the Public Key configuration menu.<br />
18. For each item, enter the following value if not already selected:<br />
Item<br />
Identification Type<br />
Value<br />
IP V4 Address<br />
Retransmission Interval 12<br />
Retry Count 2<br />
ISAKMP Notification<br />
ISAKMP Perfect Forward Secrecy<br />
SSC Authorization<br />
ENABLED<br />
DISABLED<br />
DISABLED<br />
19. Press to enter the Oakley (Phase 1) Preferences menu.<br />
20. For each item, enter the following value if not already selected:<br />
Item<br />
Oakley Hash Algorithm<br />
Oakley Encryption Algorithm<br />
Oakley Authentication Algorithm<br />
Preshared Key<br />
Oakley Group Description<br />
Value<br />
SHA MD5<br />
DES CBC Triple-DES<br />
PRE<br />
Create a unique 8-character preshared key (key A).<br />
1 2 IRE<br />
Phase 1 SA Lifetime - Seconds 28800<br />
Phase 1 SA Lifetime - KBytes<br />
DISABLED<br />
304 — revision 143
<strong>Installation</strong> & <strong>Setup</strong> <strong>User</strong> <strong>Guide</strong><br />
21. Press to exit the Oakley (Phase 1) Preferences configuration menu.<br />
22. Press to enter the IPSec (Phase 2) Preferences menu.<br />
23. For each item, enter the following value if not already selected:<br />
Item<br />
AH Transform<br />
ESP Transform<br />
HMAC Transform<br />
Value<br />
SHA MD5<br />
DES Triple-DES<br />
DES SHA MD5<br />
Phase 2 Lifetime - Seconds 28800<br />
Phase 2 Lifetime - KBytes<br />
AH Protocol Negotiation<br />
ESP Protocol Negotiation<br />
Replay Protection<br />
DISABLED<br />
DISABLED<br />
REQUIRED<br />
ENABLED<br />
24. Press to exit the IPSec (Phase 2) Preferences menu.<br />
25. Press to exit the Public Key menu.<br />
26. Press to exit the Configuration menu.<br />
27. The SafeNet/Speed box is now configured to work with the network.<br />
revision 143 — 305
N: Encryption<br />
Step 3: Installing SafeNet/Soft-PK on the Server and<br />
Client<br />
Note:<br />
It does not matter whether you install SafeNet/Soft-PK on the server or the<br />
client first, but it must be installed on both machines.<br />
1. On the server, insert the SafeNet/Soft-PK CD into the CD-ROM drive and<br />
run the <strong>Setup</strong>.exe file.<br />
2. The InstallShield Wizard for SafeNet/Soft-PK opens. Click [Next].<br />
3. The wizard continues, and the License Agreement window is displayed. If<br />
you agree to the terms, click [Yes].<br />
4. The wizard continues, and the <strong>Setup</strong> Type window is displayed. Select the<br />
Typical option and click [Next].<br />
306 — revision 143
<strong>Installation</strong> & <strong>Setup</strong> <strong>User</strong> <strong>Guide</strong><br />
5. A dialog box opens. Since Windows 2000 provides a native L2T2<br />
component, the SafeNet VPN Adapter does not need to be installed. Click<br />
revision 143 — 307
N: Encryption<br />
[OK] to acknowledge that the SafeNet L2T2 Component will not be<br />
installed.<br />
6. The wizard continues, and the Select Components window is displayed.<br />
Make sure the SafeNet IPSec Component checkbox is selected and click<br />
[Next].<br />
7. The wizard continues, and the Start Copying Files window is displayed.<br />
Click [Next].<br />
8. Select the Yes, I want to restart my computer now option and click<br />
[Finish].<br />
9. Repeat the installation on the workstation.<br />
308 — revision 143
<strong>Installation</strong> & <strong>Setup</strong> <strong>User</strong> <strong>Guide</strong><br />
Step 4: Configuring SafeNet/Soft-PK Peer-to-Peer<br />
Encryption on the Server<br />
1. Click the Windows Start button, then select Programs > SafeNet Soft-PK ><br />
Security Policy Editor.<br />
2. Click the Add a new connection toolbar icon.<br />
3. Name the connection ‘Panel Workstation 001’.<br />
4. With Panel Workstation 001 highlighted:<br />
a. Make sure the following options are selected:<br />
• Secure<br />
• Protocol dropdown set to ‘All’<br />
• ID Type dropdown listbox set to ‘IP Address’<br />
b. Enter the static IP address of the workstation.<br />
5. Expand Panel Workstation 001. With ‘My Identity’ highlighted:<br />
a. Make sure the following options are selected:<br />
• ‘IP Address’ in the ID Type dropdown listbox<br />
• ‘None’ in the Select Certificate dropdown listbox<br />
revision 143 — 309
N: Encryption<br />
• ‘Any’ in the Name dropdown listbox<br />
b. Click [Pre-Shared Key].<br />
6. Click [Enter Key].<br />
7. Enter at least 8 characters for the key, then click [OK].<br />
310 — revision 143
<strong>Installation</strong> & <strong>Setup</strong> <strong>User</strong> <strong>Guide</strong><br />
Note:<br />
This preshared key: (key B) should be different than the preshared key<br />
entered in step 20 of Step 2: Configuring the SafeNet/Speed Box (key A) on<br />
page 304.<br />
8. With Panel Workstation 001 expanded and ‘Security Policy’ highlighted:<br />
a. Select the Main Mode option.<br />
b. Select the Enable Replay Detection checkbox.<br />
9. With Panel Workstation 001 expanded and ‘Proposal 1’ beneath<br />
‘Authentication (Phase 1)’ highlighted:<br />
a. Make sure the following are selected:<br />
• ‘Pre-Shared Key’ in the Authentication Method dropdown listbox<br />
• ‘SHA-1’ in the Hash Alg dropdown listbox<br />
• ‘Unspecified’ in the SA Life dropdown listbox<br />
• ‘Diffie-Hellman Group 1’ in the Key Group dropdown listbox<br />
b. In the Encrypt Alg dropdown listbox, select ‘Triple DES’.<br />
revision 143 — 311
N: Encryption<br />
10. With Panel Workstation 001 expanded and ‘Proposal 1’ beneath ‘Key<br />
Exchange (Phase 2)’ highlighted:<br />
a. Make sure the following are selected:<br />
• ‘Unspecified’ in the SA Life dropdown listbox<br />
• ‘None’ in the Compression dropdown listbox<br />
• The Encapsulation Protocol (ESP) checkbox<br />
• ‘SHA-1’ in the Hash Alg dropdown listbox<br />
• ‘Tunnel’ in the Encapsulation dropdown listbox<br />
b. In the Encrypt Alg dropdown listbox, select ‘Triple DES’.<br />
11. Click the ‘Save’ toolbar button.<br />
Step 5: Configuring SafeNet/Soft-PK Peer-to-Peer<br />
Encryption on the Workstation<br />
To configure SafeNet/Soft-PK peer-to-peer encryption on the workstation, follow<br />
the same process as was previously described in Step 4: Configuring SafeNet/<br />
312 — revision 143
<strong>Installation</strong> & <strong>Setup</strong> <strong>User</strong> <strong>Guide</strong><br />
Soft-PK Peer-to-Peer Encryption on the Server on page 309, with minor<br />
modifications:<br />
1. Click the Windows Start button, then select Programs > SafeNet Soft-PK ><br />
Security Policy Editor.<br />
2. Click the Add a new connection toolbar icon.<br />
3. Name the connection ‘Server 001’.<br />
4. With Server 001 highlighted:<br />
a. Make sure the following options are selected:<br />
revision 143 — 313
N: Encryption<br />
Secure<br />
• Protocol dropdown set to ‘All’<br />
• ID Type dropdown listbox set to ‘IP Address’<br />
b. Enter the static IP address of the workstation.<br />
5. Expand Server 001. With ‘My Identity’ highlighted:<br />
a. Make sure the following options are selected:<br />
• ‘IP Address’ in the ID Type dropdown listbox<br />
• ‘None’ in the Select Certificate dropdown listbox<br />
• ‘Any’ in the Name dropdown listbox<br />
b. Click [Pre-Shared Key].<br />
6. Click [Enter Key].<br />
7. Enter the same key (key B) that was entered on the server in step 7 of Step 4:<br />
Configuring SafeNet/Soft-PK Peer-to-Peer Encryption on the Server on<br />
page 310, then click [OK].<br />
8. With Server 001 expanded and ‘Security Policy’ highlighted, make sure<br />
that:<br />
• The Main Mode option is selected.<br />
• The Enable Replay Detection checkbox is selected.<br />
9. With Server 001 expanded and ‘Proposal 1’ beneath ‘Authentication (Phase<br />
1)’ highlighted:<br />
a. Make sure that the following are selected:<br />
• ‘Pre-Shared Key’ in the Authentication Method dropdown listbox<br />
• ‘SHA-1’ in the Hash Alg dropdown listbox<br />
• ‘Unspecified’ in the SA Life dropdown listbox<br />
• ‘Diffie-Hellman Group 1’ in the Key Group dropdown listbox<br />
b. In the Encrypt Alg dropdown listbox, select ‘Triple DES’.<br />
10. With Server 001 expanded and ‘Proposal 1’ beneath ‘Key Exchange (Phase<br />
2)’ highlighted:<br />
a. Make sure that the following are selected:<br />
314 — revision 143
<strong>Installation</strong> & <strong>Setup</strong> <strong>User</strong> <strong>Guide</strong><br />
• ‘Unspecified’ in the SA Life dropdown listbox<br />
• ‘None’ in the Compression dropdown listbox<br />
• The Encapsulation Protocol (ESP) checkbox<br />
• ‘SHA-1’ in the Hash Alg dropdown listbox<br />
• ‘Tunnel’ in the Encapsulation dropdown listbox<br />
b. In the Encrypt Alg dropdown listbox, select ‘Triple DES’.<br />
11. Click the ‘Save’ toolbar button.<br />
Step 6: Configuring SafeNet/Soft-PK Peer-to-Panel<br />
Encryption on the Workstation<br />
To configure SafeNet/Soft-PK peer-to-panel encryption on the workstation,<br />
follow the same process as was previously described in Step 4: Configuring<br />
SafeNet/Soft-PK Peer-to-Peer Encryption on the Server on page 309, with minor<br />
modifications:<br />
1. Click the Windows Start button, then select Programs > SafeNet Soft-PK ><br />
Security Policy Editor.<br />
2. Select a root item in the tree (i.e. Server 001).<br />
3. Click the Add a new connection toolbar icon.<br />
4. Name the connection ‘LANtronix Panel 001’.<br />
5. With LANtronix Panel 001 highlighted:<br />
a. Make sure the following options are selected:<br />
revision 143 — 315
N: Encryption<br />
Secure<br />
• ‘All’ in the Protocol dropdown<br />
• ‘IP Address’ in the first ID Type dropdown listbox<br />
• The Connect Using Secure Gateway Tunnel option<br />
• ‘IP Address’ in the second ID Type dropdown listbox<br />
b. Enter the static IP address of the LANtronix box in the first IP Address<br />
field.<br />
c. Enter the static IP address of the SafeNet/Speed box in the second IP<br />
Address field.<br />
6. Expand LANtronix Panel 001. With ‘My Identity’ highlighted:<br />
a. Make sure the following options are selected:<br />
• ‘IP Address’ in the ID Type dropdown listbox<br />
• ‘None’ in the Select Certificate dropdown listbox<br />
• ‘Any’ in the Name dropdown listbox<br />
b. Click [Pre-Shared Key].<br />
7. Click [Enter Key].<br />
8. Enter the same key (key A) that was entered on the SafeNet/Speed box in<br />
step 20 of Step 2: Configuring the SafeNet/Speed Box on page 304, then<br />
click [OK].<br />
9. With LANtronix Panel 001 expanded and ‘Security Policy’ highlighted:<br />
a. Select the Main Mode option.<br />
b. Select the Enable Replay Detection checkbox.<br />
10. With LANtronix Panel 001 expanded and ‘Proposal 1’ beneath<br />
‘Authentication (Phase 1)’ highlighted:<br />
a. Make sure that the following are selected:<br />
• ‘Pre-Shared Key’ in the Authentication Method dropdown listbox<br />
• ‘SHA-1’ in the Hash Alg dropdown listbox<br />
• ‘Diffie-Hellman Group 1’ in the Key Group dropdown listbox<br />
b. In the Encrypt Alg dropdown listbox, select ‘Triple DES’.<br />
316 — revision 143
<strong>Installation</strong> & <strong>Setup</strong> <strong>User</strong> <strong>Guide</strong><br />
c. In the SA Life dropdown listbox, select ‘Seconds’.<br />
d. Enter ‘28800’ in the Seconds field.<br />
11. With LANtronix Panel 001 expanded and ‘Proposal 1’ beneath ‘Key<br />
Exchange (Phase 2)’ highlighted:<br />
a. In the SA Life dropdown listbox, select ‘Seconds’.<br />
b. Enter ‘28800’ in the Seconds field.<br />
c. In the Compression dropdown listbox, select ‘None’.<br />
d. Select the Encapsulation Protocol (ESP) checkbox.<br />
e. In the Encrypt Alg dropdown listbox, select ‘Triple DES’.<br />
f. In the Hash Alg dropdown listbox, select ‘SHA-1’.<br />
g. In the Encapsulation dropdown listbox, select ‘Tunnel’.<br />
12. Click the ‘Save’ toolbar button.<br />
revision 143 — 317
N: Encryption<br />
318 — revision 143
<strong>Installation</strong> & <strong>Setup</strong> <strong>User</strong> <strong>Guide</strong><br />
Appendix O:<br />
Ports Used by B.A.S.I.S.<br />
Note:<br />
All of the following ports use the TCP protocol.<br />
Port Function B.A.S.I.S. version Where port can be changed<br />
80 Web server Only used with<br />
B.A.S.I.S. 5.7 and 5.8<br />
builds prior to 5.8.310<br />
1433 Default port for<br />
SQL Server<br />
1521 Default port for<br />
Oracle<br />
2000 Digital Video -<br />
live video<br />
streams<br />
3001 Lantronix<br />
connected<br />
controllers<br />
4001 Communications<br />
Server RPC<br />
4002 Global Output<br />
Server RPC<br />
4003 Login Driver<br />
RPC<br />
4004 Communications<br />
Server Socket<br />
(event reporting)<br />
4005 Linkage Server<br />
RPC<br />
4006 Video Server<br />
RPC<br />
B.A.S.I.S. 5.7 and<br />
newer<br />
B.A.S.I.S. 5.0 and<br />
newer<br />
All B.A.S.I.S. versions<br />
B.A.S.I.S. 5.0 and<br />
newer<br />
B.A.S.I.S. 5.0 and<br />
newer<br />
All B.A.S.I.S. versions<br />
B.A.S.I.S. 5.7 and<br />
newer<br />
B.A.S.I.S. 5.7 and<br />
newer<br />
Check SQL Server configuration/ documentation; this can<br />
be changed in SQL configuration<br />
Check Oracle configuration/documentation; this can be<br />
changed in Oracle configuration<br />
To change, update Registry Setting on Video Recorder<br />
HKEY_CLASSES_ROOT\Spider\Resources\Spider\TC<br />
PSHAREPARAM<br />
Used to communicate with all LAN controllers (BEST,<br />
Matrix Switchers, all others); this cannot be changed<br />
Can be changed in ACS.INI [Service] section<br />
DriverRpcPort *<br />
Can be changed in ACS.INI [Service] section GosRpcPort<br />
*<br />
Can be changed in ACS.INI [Service] section<br />
LoginRpcPort *<br />
Can be changed in ACS.INI [Service] section<br />
DriverSocketPort *<br />
Can be changed in ACS.INI [Service] section<br />
LinkageServerRpcPort *<br />
Can be changed in ACS.INI [Service] section<br />
VideoServerRpcPort *<br />
4007-<br />
4057<br />
Alarm<br />
Monitoring RPC<br />
B.A.S.I.S. 5.9 and<br />
newer<br />
Used for Guard Tour only. One port used per Monitoring<br />
instance on a given machine (typically 4007)<br />
Can be changed in ACS.INI [Service] section<br />
AcsmntrRpcMinPort, AcsmntrRpcMaxPort **<br />
4059 Replicator B.A.S.I.S. 5.9 and<br />
newer<br />
4060 Replicator B.A.S.I.S. 5.9 and<br />
newer<br />
Can be changed in ACS.INI [Service] section<br />
ReplicatorSocketPort *<br />
Can be changed in ACS.INI [Service] section<br />
ReplicatorRpcPort *<br />
revision 143 — 319
O: Ports Used by B.A.S.I.S.<br />
Port Function B.A.S.I.S. version Where port can be changed<br />
4061 DataExchange B.A.S.I.S. 5.9 and<br />
newer<br />
4062 DataExchange B.A.S.I.S. 5.9 and<br />
newer<br />
8189 License Server B.A.S.I.S. 5.7 or<br />
newer<br />
Can be changed in ACS.INI [Service] section<br />
DESocketPort *<br />
Can be changed in ACS.INI [Service] section DERpcPort *<br />
To change the License Server port:<br />
1. The value for the Port key in the [License Server]<br />
section of the ACS.INI file must be changed on every<br />
B.A.S.I.S. machine. The default is:<br />
[License Server]<br />
Port=8189<br />
2. The following must be added to the<br />
LicenseServerConfig\Server.properties file (file<br />
content is case-sensitive!):<br />
Port=8189 where '8189' is replaced by the desired port<br />
number.<br />
(This line is not present by default. The whole file is<br />
not present by default; it is created when the admin<br />
username or password is changed.)<br />
8190 Web Utility<br />
Server<br />
9999 License<br />
Administration<br />
Only used with 5.7 and<br />
5.8 builds prior to<br />
5.8.310<br />
B.A.S.I.S. 5.7 and<br />
newer<br />
To change the License Administration port, the following<br />
must be added to the<br />
LicenseServerConfig\Server.properties file (file content<br />
is case sensitive!):<br />
AdminPort=9999 where '9999' is replaced by the desired<br />
port number.<br />
(This line is not present by default. The whole file is not<br />
present by default; it is created when the admin username or<br />
password is changed.)<br />
Note:<br />
The License Administration shortcut installed by<br />
B.A.S.I.S. can’t be used if the License<br />
Administration port has been changed. To access<br />
the License Administration after the port has been<br />
changed, simply point the browser to http://<br />
licenseserver:9999 (where ‘licenseserver’ is the<br />
name of the machine running Licenser Server and<br />
‘9999’ is the port number for License<br />
Administration).<br />
* To change these ports, the ACS.INI settings must be changed on all machines<br />
(server and clients).<br />
** To change these ports for a given monitoring station, the ACS.INI settings<br />
only need to be changed on that machine.<br />
320 — revision 143
<strong>Installation</strong> & <strong>Setup</strong> <strong>User</strong> <strong>Guide</strong><br />
Recorded Digital Video Ports<br />
Recorded digital video uses DCOM to stream video, which is controlled by<br />
Microsoft using a “find any free port” method. This can be modified using the<br />
DCOMconfig utility to specify the ports that DCOM can use. The following<br />
steps can be followed, but please refer to the Microsoft DCOM documentation<br />
for complete and updated information.<br />
To modify the ports used for recorded video playback, a change must be made in<br />
the DCOMcnfg utility included as part of the Windows operating system.<br />
1. Run the DCOMcnfg utility by typing in “dcomcnfg” from the Run<br />
command on the Start menu.<br />
2. Select the “Default Protocols” tab, which will list all of the protocols DCOM<br />
will use for communication over the network.<br />
3. Modify the ports used by the selecting “Properties” for the “Connectionoriented<br />
TCP/IP” protocol and enter in the list of ports that can be used.<br />
revision 143 — 321
O: Ports Used by B.A.S.I.S.<br />
322 — revision 143
<strong>Installation</strong> & <strong>Setup</strong> <strong>User</strong> <strong>Guide</strong><br />
Index<br />
A<br />
About accounts ................................................. 211<br />
<strong>Access</strong> control server/configuration & monitoring<br />
station checklist ........................................... 14<br />
<strong>Access</strong> database upgrade .................................... 30<br />
ACCESSCONTROL database<br />
backup........................................................ 166<br />
restore ........................................................ 167<br />
<strong>Access</strong>Control_Data.mdf file............................ 238<br />
<strong>Access</strong>ControlDemo_Data.mdf file.................. 238<br />
Accounts<br />
about .......................................................... 211<br />
ADMIN...................................................... 205<br />
Lenel .......................................................... 205<br />
SA .............................................................. 205<br />
table of accounts ........................................ 205<br />
Acrobat Reader - install ...................................... 52<br />
ACS.INI file<br />
License Server settings .............................. 249<br />
settings when manually upgrading from <strong>Access</strong><br />
to SQL Server Desktop Engine .......... 223<br />
Terminal Services environment................. 278<br />
Administrator properties - change .................... 271<br />
password .................................................... 271<br />
username.................................................... 271<br />
Alarm Monitoring<br />
Alarm Monitoring station checklist............. 15<br />
FlashPoint video input ........................ 55, 252<br />
Appembed.htm file ........................................... 292<br />
Attach<br />
hardware key......................................... 25, 47<br />
SQL Server Desktop Engine database....... 237<br />
Automatic e-mail/paging .................................... 89<br />
Automatic paging - setting up........................... 103<br />
B<br />
B........................................................................ 205<br />
B.A.S.I.S.<br />
install .................................................... 41, 42<br />
installing on Citrix server .......................... 293<br />
installing on Oracle 9i client...................... 164<br />
installing on Oracle 9i server..................... 154<br />
maintaining .................................................. 34<br />
publishing as a web application using Citrix....<br />
294<br />
removing............................................... 34, 38<br />
set up B.A.S.I.S. database..................... 24, 51<br />
setting up encryption for............................ 302<br />
setting up the B.A.S.I.S. Capture dialog...... 79<br />
upgrade <strong>Access</strong> database ............................. 30<br />
upgrade from B.A.S.I.S. 2000 ..................... 23<br />
upgrade from B.A.S.I.S. 2002 ..................... 23<br />
Backup<br />
ACCESSCONTROL database .................. 166<br />
configure automatic file backup to tape .... 183<br />
configure database backup folder .............. 175<br />
intervals between ....................................... 167<br />
SQL Server database to file ....................... 175<br />
SQL Server database to tape drive ............ 183<br />
SQL Server Desktop Engine database to file ...<br />
193<br />
SQL Server Desktop Engine database to tape<br />
drive.................................................... 183<br />
Backup procedures<br />
Dell Precision 330 ..................................... 165<br />
Dell Precision 340<br />
SQL Server 2000 ................................ 170<br />
Badging room layout .......................................... 81<br />
Basic camera setup (CAM-CCP-500K).............. 83<br />
Basic camera setup (VK-C77U) ....................... 273<br />
Basic continuous lighting setup (EHK-K42U-A) 85<br />
Basic flash setup (EHK-283) ............................ 274<br />
C<br />
CAM-CCP-500K image capture kit ................... 83<br />
CAM-CCP-500KUSB Windows 2000 image<br />
capture kit .................................................... 65<br />
Camera<br />
capture quality .................................... 79, 273<br />
CON-500 camera controller ................. 64, 77<br />
connect to Flashpoint board....................... 258<br />
connect video camera to FlashPoint 3D board .<br />
58<br />
setting up a CAM-CCP-500K...................... 83<br />
setting up a VK-C77U ............................... 273<br />
Capture station<br />
configure...................................................... 79<br />
set up............................................................ 79<br />
setup specifications............................. 80, 273<br />
Carrier - configuring in WirelessOffice<br />
Administrator............................................... 99<br />
CCD video camera....................................... 54, 65<br />
CCD/CCTV video setup<br />
current hardware .......................................... 53<br />
discontinued hardware............................... 251<br />
USB devices ................................................ 65<br />
CCP-500 (back view).......................................... 84<br />
Change<br />
database password ..................................... 206<br />
revision 143 — 323
Index<br />
Lenel account password............................. 208<br />
scheduled backup Intervals........................ 167<br />
SYSTEM account password using Database<br />
<strong>Setup</strong>................................................... 212<br />
system administrator password for the database<br />
211<br />
Change administrator properties for the License<br />
Administration application ........................ 271<br />
Checklist<br />
access control server/configuration &<br />
monitoring station................................. 14<br />
Alarm Monitoring station ............................ 15<br />
ID badging station........................................ 15<br />
WirelessOffice ............................................. 91<br />
Citrix<br />
configure the carrier..................................... 99<br />
configure the Citrix web server ................. 280<br />
general issues............................................. 278<br />
implications ............................................... 278<br />
installing B.A.S.I.S. on the server ............. 293<br />
installing Citrix MetaFrame on the server. 279<br />
installing Feature Release 1 (Service Pack 2)...<br />
280<br />
installing required applications.................. 279<br />
overview .................................................... 277<br />
publishing B.A.S.I.S. as a web application 294<br />
running the Citrix Web Site Wizard .......... 288<br />
Citrix NFuse Web Extensions - install ............. 283<br />
Client<br />
Oracle 9i..................................................... 159<br />
Command line - running License Server from . 250<br />
Communication Server ................................ 25, 51<br />
CON-500 camera controller programming unit. 64,<br />
77<br />
Concurrent licensing ......................................... 249<br />
Conduct<br />
database restore for ACCESSCONTROL. 167<br />
random database backup for<br />
ACCESSCONTROL .......................... 166<br />
Configuration information - viewing................ 217<br />
Configure<br />
automatic database file backup to tape drive....<br />
183<br />
capture station.............................................. 79<br />
Distributed ID/Mobile Badging system..... 243<br />
Microsoft SQL Server for automatic database<br />
backup to file ...................................... 175<br />
Mobile Badging station ............................. 244<br />
Oracle 9i client software............................ 159<br />
Oracle 9i server software........................... 133<br />
server to be a Distributed ID Master server 243<br />
SQL Server 2000 ....................................... 116<br />
TCP/IP in Windows 2000............................ 87<br />
video hardware & software................... 53, 65<br />
WirelessOffice messaging software version 3.0<br />
89<br />
Connect your video cameras to your FlashPoint 3D<br />
board ............................................................ 58<br />
Continuous lighting diagram .............................. 83<br />
Continuous lighting setup ................................... 85<br />
Create<br />
database ..................................................... 116<br />
database backup folder .............................. 175<br />
login........................................................... 120<br />
virtual IIS directory ................................... 281<br />
Create the Lenel user<br />
SQL Server ................................................ 120<br />
D<br />
Database backup<br />
overview .................................................... 165<br />
Database <strong>Installation</strong> Utility<br />
field table ................................................... 236<br />
overview .................................................... 235<br />
procedures.................................................. 237<br />
window ...................................................... 235<br />
Database owner - change in SQL Server Desktop<br />
Engine........................................................ 241<br />
Database restoration.......................................... 165<br />
Database <strong>Setup</strong><br />
change database password ......................... 217<br />
change SYSTEM account password.......... 212<br />
how to run.................................................. 214<br />
manually upgrade from <strong>Access</strong> to SQL Server<br />
Desktop Engine after running............. 224<br />
manually upgrade from <strong>Access</strong> to SQL Server<br />
Desktop Engine before running.......... 221<br />
procedures.................................................. 214<br />
program...................................................... 213<br />
running on an Oracle 9i server .................. 157<br />
view configuration information ................. 217<br />
viewing the setup log................................. 216<br />
Database <strong>Setup</strong> Options window ...................... 213<br />
Default accounts and passwords table .............. 205<br />
Deleting an installed license ............................. 267<br />
Dell GX1<br />
chassis diagram............................................ 58<br />
I/O ports and connectors.............................. 58<br />
Dell Precision 330............................................. 165<br />
backup and restore process overview ........ 165<br />
change scheduled backup intervals............ 167<br />
conduct a database restore for<br />
ACCESSCONTROL .......................... 167<br />
conduct a random database backup for<br />
ACCESSCONTROL .......................... 166<br />
Dell Precision 340<br />
backup and restore process overview ........ 169<br />
324 — revision 143
<strong>Installation</strong> & <strong>Setup</strong> <strong>User</strong> <strong>Guide</strong><br />
manually back up an SQL Server Desktop<br />
Engine database to a file..................... 193<br />
SQL Server 2000 backup procedures ........ 170<br />
create a database backup folder.......... 175<br />
install drivers for the tape backup device..<br />
170<br />
Demo database.................................................. 238<br />
Determining if the License Server is running... 250<br />
Diffused lighting ................................................. 82<br />
DirectX<br />
install ......................................................... 201<br />
requirements .............................................. 201<br />
Disable strong password enforcement .............. 206<br />
Discontinued hardware<br />
configure video hardware .......................... 251<br />
configure video software ........................... 251<br />
connect your video cameras to your FlashPoint<br />
board................................................... 258<br />
EHK-283 (Enhance Lighting Kit) ............. 263<br />
Flashpoint video capture board installation 253<br />
install FlashPoint VGA display adapter driver.<br />
253<br />
verify that the VGA display settings are correct<br />
255<br />
Distributed ID Master server ............................ 243<br />
Dongle................................................. 25, 47, 249<br />
parallel port.................................................. 47<br />
USB ............................................................. 47<br />
DPS060200-P5 camera power supply ......... 54, 65<br />
E<br />
Edit<br />
Appembed.htm file .................................... 292<br />
Template.ica file ........................................ 292<br />
EHK-283........................................................... 274<br />
EHK-K42U-A..................................................... 85<br />
EHK-K42U-A Professional Continuous Lighting<br />
Kit ................................................................ 54<br />
EHK-K42U-A professional continuous lighting kit<br />
65<br />
E-Mail<br />
setup procedures .......................................... 92<br />
E-mail<br />
automatic...................................................... 89<br />
manual.......................................................... 89<br />
Enable strong password enforcement ............... 206<br />
Encryption......................................................... 299<br />
configuring SafeNet/Soft-PK peer-to-panel<br />
encryption on the workstation ............ 315<br />
configuring SafeNet/Soft-PK peer-to-peer<br />
encryption on the server ..................... 309<br />
configuring SafeNet/Soft-PK peer-to-peer<br />
encryption on the workstation ............ 312<br />
configuring the SafeNet/Speed box........... 302<br />
hardware configuration.............................. 302<br />
installing SafeNet/Soft-PK on the server and<br />
client ................................................... 306<br />
overview .................................................... 299<br />
Enforce strong passwords checkbox................. 206<br />
Environmental considerations affecting flash &<br />
camera capture quality........................ 79, 273<br />
Environmental considerations and factors leading to<br />
poor lighting ....................................... 86, 275<br />
F<br />
File Messenger - configuring.............................. 99<br />
Final adjustments for continuous lighting .......... 83<br />
Final adjustments for fixed diffused lighting...... 82<br />
Flash capture quality.................................. 79, 273<br />
Flash setup ........................................................ 274<br />
FlashPoint<br />
3D VGA display adapter driver installation 56<br />
install software............................................. 58<br />
video capture board installation................... 55<br />
Flashpoint<br />
software installation................................... 257<br />
H<br />
Hardware key............................................... 25, 47<br />
parallel ......................................................... 47<br />
USB ............................................................. 47<br />
Hardware requirements for SQL Server ........... 107<br />
Hitachi VK-C77U camera dip switch settings.. 262<br />
HOC-3610............................................. 55, 56, 66<br />
How to run the Database <strong>Setup</strong> program.......... 214<br />
I<br />
ID badging station checklist ............................... 15<br />
IIS directory ...................................................... 281<br />
Install .................................................................. 25<br />
Acrobat Reader ............................................ 52<br />
B.A.S.I.S. ET............................................... 41<br />
B.A.S.I.S. on an Oracle 9i server............... 154<br />
B.A.S.I.S. software ...................................... 42<br />
B.A.S.I.S. via a Terminal Services client<br />
window ............................................... 298<br />
Citrix MetaFrame on the server................. 279<br />
Citrix NFuse Web Extensions ................... 283<br />
DirectX ...................................................... 201<br />
F5U208 VideoBus II USB Cable (Windows<br />
2000)..................................................... 70<br />
F5U208 VideoBus II USB Cable (Windows<br />
XP)........................................................ 66<br />
Feature Release 1 (Service Pack 2) for Citrix ..<br />
280<br />
FlashPoint 3D VGA display adapter driver. 56<br />
revision 143 — 325
Index<br />
FlashPoint software ............................ 58, 257<br />
FlashPoint VGA display adapter driver..... 253<br />
FlashPoint video capture board .......... 55, 253<br />
Java client .................................................. 282<br />
Microsoft SQL Server................................ 107<br />
new B.A.S.I.S. license ................. 25, 51, 268<br />
NFuse Web Site Wizard ............................ 286<br />
Oracle 9i client software............................ 159<br />
Oracle 9i server software.................. 133, 135<br />
SafeNet/Soft-PK on the server and client.. 306<br />
SQL Server 2000 (new installations)......... 108<br />
configuring SQL Server 2000 ............ 116<br />
create a login....................................... 120<br />
installing SQL Server 2000 ................ 109<br />
run SQL Query Analyzer.................... 123<br />
VideoBus USB cable ................................... 66<br />
WirelessOffice messaging software ............ 93<br />
WirelessOffice messaging software version 3.0<br />
89<br />
J<br />
Java client - install ............................................ 282<br />
L<br />
Large fonts .......................................................... 57<br />
Layout of room recommended for badging ........ 81<br />
Lenel account password<br />
change........................................................ 208<br />
Lenel database<br />
configure for Oracle 9i server.................... 137<br />
Lenel user<br />
create on Oracle 9i server .......................... 155<br />
License<br />
deleting ...................................................... 267<br />
install ........................................................... 25<br />
viewing ...................................................... 267<br />
License Administration<br />
change administrator properties................. 271<br />
deleting an installed license....................... 267<br />
logging into................................................ 266<br />
logging out................................................. 271<br />
overview .................................................... 265<br />
password .................................................... 265<br />
procedures.................................................. 265<br />
starting ....................................................... 265<br />
username.................................................... 265<br />
viewing an installed license....................... 267<br />
viewing the License Server log.................. 270<br />
License Server<br />
ACS.INI settings........................................ 249<br />
attach the hardware key ........................ 25, 47<br />
determine if running .................................. 250<br />
overview .................................................... 249<br />
procedures.................................................. 250<br />
running from the command line ................ 250<br />
running in Windows .................................. 250<br />
viewing License Server log ....................... 270<br />
Lighting<br />
environmental considerations ............. 86, 275<br />
final adjustments for continuous lighting .... 83<br />
final adjustments for fixed diffused lighting 82<br />
Log files<br />
License Server ........................................... 270<br />
setup log..................................................... 216<br />
Logging into License Administration............... 266<br />
Logging out License Administration ................ 271<br />
Login Driver ..................................................... 210<br />
Login for SQL Server ....................................... 120<br />
M<br />
Maintain<br />
B.A.S.I.S...................................................... 34<br />
Manual<br />
e-mail ........................................................... 89<br />
override settings for Saerim DSP 32X ........ 76<br />
paging .......................................................... 89<br />
Manual paging<br />
setting up.................................................... 103<br />
Manually back up an SQL Server Desktop Engine<br />
database to a file ........................................ 193<br />
Manually upgrade from <strong>Access</strong> to SQL Server<br />
Desktop Engine<br />
after running Database <strong>Setup</strong>..................... 224<br />
before running Database <strong>Setup</strong>.................. 221<br />
Mobile Badging station<br />
configure.................................................... 244<br />
Mobile Badging system .................................... 243<br />
N<br />
Net Configuration Assistant<br />
running on Oracle 9i client ........................ 164<br />
running on Oracle 9i server ....................... 146<br />
O<br />
Operating system requirements for SQL Server 108<br />
Oracle 9i client<br />
configure software ..................................... 159<br />
install B.A.S.I.S. software ......................... 164<br />
install software........................................... 159<br />
run the Net Configuration Assistant .......... 164<br />
verify that the system works...................... 164<br />
Oracle 9i server<br />
configure the Lenel database ..................... 137<br />
create the Lenel user .................................. 155<br />
install B.A.S.I.S. ........................................ 154<br />
install software........................................... 135<br />
326 — revision 143
<strong>Installation</strong> & <strong>Setup</strong> <strong>User</strong> <strong>Guide</strong><br />
installing .................................................... 133<br />
run Database <strong>Setup</strong> .................................... 157<br />
run the Net Configuration Assistant .......... 146<br />
software configuration overview ............... 133<br />
verify that the system works...................... 152<br />
P<br />
Paging<br />
automatic...................................................... 89<br />
manual.......................................................... 89<br />
setting up automatic paging....................... 103<br />
setting up manual paging........................... 103<br />
setup procedures .......................................... 92<br />
Parallel port dongle............................................. 47<br />
Password ........................................................... 120<br />
Password change<br />
inform administrators of the password change.<br />
212<br />
write down ................................................. 212<br />
Passwords<br />
access control database.............................. 120<br />
case sensitivity........................................... 206<br />
change database password ................ 205, 217<br />
change Lenel account password ................ 208<br />
change the database password ................... 206<br />
change the SYSTEM account password using<br />
Database <strong>Setup</strong> ................................... 212<br />
change the system administrator password for<br />
the database ........................................ 211<br />
disable strong password enforcement........ 206<br />
enable strong password enforcement......... 206<br />
Enforce strong passwords checkbox.......... 206<br />
enforcement when using single sign-on .... 205<br />
License Administration.............................. 265<br />
Login Driver .............................................. 210<br />
maximum length ........................................ 206<br />
minimum length......................................... 206<br />
Oracle......................................................... 206<br />
standards .................................................... 205<br />
table of default passwords ......................... 205<br />
Peer-to-panel encryption<br />
workstation ................................................ 315<br />
Peer-to-peer encryption<br />
server.......................................................... 309<br />
workstation ................................................ 312<br />
Poor lighting .............................................. 86, 275<br />
Port<br />
configure for WirelessOffice ....................... 98<br />
Ports .................................................................. 319<br />
Q<br />
Query Analyzer - running ................................. 123<br />
R<br />
Recommended badging room layout .................. 81<br />
Remove<br />
B.A.S.I.S............................................... 34, 38<br />
Required video hardware .................... 53, 65, 251<br />
Restore<br />
ACCESSCONTROL database .................. 167<br />
Microsoft SQL Server 2000 database........ 189<br />
Room layout & lighting setup for a capture station<br />
with discontinued video capture hardware 273<br />
Room layout recommended for badging ............ 81<br />
Run<br />
Citrix Web Site Wizard ............................. 288<br />
License Server from the command line..... 250<br />
License Server in Windows....................... 250<br />
Query Analyzer.......................................... 123<br />
S<br />
Saerim DSP32X manual override settings.......... 76<br />
SafeNet/Soft-PK<br />
configure peer-to-peer encryption on the server<br />
309<br />
configure peer-to-peer encryption on the<br />
workstation ......................................... 312<br />
configuring peer-to-panel encrytion on the<br />
workstation ......................................... 315<br />
SafeNet/Speed box - configuring for encryption.....<br />
302<br />
Setting up<br />
automatic paging........................................ 103<br />
B.A.S.I.S. Capture dialog ............................ 79<br />
B.A.S.I.S. database ............................... 24, 51<br />
capture station.............................................. 79<br />
FlashPoint board ........................................ 253<br />
manual paging............................................ 103<br />
<strong>Setup</strong> log - viewing........................................... 216<br />
Small fonts .......................................................... 57<br />
SQL Server<br />
configure for automatic database backup to file<br />
175<br />
configure SQL Server 2000....................... 116<br />
create database........................................... 116<br />
create login ................................................ 120<br />
create the Lenel user .................................. 120<br />
hardware requirements .............................. 107<br />
install ......................................................... 107<br />
manually back up the database to tape ...... 181<br />
new installations ........................................ 108<br />
operating system requirements .................. 108<br />
restore file to Microsoft SQL Server 2000<br />
database .............................................. 189<br />
support overview ....................................... 107<br />
upgrade B.A.S.I.S. database ........................ 26<br />
revision 143 — 327
Index<br />
upgrading from SQL Server 7.0 to SQL Server<br />
2000 Standard Edition ........................ 125<br />
verifying the database upgrade .................. 131<br />
SQL Server Desktop Engine<br />
change database owner .............................. 241<br />
manually back up an SQL Server Desktop<br />
Engine database to a file..................... 193<br />
manually upgrade from <strong>Access</strong> after running<br />
Database <strong>Setup</strong> ................................... 224<br />
manually upgrade from <strong>Access</strong> before running<br />
Database <strong>Setup</strong> ................................... 221<br />
transfer database to new machine.............. 229<br />
Start<br />
Communication Server ......................... 25, 51<br />
License Administration application........... 265<br />
Strong password enforcement<br />
disable........................................................ 206<br />
enable......................................................... 206<br />
SYSTEM account password - change .............. 212<br />
T<br />
Tape drive<br />
backup........................................................ 183<br />
TCP/IP in Windows 2000 ................................... 87<br />
Template.ica file ............................................... 292<br />
Terminal Services<br />
install B.A.S.I.S. using .............................. 298<br />
Transfer an SQL Server Desktop Engine database..<br />
229<br />
U<br />
Upgrade<br />
B.A.S.I.S. <strong>Access</strong> database.......................... 30<br />
B.A.S.I.S. Oracle database........................... 26<br />
B.A.S.I.S. SQL database.............................. 26<br />
from B.A.S.I.S. 2000 ................................... 23<br />
SQL Server 7.0 to SQL Server 2000 Standard<br />
Edition ................................................ 125<br />
Upgrading .................................................... 23, 38<br />
USB devices<br />
hardware key................................................ 47<br />
install Belkin F5U208 VideoBus II on<br />
Windows 2000...................................... 70<br />
install Belkin F5U208 VideoBus II on<br />
Windows XP......................................... 66<br />
<strong>User</strong>name for License Administration.............. 265<br />
configure discontinued hardware............... 251<br />
required........................................ 53, 65, 251<br />
Video I/O Settings form<br />
discontinued hardware............................... 261<br />
Video Settings form<br />
current hardware ................................... 61, 74<br />
discontinued hardware............................... 261<br />
Video software<br />
configure discontinued software................ 251<br />
Video software settings....................................... 72<br />
current hardware .......................................... 60<br />
discontinued hardware............................... 259<br />
Video software settings for a capture station<br />
current hardware .......................................... 60<br />
discontinued hardware............................... 260<br />
Video software settings for a CCTV station<br />
current hardware .......................................... 60<br />
discontinued hardware............................... 259<br />
View<br />
configuration information.......................... 217<br />
installed license.......................................... 267<br />
License Server log ..................................... 270<br />
setup log..................................................... 216<br />
Virtual IIS directory.......................................... 281<br />
VK-C77U<br />
basic camera setup ..................................... 273<br />
camera dip switch settings......................... 262<br />
W<br />
Web browsers supported................................... 265<br />
Web server configuration for Citrix.................. 280<br />
Windows Terminal Services/Citrix overview... 277<br />
WirelessOffice .................................................... 89<br />
configuration checklist ................................ 91<br />
configure File Messenger ............................ 99<br />
configure the port......................................... 98<br />
installing ...................................................... 93<br />
overview ...................................................... 89<br />
V<br />
VGA display settings<br />
discontinued hardware............................... 255<br />
supported hardware...................................... 56<br />
Video capture board installation - FlashPoint..... 55<br />
Video hardware<br />
328 — revision 143
<strong>Installation</strong> & <strong>Setup</strong> <strong>User</strong> <strong>Guide</strong><br />
revision 143 — 329
P.O. Box 5044<br />
Indianapolis, IN 46250<br />
Phone: (317) 849-2250<br />
B.A.S.I.S. ® ET Third Edition <strong>Installation</strong> & <strong>Setup</strong> <strong>User</strong> <strong>Guide</strong>, product version 5.10.423<br />
Item number E810, revision 143, April 2004<br />
Content of this document copyright © 1994, 1995, 1996, 1997, 1998, 1999, 2000, 2001, 2002, 2003 & 2004 by<br />
Lenel <strong>Systems</strong> International, Inc. BadgeDesigner, FormsDesigner, and MapDesigner, are trademarks used<br />
by <strong>Best</strong> <strong>Access</strong> <strong>Systems</strong> with permission from Lenel <strong>Systems</strong> International, Inc. Windows, Windows XP,<br />
Windows 2000 are trademarks and Microsoft is a registered trademark of Microsoft Corporation. Integral and<br />
FlashPoint are trademarks of Integral Technologies, Inc. Crystal Reports for Windows is a trademark of Crystal<br />
Computer Services, Inc. Oracle is a registered trademark of Oracle Corporation. Other product names mentioned<br />
in this <strong>User</strong> <strong>Guide</strong> may be trademarks or registered trademarks of their respective companies and are hereby<br />
acknowledged.<br />
Information in this document is subject to change without notice. No part of this document may be reproduced or<br />
transmitted in any form or by any means, electronic or mechanical, for any purpose, without the express written<br />
permission of the authors.<br />
The software described in this document is licensed to <strong>Best</strong> <strong>Access</strong> <strong>Systems</strong> by Lenel <strong>Systems</strong> International, Inc.<br />
Portions of this product were created using LEADTOOLS © 1991-2004, LEAD Technologies, Inc. ALL RIGHTS<br />
RESERVED. The software includes ImageStream® Graphic Filters. Copyright © 1991-2004 Inso Corporation.<br />
All rights reserved. ImageStream Graphic Filters and ImageStream are registered trademarks of Inso Corporation.


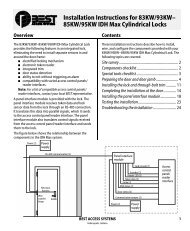


![B.A.S.I.S. G Service Manual [T63300] - Best Access Systems](https://img.yumpu.com/48375082/1/190x245/basis-g-service-manual-t63300-best-access-systems.jpg?quality=85)

