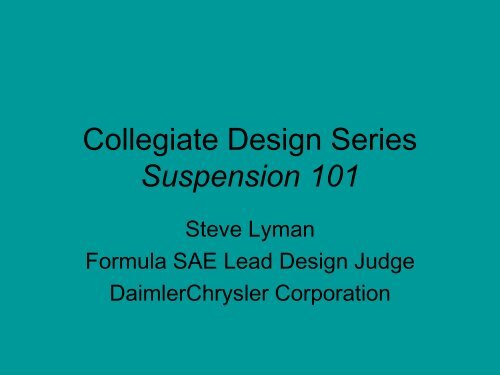
Collegiate Design Series Suspension 101 - SAE
Collegiate Design Series Suspension 101 - SAE
Collegiate Design Series Suspension 101 - SAE

You also want an ePaper? Increase the reach of your titles
YUMPU automatically turns print PDFs into web optimized ePapers that Google loves.
<strong>Collegiate</strong> <strong>Design</strong> <strong>Series</strong><br />
<strong>Suspension</strong> <strong>101</strong><br />
Steve Lyman<br />
Formula <strong>SAE</strong> Lead <strong>Design</strong> Judge<br />
DaimlerChrysler Corporation
There Are Many Solutions<br />
• “It depends.”<br />
• “Everything is a compromise.”
<strong>Suspension</strong> <strong>101</strong><br />
• Ride Frequency/ Balance (Flat Ride)<br />
• Motion Ratios<br />
• Ride Friction<br />
• <strong>Suspension</strong> Geometry Selection<br />
• <strong>Suspension</strong> Layouts- Double A Arm<br />
Variations and Compromises<br />
• Dampers- A Really Quick Look
“The thing we had missed was that the excitation at front<br />
and rear did not occur simultaneously. The actual case<br />
was more like this--<br />
<strong>Suspension</strong> Travel<br />
Time<br />
Lag<br />
Front Rear<br />
--with the angle of crossing of the two wave lines<br />
representing the severity of the pitch.”<br />
(From Chassis <strong>Design</strong>: Principles and Analysis, Milliken & Milliken, <strong>SAE</strong> 2002)<br />
Time
“By arranging the suspension with the lower frequency in front<br />
(by 20% to start) this motion could be changed to--<br />
<strong>Suspension</strong> Travel<br />
Front <strong>Suspension</strong> Rear <strong>Suspension</strong> Pitch<br />
Time<br />
--a much closer approach to a ‘flat’ ride”.<br />
(From Chassis <strong>Design</strong>: Principles and Analysis, Milliken & Milliken, <strong>SAE</strong> 2002)<br />
2<br />
1.5<br />
1<br />
0.5<br />
0<br />
-0.5<br />
-1<br />
-1.5<br />
-2<br />
Pitch (deg)
What ride frequencies are<br />
common today?<br />
Ride Rate<br />
wlo tire<br />
Corner Unsprung Sprung<br />
Weight Weight Weight<br />
Frequency<br />
Ride Rate<br />
wlo tire<br />
Corner Unsprung Sprung<br />
Weight Weight Weight Frequency<br />
Front <strong>Suspension</strong><br />
Rear <strong>Suspension</strong><br />
Vehicle<br />
Ride<br />
Ratio<br />
(Ib/in) (lb) (Ib) (lb) (hertz) (Ib/in) (lb) (Ib) (lb) (hertz) Rr/Frt<br />
99 Volvo V70 XC 119 1032 100 932 1.12 131 832 100 732 1.32 1.18<br />
2001 MB E320 4-Matic 117 991 100 891 1.13 148 964 100 864 1.29 1.14<br />
Jeep KJ Liberty 126 1036 85 951 1.14 181 914 85 829 1.46 1.28<br />
97 NS Chrysler T&C 148 1173 85 1088 1.15 145 880 85 795 1.34 1.16<br />
Pacifica 160 1286 85 1166 1.16 153 1074 85 989 1.23 1.06<br />
99 MB E320 4-Matic 121 985 100 885 1.16 150 960 100 860 1.31 1.13<br />
97 Peugeot 306 GTI 110 850 85 765 1.19 113 468 85 383 1.7 1.43<br />
99 Audi A6 Quattro 152 1070 100 970 1.24 172 864 100 764 1.48 1.2<br />
2001 MB E320 2WD<br />
131<br />
99<br />
907<br />
907<br />
85<br />
85<br />
822<br />
822<br />
1.25<br />
1.09<br />
144 969 85 884 1.26 NA<br />
95 BMW M3 113 783 85 698 1.26 159 790 85 705 1.48 1.18<br />
2001 VW Passat 163 1060 100 960 1.29 136 670 100 570 1.53 1.19<br />
2000 Neon 134 836 75 761 1.31 127 510 65 445 1.67 1.27<br />
2001 JR 161 1009 85 924 1.31 136 607 85 522 1.6 1.22<br />
99 LH Dodge Intrepid 185 1125 85 1040 1.32 152 651 85 566 1.62 1.23<br />
02 Jeep WG Grand Cherokee 197 1170 85 1085 1.33 184 1005 85 920 1.4 1.05<br />
2000 VW Golf 107 797 85 712 1.21 105 586 85 501 1.43 1.18
Does motion ratio affect forces<br />
transmitted into the body?<br />
• Motion ratio is spring travel divided by<br />
wheel travel.<br />
• The force transmitted to the body is<br />
reduced if the motion ratio is increased.
� T<br />
Does motion ratio affect forces transmitted to the<br />
body?<br />
� L<br />
Force at spring for 1” wheel travel = 300 lb<br />
Force at body = Force at wheel / MR<br />
Spring Rate=300 lb / 0.5 = 600 lb/in<br />
Wheel Rate: 150 lb/in<br />
Spring Rate= Wheel Rate / MR 2<br />
Motion Ratio: 0.5 �Not good<br />
Force at wheel for 1” wheel<br />
travel = 150 lb<br />
Spring deflection for 1”<br />
wheel travel=0.5”
How does ride friction affect<br />
(3.16 Hz)<br />
(1.05 Hz)<br />
frequency?<br />
(From Chassis <strong>Design</strong>: Principles and Analysis, Milliken & Milliken, <strong>SAE</strong> 2002)<br />
Small inputs don’t “break through” the friction, resulting<br />
in artificially high ride frequency
Ride Summary<br />
• Flat Ride<br />
– Improves handling, acceleration, braking performance<br />
• Plenty of suspension travel<br />
– Allows lower spring rates & ride frequencies<br />
– Allows progressive jounce bumper engagement<br />
• Good motion ratio<br />
– Reduces loads into vehicle structure<br />
– Increases shock velocity, facilitates shock tuning<br />
– 1.00:1 is ideal, 0.60:1 minimum design target<br />
• Stiff structure (The 5 th Spring)<br />
– Improves efficiency of chassis and tire tuning<br />
– Provides more consistent performance on the track<br />
– Applies to individual attachment compliances, 5:1 minimum design<br />
target, 10:1 is ideal<br />
– Successful <strong>SAE</strong> designs in the 2000-3000 ft-lbs/deg range (static<br />
torsion), 2X for static bending (lbs/in)<br />
• Low Friction<br />
– Permits dampers to provide consistent performance<br />
– Not masked by coulomb friction (stiction)<br />
– 40:1 minimum (corner weight to frictional contribution for good SLA<br />
suspension
<strong>Suspension</strong> Geometry Setup<br />
• Front <strong>Suspension</strong> 3 views<br />
• Rear <strong>Suspension</strong> 3 views
Front <strong>Suspension</strong> Front View<br />
• Start with tire/wheel/hub/brake<br />
rotor/brake caliper package.<br />
– pick ball joint location.<br />
– pick front view instant center length and<br />
height.<br />
– pick control arm length.<br />
– pick steering tie rod length and orientation.<br />
– pick spring/damper location.
FSFV: wheel/hub/brake package<br />
• Ball joint location establishes:<br />
– King Pin Inclination (KPI): the angle<br />
between line through ball joints and line<br />
along wheel bearing rotation axis minus 90<br />
degrees.<br />
– Scrub radius: the distance in the ground<br />
plan from the steering axis and the wheel<br />
centerline.<br />
– Spindle length: the distance from the steer<br />
axis to the wheel center.
Spindle Length<br />
King Pin<br />
Inclination Angle<br />
Scrub Radius<br />
(positive shown)<br />
From The Automotive Chassis: Engineering Principles,<br />
J. Reimpell & H. Stoll, <strong>SAE</strong> 1996<br />
Spindle<br />
Length<br />
Scrub Radius<br />
(negative shown)
FSFV: wheel/hub/brake<br />
package<br />
• KPI effects returnability and camber in<br />
turn.<br />
• KPI is a result of the choice of ball joint<br />
location and the choice of scrub radius.
FSFV: wheel/hub/brake<br />
package<br />
• Scrub radius determines:<br />
– the sign and magnitude of of the forces<br />
in the steering that result from braking.<br />
– a small negative scrub radius is desired.<br />
• Scrub radius influences brake force<br />
steer.
FSFV: wheel/hub/brake<br />
package<br />
• Spindle length determines the<br />
magnitude of the forces in the steering<br />
that result from:<br />
– hitting a bump<br />
– drive forces on front wheel drive vehicles<br />
• Spindle length is a result of the choice<br />
of ball joint location and the choice of<br />
scrub radius.
FSFV: wheel/hub/brake package<br />
• Front view instant center is the<br />
instantaneous center of rotation of the<br />
spindle (knuckle) relative to the body.<br />
• Front view instant center length and<br />
height establishes:<br />
– Instantaneous camber change<br />
– Roll center height (the instantaneous<br />
center of rotation of the body relative to<br />
ground)
From Car <strong>Suspension</strong> and Handling 3 rd Ed, D. Bastow & G. Howard, <strong>SAE</strong> 1993
FSFV: wheel/hub/brake<br />
package<br />
• The upper control arm length compared<br />
to the lower control arm length<br />
establishes:<br />
– Roll center movement relative to the body<br />
(vertical and lateral) in both ride and roll.<br />
– Camber change at higher wheel<br />
deflections.
(From <strong>Suspension</strong> Geometry and <strong>Design</strong>, John Heimbecher, DaimlerChrysler Corporation)
FSFV: Roll Center Movement<br />
• Ride and roll motions are coupled when a<br />
vehicle has a suspension where the roll<br />
center moves laterally when the vehicle rolls.<br />
• The roll center does not move laterally if in<br />
ride, the roll center height moves 1 to 1 with<br />
ride (with no tire deflection).
FSFV: wheel/hub/brake<br />
package<br />
• The steering tie rod length and<br />
orientation (angle) determines the<br />
shape (straight, concave in, concave<br />
out) and slope of the ride steer curve.
FSFV: wheel/hub/brake<br />
package<br />
• The spring location on a SLA suspension<br />
determines:<br />
– the magnitude of the force transmitted to the body<br />
when a bump is hit (the force to the body is higher<br />
than the force to the wheel)<br />
– the relationship between spring rate and wheel<br />
rate (spring rate will be higher than wheel rate)<br />
– how much spring force induces c/a pivot loads<br />
• An offset spring on a strut can reduce ride<br />
friction by counteracting strut bending<br />
(Hyperco gimbal-style spring seat).
From The Automotive Chassis: Engineering Principles, J. Reimpell & H. Stoll, <strong>SAE</strong> 1996<br />
Spring axis aligned<br />
with kingpin axis<br />
(not strut C L)
Front <strong>Suspension</strong> Side View<br />
• Picking ball joint location and wheel<br />
center location relative to steering axis<br />
establishes:<br />
– Caster<br />
– Caster trail (Mechanical Trail)
From The Automotive Chassis: Engineering Principles, J. Reimpell & H. Stoll, <strong>SAE</strong> 1996
Front <strong>Suspension</strong> Side View<br />
• Picking the side view instant center<br />
location establishes:<br />
• Anti-dive (braking)<br />
• Anti-lift (front drive vehicle acceleration)
Anti Dive/Anti Squat CS<br />
Transparency
<strong>Suspension</strong> Variations<br />
Tranparencies-CS
Front <strong>Suspension</strong> Side View<br />
• Anti-dive (braking):<br />
– Instant center above ground and aft of<br />
tire/ground or below ground and forward of<br />
tire/ground.<br />
– Increases effective spring rate when<br />
braking.<br />
– Brake hop if distance from wheel center to<br />
instant center is too short.
Front <strong>Suspension</strong> Plan View<br />
• Picking steer arm length and tie rod<br />
attitude establishes:<br />
– Ackermann<br />
– recession steer<br />
– magnitude of forces transmitted to steering
Front <strong>Suspension</strong>: Other<br />
Steering Considerations<br />
• KPI and caster determine:<br />
– Returnability<br />
• The steering would not return on a vehicle with<br />
zero KPI and zero spindle length<br />
– camber in turn
Steer Angle<br />
Camber<br />
Caster<br />
From The Automotive Chassis: Engineering Principles, J. Reimpell & H. Stoll, <strong>SAE</strong> 1996
Front <strong>Suspension</strong>: Other<br />
Steering Considerations<br />
• Caster and Caster Trail establish how<br />
forces build in the steering.<br />
– Caster gives effort as a function of steering<br />
wheel angle (Lotus Engineering).<br />
– Caster Trail gives effort as a function of<br />
lateral acceleration (Lotus Engineering).<br />
– Spindle offset allows picking caster trail<br />
independent of caster.
Rear <strong>Suspension</strong> Rear View<br />
• Start with tire/wheel/hub/brake<br />
rotor/brake caliper package.<br />
– pick ball joint (outer bushing) location<br />
– pick rear view instant center length and<br />
height.<br />
– pick control arm length.<br />
– pick steering tie rod length and orientation.<br />
– pick spring/damper location.
RSRV: wheel/hub/brake<br />
package<br />
• Ball joint location establishes:<br />
– Scrub radius: Scrub radius determines the sign<br />
and magnitude of of the forces in the steering that<br />
result from braking.<br />
– Spindle length: Spindle length determines the<br />
magnitude of the steer forces that result from<br />
hitting a bump and from drive forces. Spindle<br />
length is a result of the choice of ball joint (outer<br />
bushing) location and the choice of scrub radius.
RSRV: wheel/hub/brake<br />
package<br />
• Rear view instant center length and<br />
height establishes:<br />
– Instantaneous camber change<br />
– Roll center height
RSRV: wheel/hub/brake<br />
package<br />
• The upper control arm length compared<br />
to the lower control arm length<br />
establishes:<br />
– Roll center movement relative to the body<br />
(vertical and lateral) in both ride and roll.<br />
– Camber change at higher wheel<br />
deflections.
RSRV: wheel/hub/brake package<br />
• Some independent rear suspensions<br />
have a link that acts like a front<br />
suspension steering tie rod. On these<br />
suspensions, steering tie rod length and<br />
orientation (angle) determines the<br />
shape (straight, concave in, concave<br />
out) and slope of the ride steer curve.
RSRV: wheel/hub/brake package<br />
• The spring location on a SLA suspension<br />
determines:<br />
– the magnitude of the force transmitted to the body<br />
when a bump is hit (the force to the body is higher<br />
than the force to the wheel)<br />
– the relationship between spring rate and wheel<br />
rate (spring rate will be higher than wheel rate)<br />
– how much spring force induces bushing loads<br />
• An offset spring on a strut can reduce ride<br />
friction by counteracting strut bending.
Rear <strong>Suspension</strong> Side View<br />
• Picking outer ball joint/bushing location<br />
establishes:<br />
– Caster<br />
– Negative caster can be used to get lateral<br />
force understeer
Rear <strong>Suspension</strong> Side View<br />
• Picking side view instant center location<br />
establishes:<br />
– anti-lift (braking)<br />
– anti-squat (rear wheel vehicle acceleration)
Rear <strong>Suspension</strong> Side View<br />
• Anti-lift (braking):<br />
– Instant center above ground and forward of<br />
tire/ground or below ground and aft of<br />
tire/ground.<br />
– Brake hop if distance from wheel center to<br />
instant center is too short.
Rear <strong>Suspension</strong> Side View<br />
• Anti-squat (rear wheel vehicle<br />
acceleration)<br />
• “Cars are like primates. They need to squat to go.”—Carroll Smith<br />
– independent<br />
• wheel center must move aft in jounce<br />
• instant center above and forward of wheel<br />
center or below and aft of wheel center<br />
• increases effective spring rate when<br />
accelerating.<br />
– beam<br />
• instant center above ground and forward of<br />
tire/ground or below ground and aft of<br />
tire/ground.
• Scrub radius:<br />
Rear <strong>Suspension</strong><br />
– small negative insures toe-in on braking<br />
• Spindle length:<br />
– small values help maintain small<br />
acceleration steer values
• Camber change:<br />
Rear <strong>Suspension</strong><br />
– at least the same as the front is desired<br />
– tire wear is a concern with high values<br />
– leveling allows higher values
Rear <strong>Suspension</strong><br />
• Roll Center Height:<br />
– independent<br />
• avoid rear heights that are much higher than<br />
the front, slight roll axis inclination forward is<br />
preferred<br />
– beam axle<br />
• heights are higher than on independent<br />
suspensions no jacking from roll center height<br />
with symmetric lateral restraint
Rear <strong>Suspension</strong><br />
• Roll center movement:<br />
– independent:<br />
• do not make the rear 1 to 1 if the front is not<br />
– beam<br />
• no lateral movement<br />
• vertical movement most likely not 1 to 1
Rear <strong>Suspension</strong><br />
• Ride steer / roll steer:<br />
– independent<br />
• small toe in in jounce preferred<br />
• consider toe in in both jounce and rebound<br />
– gives toe in with roll and with load<br />
– toe in on braking when the rear rises<br />
– beam<br />
• increasing roll understeer with load desired<br />
• 10 percent roll understeer loaded is enough<br />
• roll oversteer at light load hurts directional<br />
stability
Rear <strong>Suspension</strong><br />
• Anti-lift:<br />
– independent<br />
• instant center to wheel center at least 1.5 times<br />
track (short lengths compromise other<br />
geometry) to avoid brake hop
Dampers- A Really Quick Look<br />
• Purpose of Dampers<br />
• Damper Types and Valving<br />
• Performance Testing<br />
• Development of Dampers
Introduction<br />
Primary function: dampen the sprung and unsprung<br />
motions of the vehicle, through the dissipation of<br />
energy.<br />
Can also function as a relative displacement limiter<br />
between the body and the wheel, in either<br />
compression or extension. Or as a structural<br />
member, strut.
Simple model: force proportional to velocity.<br />
Real World:<br />
Force<br />
�<br />
kx� cx�<br />
� The multi-speed valving characteristics of the damper (low, mid and<br />
high relative piston velocity) permit flexibility in tuning the damper.<br />
� Different valving circuits in compression (jounce) and extension<br />
(rebound) of the damper permits further flexibility.<br />
� Also generates forces that are a function of position, acceleration and<br />
temperature.<br />
Force � kx� c1x<br />
� c2x�<br />
� c3�x<br />
��<br />
c4T
Compression<br />
Twin Tube Damper<br />
Rebound
Chamber G<br />
Oil<br />
P 2 ,V 2<br />
Monotube Damper Schematics<br />
Gas<br />
P G ,V G<br />
Oil, P 1 ,V 1<br />
Q 12<br />
Chamber 1<br />
Piston<br />
Chamber 2<br />
Piston rod<br />
Oil<br />
P 2 ,V 2<br />
Oil<br />
P 1 , V 1<br />
Q 12<br />
Q 13<br />
Separator<br />
Piston<br />
a) Monotube (b) Remote Reservoir<br />
Schematics of monotube and remote reservoir dampers.<br />
Chamber G<br />
Compression Head<br />
Oil<br />
P 3 ,V 3<br />
Chamber 3<br />
Ga<br />
s<br />
PG, VG Remote Reservoir and<br />
Twin Tube are<br />
functionally similar
Deflection<br />
Disc Stack<br />
Flow Through<br />
Bleed Orifice<br />
Leakage<br />
Flow<br />
Oil<br />
Oil<br />
Monotube Low Speed Damping Force<br />
�X<br />
Low<br />
Pressure<br />
Deflection Disc<br />
Stop<br />
High<br />
Pressure<br />
Piston Retaining<br />
Nut<br />
Deflection<br />
Disc Spacer<br />
Piston<br />
Schematic of low speed compression valve flow.<br />
At low speeds, total DAMPER force might be<br />
influenced more by friction and gas spring, then<br />
damping.<br />
Low speed flow is normally controlled by an orifice.<br />
Types of orifices:<br />
•Hole in piston (with or without one way valve)<br />
•Notch in disc<br />
•Coin land<br />
For turbulent flow:<br />
�<br />
�P<br />
=<br />
�<br />
�<br />
� C<br />
d<br />
Q<br />
�A<br />
eff<br />
�<br />
�<br />
�<br />
�<br />
2<br />
�<br />
�<br />
2<br />
As flow rate Q is equal to relative velocity of the piston<br />
times the area of the piston in compression (piston area –<br />
rod area in rebound):<br />
Orifice damping force is proportional to the square of the<br />
piston speed.
Monotube Mid Speed Damping Force<br />
Oil<br />
Deflection Disc<br />
Flow<br />
Oil<br />
�X<br />
Low<br />
Pressure<br />
High<br />
Pressure<br />
Schematic of mid speed compression valve flow.<br />
Mid speed flow is normally controlled by an flow<br />
compensating device.<br />
Types of flow compensating devices:<br />
•Deflection Discs ( typically stacked)<br />
•Blow off valve (helical spring)<br />
Preloaded on the valve determines the cracking pressure,<br />
and hence the force at which they come into play. Define<br />
the knee in FV curve.<br />
Preload:<br />
•Disc, shape of piston, often expressed in degree.<br />
•Disc, spring to preload (sometimes found in adjustable<br />
race dampers)<br />
•Spring, amount of initial deflection.<br />
•Torque variation on jam nut can often vary preload.<br />
Undesired for production damper,<br />
With flow compensation pressure drop and force are<br />
proportional to velocity.
Oil<br />
Deflection Disc<br />
Flow<br />
Oil<br />
Monotube High Speed Damping Force<br />
�X<br />
Low<br />
Pressure<br />
High<br />
Pressure<br />
Schematic of high speed compression valve flow.<br />
High speed flow is controlled by restrictions in effective<br />
flow area. i.e. effectively orifice flow.<br />
Flow restrictions, typically which ever has smaller effective<br />
area:<br />
•Limit of disc or blow off valve travel.<br />
•Orifice size through piston.<br />
As per low speed damping, pressure drop and force are<br />
proportional to velocity squared.<br />
Rebound damping and pressure drops across<br />
compression heads (foot valves) are similar to those<br />
discussed here.
Dead Length = A + B + C + D + E + F<br />
Dead Length<br />
Max Travel = (Extended Length – Dead Length) /2
Performance Measurement<br />
Computer Controlled Servo Hydraulic Shock Dyno<br />
Various wave forms can be<br />
used to test, sinusoidal,<br />
step, triangular, track<br />
measurements, etc.<br />
Data captured for further<br />
manipulation.<br />
Easy to vary input freq. and<br />
amplitude.<br />
Offers potential to perform<br />
low speed friction and gas<br />
spring check, which are<br />
removed from the damper<br />
forces, to produce damping<br />
charts.<br />
Need to know which<br />
algorithms are used.
Displacement<br />
1<br />
Sinusoidal Input<br />
2 4<br />
Time<br />
Sine Wave Displacement Input<br />
Sinusoid, most Common Input form for Shock Testing<br />
Displacement = X sin (�t)<br />
Velocity = V = X � cos (� t)<br />
Where w = 2 * � * Freq.<br />
Peak Velocity = X * �<br />
3<br />
1<br />
Velocity<br />
1<br />
2<br />
3<br />
Time<br />
Corresponding Velocity Input<br />
Typically test at a given stroke and vary<br />
frequency.<br />
<strong>Suspension</strong> normally respondes at forcing<br />
freq. and natural frequencies.<br />
So should we test at bounce and wheel hop<br />
freq.?<br />
4<br />
1
Force<br />
1<br />
Displacement<br />
Force-Displacement Plot<br />
2<br />
4<br />
Test Outputs<br />
3<br />
Force<br />
3<br />
4<br />
Velocity<br />
Force-Velocity Plot<br />
1<br />
2
Force<br />
lbs<br />
1000<br />
800<br />
600<br />
400<br />
200<br />
0<br />
-200<br />
Peak Force - Peak Velocity Plot<br />
3 Speed Audit Test<br />
23 Speed<br />
Development<br />
Test<br />
-400<br />
0 10 20 30 40 50 60 70<br />
Velocity<br />
in/sec<br />
Typical Peak Force - Peak Velocity Plot
Monotube vs. Twin Tube<br />
Advantages / Disadvantages of Twin Tube and Monotube Shock Absorbers<br />
Twin Tube<br />
Cost Less More<br />
Weight More Less<br />
Packaging Less dead length. Minor<br />
external damage OK. Must<br />
be mounted upright.<br />
Rod Reaction Force Low High<br />
Sealing Requirements Moderate High<br />
Fade Performance Moderate Better<br />
Monotube<br />
Longer dead length. Minor<br />
external damage can cause<br />
failure. Can be mounted in<br />
any position<br />
Twin tube has greater sensitivity to compressibility and hence acceleration.
Copyright © 2011 Steve Lyman.<br />
All rights reserved.