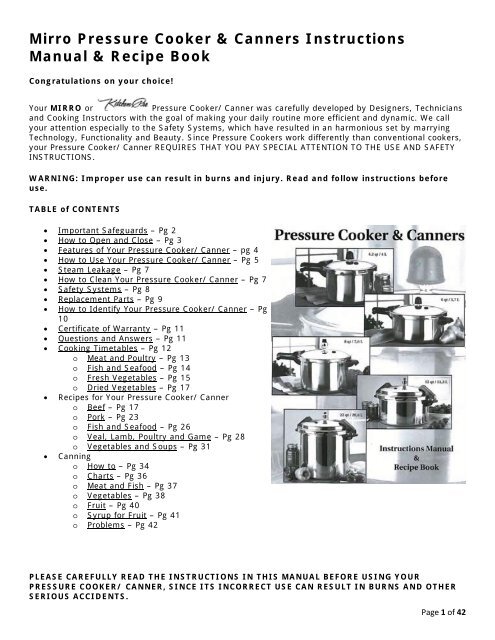
Mirro Pressure Cooker & Canners Instructions Manual & Recipe Book
Mirro Pressure Cooker & Canners Instructions Manual & Recipe Book
Mirro Pressure Cooker & Canners Instructions Manual & Recipe Book

You also want an ePaper? Increase the reach of your titles
YUMPU automatically turns print PDFs into web optimized ePapers that Google loves.
<strong>Mirro</strong> <strong>Pressure</strong> <strong>Cooker</strong> & <strong>Canners</strong> <strong>Instructions</strong><br />
<strong>Manual</strong> & <strong>Recipe</strong> <strong>Book</strong><br />
Congratulations on your choice!<br />
Your MIRRO or<br />
<strong>Pressure</strong> <strong>Cooker</strong>/ Canner was carefully developed by Designers, Technicians<br />
and Cooking Instructors with the goal of making your daily routine more efficient and dynamic. We call<br />
your attention especially to the Safety Systems, which have resulted in an harmonious set by marrying<br />
Technology, Functionality and Beauty. Since <strong>Pressure</strong> <strong>Cooker</strong>s work differently than conventional cookers,<br />
your <strong>Pressure</strong> <strong>Cooker</strong>/ Canner REQUIRES THAT YOU PAY SPECIAL ATTENTION TO THE USE AND SAFETY<br />
INSTRUCTIONS.<br />
WARNING: Improper use can result in burns and injury. Read and follow instructions before<br />
use.<br />
TABLE of CONTENTS<br />
• Important Safeguards – Pg 2<br />
• How to Open and Close – Pg 3<br />
• Features of Your <strong>Pressure</strong> <strong>Cooker</strong>/ Canner – pg 4<br />
• How to Use Your <strong>Pressure</strong> <strong>Cooker</strong>/ Canner – Pg 5<br />
• Steam Leakage – Pg 7<br />
• How to Clean Your <strong>Pressure</strong> <strong>Cooker</strong>/ Canner – Pg 7<br />
• Safety Systems – Pg 8<br />
• Replacement Parts – Pg 9<br />
• How to Identify Your <strong>Pressure</strong> <strong>Cooker</strong>/ Canner – Pg<br />
10<br />
• Certificate of Warranty – Pg 11<br />
• Questions and Answers – Pg 11<br />
• Cooking Timetables – Pg 12<br />
o Meat and Poultry – Pg 13<br />
o Fish and Seafood – Pg 14<br />
o Fresh Vegetables – Pg 15<br />
o Dried Vegetables – Pg 17<br />
• <strong>Recipe</strong>s for Your <strong>Pressure</strong> <strong>Cooker</strong>/ Canner<br />
o Beef – Pg 17<br />
o Pork – Pg 23<br />
o Fish and Seafood – Pg 26<br />
o Veal, Lamb, Poultry and Game – Pg 28<br />
o Vegetables and Soups – Pg 31<br />
• Canning<br />
o How to – Pg 34<br />
o Charts – Pg 36<br />
o Meat and Fish – Pg 37<br />
o Vegetables – Pg 38<br />
o Fruit – Pg 40<br />
o Syrup for Fruit – Pg 41<br />
o Problems – Pg 42<br />
PLEASE CAREFULLY READ THE INSTRUCTIONS IN THIS MANUAL BEFORE USING YOUR<br />
PRESSURE COOKER/ CANNER, SINCE ITS INCORRECT USE CAN RESULT IN BURNS AND OTHER<br />
SERIOUS ACCIDENTS.<br />
Page 1 of 42
Important Safeguards<br />
When using pressure cookers, basic safety precautions should always be followed. If you have a question<br />
on the proper operation of your pressure cooker please call our Consumer Center at 1-800-527-7727.<br />
1. Read all instructions before using your pressure cooker.<br />
2. Before each use make sure the vent tube is clear. Remove the pressure control and<br />
place the lid against the light to make sure that the tube is clear. If plugged clean all holes<br />
with a piece of wire. See Vent Tube Check.<br />
3. Never cook APPLESAUCE, CRANBERRIES, PEARL BARLEY, SPLIT PEASE, RHUBARB,<br />
NOODLES, MACARONI, SPAGHETTI or OTHER PASTA, OATMEAL or OTHER CEREALS<br />
in a pressure cooker. These foods tend to foam, froth and splutter, and can plug the vent<br />
tube.<br />
WARNING: If the vent tube is plugged, the overpressure devices can open and spray<br />
scalding hot steam and food. Keep head and face away from cooker. See How to Use Your<br />
<strong>Pressure</strong> <strong>Cooker</strong>.<br />
4. Never fill your pressure cooker more than 2/3 full. When cooking foods that puff<br />
up during cooking, such as rice and dried vegetables, do not fill more than 1/2<br />
full.<br />
WARNING: Overfilling the cooker can plug the vent tube causing a release of scalding<br />
steam from the overpressure devices. See How to Use Your <strong>Pressure</strong> <strong>Cooker</strong>.<br />
5. This appliance cooks under pressure. make absolutely sure your pressure cooker is properly<br />
closed before placing on heat. The cooker is closed when the lid handle is directly<br />
over the handle of the pan.<br />
WARNING: Improper closure of the lid can cause the lid to be thrown from the pan. See<br />
How to Open and Close.<br />
6. If the overpressure devices release, protect yourself from the steam and turn off heat and<br />
allow the cooker to cool. The reusable overpressure plug may be reset. If the gasket has<br />
blown out of the overpressure window replace with a new gasket. Do not reuse.<br />
7. Never try to open your pressure cooker until the cooker is thoroughly cool and the internal<br />
pressure is down. When the pressure is down the lid should turn easily. Never try to force<br />
open the lid if it seems locked tight. See Food Removal.<br />
8. Never remove the <strong>Pressure</strong> Control during cooking or when the cooker is still hot. Steam<br />
will release through the vent tube that can cause burns.<br />
9. Supervise children closely when using your pressure cooker near children. Keep handles<br />
turned toward the inside of the stove.<br />
10. Always remove the gasket before using the cooker as a conventional (non Pressurized)<br />
covered pan without the pressure control. If you leave the gasket in, some pressure can<br />
develop in the cooker. Without the gasket, no pressure will develop.<br />
11. Never use your <strong>Pressure</strong> <strong>Cooker</strong> for other than its intended use: cooking appropriate foods<br />
under pressure on residential ranges. Never place the cooker inside a heated oven. Do not<br />
use the cooker outdoors.<br />
12. Never use your pressure <strong>Cooker</strong> for pressure frying with oil and never "broast" (pressure<br />
cook with oil or shortening instead of water) in your cooker.<br />
13. Do not touch hot metal surfaces. Use handles or knobs. Be extremely careful when moving<br />
a pressure cooker full of hot liquids.<br />
Save these instructions.<br />
Page 2 of 42
How to Open and Close<br />
To Close<br />
Find OPEN-CLOSE on top of the lid located left of the lid<br />
handle. Turn and place lid so the arrow is pointing toward the<br />
center of the pan handle, Fig. A. next turn the lid clockwise,<br />
Fig. B, until the handle on the lid is directly over the<br />
handle on the pan, Fig .C.<br />
To Open<br />
To open, turn the lid counterclockwise, Fig. D, until the arrow<br />
OPEN-CLOSE points to the center of the Pan Handle, lifting<br />
the lid to open, Fig .E. Practice this operation several times<br />
until you master it. If the lid is hard to turn, lubricate the<br />
Rubber Gasket with cooking oil. Excessive lubrication may<br />
deform the Rubber Gasket. Do not lubricate the Rubber<br />
Gasket after the third time you've used your <strong>Pressure</strong> <strong>Cooker</strong>.<br />
Whenever the cooker is in use or under pressure, the handle<br />
on the lid must always be over the handle on the pan. Never<br />
use force to open and never open when under pressure.<br />
Consult How to Use Your <strong>Pressure</strong> <strong>Cooker</strong>.<br />
Page 3 of 42
Features of Your <strong>Pressure</strong> <strong>Cooker</strong><br />
1. - SINGLE PRESSURE CONTROL Keeps internal pressure steady, it is an automatic<br />
cooking control, operating at a pressure of 10 PSI (pounds per square inch). Included with<br />
4.2 & 6 Qt. Models.<br />
a. - SELECTIVE PRESSURE CONTROL Keeps internal pressure steady, allowing the selection<br />
of 3 cooking pressures: 5, 10 and 15 PSI. To disassemble the Selective <strong>Pressure</strong> Control,<br />
turn the knob keeping the rest of the assembly fixed, until the notches of the knob are<br />
aligned with the notches of the assembly, thus releasing the components of the control.<br />
Included with 8, 12 & 22 Qt. Models.<br />
b. -VENT TUBE Fastened to the center of the lid, having holes allowing for the release of<br />
steam. The Single <strong>Pressure</strong> Control or Selective <strong>Pressure</strong> Control is connected to the top.<br />
c. - PAN AND LID HANDLES Allow the opening and closing of your <strong>Pressure</strong> <strong>Cooker</strong> as well<br />
as it's handling. If handles become loose tighten with a screw driver.<br />
- REUSABLE OVERPRESSURE PLUG It will release if the vent tube becomes plugged and the<br />
cooker develops too much pressure. The red pin in the center pushed out, releasing steam<br />
(Fig. A) on page 7.<br />
d. - SAFETY WINDOW This is an additional feature that will release if the vent tube and<br />
reusable overpressure plug becomes plugged and the cooker develops too much pressure.<br />
The rubber gasket will push out from the lid opening releasing the steam.<br />
e. - RUBBER GASKET Fitted inside the lid, it's function is to seal the lid of the pan of the<br />
<strong>Pressure</strong> <strong>Cooker</strong>.<br />
f. - SAFETY LOCKS Located on the lid and pan are locking lags, this feature prevents the<br />
opening of the lid of your pressure cooker when pressurized.<br />
g. - SPRING SAFETY DEVICE Located in the lid handle or lid. Its function is to prevent the<br />
pressurization of your cooker before being closed.<br />
h. - COOKING RACK To prevent food from sticking to the bottom of the cooker and to place<br />
jars off the bottom of the 8, 12 and 22 Qt. canners.<br />
Page 4 of 42
Never Cook APPLESAUCE, CRANBERRIES, PEARL BARLEY, SPLIT PEAS, RHUBARB, NOODLES,<br />
MACARONI, SPAGHETTI or OTHER PASTA, OATMEAL or OTHER CEREALS in a <strong>Pressure</strong> <strong>Cooker</strong>.<br />
Page 5 of 42
How to use your <strong>Pressure</strong> <strong>Cooker</strong><br />
VENT TUBE CHECK Pick up the lid of your <strong>Pressure</strong> <strong>Cooker</strong><br />
remove the <strong>Pressure</strong> Control and hold the lid against the<br />
light to verify if the Vent Tube is clear. In the event it is<br />
blocked, clean it with a wire along with all other holes<br />
located inside the cover. Look again against the light to<br />
make sure that it is clean. After cleaning, place <strong>Pressure</strong><br />
Control on top of Vent Tube.<br />
FILLING Fill the cooker with food and add the required<br />
amount of water. Make sure the quantity of food and water is<br />
correct. Never fill the cooker more than 1/2 full of foods that<br />
puff up like rice and dried vegetables. For all other foods,<br />
never fill more than 2/3 full.<br />
COOKING Place the cooker on high heat until the <strong>Pressure</strong> Control begins to release<br />
steam. The <strong>Pressure</strong> Control will rock or jiggle when the cooker reaches its pressure.<br />
Lower the heat so that the pressure control rocks gently. Generally a setting of<br />
'medium' or 'low' will be right. Count cooking time from the first jiggle of the <strong>Pressure</strong><br />
Control. See Cooking Time Table, page 14 for approximate cooking times.<br />
Caution: Never beat a spoon or other utensil on the rim of the pan. Any denting of<br />
the rim can prevent a good gasket seal causing steam leakage.<br />
FOOD REMOVAL When cooking is done, turn heat off and reduce the pressure. Do not remove the<br />
<strong>Pressure</strong> Control until pressure is completely reduced.<br />
YOU CAN REDUCE PRESSURE THREE WAYS:<br />
1. fast - for fresh vegetables and fish<br />
Run cold water over the cooker (Fig. A), or place<br />
it in a pan of cold water. Depending on the<br />
amount of food in the cooker, it will take 15-60<br />
seconds for the pressure to go down fully.<br />
2. normally - for canning<br />
Let the cooker cool slowly to room temperature.<br />
This will take 30-40 minutes for a small cooker,<br />
45-60 minutes for the largest canner.<br />
3. combination - for meats and dried vegetables<br />
Let the cooker cool normally at room temperature for 5 min, then place the cooker under<br />
cold water to reduce the remaining pressure.<br />
As the pressure is reduced, air will re-enter the cooker and you will hear a<br />
hissing or squealing sound. After you have cooled the cooker, raise the<br />
<strong>Pressure</strong> Control with a fork (Fig. B) to make sure the pressure is down and<br />
if it is, remove the pressure control. If steam escapes , the pressure is not<br />
down. Continue to cool the cooker with cold water until the pressure is<br />
down. Open the cover by turning the cover counter clockwise until the<br />
OPEN-CLOSE arrow points to the center of the pan handle. When pressure is<br />
down cover should turn easily. Warning: Never tug or force the cover<br />
open. <strong>Pressure</strong> may not be down. Continue to cool cooker.<br />
Page 6 of 42
Steam Leakage<br />
STEAM ESCAPE THROUGH THE VENT TUBE The movement (jiggling) of<br />
the pressure control and release of small amounts of steam from the Vent<br />
Tube during cooking is normal. The purpose of releasing steam is to<br />
maintain a constant internal pressure. The formation of water droplets<br />
around the Vent Tube at the start of cooking is normal. This is caused by<br />
condensation of the steam leaving the cooker and coming in contact with<br />
the cooler metal. After he lid heats up, the water will disappear.<br />
STEAM ESCAPE AROUND RIM OF LID Water trapped inside the handle or<br />
between the gasket and cover will escape as steam when the cooker is heated up.<br />
The steam should stop as the pressure builds up. If it does not stop, turn the heat<br />
off and cool the cooker. Remove the pressure control and open the cooker. Remove<br />
the gasket from the lid and wipe dry the gasket, pan rim, and inside of the cover. If<br />
the gasket has shrunk from it's original size gently stretch it and start over. If<br />
gasket continues to leak, replace it. Do not use your <strong>Pressure</strong> <strong>Cooker</strong> if steam is<br />
constantly leaking from the rim of the lid.<br />
STEAM ESCAPES THROUGH THE REUSABLE OVERPRESSURE PLUG OR SAFTEY WINDOW Consult<br />
Safety Systems.<br />
How to Clean your <strong>Pressure</strong> <strong>Cooker</strong><br />
Before using your <strong>Pressure</strong> <strong>Cooker</strong> for the first time, wash it thoroughly in hot soapy water. Rinse<br />
thoroughly and dry.<br />
INTERIOR To make cleaning easier, run warm water into your<br />
after removing food. Wash in hot, soapy water. Rinse thoroughly and<br />
EXTERIOR Do not soak cover or pan in water or wash in the<br />
will dull the outside polished finish. Clean the exterior occasionally<br />
The outside bottom of the pan may be scoured with a steel wool pad<br />
cooker immediately<br />
dry.<br />
dishwasher, as this<br />
with silver polish.<br />
if necessary.<br />
GASKET After each use, remove the gasket from the lid. Wash in hot, soapy water.<br />
Rinse and dry. Then slip the gasket back in place in the cover.<br />
VENT TUBE Clean and check the vent tube as described in Vent Tube Check<br />
PRESSURE CONTROL The pressure control should remain clean because it is 'steam<br />
cleaned' during use. However, washing it in hot soapy water and rinsing will not harm<br />
it.<br />
STORAGE Store cooker with the lid off or upside down on cooker. DO not store with cover and gasket<br />
closed tight on pan.<br />
SPRING SAFETY After each use, clean the spring safety device with hot soapy water and rinse. Also,<br />
check the function of the safety device as described on 'SPRING SAFETY DEVICE'.<br />
Page 7 of 42
Safety Systems<br />
YOUR PRESSURE COOKER COMES WITH FOUR SAFETY SYSTEMS ESPECIALLY DEVELOPED FOR<br />
YOUR PROTECTION. READ CAREFULLY.<br />
1. SAFETY LOCKS The locks prevent opening the cooker while<br />
under pressure. Never force the cover to open. Make sure the<br />
pressure is down by cooling the cooker under cold water. With the<br />
pressure down the cover will turn open smoothly.<br />
2. REUSEABLE OVERPRESSURE PLUG This device is activated<br />
when the Vent Tube becomes plugged and excessive pressure<br />
builds in the cooker. If you follow the directions for using the<br />
cooker the Overpressure Plug will probably never release.<br />
However, when activated the red center pin will move upward<br />
releasing steam (Fig. A). Keep your head and face away from<br />
cooker. To resume cooking, turn off the heat, cool the cooker<br />
and open. Remove the <strong>Pressure</strong> Control and clean all vent tube<br />
holes. Perform Vent Tube Check and review Filling <strong>Instructions</strong>.<br />
Reset the red center pin by pushing the pin down (Fig. B). If the<br />
Overpressure Plug is leaking, with vent tube clear, replace it.<br />
To remove a damaged Overpressure Plug, remove red pin and<br />
push on the black part of the valve from the top or outside of the<br />
lid. Clean the hole in the cover with hot soapy water and rinse. To<br />
replace, push pointed end of valve through the underside of the<br />
cover. The word "INSIDE" will be visible from the underside of the<br />
cover when correctly installed (Fig. C).<br />
3. OVERPRESSURE WINDOW This feature is designed to operate<br />
when both the Vent Tube and Over <strong>Pressure</strong> Plug are blocked.<br />
Excessive pressure will force the gasket out of the window and<br />
release steam. If this should happen, turn off heat and cool your<br />
cooker with cold water and open the lid. Remove the <strong>Pressure</strong><br />
Control and clean all vent tube holes. Perform Vent Tube Check<br />
and review Filling <strong>Instructions</strong>. Clean the Overpressure Plug with<br />
hot soapy water and rinse. Do not reuse the gasket; replace<br />
it.<br />
4. SPRING SAFETY DEVICE<br />
a. (4.2, 6 & 8 Qt. Models)<br />
Located inside the lid handle the spring safety pin pushes on the<br />
gasket to prevent the cooker from being pressurized before the lid<br />
is closed. The lid is closed when the lid handle is directly<br />
above the pan handle. Never cook with the lid in any other<br />
position. Improper closure can cause the lid to be thrown<br />
from the pan. To check the spring compression, push on the pin<br />
with your finger to depress it and slide your finger off. The pin<br />
should snap back to its original position. If the pin does not snap<br />
back or is stuck, broken or missing you must replace the lid<br />
handle.<br />
Page 8 of 42
. (12 & 22 Qt. Models)<br />
Located on the outside of the lid, the spring safety pushed on the gasket to prevent the<br />
cooker from being pressurized before the lid is closed. The lid is closed when the lid<br />
handle is directly above the pan handle. Never cook with the lid in any other<br />
position. Improper closure can cause the lid to be thrown from the pan. If the<br />
spring is loose, damaged or not longer presses the gasket away from the edge of the cover,<br />
replace it before use. First remove the gasket and, using a flat screwdriver, push on either<br />
end of the spring to remove from slot. Fig. D. Remove the spring and clean the area. Fig. E.<br />
Place the new spring from the outside of the lid by pushing one end of the new spring into<br />
the slot. Next press on the side with your thumb and finger as shown in Fig. F and snap the<br />
other end of the spring in the remaining slot. Check to make sure the spring is set by<br />
pressing from the outside with your thumbs as shown in Fig. G<br />
RUBBER GASKET The gasket inside the lid seals the lid when the cooker<br />
is closed according to the directions. After a long period of use, the gasket<br />
may become hard or shrink losing its sealing ability. Gently stretch gasket<br />
and test it. If it continues to leak, replace it.<br />
REPLACEMENT PARTS<br />
WARNING: Always use genuine replacement parts.<br />
The use of parts not manufactured by MIRRO/ KitchenPro can cause injury!<br />
Page 9 of 42
IDENTIFY YOUR PRESSURE COOKER<br />
The stamp on the bottom of your pressure cooker/ canner identifies your product.<br />
This example is for the (4.2 Qt.) Model.<br />
Write down the capacity of your cooker, model number and date of manufacture. This information is<br />
important for the warranty and replacement parts.<br />
Quarts Model Date of Manufacture<br />
Page 10 of 42
Ten Year Limited Warranty<br />
Our Promise to You:<br />
This <strong>Mirro</strong> Company product is warranted against defects in workmanship and material for a period of TEN<br />
YEARS from the date that the product is originally purchased. If this product becomes defective within the<br />
warranty period, <strong>Mirro</strong> will repair it or replace it.<br />
This warranty is not applicable to the gasket and reusable overpressure plug or damage to the<br />
product resulting from misuse, accidents or alterations to the product. MIRRO SHALL NOT BE LIABLE<br />
FOR INCIDENTAL OR CONSEQUENTIAL DAMAGES, HOWEVER CAUSED. Some states do not allow<br />
the inclusion or limitation of incidental or consequential damages, so the above exclusions may not apply<br />
to you.<br />
If service becomes necessary within the warranty period, return the product, postage paid (by you), along<br />
with description of the claimed defect, to:<br />
MIRRO COMPANY<br />
ATTN: Consumer Center<br />
1512 Washington Street<br />
P.O. Box 1330<br />
Manitowoc, WI 54221-1330<br />
<strong>Mirro</strong> will refund the postage and insurance charges, if any, you prepaid if the service work requested is<br />
covered by the warranty.<br />
This warranty gives you specific legal rights and you may also have other rights which vary from state to<br />
state.<br />
Comments, Questions, Concerns Call Our Customer Center at 1-800-527-7727<br />
Questions and Answers<br />
HOW DOES THE PRESSURE COOKER WORK<br />
The <strong>Pressure</strong> cooker produces pressure by heating water thereby generating steam (similar to the steam<br />
that raises the lid of your conventional cooker). he <strong>Pressure</strong> <strong>Cooker</strong> keeps the steam inside, allowing the<br />
excess to escape through the Vent Tube. The <strong>Pressure</strong> Control automatically maintains a constant internal<br />
pressure.<br />
IF I USE HIGH HEAT WILL THE FOOD COOK FASTER<br />
No. Using high heat for cooking will only waste energy and result in excessive loss of cooking liquid<br />
(water). However you must use high heat to initially bring cooker up to pressure.<br />
WHY DOES STEAM ESCAPE FROM THE REUSEABLE OVERPRESSURE PLUG AT THE BEGINNING OF<br />
THE OPERATION<br />
At the start of cooking the internal pressure is low and not sufficient to activate the red center pin of the<br />
Page 11 of 42
Overpressure Plug. The purpose of this is to eliminate the cold air inside the cooker at the start of cooking.<br />
However, if during cooking, steam continues to escape, make sure the Overpressure Plug is clean and the<br />
red center pin is in the correct position. Remember to only open your cooker when the pressure is down.<br />
If the Overpressure Plug continues to leak replace it with a new one.<br />
WHEN SHOULD I REPLACE THE RUBBER GASKET<br />
The lifespan of your Rubber gasket depends on the type of food and how frequently you use your <strong>Pressure</strong><br />
<strong>Cooker</strong>. If you notice steam escaping between the body and the lid (as long as the gasket and lid are<br />
clean and properly installed), stretch the Rubber Gasket slightly and test it again. Should the leakage<br />
continue, replace it with a new and original one.<br />
WHAT SHOULD I DO IF, DURING COOKING, STEAM STOPS COMING OUT OF THE VENT TUBE<br />
Turn off the heat and wait while your <strong>Pressure</strong> <strong>Cooker</strong> cools to room temperature. Open it and remove the<br />
<strong>Pressure</strong> Control, check the Vent Tube against the light and clean it with wire, check the level of food and<br />
water (if in excess remove part of it), close the lid correctly, replace he <strong>Pressure</strong> Control and resume<br />
cooking.<br />
WHAT MAKES THE RUBBER GASKET STRETCH, SHRINK, SWELL OR STIFFEN<br />
The stretching or 'swelling' may occur when there is accumulation of grease from the food or excessive<br />
oiling. Wash it thoroughly after each use. Stiffness or shrinkage is caused by pressure, heat and age. If<br />
this occurs, replace with a new one.<br />
WHEN COOLING MY PRESSURE COOKER UNDER THE WATER TAP, IT WHISTLES; IS THIS<br />
DANGEROUS<br />
While being cooled under water, initial pressure is quickly reduced producing a vacuum. The whistle is<br />
produced by the incoming air. This is normal and not dangerous.<br />
WHAT MAKES THE COOKER LID HARD TO CLOSE<br />
In a new cooker, the gasket is dry and often very snug fitting. Pressing down on the cover with one hand,<br />
while you close the cooker with the other will often help. You may lubricate the gasket with cooking oil or<br />
shortening for the first two or three uses. Caution: Excessive lubrication will cause the gasket to swell and<br />
not fit properly.<br />
HOW DO I KNOW WHEN THE PRESSURE COOKER IS OPERATING CORRECTLY<br />
As long as the cooker lid is closed, that is lid handle directly over pan handle and the <strong>Pressure</strong> Control is<br />
gently rocking or jiggling you can be sure the cooker is maintaining the proper internal pressure. The<br />
<strong>Pressure</strong> <strong>Cooker</strong> never need to be tested or adjusted for accuracy.<br />
COOKING TIMETABLES<br />
How to Adapt Your Own <strong>Recipe</strong>s to <strong>Pressure</strong> Cooking<br />
The recipes in this book are only a start; most foods that can be boiled, steamed, or braised are suitable<br />
for pressure cooking. By following a few simple guidelines, you can adapt your favorite recipes for<br />
pressure cooking.<br />
1. Use the timetables and recipes in this book to determine pressure, cooking time, amount of<br />
liquid, and cooling method for use in your own recipes.<br />
2. you may use other liquids such as wine, beer, broth, tomato juice, etc. in place of an equal<br />
amount of water, but do not use milk or milk products as they boil over and scorch<br />
easily.<br />
3. You may cook different foods together. If they require different cooking times, just start the<br />
food with the longest cooking time first, and add the others later; as in conventional<br />
cooking.<br />
Page 12 of 42
MEAT and POULTRY TIMETABLE<br />
This pressure cooker is ideal for tenderizing the less tender cuts of meat. Most meats (except corned beef,<br />
salt pork and tongue) should be browned in hot fat in the uncovered cooker before pressure cooking.<br />
Cooking time may vary depending upon cut, grade, amount of bone, etc., and may be adjusted to suit<br />
your taste. Time is given as a total rather than minutes per pound.<br />
FOR ALL MEAT AND POULTRY COOL COOKER NORMALLY FOR 5 MINUTES, THEN PLACE UNDER FAUCET OR<br />
IN A PAN OF COLD WATER TO REDUCE PRESSURE.<br />
Amount of Liquid<br />
4.2 Qt.<br />
<strong>Cooker</strong><br />
6/8 Qt.<br />
<strong>Cooker</strong><br />
Meat and Poultry<br />
Minutes To<br />
Cook<br />
at 10 at 15<br />
Lbs. Lbs.<br />
6 cups 8 cups<br />
Beef, Corned - 3-4 in. thick. Follow pkg. directions for<br />
preparation for cooking.<br />
60 45<br />
1 1/2 cups 2 cups Beef Flank Steak 45 35<br />
3 cups 4cups<br />
Beef Heart - Remove veins. Cover with salted water 1/2 hr.<br />
Drain. Add fresh water and 1/4 cup vinegar. Cook.<br />
60 45<br />
2 cups 2 1/2 cups Beef Liver - Slice. Cook on rack. 6 5<br />
2 cups 2 1/2 cups Beef Pot Roast (blade, chuck or rump) - 2-3 in. thick. 40-50 30-40<br />
2 cups 2 1/2 cups Beef Round Steak (Swiss) - 1/2 in. 25-30 20-25<br />
2 cups 2 1/2 cups Beef Short Ribs 45-50 35-40<br />
3 cups 3 1/2 cups Beef Stew - 1 in. pieces 20-25 15-20<br />
Beef Tongue<br />
4 cups 5 cups<br />
Fresh or smoked - Cook. Cool in cooking liquid. Skin.<br />
Cured (corned) - Cover with water several hrs. Drain. Cook.<br />
60 45<br />
Cool in cooking liquid. Skin<br />
2 cups 2 1/2 Chicken (fried) 2 1/2 -3 lbs. 15 12<br />
3 cups 4 cups Chicken (fricasseed)-3-4 lbs. 20-25 15-20<br />
3 cups 4 cups Chicken (stewed) - 4-5 lbs. 30-40 25-30<br />
4 cups 5 cups Ham (shank, uncooked) - 3-5 lbs. 45-60 35-45<br />
4 cups 5 cups Ham (picnic shoulder, uncooked) - 3-6 lbs. 45-60 35-45<br />
1 cup 1 1/2 cups Ham (slices, uncooked) - 1/2 in. slice 6-8 5-6<br />
1 cup 1 1/2 cups 1 in. (2.5 cm) slice 12-14 9-12<br />
1 1/2 cups 2 cups 2 in. (5 cm) slice 18-25 12-20<br />
3 cups 6 cups Lamb Shoulder - 3-6 lbs. 45-60 35-45<br />
1 cup 1 1/2 cups Lamb Steak - 1/2 in. thick 12 9<br />
3 cups 4 cups Lamb Stew 1 in. pieces 15 10<br />
4 cups 5 cups Mutton (boiled) - 4-6 lbs. 60 45<br />
3 cups 4 cups Oxtails 60 45<br />
1 1/2 cups 2 cups Partridge 15 12<br />
2 cups 2 1/2 cups Pheasant 20-25 15-20<br />
1 1/2 cups 2 cups Pork Chops 12 9<br />
4 cups 5 cups Pork Shanks 45 35<br />
2 1/2 cups 3 cups Pork Shoulder - 2 1/2 in. thick 45-50 35-40<br />
1 1/2 cups 2 cups Pork Spareribs 20 15<br />
1 1/2 cups 2 cups Rabbit 18-20 12-15<br />
2 cups 2 1/2 cups Squirrel 25-30 20-25<br />
Turkey (Same as chicken)<br />
3 cups 4 cups Veal Heart 45 35<br />
4 cups 5 cups Veal Shank 50-60 40-45<br />
1 cup 2 cups Veal Steak - 1/2 in. thick 18-20 12-15<br />
3 cups 4cups Veal Stew - 1 in. pieces 15 10<br />
3 cups 4 cups Veal Tongue - See Beef Tongue (above) 30 25<br />
2 cups 2 1/2 cups Venison Pot Roast - 3-4 in. thick 40-50 30-40<br />
Page 13 of 42
FISH and SEAFOOD TIMETABLE<br />
FOR ALL FISH AND SEAFOOD, REDUCE PRESSURE INSTANTLY BY PLACING COOKER UNDER COLD WATER<br />
(FAUCET).<br />
Amount of Liquid<br />
4.2 Qt.<br />
<strong>Cooker</strong><br />
6/8 Qt.<br />
<strong>Cooker</strong><br />
Fish and Seafood<br />
Minutes to<br />
Cook<br />
at 10 at 15<br />
Lbs. Lbs.<br />
1 cup 2 cup<br />
1 cup 2 cup<br />
3 cups 6 cups<br />
3 cups 6 cups<br />
3 cups 6 cups<br />
3 cups 6 cups<br />
Fish Steaks - 3/4 in. thick. Season with salt and pepper. Dip in flour.<br />
Brown in hot shortening in cooker. Place Steaks on rack. Add water.<br />
Cover and cook.<br />
4-6 3-5<br />
Steamed Fish - 3/4 in. thick. Place water, sliced onion, bay leaf and<br />
parsley in cooker. Season fish and place on rack in cooker. Cover and 3-5 2-4<br />
cook.<br />
Finnan Haddie (Salt Cod) - Cover with water and let stand 1 hour.<br />
Drain. Place in cooker with water. Cover and cook. Flake fish and 8 6<br />
discard skin. Serve with white sauce.<br />
Shrimp - Wash shrimp. Place in cooker with water and lemon slice.<br />
Cover and cook. Drain. Cover with cold water. Shell and clean.<br />
4-6 3-5<br />
Lobster Tail - Wash lobster tails. Place in cooker with water and salt.<br />
6-8<br />
Cover and cook. Plunge lobster tails in cold water and remove shells.<br />
5-6<br />
Clams - Wash clams thoroughly in salted water, using a brush to<br />
scrub the shells. Cover clams with cold water and salt. Cover and cook.<br />
Strained clam liquid can be used in clam chowder.<br />
Page 14 of 42
FRESH VEGETABLE TIMETABLE<br />
Compared with other cooking methods, many fresh vegetables require only about one third of the cooking<br />
time. The timetable is a good guide, but can only approximate because of the variation in age and type of<br />
each food. Quantity of water shown in chart should be used regardless of whether a cupful or a pan full is<br />
to be cooked. Be sure to reduce pressure instantly to prevent overcooking. If vegetables are wilted, soak<br />
for a few minutes to restore moisture. They may be seasoned either before or after cooking.<br />
Those vegetables that have similar cooking times may be cooked together in the cooker and flavors will<br />
not mingle. If desired, vegetables may be placed in individual metal or heatproof containers and placed on<br />
rack with water in bottom of cooker. Or, form containers of a double thickness of household aluminum foil<br />
pressed over inverted bowl or can. When cooking in such individual containers, leave containers<br />
uncovered and increase cooking time slightly.<br />
Follow general directions for operation of cooker.<br />
It is not necessary to use the rack unless specified, but if you prefer to do so, add an extra 1/4 cup of<br />
water.<br />
To drain cooking water from vegetables, remove cover after pressure is reduced, slip out gasket, replace<br />
cover without gasket and you have a perfect drainer. Food cannot slip out because the cover is locked on.<br />
FOR ALL VEGETABLES, REDUCE PRESSURE BY PLACING SOOKER UNDER COLD WATER (FAUCET).<br />
Amount of Liquid<br />
4.2 Qt.<br />
<strong>Cooker</strong><br />
6/8 Qt.<br />
<strong>Cooker</strong><br />
Fresh Vegetables<br />
Minutes to<br />
Cook<br />
at 10 Lbs.<br />
2 cups 2 1/2 cups Artichoke - Wash, cut off tops and ties ends to hold shape. 15<br />
1 cup 1 1/2 cups Asparagus - Snap off tough ends. Remove scales. Wash. 2-2 1/2<br />
1 cup 1 1/2 cups Beans, Green or Wax - Wash and cut. 2-3<br />
1 cup 1 1/2 cups Beans, Lima (fresh)- Shell and wash. 2<br />
1 1/2 cups 2 cups<br />
Beets (small whole) - cut tops, leaving 1 in. steam and root. Wash.<br />
12<br />
Cook. Cool. Remove skin. Reheat for serving.<br />
2 cups 3 cups Beets (large, whole) - Same as small, whole beets above. 18<br />
1 cup<br />
Broccoli - Remove large outer leaves. Cut off tough part of stalk.<br />
1 1/2 cups<br />
Cut into strips. Wash.<br />
2-2 1/2<br />
1 1/2 cups 2 cups Brussels Sprouts - Wash. 5<br />
1 1/2 cups 2 cups<br />
Cabbage (shredded) - Remove wilted outer leaves. Quarter<br />
cabbage and shred into thin strips.<br />
2-3<br />
1 1/2 cups 2 cups<br />
Cabbage (wedges) - use medium size head. Cut in 2 or 3 in.<br />
wedges. Remove core.<br />
5-8<br />
1 1/2 cups 2 cups<br />
Cabbage, Red (shredded) - Remove wilted outer leaves. Quarter<br />
cabbage and shred into thin strips.<br />
5<br />
1/2 cup 1 cup Carrots (sliced) - Wash and scrape. Slice or cut in strips. 2 1/2<br />
1/2 cup 1 cup Carrots (small whole) - Wash and scrape. 4<br />
1 cup<br />
Cauliflower (flowerets) - Cut off stem and leaves. Break into large<br />
1 1/2 cups 2-3<br />
flowerets. Wash.<br />
Cauliflower (whole) - Cut off stem and leaves. Remove center<br />
2 cups 2 1/2 cups core, leaving only enough to keep flowerets from falling off. Cook on 6-8<br />
rack.<br />
1 cup<br />
Celery - Separate stalks. Wash well. With a knife, pull off tough<br />
1 1/2 cups<br />
fibres. Slice.<br />
3-5<br />
2 cups 2 1/2 cups Corn (on the cob) - Remove husks and silk. Wash. Cook on rack. 5<br />
1 cup 1 1/2 cups Corn (whole kernel) - Remove husks and silk. Wash. Cut off cob. 3<br />
1 cup<br />
Egg Plant - Wash, pare and cut into 1/2 or 1 in. cubes. Cook at once<br />
1 1/2 cups 3<br />
to prevent discoloration.<br />
1 cup<br />
Kale or Collards - Wash well in several waters. Remove tough veins<br />
1 1/2 cups 4-6<br />
and cut into 2 in. pieces.<br />
1 cup 1 1/2 cups Kohlrabi- Wash and peel. cut into 1/2 in. slices or 1 in. pieces. 4<br />
Page 15 of 42
1 cup 1 1/2 cups Okra - Cut off ends and wash. Cut into 1/2 in. pieces. 3<br />
1 cup 1 1/2 cups Onions (sliced) - Peel and slice. 3<br />
1 1/2 cups 2 cups Onions (whole medium) - Peel. 7-10<br />
1 cup 1 1/2 cups Parsnips (sliced) - Peel, wash and cut into 1/2 in. slice. 2<br />
1 1/2 cups 2 cups Parsnips (halves) - Peel, wash and cut in halves. Cook on rack. 7<br />
1 cup 1 1/2 cups Peas - Shell and wash. 2-3<br />
2 cups 2 1/2 cups Potatoes (sliced) - Scrub peel and slice. 2 1/2<br />
3 cups 4 cups<br />
Potatoes (medium, cut in halves) - Scrub, peel and cut in halves.<br />
Cook on rack.<br />
8<br />
3 cups 4 cups<br />
Potatoes (medium, whole) - Scrub. Cook peeled or unpeeled.<br />
Cook on rack.<br />
12-15<br />
2 cups 3cups<br />
Potatoes, Sweet or Yams (quartered) - Wash, peel and quarter.<br />
Cook on rack.<br />
6<br />
2 cups 3 cups<br />
Potatoes, Sweet or Yams (halved) - Wash, peel and cut in halves<br />
lengthwise. Cook on rack.<br />
8-10<br />
2 1/2 cups 3 cups Pumpkin - Cut in large pieces. Wash. Cook. Remove pulp and mash. 8-10<br />
1 1/2 cups 2 cups<br />
Rutabagas and Turnips - peel and wash. Cut into 1/2 in. cubes or<br />
slices.<br />
1 cup 11/2 cups Sauerkraut 12<br />
5<br />
1 cup 1 1/2 cups<br />
Spinach, Swiss Chard or Other Greens - Wash thoroughly in<br />
several waters.<br />
1<br />
1 1/2 cups 2 cups Squash, Acorn - Wash. Cut in half and remove seeds. Cook on rack. 6-7<br />
1 1/2 cups 2 cups<br />
Squash, Hubbard - Wash. Remove seeds. Cut in pieces. Cook on<br />
rack.<br />
8-10<br />
1 1/2 cups 2 cups<br />
Squash, Summer or Zucchini - Wash. Cut in pieces or slice. Cook<br />
on rack.<br />
2-3<br />
1/2 cup 1 cup Tomatoes - Scald 1 min. DIp in cold water and peel. 2 1/2<br />
1 1/2 cups 2 cups Turnips - Peel and wash. Cut into 1/2 in. cubes or slices. 5<br />
Page 16 of 42
DRIED VEGETABLE TIMETABLE<br />
Heat beans (not black eyed peas or lentils) and water (2 cups water for 1 cup beans) to boiling in cooker;<br />
boil 2 minutes remove from heat; cover and let stand 1 hour. Drain; add necessary water. ADD 1<br />
TABLESPOON VEGETABLE OIL TO PREVENT FROTHING. Bring up to pressure on high heat. Cook as<br />
directed.<br />
Alternate Method: Soak beans overnight in water to cover. Drain; add water and oil. bring up to pressure<br />
on high heat. Cook as directed.<br />
FOR ALL DRIED VEGETABLES, COOL COOKER NORMALLY FOR 5 MINS, THEN PLACE UNDER FAUCET.<br />
Amount of Liquid<br />
for 1 cup Vegetables<br />
Dried Vegetables<br />
Minutes to Cook<br />
4.2 Qt. <strong>Cooker</strong> 6/8 Qt. <strong>Cooker</strong> at 10 Lbs.<br />
3 cups 4 cups Black-eyed Peas 10<br />
4 cups 5 cups Great Northern Beans 20<br />
4 cups 5 cups Kidney Beans 30<br />
4 cups 5 cups Lentils 20<br />
4 cups 5 cups Lima Beans, large 30<br />
4 cups 5 cups Lima Beans, small 25<br />
4 cups 5 cups Navy Beans (Chick-Pea) 30<br />
4 cups 5 cups Pea Beans 20<br />
4 cups 5 cups Pinto Beans 10<br />
4 cups 5 cups Soybeans 35<br />
WARNING:<br />
DRIED VEGETABLES WILL EXPAND OR PUFF-UP DURING COOKING.<br />
NEVER FILL COOKER MORE THAN 1/2 FULL.<br />
OVERFILLING CAN PLUG VENT TUBE AND CAUSE RELEASE OF STEAM.<br />
RECIPES - Beef<br />
Barbequed Beef Short Ribs<br />
4.2 Qt. 6/8 Qt. Ingredients<br />
3 lbs 6 lbs Beef Short Ribs<br />
2 Tbsp 3 Tbsp Bacon Drippings<br />
2 Tbsp 1/4 cup Onion, sliced<br />
1 Tbsp 2 Tbsp Green Pepper, chopped<br />
1 cup 2 cups Catsup<br />
1 tsp 2 tsp Salt<br />
1 tsp 2 tsp Celery Seed<br />
2 Tbsp 1/4 cup Brown Sugar<br />
2 Tbsp 1/4 cup Lemon Juice<br />
2 tsp 1 Tbsp Dry Mustard<br />
2 cup 3 1/2 cup Water<br />
4 servings 8 servings<br />
1. Brown short ribs in dripping in pressure pan. Pour off excess fat.<br />
2. Mix remaining ingredients together and pour over meat.<br />
3. Cover, set control at 10 PSI and cook 40-50 minutes after control jiggles.<br />
4. Cool pan normally for 5 minutes, then place under faucet.<br />
5. Thicken sauce with 1 tablespoon flour mixed with 1/4 cup water for each cup of sauce.<br />
Page 17 of 42
Porcupine Meat Balls<br />
4.2 Qt. 6/8 Qt. Ingredients<br />
1 lb 2 lbs Ground Beef<br />
1/2 cup 1 cup Uncooked Rice<br />
1 Tbsp 2 Tbsp Onion, minced<br />
1 tsp 2 tsp Salt<br />
1/4 tsp 1/2 tsp Pepper<br />
1 10 1/oz. can 2 10 1/2 oz. cans Tomato Soup<br />
1 cup 1 1/2 cups Water<br />
Serves 4 Serves 8<br />
Beef Stew<br />
1. Combine meat, rice, onion, salt and pepper. Form into balls.<br />
2. Mix soup and water in pressure pan.<br />
3. Drop meat balls in pan. Cover, set control at 10 PSI and cook 10 minutes after control<br />
jiggles. Cool pan normally for 5 minutes, then place under faucet.<br />
4.2 Qt. 6/8 Qt. Ingredients<br />
1 1/2 lbs. 3 lbs. Beefs Stew Meat - 1 inch pieces<br />
1 Tbsp 2 Tbsp Fat<br />
1 tsp 2 tsp Salt<br />
Dash 1/4 tsp Pepper<br />
1/4 tsp 1/2 tsp Paprika<br />
3 cups 3 1/2 cups Water<br />
1/2 cup 1 cup Onions, chopped<br />
4 8 Carrots, whole<br />
4 8 Potatoes, medium, cut in halves<br />
4-6 servings 8-12 servings<br />
Beef Pot Roast<br />
1. Brown beef in fat in cooker. Season with salt, pepper and paprika. Add water<br />
2. Cover, set control at 10 PSI and cook 15 minutes after control jiggles.<br />
3. Cool cooker normally for 5 minutes, then place under faucet. Add remaining ingredients.<br />
4. Cover, set control at 10 PSI and cook 10 minutes after control jiggles. Reduce pressure<br />
instantly.<br />
4.2 Qt. 6/8 Qt. Ingredients<br />
2 lbs. 4 lbs. Beef Pot Roast 2-3 in. thick<br />
1 Tbsp 2 Tbsp Fat<br />
1 1/2 tsp 1 Tbsp Salt<br />
1/4 tsp 1/2 tsp Pepper<br />
2 4 Onions, medium, sliced<br />
2 cups 2 1/2 cups Water<br />
4-5 servings 8-10 servings<br />
1. Brown beef in fat in cooker<br />
2. Season with salt and pepper. Add onions and water.<br />
3. Cover, set control at 10 PSI and cook 45-60 minutes after control jiggles.<br />
4. Cool cooker normally for 5 minutes, then place under faucet. Prepare gravy recipe.<br />
Page 18 of 42
Flank Steak with Dressing<br />
4.2 Qt. 6/8 Qt. Ingredients<br />
1 steak 2 steaks Flank Steak (2 lbs.)<br />
Dressing:<br />
3/4 cup 1 1/2 cups Sausage Meat<br />
1 apple 2 apples Apple, peeled and sliced<br />
1 1/2 cups 3 cups Dried bread crumbs<br />
1 Tbsp 2 Tbsp Onion, minced<br />
1/4 tsp 1/2 tsp Salt<br />
3 Tbsp 6 Tbsp Fat<br />
1 1/2 cups 2 cups Water<br />
Serves 4 Serves 8<br />
1. Heat sausage meat in fry pan. Pour off excess fat.<br />
2. Add other ingredients.<br />
3. Trim edges of steak and sprinkle salt and pepper on.<br />
4. Spread dressing over flank steak, roll up loosely and tie it securely.<br />
5. Brown steak on all sides in fat in cooker<br />
6. Add water, cover, set control at 10 PSI and cook for 45 minutes after control jiggles.<br />
7. Cool cooker normally for 5 minutes and then place under faucet. Prepare gravy recipe.<br />
Braised Pepper Steak<br />
4.2 Qt. 6/8 Qt. Ingredients<br />
1 (about 1 1/2 lbs.) 2 (about 3 lbs.) Flank Steak - cut into 1/4 in. strips<br />
2 Tbsp 1/4 cup Fat<br />
1 4-oz. can 2 4-oz. cans Mushrooms<br />
2 cups 4 cups Water<br />
1 2 Beef Bouillon Cube<br />
2 Tbsp 1/4 cup Soy Sauce<br />
1 Tbsp 2 Tbsp Sugar<br />
1/4 tsp 1/2 tsp Garlic Salt<br />
Dash 1/4 tsp Pepper<br />
1 2 Green Pepper - cut in strips<br />
1 1/2 Tbsp 3 Tbsp Flour<br />
1/2 cup 1 cup Water<br />
Serves 4 Serves 8<br />
1. Brown steak strips in fat in cooker (brown about a third of the strips at a time).<br />
2. Add mushrooms, water, bouillon cube, soy sauce, garlic salt and pepper.<br />
3. Cover, set control at 10 PSI and cook for 5 minutes after control jiggles. Reduce pressure<br />
instantly.<br />
4. Add green pepper strips. Cover, set control at 10 PSI and cook an additional 3 minutes.<br />
Reduce pressure instantly<br />
5. Mix flour and water together, add and cook until thickened, stirring constantly. Serve over<br />
buttered noodles.<br />
Page 19 of 42
Chili Con Carne<br />
4.2 Qt. 6/8 Qt. Ingredients<br />
1 lb. 2 lbs. Ground Beef<br />
1/2 cup 1 cup Onion, chopped<br />
1 Tbsp 2 Tbsp Fat<br />
1 Tbsp 2 Tbsp Green Pepper, chopped<br />
1 cup 2 cups Canned Tomatoes<br />
1 tsp 2 tsp's Salt<br />
1/2 tsp 1 tsp Paprika<br />
1-2 tsp 2-4 tsp Chili Powder<br />
1 1-lb. can 2 1-lb. cans Kidney Beans, Drained (reserve liquid)<br />
4-5 servings 8-10 servings<br />
Beef Stroganoff<br />
1. Brown beef and onion in fat in cooker. Pour off excess fat.<br />
2. Add remaining ingredients except kidney beans. Add enough water to reserved bean liquid<br />
to measure 3 cups. Use 6 cups for 6/8-qt. recipe. Add to cooker. Break up tomatoes.<br />
3. Cover, set control at 10 PSI and cook 10 minutes after control jiggles.<br />
4. Cool cooker normally for 5 minutes, then place under faucet.<br />
5. Add kidney beans and simmer a few minutes.<br />
4.2 Qt. 6/8 Qt. Ingredients<br />
1 lb. 2 lbs. Beef Stew Meat - 1 in. pieces<br />
1 Tbsp 2 Tbsp Flour<br />
1 Tbsp 2 Tbsp Fat<br />
1 4-oz. can 2 4-oz cans Mushrooms, drained (reserve liquid)<br />
1 2 Onions, medium, sliced<br />
1 tsp 2 tsp Salt<br />
1/4 tsp 1/2 tsp Pepper<br />
Dash 1/4 tsp Ground Marjoram<br />
3 Tbsp 6 Tbsp Catsup<br />
1/2 cup 1 cup Dairy Sour Cream<br />
4 servings 8 servings<br />
1. Roll beef in flour. Brown in hot fat in cooker.<br />
2. Add enough water to reserved mushroom liquid to measure 1 1/2 cups. Use 3 cups for 6/8-<br />
qt. recipe. Add mushrooms, mushroom-water mixture and remaining ingredients except<br />
sour cream to cooker.<br />
3. Cover, set control at 10 PSI and cook 15 minutes after control jiggles.<br />
4. Cool cooker normally for 5 minutes, then place under faucet<br />
5. Stir in sour cream; heat through. Serve with noodles.<br />
Page 20 of 42
Hungarian Goulash<br />
4.2 Qt. 6/8 Qt. Ingredients<br />
1 1/2 lbs. 3 lbs. Beef Stew Meat, 1 in. pieces<br />
2 Tbsp 1/4 cup Fat<br />
2 3 Onions, medium, sliced<br />
1 tsp 2 tsp Salt<br />
1/4 tsp 1/2 tsp Pepper<br />
1/2 tsp 1 tsp Paprika<br />
1/2 1 Bay Leaf<br />
1/2 tsp 1 tsp Ground Marjoram<br />
3 cups 6 cups Water<br />
4 8 Potatoes, medium, whole<br />
4 8 Carrots, medium, cut lengthwise<br />
2 4 Turnips, cut in halves<br />
1 cup 2 cups Green Pepper, chopped<br />
4-6 servings 8-12 servings<br />
1. Brown beef in fat in cooker.<br />
2. Add onions, salt, pepper, paprika, bay leaf, marjoram and water.<br />
3. Cover, set control at 10 PSI and cook 15 minutes after control jiggles.<br />
4. Cool cooker normally for 5 minutes, then place under faucet.<br />
5. Place remaining ingredients on rack over beef.<br />
6. Cover, set control at 10 PSI and cook 10 minutes after control jiggles. Reduce pressure<br />
instantly<br />
7. Prepare gravy recipe.<br />
Corned Beef and Cabbage<br />
4.2 Qt. 6/8 Qt. Ingredients<br />
2 lbs. 4 lbs. Corned Beef Brisket<br />
3 cups 4 cups Water<br />
4 8 Carrots<br />
4 6 Potatoes, medium, cut in halves<br />
4 8 Cabbage wedges<br />
4 8 Onions, small, whole<br />
4 servings 8 servings<br />
1. Place corned beef in cooker. Add water<br />
2. Cover, set control at 10 PSI and cook 60 minutes after control jiggles.<br />
3. Cool cooker normally for 5 minutes, then place under faucet.<br />
4. Add remaining ingredients.<br />
5. Cover, set control at 10 PSI and cook 8-10 minutes after control jiggles. Reduce pressure<br />
instantly.<br />
Page 21 of 42
Swiss Steak with Pickled Onions<br />
4.2 Qt. 6/8 Qt. Ingredients<br />
1/4 cup 1/2 cup Flour<br />
1 tsp 2 tsp Salt<br />
Dash 1/4 tsp Pepper<br />
1 1/2 lbs. 3 lbs. Round Steak- 1/2 in. thick<br />
2 Tbsp 3 Tbsp Fat<br />
1 10-oz. bottle 1 10-oz. bottles Pickled Onions, drained (reserve liquid)<br />
4-6 servings 8-12 servings<br />
1. Mix flour, salt and pepper.<br />
2. Cut steak into individual servings; coat with flour mixture.<br />
3. Brown in hot fat in cooker.<br />
4. Add enough water to onion liquid to measure 1 1/2 cups. Use 3 cups for 6/8-qt. recipe. Add<br />
onions and onion-water mixture to cooker.<br />
5. Cover, set control to 10 PSI and cook for 35 minutes after control jiggles.<br />
6. Cool cooker normally for 5 minutes, then place under faucet. Prepare gravy recipe.<br />
Beef Vegetable Dinner<br />
4.2 Qt. 6/8 Qt. Ingredients<br />
3/4 lb. 1 1/2 lbs. Beef, Boneless Chuck, Tip or Round<br />
1 Tbsp 2 Tbsp Fat<br />
1/4 cup 1/2 cup Onion, chopped<br />
2 Tbsp 1/4 cup Green Pepper, chopped<br />
1 tsp 2 tsp Salt<br />
1/2 tsp 1 tsp Chili Powder<br />
1/4 tsp 1/2 tsp Pepper<br />
1 1-lb can 2 1-lb cans Whole Kernel Corn, drained (reserve liquid)<br />
2 cup 4 cup Corn liquid and water<br />
1 8-oz can 2 8-oz cans Tomato sauce<br />
1/4 cup 1/2 cup Catsup<br />
1 cup 2 cups Wide Noodles, uncooked<br />
4 servings 8 servings<br />
Gravy<br />
1. Cut beef into 1 x 1/4 in. pieces. Brown in fat in cooker.<br />
2. Add remaining ingredients and stir.<br />
3. Cover, set control at 10 PSI and cook 5 minutes after control jiggles.<br />
4. Cool cooker normally for 5 minutes, then place under faucet.<br />
4.2 Qt. 6/8 Qt. Ingredients<br />
1 cup 2 cups Broth (liquid from cooked meat)<br />
2 Tbsp 1/4 cup Flour<br />
1/4 cup 1/2 cup Cold Water<br />
1. Skim excess fat from broth. Add enough water to broth, if necessary, to measure 1 cup.<br />
Use 2 cups for 6/8 Qt. recipe.<br />
2. Mix flour and water until smooth. Gradually stir into broth.<br />
3. Cook over medium heat, stirring constantly, until gravy is smooth and thickened. Season<br />
with salt and pepper.<br />
Page 22 of 42
RECIPES - Pork<br />
Stuffed Pork Chops<br />
4.2 Qt. 6/8 Qt. Ingredients<br />
1 1/2 cups 3 cups Bread Cubes<br />
1 Tbsp 2 Tbsp Butter or Margarine<br />
2 Tbsp 1/4 cup Parsley, chopped<br />
4 8<br />
Pork Chops - 1 to 1 1/2 in. thick, with pocket cut<br />
along side of bone.<br />
3/4 tsp 1 1/2 tsp Salt<br />
Dash 1/4 tsp Pepper<br />
1 Tbsp 2 Tbsp Fat<br />
1 10-oz 1 10-oz<br />
can can<br />
Consommé<br />
1 cup 2 cups Water<br />
4<br />
servings<br />
8<br />
servings<br />
1. Brown bread cubes in butter. Mix with parsley.<br />
2. Stuff chops with bread mixture. Season with salt and pepper.<br />
3. Brown chops in fat in cooker.<br />
4. Place chops on rack in cooker. Add consommé and water.<br />
5. Cover, set control at 10 PSI and cook 12-15 minutes after control jiggles.<br />
6. Cool cooker normally for 5 minutes, then place under faucet. Prepare gravy recipe.<br />
Spareribs, Sauerkraut and Potatoes<br />
4.2 Qt 6/8 Qt. Ingredients<br />
2 1/2 lbs. 5 lbs. Spareribs<br />
1 Tbsp 2 Tbsp Fat<br />
1 tsp 2 tsp Salt<br />
Dash 1/4 tsp Pepper<br />
1 1-lb can 2 1-lb cans Sauerkraut, drained<br />
1 Tbsp 2 Tbsp Brown Sugar<br />
4 8 Potatoes, medium, whole<br />
1 1/4 cups 3 cups Water<br />
4 servings 8 servings<br />
1. Brown ribs in fat in cooker. Season with salt and pepper.<br />
2. Put sauerkraut in bottom of cooker and sprinkle with brown sugar<br />
3. Place ribs and potatoes over sauerkraut. Add water.<br />
4. Cover, set control at 10 PSI and cook 20 minutes after control jiggles.<br />
5. Cool cooker normally for 5 minutes, then place under faucet.<br />
Page 23 of 42
Scalloped Potatoes and Ham<br />
4.2 Qt. 6/8 Qt. Ingredients<br />
3 3 Potatoes, medium<br />
3 Tbsp 3 Tbsp Flour<br />
3/4 tsp 3/4 tsp Salt<br />
1/4 tsp 1/4 tsp Pepper<br />
1 cup 1 cup Ham, cooked, cubed<br />
2 Tbsp 2 Tbsp Onion, chopped<br />
2 Tbsp 2 Tbsp Butter or Margarine<br />
1 cup 1 cup Milk<br />
4 servings 4 servings<br />
1. Cut potatoes in thin slices (about 3 cups). Mix flour, salt and pepper.<br />
2. In greased 1 1/2 quart metal or heatproof glass bowl, arrange 3 layers of potatoes and<br />
ham, sprinkling each layer of potatoes with part of the flour mixture and dotting with<br />
butter.<br />
3. Pour milk over potatoes and cover bowl with foil.<br />
4. Pour 2 cups water in cooker. Use 3 cups for 6/8-qt. recipe. Place bowl on rack in cooker.<br />
5. Cover, set control at 10 PSI and cook 20 minutes after control jiggles.<br />
6. Cool cooker normally for 5 minutes, then place under faucet.<br />
7. Garnish potatoes, if desired, with paprika, chopped parsley or grated Cheddar cheese.<br />
Pork Chops and Browned Rice.<br />
4.2 Qt. 6/8 Qt. Ingredients<br />
4 8 Pork Chops - 1/2 in. thick<br />
1 Tbsp 2 Tbsp Fat<br />
1 cup 2 cups Rice, uncooked<br />
1 1-lb can 2 1-lb cans Tomatoes<br />
1 tsp 2 tsp Salt<br />
1/4 tsp 1/2 tsp Pepper<br />
1/4 tsp 1/2 tsp Chili Pepper<br />
2 Tbsp 1/4 cup Onions, chopped<br />
3 Tbsp 6 Tbsp Green Pepper, chopped<br />
2 cups 4 cups Water<br />
4 servings 8 servings<br />
1. Brown chops in fat in cooker. Remove.<br />
2. Place rice in hot fat. Stir constantly until browned.<br />
3. Add tomatoes (with liquid) and remaining ingredients. Stir well, breaking up tomatoes. Add<br />
pork chops and water.<br />
4. Cover, set control at 10 PSI and bring pressure up over moderate heat. Cook 12 minutes<br />
after control jiggles.<br />
5. Cool cooker normally for 5 minutes, then place under faucet.<br />
Page 24 of 42
Chow Mein<br />
4.2 Qt 6/8 Qt. Ingredients<br />
3/4 lb. 1 1/2 lbs. Pork, cubed<br />
3/4 lb. 1 1/2 lbs. Beef, cubed<br />
2 Tbsp 3 Tbsp Fat<br />
2 cups 4 cups Water<br />
2 4 Onions, medium, sliced<br />
3 cups 6 cups Celery, sliced<br />
1/2 tsp 1 tsp Salt<br />
Dash 1/4 tsp Pepper<br />
2 Tbsp 1/4 cup Cornstarch<br />
1/2 cup 1 cup Water<br />
1/4 cup 1/2 cup Soy Sauce<br />
1 1-lb. can 2 1-lb. cans Bean Sprouts, drained<br />
1/2 cup 1 cup Mushrooms, sliced<br />
1 8-oz. can 2 8-oz.cans Water Chestnuts, drained and sliced<br />
4-6 servings 8-12 servings<br />
Rice<br />
1. Brown meat in fat in cooker.<br />
2. Add water, onions, celery, salt and pepper.<br />
3. Cover, set control at 10 PSI and cook 10 minutes after control jiggles.<br />
4. Cool cooker normally for 5 minutes, then place under faucet.<br />
5. Mix cornstarch and water. Gradually stir into meat mixture. Cook until thickened, stirring<br />
constantly.<br />
6. Add remaining ingredients. Serve on hot rice.<br />
The best way to cook rice is in an uncovered mold or pan, set on a rack in cooker.<br />
Rice Water<br />
Long Grain Rice (regular<br />
1 cup 1 1/2<br />
or converted)<br />
cups<br />
Long Grain Brown Rice 1/2 1 1/2<br />
(regular)<br />
cup cups<br />
1/2 1 1/4<br />
Wild Rice<br />
cup cups<br />
Salt<br />
1 tsp 15<br />
1/2<br />
tsp<br />
1/4<br />
tsp<br />
Minutes to Cook after<br />
Control Jiggles<br />
35<br />
40<br />
1. Place rice, water and salt in greased 1-quart mold.<br />
2. Place on rack in cooker. Add 4 cups water.<br />
3. Cover; set control at 10 PSI and cook.<br />
4. Reduce pressure instantly and remove rice from mold.<br />
Page 25 of 42
RECIPES -Fish and Seafood<br />
Fish with Sweet-Sour Sauce<br />
4.2 Qt. 6/8 Qt. Ingredients<br />
1 2 Onions, sliced<br />
3 6 Carrots, sliced<br />
1 2 Bay Leaf<br />
1 2 Parsley Sprigs<br />
1 1/2 Cups 3 cups Water<br />
1 1/2 lbs. 3 lbs. Fish (haddock, pike, trout)<br />
1 tsp 2 tsp Salt<br />
Dash 1/4 tsp Pepper<br />
2 Tbsp 1/4 cup Butter or Margarine<br />
1 Tbsp 2 Tbsp Flour<br />
3 Tbsp 1/3 cup Brown Sugar<br />
1/3 cup 2/3 cup Vinegar<br />
1/4 tsp 1/2 tsp Salt<br />
4 servings 8 servings<br />
1. Place onions, carrots , bay leaf, parsley and water in cooker. Place fish on rack in cooker.<br />
Season with salt and pepper.<br />
2. Cover, set control to 10 PSI and cook 2-4 minutes after control jiggles. Reduce pressure<br />
instantly<br />
3. Place fish on hot platter. Force onions and carrots through a course sieve or puree in<br />
blender; add to strained broth.<br />
4. Brown butter, stir in flour. Gradually stir in broth. Cook until thickened, stirring constantly.<br />
Stir in sugar, vinegar and salt.<br />
5. Pour over fish. Garnish with chopped parsley.<br />
Perch or Halibut Steak<br />
4.2 Qt. 6/8 Qt. Ingredients<br />
1 1/2 lbs. 3 lbs. Perch or Halibut<br />
2 Tbsp 4 Tbsp Butter or Margarine<br />
1 1/2 tsp 1 Tbsp Salt<br />
Dash 1/4 tsp Pepper<br />
2 Tbsp 4 Tbsp Onion, chopped<br />
1/4 cup 1/2 cup Water for frozen fish<br />
or<br />
or<br />
1/2 cup 1 cup Water for fresh fish<br />
2 Tbsp 4 Tbsp Flour<br />
1/2 cup 1 cup Water<br />
1/4 tsp 1/2 tsp Salt<br />
4 servings 8 servings<br />
1. Cut fish into individual servings.<br />
2. Brown fish in hot fat in bottom of cooker. Place fish on rack.<br />
3. Season with salt and pepper. Sprinkle with onions. Add water<br />
4. Cover, set control to 10 PSI and cook for 4 minutes after control jiggles.<br />
5. Cool cooker normally. Remove fish and place on hot platter.<br />
6. Thicken liquid with flour mixed with cold water. Stir until smooth. Add salt and parsley.<br />
Page 26 of 42
Shrimp Curry<br />
4.2 Qt. 6/8 Qt. Ingredients<br />
1 lbs. 2 lbs. Shrimp<br />
2 Tbsp 4 Tbsp Fat<br />
2 Tbsp 4 Tbsp Flour<br />
1 1/4 cups 2 1/2 cups Hot Milk<br />
1/4 tsp 1/2 tsp Slat<br />
Dash 1/4 tsp Paprika<br />
1 tsp 2 tsp Onion, minced<br />
1 tsp 2 tsp Curry Powder<br />
1 tsp 2 tsp Lemon Juice<br />
4 servings 8 servings<br />
Shrimp Creole<br />
1. Cook shrimp according to chart directions.<br />
2. Melt fat in saucepan. Blend in flour.<br />
3. Add hot milk slowly, stirring constantly.<br />
4. Add remainder of ingredients and cook until smooth and thickened, stirring constantly.<br />
5. Add shrimp and serve over cooked rice.<br />
4.2 Qt. 6/8 Qt. Ingredients<br />
1/2 lbs. 1 lb Cooked or Canned Shrimp<br />
1/2 cup 1 cup Onion, diced<br />
1/2 cup 1 cup Celery, diced<br />
1 2 Clove Garlic, minced<br />
1 Tbsp 2 Tbsp Fat<br />
1 1-lb. can 2 1-lb. cans Tomatoes<br />
1 8-0z. can 2 8-oz. cans Tomato Sauce<br />
1 1/2 tsp 1 Tbsp Salt<br />
1 tsp 2 tsp Sugar<br />
1/2 tsp 1 tsp Chili Powder<br />
1 Tbsp 2 Tbsp Worcestershire Sauce<br />
Dash Dash Red Pepper Sauce<br />
1/2 cup 1 cup Green Pepper, diced<br />
1 Tbsp 2 Tbsp Cornstarch<br />
1/2 cup 1 cup Water<br />
6 servings 12 servings<br />
1. Cook shrimp according to Directions Table.<br />
2. Cook onion, celery and garlic in fat in cooker until tender but not brown.<br />
3. Add tomatoes (with liquid), tomato sauce, seasonings, green pepper and shrimp.<br />
4. Cover, set control to 10 PSI and cook 3 minutes after control jiggles. Reduce pressure<br />
instantly.<br />
5. Mix cornstarch and water. Gradually stir into Creole. Cook until thickened, stirring<br />
constantly. Serve over rice.<br />
Page 27 of 42
RECIPES - Veal, Lamb, Poultry and Game.<br />
Irish Stew<br />
4.2 Qt. 6/8 Qt. Ingredients<br />
1 1/2 lbs. 3 lbs. Lamb Stew Meat - 1 in. pieces<br />
2 Tbsp 3 Tbsp Fat<br />
3 cups 4 cups Water<br />
1 tsp 2 tsp Salt<br />
1/2 tsp 1 tsp Paprika<br />
1 tsp 2 tsp Celery Seed<br />
1/2 cup 1 cup Onion, chopped<br />
1 cup 2 cups Turnips, sliced<br />
1 cup 2 cups Carrots, sliced<br />
1 cup 2 cups Potatoes, sliced<br />
1 cup 2 cups Parsnips, sliced<br />
4-6 servings 8-12 servings<br />
Veal Scallopini<br />
1. Brown lamb in fat in cooker. Add water and seasonings.<br />
2. Cover, set control at 10 PSI and cook 8 minutes after control jiggles.<br />
3. Cool cooker normally for 5 minutes, then place under faucet. Add vegetables.<br />
4. Cover, set control at 10 PSI and cook 5 minutes after control jiggles. Reduce pressure<br />
instantly.<br />
5. Prepare gravy recipe.<br />
4.2 Qt. 6/8 Qt. Ingredients<br />
1 1/4 lbs 2 1/2 lbs Veal Steak - 1/2 in. thick<br />
3 Tbsp 6 Tbsp Flour<br />
1 tsp 2 tsp Salt<br />
Dash 1/4 tsp Pepper<br />
1/2 tsp 1 tsp Paprika<br />
3 Tbsp 5 Tbsp Fat<br />
1 2 Clove Garlic, minced<br />
1 2 Onion, medium, sliced<br />
1/2 tsp 1 tsp Dry Mustard<br />
3 cups 6 cups Tomato Juice<br />
1/2 cup 1 cup Mushrooms, sliced<br />
2 Tbsp 1/4 cup Parsley, chopped<br />
4-5 servings 8-10 servings<br />
1. Cut veal into serving pieces.<br />
2. Mix flour, salt, pepper and paprika; coat veal.<br />
3. Brown veal in hot fat in cooker. Add remaining ingredients except mushrooms and parsley.<br />
4. Cover, set control to 10 PSI and cook 12-15 minutes after control jiggles.<br />
5. Cool cooker normally for 5 minutes; then place under faucet.<br />
6. Stir in mushrooms and parsley; heat through.<br />
Page 28 of 42
Chicken Paprika<br />
4.2 Qt. 6/8 Qt. Ingredients<br />
1 2 Chicken - 2 1/2 - 3 lbs.<br />
1 tsp 2 tsp Salt<br />
Dash 1/4 tsp Pepper<br />
1 tsp 2 tsp Paprika<br />
3 Tbsp 6Tbsp Flour<br />
2 Tbsp 1/4 cup Fat<br />
3 cups 4 cups Water<br />
1 2 Chicken Bouillon Cube<br />
1 cup 2 cup Diary Sour Cream<br />
4-6 servings 8-12 servings<br />
Fried Chicken<br />
1. Cut chicken into individual servings.<br />
2. Mix salt, pepper, paprika and flour, coat chicken.<br />
3. Brown in hot fat in cooker. Place on rack.<br />
4. Slowly add water and bouillon cube.<br />
5. Cover, set control to 10 PSI and cook 12 minutes after control jiggles.<br />
6. Cool cooker normally for 5 minutes, then place under faucet.<br />
7. Stir in sour cream; heat thorough.<br />
4.2 Qt. 6/8 Qt. Ingredients<br />
1 2 Chicken - 2 1/2 - lbs.<br />
1/4 cup 1/2 cup Flour<br />
1 1/2 tsp 1 Tbsp Salt<br />
Dash 1/4 tsp Pepper<br />
1 tsp 2 tsp Paprika<br />
2 Tbsp 1/4 cup Fat<br />
1 2 Onion, small, cut in halves<br />
2 cups 2 1/2 cups Water<br />
4-5 serving 8-12 servings<br />
1. Cut chicken into individual servings. Mix flour, salt, pepper and paprika; coat chicken.<br />
2. Brown in hot fat in cooker. Add onion and water. Place chicken on rack in cooker.<br />
3. Cover, set control at 10 PSI and cook 12 minutes after control jiggles.<br />
4. Cool cooker normally for 5 minutes, then place under faucet.<br />
5. Place chicken under the oven broiler for a few minutes to crisp. Prepare gravy recipe.<br />
Page 29 of 42
Hasenpfeffer (Sweet Sour Rabbit)<br />
4.2 Qt. 6/8 Qt. Ingredients<br />
1 2 Rabbit, domestic (2 1/2 lbs.)<br />
1 1/2 cups 3 cups Vinegar<br />
3 cups 6 cups Water<br />
3 6 Bay Leaves<br />
1 1/2 tsp 3 tsp Salt<br />
1/2 tsp 1 tsp Pepper<br />
1 2 Onion, sliced<br />
1/4 cup 1/2 cup Flour<br />
3 Tbsp 6 Tbsp Fat<br />
1 cup 2 cups Dairy Sour Cream<br />
5 10 Gingersnaps, crumbled<br />
3-4 servings 6-8 servings<br />
Venison Pot Roast<br />
1. Cut rabbit into individual servings. Place in shallow glass dish. Mix vinegar and water; pour<br />
over rabbit.<br />
2. Add bay leaves, salt, pepper and onion. Cover and refrigerate, turning occasionally, at least<br />
12 hours, but no longer than 24 hours.<br />
3. Remove rabbit from marinade; dry on paper towels. Coat with flour and brown in hot fat in<br />
cooker.<br />
4. Strain marinade and add 1 1/4 cups for 3-4 servings recipe. Add 2 cups for 6-8 serving<br />
recipe.<br />
5. Cover, set control to 10 PSI and cook for 15-20 minutes after control jiggles.<br />
6. Cool cooker normally for 5 minutes; then place under faucet.<br />
7. Stir in sour cream and gingersnap crumbs; heat through.<br />
4.2 Qt. 6/8 Qt. Ingredients<br />
2 lbs. 4 lbs Venison Pot Roast - 3-4 in. thick<br />
2 Tbsp 4 Tbsp Fat<br />
1 tsp 2 tsp Salt<br />
Dash 1/4 tsp Pepper<br />
2 cups 2 1/2 cups Water<br />
1 2 Clove Garlic, minced<br />
4-6 servings 8-12 servings<br />
1. Brown venison in fat in cooker. Pour off excess fat.<br />
2. Season with salt and pepper. Add water and garlic.<br />
3. Cover, set control to 10 PSI and cook for 30-40 minutes after control jiggles.<br />
4. Cool cooker normally for 5 minutes, then place under faucet.<br />
5. Prepare gravy recipe. Serve very hot.<br />
Page 30 of 42
RECIPES - Vegetables and Soups<br />
Baked Beans<br />
4.2 Qt. 6/8 Qt. Ingredients<br />
1 lb 2 lbs. Dried Navy Beans<br />
or<br />
(2 1/2 cups) (4 2/3 cups) (Great Northern Beans)<br />
4 cups 8 cups Water<br />
3 slices 6 slices Bacon or Salt Pork, cut in 2 in. pieces<br />
2 Tbsp 1/4 cup Onion, chopped<br />
1/4 cup 1/2 cup Molasses or Syrup<br />
3 Tbsp 6 Tbsp Brown Sugar<br />
1 tsp 2 tsp Dry Mustard<br />
1 tsp 2 tsp Salt<br />
Dash Dash Pepper<br />
4 servings 8 servings<br />
1. Heat beans and water to boiling in cooker; boil 2 minutes. Remove from heat; cover and let<br />
stand 1 hour.<br />
2. Drain beans, reserving liquid. Add enough water to bean liquid to measure 4 cups. Use 8<br />
cups for 6/8-qt. recipe.<br />
3. Stir bacon and onion into beans. Mix bean liquid and remaining ingredients; pour over<br />
beans.<br />
4. Cover, set control to 10 PSI and cook 25 minutes after control jiggles.<br />
5. Cool cooker normally for 5 minutes, then place under faucet.<br />
Alternate Method: Soak beans in 4 cups water overnight. Use 8 cups for 6/8-qt recipe. Drain, reserving<br />
liquid. Continue as directed in step 2.<br />
Spicy Red Cabbage<br />
4.2 Qt. 6/8 Qt. Ingredients<br />
1/2 cup 1 cup Raisins<br />
2 Tbsp 1/4 cup Bacon Fat, Butter or Margarine<br />
5 cups 10 cups Red Cabbage, shredded<br />
1 cup 2 cups Apples, sliced<br />
3/4 cup 1 1/2 cups Onions, chopped<br />
1 tsp 1 1/2 tsp Mixed Spices, tied in wet cheesecloth<br />
1/2 cup 2/3 cup Water<br />
3/4 tsp 1 1/2 tsp Salt<br />
1/4 tsp 1/2 tsp Pepper<br />
2 Tbsp 1/4 cup Sugar<br />
4 servings 8 servings<br />
1. Place all ingredients in cooker.<br />
2. Cover, set control at 10 PSI and cook 5 minutes after control jiggles. Reduce pressure<br />
instantly.<br />
3. Remove spices.<br />
Page 31 of 42
Hubbard Squash<br />
4.2 Qt. 6/8 Qt. Ingredients<br />
2 cups 4 cups Squash, cooked<br />
1/2 tsp 1 tsp Salt<br />
Dash Dash Pepper<br />
2 Tbsp 1/4 cup Bacon drippings<br />
2 Tbsp 1/4 cup Brown Sugar<br />
2 Tbsp 1/4 cup Orange Juice<br />
4 servings 8 servings<br />
1. Cook squash according to chart directions.<br />
2. Scrape squash from shell and mash it.<br />
3. Add other ingredients and heat squash thoroughly.<br />
Two-Minute Vegetable Plate<br />
4.2 Qt. 6/8 Qt. Ingredients<br />
1 1/2 cups 1 cup Water<br />
1 small 1 large Cauliflower, broken into large flowerets<br />
1/2 lb 1 lb Green Beans, cut in halves<br />
4 8 Carrots, medium, quartered and cut lengthwise<br />
1 small 1 large Bunch Broccoli, stems cut in quarters<br />
1 tsp 1 1/2 tsp Salt<br />
3 Tbsp 6 Tbsp Browned Butter<br />
4 servings 8 servings<br />
Vegetable Soup<br />
1. Put water in cooker with rack.<br />
2. Place vegetables on rack. Season with salt.<br />
3. Cover, set control at 10 PSI and cook 2-3 minutes after control jiggles. Reduce pressure<br />
instantly.<br />
4. Arrange vegetables on large serving plate. Serve with hot browned butter.<br />
4.2 Qt. 6/8 Qt. Ingredients<br />
1 1/2 lbs 3 lbs Soup Meat and Bones<br />
1 small 1 medium Onion, sliced<br />
1 tsp 2 tsp Salt<br />
Dash 1/4 tsp Pepper<br />
1 1/2 qt. 2 1/2 qt. Water<br />
1/2 cup 1 cup Carrots, sliced<br />
1 cup 2 cups Canned Tomatoes<br />
1 cup 2 cups Green Beans, cut up<br />
1/2 cup 1 cup Celery, diced<br />
4 servings 8 servings<br />
1. Place soup meat and bone, onion, salt, pepper and water in cooker.<br />
2. Cover, set control at 10 PSI and cook 50 minutes after control jiggles.<br />
3. Cool cooker normally for 5 minutes, then place under faucet.<br />
4. Remove bone and meat. Strain broth. Return broth and meat only to cooker.<br />
5. Add vegetables<br />
6. Cover, set control at 10 PSI and cook 5 minutes after control jiggles.<br />
7. Cool cooker normally for 5 minutes, then place under faucet. Sprinkle with chopped<br />
parsley.<br />
Page 32 of 42
Chicken Gumbo<br />
4.2 Qt. 6/8 Qt. Ingredients<br />
2 1/2 lbs 3 1/2 lbs Chicken<br />
1/4 cup 1/4 cup Flour<br />
1/2 tsp 1/2 tsp Salt<br />
1/4 tsp 1/4 tsp Pepper<br />
2 Tbsp 4 Tbsp Fat<br />
1/4 cup 1/2 cup Onion, chopped<br />
1 Tbsp 2 Tbsp Parsley, chopped<br />
1 1/2 Tbsp 3 Tbsp Pimento, chopped<br />
1 1/4 cups 2 1/2 cups Tomatoes<br />
3 cups 5 cups Water<br />
1 tsp 2 tsp Salt<br />
1 cup 2 cups Okra<br />
3/4 cup 1 1/2 cups Rice, cooked<br />
4 servings 8 servings<br />
Clam Chowder<br />
1. Cut chicken into pieces for serving and dredge in flour, salt and pepper.<br />
2. Brown well in cooker with onion in hot fat.<br />
3. Add parsley, pimento, tomatoes, water and salt.<br />
4. Cover, set control on at 10 PSI and cook for 25 minutes after control jiggles. Cool cooker<br />
normally for 5 minutes and then place under faucet.<br />
5. Add okra and cooked rice and simmer 5 minutes.<br />
4.2 Qt. 6/8 Qt. Ingredients<br />
1/4 lb 1/2 lb Salt Pork, diced<br />
1/2 cup 1 cup Onion, sliced<br />
1 tsp 2 tsp Salt<br />
Dash 1/4 tsp Pepper<br />
2 1/2 cups 4 cups Water<br />
1 1-lb. can 2 1-lb. can Tomatoes<br />
1 cup 2 cups Potatoes, diced<br />
1 6 1/2-oz. can 2 6 1/2-oz. cans Clams<br />
4-6 servings 8-12 servings<br />
1. Cook and stir salt pork in cooker until pork is crisp. Pour off excess fat.<br />
2. Add onion, salt, pepper, water, tomatoes (with liquid) and potatoes. Break up tomatoes.<br />
3. Cover, set control at 10 PSI and cook 6 minutes after control jiggles.<br />
4. Cool cooker normally for 5 minutes, then place under faucet.<br />
5. Add clams (with liquid). Bring to a boil and cook uncovered for 2 minutes. Sprinkle with<br />
thyme.<br />
Page 33 of 42
CANNING<br />
CAUTION: <strong>Pressure</strong> can only in models with selective control (5, 10, 15 lbs.) only. Do not try to<br />
can in single-control model.<br />
WARNING: Read instructions for ordinary pressure cooking before you attempt to use your<br />
cooker or canner for canning.<br />
General Tips for <strong>Pressure</strong> Canning<br />
The U.S. Department of agriculture recommends pressure canning as the only safe way to can meats, fish,<br />
poultry, and all common vegetables. Fruits and plain tomato products may be canned by the hot-waterbath<br />
method, but pressure canning them will save time and energy.<br />
Use a water bath canner for pickles, jams and jellies. Do not blanch in a pressure canner. Use a blancher<br />
or covered pot with a suitable basket.<br />
To can mixtures of foods (soups, stews, etc) use the time required for the ingredient with the longest<br />
processing time. Sometimes it is better to can ingredients separately (meat and vegetables, for example)<br />
and then combine them to heat for serving.<br />
Before canning for the first time, follow this procedure to get familiar with how your canner operates:<br />
1. Pour 2 quarts of water and 1 tablespoon of vinegar in canner.<br />
2. Close cover and place control on vent tube at 10lbs. pressure<br />
3. Heat on high until control jiggles<br />
4. Turn down heat so that control rocks gently. Note the heat setting on your range that<br />
maintains this level<br />
5. Remove from heat and let the caner cool until pressure is fully down.<br />
Note: At altitudes above 1,000 feet, increase pressure by 5 lbs.<br />
How to <strong>Pressure</strong> Can in Glass Jars<br />
CAUTION: Use only standard jars intended for home canning. These jars will have<br />
manufacturer's name molded in the glass. Never use jars from commercial food products.<br />
1. Check jars and lids for nicks, chips, cracks, or sharp edges. Discard any imperfect jars and<br />
lids.<br />
CAUTION: Use only NEW metal lids (used with metal screw bands).<br />
2. Wash jars and lids thoroughly in hot soapy water. Rinse.<br />
3. Keep jars covered with hot water until filled. You need not sterilize jars for pressure<br />
canning. Place metal lids in hot or boiling water as directed by manufacturer.<br />
4. Select fresh, firm (not overripe) product. Sort according to size and ripeness.<br />
5. Wash and prepare food according to chart directions (see canning pages).<br />
6. Pack food into jars.<br />
Most foods may be packed raw. Pack raw foods tightly because raw foods shrink during<br />
processing. Food may also be pre-heated or partially cooked before packing. Pack hot food<br />
fairly loosely.<br />
7. Finish filling jar with syrup, water or juice, allowing adequate head space according to chart<br />
(see canning pages). Add salt (if desired) according to chart.<br />
8. Insert blade of plastic spatula down sides of jar to release any trapped air bubbles.<br />
Page 34 of 42
9. Wipe rim of jars clean and close lids according to manufactures directions.<br />
10. Place rack in canner and add recommended amount of hot water for hot pack. For cold<br />
pack use room temperature water.<br />
Add 1 tablespoon vinegar or 1 teaspoon cream of tartar to help prevent water stains in<br />
canner.<br />
11. Set jars on rack in canner. it is all right if sides of jars touch each other.<br />
Note: 22-quart canner is furnished with two flat racks for stacking halfpint<br />
or pint jars. Place one rack in bottom of canner and the other<br />
between tiers of jars.<br />
12. Close canner. Make sure that canner is properly closed, with grips on lid<br />
directly over grips on pan.<br />
13. With pressure control OFF, heat on high until steam comes out of vent<br />
tube. Let steam vent for 10 minutes.<br />
14. After venting, place control on vent tube using a hot pad at correct pressure according to<br />
the chart.<br />
15. When control jiggles vigorously, reduce heat so that control rocks or jiggles gently.<br />
CAUTION: Prevent drafts from blowing over canner and avoid turning heat up and<br />
down. This can cause uneven pressure and can cause liquid to be forced out of<br />
jars.<br />
16. Process according to time given in charts. Count processing time from the time the control<br />
starts to jiggle vigorously.<br />
17. When processing time is completed, turn off heat. Let canner cool.<br />
CAUTION: Do not fast-cool by setting canner in water or by running water over<br />
the canner. Never lift control to release pressure.<br />
It takes about 35-40 minutes for pressure to drop in a smaller cooker filled with<br />
jars, and 45 minutes to an hour in a large canner with a full load.<br />
18. When pressure is fully down, remove control. Carefully remove cover.<br />
WARNING: Escaping steam can scald you and the pressure control may be hot.<br />
Protect your hands with pot holders or oven mitts and tilt cover so steam escapes<br />
away from you.<br />
To test if pressure is down, gently nudge control. If you see steam spurting out, pressure is<br />
not yet down. Let canner continue to cool.<br />
Note: You may hear a hissing noise when control is nudged. If you also see steam spurt<br />
out, pressure is not down. If you do not see steam, the hissing is air entering the canner.<br />
19. Using a jar lifter, remove jars from canner. Set jars on a cooking rack or on several<br />
thickness of cloth.<br />
CAUTION: Never set hot jars on a cold or wet surface. The jars may break.<br />
20. Complete seal if jars are not self sealing. If any liquid boiled out during processing, seal jar<br />
as is. Do not add liquid, as that would require reprocessing. Fruits and vegetables not<br />
covered by liquid may turn dark, but they will not spoil.<br />
21. Let jars cool. Keep jars out of drafts, and upright.<br />
22. After 12 hours. Remove screw bands from jars with metal lids. If a screw band does not<br />
easily come off, cover it for one minute with a hot damp cloth. This will expand the metal<br />
slightly and usually permit the band to be removed. If the band cannot easily be removed,<br />
leave it on.<br />
CAUTION: Never force screw bands off. You might break the seal.<br />
23. Examine jars for leaks and test seal. For a metal lid, test the seal by tapping with a<br />
teaspoon. A clear ring is a sign of a good seal. If a lid is curved down and does not move<br />
when tapped, that is also a sign of a good seal.<br />
Page 35 of 42
WARNING: If a jar leaks or is not sealed, use the contents promptly or reprocess<br />
within 24 hours with new lids for the full recommended processing time.<br />
24. Wipe jars with a damp cloth, dry and label with contents and date. Store in a cool dry<br />
place.<br />
CAUTION: Do not permit contents to freeze. The liquid will expand and may break the jar.<br />
<strong>Pressure</strong> Canning Charts<br />
Canner<br />
size<br />
Amount of<br />
Water In<br />
Canner<br />
Half<br />
Pint<br />
Jar Capacity of Canner<br />
Pint,<br />
Reg.<br />
Pint,<br />
Wide<br />
Mouth<br />
Quarts<br />
8 Qt. 2 Qt. 8 6 5 -<br />
12 Qt. 2 1/2 Qt. 13 10 8 7<br />
22 Qt. 2 1/2 Qt. 36* 20* 16* 7<br />
Add extra pint of water to canner if processing less than<br />
full capacity.<br />
*If jars are stacked and an additional rack is used<br />
between stacks.<br />
Amount of Salt for Canning Vegetables and Meats<br />
Jar Size<br />
Half Pint (8 oz.)<br />
Pint (16 oz.)<br />
Quart (32 oz)<br />
Salt<br />
1/4 tsp<br />
1/2 tsp<br />
1 tsp<br />
*Vegetables and meats can be canned successfully with<br />
or without salt<br />
HOW TO CLOSE JARS: FOLLOW LID MANUFACTURER'S DIRECTIONS CAREFULLY.<br />
Use a flat metal lid with sealing compound and a metal screw band, which fits any<br />
standard mason jar.<br />
1. Fill jar. Wipe rim clean.<br />
2. Place lid in hot or boiling water, according to manufacturer's<br />
directions.<br />
3. Put new lid on jar with sealing compound next to glass.<br />
4. Screw metal band on tight by hand. Do not use a wrench. Over<br />
tightening will cause lids to buckle.<br />
5. This jar is self sealing. Do not tighten after jar is removed from canner.<br />
CAUTION: DETECTING SPOILAGE<br />
A leaking jar or a bulging lid may be a sign of spoilage. Look for "off" odor or color. Never taste food you<br />
think has spoiled. Throw it away. Also it is possible for food to contain botulism without showing any signs<br />
of spoilage, so boil non-acid vegetables and meats for ten minutes before tasting and reboil leftovers food<br />
before serving.<br />
Page 36 of 42
<strong>Pressure</strong> Canning Meat and Fish<br />
All meat and fish should be thoroughly cooled and cleaned before canning. REDUCE PRESSURE<br />
NORMALLY.<br />
FOOD<br />
Beef, Veal, Lamb, Pork<br />
Precook meat until medium done or until pieces when cut show almost<br />
no pink at center. Cut in pieces. Add salt. Pack. Fill with liquid within 1<br />
in. from top. Adjust lids. Process.<br />
Pork Chops, Ham<br />
Fry meat until brown. Add salt. Pack. Fill with liquid to within 1 inch<br />
from top. Adjust lids. Process<br />
Chicken (with bones)<br />
Precook disjointed chicken with liquid until medium done. Add salt.<br />
Pack. Fill with liquid to within 1 inch from top. Adjust lids. Process<br />
Chicken (without bones)<br />
Precook disjointed chicken with liquid until medium done. Remove<br />
bones. Add salt. Pack. Fill with liquid to within 1 inch from top. Adjust<br />
lids. Process<br />
Chicken (fried)<br />
Fry disjointed chicken in hot fat until it is lightly browned. Add salt.<br />
Pack. Fill with liquid to within 1 in. from top. Adjust lids. Process.<br />
Rabbit, Duck, Turkey - Follow directions for Chicken.<br />
Soup Stock<br />
Cook soup stock. Skim fat and remove bones. Pour hot into containers,<br />
to within 1/2 inch from top. Adjust lids. Process.<br />
Fish (except Salmon)<br />
Cut fish in pieces. Precook. Remove bones and skin if desired. Add salt.<br />
Pack to within 1 in. from top. Add 2 Tbsp salad oil to tuna. Adjust lids.<br />
process.<br />
Salmon<br />
Slowly pour hot water on fish, being careful not to break the skin.<br />
Scrape gently until skin is white and clean. Wipe dry. Cut, leaving<br />
backbone in. Add salt. Pack to within 1 in. from top. Adjust lids.<br />
Process.<br />
Minutes To Cook<br />
After Control<br />
Jiggles<br />
Pint<br />
Jars<br />
Quart<br />
Jars<br />
Pounds<br />
<strong>Pressure</strong><br />
75 90 10<br />
75 90 10<br />
65 75 10<br />
75 90 10<br />
65 75 10<br />
20 25 10<br />
110 10<br />
110 10<br />
At altitudes of 1,000 feet or higher, use 15 lbs. instead of 10 lbs. pressure.<br />
Page 37 of 42
<strong>Pressure</strong> Canning Vegetables<br />
FOOD<br />
Asparagus<br />
Wash. Grade. Trim off scale. Cover with boiling water. Cook 2 minutes.<br />
Pack hot, cover with liquid. Or pack raw and cover with boiling water.<br />
Leave 1/2 in. head space. Add salt. Adjust lids. Process.<br />
Beans, Lima (fresh)<br />
Shell. Grade. Bring to a boil. Pack hot and cover with water. Or pack<br />
raw and cover with boiling water. Leave 1 in. head space in pints. Leave<br />
1 1/2 inches in quarts. Add salt. Adjust lids. Process.<br />
Beans, String or Wax<br />
Wash. String. Cut in pieces. Boil 5 minutes. Pack hot. Cover with boiling<br />
liquid. Pr pack raw and cover with boiling water. Leave 1/2 in. head<br />
space. Add salt. Adjust lids. Process.<br />
Beets<br />
Wash. Retain 1 in. of the stem. Cook in canner with 1-1 1/2 cups water<br />
at 15 lbs. for 6 minutes. Cool canner under faucet. Open canner. Cover<br />
beets with cold water. Slip off skins. Cut into 1/2 in. slices. Pack in jars.<br />
Cover with fresh boiling water leaving 1 inch head space. Add salt.<br />
Adjust lids. Process.<br />
Carrots<br />
Scrape. Slice or cut as desired. Boil for 5 minutes. Pack. Cover with hot<br />
liquid, leaving 1 inch head space. Add salt. Adjust lids. Process.<br />
Corn (whole kernel)<br />
Remove husks. Cut kernels from cob. To each quart of corn, add 1 pint<br />
of boiling water and 1 tsp of salt. Boil 1 minute. Pack loosely and cover<br />
with water. Or pack raw loosely and cover with boiling water. Leave 1<br />
in. head space. Add salt, Adjust lids. Process.<br />
Greens<br />
Can only very fresh tender greens. Wash carefully. Remove tough<br />
stems. Boil in small amount of water. Pack loosely. Cover with hot<br />
liquid. Leave 1 in. head space. Add salt. Adjust lids. Process.<br />
Mushrooms<br />
Trim and soak in cold water 10 minutes. Wash. Cut large ones in half.<br />
Cook gently 15 minutes. Pack hot and cover with boiling water. Leave<br />
1/2 in. head space. Add salt. Adjust lids. Process.<br />
Okra<br />
Wash and trim. Cook 1 minute. Cut into 1 in. lengths. Pack hot and<br />
cover with boiling water. Leave 1 in. head space. Add salt. Adjust lids.<br />
Process.<br />
Minutes to Cook<br />
After Control<br />
Jiggles<br />
Half Pint<br />
& Pint<br />
Jars<br />
Quart<br />
Jars<br />
Pounds<br />
<strong>Pressure</strong><br />
30 40 10<br />
40 50 10<br />
20 25 10<br />
30 30 10<br />
25 30 10<br />
55 85 10<br />
70 90 10<br />
45 - 10<br />
25 40 10<br />
Page 38 of 42
Peas (fresh Blackeye, Cowpeas, Blackeye Beans)<br />
Shell and wash. Bring to boil. Drain. Pack loosely and cover with boiling<br />
water. Or pack raw loosely and cover with boiling water. Leave 1 1/2 in.<br />
head space. Add salt. Adjust lids. Process.<br />
Peas (green)<br />
Shell. Use only young, fresh peas. Bring to a boil. Pack loosely and<br />
cover with boiling water. Or pack raw loosely and cover with boiling<br />
water. Leave 1 in. Head space. Add salt. Adjust lids. Process.<br />
Potatoes<br />
Wash, pare and cut into 1/2 in. cubes. or use whole 2 1/2 inch in<br />
diameter. Boil cubes 2 minutes; whole potatoes 10 minutes. Drain.<br />
Pack and cover with boiling water. Leave 1 in. head space. Add salt.<br />
Adjust lids. Process.<br />
Pumpkin or Hubbard Squash<br />
Peel and cut into 1 inch cubes. Cook until tender. Pack hot. Leave 1<br />
inch head space. Adjust lids. Process.<br />
Sauerkraut<br />
Heat well-fermented sauerkraut to simmering. Pack hot and cover with<br />
hot juice. leave 1 inch head space. Adjust lids. Process.<br />
Summer Squash (Zucchini)<br />
Wash Squash. Do not pare. Cut into small pieces. Boil 2-3 minutes.<br />
Pack hot ad cover with boiling liquid. leave 1 inch head space. Add salt.<br />
Adjust lids. Process.<br />
Sweet Potatoes<br />
Wash. Boil until skins slip off easily. Cut in pieces. For wet pack, pack<br />
and cover with boiling water. Leave 1 inch head space. Add salt. For dry<br />
pack, Pack cooked pieces and add no salt or liquid. Leave 1 inch head<br />
space. Adjust lids. Process.<br />
Tomatoes<br />
See fruit chart<br />
45 40 10<br />
40 40 10<br />
35 40 10<br />
65 80 10<br />
10 15 5<br />
30 40 10<br />
65(wet)<br />
65(dry)<br />
90(wet)<br />
95 (dry)<br />
10<br />
10<br />
Reduce pressure normally.<br />
At altitudes of 1,000 feet or higher use 15 lbs. instead of 10 lbs. pressure.<br />
Page 39 of 42
<strong>Pressure</strong> Canning Fruits<br />
Fruits may be processed either in a boiling water bath or in a pressure canner. When using pressure<br />
method, time processing very carefully because fruits are easily overcooked. To keep peeled fruit from<br />
darkening before it is packed, place it in water to which ascorbic or citric acid has been added. These<br />
products may be obtained at drug or grocery stores. Follow package directions, or drop fruit in a solution<br />
of 1 gal. water, 2 tbsp salt and 2 tbsp vinegar. REDUCE PRESSURE NORMALLY.<br />
FOOD<br />
Apples<br />
Wash, pare and core and cut in pieces. Pack. Fill with syrup to within<br />
1/2 inch from top. Or precook 3 minutes in syrup. Pack and add syrup.<br />
Adjust lids and process.<br />
Applesauce<br />
Cook applesauce (NOT IN PRESSURE COOKER) pack within 1/4 in.<br />
from top. Adjust lids. Process.<br />
Apricots and Nectarines<br />
Wash. Pack whole or halve and pit. Fill with syrup to within 1/2 inch<br />
from top. Adjust lids. Process<br />
Berries (except Strawberries)<br />
Wash. Stem. Pack. Fill with syrup to within 1/2 inch from top. Adjust<br />
lids. Process.<br />
Cherries<br />
Wash and stem. Pit. Pack. Fill with syrup to within 1/2 inch from top.<br />
Adjust lids. Process.<br />
Figs<br />
Wash. Leave stems on. Boil for 2 minutes. Prepare a thin syrup with<br />
this water and boil figs in it for 5 minutes. Pack. Add 1 2/2 tsp lemon<br />
juice per pint or 1 Tbsp per quart. Fill with syrup to within 1/2 inch<br />
from top. Adjust lids. Process.<br />
Grapes<br />
Wash and stem. Fill with syrup to within 1 1/2 inches from top. Adjust<br />
lids. Process.<br />
Peaches<br />
Wash dip peaches in boiling water, then cold water. Remove skins. Cut<br />
in halves and remove pits. Pack. Fill with syrup to within 1/2 inch from<br />
top. Adjust lids. Process.<br />
Pears<br />
Wash. Peel. Halve and core. Fill with syrup to within 1/2 inch from top.<br />
Adjust lids. Process.<br />
Pineapple<br />
Slice and peel. Remove eyes and core. Boil 5-10 minutes in medium<br />
syrup. Pack. Fill with syrup to within 1/2 inch from top. Adjust lids.<br />
Process.<br />
Plums<br />
Wash. prick skins. Fill with syrup within 1/2 inch from top. Adjust lids.<br />
Minutes to Cook<br />
After Control<br />
Jiggles<br />
Half Pint<br />
& Pint<br />
Jars<br />
Quart<br />
Jars<br />
Pounds<br />
<strong>Pressure</strong><br />
8 8 5<br />
8 10 5<br />
10 10 5<br />
8 8 5<br />
10 10 5<br />
10 10 5<br />
8 8 5<br />
10 10 5<br />
10 10 5<br />
15 15 5<br />
10 10 5<br />
Page 40 of 42
Process.<br />
Rhubarb<br />
Wash. Cut in pieces. Pack. Add syrup to within 1/2 inch from top. Or<br />
cook rhubarb sauce (NOT IN PRESSURE COOKER) and pack. Adjust<br />
lids and process.<br />
Strawberries<br />
Wash and stem. Boil gently 3 minutes with 1/2 cup sugar for each<br />
quart of fruit. Let stand overnight. Bring quickly to boil. Pack to within<br />
1/2 inch from top. Adjust lids. Process in boiling water bath, not under<br />
pressure - 15 minutes for pints and quarts.<br />
5 5 5<br />
15 15<br />
Tomatoes<br />
Scald 1/2 minute. Place in cold water. Remove skins. Quarter. Add<br />
salt. Pack Tightly. Or bring peeled and quartered tomatoes to a boil<br />
and then pack to within 1/2 inch of top. Adjust lids. Process.<br />
25 25 10<br />
Tomato Juice<br />
Cook tomatoes and put through food press. Season and bring to boil.<br />
Fill jars to within 1/4 inch from top. Adjust lids. Process.<br />
20 20 5<br />
Reduce pressure normally.<br />
At altitudes of 1,000 feet or higher use 15 lbs. instead of 10 lbs. pressure.<br />
NOTE: It is recommended that home canned tomato products have acid added as part of the<br />
preservation process. The most common acid to add is bottled lemon juice, not fresh. Add one<br />
tablespoon per pint or two tablespoons per quart. This should be added to the jar before adding<br />
the tomatoes.<br />
How To Make Syrup<br />
Adding syrup to canned fruit helps to retain its flavor, color and shape. It does not prevent spoilage of<br />
these foods. The following guidelines for preparing and using syrups offer a new "very light" syrup, which<br />
approximates the natural sugar content of many fruits. The sugar content in each of the five syrups is<br />
increased by about 10 percent. Quantities of water and sugar to make enough syrup for a canner load of<br />
pints or quarts are provided for each syrup type.<br />
Preparing and using syrups.<br />
Syrup<br />
Type<br />
Very<br />
Light<br />
Approx. %<br />
Sugar<br />
Measures of Water and Sugar<br />
For 8 Half- Pint, 7 Pint or 4 Quart Load<br />
Cups Cups<br />
Fruits commonly packed in syrup*<br />
Water Sugar<br />
Approximates natural sugar level in most fruits and adds<br />
the fewest calories<br />
Very sweet fruit. Try a small amount the first time to see<br />
if your family likes it.<br />
10 6 1/2 3/4<br />
Light 20 5 3/4 1 1/2<br />
Medium 30 5 1/4 2 1/4 Sweet apples, sweet cherries, berries, grapes.<br />
Heavy 40 5 3 1/4<br />
Very<br />
Heavy<br />
50 4 1/2 4 1/4<br />
Tart apples, apricots, sour cherries, gooseberries,<br />
nectarines, peaches, pears, plums<br />
Very sour fruit. Try a small amount the first time to see if<br />
your family likes it.<br />
Page 41 of 42
*many fruits that are typically packed in heavy syrup are excellent and tasteful products when packed in<br />
lighter syrups. It is recommended that lighter syrups be tried since they contain fewer calories from added<br />
sugar.<br />
Procedure: Heat water and sugar together. Bring to a boil and pour over raw fruits in jars. For hot packs,<br />
bring water and sugar to boil, add fruit, reheat to boil, and fill jars immediately.<br />
Other sweeteners: Light corn syrups or mild flavored honey may be used to replace up to half the table<br />
sugar called for in syrups.<br />
CANNING PROBLEMS<br />
Problem: Liquid is lost from jars.<br />
Causes and Remedies:<br />
1. Jars are packed too full or too tight.<br />
When food and liquid are boiled, they expand. If there is not sufficient room, liquid will be<br />
forced out.<br />
Leave adequate head space of 1/2"- 1" as recommended in the chart.<br />
2. Air bubbles are trapped in jar.<br />
When food begins to boil, air bubbles will force liquid out of the jar.<br />
Before closing jar; run a plastic spatula down the sides of the jar to release any trapped air.<br />
3. <strong>Pressure</strong> is allowed to fluctuate during processing.<br />
If heat is adjusted up and down frequently, it may cause sudden changes in pressure,<br />
which may force liquid out of jars.<br />
After control starts to jiggle, adjust heat so that the control gently rocks. Avoid frequent<br />
adjustments.<br />
4. <strong>Pressure</strong> is reduced too rapidly after processing.<br />
If pressure is rapidly reduced, such as by running cold water over the canner, or nudging<br />
the control frequently, the pressure in the canner may drop more quickly than the pressure<br />
in the jars, and liquid may be forced out of the jars.<br />
Allow canner to cool normally to room temperature. After 25-35minutes (for a small<br />
cooker) or 40-45 minutes (for a large canner), check pressure by nudging control.<br />
Problem: Canning jars break.<br />
Causes and Remedies:<br />
1. Commercial food product jars rather than home canning jars are used.<br />
Use only canning jars intended for home canning.<br />
2. Damaged jars are used.<br />
Old jars may have invisible cracks. Jars may be damaged in shipping. Carefully inspect jars<br />
before using.<br />
3. Jars are placed directly in canner without rack.<br />
Always use rack.<br />
4. Hot jars are set on a cold or wet surface or exposed to cold drafts.<br />
Set jars on a cooling rack or on several thickness of cloth. Protect from drafts.<br />
5. Jars are damaged by using a knife to release air bubbles.<br />
Use only a plastic or rubber spatula to release trapped air.<br />
6. Hot jars placed in cold water. Cold jars placed in hot water.<br />
FOR MORE INFORMATION ABOUT CANNING:<br />
1. Your University Extension County home economist will also have information about home<br />
canning.<br />
Page 42 of 42