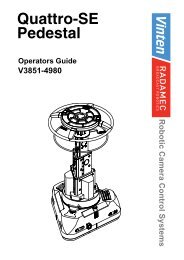
Operators Guide - Vinten Radamec
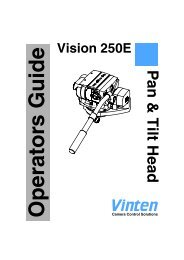
Operators Guide - Vinten Radamec
Operators Guide - Vinten Radamec

Create successful ePaper yourself
Turn your PDF publications into a flip-book with our unique Google optimized e-Paper software.
<strong>Vinten</strong> Broadcast Ltd.<br />
Erratic and jerky operation can also be caused by the following :<br />
1. Noisy demand signal.<br />
2. Noisy positional feedback potentiometer. Check and replace if necessary.<br />
3. Faulty motor or tacho. Check and replace if necessary.<br />
4. Loose timing belt drives. Check and tighten if necessary.<br />
4.3. Dismantling the Head<br />
Fit the tilt locking pin, set pan to its mid position by lining up the red dots on the pan<br />
base and the main casting, and apply the pan brakes. Remove the payload so that if<br />
necessary, the head may be transferred to a suitable working area.<br />
All adjustments and replacements on tilt (except changing the motor), can be carried<br />
out by just removing the back cover. To change the tilt motor or carry out any work<br />
on pan, the main and base castings must also be separated.<br />
A total of twelve M5 Hex socket screws (including four which secure it to the base<br />
casting) hold the back cover in position. A further eight of these screws are used to<br />
fix the base and main castings together. However, before any castings can be<br />
separated, the brake knobs must be removed by undoing the screw at their centres.<br />
Note that removal of the load platform, after marking its position, will make the main<br />
casting easier to handle.<br />
4.4. Replacing a Reset Potentiometer<br />
Having gained access to the appropriate axis, replacing a reset potentiometer is the<br />
same for either pan or tilt. Set the axis being worked on to its mid position and<br />
unsolder the wires from the potentiometer terminals after having noted their coding<br />
and position. Remove the three clamps holding the potentiometer body in position.<br />
The potentiometer may now be removed by pulling it out of the 'O' rings, which retain<br />
it in the end of the output shaft. These 'O' rings are a tight fit, so some effort may be<br />
required, but avoid pulling the potentiometer from side to side.<br />
If either of the three 'O' rings used on each axes is seen to have remained on the<br />
potentiometer shaft, it should immediately be removed and fitted into the hole in the<br />
end of the output shaft.<br />
NOTE<br />
NEVER ATTEMPT TO FIT A REPLACEMENT RESET POTENTIOMETER BY<br />
PUTTING THE THREE 'O' RINGS ON ITS SHAFT. THEY MUST ALWAYS BE<br />
FITTED INTO THE HOLE IN THE END OF THE OUTPUT SHAFT BEFORE THE<br />
POTENTIOMETER IS FITTED.<br />
Insert the shaft of the new potentiometer into the 'O' rings in the output shaft and<br />
push it home onto its mounting plate. The potentiometer spigot is not a location fit in<br />
the mounting plate so let the potentiometer centralise itself and then fit the three<br />
clamps to hold it in position.<br />
With the axis set to its mid point, centre the potentiometer using a DVM. This is done<br />
by slipping the potentiometer shaft in the 'O' rings, until the correct setting is found.<br />
Re-solder the wires to the potentiometer terminals.<br />
After re-assembly, the head may now be removed to service.<br />
435H Technical Manual Page 6