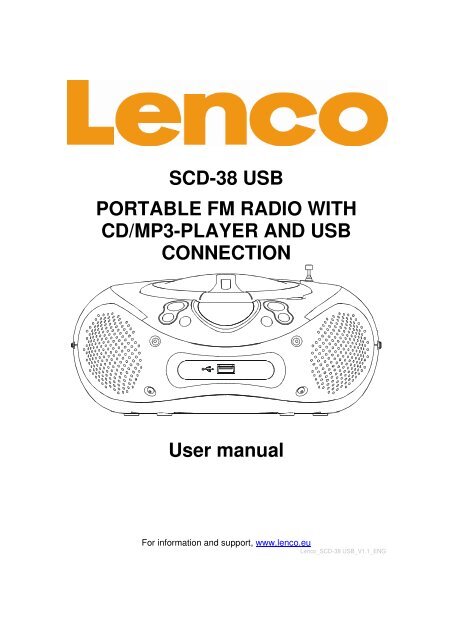
SCD-38 USB PORTABLE FM RADIO WITH CD/MP3 ... - Lenco
SCD-38 USB PORTABLE FM RADIO WITH CD/MP3 ... - Lenco
SCD-38 USB PORTABLE FM RADIO WITH CD/MP3 ... - Lenco

You also want an ePaper? Increase the reach of your titles
YUMPU automatically turns print PDFs into web optimized ePapers that Google loves.
<strong>S<strong>CD</strong></strong>-<strong>38</strong> <strong>USB</strong><br />
<strong>PORTABLE</strong> <strong>FM</strong> <strong>RADIO</strong> <strong>WITH</strong><br />
<strong>CD</strong>/<strong>MP3</strong>-PLAYER AND <strong>USB</strong><br />
CONNECTION<br />
User manual<br />
For information and support, www.lenco.eu<br />
<strong>Lenco</strong>_<strong>S<strong>CD</strong></strong>-<strong>38</strong> <strong>USB</strong>_V1.1_ENG
Safety Precautions<br />
IMPORTANT SAFETY INSTRUCTIONS - READ CAREFULLY BEFORE USE.<br />
CAUTION: TO PREVENT ELECTRICAL SHOCK, DO NOT REMOVE<br />
ANY COVER SCREWS. THERE ARE NO USER SERVICEABLE<br />
PARTS INSIDE. REQUEST A QUALIFIED SERVICE PERSON TO<br />
PERFORM SERVICING.<br />
This symbol indicates that there are important operating maintenance<br />
instructions in the user manual accompanying this unit.<br />
This symbol indicates that dangerous voltage is present within this unit<br />
constituting a risk of electric shock or personal injury.<br />
Keep these instructions in mind:<br />
Do not use this unit near water.<br />
Clean only with a slightly damp cloth.<br />
Do not cover or block any ventilation openings. When placing on a shelf leave 5 cm (2”) free<br />
space around the whole unit.<br />
Install in accordance with the supplied user manual.<br />
Protect the power cord from being walked on or pinched, particularly at plugs, and the point<br />
where it exits the unit. Do not place heavy items on the power cord, which may damage it.<br />
Take note that the power cord cannot be reached and pulled by young children, avoiding<br />
injury.<br />
Unplug this unit during lightning storms or when unused for a long period of time.<br />
Keep the unit away from heat sources such as radiators, heaters, stoves, candles and other<br />
heat-generating products.<br />
<br />
<br />
<br />
WARNING! NEVER INSERT AN OBJECT INTO THE PRODUCT THROUGH VENTS OR<br />
OPENINGS. HIGH VOLTAGE FLOWS IN THE PRODUCT AND INSERTING AN OBJECT<br />
CAN CAUSE ELECTRIC SHOCK AND/OR SHORT INTERNAL PARTS. FOR THE SAME<br />
REASON, DO NOT SPILL WATER OR LIQUID ON THE PRODUCT.<br />
Do NOT use in wet or moist areas such as bathrooms, steamy kitchens or near swimming<br />
pools.<br />
Do not use this unit when moisture condensation may occur.<br />
NOTE: No naked flames such as candles should be placed on the radio.<br />
2
SAFETY PRECAUTIONS (continued)<br />
This unit has been produced according to all current safety regulations. The following safety tips<br />
should safeguard users against careless use and the dangers connected with such use.<br />
Although this unit has been carefully manufactured and rigorously checked before leaving the<br />
factory, as with all electrical appliances, it is possible for problems to develop. If you notice<br />
smoke, an excessive build up of heat or any other unexpected phenomena, you should<br />
disconnect the plug from the mains power socket immediately.<br />
Ensure that the unit is sufficiently ventilated!<br />
The mains plug or appliance coupler is used as the disconnect device, the disconnect device<br />
shall remain readily operable.<br />
This unit must operate on a power source specified on the specification label. If you are not<br />
sure of the type of power supply used in your home, consult your dealer or local power<br />
company.<br />
The socket outlet must be installed near the equipment and must be easily accessible.<br />
Do not overload AC outlets or extension cords. Overloading can cause fire or electric shock.<br />
Units with Class 1 construction shall be connected to a mains socket outlet with a protective<br />
earthed connection.<br />
Keep away from rodents. Rodents enjoy biting into power cords.<br />
Always hold the plug when pulling out the plug from the mains supply socket. Do not pull the<br />
power cord. This can cause a short circuit.<br />
The screen is made of plastic and can break if damage is done to it. When broken, be careful<br />
with sharp edged plastic splinters to avoid injury.<br />
Avoid placing the unit on any surfaces that may be subject to vibrations or shocks.<br />
To protect the unit during a thunderstorm unplug the AC power cable and disconnect the<br />
aerial. Caution: Do not touch the aerial (RF) connector.<br />
When the unit is not used for long periods of time, unplug the AC power cable for safety<br />
reasons.<br />
Do NOT tap or shake the screen, you may damage the internal circuits. Take good care of<br />
the remote control, do not drop.<br />
To clean the TV use a soft dry cloth. Do NOT use solvents or petrol based fluids. For<br />
stubborn stains, you may use a damp cloth with dilute detergent.<br />
The laser beam used in the <strong>CD</strong> player section may be harmful to the eyes. Do not attempt to<br />
disassemble the cabinet. Refer servicing to qualified personnel only.<br />
If the player is left in a car parked in the sun, be sure to choose a location in the car where the<br />
player will not be subjected to the direct sunlight.<br />
<strong>CD</strong><br />
Before playing, clean the <strong>CD</strong> with a cleaning cloth.<br />
Do not expose the <strong>CD</strong> to direct sunlight or heat sources such as hot air ducts. Do not leave it<br />
in a car parked in direct sunlight as there can be a considerable rise in temperature inside of<br />
the car.<br />
Do not stick paper or stickers on the <strong>CD</strong>, nor scratch the <strong>CD</strong>.<br />
After playing, store the <strong>CD</strong> in its case. Scratches, dirt or fingerprints on the <strong>CD</strong> may cause<br />
tracking errors or skipping.<br />
If the player is brought directly from a cold to a warm location, or is placed in a very damp<br />
room, moisture may condense on the lens inside of the <strong>CD</strong> player section. Should this occur<br />
the player will not operate properly in this case, remove the <strong>CD</strong> and wait about an hour for<br />
the moisture to evaporate.<br />
This <strong>CD</strong> player is designed to be played on a stable no vibration position. If you bump the set<br />
during <strong>CD</strong> play, the music will stop or skip for a few seconds. This is normal for this type of<br />
player.<br />
3
Scratched discs<br />
If your disc is badly scratched, it will not play. You may be able to repair the disc if you use a disc<br />
polisher.<br />
Cleaning the Lens<br />
If the lens becomes dirty, it may cause a skipping of sound during <strong>CD</strong> operation. Clean the lens<br />
with a commercially available lens cleaner and blower or carefully wipe it with a soft dry cloth.<br />
Where to install<br />
Locate the unit away from direct sunlight and strong lights, soft indirect lighting is recommended<br />
for comfortable viewing. Use curtains or blinds to prevent direct sunlight falling on the screen.<br />
Place the TV on a sturdy platform of which the surface should be flat and steady. This will prevent<br />
it from falling over. Make sure the television is located in a position where it cannot be pushed or<br />
hit by objects, as pressure will break or damage the screen, and so that small objects cannot be<br />
inserted into the ventilation slots or openings in the cabinet.<br />
Declaration of Conformity<br />
Products with the CE marking comply with the EMC Directive (2004/108/EC) and the<br />
Low Voltage Directive (2006/95/EC) issued by the Commission of the European<br />
Community.<br />
Note:<br />
This user manual is printed prior to the product development. When a part of the<br />
product specification has to be changed to improve operability or other functions,<br />
priority is given to the product specification itself. In such cases, the instruction<br />
manual may not entirely match all the functions of the actual product. Therefore,<br />
the actual product and packaging, as well as the name and illustrations, may<br />
differ from the manual. The drawings shown as an example in this manual may<br />
be different from the actual appearance of the unit.<br />
<strong>Lenco</strong> is not liable for any consequential damage.<br />
IMPORTANT NOTE:<br />
The <strong>USB</strong> memory stick should be plugged into the unit directly. Don’t<br />
use an <strong>USB</strong> extension cable because it can cause interference<br />
resulting in failing of data.<br />
<strong>Lenco</strong> recommends using A-brand batteries for longer life and better results.<br />
When the unit will not be used for a few weeks or more, remove the batteries<br />
to avoid damage that can be caused by battery leakage or corrosion.<br />
Batteries shall not be exposed to excessive heat such as sunshine or fire.<br />
4
End of Life<br />
This symbol indicates that the relevant electrical product or<br />
battery should not be disposed of as general household waste in<br />
Europe. To ensure the correct waste treatment of the product<br />
and battery, please dispose them in accordance to any<br />
applicable local laws of requirement for disposal of electrical<br />
equipment or batteries. In so doing, you will help to conserve<br />
natural resources and improve standards of environmental<br />
protection in treatment and disposal of electrical waste (Waste<br />
Electrical and Electronic Equipment Directive).<br />
When you see a crossed-out wheeled waste container on the product. It means<br />
that the product falls under the EU directive 2002/96/EC.<br />
5
Dear customer,<br />
Thank you for purchasing this <strong>Lenco</strong> product. Quality and usability is our top<br />
priority, in order to let you enjoy maximal of this product we manufactured your<br />
product with high quality materials, components and care. Before connecting<br />
parts and power, please carefully read the user manual and always keep these<br />
instructions close by your apparatus.<br />
What’s in the box<br />
1x <strong>S<strong>CD</strong></strong>-<strong>38</strong> <strong>USB</strong><br />
1x AC Power cable<br />
1x Quick guide<br />
Our factory assembles the content of the box with the utmost care. If<br />
unfortunately an accessory is missing in the box, you need to contact your dealer<br />
as soon as possible.<br />
6
Table of content<br />
Safety Precautions ............................................................................ 2<br />
End of Life......................................................................................... 5<br />
What’s in the box............................................................................. 6<br />
Exploring the device.......................................................................... 8<br />
Top view .................................................................................................................................8<br />
Front view ...............................................................................................................................9<br />
Left view .................................................................................................................................9<br />
Right view .............................................................................................................................10<br />
Back view .............................................................................................................................10<br />
The display (6) ......................................................................................................................11<br />
Selecting a power source ................................................................ 12<br />
Connecting via the AC power cord ........................................................................................12<br />
Using the device on batteries ................................................................................................12<br />
Basic operation ............................................................................... 13<br />
Listening to the radio.............................................................................................................13<br />
Playing an audio, <strong>MP3</strong> or WMA <strong>CD</strong>......................................................................................13<br />
Playing an <strong>USB</strong> device..........................................................................................................15<br />
Connecting an external audio source.....................................................................................17<br />
Troubleshooting .............................................................................. 18<br />
Service and support ........................................................................ 19<br />
Specification.................................................................................... 20<br />
7
Exploring the device<br />
Top view<br />
1. Folder button: Switch between folders (during <strong>MP3</strong>/WMA playback).<br />
2. Next button: skip to the next track; hold the button to fast forward.<br />
3. Prev button: skip to the previous track; hold the button to fast backward.<br />
4. Repeat button: repeat a track, a folder or everything.<br />
5. Power indicator.<br />
6. Display.<br />
7. <strong>FM</strong> Stereo indicator.<br />
8. Stop button: stop playback<br />
9. Play/pause button: Press this to play / pause <strong>CD</strong>/<strong>USB</strong>.<br />
10. PROG: Program your desired tracks.<br />
11. OPEN/CLOSE notch: open or close <strong>CD</strong> compartment.<br />
12. <strong>CD</strong> door<br />
13. <strong>FM</strong> antenna<br />
14. Speakers<br />
8
Front view<br />
15. <strong>USB</strong> socket: connection for a <strong>USB</strong> device.<br />
Left view<br />
16. Function switch.<br />
17. VOLUME control: increase/decrease the volume.<br />
9
Right view<br />
18. Tuning control<br />
19. <strong>FM</strong> MONO/STEREO Switch<br />
20. <strong>FM</strong> frequency display<br />
Back view<br />
21. AUX IN socket (Input audio signal)<br />
22. AC IN socket<br />
10
The display (6)<br />
A. Program LED: Indicates that “program mode” is active.<br />
B. Play LED: Indicates that “playback mode” is active.<br />
C. Repeat LED: Indicates that “repeat mode” is active.<br />
NOTE: "no" will be shown in the display if there is no disc in the <strong>CD</strong><br />
compartment or when a disc error occurs.<br />
11
Selecting a power source<br />
You can use the AC power outlet or batteries as a power source.<br />
Note: Batteries are not included.<br />
Connecting via the AC power cord<br />
Insert one end of the supplied AC power cord into the AC IN socket located at<br />
the rear view of the player, and the other end to the wall outlet.<br />
Note: If the plug of the AC power cord does not match your outlet, do not force it.<br />
Reverse it and try again. The plug is polarized and only fits one way into the wall<br />
outlet and rear of the set.<br />
Using the device on batteries<br />
Important: Remove the AC power cord while operating the unit on batteries.<br />
Notes:<br />
-<strong>Lenco</strong> recommends the use of A-Brand batteries.<br />
-Replace the batteries when the POWER LED dims or when the player<br />
stops operating.<br />
-If the <strong>CD</strong> does not play, this means that the batteries are almost empty.<br />
Loading the batteries:<br />
1. Roll over the unit so that the<br />
battery compartment<br />
leg<br />
leg<br />
becomes accessible.<br />
2. Use one finger to press the<br />
sagging block towards the<br />
arrow on the battery cover<br />
and then push the cover to<br />
leg<br />
leg<br />
buckle<br />
the arrow until hearing a click,<br />
sagging block<br />
now hold the front edge of the<br />
cover and turn up to remove it.<br />
3. Place 6 size "C" batteries into<br />
the battery compartment<br />
according to the direction of<br />
“+” and “-“electrode marked<br />
inside of the battery<br />
compartment.<br />
4. Place the buckle of the cover<br />
leg groove<br />
leg groove<br />
leg groove<br />
leg groove<br />
buckle groove<br />
towards the buckle groove and place the 4 legs of the cover face to the leg<br />
grooves to wedge the cover onto the player and then push it into previous<br />
position to close it.<br />
12
Basic operation<br />
Listening to the radio<br />
1. Slide the FUNCTION switch (16) into <strong>RADIO</strong> position, the POWER LED will<br />
turn on.<br />
2. Tune to the desired frequency using the TUNING control wheel (18). In the<br />
<strong>FM</strong> frequency display (20) you can see what the current frequency is.<br />
3. Extend the antenna (13) fully for the best reception; move it around to search<br />
for better reception if necessary.<br />
Turn the volume knob (17) to adjust the volume.<br />
Slide the <strong>FM</strong> MONO/STEREO switch (19) into the position that you prefer.<br />
4. Slide the FUNCTION switch (16) into OFF position to turn off the radio.<br />
Note: If the <strong>FM</strong> stereo reception is good, the <strong>FM</strong> ST LED will lighten up.<br />
Playing an audio, <strong>MP3</strong> or WMA <strong>CD</strong><br />
Open the <strong>CD</strong> compartment and place a <strong>CD</strong> in the <strong>CD</strong> compartment with the<br />
label side up.<br />
Close the <strong>CD</strong> compartment.<br />
1. Slide the FUNCTION switch (16) into <strong>CD</strong>/<strong>USB</strong> (AUX IN) position.<br />
The unit will now start reading the <strong>CD</strong>, this may take some time.<br />
After this the unit will start to play automatically.<br />
2. Slide the FUNCTION switch (16) into OFF position to turn off the unit.<br />
Notes:<br />
When a disc is being played and a <strong>USB</strong> device is connected the unit will<br />
automatically switch to play content from the <strong>USB</strong> device.<br />
When a <strong>USB</strong> device is being played and a <strong>CD</strong> is inserted, the unit will<br />
automatically switch to play the <strong>CD</strong>.<br />
When both a <strong>USB</strong> device and a <strong>CD</strong> are inserted and you turn on the unit, the<br />
unit will start playing content from the <strong>USB</strong> device.<br />
When an AUX cable is connected, the unit will switch to AUX mode.<br />
Play / pause playback<br />
During playback press the play / pause button (9) to pause the playback.<br />
In pause mode press the play / pause button to resume the playback.<br />
In stop mode press the play / pause button to start the playback.<br />
Stop playback<br />
During playback press the stop button (8) to stop the playback.<br />
Go to the next track<br />
Press the next button (2) to skip to the next track.<br />
Note: If you have reached the last track of the root directory or in the current<br />
folder and there are multiple folders in the root directory the unit will automatically<br />
skip to the next folder (<strong>USB</strong> playback).<br />
13
Fast forward through the currently playing track<br />
Press and hold the next button (2) to fast forward through the currently playing<br />
track.<br />
Go to the previous track<br />
Press the prev button (3) to go back to the previous track.<br />
Note A: If you have reached the first track of the root directory or in the current<br />
folder and there are multiple folders in the root directory the unit will automatically<br />
go back to the last track of the previous folder (<strong>USB</strong> playback).<br />
Note B: The prev button also works as a rewind function so sometimes this<br />
button must be pressed twice to go to the previous track.<br />
Fast backward through the currently playing track<br />
Press and hold the prev button (3) to fast backward through the currently playing<br />
track.<br />
Switching between folders (<strong>MP3</strong>/WMA only)<br />
Press the folder button (1) once to activate the folder mode. When this mode<br />
is active the current folder numbers starts to flash in the display.<br />
Press the folder button (1) again to move to the next folder.<br />
Repeat function<br />
Press the REPEAT button (4) once to repeat the currently playing track.<br />
When this mode is active the repeat LED flashes.<br />
Press the REPEAT button (4) twice to repeat the current folder. When this<br />
mode is active the repeat LED burns continuously but after a few seconds the<br />
display flashes and will show the folder number.<br />
Press the REPEAT button (4) three times to repeat the whole medium. When<br />
this mode is active the repeat LED burns continuously.<br />
Creating a playlist<br />
You can make a playlist up to 20 tracks.<br />
1. Press the STOP button (8).<br />
2. Press the PROG button (10) P.01 will start to flash.<br />
3. Press the PREV/NEXT button (3/2) to select the desired track, and press the<br />
PROG button (10) to confirm.<br />
Note: (If available) to step through the folders, activate folder mode by<br />
pressing the folder button (1). Now press the folder button (1) to step through<br />
the folders. For example, to go to folder 3 press 3 time the folder button (1).<br />
Via the PREV/NEXT button (3/2) you can select the desired track, press the<br />
PROG button to confirm.<br />
Repeat step 3 to program other tracks.<br />
4. When you are finished, press the PLAY/PAUSE button (9) to start the playlist.<br />
14
Repeat the playlist<br />
Press the REPEAT button (4) once to repeat the current track.<br />
Press the REPEAT button (4) twice to repeat the playlist.<br />
Cancel the playlist<br />
Press the STOP button (8) twice to cancel the playlist.<br />
Playing an <strong>USB</strong> device<br />
Connect a <strong>USB</strong> device to the <strong>USB</strong> socket (15).<br />
1. Slide the FUNCTION switch (16) into <strong>CD</strong>/<strong>USB</strong> (AUX IN) position.<br />
The unit will now start reading the <strong>USB</strong> device. This may take some time.<br />
After the reading is complete the unit will start to play automatically.<br />
2. Slide the FUNCTION switch (16) into OFF position to turn off the unit.<br />
Notes:<br />
When a disc is being played and a <strong>USB</strong> device is connected the unit will<br />
automatically switch to play content from the <strong>USB</strong> device.<br />
When a <strong>USB</strong> device is being played and a <strong>CD</strong> is inserted, the unit will<br />
automatically switch to play the <strong>CD</strong>.<br />
When both a <strong>USB</strong> device and a <strong>CD</strong> are inserted and you turn on the unit, the<br />
unit will start playing content from the <strong>USB</strong> device.<br />
When an AUX cable is connected, the unit will switch to AUX mode.<br />
Play / pause playback<br />
During playback press the play / pause button (9) to pause the playback.<br />
In pause mode press the play / pause button to resume the playback.<br />
In stop mode press the play / pause button to start the playback.<br />
Stop playback<br />
During playback press the stop button (8) to stop the playback.<br />
Go to the next track<br />
Press the next button (2) to skip to the next track.<br />
Note: If you have reached the last track of the root directory or in the current<br />
folder and there are multiple folders in the root directory the unit will automatically<br />
skip to the next folder (<strong>USB</strong> playback).<br />
Fast forward through the currently playing track<br />
Press and hold the next button (2) to fast forward through the currently playing<br />
track.<br />
15
Go to the previous track<br />
Press the prev button (3) to go back to the previous track.<br />
Note A: If you have reached the first track of the root directory or in the current<br />
folder and there are multiple folders in the root directory the unit will automatically<br />
go back to the last track of the previous folder. (<strong>USB</strong> playback).<br />
Note B: The prev button also works as a rewind function so sometimes this<br />
button must be pressed twice to go to the previous track.<br />
Fast backward through the currently playing track<br />
Press and hold the prev button (3) to fast backward through the currently playing<br />
track.<br />
Switching between folders (<strong>MP3</strong>/WMA only)<br />
Press the folder button (1) once to activate the folder mode. When this mode<br />
is active the current folder numbers starts to flash in the display.<br />
Press the folder button (1) again to move to the next folder.<br />
Repeat function<br />
Press the REPEAT button (4) once to repeat the currently playing track.<br />
When this mode is active the repeat LED flashes.<br />
Press the REPEAT button (4) twice to repeat the current folder. When this<br />
mode is active the repeat LED burns continuously but after a few seconds the<br />
display flashes and will show the folder number.<br />
Press the REPEAT button (4) three times to repeat the whole medium. When<br />
this mode is active the repeat LED burns continuously.<br />
Creating a playlist<br />
You can make a playlist up to 20 tracks.<br />
1. Press the STOP button (8).<br />
2. Press the PROG button (10) P.01 will start to flash.<br />
3. Press the PREV/NEXT button (3/2) to select the desired track, and press the<br />
PROG button (10) to confirm.<br />
Note: (If available) to step through the folders, activate folder mode by<br />
pressing the folder button (1). Now press the folder button (1) to step through<br />
the folders. For example, to go to folder 3 press 3 time the folder button (1).<br />
Via the PREV/NEXT button (3/2) you can select the desired track, press the<br />
PROG button to confirm.<br />
Repeat step 3 to program other tracks.<br />
4. When you are finished, press the PLAY/PAUSE button (9) to start the playlist.<br />
Repeat the playlist<br />
Press the REPEAT button (4) once to repeat the current track.<br />
Press the REPEAT button (4) twice to repeat the playlist.<br />
Cancel the playlist<br />
Press the STOP button (8) twice to cancel the playlist.<br />
16
Connecting an external audio source<br />
Connect a 3,5 mm stereo jack aux cable to the AUX IN socket (18).<br />
1. Slide the FUNCTION switch (16) into <strong>CD</strong>/<strong>USB</strong> (AUX IN) position. The unit will<br />
now activate the AUX IN mode.<br />
2. Slide the FUNCTION switch (16) into OFF position to turn off the unit.<br />
Note: A 3,5mm stereo jack cable is not included.<br />
You can only increase / decrease the volume by using the volume control (17).<br />
All other functions need to be operated from the external audio source.<br />
17
Troubleshooting<br />
Please refer to the following instruction when there are problems with the unit.<br />
If the problem still exits, please consult your dealer.<br />
Problem<br />
Remedy<br />
Check the AC power cord.<br />
General<br />
<strong>CD</strong> Player<br />
Radio<br />
The unit does not turn on<br />
There is no sound<br />
"- - -" or "nl" Appears in the<br />
display<br />
<strong>CD</strong> does not play<br />
The sound drips out<br />
<strong>CD</strong> does not play while the<br />
radio continues to play on<br />
battery power<br />
The sound is weak or has<br />
poor quality<br />
Check the batteries<br />
Check the FUNCTION switch.<br />
Adjust the volume<br />
Is the disk format supported<br />
Is the <strong>CD</strong> compartment closed<br />
Take out the <strong>CD</strong> and leave the<br />
<strong>CD</strong> DOOR open for about an hour<br />
to dry moisture condensation<br />
Make sure the <strong>CD</strong> is not<br />
scratched<br />
Clean the <strong>CD</strong><br />
Make sure the FUNCTION switch<br />
is at <strong>CD</strong>/<strong>USB</strong>/AUX IN position<br />
If connected; disconnect the audio<br />
cable from the AUX IN jack.<br />
Clean the <strong>CD</strong>, or replace it if the<br />
<strong>CD</strong> is badly damaged<br />
Place the player in a location free<br />
from vibration<br />
Check if your batteries are okay<br />
It is normal since the radio uses<br />
less power than the <strong>CD</strong> player.<br />
Replace the batteries to be able<br />
to playback the <strong>CD</strong> again.<br />
Replace all the batteries with new<br />
ones, or bring the set near a<br />
window, or rotate the set/antenna<br />
18
Service and support<br />
<strong>Lenco</strong> offers service and warranty in accordance to European law, which means<br />
that in case of repair (both during and after the warranty period), you should<br />
contact your local dealer. Please note: It is not possible to send repairs to <strong>Lenco</strong><br />
directly.<br />
<strong>Lenco</strong> helpdesk:<br />
Germany 0699- 5307177<br />
The Netherlands 0900-BELLENCO (0900-23553626)<br />
Belgium 026-200115<br />
France 0170480005<br />
The helpdesk is accessible from Monday till Friday from 9 AM till 6 PM.<br />
In case your device needs repair our helpdesk will redirect you to your local<br />
dealer.<br />
Important note: If the unit is opened by a non-official service center the warranty expires.<br />
19
Specification<br />
Power source<br />
AC 230V 50 Hz<br />
DC 9V (6 size ”C” batteries)<br />
Power consumption<br />
< 1 W in standby<br />
Max. 13W<br />
Speakers<br />
1 Watt / 4 ohms<br />
Dimensions 259 X 223 X 118<br />
Weight<br />
1295g(without batteries)<br />
Playable disc type and format Type: <strong>CD</strong>-DA , <strong>CD</strong>-R , <strong>CD</strong>-RW<br />
Format: <strong>CD</strong> , <strong>MP3</strong> , WMA<br />
Max tracks folders<br />
1: <strong>USB</strong><br />
Max files : 999<br />
Max folder: 128<br />
Max files in folder :128<br />
2:<strong>MP3</strong> <strong>CD</strong>,WMA <strong>CD</strong><br />
Max folder + file: 464 (e.g. 1folder + 463<br />
songs; 2 folders + 462 songs ; ...... etc)<br />
Max folder : 47<br />
Radio Frequency range<br />
<strong>FM</strong>:87.5-108 MHz<br />
20