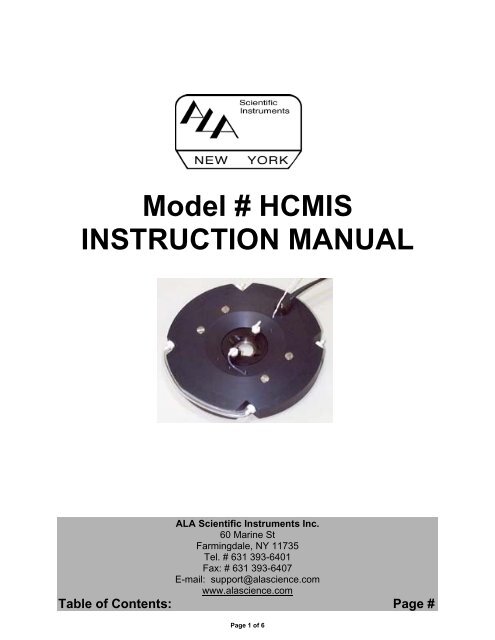
Model # HCMIS INSTRUCTION MANUAL - ALA Scientific Instruments
Model # HCMIS INSTRUCTION MANUAL - ALA Scientific Instruments
Model # HCMIS INSTRUCTION MANUAL - ALA Scientific Instruments

Create successful ePaper yourself
Turn your PDF publications into a flip-book with our unique Google optimized e-Paper software.
<strong>Model</strong> # <strong>HCMIS</strong><br />
<strong>INSTRUCTION</strong> <strong>MANUAL</strong><br />
<strong>ALA</strong> <strong>Scientific</strong> <strong>Instruments</strong> Inc.<br />
60 Marine St<br />
Farmingdale, NY 11735<br />
Tel. # 631 393-6401<br />
Fax: # 631 393-6407<br />
E-mail: support@alascience.com<br />
www.alascience.com<br />
Table of Contents: Page #<br />
Page 1 of 6
INTRODUCTION............................................................................................................. 3<br />
PRODUCT OVERVIEW .................................................................................................. 4<br />
EXPLOSION DIAGRAM OF <strong>HCMIS</strong> WITH GAS PORTS............................................... 5<br />
CARE AND MAINTENANCE.......................................................................................... 6<br />
LIMITED WARRANTY .................................................................................................... 6<br />
Page 2 of 6
Introduction<br />
The Micro-Incubator stage you have purchased is designed to provide you with very<br />
accurate temperature control through a broad temperature range (0-45°C). The assembly<br />
is equipped with two Peltier elements, one on each side. Peltiers are thermoelectric<br />
devices. They use current passed through a field of dissimilar metals to drive heat to<br />
one side of the element. Consequently, the other side gets cool. It is possible for the<br />
cold side to be 67°C cooler than the warm side, provided that adequate cooling is<br />
provided.<br />
The <strong>HCMIS</strong> system uses water flow-through cooling to remove the heat generated by<br />
the Peltier elements. This heat removal is essential. When the unit is in cooling mode,<br />
a substantial amount of heat will be generated. The user must insure sufficient water<br />
flow to cool the Peltiers. The water flow must be no less than 300ml/min.! Keeping the<br />
temperature of the upper part of the chamber assembly (the heat exchange part) at<br />
room temperature by flowing water through it, will give excellent stability and cold<br />
temperature range. Do not worry if your flow of water is temporarily disrupted, the mass<br />
of the upper part of the <strong>HCMIS</strong> can absorb significant heat. In fact, for cooling of up to<br />
5°C below room temperature, no water cooling is necessary unless you see inadequate<br />
performance, or unless the system feels very hot. It is not necessary to flow cooling<br />
water when the system is in the heating mode.<br />
It is important to insure that the flow of water is constant and bubble free so that no<br />
vibrations are induced into the chamber system. Also, periodically check the water<br />
pathway for leaks; tighten any fitting as necessary. As you may be aware, Peltier<br />
heating/cooling devices pump heat according to the voltage orientation. Thus, a Peltier<br />
driven temperature control system is switched from heating to cooling and visa versa,<br />
by a polarity switch, (+ to -, or – to +). When you install the <strong>HCMIS</strong>, you must be sure<br />
that it is connected to the temperature controller correctly. This is easily done by<br />
plugging in the stage to your controller, turning the controller on heating or cooling,<br />
while holding your hand on the bottom section of the chamber. Make sure that the<br />
bottom section responds the way it is supposed to for the setting of the controller. If it<br />
does not, reverse the polarity on the plugs to your controller’s power output and the unit<br />
should function properly.<br />
Additionally, you must be sure that your controller can provide adequate power for the<br />
<strong>HCMIS</strong>. This means at least 12VDC and 4 amp. output. If the voltage is too low the<br />
system will not work properly. Also, if your controller cannot supply enough amperage,<br />
the controller may burn out.<br />
Page 3 of 6
Product Overview<br />
Cooling<br />
water tubes.<br />
Block Thermistor<br />
Wire.<br />
<strong>ALA</strong> MS series cell<br />
chamber or Corning<br />
35mm petri dish<br />
Built-in perfusion<br />
pre-heat/pre-cool<br />
tube.<br />
The <strong>HCMIS</strong> is placed on a microscope stage. It can be secured as necessary, but it will<br />
fit directly into an Olympus IX-SFR stage (or any other stage with a 110mm opening).<br />
When cooling, a steady flow of water of not less than 300ml/min. must be maintained<br />
through the cooling water tubes. When heating, no water is necessary. A thermistor<br />
(2250 ohms @ 25°C) is permanently installed in the chamber block for monitoring.<br />
pre-<br />
The unit is also equipped with a perfusion tube that passes through the block for<br />
heating or pre-cooling perfusion solutions.<br />
The perfusion tube enters the lower<br />
part of the block at one side. It<br />
passes one way, then emerges, is<br />
looped back and passes through the<br />
other way. When it emerges from<br />
the block, next to where it entered, it<br />
goes out through the upper part of<br />
the block to the cell chamber.<br />
(1.65mm OD tubing recommended,<br />
smaller OD ok.)<br />
The <strong>HCMIS</strong> is equipped with a perfusion pre-heater/pre-cooler to assist in reaching the<br />
temperature requirements in your chamber. The solution can make two passes through<br />
the temperature block of 38mm each before being shunted to the cell chamber.<br />
Performance will vary greatly with flow rate and temperature set-point. Thin-wall Teflon<br />
type tubing is recommended. Be aware that heating/cooling perfusion solutions will add<br />
considerably to the energy requirements of the system, so try to optimize things as<br />
Page 4 of 6
much as possible. (If you have additional pre-heating/pre-cooling requirements, please<br />
contact your representative regarding the <strong>ALA</strong> Heated Perfusion Tube or the <strong>ALA</strong><br />
Heating/Cooling Pre-stage.)<br />
Explosion Diagram of <strong>HCMIS</strong> with Gas Ports<br />
Gas Ports<br />
4-40<br />
Seal position<br />
(one of four)<br />
Plug<br />
position<br />
Front<br />
Rear<br />
To attach gas vents to the <strong>HCMIS</strong> use the four 4-40 screws provided. Be sure that the<br />
square seals are placed at the lower ends of each vent and seal the cut-away part of<br />
the vent. Make the screws firm, but not tight. A plug is provided in one vent where the<br />
perfusion tube goes. If the tube is used, remove the plug. Replace the plug if the tube<br />
is not used, (i.e. do not leave a hole). The gas leaves the vents from a slot at the base<br />
that is formed between the <strong>HCMIS</strong> body and the vent. The slot is about 0.25mm. You<br />
Page 5 of 6
should check the slot after installing the vents by sliding a piece of paper in to confirm<br />
that the slot is open all the way across the vent. Adjust the screws as necessary.<br />
Gas pressure will need to be determined empirically for each set up. Generally, we<br />
recommend about 10PSI (68kPa) as a guide. Certainly you may need more or less<br />
pressure. Remember that the gas is to form a curtain over the prep and you may or<br />
may not want it to create turbulence in the chamber. Also remember that when cooling,<br />
humidified gasses will cause condensation. Generally, the temperature of the gas<br />
should not cause a problem for the temperature control, but if you notice a problem,<br />
please consult your dealer or <strong>ALA</strong> directly for a solution. We do have gas warmers and<br />
coolers!<br />
Care and Maintenance<br />
The <strong>HCMIS</strong> should be kept clean and dry. During extended cooling in warm weather,<br />
condensation will accumulate on the lower block. Try to wipe this up periodically during<br />
operation to prevent dripping. Wipe off all salt solutions that get on the block with a<br />
damp cloth or towel. Do not immerse the block fully in water. If it should become<br />
immersed, allow it to dry for a day before attempting to re-use it. Contact your<br />
representative or the factory if there are any irregularities in performance.<br />
Limited Warranty<br />
<strong>ALA</strong> <strong>Scientific</strong> <strong>Instruments</strong> Inc. agrees to warranty this product for one year from the<br />
date of shipment. Said warranty covers all parts and labor necessary to remedy defects<br />
in workmanship and/or materials. Coverage is limited to repair or replacement of parts.<br />
All units returned to <strong>ALA</strong> <strong>Scientific</strong> <strong>Instruments</strong> Inc. for repair, whether under warranty or<br />
not, must be returned freight prepaid. Freight collect will be refused and will result in<br />
longer repair times.<br />
<strong>ALA</strong> <strong>Scientific</strong> <strong>Instruments</strong> Inc. assumes no liability for damage to or resulting from the<br />
use of this product including damage to other equipment, personal property and<br />
persons using this instrument. The user is responsible for using this instrument in<br />
accordance with this manual for the intended purpose of monitoring biological signals.<br />
Usage that is inconsistent with this intent may result in forfeiture of warranty. Please<br />
consult <strong>ALA</strong> <strong>Scientific</strong> <strong>Instruments</strong> if considering alternative applications.<br />
THIS EQUIPMENT IS NOT INTENDED NOR APPROVED FOR CLINICAL USE IN<br />
ANY WAY AT ALL.<br />
No other warranties are expressed or implied, your rights as a consumer may vary from<br />
state to state.<br />
Please note: It is the buyer's responsibility to inspect this instrument upon receipt for<br />
possible damage that has resulted from shipping and to report any claim to the carrier<br />
within three business days.<br />
If the unit is damaged in shipment, it is the buyer's responsibility to file a claim with the<br />
carrier. <strong>ALA</strong> <strong>Scientific</strong> <strong>Instruments</strong> will assist as much as possible.<br />
Page 6 of 6