Get the Instruction Book for this product - Breville
Get the Instruction Book for this product - Breville
Get the Instruction Book for this product - Breville

You also want an ePaper? Increase the reach of your titles
YUMPU automatically turns print PDFs into web optimized ePapers that Google loves.
CONTENTs<br />
• First point is good start<br />
Sub Heading<br />
Main body paragraph<br />
NOTES: Insert note here, note<br />
point is use when <strong>the</strong>y ask<br />
<strong>for</strong> it.<br />
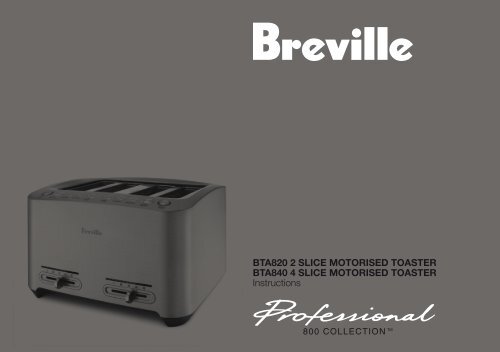
BTA820 2 SLICE MOTORISED TOASTER<br />
BTA840 4 SLICE MOTORISED TOASTER<br />
<strong>Instruction</strong>s<br />
WARNING: THIS BOX IS DANGEROUS<br />
800 COLLECTION<br />
Content
Content
CONTENTs<br />
6 <strong>Breville</strong> Recommends Safety First<br />
7 Know Your <strong>Breville</strong> Professional 800 Collection 2 slice Toaster<br />
8 Know Your <strong>Breville</strong> Professional 800 Collection 4 slice Toaster<br />
9 Operating Your <strong>Breville</strong> Professional 800 Collection Toaster<br />
18 Cleaning<br />
Content
Congratulations on <strong>the</strong> purchase of your new<br />
<strong>Breville</strong> Professional 800 Collection Toaster.<br />
At <strong>Breville</strong>, we are proud of our innovations.<br />
Our Professional 800 Collection appliances<br />
are designed to be <strong>the</strong> best in <strong>the</strong>ir class. When<br />
we set out to design <strong>this</strong> collection we were<br />
determined to add an exceptional toaster, one<br />
that would stand proud in any kitchen.<br />
Unique features, such as automatic one-press<br />
Lift and Look and A Bit More ensures<br />
that you can monitor and control <strong>the</strong> progress<br />
of your toast.<br />
The toaster’s outstanding craftsmanship, made<br />
from heavy duty die cast materials and intelligent<br />
controls, makes <strong>this</strong> not only a durable but<br />
versatile toaster.<br />
This is why we are confident that you will find <strong>the</strong><br />
Professional 800 Collection toaster to be <strong>the</strong><br />
best of <strong>Breville</strong>.<br />
Enjoy!<br />
<br />
Introduction
BREVILLE RECOMMENDS SAFETY FIRST<br />
We at <strong>Breville</strong> are very safety conscious. We design and manufacture consumer <strong>product</strong>s with <strong>the</strong> safety of you, our valued customer, <strong>for</strong>emost in mind.<br />
In addition, we ask that you exercise a degree of care when using any electrical appliance and adhere to <strong>the</strong> following precautions:<br />
IMPORTANT SAFEGUARDS FOR YOUR BREVILLE Professional 800 Collection TOASTER<br />
• Carefully read all instructions be<strong>for</strong>e operating<br />
and save <strong>for</strong> future reference.<br />
• Remove and safely discard any packaging<br />
material or promotional labels be<strong>for</strong>e using <strong>the</strong><br />
toaster <strong>for</strong> <strong>the</strong> first time.<br />
• To eliminate a choking hazard <strong>for</strong> young<br />
children, remove and safely discard <strong>the</strong><br />
protective cover fitted to <strong>the</strong> power plug of <strong>this</strong><br />
appliance<br />
• Do not place <strong>the</strong> toaster near <strong>the</strong> edge of a<br />
table, counter or bench top during operation.<br />
Ensure <strong>the</strong> surface is level, clean and free<br />
of water.<br />
• Do not place <strong>the</strong> toaster on or near a hot gas<br />
or electric burner, or where it could touch a<br />
heated oven.<br />
• Keep appliance clear of walls and o<strong>the</strong>r heat<br />
sensitive materials such as cloths and curtains.<br />
• Do not use <strong>the</strong> toaster on sink drainborad.<br />
• Always ensure <strong>the</strong> toaster is properly<br />
assembled be<strong>for</strong>e use. Follow <strong>the</strong> instructions<br />
provided in <strong>this</strong> book.<br />
• The appliance is not intended to be operated<br />
by means of an external timer or separate<br />
remote control system.<br />
• Bread may burn, <strong>the</strong>re<strong>for</strong>e <strong>this</strong> toaster<br />
must not be used near or below curtains or<br />
o<strong>the</strong>r combustible material and it must be<br />
supervised at all times when in use.<br />
• Ensure that bread to be toasted is <strong>the</strong> correct<br />
size <strong>for</strong> <strong>the</strong> toaster and does not protrude<br />
above <strong>the</strong> bread slice opening. Ensure <strong>the</strong><br />
bread is not too thick or long that it will jam or<br />
wedge <strong>the</strong> bread carriage.<br />
• Never cover <strong>the</strong> toaster whilst it is plugged into<br />
<strong>the</strong> power outlet or while hot.<br />
• Do not place toast directly on top of toasting<br />
slots to warm toast as <strong>this</strong> may prevent correct<br />
air circulation and damage <strong>the</strong> appliance.<br />
• Do not move <strong>the</strong> toaster whilst in operation<br />
or when hot.<br />
• Do not touch hot surfaces. Use side areas<br />
<strong>for</strong> lifting and carrying <strong>the</strong> appliance.<br />
• Do not leave <strong>the</strong> toaster unattended<br />
when toasting.<br />
• Always turn <strong>the</strong> power off at <strong>the</strong> power<br />
outlet and <strong>the</strong>n remove <strong>the</strong> plug from <strong>the</strong><br />
power outlet be<strong>for</strong>e attempting to move <strong>the</strong><br />
appliance, when <strong>the</strong> appliance is not in use<br />
and be<strong>for</strong>e cleaning or storing.<br />
• Do not allow breadcrumbs to accumulate in<br />
<strong>the</strong> bottom of <strong>the</strong> toaster. Failure to clean <strong>the</strong><br />
crumb tray regularly may result in a fire hazard.<br />
• Do not clean with metal scouring pads. Pieces<br />
can break off <strong>the</strong> pad and touch electrical<br />
parts creating an electric shock hazard.<br />
• Keep <strong>the</strong> appliance clean. Follow <strong>the</strong> cleaning<br />
instructions provided in <strong>this</strong> book.<br />
<strong>Breville</strong> recommends safety first
BREVILLE RECOMMENDS SAFETY FIRST (continued)<br />
IMPORTANT SAFEGUARDS FOR ALL ELECTRICAL APPLIANCES<br />
• Fully unwind <strong>the</strong> power cord be<strong>for</strong>e use.<br />
• Do not let <strong>the</strong> power cord hang over <strong>the</strong> edge<br />
of a table or counter, touch hot surfaces, or<br />
become knotted.<br />
• To protect against electric shock, do not<br />
immerse power cord, power plug or appliance<br />
in water or any o<strong>the</strong>r liquid.<br />
• This appliance is not intended <strong>for</strong> use by<br />
persons (including children) with reduced<br />
physical, sensory or mental capabilities, or<br />
lack of experience and knowledge, unless <strong>the</strong>y<br />
have been given supervision or instruction<br />
concerning use of <strong>the</strong> appliance by a person<br />
responsible <strong>for</strong> <strong>the</strong>ir safety.<br />
• Children should be supervised to ensure that<br />
<strong>the</strong>y do not play with <strong>the</strong> appliance.<br />
• This appliance is intended <strong>for</strong> household use<br />
only. Do not use <strong>this</strong> appliance <strong>for</strong> o<strong>the</strong>r than<br />
its intended use. Do not use in moving vehicles<br />
or boats. Do not use outdoors<br />
• It is recommended to regulary inspect <strong>the</strong><br />
appliance. Do not use <strong>the</strong> appliance if power<br />
cord, power plug or appliance becomes<br />
damaged in any way. Return <strong>the</strong> entire<br />
appliance to <strong>the</strong> nearest authorised <strong>Breville</strong><br />
service centre <strong>for</strong> examination and/or repair.<br />
• Any maintenance o<strong>the</strong>r than cleaning should<br />
be per<strong>for</strong>med at an authorised <strong>Breville</strong> Service<br />
Centre.<br />
• The installation of a residual current device<br />
(safety switch) is recommended to provide<br />
additional safety protection when using<br />
electrical appliances. It is advisable that a<br />
safety switch with a rated residual operating<br />
current not exceeding 30mA be installed in <strong>the</strong><br />
electrical circuit supplying <strong>the</strong> appliance. See<br />
your electrician <strong>for</strong> professional advice.<br />
NOTE: This <strong>Breville</strong> Toaster is<br />
electronically controlled<br />
and will not operate until<br />
<strong>the</strong> toaster is plugged into<br />
a 230/240 volt power point<br />
and switched on.<br />
WARNING: NEVER OPERATE TOASTER ON ITS SIDE.<br />
NEVER ADD ANY FOOD SUBSTANCE TO THE BREAD, MUFFINS OR<br />
CRUMPETS AS THIS CAN LEAD TO ELECTROCUTION OR FIRE.<br />
THIS TOASTER IS FOR TOASTING BREAD, CRUMPETS AND MUFFINS<br />
ONLY. PLACING OTHER ITEMS IN THE TOASTER CAN LEAD TO<br />
ELECTROCUTION OR FIRE.<br />
<br />
BREVILLE Recommends safety first
KNOW YOUR BREVILLE PROFESSIONAL 800 COLLECTION 2 SLice TOASTER<br />
Intelligent auto lowering<br />
CRUMPET<br />
DEFROST<br />
Back-lit chrome capped buttons<br />
TOAST/CANCEL<br />
A BIT MORE<br />
Automatic LIFT & LOOK<br />
Extra wide slots with self<br />
centring carriage<br />
Brushed diecast body<br />
Toast ready sound alert<br />
LED toasting<br />
progress indicator<br />
Variable browning control<br />
Slide out crumb tray<br />
Cord storage<br />
KNOW YOUR BREVILLE PROFESSIONAL 800 COLLECTION 2 Slice TOASTER
KNOW YOUR BREVILLE PROFESSIONAL 800 COLLECTION 4 SLICE TOASTER<br />
Intelligent auto lowering<br />
DEFROST<br />
CRUMPET<br />
Back-lit chrome capped buttons<br />
TOAST/CANCEL<br />
A BIT MORE<br />
Automatic LIFT & LOOK<br />
Extra wide slots with self<br />
centring carriage<br />
Brushed diecast body<br />
Toast ready sound alert<br />
Independent LED toasting<br />
progress indicator<br />
Independent variable<br />
browning control<br />
Independent slide out crumb tray<br />
Cord storage<br />
<br />
KNOW YOUR BREVILLE PROFESSIONAL 800 COLLECTION 4 Slice TOASTER
Operating
OPERATING YOUR BREVILLE PROFESSIONAL 800 COLLECTION TOASTER<br />
Be<strong>for</strong>e first use, remove any packaging material<br />
or promotional labels attached to your toaster.<br />
1. Insert <strong>the</strong> power plug into a 230/240 volt<br />
power outlet <strong>the</strong>n turn <strong>the</strong> power on. The<br />
TOAST/CANCEL button surround will<br />
illuminate in white. The LED toasting progress<br />
indicator will illuminate in red from left to right,<br />
<strong>the</strong>n align to <strong>the</strong> selected browning setting<br />
(indicated by <strong>the</strong> position of <strong>the</strong> browning<br />
control slide). The toaster will revert to standby<br />
mode after 30 seconds if a button is not<br />
pressed or <strong>the</strong> browning control slide is not<br />
adjusted.<br />
NOTE: When using <strong>the</strong> toaster <strong>for</strong><br />
<strong>the</strong> first time, we suggest<br />
toasting on <strong>the</strong> maximum<br />
setting without bread. The<br />
toaster may emit a thin<br />
smoke or distinct ODOUR on<br />
initial use. This is normal<br />
and not detrimental to <strong>the</strong><br />
per<strong>for</strong>mance of <strong>the</strong> toaster.<br />
2. Place 1 slice of bread, 1 crumpet or half<br />
an English muffin only, into each of <strong>the</strong><br />
toasting slots.<br />
Ensure items <strong>for</strong> toasting are not too large<br />
or too thick to fit in <strong>the</strong> toasting slots.<br />
The BTA820 has a single browning control<br />
slide and row of function buttons that<br />
simultaneously control <strong>the</strong> two toasting slots.<br />
The BTA840 has dual independent<br />
controls allowing each pair of slots to work<br />
independently so you can simultaneously toast<br />
to different preferences.<br />
3. Select <strong>the</strong> desired browning setting by<br />
adjusting <strong>the</strong> browning control slide on <strong>the</strong><br />
front of <strong>the</strong> toaster. The browning settings<br />
range from ‘1’ (lightest) to ‘5’ (darkest). The<br />
LED toasting progress indicator will illuminate<br />
in red and align to <strong>the</strong> selected browning<br />
setting (as indicated by <strong>the</strong> position of <strong>the</strong><br />
browning control slide).<br />
NOTE: When using <strong>the</strong> toaster<br />
<strong>for</strong> <strong>the</strong> first time, it is<br />
suggested to toast on<br />
browning setting ‘3’.<br />
Various types of bread<br />
and personal preference<br />
may require a different<br />
browning setting. For<br />
example, raisin toast<br />
and white light-textured<br />
breads may require a<br />
lighter setting, whilst<br />
heavier textured rye<br />
breads may require a<br />
darker setting.<br />
4. To start <strong>the</strong> toasting process, press <strong>the</strong><br />
TOAST/CANCEL button on top of <strong>the</strong> toaster.<br />
The TOAST/CANCEL button surround<br />
will illuminate in red and <strong>the</strong> carriage will<br />
automatically lower into <strong>the</strong> toasting slots<br />
which starts <strong>the</strong> toasting cycle. As <strong>the</strong> carriage<br />
automatically locks into position, <strong>the</strong> LIFT &<br />
LOOK button surround will illuminate in<br />
10<br />
OPERATING YOUR BREVILLE PROFESSIONAL 800 COLLECTION TOASTER
OPERATING YOUR BREVILLE PROFESSIONAL 800 COLLECTION TOASTER<br />
white and <strong>the</strong> LED toasting progress indicator<br />
(above <strong>the</strong> selected browning setting) will flash<br />
and start to gradually count down (towards <strong>the</strong><br />
left) indicating <strong>the</strong> toasting progress.<br />
5. The LIFT & LOOK button can be pressed<br />
up until 10 seconds be<strong>for</strong>e <strong>the</strong> end of <strong>the</strong><br />
toasting cycle to view <strong>the</strong> browning of <strong>the</strong><br />
bread. When selected, <strong>the</strong> LIFT & LOOK<br />
button surround will flash and <strong>the</strong> LED toasting<br />
progress indicator will remain steady (indicating<br />
that <strong>the</strong> selected browning setting has not<br />
been interrupted by <strong>the</strong> carriage rising). The<br />
toasting recommences immediately as <strong>the</strong><br />
carriage lowers and locks into position, and<br />
as indicated by <strong>the</strong> LIFT & LOOK button<br />
surround illuminating and <strong>the</strong> LED toasting<br />
progress indicator flashing.<br />
6. Approximately 10 seconds be<strong>for</strong>e <strong>the</strong> end<br />
of <strong>the</strong> selected browning setting, <strong>the</strong> LIFT<br />
& LOOK button will cease illumination.<br />
As <strong>the</strong> toasting stops and <strong>the</strong> carriage rises,<br />
<strong>the</strong> TOAST/CANCEL button surround will<br />
flash and <strong>the</strong> LED toasting progress indicator<br />
will cease flashing. The LED toasting progress<br />
indicator will re-illuminate to <strong>the</strong> previously<br />
selected browning setting.<br />
7. Once <strong>the</strong> toasting cycle has completed and<br />
<strong>the</strong> carriage has risen and locked into <strong>the</strong><br />
raised position, <strong>the</strong> toast ready alert will sound.<br />
Remove <strong>the</strong> toast. The TOAST/CANCEL button<br />
surround will re-illuminate in white <strong>for</strong> up to<br />
30 seconds, ready <strong>for</strong> <strong>the</strong> next toasting cycle.<br />
NOTE: The toaster will revert<br />
to stand-by mode after 30<br />
seconds if A BUTTON IS NOT<br />
pressed or <strong>the</strong> slide is not<br />
adjusted. The TOAST/CANCEL<br />
button surround and LED<br />
toasting progress indicator<br />
will cease illumination.<br />
NOTE: The toaster will re-activate<br />
FROM STAND-BY MODE and<br />
<strong>the</strong> TOAST/CANCEL button<br />
surround and LED toasting<br />
PROGRESS INDICATOR WILL<br />
ILLUMINATE WHEN:<br />
A. ANY OF THE BUTTONS ARE<br />
PRESSED.<br />
B. THE BROWNING CONTROL<br />
SLIDE IS MOVED.<br />
C. THE POWER AT THE POWER.<br />
outlet is turned oFF<br />
<strong>the</strong>n on again.<br />
warning: DO NOT LEAVE THE TOASTER UNATTENDED WHEN IN USE AS TOAST<br />
MAY JAM.<br />
iN THE UNLIKELY EVENT THAT BREAD, CRUMPETS OR MUFFINS BECOME<br />
JAMMED IN THE TOASTING SLOTS, ALL THE BUTTONS AND THE LED<br />
TOASTING PROGRESS INDICATOR WILL FLASH and <strong>the</strong> elements will<br />
turn off. SWITCH THE TOASTER OFF AT THE POWER OUTLET, REMOVE<br />
THE POWER PLUG AND ALLOW THE TOASTER TO COOL COMPLETELY<br />
BEFORE CAREFULLY EASING THE BREAD OUT OF THE SLOTS. TAKE<br />
CARE NOT TO DAMAGE THE ELEMENTS.<br />
OPERATING YOUR BREVILLE PROFESSIONAL 800 COLLECTION TOASTER<br />
11
OPERATING YOUR BREVILLE PROFESSIONAL 800 COLLECTION TOASTER<br />
TOAST/CANCEL button<br />
The TOAST/CANCEL button surround will<br />
illuminate in white <strong>for</strong> up to 30 seconds when <strong>the</strong><br />
appliance is turned on. The toaster will revert to<br />
stand-by mode after 30 seconds if a button is<br />
not pressed or <strong>the</strong> browning control slide is not<br />
adjusted.<br />
• Press <strong>the</strong> TOAST/CANCEL button once<br />
to lower <strong>the</strong> carriage and start <strong>the</strong> toasting<br />
process. The TOAST/CANCEL button<br />
surround will <strong>the</strong>n illuminate in red.<br />
• Press <strong>the</strong> TOAST/CANCEL button during<br />
operation to cancel <strong>the</strong> toasting process or any<br />
o<strong>the</strong>r function. The TOAST/CANCEL button<br />
illumination will change from red to white and<br />
stay illuminated <strong>for</strong> up to 30 seconds.<br />
NOTE: Toasting can be stopped<br />
at any time by pressing<br />
<strong>the</strong> TOAST/CANCEL button<br />
located on <strong>the</strong> top of <strong>the</strong><br />
toaster. This will cancel<br />
<strong>the</strong> operation and <strong>the</strong><br />
carriage will move to<br />
<strong>the</strong> raised position.<br />
NOTE: The <strong>Breville</strong> Professional<br />
800 Collection Toaster<br />
features a LIFT & LOOK<br />
button. This automatically<br />
raises <strong>the</strong> carriage without<br />
cancelling or resetting <strong>the</strong><br />
selected browning setting.<br />
Use <strong>the</strong> LIFT & LOOK button<br />
to view browning progress<br />
during <strong>the</strong> toasting and,<br />
if necessary, cancel <strong>the</strong><br />
process when <strong>the</strong> desired<br />
toast colour is achieved.<br />
12<br />
OPERATING YOUR BREVILLE PROFESSIONAL 800 COLLECTION TOASTER
OPERATING YOUR BREVILLE PROFESSIONAL 800 COLLECTION TOASTER<br />
A BIT MORE Button<br />
This feature can be selected after or during <strong>the</strong><br />
toasting cycle.<br />
To use <strong>this</strong> feature during <strong>the</strong> toasting cycle:<br />
1a. The A BIT MORE button surround will<br />
illuminate in white when selected. The<br />
toasting time will automatically increase but<br />
will not illuminate more of <strong>the</strong> LED toasting<br />
progress indicator. A BIT MORE function<br />
can be cancelled by pressing <strong>the</strong> A BIT<br />
MORE button again and <strong>the</strong> original<br />
toasting cycle will continue.<br />
To use <strong>this</strong> feature after <strong>the</strong> toasting cycle<br />
has completed:<br />
1b. The A BIT MORE button surround will<br />
illuminate in white when selected. The<br />
carriage will automatically lower and begin<br />
<strong>the</strong> additional toasting time. The LED<br />
toasting progress indicator will automatically<br />
align with <strong>the</strong> lowest browning setting <strong>the</strong>n<br />
flash and count down <strong>for</strong> <strong>the</strong> additional<br />
browning time.<br />
2. The TOAST/CANCEL button surround<br />
will also illuminate in red and <strong>the</strong> LIFT &<br />
LOOK button surround will illuminate in<br />
white allowing you to check on <strong>the</strong> toasting<br />
progress and, if necessary, cancel <strong>the</strong> cycle<br />
by pressing <strong>the</strong> TOAST/CANCEL button<br />
when <strong>the</strong> desired toast colour is achieved.<br />
3. Approximately 10 seconds be<strong>for</strong>e <strong>the</strong> end of<br />
<strong>the</strong> additional browning, <strong>the</strong> LIFT & LOOK<br />
button will cease illumination. As <strong>the</strong> toasting<br />
stops and <strong>the</strong> carriage rises, <strong>the</strong> TOAST/<br />
CANCEL button surround will flash, <strong>the</strong> LED<br />
toasting progress indicator will cease flashing<br />
and <strong>the</strong> A BIT MORE button surround<br />
will cease illumination. The LED toasting<br />
progress indicator will re-illuminate to <strong>the</strong><br />
previously selected browning setting.<br />
4. Once <strong>the</strong> toasting cycle has finished and <strong>the</strong><br />
carriage has risen and locked into <strong>the</strong> raised<br />
position, <strong>the</strong> toast ready alert will sound.<br />
Remove <strong>the</strong> toast. The TOAST/CANCEL<br />
button surround will re-illuminate in white<br />
<strong>for</strong> up to 30 seconds, ready <strong>for</strong> <strong>the</strong> next<br />
toasting cycle.<br />
NOTE: A BIT MORE button can<br />
be used with <strong>the</strong> TOAST,<br />
CRUMPET and DEFROST<br />
functions.<br />
OPERATING YOUR BREVILLE PROFESSIONAL 800 COLLECTION TOASTER<br />
13
OPERATING YOUR BREVILLE PROFESSIONAL 800 COLLECTION TOASTER<br />
CRUMPET Button<br />
This feature activates additional heat to <strong>the</strong> middle<br />
heating elements to perfectly toast crumpet tops<br />
and lightly toast <strong>the</strong> crumpet bases.<br />
To toast crumpets:<br />
1. Place <strong>the</strong> crumpets into <strong>the</strong> toasting slots<br />
with crumpet tops facing inwards as per <strong>the</strong><br />
crumpet markings above <strong>the</strong> middle elements<br />
of <strong>the</strong> toaster.<br />
2. Select <strong>the</strong> desired browning setting by<br />
adjusting <strong>the</strong> browning control slide on <strong>the</strong><br />
front of <strong>the</strong> toaster. The browning settings<br />
range from ‘1’ (lightest) to ‘5’ (darkest).<br />
3. Press <strong>the</strong> TOAST/CANCEL button and <strong>the</strong><br />
surround will illuminate in red <strong>the</strong>n press<br />
<strong>the</strong> CRUMPET button and <strong>the</strong> surround<br />
will illuminate in white. The crumpets will<br />
automatically lower into <strong>the</strong> toasting slots.<br />
The middle and side heating elements will<br />
automatically adjust.<br />
4. The LIFT & LOOK button surround will<br />
also illuminate in white allowing <strong>the</strong> toasting<br />
progress to be checked and, if necessary,<br />
cancel <strong>the</strong> cycle by pressing <strong>the</strong> TOAST/<br />
CANCEL button when <strong>the</strong> desired toast<br />
colour is achieved.<br />
5. Approximately 10 seconds be<strong>for</strong>e <strong>the</strong> end<br />
of <strong>the</strong> selected browning setting, <strong>the</strong> LIFT &<br />
LOOK button will cease illumination. As<br />
<strong>the</strong> toasting stops and <strong>the</strong> carriage rises, <strong>the</strong><br />
TOAST/CANCEL button surround will flash<br />
and <strong>the</strong> LED toasting progress indicator will<br />
cease flashing. The LED toasting progress<br />
indicator will re-illuminate to <strong>the</strong> previously<br />
selected browning setting.<br />
6. Once <strong>the</strong> toasting cycle has finished and <strong>the</strong><br />
carriage has risen and locked into <strong>the</strong> raised<br />
position, <strong>the</strong> toast ready alert will sound.<br />
Remove <strong>the</strong> crumpets. The TOAST/CANCEL<br />
button surround will re-illuminate in white <strong>for</strong><br />
up to 30 seconds, ready <strong>for</strong> <strong>the</strong> next toasting<br />
cycle. The CRUMPET button surround will<br />
remain illuminated and should be pressed<br />
once to cancel if a subsequent toasting<br />
function is required. The CRUMPET button<br />
surround will cease to illuminate after 30<br />
seconds or when <strong>the</strong> appliance is switched<br />
off at <strong>the</strong> power point<br />
NOTE: Place <strong>the</strong> crumpets into<br />
<strong>the</strong> toasting slots with<br />
crumpet tops facing<br />
inwards as per <strong>the</strong> crumpet<br />
markings above <strong>the</strong> middle<br />
elements of <strong>the</strong> toaster.<br />
14<br />
OPERATING YOUR BREVILLE PROFESSIONAL 800 COLLECTION TOASTER
OPERATING YOUR BREVILLE PROFESSIONAL 800 COLLECTION TOASTER<br />
DEFROST Button<br />
This feature activates additional toasting time<br />
required to toast frozen bread.<br />
To toast frozen bread:<br />
1. Place <strong>the</strong> bread into <strong>the</strong> toasting slots.<br />
2. Select <strong>the</strong> desired browning setting by<br />
adjusting <strong>the</strong> browning control slide on <strong>the</strong><br />
front of <strong>the</strong> toaster. The browning settings<br />
range from ‘1’ (lightest) to ‘5’ (darkest).<br />
3. Press <strong>the</strong> TOAST/CANCEL button and <strong>the</strong><br />
surround will illuminate in red <strong>the</strong>n press<br />
<strong>the</strong> DEFROST button and <strong>the</strong> surround will<br />
illuminate in white. The bread will automatically<br />
lower into <strong>the</strong> toasting slots. The toasting time<br />
will automatically increase.<br />
4. The LIFT & LOOK button surround will<br />
illuminate in white allowing you to check on<br />
<strong>the</strong> toasting progress and, if necessary, cancel<br />
<strong>the</strong> cycle by pressing TOAST/CANCEL button<br />
when <strong>the</strong> desired toast colour is achieved.<br />
5. Approximately 10 seconds be<strong>for</strong>e <strong>the</strong> end<br />
of <strong>the</strong> selected browning setting, <strong>the</strong> LIFT &<br />
LOOK button will cease illumination.<br />
As <strong>the</strong> toasting stops and <strong>the</strong> carriage rises,<br />
<strong>the</strong> TOAST/CANCEL button surround will flash<br />
and <strong>the</strong> LED toasting progress indicator will<br />
cease flashing. The LED toasting progress<br />
indicator will re-illuminate to <strong>the</strong> previously<br />
selected browning setting.<br />
6. Once <strong>the</strong> toasting cycle has finished and <strong>the</strong><br />
carriage has risen and locked into <strong>the</strong> raised<br />
position, <strong>the</strong> toast ready alert will sound.<br />
Remove <strong>the</strong> toast. The TOAST/CANCEL<br />
button surround will re-illuminate in white <strong>for</strong><br />
up to 30 seconds, ready <strong>for</strong> <strong>the</strong> next toasting<br />
cycle. The DEFROST button surround will<br />
remain illuminated and should be pressed<br />
once to cancel if a subsequent toasting<br />
function is required. The DEFROST button<br />
surround will cease to illuminate after 30<br />
seconds or when <strong>the</strong> appliance is switched<br />
off at <strong>the</strong> power point<br />
OPERATING YOUR BREVILLE PROFESSIONAL 800 COLLECTION TOASTER<br />
15
OPERATING YOUR BREVILLE PROFESSIONAL 800 COLLECTION TOASTER<br />
LIFT & LOOK Button<br />
This feature automatically raises and lowers <strong>the</strong><br />
carriage so you can check progress without<br />
interrupting and/or cancelling <strong>the</strong> toasting cycle.<br />
To select <strong>this</strong> feature:<br />
2. Approximately 10 seconds be<strong>for</strong>e <strong>the</strong> end<br />
of <strong>the</strong> selected browning setting, <strong>the</strong> LIFT &<br />
LOOK button will cease illumination and<br />
cannot be activated in <strong>this</strong> time.<br />
1. The LIFT & LOOK button surround will<br />
illuminate in white during <strong>the</strong> toasting cycle<br />
and when using <strong>the</strong> A BIT MORE,<br />
CRUMPET and DEFROST features. You<br />
can press <strong>the</strong> LIFT & LOOK button during<br />
toasting cycle to view <strong>the</strong> toasting progress. If<br />
selected, <strong>the</strong> LIFT & LOOK button surround<br />
will flash. The LED toasting progress indicator<br />
will cease to flash indicating that <strong>the</strong> selected<br />
toasting cycle time has not been interrupted.<br />
When <strong>the</strong> LIFT & LOOK cycle has finished,<br />
<strong>the</strong> toasting cycle will re-commence, indicated<br />
by <strong>the</strong> resumed flashing of LED toasting<br />
progress indicator.<br />
16<br />
OPERATING YOUR BREVILLE PROFESSIONAL 800 COLLECTION TOASTER
Cleaning
CARE, CLEANING AND STORAGE<br />
Care and cleaning<br />
1. Switch <strong>the</strong> toaster off at <strong>the</strong> power outlet and<br />
<strong>the</strong>n remove <strong>the</strong> power plug from <strong>the</strong> power<br />
outlet. Allow <strong>the</strong> toaster to cool completely<br />
be<strong>for</strong>e cleaning.<br />
2. To clean any crumbs from <strong>the</strong> toaster, remove<br />
<strong>the</strong> crumb tray, located under <strong>the</strong> control<br />
panel at <strong>the</strong> front of <strong>the</strong> toaster, by pulling it<br />
outwards. Empty and replace <strong>the</strong> crumb tray<br />
be<strong>for</strong>e using <strong>the</strong> toaster again. Replace <strong>the</strong><br />
crumb tray by sliding it inwards until it locks<br />
into position.<br />
3. To remove any additional crumbs, turn <strong>the</strong><br />
toaster upside down over a bin and shake<br />
crumbs free.<br />
4. Wipe <strong>the</strong> outside of <strong>the</strong> toaster with a slightly<br />
dampened soft cloth <strong>the</strong>n polish with a soft dry<br />
cloth to dry completely.<br />
NOTE: DO NOT CLEAN WITH METAL<br />
SCOURING PADS. PIECES CAN<br />
BREAK OFF THE PAD AND TOUCH<br />
ELECTRICAL PARTS CREATING AN<br />
ELECTRIC SHOCK HAZARD.<br />
STORAGE<br />
Switch <strong>the</strong> toaster off at <strong>the</strong> power outlet and<br />
remove <strong>the</strong> power plug from <strong>the</strong> power outlet.<br />
Allow <strong>the</strong> toaster to cool completely be<strong>for</strong>e<br />
storing. Follow <strong>the</strong> directions <strong>for</strong> cleaning and<br />
store in an upright position on a flat surface on<br />
a bench top or in an accessible cupboard.<br />
Do not store anything on top of <strong>the</strong> toaster.<br />
WARNING: Do not use <strong>the</strong> toaster without <strong>the</strong> slide-out crumb tray in position. Do not allow crumbs to<br />
build up in <strong>the</strong> crumb tray. Failure to clean <strong>the</strong> crumb tray regularly may result in a fire hazard.<br />
18<br />
CARE, CLEANING AND STORAGE
NOTES<br />
notes<br />
19
20 NOTES NOTES
NOTES<br />
notes<br />
21
Australian Customers<br />
Mail: <strong>Breville</strong> Customer<br />
Service Centre<br />
PO Box 22<br />
Botany<br />
NSW 2019<br />
AUSTRALIA<br />
Phone: Customer Service:<br />
1300 139 798<br />
Fax (02) 9384 9601<br />
Email Customer Service<br />
askus@breville.com.au<br />
New Zealand Customers<br />
Mail: <strong>Breville</strong> Customer<br />
Service Centre<br />
Private Bag 94411<br />
Greenmount<br />
Auckland<br />
New Zealand<br />
Phone: Customer Service:<br />
0800 273 845<br />
Fax 0800 288 513<br />
Email Customer Service<br />
askus@breville.com.au<br />
www.breville.com.au<br />
800 COLLECTION<br />
<br />
Model BTA820/BTA840<br />
Issue 01/07<br />
<strong>Breville</strong> is a registered trademark of <strong>Breville</strong> Pty Ltd. A.B.N. 98 000 092 928<br />
<strong>Breville</strong> Professional 800 Collection is a trademark of <strong>Breville</strong> Pty Ltd.<br />
Head Office Building 2, Port Air Industrial Estate,<br />
1A Hale Street, Botany, NSW, 2019 Australia Tel 1300 139 798<br />
20 Mono Place, Ellerslie, Auckland, New Zealand<br />
Private Bag 94411, Greenmount, Auckland Tel 0800 273 845<br />
Due to continued <strong>product</strong> improvement, <strong>the</strong> <strong>product</strong>s illustrated/photographed in <strong>this</strong> brochure<br />
may vary slightly from <strong>the</strong> actual <strong>product</strong>.