2-Piece, Snap-Fit Molding Manual - Laminators Inc.
2-Piece, Snap-Fit Molding Manual - Laminators Inc.
2-Piece, Snap-Fit Molding Manual - Laminators Inc.
You also want an ePaper? Increase the reach of your titles
YUMPU automatically turns print PDFs into web optimized ePapers that Google loves.
Tech Support: 800.523.2347<br />
<strong>Laminators</strong><strong>Inc</strong>.com
TABLE OF CONTENTS Tech Support: 800.523.2347<br />
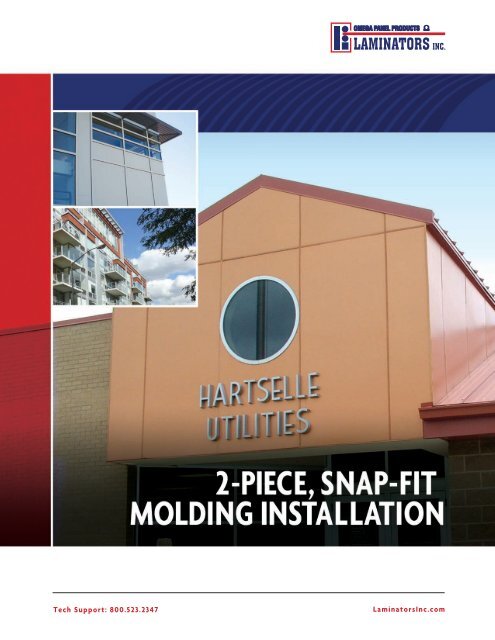
2-<strong>Piece</strong>, <strong>Snap</strong>-<strong>Fit</strong> <strong>Molding</strong><br />
With <strong>Laminators</strong>’ 2-<strong>Piece</strong>, <strong>Snap</strong>-<strong>Fit</strong> Extruded <strong>Molding</strong> System, all molding receptors are fastened prior<br />
to panel installation. <strong>Molding</strong>s are available either color-matched to the panels or in a contrasting color.<br />
Before You Start 1<br />
Preparing the Wall<br />
Installation over Plywood Sheathing 2 – 3<br />
Installation over Gypsum with or without Building Wrap 4 – 5<br />
Mounting the Panels 6 – 7<br />
Essential Equipment and Supplies 8<br />
Additional Accessories 9 – 10<br />
Panel Maintenance<br />
Inside Back Cover<br />
Panels with Metallic Paint Finishes:<br />
The protective masking on the face of each panel should be left in place until work is complete on any given area<br />
of an installation. However, to help ensure good color uniformity, periodically remove the masking from half of a<br />
panel (peel masking upward from the bottom of the panel) to check for color, scratches, and dents.<br />
On panels with metallic finishes, a good color match is much more difficult to achieve. In this case, two adjoining<br />
panels should be periodically checked by removing the masking from half of two panels as the installation<br />
progresses. The masking should then be taped back over the panel to protect it.<br />
Should any defects be found, stop work immediately and call <strong>Laminators</strong> for assistance.<br />
When installing panels with metallic finishes, it is very important that the directional arrows on the panel<br />
masking are oriented in the same direction.<br />
Color variation is a characteristic of Aluminum composite panels with metallic paint finishes.<br />
<strong>Laminators</strong> <strong>Inc</strong>orporated DOES NOT warrant a color match for these panels.
<strong>Laminators</strong><strong>Inc</strong>.com<br />
Substrate and Framing<br />
Prior to installation, the installer MUST verify that the<br />
framing and substrate are in compliance with all<br />
architects’ specifications.<br />
Inspect BOTH primary and secondary wall framing to verify<br />
that all girts, angles, channels, studs and sheathing and<br />
other structural panel support members and anchorage<br />
have been installed within the following tolerances:<br />
1/4" in any 20' length vertically or horizontally<br />
1/2" in any building elevation<br />
Inspect sheathing to verify that sheathing joints are<br />
supported by framing and that installation is within<br />
flatness tolerances. These surfaces must be even, smooth,<br />
sound, clean and dry. If the substrate or framing is not<br />
within architectural specifications, the installer must<br />
submit a written report to the General Contractor listing<br />
conditions that are detrimental to the installation of<br />
panels. Do NOT proceed with installation until<br />
unsatisfactory conditions have been corrected.<br />
Summary of Installer Responsibility<br />
The Panel Installer assumes total responsibility for all<br />
components of the panel installation including, but not<br />
limited to attachment to sub-construction, panel-to-panel<br />
joints, joints between panels and dissimilar material, and<br />
the joint seal associated with the panel system.<br />
Installation Supplies & Accessories<br />
See page 7 to be sure you are using materials that have<br />
been tested and approved by <strong>Laminators</strong> for use with<br />
Omega-Lite panels. Inventory all materials and accessories<br />
to ensure that all materials are available on-site. Call Tech<br />
Support if you need additional recommendations.<br />
Receiving and Storage<br />
Examination: Upon receipt of materials, perform a thorough<br />
examination to identify any damage that may have occurred<br />
during shipping. Any damage must be noted on the bill of<br />
lading at the time of receipt.<br />
Storage: Panels are to be stored horizontally on pallets with<br />
a positive slope for drainage of water and should be covered<br />
with watertight and ventilated materials. Standing water will<br />
damage panel finish.<br />
No more than 1500 pounds should be stacked on one<br />
pallet. Depending on panel size, this should be fewer than<br />
50 panels at 30 pounds per panel and less than 2-1/2 '<br />
high. Do not stack other materials on or in contact with<br />
panels to prevent staining, denting, or other damage.<br />
Storage temperature must not exceed 120ºF (49ºC).<br />
<strong>Laminators</strong>’ warranty does not cover water damage caused<br />
by improper storage or installation. Inspect panels on<br />
delivery, then store them on skids 8" above the ground.<br />
Place a breathable cover over them and store them in a<br />
ventilated space under roof.<br />
If wet panels are discovered, uncrate them and dry them<br />
with towels to prevent wood rotting, paint attaining or<br />
aluminum corrosion.<br />
BEFORE YOU START<br />
Panel Handling<br />
Use clean work gloves to avoid hand injury from any sharp<br />
edges and to prevent smudging of the prefinished surfaces.<br />
Although panels are shipped with protective masking on<br />
both sides, always lift one panel completely off the next<br />
to prevent scratches. Do not slide one panel across another.<br />
Protect panels from construction hazards. Good<br />
construction practice provides for panel protection and<br />
cleaning in the contract documents. Normally these are the<br />
general contractor’s responsibility. Temporary protection<br />
may be required if welding, cutting, sandblasting, or<br />
other potentially damaging construction activities are<br />
scheduled nearby.<br />
Cutting the Panels<br />
Omega-Lite panels are designed to be cut to size on<br />
the job site. Even if the panels have been received cut<br />
to size, it may be necessary to do some minor trimming<br />
to account for areas of an elevation that may be out of<br />
square. To cut Omega-Lite panels, use a circular saw with<br />
a sharp, carbide-tipped blade (40-tooth minimum).<br />
Do not remove the protective masking from the panel face.<br />
After cutting, use a screwdriver or deburring tool (see<br />
page 8) to remove burrs or sharp edges from the panels.<br />
Carbide-tipped<br />
blade (40 tooth min.)<br />
recommended<br />
Safety tip: Wear safety glasses when cutting!<br />
Wear gloves when handling cut edges!<br />
Ventilation is Important<br />
The wood or exterior gypsum board of the substrate<br />
must be protected and ventilated. Trapped moisture can<br />
cause major damage in a short time. When mounting over<br />
exterior gypsum or masonry, use steel strapping or hat<br />
channels to separate panels from the structure for good<br />
air circulation.<br />
Flashing<br />
<strong>Laminators</strong> can supply flashing materials made from<br />
aluminum sheet painted to match the adjacent panel<br />
system or surface.<br />
Use proper flashing technique when installing flashing<br />
with panels.<br />
Complete CAD details and product<br />
specifications can be downloaded from<br />
our website <strong>Laminators</strong><strong>Inc</strong>.com<br />
1
PREPARING THE WALL Tech Support: 800.523.2347<br />
Installation Over Plywood Sheathing<br />
A<br />
Panel adhesive<br />
Receptors<br />
Foam tape<br />
16" on center<br />
typical<br />
3/4" path<br />
for drainage<br />
Silicone<br />
caulk<br />
Detail A<br />
Panel<br />
adhesive<br />
“J” <strong>Molding</strong><br />
or Drip Edge<br />
“J” <strong>Molding</strong><br />
or Drip Edge<br />
Ice &<br />
water shield<br />
B<br />
2<br />
This installation process is the basis for mounting<br />
panels over a variety of substrates. You should read<br />
and understand this entire process before attempting<br />
to mount panels using this installation system.<br />
2-<strong>Piece</strong> <strong>Molding</strong>s are designed primarily for<br />
“picture framing” individual panels or small<br />
groups of panels where 1-<strong>Piece</strong> <strong>Molding</strong>s would<br />
be inconvenient to use. For example, installing<br />
individual panels into a window opening with<br />
“J” moldings around the perimeter would be almost<br />
impossible with 1-<strong>Piece</strong> <strong>Molding</strong>s, without fasteners<br />
(screws) being exposed. Additionally, 2-<strong>Piece</strong><br />
<strong>Molding</strong>s should only be installed over sheathing,<br />
such as plywood, or gypsum. Open framing is<br />
not acceptable.<br />
Detail B<br />
The main drawing (upper left) depicts the layout for<br />
one panel at ground level. “J” molding is shown:<br />
either “J” or drip edge moldings can be used here.<br />
The detail drawings (Detail A & B) show close-up<br />
details from the main drawing. The instructions on the<br />
opposing page explain this process and the purpose of<br />
each element shown in the above drawings.<br />
Note: To guard against water penetration, <strong>Laminators</strong><br />
recommends that all these installation systems<br />
include a vapor permeable, water-tight moisture<br />
barrier (appropriate for the climate and wall<br />
construction) installed on the substrate<br />
behind the metal wall panels.
<strong>Laminators</strong><strong>Inc</strong>.com<br />
PREPARING THE WALL<br />
Plastic<br />
receptor<br />
Substrate<br />
Step 1: Attach plastic receptors<br />
Attach the black plastic receptors every 16" O.C. using galvanized<br />
or stainless steel bugle headed screws. Screws with high profile<br />
heads will interfere with panel installation.<br />
See manufacturer’s instructions for the proper use of ice and water shield.<br />
“J” Faceplate<br />
molding<br />
Tip: Temporarily install a “J” faceplate<br />
Temporarily install a “J” faceplate backwards into the black<br />
plastic receptor. This will force the receptor to stay straight<br />
during installation. If the receptor is not installed straight,<br />
you will have difficulty snapping the faceplate into it during<br />
final assembly.<br />
Closed cell PVC<br />
foam tape<br />
Step 2: Apply closed cell PVC foam tape<br />
Apply foam tape every 16" O.C. as shown in the main drawing<br />
on the opposite page. These strips of foam tape act as a shim<br />
and help keep everything on the same plane.<br />
Note: It is important to keep the backer on the foam tape<br />
as it is applied to avoid stretching or inaccurate placement.<br />
Closed cell<br />
PVC foam tape<br />
Sheathing<br />
Panel<br />
adhesive<br />
Step 3: Apply panel adhesive<br />
Apply generous 3" dabs and 3/8" beads of panel adhesive<br />
as shown in the main drawing on page 2.<br />
Many panel adhesives have a high solvent content that<br />
evaporates as it cures. This causes the adhesive to lose<br />
volume and shrink. Applying panel adhesive next to the<br />
foam tape will prevent the panels from being drawn in<br />
towards the plywood, ensuring that the panels will<br />
maintain a flat appearance.<br />
3
PREPARING THE WALL<br />
Tech Support: 800.523.2347<br />
Installation Over Gypsum (With or without building wrap)<br />
A<br />
3/4" path for drainage<br />
Panel adhesive<br />
Receptors<br />
Foam tape<br />
16" on center<br />
typical<br />
Silicone caulk<br />
Steel strapping<br />
Steel squares<br />
Detail A<br />
Panel<br />
adhesive<br />
“J” <strong>Molding</strong><br />
or Drip Edge<br />
Steel<br />
strapping<br />
Ice &<br />
water shield<br />
B<br />
Detail B<br />
When installing panels over exterior grade<br />
gypsum, with or without building wrap,<br />
remember that neither exterior grade<br />
gypsum nor building wrap are structural.<br />
For proper installation, 18 or 20 gauge steel<br />
squares must be used to create a surface that<br />
will accept panel adhesive.<br />
All steel squares must be attached with lowprofile,<br />
pan head screws on all four corners.<br />
These screws must pass through the steel<br />
squares, the exterior grade gypsum, and attach<br />
to the stud wall. <strong>Molding</strong>s must be attached<br />
through the gypsum to the studs.<br />
The main drawing (upper left) depicts the layout<br />
for one panel at ground level. “J” <strong>Molding</strong> is shown:<br />
either “J” or drip edge moldings can be used here.<br />
The detail drawings (Detail A & B) show close-up<br />
details from the main drawing. The instructions<br />
on the opposing page will explain this process<br />
and the purpose of each element shown in the<br />
above drawings.<br />
4
<strong>Laminators</strong><strong>Inc</strong>.com<br />
PREPARING THE WALL<br />
Plastic<br />
receptor<br />
Substrate<br />
Step 1: Attach plastic receptors<br />
Attach the black plastic receptors every 16" O.C. using galvanized<br />
or stainless steel bugle headed screws. Screws with high profile<br />
heads will interfere with panel installation.<br />
See manufacturer’s instructions for the proper use of ice and<br />
water shield.<br />
“J” Faceplate<br />
molding<br />
Installation tip: Alignment of receptors<br />
Temporarily install a “J” faceplate molding backwards into<br />
the plastic receptor. This will force the receptor to stay<br />
straight during installation. If the receptor is not installed<br />
perfectly straight, you will have difficulty snapping the<br />
faceplate into it.<br />
Closed cell PVC<br />
foam tape<br />
Step 2: Apply closed cell PVC foam tape<br />
Apply closed cell PVC foam tape every 16" O.C. as shown<br />
in the main drawing on page 4. These strips of foam tape<br />
act as a shim and help keep everything on the same plane.<br />
Note: It is important to keep the backer on the foam tape<br />
as it is applied to avoid stretching or inaccurate placement.<br />
Closed cell PVC<br />
foam tape<br />
Steel<br />
square<br />
Panel<br />
adhesive<br />
Step 3: Apply panel adhesive<br />
Apply generous 3" dabs and 3/8" thick beads of panel<br />
adhesive to steel straps. Straps should be screwed down<br />
every 16"-24" O.C.<br />
Many panel adhesives have a high solvent content that<br />
evaporates as it cures. This causes the adhesive to lose<br />
volume and shrink. Applying panel adhesive next to the<br />
foam tape will prevent the panels from being drawn in<br />
towards the gypsum, ensuring that the panels will<br />
maintain a flat appearance.<br />
5
MOUNTING THE PANELS<br />
Tech Support: 800.523.2347<br />
The 2-<strong>Piece</strong>, <strong>Snap</strong>-<strong>Fit</strong> installation is not a progressive system. That is, you don’t move<br />
from one end of the building to another, installing a molding then a panel, then another<br />
molding and panel. Rather, you should lay out a grid where the joints will fall, then<br />
fasten moldings over the entire wall. <strong>Snap</strong> a line to ensure that the bottom drip edge<br />
receptor is perfectly straight to facilitate installation of the aluminum faceplate.<br />
When installing panels with metallic finishes, it is very important that the directional arrows on the<br />
panel masking are oriented in the same direction.<br />
Set up a clean worktable<br />
Using available materials (straight 2x4s, 3/4" flat sound<br />
plywood with smooth surface, or MDF plywood for precision<br />
work) construct a worktable at least 48" x 96" and at a<br />
comfortable working height.<br />
Panel<br />
adhesive<br />
Plastic<br />
receptor<br />
Step 1: Apply adhesives<br />
Apply a 3/8" bead of <strong>Laminators</strong>’ approved silicone caulk<br />
into the receptors and 3/8" bead of <strong>Laminators</strong>’ approved<br />
panel adhesive inside the pocket that receives the faceplate.<br />
The silicone will prevent water from getting behind the panels<br />
and the panel adhesive will hold the faceplates in place<br />
permanently and minimize the expansion and contraction of<br />
the faceplates during the normal warming and cooling cycle<br />
that occurs each day.<br />
Plastic<br />
receptor<br />
Panel<br />
adhesive<br />
Silicone<br />
caulk<br />
Panel<br />
Silicone<br />
caulk<br />
Step 2: Attach the panels<br />
Drill a 1/8" pilot hole in the top and bottom edge of the panel<br />
1/4" O.C. from the bottom edge of the panel. Screw panel in<br />
place. This will hold the panel until the panel adhesive cures<br />
on the wall and in the receptors. Take care not to overdrive the<br />
screw, as this may create a dimple that will be visible beyond<br />
the portion of the panel covered by the faceplate. Do not use<br />
bugle head type screws here, as they may also create dimples.<br />
You may find that turning the torque setting on your drill all<br />
the way down will help prevent dimpling.<br />
Caulk Manufacturers’ Recommendation:<br />
Panel surfaces and edges should be clean, dry and free of all<br />
contaminants such as protective coatings, oils, grease, soap<br />
or detergent films, water and dust.<br />
6
<strong>Laminators</strong><strong>Inc</strong>.com<br />
MOUNTING THE PANELS<br />
Faceplate<br />
Panel<br />
masking<br />
Step 3: Caulk receptors<br />
Strip the masking back about 3" from the edges of<br />
the panel. Leave the rest of the masking on for now<br />
to protect the panel until work is complete in that area.<br />
Just prior to attaching the faceplates, apply a bead of<br />
<strong>Laminators</strong>’ approved silicone caulk to all four corners<br />
of the panel. This will seal the gaps left in the receptors<br />
shown in the main drawings on page 2 and 4. Faceplates<br />
should be cut about 1/8" shorter than the distance you<br />
are spanning to allow for expansion and contraction.<br />
This gap can be top beaded with clear silicone caulk to<br />
seal the area.<br />
Receptors<br />
Top bead<br />
of caulk<br />
7
ESSENTIAL EQUIPMENT Tech Support: 800.523.2347<br />
• Work table or saw horses and 3/4" particle board<br />
to create work table<br />
• Aluminum brake capable of bending 0.032" aluminum<br />
• Porter-Cable 3 HP router with guide or equivalent<br />
able to accept a 1/2" carbide shank<br />
• <strong>Laminators</strong>’ router bit (Part #RB 1/2)<br />
— Custom designed router bit only available from<br />
<strong>Laminators</strong> <strong>Inc</strong>. that forces bending into the<br />
middle of the groove and eliminates core showthrough.<br />
Carbide with 1/2" shank.<br />
• Miter saw or chop saw with 10" diameter blade<br />
• Circular saw with 7-1/4", 40-tooth blade (min.)<br />
• Jigsaw with 24-tooth, sheet metal cutting blade<br />
• Caulking gun<br />
• Screw gun<br />
• Long 1/8" drill bit with drill bit plastic guard tubing<br />
• Deburring tool (Part #DEBURRING TOOL)<br />
• Aviation snips or heavy-duty scissors<br />
• Plastic putty tool or scraper to remove excess caulk<br />
and adhesive from panels<br />
• Metal single cut rectangular file with medium teeth<br />
• Utility knife<br />
• Tape measure<br />
• Safety glasses<br />
• Gloves to handle panels<br />
ESSENTIAL SUPPLIES<br />
• Panels<br />
• <strong>Molding</strong>s/extrusions as needed<br />
— “J” extrusion for drip edge (required)<br />
and end of run option (optional)<br />
— “H” extrusion for end of run option (optional)<br />
— snap-in extrusions (required)<br />
• Color-matched flat stock<br />
• Strapping<br />
— 0.40" aluminum or 20 ga. galvanized exterior<br />
sheet metal strips 3" x 8', 10', or 12'<br />
• Furring strips or studs as needed<br />
• Insulation, 3/4" foam to go between furring strips<br />
• Ice & water shield or flashing<br />
• Gaska Tape® V710, 3/16" x 2" or equivalent closed cell<br />
7 lb. density polyvinyl chloride foam tape<br />
(<strong>Laminators</strong> Part #12847)<br />
• Silicone Caulk–The following caulks have been tested<br />
and meet requirements. Color-matched caulk available<br />
from <strong>Laminators</strong> <strong>Inc</strong>.<br />
— Tremco Spectrem® 1<br />
— Dow Corning® 790, 983, 795, 995, 756, 791<br />
— GE SilGlaze® II , SilPruf®<br />
— Pecora 860, 896, 895, 890NST<br />
Note: Minimum order quantities required for<br />
certain color-matched caulks.<br />
• Caulking rope or backer rod; use 1/4" or 3/8" to suit job<br />
• Masking tape (Scotch brand Safe Release Masking Tape<br />
is recommended) 1" wide<br />
• Panel Adhesive–The following adhesives have<br />
been tested and meet requirements. Various<br />
adhesives available from <strong>Laminators</strong> <strong>Inc</strong>.<br />
— Titebond® Heavy-Duty Construction Adhesive<br />
or Premium Polyurethane Construction Adhesive<br />
— Liquid Nails® 602 Subfloor (LN-602), 950<br />
Polyurethane (LN-950), 902 for Subfloor (LN-902),<br />
or 901 for Heavy Construction (LN-901)<br />
— DAP 4000 Subfloor Adhesive<br />
— OSI Sealants PL400<br />
• Screws<br />
— #6 x 1-1/4" bugle-head drywall or #8 or #10 x 1"<br />
Phillips Pan Head for securing clips into sheathing<br />
— #8 or #10 x 3/4" or longer, TEKS/3 screws to secure<br />
clips into steel studs<br />
— #6 x 1/2" and #6 x 1" Phillips Pan Head,<br />
TEKS/2 screws for mounting moldings<br />
to plywood or metal<br />
• Wood shims to assist with spacing between panels<br />
• Mineral spirits and rags to clean caulk from panels<br />
if necessary<br />
• Touch-up paint<br />
Note: Trademarks are registered by the companies noted.<br />
How Much Will I Need<br />
For every 100 sq. ft. of Omega-Lite panels<br />
you will need:<br />
• 3 tubes 11 oz. silicone caulk<br />
• 1 tube 28 oz. panel adhesive<br />
• 1 roll 2" x 50' closed cell PVC foam tape<br />
8
<strong>Laminators</strong><strong>Inc</strong>.com<br />
ADDITIONAL ACCESSORIES<br />
2-<strong>Piece</strong>, <strong>Snap</strong>-<strong>Fit</strong> <strong>Molding</strong>...for use with Omega-Lite & Omega-Ply panels<br />
Reveal “H” <strong>Molding</strong><br />
Item 4395X: Faceplate, Item 43900: Receptor<br />
“J” <strong>Molding</strong><br />
Item 4315X: Faceplate, Item 43100: Receptor<br />
“H” <strong>Molding</strong><br />
Item 4305X: Faceplate, Item 43000: Receptor<br />
Outside Corner<br />
Item 4335X: Faceplate, Item 43300: Receptor<br />
<strong>Snap</strong>-In Extrusions<br />
The wall thickness for the top pieces is 0.050.<br />
Gap A, B, C indicates the three snap positions<br />
to accommodate panel thickness.<br />
Gap Height IC Height<br />
A) 0.215 D) 0.412 G) 1.288<br />
B) 0.265 E) 0.462 H) 1.338<br />
C) 0.315 F) 0.512 I ) 1.388<br />
Faceplates are shown in grey. Receptors are shown in black.<br />
The letter X identifies the molding color.<br />
Inside Corner (Drip Cap)<br />
Item 4325X: Faceplate, Item 43100: Receptor<br />
9
Tech Support: 800.523.2347<br />
1-<strong>Piece</strong>, Tight-<strong>Fit</strong> <strong>Molding</strong>...for use with Omega-Lite panels<br />
Item 4525X: Inside Corner (Drip Cap)<br />
Item 4535X: Adjustable (Bendable) Outside Corner<br />
Item 4595X: Reveal “H” <strong>Molding</strong><br />
Item 4505X: “H” <strong>Molding</strong><br />
Item 4515X: “J” <strong>Molding</strong><br />
Item 4545: “Z” <strong>Molding</strong><br />
The letter “X” identifies the molding color.<br />
4515X:<br />
“J” <strong>Molding</strong><br />
4545: “Z” <strong>Molding</strong><br />
In addition to the standard clip and caulk<br />
details, these standard extrusions are used by<br />
installers to complete attractive installations.<br />
Available plastic snap-in<br />
10<br />
Fascia Soffit or Outside Corner (“J” <strong>Molding</strong> & “Z”<br />
<strong>Molding</strong> combined with plastic snap-in molding)
<strong>Laminators</strong><strong>Inc</strong>.com<br />
NOTES<br />
11
12<br />
NOTES Tech Support: 800.523.2347
<strong>Laminators</strong><strong>Inc</strong>.com<br />
PANEL MAINTENANCE<br />
Omega-Lite Panel Maintenance<br />
Routine cleaning:<br />
Omega-Lite panels should be washed periodically to keep them bright. Plain water and a clean cloth<br />
are all you need to remove ordinary dirt buildup. A mild, non-abrasive household detergent with a<br />
clean-water rinse can be used for more stubborn stains. Solvents such as alcohols, mineral spirits,<br />
naphtha, turpentine, and xylene can be applied with a soft cloth. Never soak panels in solvents.<br />
For scratches and rub-marks:<br />
Omega-Lite touch-up paint and re-paint instructions are available from <strong>Laminators</strong>. For larger paint<br />
repairs, call <strong>Laminators</strong> for standard paints designed for aluminum surfaces available at paint stores.<br />
Keep harsh solvents away from finish:<br />
Panel finishes are resistant to most but not all solvents and chemicals. You can safely use mineral spirits<br />
to remove uncured caulk and paints.<br />
We suggest that the caulk build up enough<br />
strength in an overnight cure so that bubbles<br />
do not form.<br />
Carefully review the caulk manufacturer’s literature<br />
for skin formation, tack-free time, and cure times<br />
before using. Remember, your environmental<br />
condition is the biggest factor in deciding which<br />
caulk is appropriate for your project. Caulk only<br />
one joint at a time so that the caulk does not skin<br />
over before it can be tooled. Only caulk 4' to 6'<br />
at a time for a smooth finish.<br />
It is important to only use caulk from our<br />
recommended list and to always test your caulk<br />
in the environmental conditions you are currently<br />
working in to find the one that works best. Consult<br />
with us if your caulk is not performing as expected.<br />
Apply a generous amount of panel adhesive to the<br />
sheathing to prevent it from drawing the panel<br />
towards the building as it dries; closed cell PVC<br />
foam tape should be placed out in the field of the<br />
panel where it will shim the adhesive to the proper<br />
thickness away from the furring or sheathing.<br />
13
<strong>Laminators</strong><strong>Inc</strong>.com Tech Support: 800.523.2347 3255 Penn Street · Hatfield, PA 19440<br />
©2012 <strong>Laminators</strong> <strong>Inc</strong>orporated. All rights reserved. A121 (7/12) Omega-Lite® Aluminum Building Panels Installation Guide.


