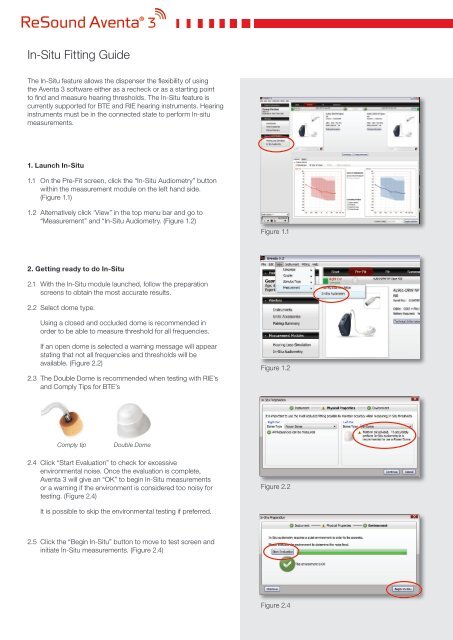
Aventa 3 In-Situ Fitting Guide - GN ReSound
Aventa 3 In-Situ Fitting Guide - GN ReSound
Aventa 3 In-Situ Fitting Guide - GN ReSound

You also want an ePaper? Increase the reach of your titles
YUMPU automatically turns print PDFs into web optimized ePapers that Google loves.
<strong>In</strong>-<strong>Situ</strong> <strong>Fitting</strong> <strong>Guide</strong><br />
The <strong>In</strong>-<strong>Situ</strong> feature allows the dispenser the flexibility of using<br />
the <strong>Aventa</strong> 3 software either as a recheck or as a starting point<br />
to find and measure hearing thresholds. The <strong>In</strong>-<strong>Situ</strong> feature is<br />
currently supported for BTE and RIE hearing instruments. Hearing<br />
instruments must be in the connected state to perform <strong>In</strong>-situ<br />
measurements.<br />
1. Launch <strong>In</strong>-<strong>Situ</strong><br />
1.1 On the Pre-Fit screen, click the “<strong>In</strong>-<strong>Situ</strong> Audiometry” button<br />
within the measurement module on the left hand side.<br />
(Figure 1.1)<br />
1.2 Alternatively click ‘View” in the top menu bar and go to<br />
“Measurement” and “<strong>In</strong>-<strong>Situ</strong> Audiometry. (Figure 1.2)<br />
Figure 1.1<br />
2. Getting ready to do <strong>In</strong>-<strong>Situ</strong><br />
2.1 With the <strong>In</strong>-<strong>Situ</strong> module launched, follow the preparation<br />
screens to obtain the most accurate results.<br />
2.2 Select dome type.<br />
Using a closed and occluded dome is recommended in<br />
order to be able to measure threshold for all frequencies.<br />
If an open dome is selected a warning message will appear<br />
stating that not all frequencies and thresholds will be<br />
available. (Figure 2.2)<br />
2.3 The Double Dome is recommended when testing with RIE’s<br />
and Comply Tips for BTE’s<br />
Figure 1.2<br />
Comply tip<br />
Double Dome<br />
2.4 Click “Start Evaluation” to check for excessive<br />
environmental noise. Once the evaluation is complete,<br />
<strong>Aventa</strong> 3 will give an “OK” to begin <strong>In</strong>-<strong>Situ</strong> measurements<br />
or a warning if the environment is considered too noisy for<br />
testing. (Figure 2.4)<br />
Figure 2.2<br />
It is possible to skip the environmental testing if preferred.<br />
2.5 Click the “Begin <strong>In</strong>-<strong>Situ</strong>” button to move to test screen and<br />
initiate <strong>In</strong>-<strong>Situ</strong> measurements. (Figure 2.4)<br />
Figure 2.4
3. Conducting <strong>In</strong>-<strong>Situ</strong> measurements<br />
3.1 Select the ear that you want to test by clicking “R” or “L” in<br />
the upper corner of the audiogram. (Figure 3.1)<br />
3.2 Select a test frequency by clicking on the “Freq” arrows,<br />
using the keyboard or pick it from the frequency drop down<br />
(Figure 3.2)<br />
3.3 Select a signal tone choosing between pure tone and<br />
warble tone (Figure 3.3)<br />
3.4 Select tone length or manual control. Click the “Tone” play<br />
button to play the tone. (Figure 3.4)<br />
3.5 Set the signal intensity by selecting the initial stimulus level.<br />
Change the intensity in the drop down, by clicking the “5<br />
step dB” arrows or using the keyboard. (Figure 3.5)<br />
3.6 Press the “Tone” button or the keyboard “Space” bar to<br />
present tone/stimulus. If in manual mode the user must<br />
hold the “Tone” button down for the desired length of time.<br />
A green status indicator shows when tone is being<br />
presented.<br />
3.7 Once a threshold is determined press the “Mark” button, or<br />
keyboard “Enter” button.<br />
3.8 To talk to the patient during test, press the “Talk Over”<br />
button in the bottom left hand side of the screen. This turns<br />
the hearing instrument microphone “on” and allows hearing<br />
through the instrument(s) during the <strong>In</strong>-<strong>Situ</strong> testing.<br />
Once finished talking, press the “Talk Over” button again to<br />
turn “Off” the microphone and continue testing. (Figure 4.1)<br />
Figure 3.1<br />
Figure 3.3<br />
Figure 3.2<br />
Figure 3.4<br />
4. Save and program<br />
4.1 Once <strong>In</strong>-<strong>Situ</strong> testing is complete click the “Save” button to<br />
store the <strong>In</strong>-<strong>Situ</strong> audiogram in the database/Noah. A green<br />
confirmation bar will indicate that the audiogram has been<br />
successfully saved to the database.<br />
4.2 Click “Auto-Fit” to initiate a fitting based on the <strong>In</strong>-<strong>Situ</strong><br />
audiogram<br />
4.3 To simply leave the <strong>In</strong>-<strong>Situ</strong> module click “Close”. (Figure 4.1)<br />
Figure 3.5<br />
Figure 4.1<br />
M200169-GB-11.06 Rev.A<br />
<strong>ReSound</strong> A/S<br />
Lautrupbjerg 7<br />
DK-2750 Ballerup, Denmark<br />
Tel.: +45 45 75 11 11<br />
Fax: +45 45 75 11 19<br />
www.resound.com<br />
United Kingdom<br />
<strong>GN</strong> <strong>ReSound</strong> Ltd.<br />
Kirtlington Business Centre<br />
Portway<br />
Kirtlington<br />
Oxon OX5 3JA<br />
Tel.: +44 1869 352 800<br />
Fax: +44 1869 343 466<br />
www.gnresound.co.uk<br />
Australia<br />
<strong>GN</strong> <strong>ReSound</strong> Pty. Ltd.<br />
Unit R1 Regent Park Estate<br />
391 Park Road<br />
Regent Park NSW 2143<br />
Tel.: 02 9743 9707<br />
Fax: 02 9743 7472<br />
Free call number: 1800 658 955<br />
www.gnresound.com.au<br />
New Zealand<br />
<strong>GN</strong> <strong>ReSound</strong> (NZ) Ltd.<br />
12 Parkway Drive<br />
Mairangi Bay<br />
Auckland<br />
Tel.: (free) 0800 900 126<br />
Fax: (free) 0800 900 695<br />
www.gnresound.co.nz